Tom's Hardware Verdict
Solid software and hardware meet great documentation, making this the ideal kit to learn electronics and coding without the fear of FAILure.
Pros
- +
Very easy to use
- +
Great selection of components
- +
Components can be used as is, or broken out
- +
Excellent learning resources
- +
GPIO pin labels
- +
Multiple power options
- +
LiPo charging
- +
Servo and motor control
- +
USB Relay
- +
Great OLED screen
Cons
- -
No LEDs on Pico GPIO footprint
- -
Guide book is mainly for Windows users
Why you can trust Tom's Hardware
Learning electronics and coding at the same time can be daunting even when using a Raspberry Pi or Raspberry Pi Pico W. There are so many things to remember, and we will always FAIL (First Attempt In Learning) as we go along. But what if we could aid our new users to learn at their own pace?
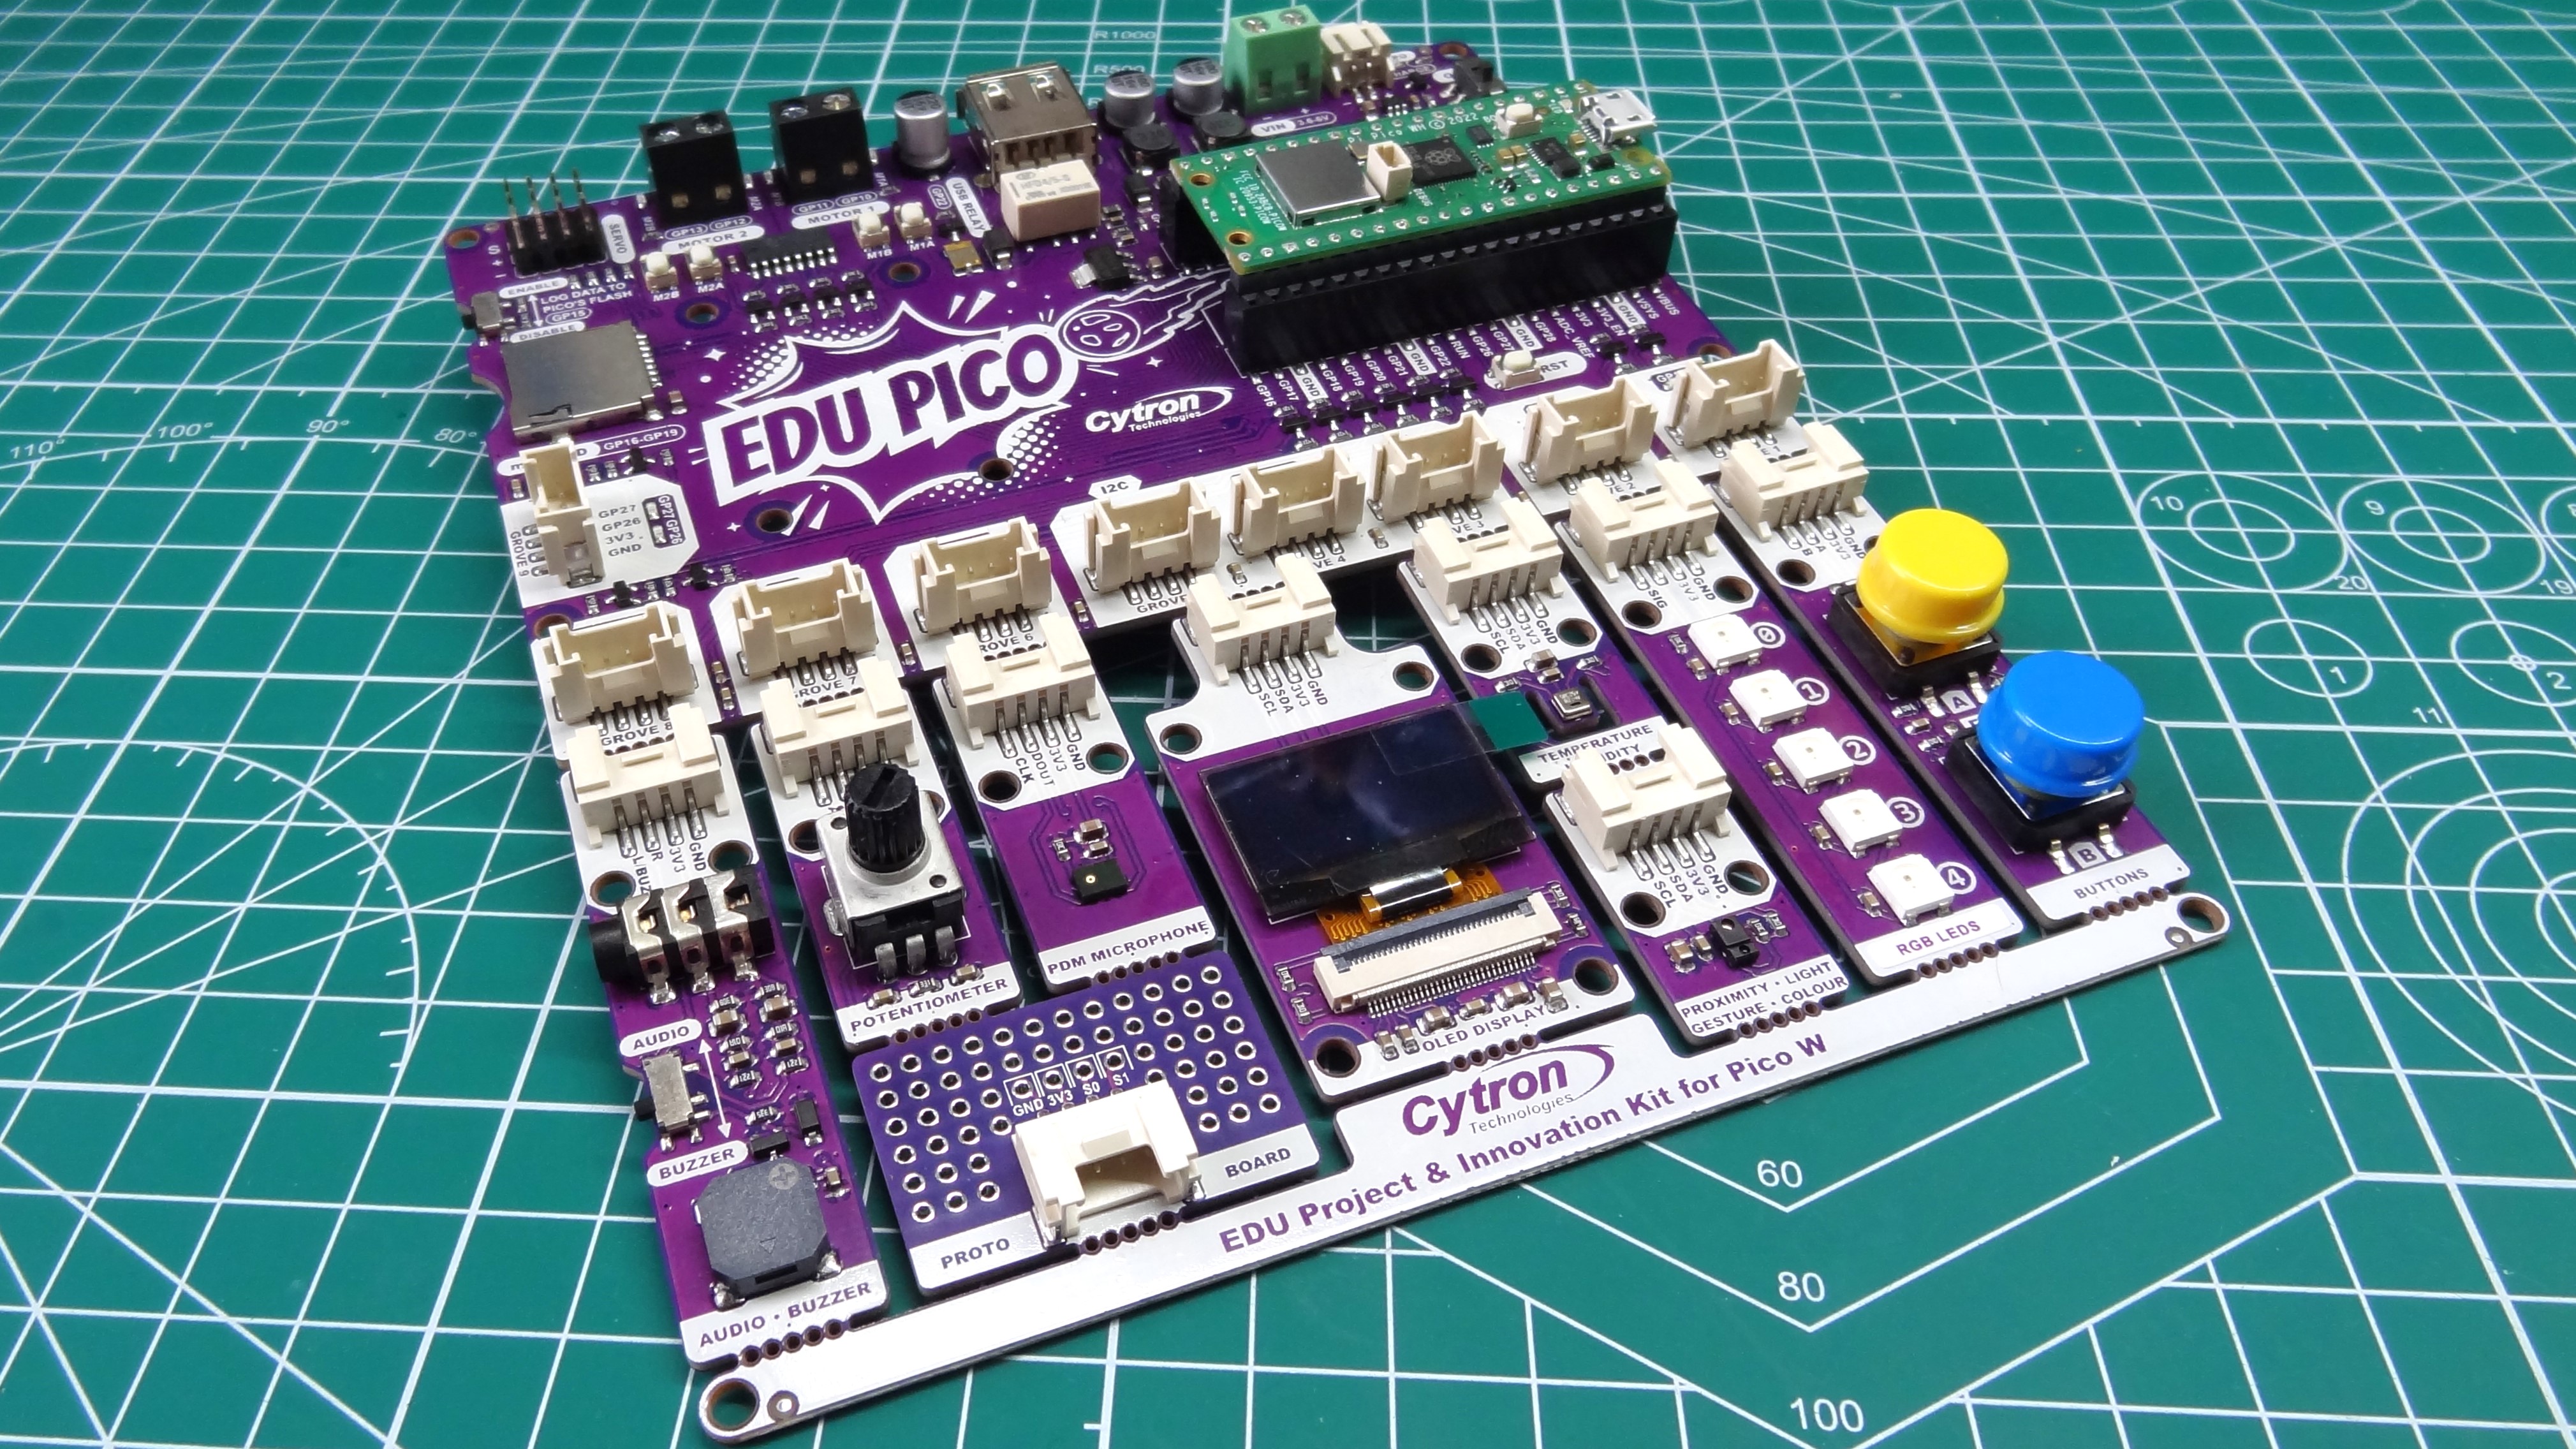
Cytron’s Edu Pico ($59 with Pico W, $54 without) follows its earlier range of boards, such as the Maker Pi Pico, Robo Pico and Maker Pi RP2040 in that it throws everything that a new user could need, into a single package. Whereas the previous boards were one large PCV, Edu Pico is made of a series of interconnected PCBs which can be broken off and integrated into projects. Before that happens, learners can use the pre-connected components along with a guide book and reference cards to create projects.
Is the Cytron Edu Pico worth your time and money, and can it help new users get to grips with coding and electronics? We’ll only find out by making our own fantastically elaborate projects using the plethora of components at our disposal.
Edu Pico Technical Specifications
| SoC | Raspberry Pi Pico W with a RP2040 Arm Cortex M0+ Dual Core at 133 MHz with 264KB of RAM, 2MB Flash storage. |
| Connections | 9 x Grove Connections |
| GPIO breakout on the Pico header | |
| 2 x Motor terminal | |
| 4 x Servo connections | |
| Speaker output | |
| Components | 1x APDS9960 Proximity, Light, Gesture & Color Sensor |
| 1x AHT20 Temperature & Humidity Sensor | |
| 1x SSD1315 OLED Display | |
| 1x PDM Microphone | |
| 5x RGB LEDs | |
| 2x Push Buttons | |
| 1x Stereo Audio Jack | |
| 1x Piezo Buzzer | |
| 1x Potentiometer | |
| 1x Protoboard | |
| 4x Servo Ports | |
| 1x Micro SD Card Slot | |
| 2x DC Motor Terminals | |
| 1x USB Relay | |
| Dimensions | 130 x 150mm |
Getting Started with Edu Pico
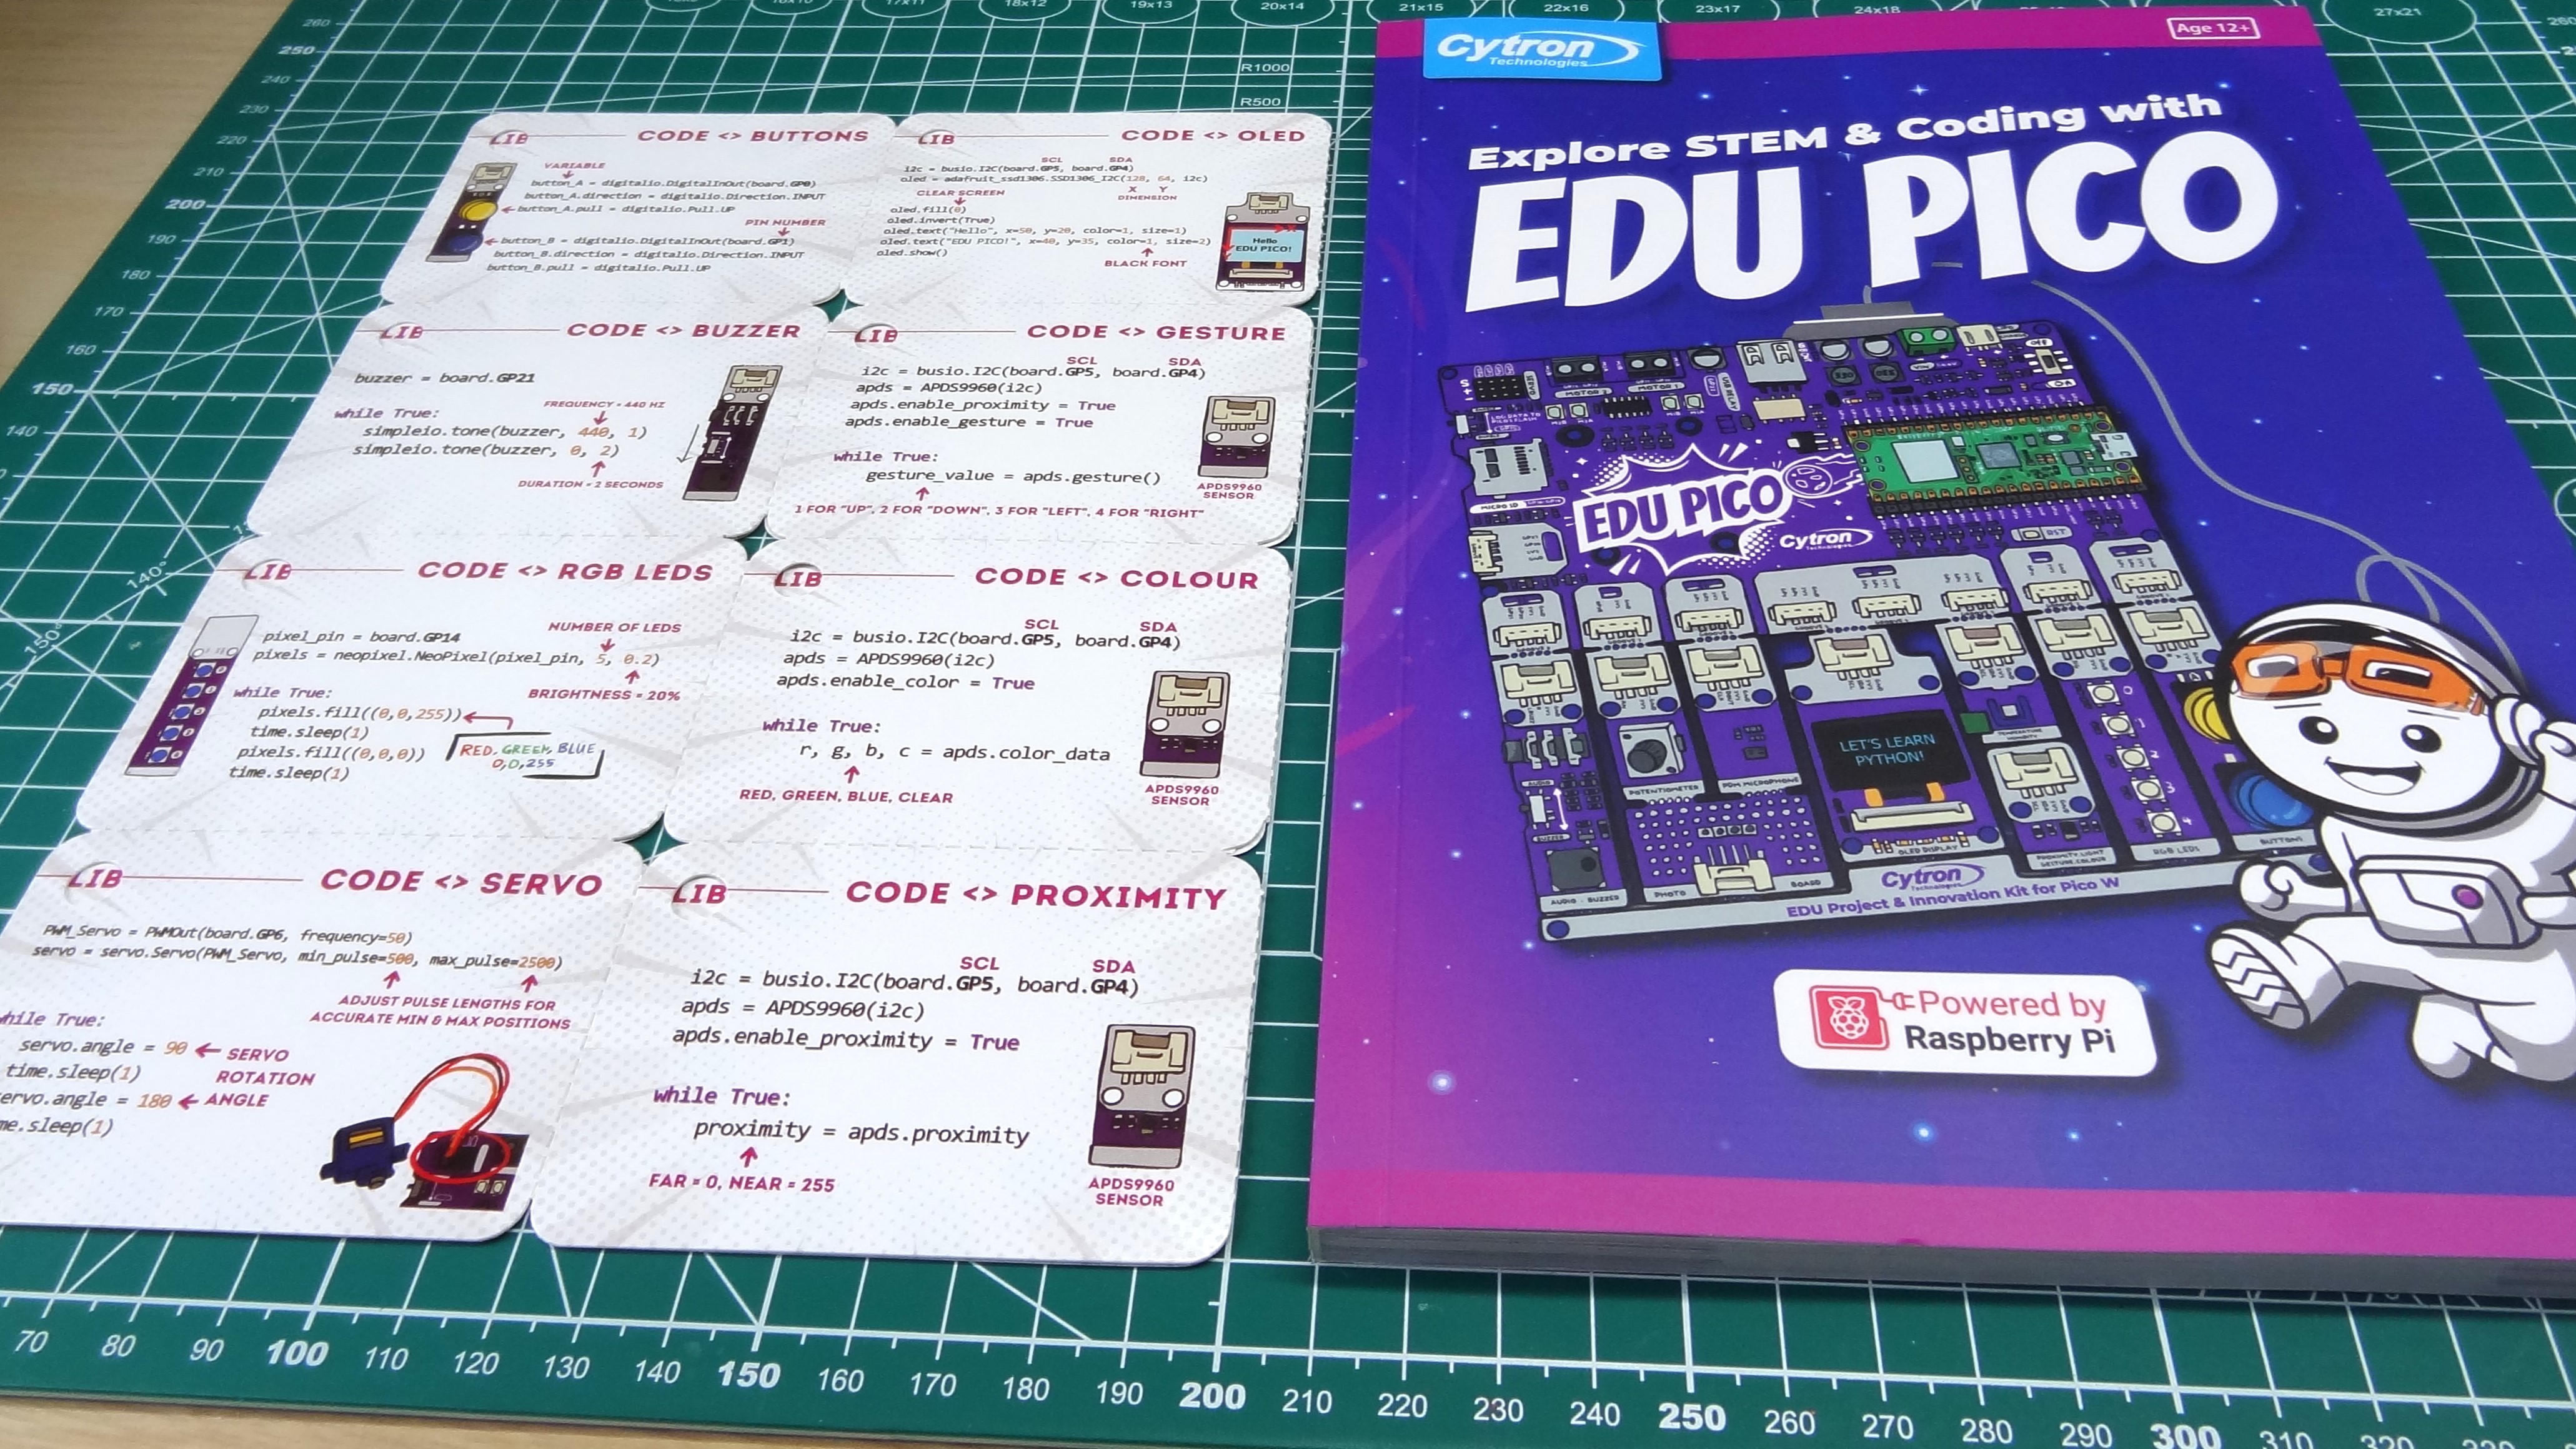
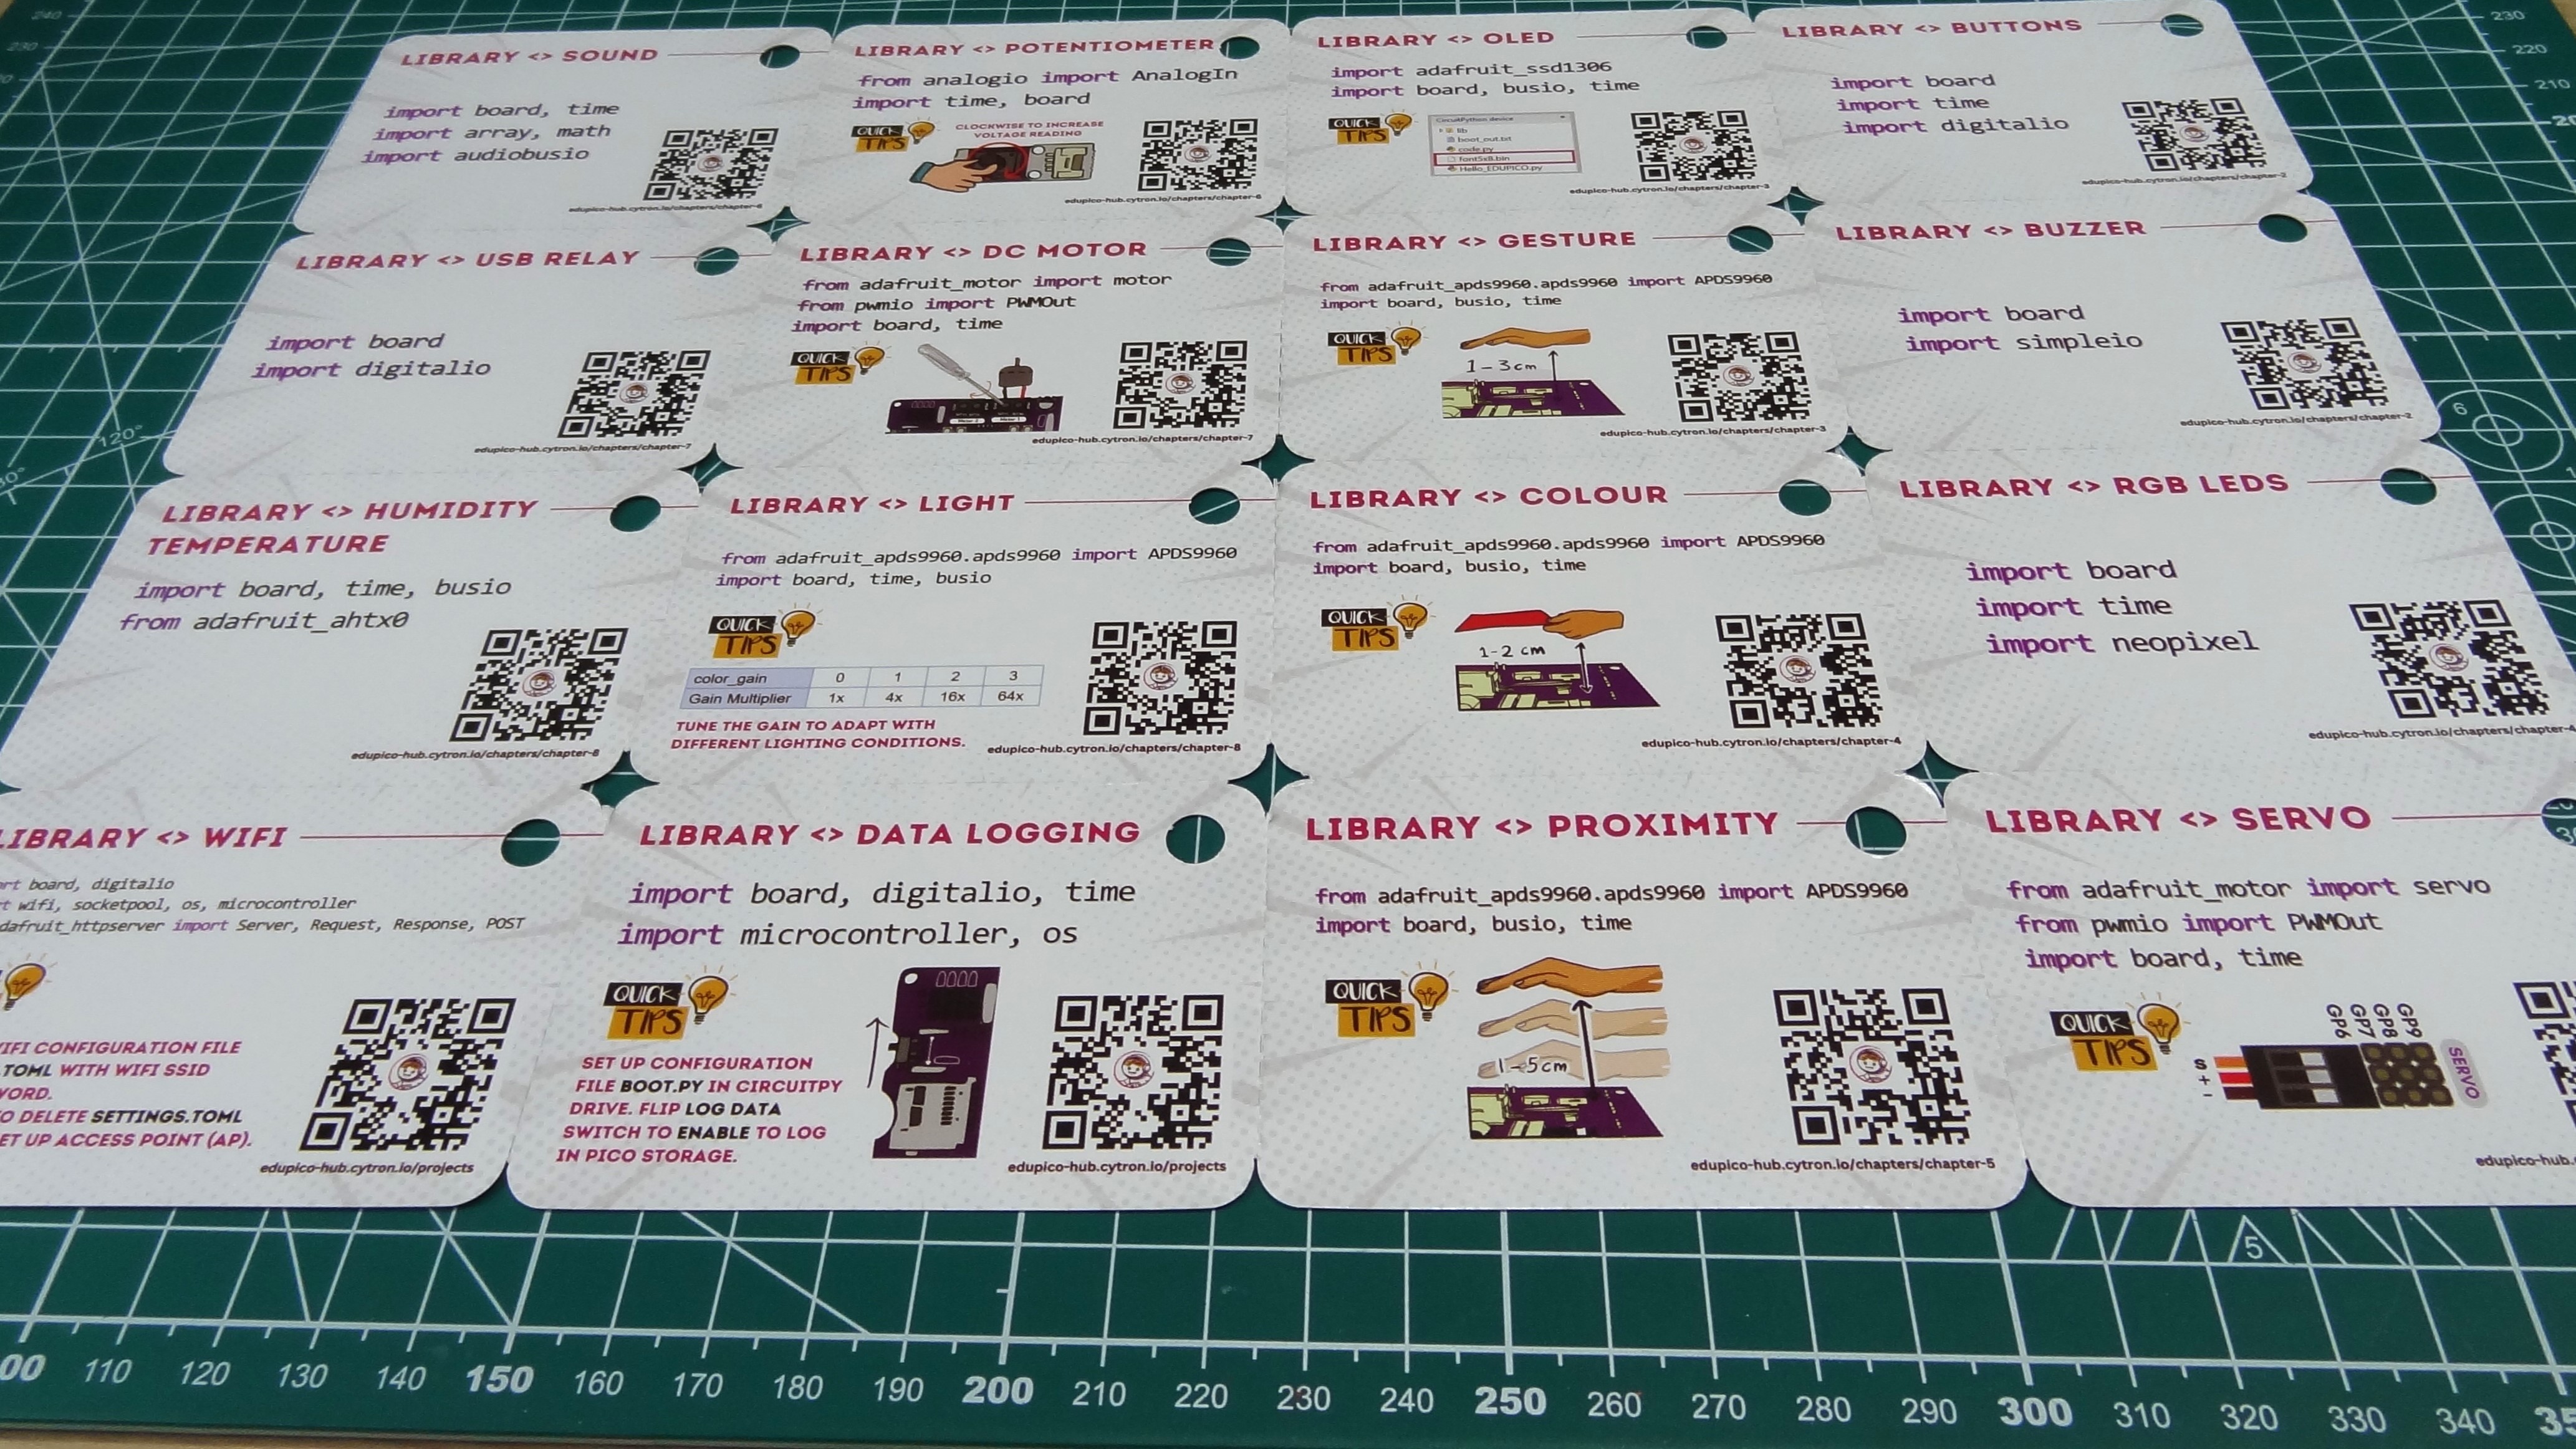
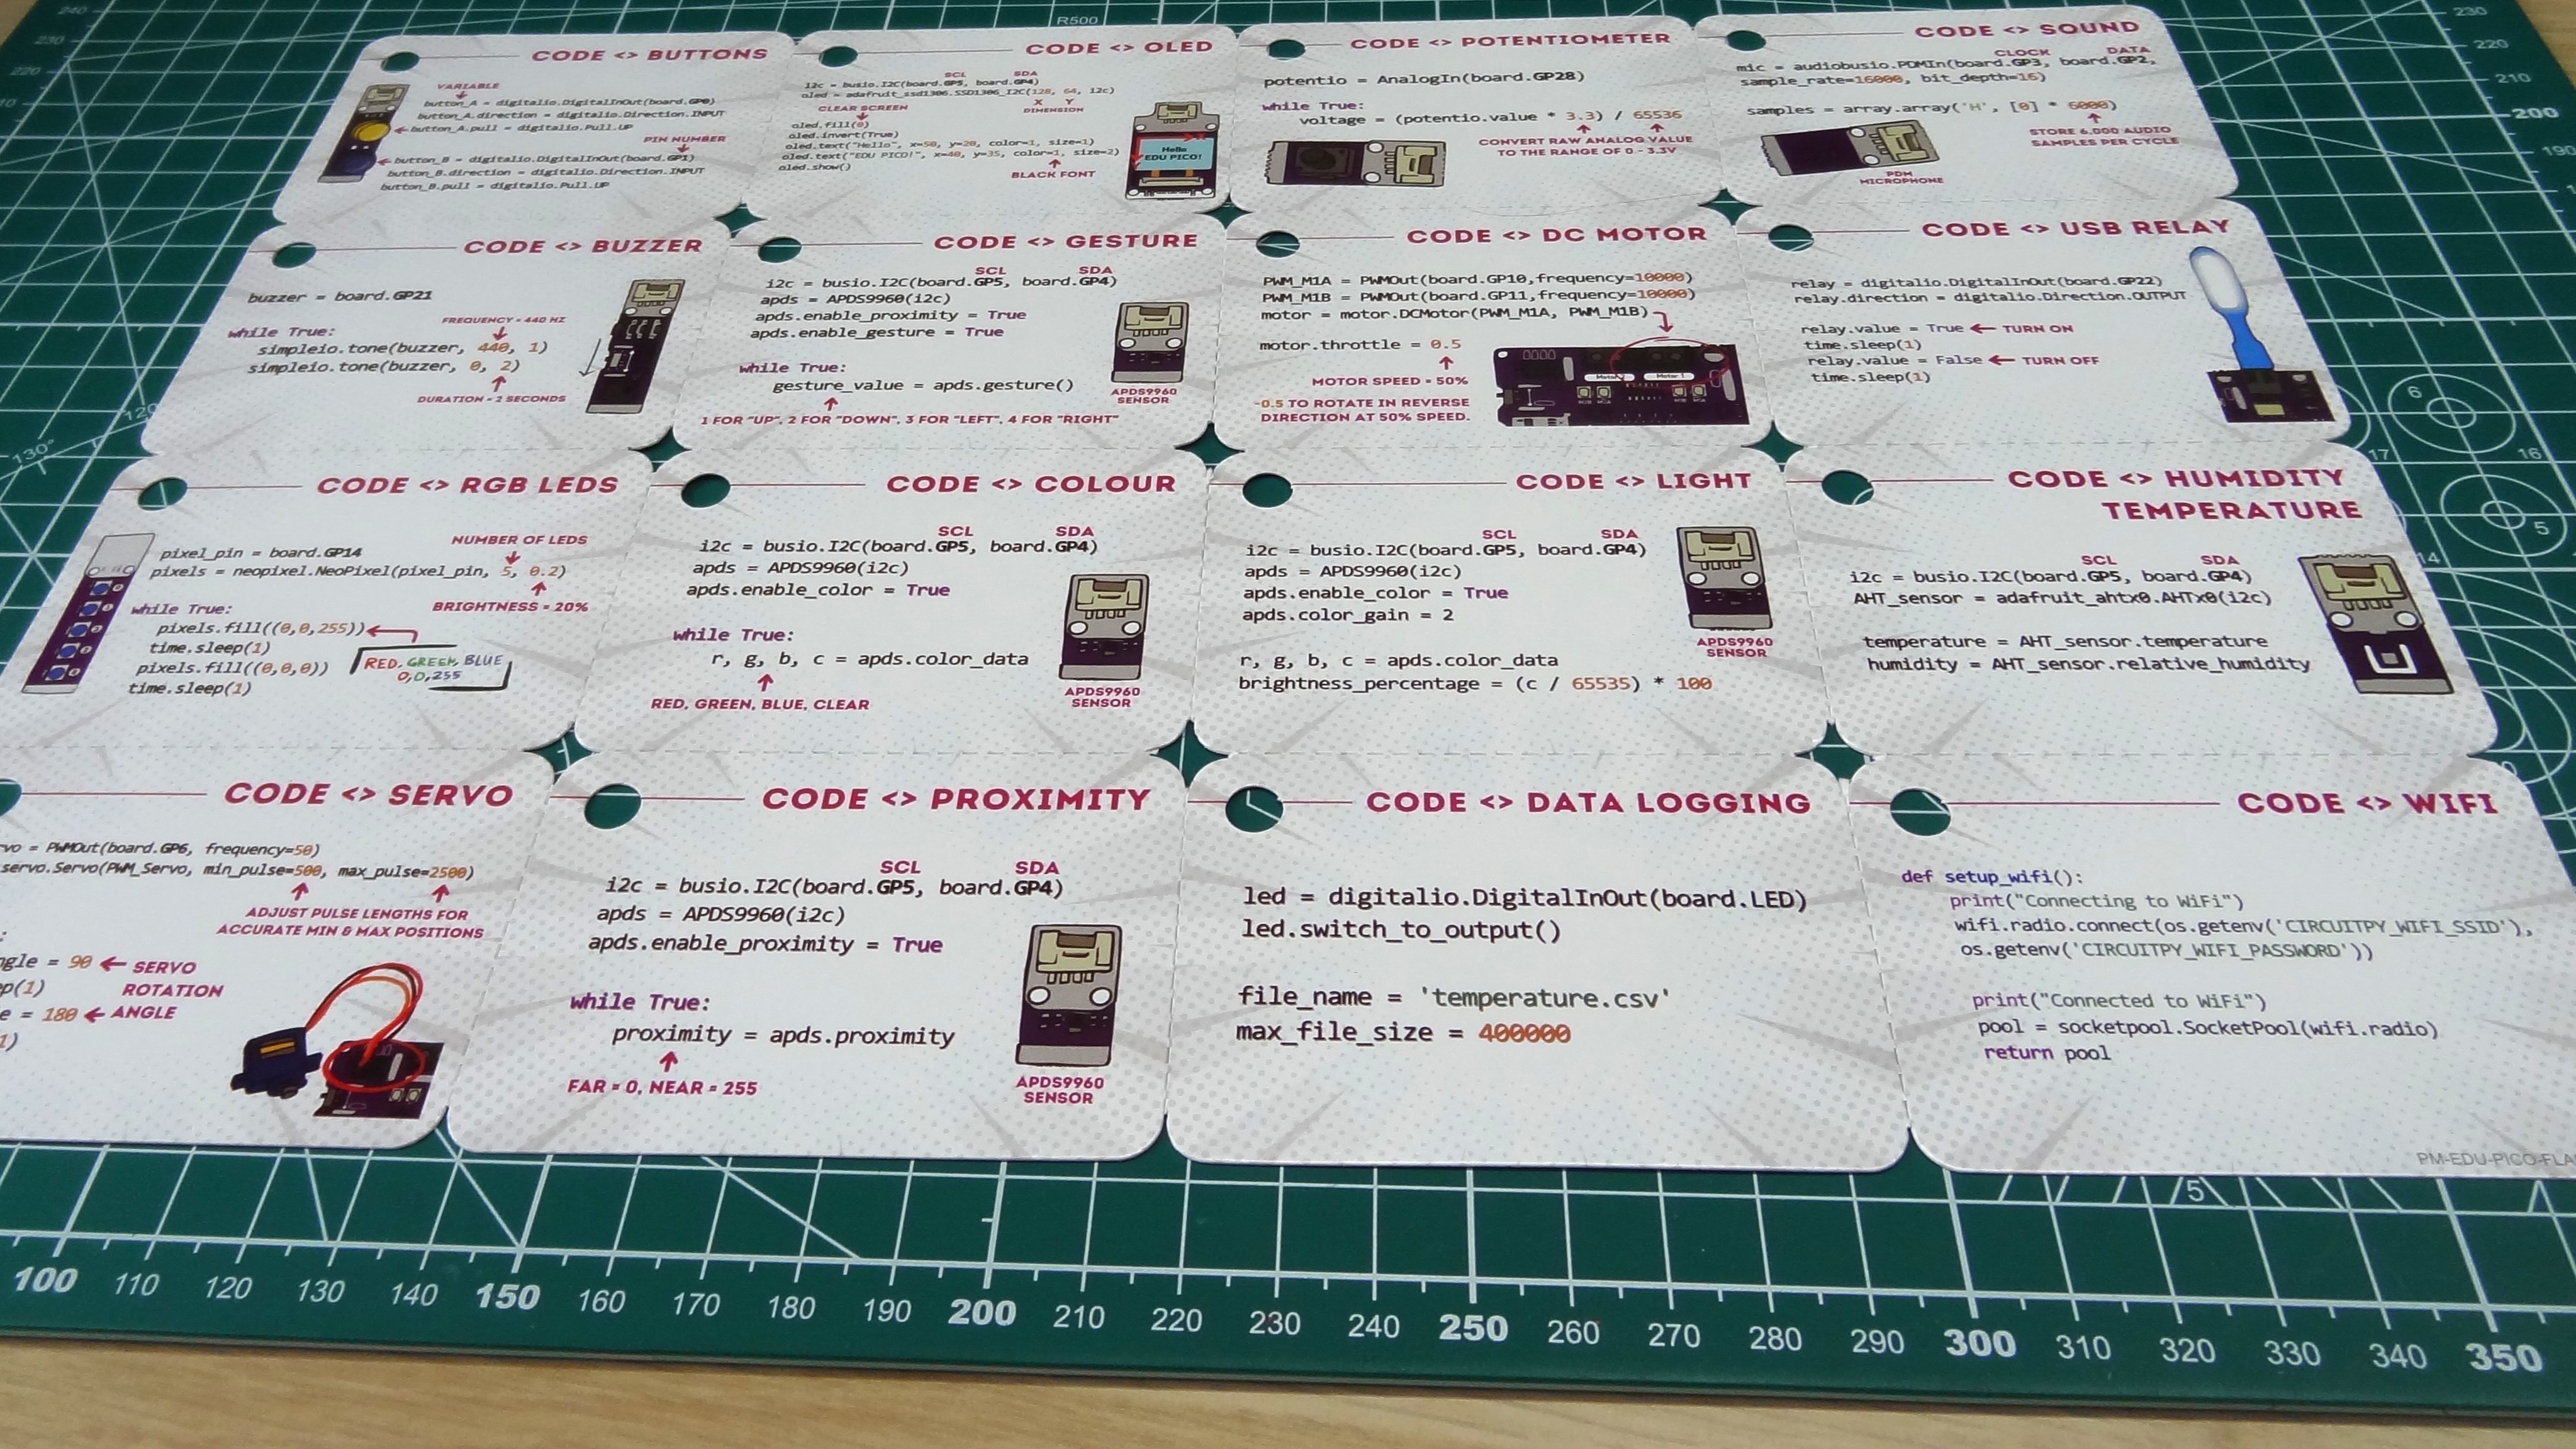
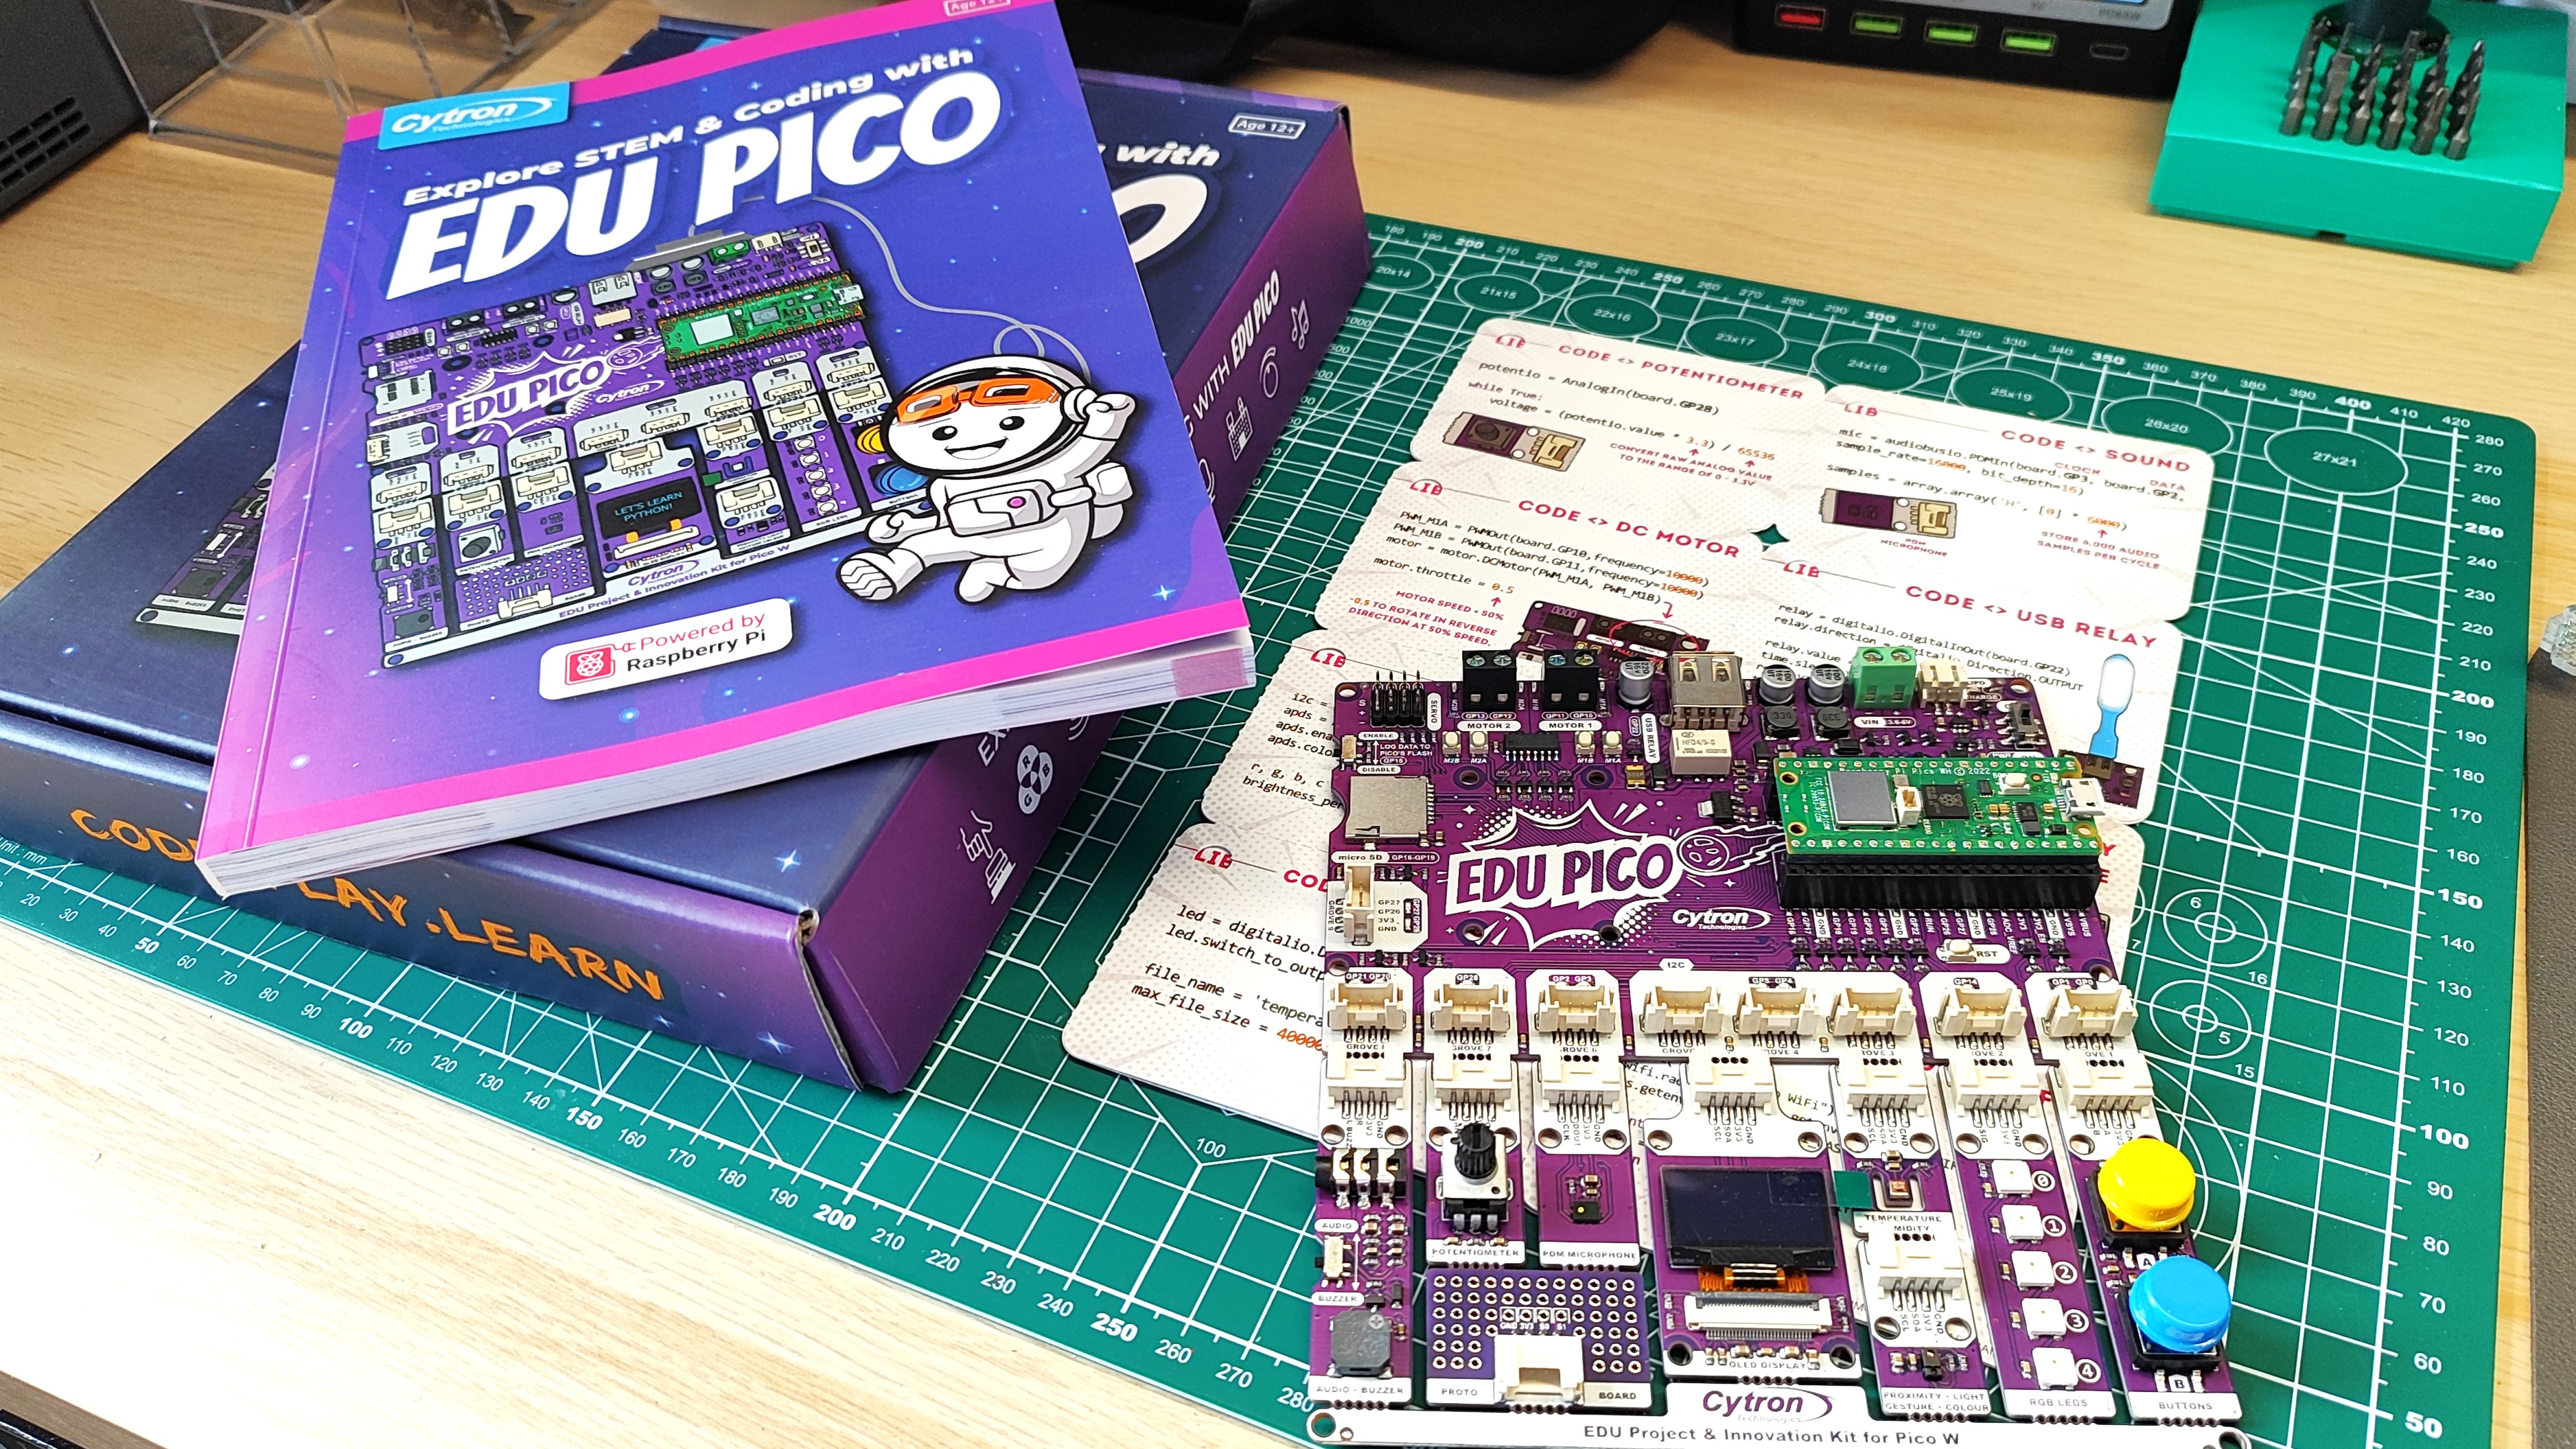
Straight away we are met with Cytron’s forward thinking. In the box are a full-color guidebook which uses a series of cartoons to guide the reader through a project, some quick reference cards and the necessary bits for the projects. The guide book, aimed at teachers and learners, is excellent.
We use it to understand the board and how to write code using CircuitPython. From flashing CircuitPython to the Pico W and then how to install and use Thonny, everything is covered. The only slight downside, and it is only slight, is that the guide focuses on Windows. It is the dominant OS, but a nod to macOS and even Linux would be appreciated. That said, the instructions don’t differ too much from setting things up in Windows.
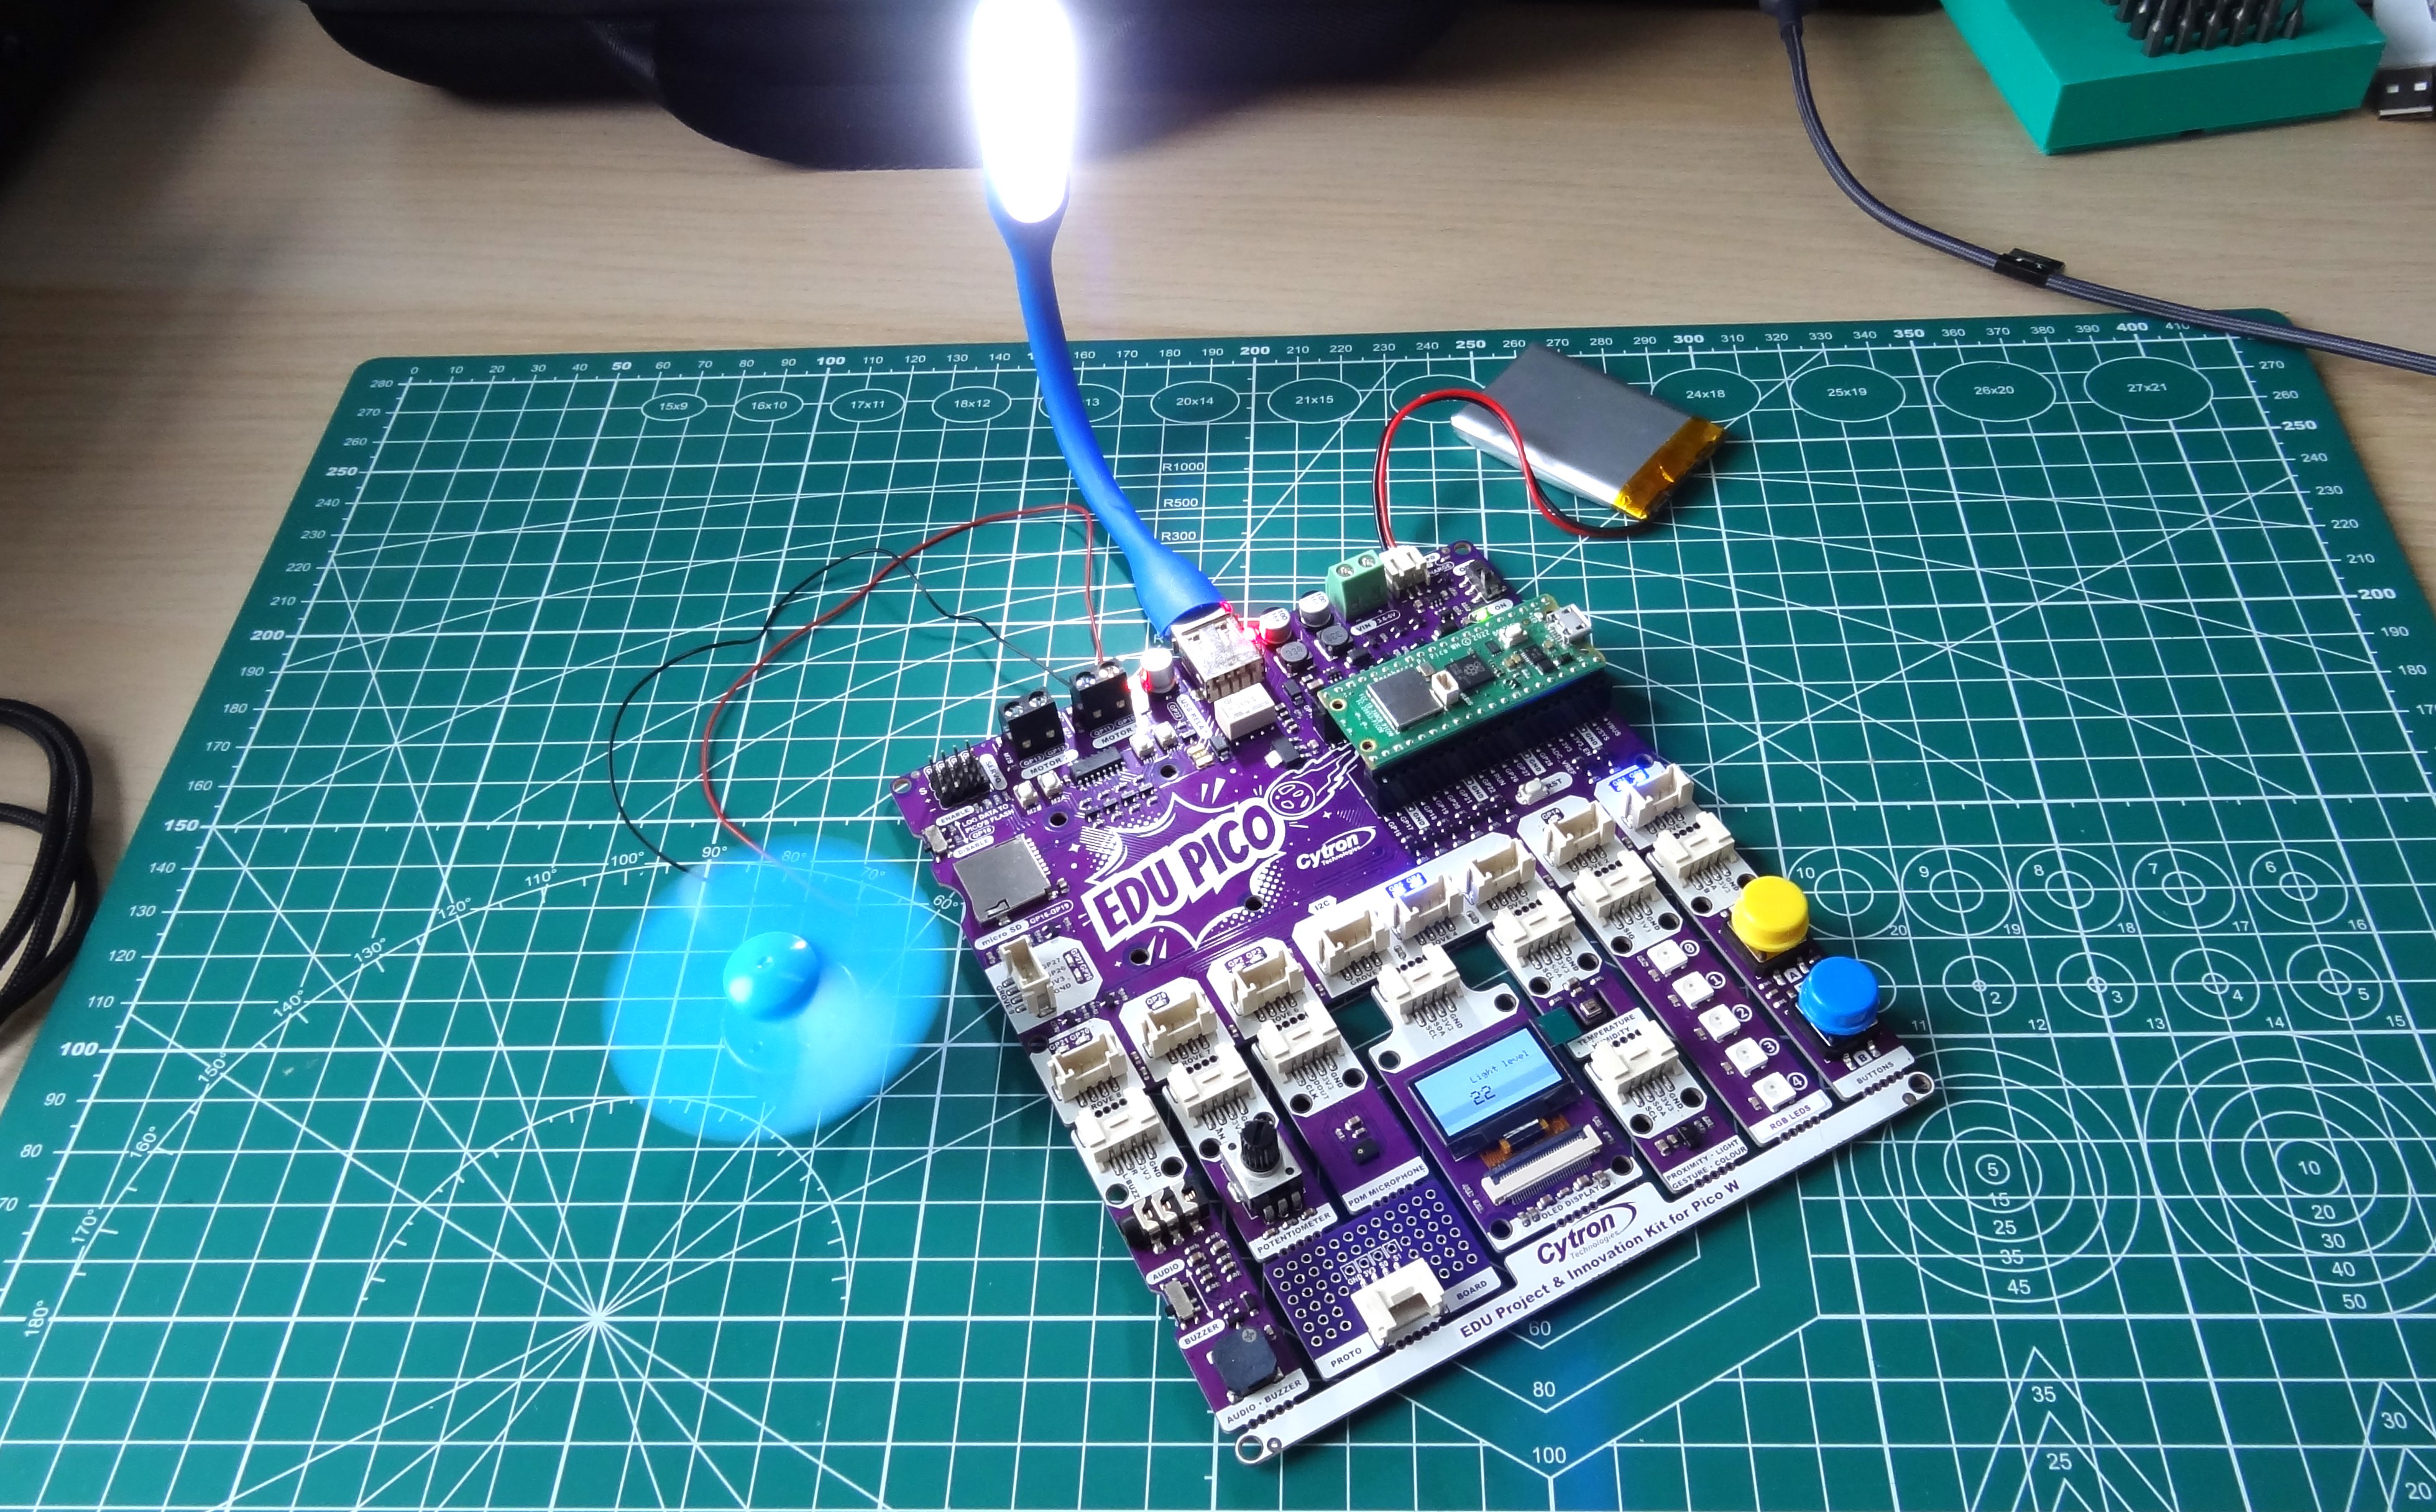
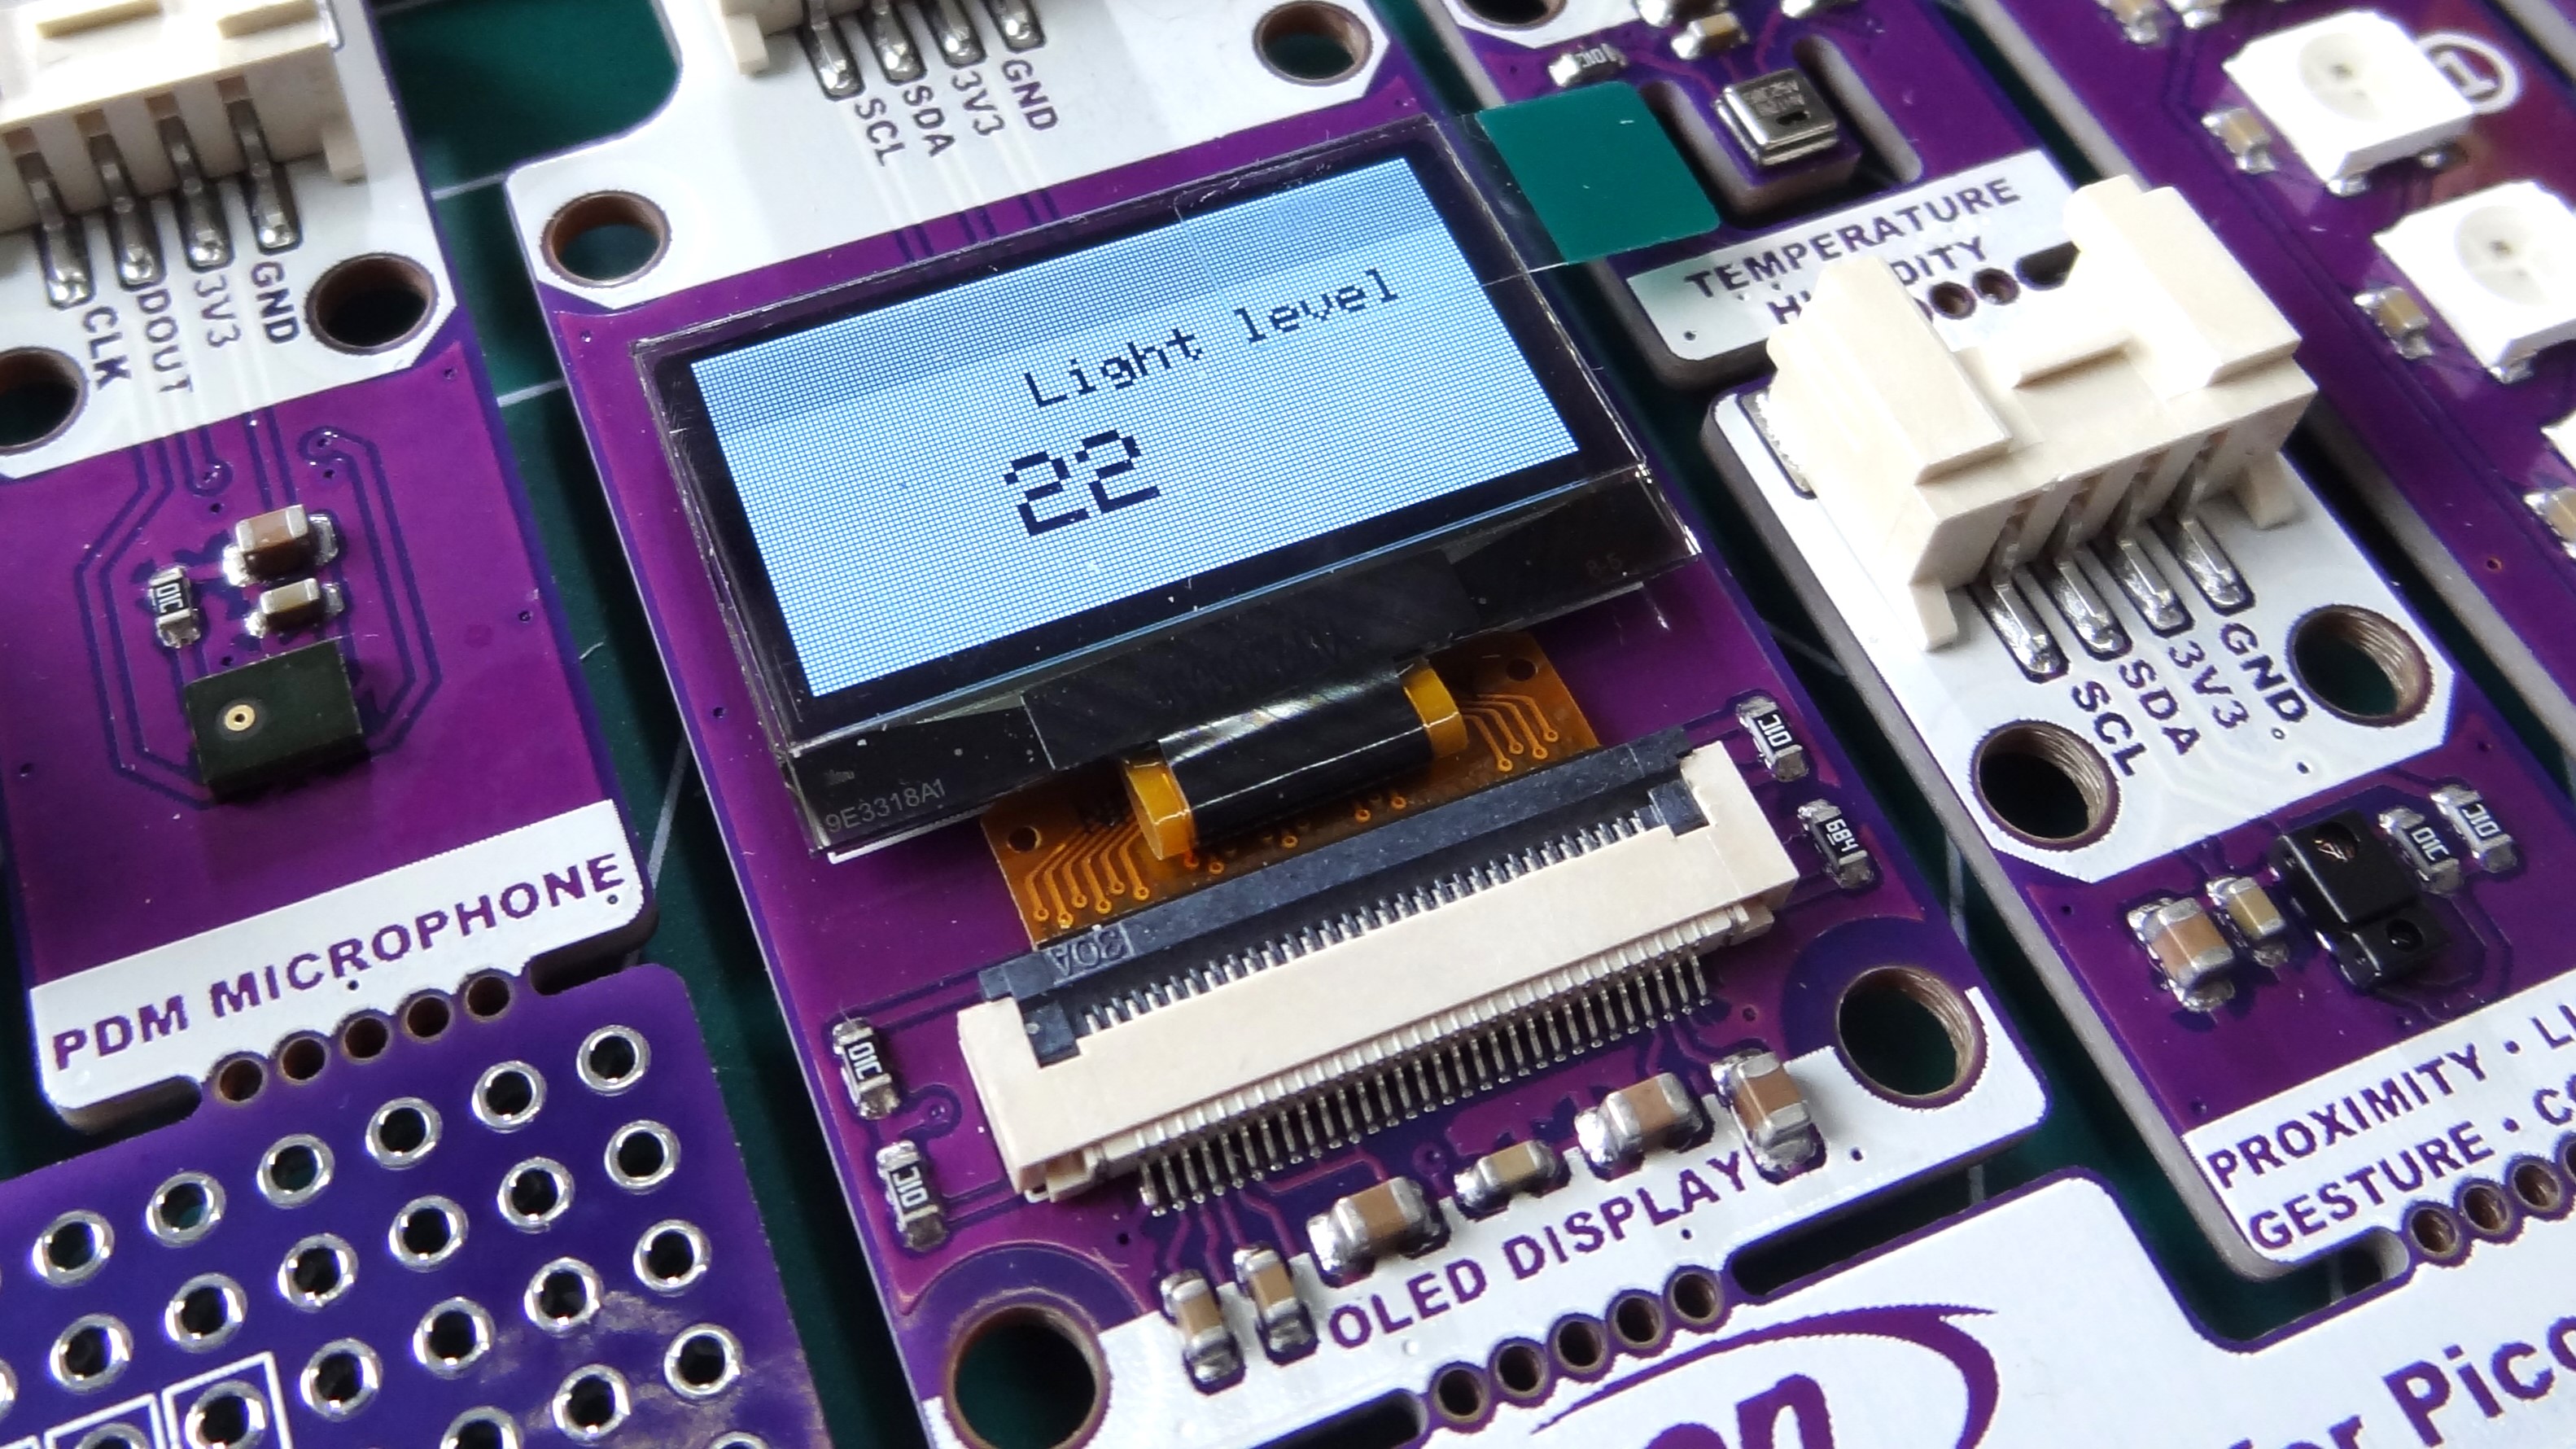
The quick reference cards are exceptional. If you know a little CircuitPython, then these cards are your gateway to start working with Edu Pico. By mixing different cards together, we quickly made a demo application which detected the light level. The current light level was reported to an OLED screen, and if it went below 30% brightness, the USB relay was turned on to power a USB lamp. We also attached a DC motor fan assembly just for the heck of it.
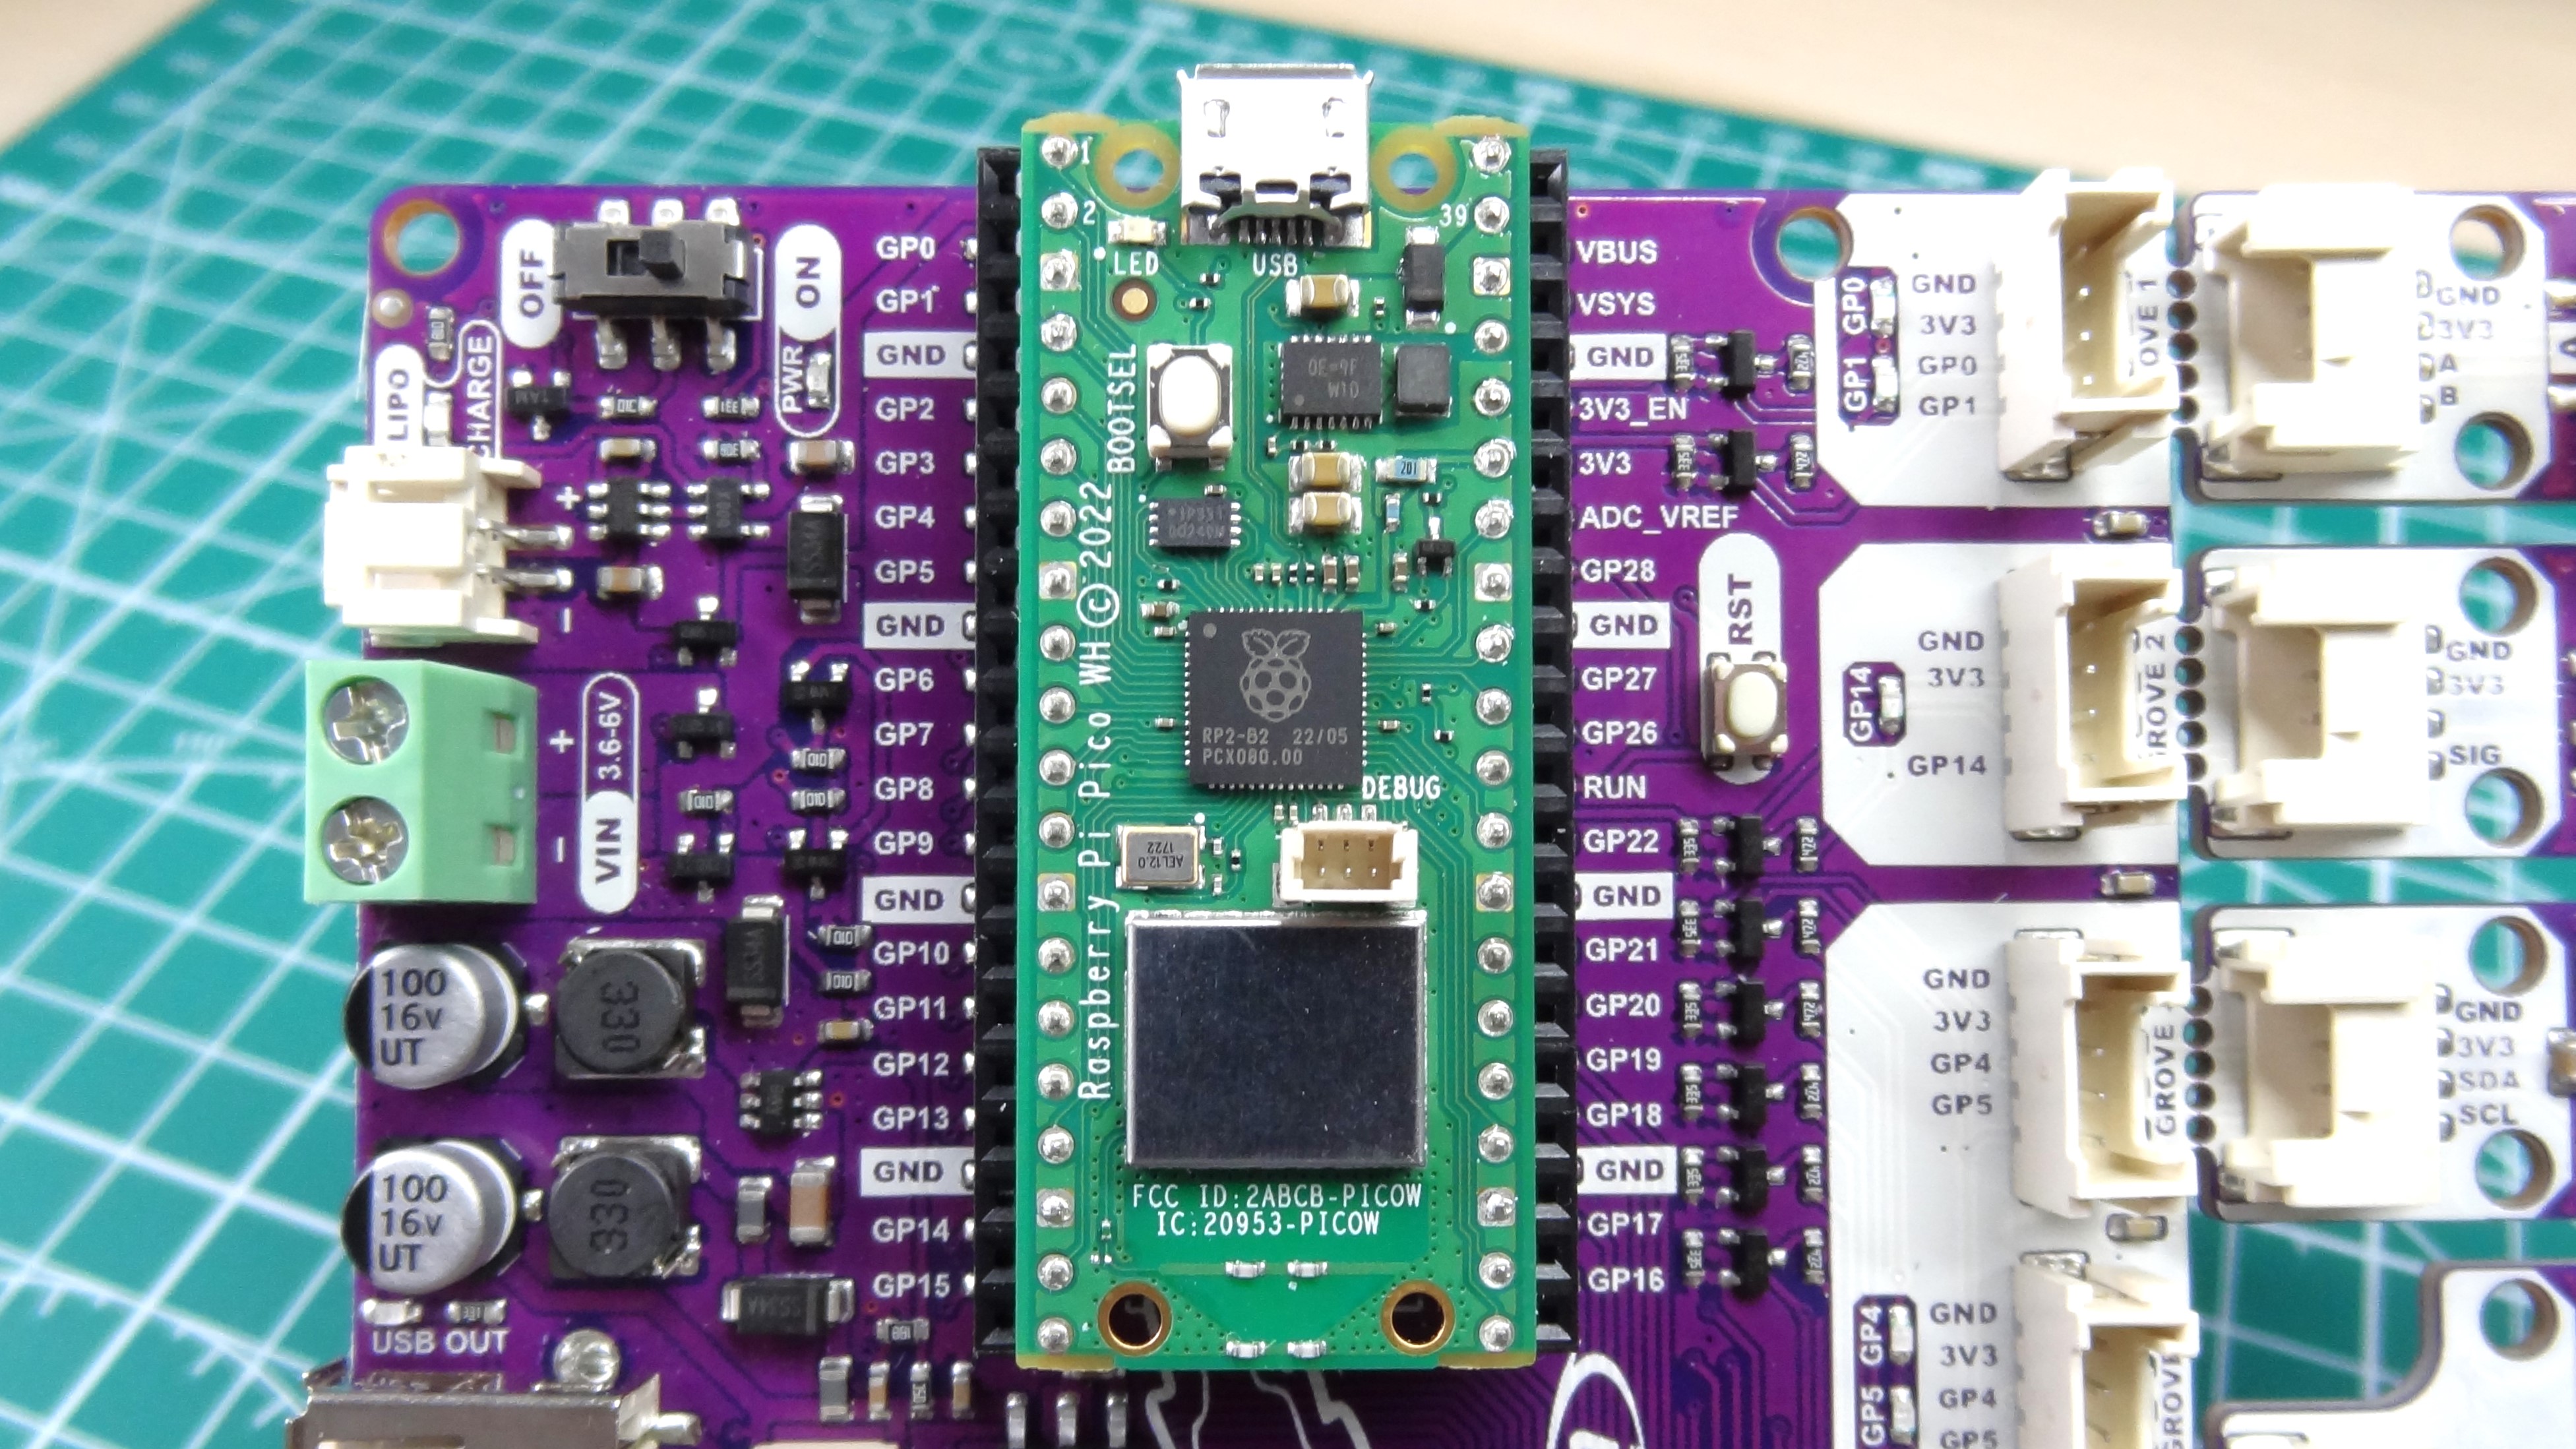
We’ve dug through the guide book and the quick reference cards, but the board itself is also a learning experience. First of all the Raspberry Pi Pico W’s GPIO is fully labeled and so are all of the connections and components on the board.
Get Tom's Hardware's best news and in-depth reviews, straight to your inbox.
Components tell us which GPIO pins they are connected to, including the I2C and SPI pins. Labeling the board makes it super accessible to newcomers, and very useful for forgetful old souls like myself.
This kit follows a similar approach as the Seeed Grove beginner kit for Arduino, and 2023’s Pico Bricks kit.
Components Choices
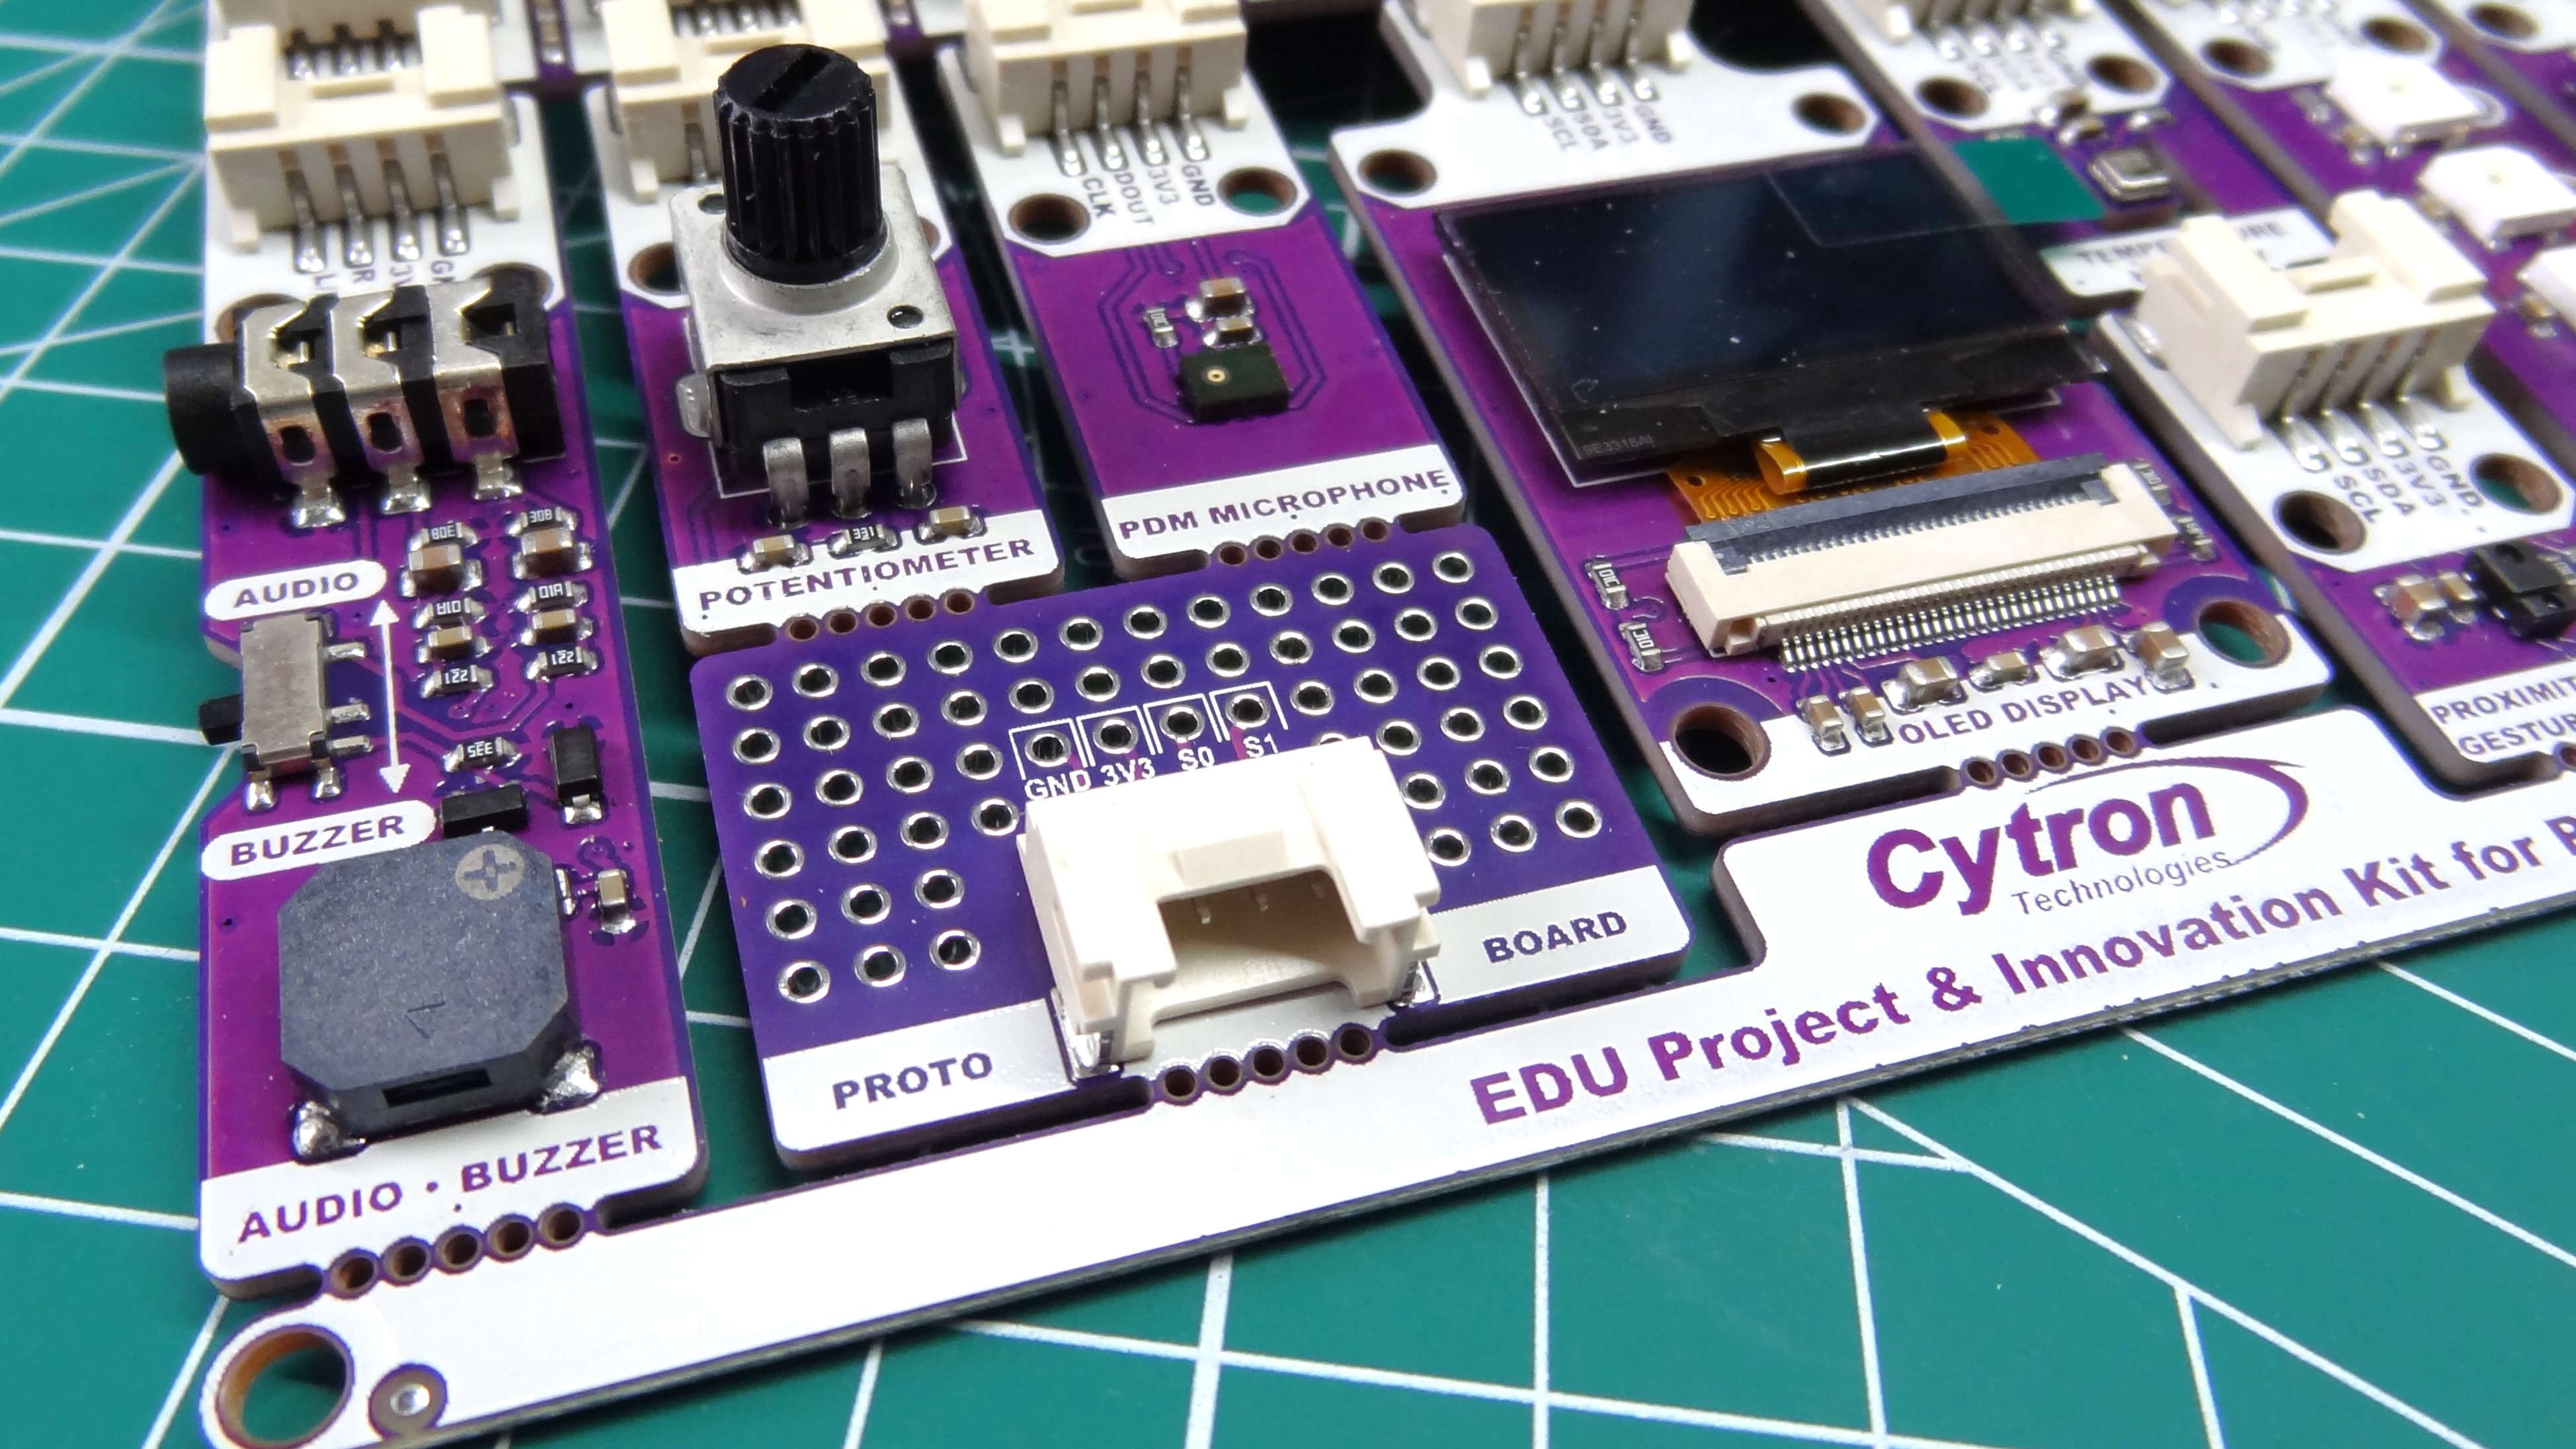
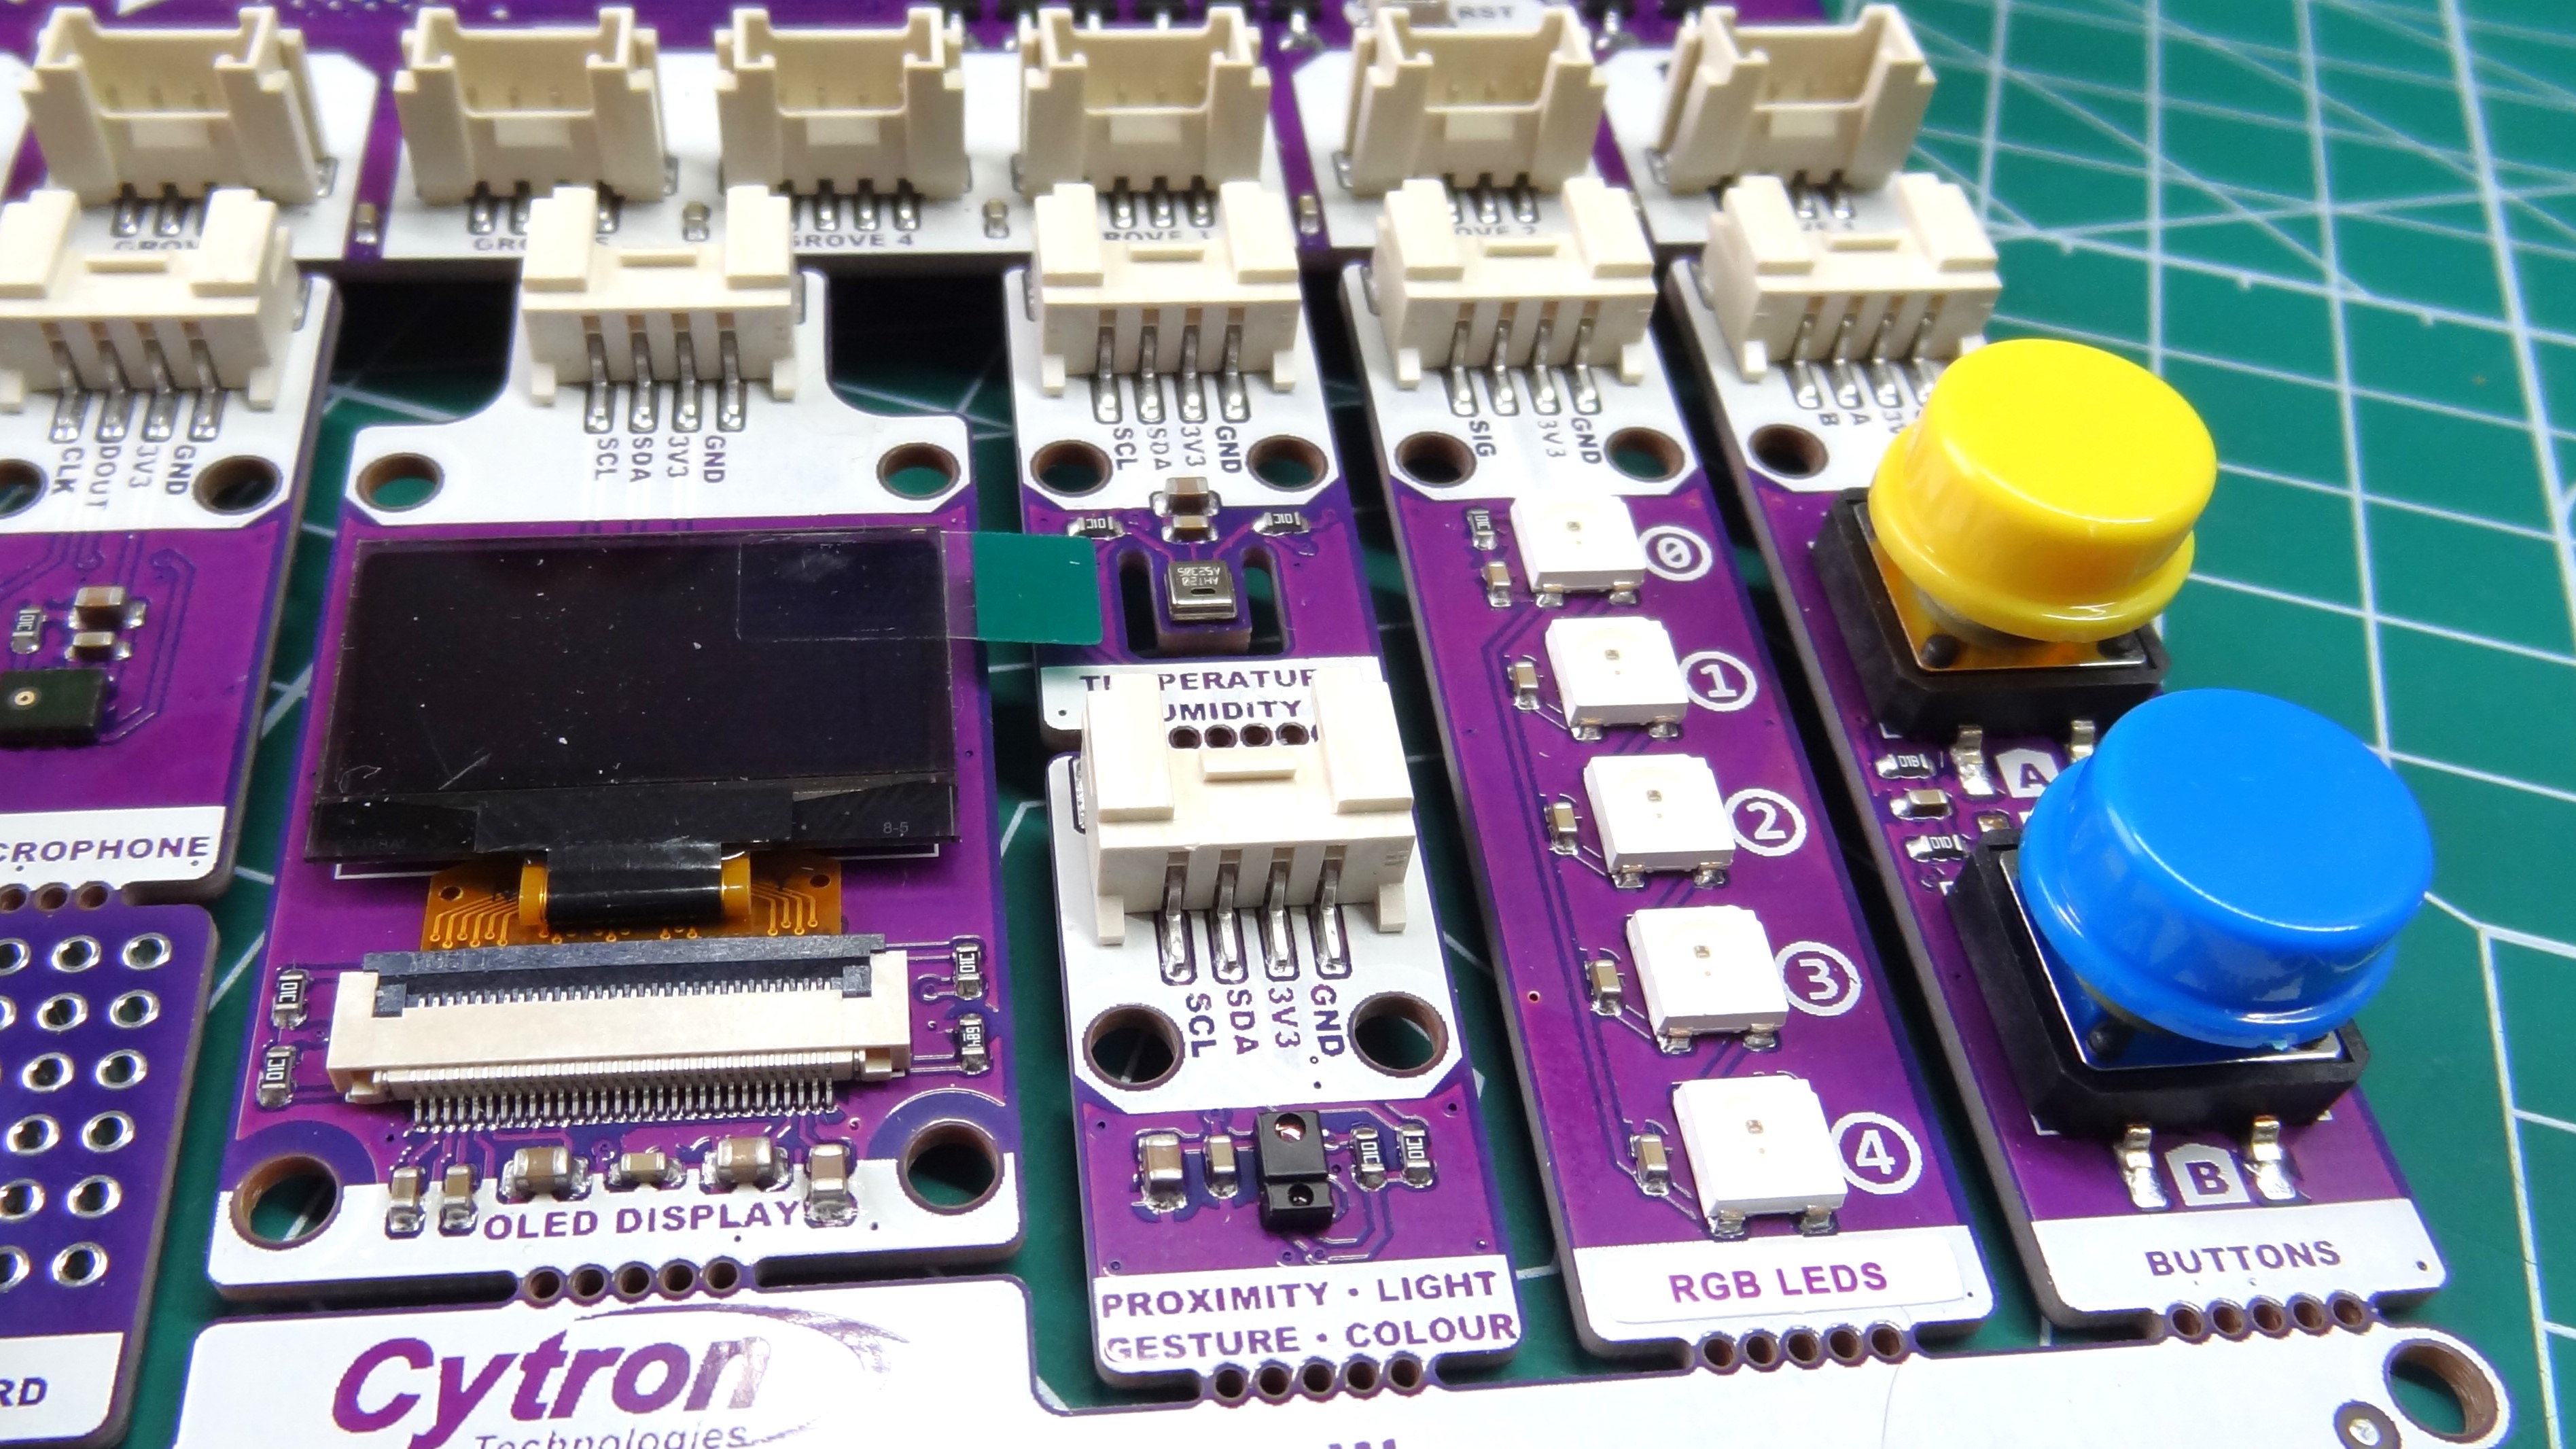
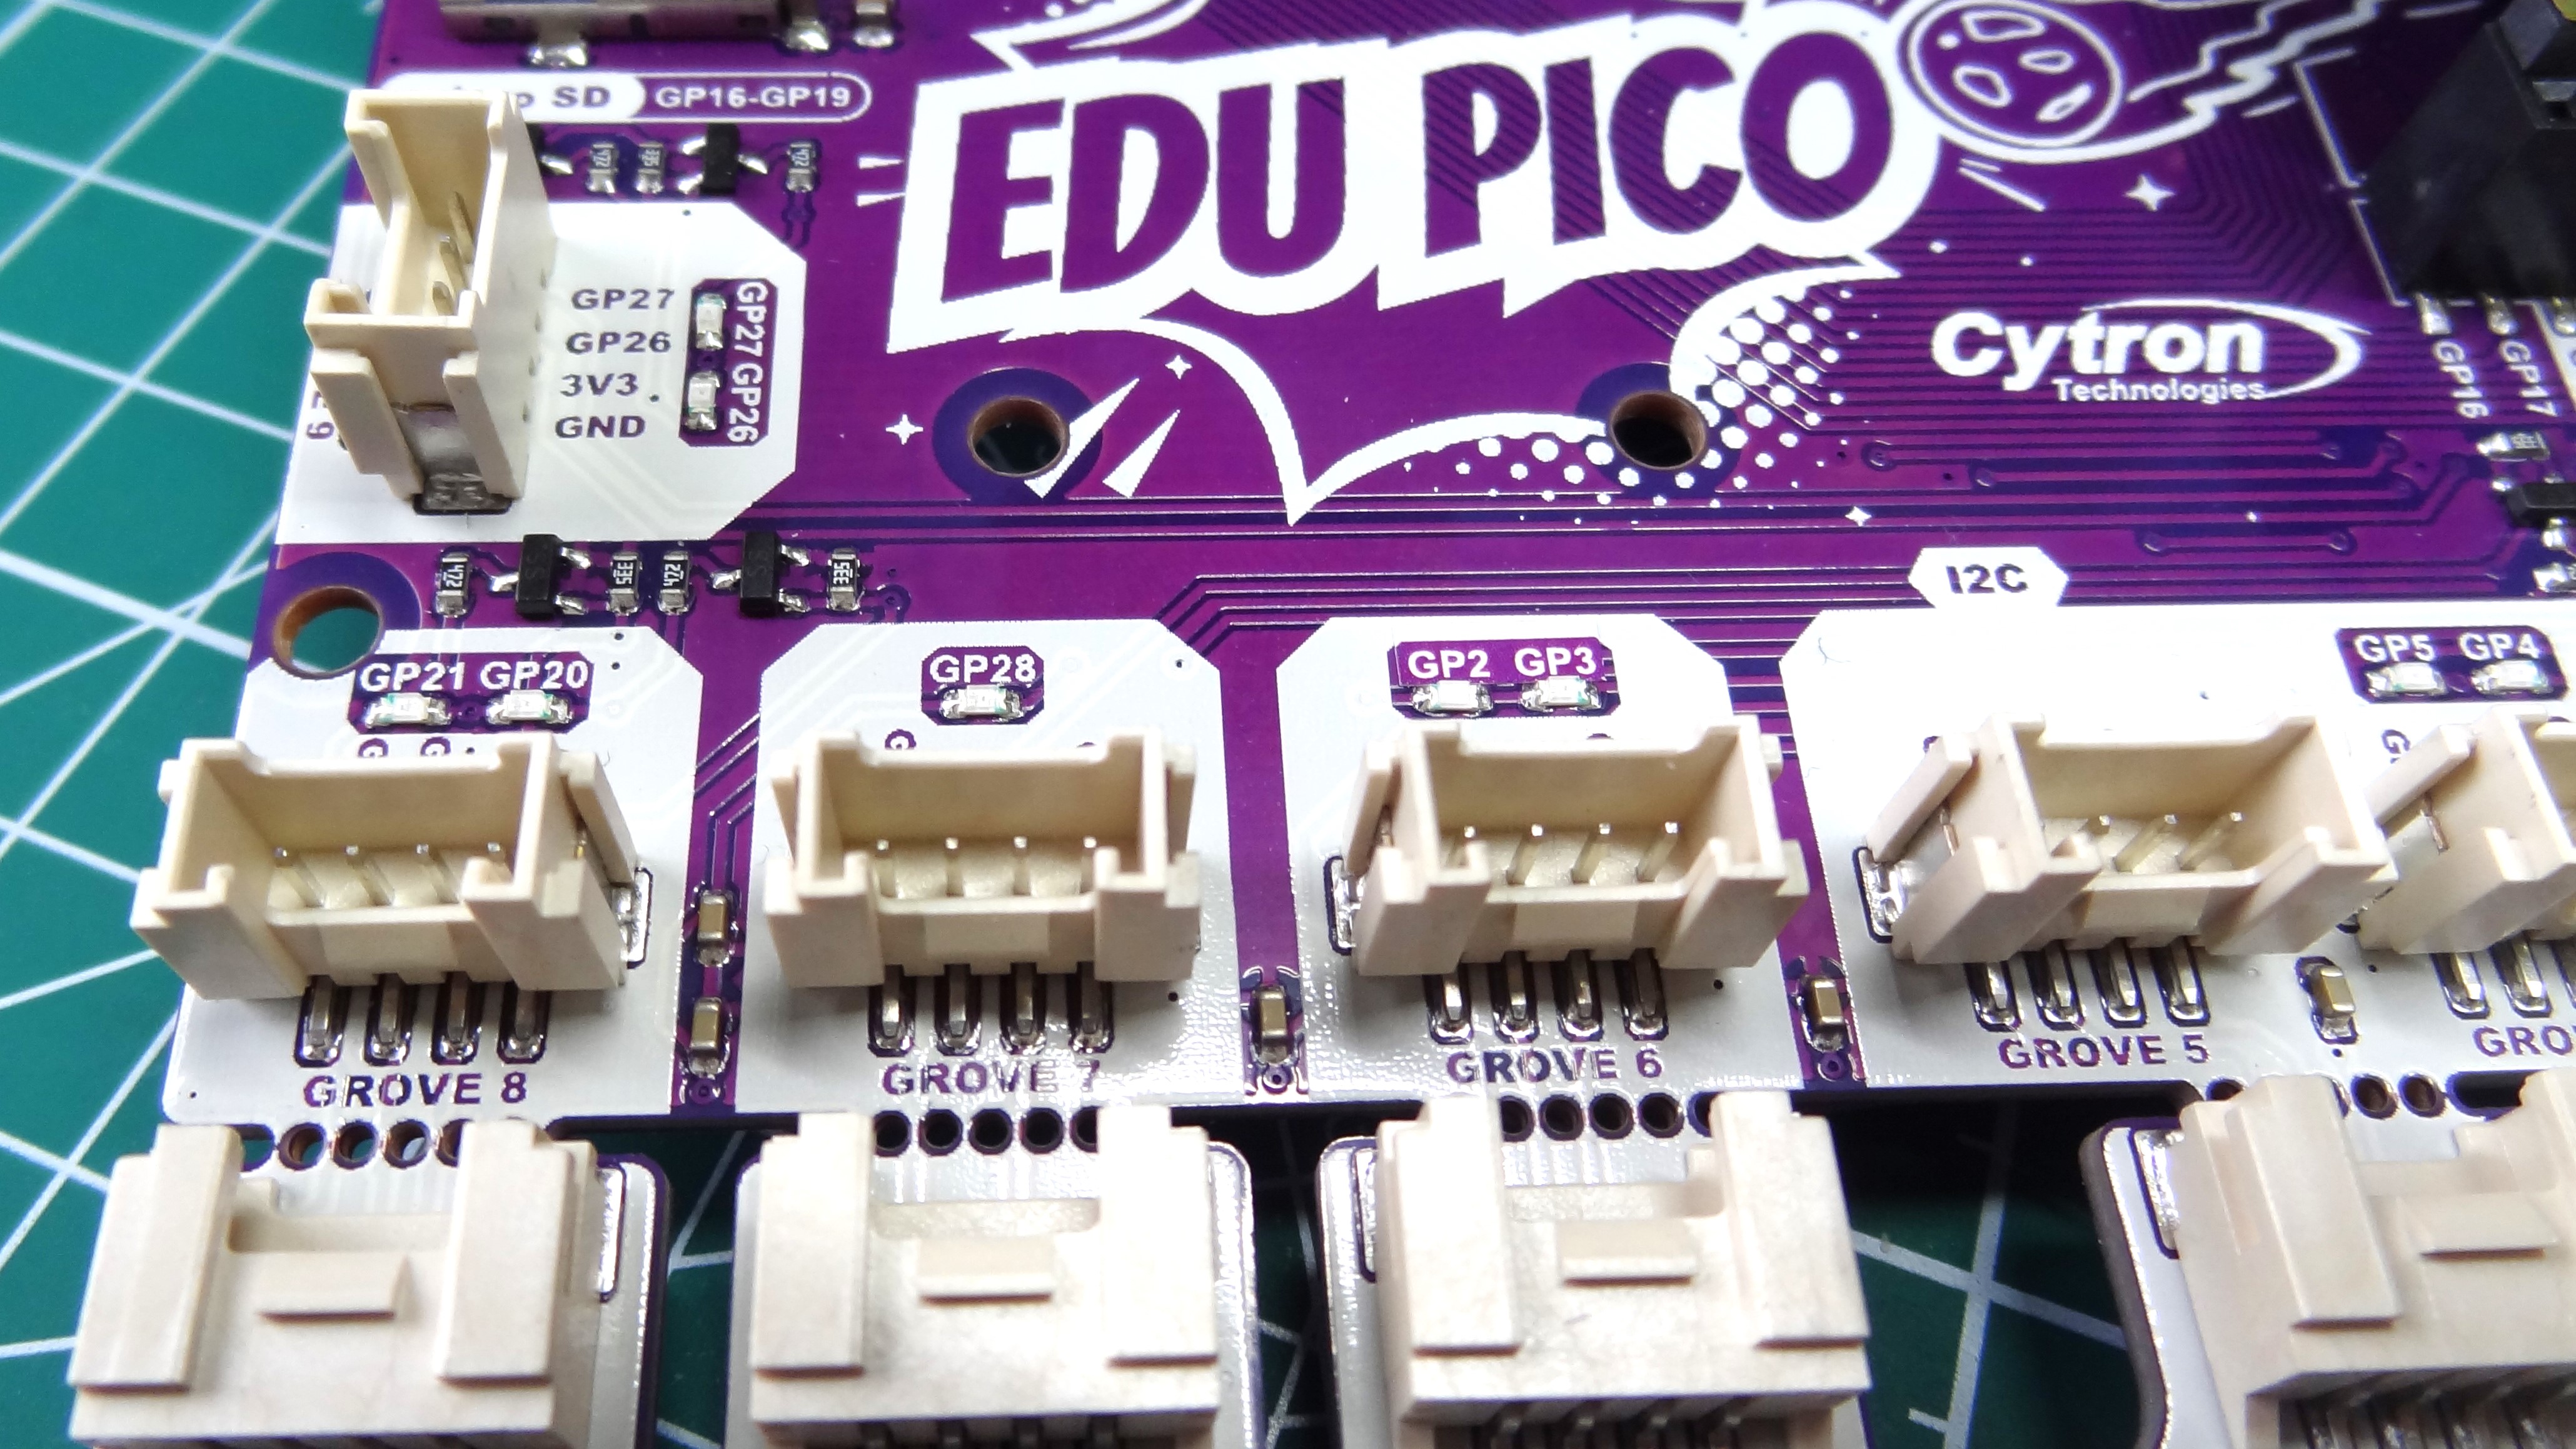
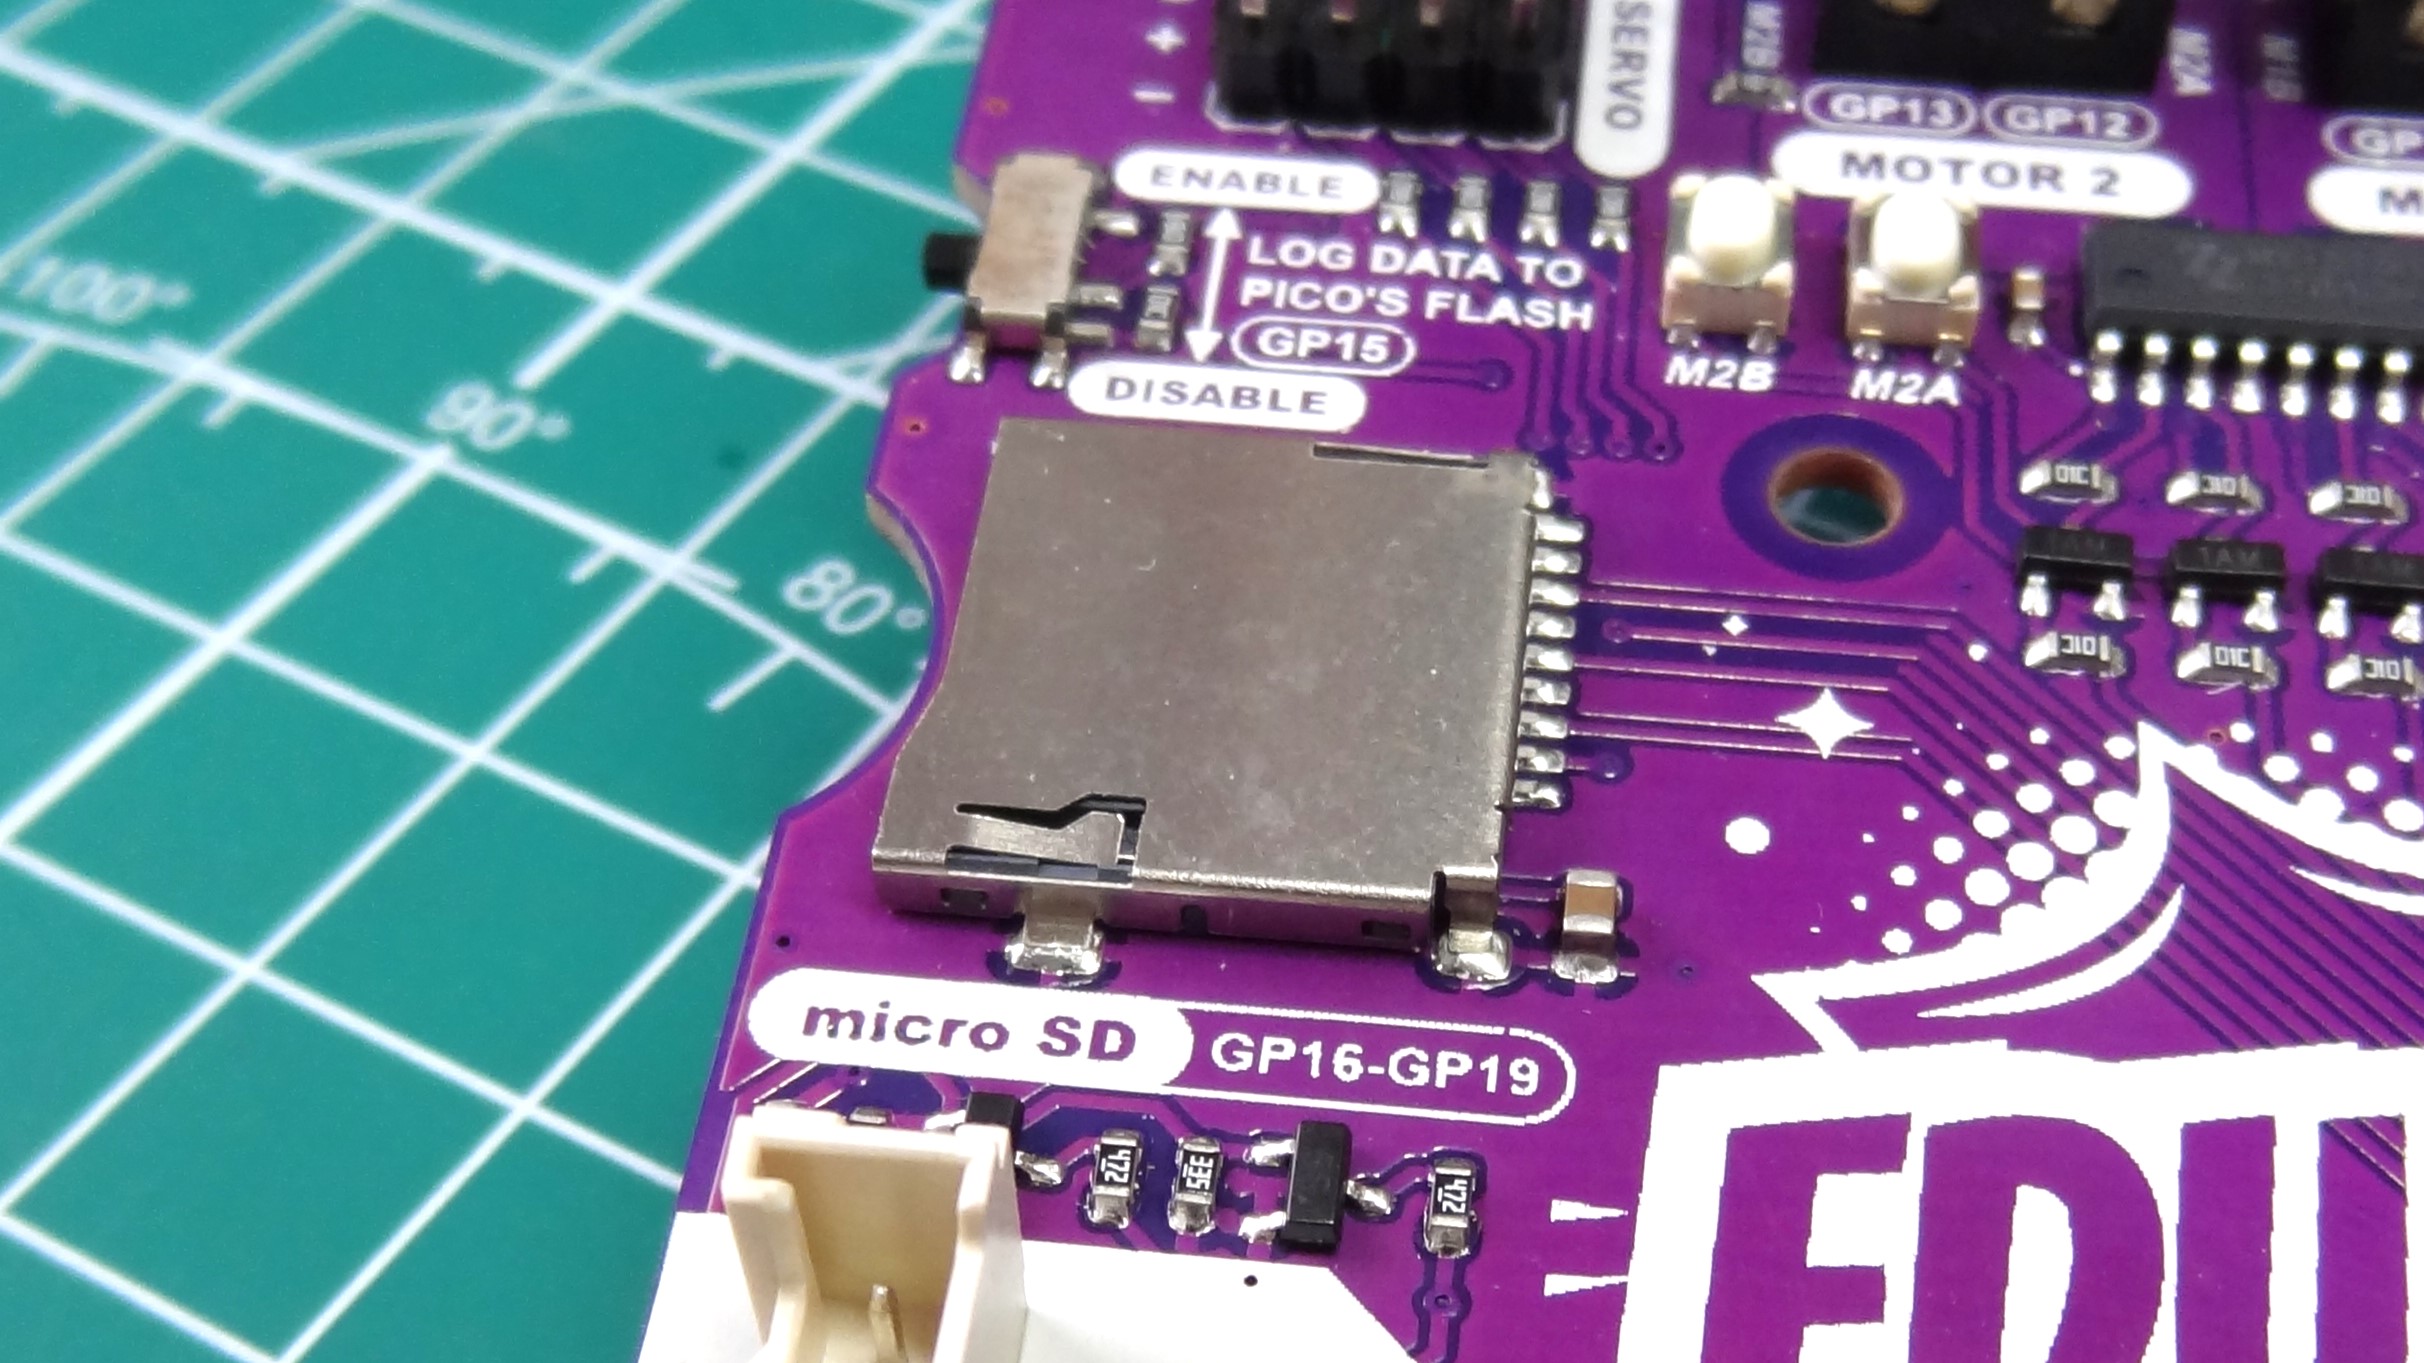
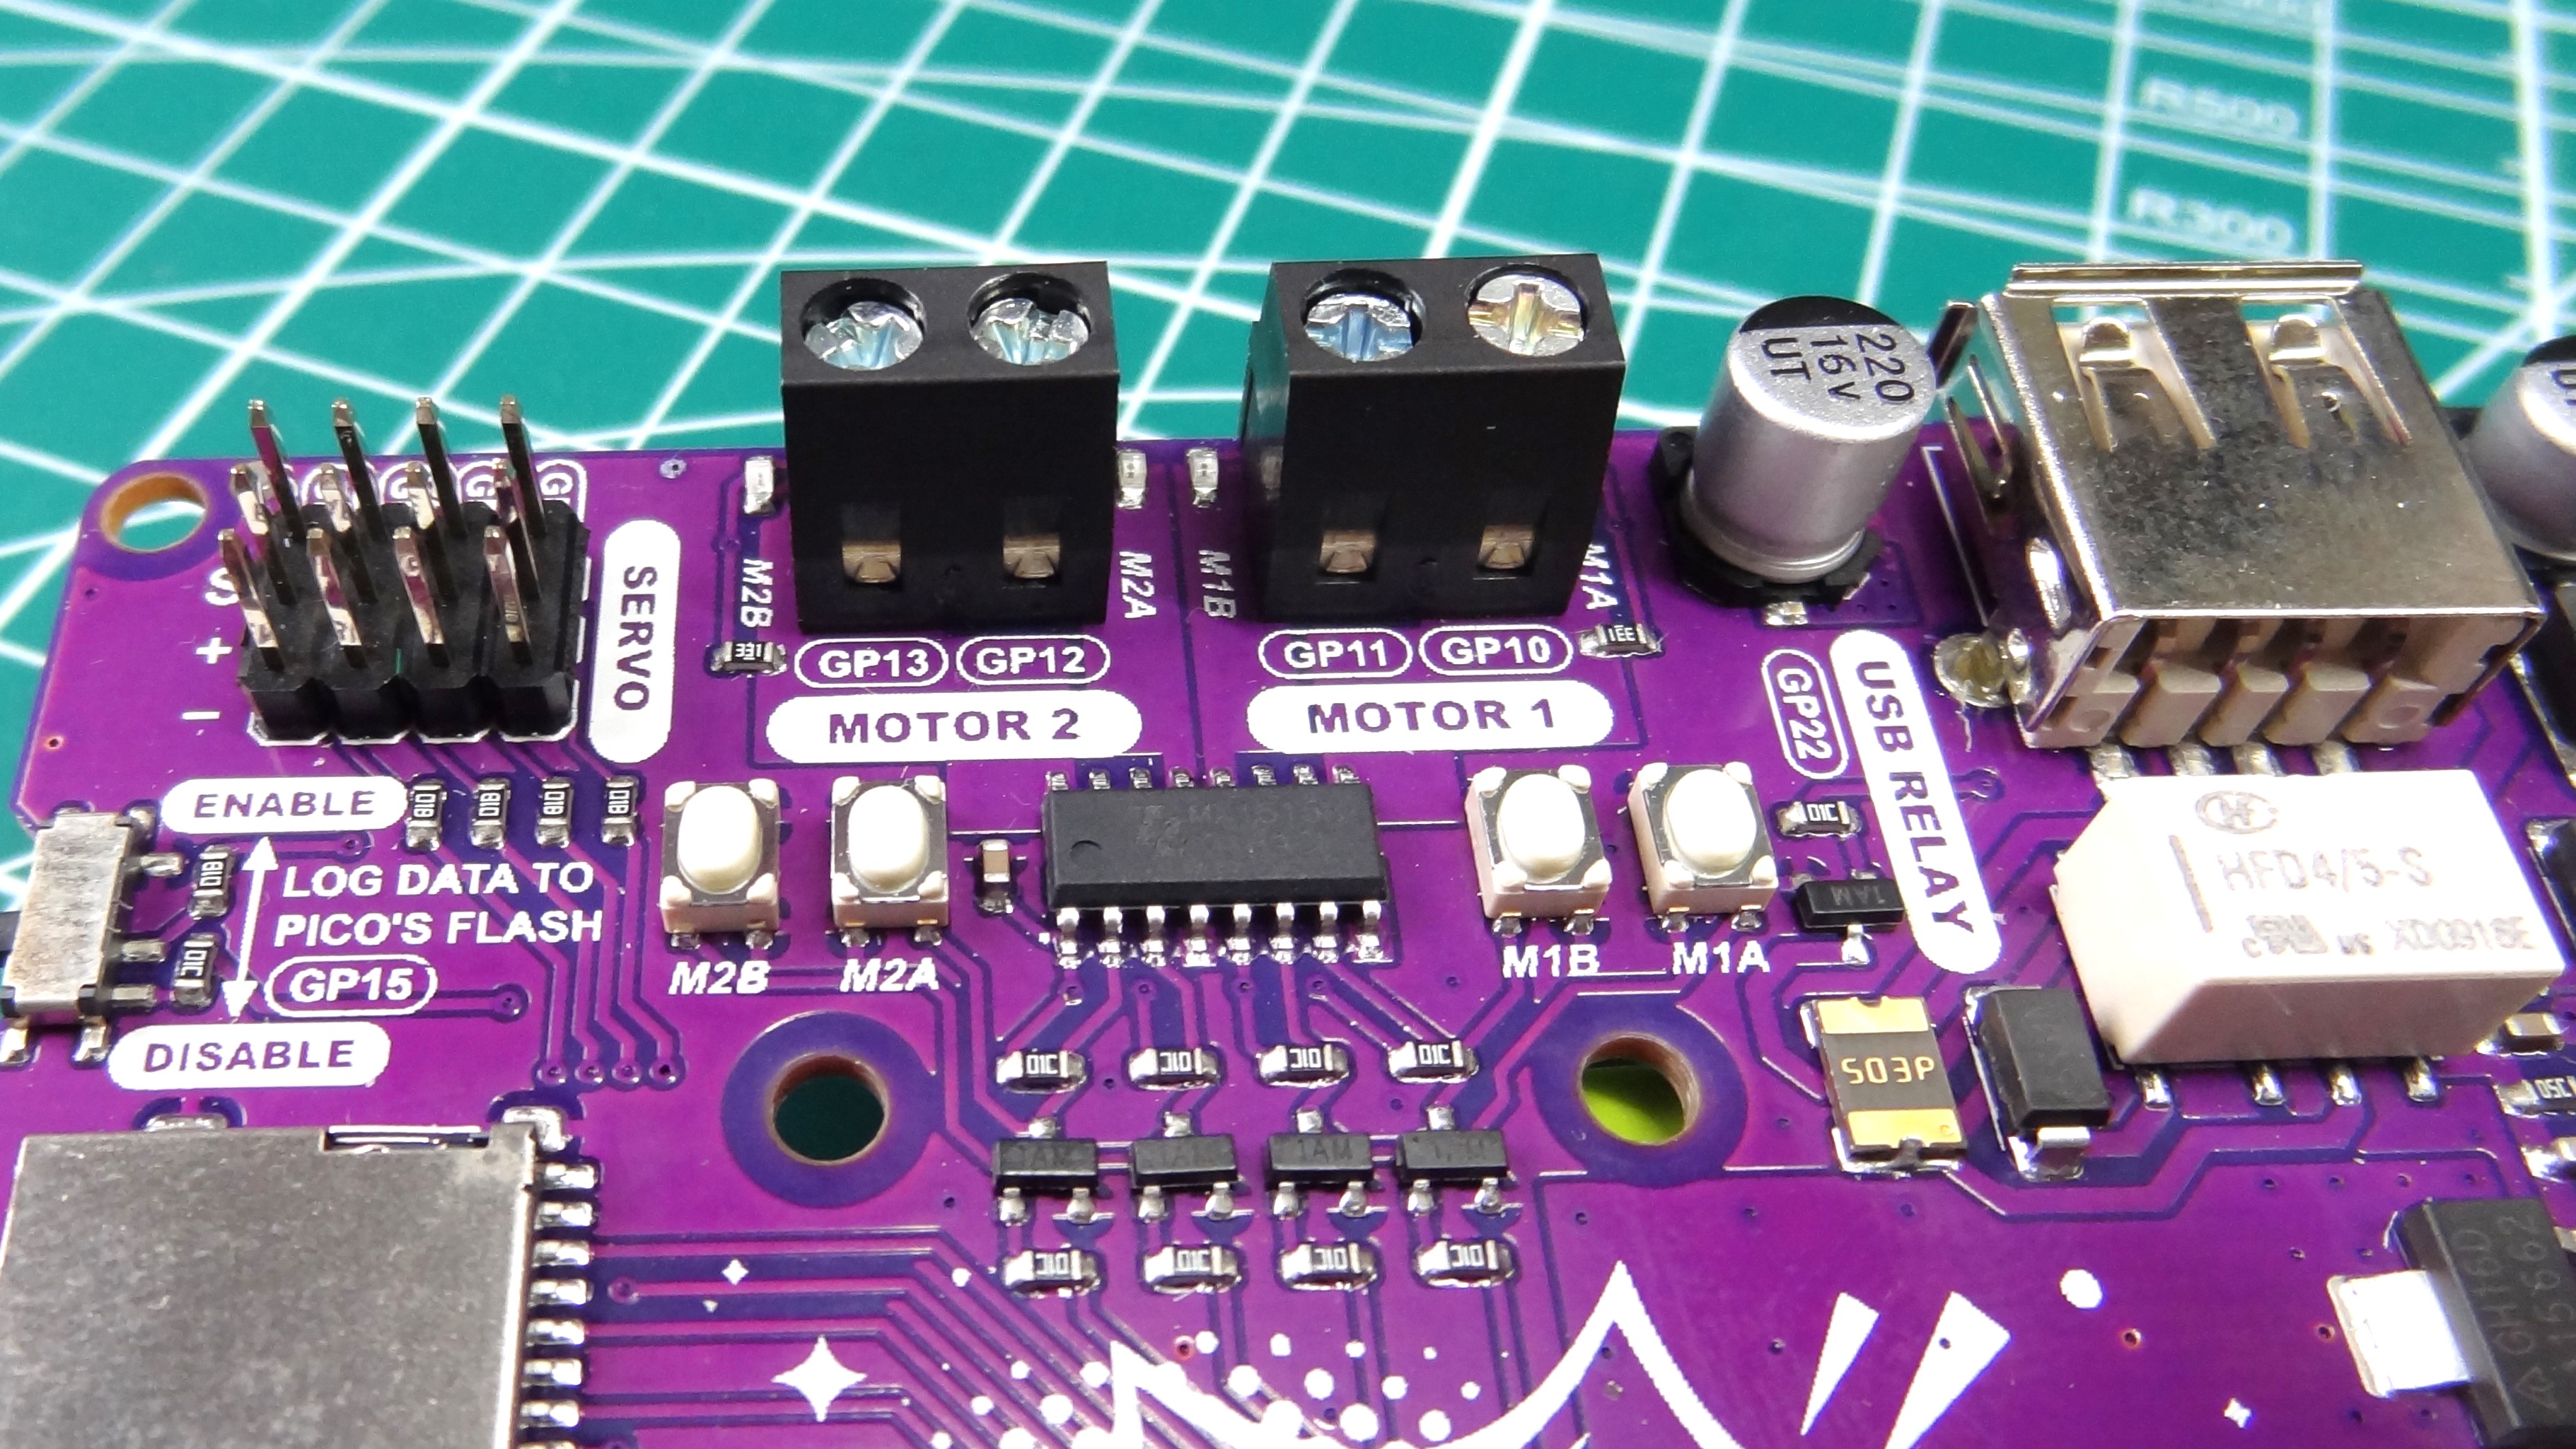
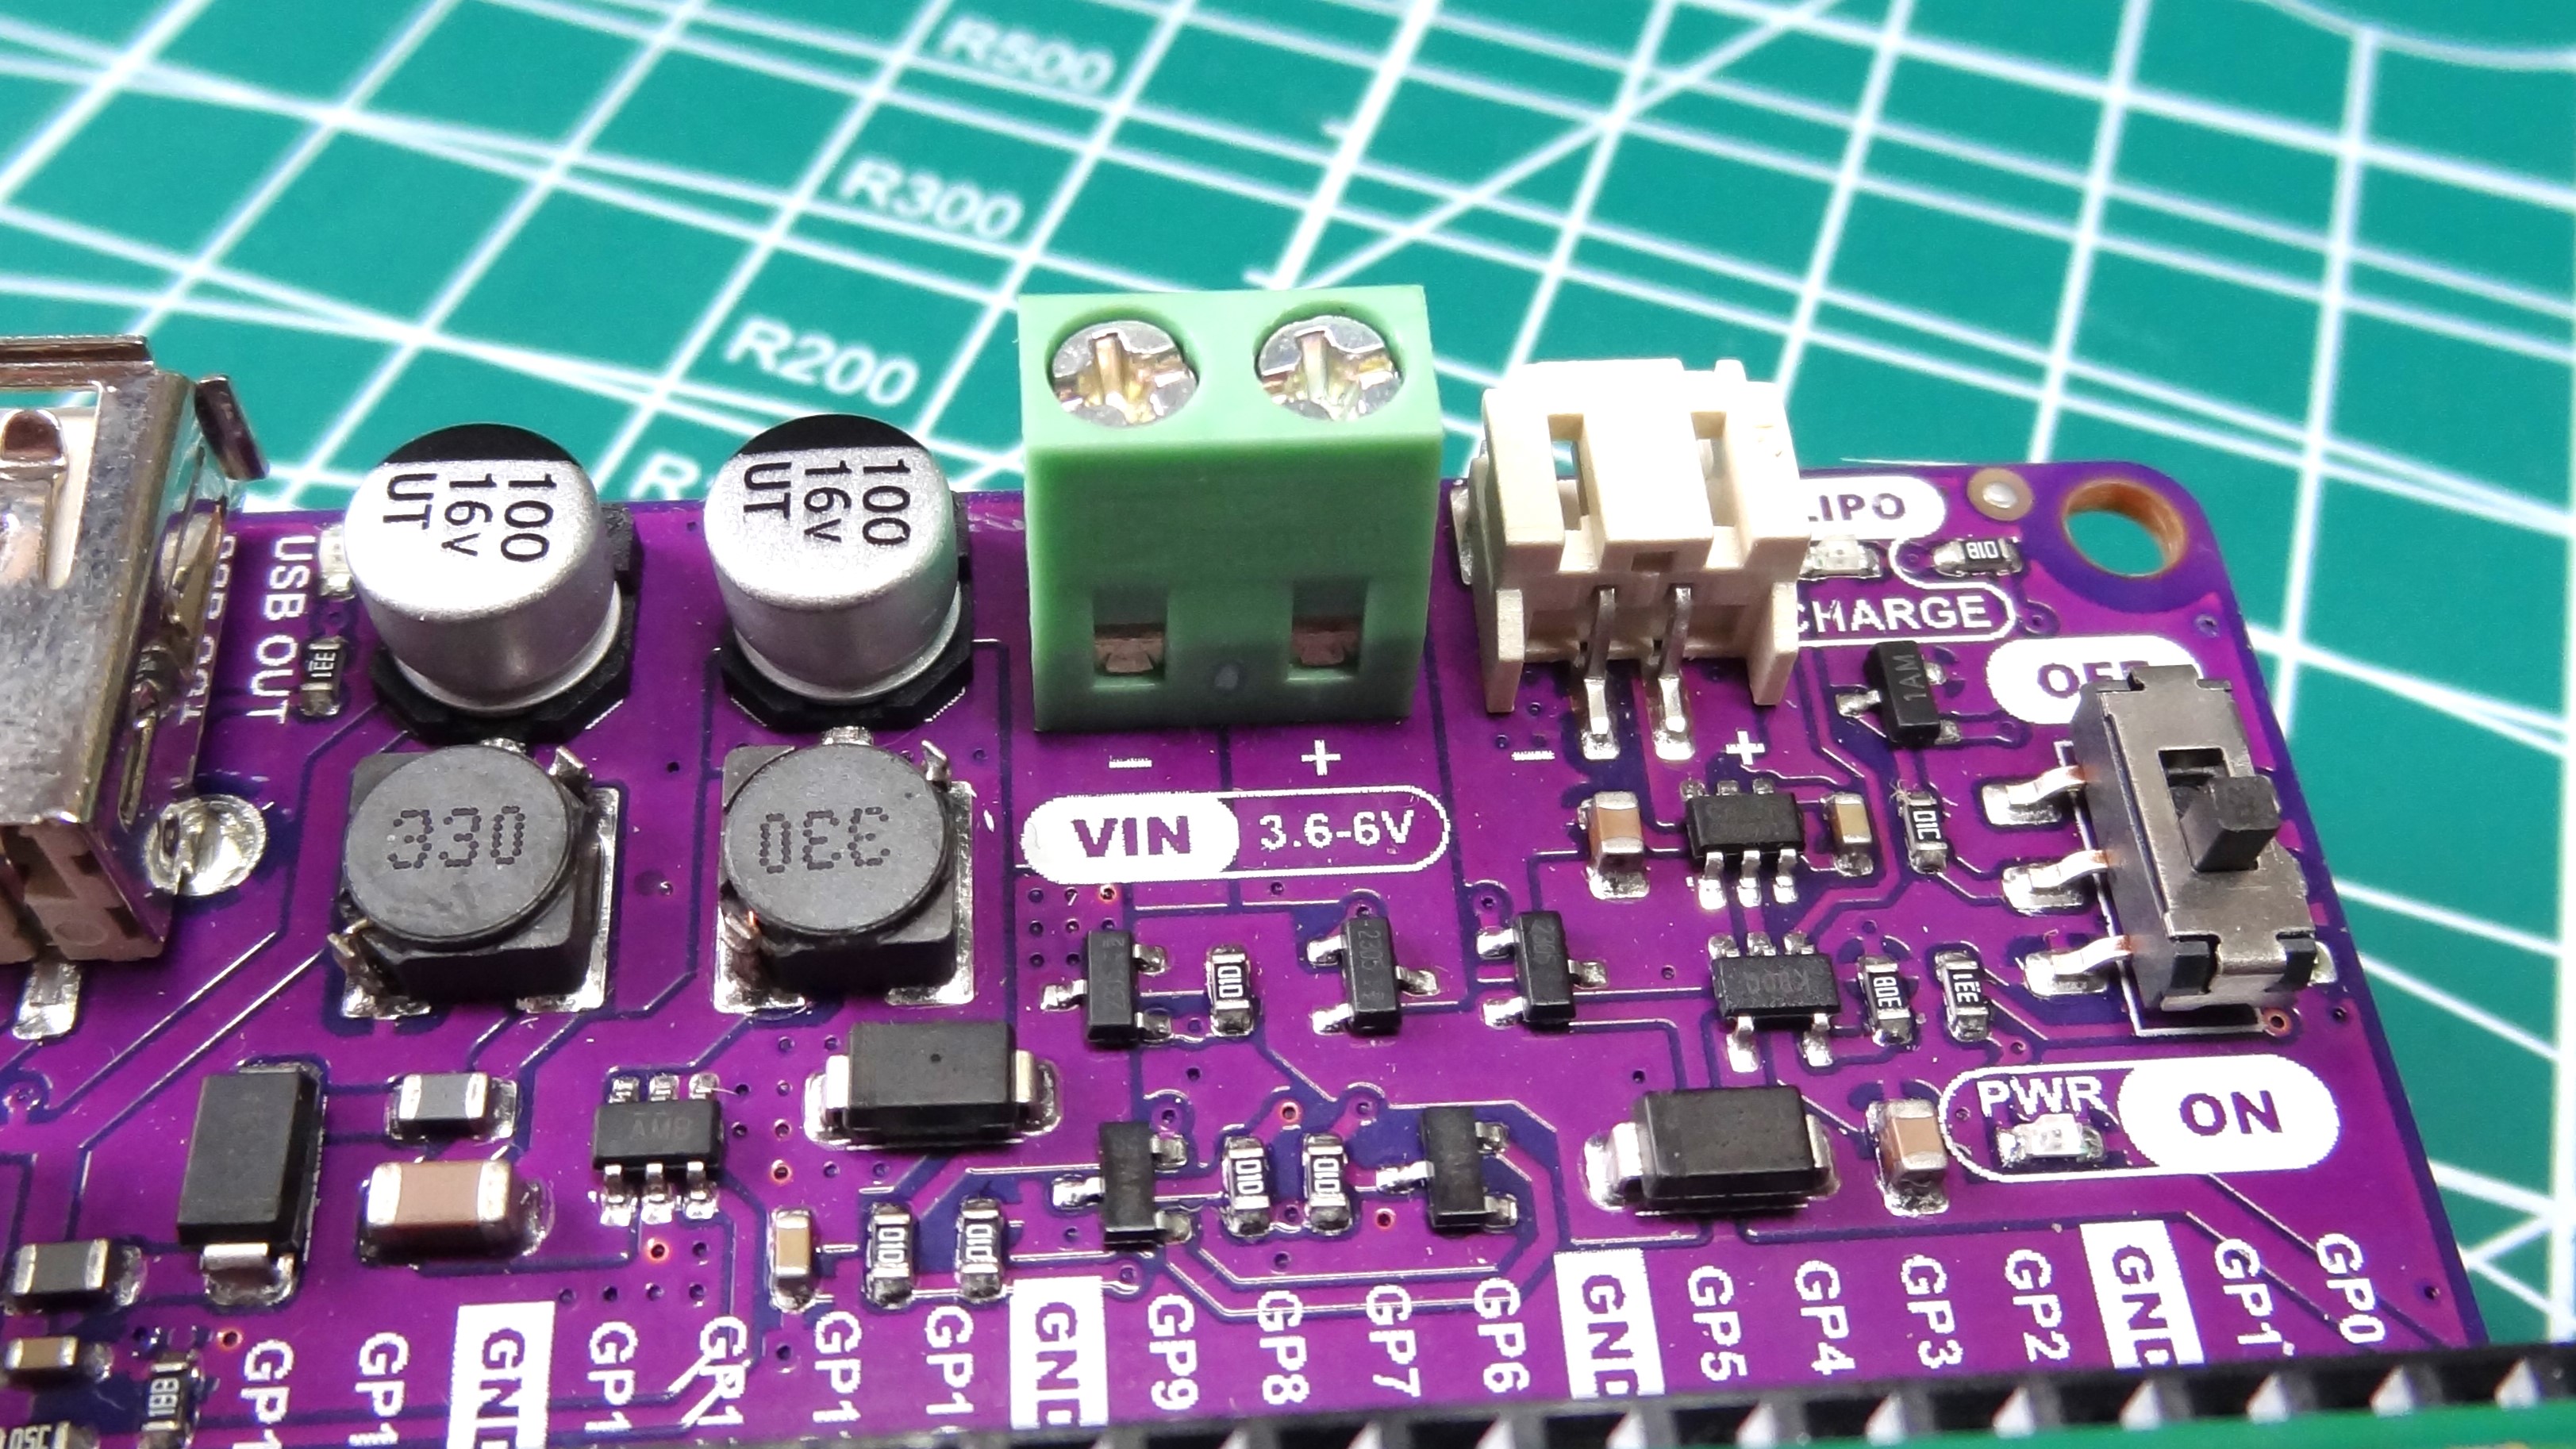
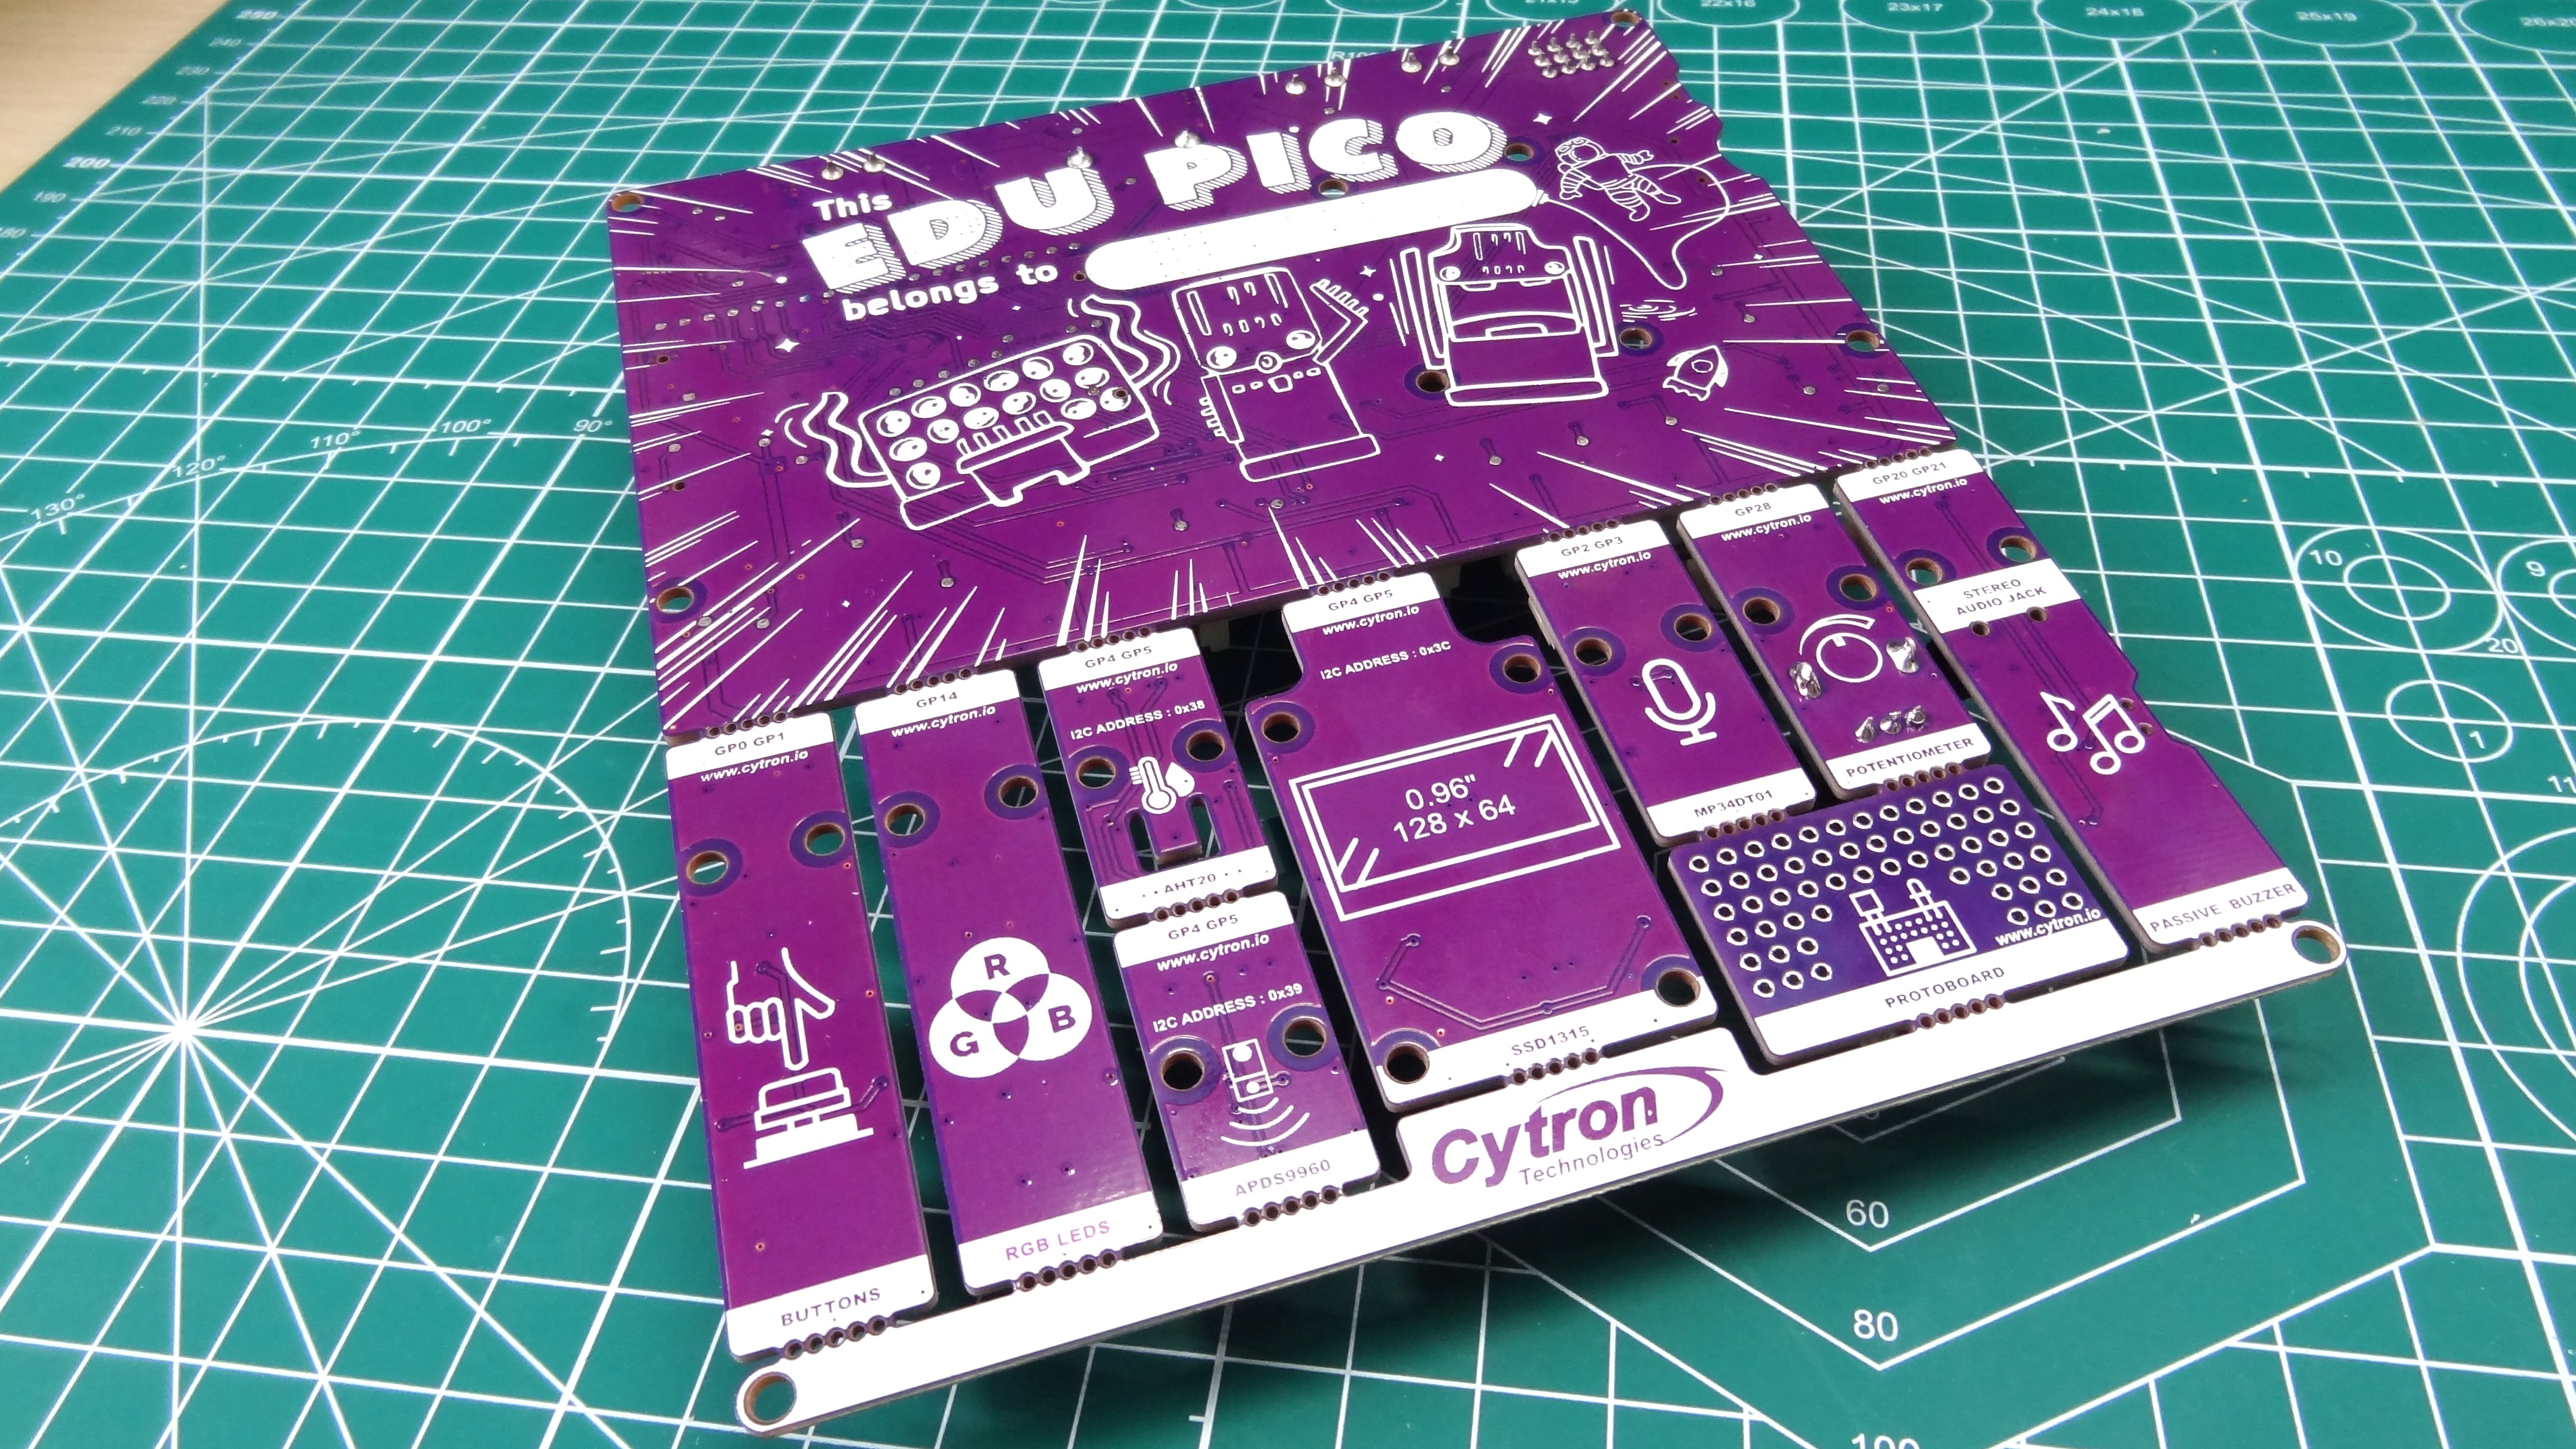
Edu Pico has a plethora of components, and they have been carefully chosen to help educators and pupils to learn the basics of programming and electronics via experimentation.
We’ll start with the basics, buttons and buzzers. There are two push buttons and a buzzer for basic input and output. With CircuitPython we have an easy means to control and read these components. With the buzzer we can use Pulse Width Modulation (PWM) to create tones and notes.
Notable on other Cytron Maker products are LEDs for the GPIO. These are missing from the Pico W footprint on the Edu Pico, but many of them are broken out to the respective components. With a few lines of code we wrote a way to blink all of the LEDs that are attached to the components, including the USB relay which made a pleasant “click”.
More advanced inputs / outputs come in the form of a potentiometer, motor terminals, servo connections and micro SD (SPI). We’ve also got the obligatory RGB LEDs (WS2812 “NeoPixels” and a rather nice looking OLED display, but what really interests learners are sensors, and we have quite the choice!
All of the sensors use the I2C interface, but don’t let that put you off as Cytron has cleverly chosen these components because they have CircuitPython modules. What does this mean? It means that we don;t have to worry about wiring them up, or writing complex code, just follow the quick reference cards / guidebook and you’ll soon be reading the world around you.
The first sensor is the APDS9960, a four-in-one proximity, light, gesture and color sensor. This sensor has a great CircuitPython module that makes using it so easy. Just a few lines of code and we can determine the color of an object, detect movement and gestures and measure light levels (which we did for our demo). For temperature and humidity we have the classic AHT20 two-in-one sensor. For classroom and hobby projects it is ideal, given that it has a 0.3 degrees Celsius accuracy. A MEMS microphone provides a digital sound input. Whether this input is your Taylor Swift karaoke, or used to measure noise levels for input triggers, is your choice.
We love the micro SD card and audio output. The micro SD card can be selected for use in projects that could exceed the storage capacity of the Raspberry Pi Pico’s 2MB of flash storage. The 3.5mm audio output is used when the beeps of the included piezo buzzer are just not annoying enough. We jest, but with the 3.5mm output we can connect the board to an external amplifier. Simple beeps can be replaced with MP3 files and your project ideas will grow.
Power options are great. We can power everything via the Pico W’s micro USB port, or we can choose a LiPo battery which can be charged via the board, or we can use an external 3.6 to 6V power source. We tested the external power inputs from 3.6 to 6V and all was well, apart from an annoying beep at 3.6V. This is an edge case, so not much to worry about.
The motor terminals are connected to an MX1515 h-bridge motor controller. A classic controller used in low-power toys and a few motor control boards for microcontrollers. Via the MX1515 we have direct control of two motors, and there are terminals broken out for connection to DC motors. Two 6V motors can be connected, anything more powerful will not work reliably. The included DC motor is plenty of fun for the basics, but we would consider purchasing some 6V motors if you intend to make a robot. We love that Cytron has continued to add motor test buttons to the PCBs. We first saw this on the “Maker Drive” motor controller, well before we started at Tom’s Hardware, and back then it was a fresh idea. Today, the idea is still welcome, wire up the motor and press the buttons to test that the motor works, and is spinning correctly.
There are four servo terminals to the left of the motor terminals and we can easily wire up the included servo thanks to SVG (Signal, Voltage, GND) configuration of the pins. Get it the wrong way round, no drama, reverse it and watch the servo sweep through its arc.
The USB relay is an odd but welcome choice. There is a relay on the board, which is set to normally open (NO), which prevents current flowing through any device attached to the USB port. Connect a USB LED lamp or some other lower power USB device and then trigger the relay to close with just a few lines of code. Power will flow to the device and trigger it to activate.
Get into the “Grove”
The off-white ports dotted around the kit are Grove connectors, polarized connectors that are used to make quick and robust connections. They are ideal for an educational environment as they only go in one way and that helps learners concentrate on building rather than debugging their setup. Debugging is an important part of the learning process, but let's boost our learner’s confidence and keep their interest.
Unlike other Maker boards from Cytron, like the CM4 Maker Board and Robo Pico, there are no Maker Ports (Cytron’s name for Stemma QT / Qwiic ports). This isn’t a big deal. I’ve personally bought into Stemma QT more than Grove, but in a class environment, I would go for Grove, it's just more durable. That said, I’d like to see Stemma QT on a future Edu Pico board, it would add a few cents per board, but it would open up the board to many more sensors.
Who is Edu Pico for?
With a wide selection of components, Edu Pico is most suited to a classroom or learning environment. We love that it “just works”, with great hardware and software choices aiding the smooth learning process.
But, this isn’t just for learners. If you want to build projects quickly, and easily, then the Grove connections are a proven means to do just that. You pay a little more for the convenience, but in our mind it is worth it.
Bottom Line
You pay a bit more for Edu Pico, but for the money you get a solid learning experience. The hardware is perfect, it provides great sensors and a flexible means to use them. For learners and educators, this is a great learning platform that will grow with the user. The interconnected components means that we don’t have to worry about wiring up a project. If we later want or need to, then the Grove connections are an accessible means to make projects happen.
The accompanying learning resources, the book and cards, are clearly written and fun to follow. We can see the reference cards being used to create a multitude of classroom projects.
This is a great kit and we’ll have lots of fun building new projects around it.

Les Pounder is an associate editor at Tom's Hardware. He is a creative technologist and for seven years has created projects to educate and inspire minds both young and old. He has worked with the Raspberry Pi Foundation to write and deliver their teacher training program "Picademy".
