Why you can trust Tom's Hardware
With the build finished, we mustn’t forget about the test bench mode. Switching to it is easy – sort of.
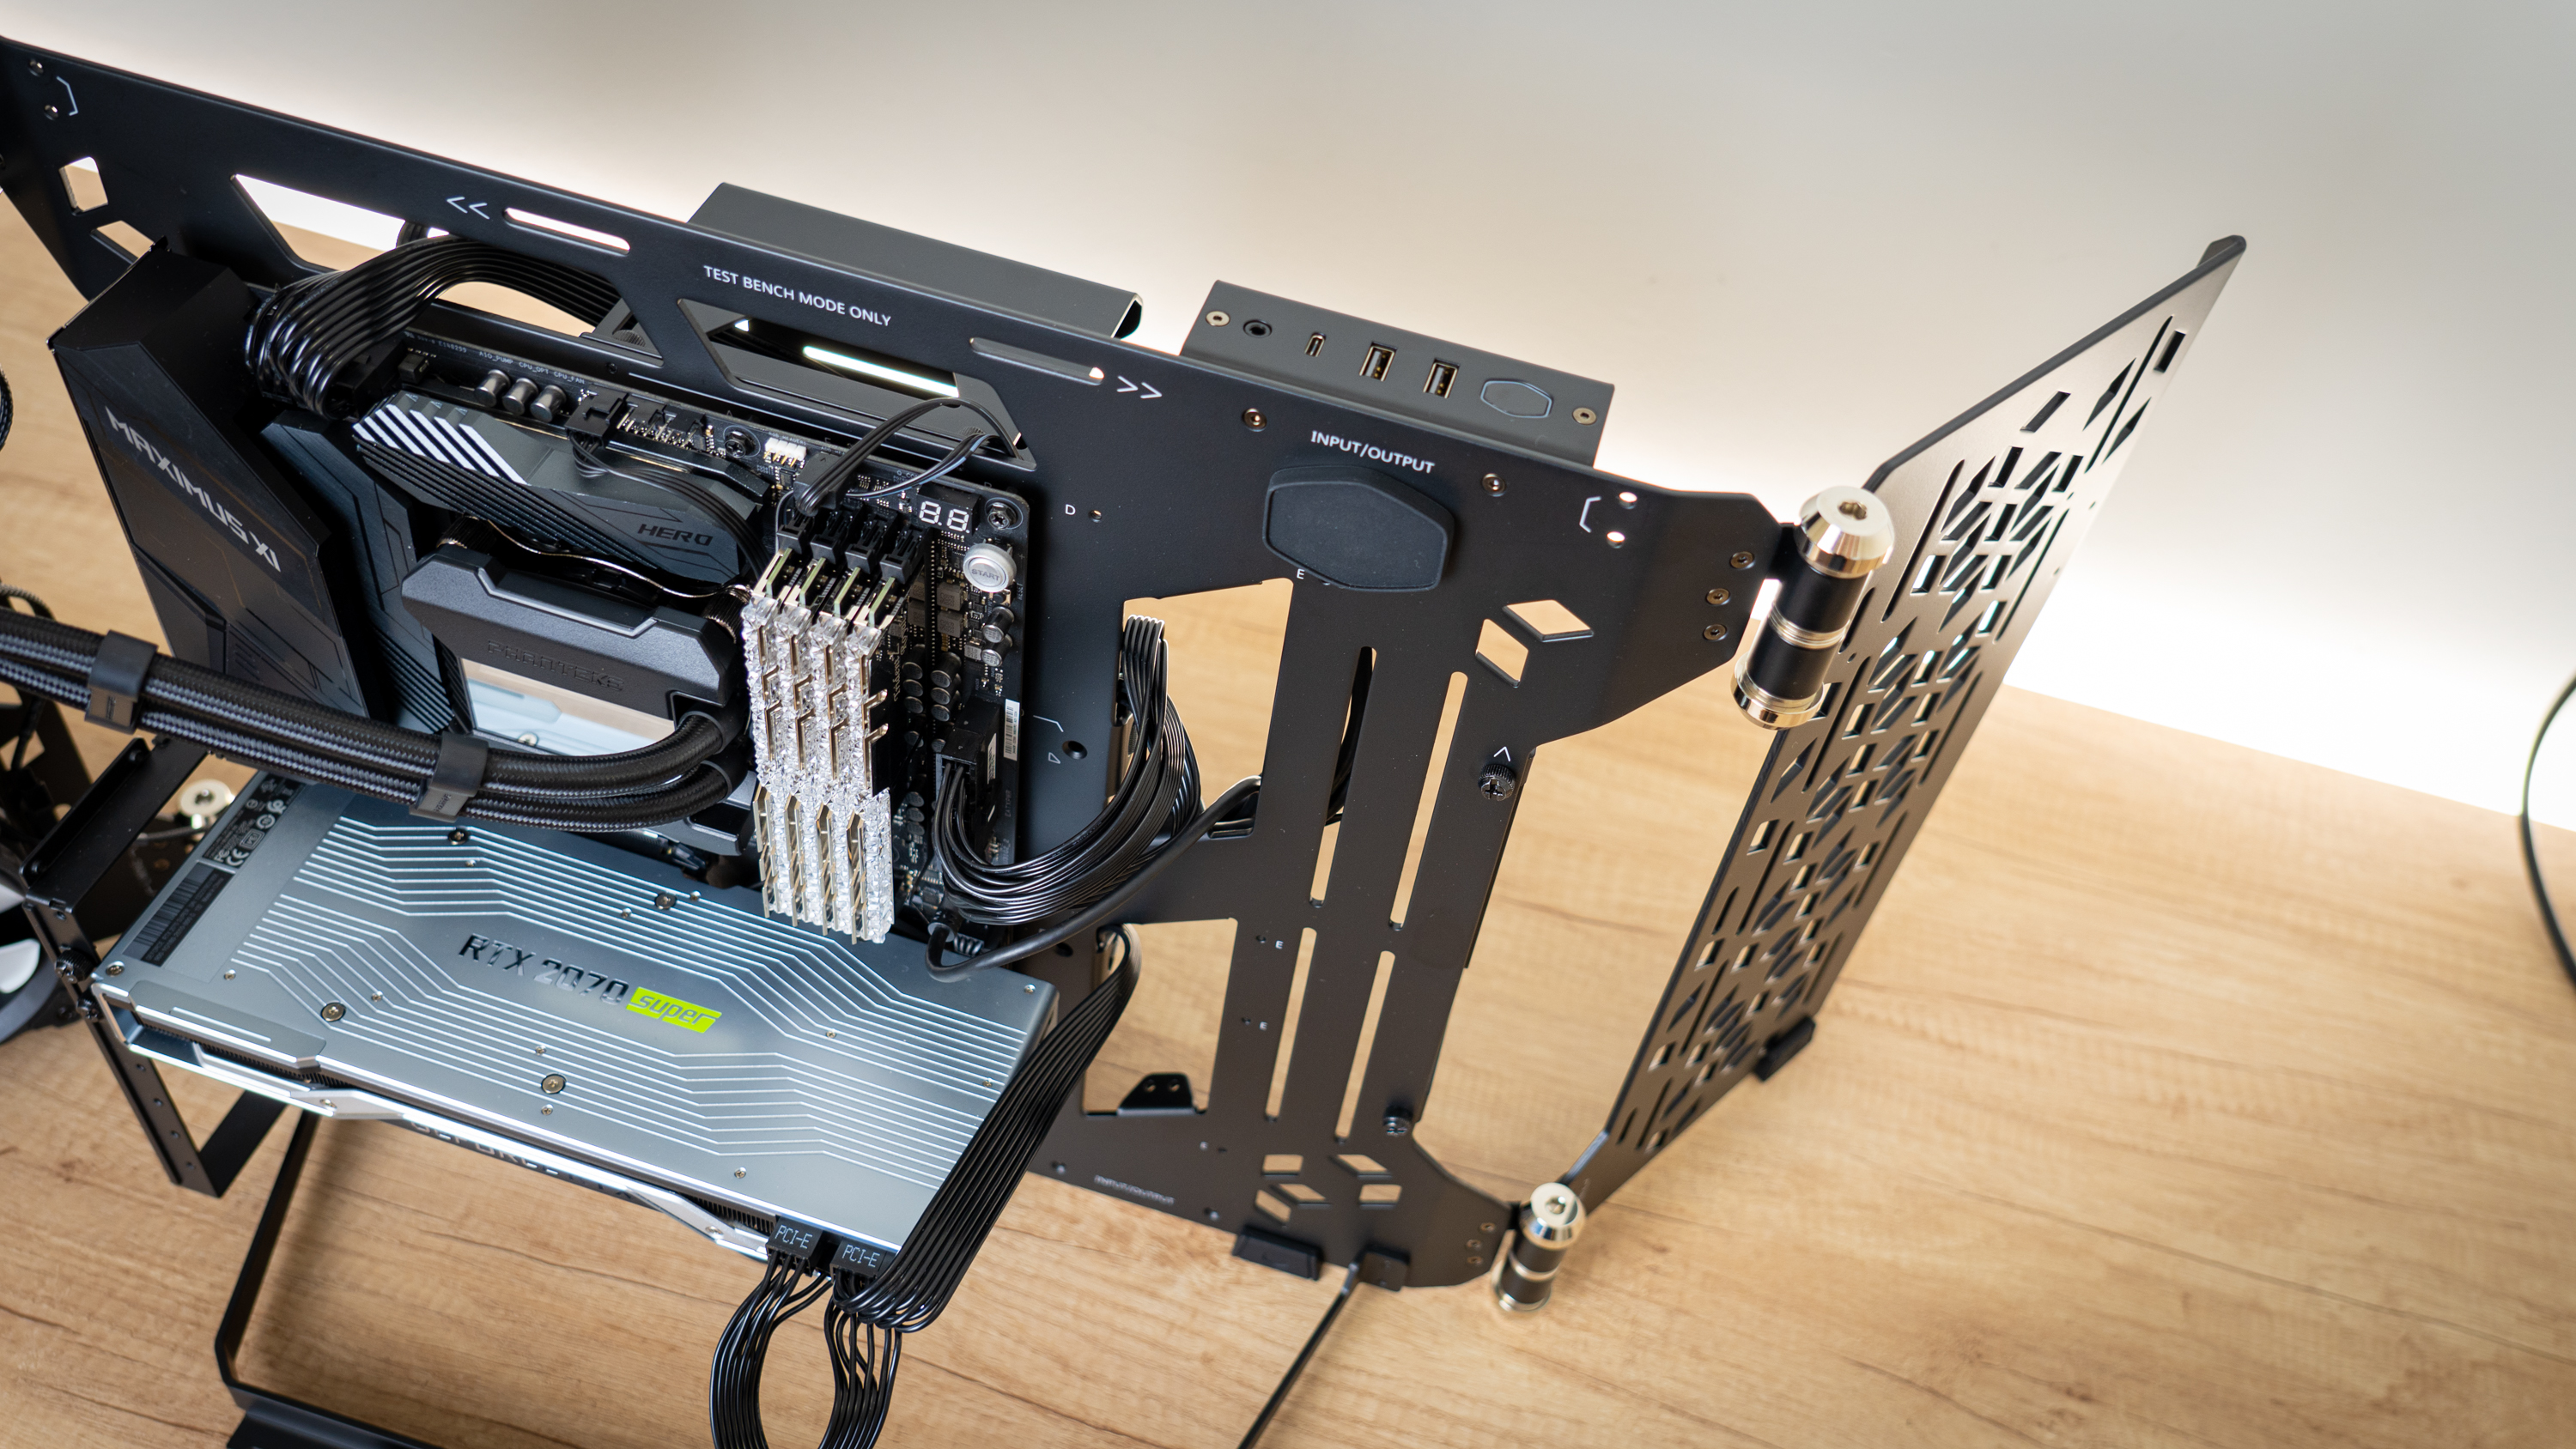
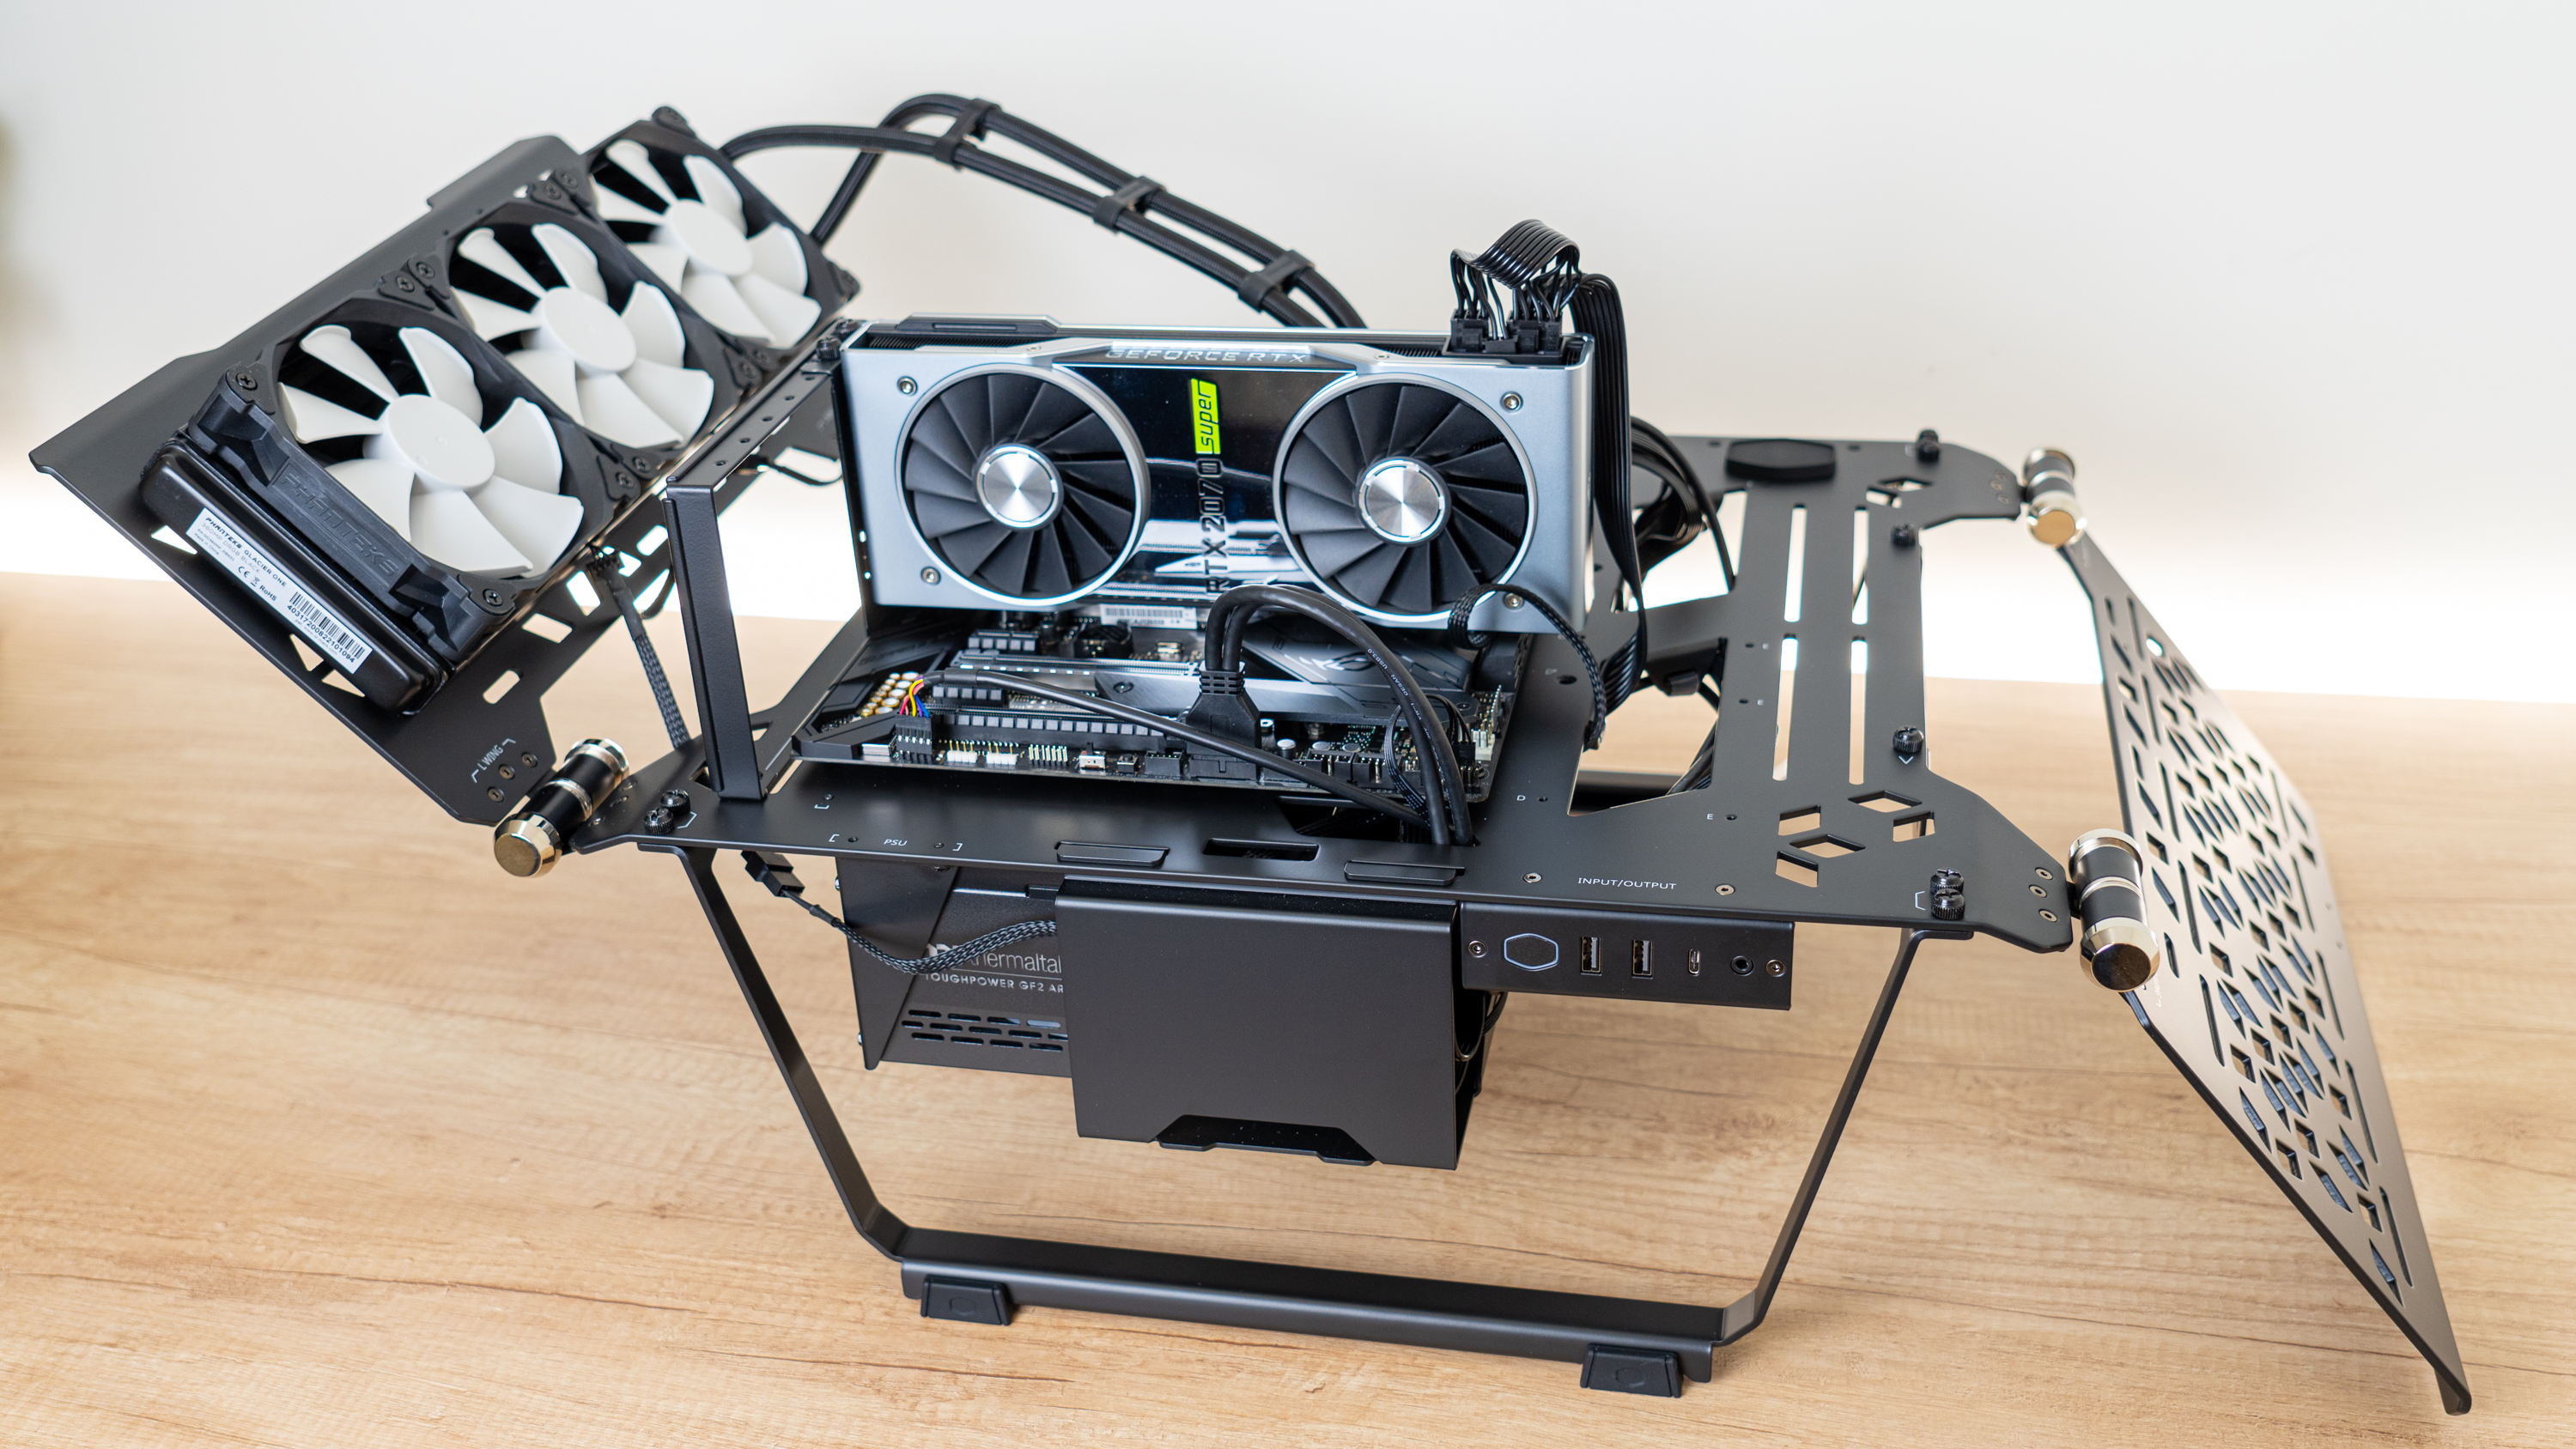
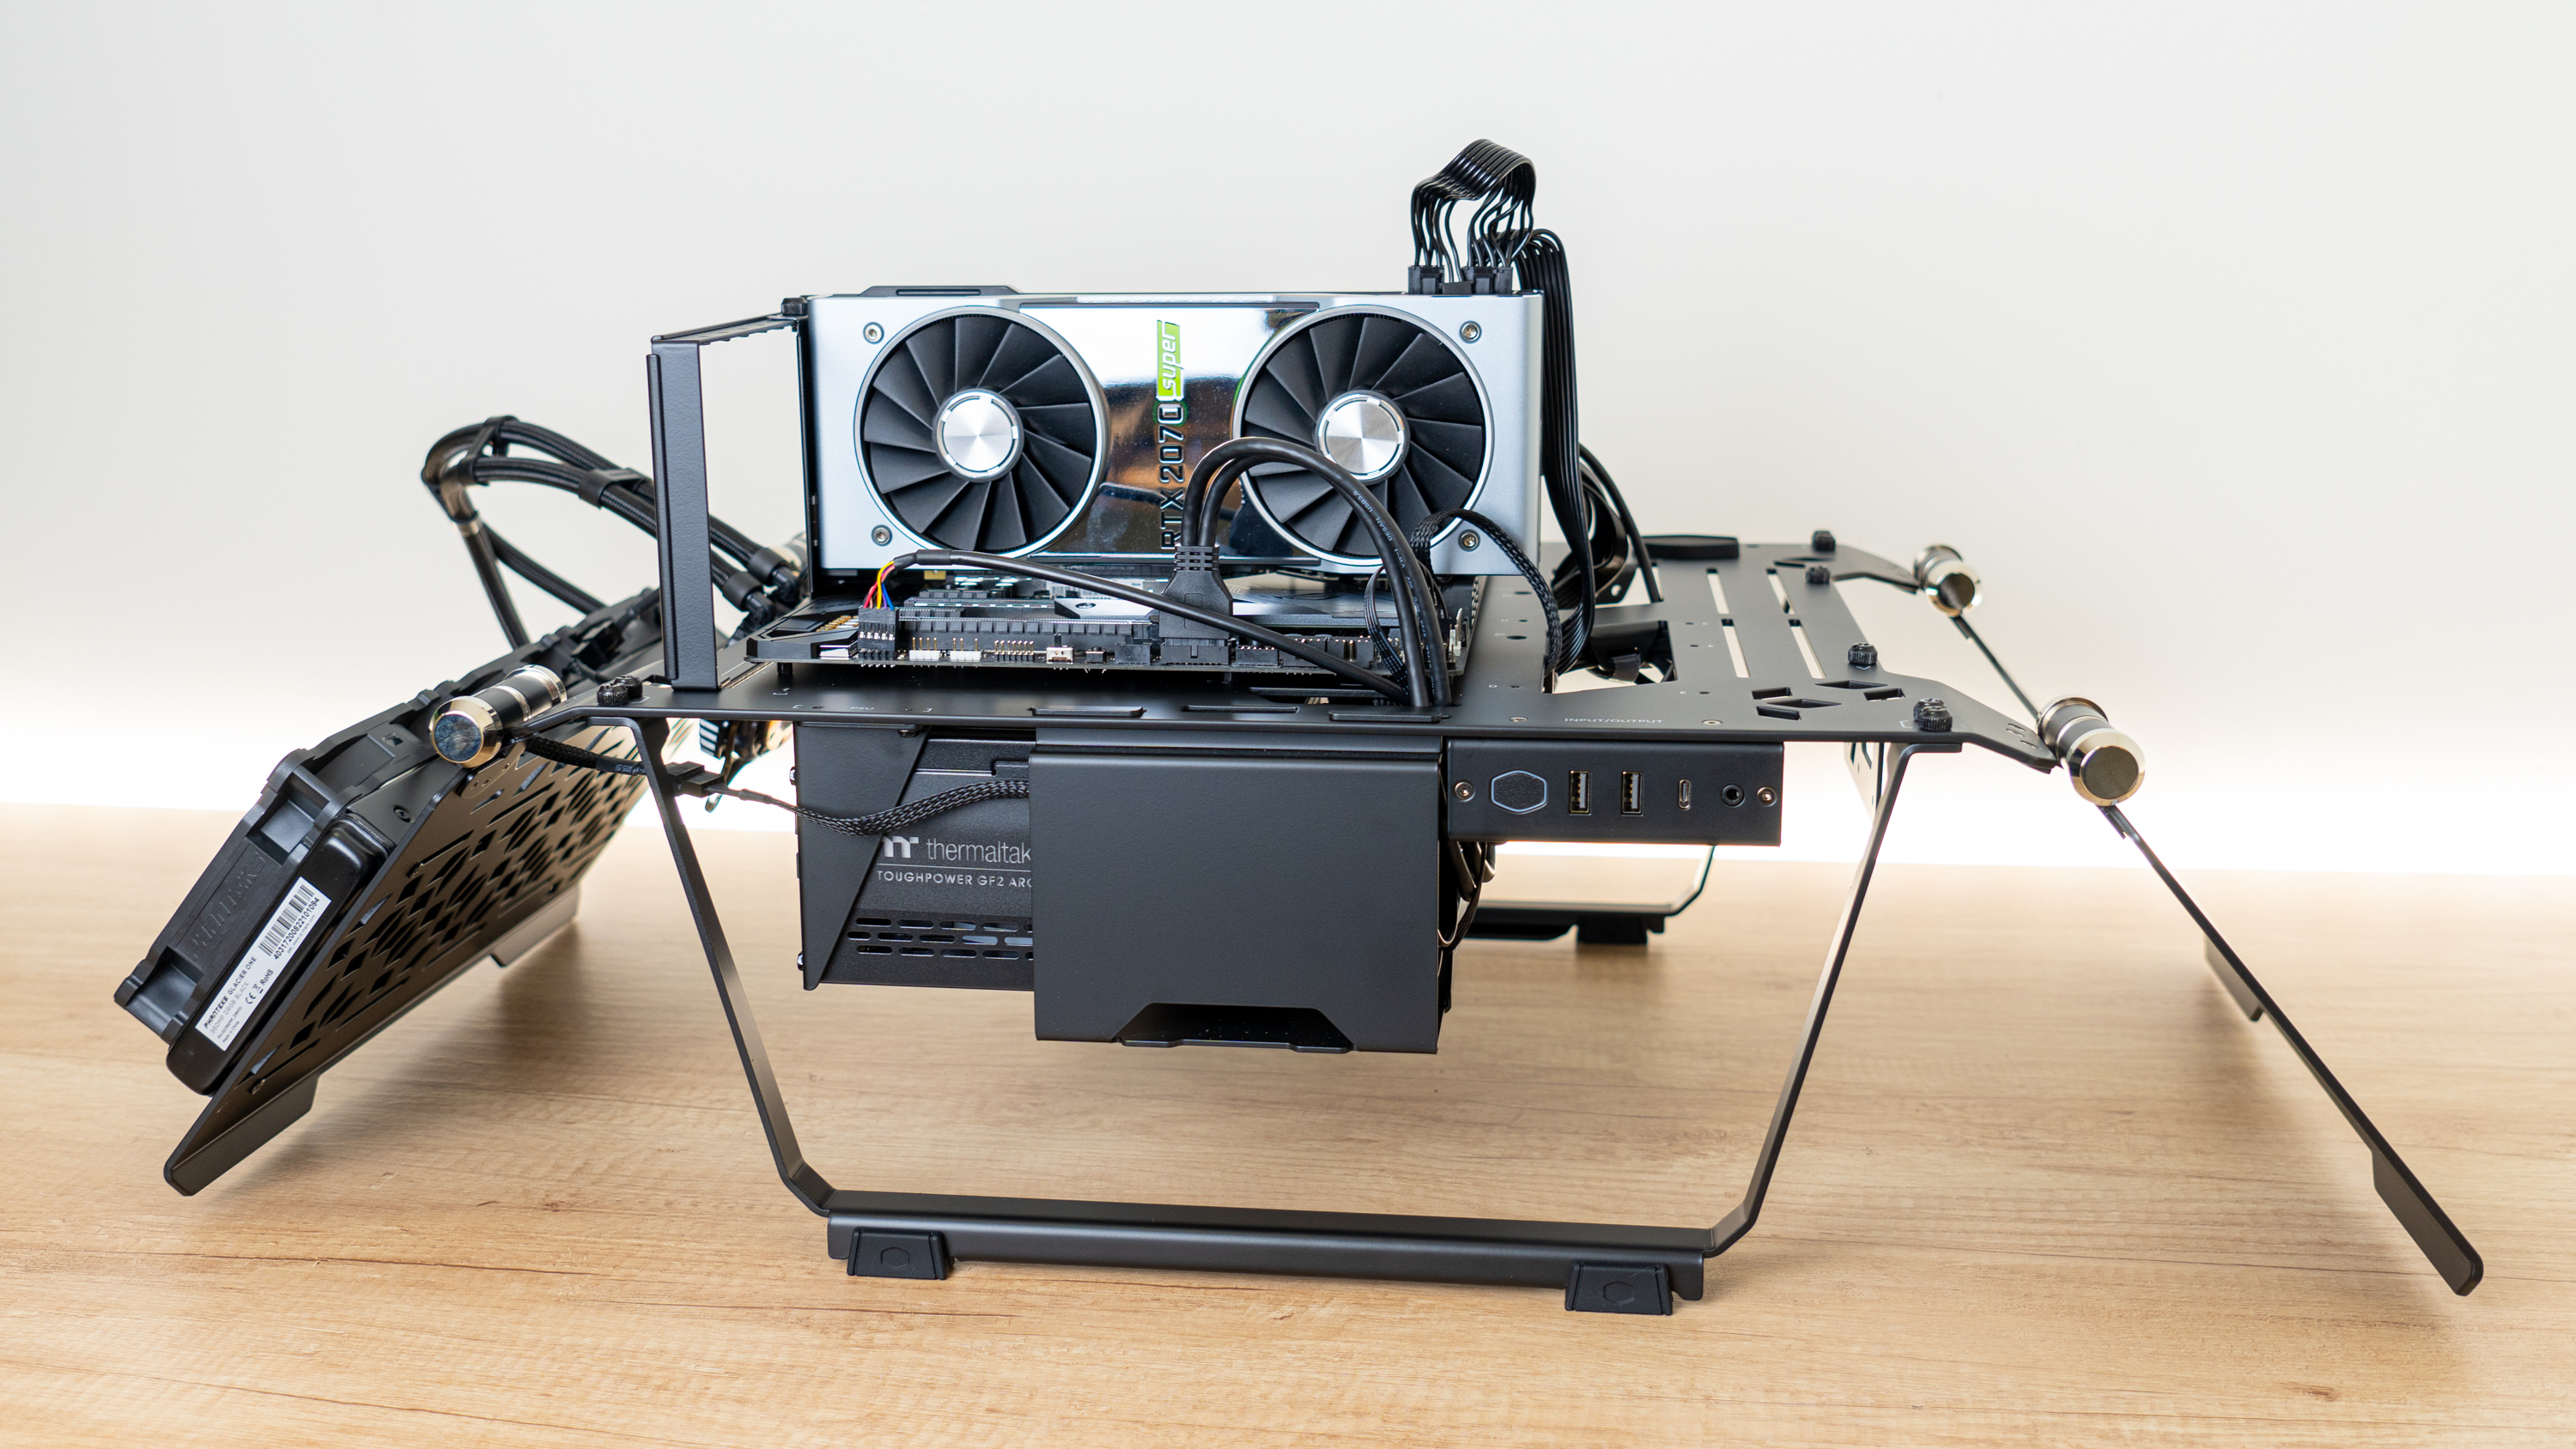
You start out by removing the arm that holds the top of the glass panel, along with the IO bracket and the bottom arm, and swap them to the back of the case – these become the legs the test bench sits on. Also move the rubber feet over to ensure you don’t scratch your desk
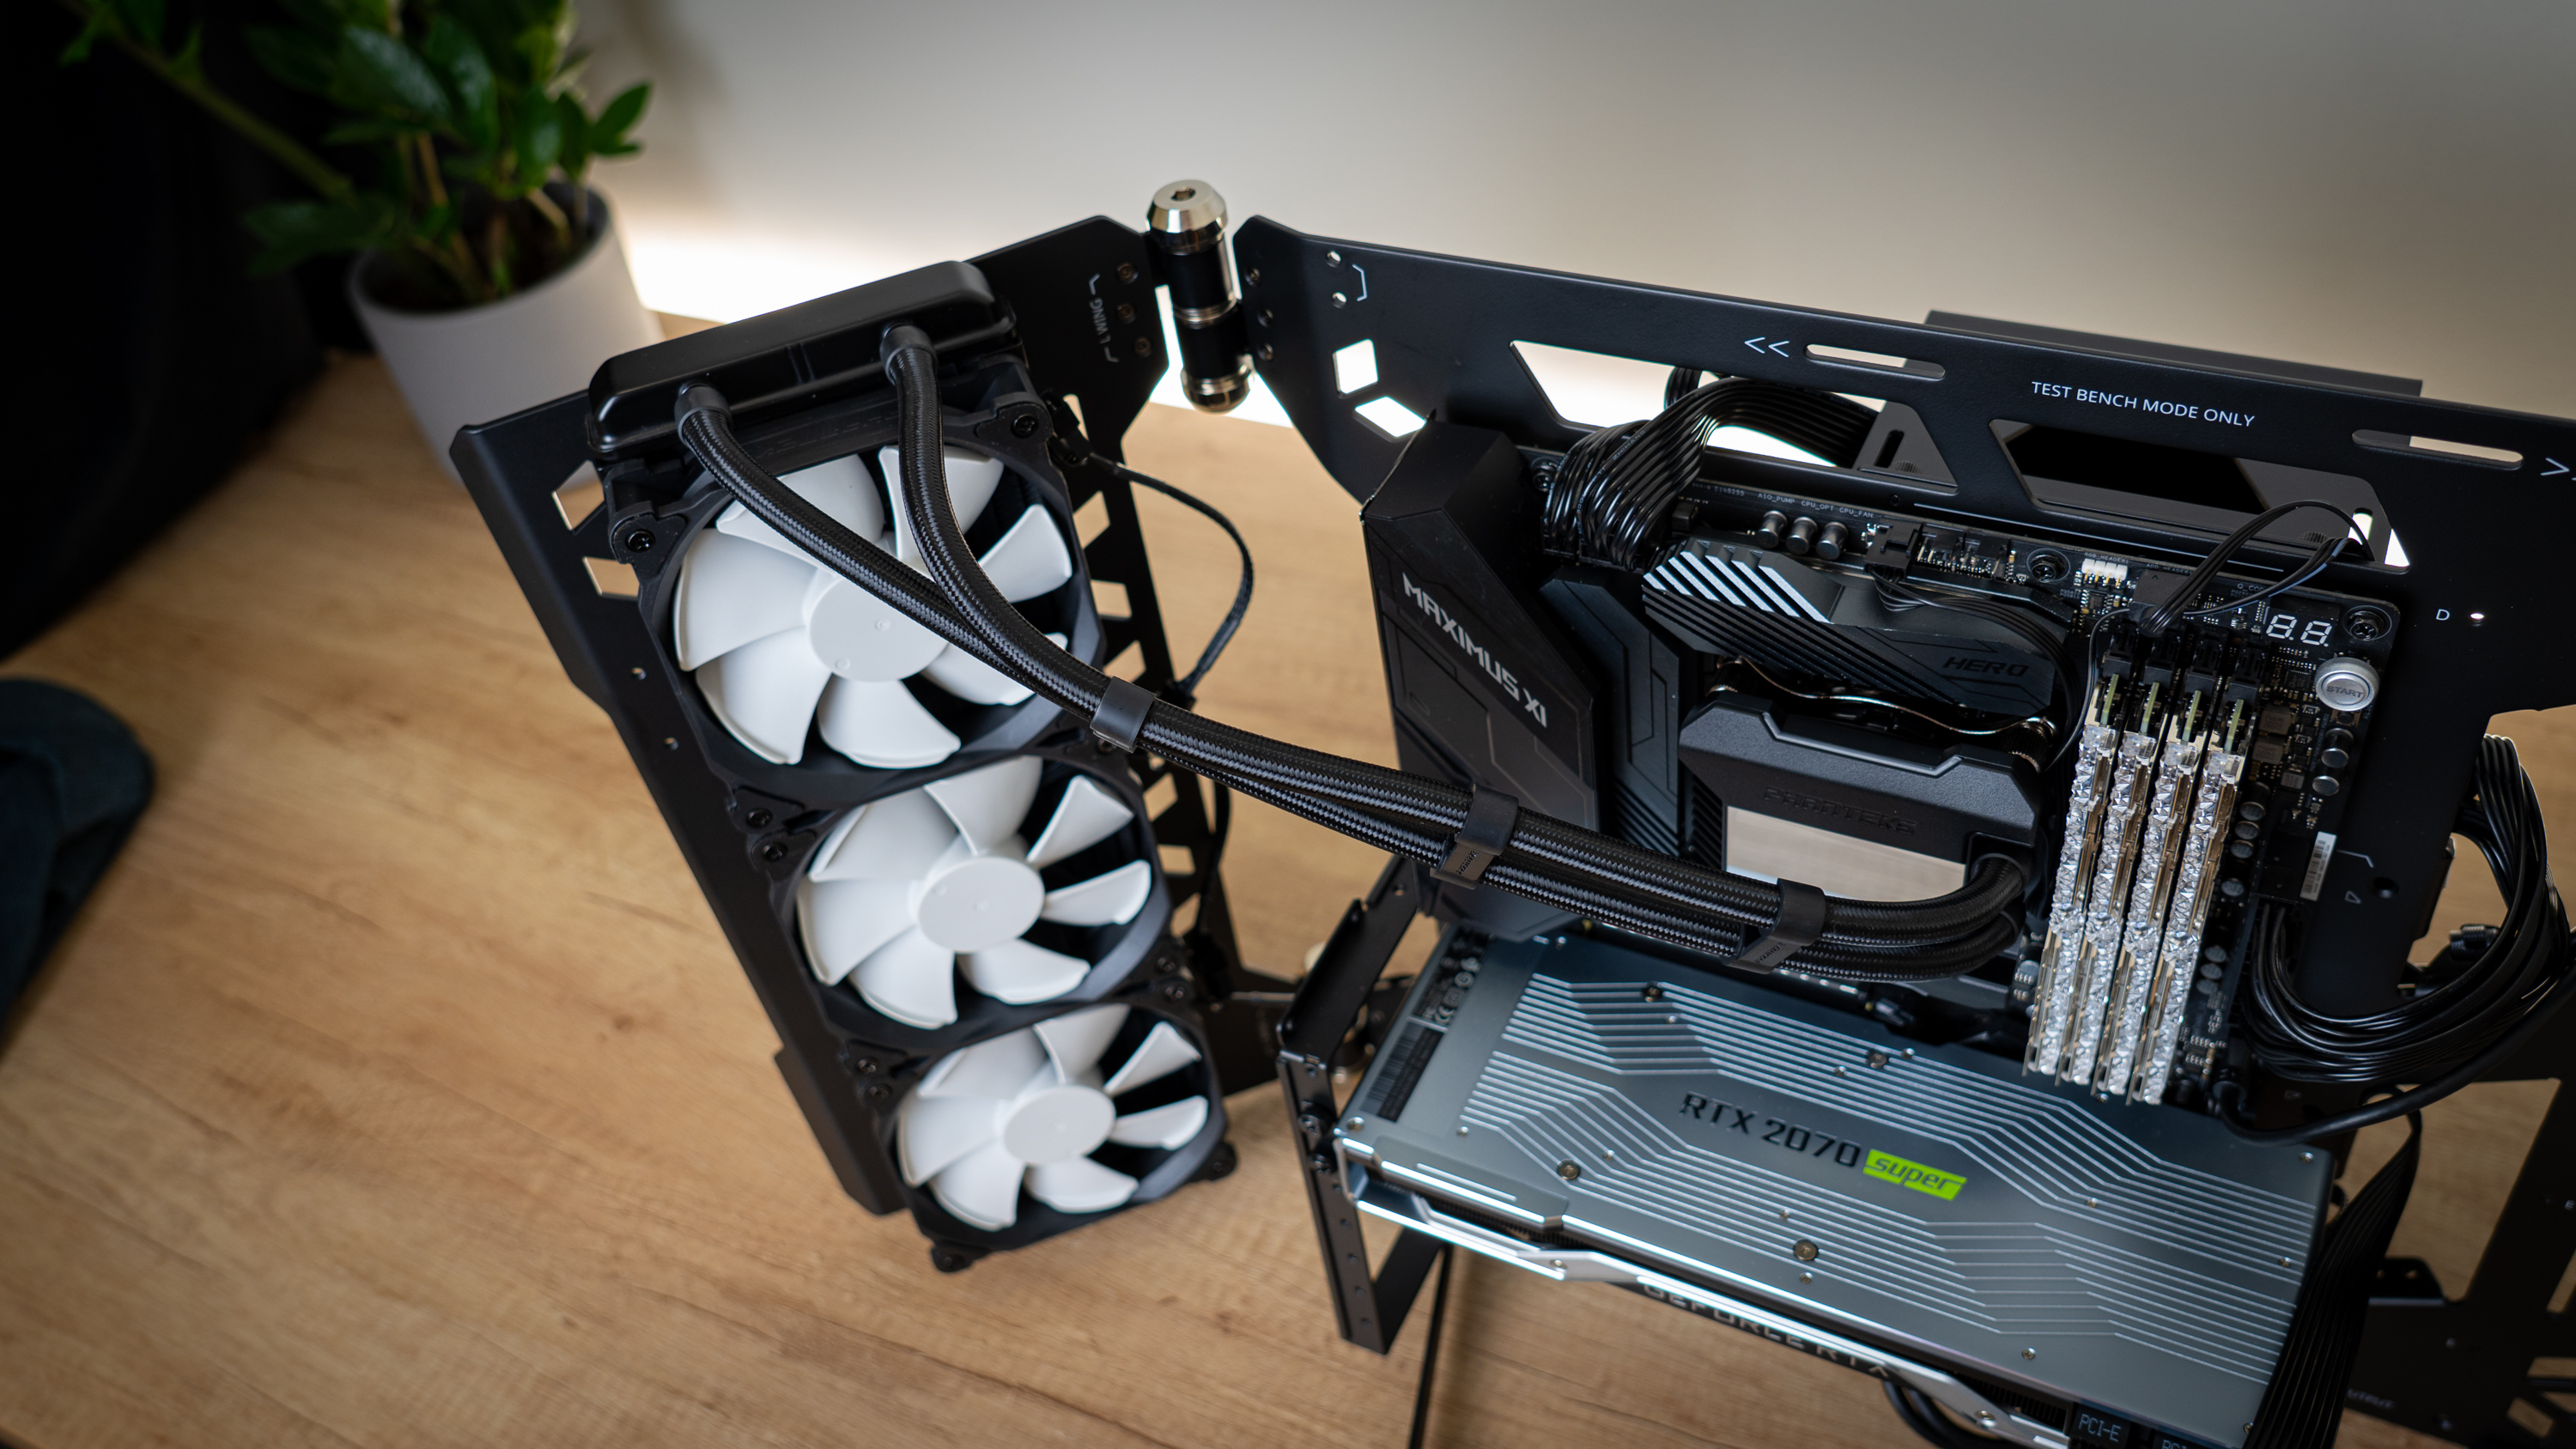
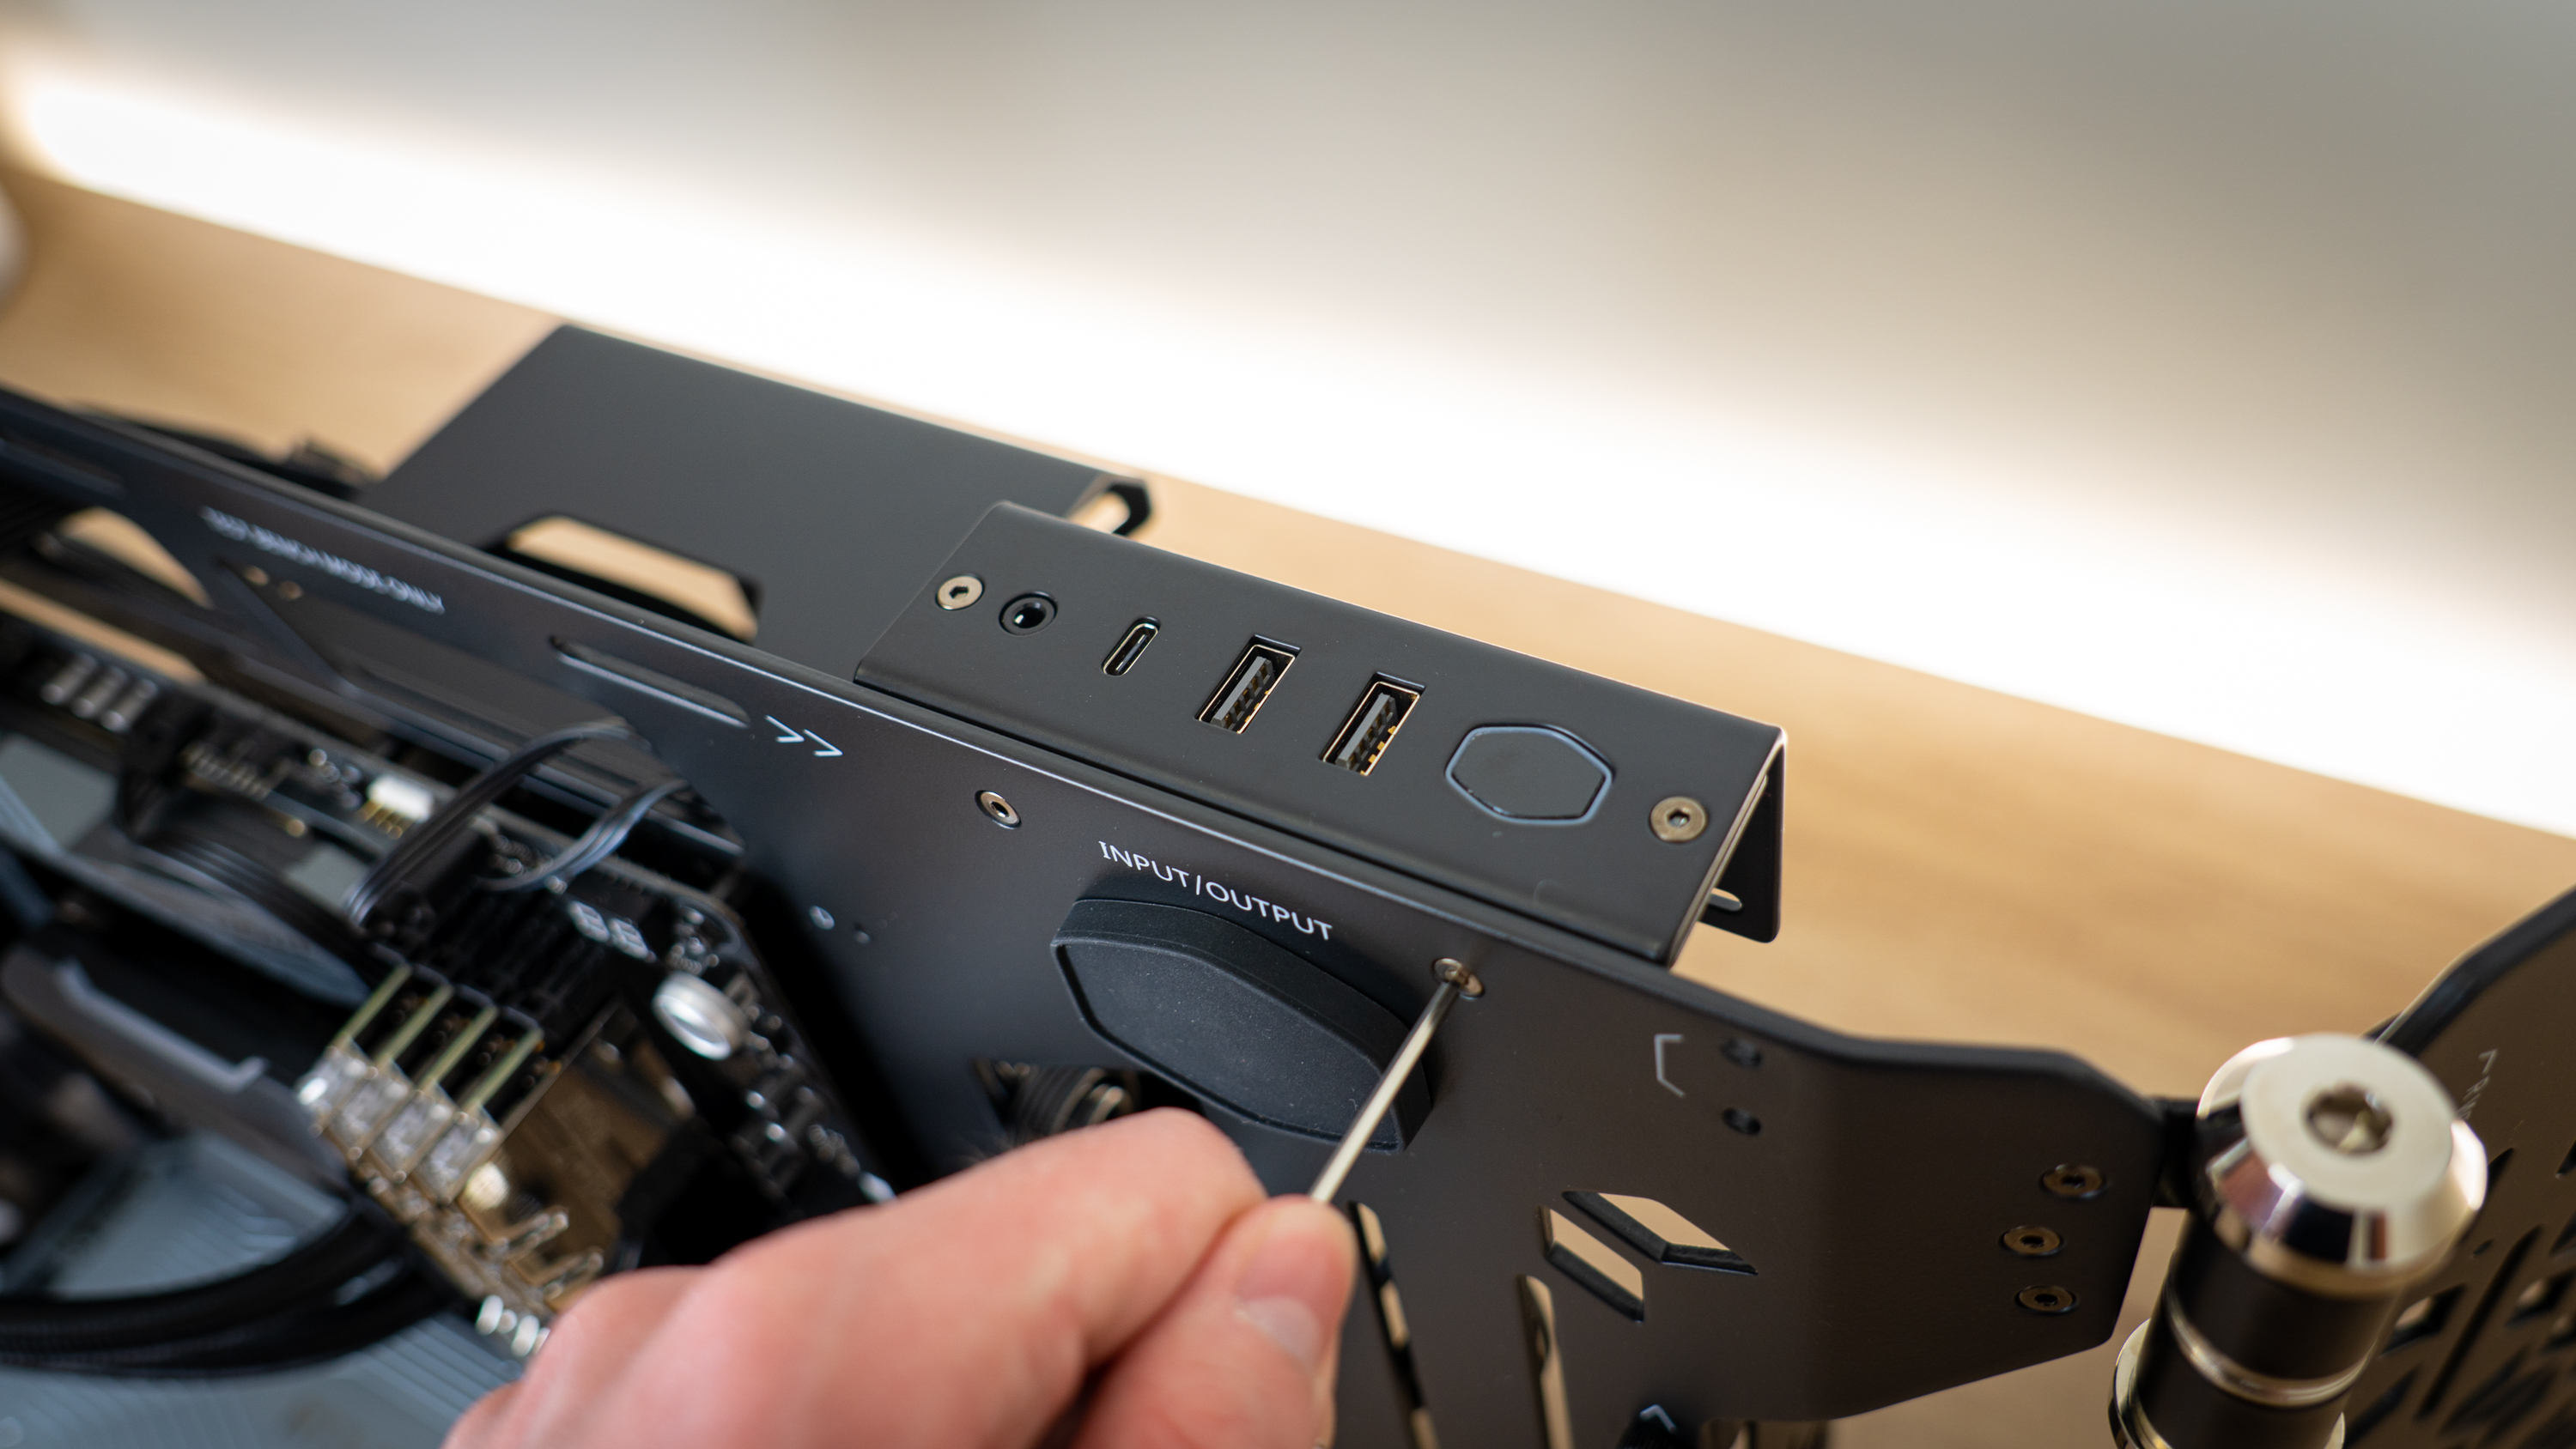
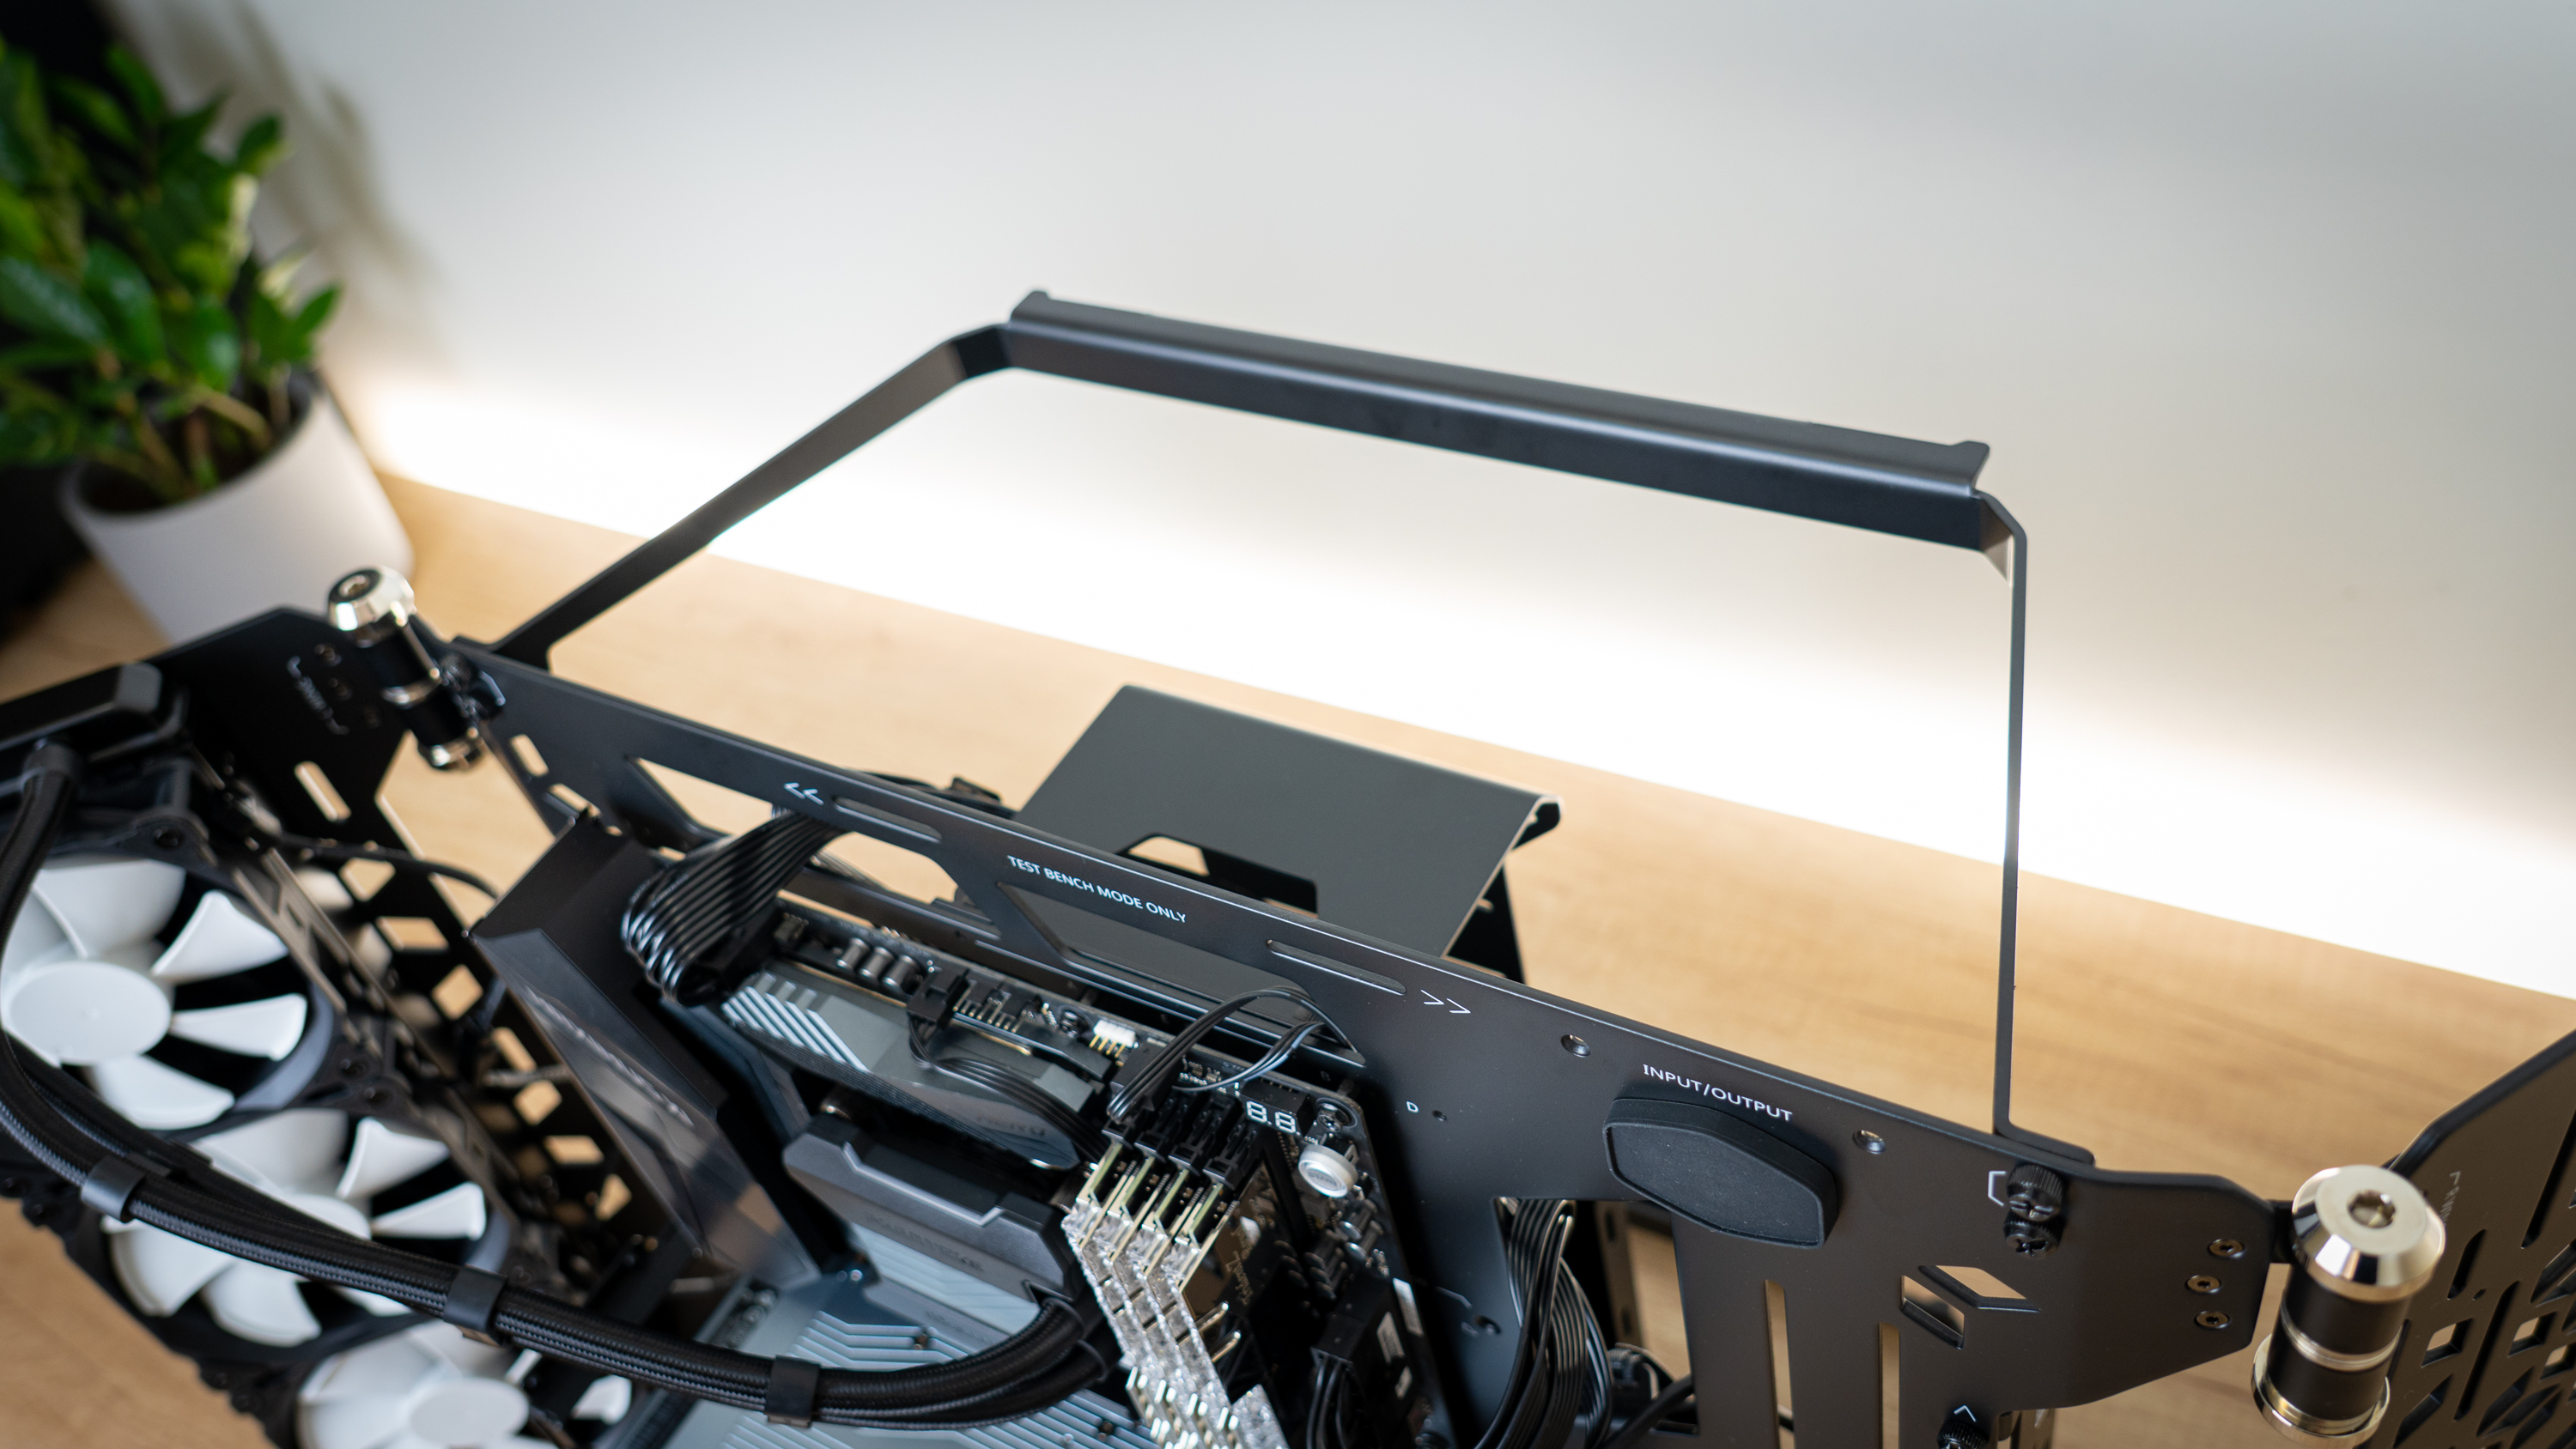
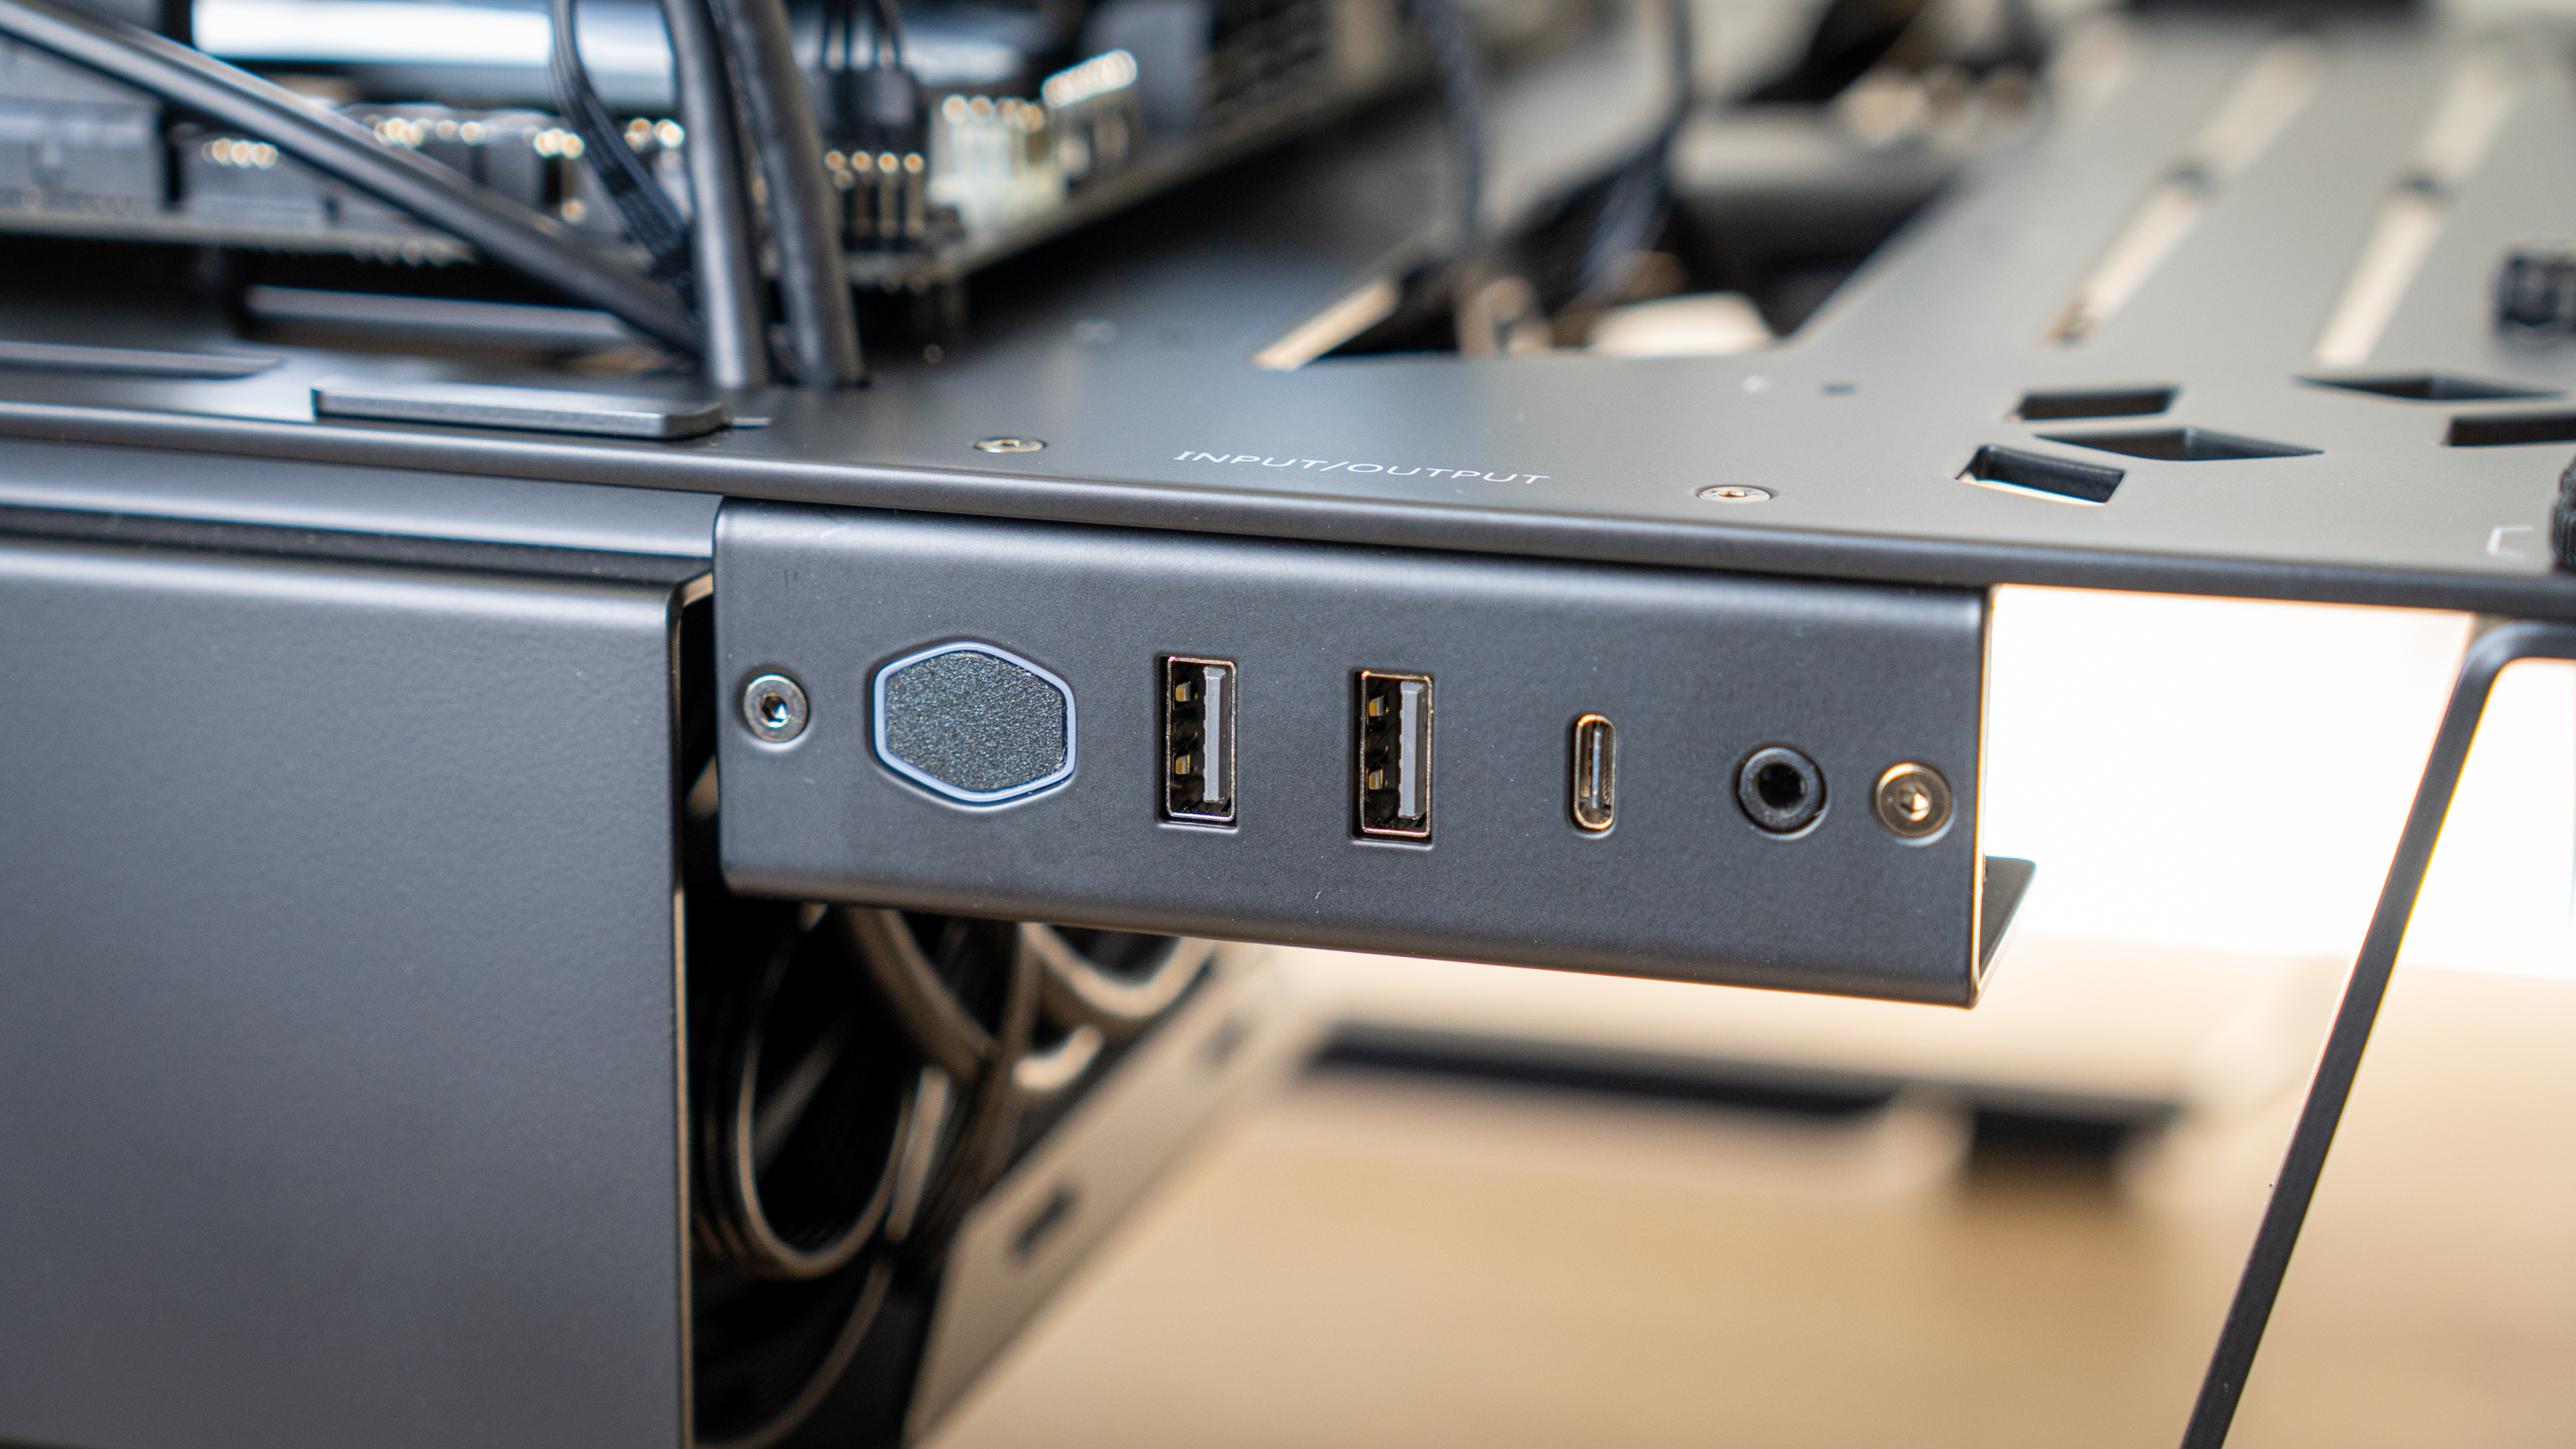
At this point, I ran into one issue that stopped me from creating a working test bench: the length of the Phanteks AIO’s tubes.
I could use the system with the left radiator wing awkwardly raised up, and while the hinges are strong enough to hold it in place, the radiator tubes were too short to drop it down like the other side. I removed the CPU block to see if I could find a different layout that worked with the wings down, but alas, no success.
In all honestly, I’m not sure how suitable this case is as a test bench. Yes, it can transform into one, but you can’t easily change the CPU cooler due to the motherboard tray cutout being too small, and you can’t use AIO coolers mounted on it in test bench mode (unless you find one with really long tubes). It also sits awkwardly high due to the length of the glass panel holders that are used as feet, and the swiveling wings make it very wide.
All that, and the manufacturing quality is arguably just too nice to use as a test bench. The MasterFrame 700 really is best used as an open-air chassis to showcase your build. The fact that it says ‘Test Bench Mode Only’ at the top just adds to the cool factor!
Conclusion
When I started this review, I wasn’t sure what to think of MasterFrame 700. I wasn’t sure how to approach it, and I wondered why the heck anybody who isn’t a reviewer or overclocker would want to buy a test bench – especially at $200.
Get Tom's Hardware's best news and in-depth reviews, straight to your inbox.
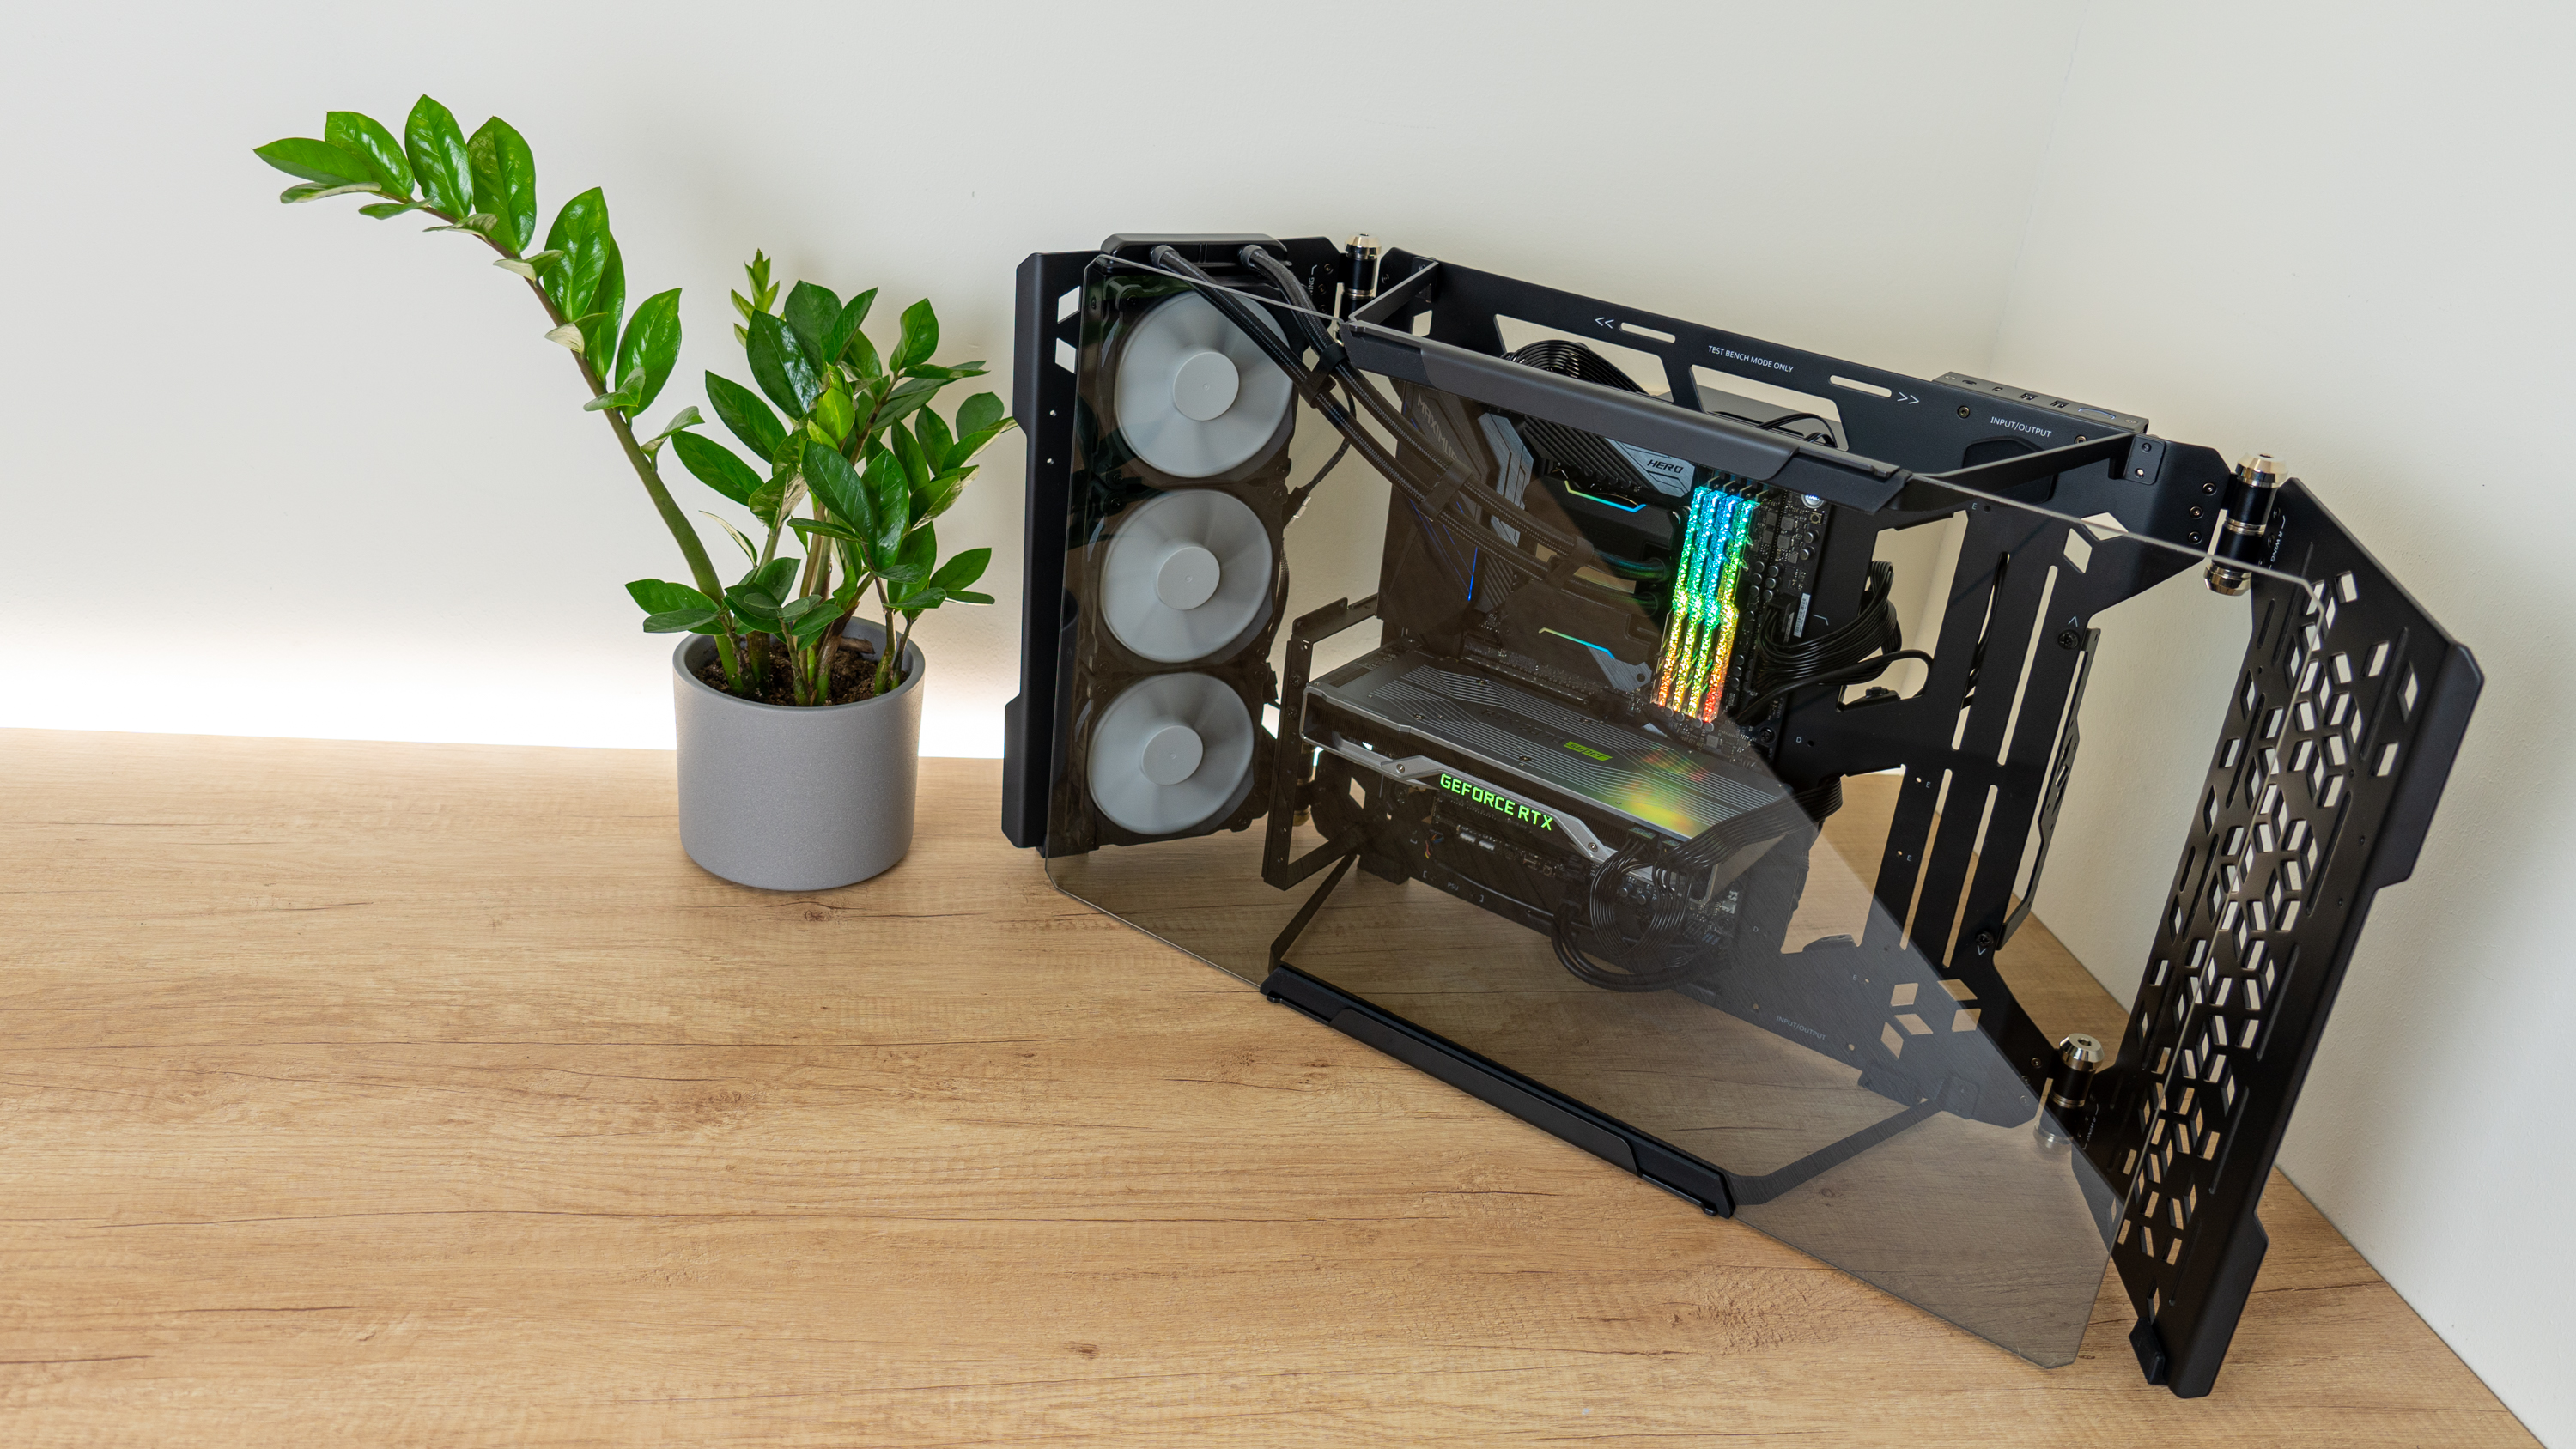
But as I worked with the Cooler Master MasterFrame 700, I learned that this isn’t really a test bench at heart – it’s a beautifully finished, handmade open-air chassis to showcase your PC build. And it happens to be able to double as a test bench. It’s easy to piece apart and thus, if you want to mod your system with a different paint color or a wrap, this is doable too.
Of course, it’s not without its drawbacks – being an open-air chassis, dust buildup is going to be worse than sealed and filtered cases, and noise levels will obviously be higher. But in exchange you’ll get great thermals, and the open-chassis look really is unbeatable when it comes to showing off your hardware, as it lets much more light fall onto your gear for better visibility. The glass panel’s tint is also light enough to be present but not so dark that it obstructs your view – right in the sweet spot.
The biggest gripes we ran into were that the paint made it difficult to insert some of the screws, and that the VESA mount makes the motherboard cutout too small for changing CPU coolers quickly and conveniently. But Cooler Master says that because of the hand-manufactured nature of the production line, it can change small details between batches, so fingers crossed there may be minor improvements.
The MasterFrame 700 isn’t cheap at $200. But if you like its looks and want an open-air chassis to showcase your build, I can tell you that the case has the quality finish needed to turn your build into a piece of art worthy of being put on display. Just make sure you have the desk – or wall – space for it.
Niels Broekhuijsen is a Contributing Writer for Tom's Hardware US. He reviews cases, water cooling and pc builds.
-
eichwana I love cases like this! I have a Thermaltake Core P5 and imo it looks amazing. It’s also really fun to build with, I can imagine with a nice secure hard tube loop, this too could look the businessReply -
pixelpusher220 Reply
Bottom of the first page describes it somewhat not I didn't follow it fully. Says if you want it flat you'll need to sacrifice some functionality. Or a really strong arm.timf79 said:I am not sure i missed it, but is there a way to mount/hang it on a wall?
