Linksys PLEK-500 Powerline Networking Adapter Review
For those looking to expand their home networks without having to run additional cabling, or dealing with weak Wi-Fi coverage, Tom's Hardware looks at Linksys PLEK-500 Powerline Kit.
Why you can trust Tom's Hardware
Hardware, Software And Tear-Down
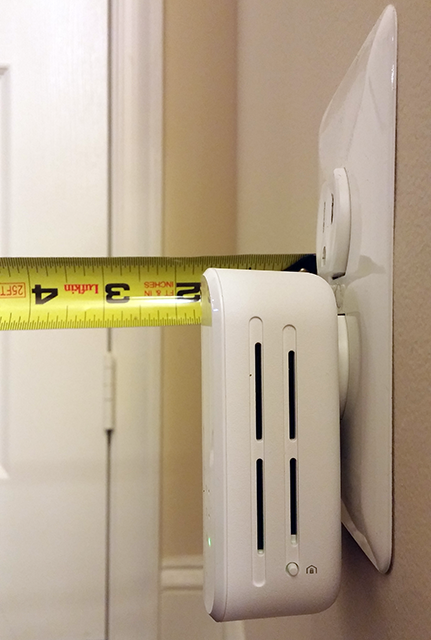
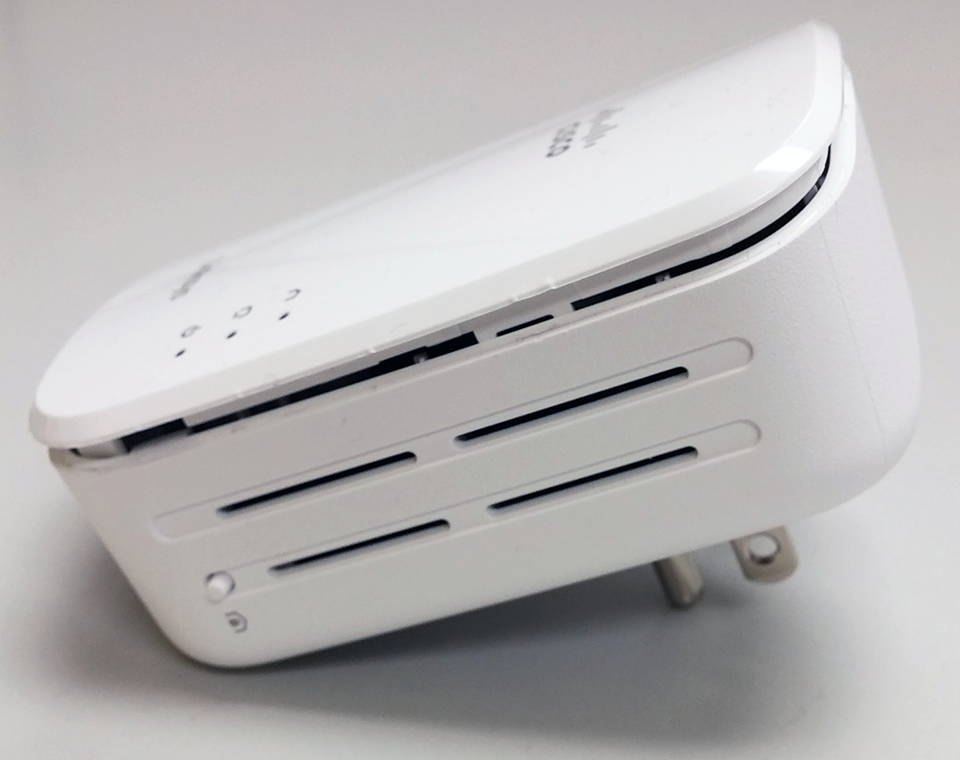
The adapter's form factor is similar in proportion to the D-Link DHP-600AV we reviewed in our round-up, except its chassis is more rounded. The PLEK-500 has what shows as a slight decline from the outer edge to the wall-adjacent edge, which provides clearance for a three-prong cable plugged in above from a slight angle. When comparing wall protrusion to the D-Link DHP-600AV, the Linksys PLEK-500 seems to stick out a little farther than an inch and a half.
There's a gigabit Ethernet port on the bottom, next to which is a hardware factory reset button. On the right side, seen in the picture above, you'll find the security button. Pressing it on one of the two Powerline adapters starts the re-sync process, and a randomized encryption key is generated.
There are three LEDs: Power, Powerline and Ethernet, and they indicate different statuses. While the Power LED is an on/off indicator similar to the Ethernet LED, the Powerline LED actually fluctuates between green and yellow. Yellow indicates a transmission rate lower than 15 Mb/s, while green means your transmission rate is above 15 Mb/s.
Software
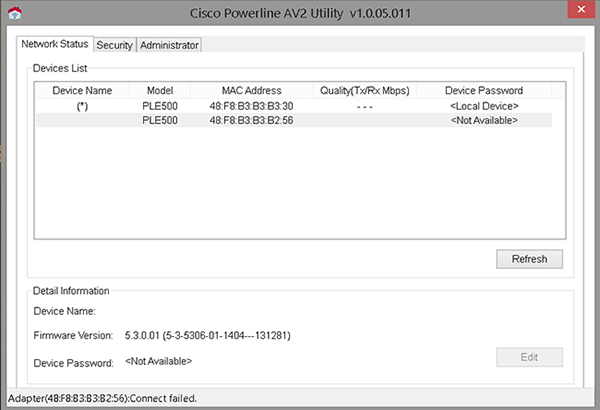
In this case, Linksys provides a software utility for advanced configuration. Although it's not included in the starter kit, you can download it from the company's support site. Prior to using the utility, make sure that your Linksys PLE-500s are plugged in and accessible. Once you launch the tool, you'll see it has three tabs (as shown in the screenshot below).
Network Status is the first tab. We can see in the Devices List window the adapters discovered, along with the model number, MAC address, throughput quality and device password. Under Detail Information you'll find the firmware version, which could be handy if Linksys pushes out an update at some point in the future.
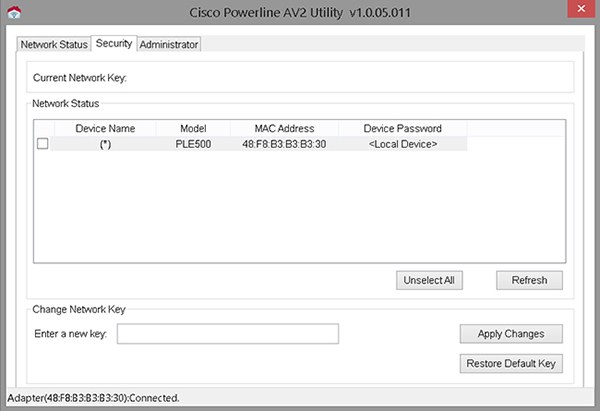
On the Security tab, you can set the Network Membership Key for selected devices. The default key is printed on the back of the Powerline adapter.
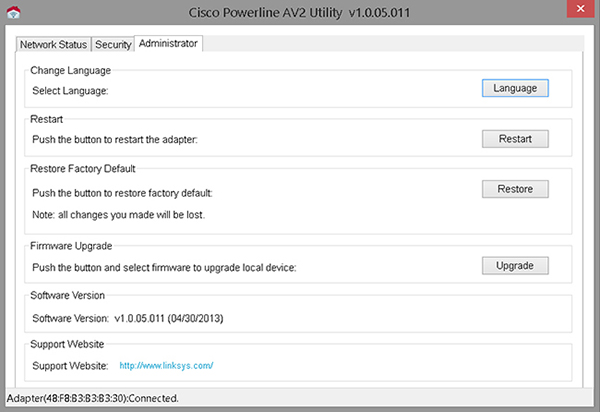
The Administrator tab lets you restart the adapter, set it to factory defaults or upgrade its firmware.
Get Tom's Hardware's best news and in-depth reviews, straight to your inbox.
I didn't need to use the advanced utility during testing, but it's nice to know you can upgrade the firmware this way.
Tear-Down
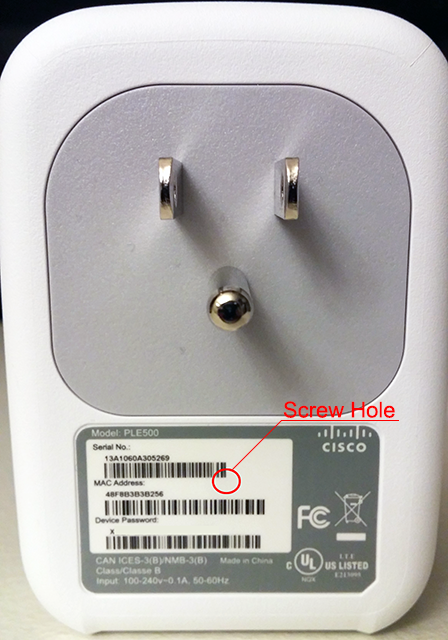
The first step in cracking open any case is to try to figure out if there are hidden screws. Some vendors hide them under rubber guards, but in this case, I found a screw behind the serial number bar code.
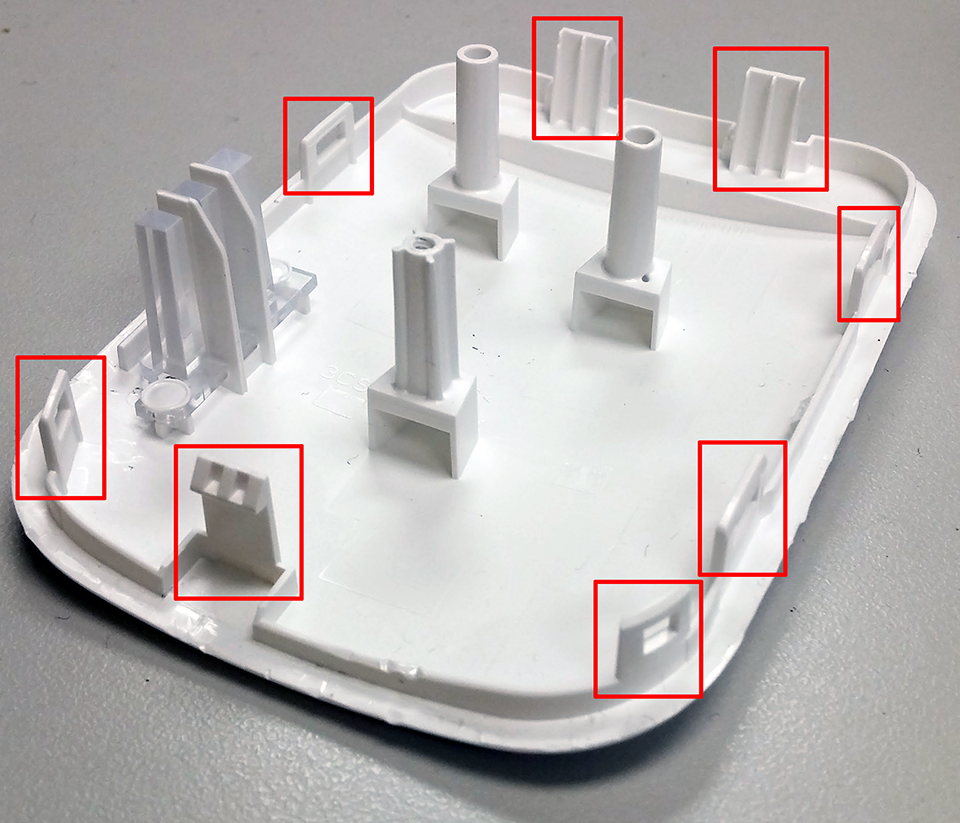
I cut away the relevant part of the label to reveal a hex-sided screw. With it loosened, the next step was to feel around the edges and find the plastic clips that needed to be depressed.
You can tell in the picture above and below that I had to do some guess-work to figure out exactly where those plastic clips were. To save you some time in case you want to break open the case yourself, here they are highlighted:
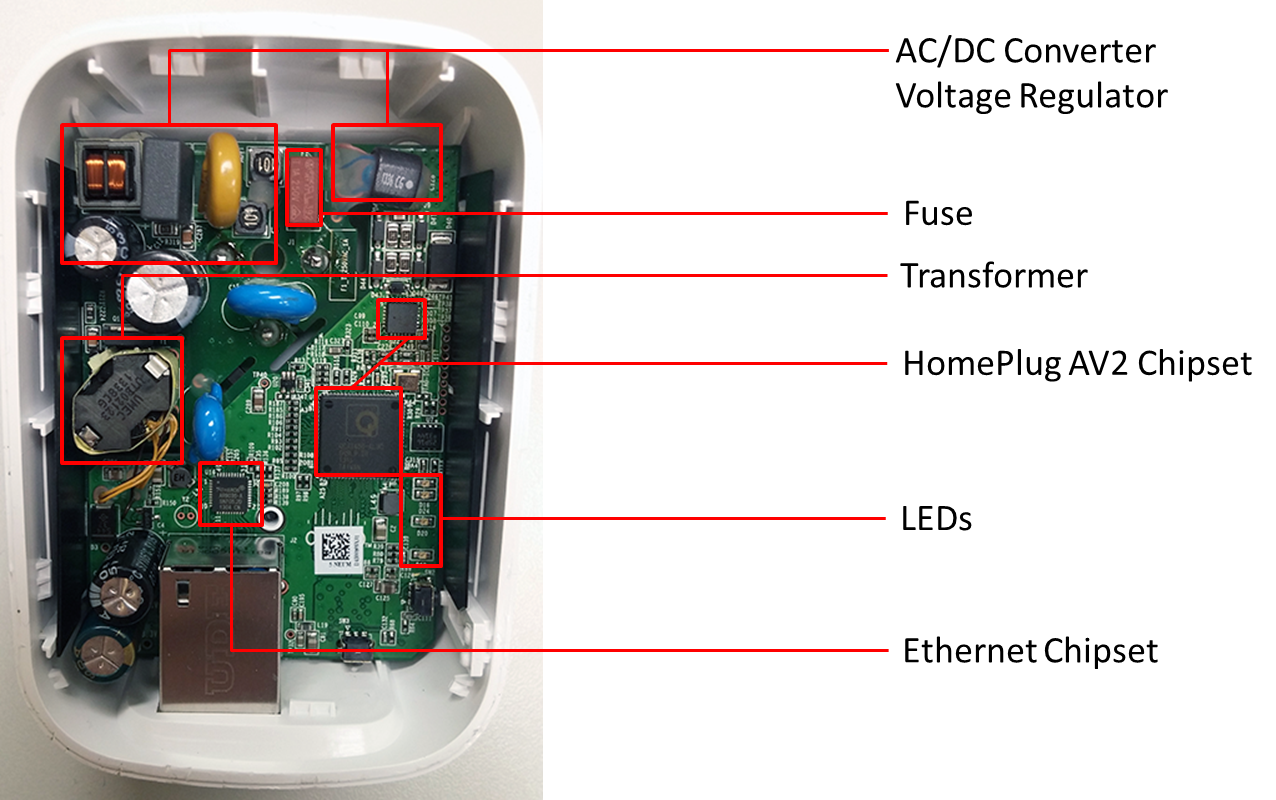
With the top off, we can get a sense of the parts inside:
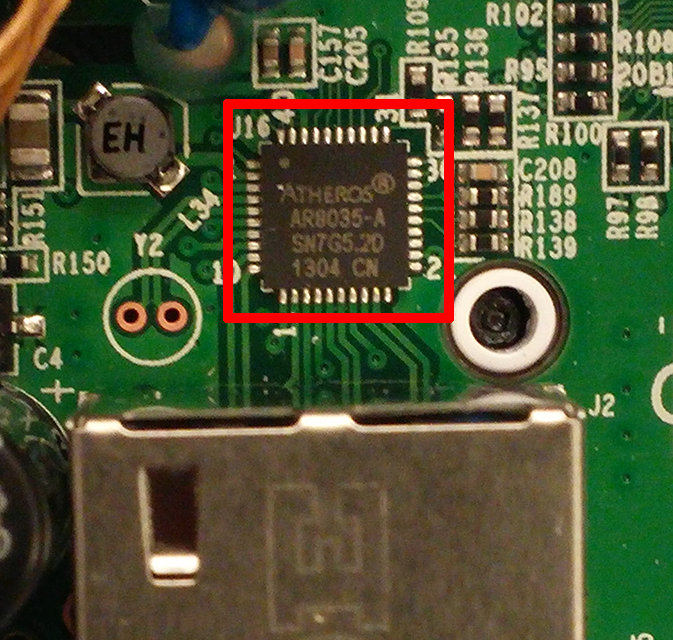
Qualcomm Atheros AR8035-A: Marketed by Qualcomm as an ultra-low-power single RGMII gigabit Ethernet PHY and part of its Ethos product line (datasheet). Other interesting marketing details include:
- Supports voltage input/output levels from 1.5V to 3.3V
- "Error-free" operation up to 140 meters of CAT5 cable (that's about 160 meters short of this adapter's marketed 300 meter max range)
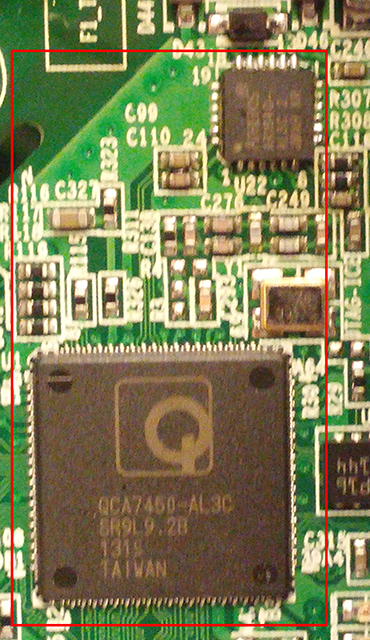
Qualcomm Atheros QCA7450/AR1540: According to a 2012 press release, this chipset is marketed by Qualcomm as its first that complies with the HomePlug AV2 specification. Reportedly included is a "SmartLink Plus" option to enable Powerline signal transmission on multiple wires. The SmartLink Plus option is elaborated on in this press release as utilizing all three electrical wires: line, neutral and ground. In the HomePlug AV2 specification, MIMO is a required capability, so this may be Qualcomm Atheros' implementation of that requirement,
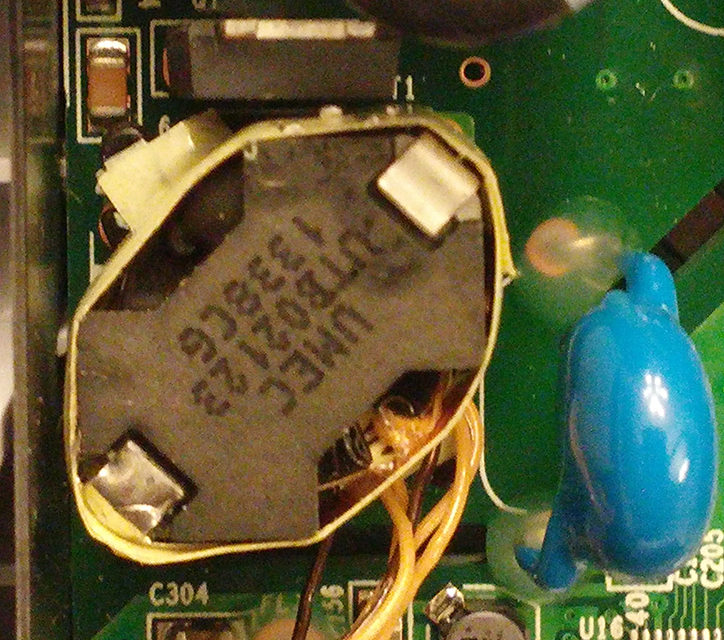
UMEC UTB02123: This is a "Flyback Transformer" cited on the UMEC website as "reinforced" for the Atheros AR7450 chipset.
Current page: Hardware, Software And Tear-Down
Prev Page Specifications, Features And Accessories Next Page Test Results And Conclusion-
Flying-Q What is the topology of the test environment? Specifically, do any of the floors' power circuits communicate via a consumer unit? Having installed several varieties of Powerline adaptors over recent years in the UK, I have found that TP-Link products are able to connect through a consumer unit when for example upstairs and downstairs have separate ring circuits off breakers in the same consumer unit. Devolo products also are able to do this. There is a degradation in throughput in this scenario, but still gives better results than wifi over the same range.Reply -
getochkn ReplyWhat is the topology of the test environment? Specifically, do any of the floors' power circuits communicate via a consumer unit? Having installed several varieties of Powerline adaptors over recent years in the UK, I have found that TP-Link products are able to connect through a consumer unit when for example upstairs and downstairs have separate ring circuits off breakers in the same consumer unit. Devolo products also are able to do this. There is a degradation in throughput in this scenario, but still gives better results than wifi over the same range.
They tell you how, there is even a link at the end of the article.
http://www.tomshardware.com/reviews/how-we-test-powerline-networking-adapters,4217.html
How we test powerline adapters. -
Flying-Q Reply
I had already read that article and it does not address my question. Are the circuits on different floors linked at a consumer unit? In the US I believe you might call them breaker boxes. In the UK most modern houses have a separate circuit (ring main) for each floor, terminated at a circuit breaker in the consumer unit. My testing has shown that some brands deal with this, albeit with a small degradation in signal, other brands fail to transmit across to another ring main or at best with significant attenuation.16796658 said:What is the topology of the test environment? Specifically, do any of the floors' power circuits communicate via a consumer unit? Having installed several varieties of Powerline adaptors over recent years in the UK, I have found that TP-Link products are able to connect through a consumer unit when for example upstairs and downstairs have separate ring circuits off breakers in the same consumer unit. Devolo products also are able to do this. There is a degradation in throughput in this scenario, but still gives better results than wifi over the same range.
They tell you how, there is even a link at the end of the article.
http://www.tomshardware.com/reviews/how-we-test-powerline-networking-adapters,4217.html
How we test powerline adapters.
-
InvalidError Reply
In NA, newer constructions have one breaker per room. One thing that may make matters worse is that we also have 2x120V mains (center-tapped 240V) with half the ciruits fed from L1 and the other half from L2, which means powerline networking products connected to L1 that want to talk to devices connected to L2 will have tons of extra attenuation on top the usual branch-to-branch connection over the breaker panel's bus bars.16798640 said:Are the circuits on different floors linked at a consumer unit? In the US I believe you might call them breaker boxes. In the UK most modern houses have a separate circuit (ring main) for each floor, terminated at a circuit breaker in the consumer unit.
-
aessu Pls add units to the graps. They're useless without. Is it telling me the time the transfer took to complete? Speed in megabits? Speed in megabytes? Or something completely else?Reply -
scogar I just got one, replaced my ageing wifi dongle that was failing, now have wired connection that is 10 times faster that works well from my upstairs to my downstairs. Saved me from having to run a hard line from the router upstairs. And now streaming actually works in my badly wifi congested condo complex.Reply -
fool20 This one's really crap compred to the TP-Link when you look at the graphs and the price, but it's never mentioned anywhere in the article that it's crap.Reply
