


The Parts Required For The Overclocking Card
The most professional plug for this connector looks pretty much like this:
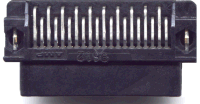
It connects directly to a little PCB required for the dipswitches and resistors that you will need. So far, all solutions that I have seen on the web were rather unprofessional. If you want to go for it then either get a plug like this (AMP is the manufacturer of the above one), or only buy an overclocking-card that's build like this. Other solutions may require a lot of little wires, which is messy and can be dangerous if one of those wires breaks. Using a connector that doesn't 'go around the corner' as this one will make the PCB hovering very clumsy above the CPU.
The next thing you need is the circuit-diagram.
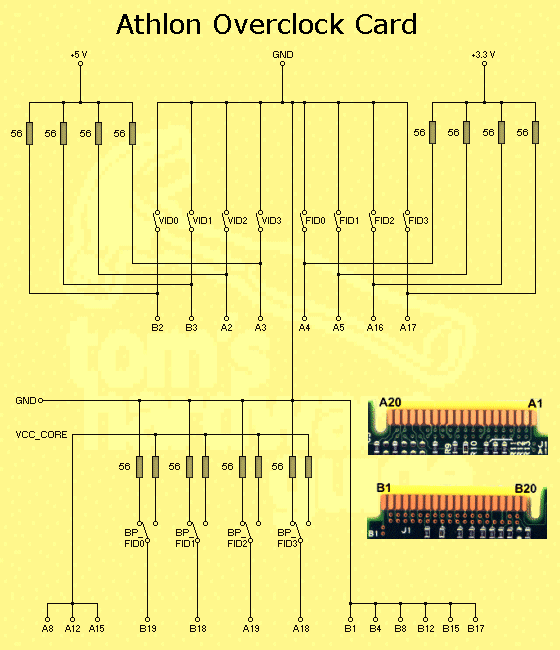
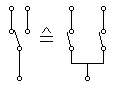
You can see that the circuitry is rather simple, however there's one little problem. You require +5V, GND and +3.3 V as well if you want to do it right, following the spec. This surprised me as much as it may surprise you and we are trying to find out if VCC_CORE could be a viable alternative as well. However, VCC_CORE (supplied from Pins A8, A12 and A15 of the connector and used for the BP_FIDs) is a lot lower than 5 or even 3.3 V. Anyway, please realize that the pull-up resistors are of major importance. They 'disable' the selection on Athlon's PCB (the resistors that I described in my initial Athlon OC-article). You could possibly do without the pull-ups and the external voltages if you'd remove all the VID and FID-resistors on Athlon's PCB. I suggest that the only solution for this problem is a 'CPU-external' voltage-supply, using a normal power-chord, just as the ones used for everything inside the computer, e.g. for fans, hard-drives and more. Those chords supply +5 V, +12 V and GND. You grab the +5V and GND from it and use a tiny little voltage-regulator chip that produces the +3.3V. This little chip does not need to have any major power-dissipation (up to 400 mW). The 3.3 V are only required for some pull-up resistors as you can see in the above diagram. You might also see a problem in the lower part of the diagram, the one for the BP-FIDs. Of course you don't require switches that can switch between two different sources, two on/off-switches can do the same job. You only have to remember to keep the two switches in alternating = opposite conditions, on/off or off/on.
Summarizing the requirements gets us to the following list:
- An AMP-connector 40-pin, pitch 1.27 mm or 1/20 inch
- A PCB which you design according to the above diagram plus the area of the 3.3 V voltage-regulator
- Two 8-switch dipswitches
- Four 4 x 56 Ohm SMD-resistor clusters
- A low wattage SMD 3.3 V voltage-regulator
- A PC-power supply Y-cable (supplies wires and connector for the power supply of the card)
With those parts you can build your own universally usable Athlon overclocking-card. I know that many of you won't be able to design their own PCB, but I am sure that shortly after the publication of this article, many companies will start building their own overclocking-cards. With the information taken from the circuitry that I published, the offered cards will hopefully be more professional than what's currently out there.