Plastic Surgery: Releasing The Athlon XP To Hit 2000+
Features
By
Frank Völkel
published
Step By Step
Before you get started, make sure that you can adjust your multiplier, either in BIOS, or by switching the jumper/DIP switch settings on the board (this is the case for most Socket 462 motherboards with VIA KT133A, VIA KT266A or SiS 735 chipsets). In our test to connect the L1 contacts, we used several Athlon XP processors. For this kind of test, the Epox EP-8KHA+, which allows you to set the clock multiplier in BIOS, is an excellent basis.
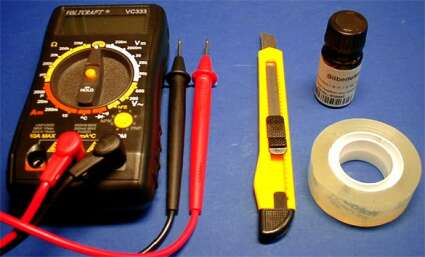
You'll need the following tools to connect the L contacts
- Conductive silver lacquer , which is what actually connects the contacts. You'll have to look around to find it on the Web. Try here
- Tape to insulate and separate
- Super Glue or a similar glue to fill the laser locks
- Scalpel to remove any remaining glue
- Multimeter to determine the resistance
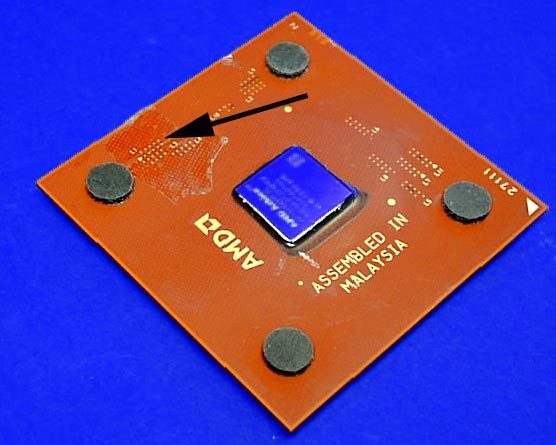
View is of an Athlon XP 1900+. The arrow shows the L1 contacts that will be modified later.
Stay On the Cutting Edge: Get the Tom's Hardware Newsletter
Get Tom's Hardware's best news and in-depth reviews, straight to your inbox.
Current page: Step By Step
Prev Page Socket A Radiates, Continued Next Page Why The Pencil Trick Doesn't Work
No comments yet
Comment from the forums

