Tom's Hardware Verdict
The Promise87 is unique and excellent. It doesn’t come cheap and lacks backlighting that could make it even better, but Wuque has delivered an excellent boutique typing option for keyboard enthusiasts.
Pros
- +
Unique and beautiful design
- +
Outstanding sound and feel
- +
Built with premium materials
- +
Excellent attention to detail
Cons
- -
No backlighting for the keys
- -
Mirrored back and glossy chamfers is easily scratched
- -
Expensive
Why you can trust Tom's Hardware
The Promise87 is the latest custom keyboard kit from Wuque Studio. The company has gained quite a bit of acclaim following its excellent Ikki68 Aurora and Mammoth75 keyboard kits, and the Promise87 is its most high-aspiring project to date. It features a full aluminum chassis, a unique gasket mounting system, weights on top of weights, and one of the most unique designs we’ve seen on the site to date.
With a price that starts at $380 and tops out at $460, it doesn’t come cheap but delivers exactly the caliber of typing experience you would expect at that price. It also features an integrated moissanite gemstone with its own RGB backlighting. This is a keyboard you could pop the question with — as long as that question is “honey, can I please buy another keyboard?”
Promise87 Specs
| Switches | None included |
| Lighting | Caps Lock indicator, Gemstone backlight |
| Onboard Storage | 4 (VIA) |
| Media Keys | Secondary functions |
| Connectivity | USB Type-C to Type-A |
| Cable | None included |
| Additional Ports | None |
| Keycaps | None included |
| Construction | Aluminum case, stainless steel weight, PORON dampeners, polyethylene foam switch pad |
| Software | QMK/VIA |
| Dimensions (LxWxH) | 14.25 x 5.4 x .8 (front) x 1.3 (rear) inches |
| Weight | 7.8 pounds (built) |
Design and Materials of the Promise87
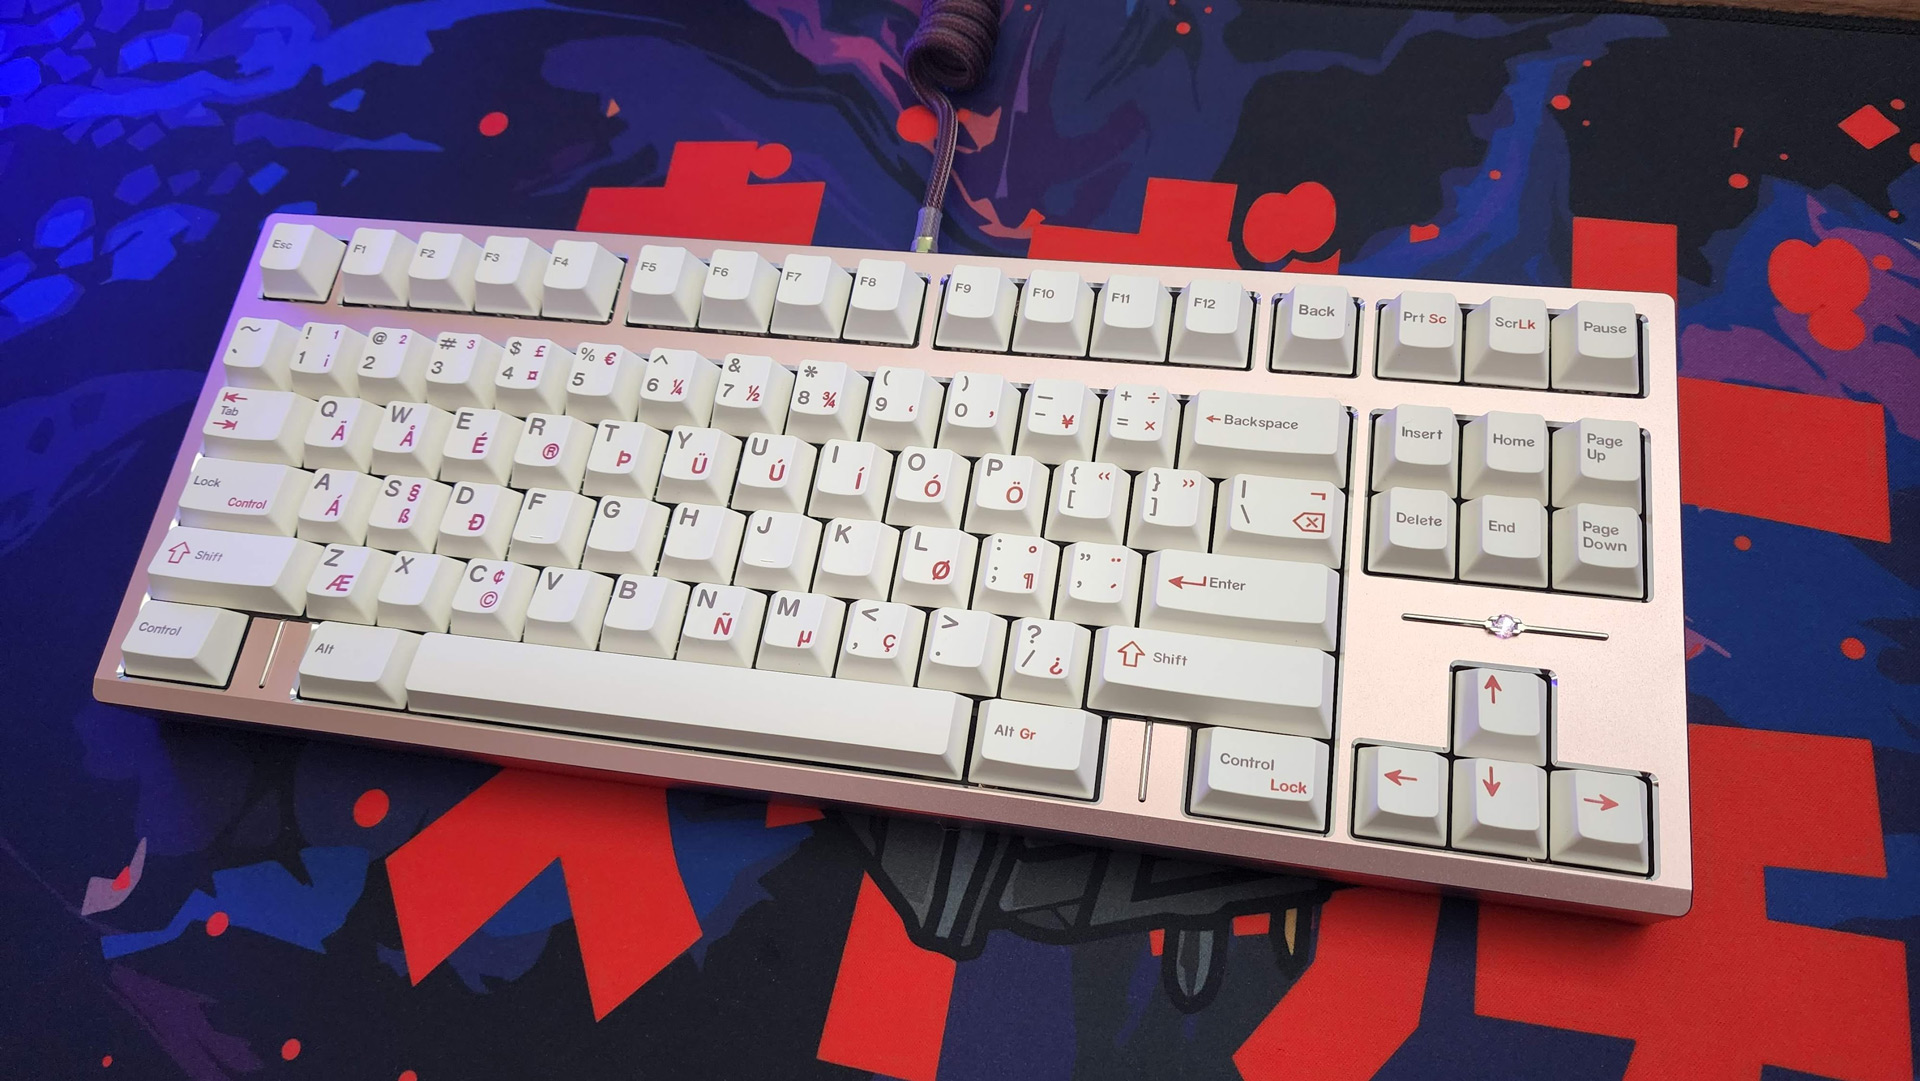
The Promise87 is a tenkeyless keyboard kit that oozes quality. It’s completely boutique and embraces aesthetics. It’s impossible to look at it and not see how it blends classic peripheral with modern art. It won’t make sense to everyone, especially at its price, but is downright impressive when viewed through the right lens.
So, what lens is that? The Promise87 isn’t an introductory keyboard kit. It’s designed for keyboard enthusiasts that have built one or even multiple keyboards in the past. It’s made for people who have seen what prebuilts and entry-level keyboards have to offer and are ready to level up; users that have spent hours on keyboard-centric forums and sub-reddits, poring over boutique builds and custom keycaps sets, and appreciate the small details and included features that give one keyboard an edge over another.
Through that lens, the Promise87 checks off multiple boxes. It’s built with top-tier materials. It’s heavy and fine-tuned with sound-altering foam. It has unique fancy touches like glossy chamfered edges, a mirrored back, and PVD bars across the blockers (if you choose the winkeyless version). It features plentiful of preset configurations, so you can find a color scheme that matches your exact taste. Then, when you’re done, Wuque offers addons like additional plate materials and PCBs that add things like RGB backlighting or Bluetooth connectivity.
It’s a board that you shouldn’t need to mod at all to sound and feel its best: Wuque designs around all of that. Out of the box, it should sound and feel better than any lesser DIY kit you’ve used in the past. It’s a board that isn’t the absolute top-tier of the mechanical keyboard hobby (those can retail for $800 - 1000 or more) but that aims to deliver the same kind of experience without breaking $550, even when you’re ordering a completely custom version of it.
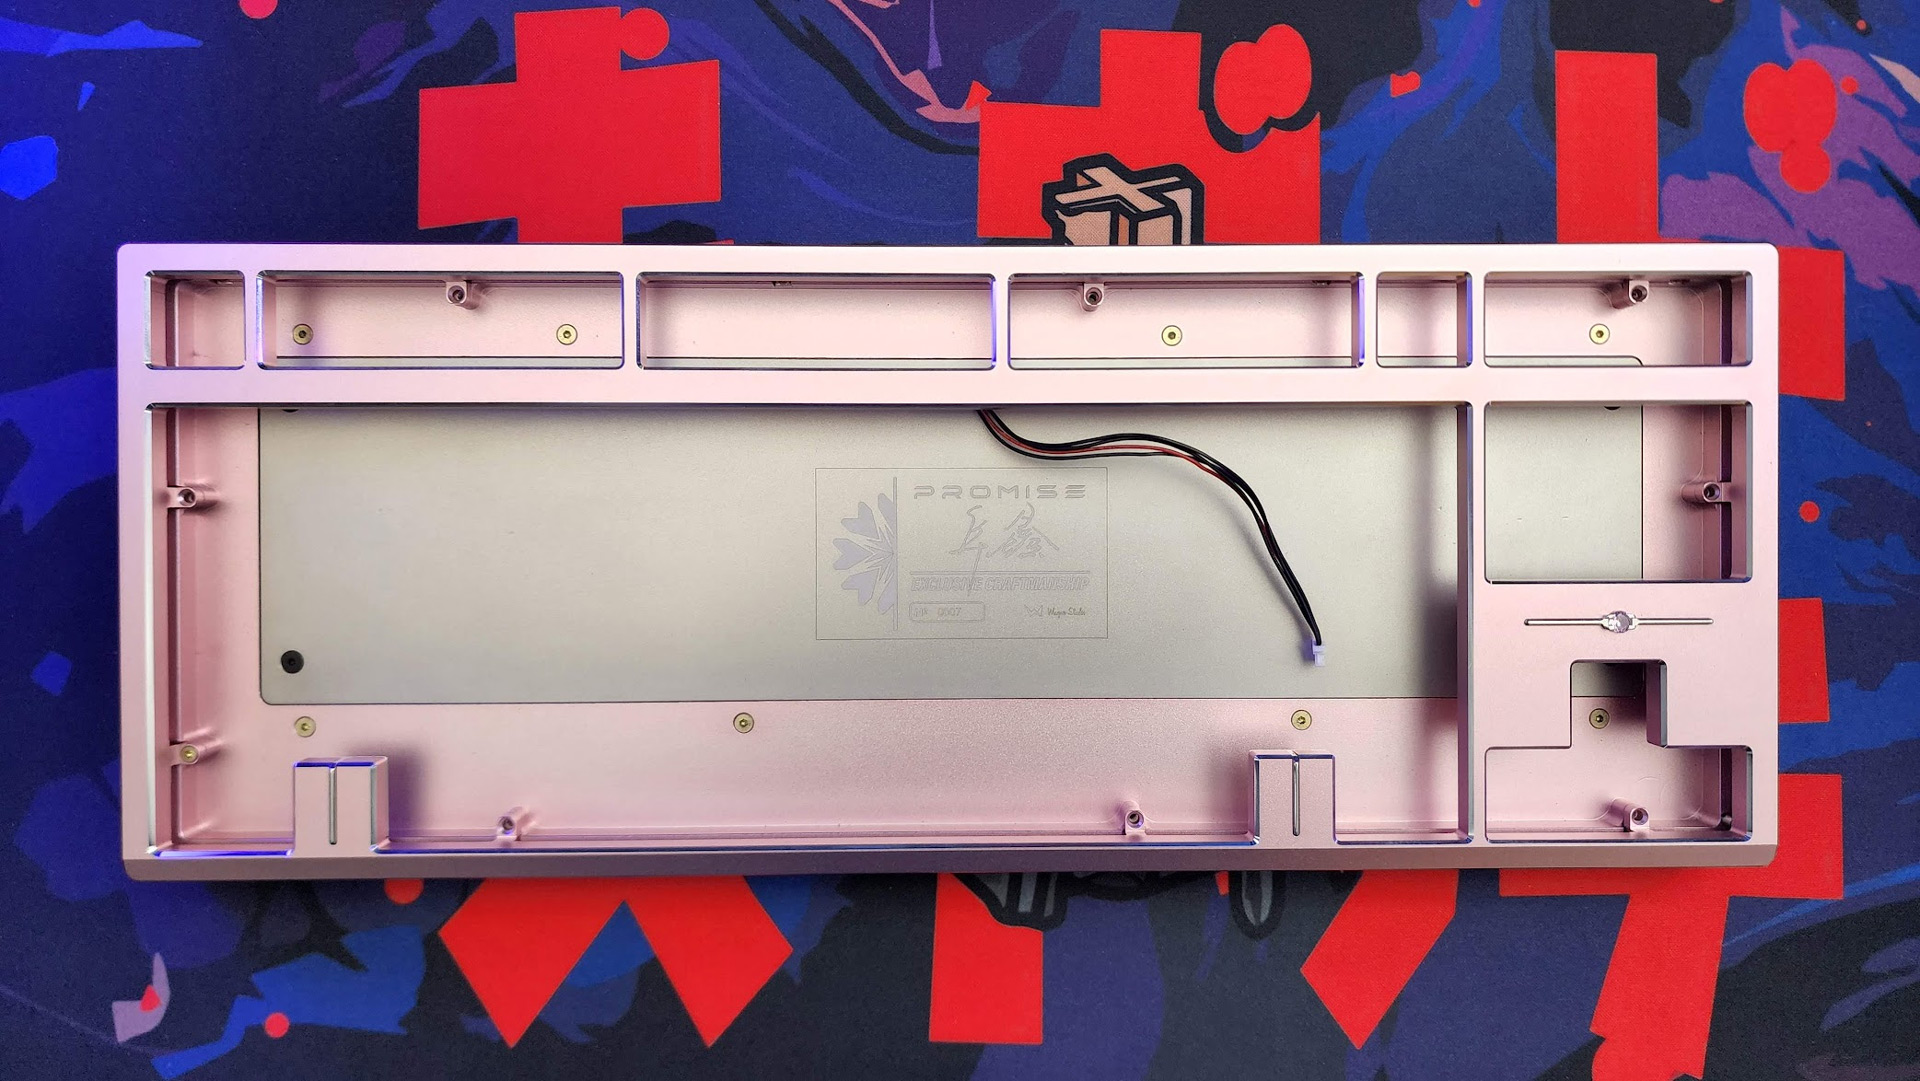
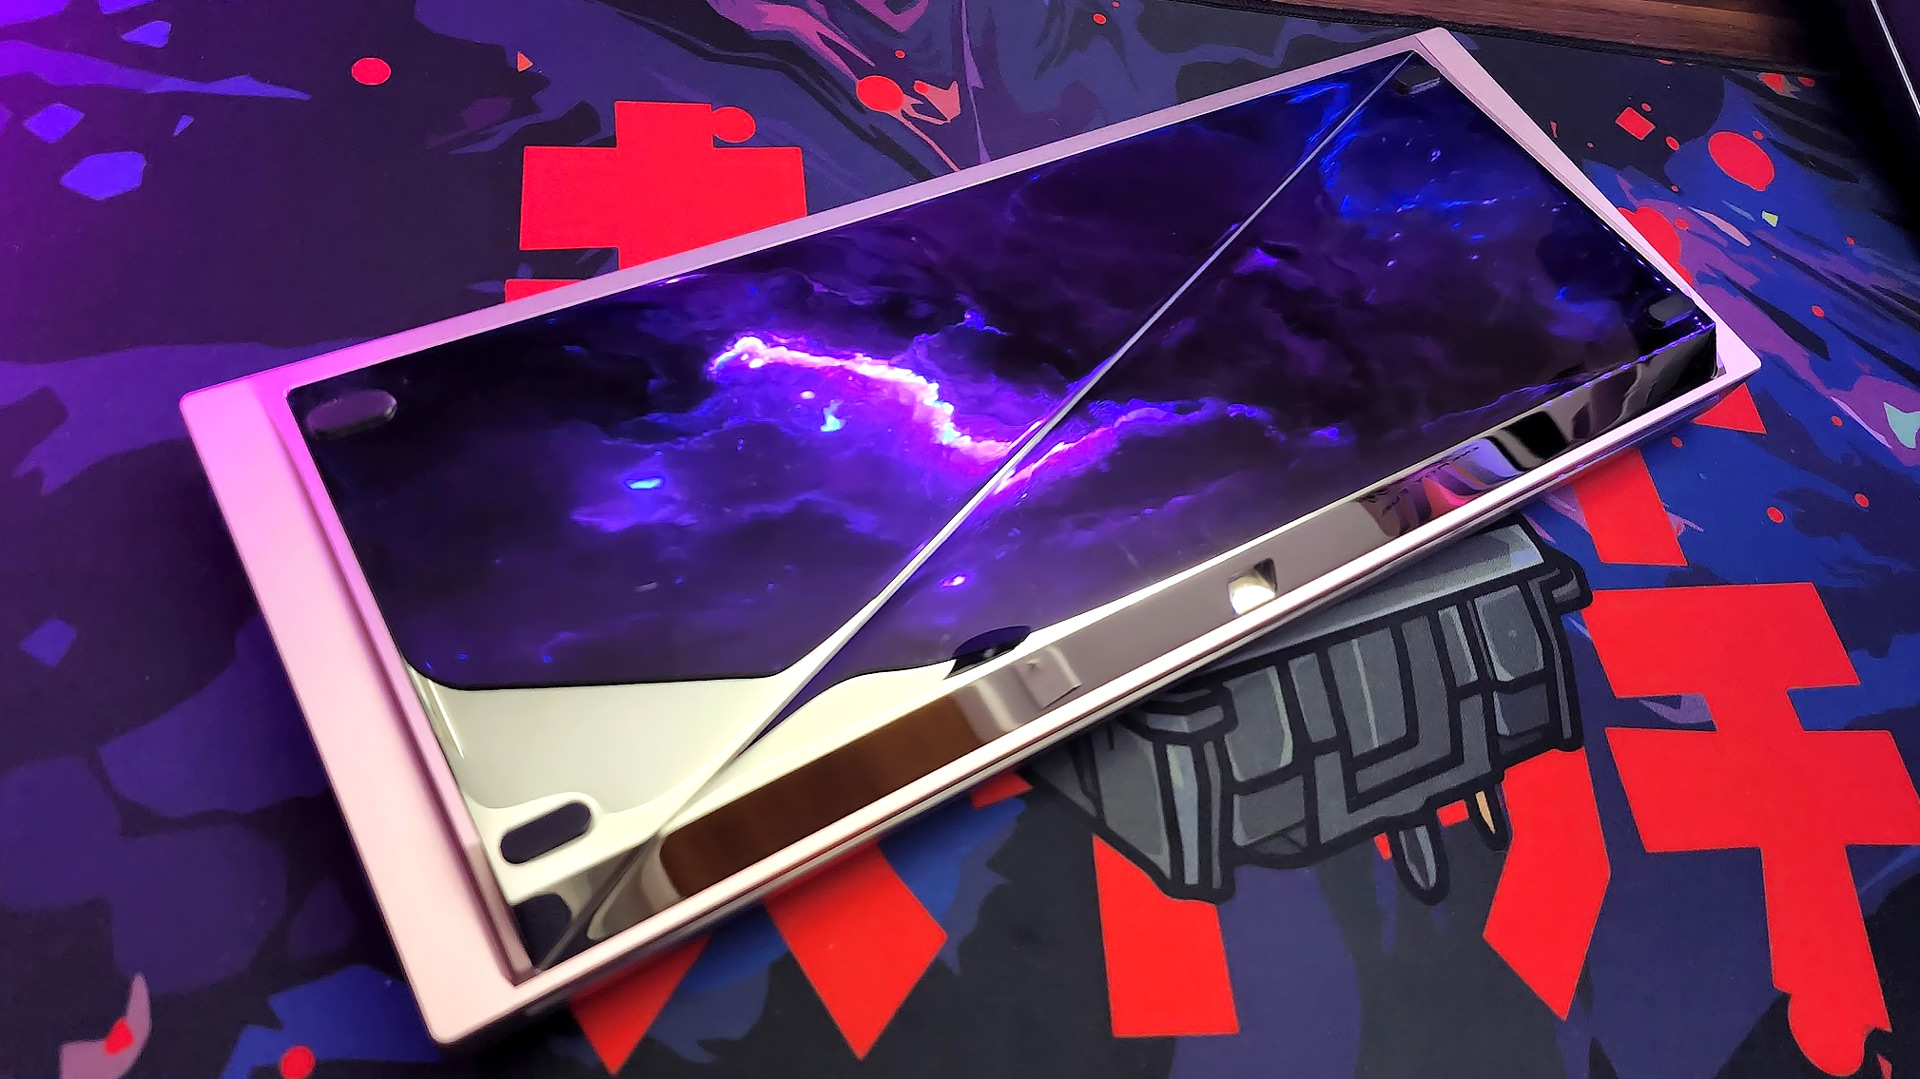
Starting with the materials, the Promise87 is shockingly heavy. Fully built, it’s just shy of eight pounds. The case is made of precision milled CNC aluminum and features an internal stainless steel weight, hidden from sight. Around the back are two more weights that come in your choice of PVD coated, mirror-finished stainless steel or sandblasted aluminum at a reduced cost.
Get Tom's Hardware's best news and in-depth reviews, straight to your inbox.
It’s available in nine different colors: e-white, silver, pink, burgundy, lavender, violet, pine, navy and black. There are two different versions of each of these colors. The difference is in the pair of weights that make up the back of the case (each half coming together in the middle, creating a diagonal line across its surface). The more expensive version uses the PVD stainless steel mentioned above while the standard version swaps these for matte-finished sandblasted aluminum. Both versions have the option for silver or gold weights, but the mirror-finished PVD editions add a rainbow prism color option, ensuring every one will be slightly different. All versions also have the option of having a laser marked logo circle engraved on the back for an additional five dollars.
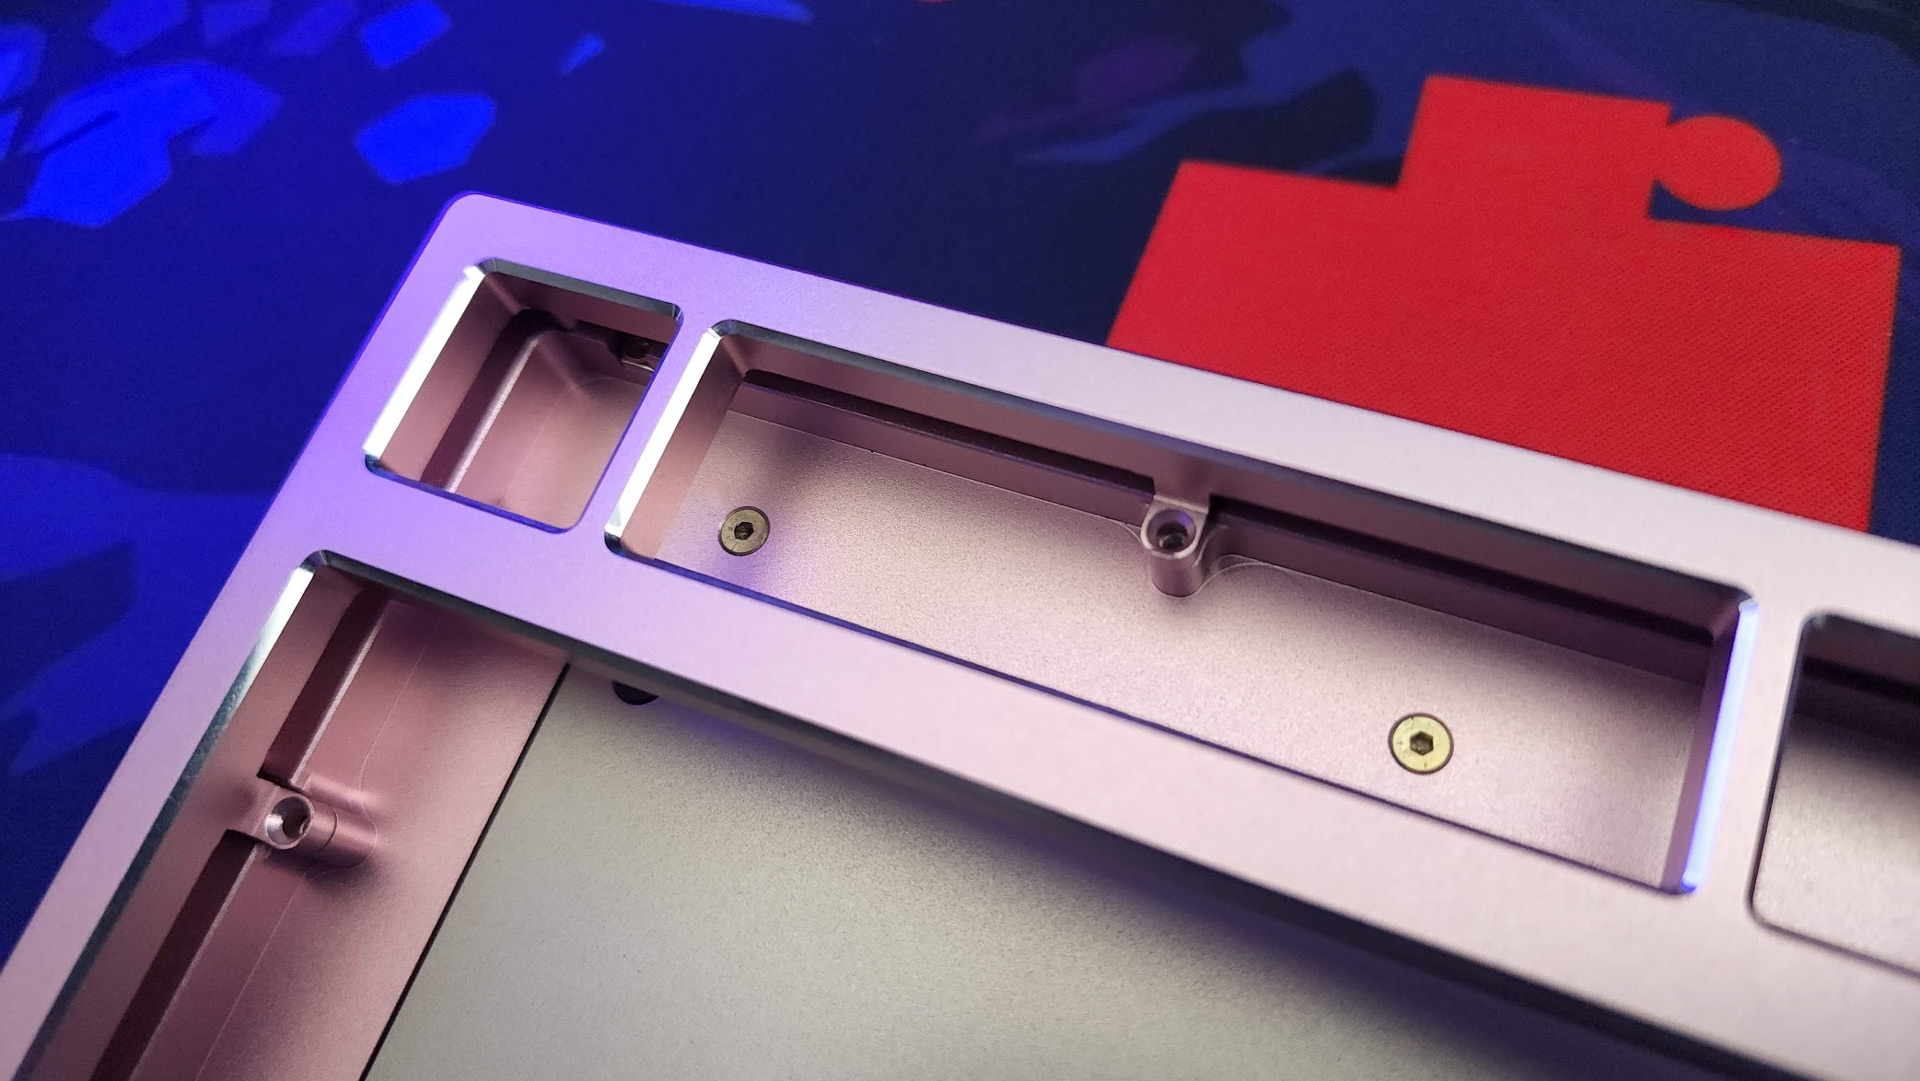
Around the front of the case, every key area has chamfered edges. The chamfers are designed to match the rear weight and are polished to a mirrored edge. If you choose the winkeyless version, the spaces usually occupied by the Windows keys are filled in by the case. These sections are called blockers. Both blockers have PVD bars that are equally glossy set into their center.
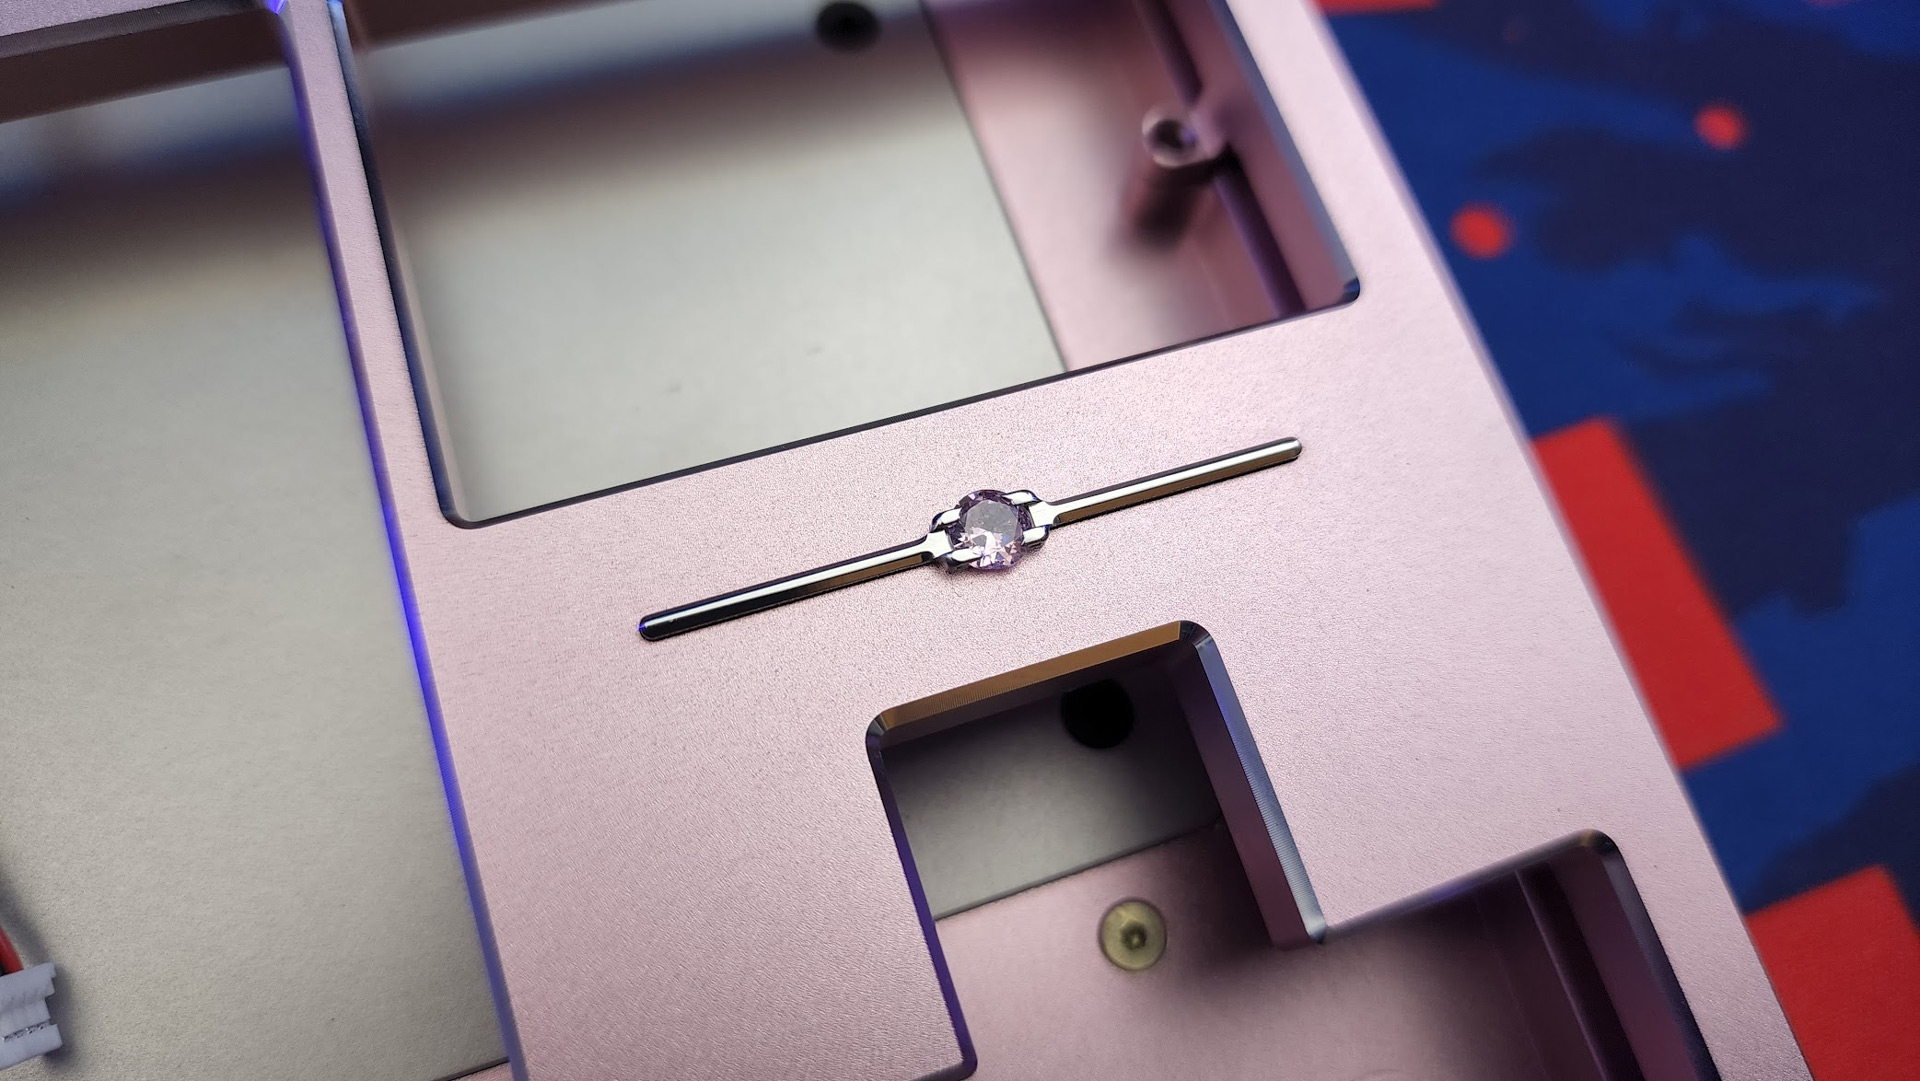
Which brings us to the most unique part of the Promise87: the diamond. Well, simulated diamond. Below the navigation cluster is another PVD bar with a large moissanite stone set into its center. It’s the only part of the keyboard that’s backlit, too. A single customizable RGB backlight is positioned underneath this stone to give it a glow and perpetual sparkle. Having a gemstone set into your keyboard isn’t going to be everyone’s cup of tea but is certainly unique and eye-catching.
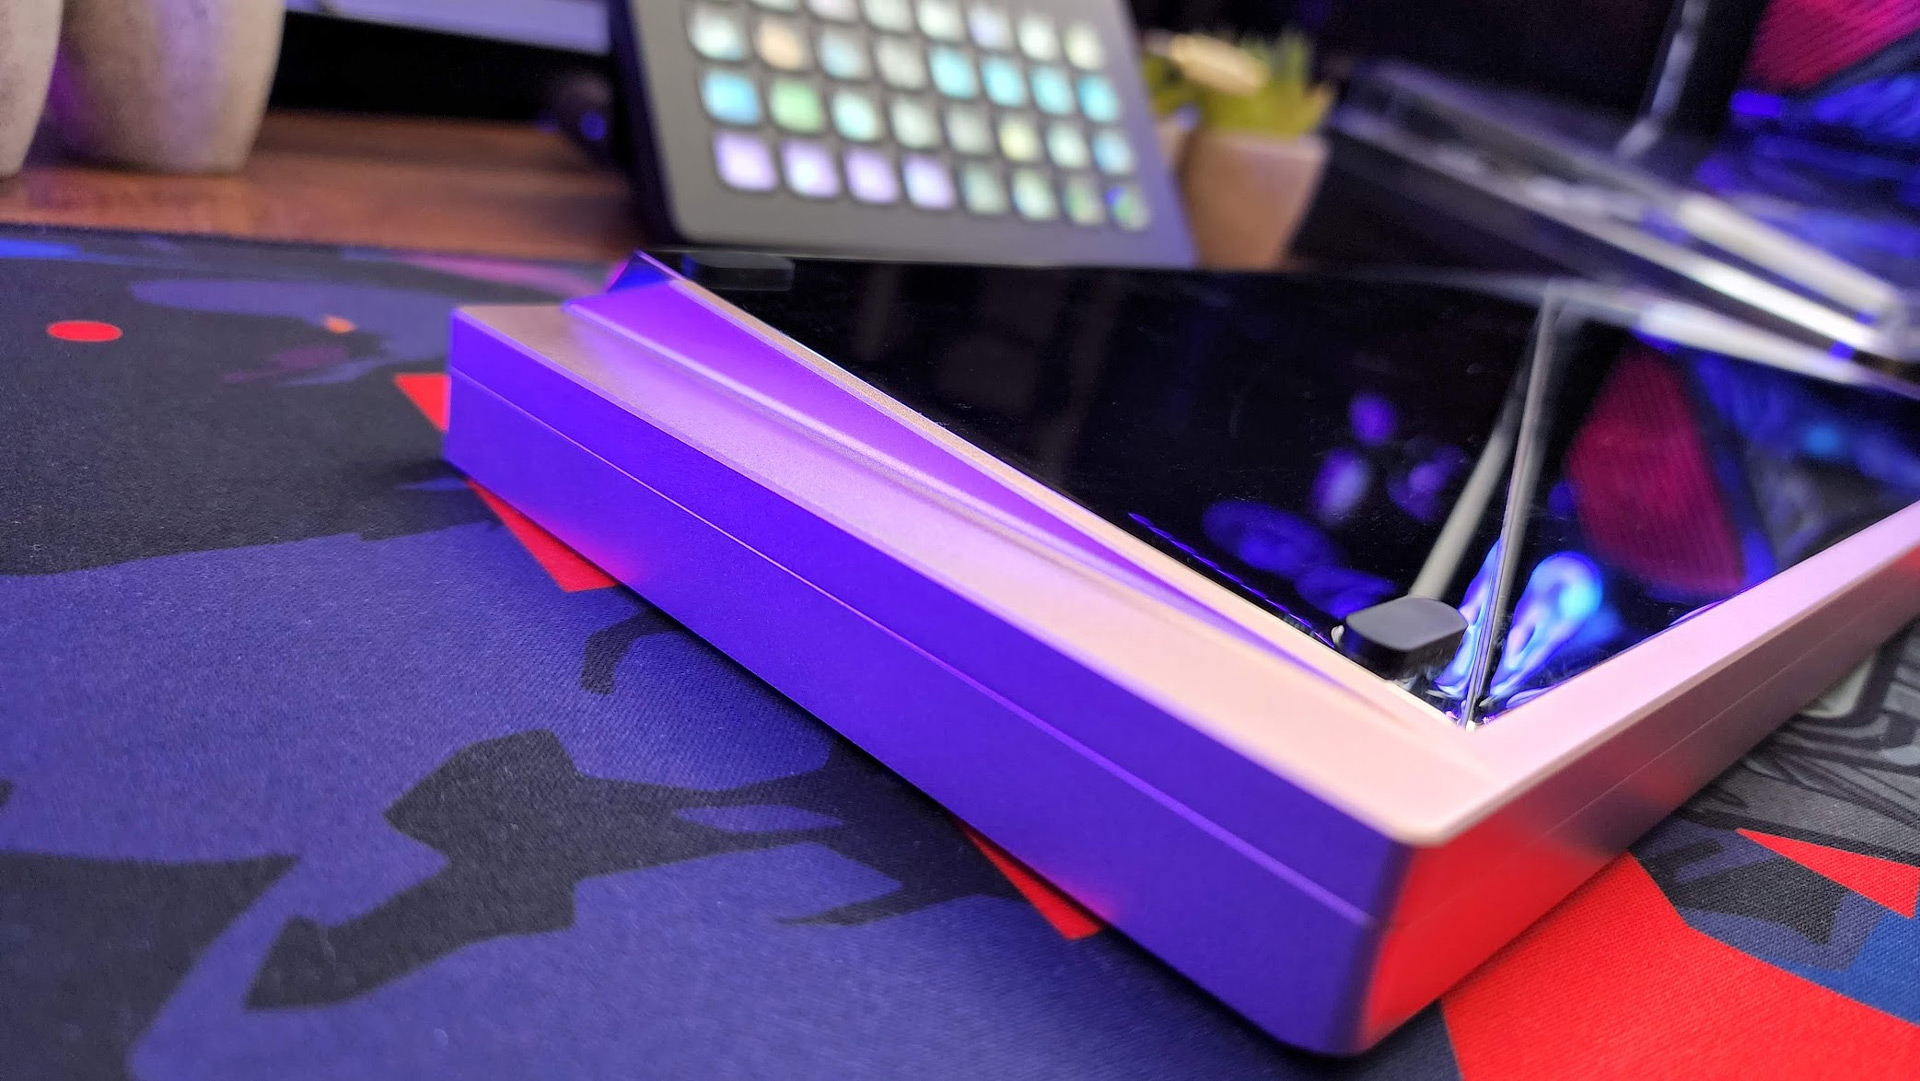
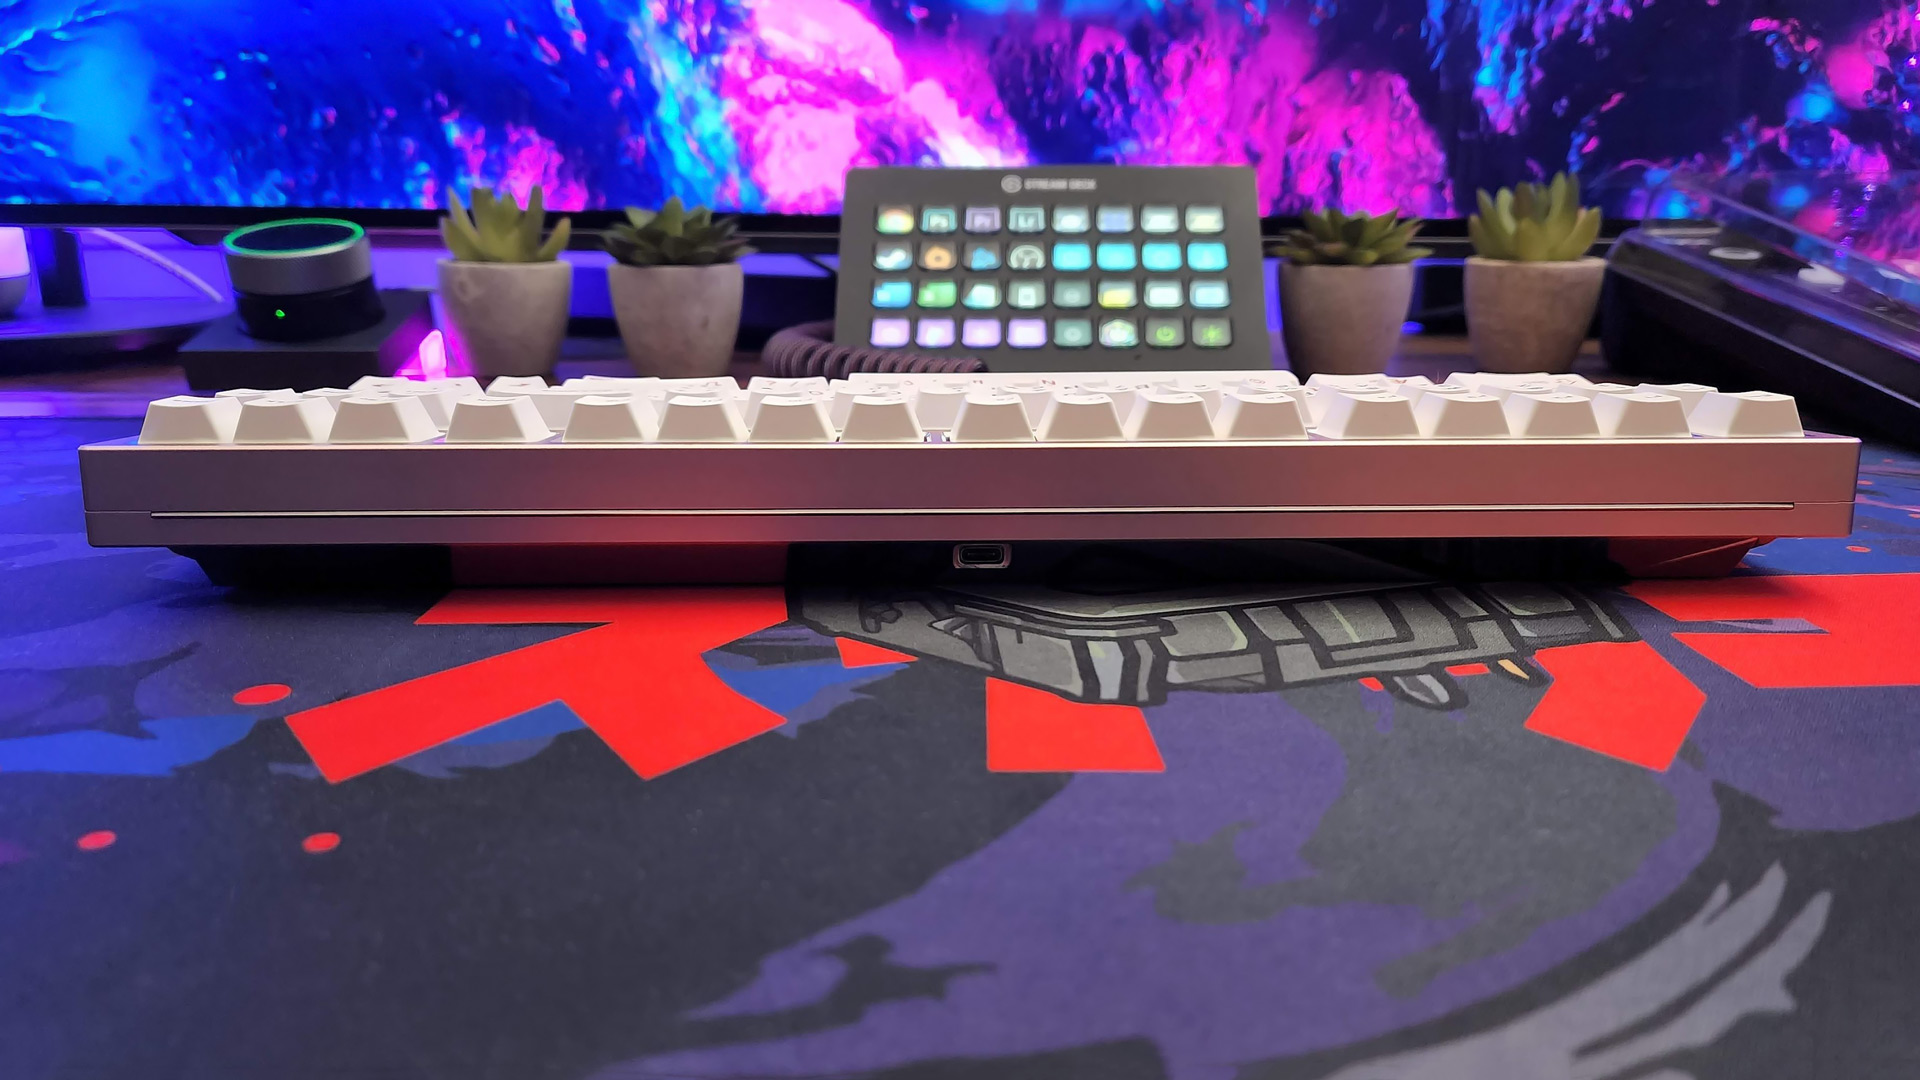
The Promise87 also leans into the subtle design elements that DIY mechanical keyboard enthusiasts appreciate. For example, the front edge is beveled downward, making it more comfortable to type on and giving it a more unique side profile. When viewed from the side, it almost seems to float due to the centered placement of the weight. Along the rear edge, there’s another PVD bar and a USB port that’s hidden below the top edge of the case. There are no visible screws; they’re all hidden below the keycaps to create a screwless design. No matter what angle you view it from, it looks great.
Wuque Studio also ran a limited group buy of a completely custom version of this keyboard. There, customers could change every element of the keyboard’s design. You could customize everything from the colors of the chamfers, to the blocker lines, to mixing and matching the two different weight materials, and even dropping the gemstone from the final build. This was limited to 400 keyboards worldwide and sold out almost instantly.
As with many custom keyboards, you’ll find that it’s a pretty simple design in terms of the layout and added features. There are no dedicated media keys, no additional USB ports, and no RGB lighting outside of the moissanite stone and a white Caps Lock indicator hidden under the key. The only thing I miss here is backlighting. Wuque told me that they feel the custom keyboard community doesn’t look for RGB lighting as much as custom keycap sets, which is almost certainly true, but even a warm white backlight would have looked very nice with this keyboard.
A basic metal keyboard can sound and feel terrible on its own, so what’s happening inside the case is just as important as the outside. Wuque has implemented multiple layers of dampening to deliver a soft, poppy typing experience that left me logging onto my computer when I should have been sleeping just to fit in a few more typing tests.
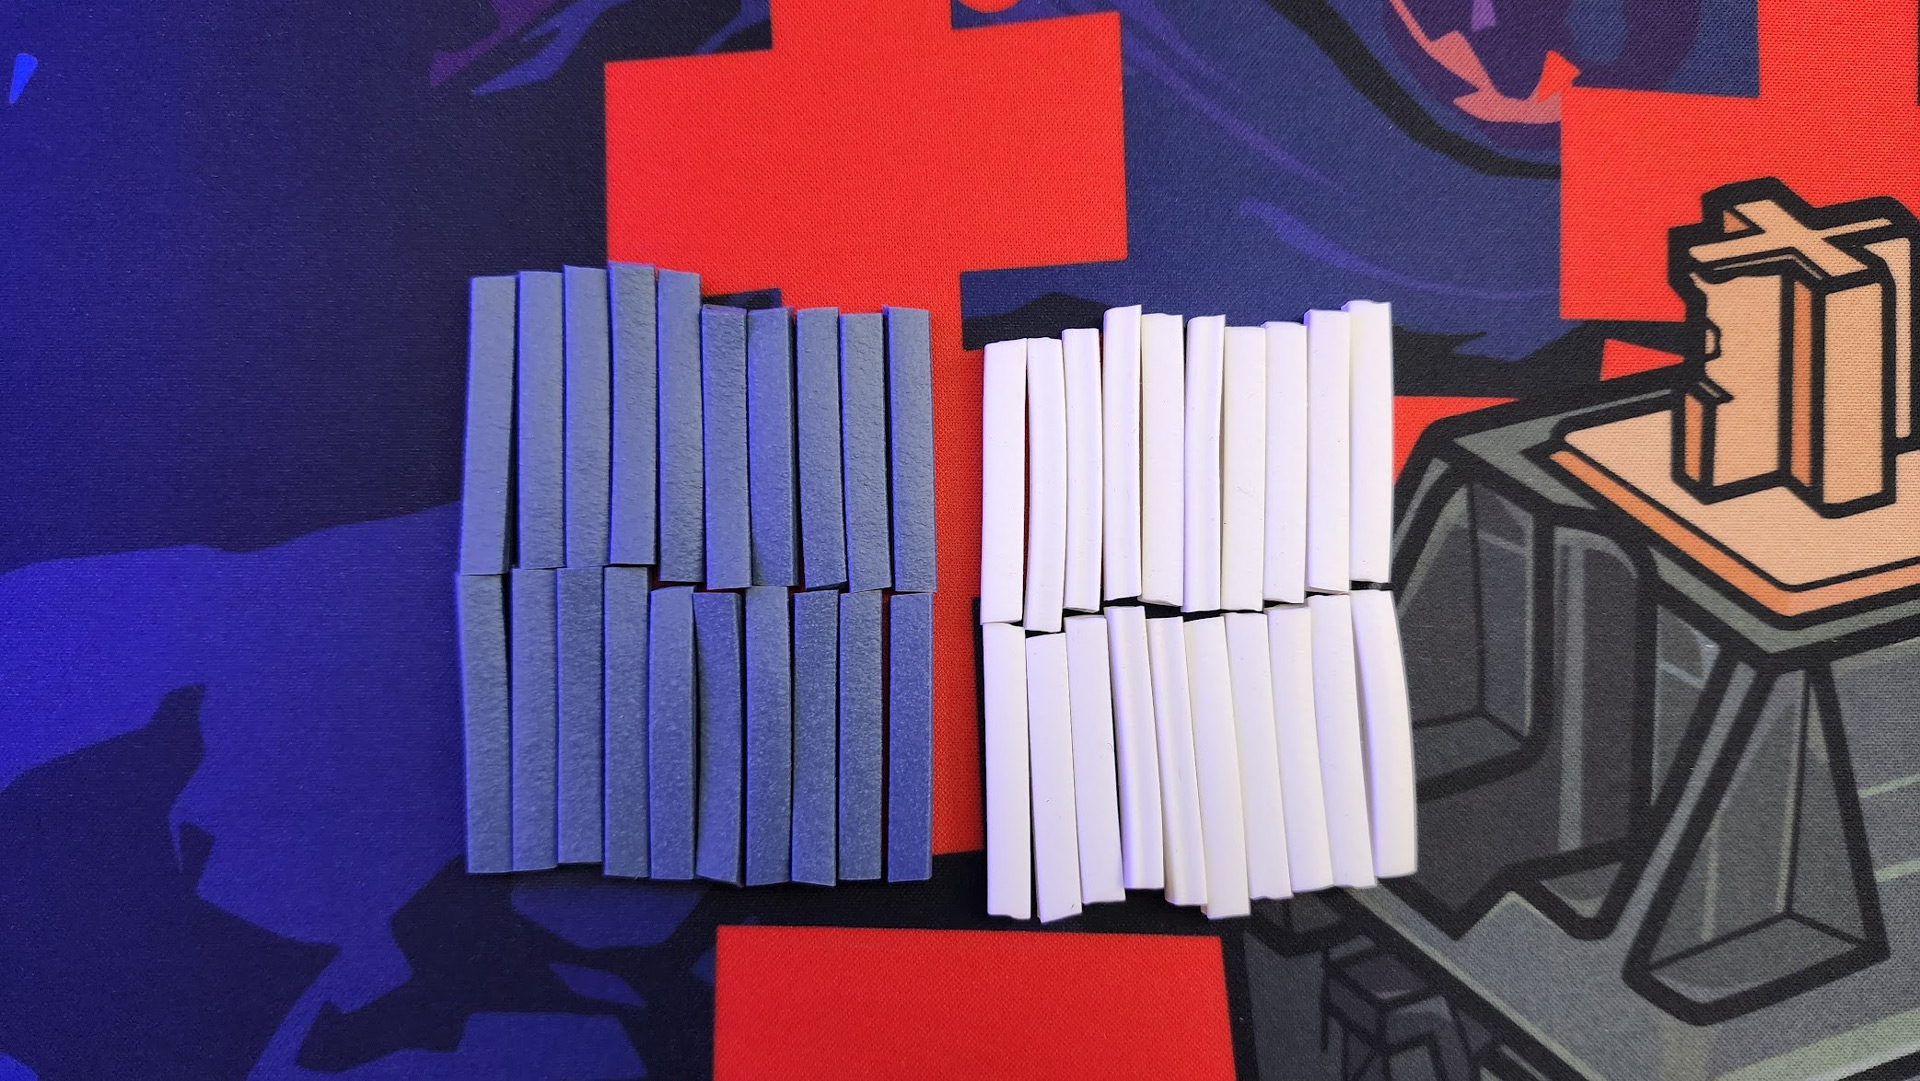
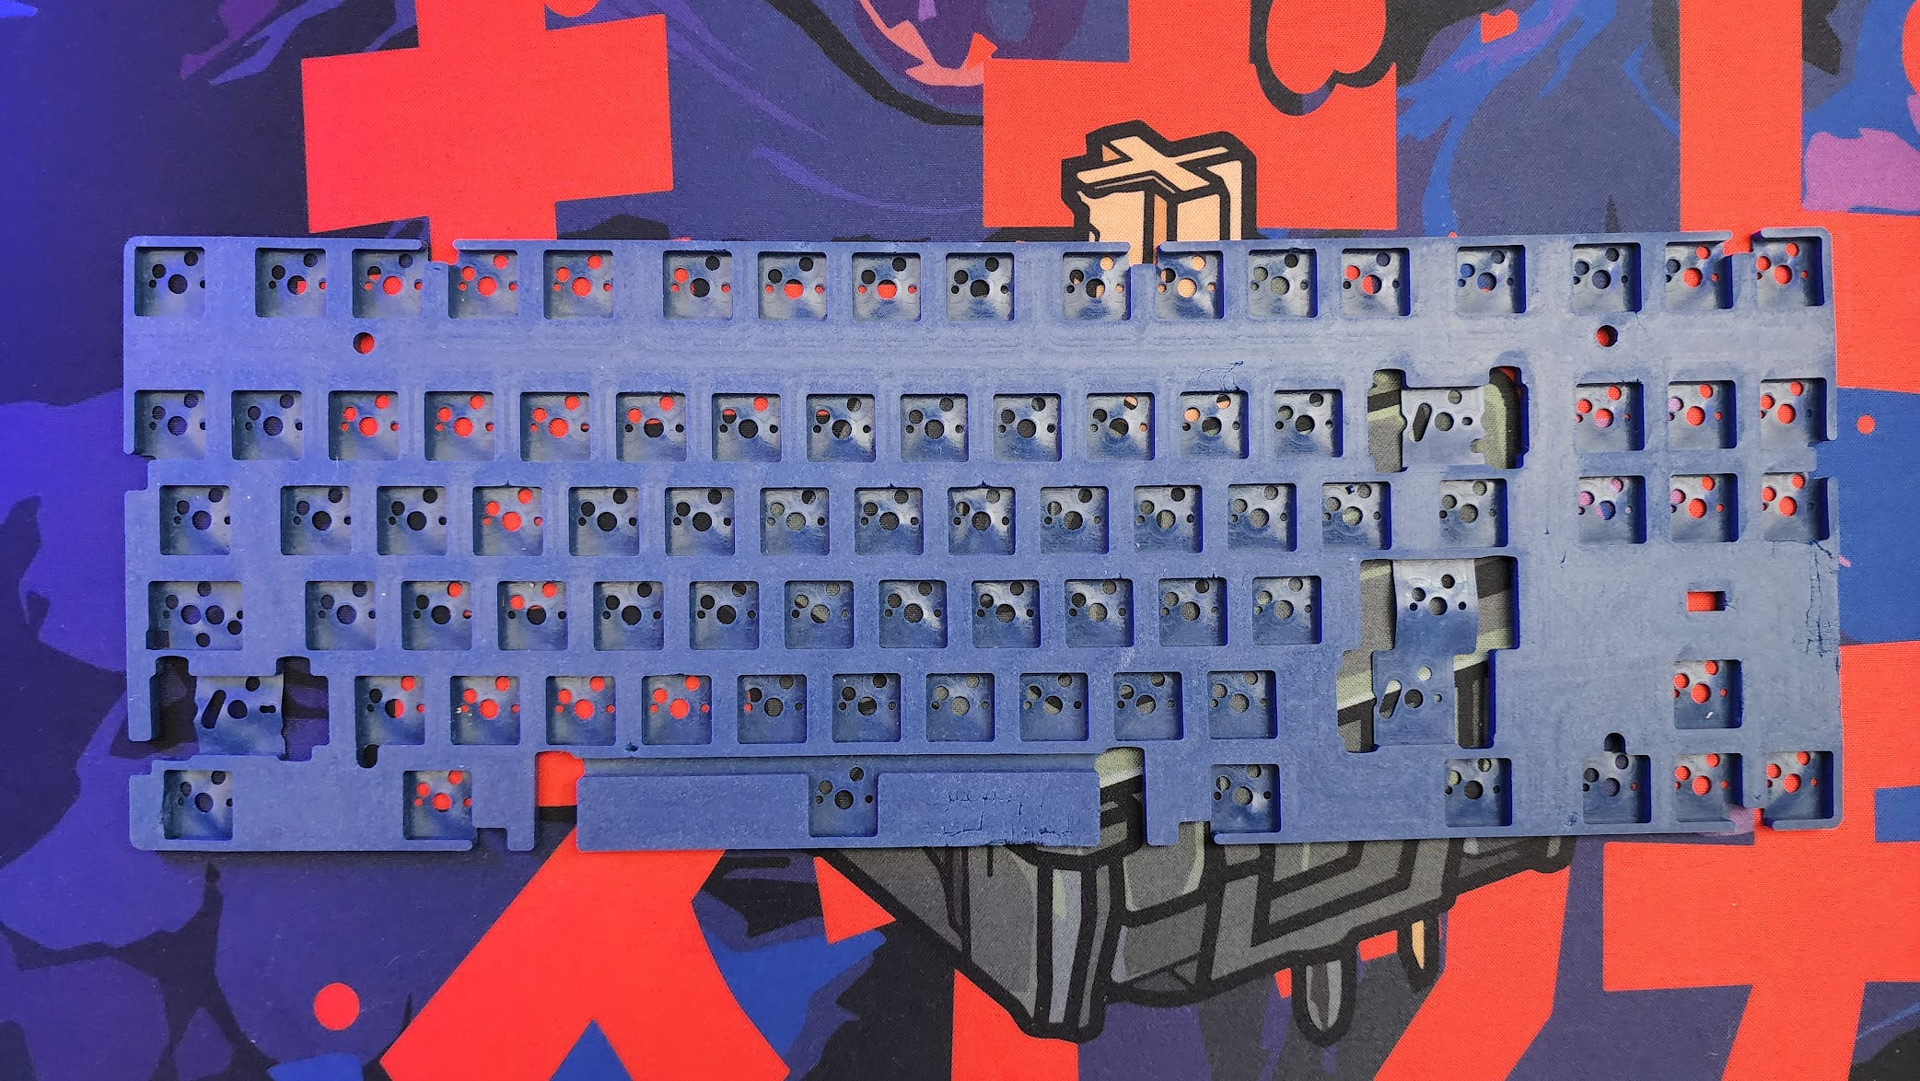
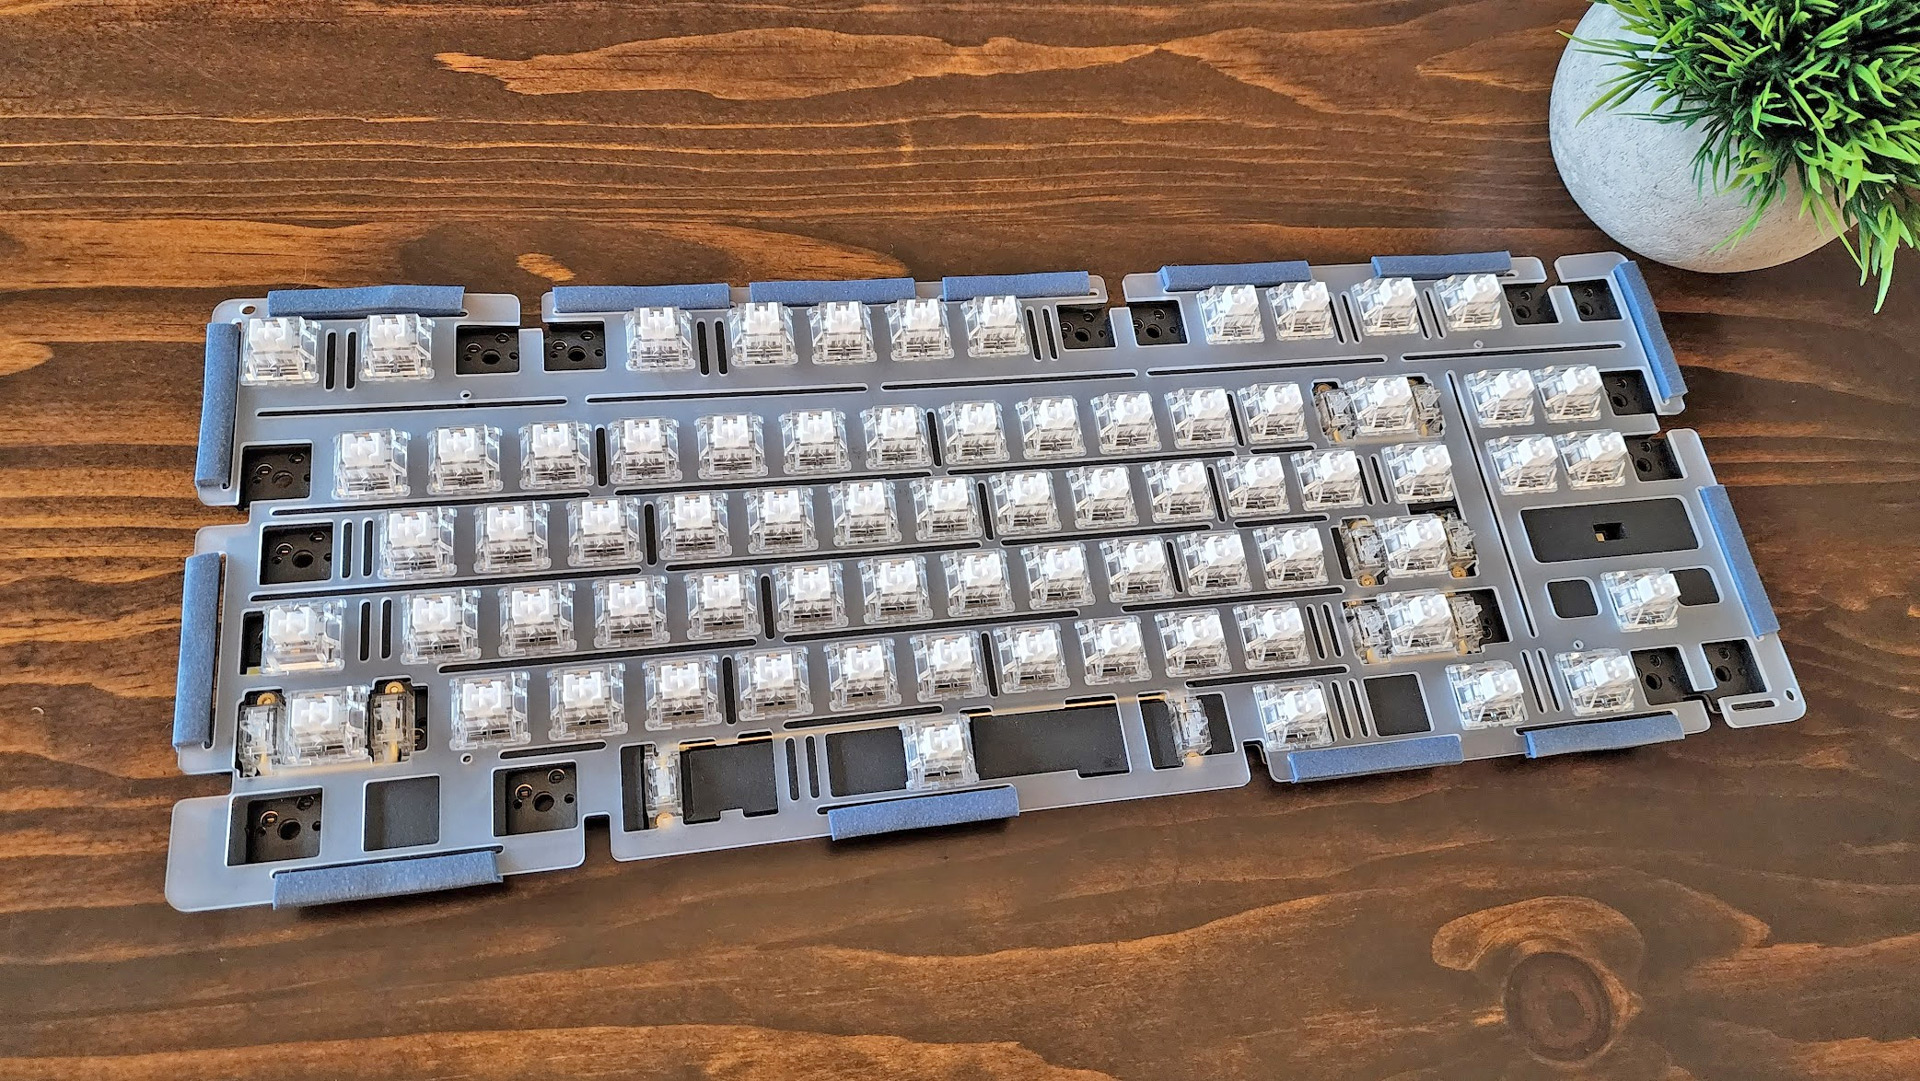
It starts with Wuque’s new gasket mounting system. The kit comes with three sets of gasket strips in blue, white and red. Blue is the softest and red is the stiffest with white falling in the middle. These strips fit onto tabs on the polycarbonate plate, which is a soft, flexible plate material that naturally gives when typing.
These tabs are sandwiched between both halves of the case, isolating the sound of your keystrokes and creating a soft typing experience. Our sample was missing the red strips, but there was a noticeable difference between the blue and white we had on hand for testing, so it’s safe to say that red will be noticeably firmer to type on.
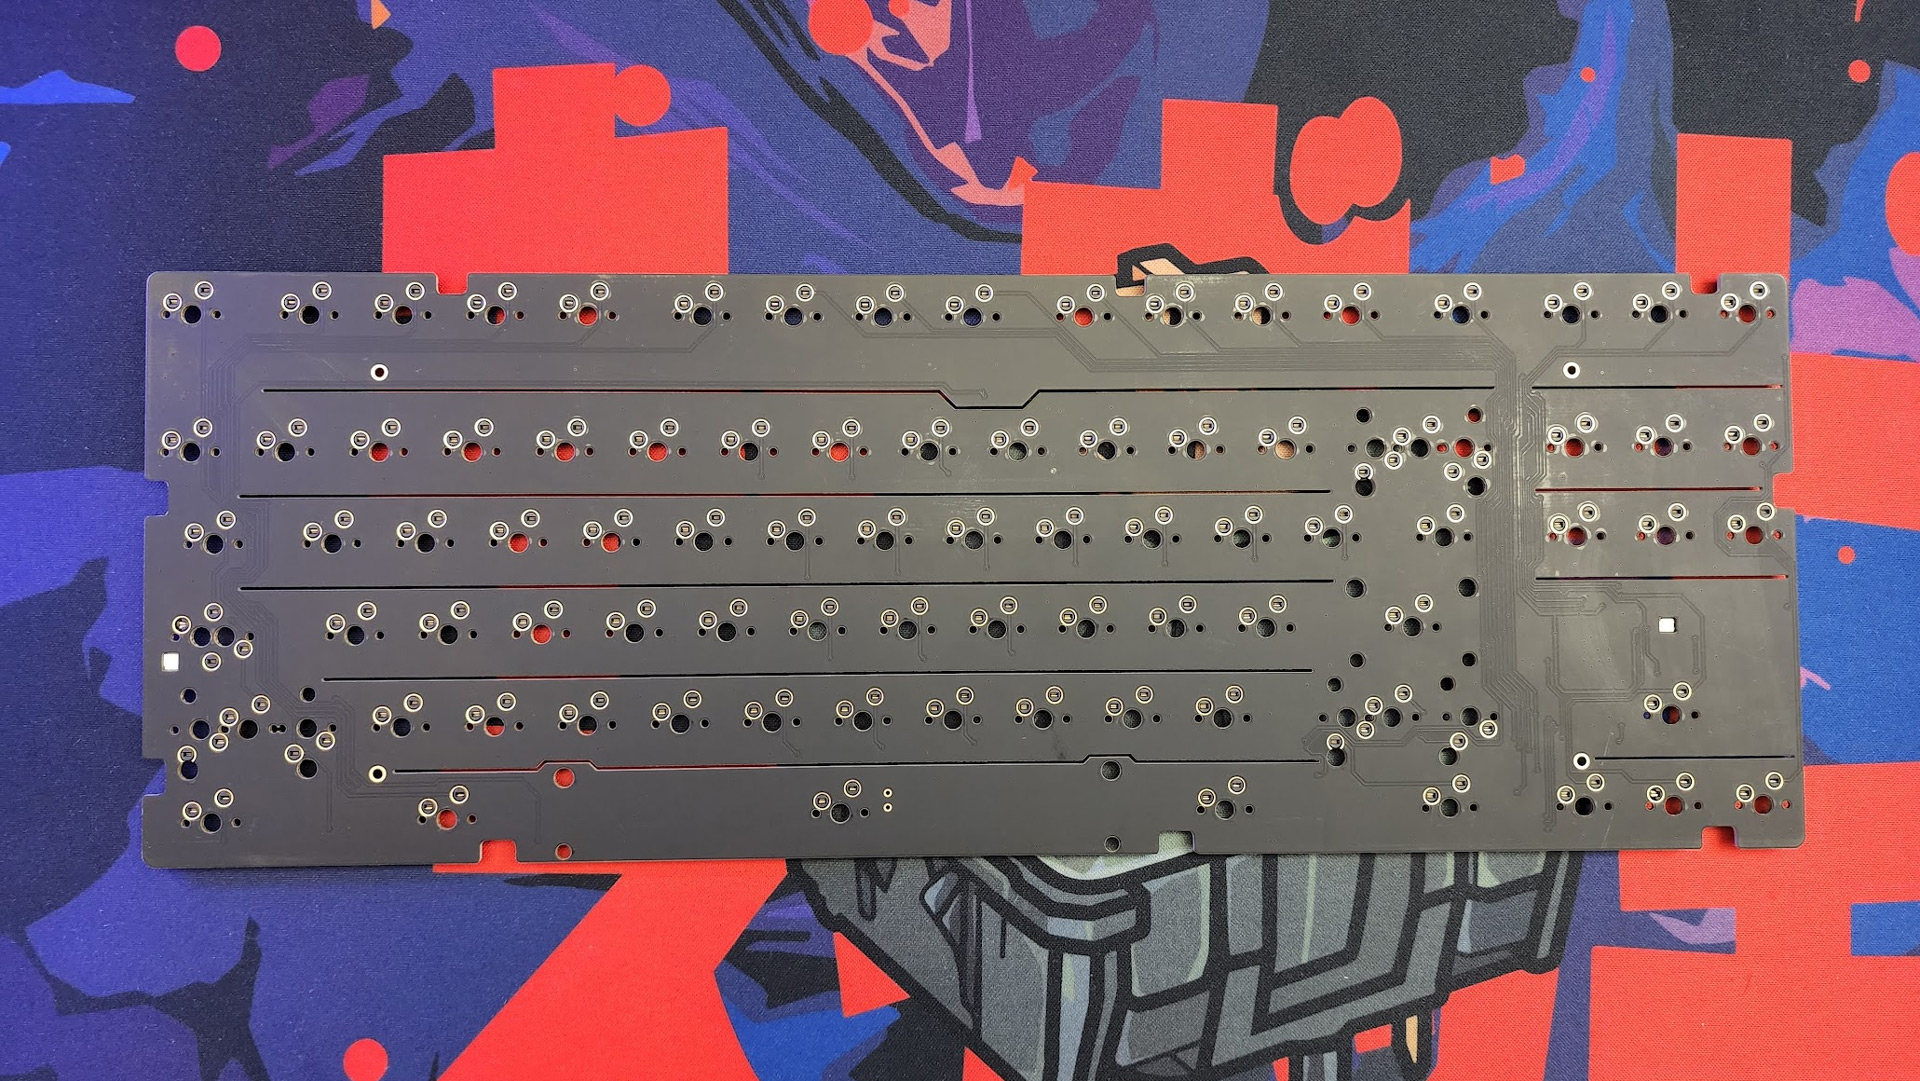
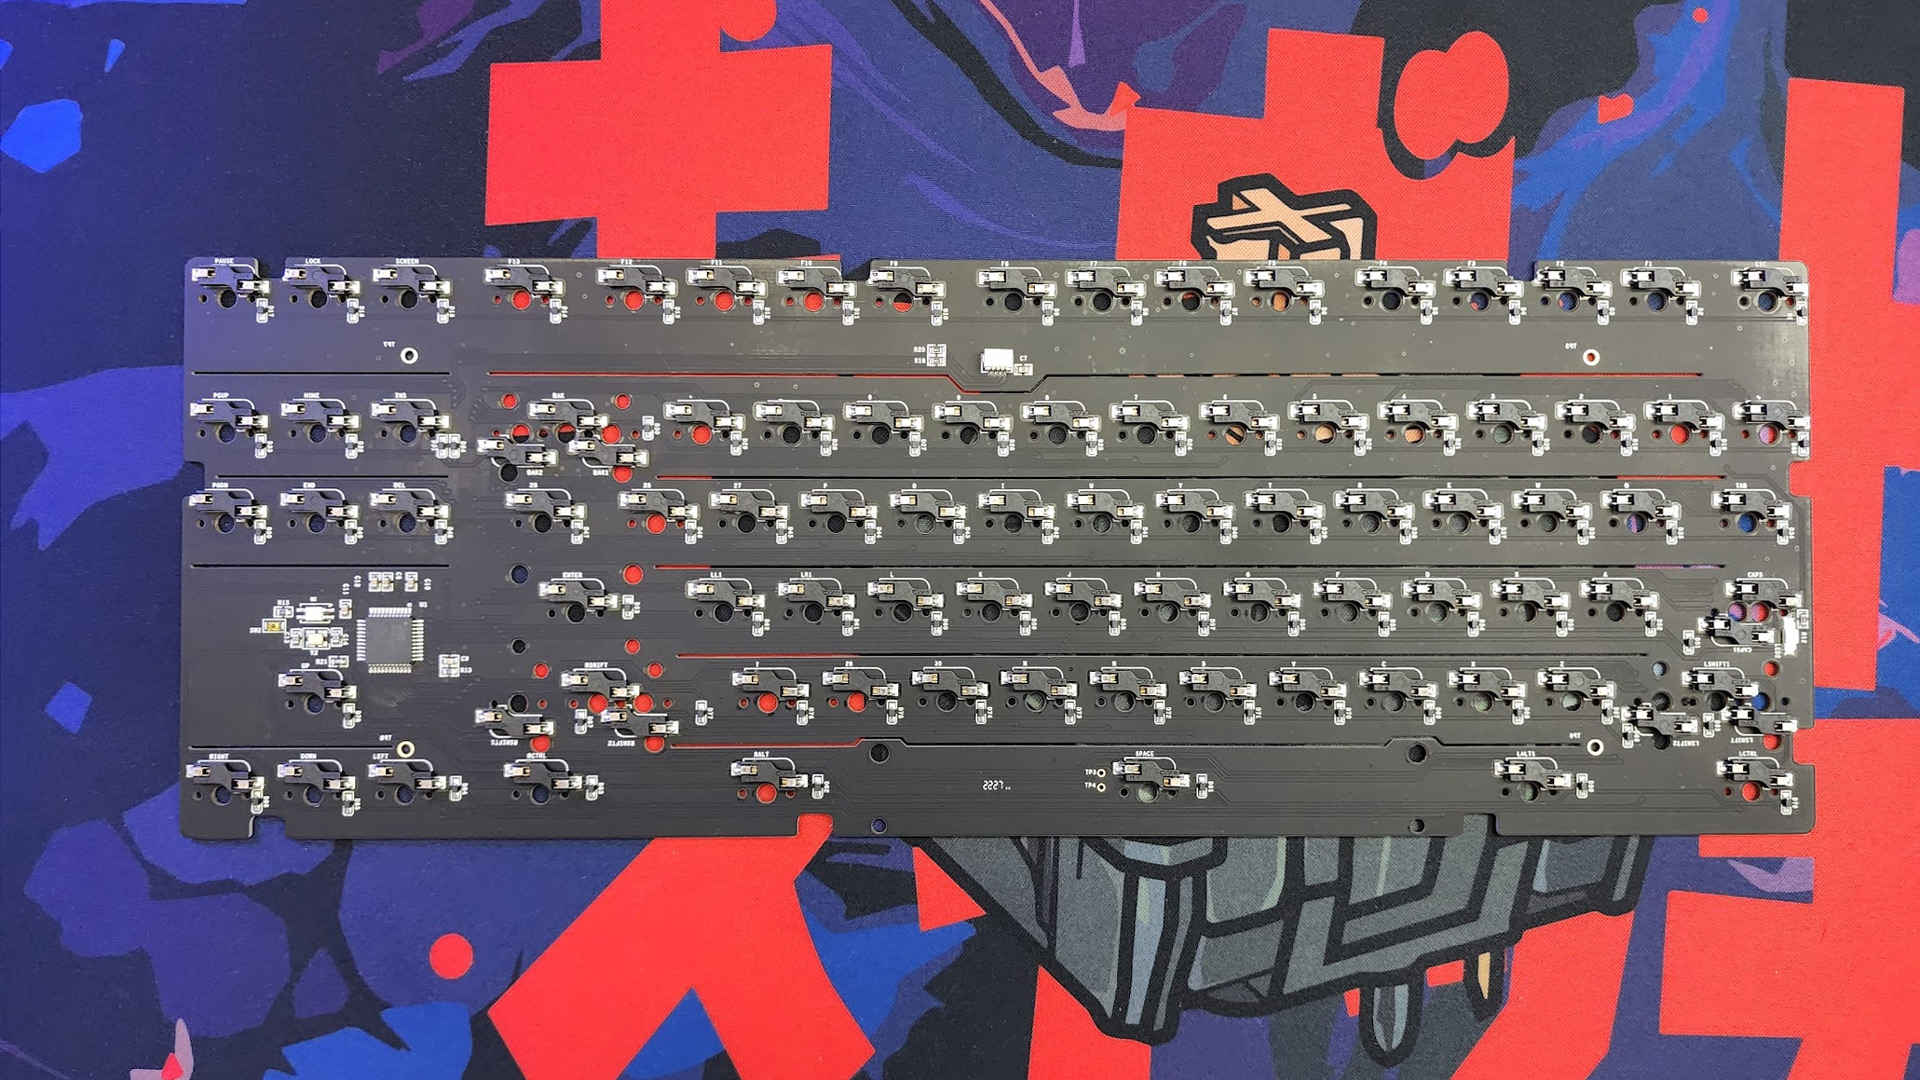
Both the plate and PCB feature flex cuts between each row, allowing the keys to depress slightly with every keystroke and create a softer typing experience. The PCB is also slightly thinner than average at 1.2mm instead of 1.6mm, so you don’t need to hammer on the keys to experience this effect. The stock PCB includes hot-swap sockets to quickly change switches without desoldering, but a solder version is available from the Wuque Store for an additional $49.
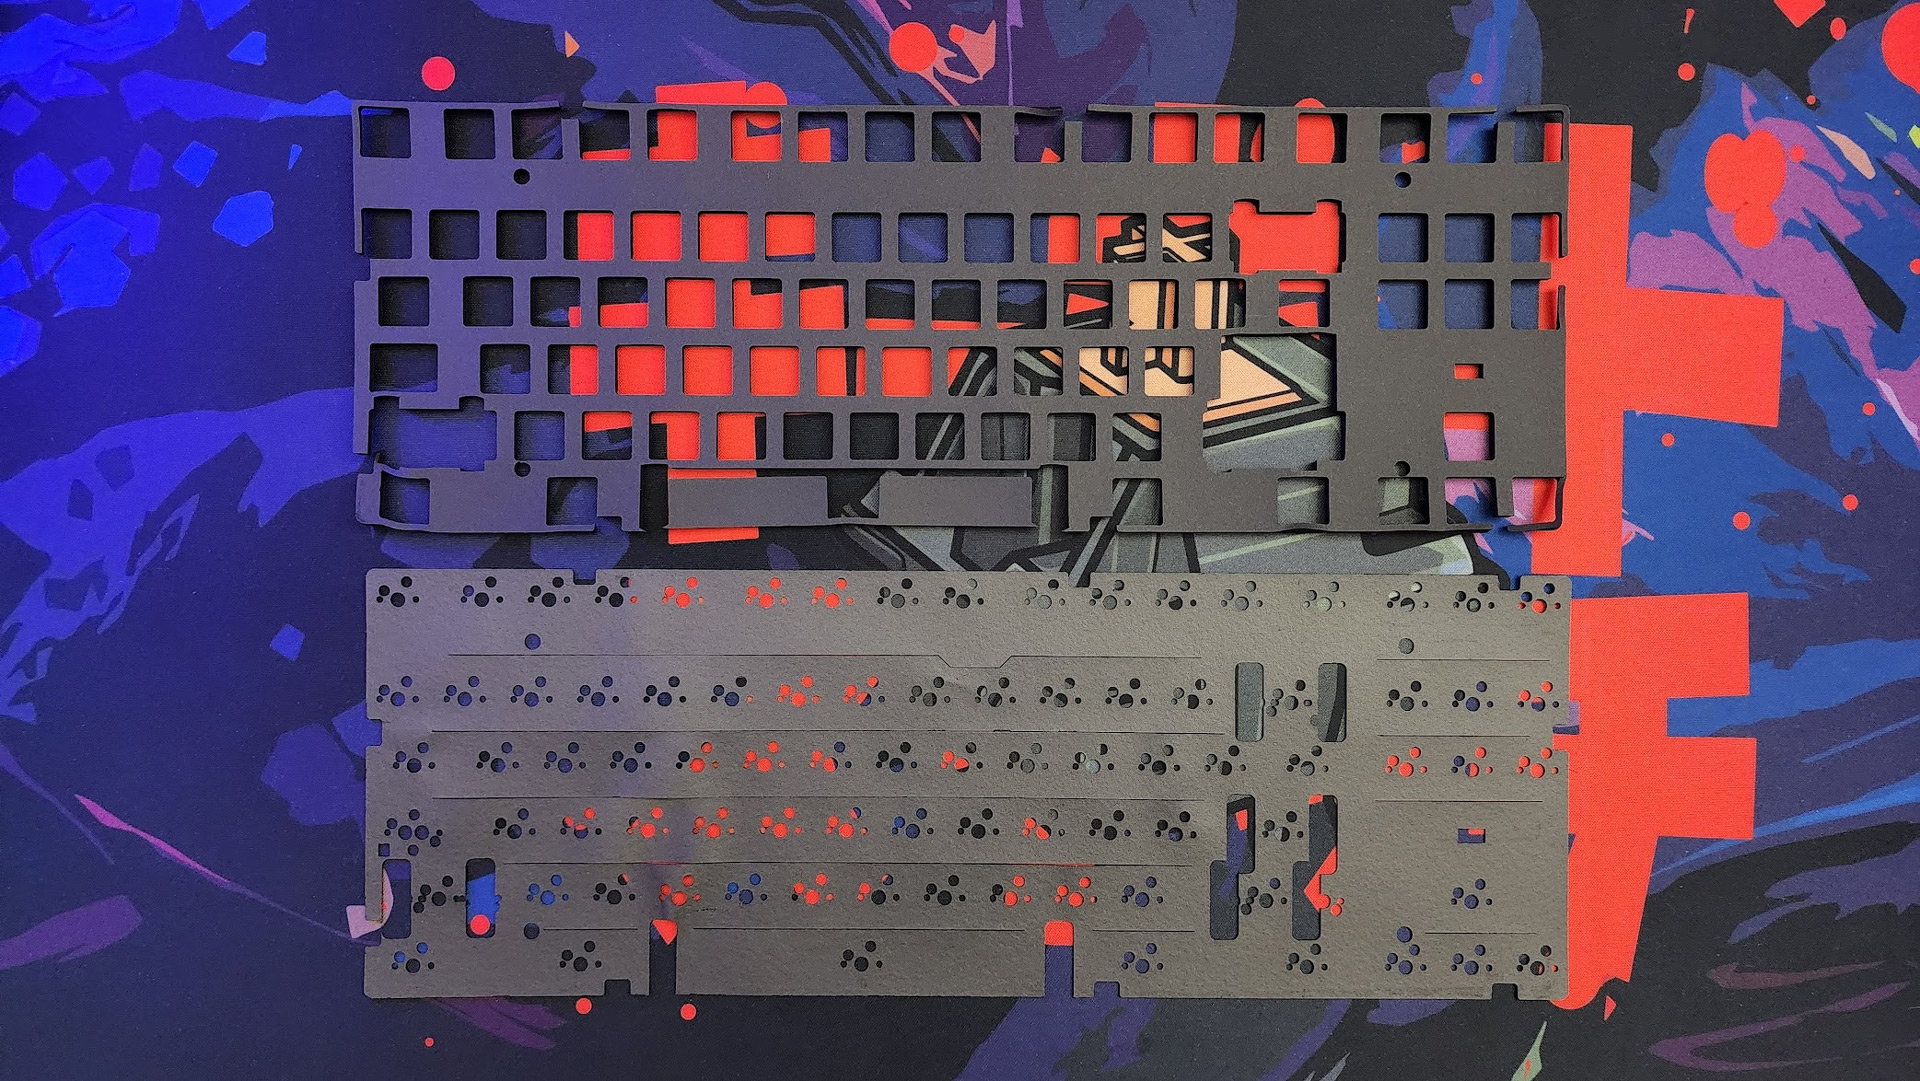
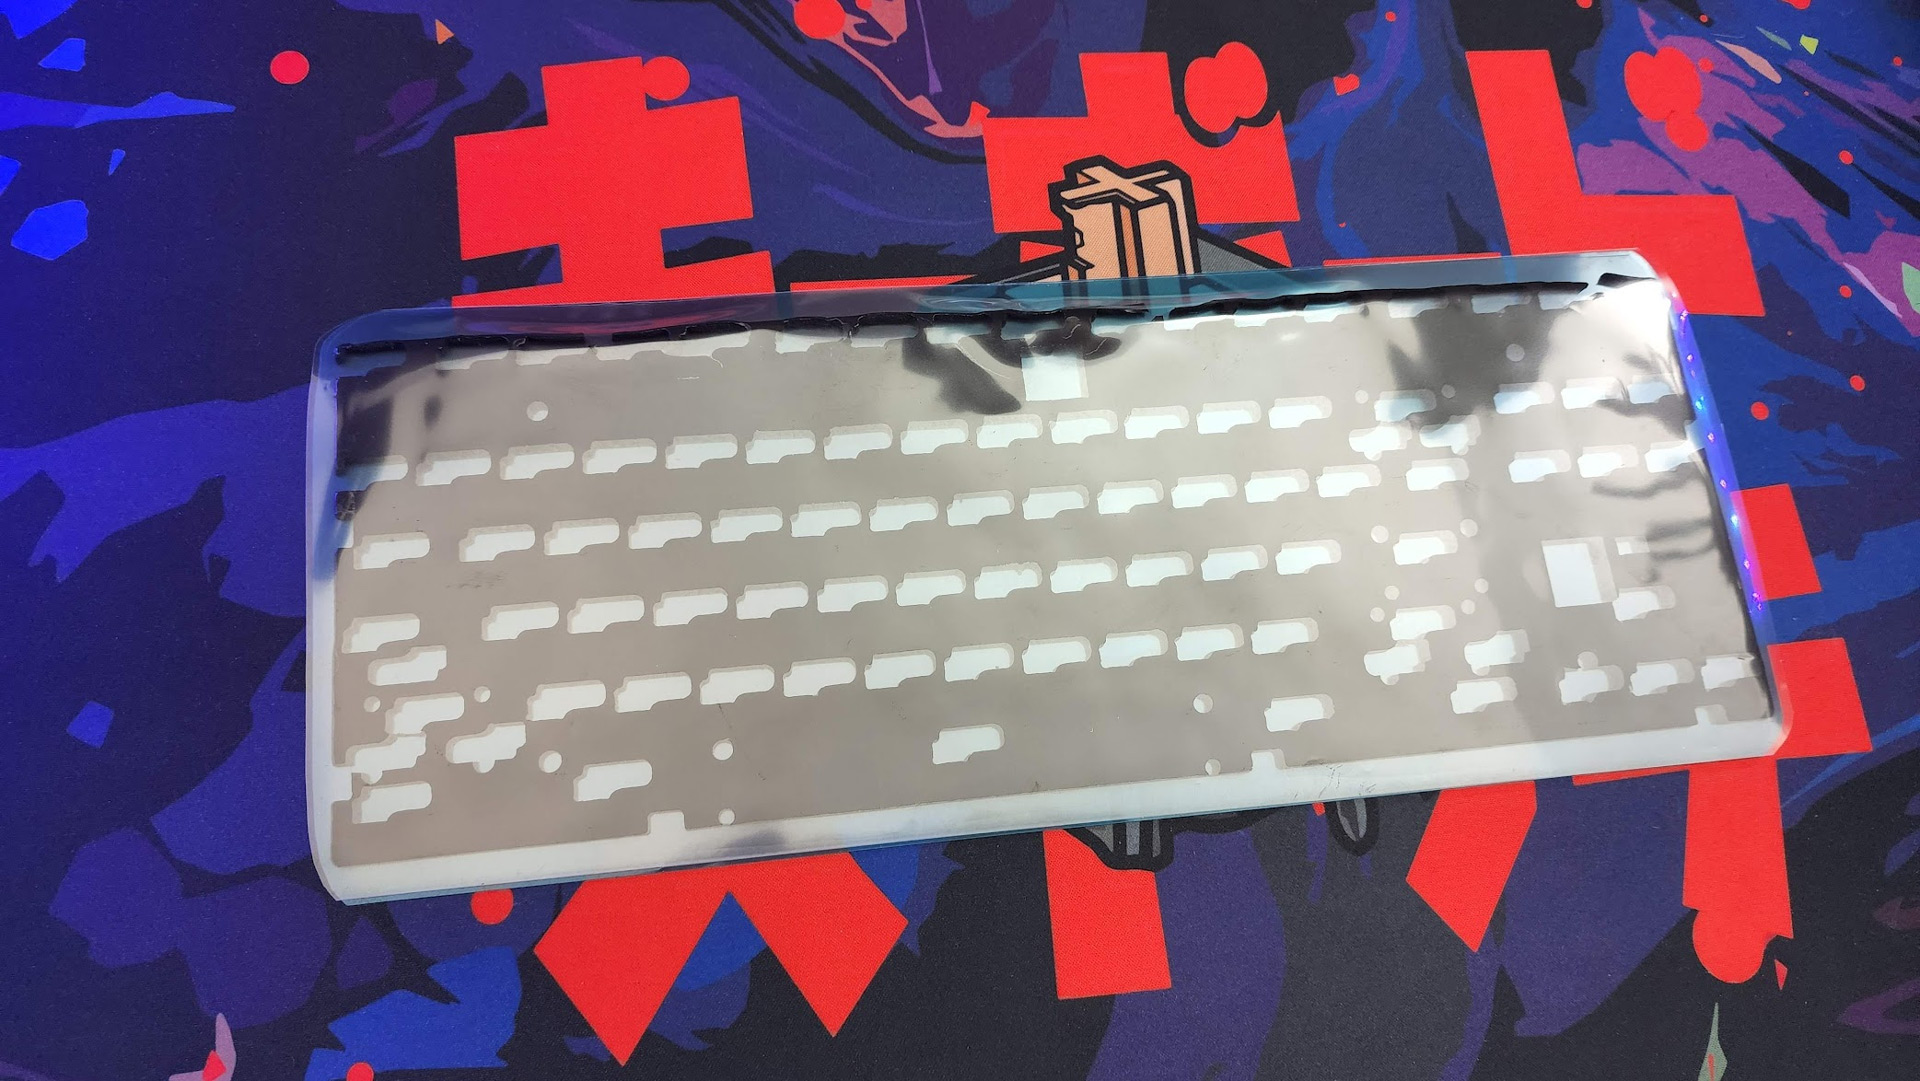
Coming from past Wuque keyboards, it came as no surprise that the keyboard integrates multiple layers of foam. The kit includes a set of PORON foams, as well as a new combination material I’ll talk about soon. PORON foam is extremely popular in custom keyboard builds because it’s soft, highly dampening, and very resilient to repeated impacts. Here, there’s a layer of plate foam to remove the empty space between the plate and PCB, a thin layer of switch foam to tune typing sounds and lend them a poppy, bubbly character, and a final layer of case foam that removes hollowness and reverberation from the empty space in the case.
The new foam material is composed of what Wuque calls Supercritical Foaming Material. It combines the plate and switch foams into a single, optional unit. It feels like a mix of PORON and silicone, but what it’s actually composed of is anyone’s guess. Wuque recommends only using this with the aluminum plate, which isn’t included in the base kit, so I didn’t use it in my build for this review. I love the concept, however, as combining those two layers removes a step of the assembly process.
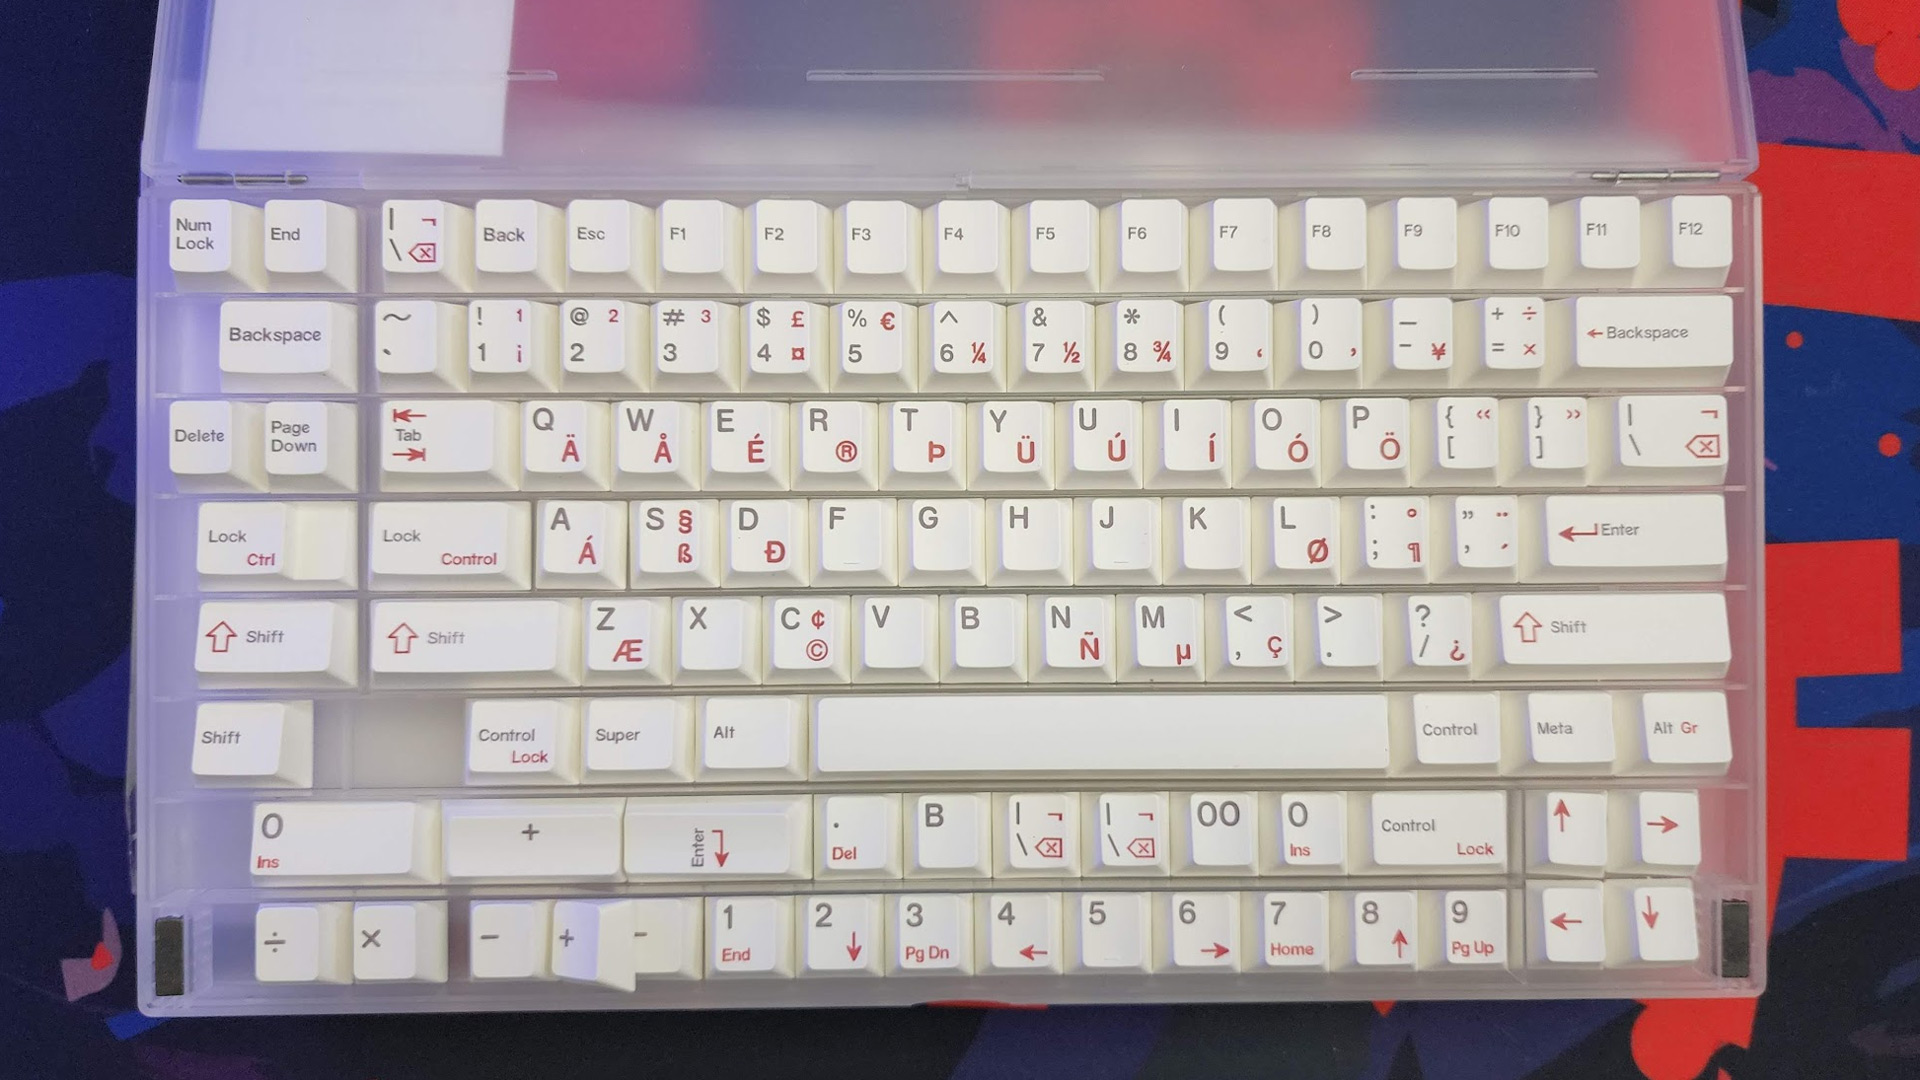
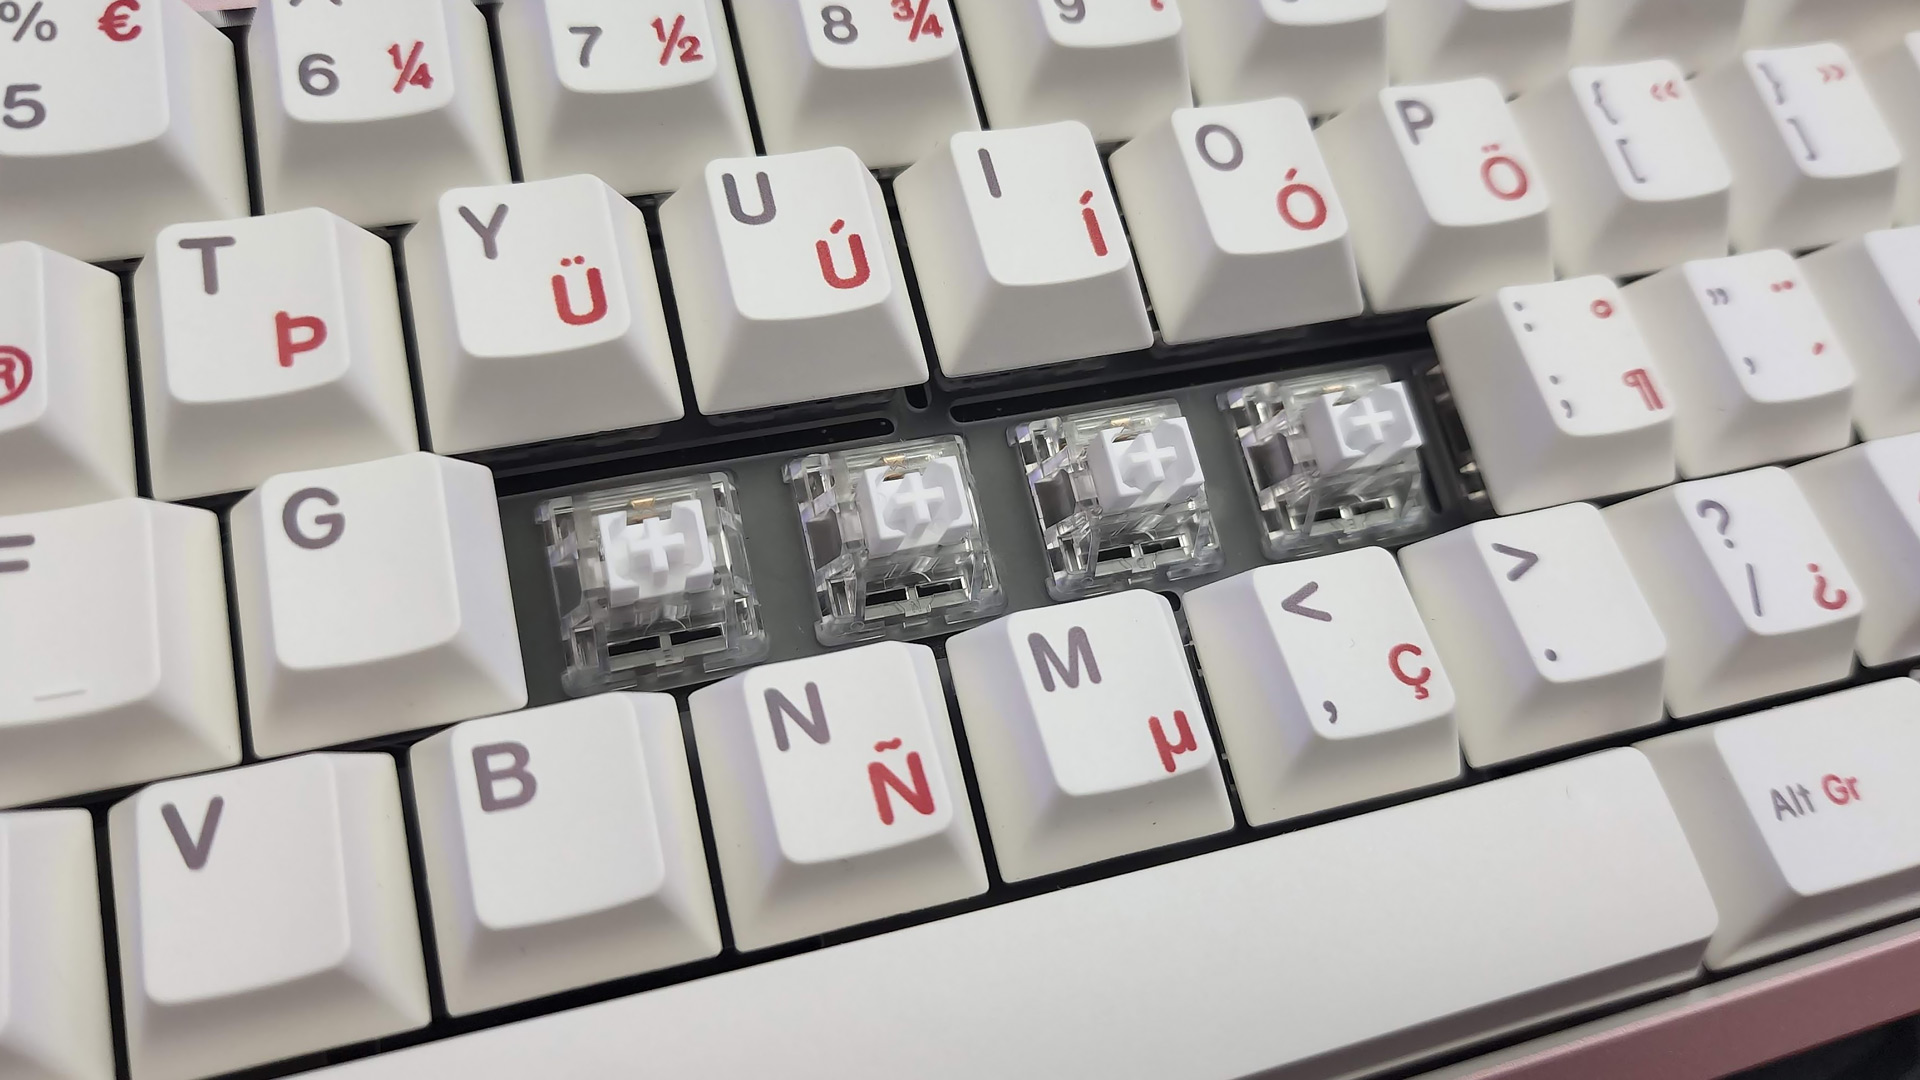
As is the norm for DIY mechanical keyboards, the Promise87 does not include switches, keycaps, stabilizers, or even a USB cable. While that may seem unusual given the high price of the keyboard, each of these elements are typically custom chosen by keyboard builders to match a certain theme, typing feel, and sound profile, so it’s understandable they are left out.
Taken as a whole, it’s an impressive kit. There is a lot to appreciate here, especially if you get into the nitty gritty of its design. It’s also worth noting that the quality of the product is impeccable. There are no stray marks or streaks from the anodization process and not a single scratch on any glossy surface.
Buyer beware, however: those PVD finishes are extremely easy to scratch. I would love to see Wuque start including a protective film to keep these surfaces pristine. The upcoming JRIS65 keyboard kit included custom TPU protectors (the same type used for smartphones) for its mirrored parts, and I am much more confident in their protection than my own ability to keep the weights pristine for their lifespan.
Assembling the Promise87
Assembling the Promise87 is slightly more complicated than many other custom mechanical keyboards, but isn’t difficult if you pay attention to the different elements of the case and components. There is no build guide published as of this writing, but Wuque Studios has been great about providing detailed, pictorial guides with each of their prior keyboards. I would expect the same closer to release.
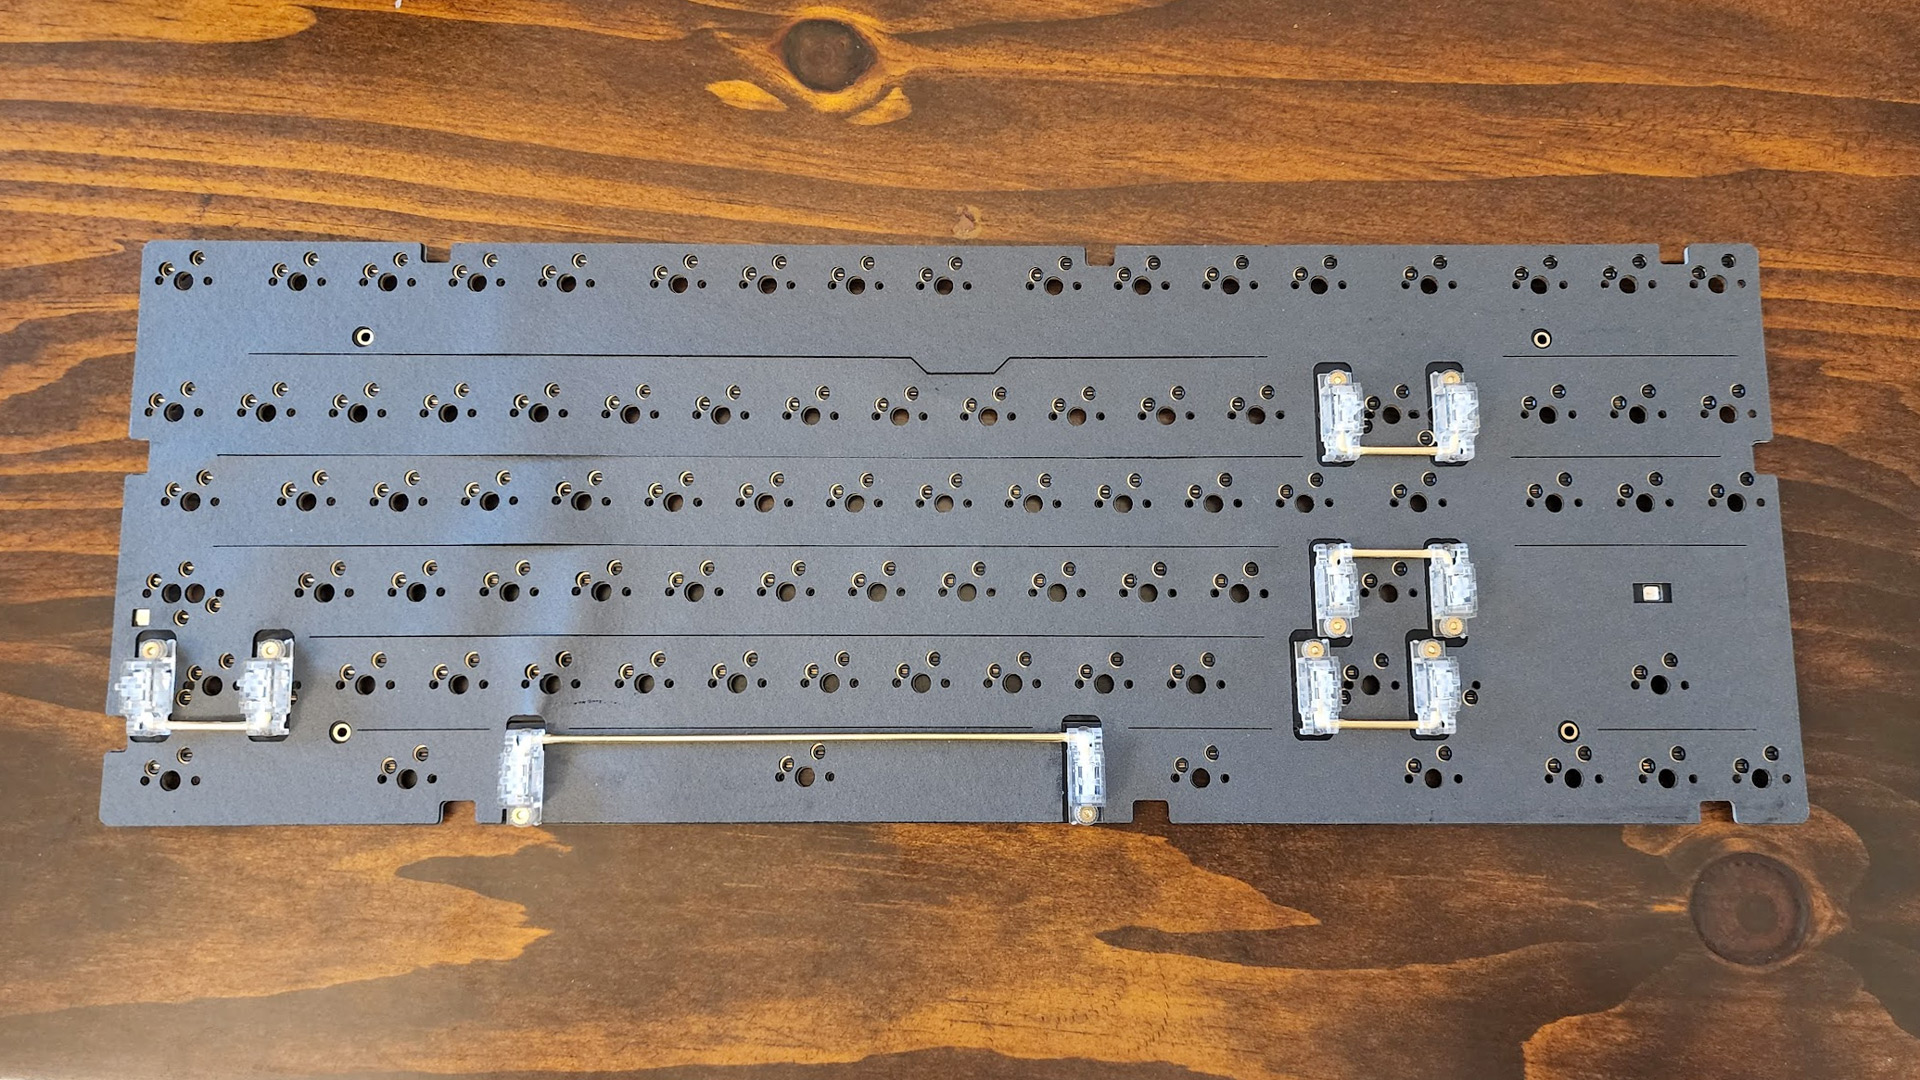
After you’ve selected your switches and stabilizers, you’ll begin by building your PCB assembly. The first step is laying down the PORON switch pad, then inserting and screwing in your stabilizers. Be sure these are lubed prior to screwing them on or you’ll need to do so later when it is much more difficult.
With that done, the first layer of thick PORON foam can be applied. The PCB foam settles over the square for each switch and should be easy to align. The plate sets on top of this. Using the polycarbonate plate, there are no standoffs required. Instead, the switches themselves hold everything together. This allows for a bit more flex to the assembly and fewer steps in the build process.
Installing switches on a PC plate without standoffs is more challenging than when a keyboard is fully built or if it uses a metal plate. You’ll want to install switches around the edges of the plate first to hold everything together. Sometimes the plastic plate will press down and not click into the switch at this point, so you’ll need to use a fingernail or screwdriver to pop it up and into place.
One of the common stumbling points for this type of keyboard is not leaving room around the cutouts for the case screws. Since the Promise87 hides its screws beneath the keycaps, installing switches here can block your access to those threads, so they must be saved until the end.
Once switches are installed, the gaskets can be added. The kit comes with three sets of gasket strips in blue, white, and red (which are the ascending stiffnesses). These can be slipped onto the tabs around the plate. This completes the PCB assembly and the hardest part of the build.
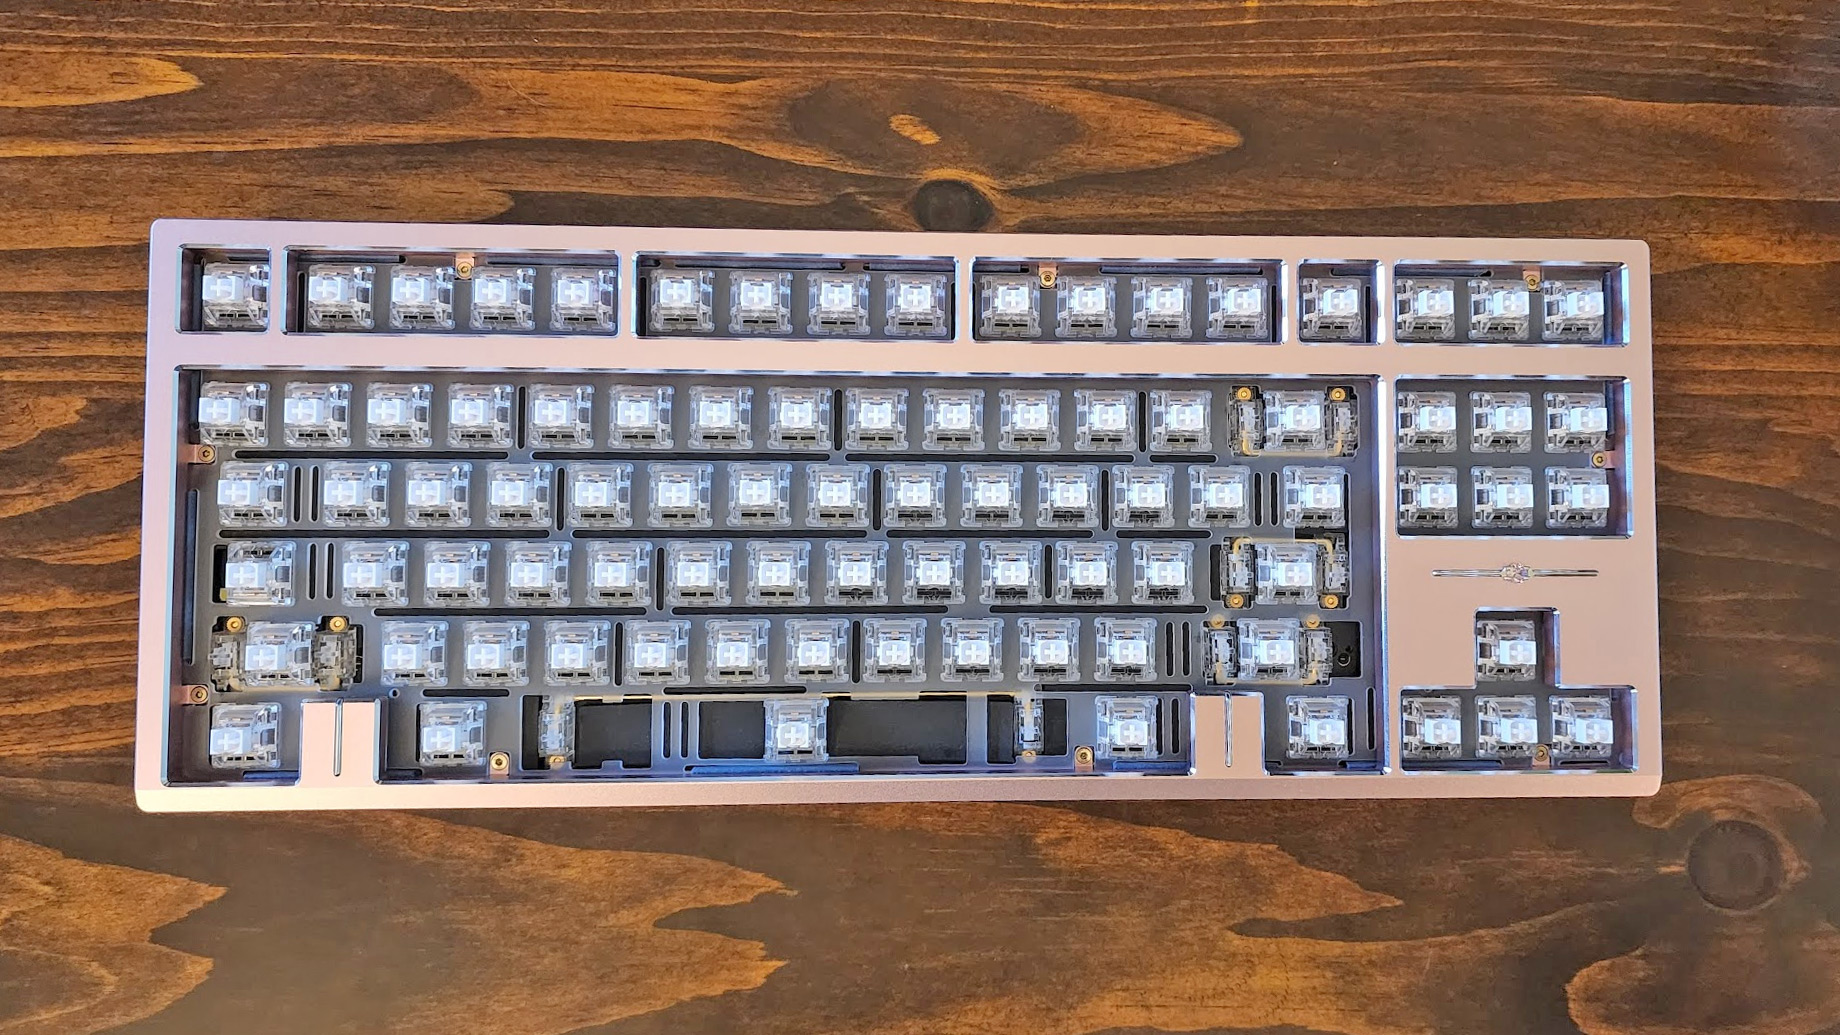
With the assembly out of the way, the last things to do are set the PORON case foam into its place in the bottom chassis and plug in the USB daughter board to the bottom of the PCB. The assembly can then be set into the case, the top half added, and the two halves screwed together. The final switches and keycaps can then be installed.
Typing Demonstration for the Promise87
Typing Experience on the Promise87
As with any custom keyboard, the typing experience on the Promise87 will vary depending on the switches, stabilizers, plate, and foam configuration you choose. Things are a bit simpler here, though, as the best sound (in my opinion) comes from using all of the foams, but switch and plate choice will absolutely make a difference.
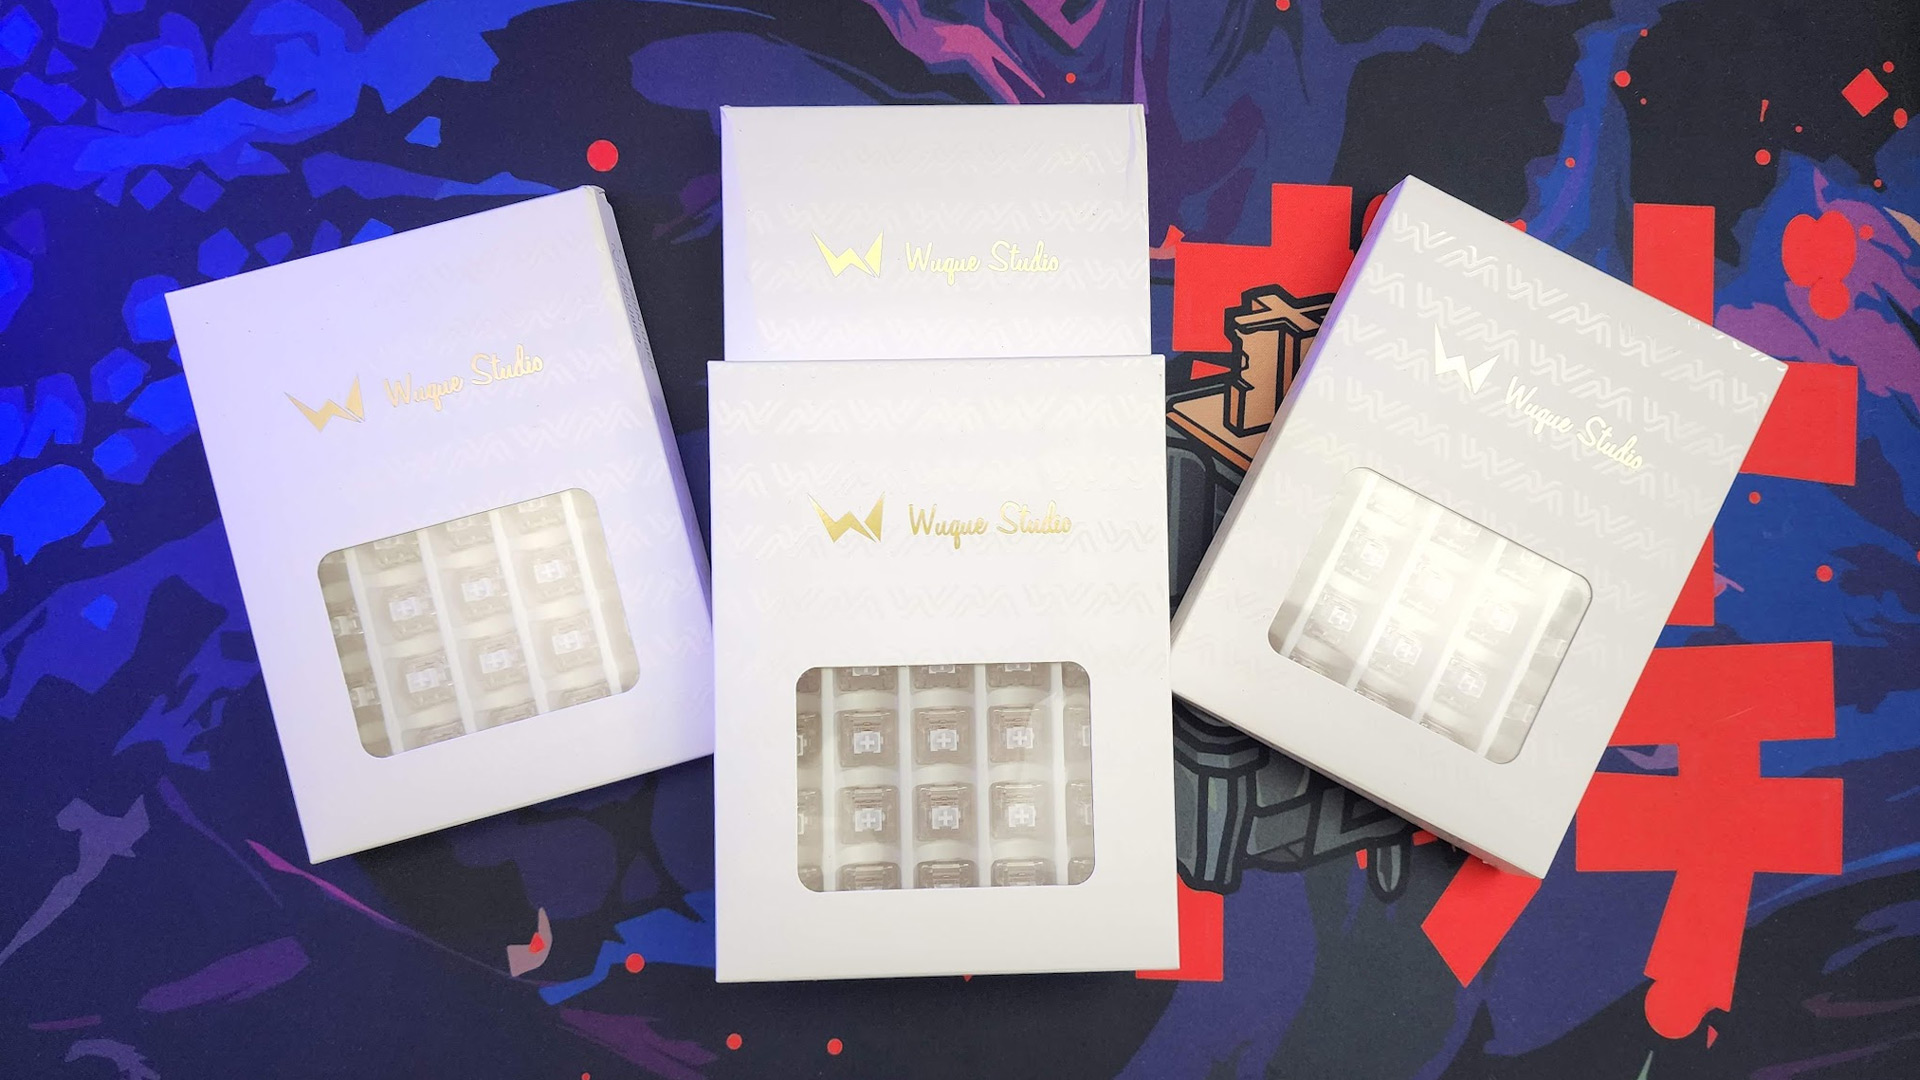
For this review, I built the keyboard using a polycarbonate plate, all of the PORON foams, pre-lubed WS Aurora Clear linear switches, and WS Aurora Stabilizers. I also outfitted it with This combination should provide one of the softest typing experiences, coming in second to the POM plate, which is available as an add-on purchase and is not part of the stock kit. I did not test the kit using the Supercritical Foaming Material, as Wuque recommends this only for the aluminum plate, which I did not have on hand for testing.
Using this configuration, the typing experience is dampened but poppy. This is especially evident on the stabilized keys, which are the best sounding I’ve tested on any keyboard to date. The sound isn’t marbly like you’ll hear on keyboards that use PE foam, but has an almost rain-like quality to it. Typing at full speed, it sounds almost bubbly. But there’s also a body to it, so it’s not even remotely thin.
When I first built the keyboard, I was worried that it would sound too muted thanks to all that foam. Like any foam-packed keyboard, it is quieter and more dampened, but only the function row has a muted quality. Removing the case foam helps, but makes the other keys sound too thin, so it’s best to leave all of the foam in or to replace it with Polyfill.
Despite the plentiful amount of flex cuts, the Promise87 isn’t especially bouncy. The stacks of foam pretty much prevent large movement. Like the Mammoth75, the flex cuts serve to give a softness to each key press. If you look closely, you can see every key given slightly under normal keystrokes. You can press and see that larger movement, but the practical design here is all about the typing experience you’ll find during normal use.
It’s excellent. The combination of softness and sound profile make the Promise87 the Sid Meier’s Civilization of mechanical keyboards. Instead of staying up late to take “just one more turn,” I found myself making excuses to type. “Just one more turn” becomes “just one more typing test.”
Speaking of, the transition to the Promise was completely seamless. Across more than twenty tests on MonkeyType, I averaged 111 WPM. My average is ~110 WPM, so it’s right on target.
Gaming Experience on the Promise87
The Promise87 isn’t a gaming keyboard but still works well for gaming. It lacks the software-enabled features offered by dedicated gaming softwares from the Logitechs and Razers of the world, but is responsive enough to be used for any game you would like. In my testing, I played through multiple levels of Doom Eternal, took to the battlefield in Call of Duty Vanguard, and swung through Hell’s Kitchen in Spider-Man Remastered. The Promise87 didn’t miss a beat.
Wuque Studio hasn’t publicized the polling rate for the keyboard, but it seems to be running at 1000Hz or 1ms. I found this using Keyboard Inspector software, but bear in mind that it is a fan-made tool and should be taken with a grain of salt. Side by side with my Razer DeathStalker V2 Pro, the two keyboards felt equally responsive.
One of the biggest highpoints it offers for gaming is its ability to have up to four layers of custom keymaps. I’ll talk more in-depth about that in the next section, but it’s possible to have unique layouts for individual games and to shift between them on the fly. It takes time to program and tweak, but is well worth the effort if you play a handful of games and want to customize your controls.
Software
The Promise87 doesn’t have any special software of its own. Instead, all of its programming is done within QMK or VIA. QMK is an open-source firmware that allows DIY keyboard builders to program in their own commands which are then stored at the firmware level. This allows them to be used on any computer regardless of OS or IT policy.
QMK is incredibly popular within the mechanical keyboard community, but it’s not the most user friendly. To program a keyboard using it, you’ll need to use an online tool like the QMK Configurator, download the firmware and flash it to the keyboard using the QMK Toolbox. It’s a nerve wracking process even for veteran keyboard builders, as malfunctions in flashing can lead to a bricked keyboard.
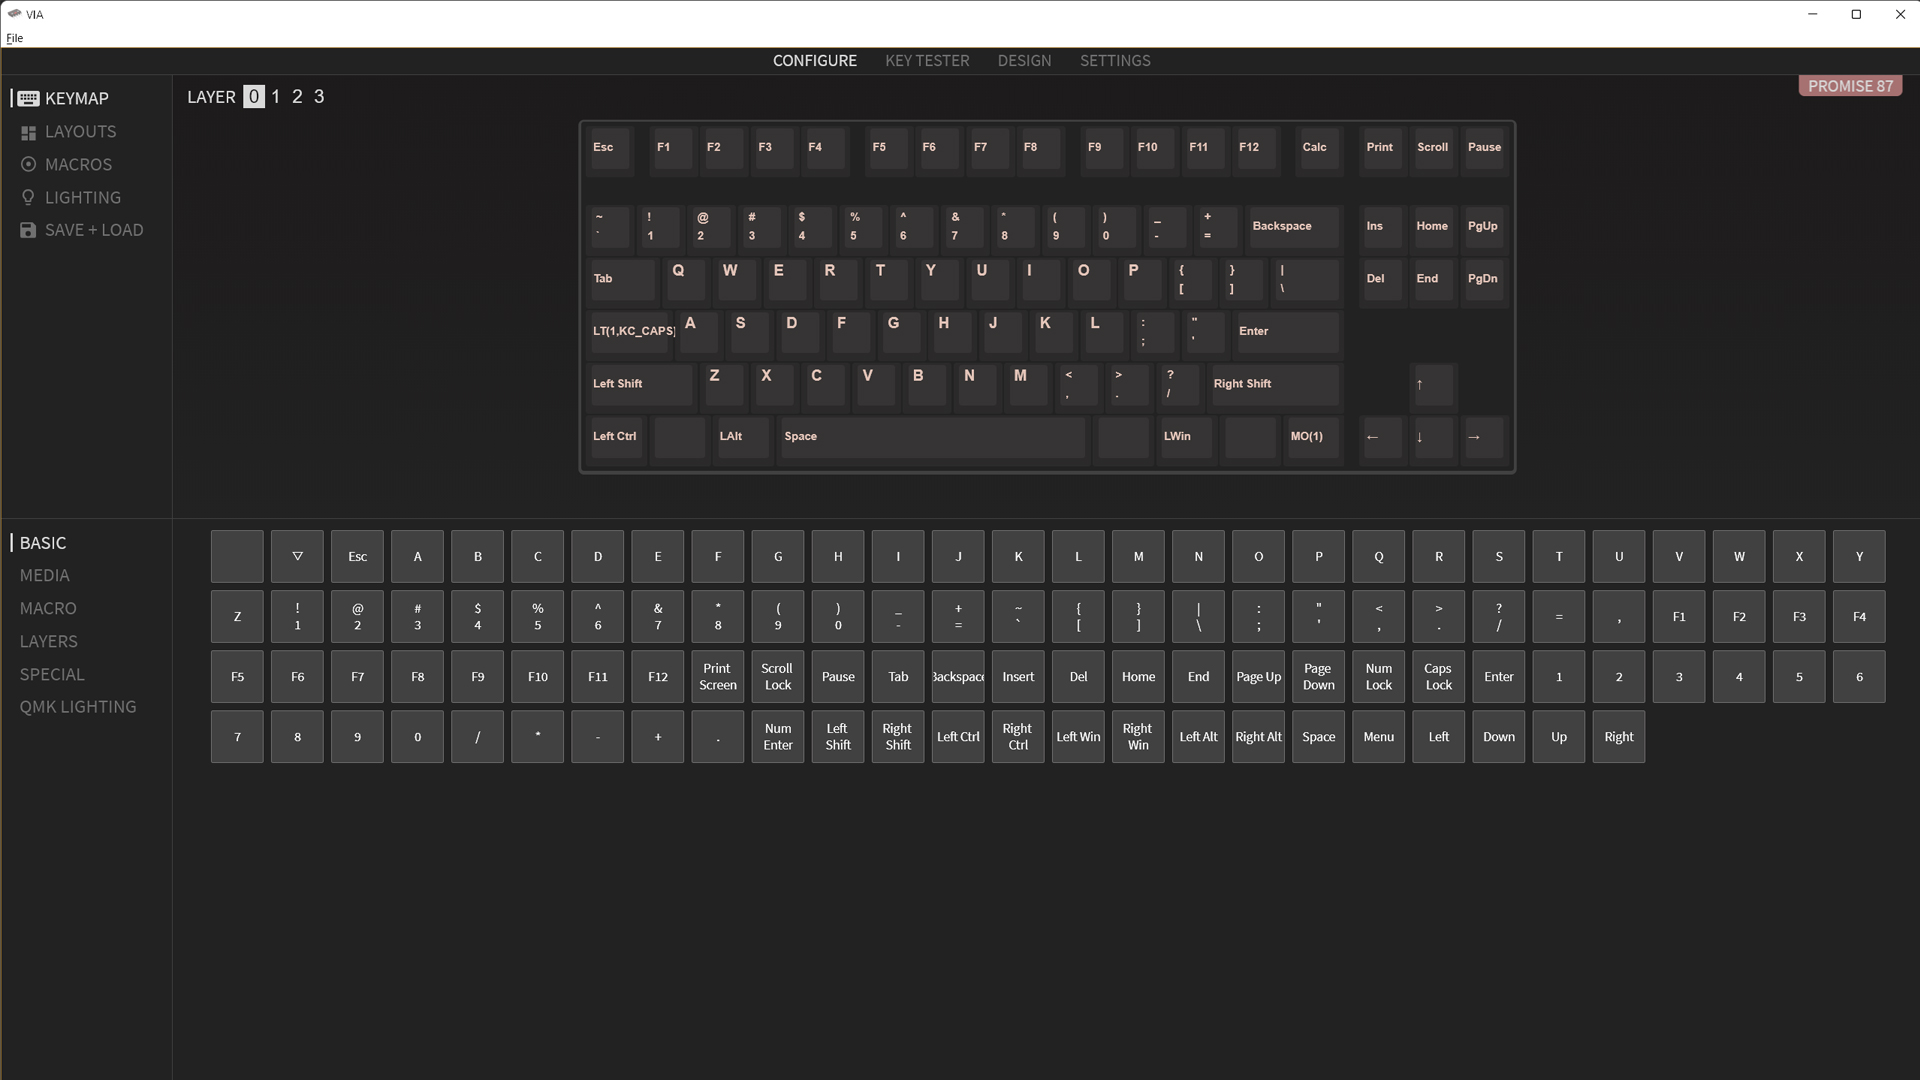
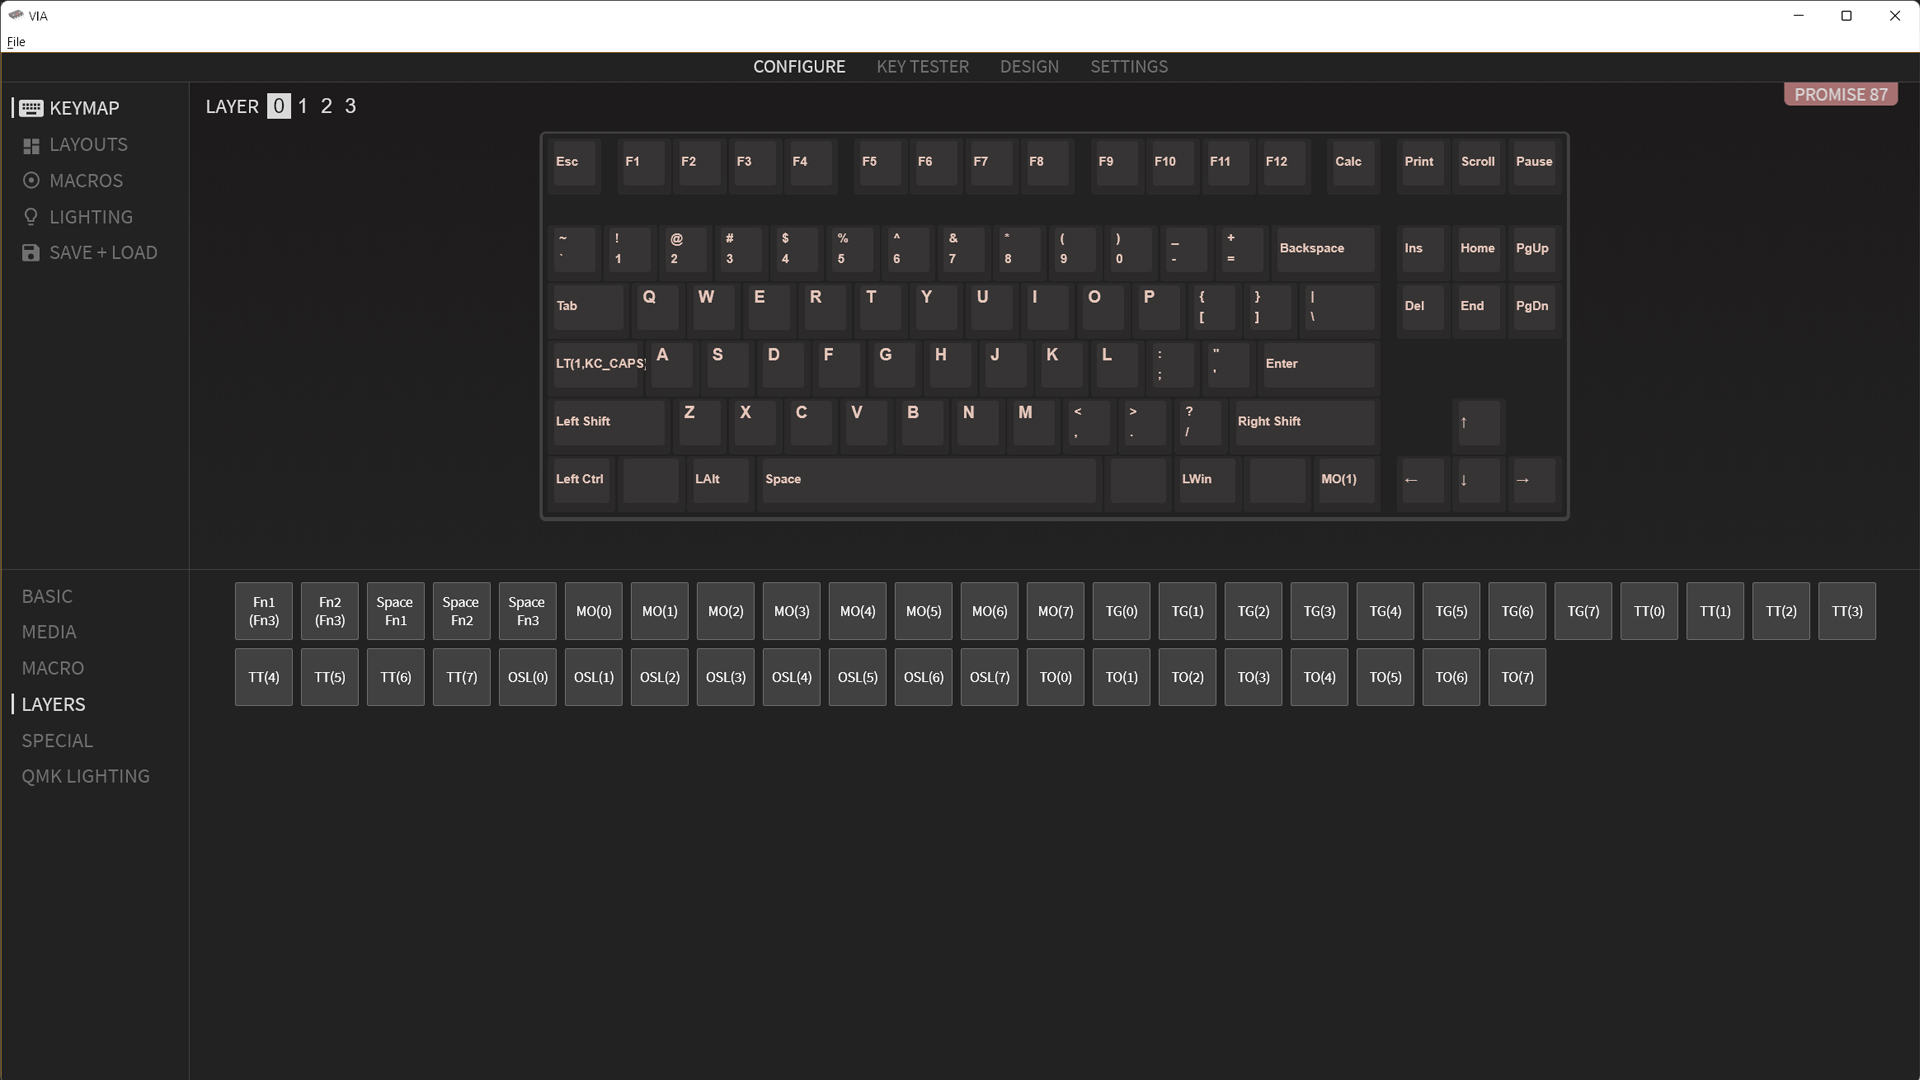
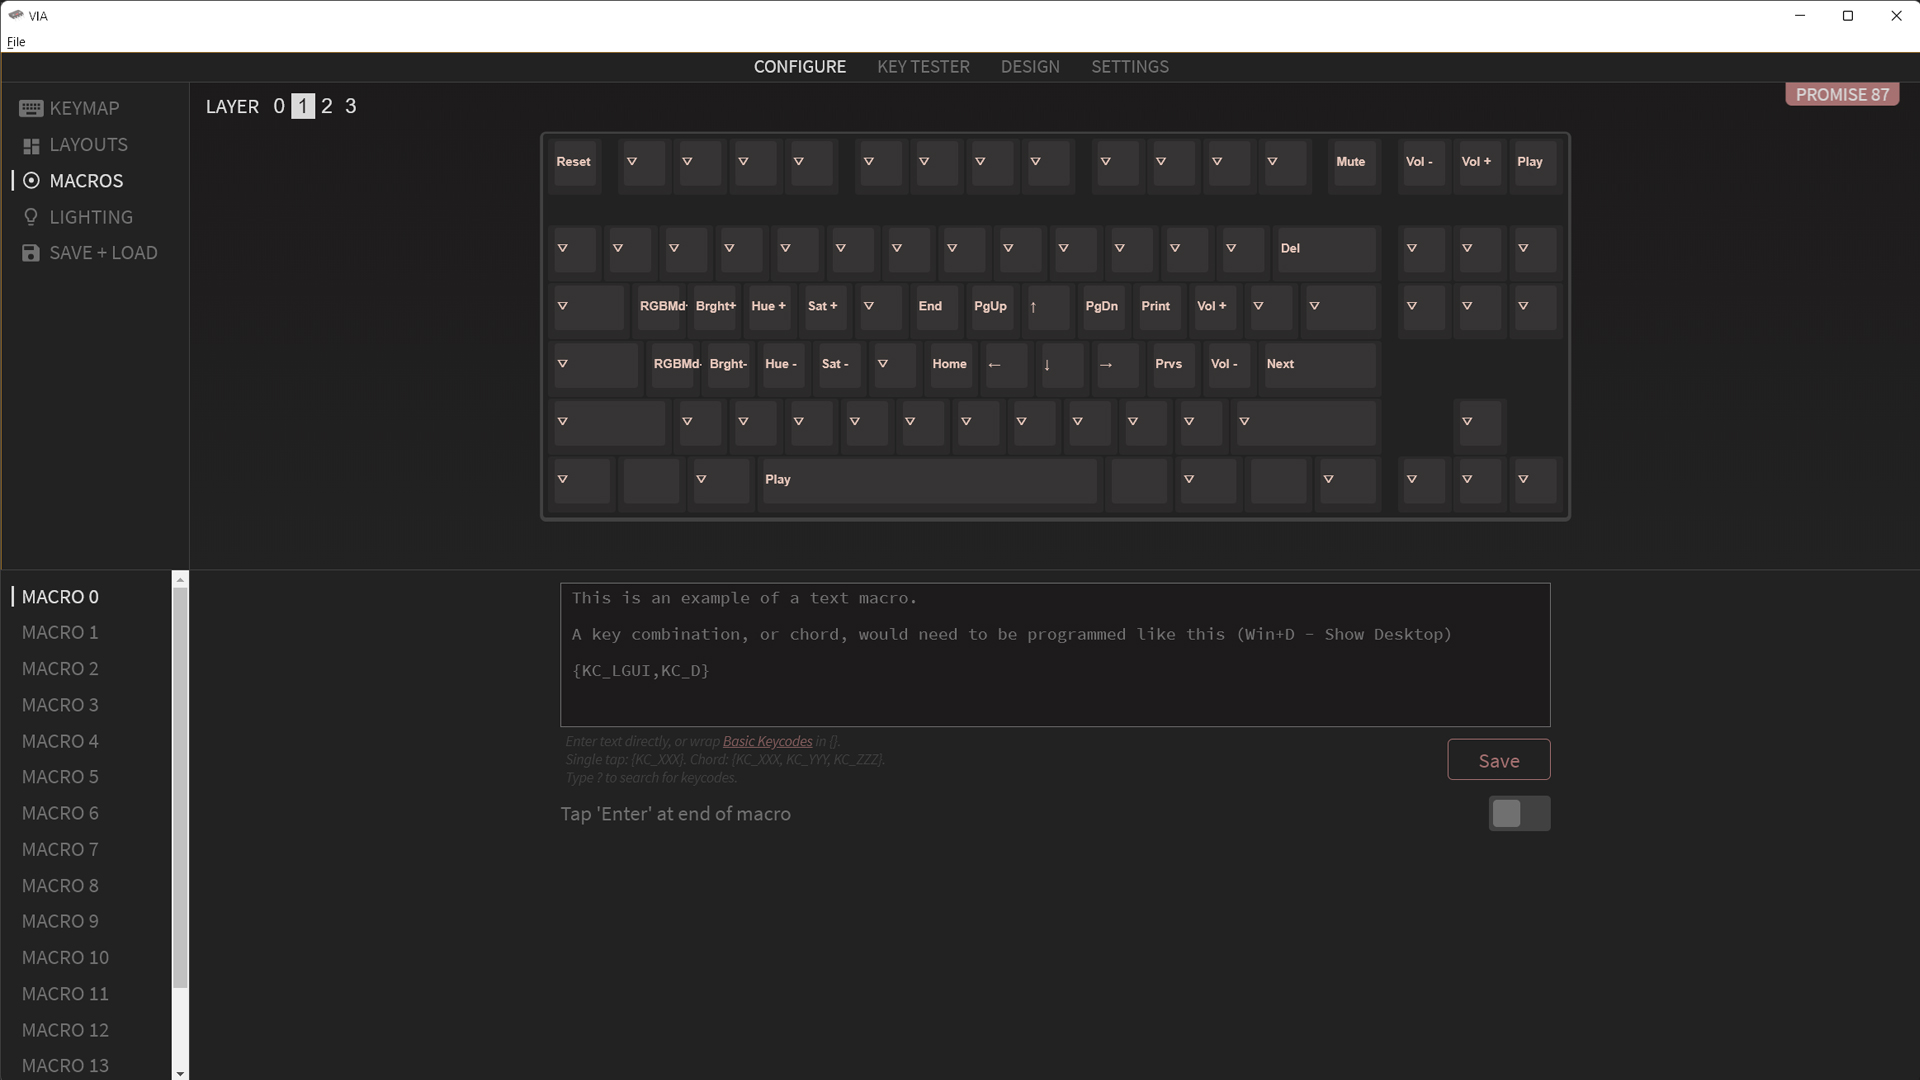
That’s where VIA comes in. Rather than follow the old school flashing process, VIA allows you to make changes in real time using an easy to interpret graphical interface. Once it detects the keyboard, you simply click the key you would like to remap and then choose what you would like there instead from a deep selection of options on the bottom half of the screen. The changes take effect immediately, no flashing required.
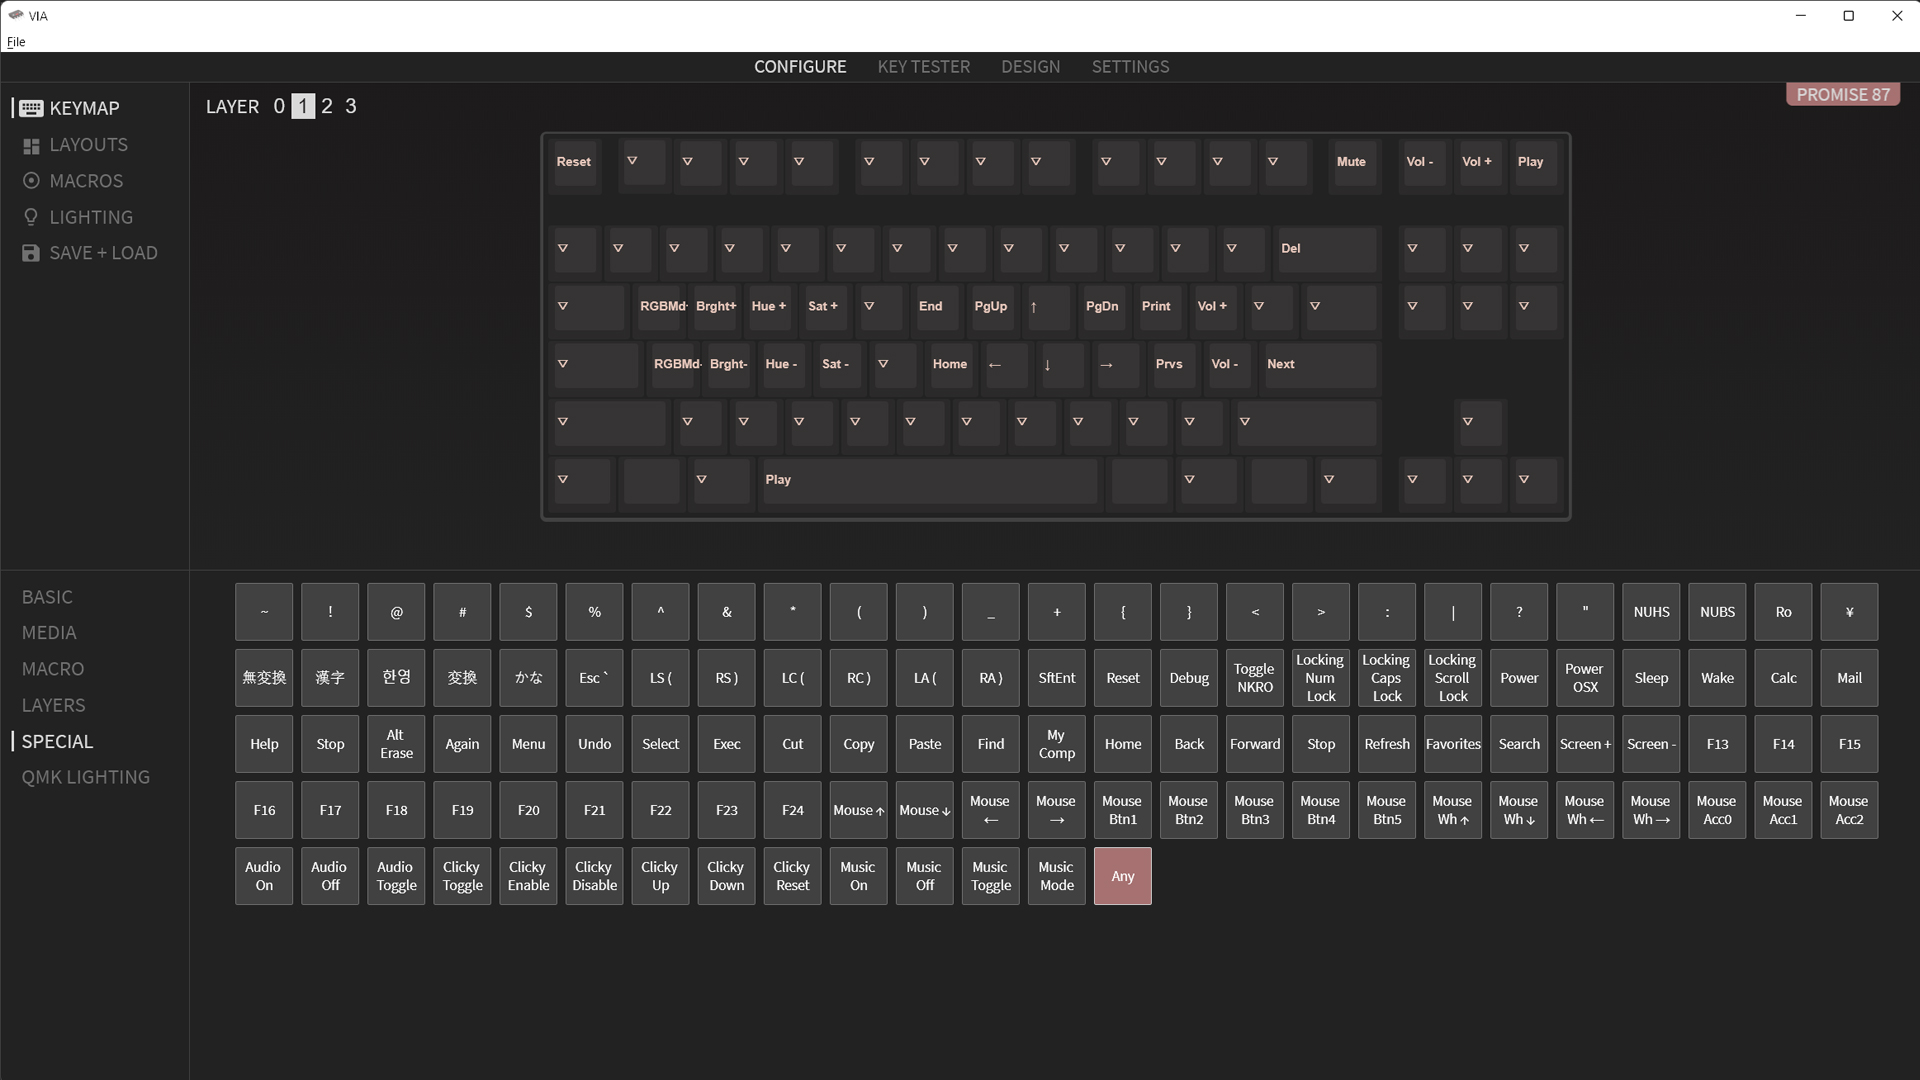
VIA also allows you to program up to four layers of keymaps. Think of these like virtual keyboards you can swap to by holding a button. You can reassign any key, but you’ll probably want to keep your base layer mostly intact. The secondary layers allow you to assign dedicated keys for things like media and lighting controls. You can even assign keys to mouse control, launch Windows applications, play macros, and intuitively transition between layers. This functionality also makes it possible to create unique layouts for different games and applications.
The level of control provided by VIA is intoxicating. It lacks gaming features like you might find in Corsair iCUE or Razer Synapse, but being able to create completely custom layouts allows you to tailor the keyboard to your exact workflow. Those premade software systems are powerful, but you’re forced to adapt to the software. VIA can make the keyboard adapt to you. It’s a subtle but important difference that’s hard to come back from.
For example, I’ve set my Caps Lock key to send Caps when tapped and to transition to my second layer when held, essentially making it a dual function key. From there, all of my media and lighting keys are directly under my fingertips. You might miss dedicated media keys, but I don’t. Thanks to VIA, I can hold Caps and have them closer to my fingers than is possible with any traditional keyboard. The same is true for the arrow keys and my most used navigation and editing buttons. Another user’s layout may be completely different, but it will work exactly how they want it to, and that’s what makes it so great.
Of course, there are some limitations. Since everything is being programmed at the firmware level, advanced macros are out. You can map text strings and shortcuts, but there’s no simple record button with editable events and delays like you’ll find in most gaming softwares. Lighting is also limited to preset effects and static colors, albeit with highly customizable colors thanks to mappable hue and saturation keys. That’s less of an issue on the Promise87 because it only has one RGB LED, but is definitely something to keep in mind for fully backlit keyboards.
Bottom Line
The Promise87 is an excellent keyboard, as it should be with a $380 starting price. But, if there’s one thing the custom keyboard hobby has taught me, it’s that a high price doesn’t necessarily mean a great mechanical keyboard. Thankfully, Wuque Studios has nailed it. The Promise87 is one of nicest keyboards I’ve ever used, so much so that I immediately turned around from this review and ordered my own. It even rivals my completely customized Rama Works U80-A, but the typing experiences are different enough that both will have steady places on my desk.
You don’t have to spend quite so much to have a great custom keyboard. Wuque Studio’s Ikki68 Aurora is another excellent option targeted at beginners and starts at only $150. TheKey.Company’s Portico75 is another great choice and features a more compact 75-percent layout. You could build your own using spare parts, or let someone else do the work for you and go with an excellent prebuilt like the iQunix F97.
The point is, while the Promise87 isn’t for everyone, it makes good on its high price. It sounds, feels, and looks amazing. It’s also highly customizable, so you can tailor the typing experience and keymaps exactly to your personal taste. If you find yourself in the thick of the mechanical keyboard hobby and are looking for your next kit, the Promise87 will remind you what makes keyboard building so fun in the first place.

Chris is a regular contributor for Tom’s Hardware, covering mechanical keyboards, peripherals, and content creation gear.
-
Exploding PSU That's a gorgeous keyboard. Not sure if I can assemble one though. I don't even have the guts to pull the key caps out of my $80 Coolermaster, I fear I might break itReply
