Tom's Hardware Verdict
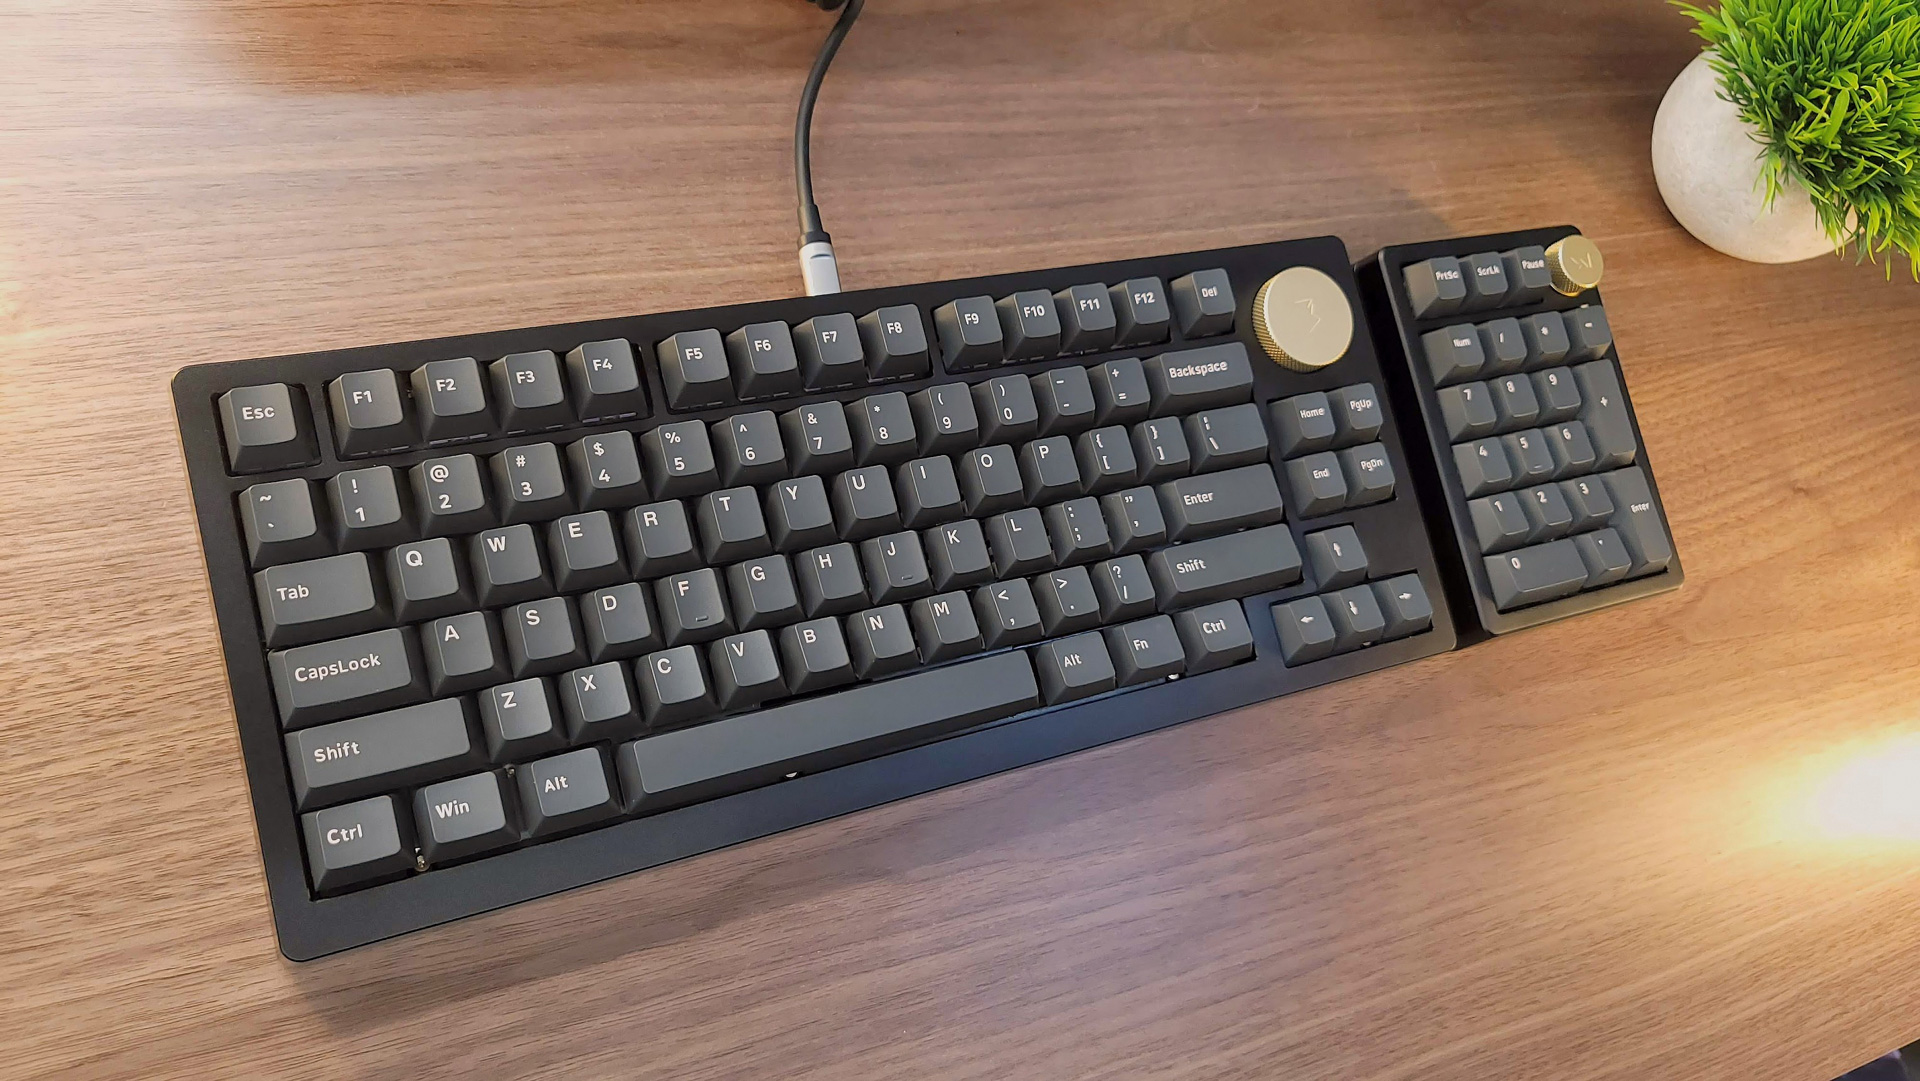
The Mammoth75 from Wuque Studio is a luxurious custom mechanical keyboard specifically designed for keyboard enthusiasts. It doesn’t come cheap and requires some patience to assemble, but the result looks, feels and sounds outstanding.
Pros
- +
+ Superb build quality
- +
+ Excellent acoustics
- +
+ Very customizable with little additional modding needed
- +
+ Stunning aesthetics
- +
+ Responsive key-feel when typing
Cons
- -
Expensive
- -
Requires time and patience to assemble
- -
Normal stabilizers are incompatible without modding
Why you can trust Tom's Hardware
It’s safe to say that there’s never been a better time to join the custom mechanical keyboard hobby. Keyboard kits are more accessible and affordable than ever, making it possible to build a keyboard uniquely tailored to you for less than $100. But the Mammoth75 from Wuque Studio is not that keyboard. If that entry-level keyboard kit is a Hyundai picked up on a bargain, the Mammoth75 is a Porsche fresh off the lot.
Entering group buy this month, prices start at $359 and scale all the way up to $719 for the highest configuration. The Mammoth75 checks all of the boxes for a modern, enthusiast-tier custom keyboard: a compact layout, a gasket mount design, a soft typing experience and excellent acoustics, lots of flex thanks to a thin and flex-cut PCB, multiple layers of foam, a full aluminum case with a hidden-screw design, user-programmability, and more. It stands out from the pack with a bold magnetic volume wheel and, in the configuration we were sent ($430), a PVD-coated aluminum base with a full-mirror finish.
This type of keyboard kit isn’t intended for the entry-level keyboard builder. It’s a luxury product that’s been built to an impeccable standard with an artisan’s attention to detail. If you have the funds to invest in a premium custom keyboard and don’t mind waiting on the production process, the Mammoth75 is an excellent choice that exemplifies what a premium keyboard can truly be.
Mammoth75 Specs
| Switches | None included |
| Lighting | Caps Lock indicator |
| Onboard Storage | 4 (VIA) to 16 (QMK) supported layers |
| Media Keys | Volume knob |
| Connectivity | USB Type-C to Type-A |
| Cable | None included |
| Additional Ports | None |
| Keycaps | None included |
| Software | VIA or QMK |
| Dimensions (LxWxH) | 13.5 x 5.8 x 1.5 inches |
| Weight | 4.1 pounds (built) |
Design of the Mammoth75
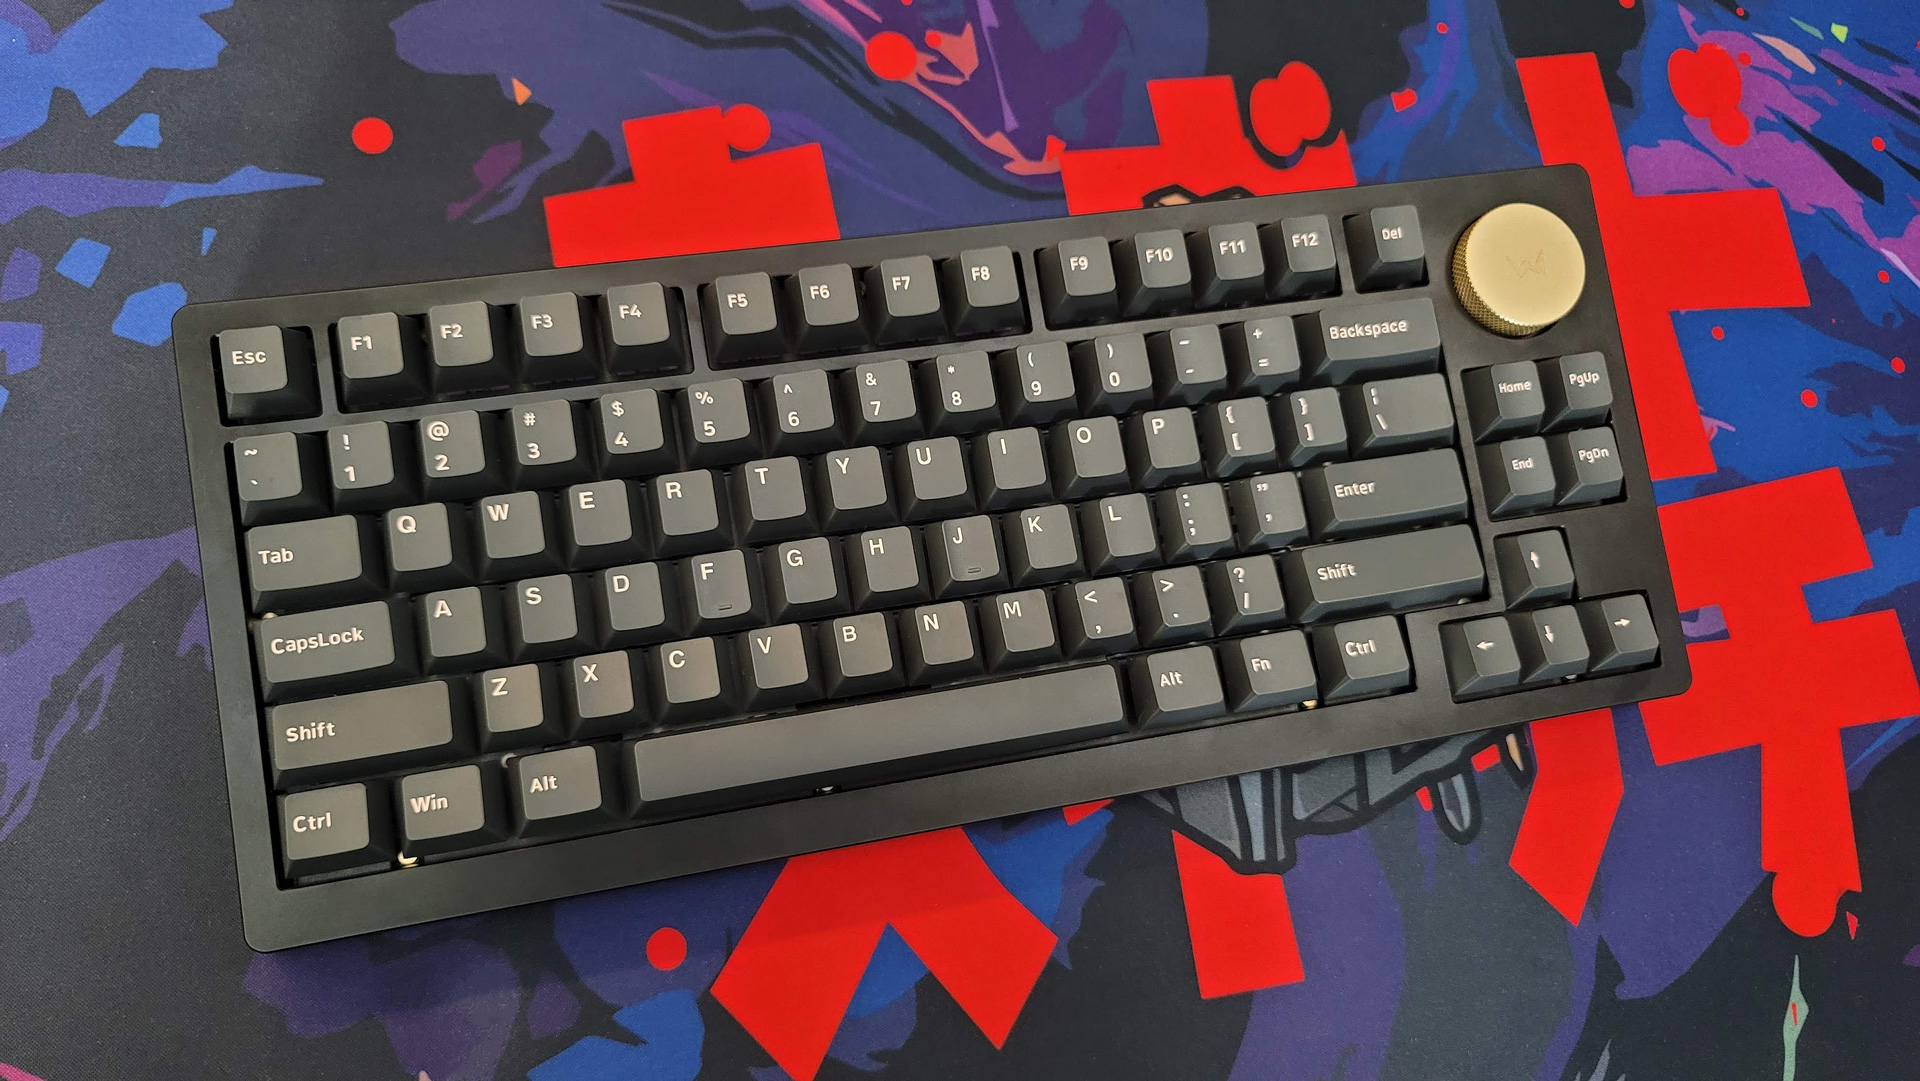
The Mammoth75 is a 75-percent keyboard that breaks the mold with its layout. Like most 75-percent keyboards, it lacks a dedicated Numpad but includes a full row of Function keys and a dedicated arrow cluster. Most keyboards using this layout include a single column of navigation and editing buttons above the arrows, but the Mammoth uses a 2x2 grid, making it only one column narrower than a traditional TKL, but that added width makes room for the oversized volume knob that lends it its unique look.
Like most custom keyboard kits, the Mammoth doesn’t come with switches, keycaps or stabilizers. The cost begins at $359 for the standard wired version with a sandblasted aluminum bottom and jumps to $430 with for the mirror-finished bottom case. If you’re really feeling spendy and find the stock 4.1-pound weight too light, the aluminum bottom can be swapped for brass, sandblasted or mirror-finished, at $669 and $719 respectively. You can also opt for Bluetooth versions of the aluminum-bottomed kit for an additional $20 each.
These prices fall in the middle to upper-middle echelon of custom mechanical keyboard pricing. With such a high cost, it’s important to know what you’re paying for. The kit has been in development for nearly a year by the team at Wuque, to fine-tune its design. If that name sounds familiar, it’s because the same team developed the Ikki Aurora 68, one of the most exciting and well-received entry-level keyboards of last year. The Mammoth75 takes that same attention to detail for what really matters most in an enthusiast-level keyboard experience and applies it to a package that’s all-together more premium. Every piece has been meticulously crafted to fine-tune the sound, feel and aesthetic of the keyboard into something even professional keyboard builders would be proud to own.
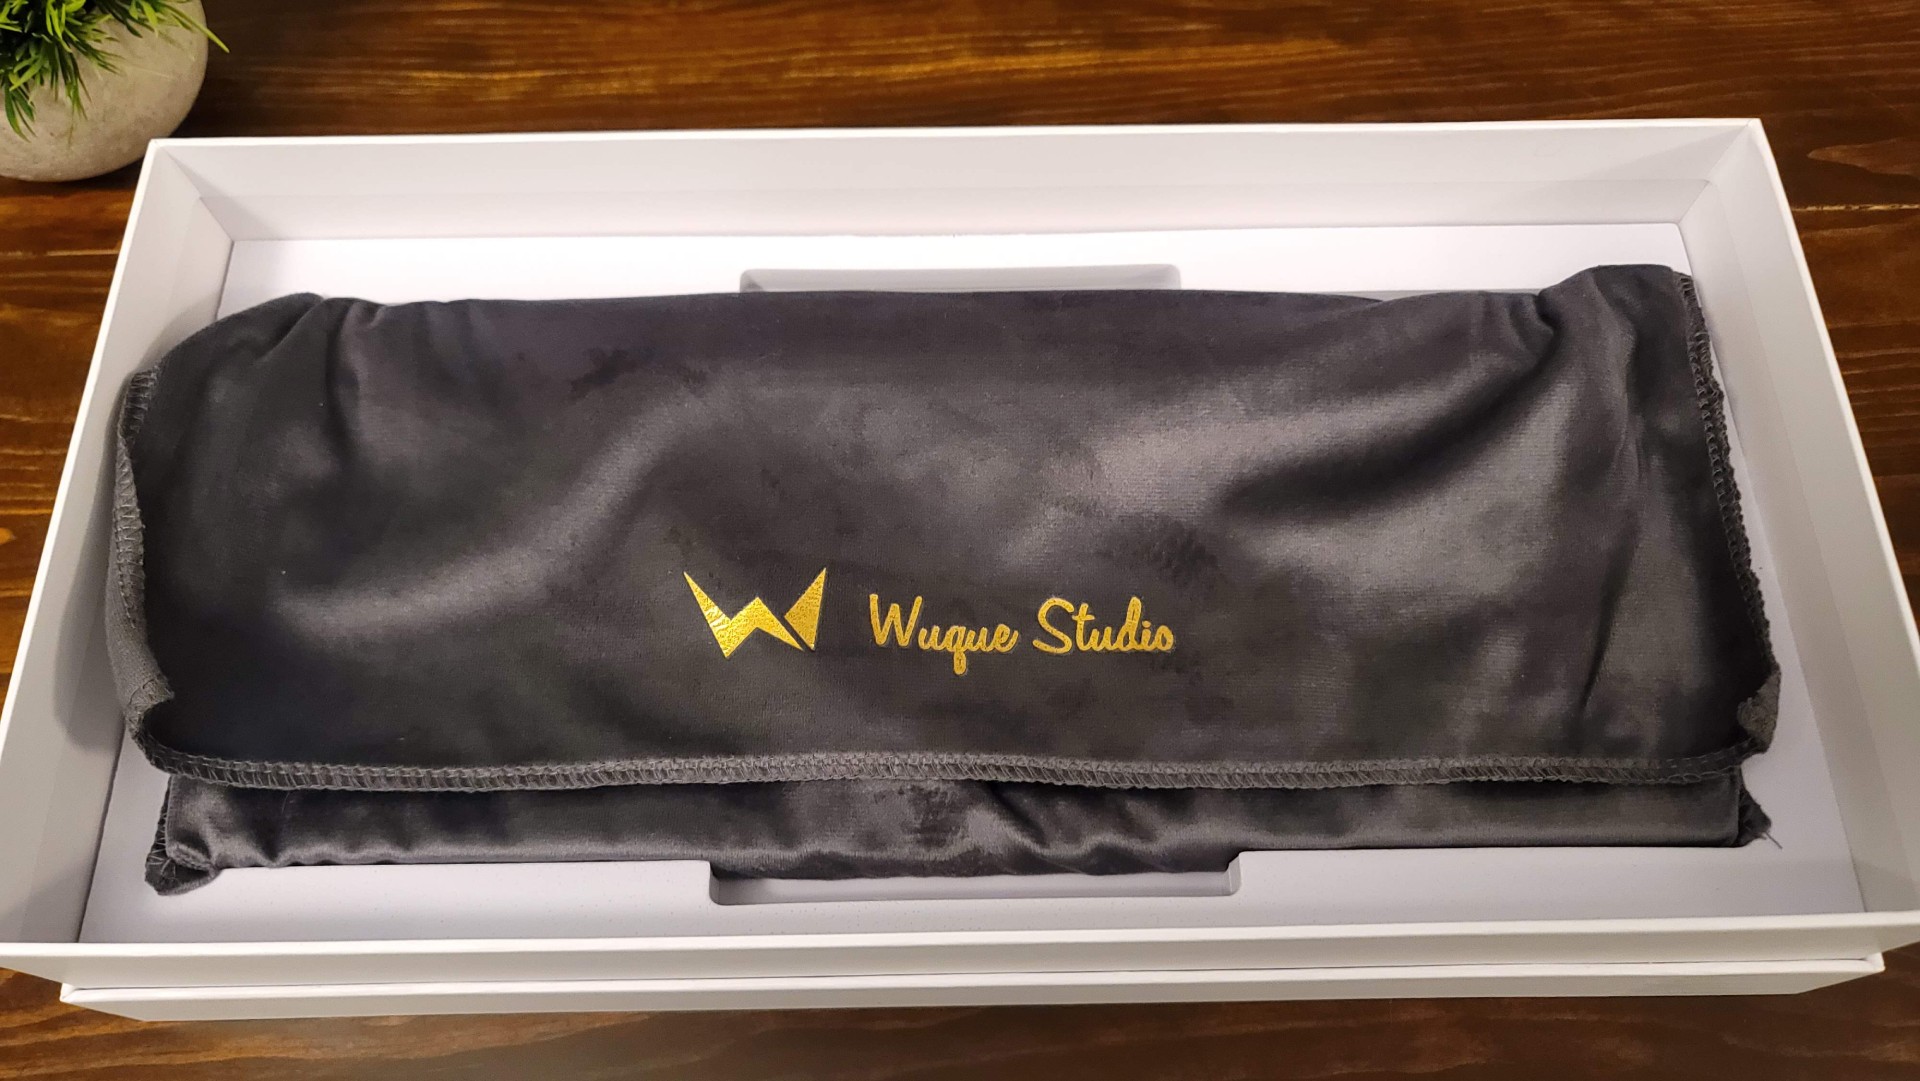
The keyboard arrives in a rather fancy white box with a gold mammoth emblem. We don’t usually remark on packaging much, but in this case, it’s too unique to ignore. Inside the box, everything is secured in protective foam, but beneath the accessory layer the case is held inside its own velvet bag emblazoned with the Wuque Studio logo. The velvet bag also serves to protect the mirrored back during assembly, as well as for traveling, but it’s not likely you’ll want to travel with it. Fully built, the keyboard weighs just over four pounds and can definitely be felt in a travel bag. The design of the case also makes it fairly hard to pick up, so it’s easiest just to leave it at your primary desk.
Get Tom's Hardware's best news and in-depth reviews, straight to your inbox.
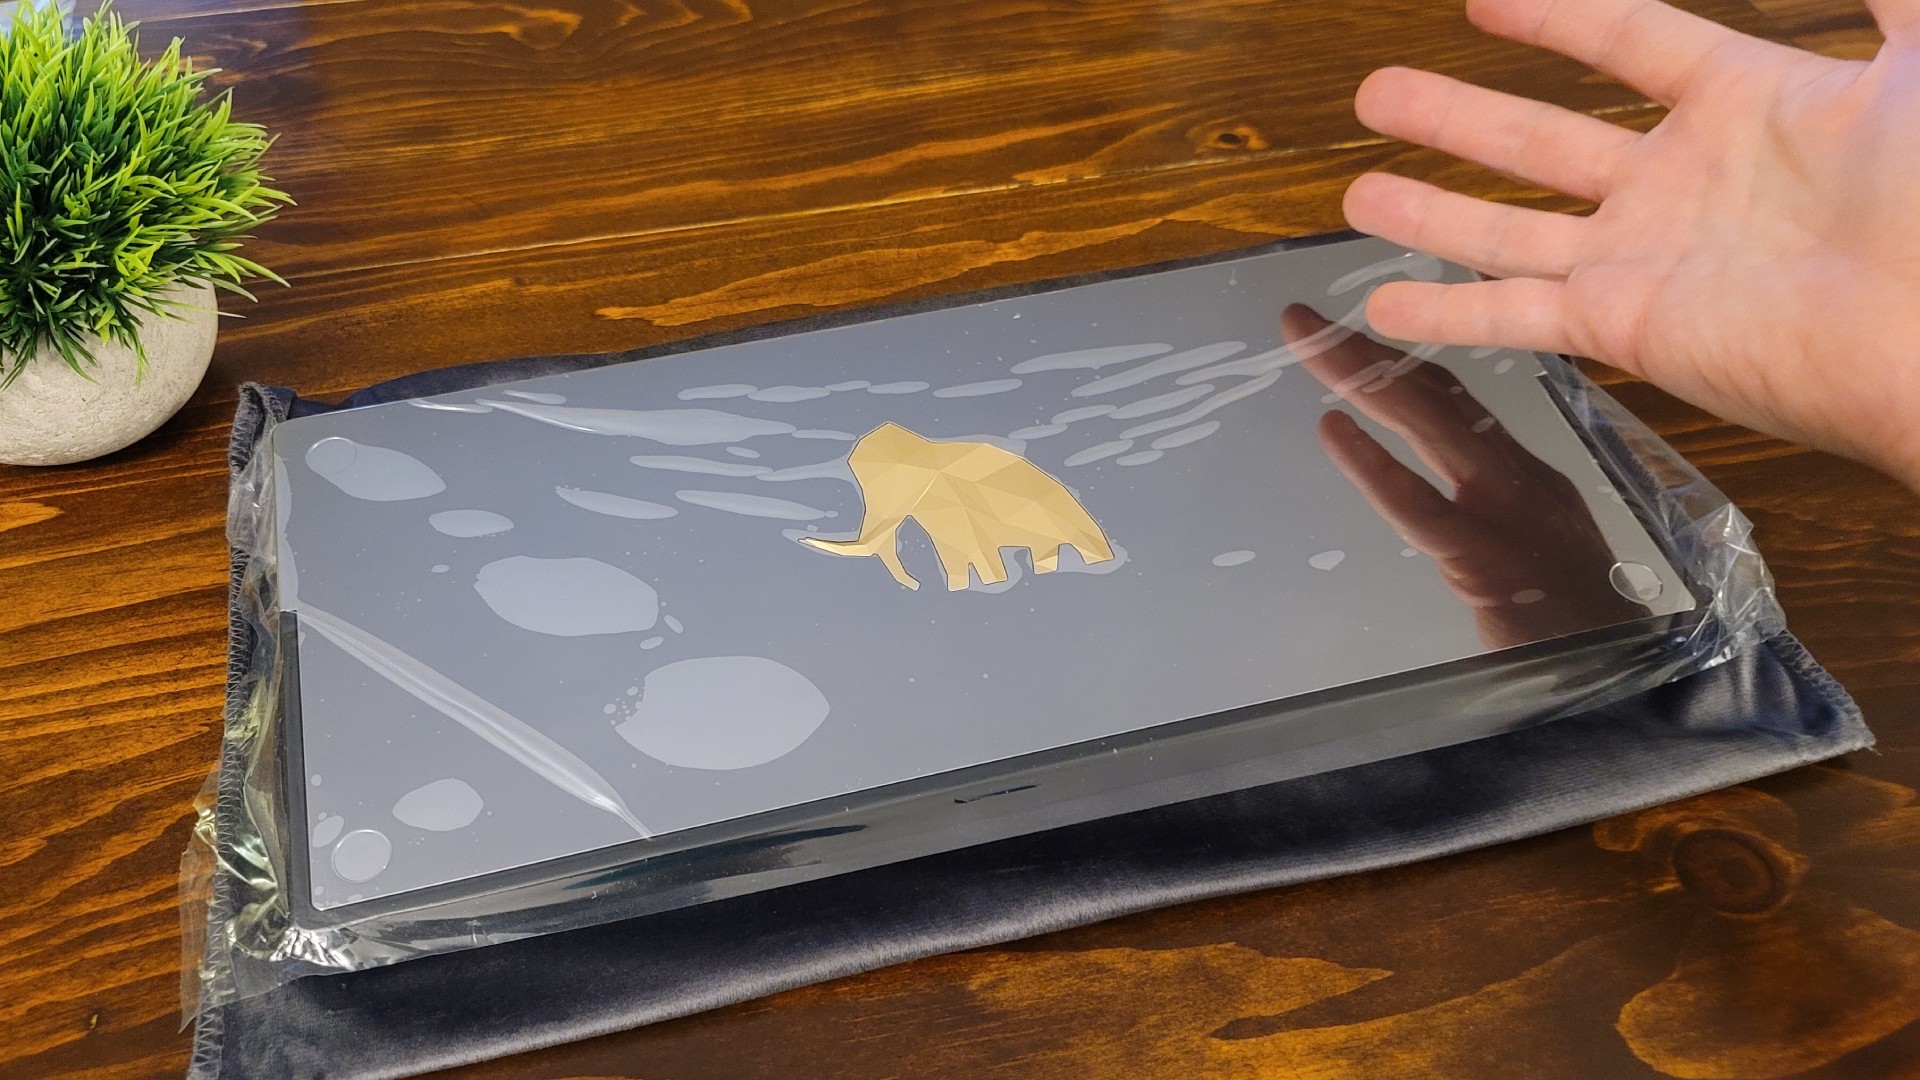
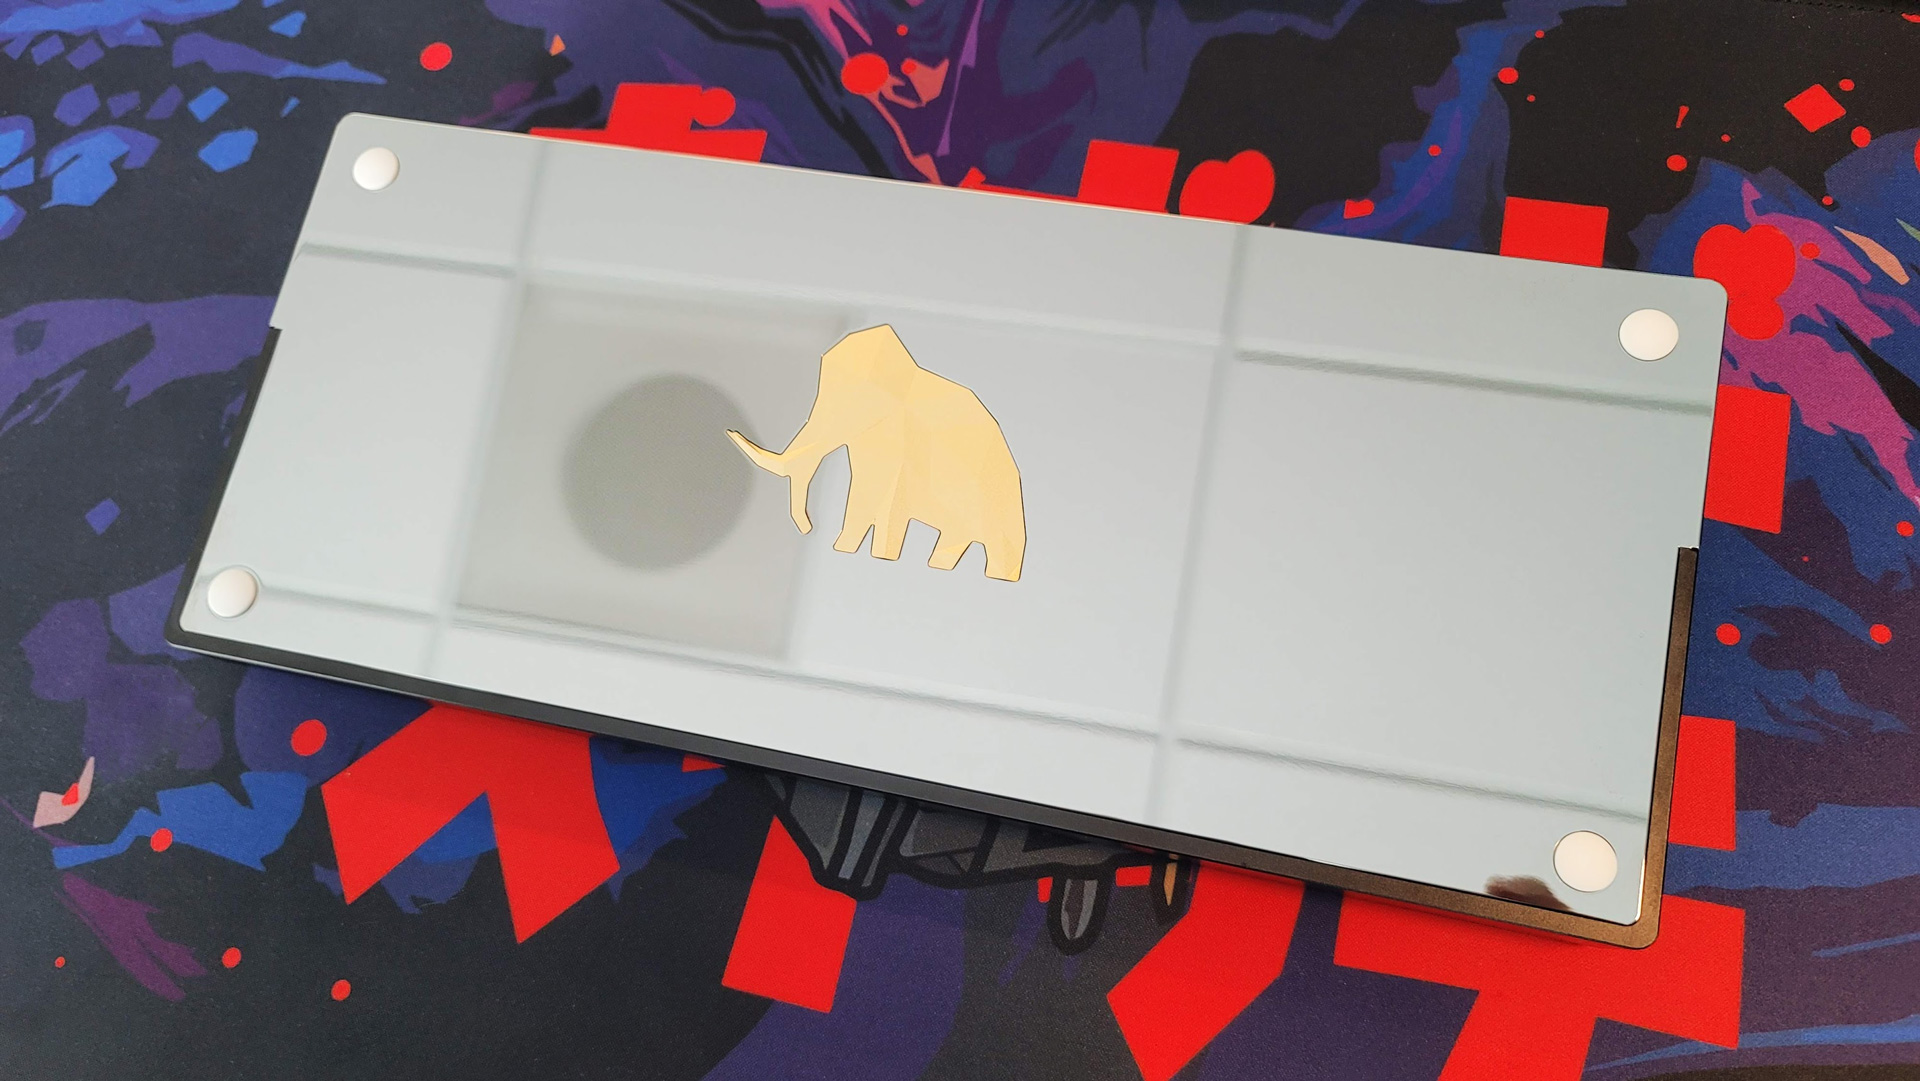
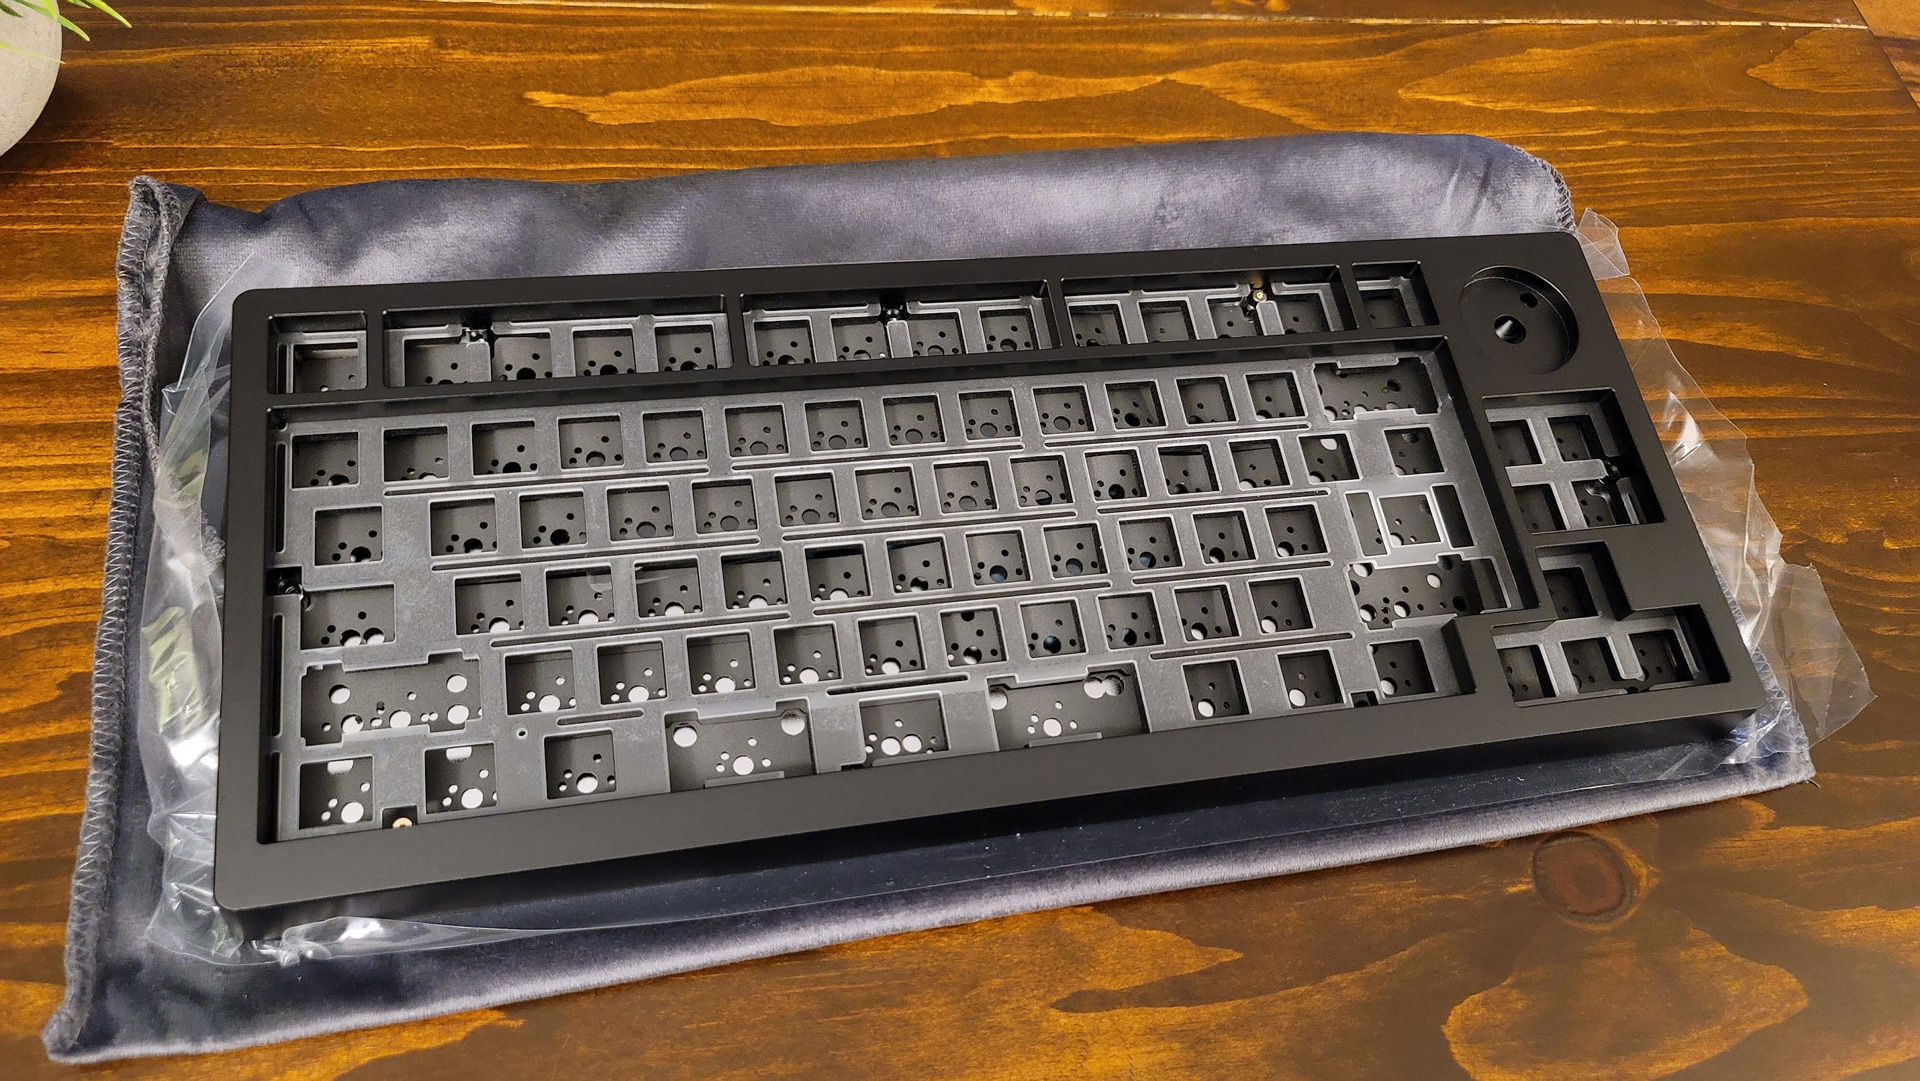
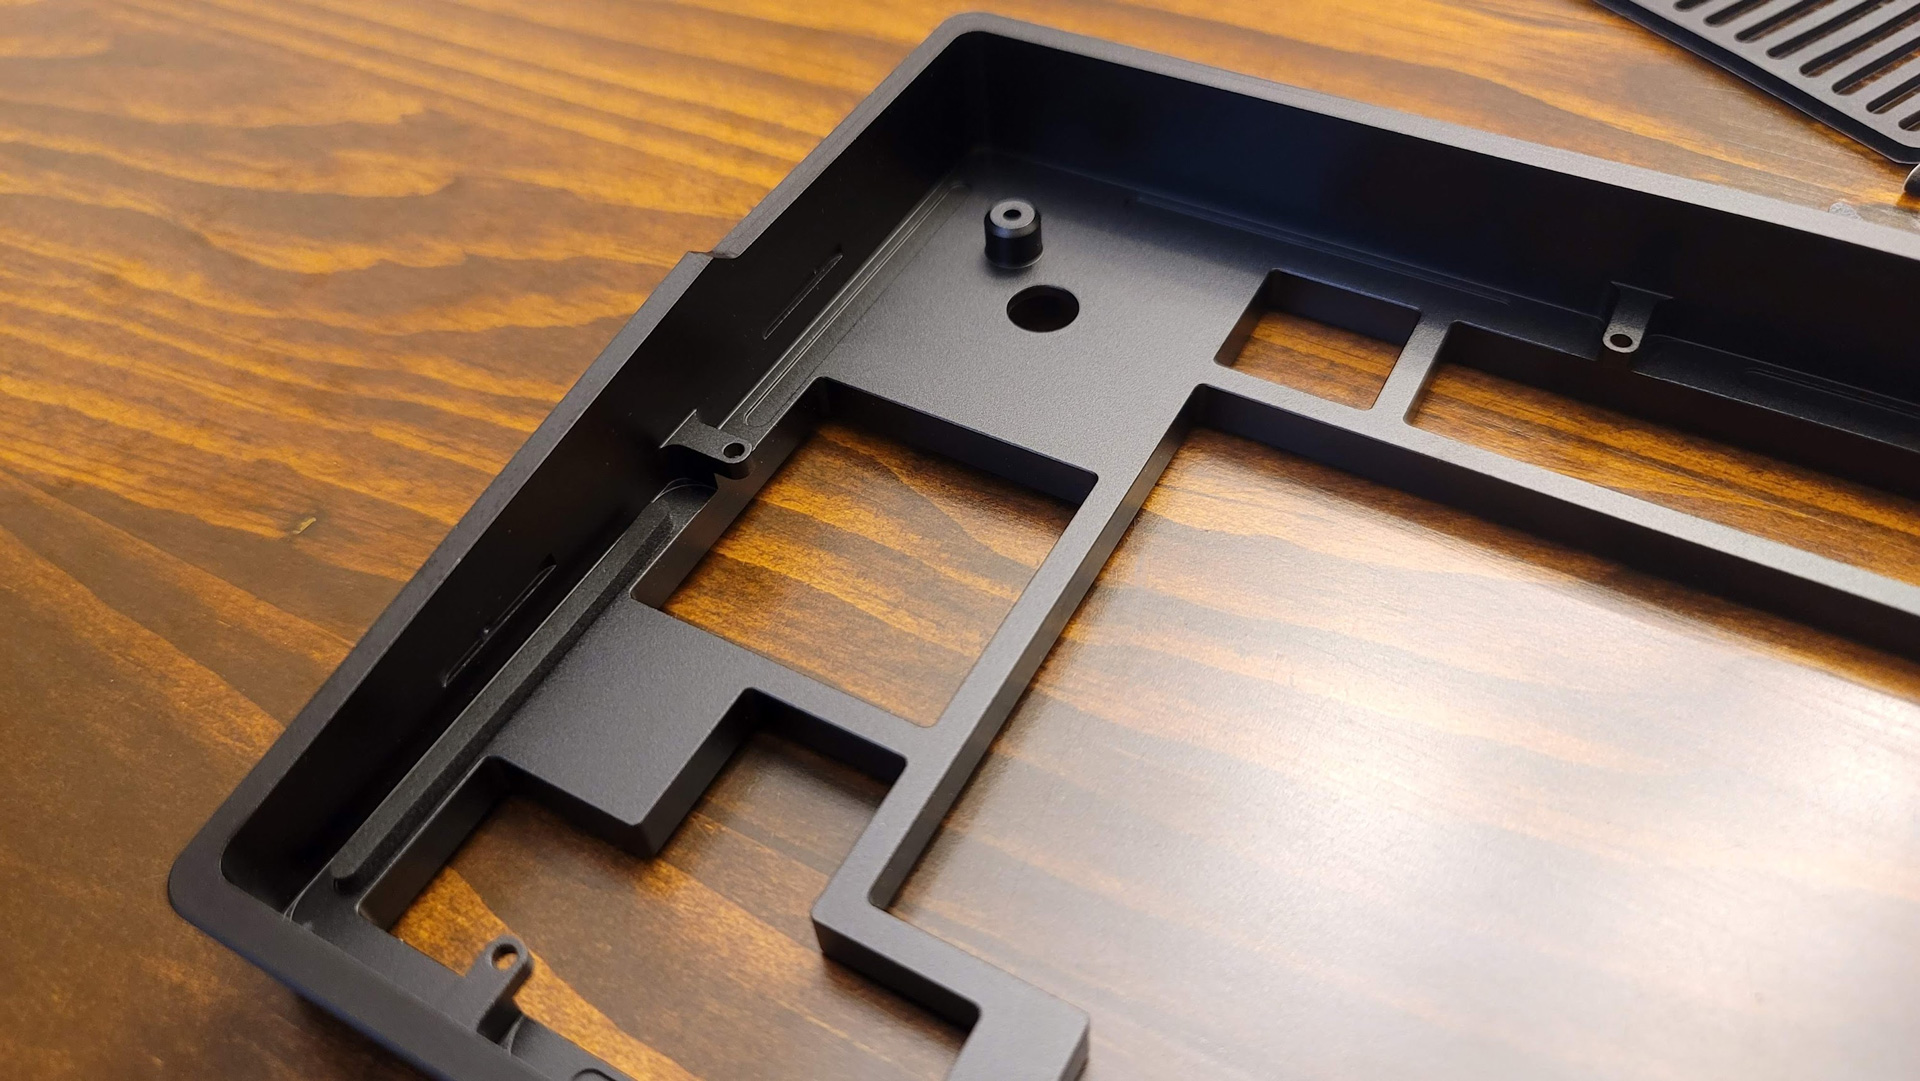
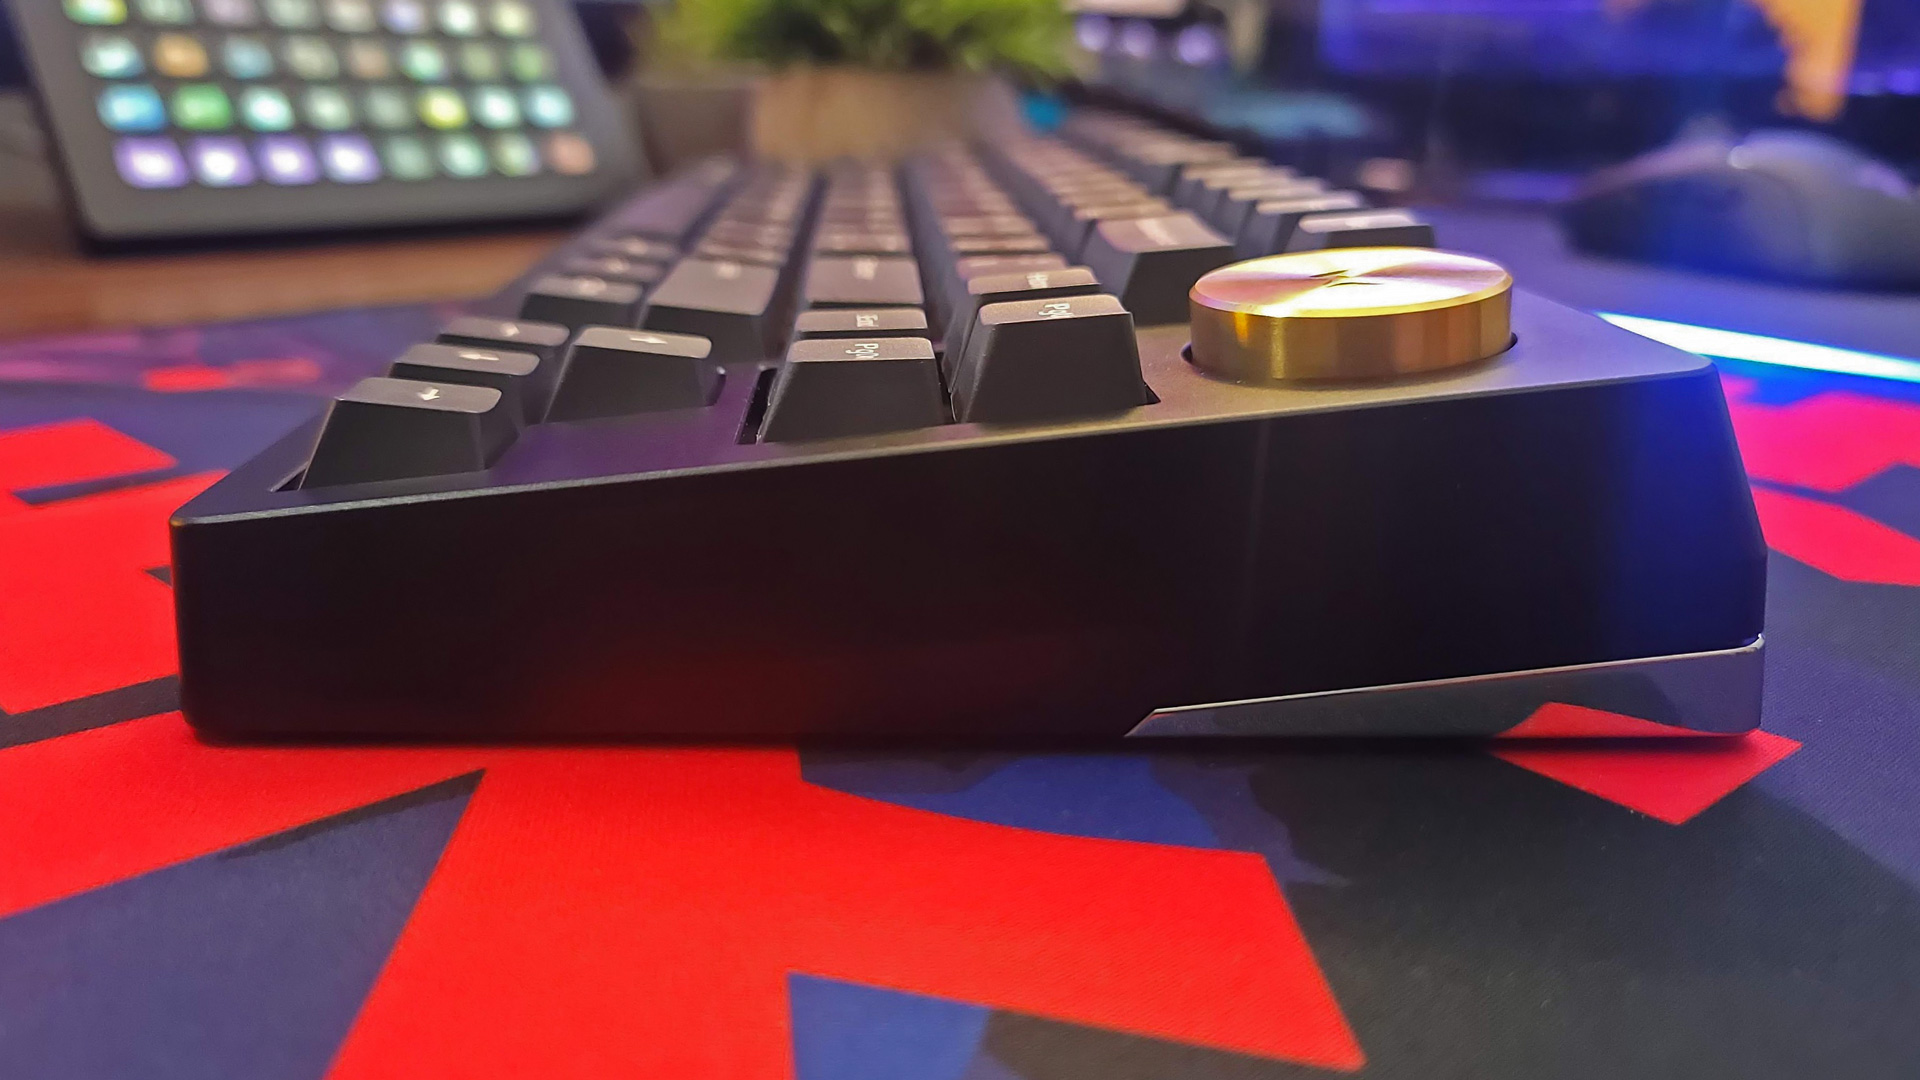
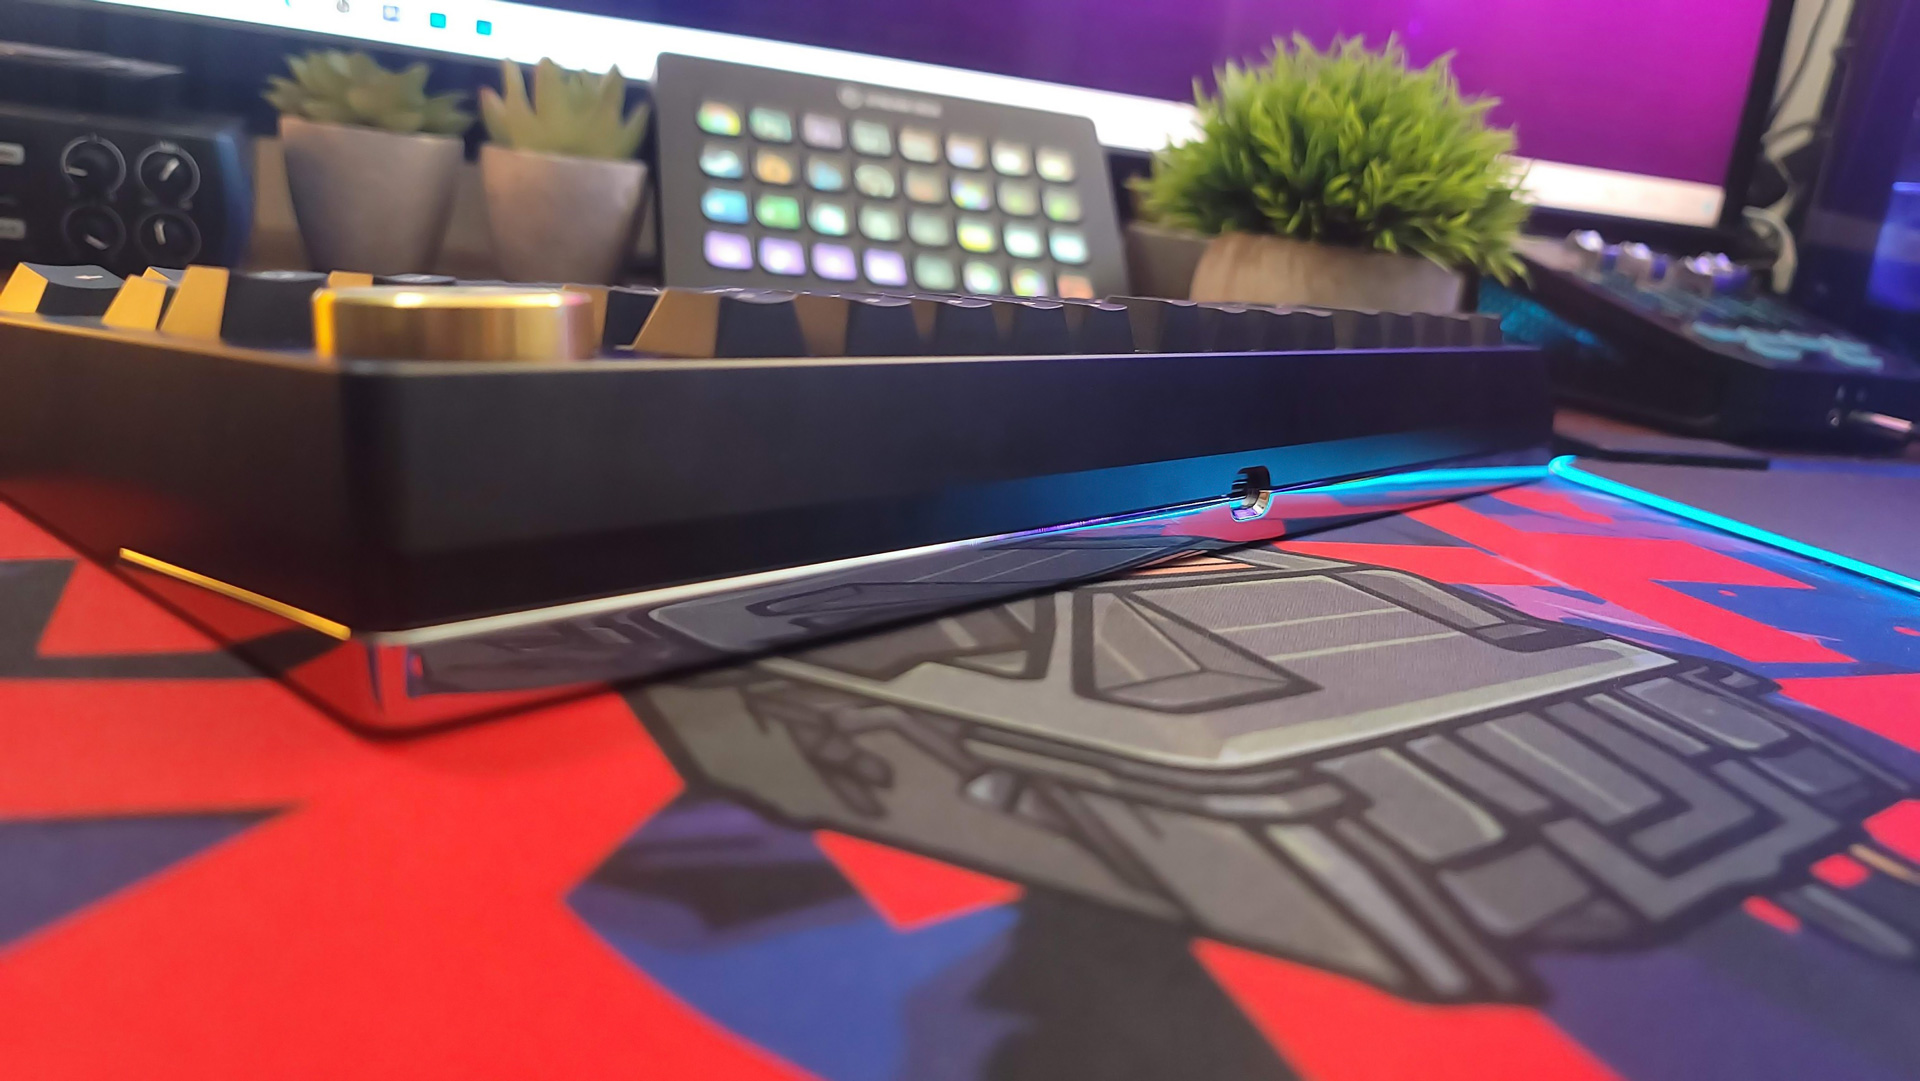
The case itself is composed of two parts: the top case, which is anodized aluminum and available in black, white, violet, and navy; and the bottom case, which wraps upwards to be viewed from the back and sides. The craftsmanship is apparent right away. There were no imperfections in the anodization at all that I could see, and the mirrored bottom (protected by a plastic sheet out of the box) was absolutely spotless and perfectly flat without any waves or warps to mar the effect. There’s also a beautiful diamond-cut aluminum mammoth weight in the center of the mirror for a unique artistic flair.
The two halves come screwed together for shipping but only two of eight screws are installed for easy disassembly. These fastener points are all part of the top case and hidden beneath the keycaps once it’s built, so the aesthetic of the case is never broken by unsightly fastener holes.
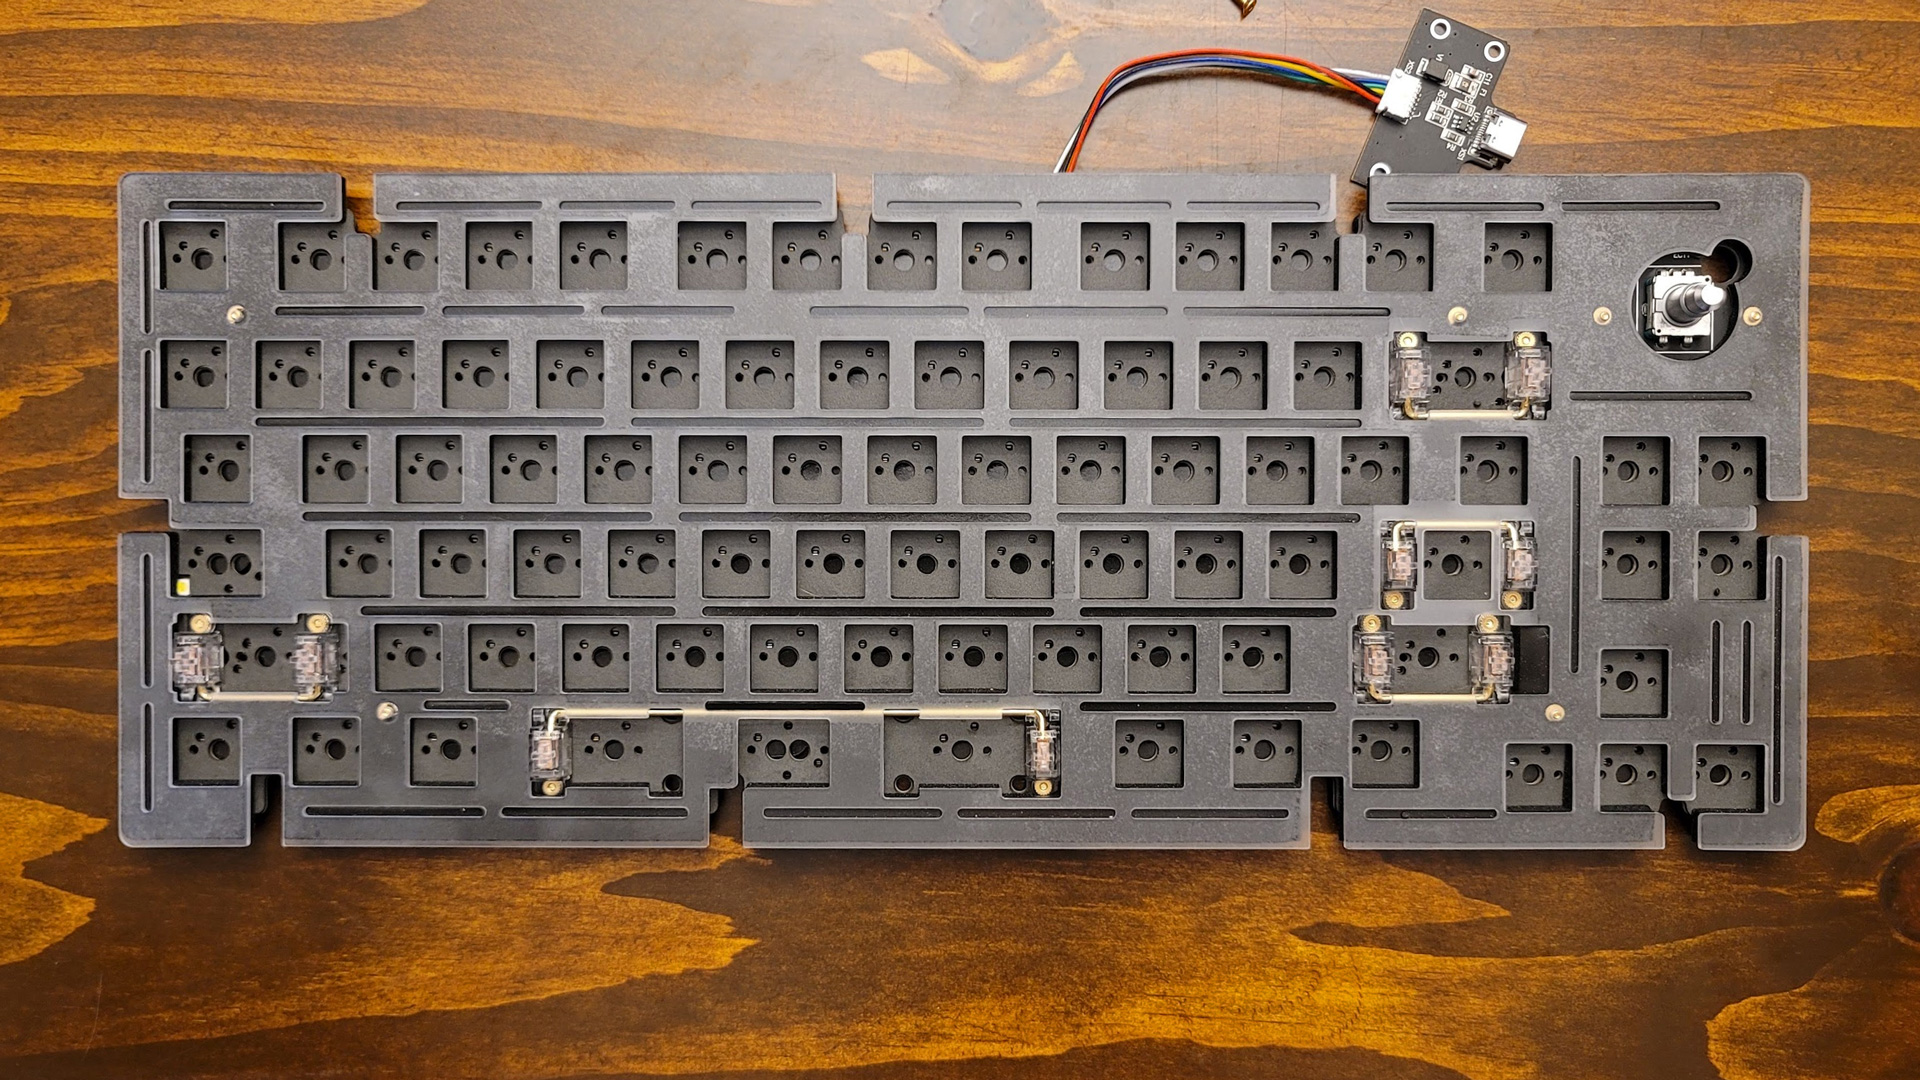
The switch plate and switch film are held between the two halves. The PCB is in a separate antistatic bag and comes with the USB daughterboard pre-attached. The accessories, which include your choice of smooth brass or knurled aluminum, and all of the hardware you’ll need to complete the build, are in separate bags and cutouts in the foam packaging.
It’s a gorgeous-looking keyboard, but keeping it that way is a challenge. The surface attracts fingerprints that are impossible to ignore when the mirror is exposed. Based on my experience with PVD coatings, it’s also likely to scratch easily, so beware of any dust or debris that may be hiding on your deskpad. This is a keyboard that will need to be treated with care at all times to maintain its pristine appearance. Since the mirror is hidden during normal use, minor scratches and fingerprints may not seem like a huge deal, but given that the mirrored bottom is one of the biggest reasons for choosing this keyboard, keeping it looking good is important.
The internal components display the same level of consideration. Because they more directly impact the typing experience, they’re designed specifically to deliver the “ideal” sound and feel Wuque has in mind. At the same time, they can be modified to tailor the sound profile to your specific tastes, so you’re not married to the exact acoustics of the designers. The goal of the design is to deliver a soft and flexible typing experience with an appealing enough sound that you’ll want to come back to your PC just to keep using it.
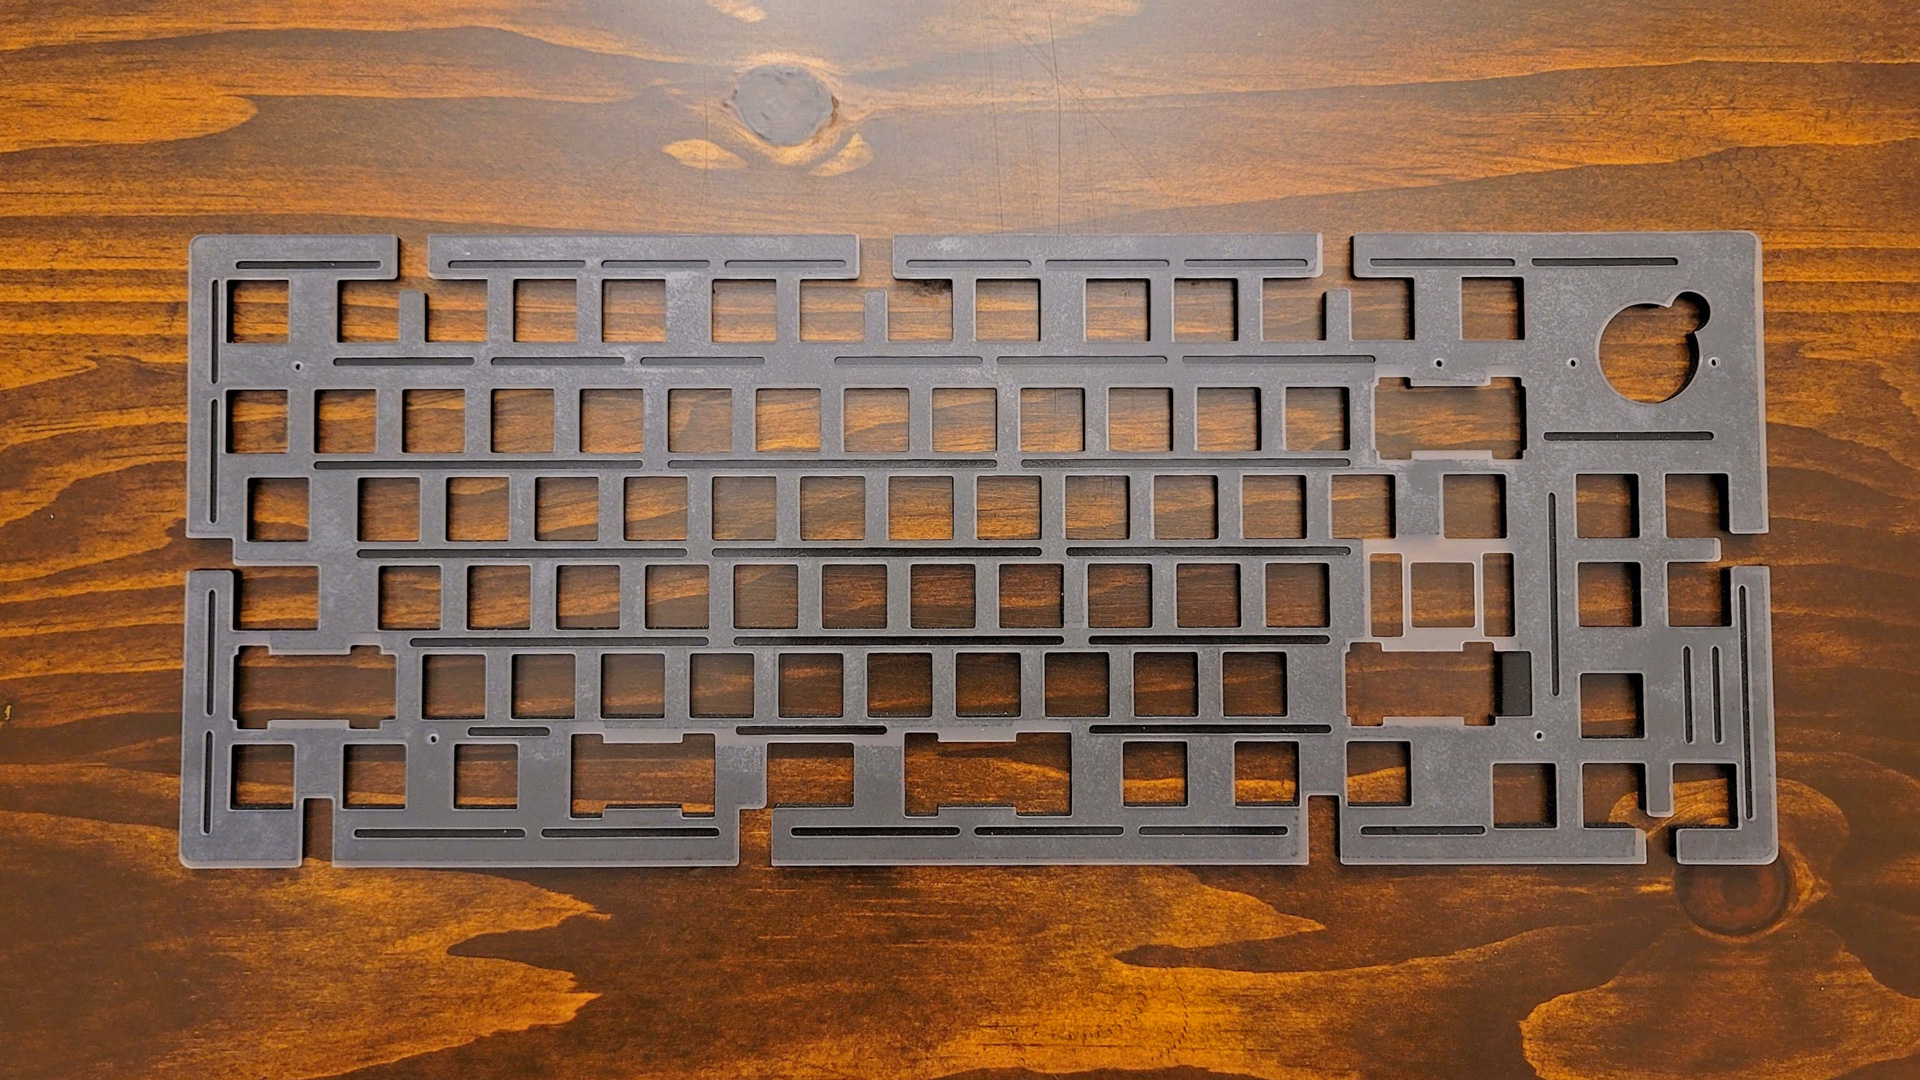
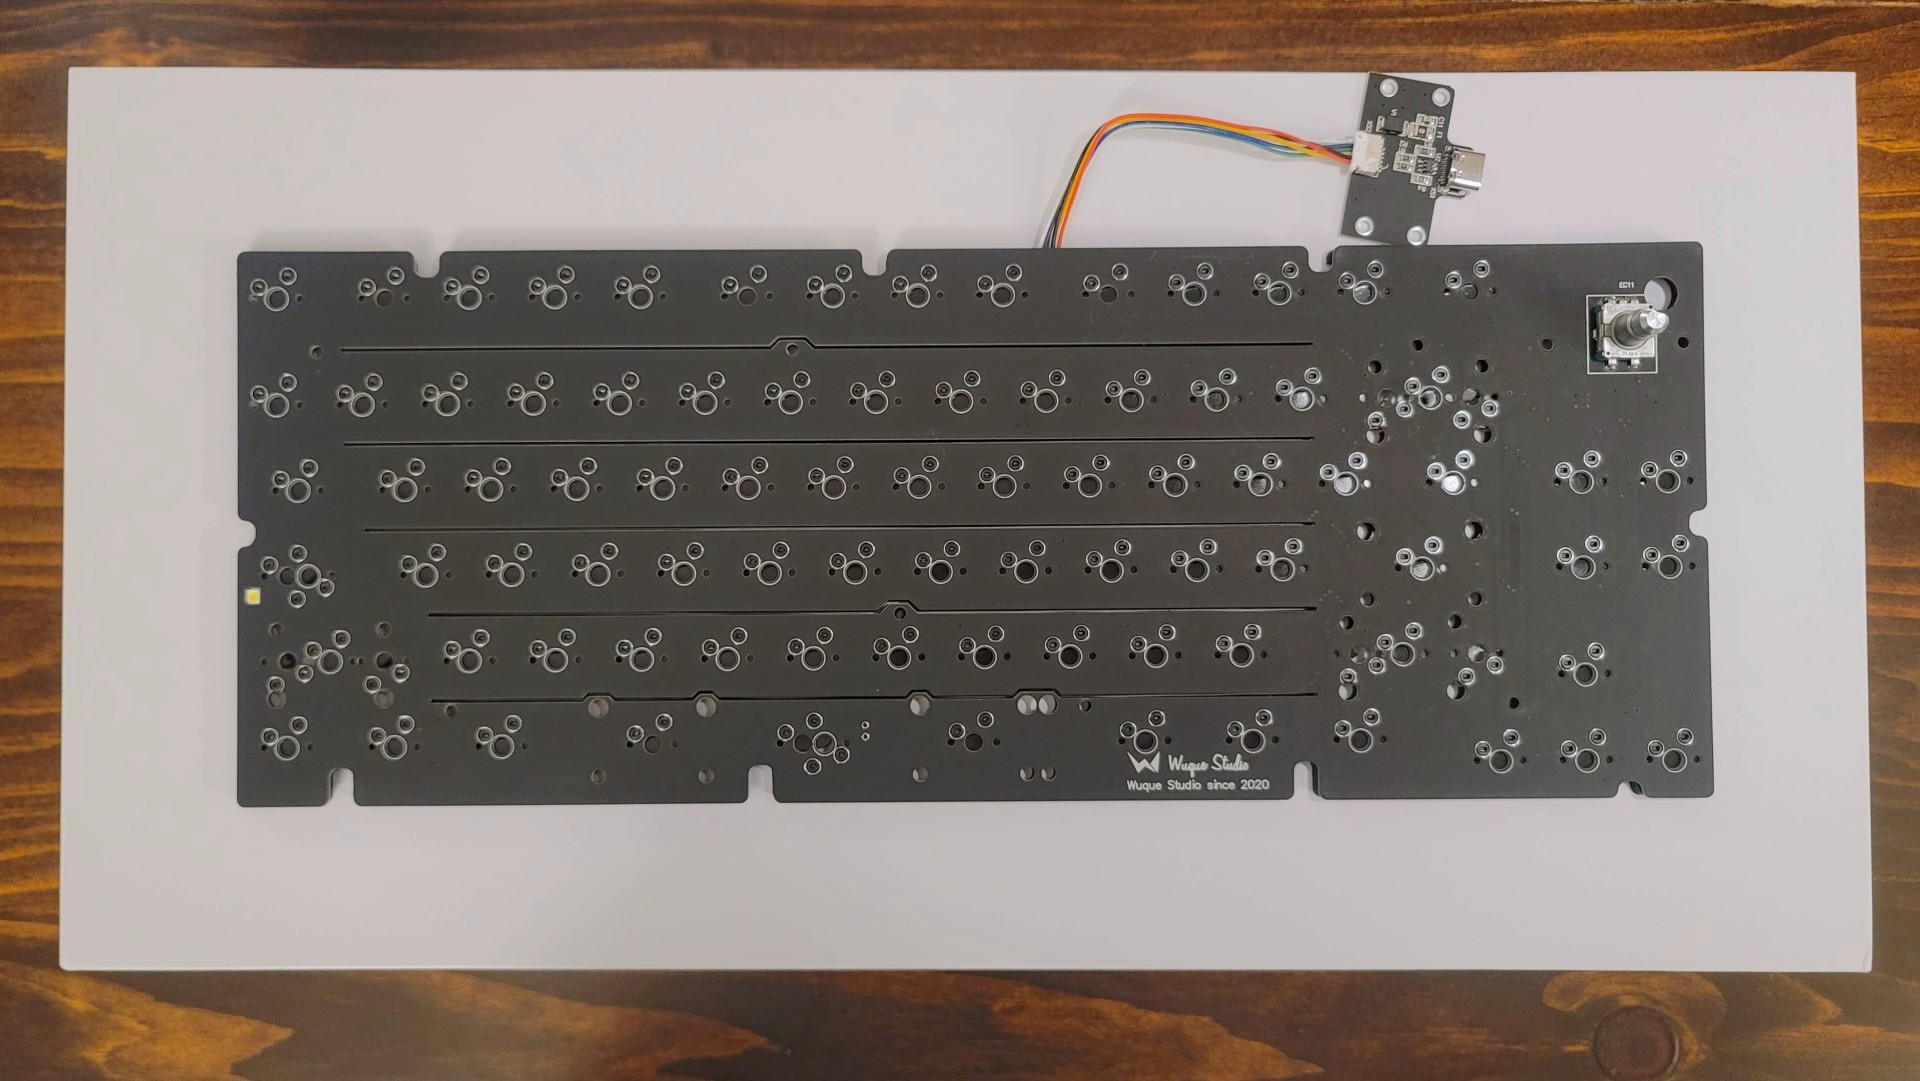
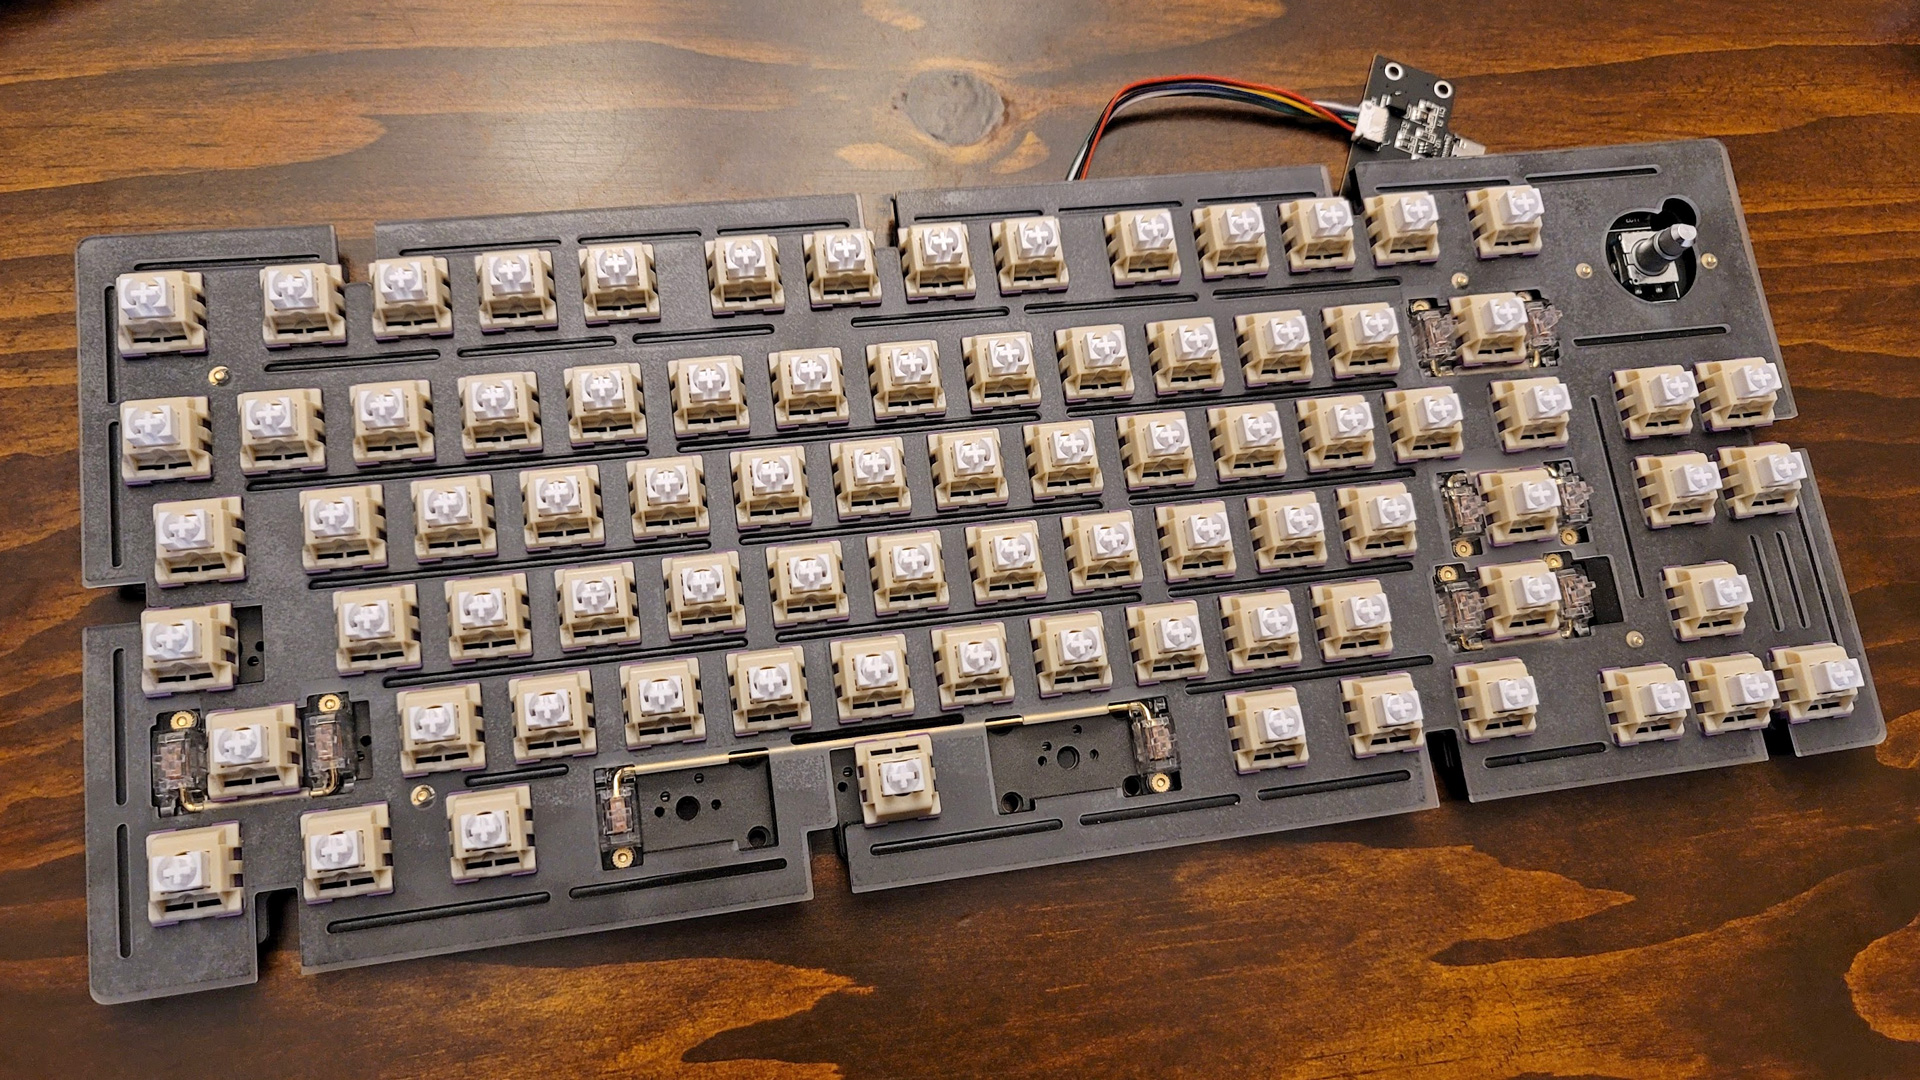
That design begins with the plate, PCB, and layers of high-quality foam. The plate is made of flexible polycarbonate. It’s a softer plastic that naturally gives under your fingers when typing, but this effect is enhanced by a series of flex cuts between each row of keys to increase the range of movement. It also lowers typing sounds slightly, creating a “thockier” sound profile (“thock” is a term used within the keyboard community for desirable, low-pitched typing sounds).
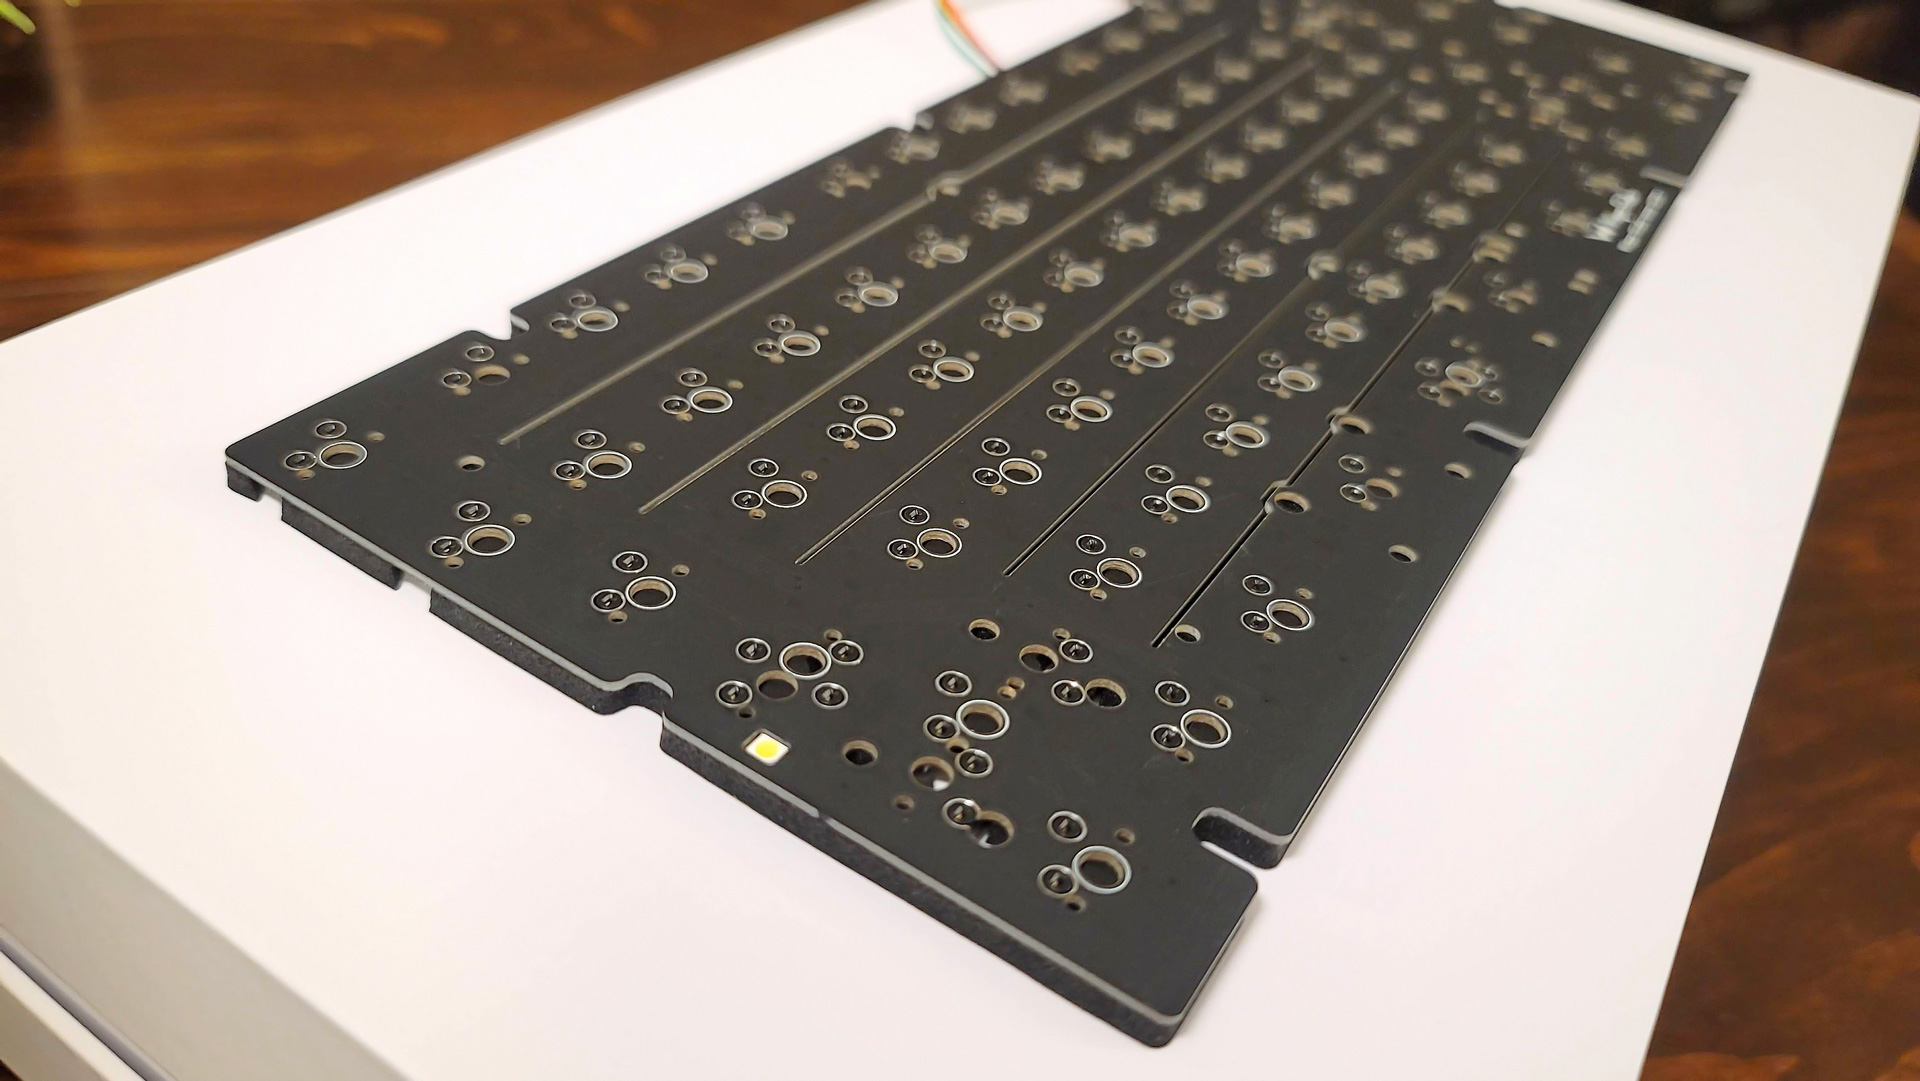
The PCB adds to the experience by being physically thinner than most other keyboards. It’s only 1.2 mm thick while most others are 1.4 mm or more, and also includes its own set of flex cuts to match the plate. It still feels solid when handled on its own, so isn’t at risk of cracking from normal use, but it does limit stabilizer compatibility. Normal screw-in stabilizers, like Durock V2s, are designed for standard PCB thicknesses and won’t seat properly. Wuque Studios offers its own set of natively compatible Aurora Series stabilizers, but others will need to be shimmed (the Mammoth75 build guide recommends winding a thread around each stabilizer foot until it screws in tightly). The PCB also supports multiple layouts, such as split Spacebar, Shift, and Backspace, as well as stepped Caps Lock for easy identification when touch typing.
Notably absent here is any kind of per-key backlighting, though there is a white Caps Lock indicator under that key. When asked, Wuque explained that this was because the flex cut design wouldn’t have worked with full RGB support, so it had to be left behind. Additionally, the type of customer considering such a high-end mechanical keyboard typically leans more on keycaps instead of backlighting for their customization needs, so RGB is less of a priority. To that end, the Mammoth75 supports south-facing switches for instant compatibility with the majority of custom keycap sets. Read our guide for how to choose the best aftermarket keycap sets for you.
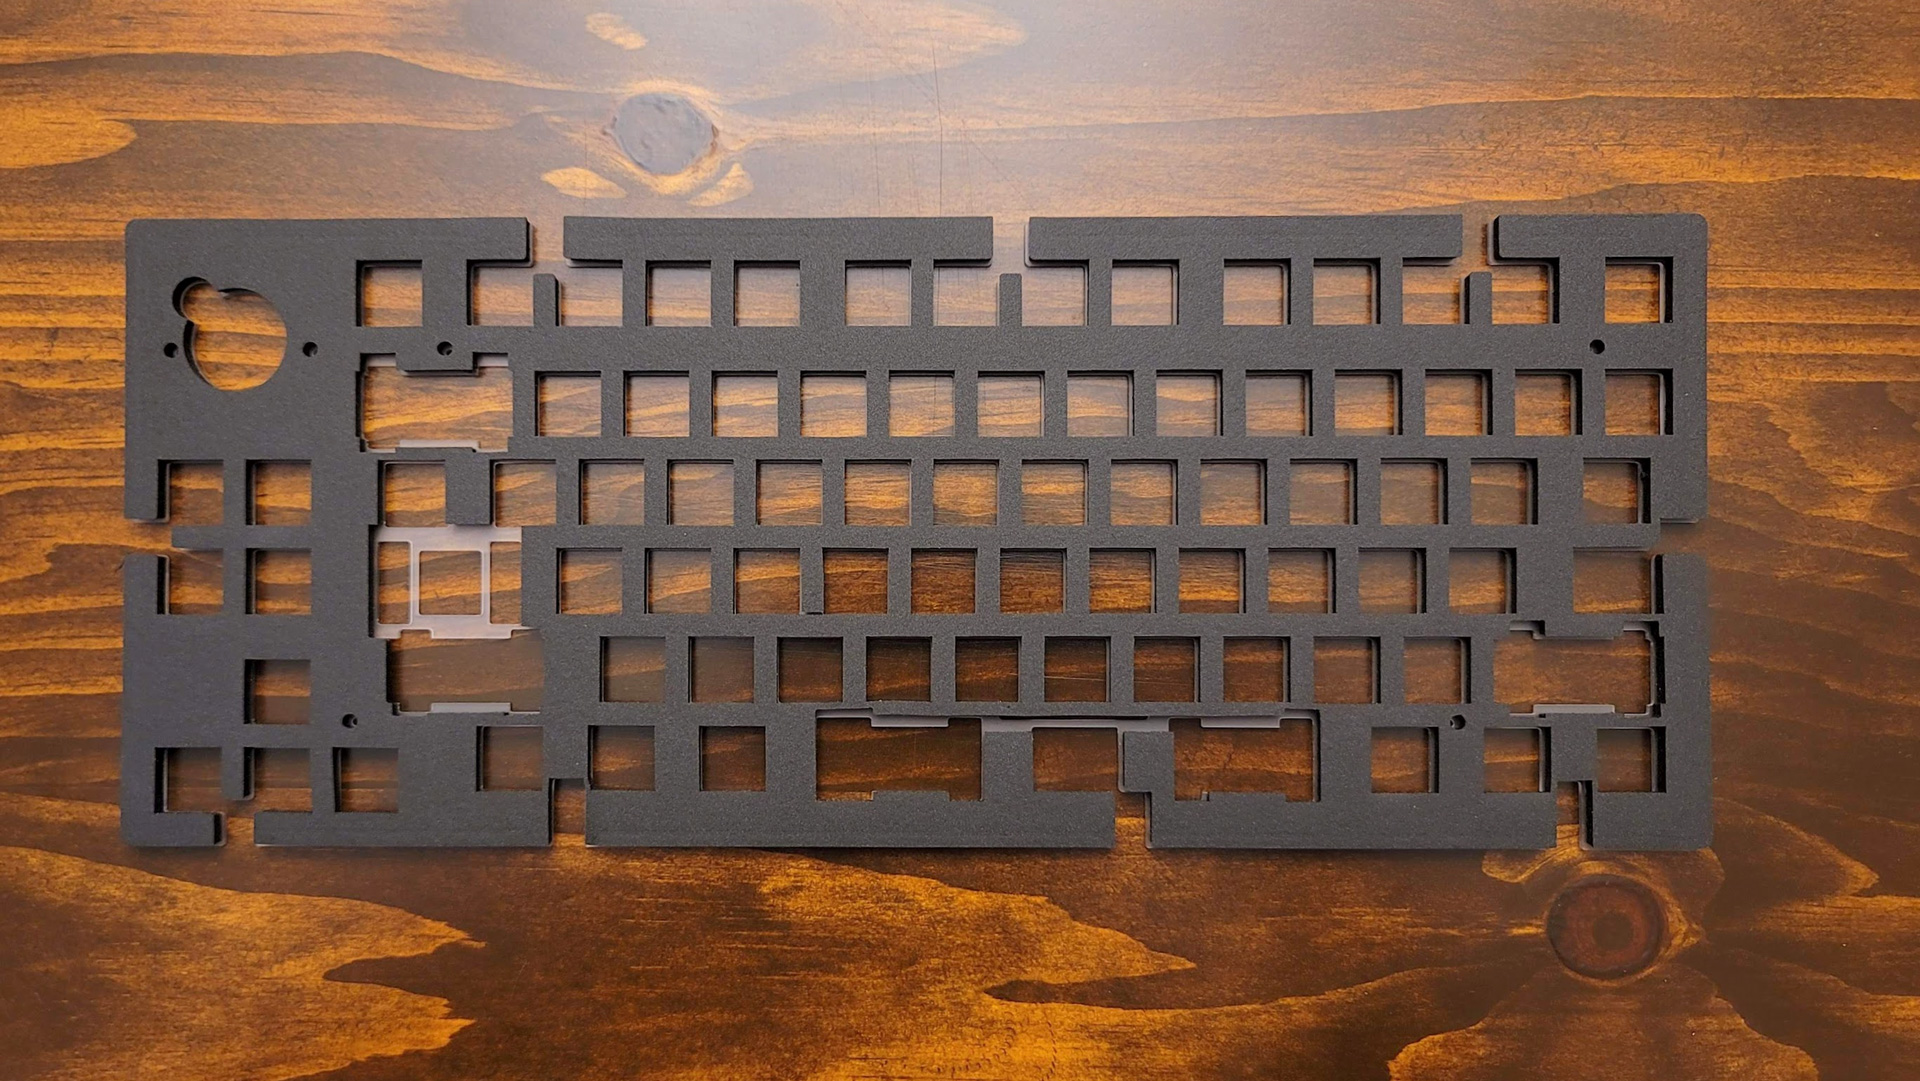
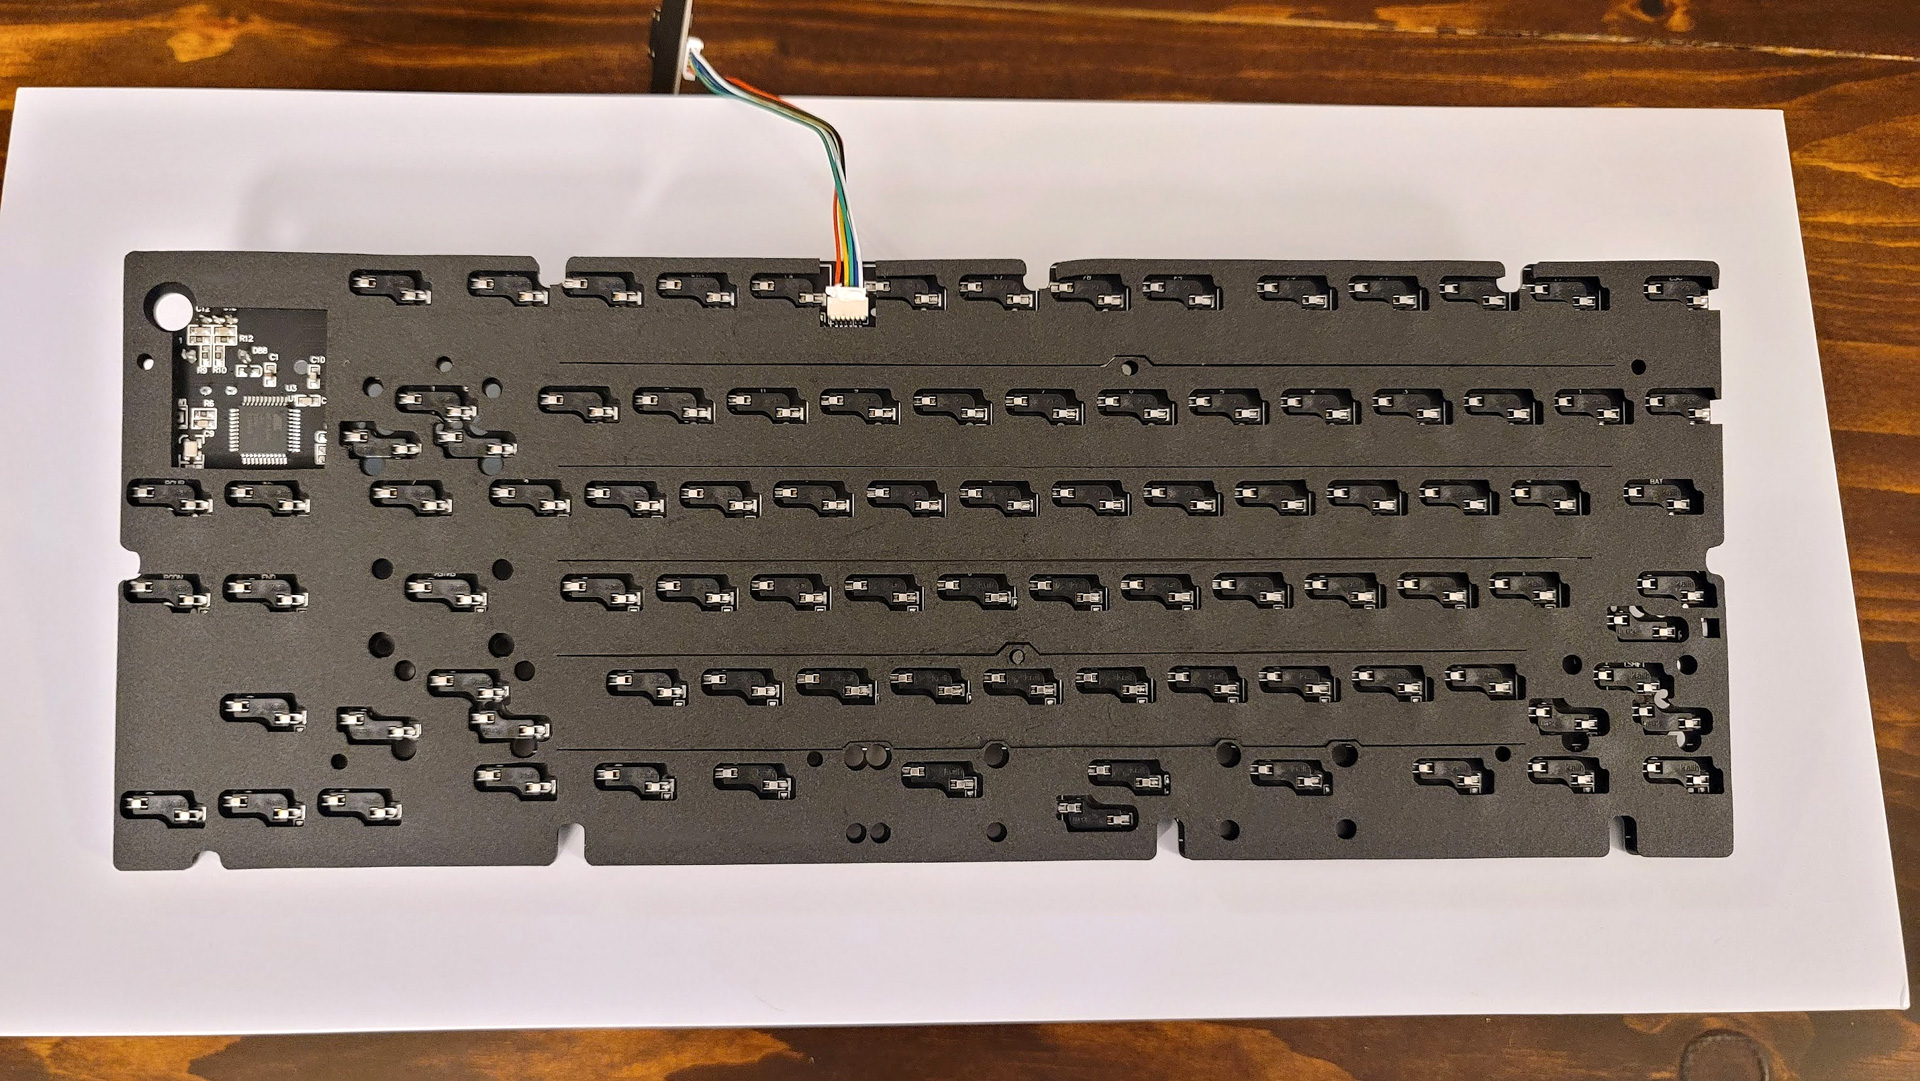
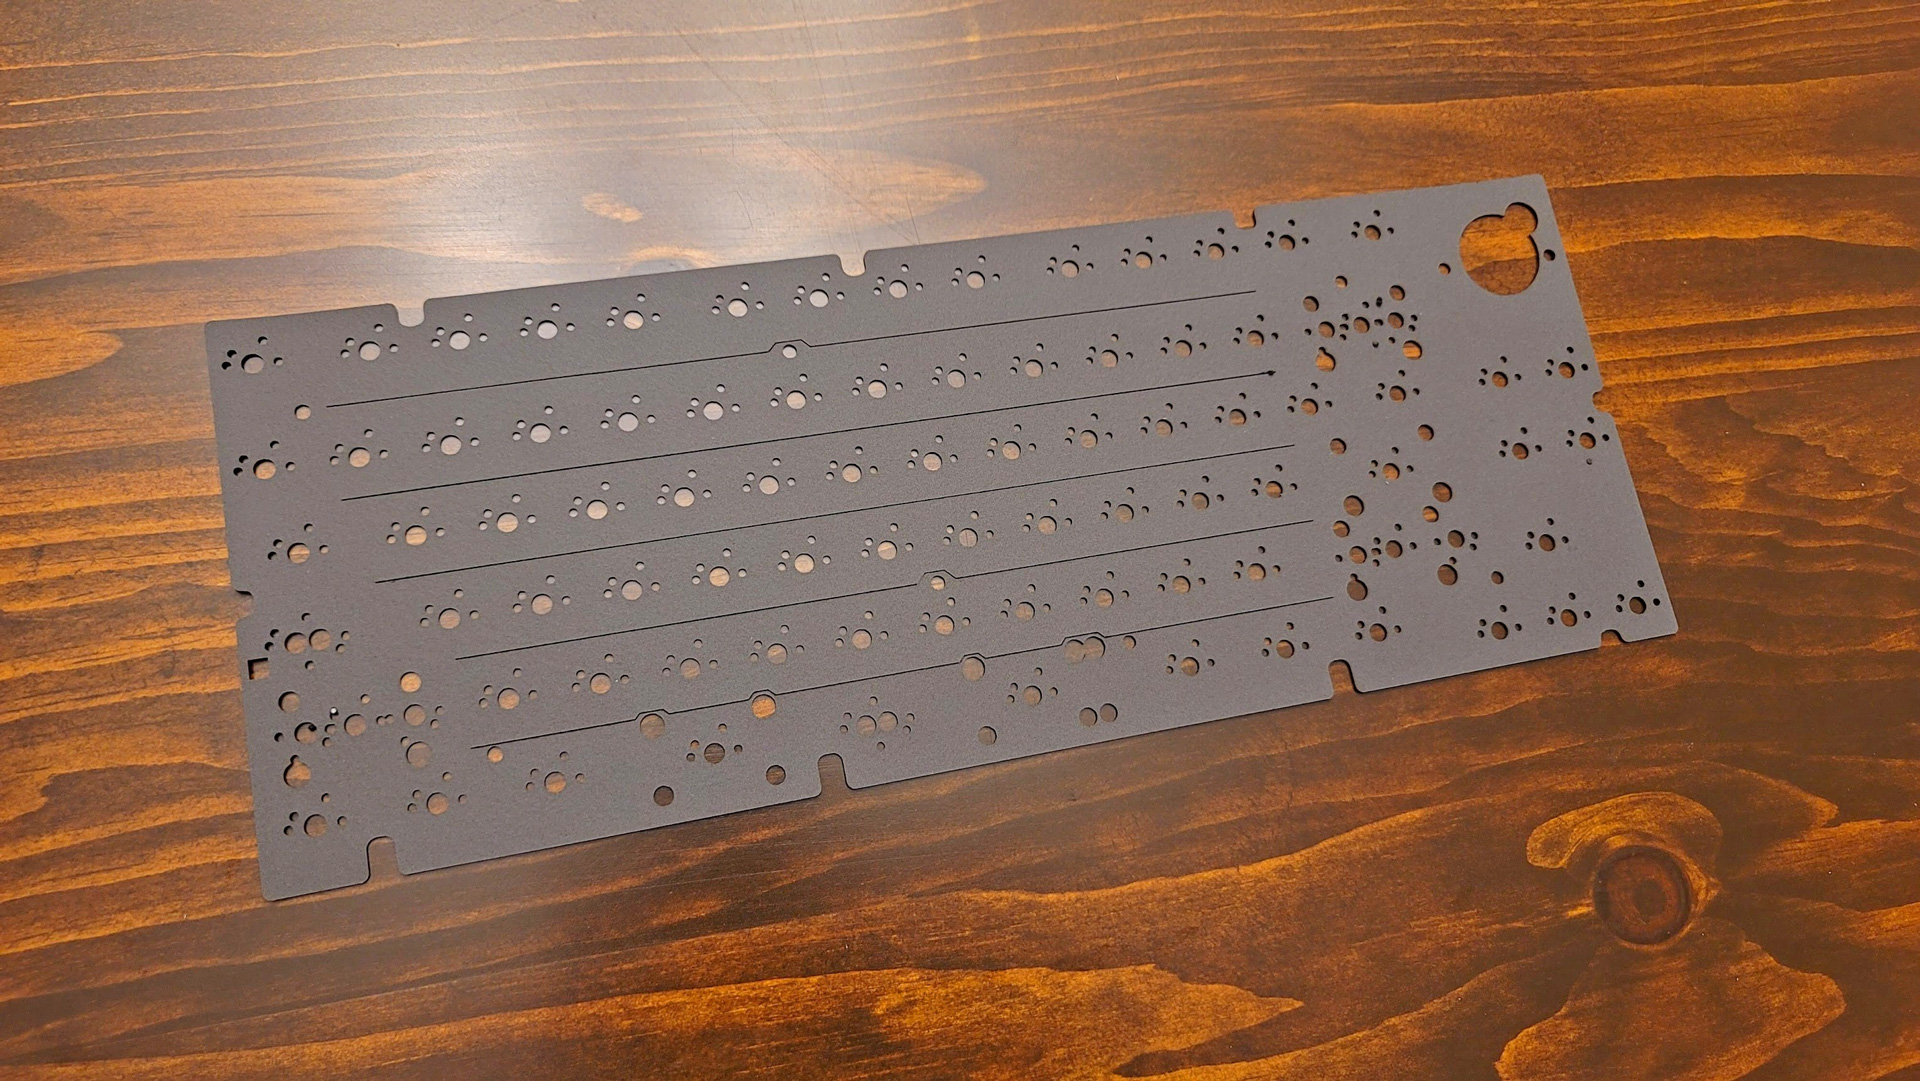
The final element is the massive amount of PORON foam included with the kit. Case foam is becoming more common, even in pre-made keyboards, but PORON foam is not common outside of the premium custom keyboard world. It is coveted for its unique blend of exceptional softness, resilience and density, making it an ideal material for dampening typing sounds, reducing reverberation throughout the case and overall acoustic tuning, while still maintaining a soft and flexible typing experience. This also removes the need for additional modding and acoustic tuning. Unless you’re considering something like the tape mod, Wuque has already considered it and factored it into the design here.
Both the plate and PCB also come with layers of soft PORON foam pre-attached, saving the need to align multiple layers of material during assembly. These can be easily peeled off without leaving any residue or debris behind, but like the plate, are recommended to be left in place for the sound and feel Wuque designed around.
The foam doesn’t end with two simple layers, either. Beneath the plate foam is a thin sheet of switch foam, similar to KBDFans’ switch pads or the PE foam mod. This is purely for acoustics and can be left or removed to taste. Underneath the PCB are pre-cut rectangles of foam to fill in the battery cavity (for the Bluetooth PCB) and to cover the USB daughterboard. Additional strips of PORON are used for the gasket mount implementation: thin strips adhere to the top case. Combined with the foam on the bottom of the PCB, the two layers sandwich the PCB assembly, dampening keystrokes and allowing the entire keyset to flex under pressure.
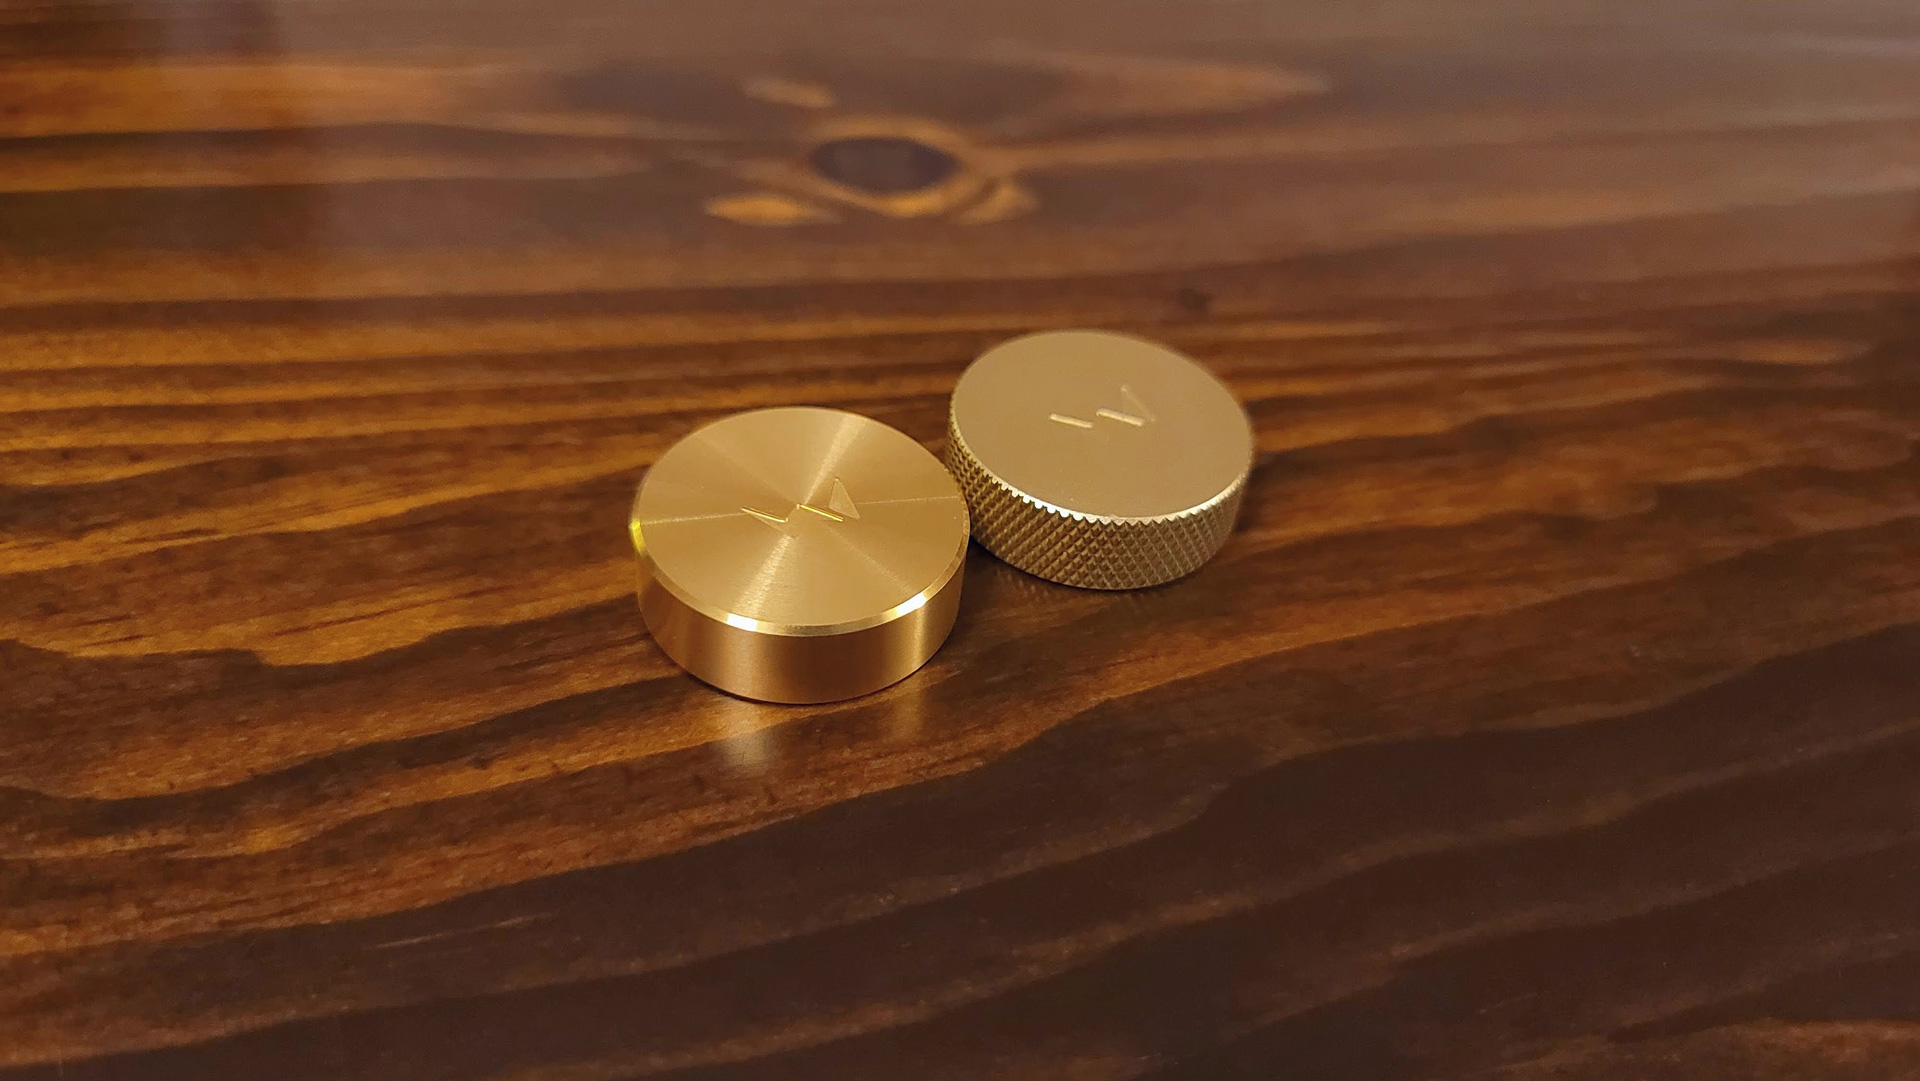
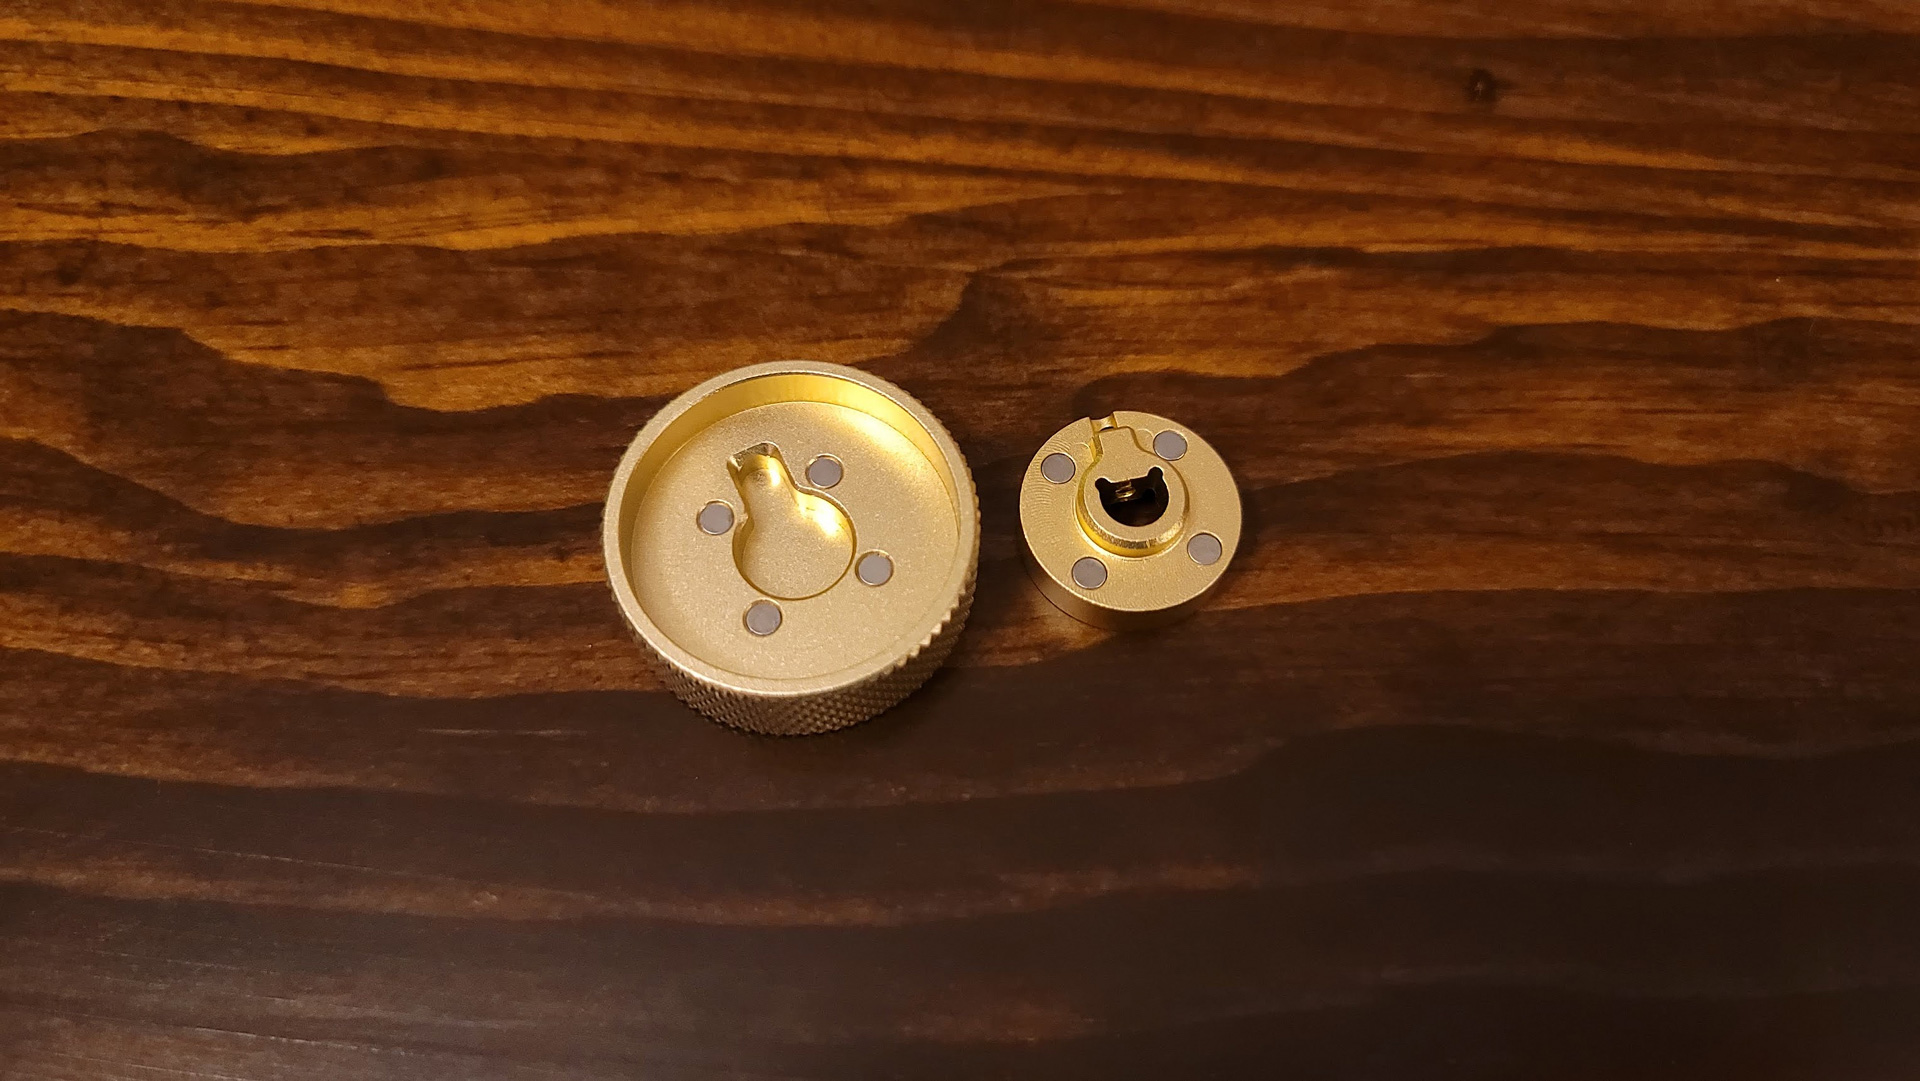
Internal construction aside, the knob is one of the stars of the show here. That might sound strange coming from the world of production keyboards where volume knobs are commonplace, but in the custom keyboard scene, it’s a highly sought-after feature. And these knobs are simultaneously higher quality and more customizable.
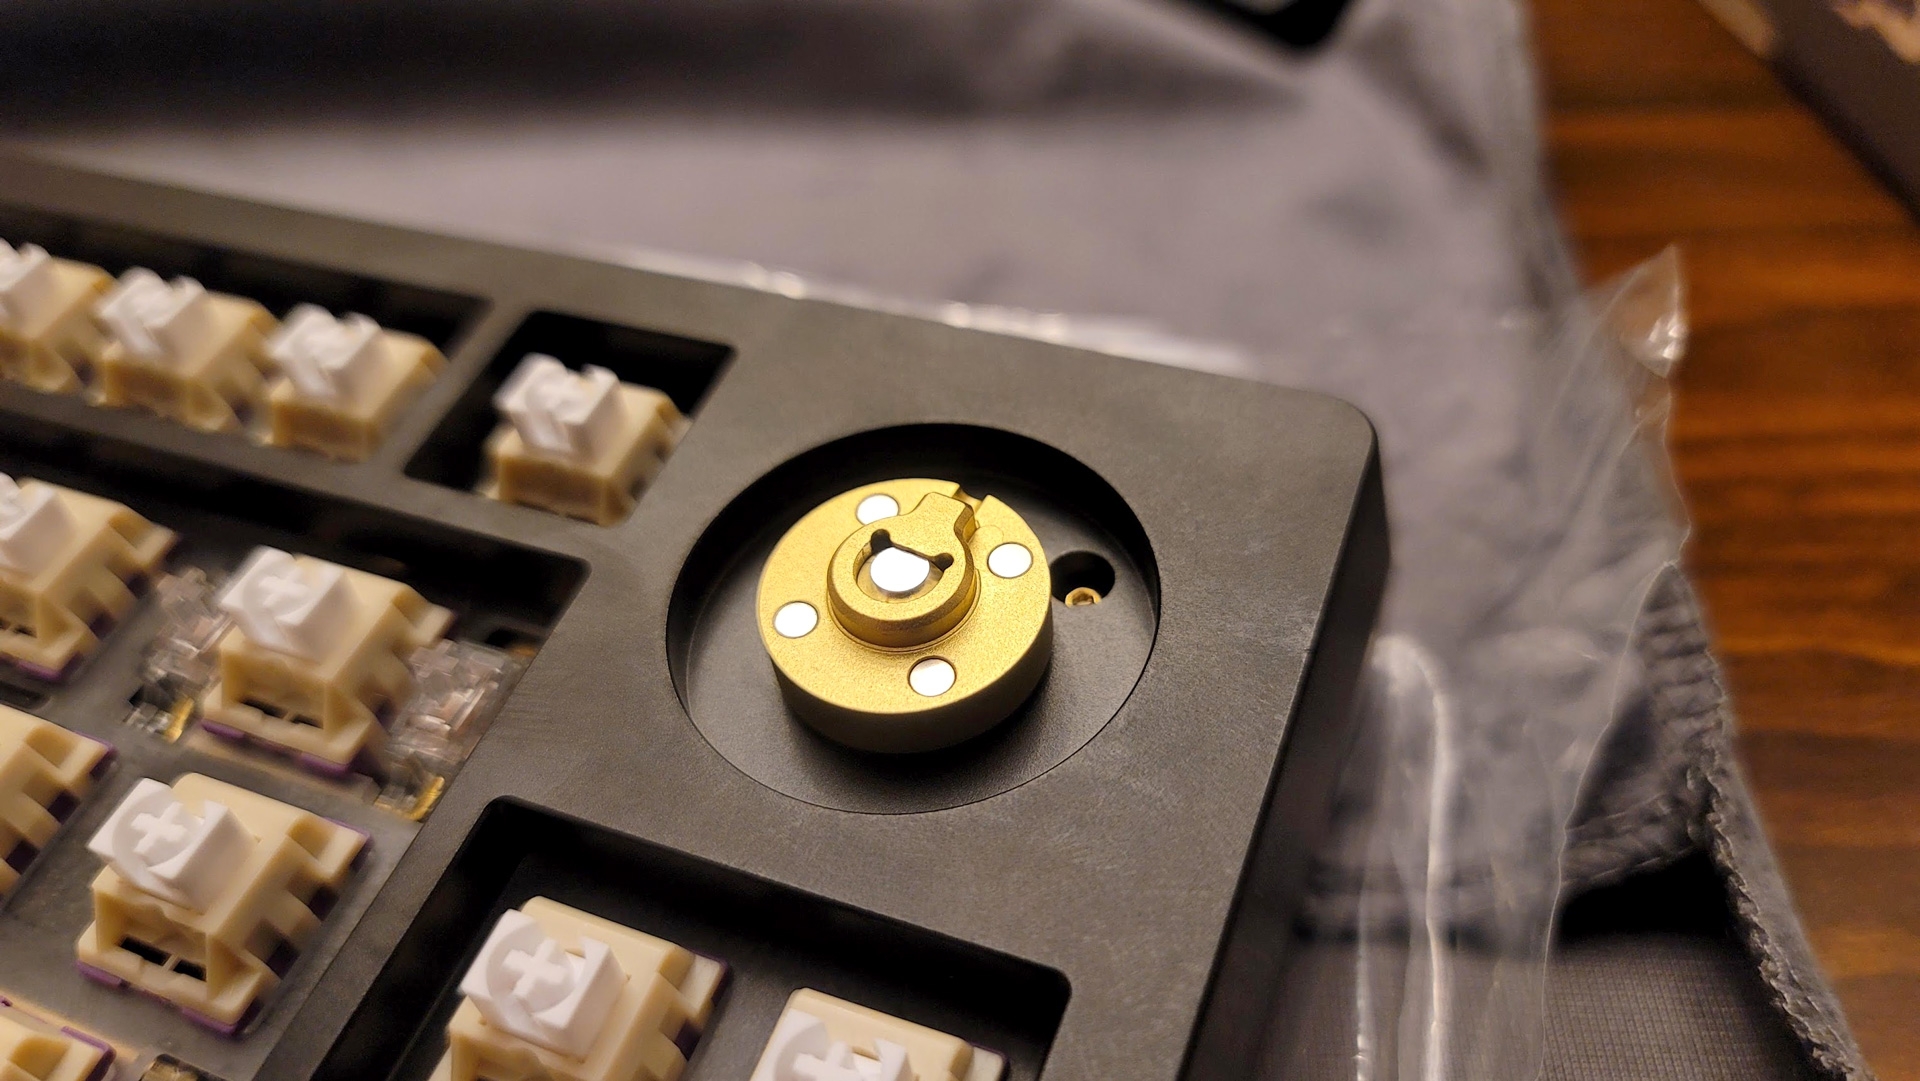
Included in the kit are a smooth golden-hued brass knob and a blonde-gold aluminum knob with knurled edges. The knobs attach to a rotary encoder with gentle notched steps. Since you have a choice of two and potentially more in the future, the knobs attach using a magnetic base. Once they’re mounted, they stay in place well but are easy to remove and swap out to match different keycap sets.
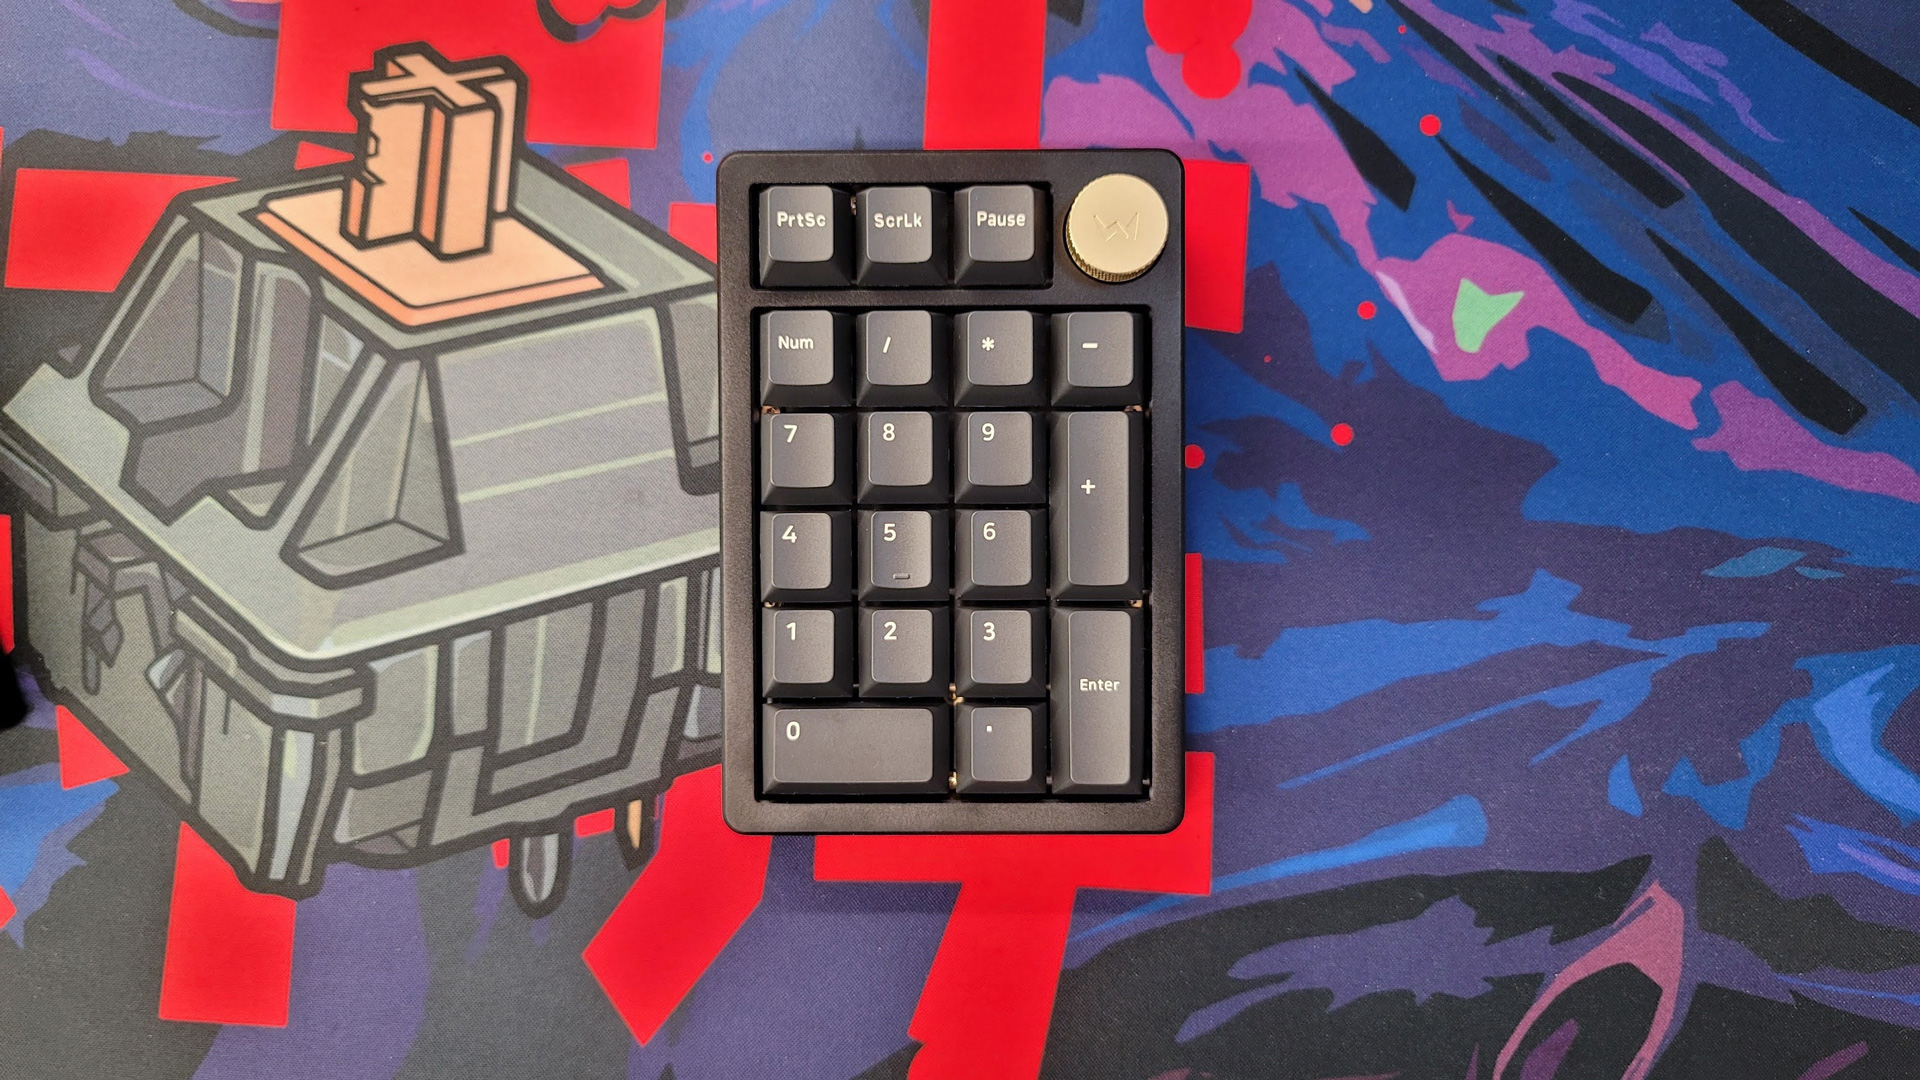
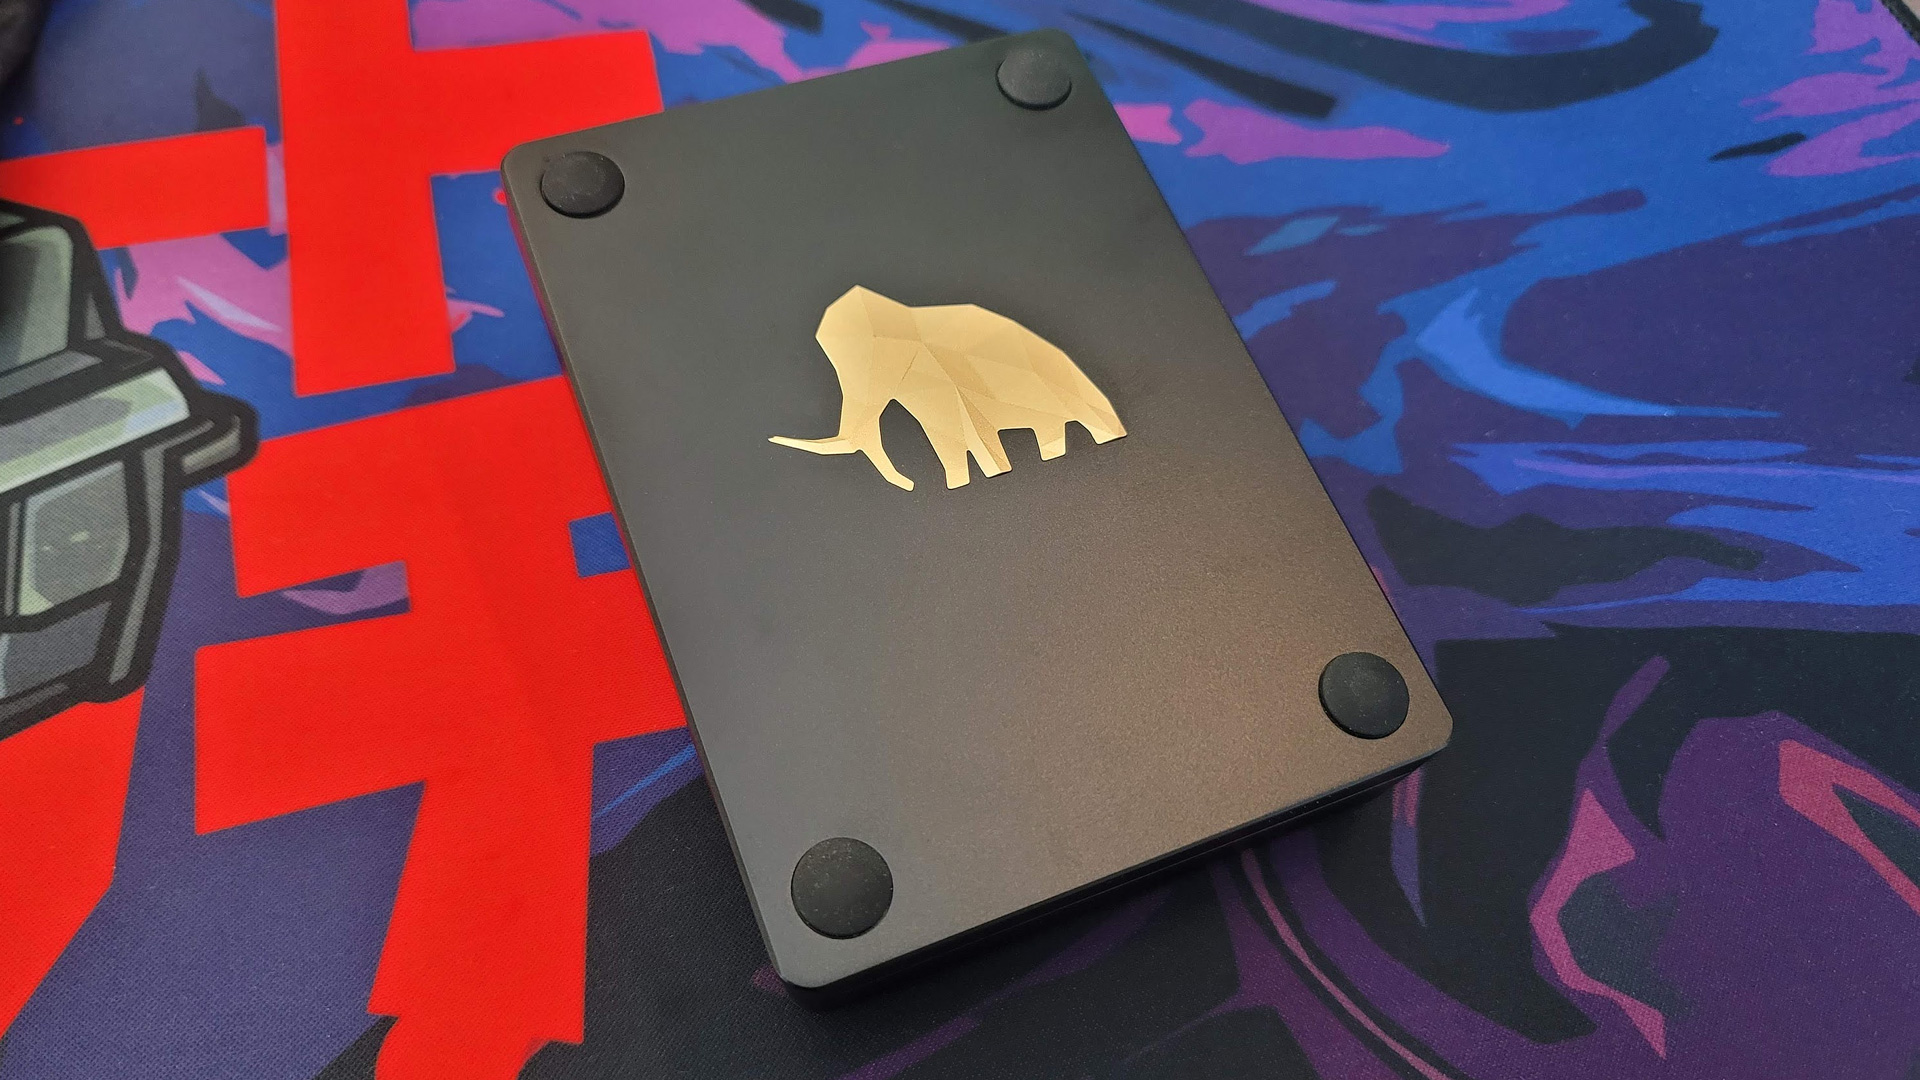
In addition to the keyboard, Wuque is also launching a separate number pad called the Mammoth 20. It features the same overall design, including the foams and gasket mount, but lacks the mirrored bottom. It does include a knurled aluminum knob to match the Mammoth75 and an identical aluminum mammoth weight set into the bottom case.
The Mammoth 20 is the perfect match for the Mammoth75, but as a separate accessory, it requires a separate USB cable (a Bluetooth version is also available). I would have liked to have seen a passthrough connection on the 75 to save needing a second USB port, but given its $109 to $125 price, it’s not a given that all keyboard buyers will also be opting for the separate number pad. Adding a second USB port to the keyboard would break the clean side and rear profile of the keyboard, so it’s understandable Wuque Studio would choose to design both products in isolation.
Both of these products are completely user-programmable. Both boards support QMK and VIA software, which allow you to remap any key across four or more layers (virtual keysets accessible by holding key combinations — think of layers like having multiple keyboards in one). These changes rewrite the keyboard’s firmware, which is the code dictating how they function, regardless of machine or presence of software. That means you can have custom keymaps for different applications, Windows shortcuts, or even macros stored and available to use no matter what computer you happen to be using.
Assembly
Building the Mammoth75 is more complicated than many custom keyboards, but isn’t difficult with time and patience. In fact, in some ways, it’s even simpler since the foam pads come pre-applied to the plate and PCB. You’ll still need to put on the gasket strips and line up the switch film, though, in addition to standard steps like preparing the stabilizers and installing switches and keycaps.
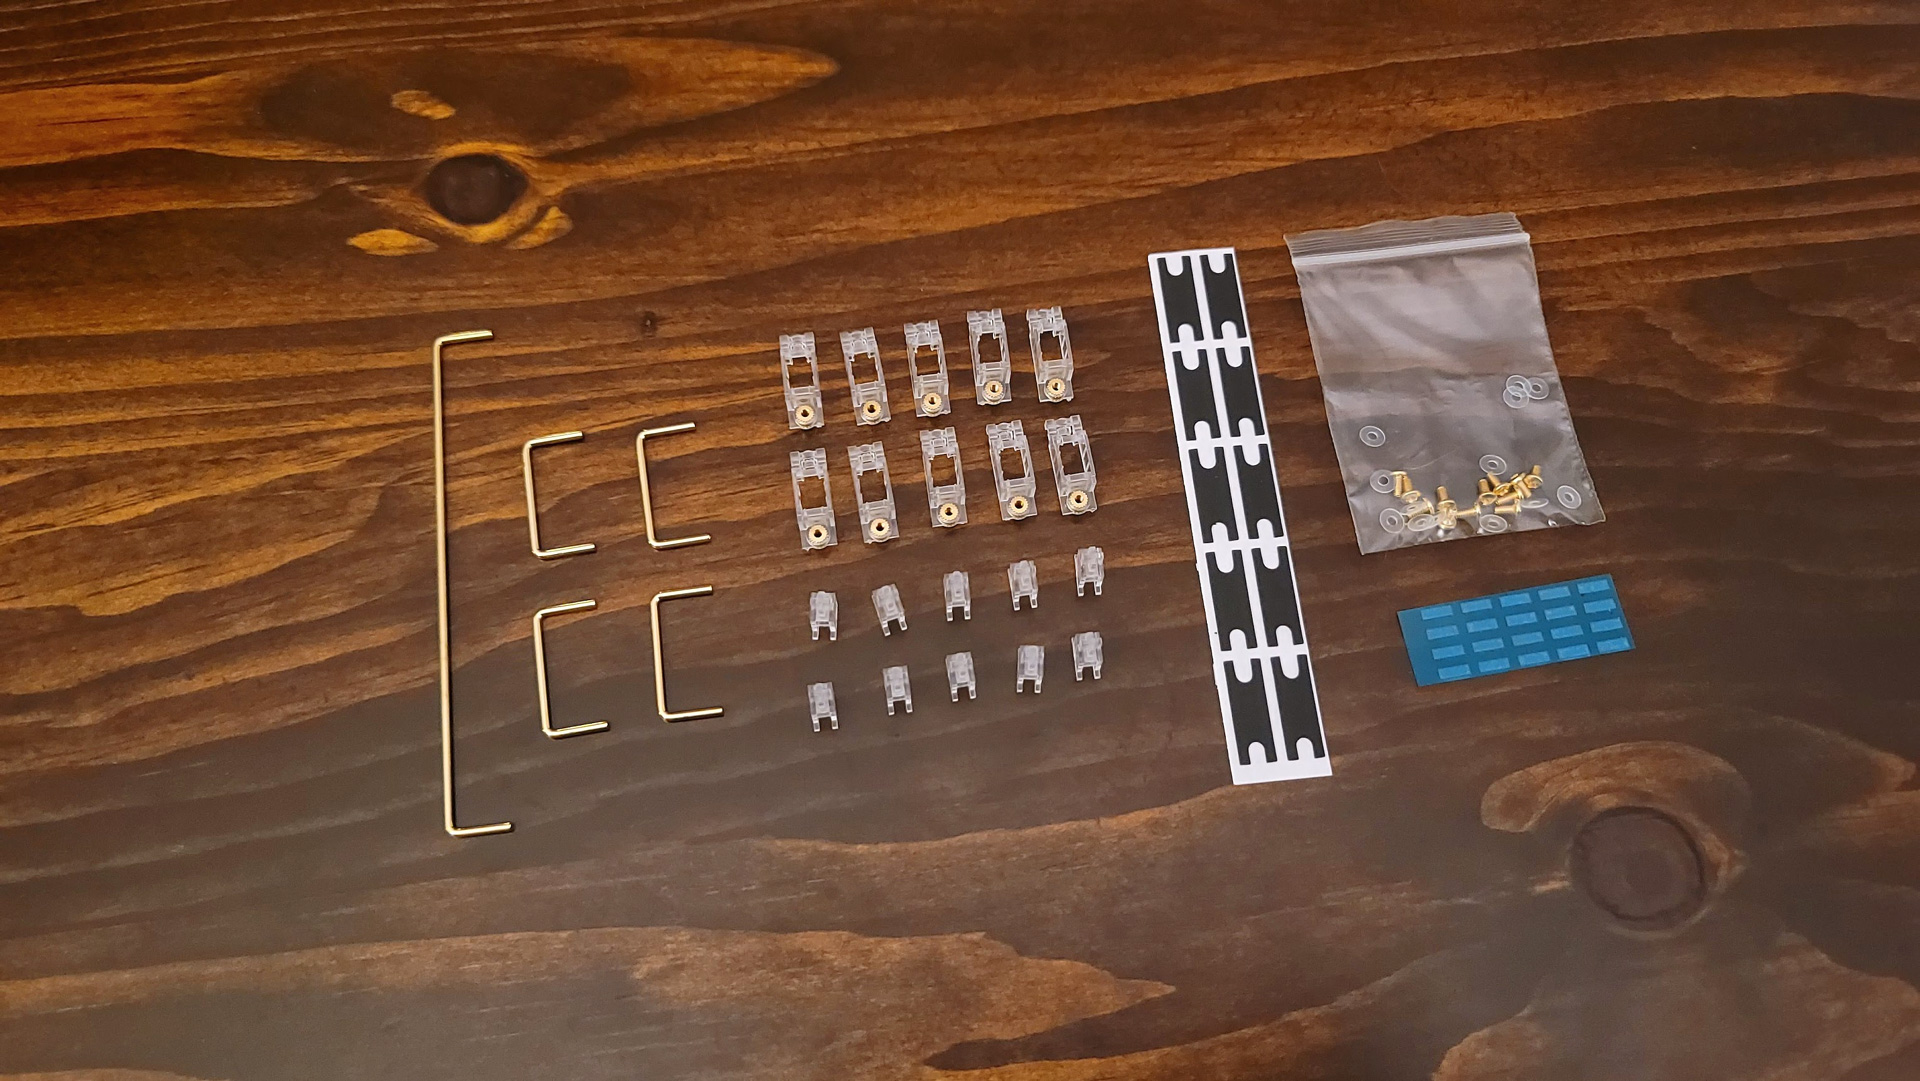
Where assembly gets more challenging is in attaching everything and in the proper order. Wuque has provided a helpful build guide to usher you through the process, but there’s a defined order and steps you won’t want to miss, like shimming third-party stabilizers, trimming the switch film, or properly mounting the knob with the plastic anchor and magnetic base.
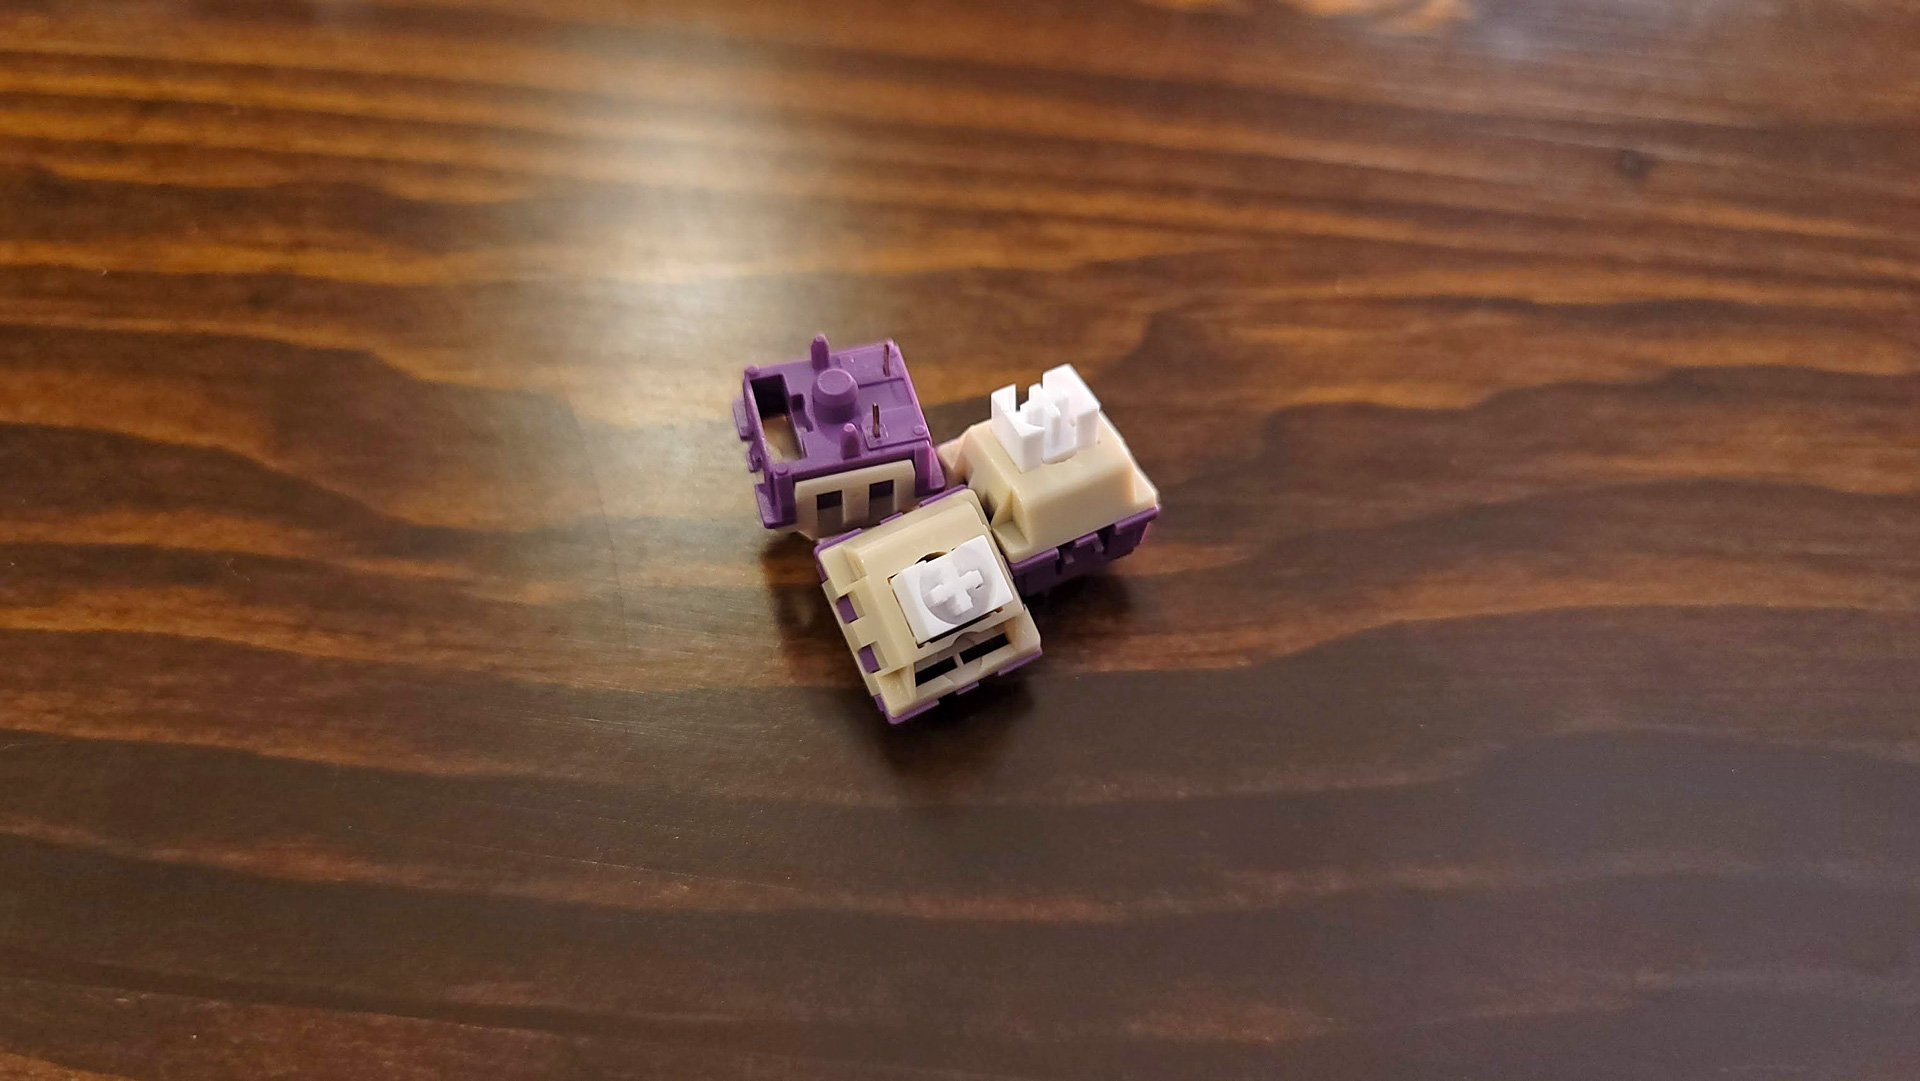
The entire build process took about ninety minutes, not including preparing the stabilizers and lubing switches. Those steps on their own add several hours but are common to any keyboard build. As someone who hates lubing switches, I was pleased to find that Wuque’s new Onion switches, sent along for this build, were effectively pre-lubed from the factory and didn’t need any extra modding. They’re also very smooth and have a great sound profile, so I highly recommend fans of linear switches give them a try.
I did run into one rather large issue of my own making, but it’s one that any builder who has never used a PORON switch pad should be aware of. When lubing stabilizers, it’s common to use dielectric grease to coat the wire. Should this leak onto the switch film, it can leave a sticky residue which can be heard and felt under the stabilized keys, even after it’s been wiped clean. This is a byproduct of the porousness of PORON, but if you like to generously lube, I highly recommend taking the build guide’s suggestion and cutting holes in the film for the bottoms of the stabilizers. Wuque includes a set of stabilizer pad stickers just for this purpose and it leads to a much nicer typing experience.
Apart from my self-inflicted frustration, there were two other small areas for improvement that Wuque has committed to addressing before launch: the number of screwdrivers required and the providing of some extra hardware in case of accidents. The prototype sample I tested with required three different screwdrivers: two sizes of Allen-Drive cap screws and a Phillips head. This will be simplified down to a single size of Allen screw, reducing how often you’ll need to change bits. The plate also attaches to the PCB using a set of nylon screws that are very soft and easy to strip. The final kit will include enough extras to provide backups in case any get deformed during installation.
Typing Experience on the Mammoth75
Since the Mammoth75 doesn’t come with switches, stabilizers, or keycaps, the typing experience will vary depending on how it’s built. For this build, Wuque provided a set of its own switches and stabilizers so I could experience the full in-house experience. Wuque’s Onion switches and Aurora stabilizers are each excellent and the stabilizers are more affordable than the industry-standard Durock V2s. I also used doubleshot PBT keycaps.
Building the keyboard exactly as recommended leads to a soft typing experience with an addictively poppy sound profile. The flex cuts under each of the alpha rows make each of the keys bounce ever so slightly, even with normal keystrokes. Keys felt almost reactive under my fingers. When typing quickly, typing took on an almost marbly sound, but the character is softer than with PE foam, like on the Jelly Epoch. The Mammoth75 doesn’t have the same slight sharpness to keystrokes but is absolutely full of character.
When typing, you quickly realize how important all of that foam is. There is no reverberation throughout the case. There is no spring ping or any unwanted noise whatsoever. While many keyboards use case foam purely to remove case reverb, here each piece pulls double duty for acoustic tuning. This is especially true of the switch film layer which acts as a kind of wave filter, bringing out the high frequencies from bottom outs.
The result is one I greatly enjoy, but there’s no mistaking that the case sounds “full.” If you prefer a bit more volume, or to hear the switches without the filter effect, you can remove any layer of foam. Removing them all does tend to make the case sound hollow, so I would recommend leaving the PCB foam in place. Pulling out the plate foam and switch film, however, immediately changes the character of typing sounds. As is ever the case, a custom keyboard is all about customizing to exactly what you want, not what anyone else says is best.
The Aurora stabilizers also impressed me. Unlike traditional stabilizers, they hook the wire from underneath, allowing pressure from the PCB to hold them in place and prevent popping out. The tolerances are very tight. I found that I had to use less lube than even Durock V2s to eliminate rattle and make my stabilized keys sound great.
Gaming Experience on the Mammoth75
The Mammoth75 isn’t designed for gaming, but functioned well for it during my testing. It also has a few general features which could be helpful depending on the kinds of games you play and how you play them.
Since the keyboard is entirely user-programmable, it’s possible to create custom layouts for individual games. As a compact keyboard, you’ll probably want to reserve at least one layer for any missing commands or media controls you frequently use. That leaves two more for different layouts, shortcuts, or macros.
Compared to a dedicated gaming keyboard, the Mammoth75 is expectedly less feature-rich for gaming. VIA and QMK are likewise not developed with gaming in mind, so you won’t find advanced features like directories of Windows shortcuts as on Logitech's G915. Assigning macros also takes more time and you can’t edit them with the same level of step-by-step detail as the Corsair K100 or Razer BlackWidow V3 Mini HyperSpeed. But, if you don’t need those features, gaming is like everything else: It feels better on the Mammoth.
Software
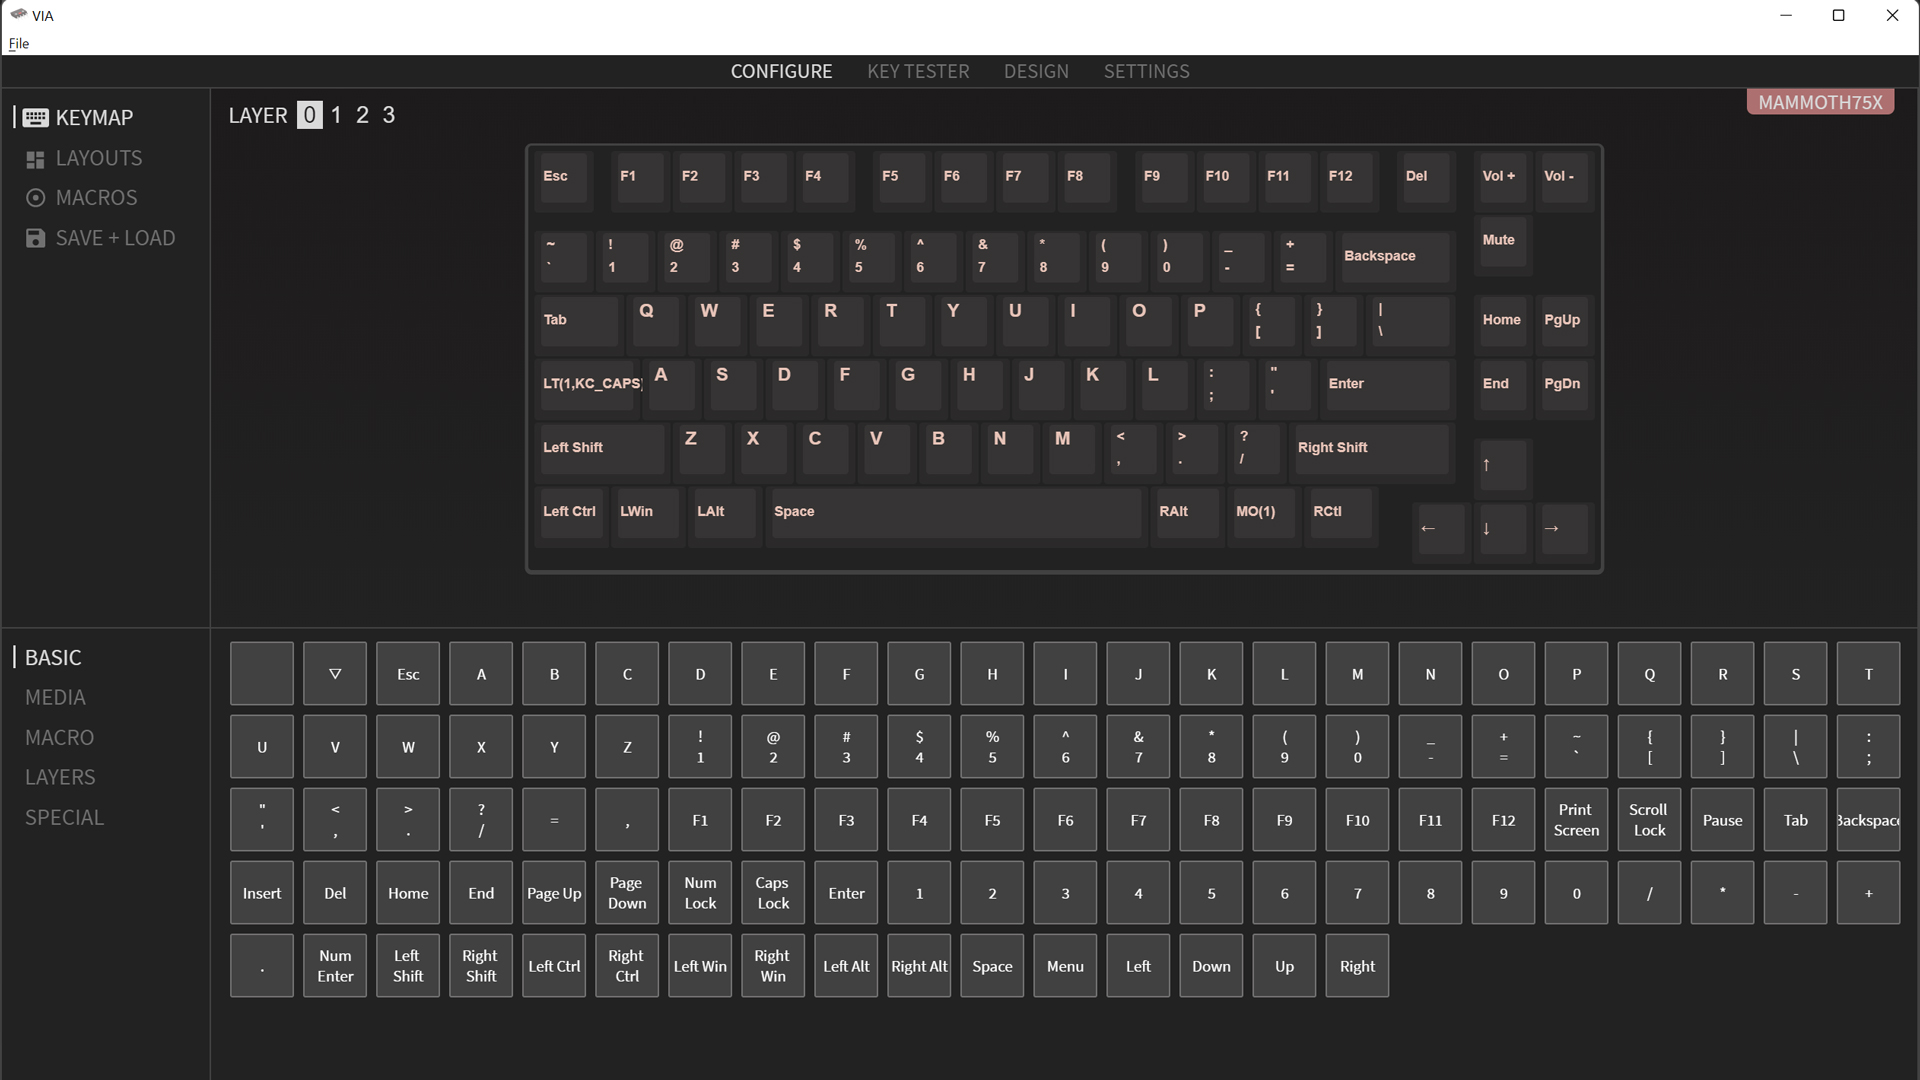
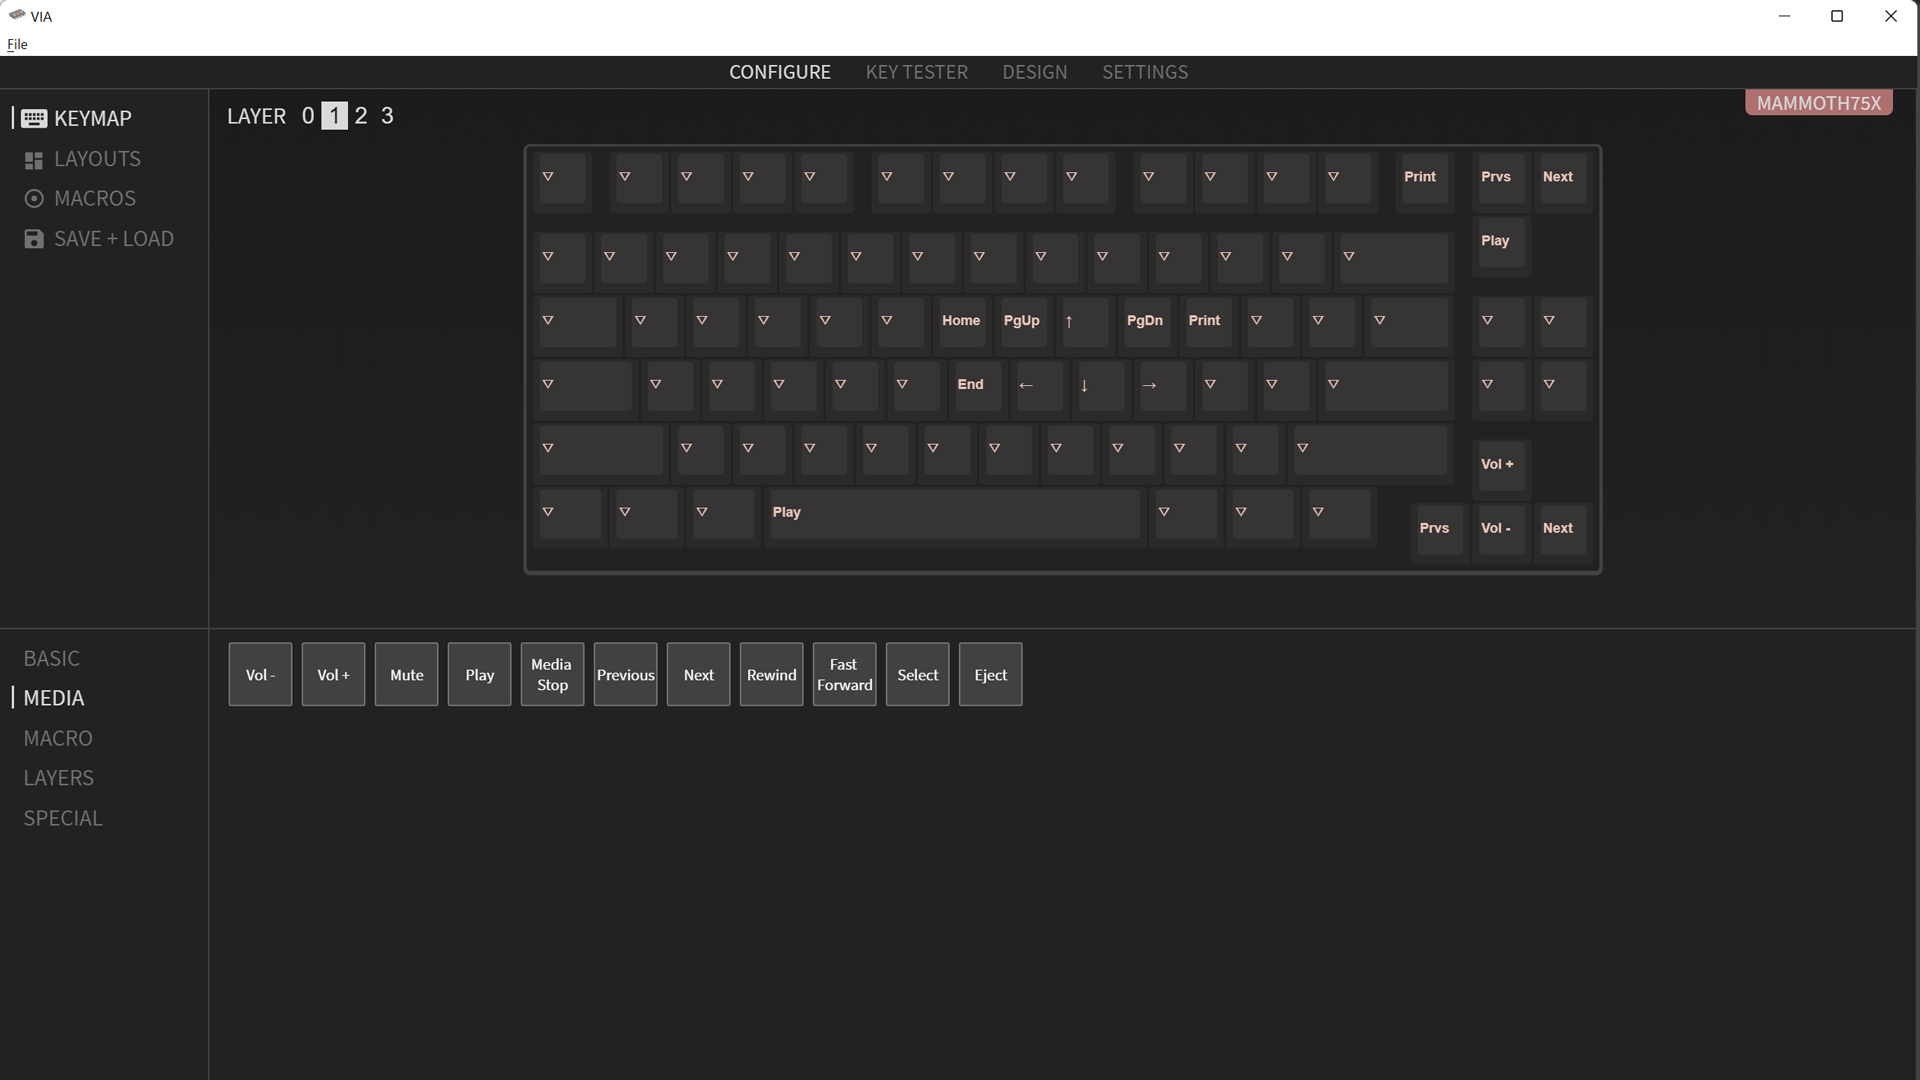
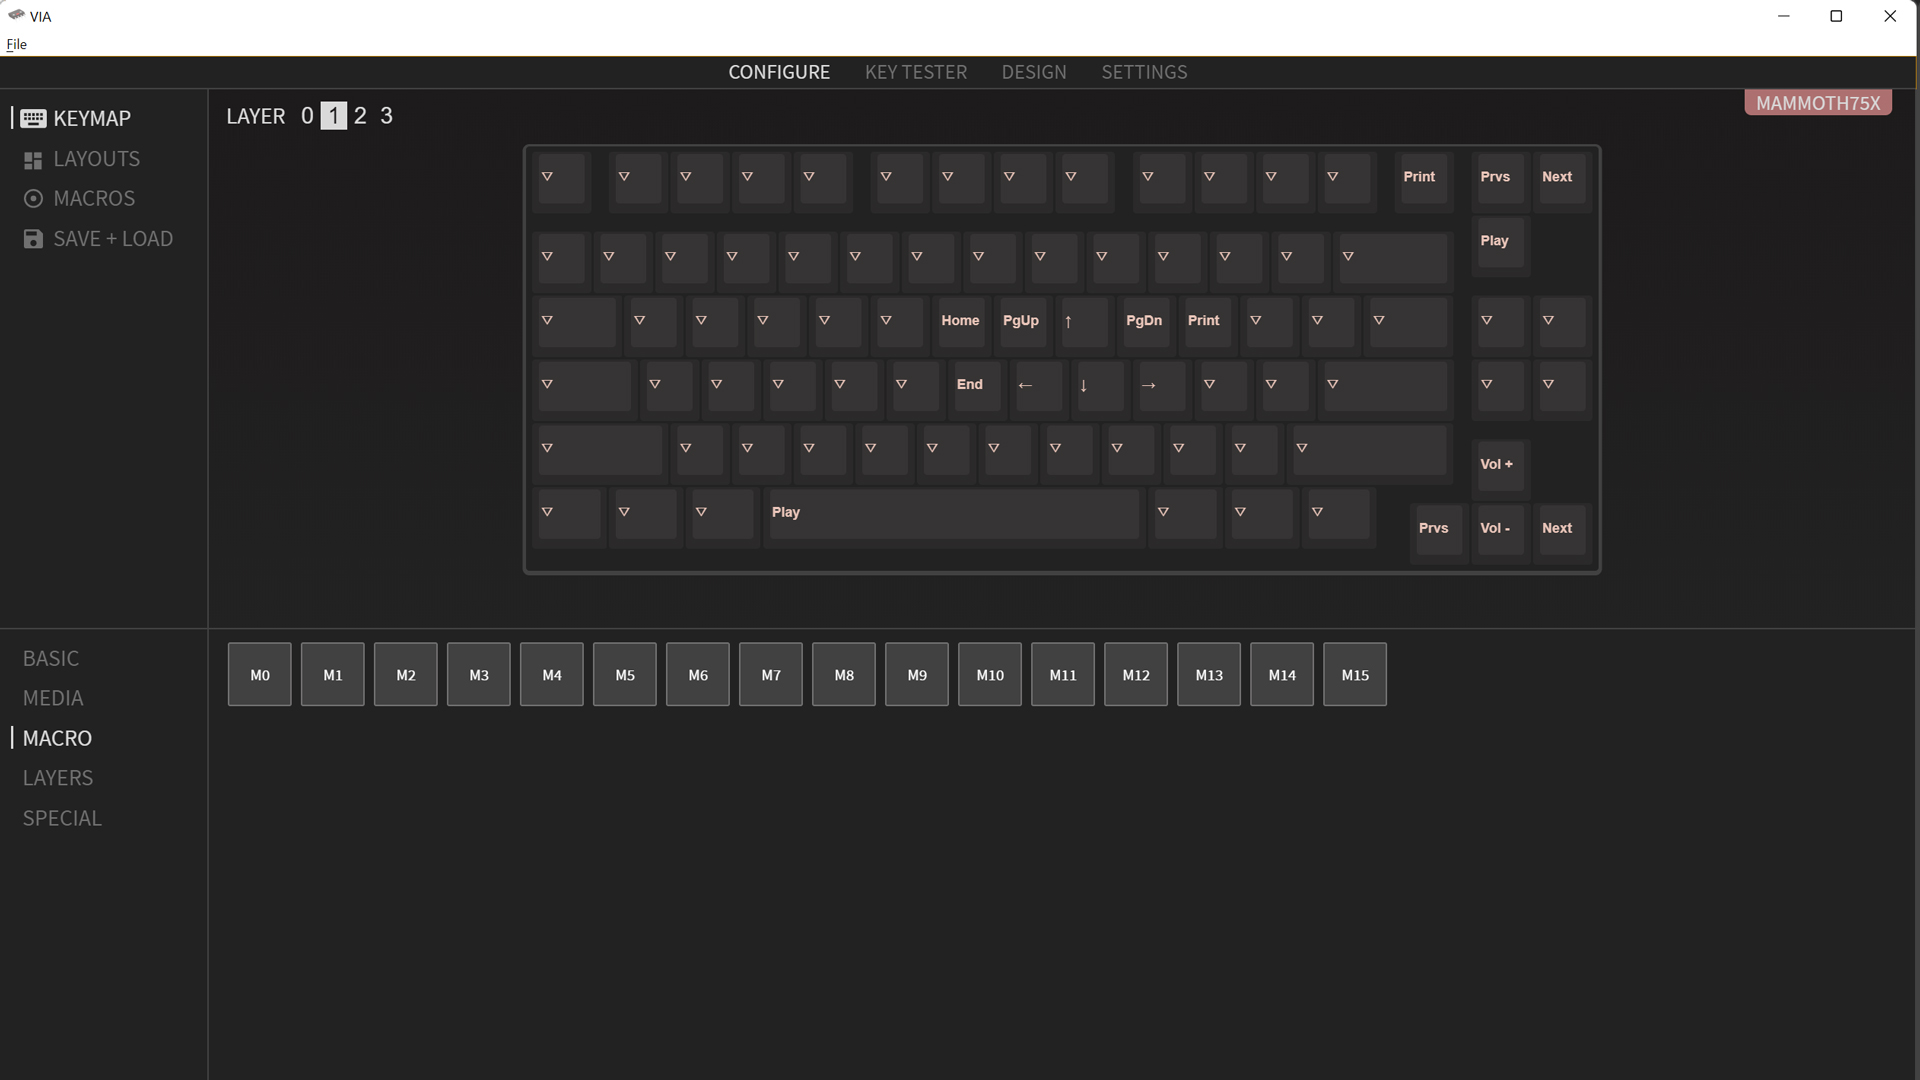
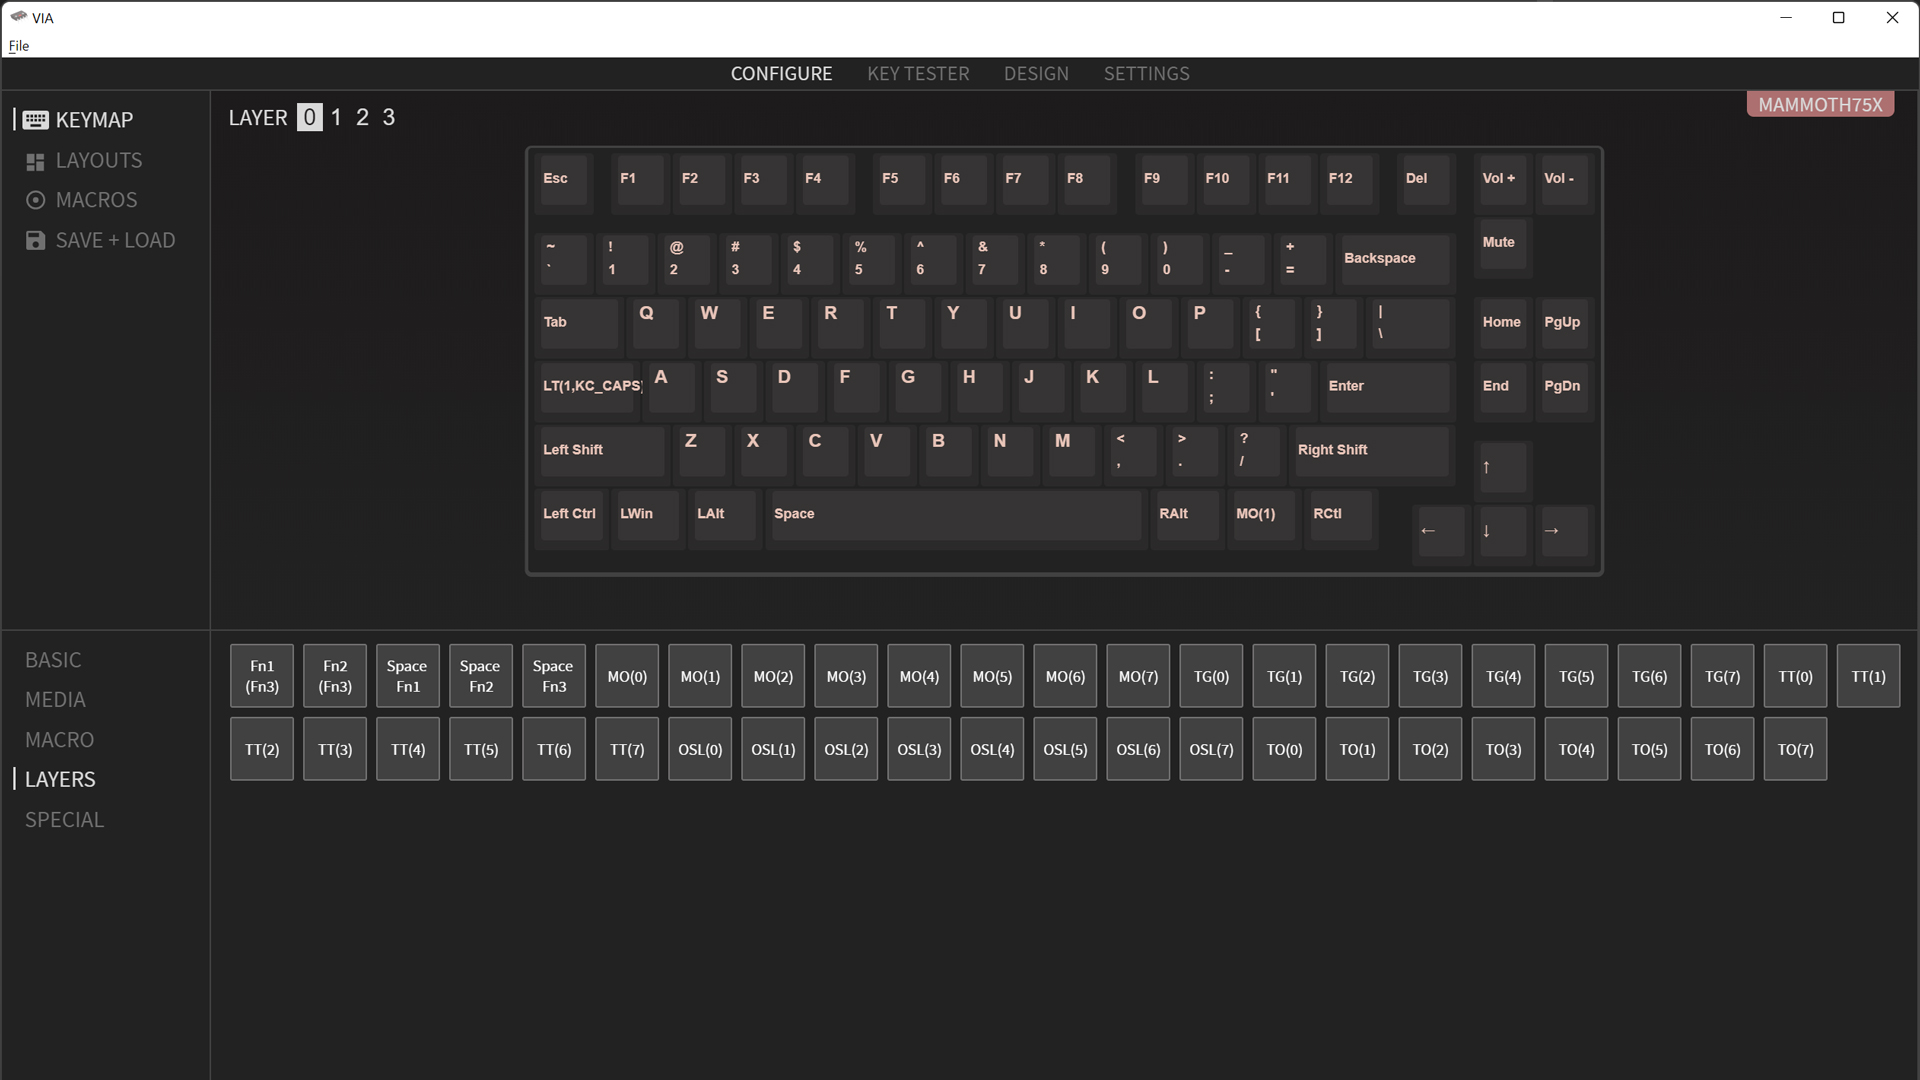
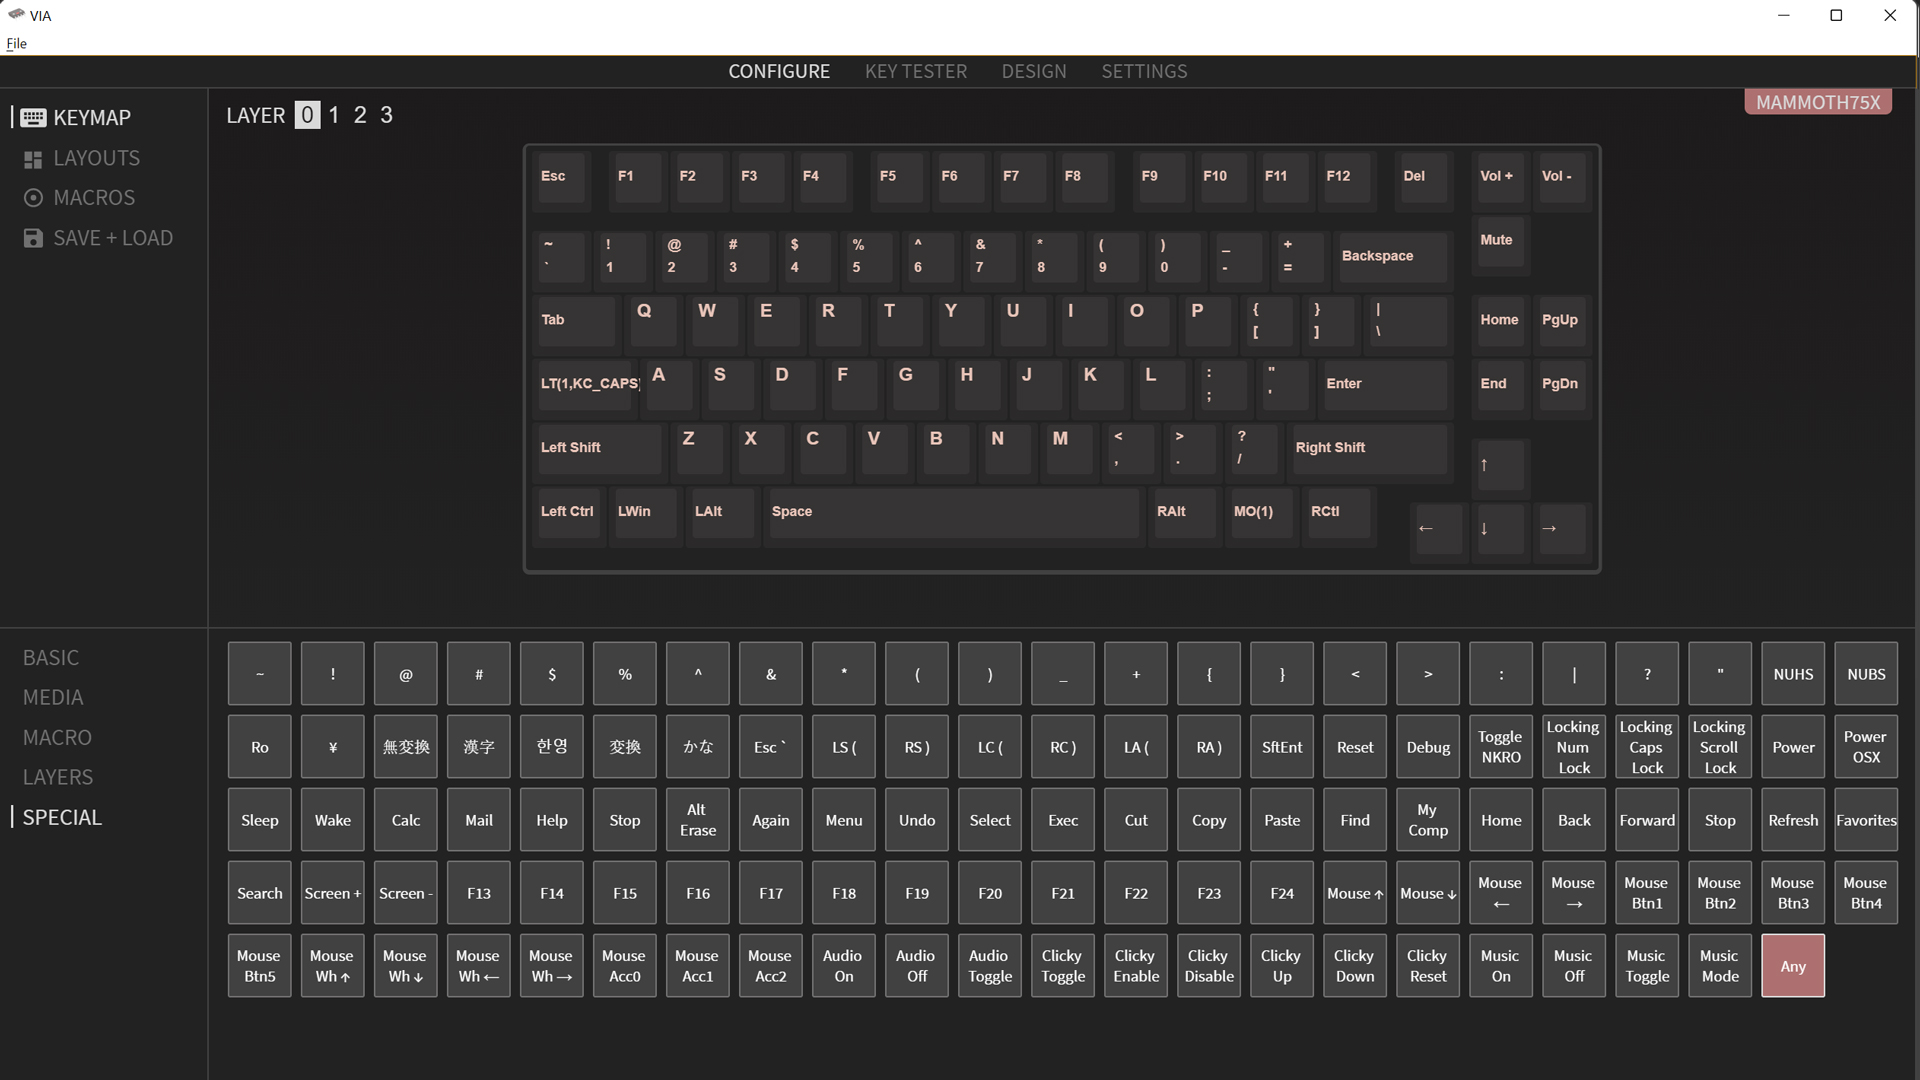
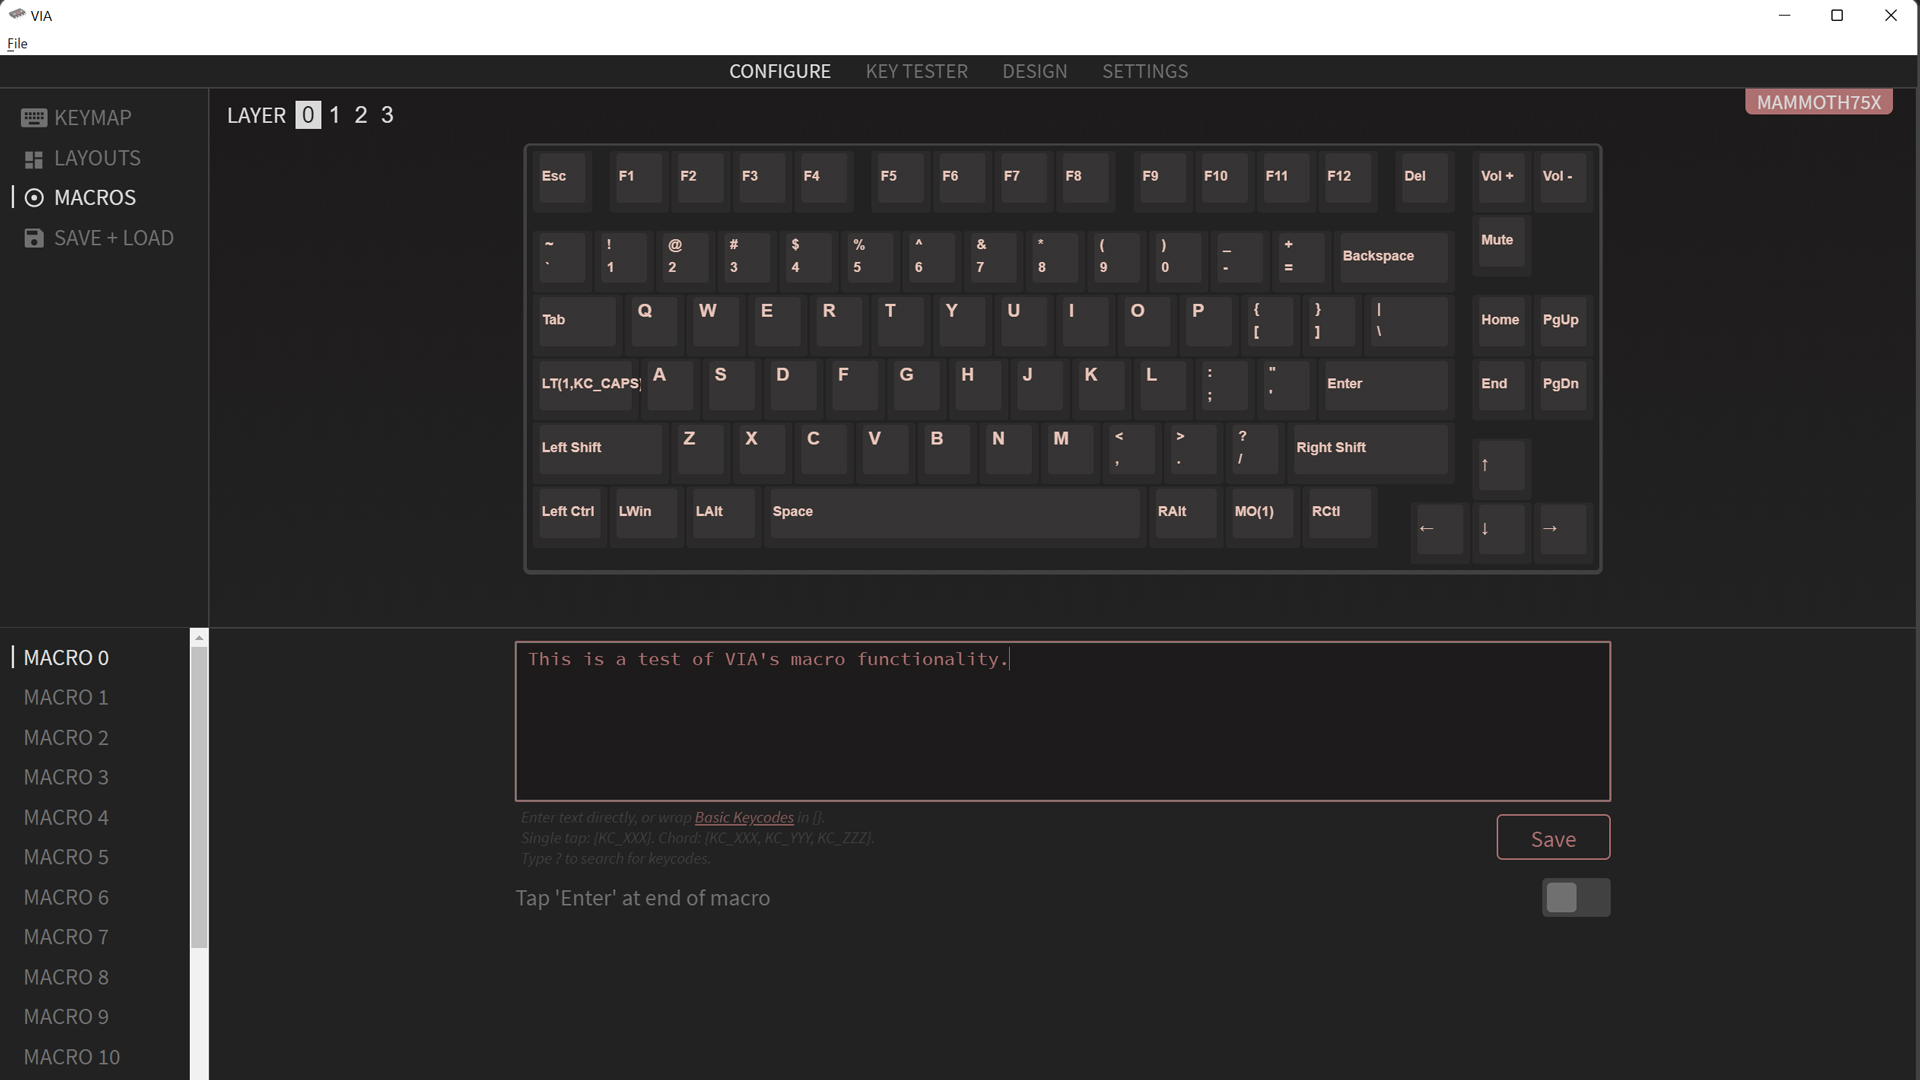
The Mammoth75 is built upon the QMK framework, which is a set of tools that allows you to remap any key across one to sixteen layers of virtual keysets. These layers are accessible by holding or tapping function keys, which you also set. It’s possible to program the keyboard with traditional coding, compiling firmware from the QMK Configurator and flashing it to the onboard processor, or using VIA, a WYSIWYG editor that instantly applies changes as soon as they’re made.
Between each of these options, VIA is the easiest and most user-friendly programming option but limits you to only four layers total. Since the keyboard doesn’t require keymaps for lighting controls and has enough buttons to cover the most commonly used functions, I didn’t find this to be a big limitation. If you play lots of games and want a unique keyset for each, the QMK Configurator quadruples the layer count, but requires the somewhat nerve-wracking step of manually flashing your own firmware to the keyboard.
QMK and VIA support is a major selling point for the Mammoth, one that many enthusiasts would consider a necessity to even consider purchasing, because of the deep layers of customization it offers. Using QMK/VIA, you can program advanced capabilities, like multi-function keys that send different commands when single-, double-, or triple-tapped. For easy access to my main secondary layer, I configured my Caps Lock to send Caps when tapped and to access Layer 1 when held. You can control your mouse, launch Windows shortcuts, control your browser, control your media, and more. It’s powerful software.
The flip side is that there is a learning curve. Basic key remapping and recording macros is extremely easy; you simply click a key and then click what you would like there instead. But any of the most advanced functions require a bit of research. Dual function keys, for example, require manually typing in the function using the appropriate codes and syntax. Setting up my Caps Lock key, for example, required the code LT(1,KC_CAPS), which I only discovered by exploring the QMK guide files and stumbling across help threads on Reddit.
The exceptional programmability of QMK lets you make the Mammoth your own in a way premade keyboards simply can’t. It takes time to learn, but once you do, it can be genuinely difficult to go back to a keyboard that doesn’t offer this level of customization.
Bottom Line
The Mammoth75 is a luxury product, through and through. It’s not for entry-level builders or keyboard enthusiasts on a tight budget. It’s the kind of kit you choose when you want to treat yourself with something fancy and eye-catching: a bit of swag for your desk or, in the words of the community: endgame.
At $430 as configured for this review, or $359 for the base option, its price is steep. If that’s deal-breakingly high, the Mode SixtyFive is another great option, starting at only $299. Of course, you can also piece together the parts for your own custom keyboard, assemble it following our guide, and top it off with a set of custom keycaps.
Neither of those options will deliver a typing experience quite as good as the Mammoth75, however. Wuque Studio is a master of its craft. It has become a darling in the keyboard community based on the impeccable quality of its products and the Mammoth75 makes it easy to see why. Yes, it’s expensive, and the mirrored bottom will take care to maintain, but the end result is a keyboard that truly is “endgame” worthy.
The Mammoth75 and Mammoth 20 will be available in Group Buy from January 14th to January 31st at 0:00 GMT+8 (that’s 8 A.M. January 13th, PST). The expected delivery is July 2022. More information is available on the official Wuque Studio product page.

Chris is a regular contributor for Tom’s Hardware, covering mechanical keyboards, peripherals, and content creation gear.
-
Friesiansam Expensive enough to make my Filco Majestouch 2 look very cheap at £125 in 2018 and, you have to build it yourself...Reply
AT that sort of price, ready built with my choice of options, would be a bit more like it.
