How to Build a Custom Mechanical Keyboard: A Step-By-Step Guide
Building your own keyboard is a fun, easy and oh-so-satisfying way to enhance your computing experience
Few things are as satisfying as building something with your own two hands. Never has that been more true in the world of mechanical keyboards, where building your own can enhance your daily computing experience. Thanks to big streamers like Taeha Types, more enthusiasts than ever have caught the keyboard bug and are itching to build their very own custom mechanical keyboard.
It’s an exciting prospect, but the idea of building your own keyboard can be intimidating. What should you buy? Where should you buy it? How do you know if it will all work together? It’s enough to push prospective builders away from ever taking the leap at all and instead hunting through pre-made offerings for a one-size-fits-all keyboard instead of something truly their own.
We’re here to help. In this guide, we’ll walk you through exactly what you need to build your very own custom mechanical keyboard, whether it’s the best gaming keyboard for you or the ultimate productivity tool.
What You Need to Build a Custom Mechanical Keyboard
To build your own mechanical keyboard, you'll need a selection of key components and accessories:
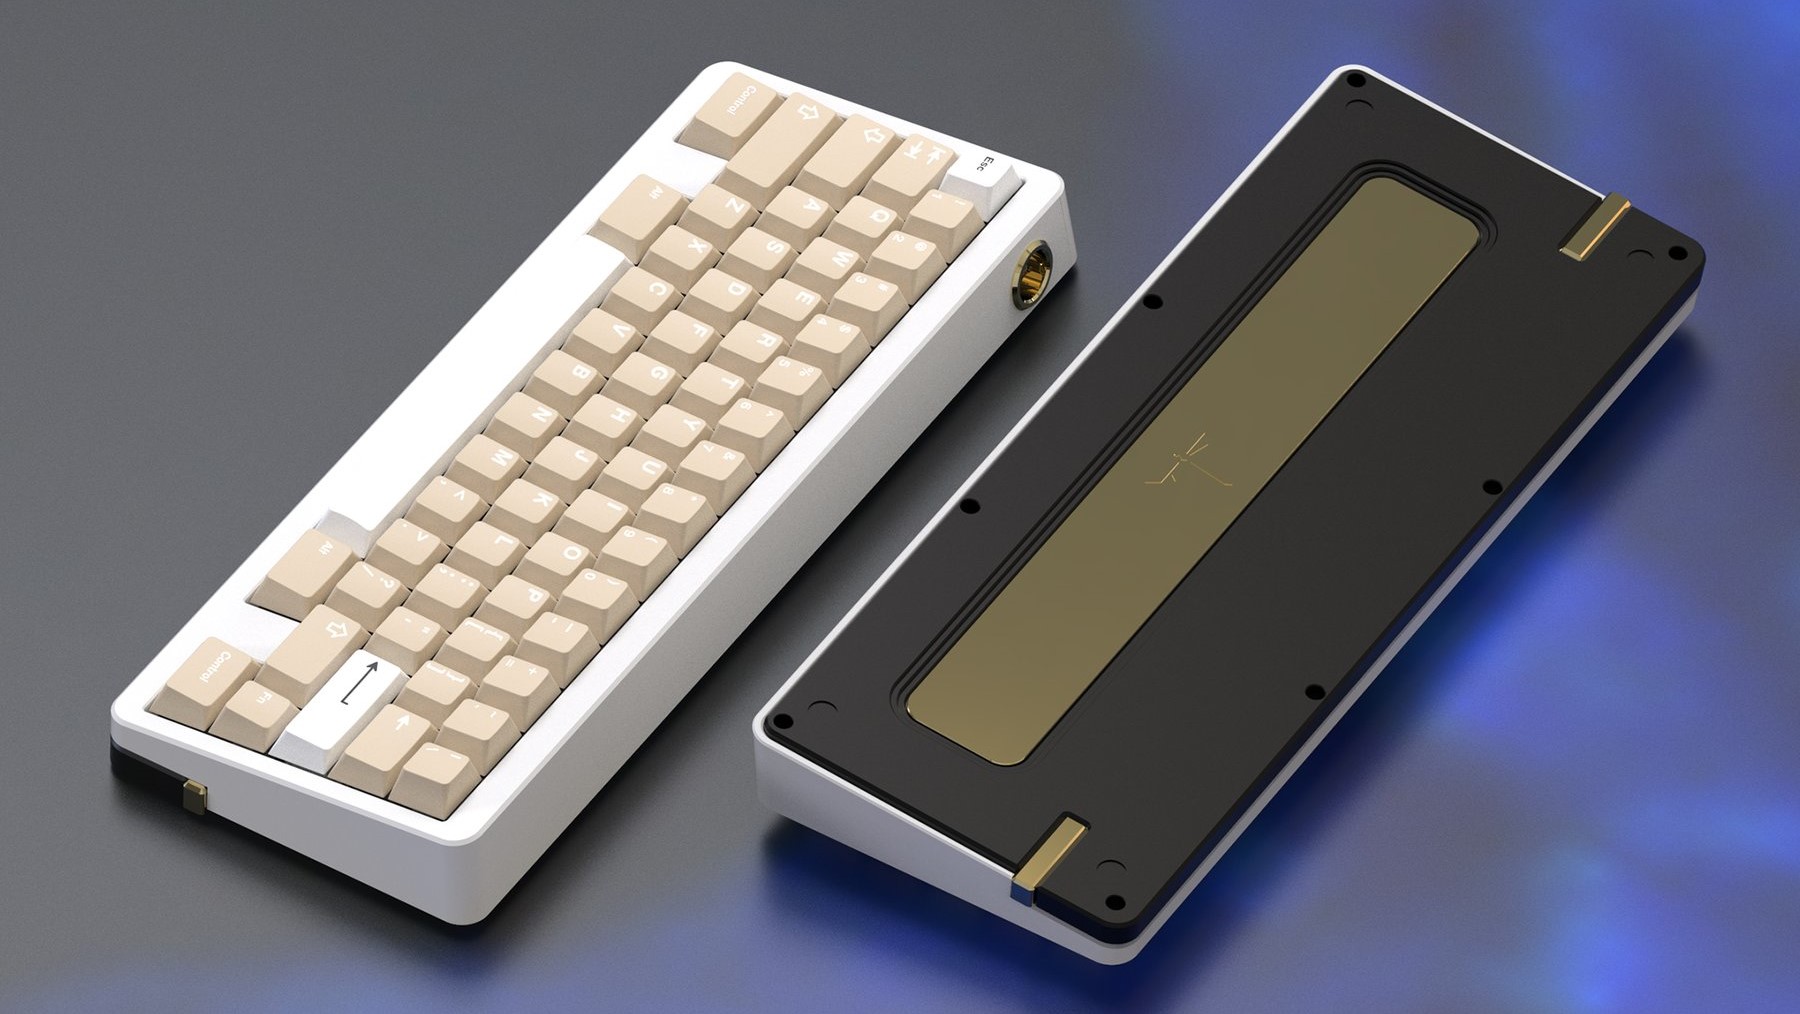
- Keyboard case
- PCB compatible with that case
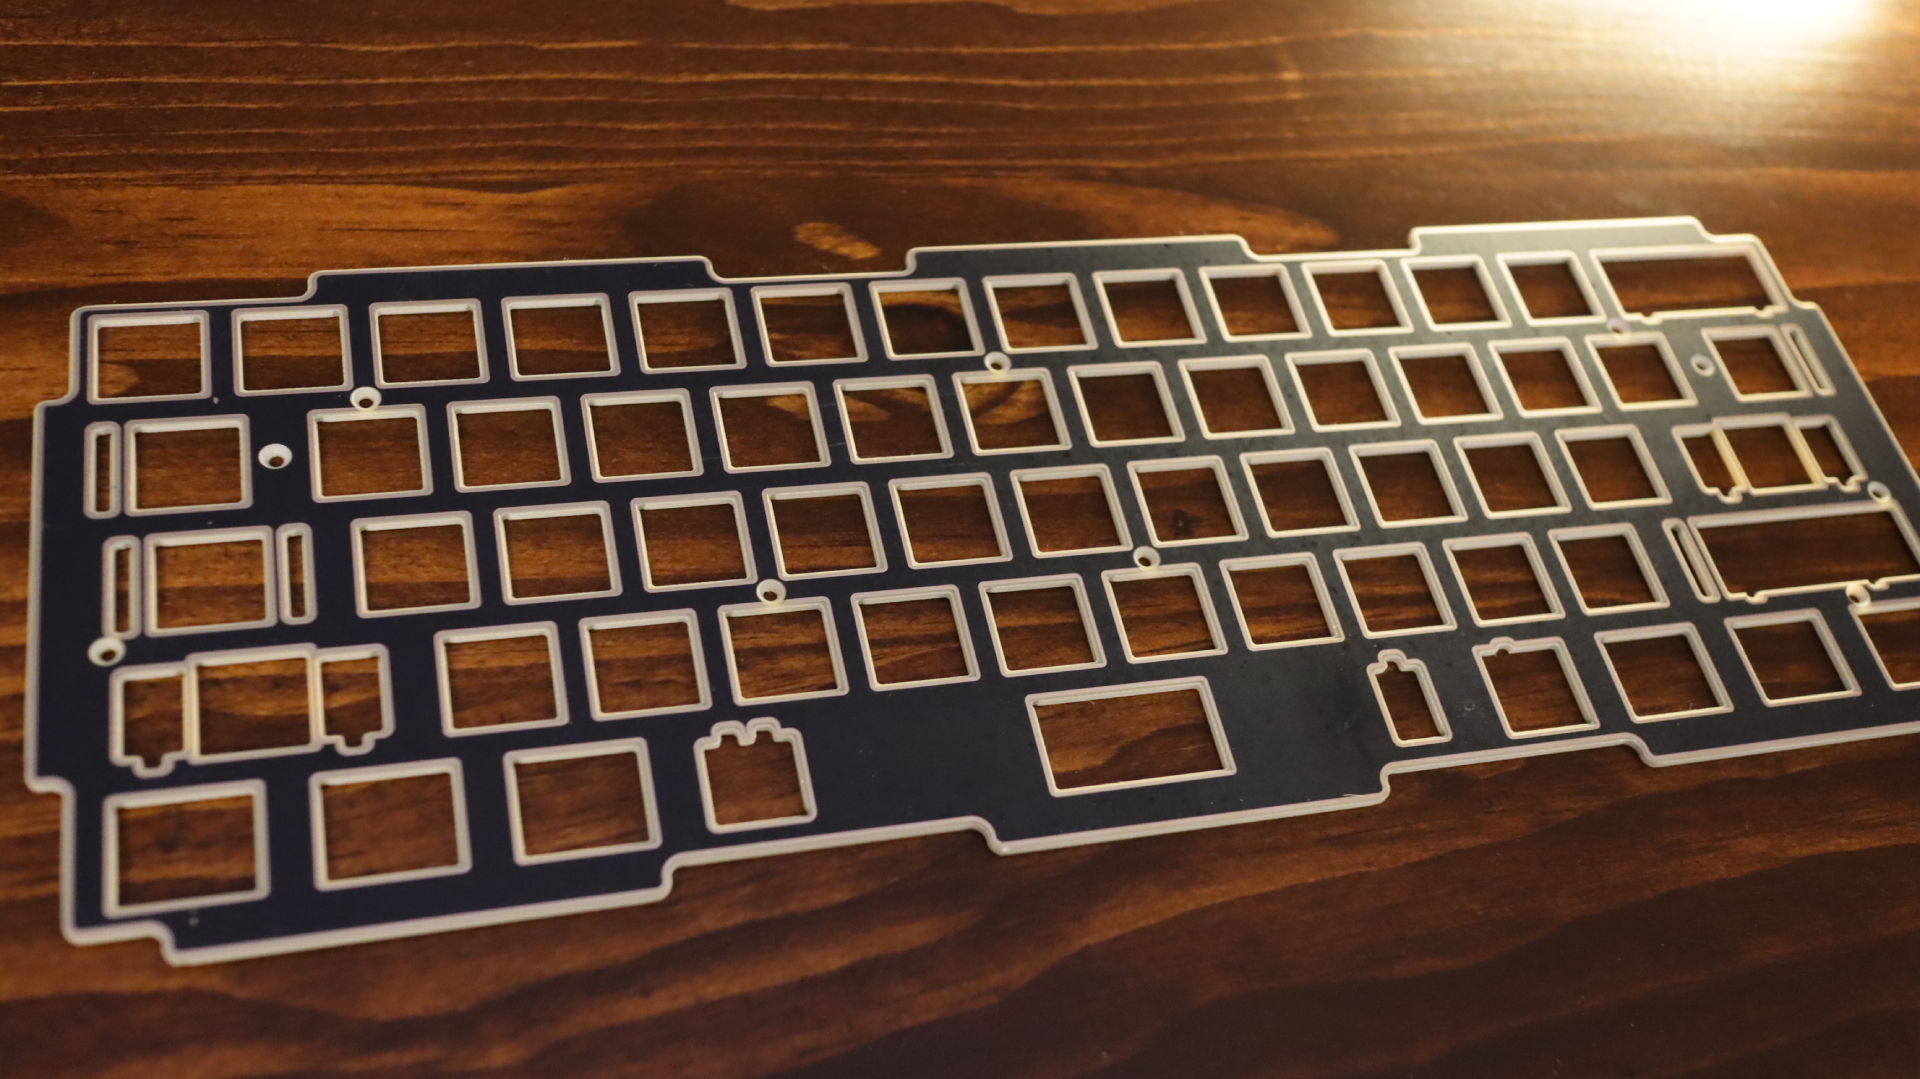
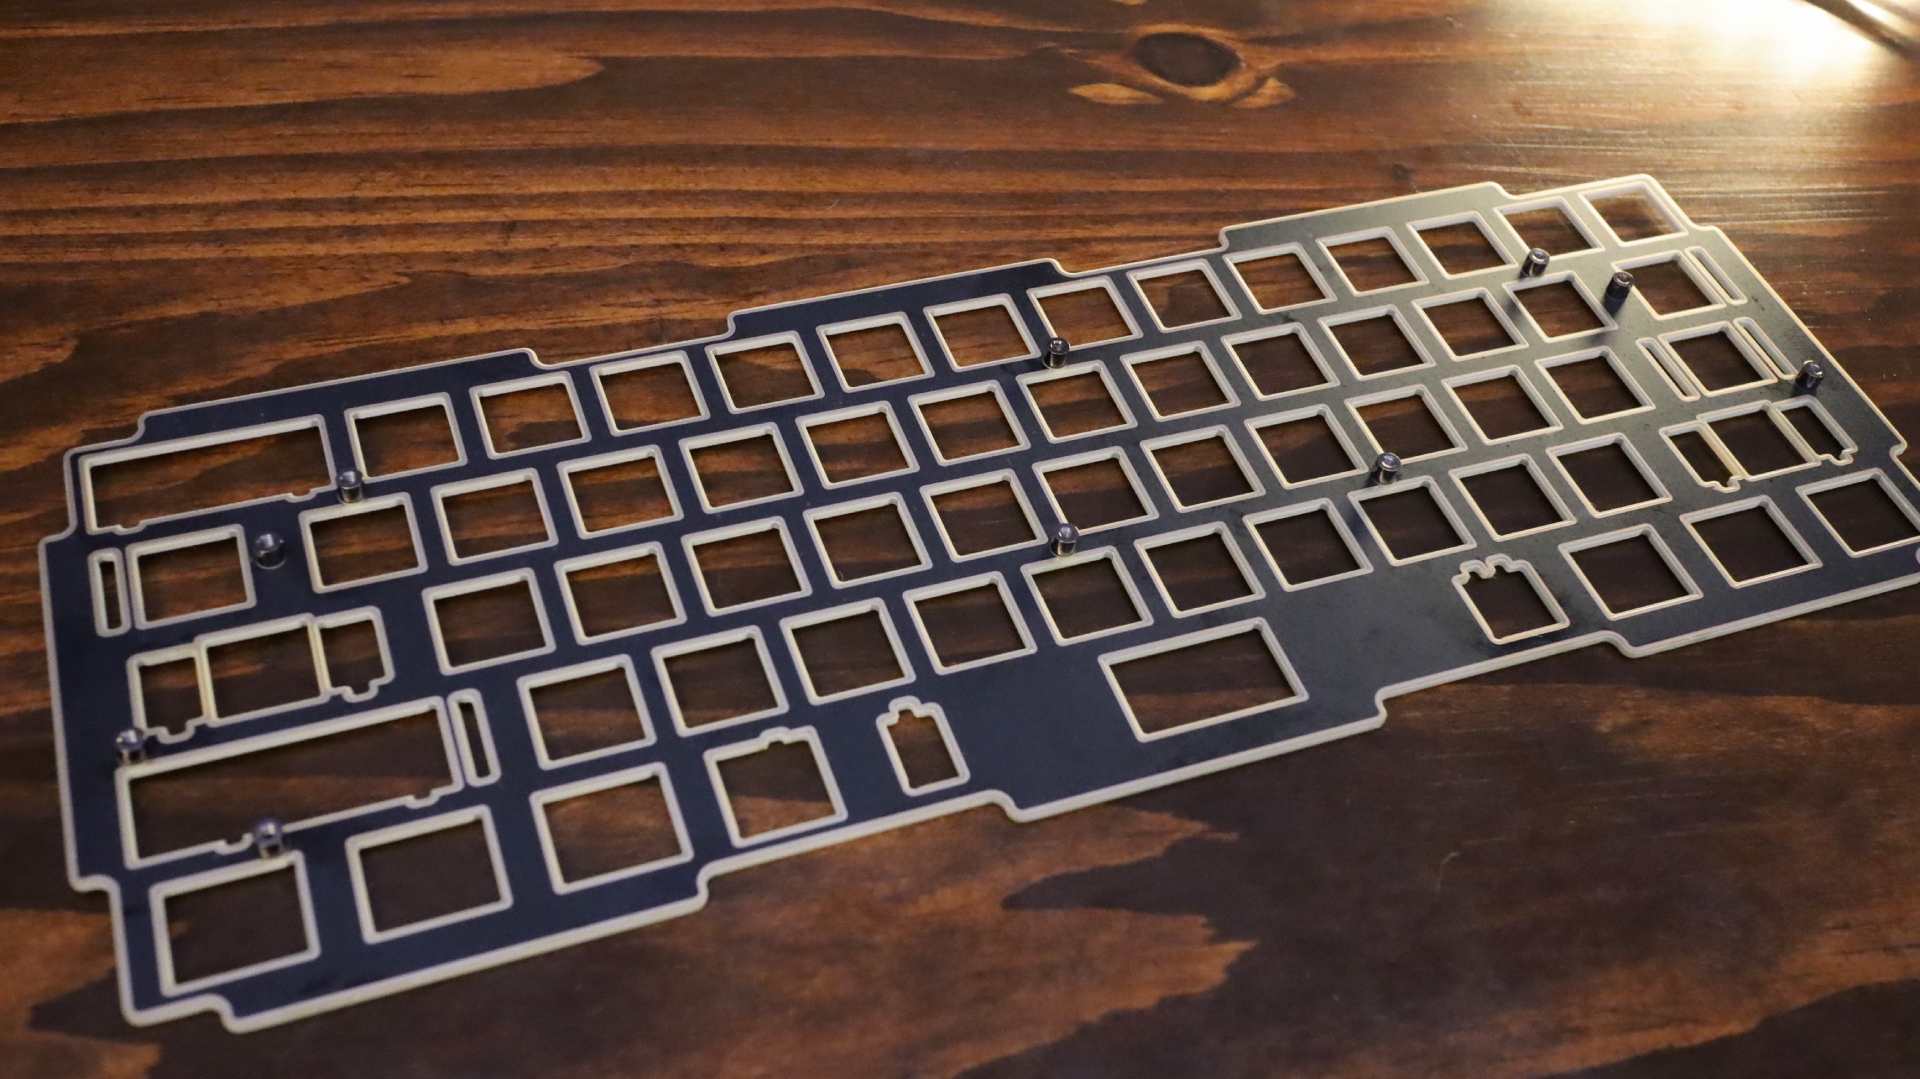
- Switch mounting plate
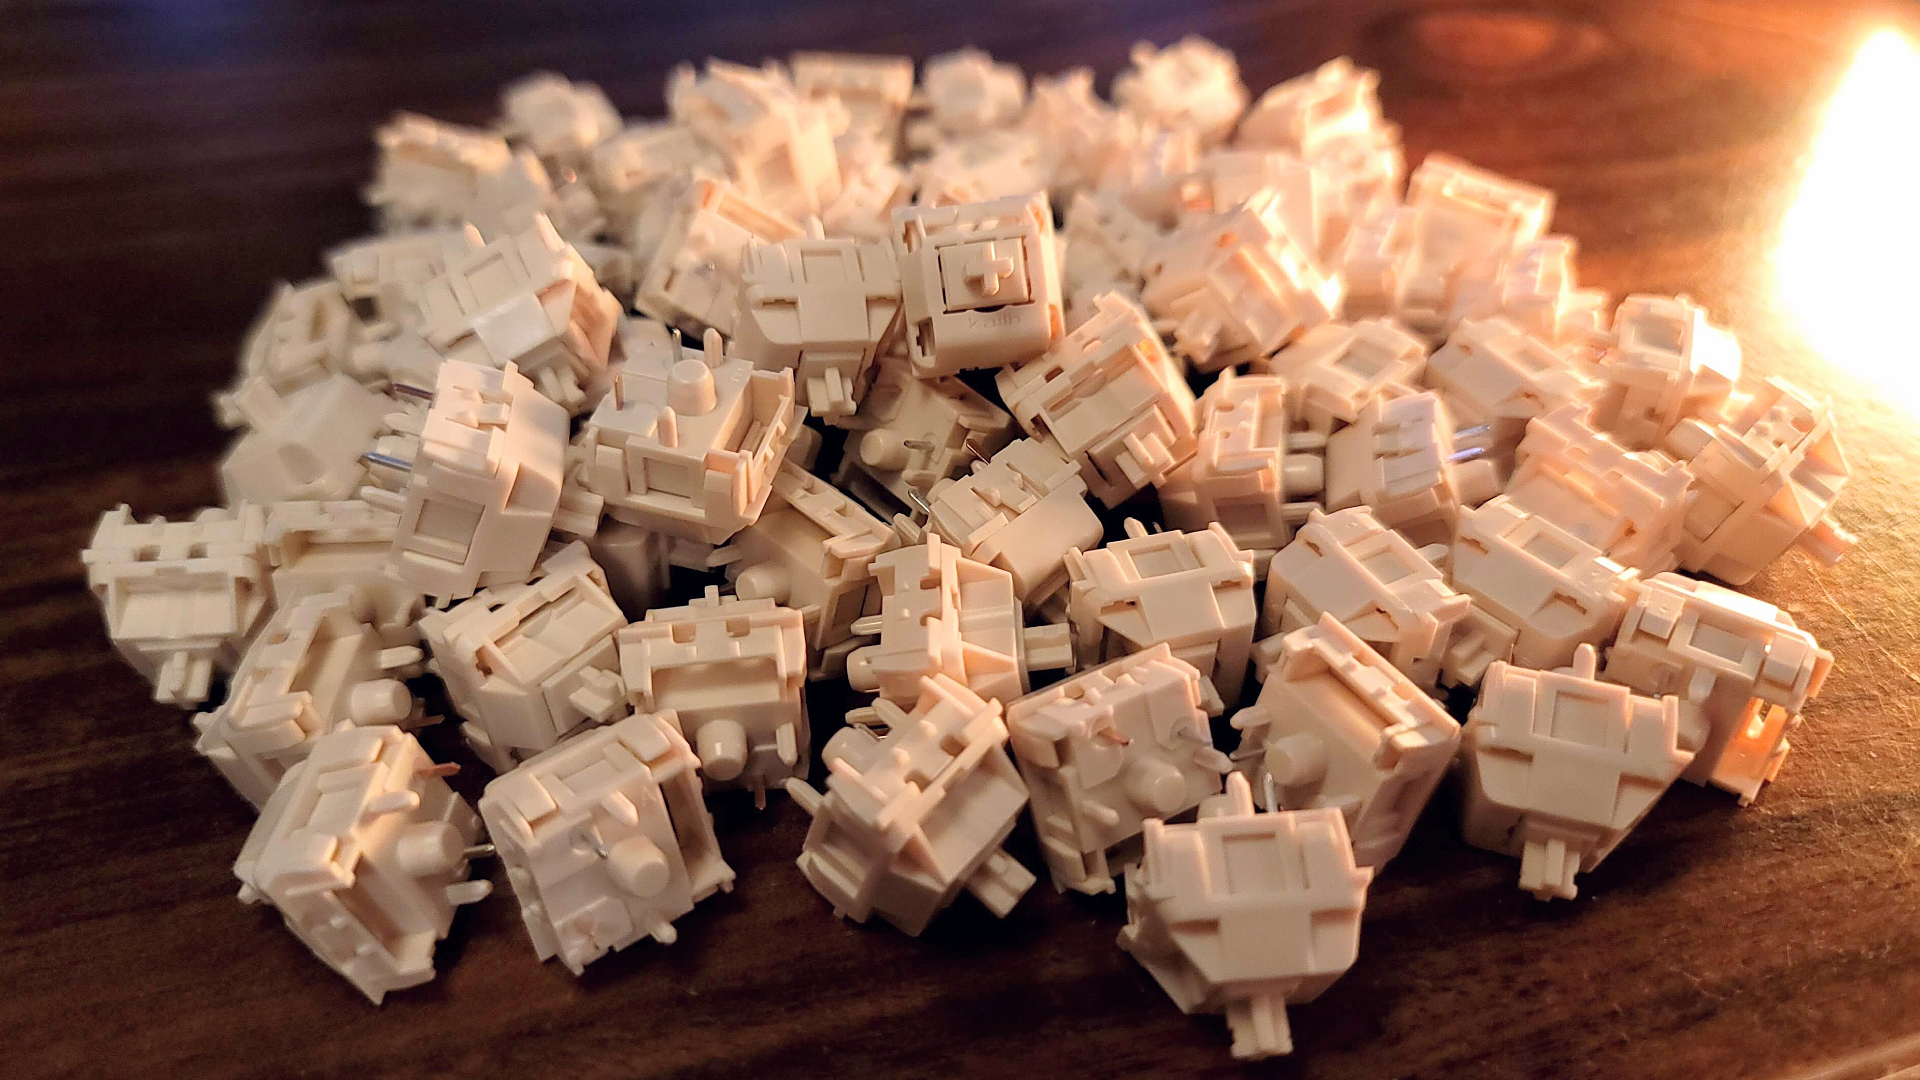
- Mechanical switches
- Stabilizers
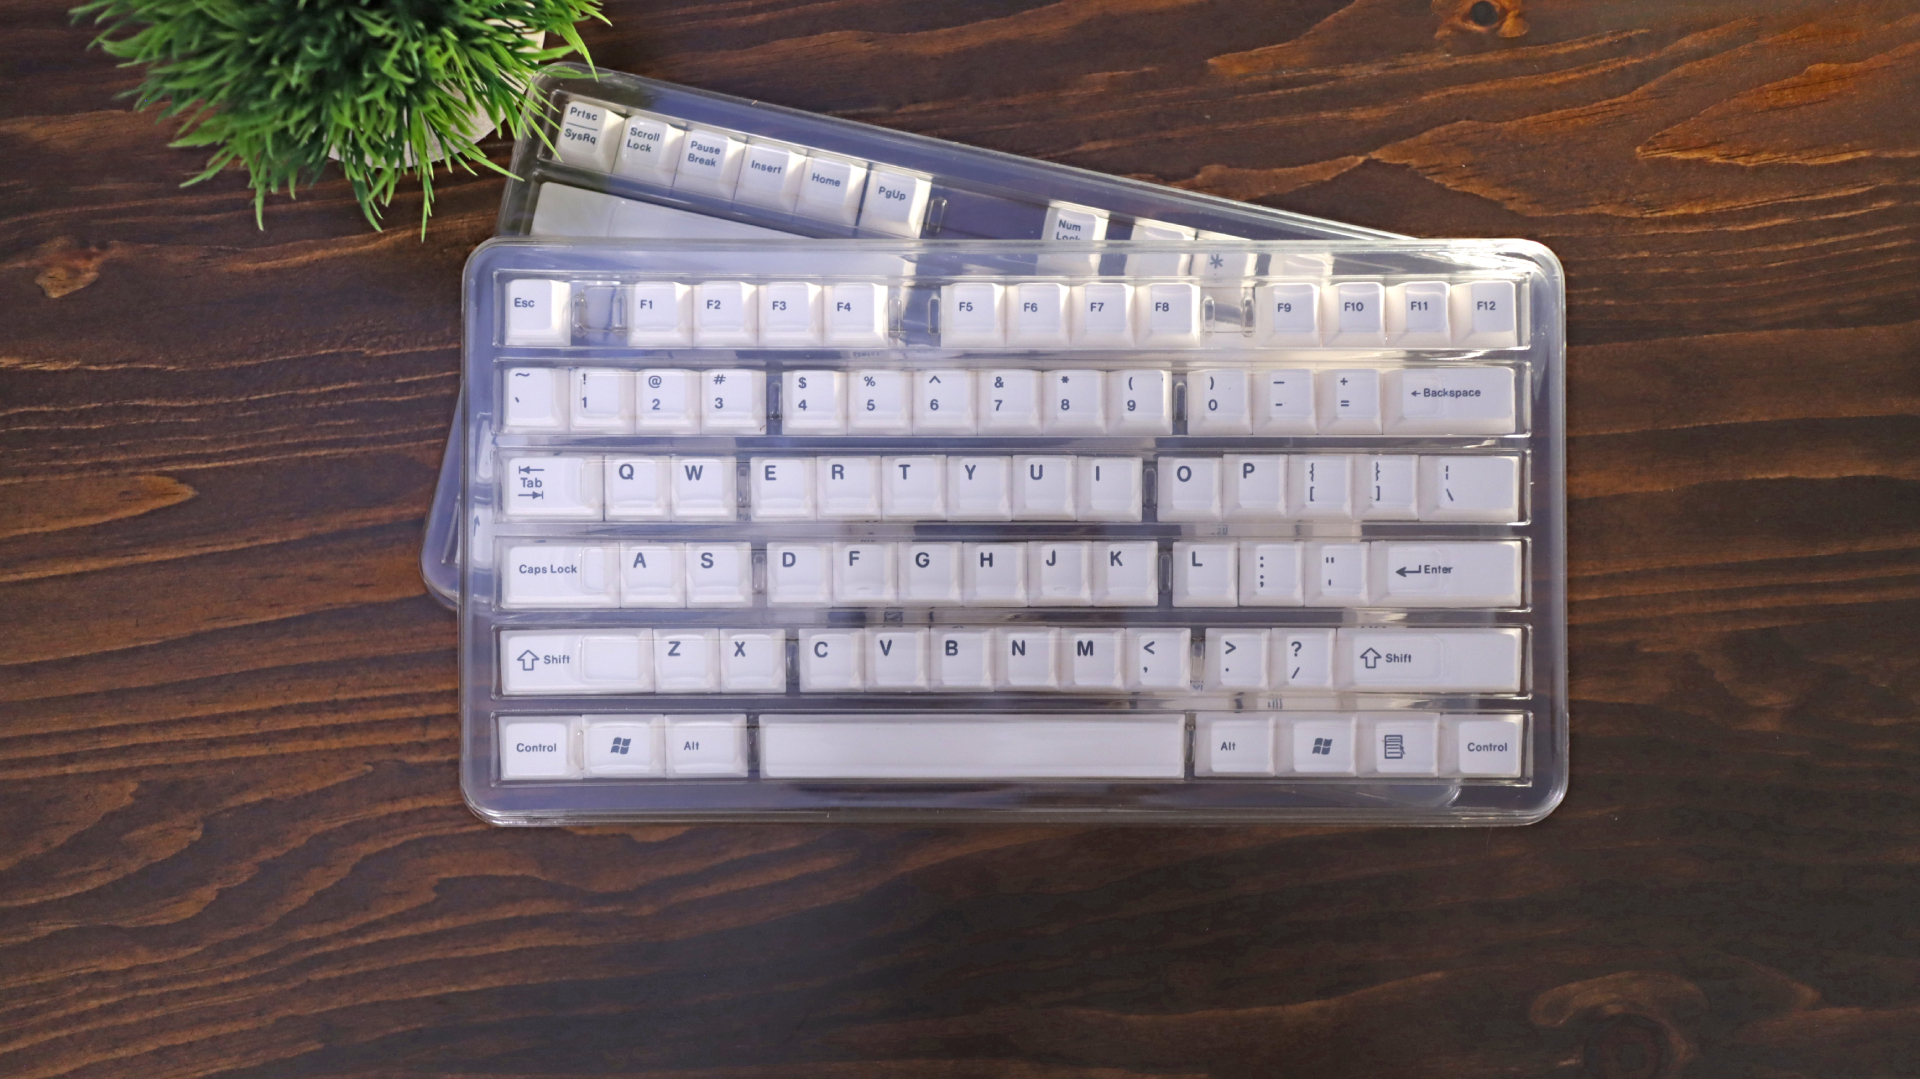
- Keycaps
- USB cable
- Screwdriver
- Tweezers
- Soldering iron and solder (not required for hot-swap keyboards)
There are many sites that offer these, but for a selection curated to keyboard builders, we recommend KBDFans and KPRepublic. For accessories, like stabilizers, switches, switch lubes and more, sites like Novel Keys, Prevail Key Company and Cannon Keys offer well-picked selections often featuring items popular within the community at the time. For a wider search, AliExpress and Banggood are each good resources but we’ve found them to generally be less reliable on quality, support and shipping time.
Optional But Helpful Extras
- Keycap and switch puller
- Stabilizer pads or cloth band-aids
- Nail clippers or flush cutters
- Permatex or other semi-thick dielectric grease
- Switch lube (Krytox 205g0 is a safe bet)
- Fine paint brush
- Switch films
- Neoprene damping material
Consider Buying a Kit
If all of this sounds like a bit much, you’re not alone. Many new builders find all of these considerations overwhelming, which is why I always recommend purchasing a kit for your first build.
DIY keyboard kits always include a matching PCB and case but often include extras like stabilizers, sound dampening foa and the carrying case. Sites like Drop, Epomaker, YMDK and KBDFans are go-to sources for custom keyboard kits. Increasingly, sites that focused on group buys and accessories have begun offering their own low-cost kits, like the TKC Portico, NovelKeys NK65 Entry Edition and Cannon Keys Bakeneko60 that are well worth considering when in-stock. Note that keyboard kits usually require that you buy switches and keycaps separately.
Get Tom's Hardware's best news and in-depth reviews, straight to your inbox.
Things to Consider Before Buying
Before purchasing any of the items above, it’s wise to go over some basic considerations to make sure everything goes smoothly, and you wind up with a keyboard you’re happy with. Take the time to consider the following, and you’ll ensure a much smoother build process.
Layout
The first thing to consider is layout. Do you want a small 60% keyboard or a full-size keyboard with a number pad? This will impact the functionality of your board but also what you should be shopping for. Here’s a rundown of the most popular layouts.
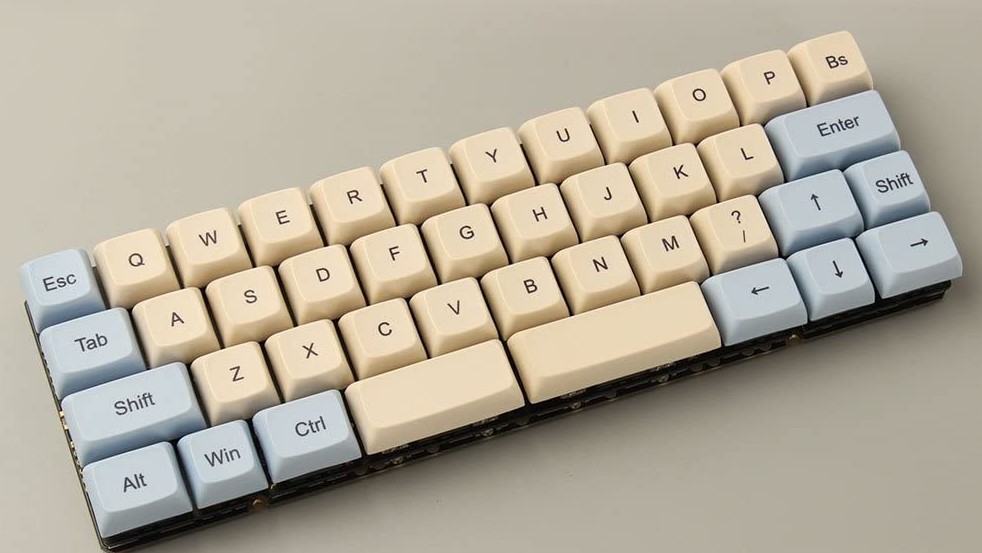
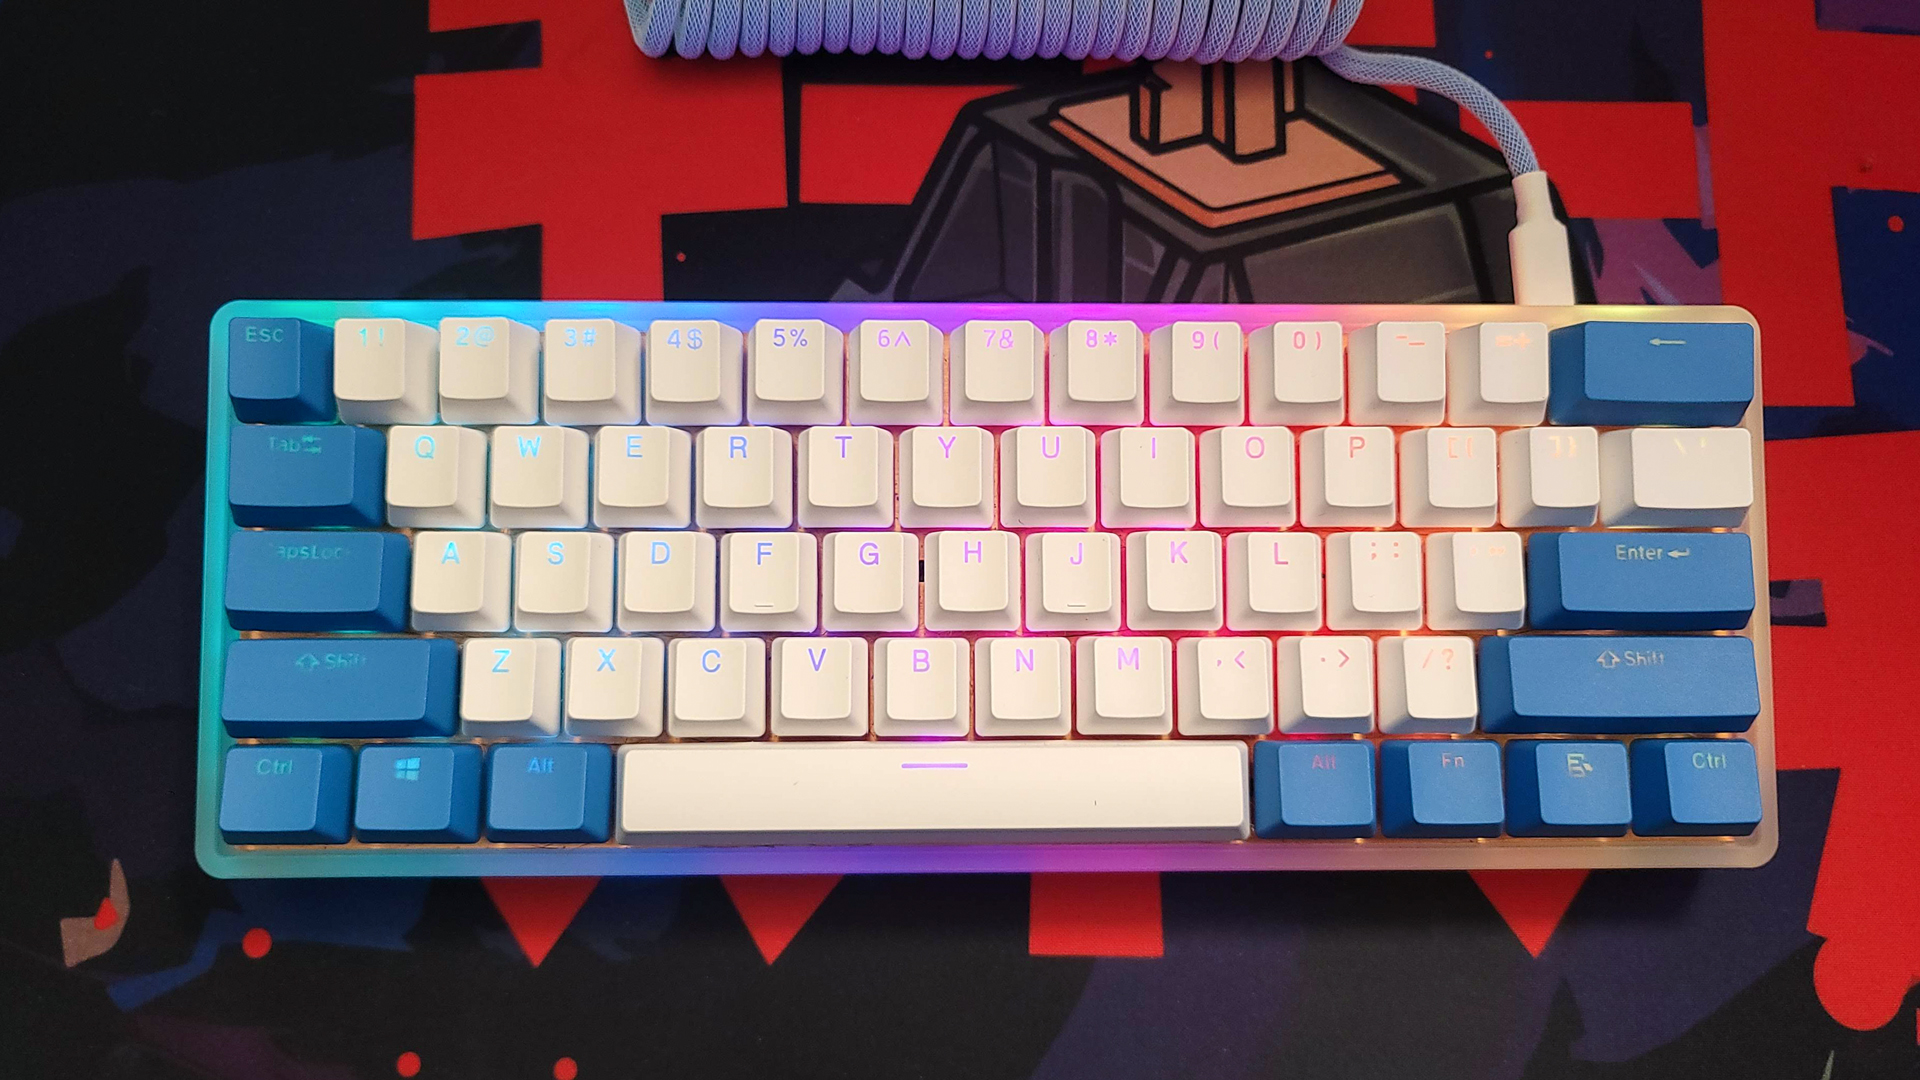
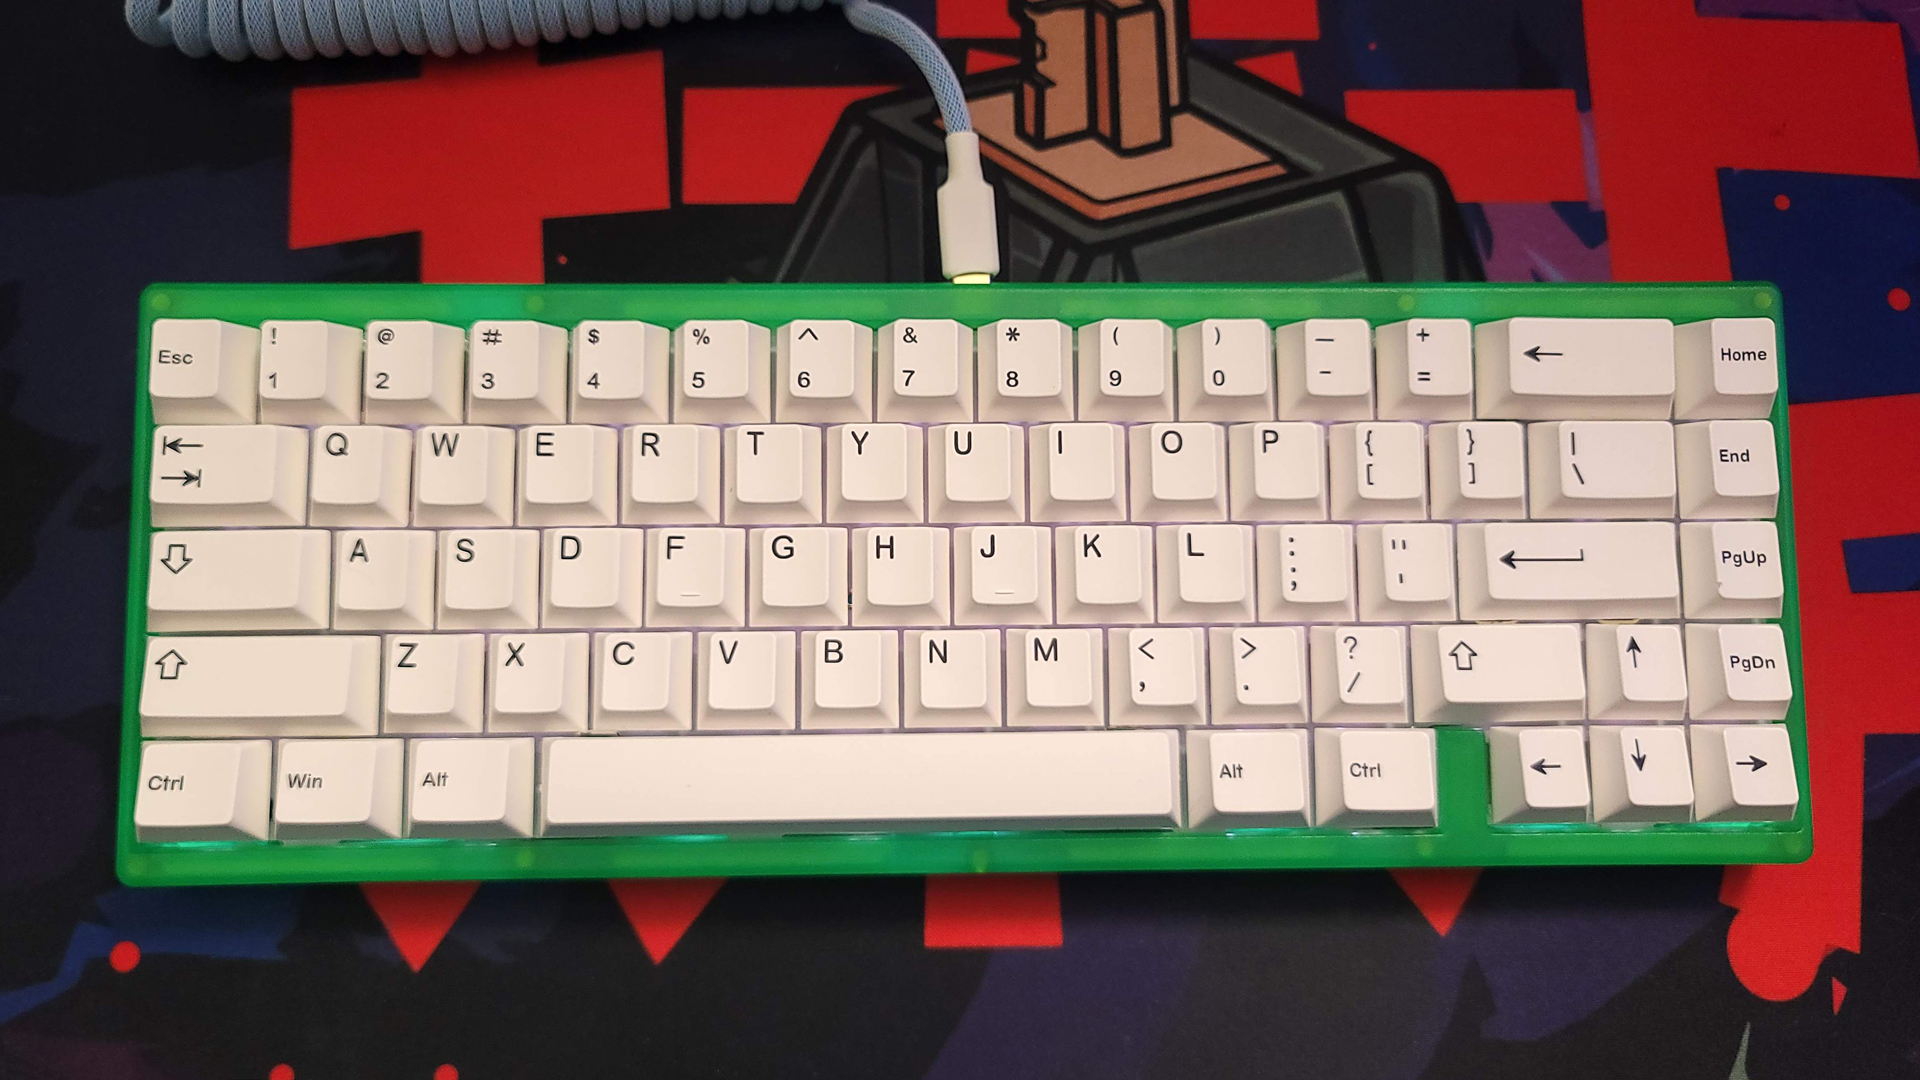
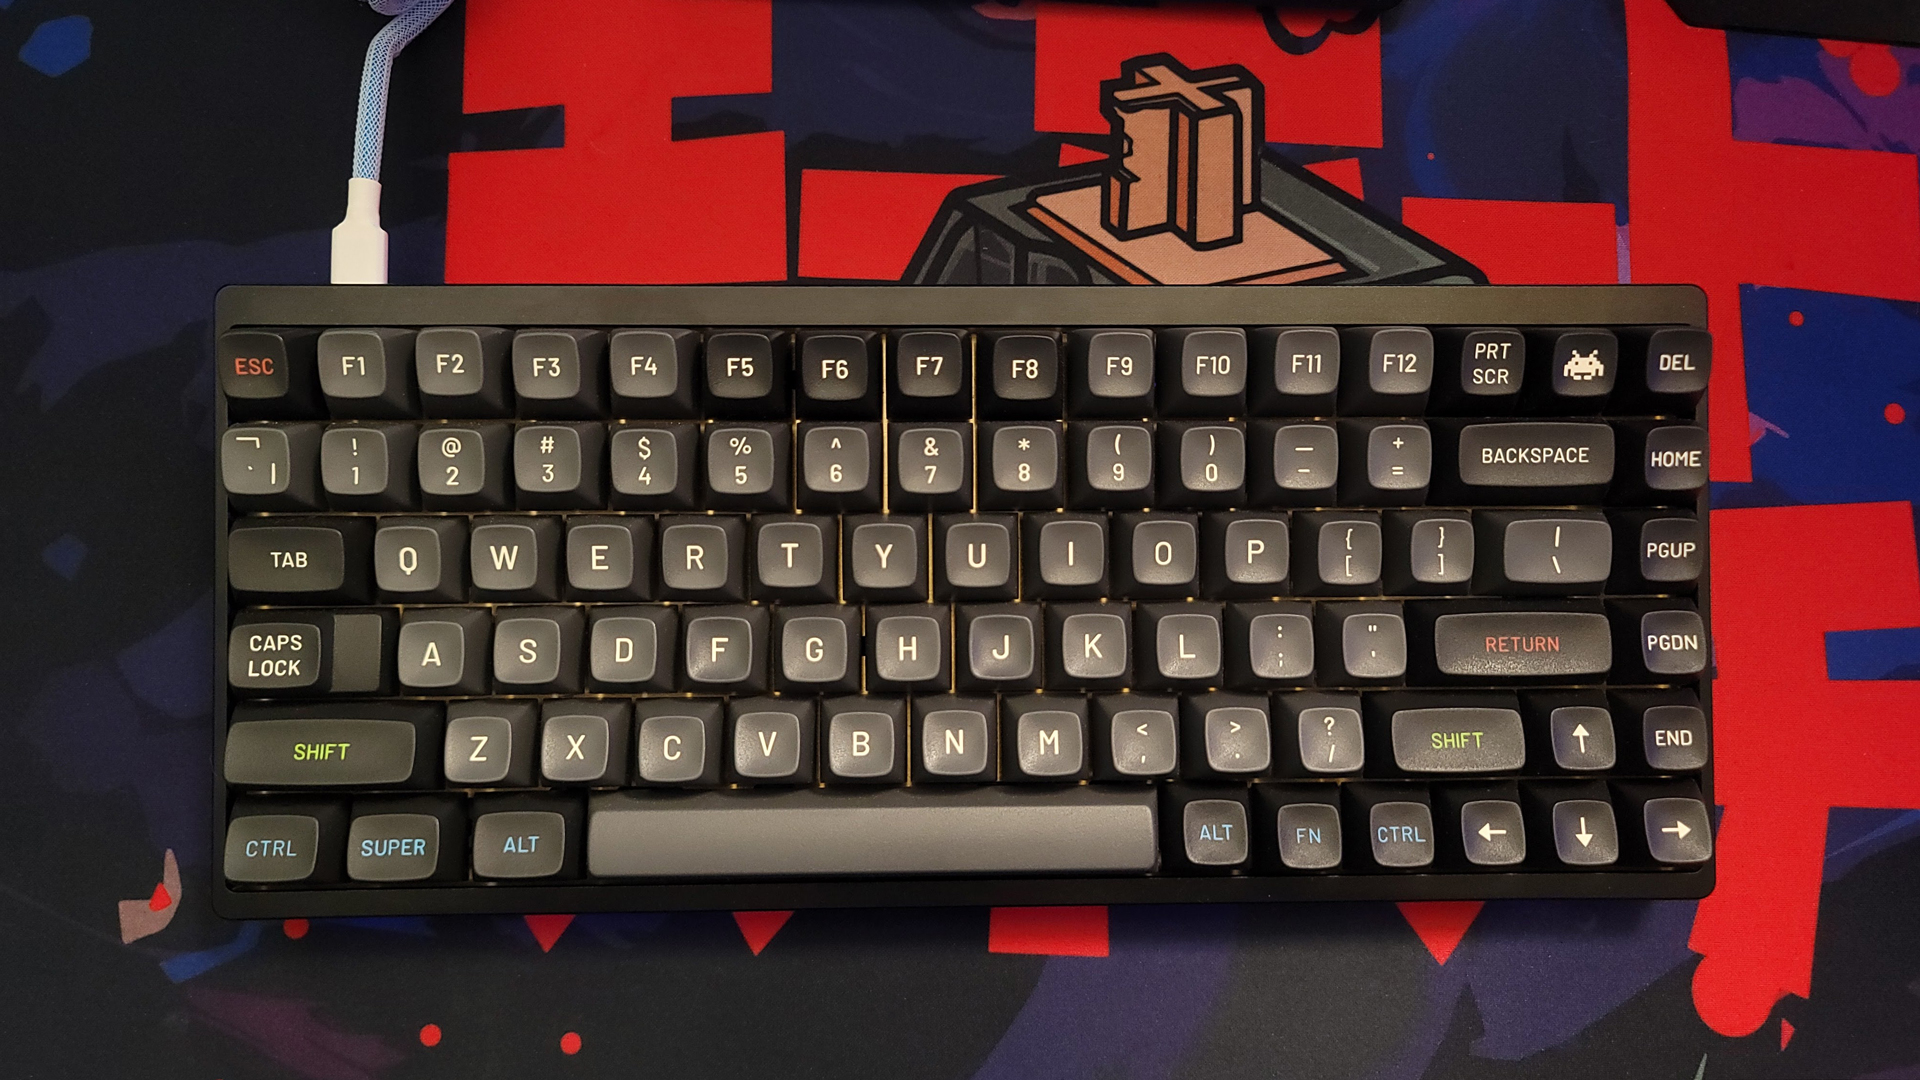
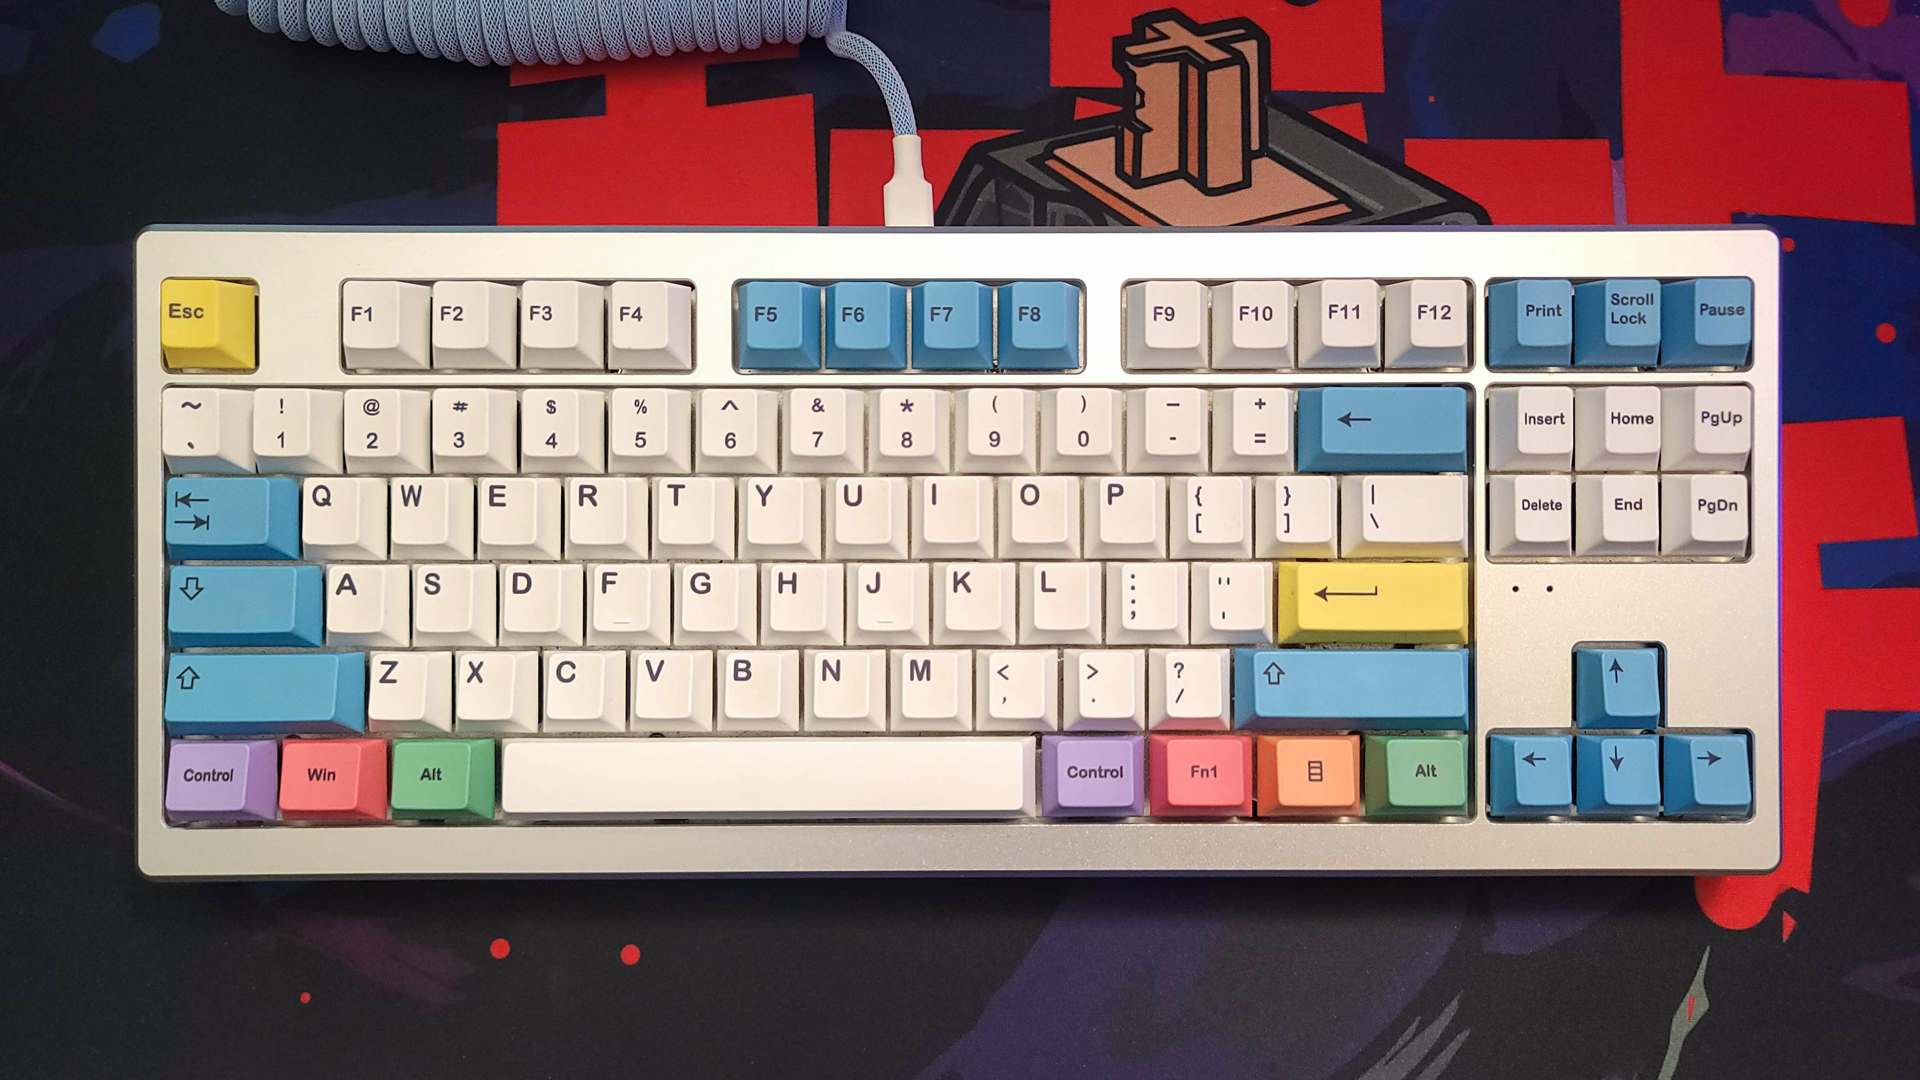
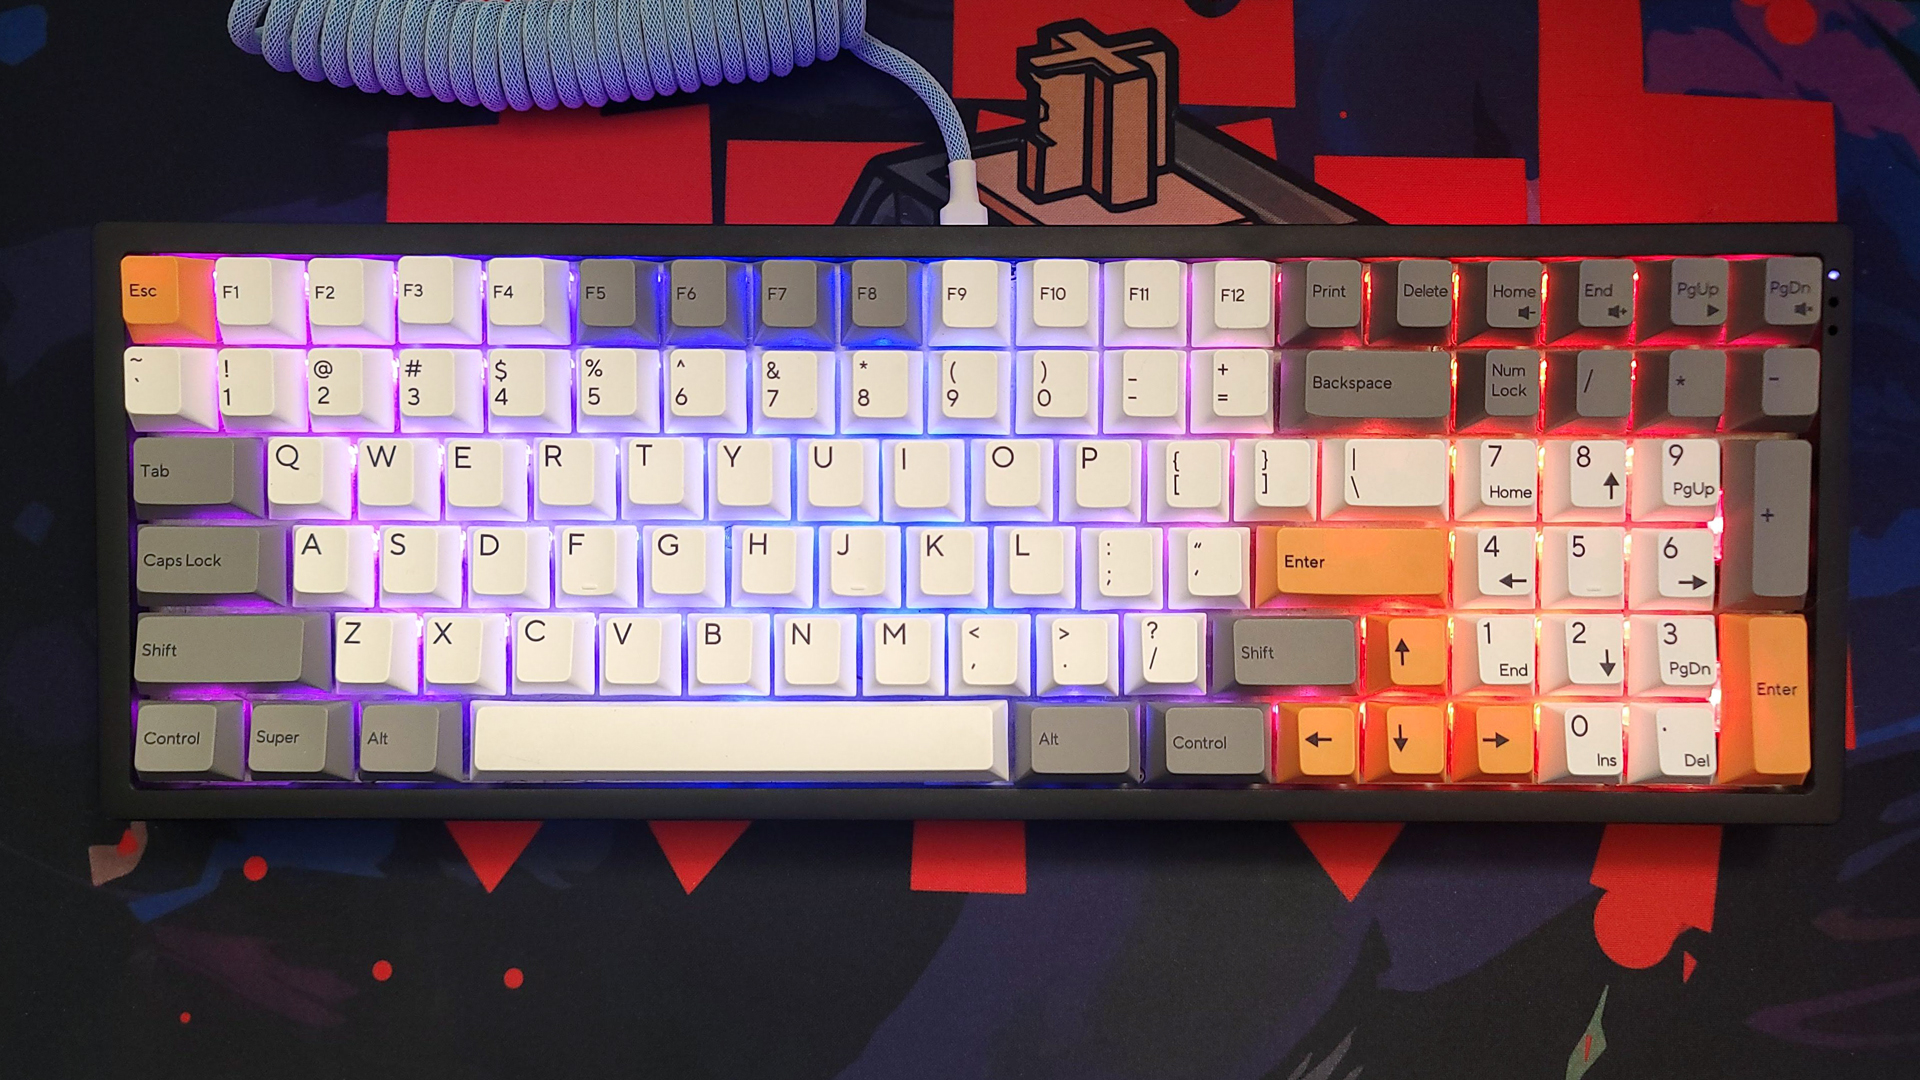
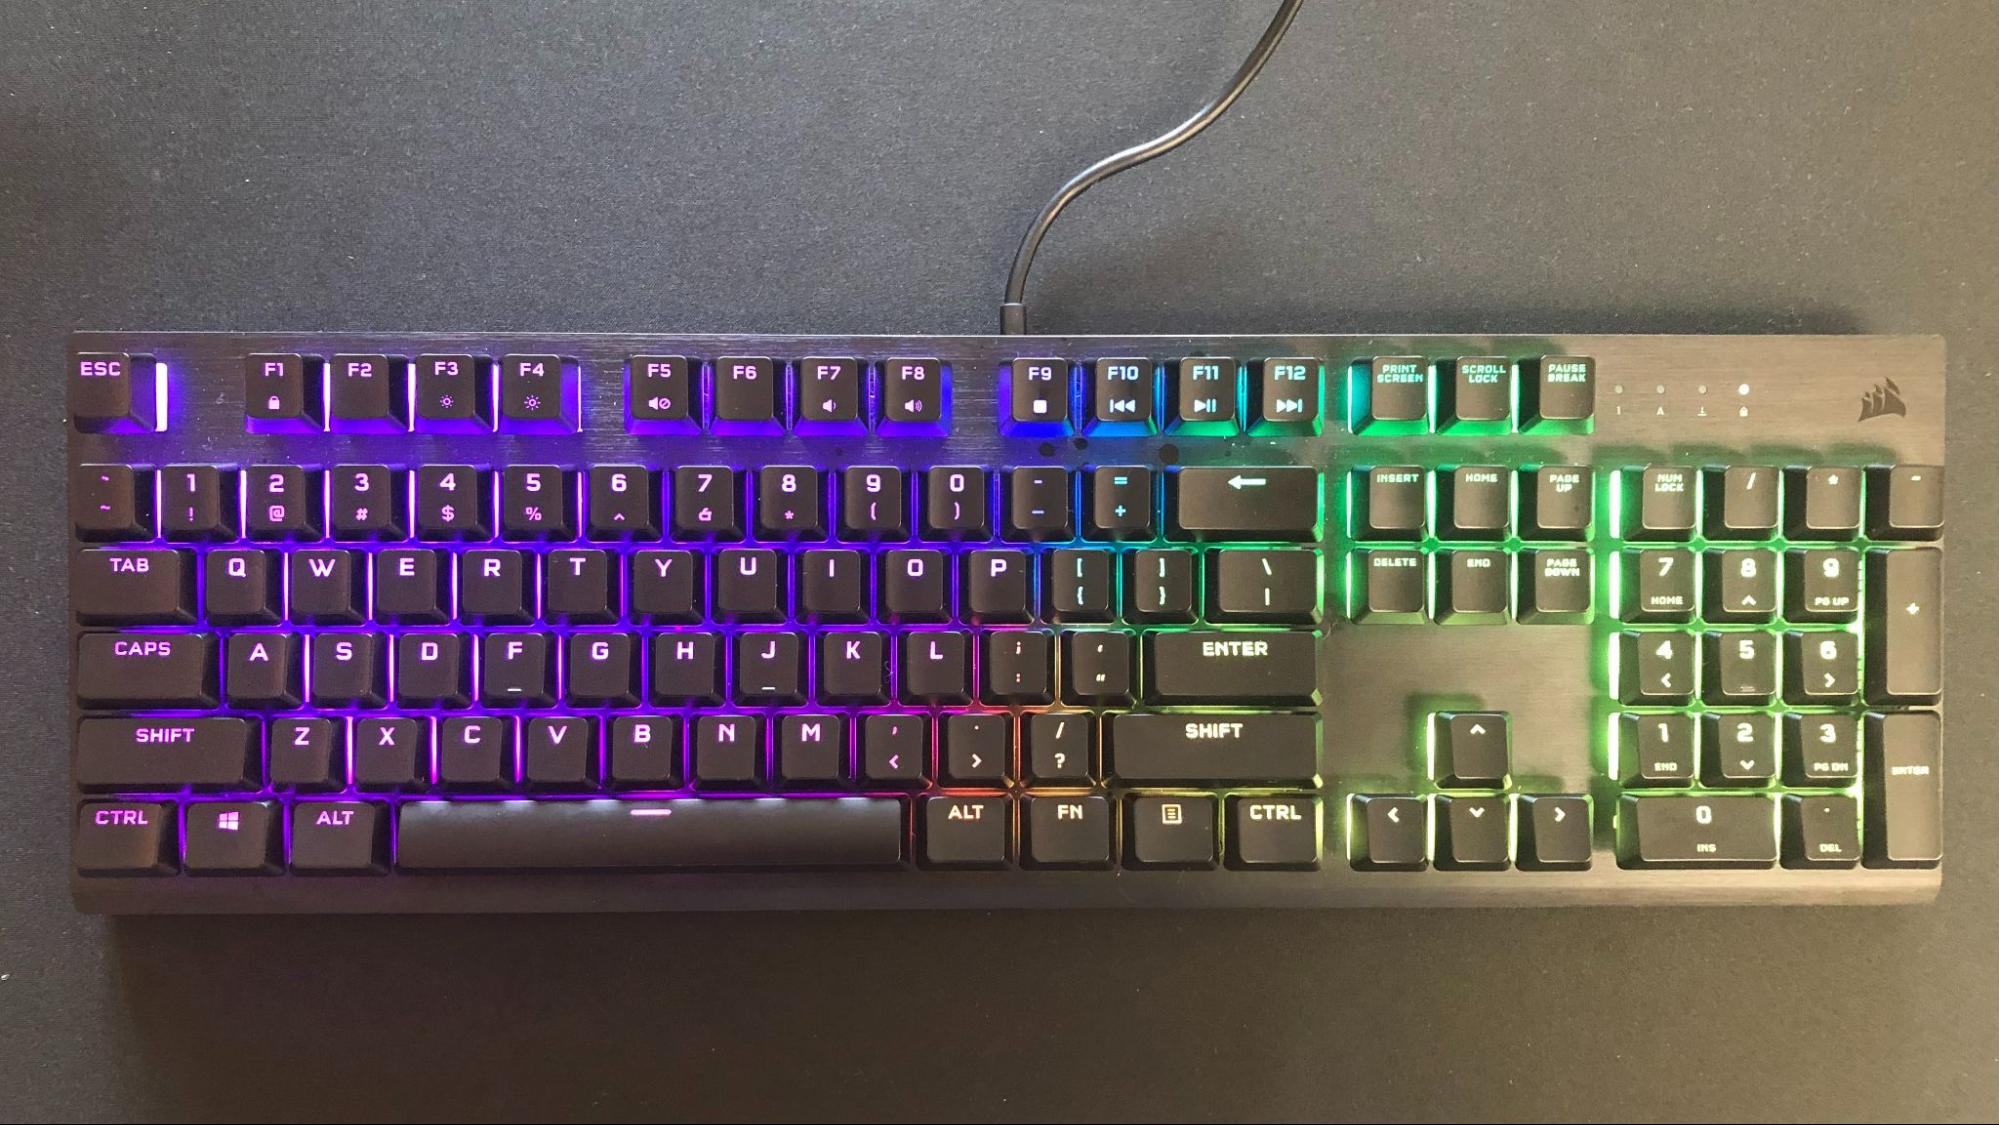
- 40%: One of the smallest functional layouts available. Essentially just the main typing keys with no number keys. This is a portable, yet difficult, layout to get used to for newcomers and relies heavily on secondary layers.
- 60%: No arrow keys, function row, number pad, or navigation and editing cluster. Secondary functions often live on a second layer accessible with key combinations.
- 65%: This is essentially a 60% keyboard with arrow keys. Most keyboards of this layout also have a selection of navigation and editing buttons along the right-hand side.
- 75%: This layout takes the 65% form factor and adds the function row back above the number keys.
- 80%/Tenkeyless/TKL: This is a standard keyboard layout that takes a full-size design and removes the number pad.
- 96%/96-Key: This layout takes most of the keys of a full-size board and pushes them together, removing empty space. Some lesser-used keys, such as Scroll Lock, are often relegated to a secondary layer or are removed entirely.
- Full-size/104/108-Key: The traditional keyboard layout, including all standard keys.
Your choice in layout also impacts your keycaps. Compact layouts often feature non-standard key sizes, making it more difficult or expensive to find matching keycaps. The trickiest layouts to find matching keycaps for are 65% and 96%; however, dedicated keyboard websites like KBDFans offer a wider selection of keycap sets to match most layouts. Note that some layouts, like that of the Happy Hacking Keyboard (HHKB), look nice but use longer-than-average spacebars, which can limit your keycap choices.
Keycaps
Keycaps are a rabbit hole all their own; however, there are a couple of things to keep in mind.
First is the type of plastic used. ABS is common on both very high-end and very low-end keycaps and can vary widely in quality. High quality ABS keycaps can be expensive but offer more vivid colors than the other popular choice, PBT.
PBT is a denser plastic and won’t get shiny after extended use like ABS keycaps do, but colors are duller and large keys are more likely to experience warping. For newcomers, PBT keycaps with doubleshot or dye-sublimated legends are a good choice because the letters will never fade, even after years of use.
PCB and Case
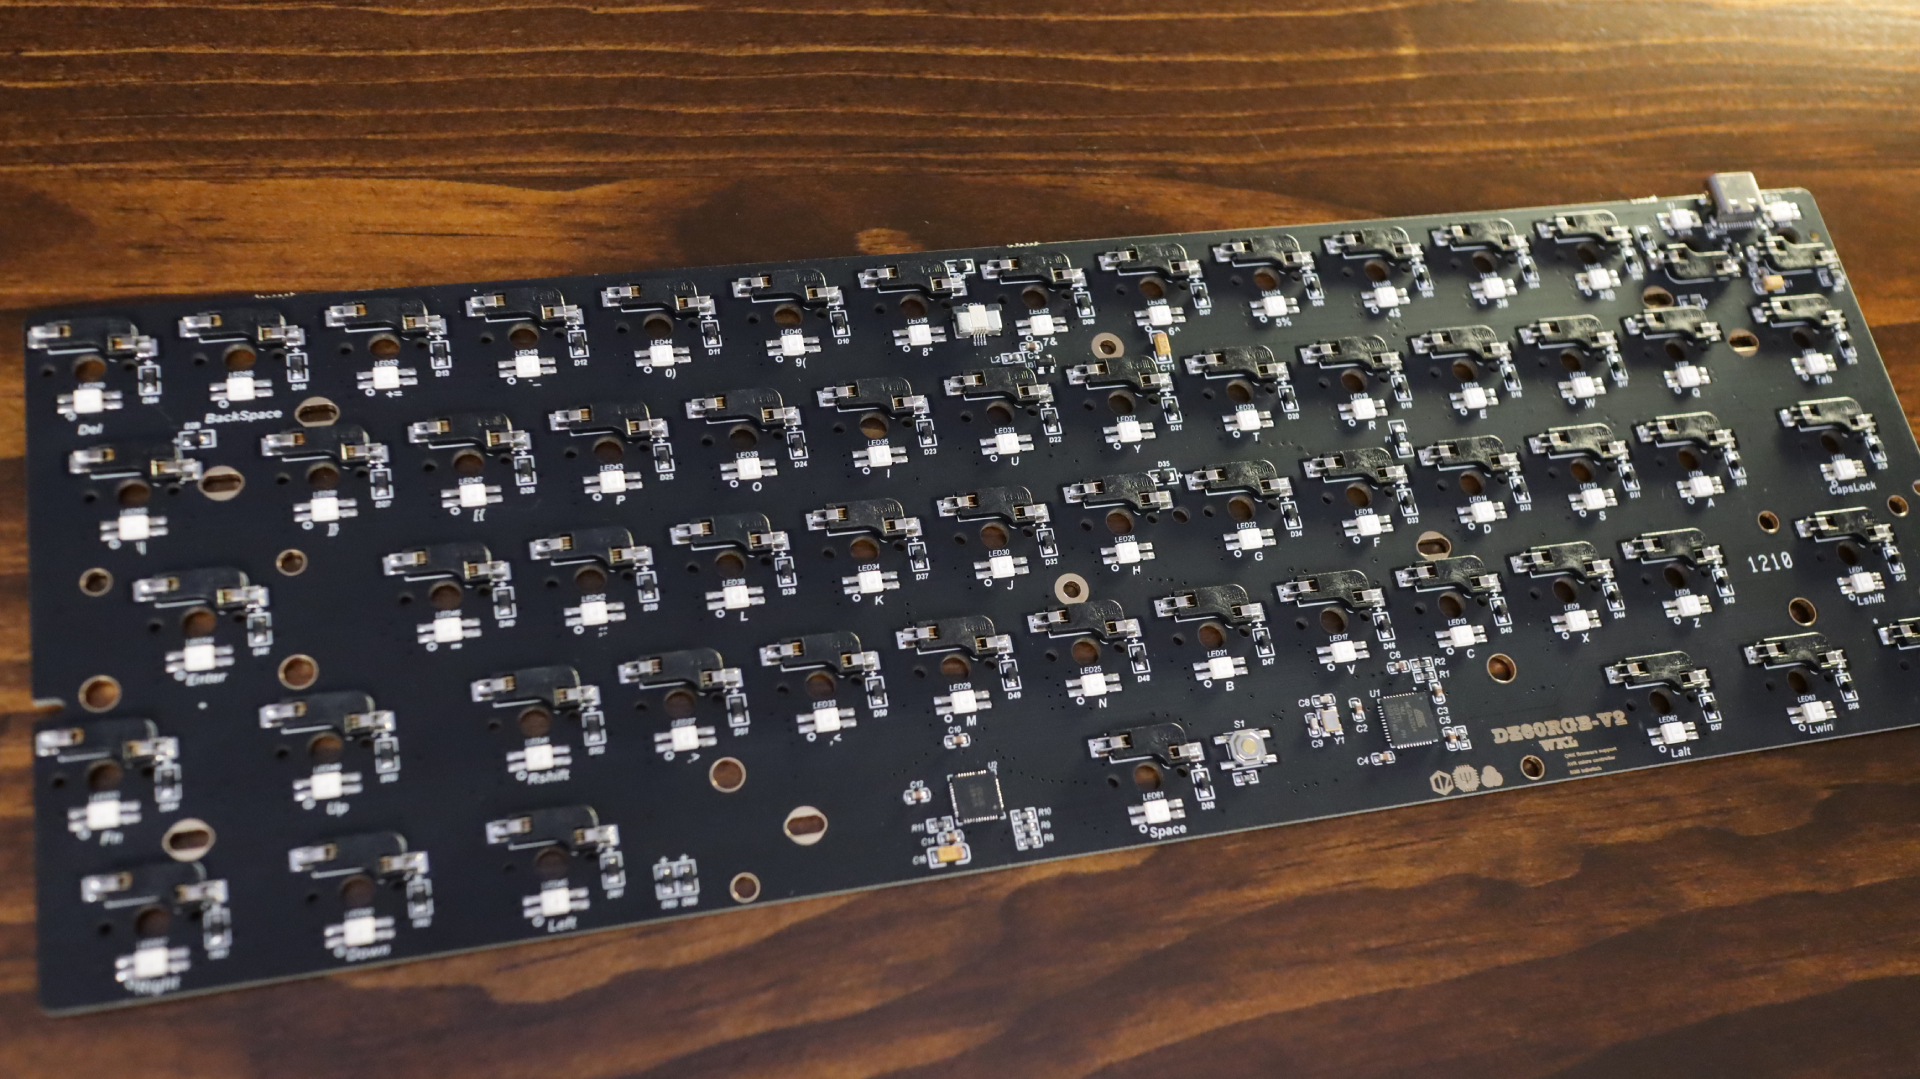
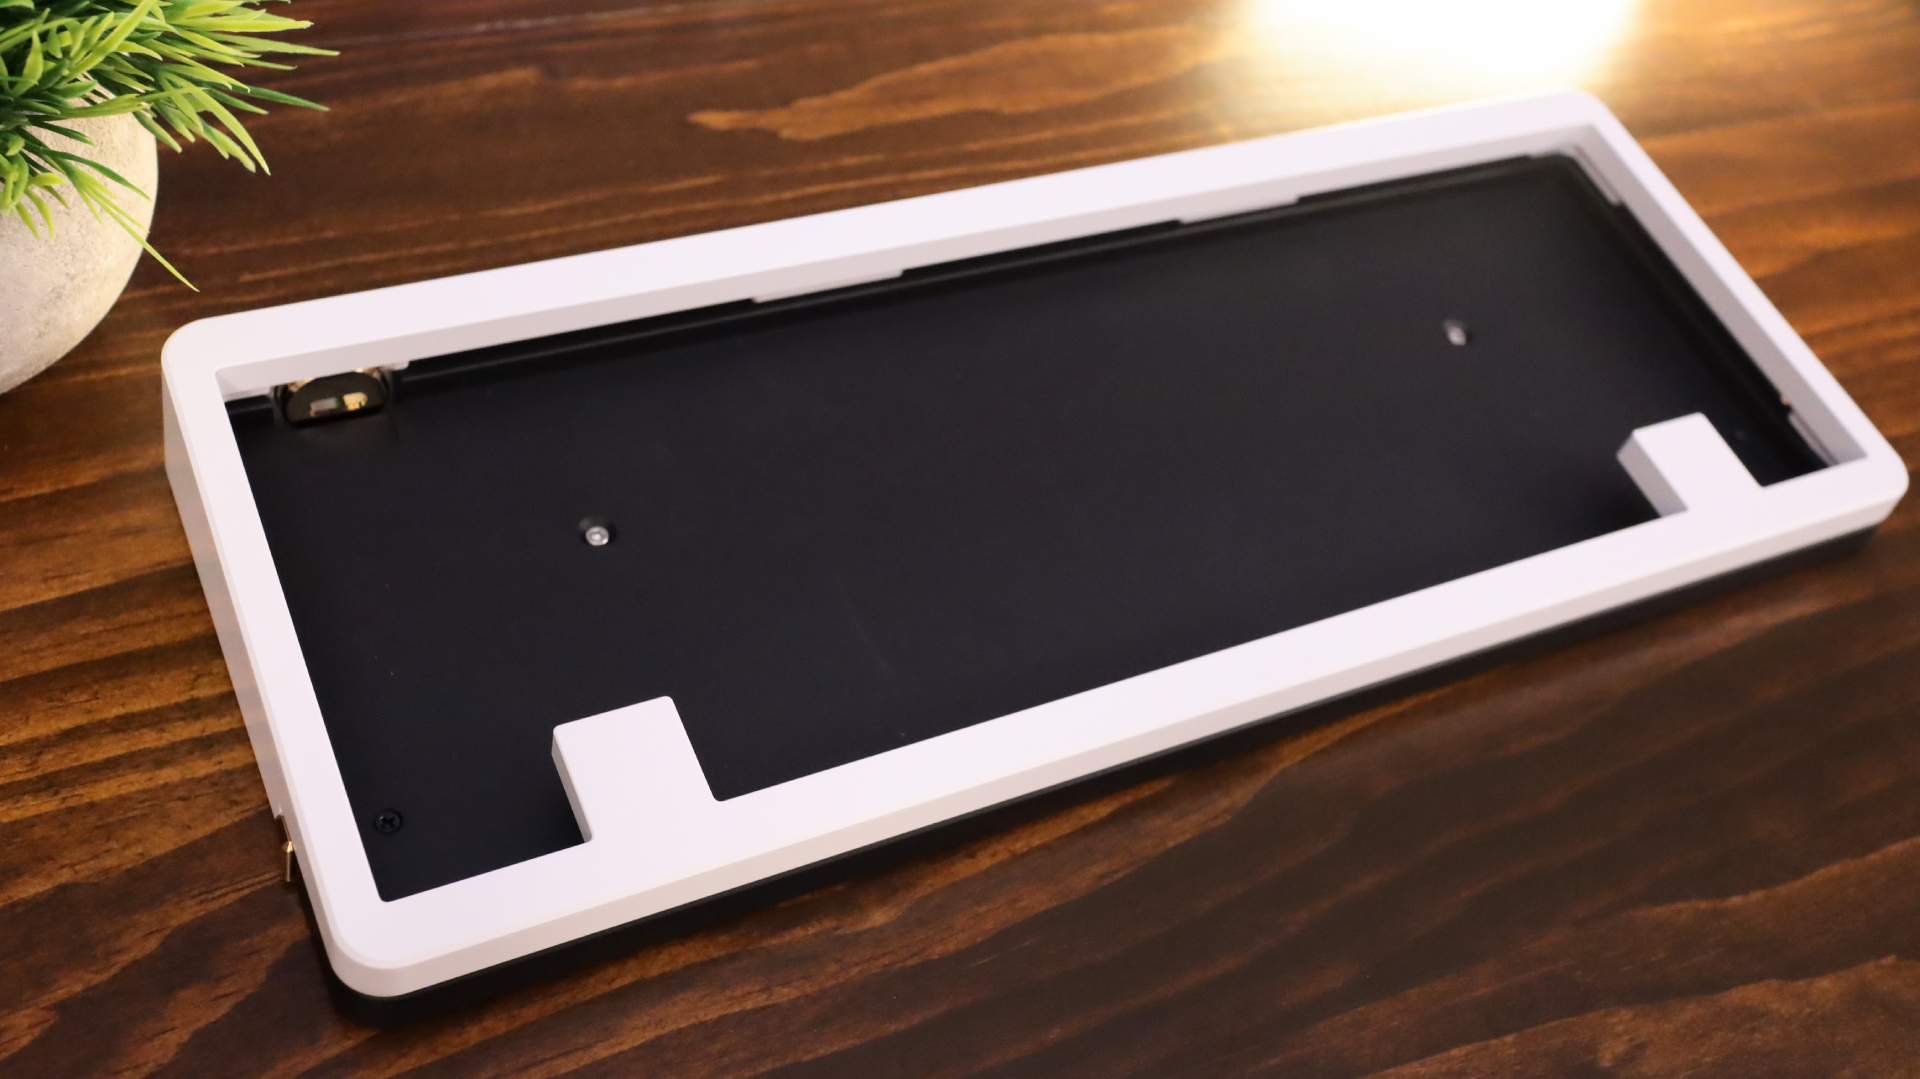
With that out of the way, you’ll want to choose a matching PCB and case. These are difficult to find on sites like Amazon but are plentiful on dedicated keyboard building storefronts like KPRepublic and KBDFans. You can also find an array of options on AliExpress and Banggood. Be sure that your PCB matches your case. That means making sure all mounting points for fasteners and the USB port line-up. Also be sure to look for extra features you may be interested in, like RGB or hot-swappable switches, which let you change your mechancaical keyboard’s switches without soldering. But if you prefer to solder then we have a list of the best soldering irons for you to choose from.
Switch Mounting Plate
If you’re a new builder, you don’t need to get too hung up on the switch mounting plate. The mounting plate is what your mechanical switches snap into to hold them in place when plugged into the PCB. You don’t want switches losing connection because they’re wobbling around in those hot-swap sockets!
Switch plates come in a variety of different materials, from polycarbonate, to aluminum, brass,and copper, all the way to carbon fiber on the expensive end of the spectrum. Harder materials, like brass, are more rigid to type on and have a higher pitched sound profile. The consideration here should be on whether you want your typing experience to be firm or flexible and what type of sound you’d like.
Stabilizers
Next, you’ll need a set of stabilizers to support the larger keys on the keyboard. Most keyboards require five stabilizers total, but some compact layouts require less.
Be sure to note whether your PCB and case use stabilizers that mount directly to the PCB via clips or screws or snap onto the plate. Enthusiasts tend to prefer screw in PCB-mounted stabilizers for their added stability but the most important thing is that they are compatible. Remember, one of the joys of building your own keyboard is being able to change it to meet your needs over time.
Switches
Finally, we come to switches. Do you prefer linear, tactile, or clicky? Your choice of switch will be the most impactful to your typing experience, so spend some time considering what you like most. The world of key switches extends far beyond Cherry MX, so don’t feel locked into buying pricey Cherries because they’re popular in production keyboards. Read up on the differences. Consider picking up a switch tester to try some for yourself. If you’re not sure which switch is your favorite, consider picking up a hot-swappable PCB so you can try new switches without needing to desolder them from your keyboard.
The one thing to caveat to switch choice is how many pins it has. 5-pin, also called PCB-mounted, switches can install without a plate and have five pins on the bottom for added support. 3-pin, or plate-mounted, switches are made to use with a plate and have three pins on the bottom. Some PCBs only support 3-pin switches. Look at one of the switch slots. Does it have three holes or five? If your switch of choice has five pins but your PCB only supports three pin switches, don't worry: You can still use them in your build, but you'll need to use your nail clippers or flush cutters to trim off the two smaller plastic pins to make it compatible.
If you’ve been following this hobby for some time, you may have heard of lubing your switches. This is an optional and time consuming step but can dramatically increase the smoothness of your typing experience, as well as improve their sound profile. If this sounds like something you’re interested in, see our article How to Lube Switches on Your Mechanical Keyboard.
The Keyboard Kit Used in This Guide
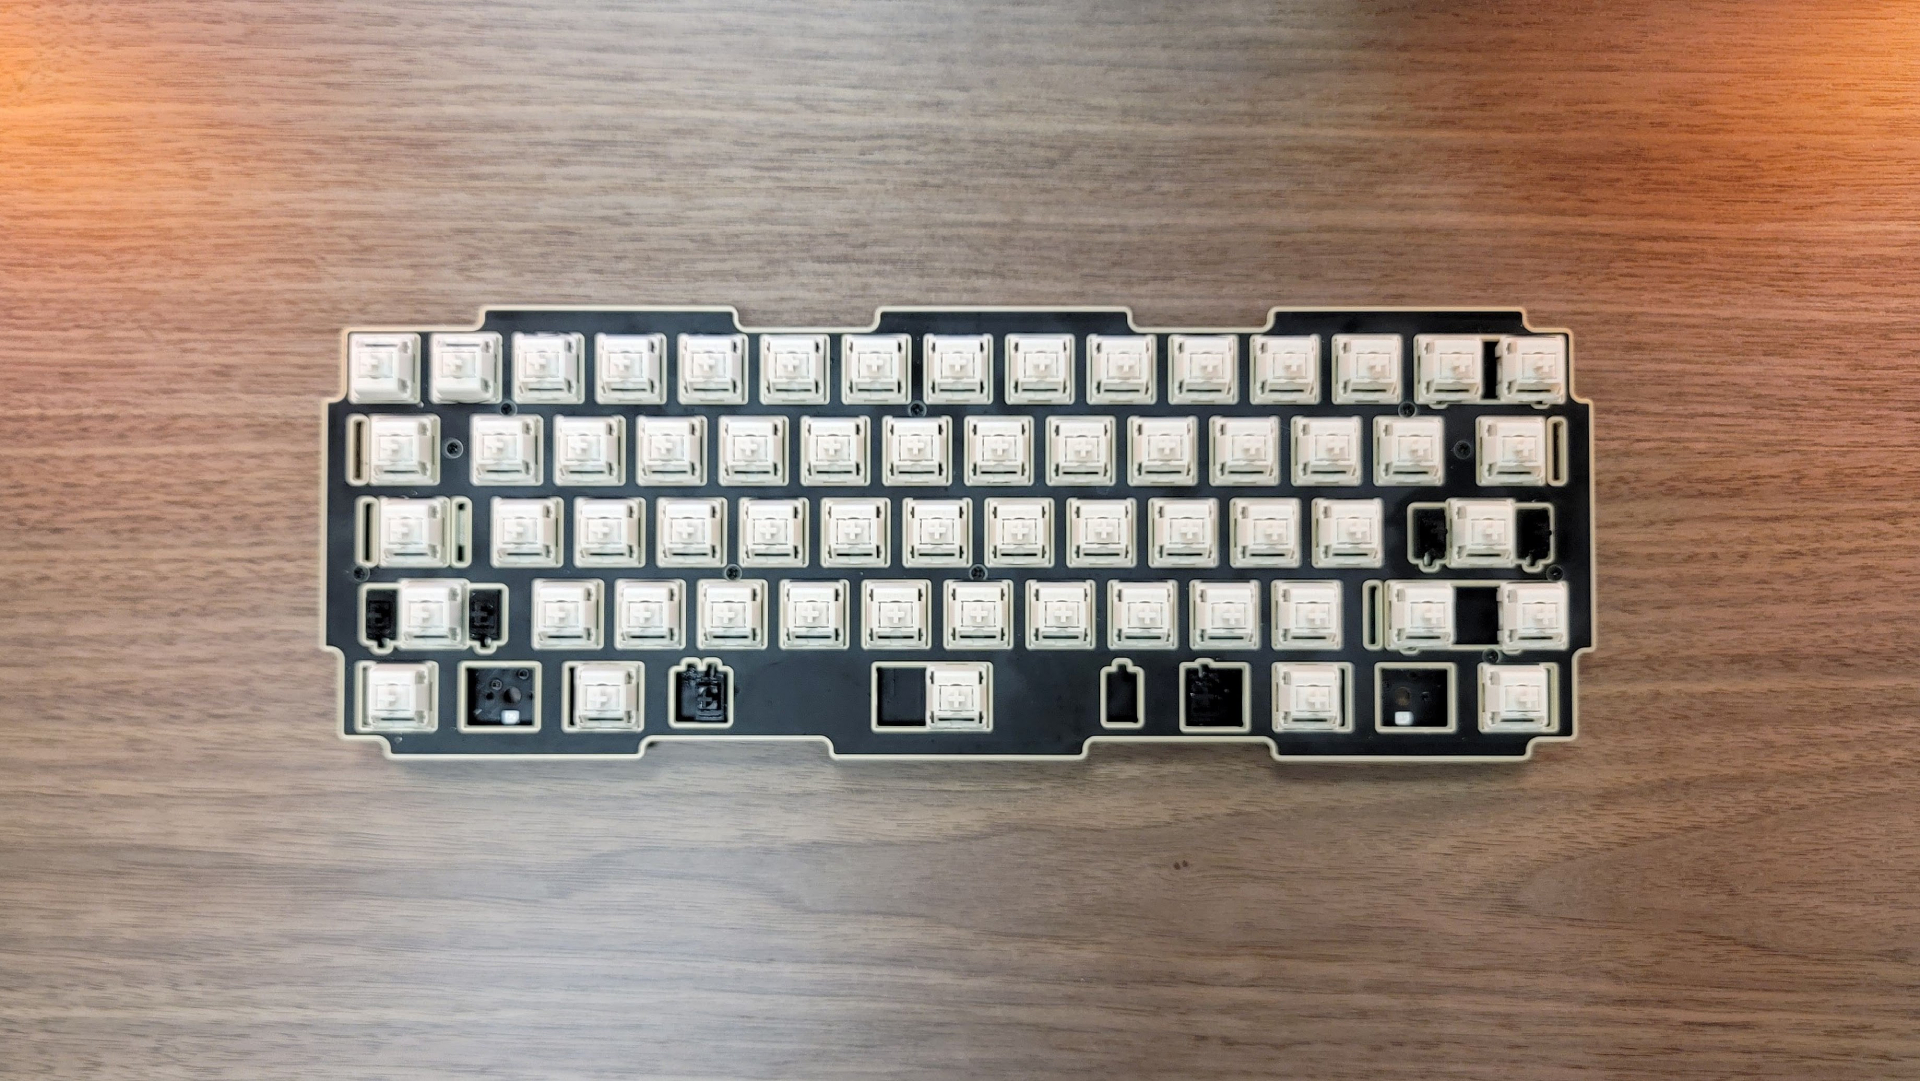
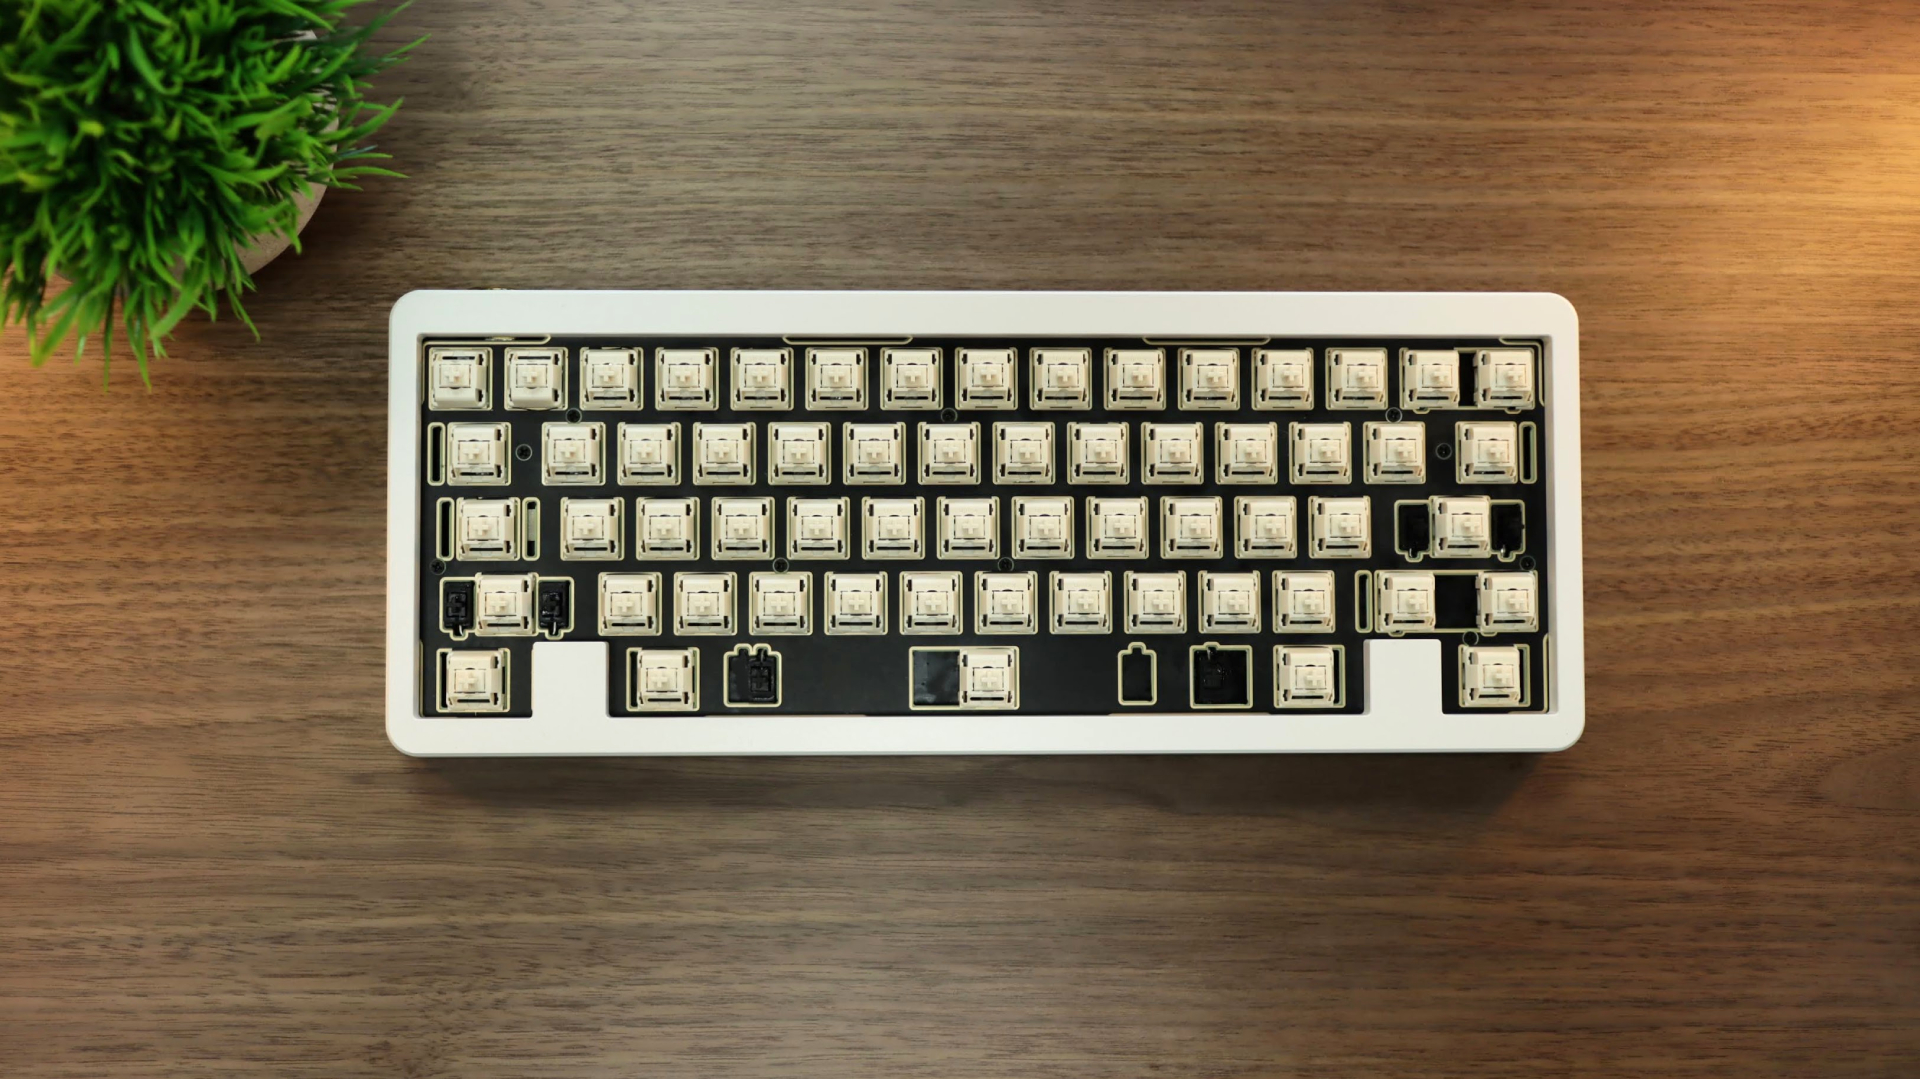
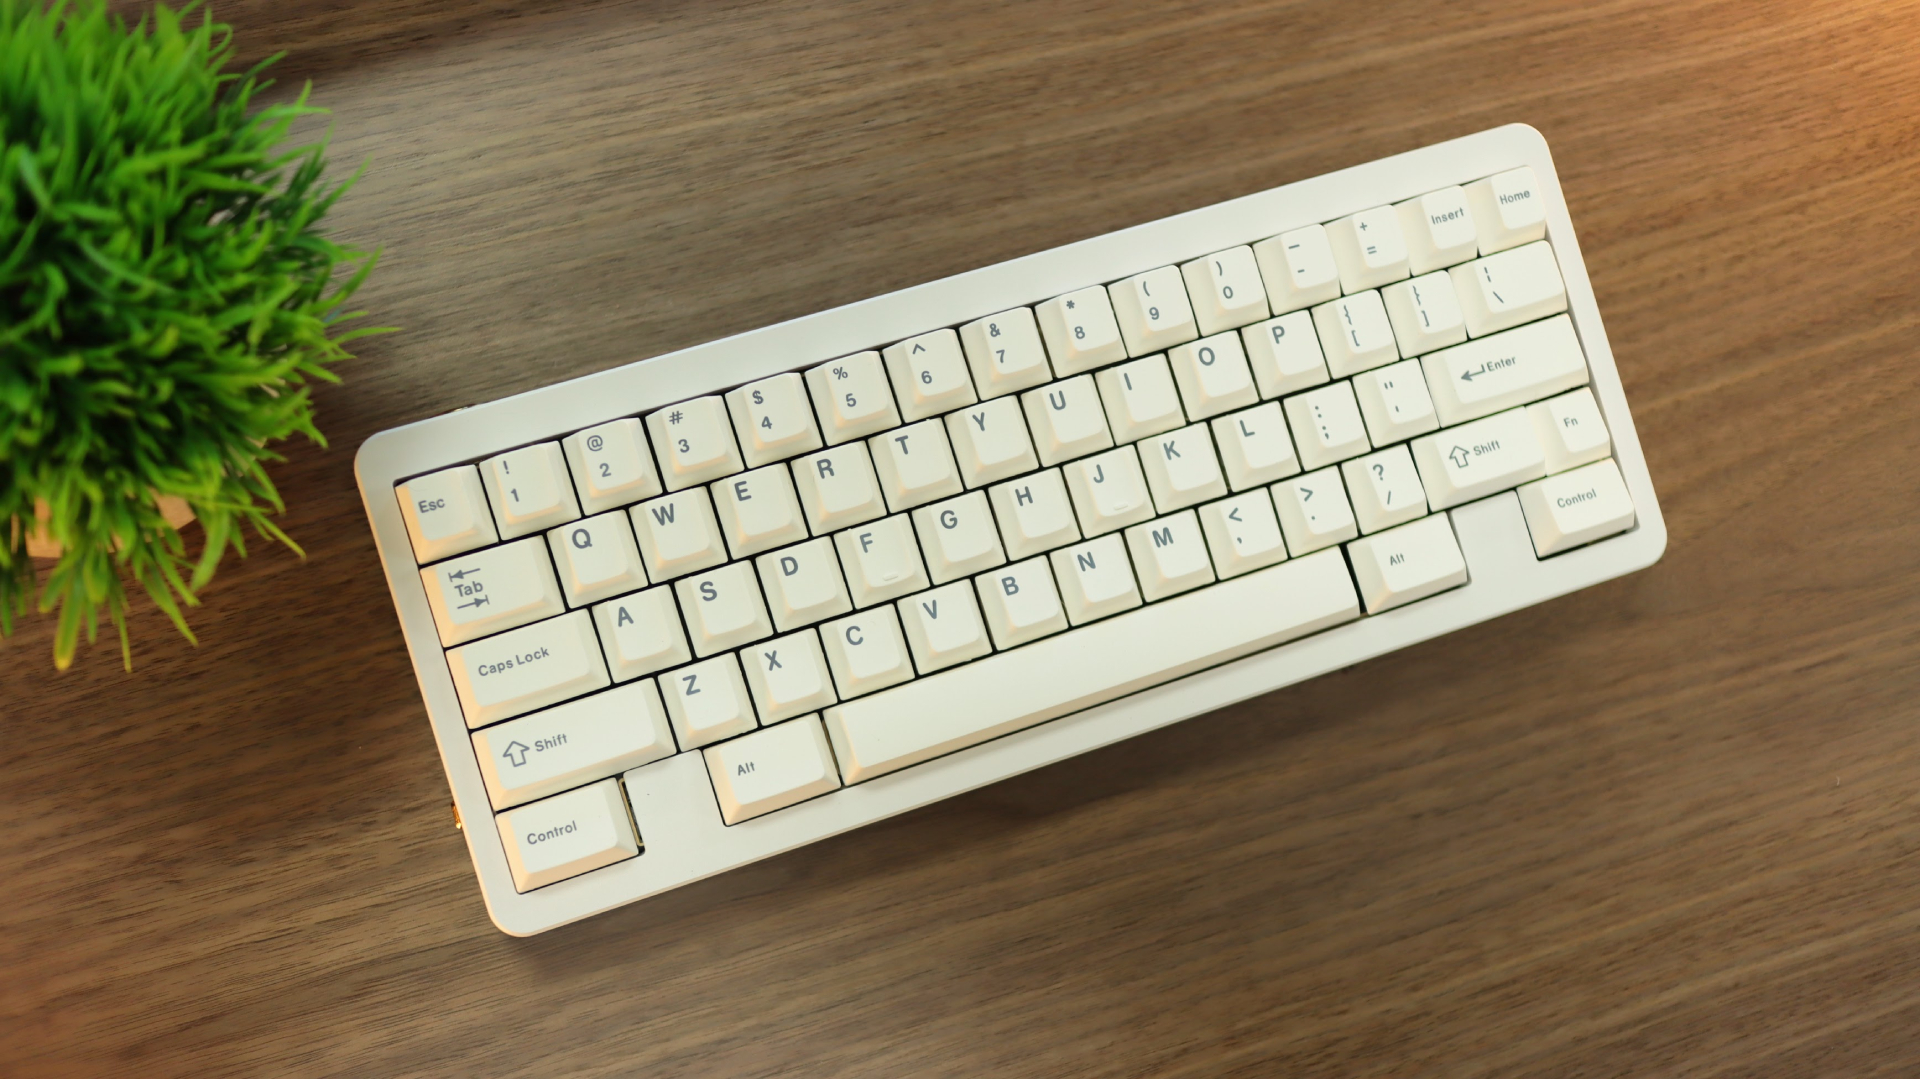
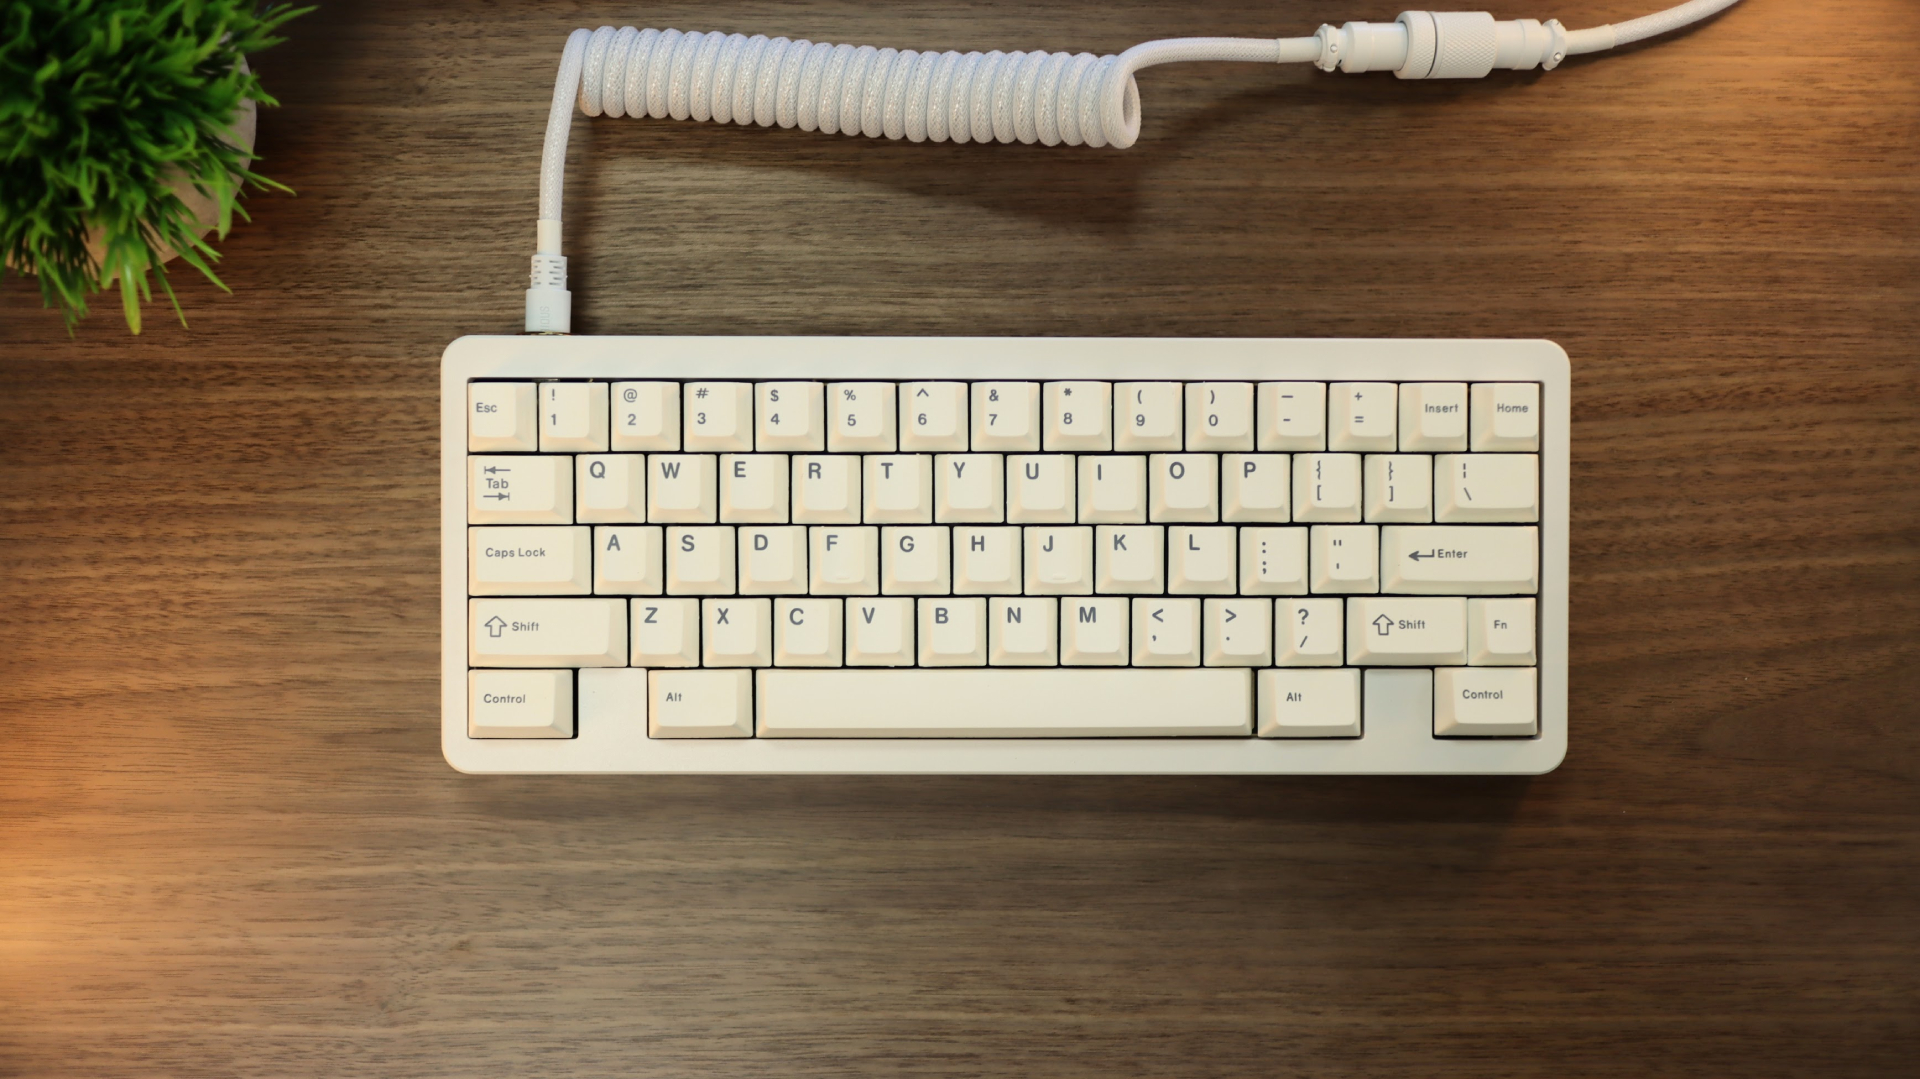
For our build, we used the D60 WKL keyboard kit from KBDFans but the steps here should apply to most keyboard builds. We chose this kit because it offers a number of features popular in custom keyboards today, such has the potential to look and sound great, and (at the time of writing) is readily available for purchase, avoiding the lengthy group buy process.
The kit included the basics for a custom keyboard build, including the case, PCB, and plate, as well as a nice brass weight and stabilizers, for $335. While this particular kit is expensive, custom keyboards can be built for much less. Great keyboards don’t have to cost a lot of money, especially if you take the time to apply some simple modifications along the way.
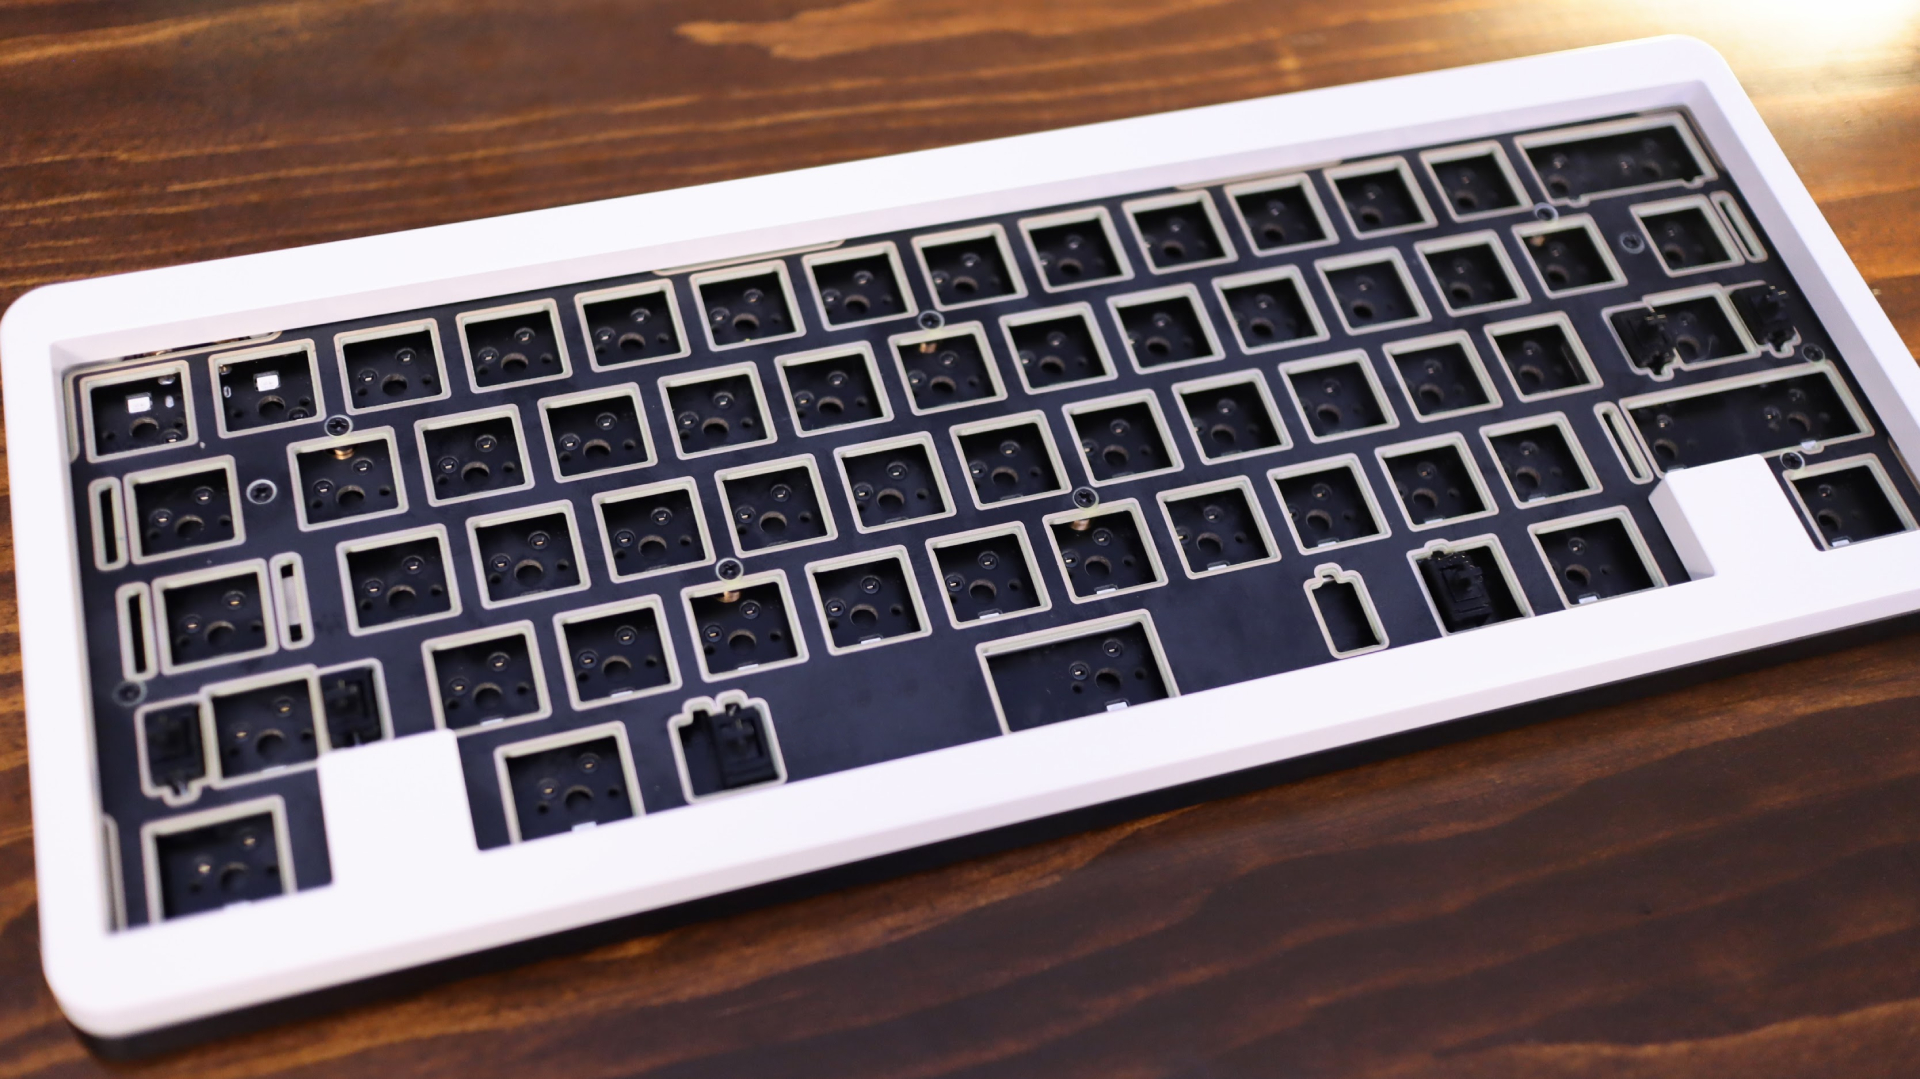
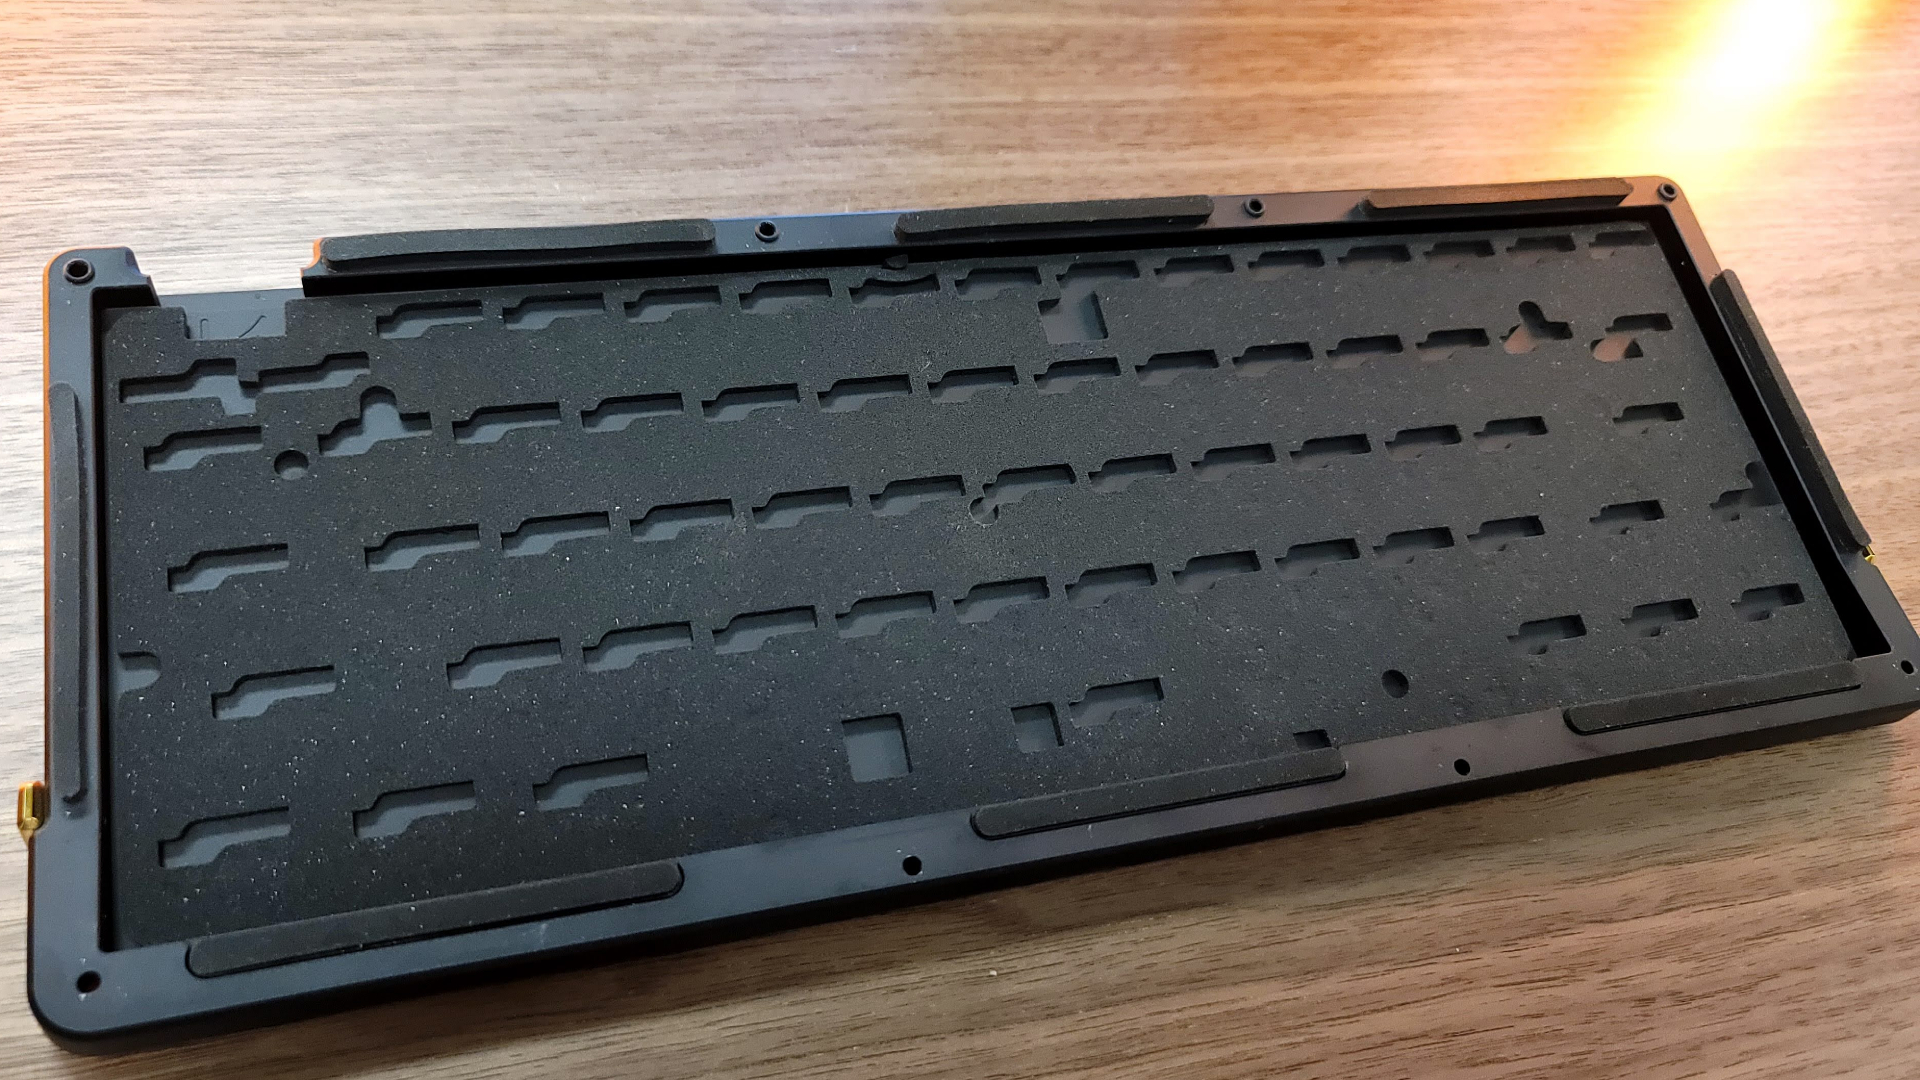
The D60 kit features a 60% layout with blockers for the Windows keys (so-called when the case blocks the location of the Windows keys) to create an appealing symmetrical layout. It uses a gasket mount design, which places soft gaskets between the PCB and case to isolate keystrokes and improve the typing sound. We chose the FR4 plate to balance a soft typing experience with a pleasant sound profile. The kit also includes pre-cut damping foam for the case and between the plate and PCB to further tune the sound and feel of the keyboard.
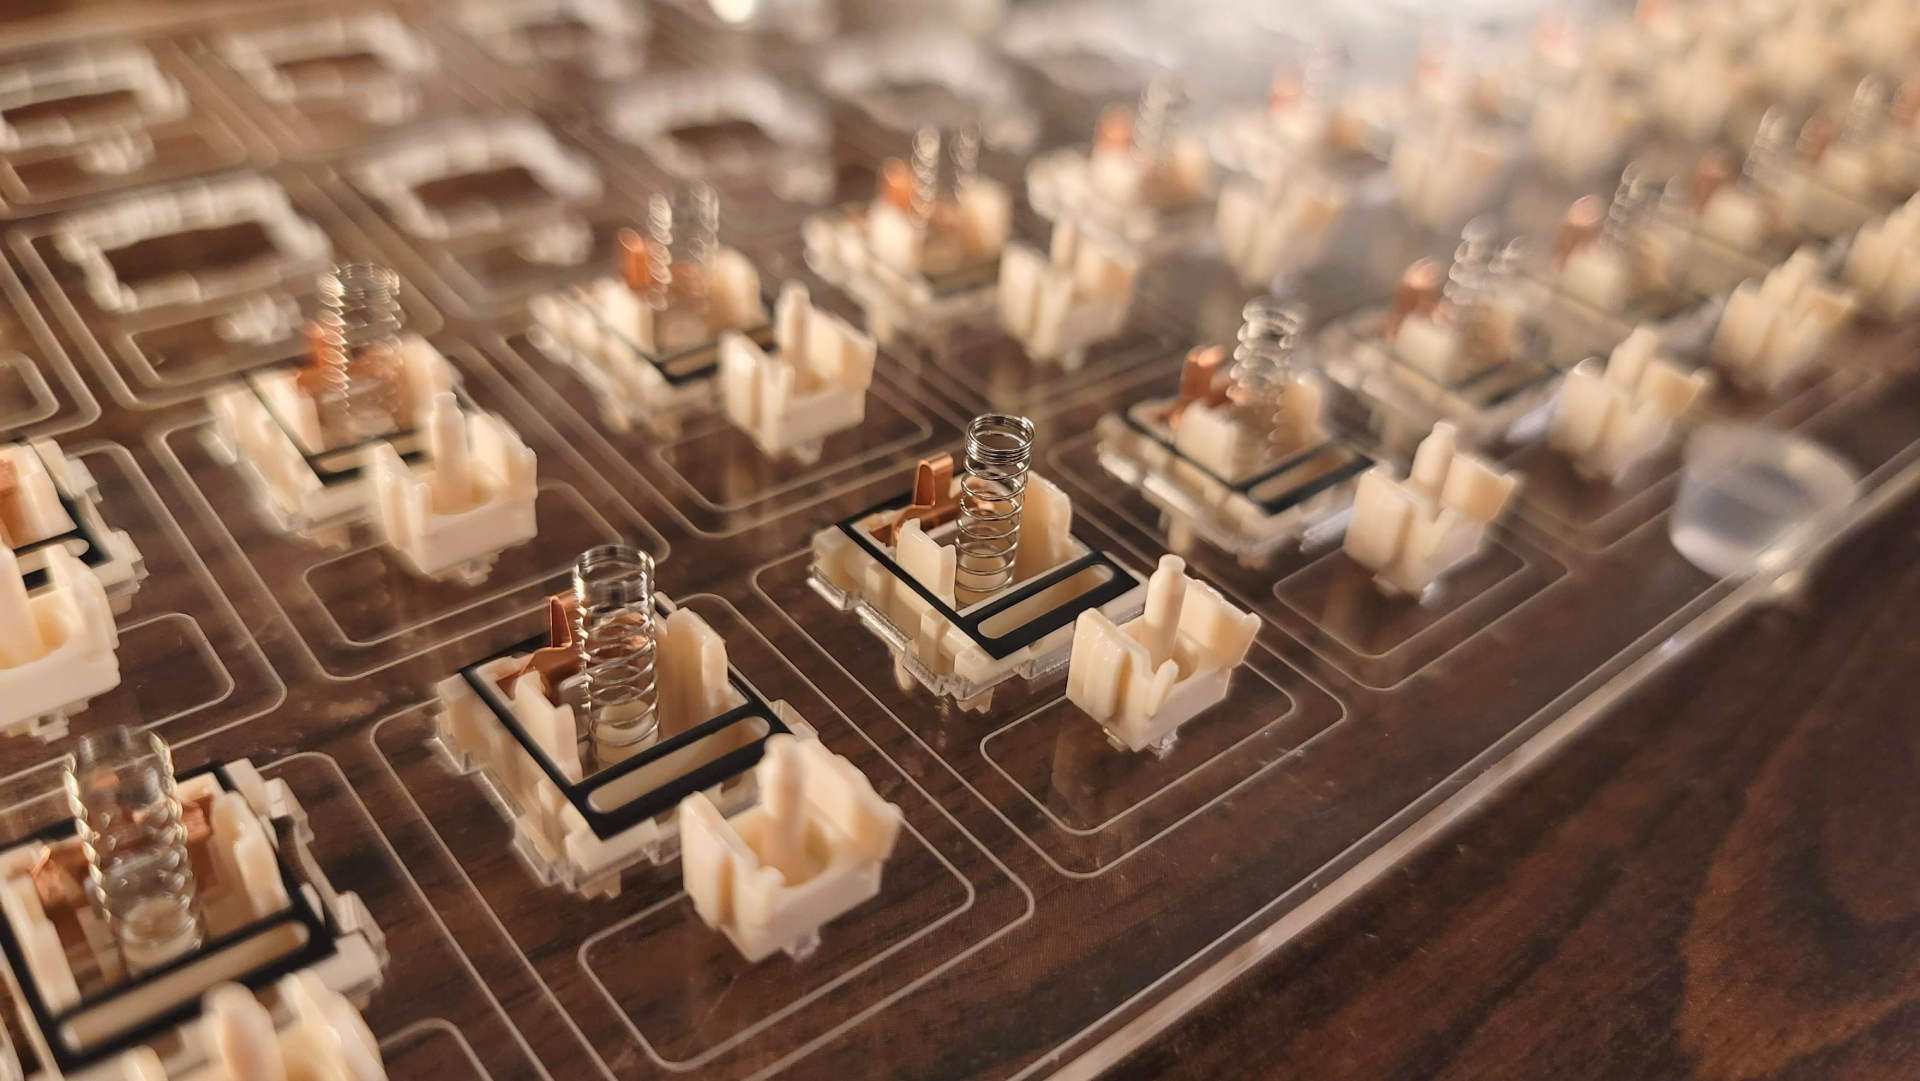
I combined it with EnjoyPBT Gray keycaps and NovelKeys Cream switches lubed with Krytox 205g0 and tightened with switch films. Both of these also enhance the sound and feel of the switches. The total cost to build this exact keyboard was $472.
How to Build a Custom Mechanical Keyboard
By following the basic steps in this guide, you’ll be able to build a working keyboard, but I highly recommend applying the three optional modifications I’ll be showing you along the way. They will absolutely make your keyboard sound and feel better to use.
It's also important to note that keyboards can be very different from one another in their construction. Mounting styles and the order of operations can sometimes vary. This is especially true when it comes to how the PCB and plate join together and connect with the case. The important thing is to take note of your specific components and be willing to move throughout these steps as necessary to make building easy and fun.
This guide endeavors to cover the most common builds.
Step 1: Switch Lubing
If you’re planning on lubing your switches and would like them to be ready for the first time you use your keyboard, be sure you do that ahead of time. Switch lubing can take several hours, so plan ahead.
Step 2: Test the PCB.
Before proceeding, you should first make sure your PCB works as intended. Unpack your PCB, and plug it into your PC using a matching USB cable. Be careful not to touch the board to anything that could cause a short, like a metal keyboard case.
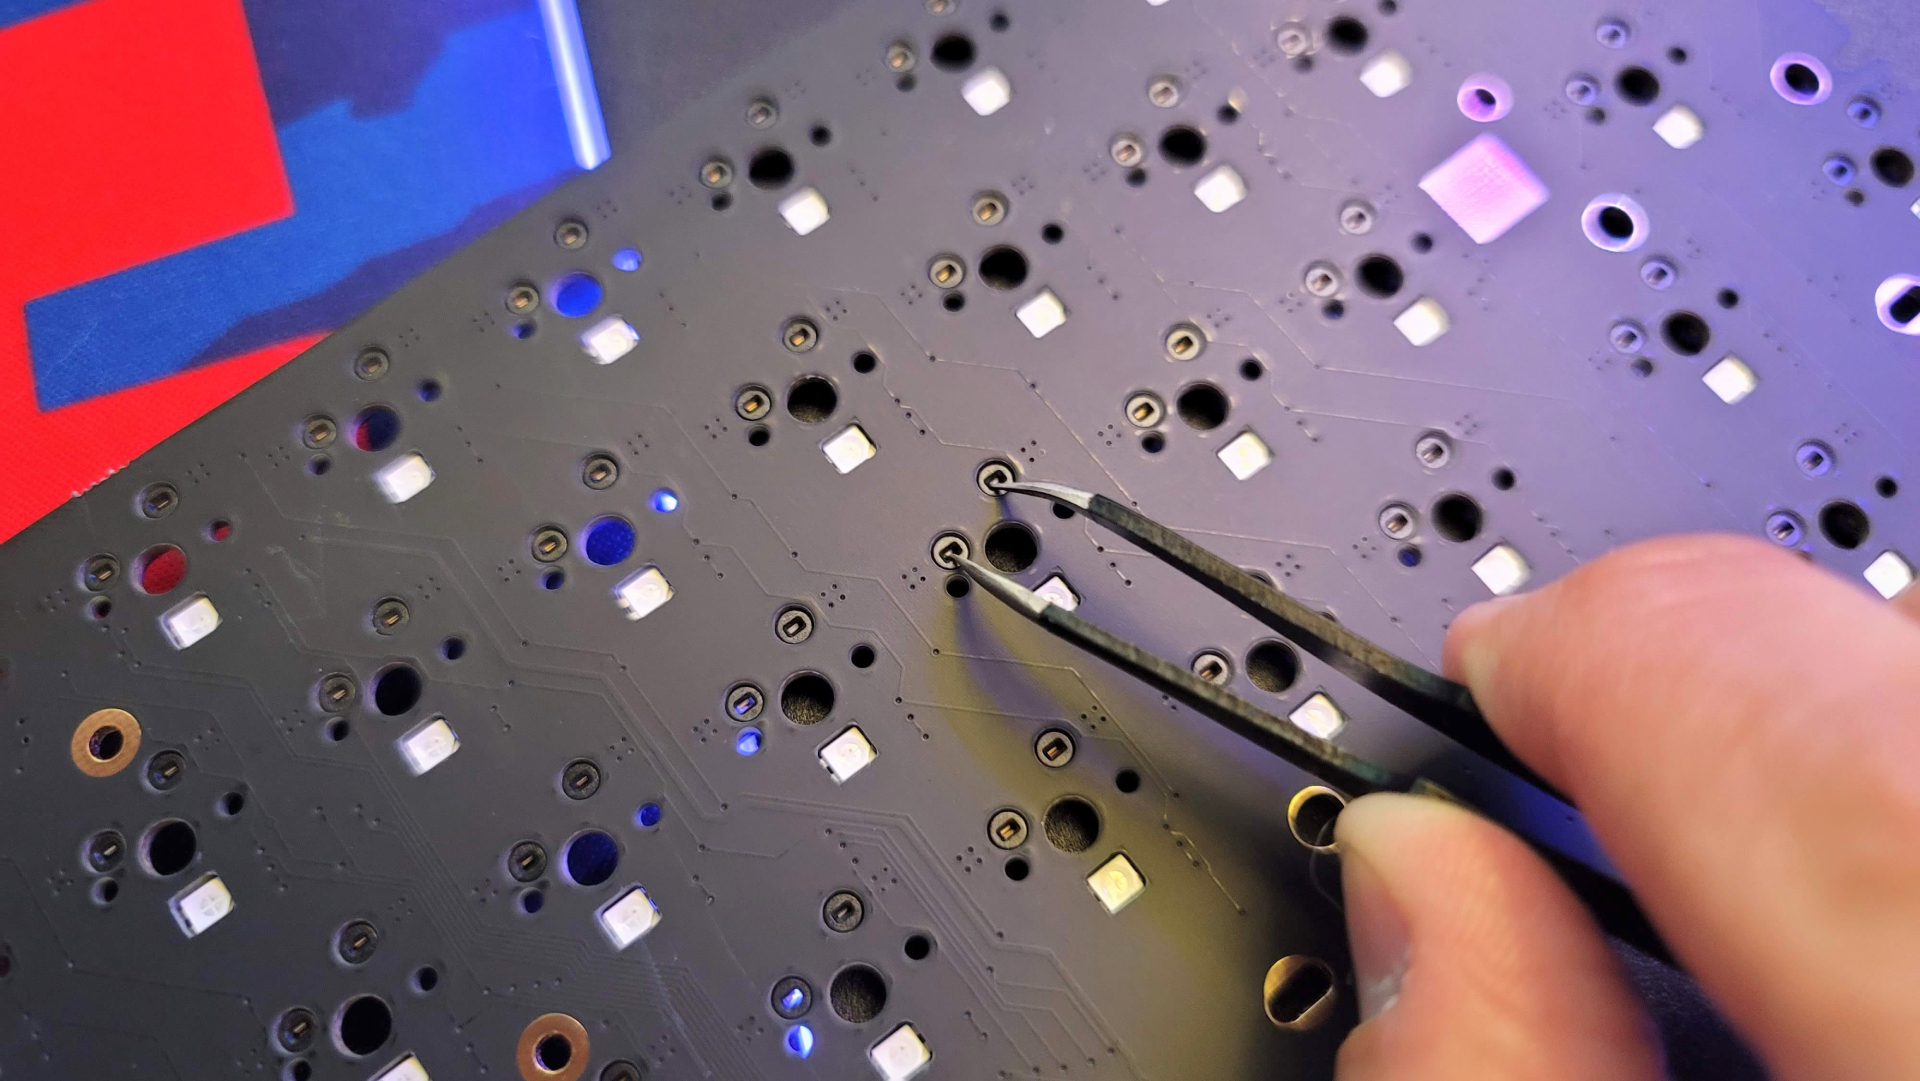
Next, head to Keyboard Tester and open the test tool. Looking at the PCB, notice that each position where a key will go has two small holes for each switch’s contact pins. Using your tweezers, touch both metal tips to these holes. Don’t force the tips in as that may damage the PCB or hot-swap socket built into your keyboard. When the tweezers make contact, you should see that letter or number change color on the Keyboard Tester.
Do this for every key, and re-test any that do not work.
Depending on your layout, some keys on the Keyboard Tester may remain unchanged. The important thing is that every pin you touch, with the exception of specialized keys like Fn, cause a reaction on the testing tool. If they do not, contact the manufacturer because the PCB may be faulty.
Step 3: If necessary, disassemble the case.
Some keyboards ship with the PCB and plate pre-installed. If this is the case, disassemble the case to retrieve these parts. If these parts arrive separated, or the keyboard does not require disassembly for building, such as a tray mount or friction fit keyboard, proceed to the next step.
If disassembly is required, or you would simply like the case to be ready for its role in the build process, remove the necessary fasteners so the keyboard is open and able to be built in. Be sure to take special note of how the keyboard is assembled, taking pictures if necessary.
Step 4: Assemble the stabilizers.
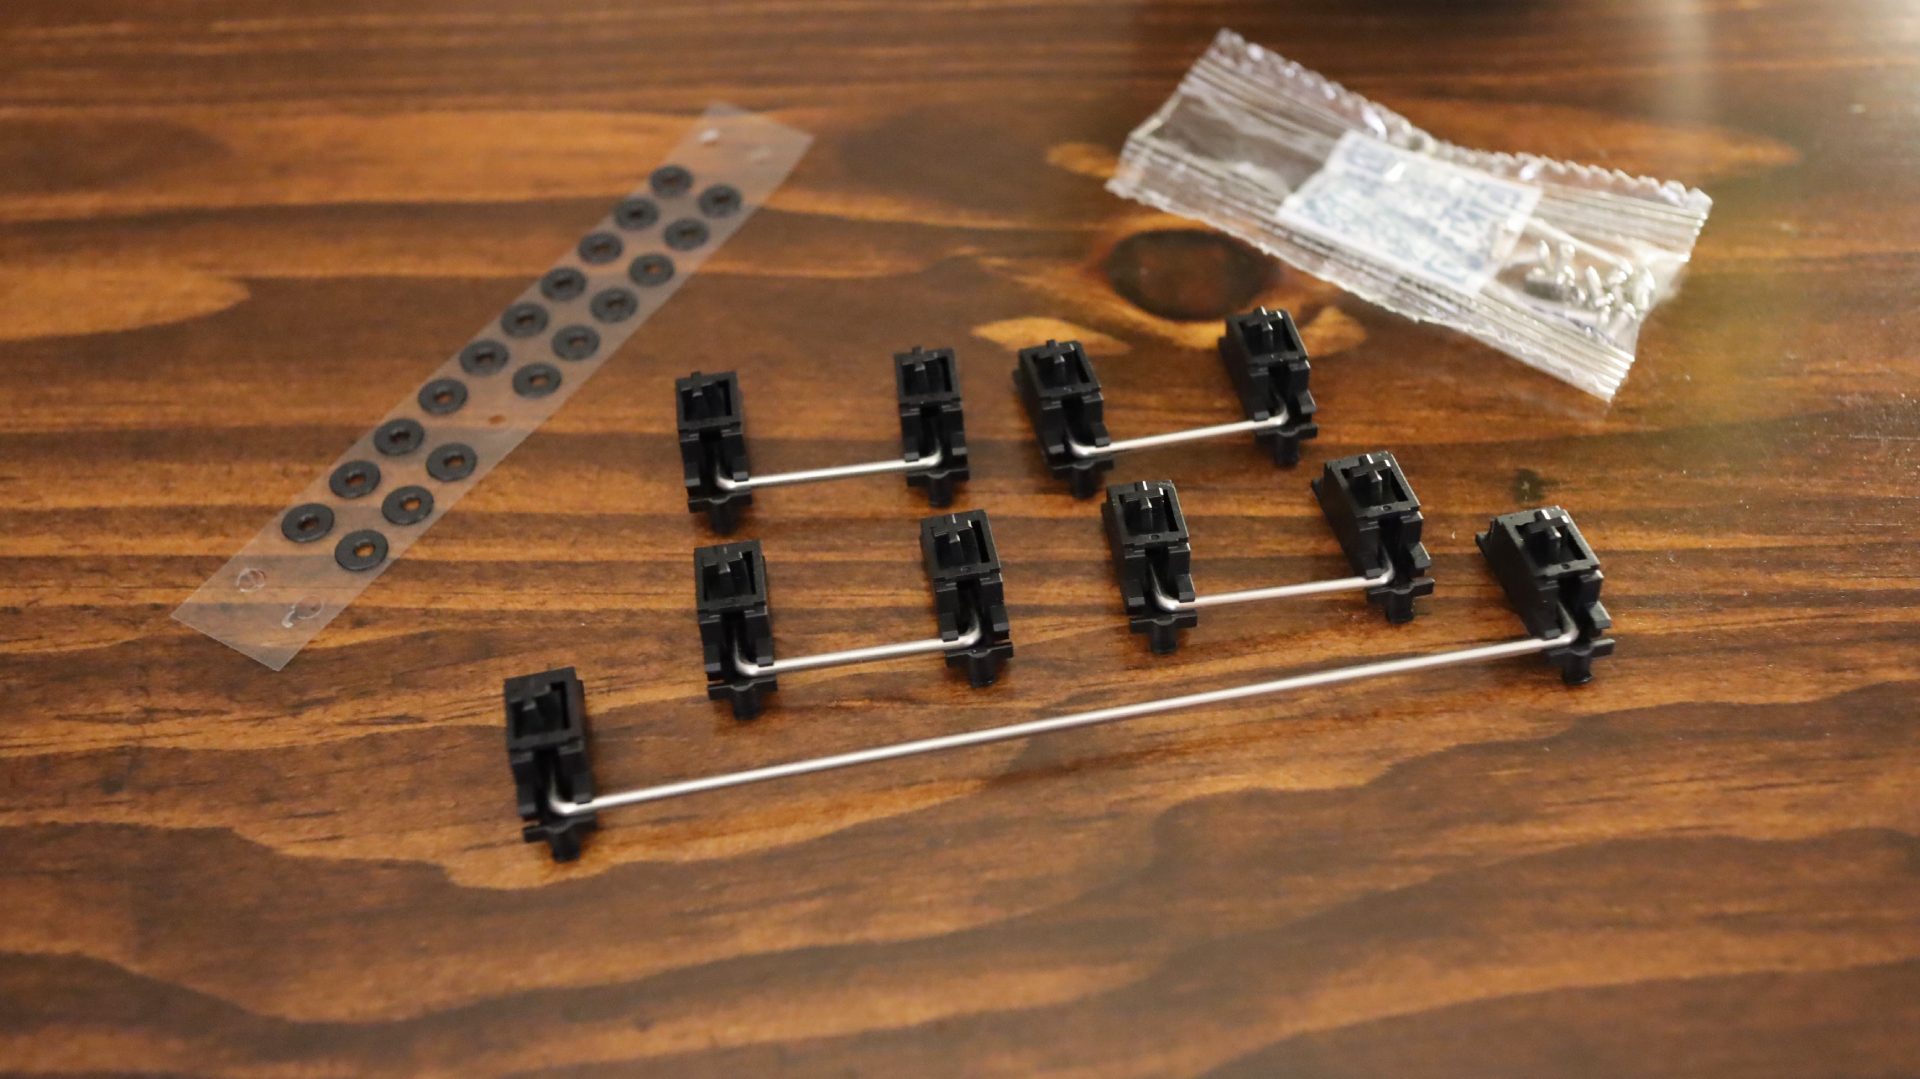
Most stabilizers come disassembled and will need to be fit together before being installed on the keyboard. Stabilizers feature three key parts: the housing, the stem and the wire. Each stabilizer will have two housings, two stems and one wire. The housing is the largest of these pieces and acts as the shell for the smaller plastic piece, the stem. The wire inserts into the bottom hole of the stem and snaps into the housing to keep it in place.
Insert the stem into the housing through the bottom of the housing. Make sure the side with two holes faces the front of the housing. This is the larger side, and you should see tiny guides to hold the wire.
Next, slide the end of the wire through the housing and into the bottom hole. Be sure it passes all the way through the stem and not out the bottom as this will interfere with its movement.
Once it’s all the way inserted, press the wire into its guide until it snaps securely into the housing. Be careful not to bend the wire.
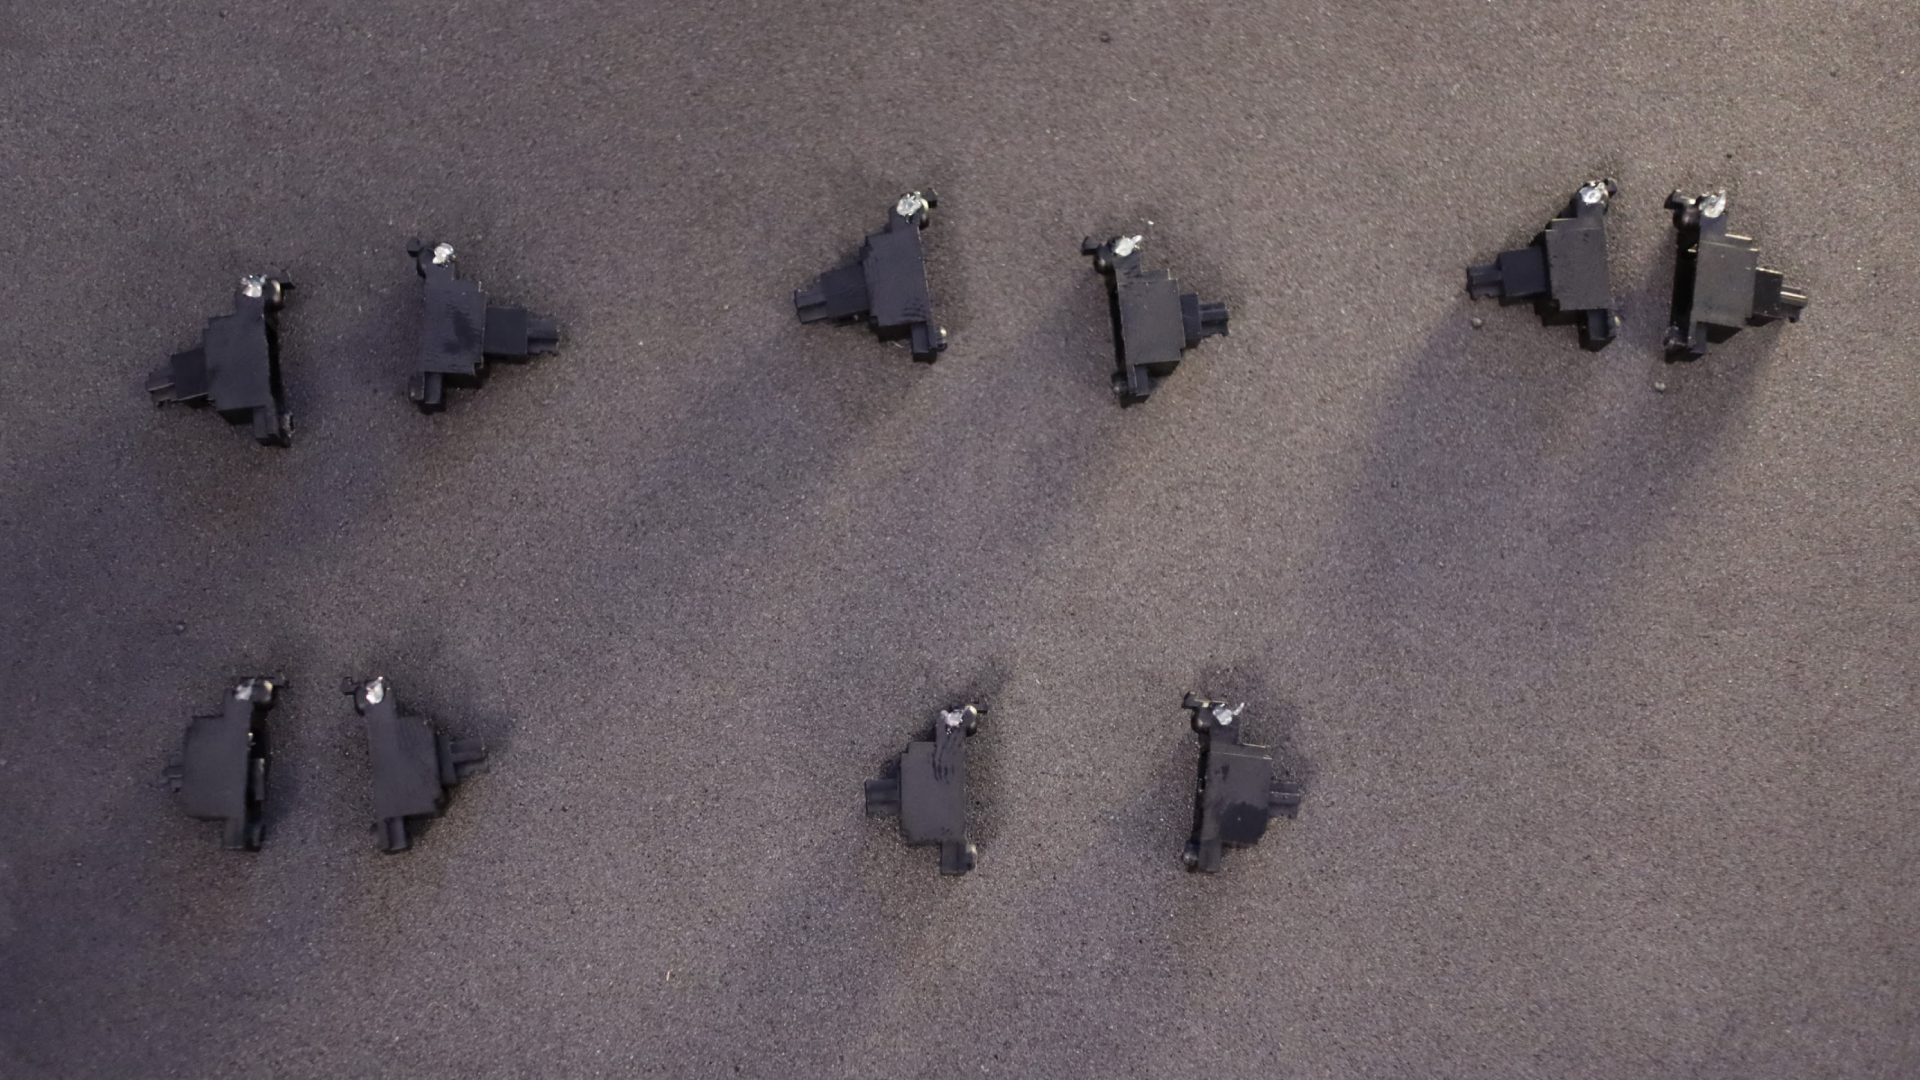
Optional Modification: Clip and Lube the Stabilizers: One of the most important mods any keyboard builder can do is to clip and lube the stabilizers. This dramatically reduces rattle when using the larger keys and makes the keyboard feel and sound much better to use. Perform the following steps one at a time to build each stabilizer. Don’t work ahead, as trying to lube multiple stabilizers simultaneously becomes messy and difficult once you progress to the wire.
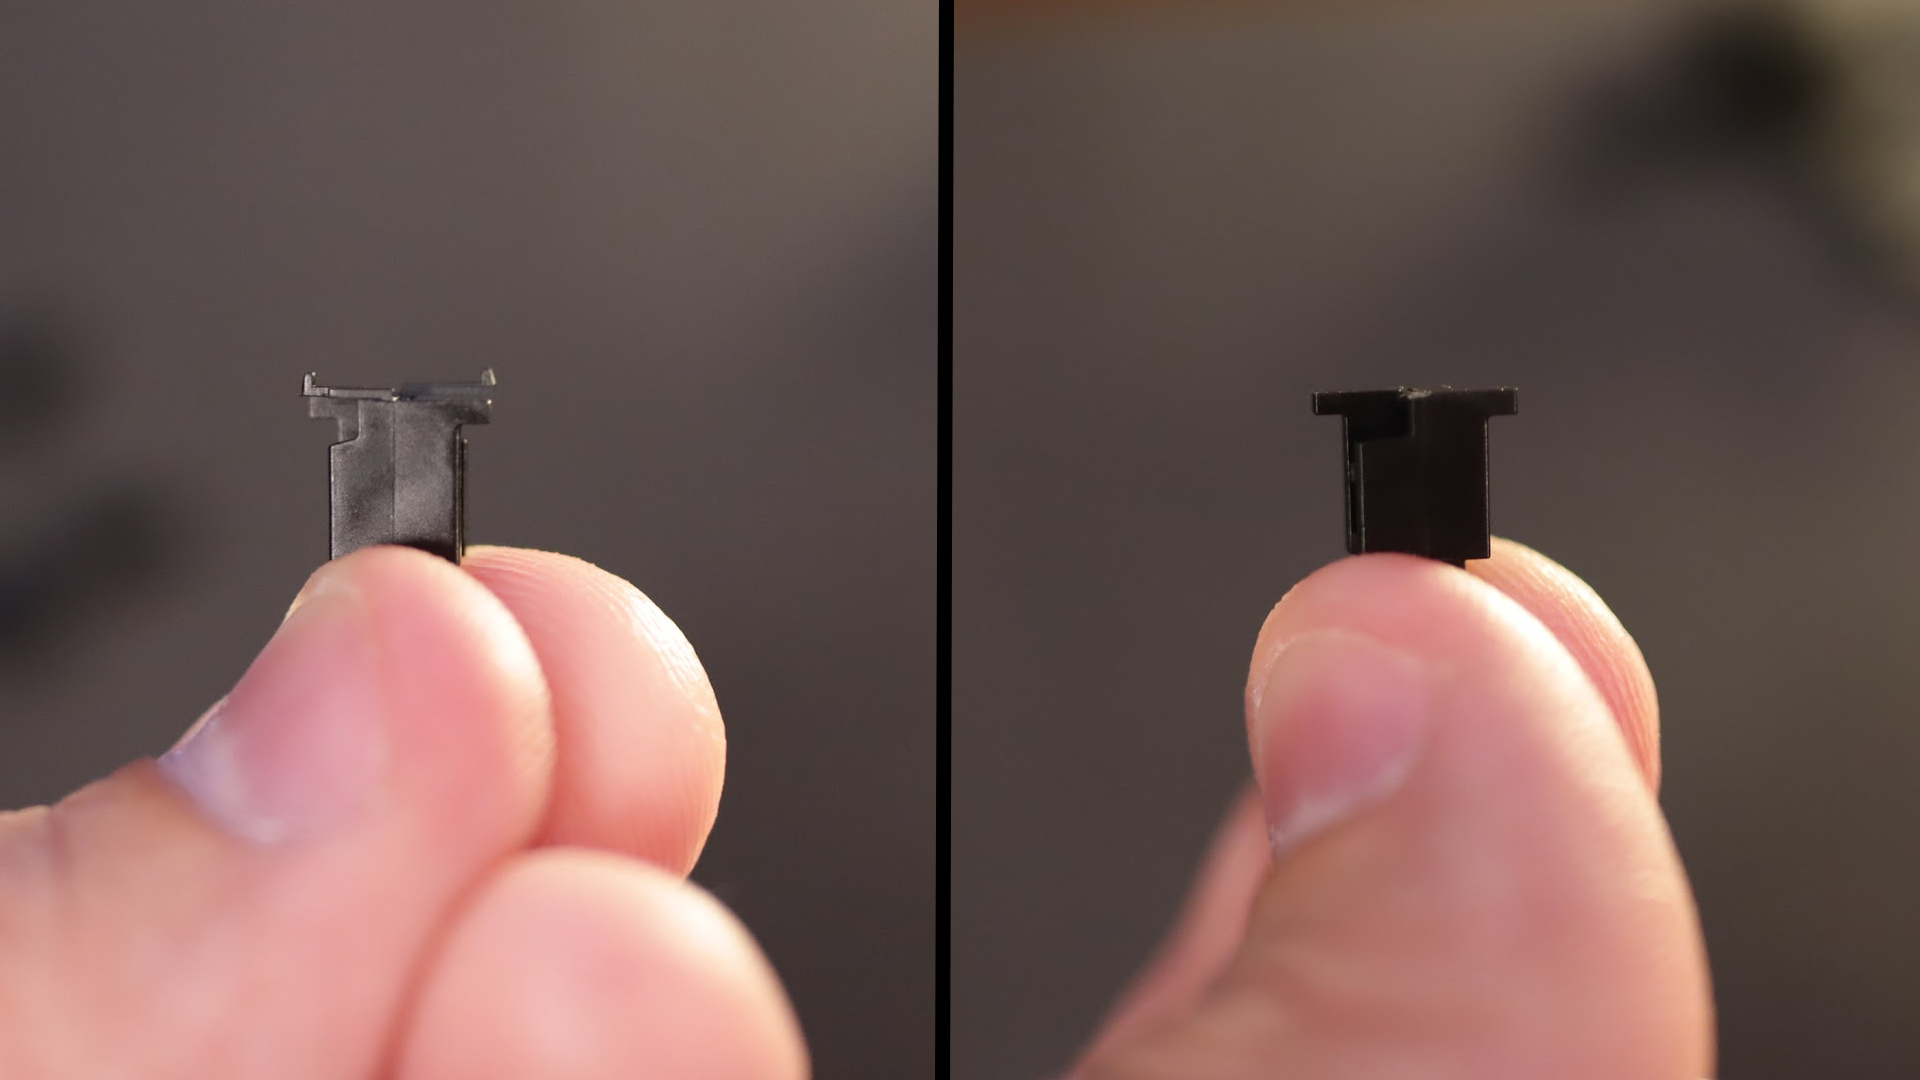
Begin by clipping the feet of each stabilizer stem. To do this, flip each stem over and look for two forked feet. Using nail clippers or flush cutters, cut both forked feet off until you have a flat surface.
Next, using Krytox 205g0 or another thin lube and a paintbrush, paint a thin layer of lube along all four sides of the stem. I also like to paint a thin layer along the inside of each housing covering each point of contact. Then, re-insert the stem into the housing.
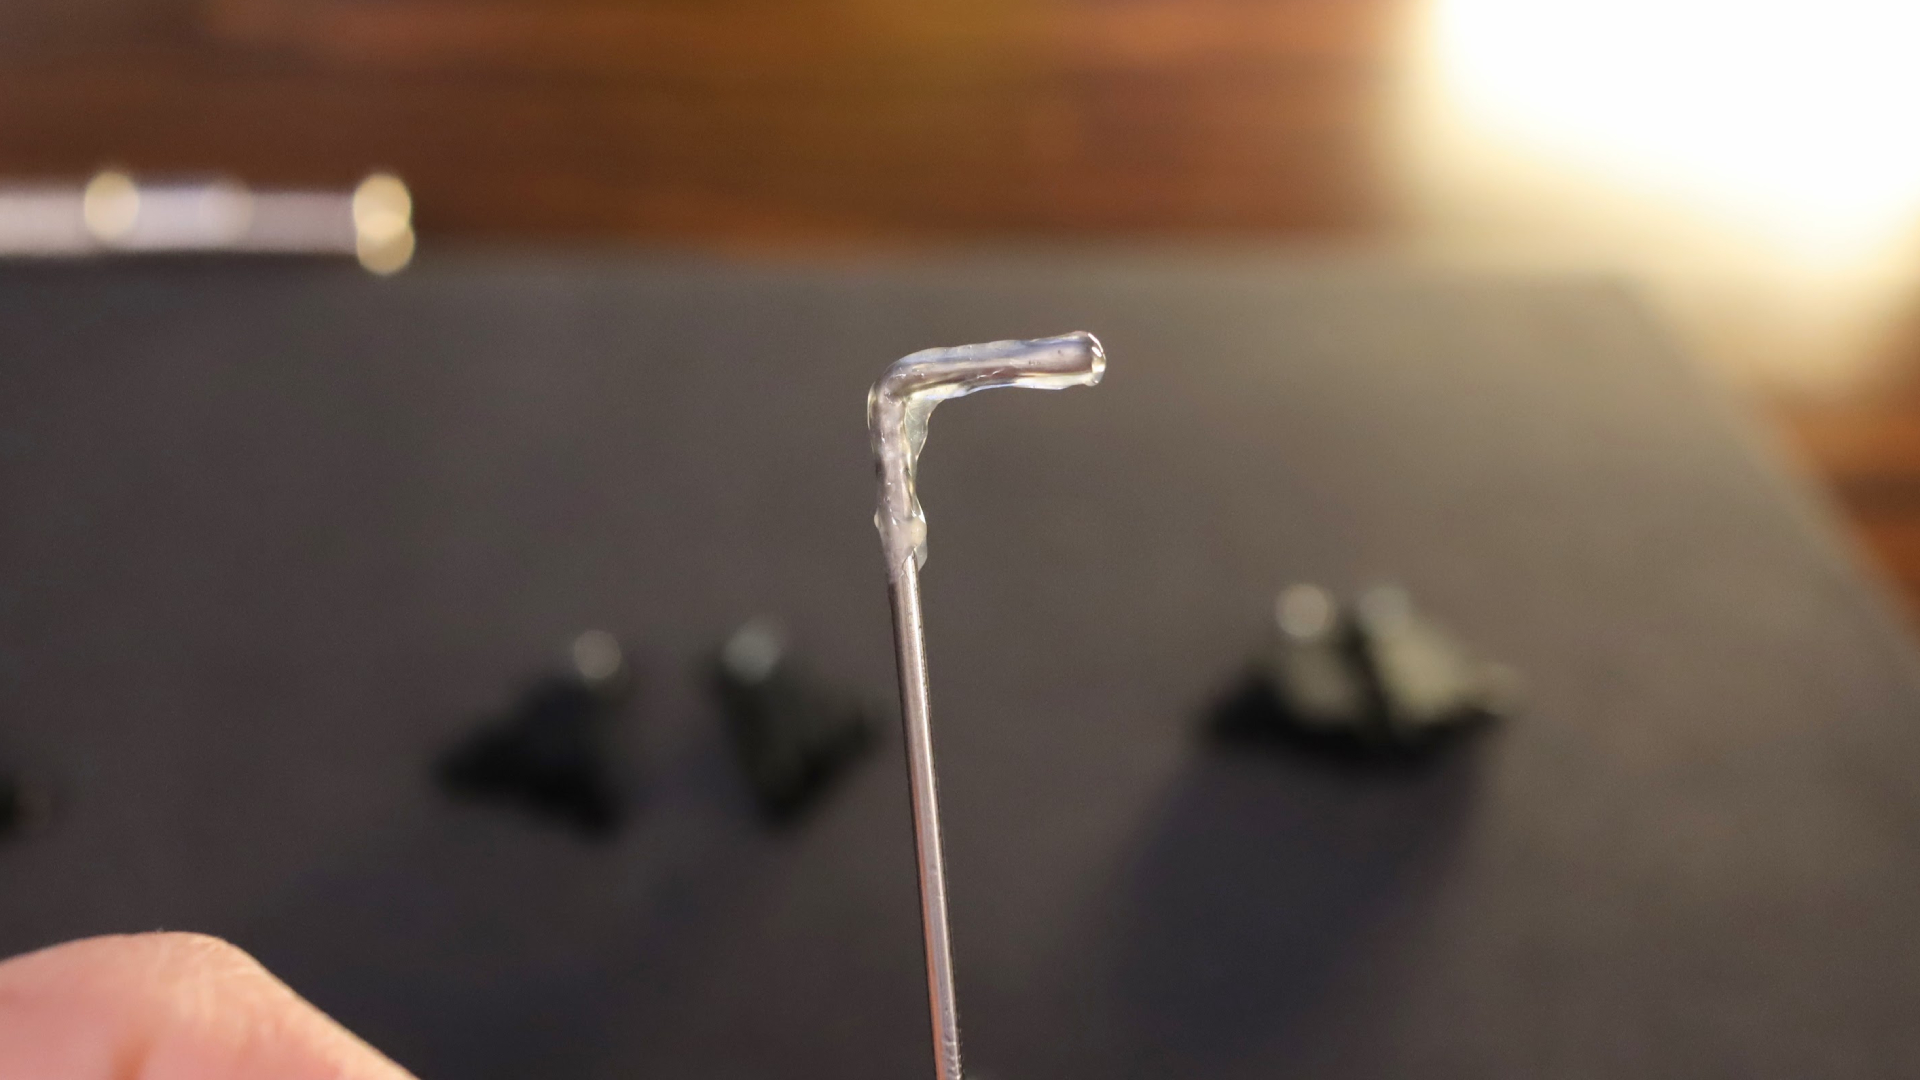
Finally, add a layer of semi-thick dielectric grease to both bent ends of the wire for that stabilizer going about a 1cm past the 90-degree bend. You want to completely coat the wire but don’t glob it on. The goal is to create a barrier between the metal end of the wire and the plastic interior of the stem, eliminating rattle. Too much lubricant can make the stabilizer feel sluggish.
When you’re done, re-insert the wire into the stem, and snap it into the housing.
Step 5: If using PCB-mounted stabilizers, mount the stabilizers.
At this point, if your PCB uses PCB-mounted stabilizers, it’s safe to install them.
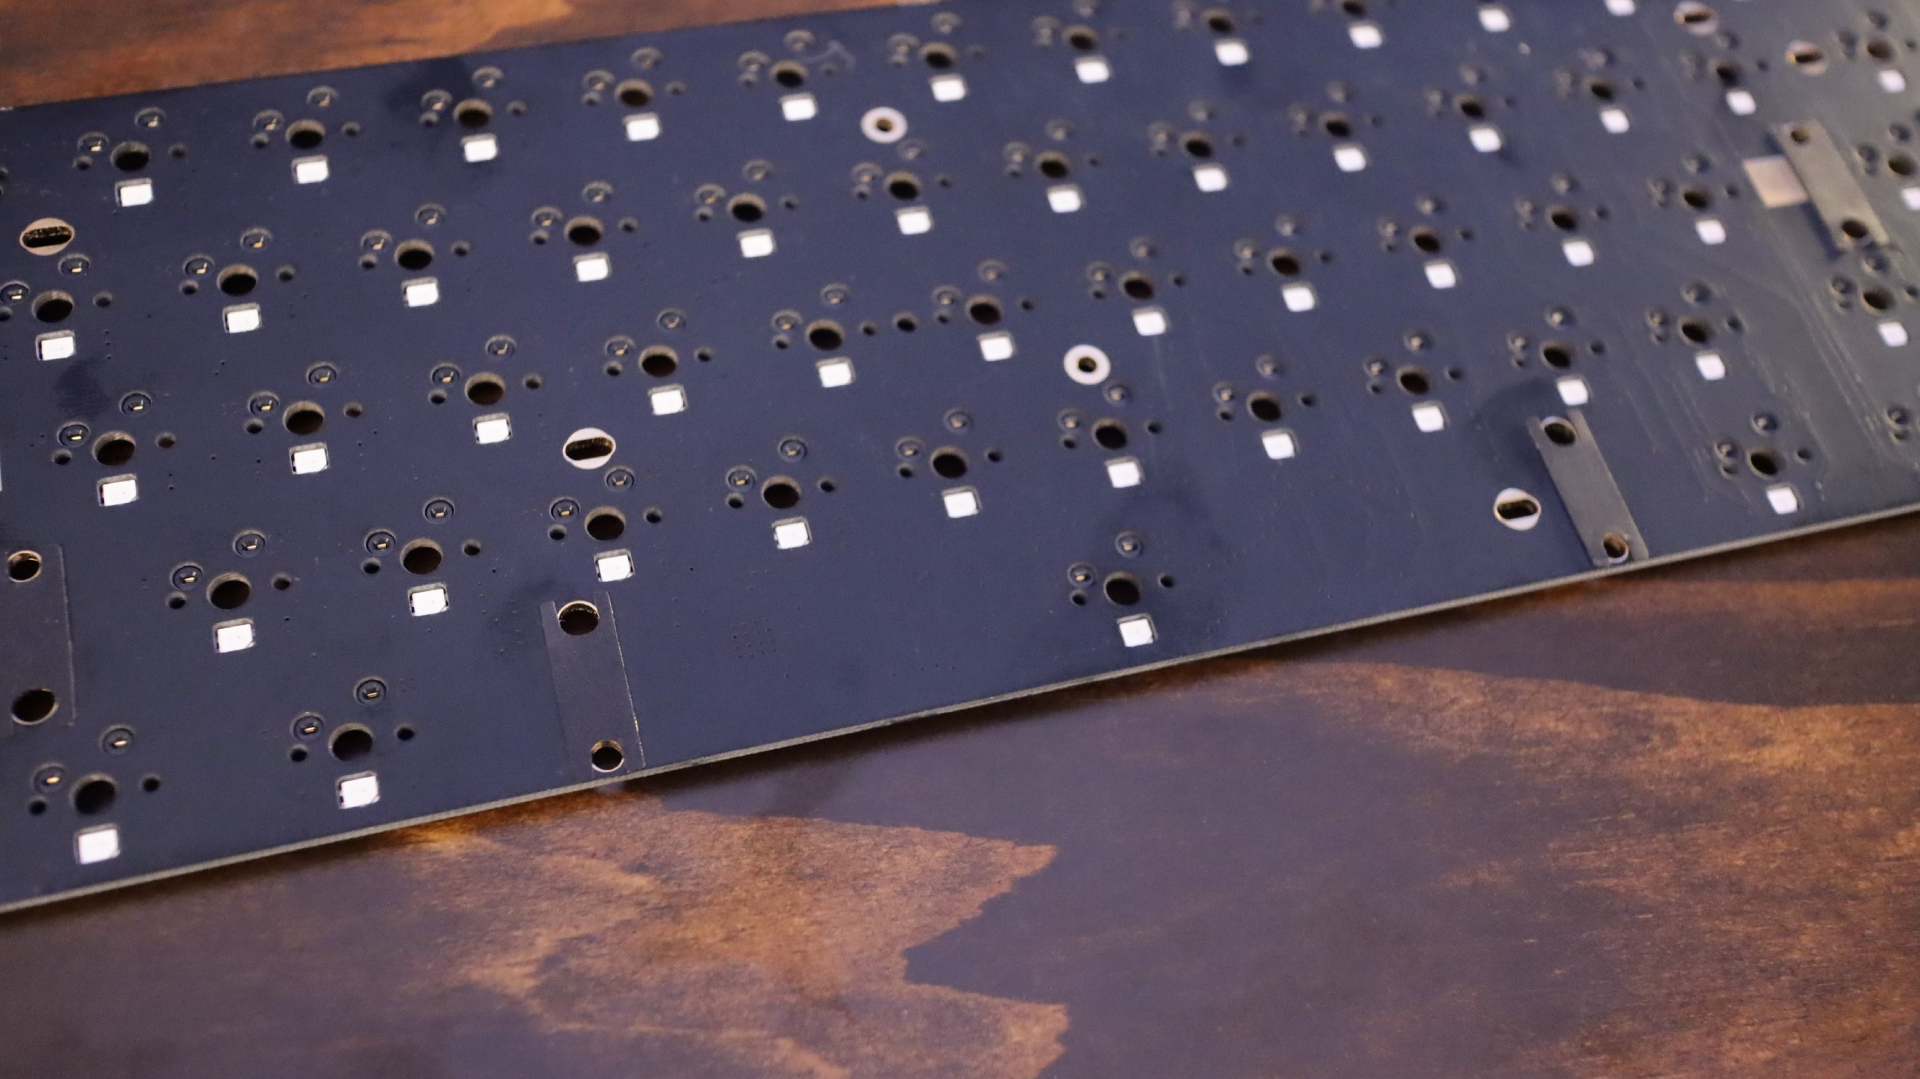
Look at your PCB. Imagine the size of the larger, stabilized keys. Near the edges of their width, you’ll notice two circles, one larger and one smaller. For screw-in stabilizers, the smaller hole is used for the threaded portion of the stab and the larger is for the clip. For snap-in stabilizers, the larger holes should be on the same side as the wire.
Insert the stabilizers, and secure it by screwing or snapping it into place.
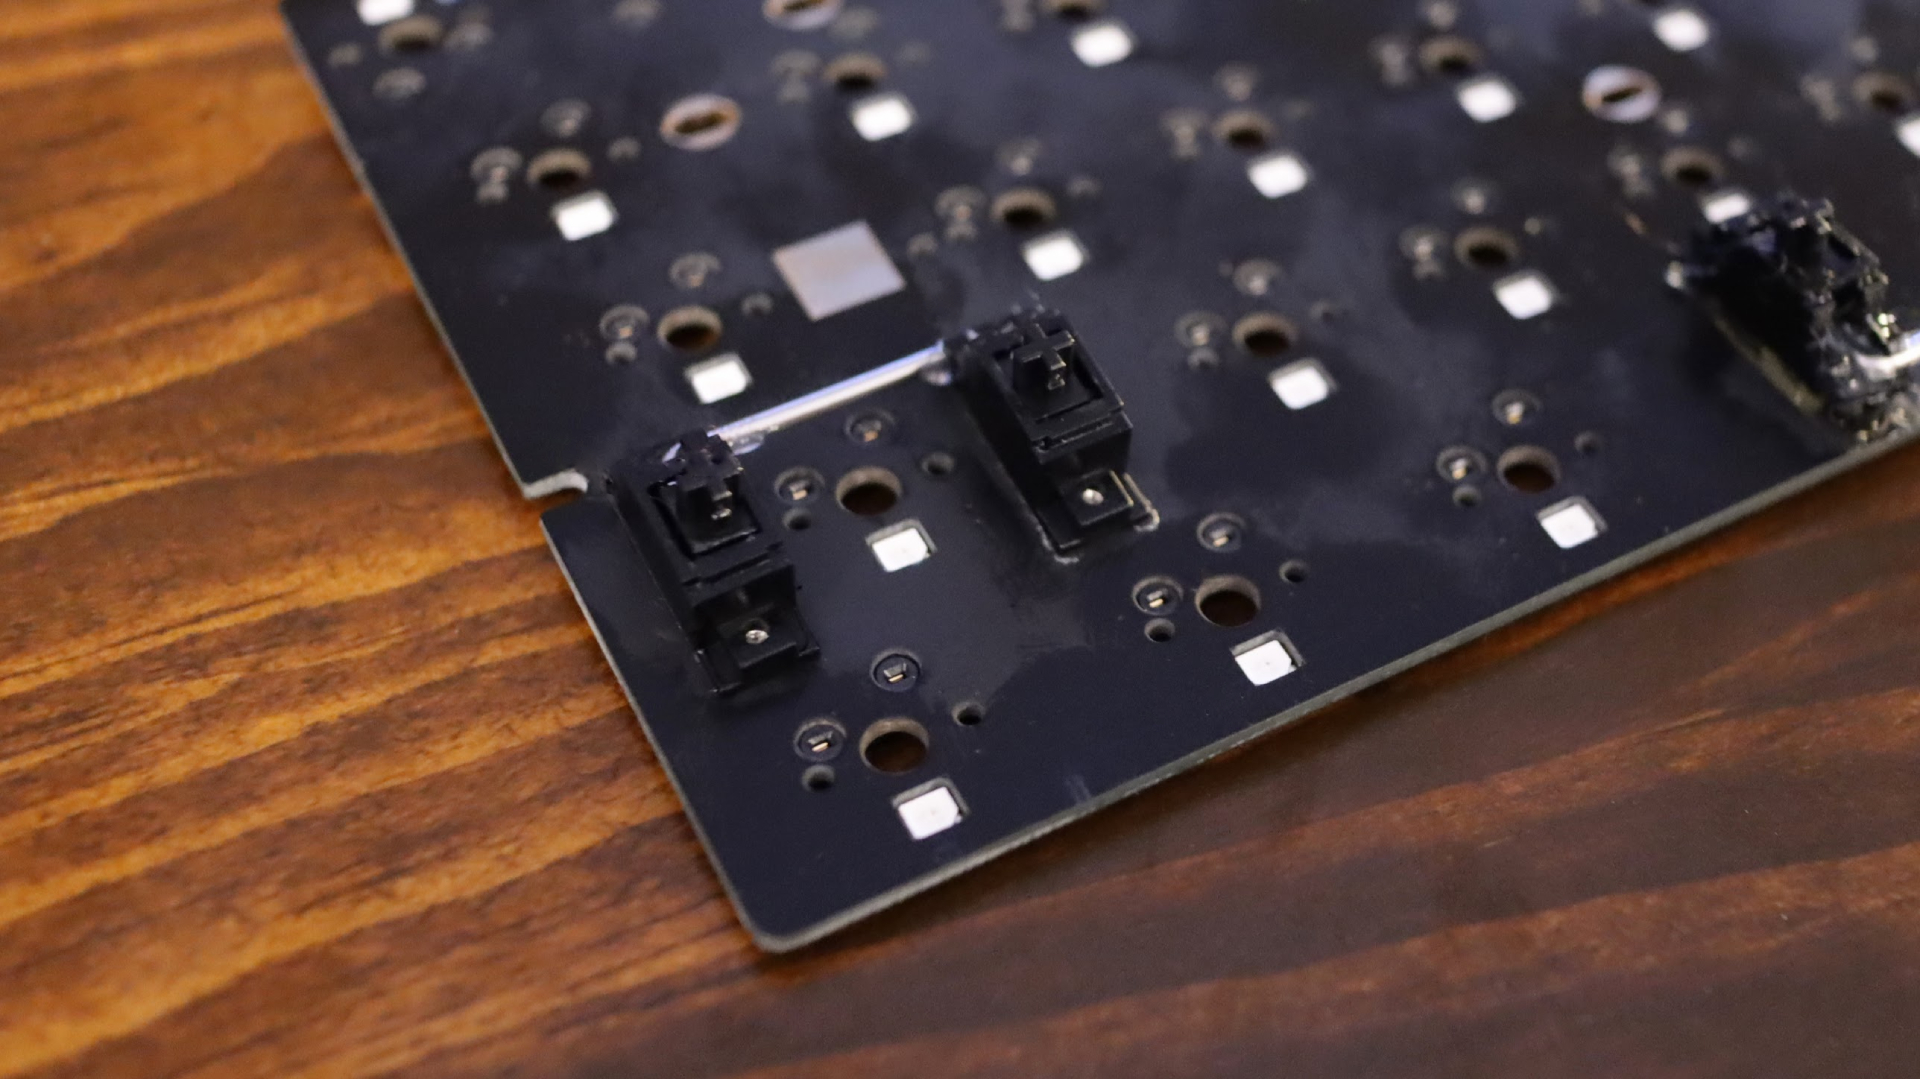
Optional Modification: Band-Aid Mod: Another popular mod to enhance the sound of stabilizers is the band-aid mod. This mod involves placing a small piece of adhesive material directly underneath each stabilizer stem. Rather than have the plastic bottom of the stem hit the hard PCB every time you use a stabilized key, it instead hits a cushioned surface, lowering its volume and softening its feel. These days, it’s possible to buy pre-cut adhesive foam stickers, but you can also accomplish the effect by cutting small pieces of Band-Aid and sticking them directly on the PCB.
To begin, cut a Band-Aid or, if you’re using stabilizer stickers as I did, peel the sticker, to roughly match the size of the cutout for the stem in the bottom of the housing.
Next, apply this to the PCB using tweezers for ease of application.
Finally, if you’re using a Band-Aid, apply a tiny amount of dielectric grease to the top of the Band-Aid, and rub it into the fabric. You should use just enough to make the color of the Band-Aid darken. Do this for both sides of each stabilizer.
Step 6: If your keyboard requires it, screw the PCB into the case, mount the plate to the PCB and apply foam if necessary.
It’s now time to join the larger components. This step will vary depending on your keyboard.
If your PCB needs to be screwed into the bottom case below the mounting plate, skip ahead to Step 8 to prep the case and proceed to attach the PCB. If the PCB and plate can be assembled and installed as a whole unit, complete the next step outside of the case. Look closely at the fastening points on the case, PCB, and plate to determine which matches your keyboard. Unless the PCB needs to be fastened separate from the plate, it's likely that you can save installation for Step 9.
If your keyboard came with PCB foam, lay it on top of the PCB lining up the cutouts with the switch locations and fitting it over the stabilizers you may have installed.
Next, it's time to mount the plate to the PCB. If your kit has threaded stand-offs for the plate, simply line up the plate, fitting it over your stabilizers, and use screws to fasten it down. If your kit includes separate standoffs, screw them into place now. If your plate does not attach by another method, install switches in all four corners and in the center of the keyboard to hold it in place. See step 7 for guidance on installing switches.
If your keyboard uses an integrated plate that's built into the top half of the case, secure the PCB assembly to either the top or bottom half of your case, depending on its construction.
Step 7: If using plate-mount stabilizers, install them now.
If your keyboard uses plate-mounted stabilizers, you’ll need to install these before adding in the rest of the switches.
Locate the position of each of your stabilized keys. You’ll notice cut-outs for each stabilizer housing and a line long enough to fit the wire. Slide the wire into this slot until each housing slots into the proper cut-out. Then, simply press down to snap each side into place.
Optional Modification: Band-Aid Mod: No matter your mounting type, the Band-Aid mod is still applicable. See Step 4 for instructions.
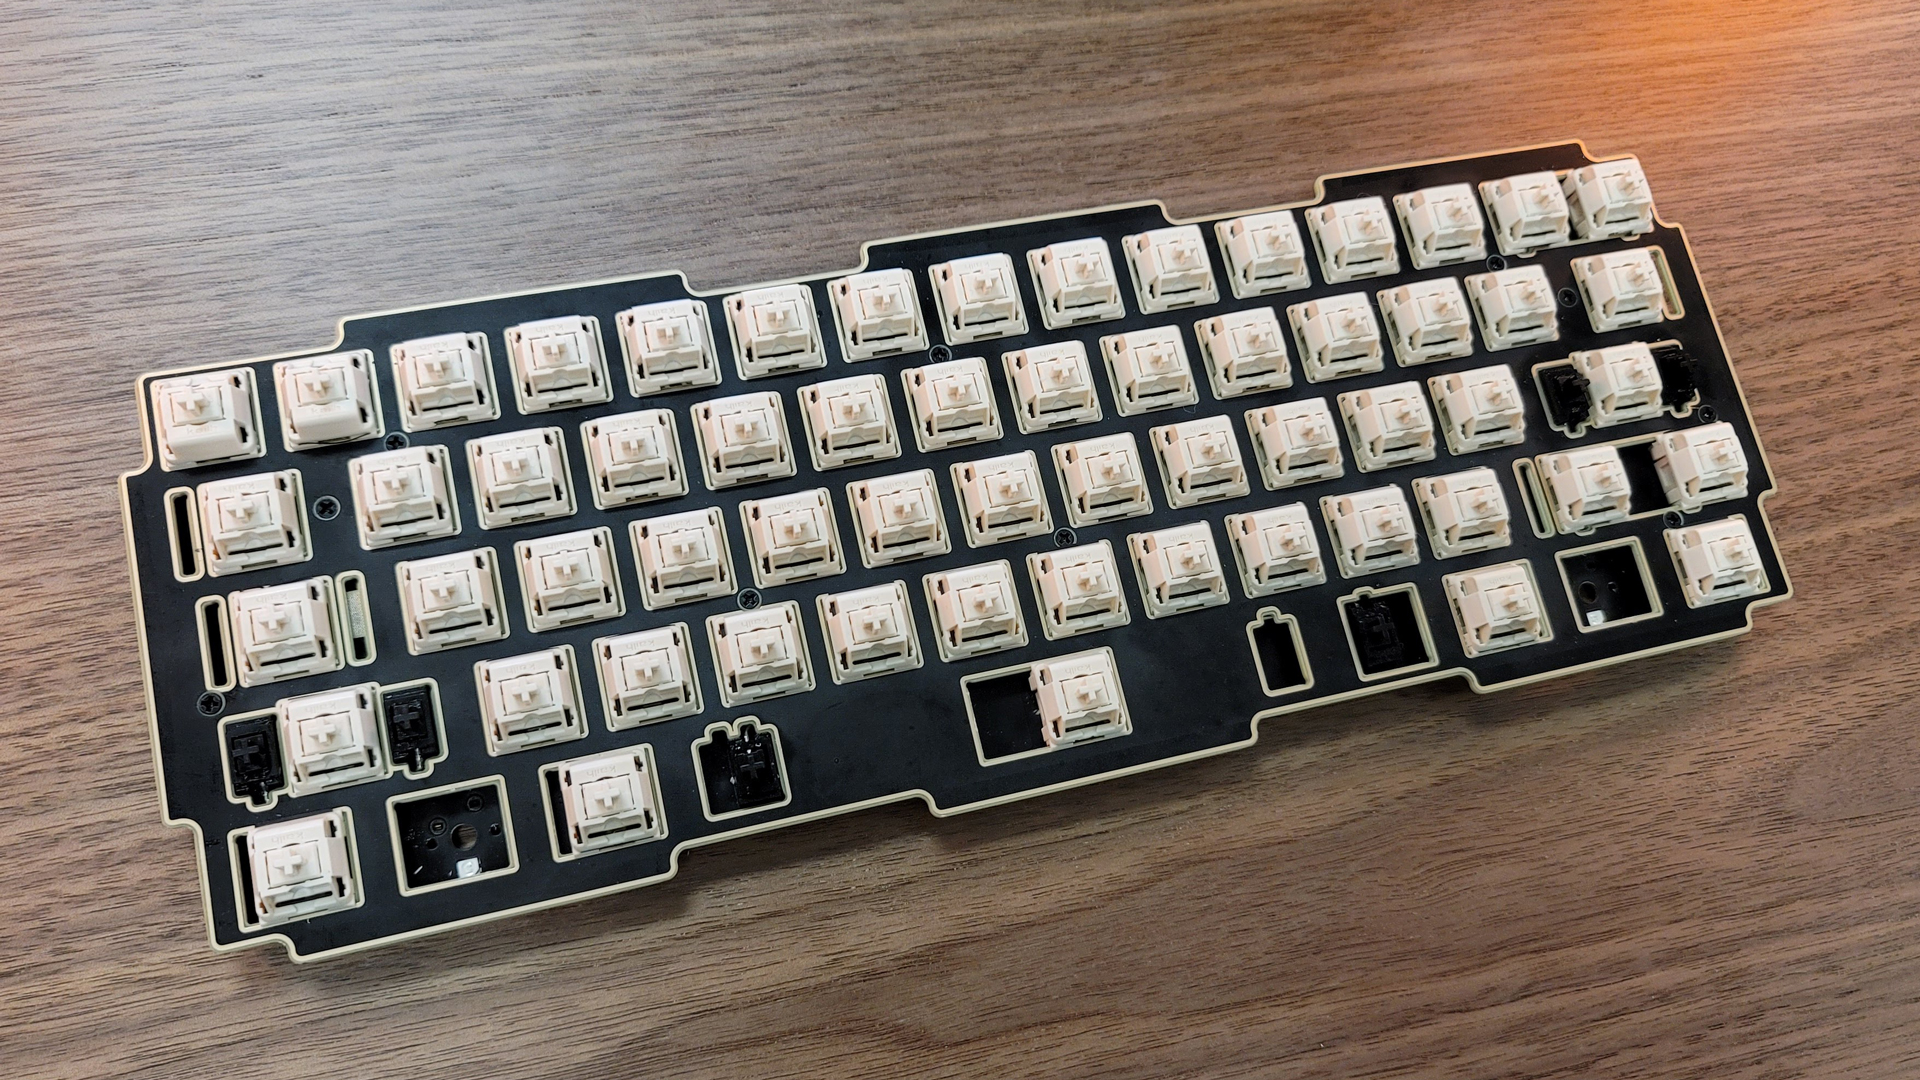
Step 8: Install the mechanical switches.
Installing mechanical switches isn’t difficult, but the process will vary, depending on if your keyboard uses hot-swap sockets or requires soldering.
If it’s hot-swappable, align the large, center mounting pin with the matching cut-out on the board, as well as any other guide pins your switch may have in addition to the two metal contact pins.
Press down firmly and straightly, but don’t force it if it doesn’t want to go. If it’s not going in, it’s likely that the pins are not aligned correctly, and you need to try again. If one of the metal pins gets bent, don’t worry. Just straighten it out before making another attempt.
If your keyboard requires soldering, it’s time to break out your soldering iron. The plate should hold the switches in place, but it can be helpful to solder in switches at each of the four corners to begin.
Warm up the soldering iron to approximately 380 degrees Celsius (716 degrees Fahrenheit). Apply a small amount of solder to the tip of the iron.
Then, touch the iron to the contact pad and pin, and allow them to warm up for several seconds before adding solder.
If done correctly, the solder should flow onto the pin and contact pad creating a neat, cone-like structure. If it’s not perfect, don’t fret. The important part is that the solder joint makes a firm connection between the contact pin and the PCB.
Step 9: Prepare the case and gaskets, applying foam if necessary.
Now it’s time to look at the case itself. If you haven't taken it apart yet, do that now. Again, be sure to note any fastening points or quirks of your case.
For keyboards using gaskets or another novel mounting system, your build may require the application of foam strips in set locations of either the case or the PCB. Apply these now as necessary.
Next, add any sound damping material, such as pre-cut case foams, to the bottom of the case.
Optional Modification: Add your own sound dampening foam: If your case did not come with case foam, you can add your own! Adding foam can often reduce or eliminate the hollow sound found in some keyboards and can reduce some of the high-pitched resonances when typing. This mod is less necessary than the previous two but is certainly helpful if you have excess space in the body of your keyboard or want a more “solid” feel.
You can use many different materials for this. The best, and most expensive, is sorbothane. If that’s too expensive, neoprene is another excellent option. I use two layers of colored craft neoprene I purchased from my local craft store, but you can also buy it in larger, thicker sheets for easier application. If that’s still too much, consider using shelf liner! The idea is to fill the empty space with a material that is dense enough to absorb unwanted frequencies.
Step 10: Mount the PCB assembly.
Re-insert the assembly into the case. Depending on the mounting style of your case, where the attachment point can vary.
If you purchased a kit, refer back to how it was assembled originally. If you purchased each piece separately and are unsure, consult your documentation or refer to this handy mounting style guide.
Step 11: Reassemble the case.
With switches installed and the internals of the keyboard safely mounted, it’s time to put the case back together. Typically, this means screwing both halves in place, but the process can vary, depending on your keyboard’s construction.
Step 12: Install the keycaps.
Now that the case is back together, the only thing left to do is install your keycaps.
The plastic cross on the top of each switch is called the stem. Underneath each keycap is another stem with a cutout that will perfectly match the top of each switch.
Simply press the keycap down on to the switch to install. For larger keys, give an extra push where the keycap connects to the stabilizer stems to ensure it sits evenly.
Step 13: Test for bent pins and working switches
Now it’s time to go back to Keyboard Tester. Press every key. Each key that changed color during your PCB test should also change color when pressed. If it doesn’t, a key may have become bent when pressed into the hot-swap socket or may not be making a good connection with your solder joint.
If your keyboard is hot-swappable, simply pull the key out, straighten the pin with your tweezers and re-install.
If it’s soldered in, examine the solder joint. Add more solder if necessary or remove the switch, and try again. Be careful to remove all of the current solder before attempting to pull the switch out and not to damage the solder pad.
Step 12: Program your new keyboard.
Now that your keyboard is functioning, you can be content with a job well done or take it a step further and program it with a custom layout. Of course, this process will vary depending on your board. If it uses its own software suite, download that and have fun remapping keys. If it uses QMK, an open-source software popular among keyboard kits, follow the manufacturer's instructions. If there are none, have a look at this video tutorial, and explore the Online Configurator.
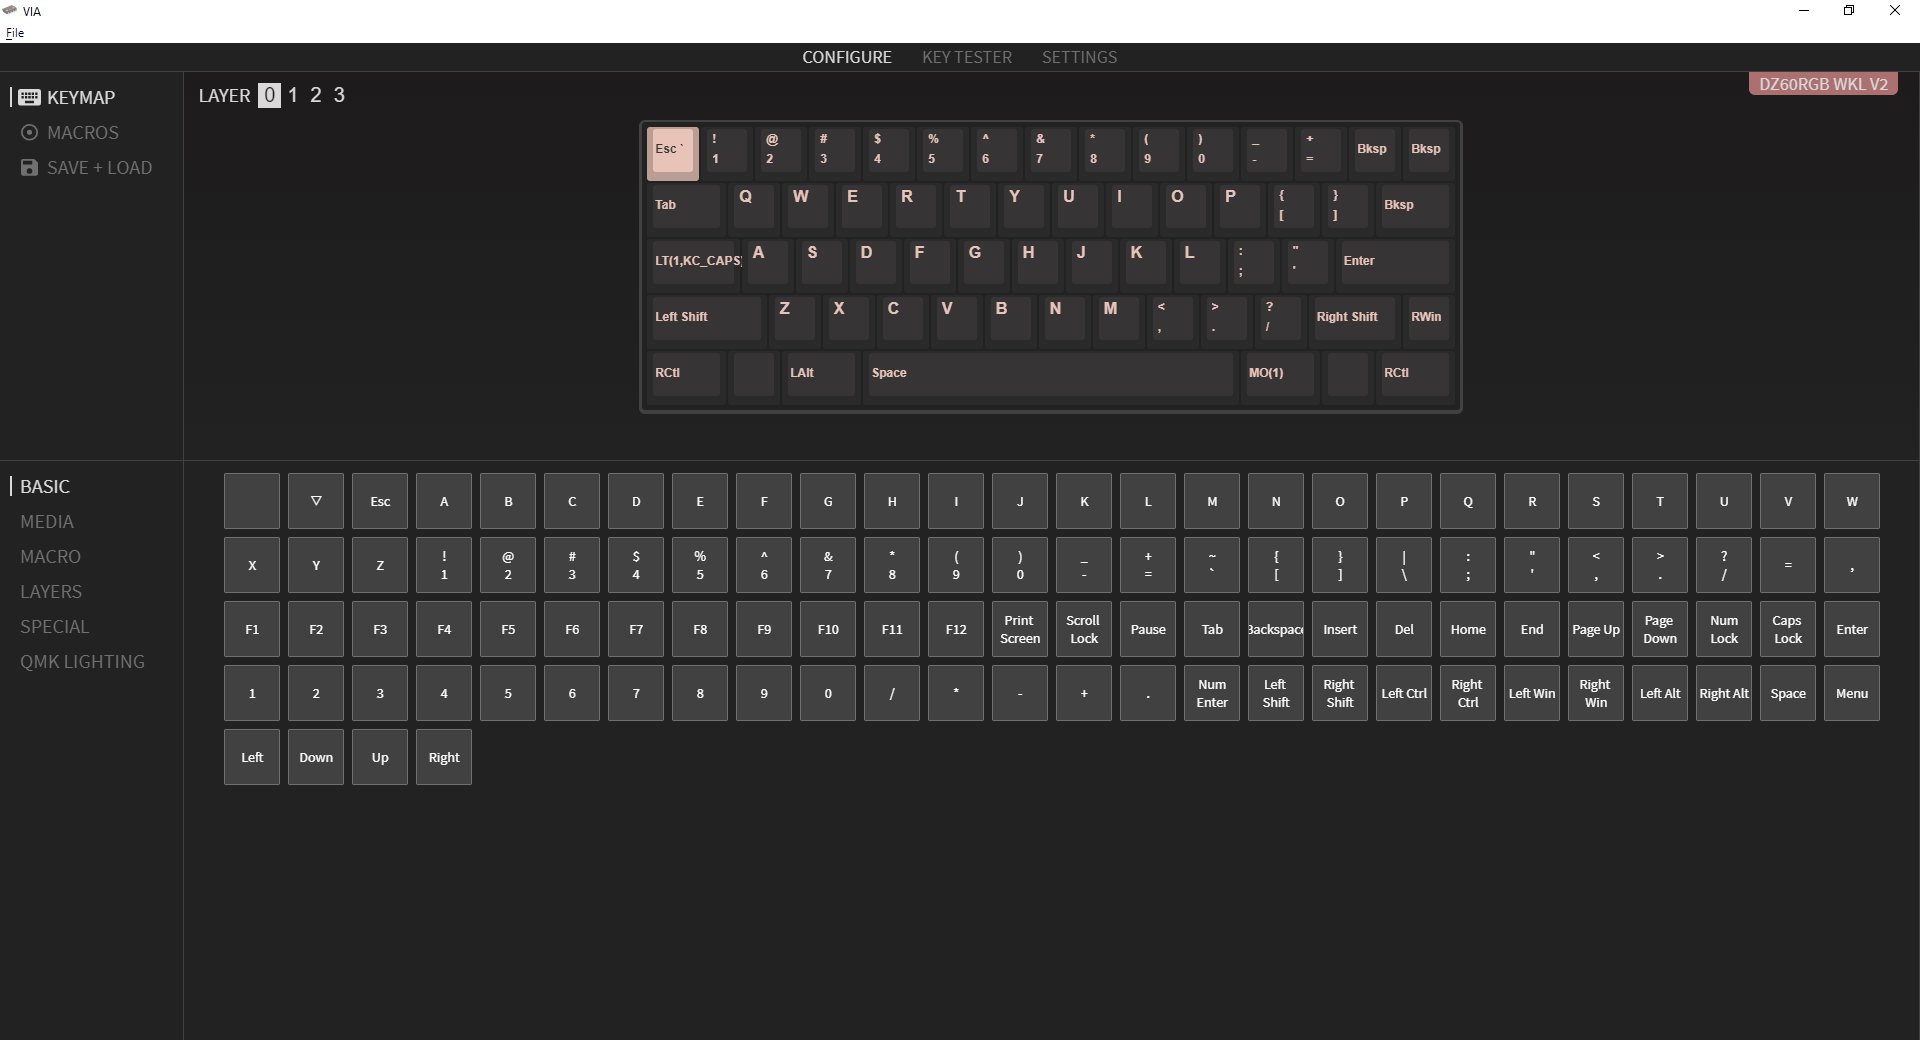
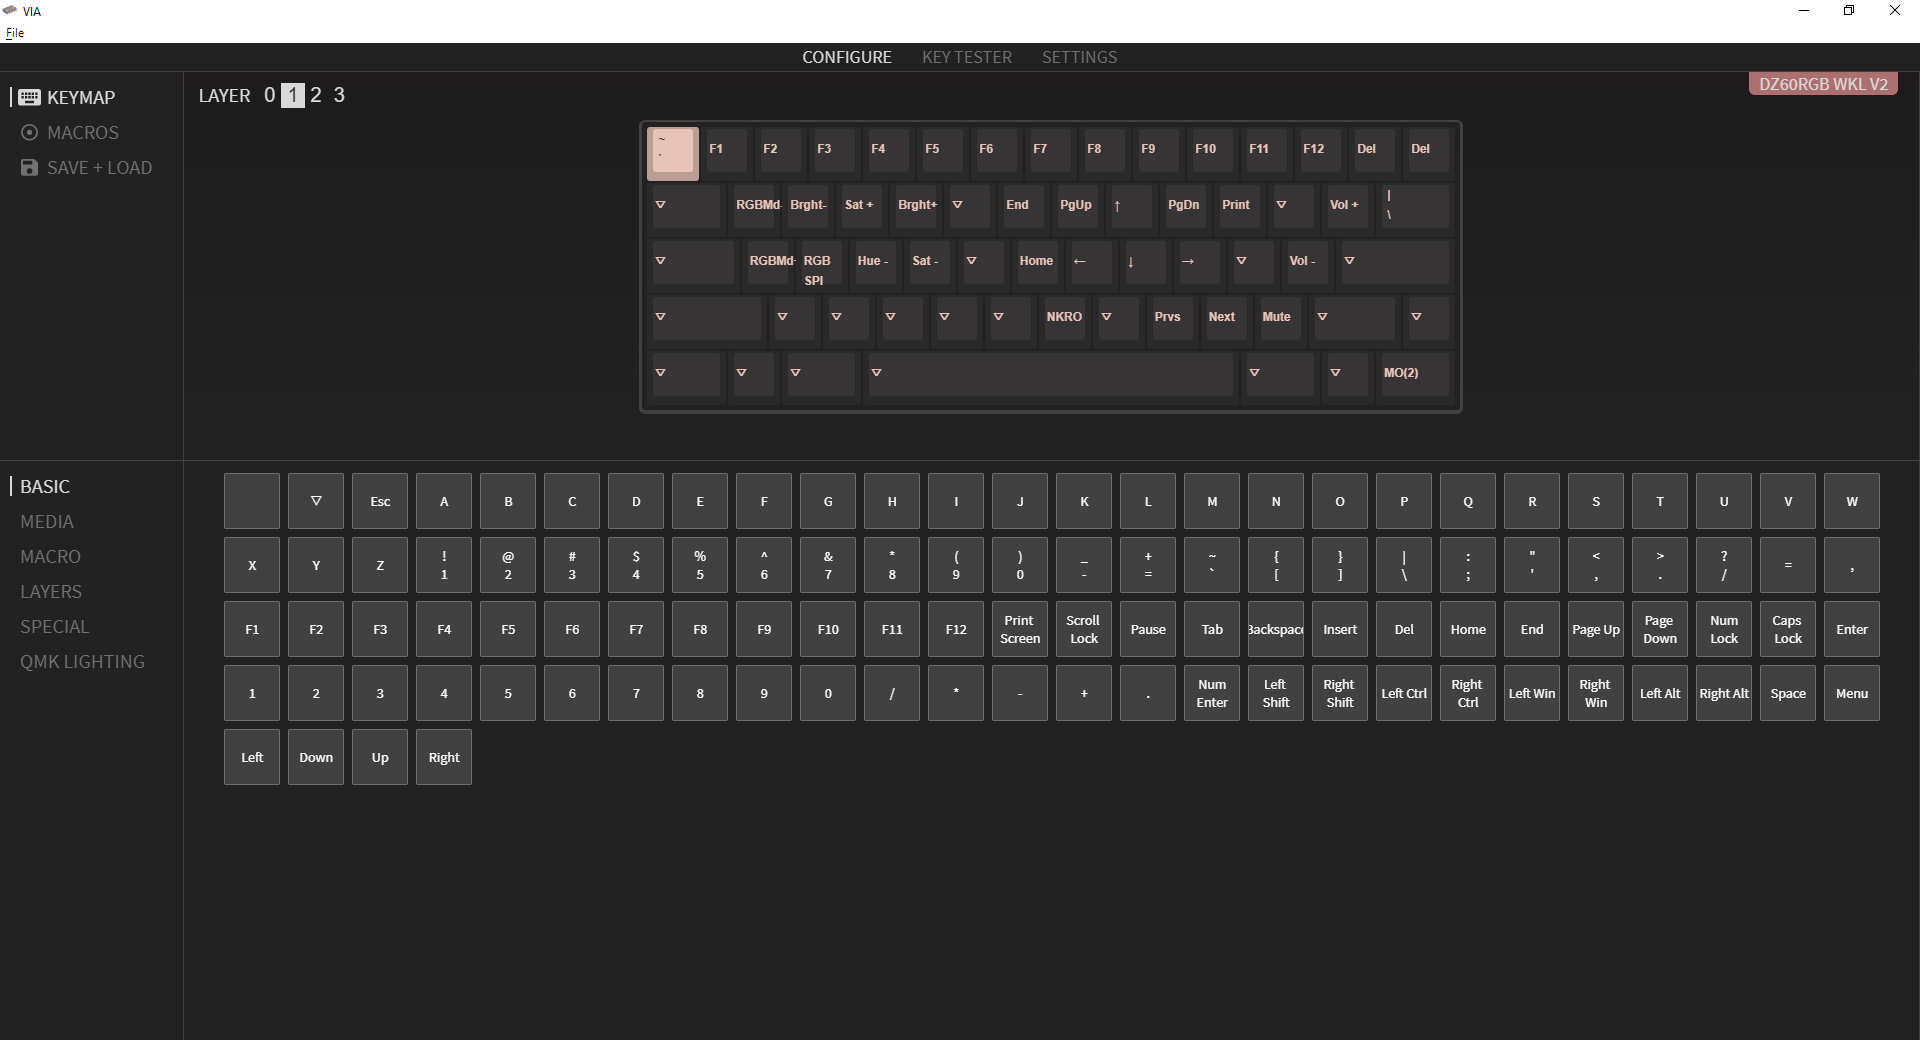
If your keyboard supports VIA, I highly suggest downloading the application and using it. VIA is based on QMK, so it retains extensive levels of programmability using an intuitive graphical interface but updates the keyboard in real time, so no flashing is necessary.
Step 14: Enjoy!
Congratulations, you’ve just built your own custom mechanical keyboard! In all likelihood, what you have in your hands will look, feel and sound better than just about anything you can buy off the shelf. Enjoy your new keyboard, and be careful not to fall too far down this rabbit hole.

Chris is a regular contributor for Tom’s Hardware, covering mechanical keyboards, peripherals, and content creation gear.
-
voyteck A vague thought about modifying my Sculpt Ergonomic Desktop this way crossed my mind recently. On the other hand I just talked with someone who can hear her neighbor typing and I'm not sure it's worth the hassle if I choose low noise over functionality.Reply
