How to Change the Lock Screen Photos on Windows 10
Windows 10 computers come with default picturesque professional photos on the Windows lock screen. Though beautiful, they’re not very personal. If you’d rather see your own pics on the lock screen instead of Microsoft’s then this guide is for you.
Here’s how to change the lock screen photos on a Windows 10 PC.
How to Change The Lock Screen Photos on Windows 10
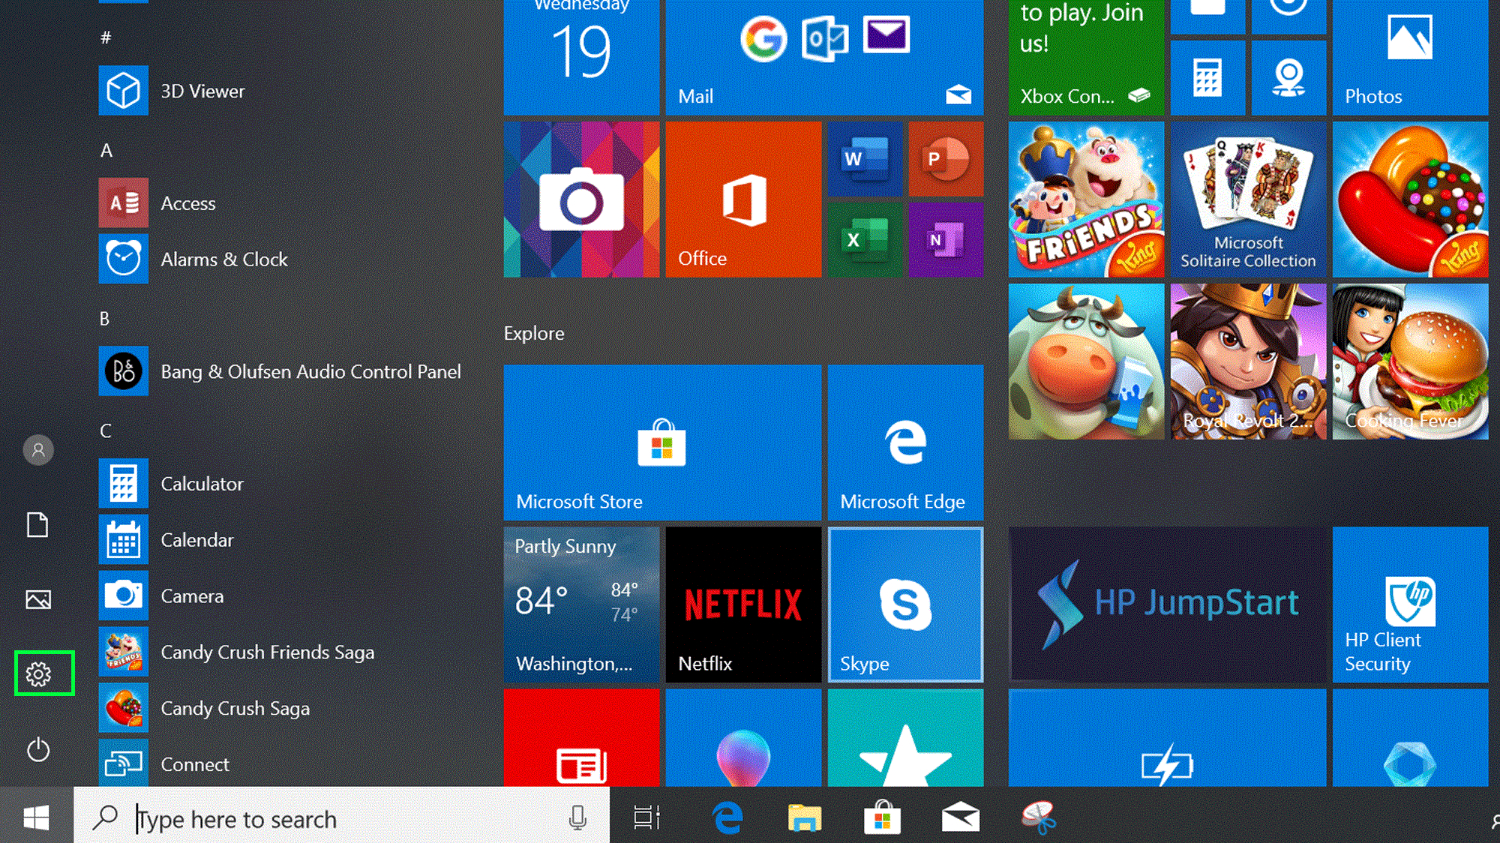
1. Click Settings. You can reach the gear icon from the start menu or you can search for it in the Windows search bar.
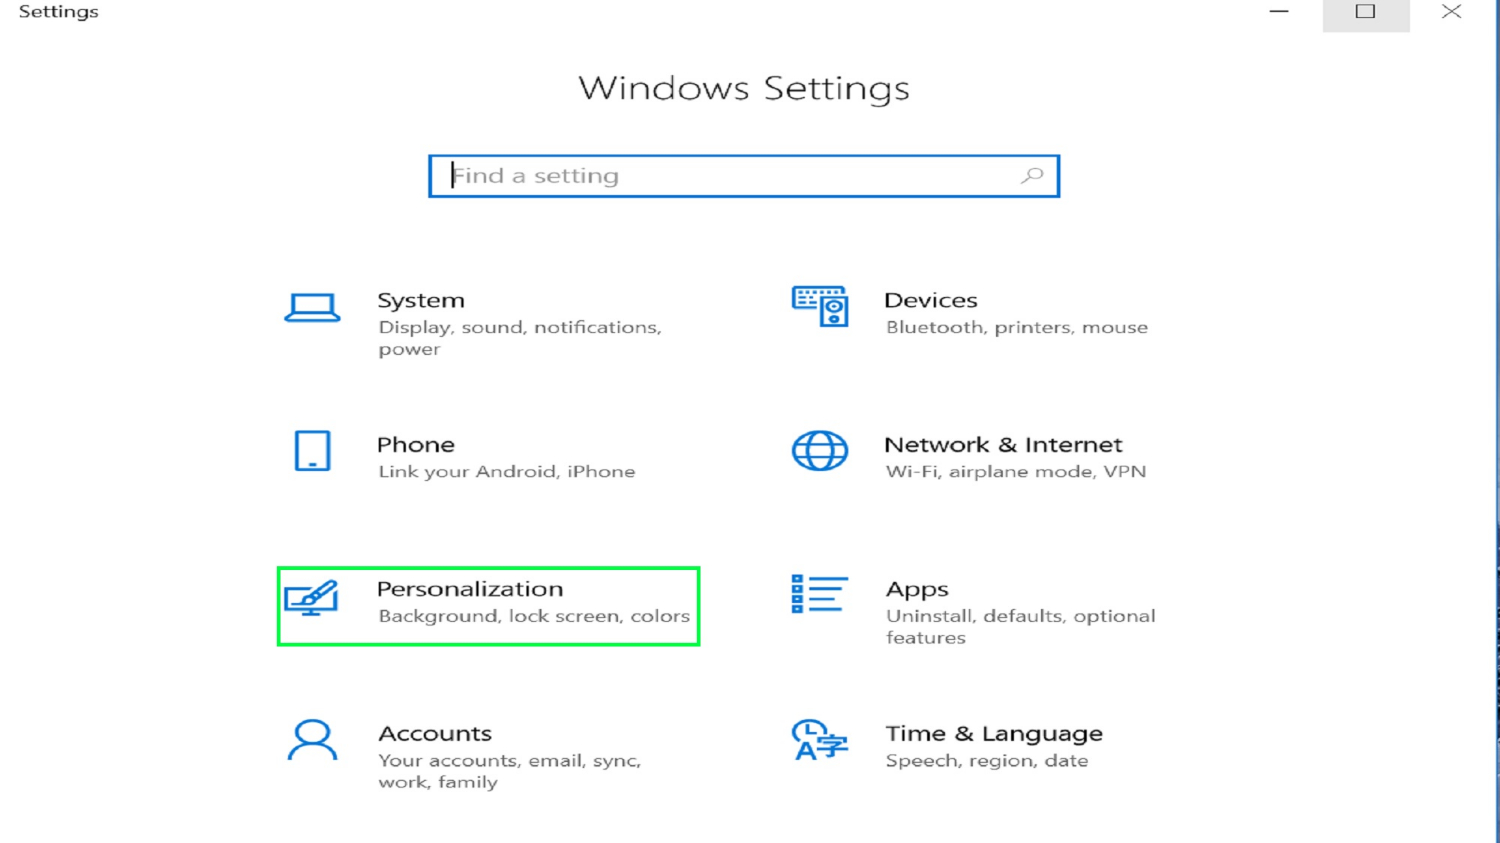
2. Click on “Personalization.”
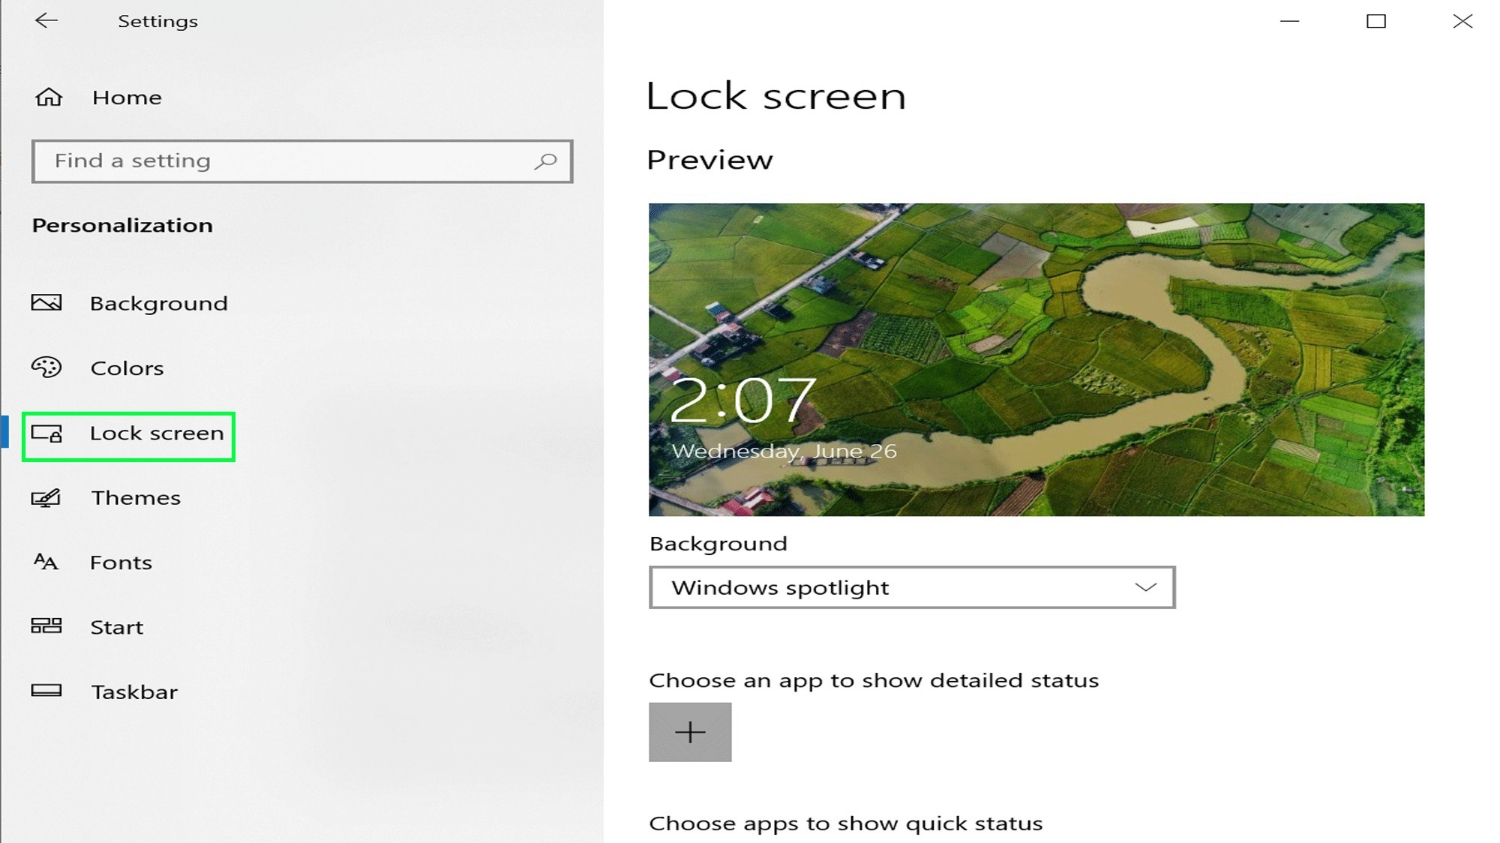
3. Click on “Lock Screen.”
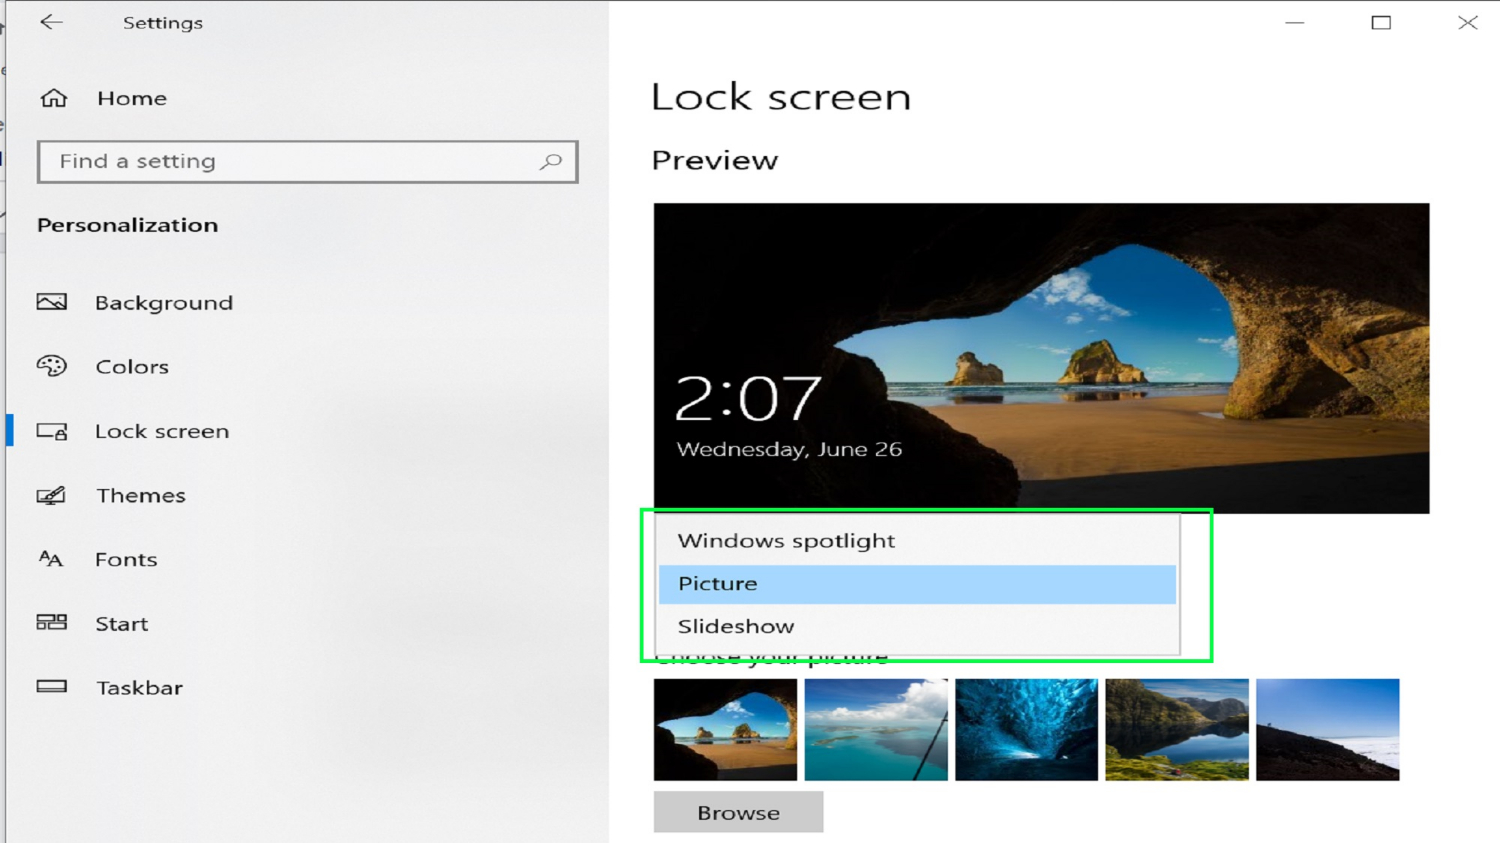
4. Click on the drop-down menu under "Background" and scroll to "Pictures." You can choose to show an individual picture, a slideshow or the default Windows spotlight.
5. Choose one of the pictures that pops up or hit "Browse" to select a different picture from your library. Make sure that the picture you want is located in the far left of picture lineup.
Get Tom's Hardware's best news and in-depth reviews, straight to your inbox.
You have now successfully changed the photos on the Windows 10 lock screen.
You can continue to scroll down the “Lock Screen” page to see a preview, toggle Windows tips on or off and to select apps you want to show quick or detailed information on the lock screen.


