How to Install Fonts on Windows 11 or 10
The ability to use your typeface of choice is just a few clicks away
Windows 11 ships with plenty of fonts, but it offers several ways for people who aren’t content with the likes of Arial, Georgia, and Times New Roman to install their own. This can be particularly useful for developers who spend a lot of time staring at text, graphic designers who think a piece needs more pizazz than Verdana can offer, and writers who have successfully convinced themselves that constantly experimenting with new fonts is productive. (Ahem.)
Fonts can be installed on Windows 11 or 10 via the Microsoft Store, Settings and File Explorer. Each method has its own benefits and drawbacks. The Microsoft Store can install a given font with just a few clicks, for example, but it doesn’t offer the same breadth of choices as the open web. Settings and File explorer require a bit more effort on the installation front but can be used to install any font available for download in the TrueType, OpenType or PostScript file formats. Note that, though these screenshots were taken from Windows 11, the same steps also work in Windows 10.
How to install fonts via the Microsoft Store in Windows 11 or 10
The Microsoft Store is the most approachable way for most Windows users to install new fonts because it’s a straightforward process that’s unlikely to be used to install anything malicious on your system, which isn’t guaranteed when you’re installing a font from an obscure website, for example. Here’s how to install new fonts on Windows 11 via the Microsoft Store.
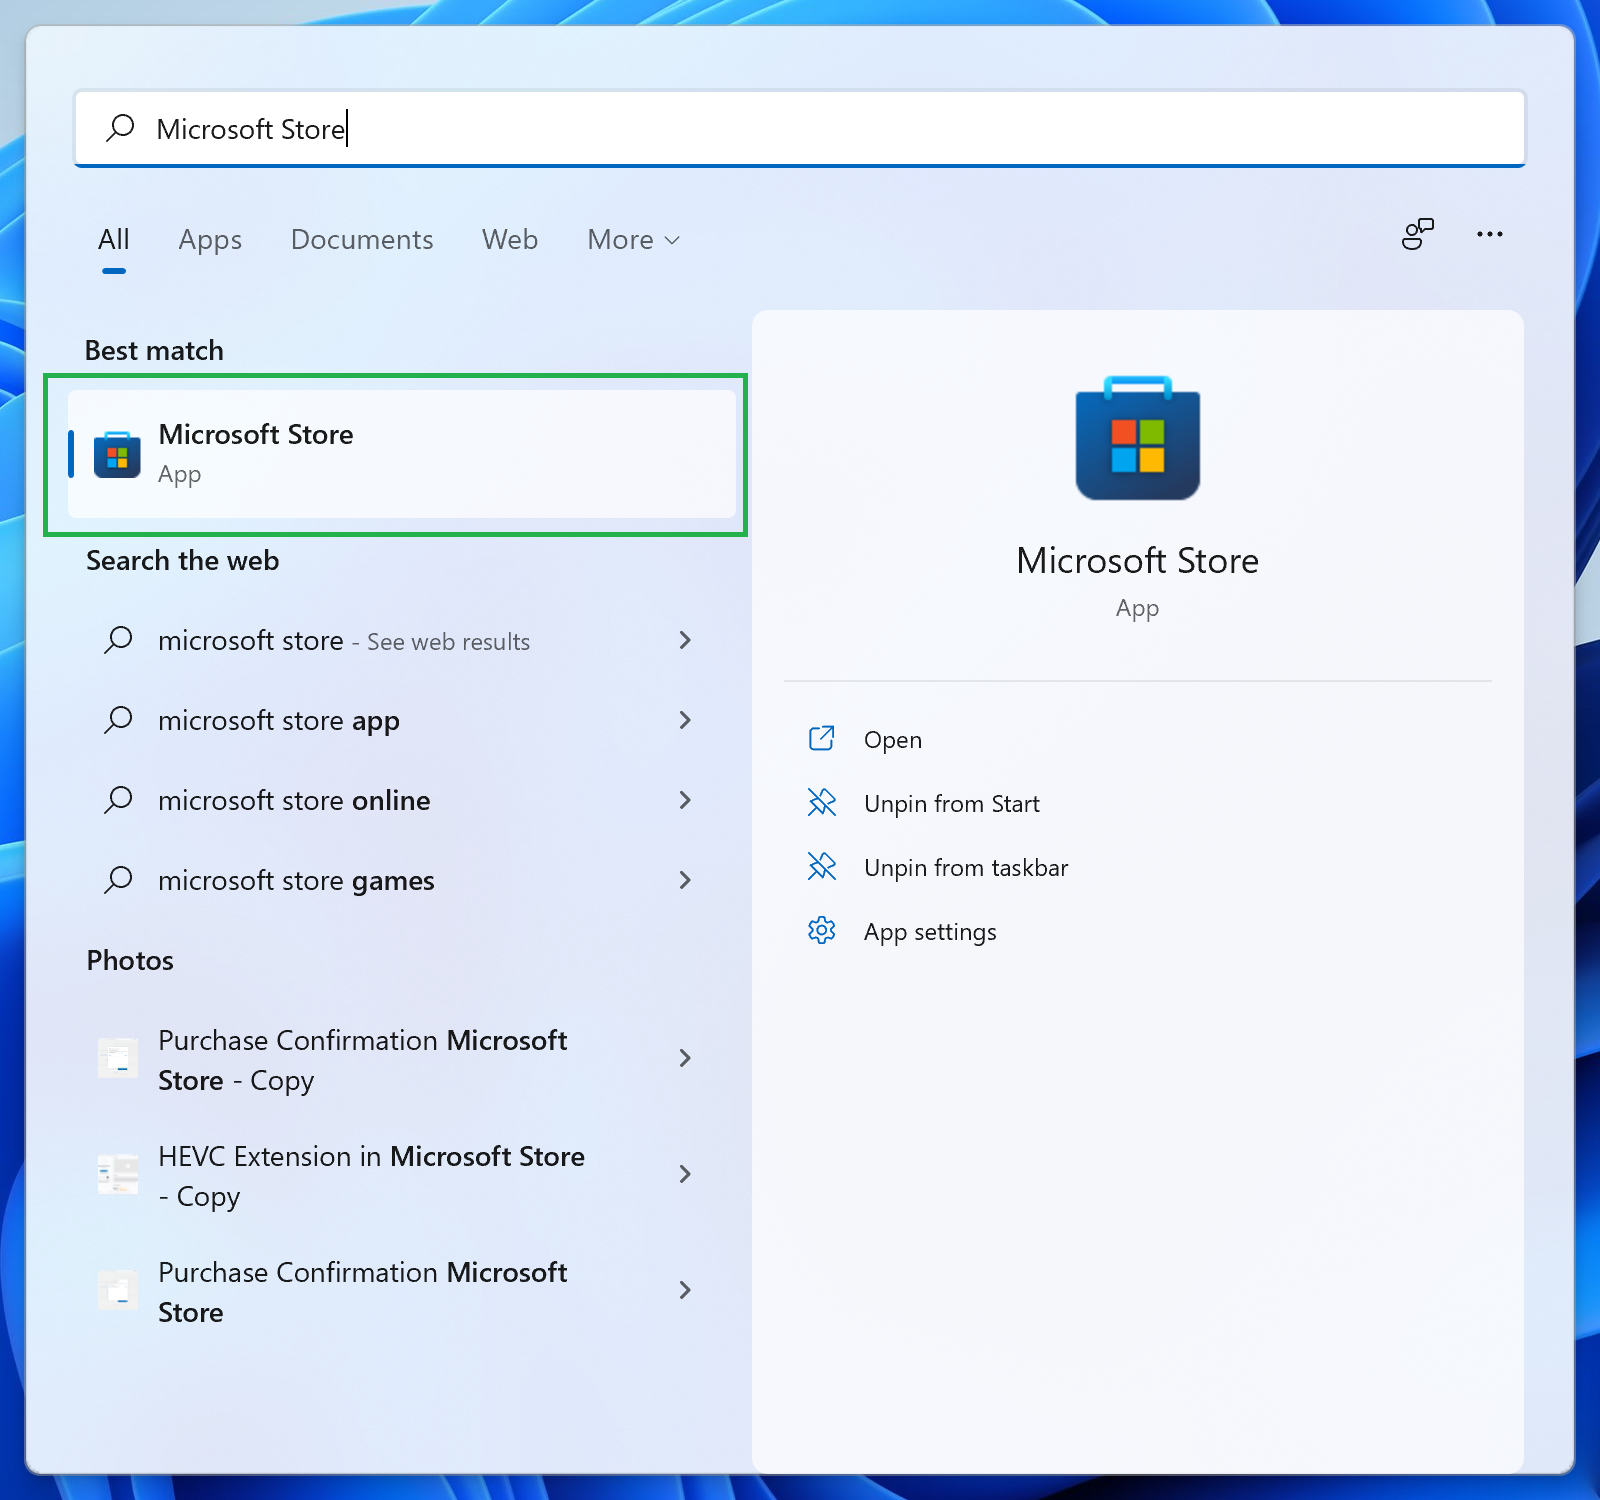
1. Launch the Microsoft Store. Microsoft pins it to Windows 11’s Taskbar and Start menu by default, but if you’ve removed it from both of those places, the quickest way to access the marketplace is by searching for “Microsoft Store” via the Start menu.
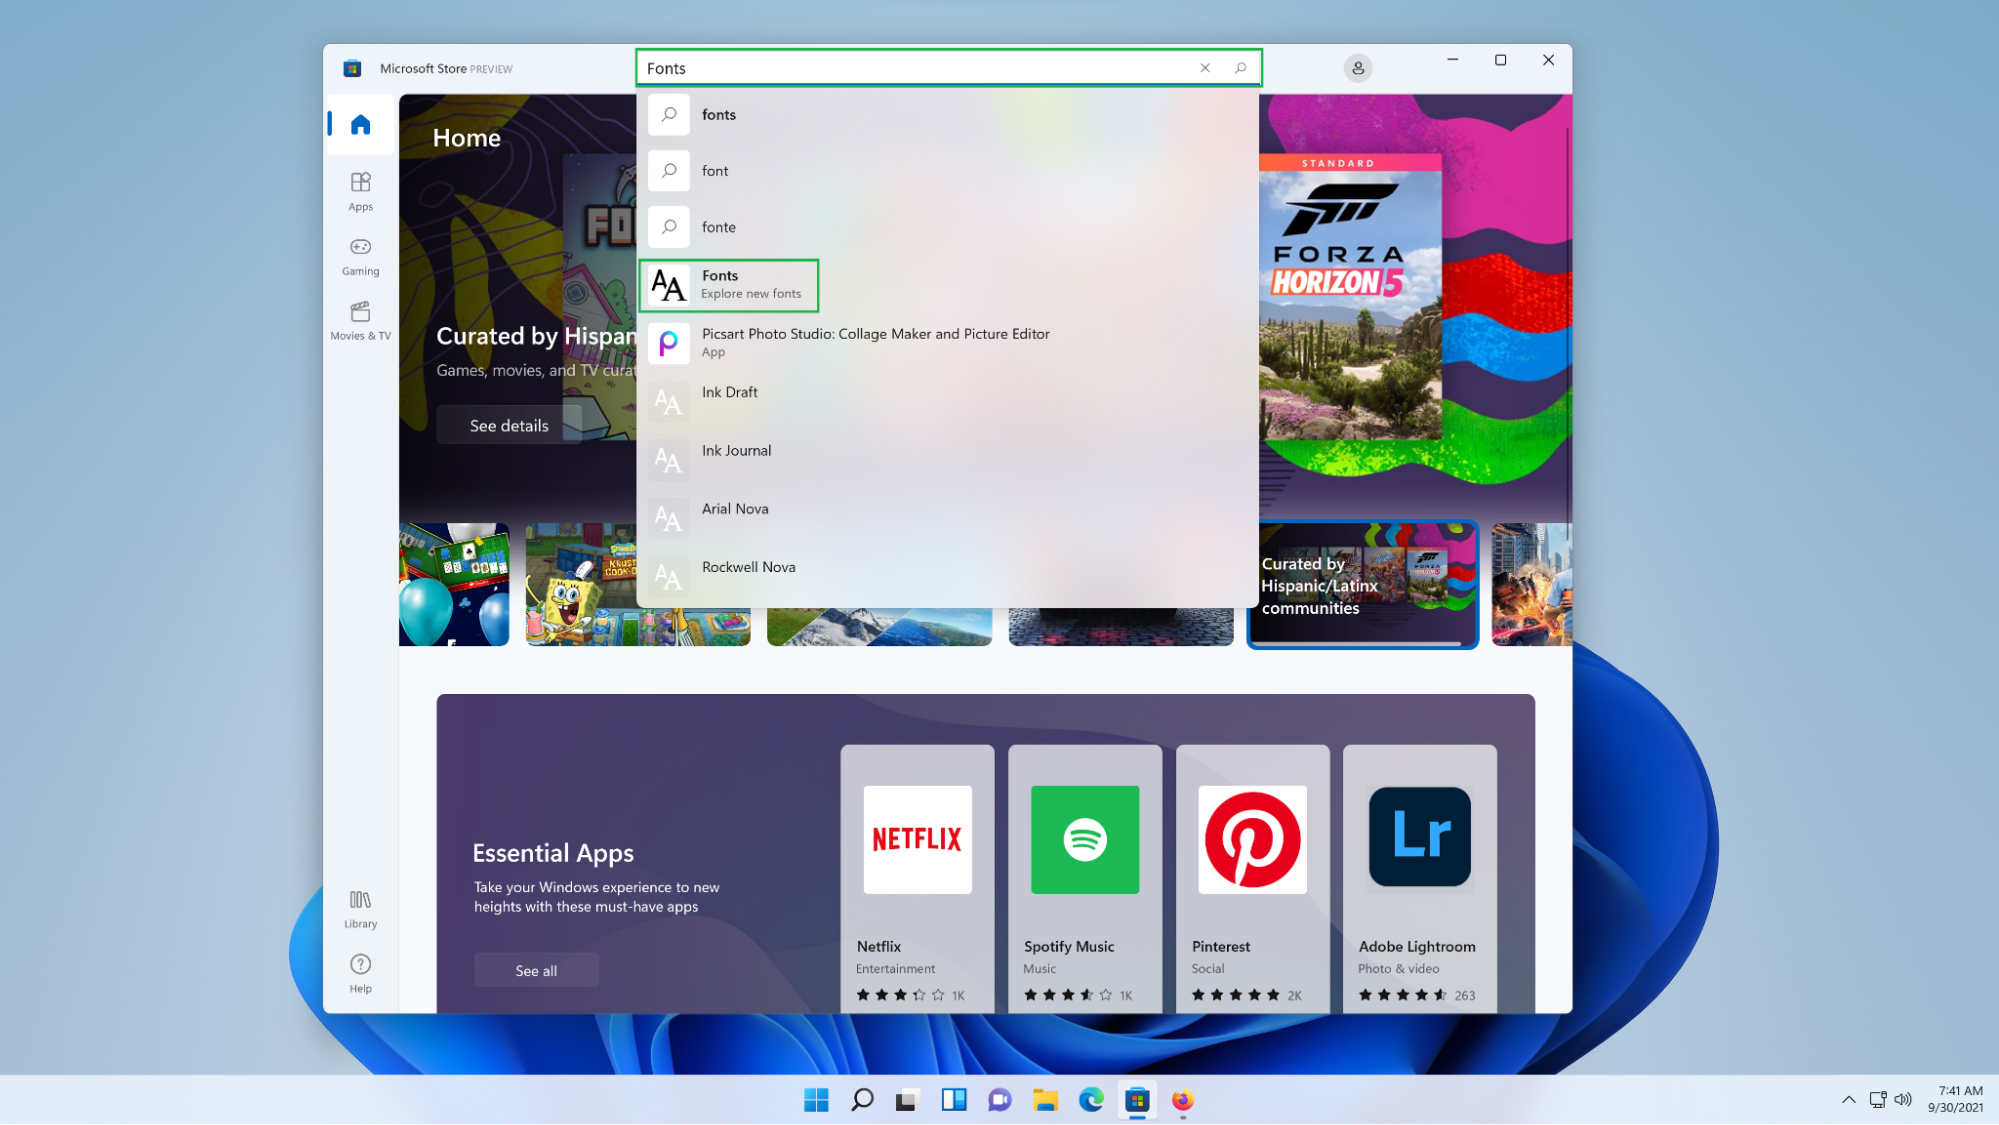
2. Search for ‘Fonts’ in the top search bar. A results menu will appear, and “Fonts” should be the top result. It’s easy to spot if it isn’t, though, because it has a nondescript icon and is captioned with “Explore new fonts.” Click it.
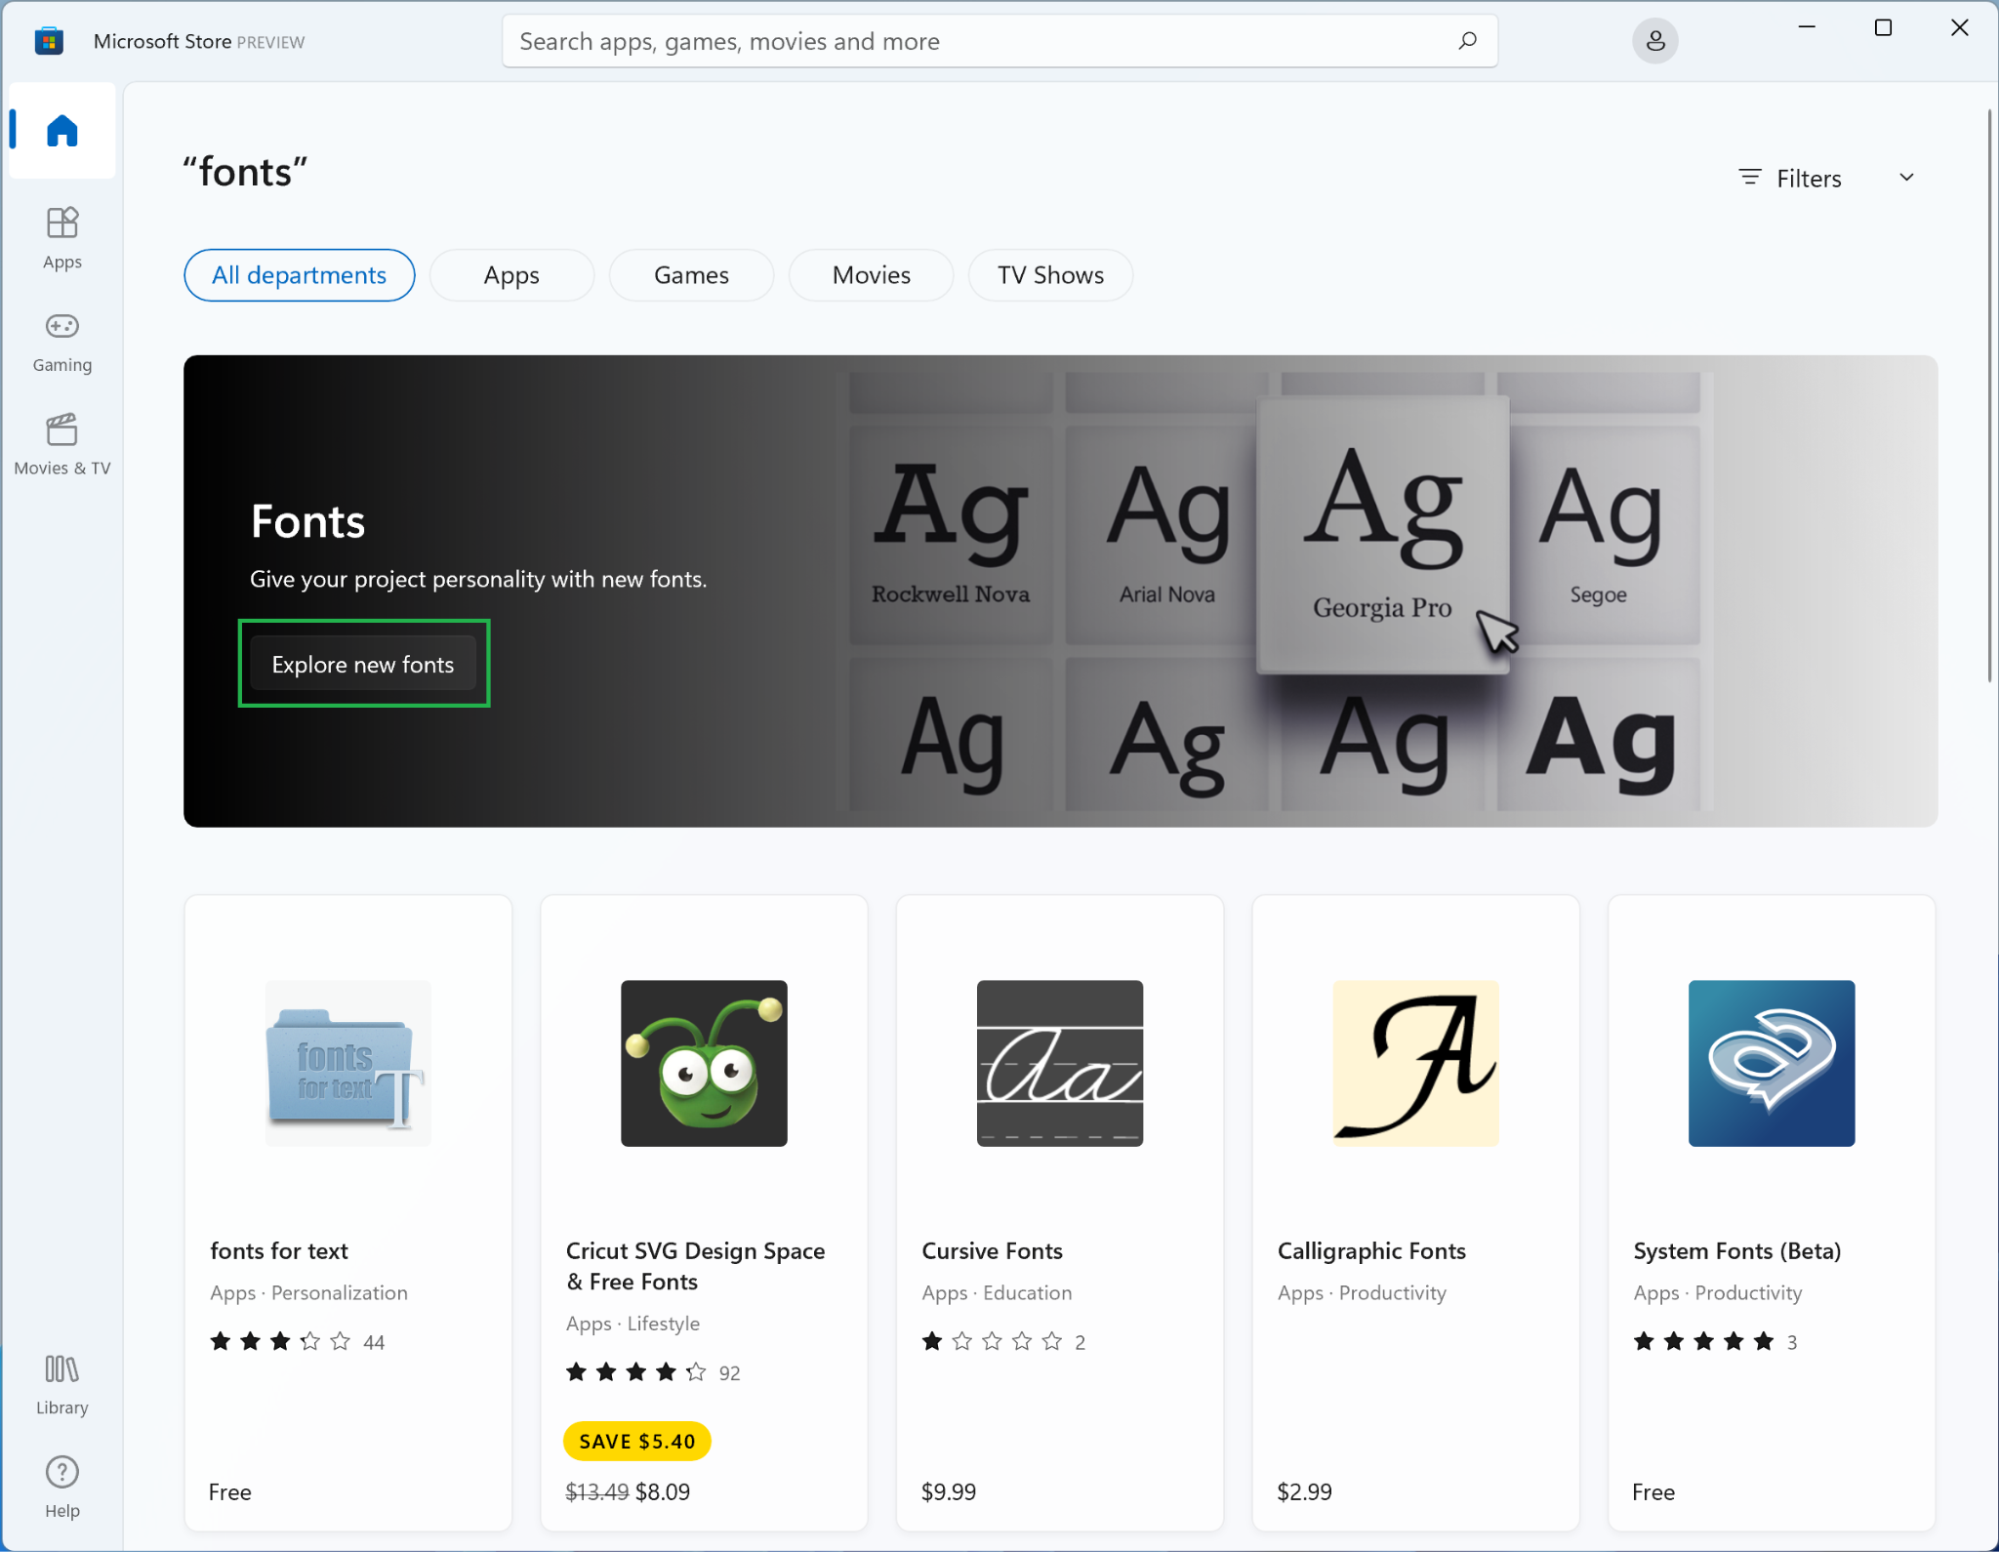
3. Click the ‘Explore new fonts’ button. Microsoft devotes a significant amount of this page to a curated selection of fonts, many of which it designed, so we’ll start there.
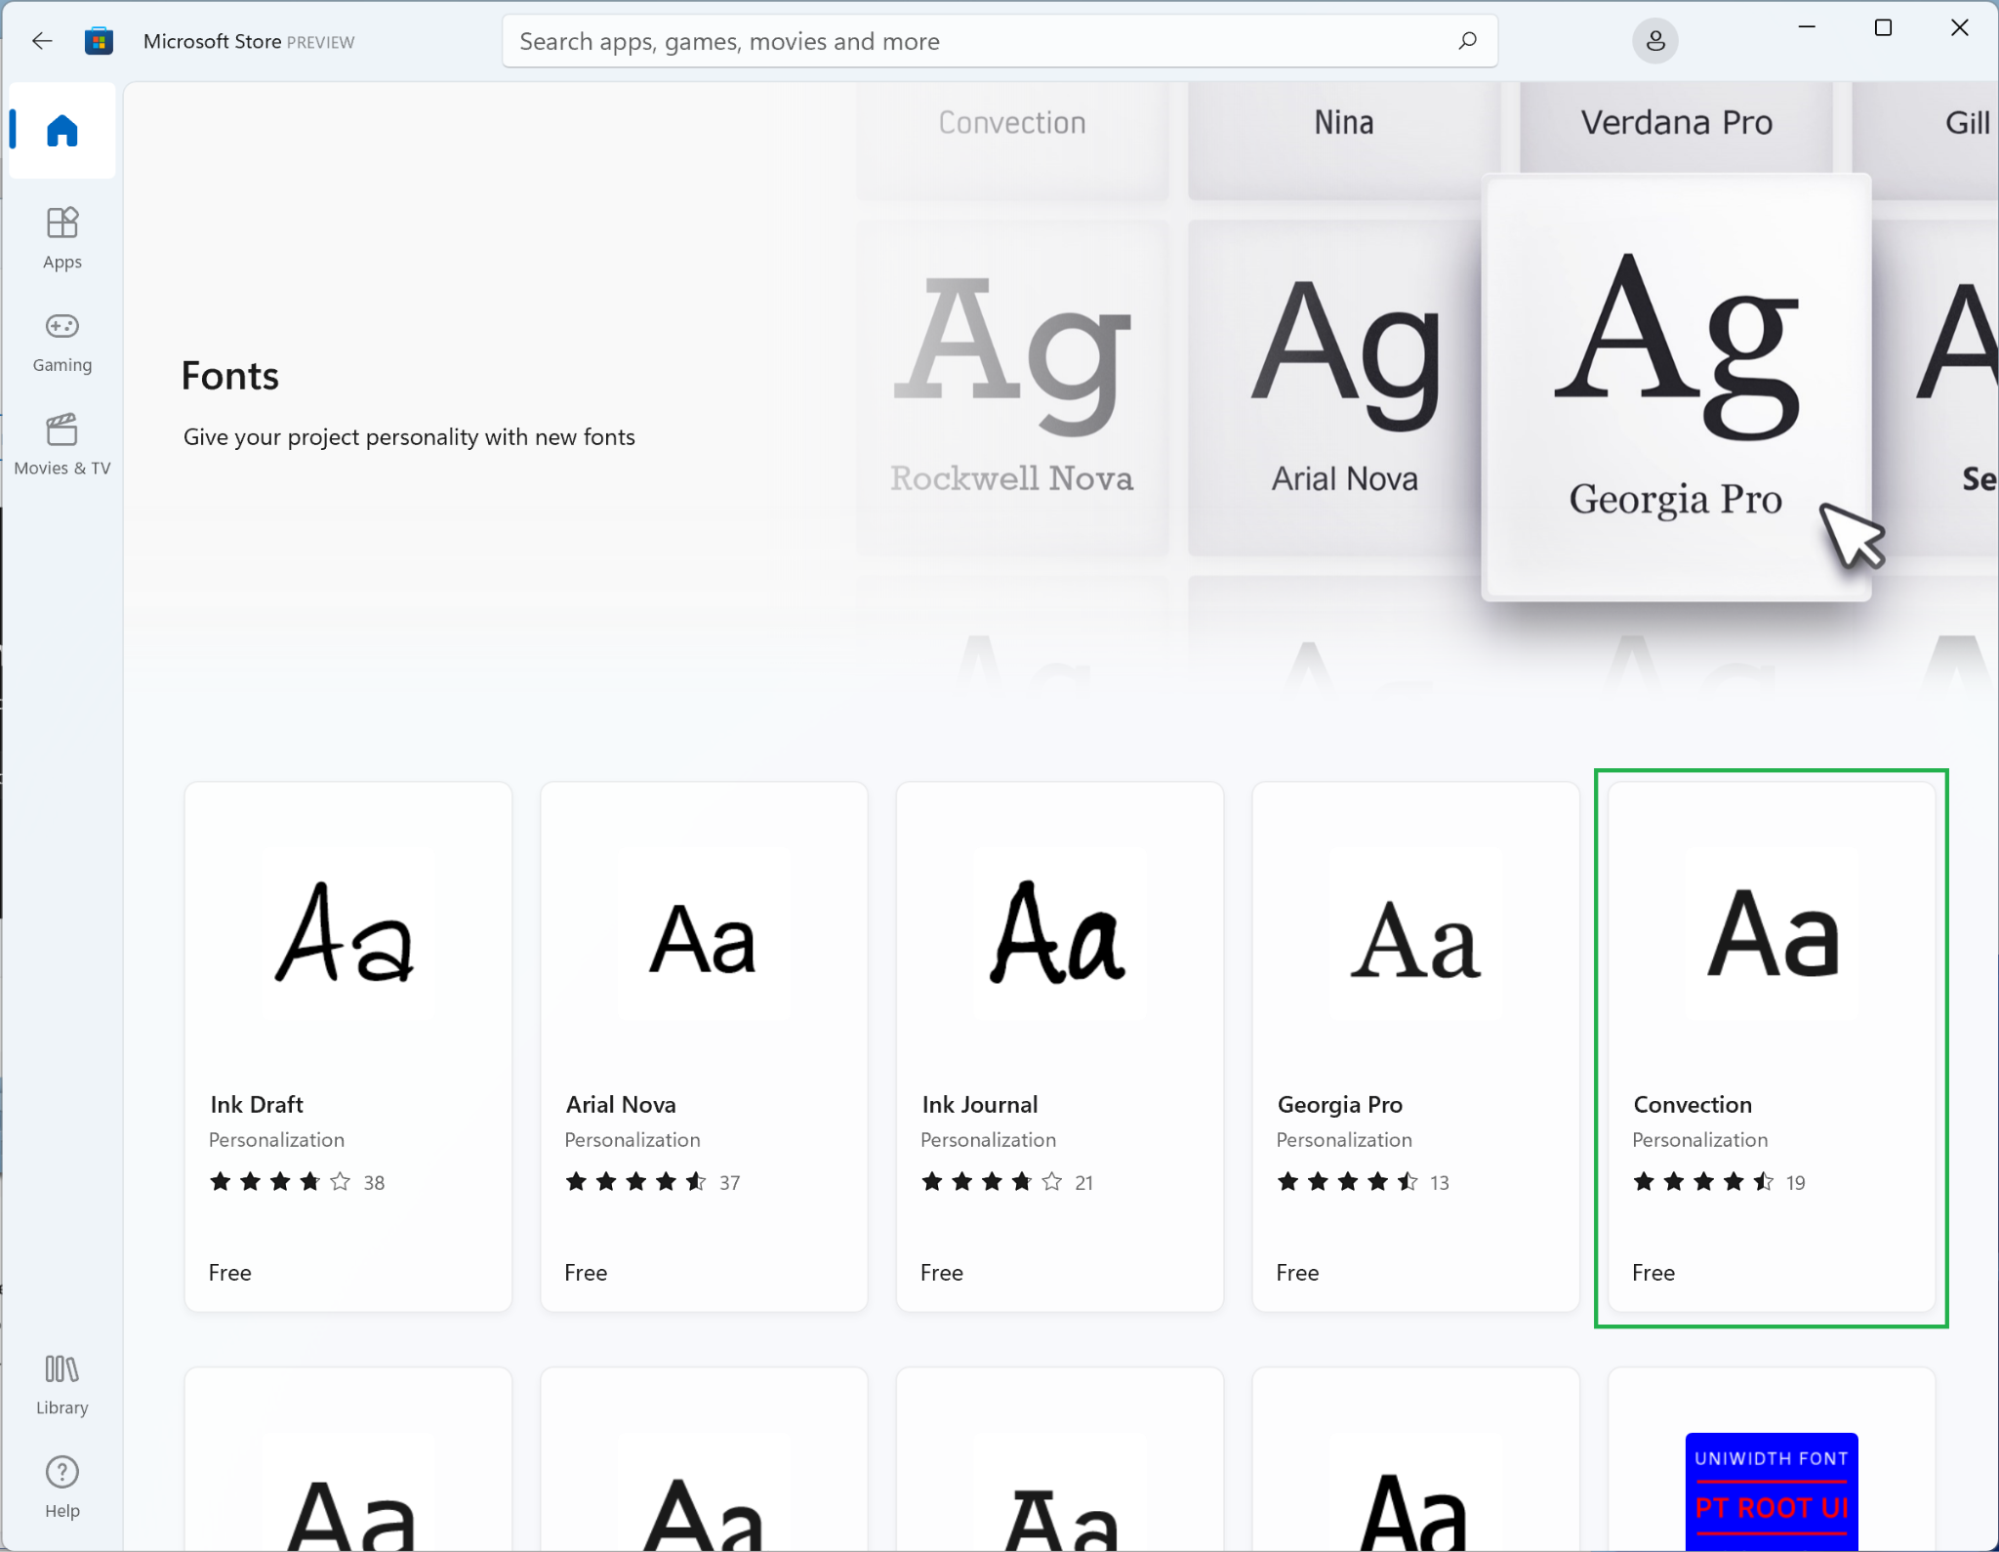
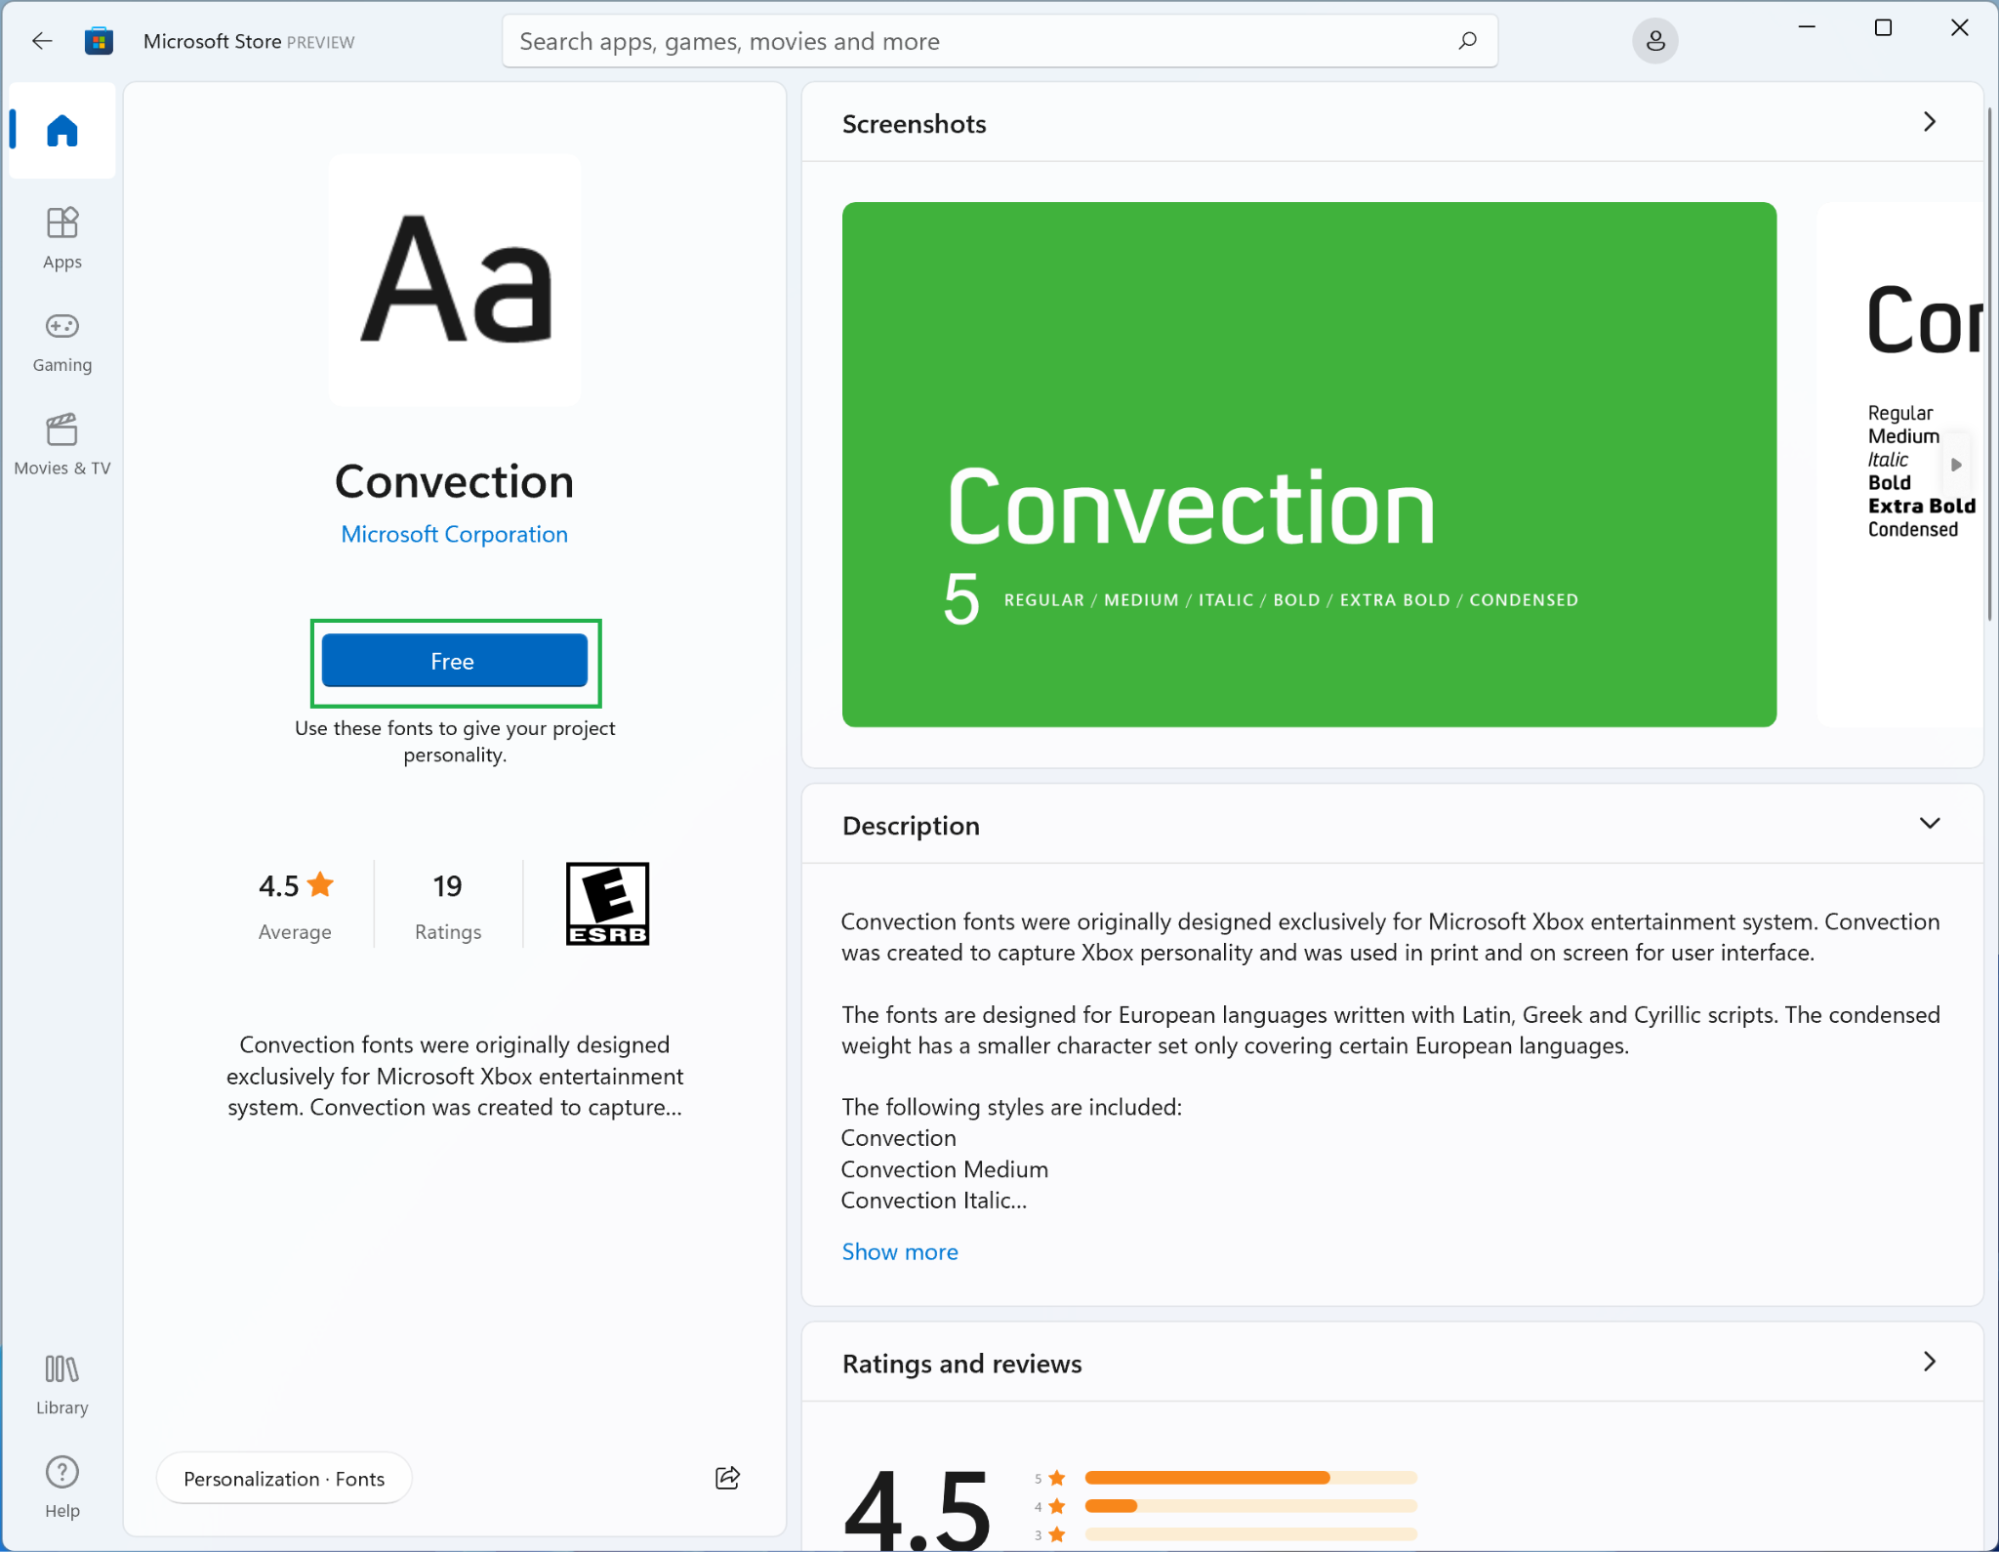
4. Choose a font that interests you. In our case we’re going to select “Convection” because it looks like a fun sans serif we might want in our collection, but the steps will be the same for any of the fonts you choose, so pick whichever option catches your eye.
Get Tom's Hardware's best news and in-depth reviews, straight to your inbox.
5. Click the ‘Free’ button. You don’t even have to sign in to the Microsoft Store to install free fonts; you simply have to click the “Free” button. Paid fonts do require you to sign in to a Microsoft account, however, and you’ll have to choose your payment method before you can confirm your purchase and install the font you want to use.
Once the “Free” button changes to “Open” you should be able to use the font you chose. Note that clicking the “Open” button won’t actually preview the font. It simply leads to the Personalization section of the Settings app, which is exactly where we were going to go next.
How to install fonts via Settings in Windows 11 or 10
Installing fonts via Settings requires you to download a TrueType, OpenType or PostScript file. Many sites offer a variety of free, often user-created fonts, and professionally designed fonts can be found on a variety of marketplaces. Google Fonts is one of the best. Just be wary about where you choose to download something from so you can minimize your potential exposure to malicious files. With all that said, here’s how to install fonts via the Settings app that’s built in to Windows 11 and Windows 10.
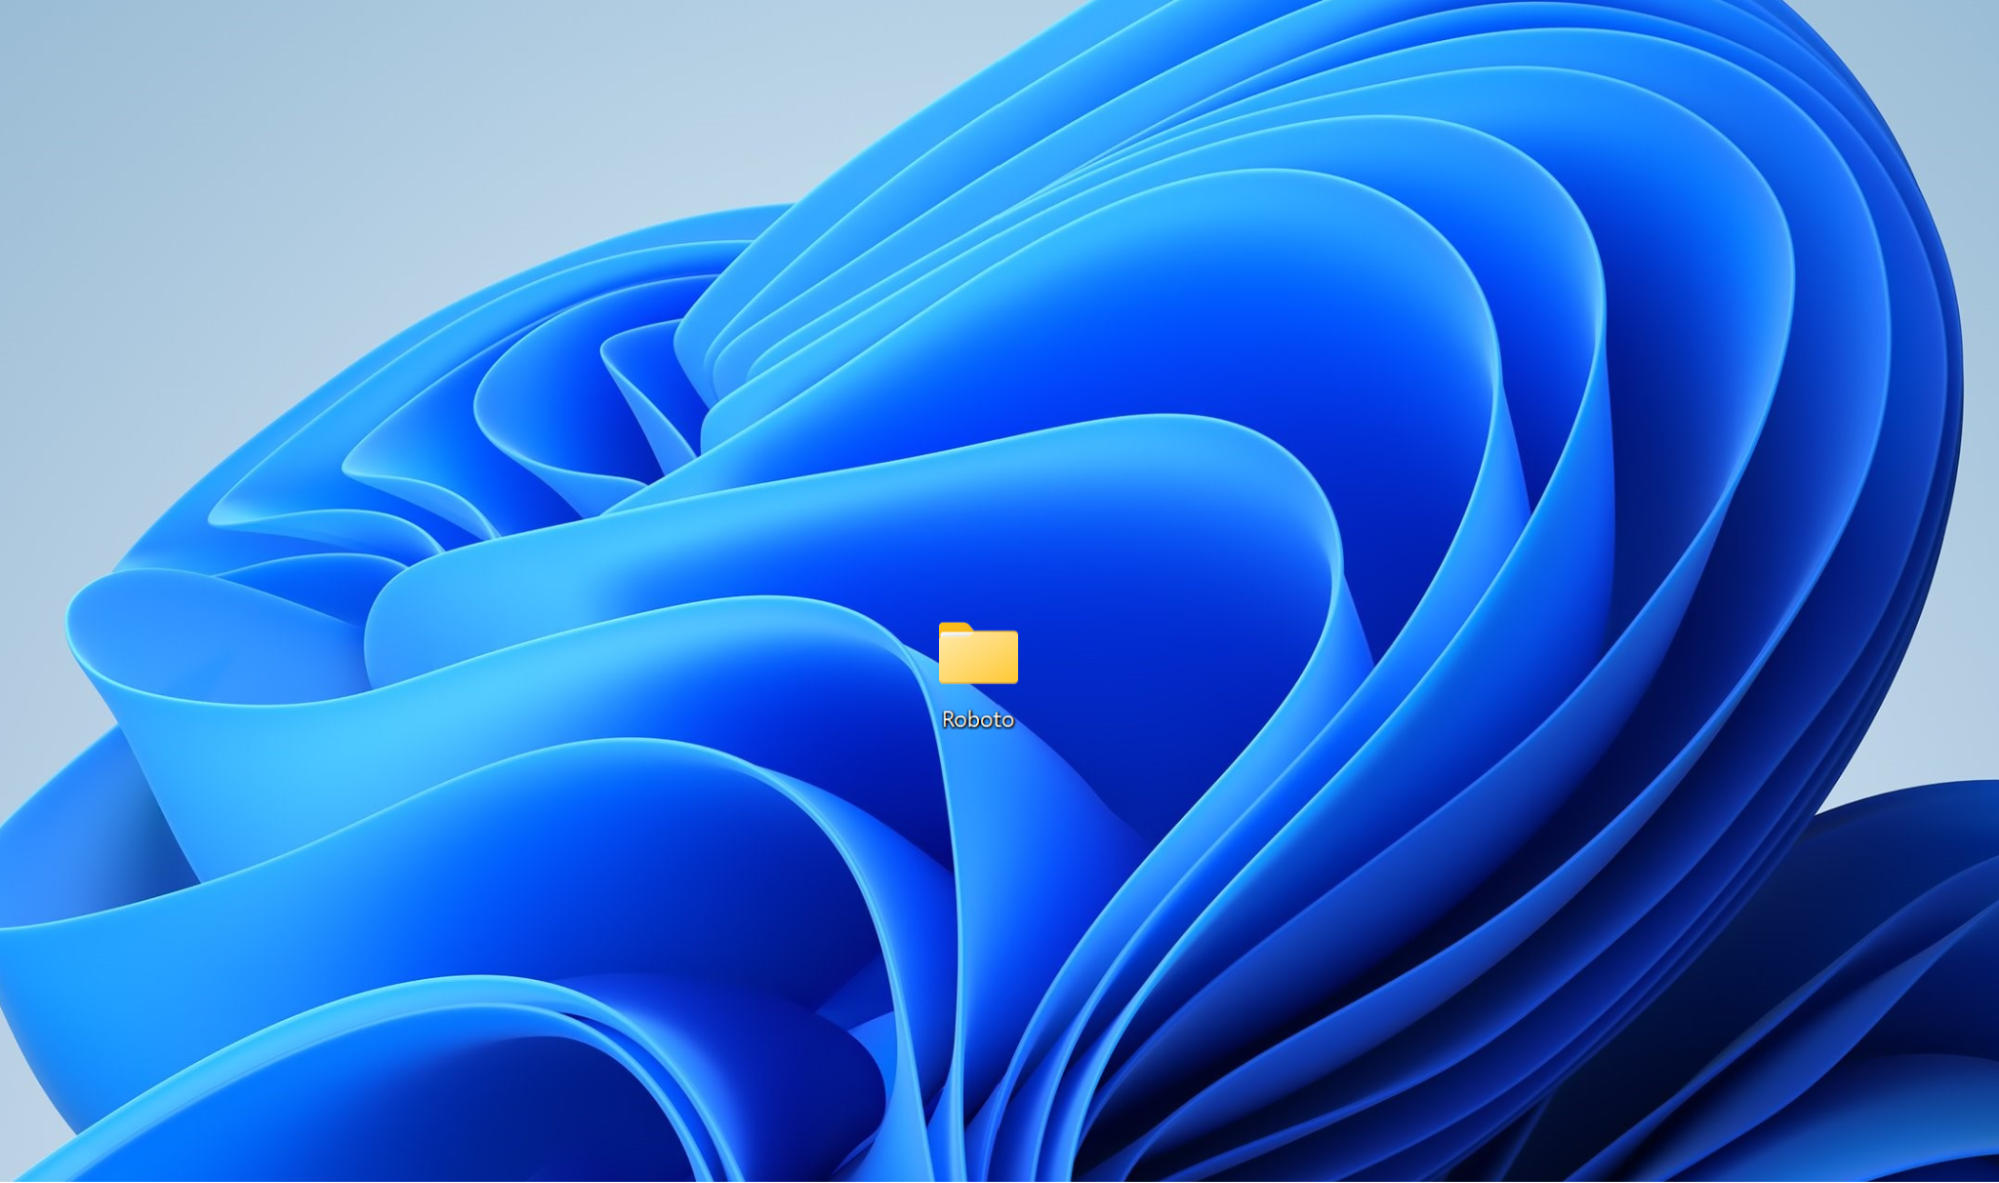
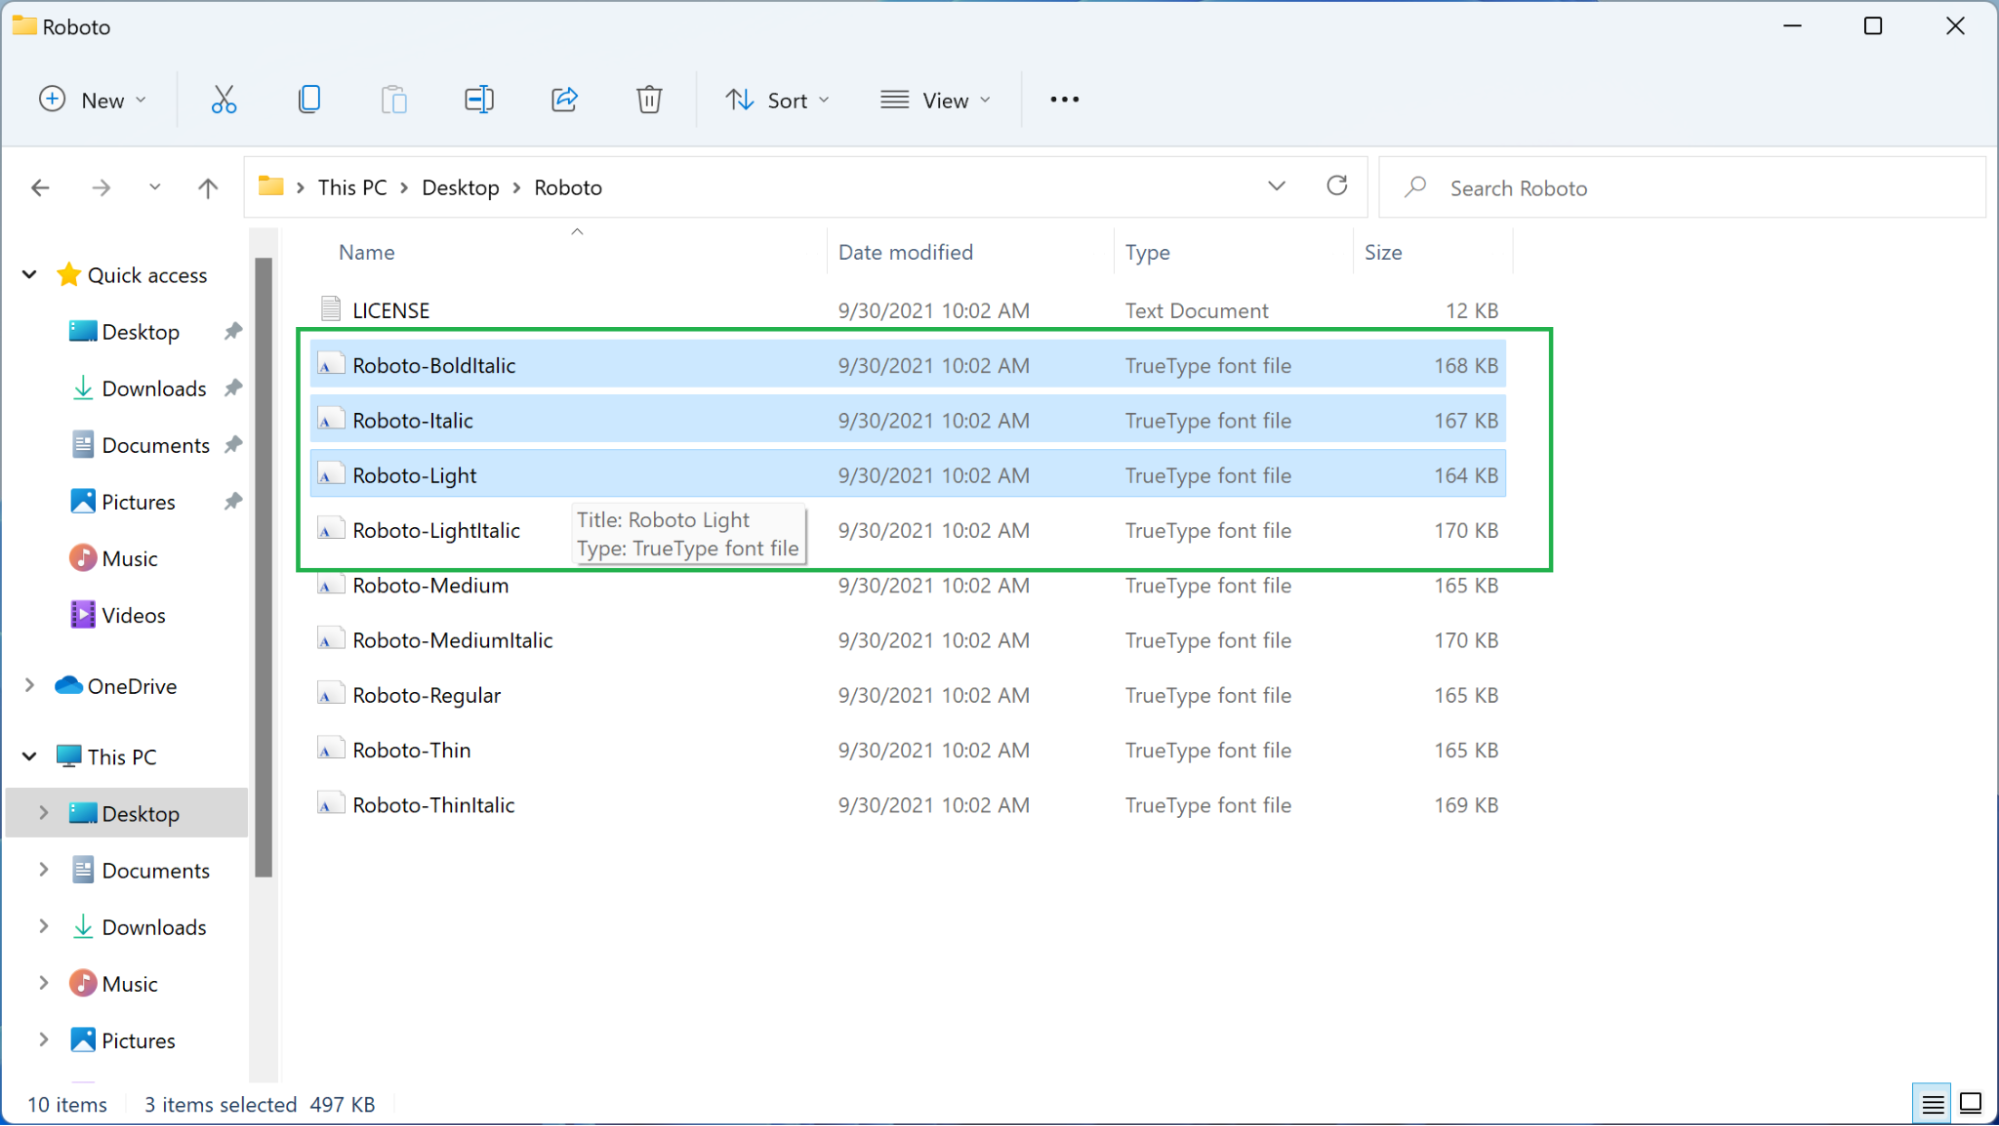
1. Locate your downloaded font. Most browsers automatically save downloaded files to the Downloads folder, but if you set a custom destination, navigate to it using your file manager of choice. You can then leave that program window open or move the file to your Desktop, which is what we’ve done in the picture below with Google’s Roboto font. Note that if your download is compressed (in a ZIP file perhaps) you’ll have to extract it.
Installing fonts via Settings requires you to download a TrueType, OpenType or PostScript file. Many sites offer a variety of free, often user-created fonts, and professionally designed fonts can be found on a variety of marketplaces. Google Fonts is one of the best. Just be wary about where you choose to download something from so you can minimize your potential exposure to malicious files. With all that said, here’s how to install fonts via the Settings app that’s built in to Windows 11 and Windows 10.
2. Locate your downloaded font. Most browsers automatically save downloaded files to the Downloads folder, but if you set a custom destination, navigate to it using your file manager of choice. You can then leave that program window open or move the file to your Desktop, which is what we’ve done in the picture below with Google’s Roboto font. Note that if your download is compressed (in a ZIP file perhaps) you’ll have to extract it.
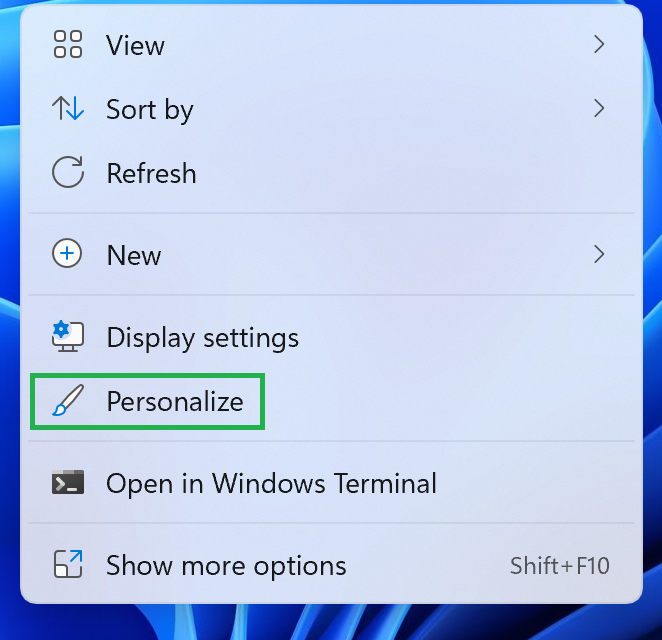
3. Navigate to the ‘Personalization’ page in Settings. The quickest way to do this is to right-click on the Desktop and choose “Personalize” from the menu that appears. You can also navigate to it in the Settings app by clicking “Personalization” in the sidebar.
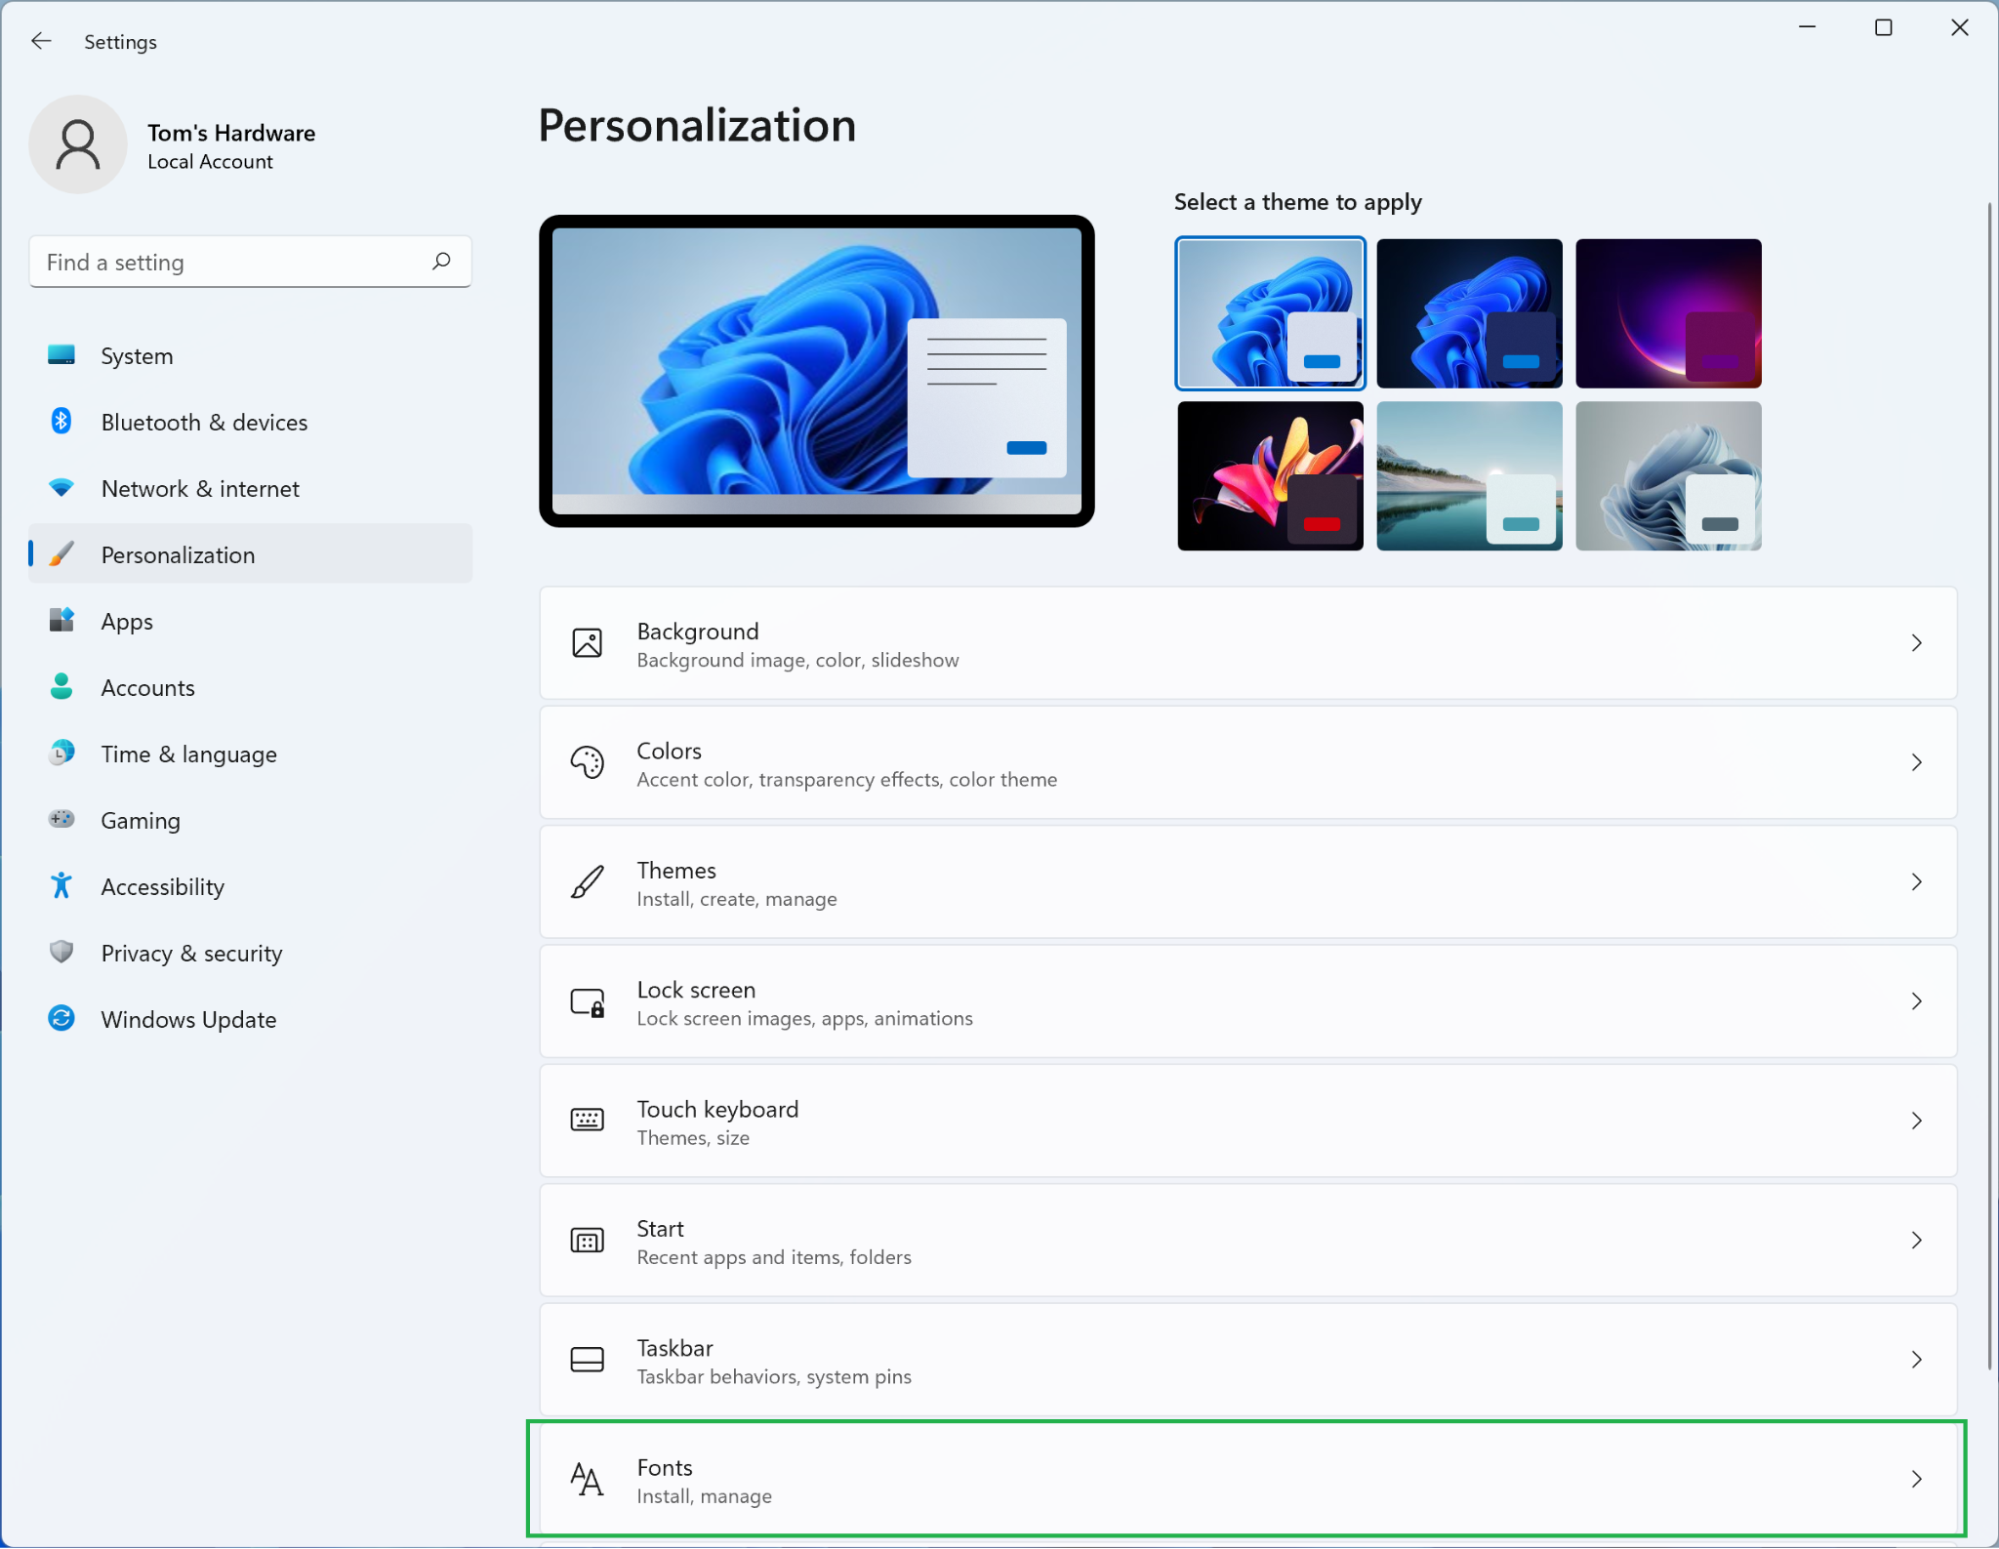
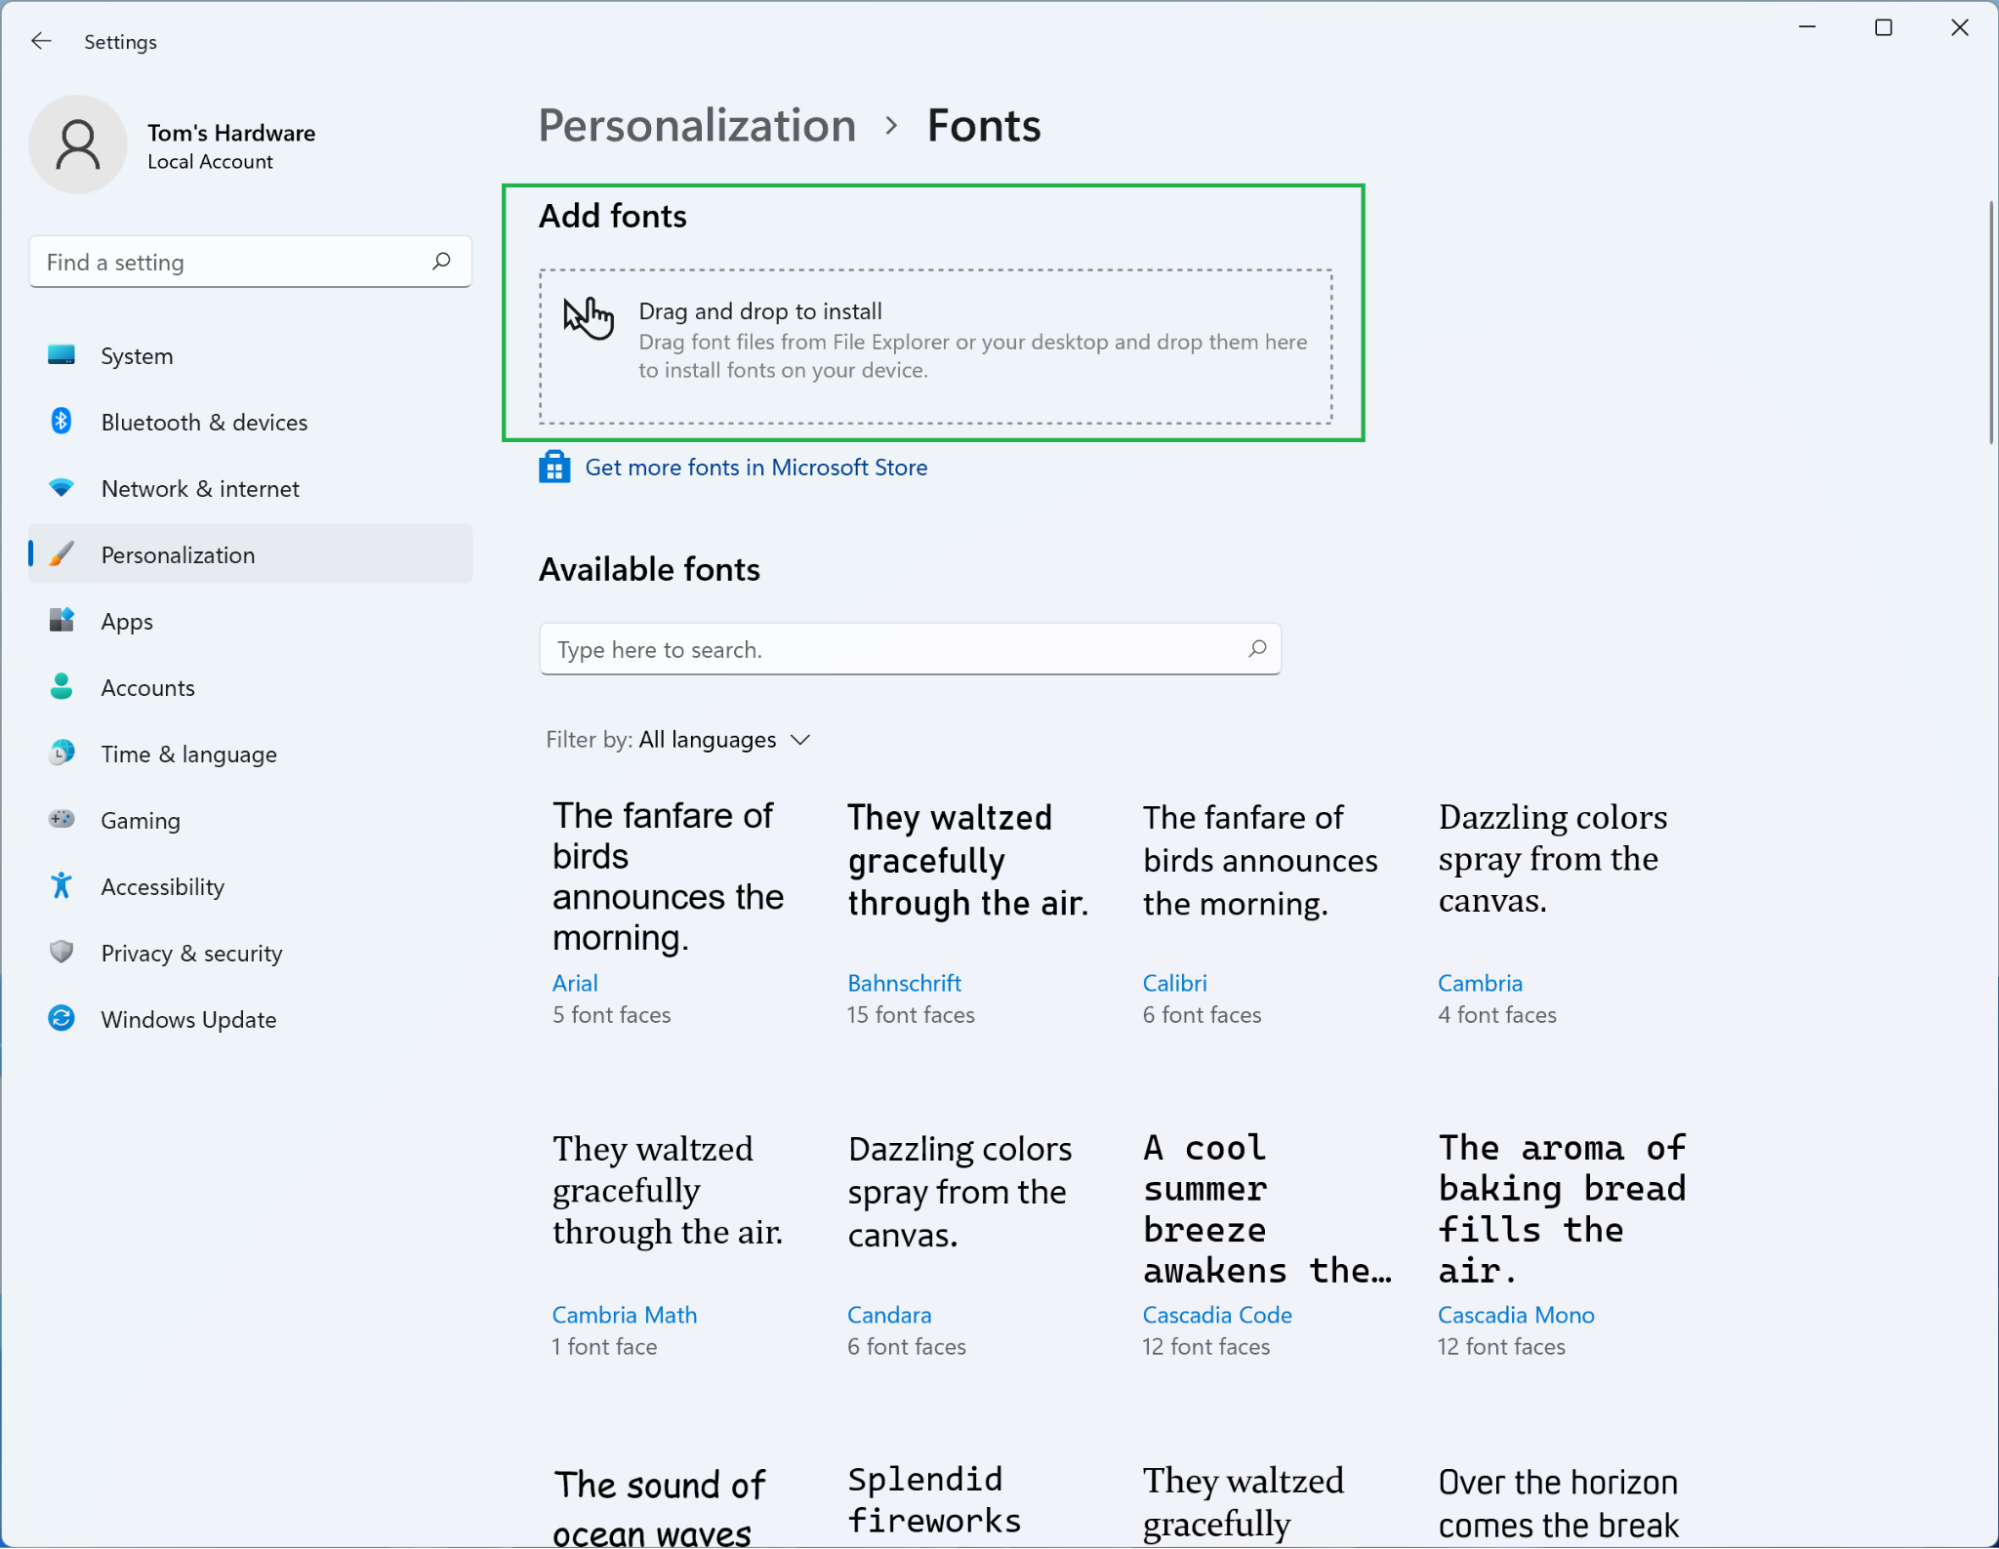
4. Select the ‘Fonts’ option. You might have to scroll, but there will be an option called “Fonts” captioned “Install, manage.” Clicking it will bring up a page showing your installed fonts and, more important for our purposes, a way to add new ones.
5. Drag your downloaded font to the appropriate box in Settings. You can’t drag-and-drop the folder itself for some reason, but you can select multiple files within the folder and drop them in the indicated area to install your new font.
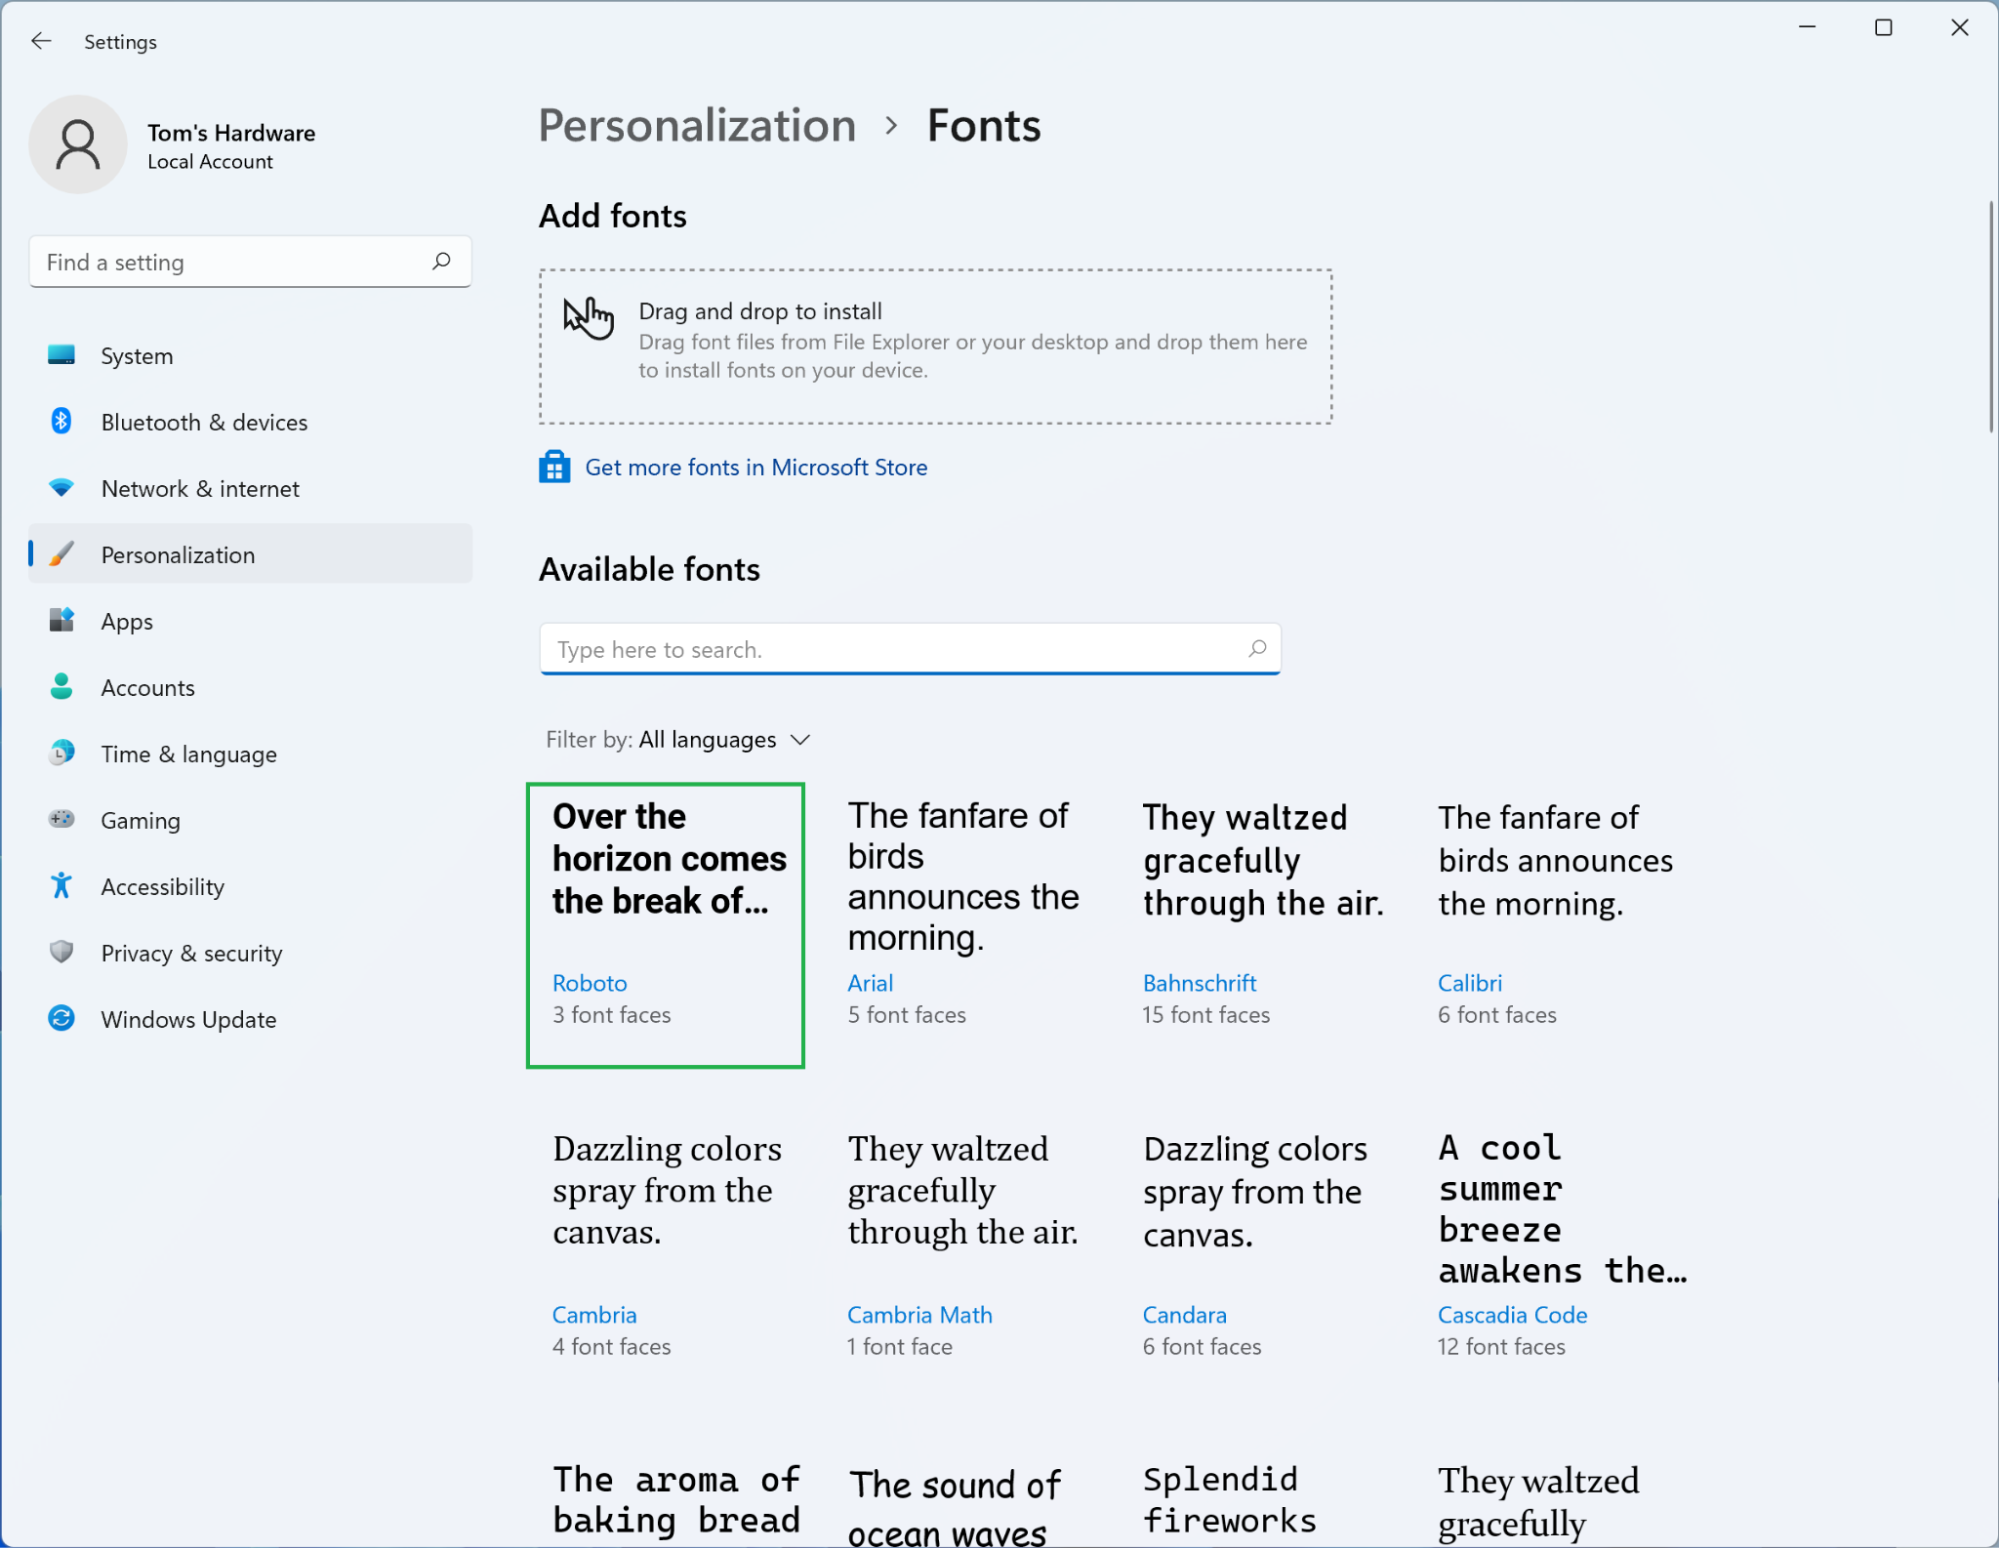
6. Confirm the font was installed. Settings will automatically show the new font as the first item in the list of installed fonts below the drag-and-drop interface to confirm it was successfully installed. (The fonts will be alphabetically sorted again if you return to the page.) The app will also group multiple font faces, such as Roboto Bold or Roboto Italic, under a single font to prevent duplicates from cluttering up the list.
That’s it! The font you downloaded has now been successfully installed and should be selectable in most programs. You can safely remove the downloaded file from your system; Windows stores installed fonts in a separate folder to make sure they remain available.
How to install fonts via File Explorer in Windows 11
Installing fonts via File Explorer is very similar to installing them via Settings—it simply requires more right-clicking instead of dragging and dropping files across multiple windows. Let’s begin.
1. Locate the downloaded font. As before, you’ll most likely want to check your Downloads folder, but if you saved the font somewhere else you can either navigate to the appropriate folder in File Explorer or use Windows 11 or 10’s search tool to find it.
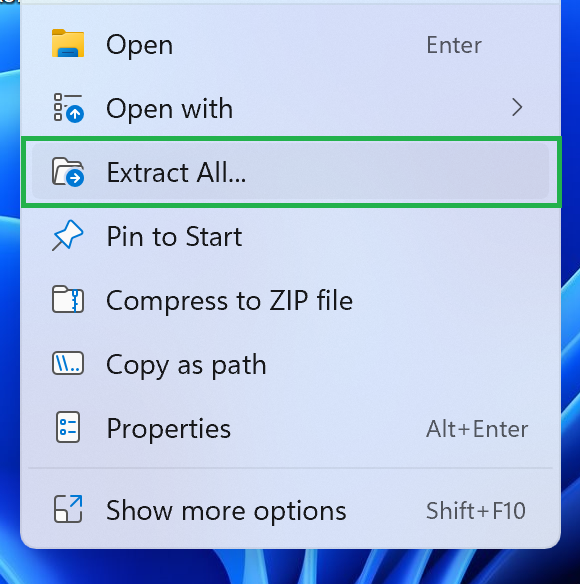
2. (Optional) Decompress the archive. If you downloaded the font as a ZIP file you can right-click it, choose “Extract All...” from the menu, and then click “Extract” in the window that appears. Other archive formats such as .rar files will require additional software.
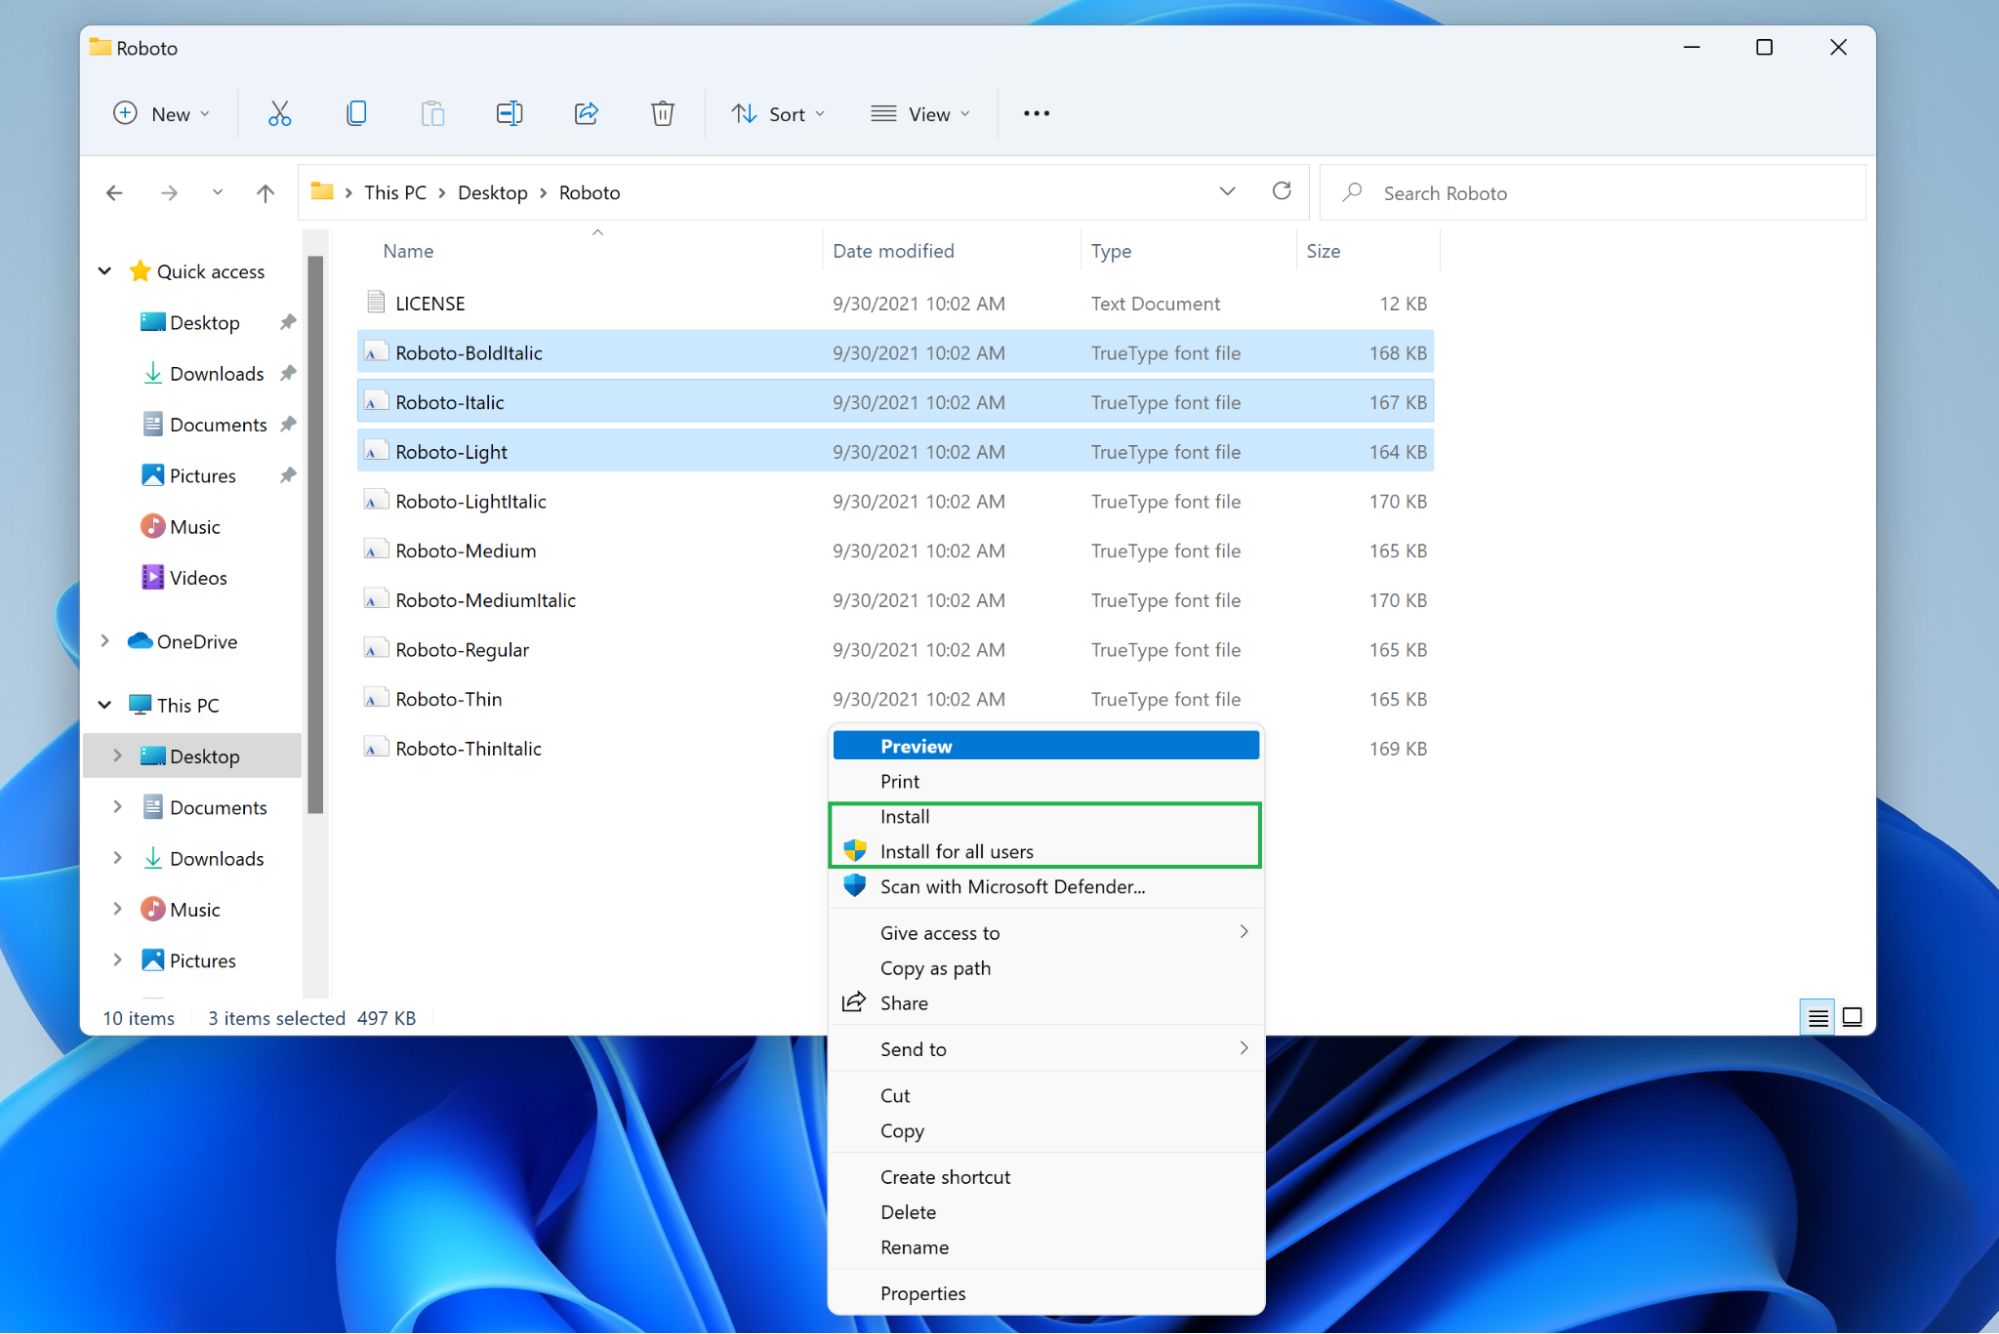
3. Select the files you need. Many fonts ship with numerous font faces (bold, italic, etc.) and weights (light, heavy, and so on) you can use. If you want to install all of them for posterity’s sake, you can select all of them. If you only want to install a few of them, just pick the ones you need, and ignore the rest.
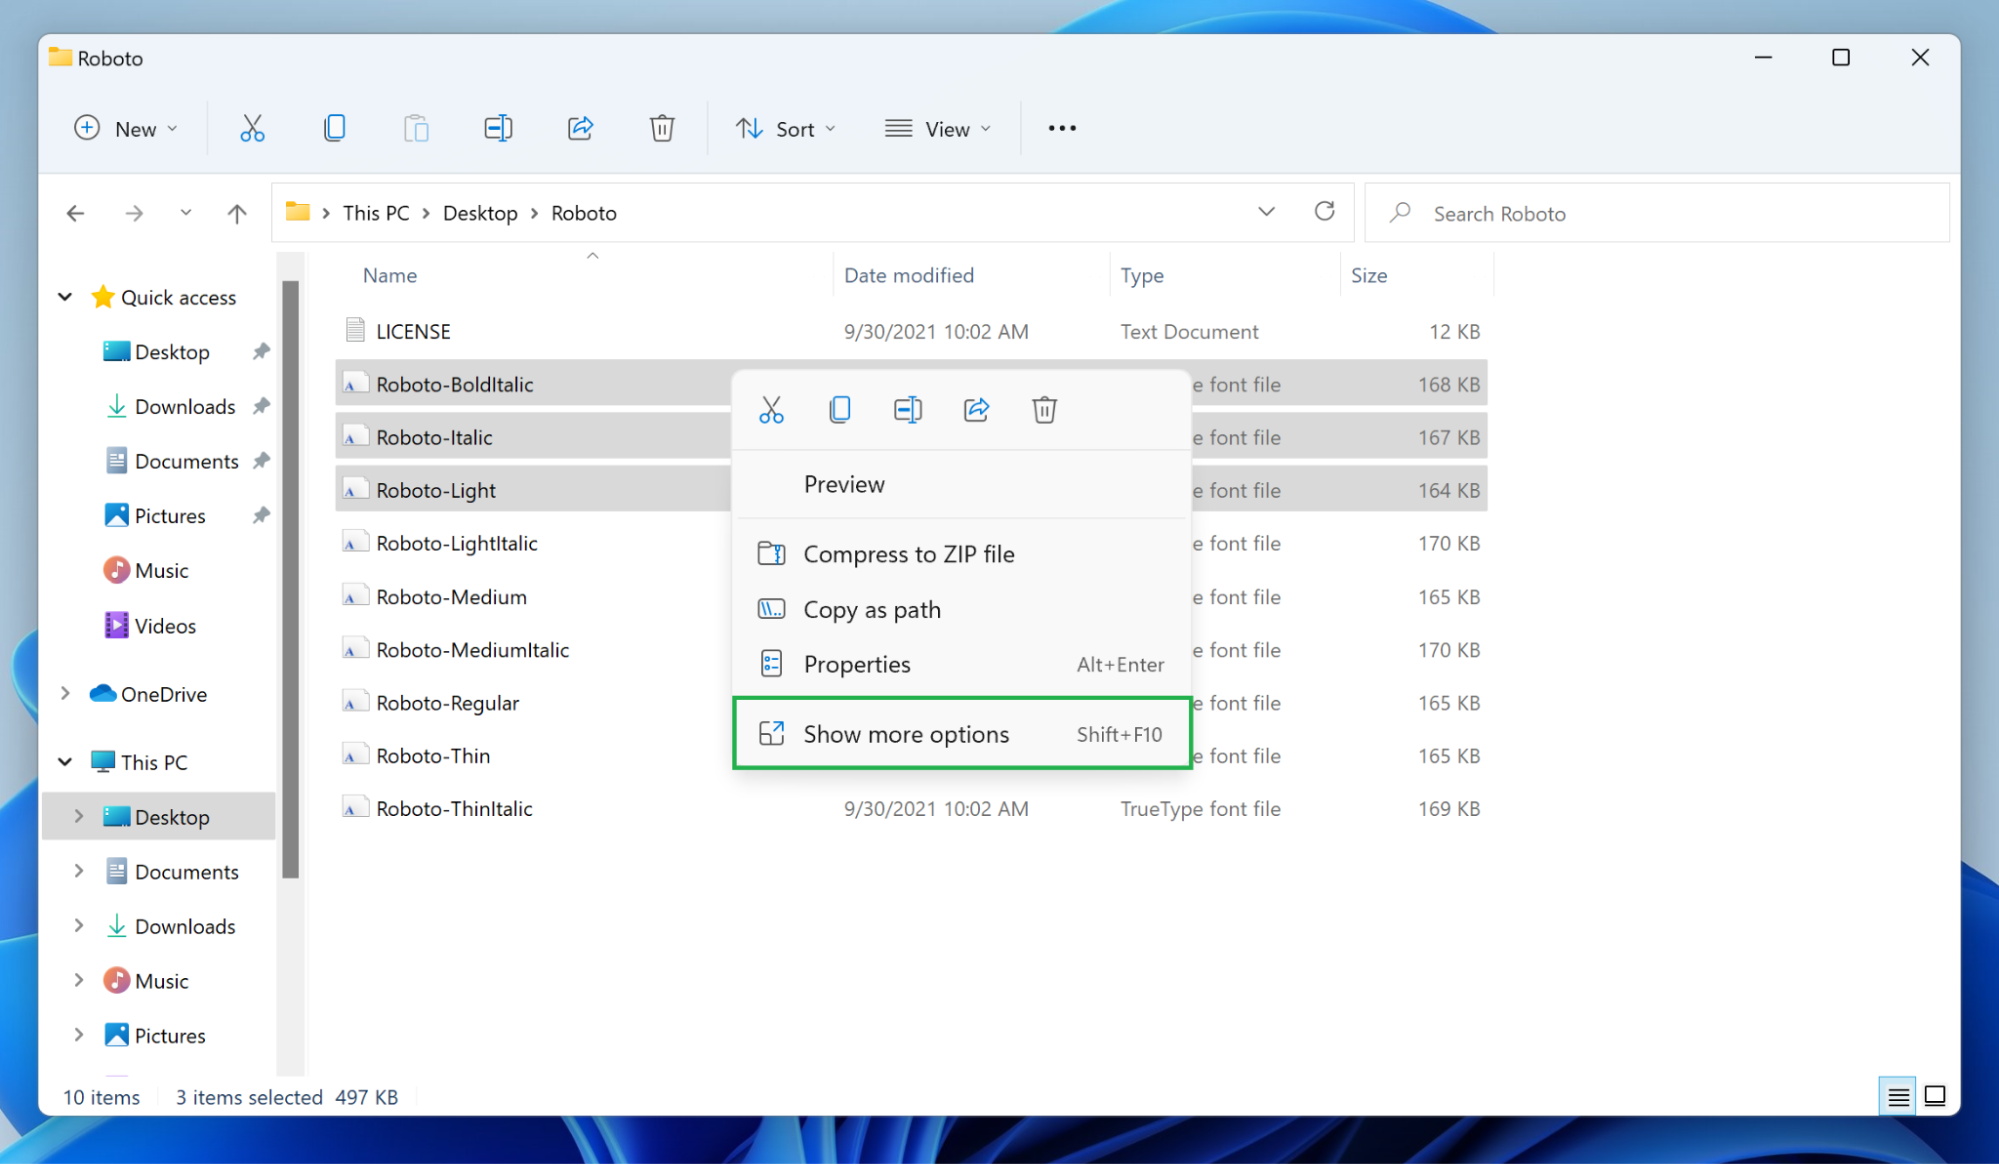
4. Right-click and, if the option to install doesn’t appear, select ‘Show more options’ in the menu. Windows 11 has moved the ability to install fonts by right-clicking the appropriate file and then choosing the appropriate option, so you’ll have to click “Show more options” or press Shift+F10 to access it. Windows 10 users can skip this step.
5. Choose ‘Install’ or ‘Install for all users’ from the menu. Normal users can install fonts for their own use, but installing it for every account on the system requires administrator privileges. Either way, once you’ve clicked whichever option you chose, a progress window should appear that automatically closes when the font is successfully installed.
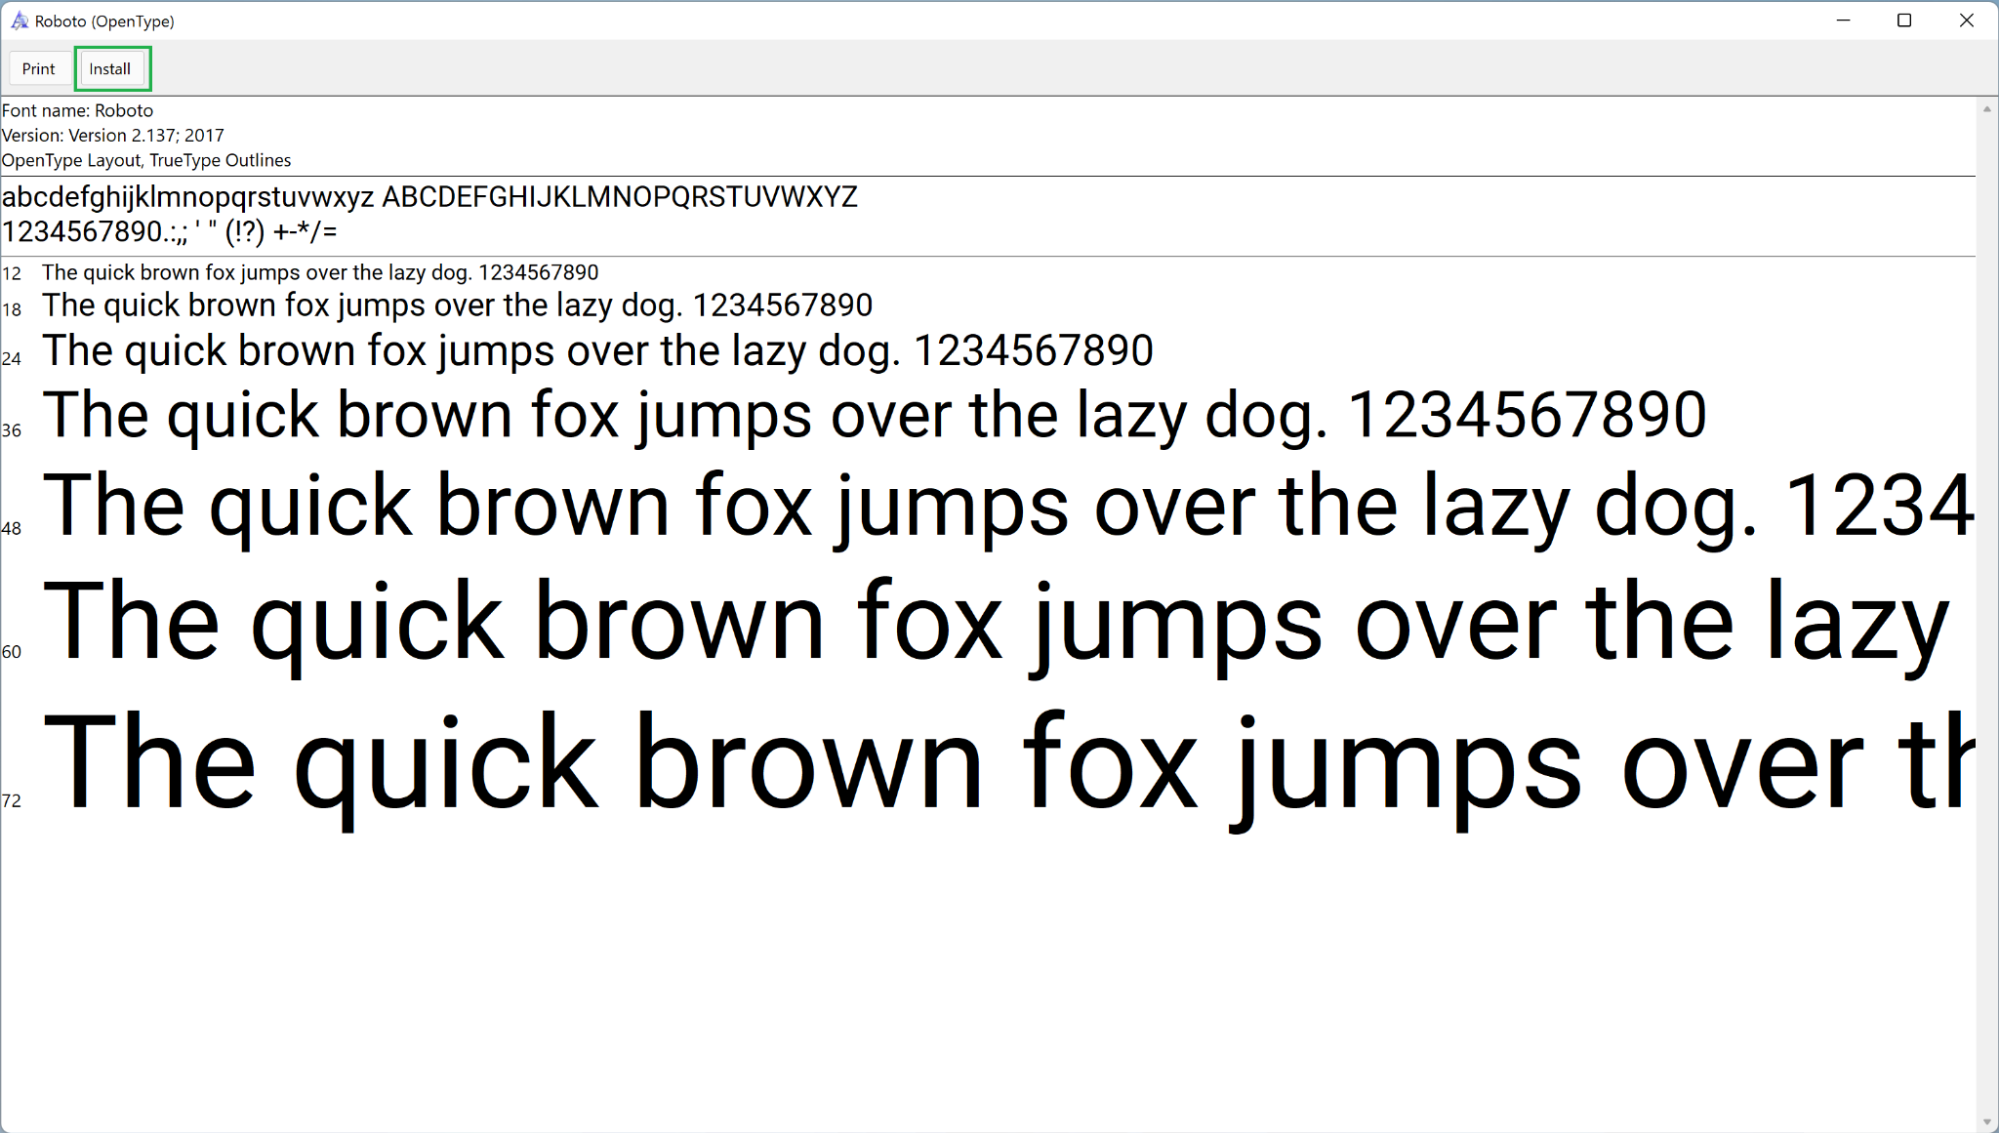
Alternative: Preview and then install. You can also skip all this right-clicking by opening the font face (or faces) you wish to install directly. This will show you a standard preview of the font face you’re about to add, and if you still want it, you can click the “Install” button.
Any of these methods will expand Windows 11 or Windows 10’s collection of fonts so you can use something that’s a little easier on the eyes, perhaps, or maybe even more eye-catching than the default options. Just remember that Comic Sans is never the appropriate font for the job.
More Windows 11 Tutorials:

Nathaniel Mott is a freelance news and features writer for Tom's Hardware US, covering breaking news, security, and the silliest aspects of the tech industry.
