PC Airflow Guide: How to Set Up and Position Your Fans
Arranging your case fans properly helps your system run at peak performance. Here’s how to do it.
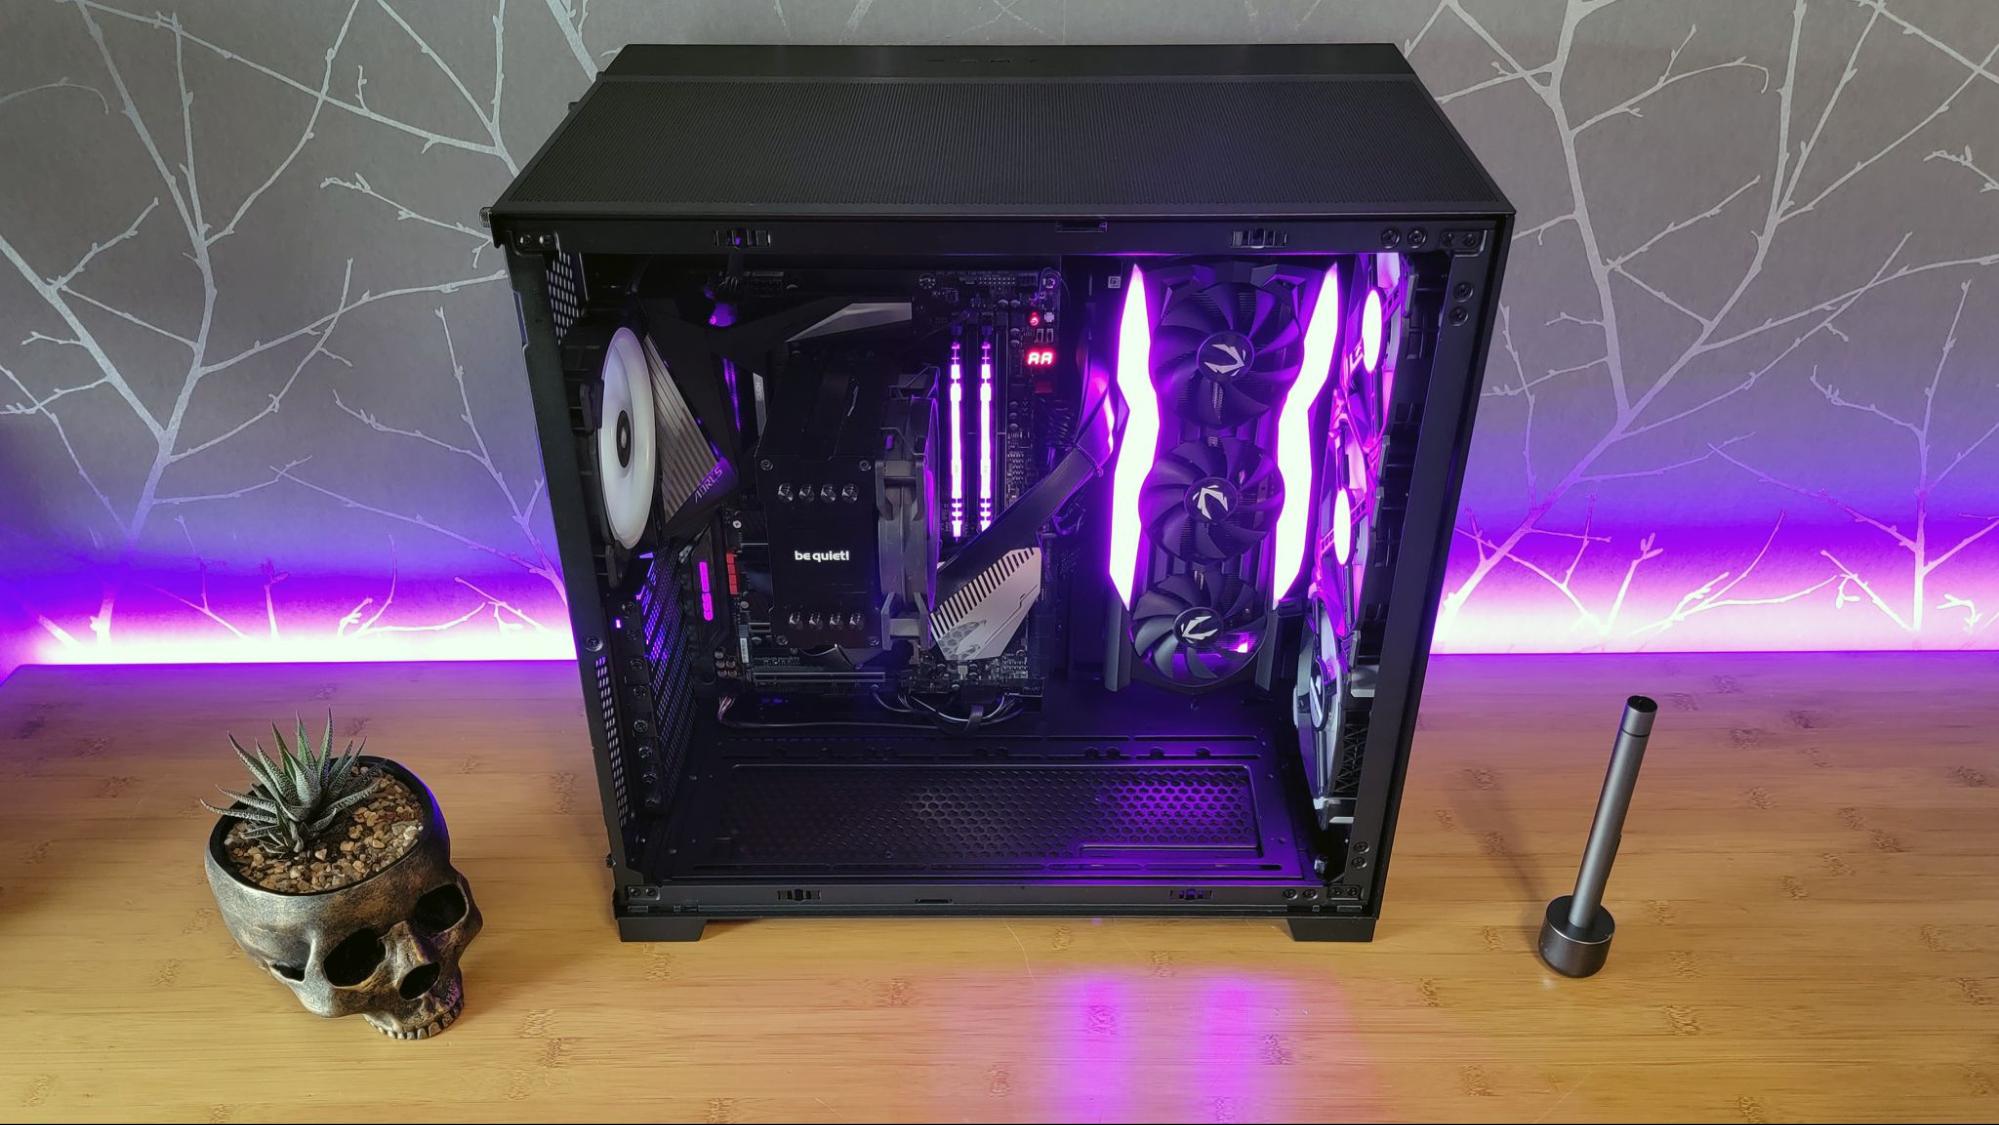
Computers rely on a steady stream of cool air to perform their best. There are many ways to arrange your case fans, and relying on the case or system manufacturer to choose that for you isn’t always the best choice. Opening up your PC case and rearranging components can be a daunting task. We’re here to help.
The good news is that fans are one of the simplest components inside your PC. They’re usually connected to clear mounting points and use only four screws to attach. Each fan uses a single connector for power, plus another if it has customizable RGB. There are a few things you need to know to get started organizing and arranging your fans. But once you do, arranging them for peak performance isn’t difficult or exceptionally time consuming.
Case Fan Basics
Before deciding how to arrange your case fans, there are a handful of things to know, including some key terms and specs. It’s important to choose the right fan for the job, and that they’re oriented and connected correctly. Here are the most important things to know.
Most Cases Come with Pre-Installed Fans: Most cases come with one or more fans already installed. Nearly all will include a rear fan to exhaust hot air out the back of your PC. The quality of case fans varies, but usually aligns with the quality of the case. The best PC cases often include very good fans, while lower-end options tend to use lower performance (and often louder) fans.
Fan Size: Fans come in a wide range of sizes, but the most common are 120mm and 140mm, with big 200mm spinners seeing a bit of a resurgence lately as well. The benefit to a larger fan is that it’s able to move the same volume of air at a lower RPM, thereby reducing fan noise. Be sure to check your case to see which sizes it supports and where they can be installed.
CFM, RPM and Noise: The volume of air a fan can move is measured in Cubic Feet Per Minute (CFM). This number can range widely depending on fan size, RPM, and how it balances noise levels, but a “good” case fan will typically output upwards of 50 CFM.
RPM, or Rotations Per Minute, is how fast a fan spins. The higher the RPM, the more air it is likely to move; however, these high speeds often come at the cost of noise, measured in decibels (dB). A fan that spins exceptionally fast is likely to have a more powerful motor and to generate more vibrations that you’ll hear when using your PC. If fan noise bothers you, try to aim for a fan below 30dB.
Get Tom's Hardware's best news and in-depth reviews, straight to your inbox.
When shopping for case fans, look for the best balance of CFM and dB that fits your budget. RPM is less important so long as the fan is able to move plenty of air without making your PC sound like a jet engine. If you’re technical and have a computer that supports it (prebuilt systems oftend don't), you can even go into your system’s BIOS and create a custom fan curve to balance cooling performance with noise levels.
Another option is to add more or larger fans to your system. Since multiple fans and those with larger blades can move more air, making these changes allows you to run them more slowly, lowering the total noise of your system. Depending on the case fans you select, this can cost more than using fewer smaller fans but gives you some extra control over your PCs acoustics.
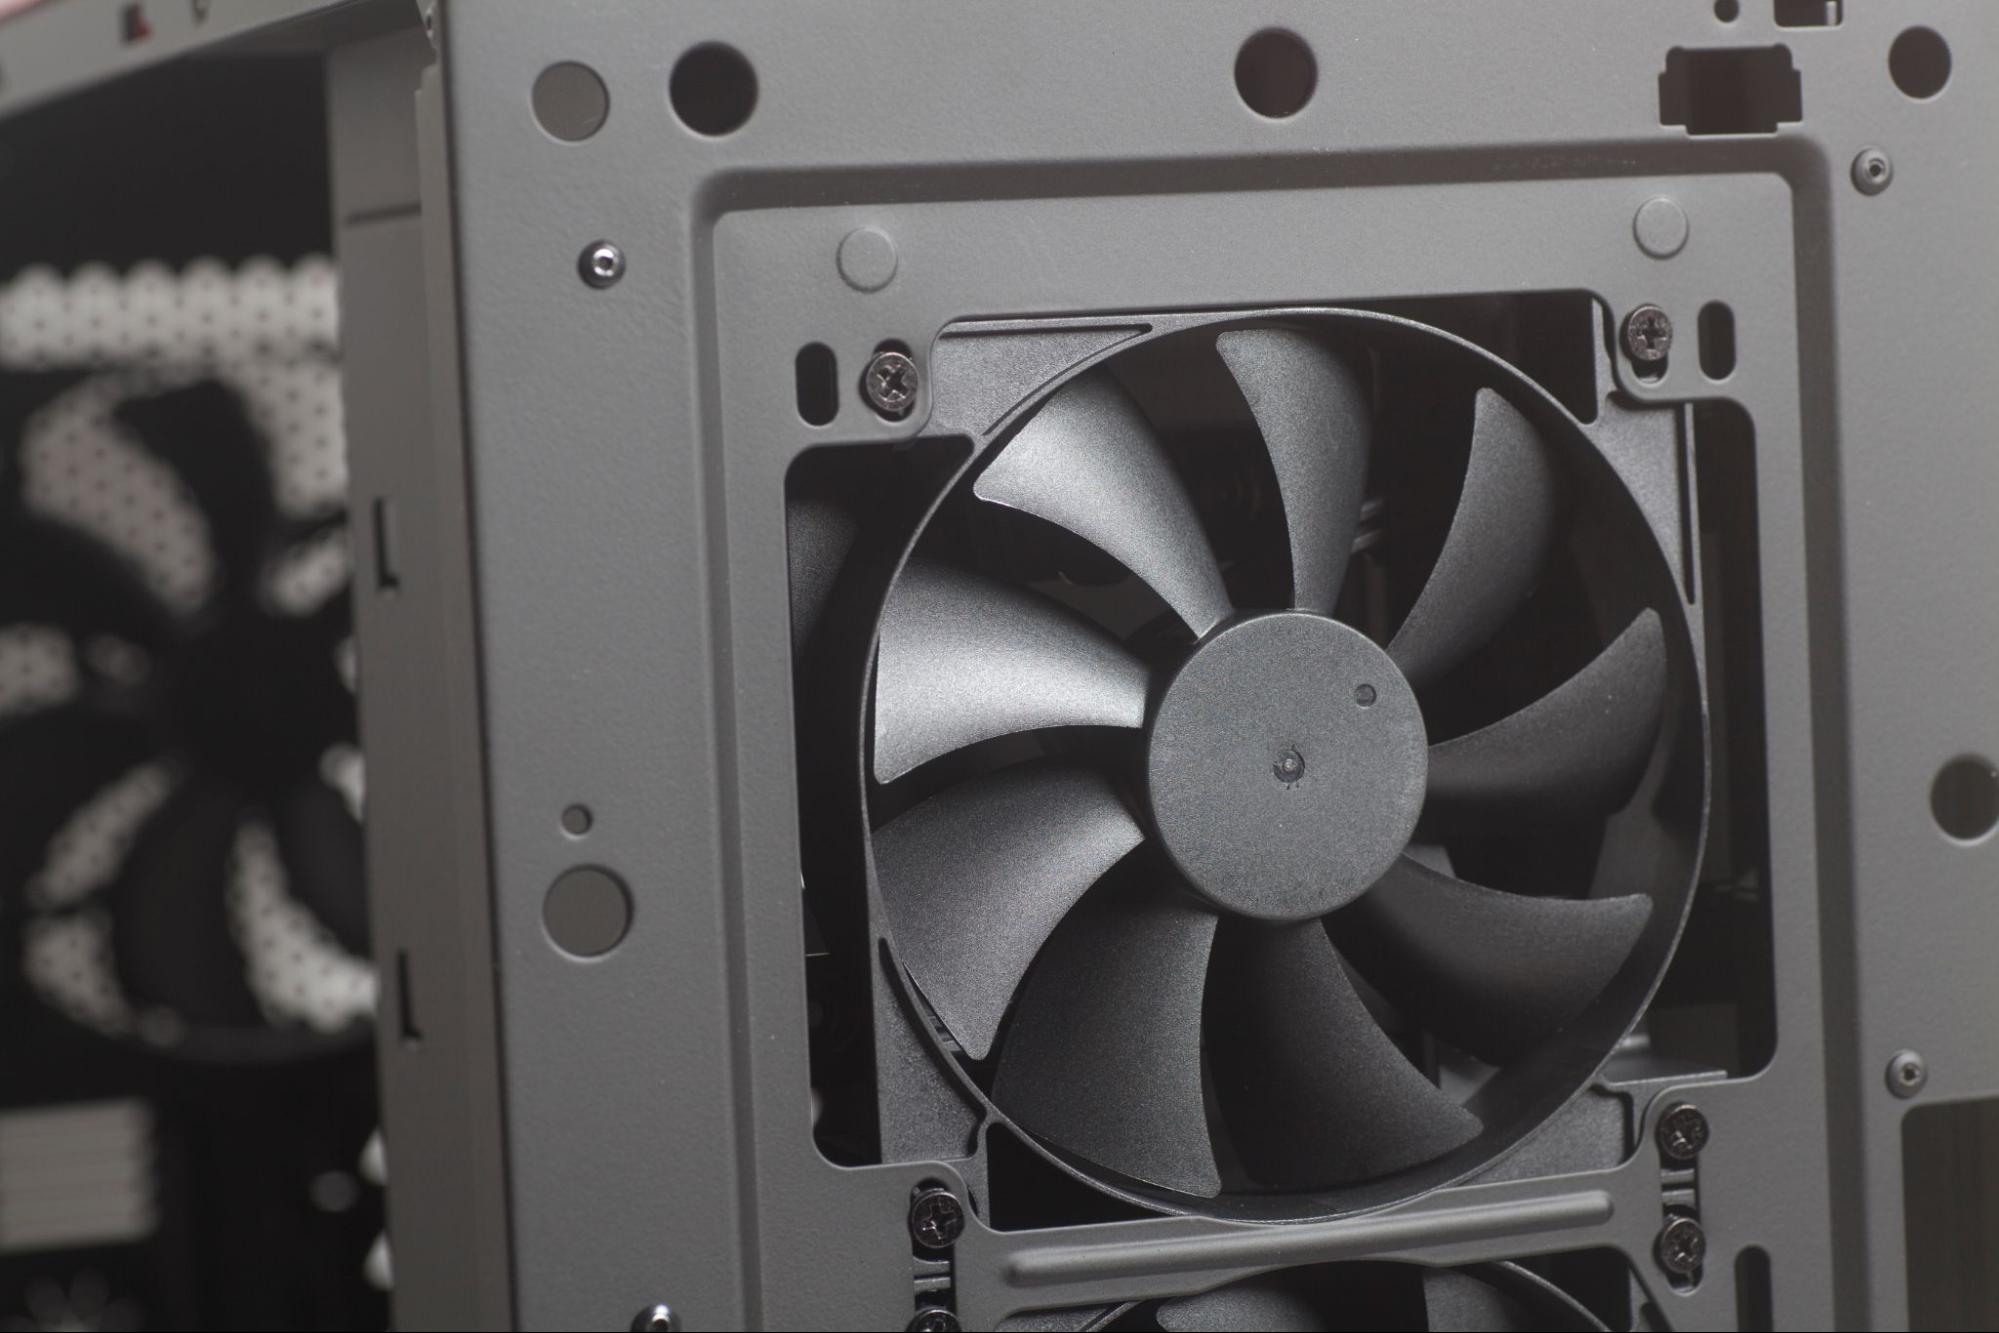
Fan Orientation: Like any fan, the blowers in your PC have intake and exhaust sides. If you’re not sure which is which, check the edges of the fan for a small arrow. Manufacturers will often place this symbol along one edge of the fan to indicate the direction of airflow. If this isn’t present, you can simply use your hand to feel the direction the air is moving. Usually, the pretty brand sticker is also on the intake side, since it’s more likely to be visible through glass or mesh side panels.
Installation: Installing case fans is very easy. Your case should have set mounting points on the front, rear, top, bottom, and sometimes even the sides. Every case supports certain fan diameters (usually 120mm and 140mm), so be sure to consult its documentation.
Installation is as simple as inserting the fan into the case, lining it up with the mounting holes, and screwing in four fasteners to lock it in place. Then, connect the power cable to the matching fan header on your motherboard (and RGB header if your fan has customizable RGB lighting). Removing the fan is just as easy: disconnect the fan from its power and RGB connectors, unscrew the fasteners, and you’re done. Of course, any time you are taking off your side panel to do something inside your system, be sure the system is powered down and unplugged.
The Fundamentals of Airflow and Case Pressure
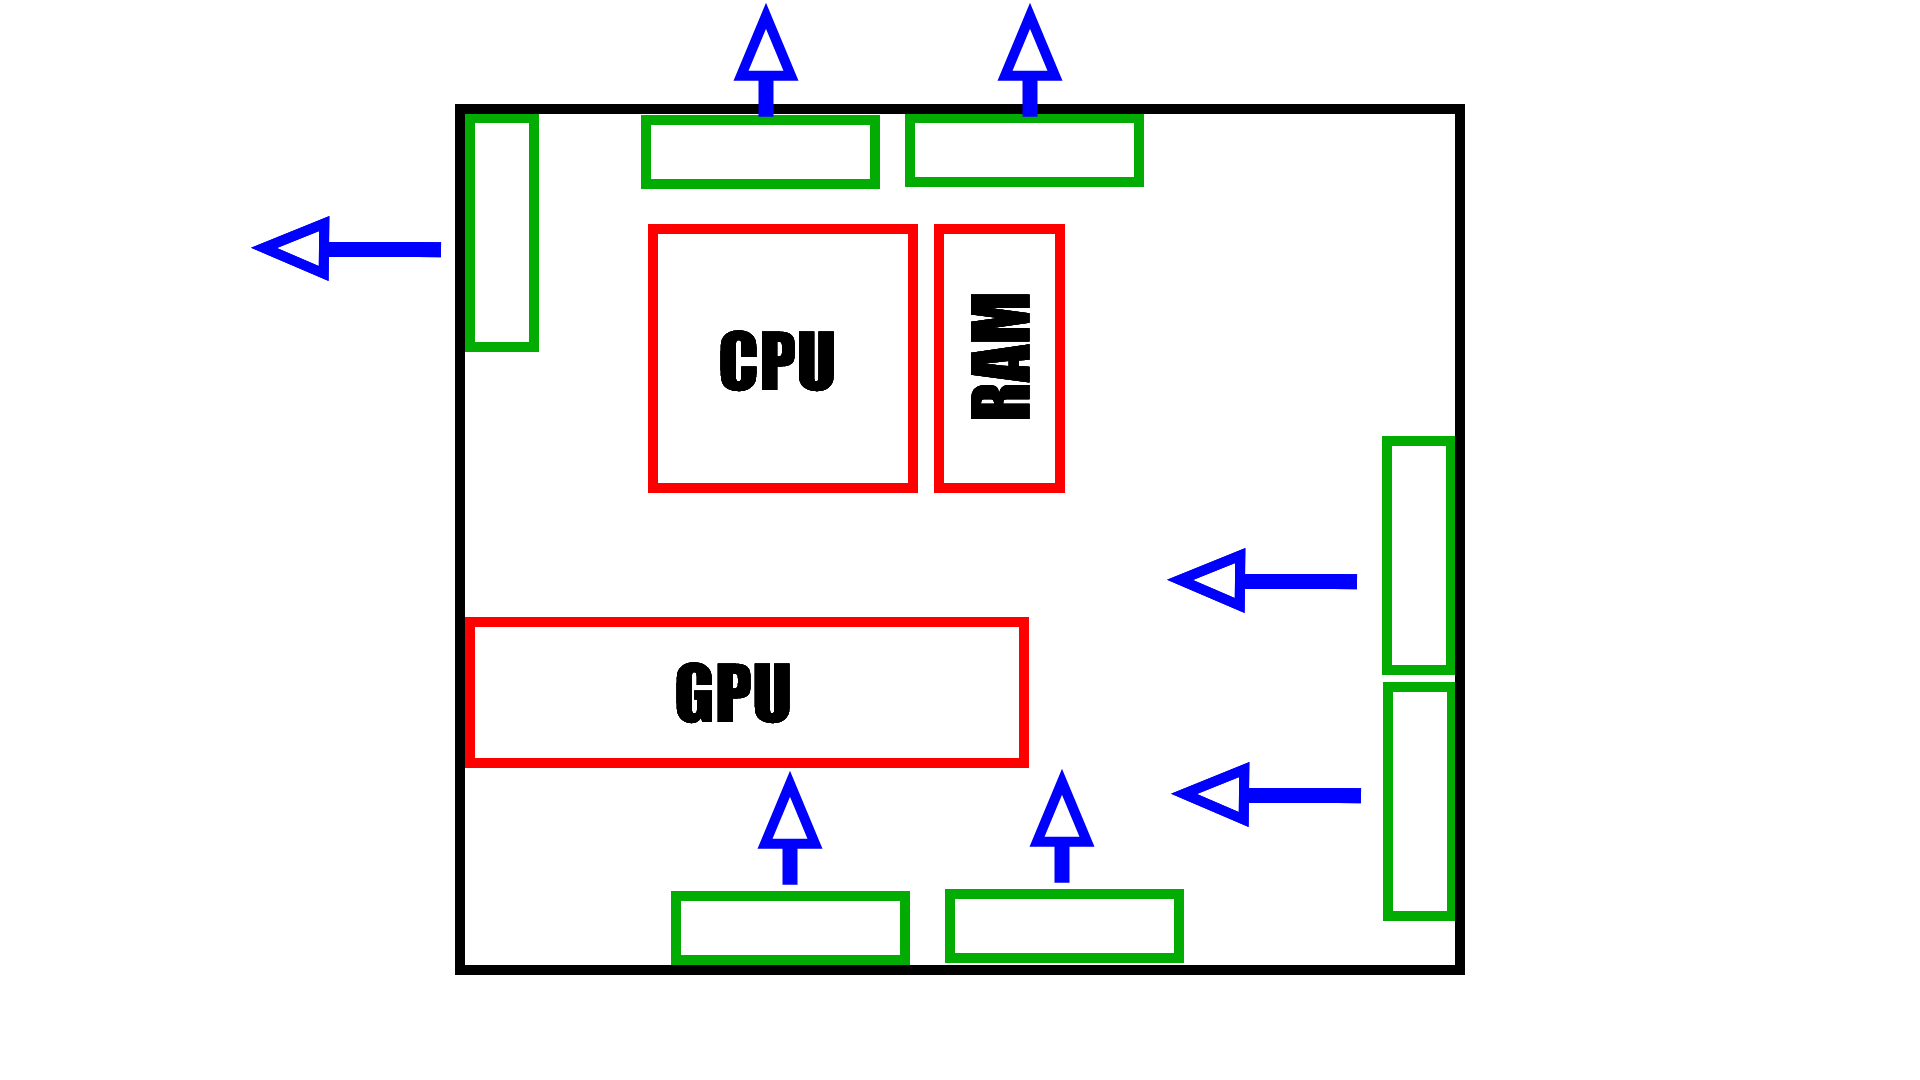
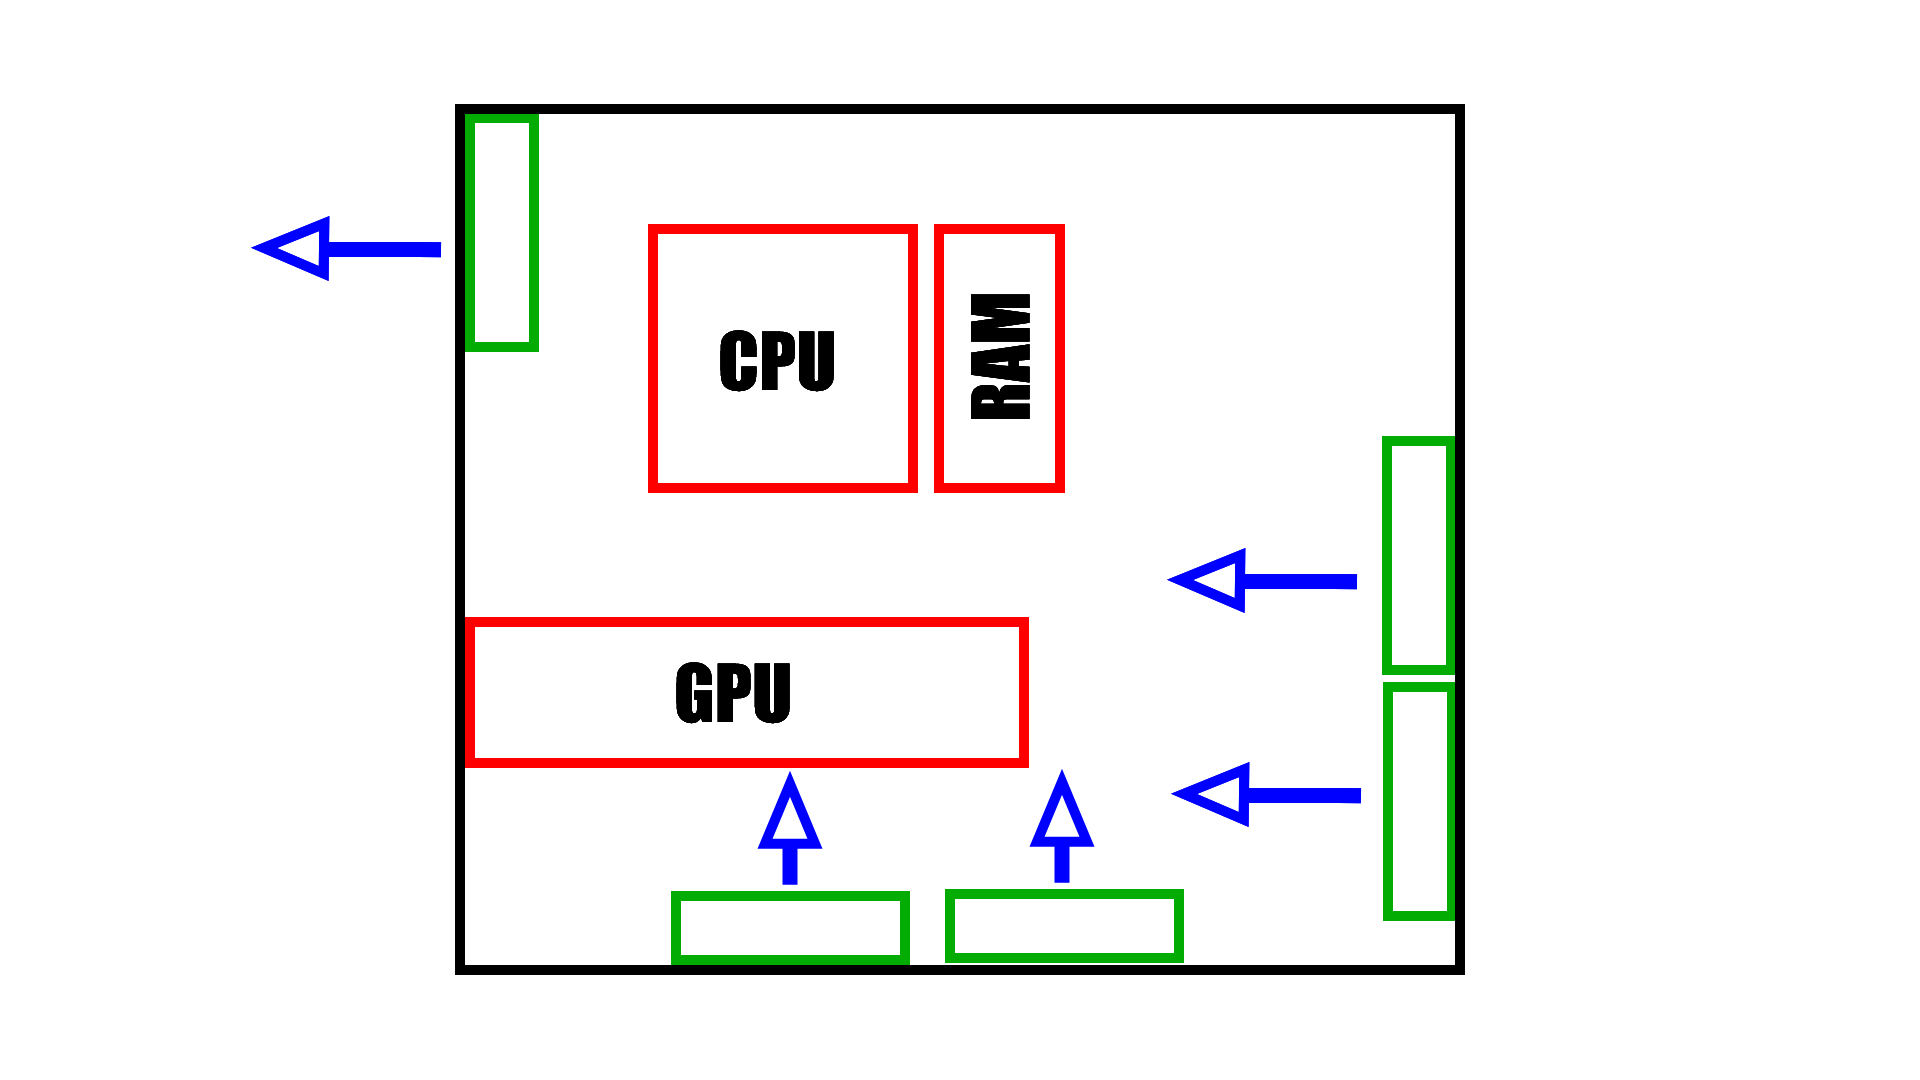
Generally, the goal of positioning fans in a PC case is to create an airflow channel from the right side/front of your case to the upper left/rear. This channel should bring cool air across the CPU, GPU and other heat sensitive components and then exhaust out of the back and/or top. This path causes the air to heat up as it travels, creating a cycle of cool air in, hot air out.
Another important concept is case pressure. The amount of fans you have blowing cool air in versus exhausting hot air out will create positive or negative pressure. When they are perfectly balanced, this is considered neutral pressure.
Positive case pressure is when the fans are oriented to push more air into the case than out. Negative pressure is created when there are more fans blowing air out than sucking in. Neutral pressure is when there is an equal amount of intake and exhaust. Because computer cases are not sealed, and the number and power of fans can be mixed, you’ll usually lean slightly one way or the other.
While there are proponents of both positive and negative pressure arrangements, there are also benefits to both. A positive configuration makes sure your components are always fed with fresh, cool air (which has the side benefit of pushing dust away from your computer). A negative configuration quickly exhausts heated air so it doesn’t stagnate.
Both pressure systems can succeed at creating an airflow channel, so your components stay cool. Because of this, many users find it beneficial to balance their intake and outake fans, focusing more on the direction they would like the airflow to travel. Regardless which you choose, it’s wise to make sure your intake fans are blowing cool air toward your GPU and CPU as directly as possible. This means they should generally be on the front of the case, although if you have a case with a vented bottom and feet that lift it significantly off the ground, intake fans on the bottom can be a good option, too – just make sure your case isn't sitting on thick carpeting, blocking fresh air from getting to the fans.
Common and Ideal Fan Arrangements
There are a number of different ways to configure your fans. The ideal fan arrangement is one that draws in lots of cool air with a direct path up and out of the PC. Beginning with the best configuration, but requiring the most fans, and proceeding to less effective arrangements, the most common fan configurations can incorporate both positive or negative pressure, depending on the number of fans used in each location.
Front, Rear, Top, and Bottom: In this configuration, the front and bottom fans draw air into the case, while the top and rear fans exhaust hot air out. This creates a clear channel across the core components of your computer while also feeding additional cool air directly upwards. It is similar to the traditional Front and Rear configuration (described below) but with added air volume to increase the rate of flow. This scenario provides cool air directly to the GPU and pushes that air upward, toward the CPU and exhaust fans.
Front, Rear, and Bottom Configuration: This fan arrangement is similar to the above, but relies on a single rear exhaust fan. It is still a very solid configuration, but is generally less effective due to the reduced exhaust out of the top of the case. If you’re considering this configuration and have more than one case fan at the bottom of the PC, consider moving it to the top of the case for the best cooling. That's provided, of course, that your case has vents and fan mounting areas at the top.
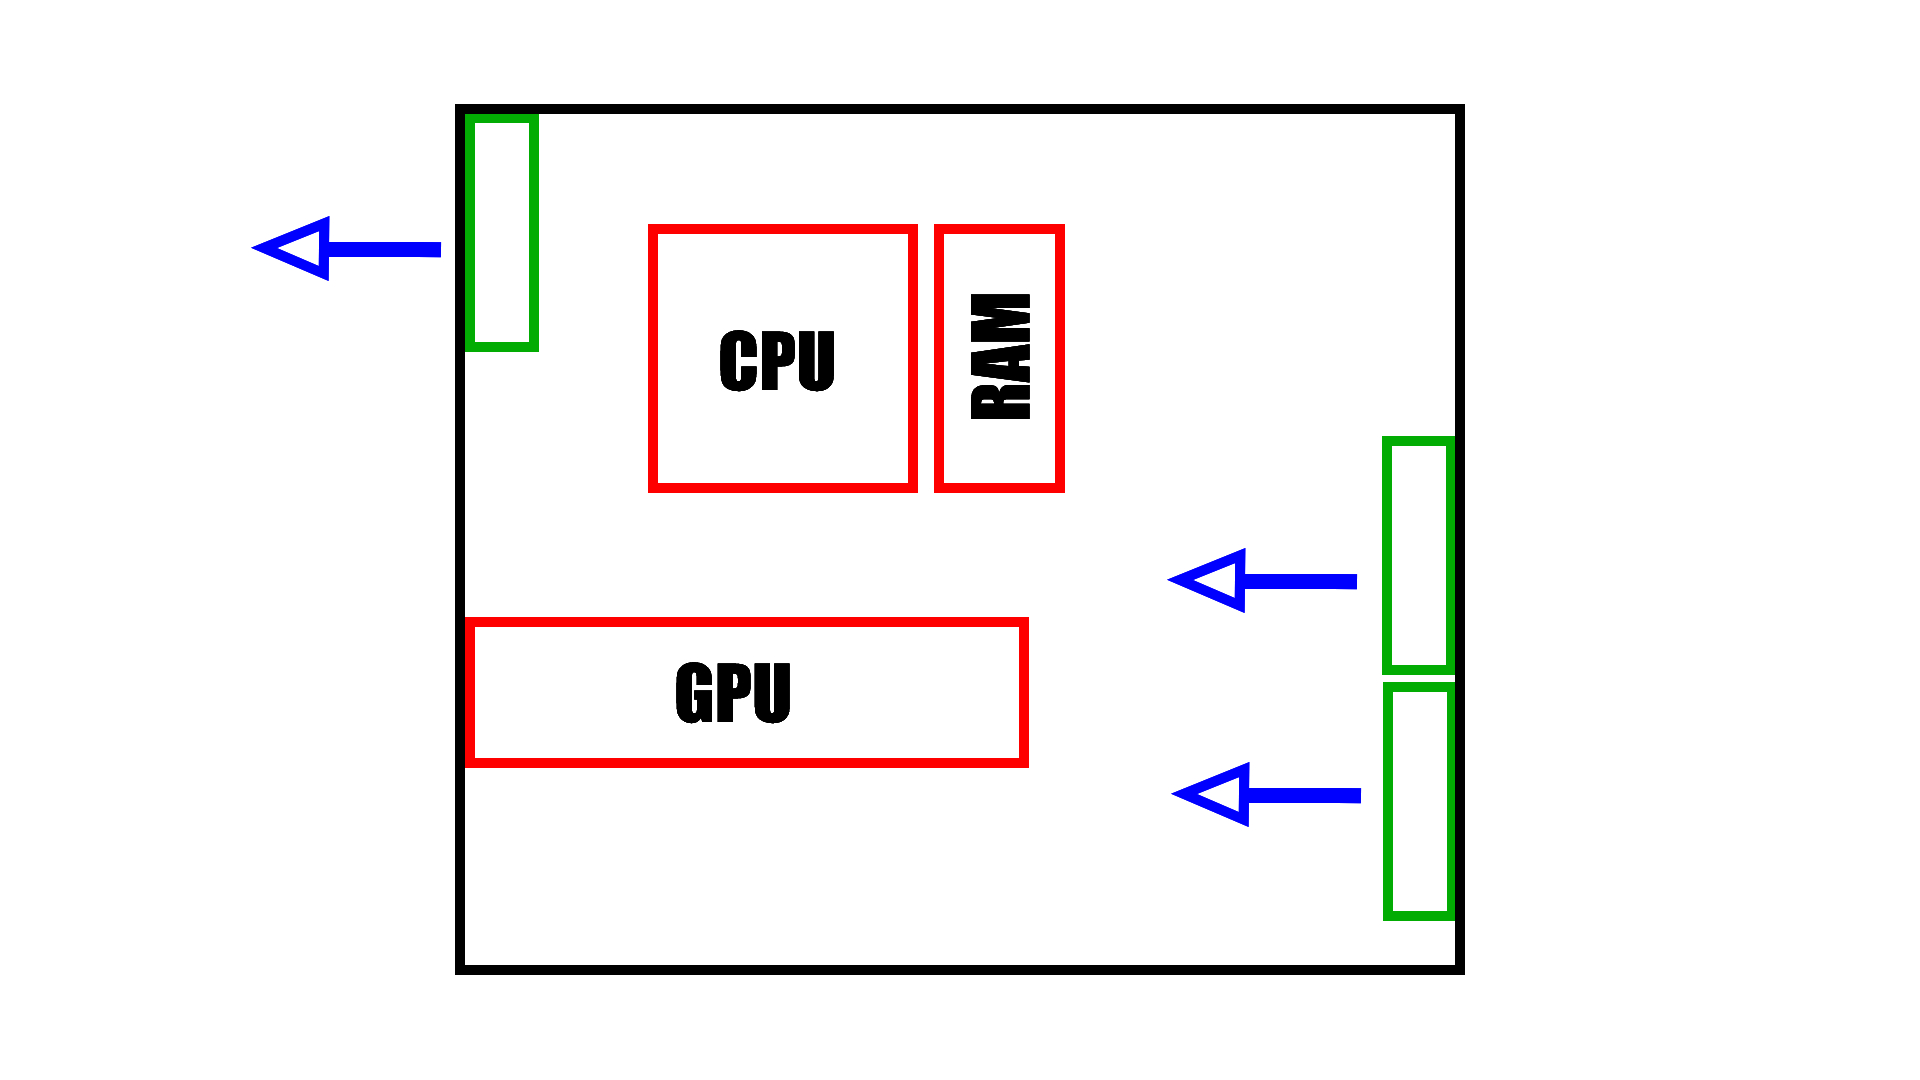
Front and Rear Configuration: This is the most common cooling configuration and is how most PC cases with more than one included fan come pre-configured; this can work very well. In this arrangement, one or more fans draw air through the front panel of the case and blow it directly toward the motherboard. There, the air is consumed by the GPU and CPU and blown into the channel of the rear exhaust fan, creating a flow from front to back. Keep in mind, though, that this option won't work nearly as well as it should if your case front doesn't provide lots of airflow to your intake fans.
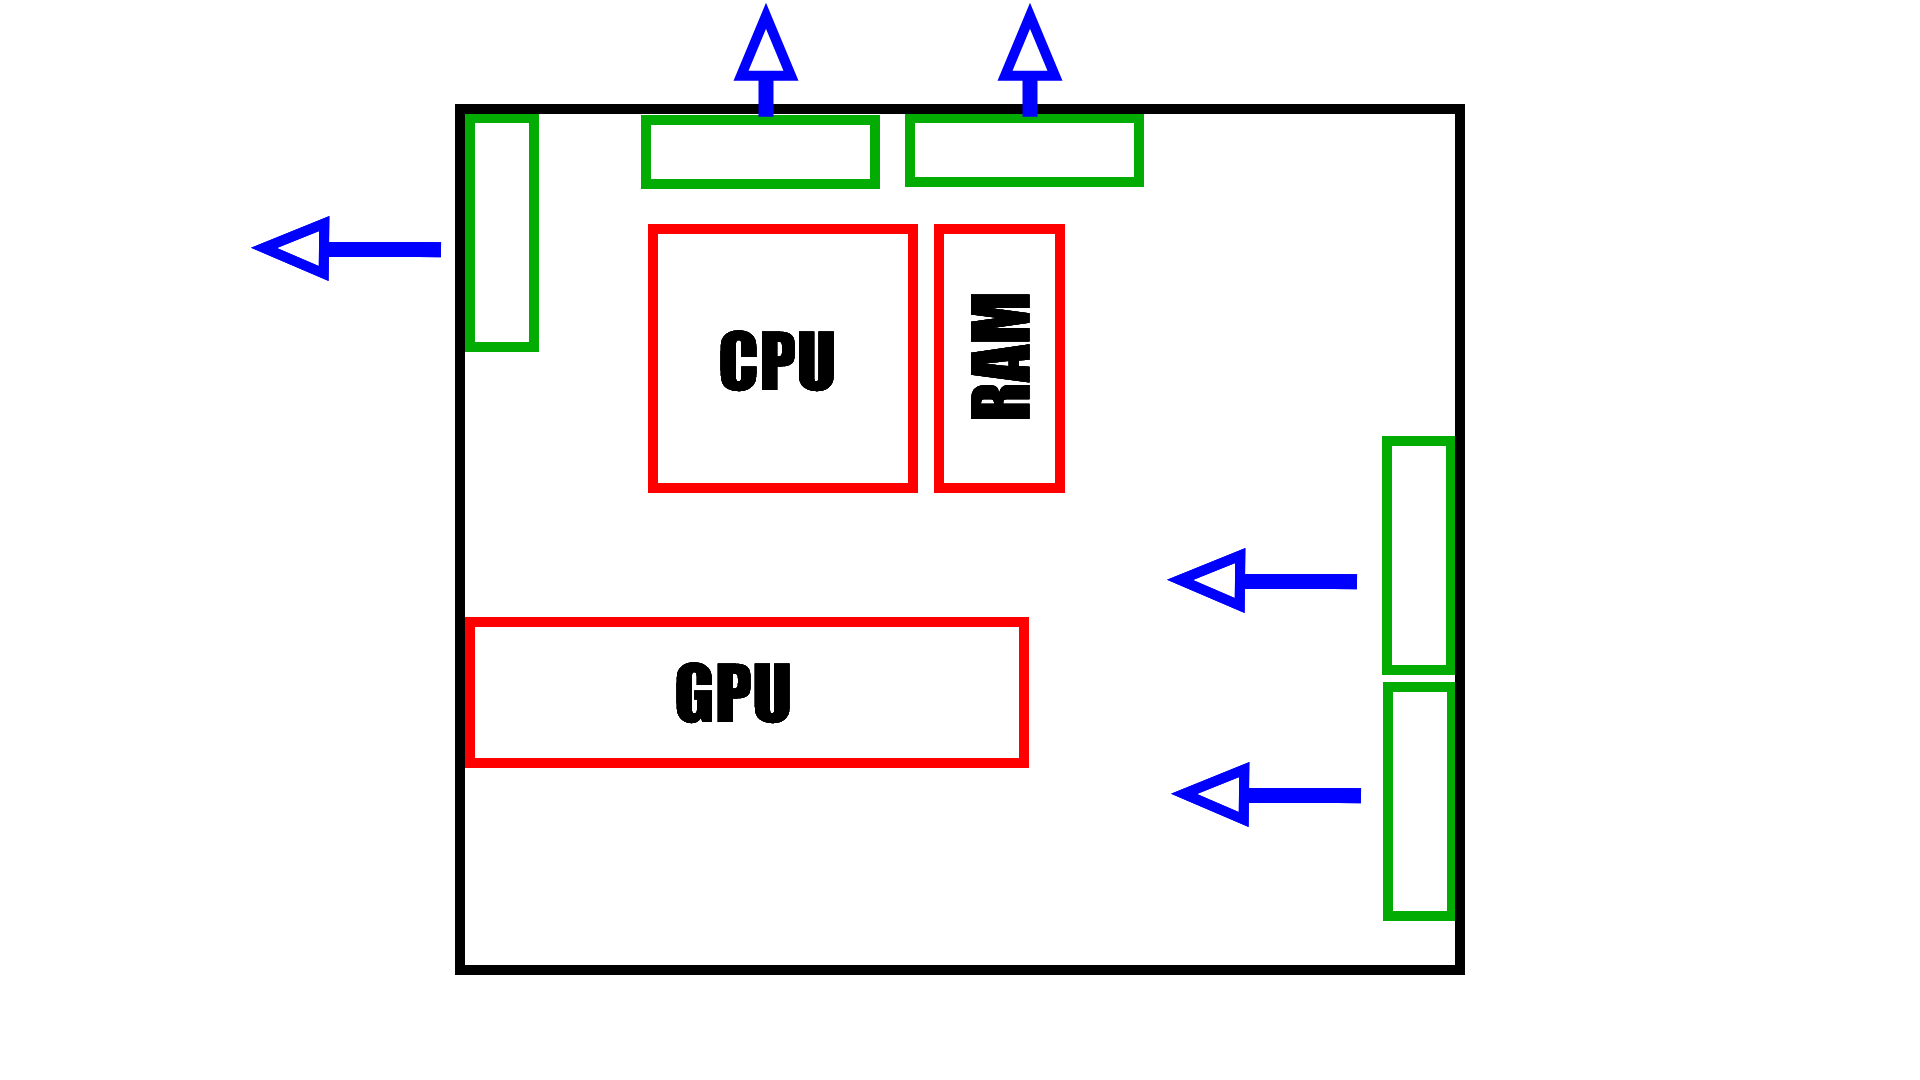
Front, Rear, and Top Configuration: This fan organization is all about drawing the air through the case. It can be less effective than the Front, Rear, Bottom configuration as it lacks the upward push the bottom case fan provides. Given strong enough front fans, this can still be an effective arrangement – again, provided your case front is well ventilated.
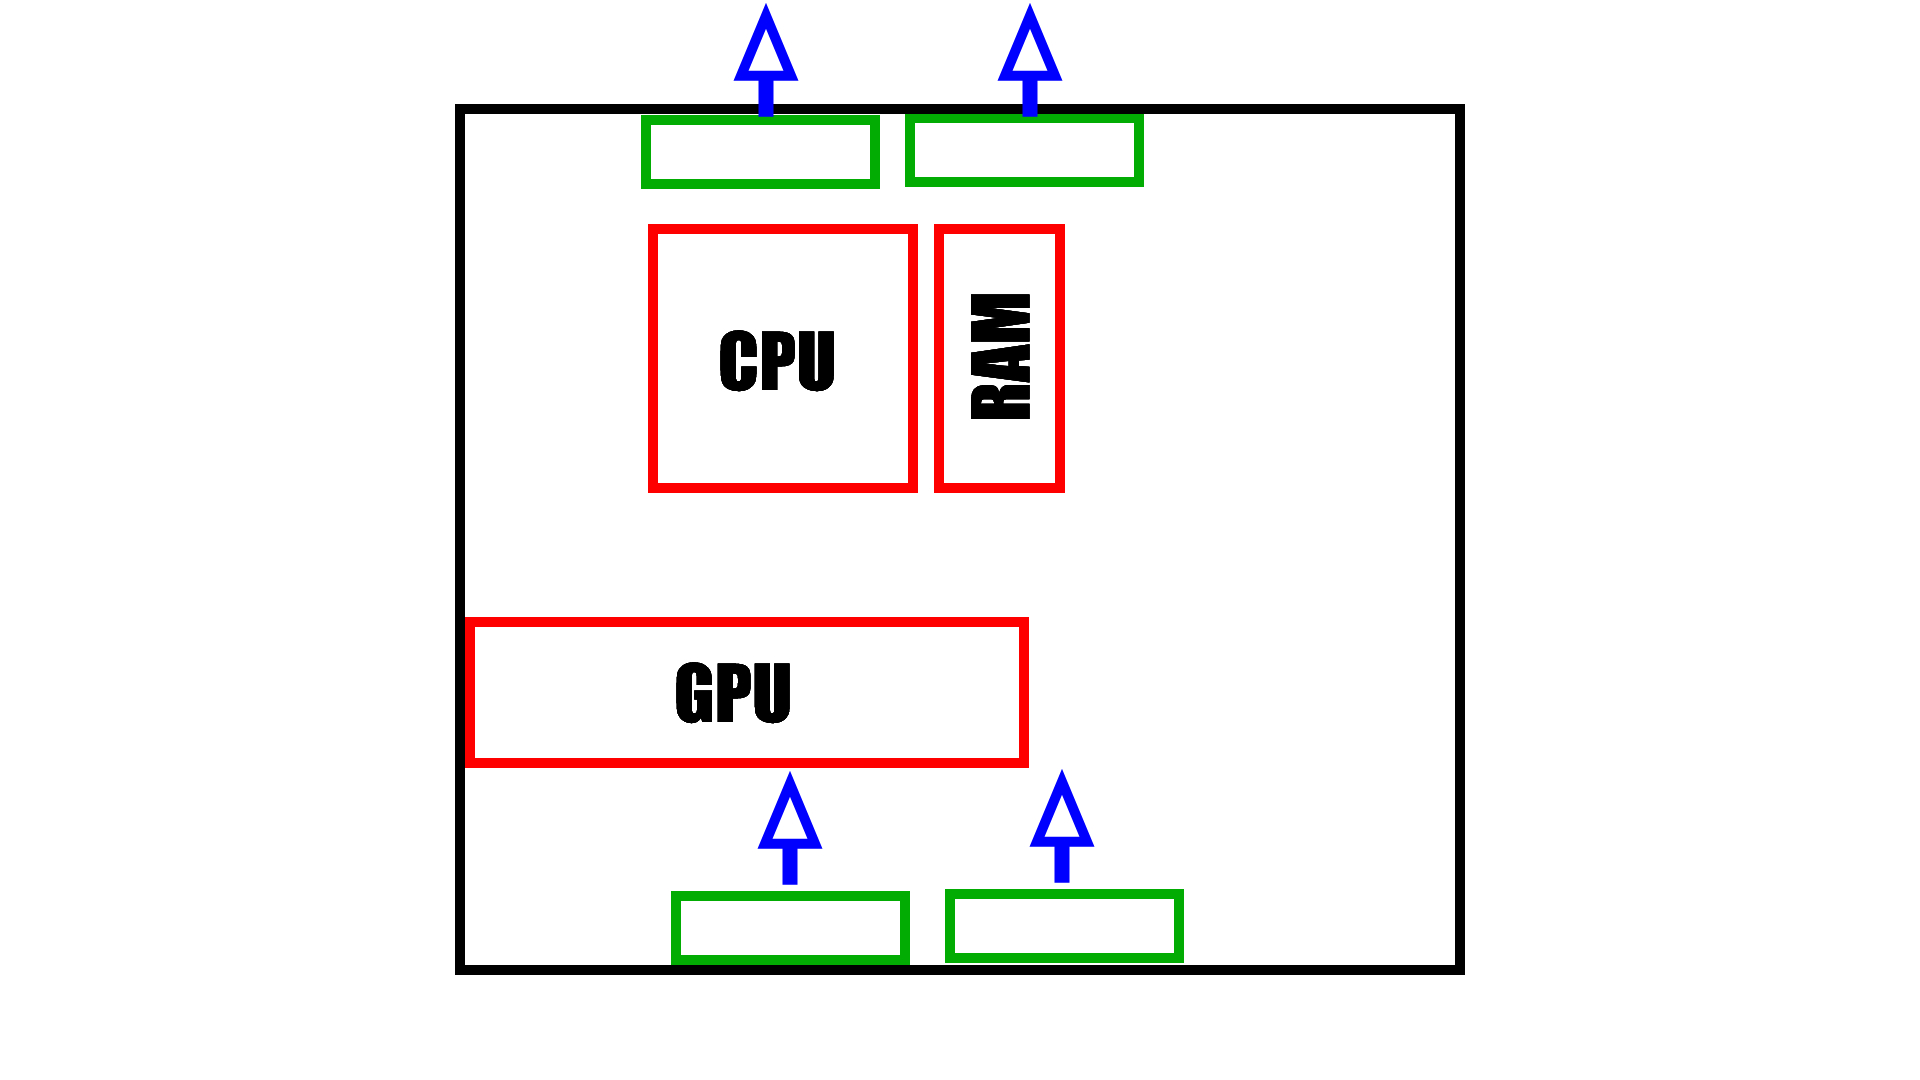
Top and Bottom (Chimney) Configuration: This configuration isn’t especially common these days, but is an option that can work well when mounting front and rear fans isn’t an option. In this arrangement, fans draw in air from below the case and blow it upward, across the motherboard, and exhaust it out of the top of the case. It is best suited for vertical mounted GPUs, as graphics cards plugged directly into the PCIe slot (when the motherboard is mounted in a standard orientation) can block the flow of cool air from reaching the CPU.
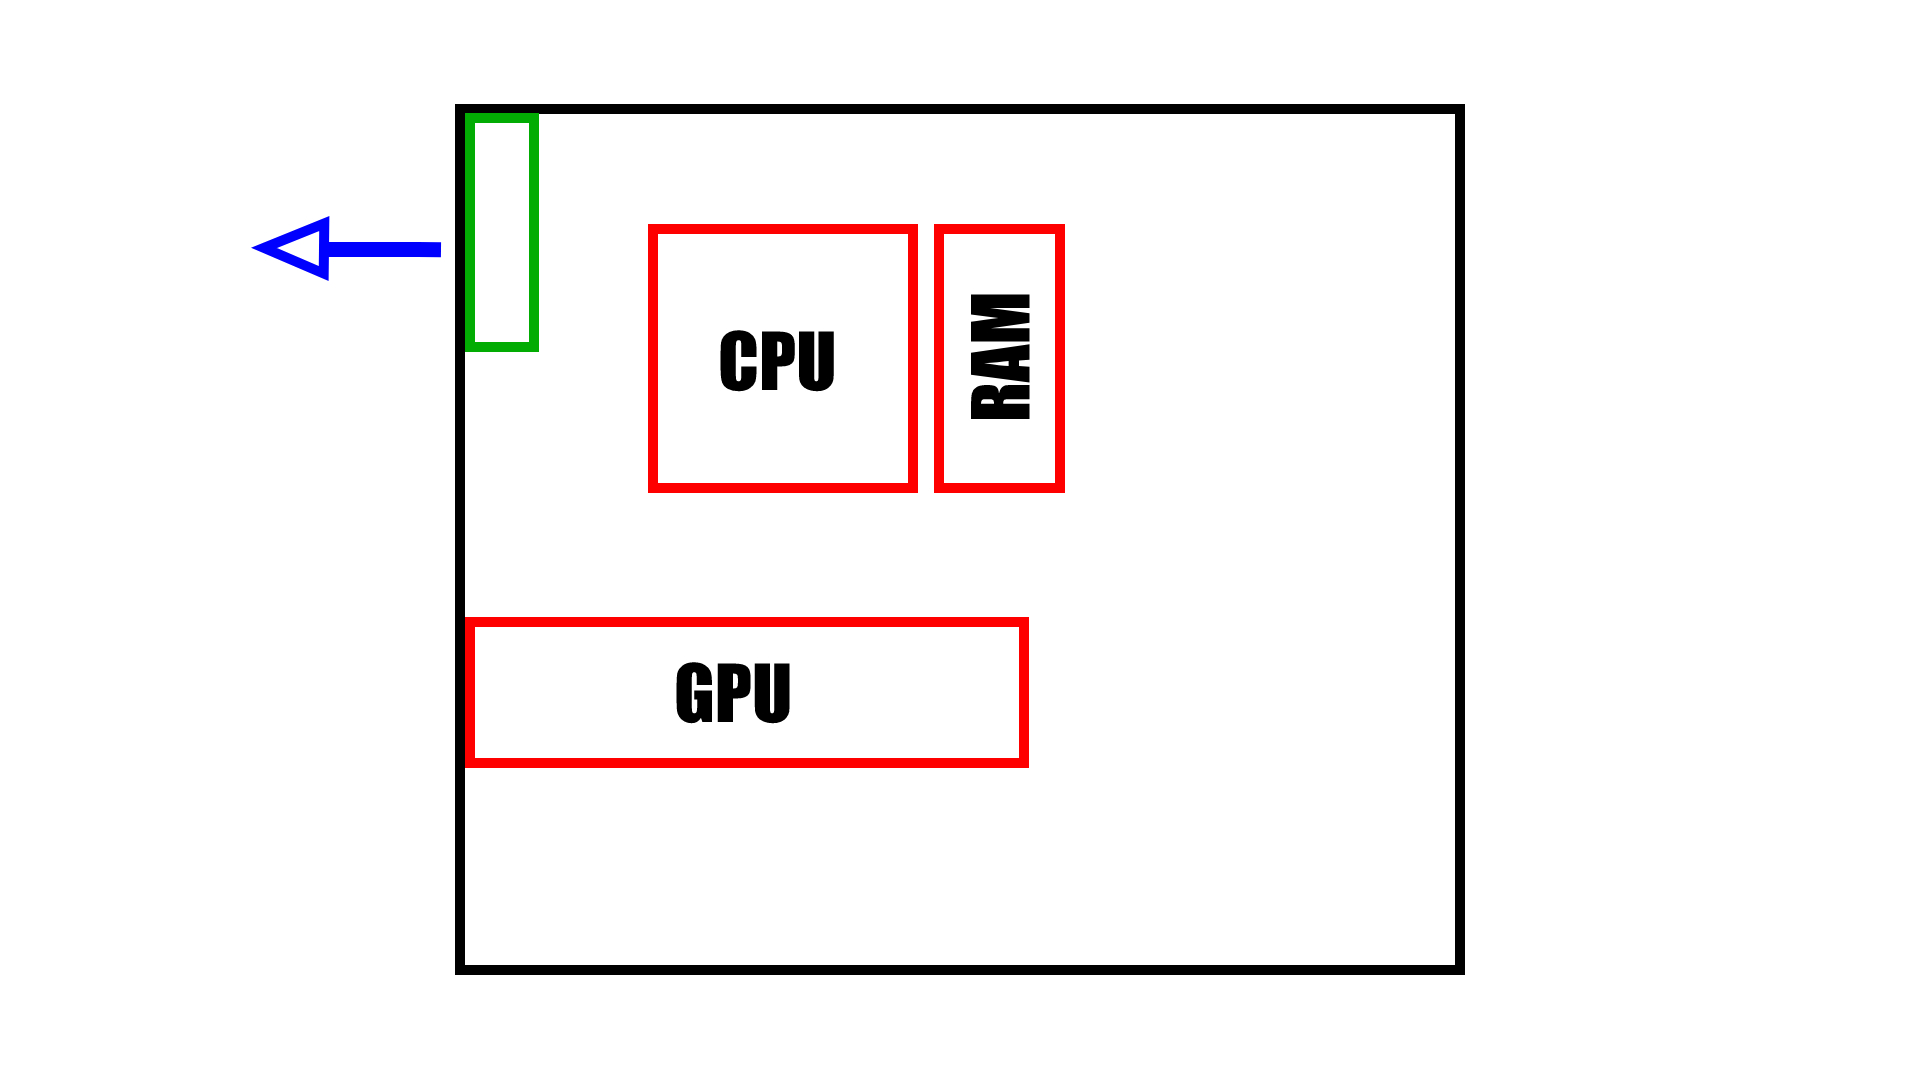
Rear Fan Only: Some PC cases, especially very cheap ones, come with a single fan. And when they have a single fan, it’s usually mounted in the rear exhaust. This is a poor solution and will only work well for low-end components. Without a source of cool air, components quickly become too hot. Air movement is minimal with this setup, so if you can, get another fan or two to mount at the front of the case for intake.
Front Fan Only: This configuration is perhaps the least effective, and is not a good cooling solution. With a single front fan, cool air is drawn in and then stagnates without an exhaust fan to draw it back out. Air temperature increases and that hot air hovers until it naturally rises out of the case.
If you only have two fans, we recommend positioning them in a front, rear configuration. If you have three fans and a dedicated GPU, we recommend placing them in the front, rear, and bottom of your case. With additional fans, consider the arrangement of your components, any wires or structures that might impede airflow, and position your fans accordingly to draw air in from the bottom right (front), flowing to the upper left (rear) of your case.
What About AIOs?
If you’re using an all-in-one CPU cooler, it will come with fans that should be mounted at the position recommended by the manufacturer. These components use special, high static pressure fans to force air through the tight fins of the radiator. There are particular fan arrangements that go along with these coolers, however.
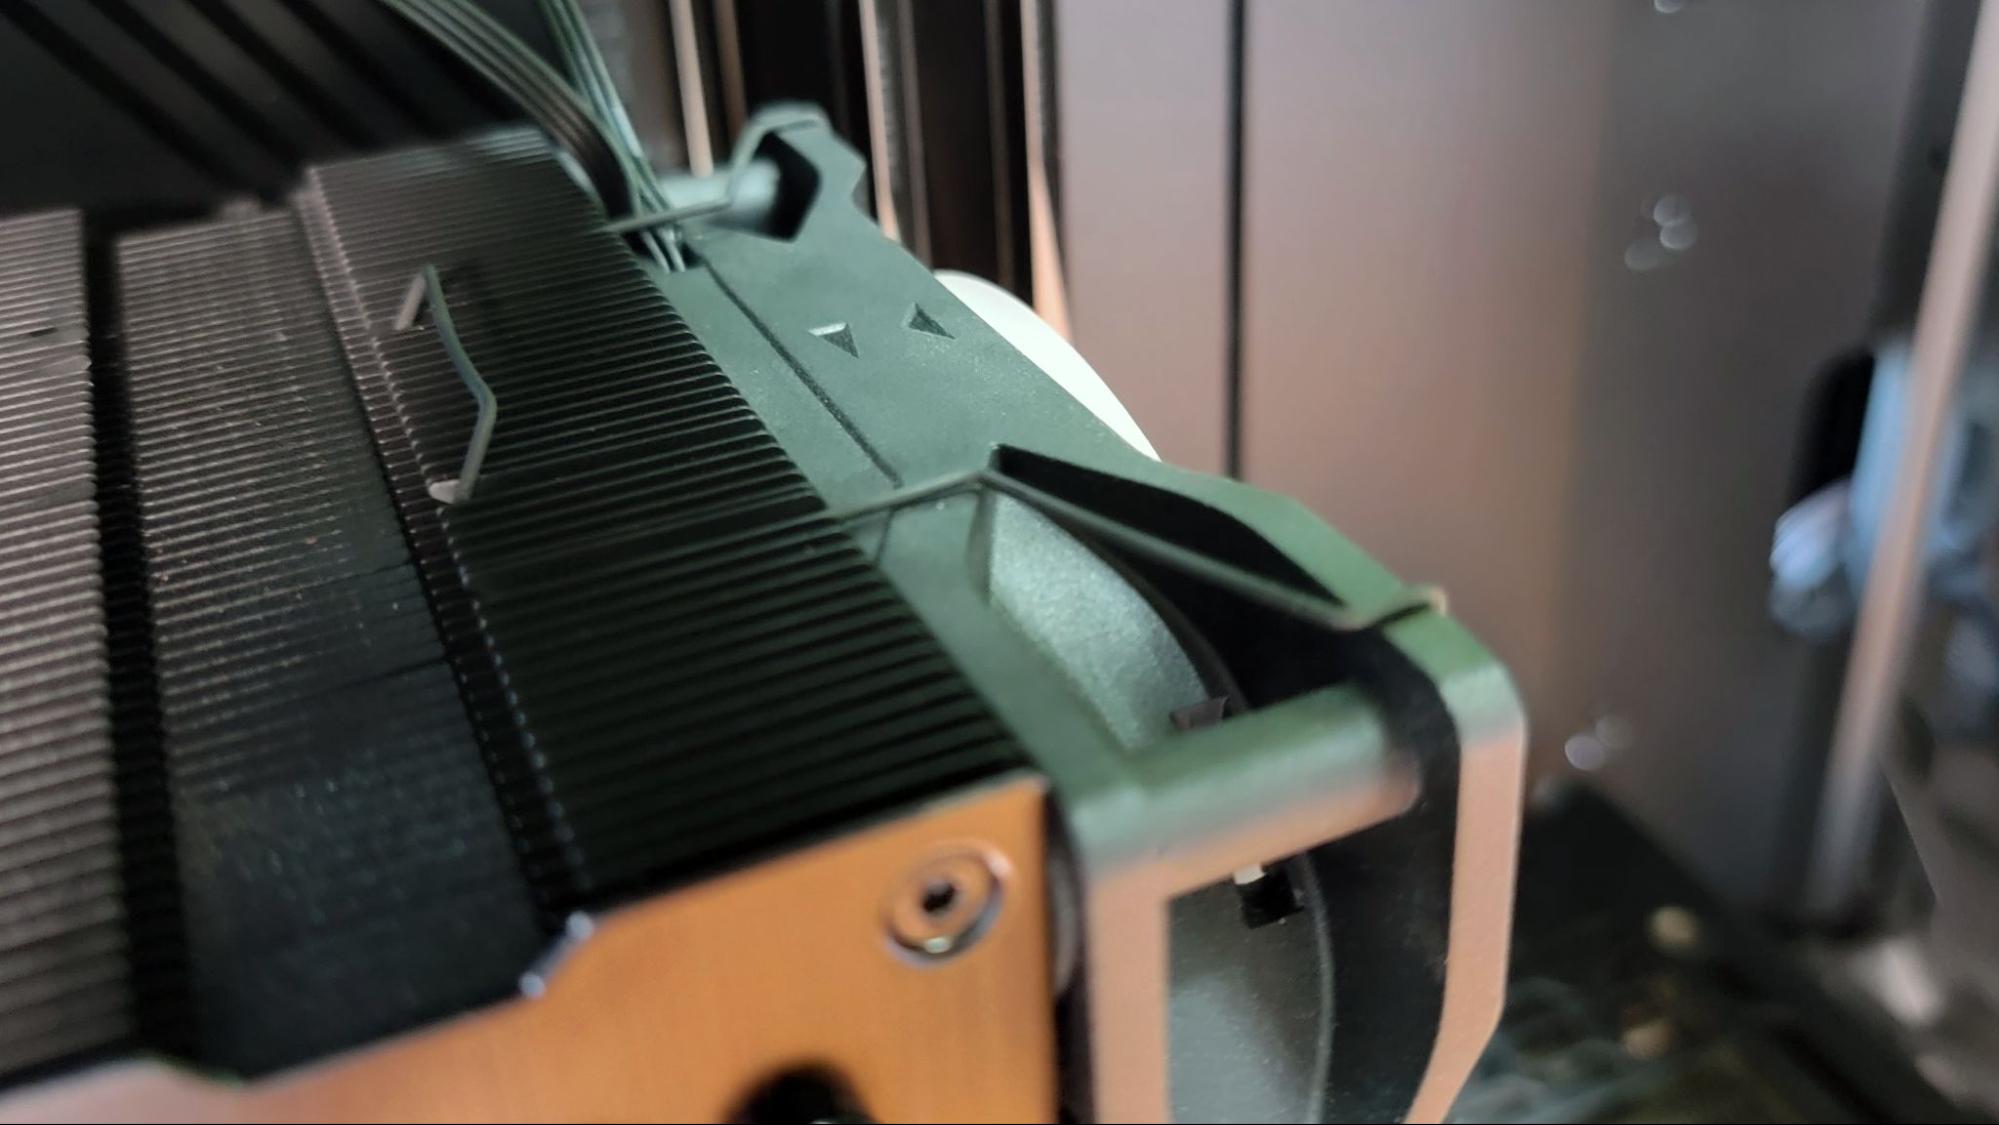
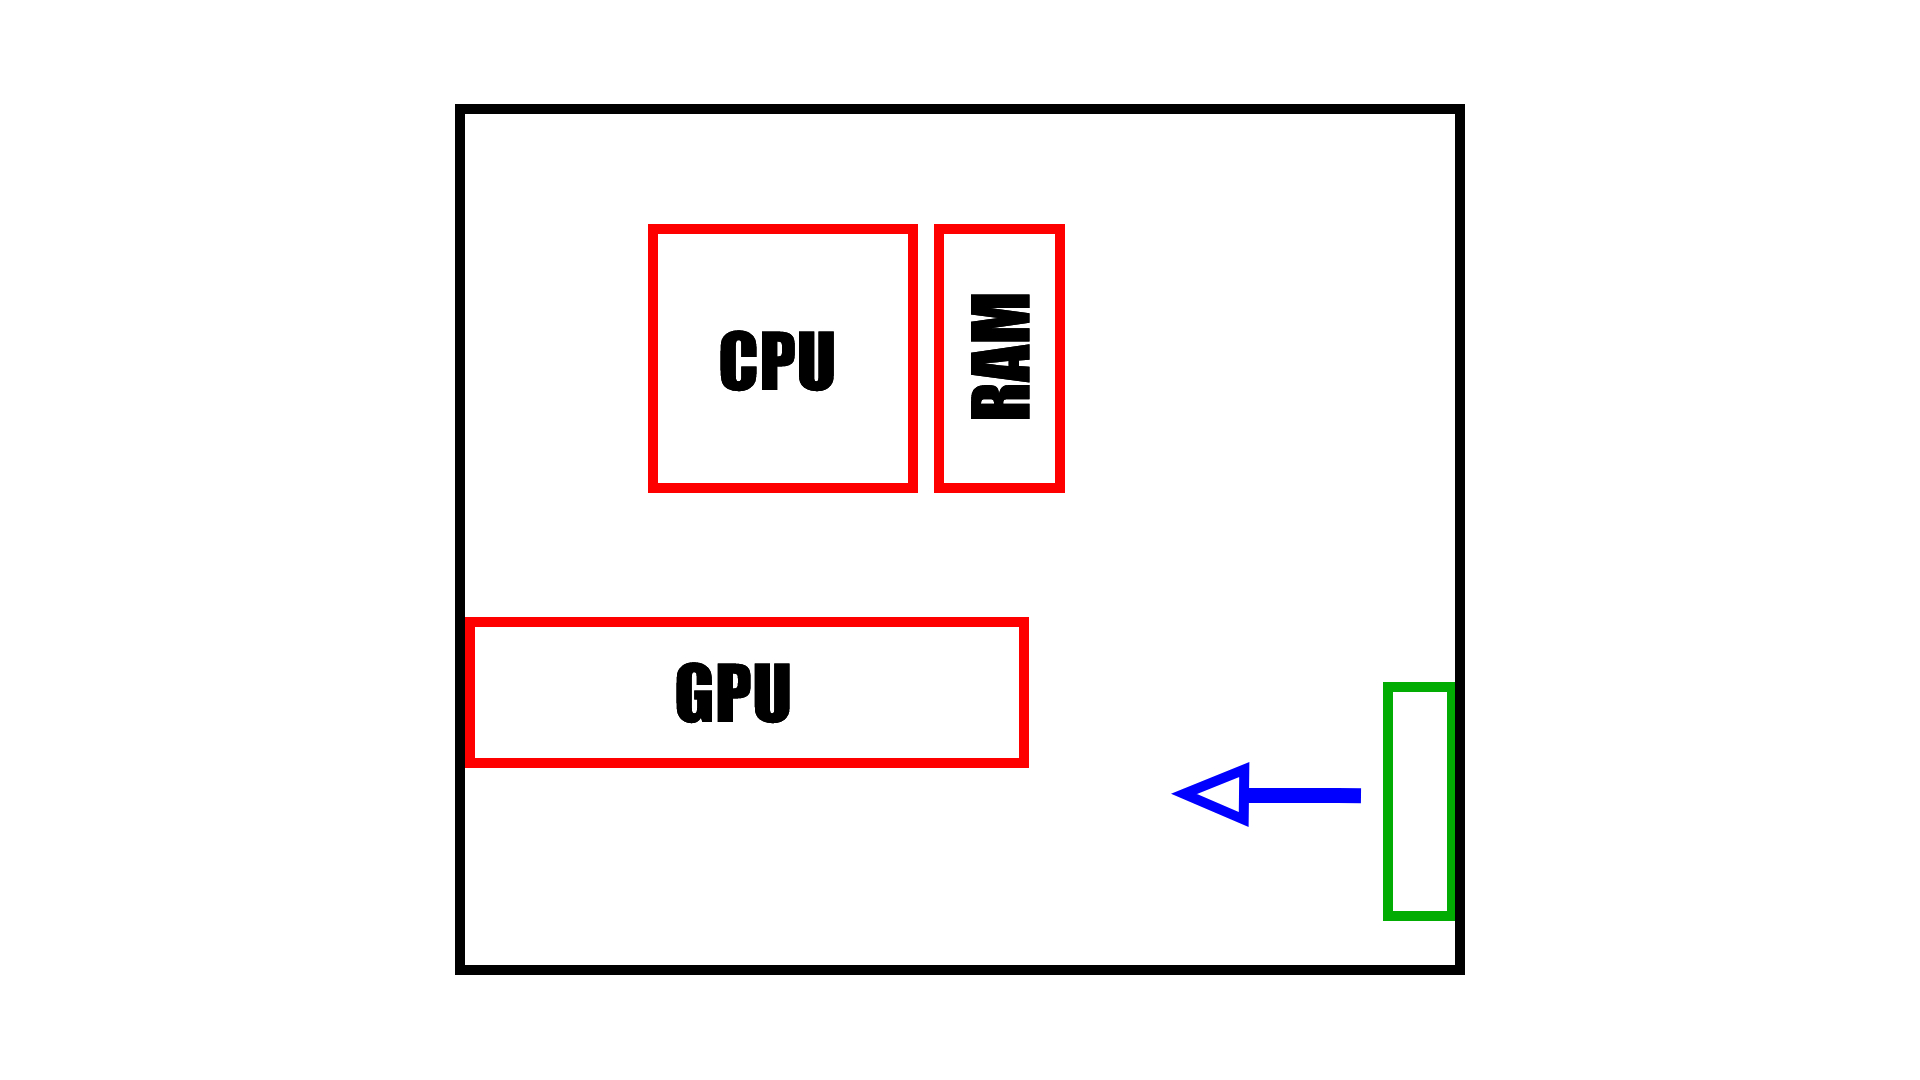
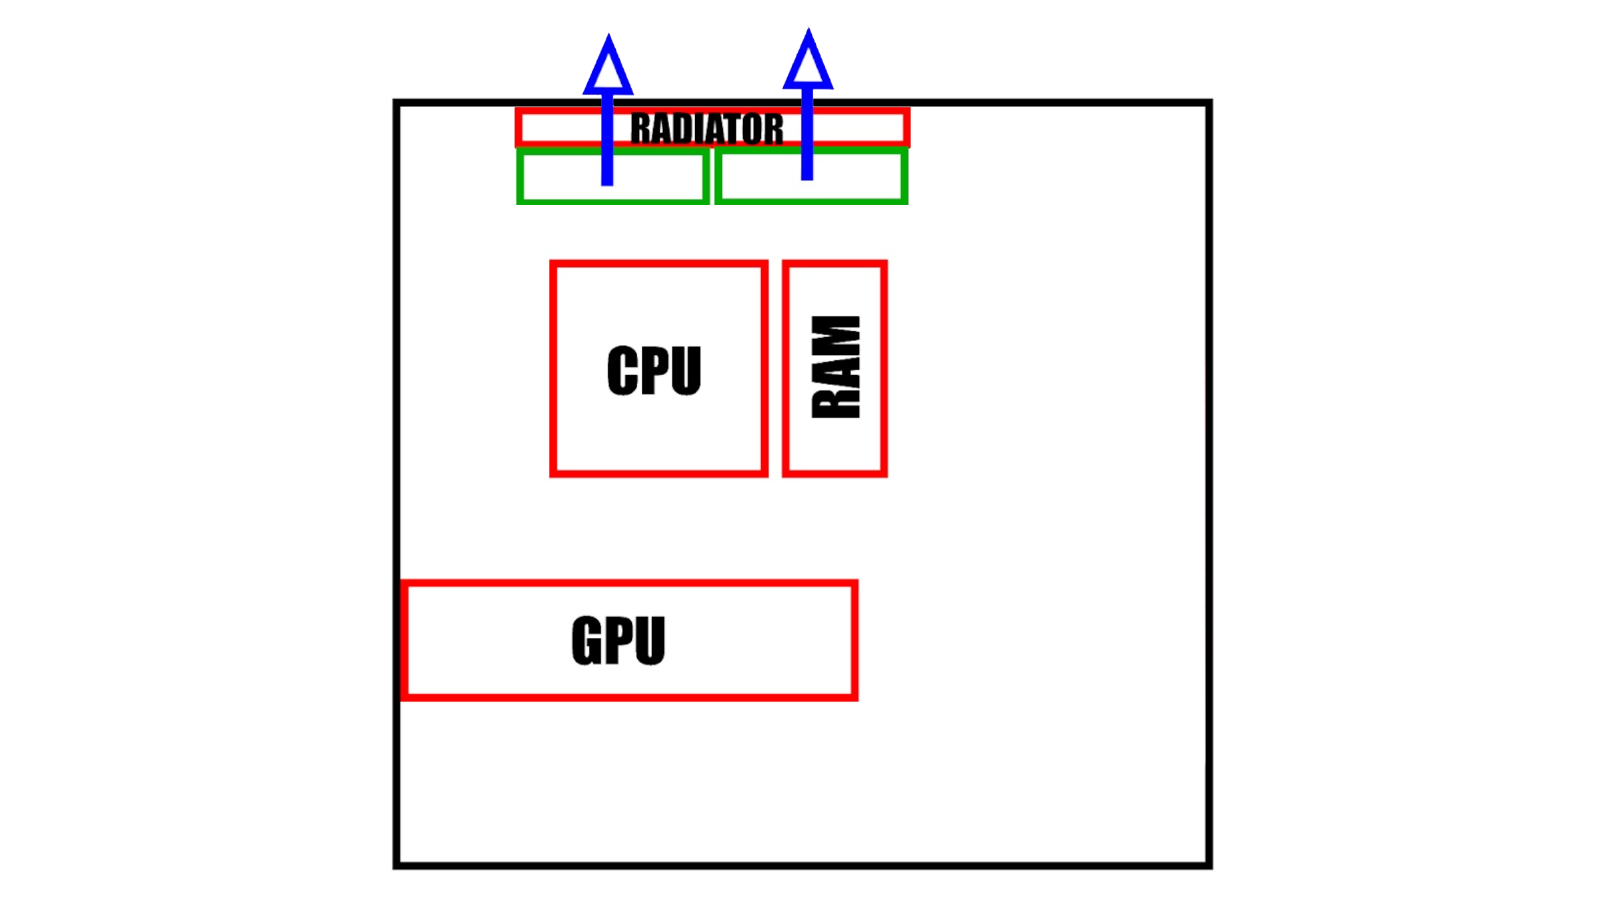
Push: In this arrangement, the fans push air through the radiator. This is the most common configuration and the one manufacturers most often recommend. Depending on whether your case is mounted in the top (as pictured below) or the front of the case, this will either be pushing warm air out through the radiator and out of the case or cool air in through the radiator into the case. Ideally, any air that passes through the hot fins of the radiator will be immediately expelled from the case; however, mounting options and aesthetic needs can sometimes limit this choice.
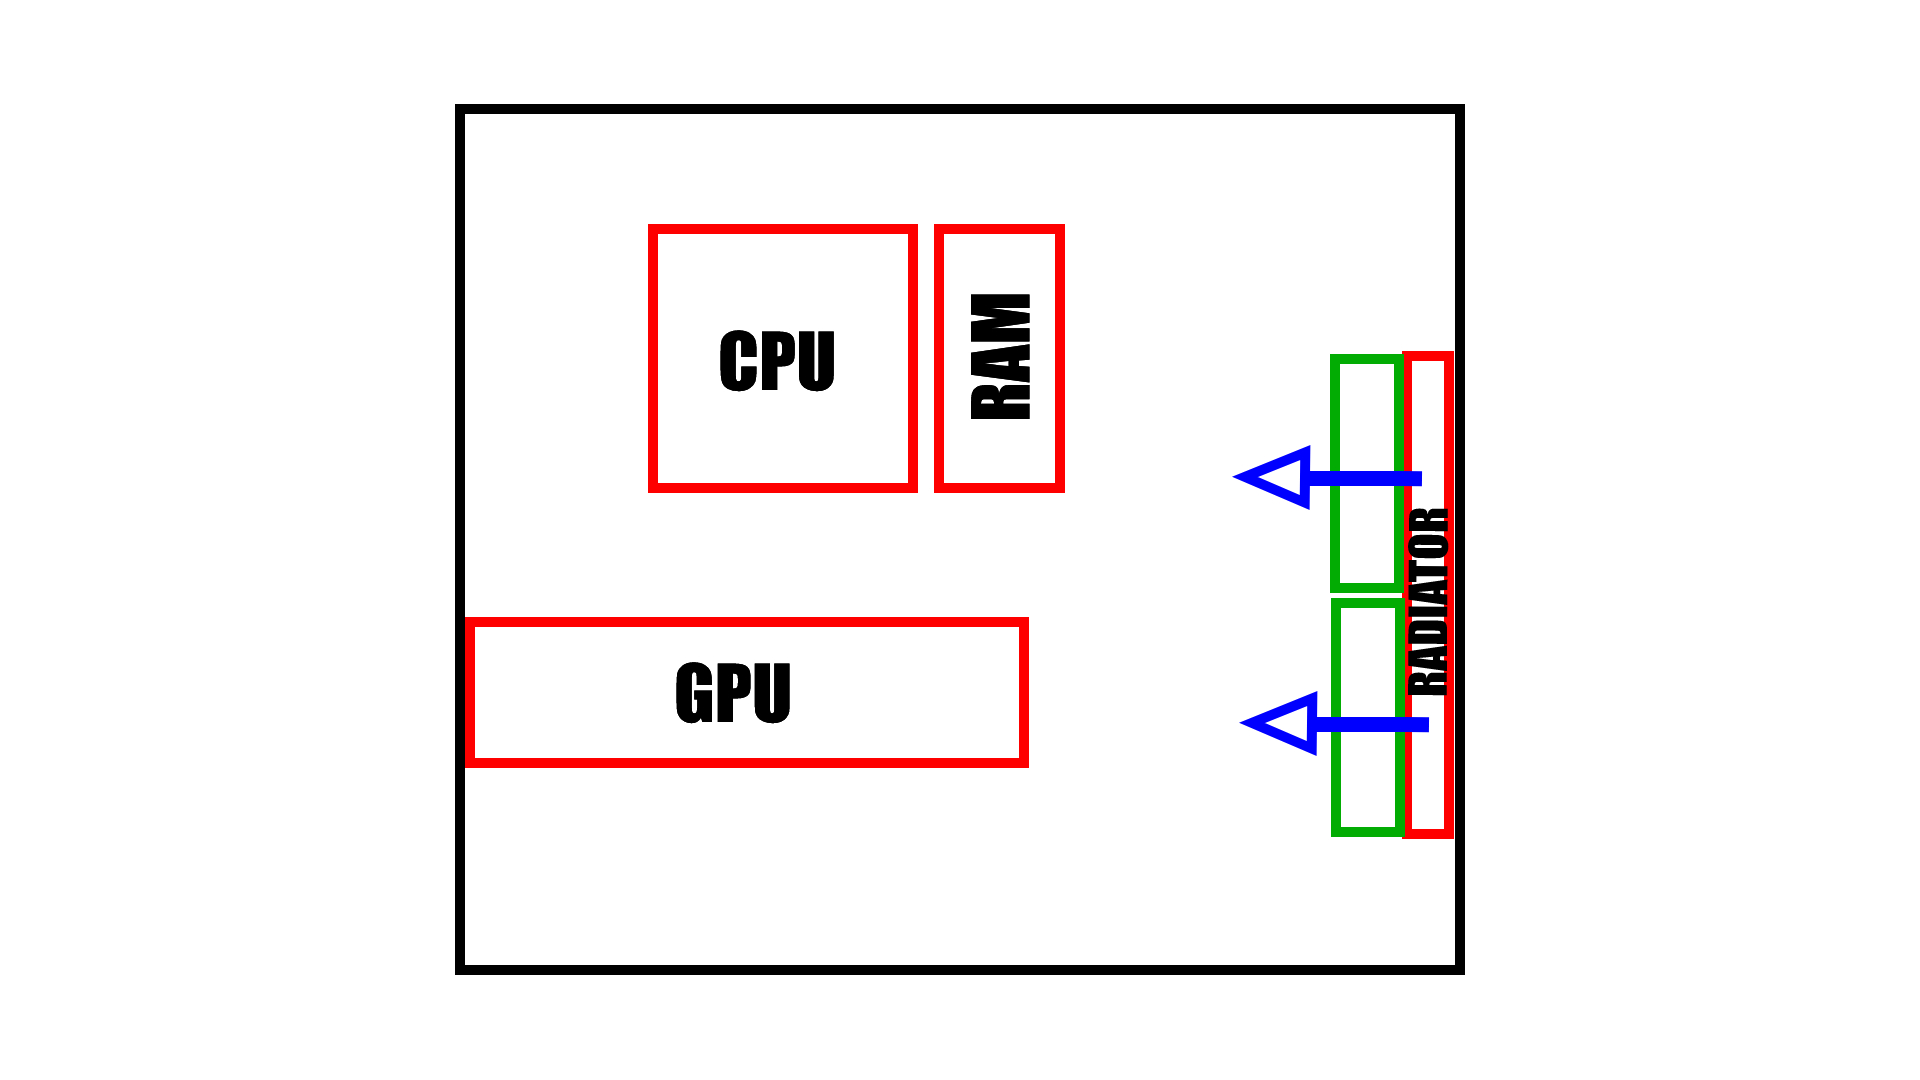
Pull: A pull configuration reverses the fan position to suck air through the fin-stack. It is not as common and generally not as effective as push-oriented fans. The same principles about positioning and expelling warm air apply here.
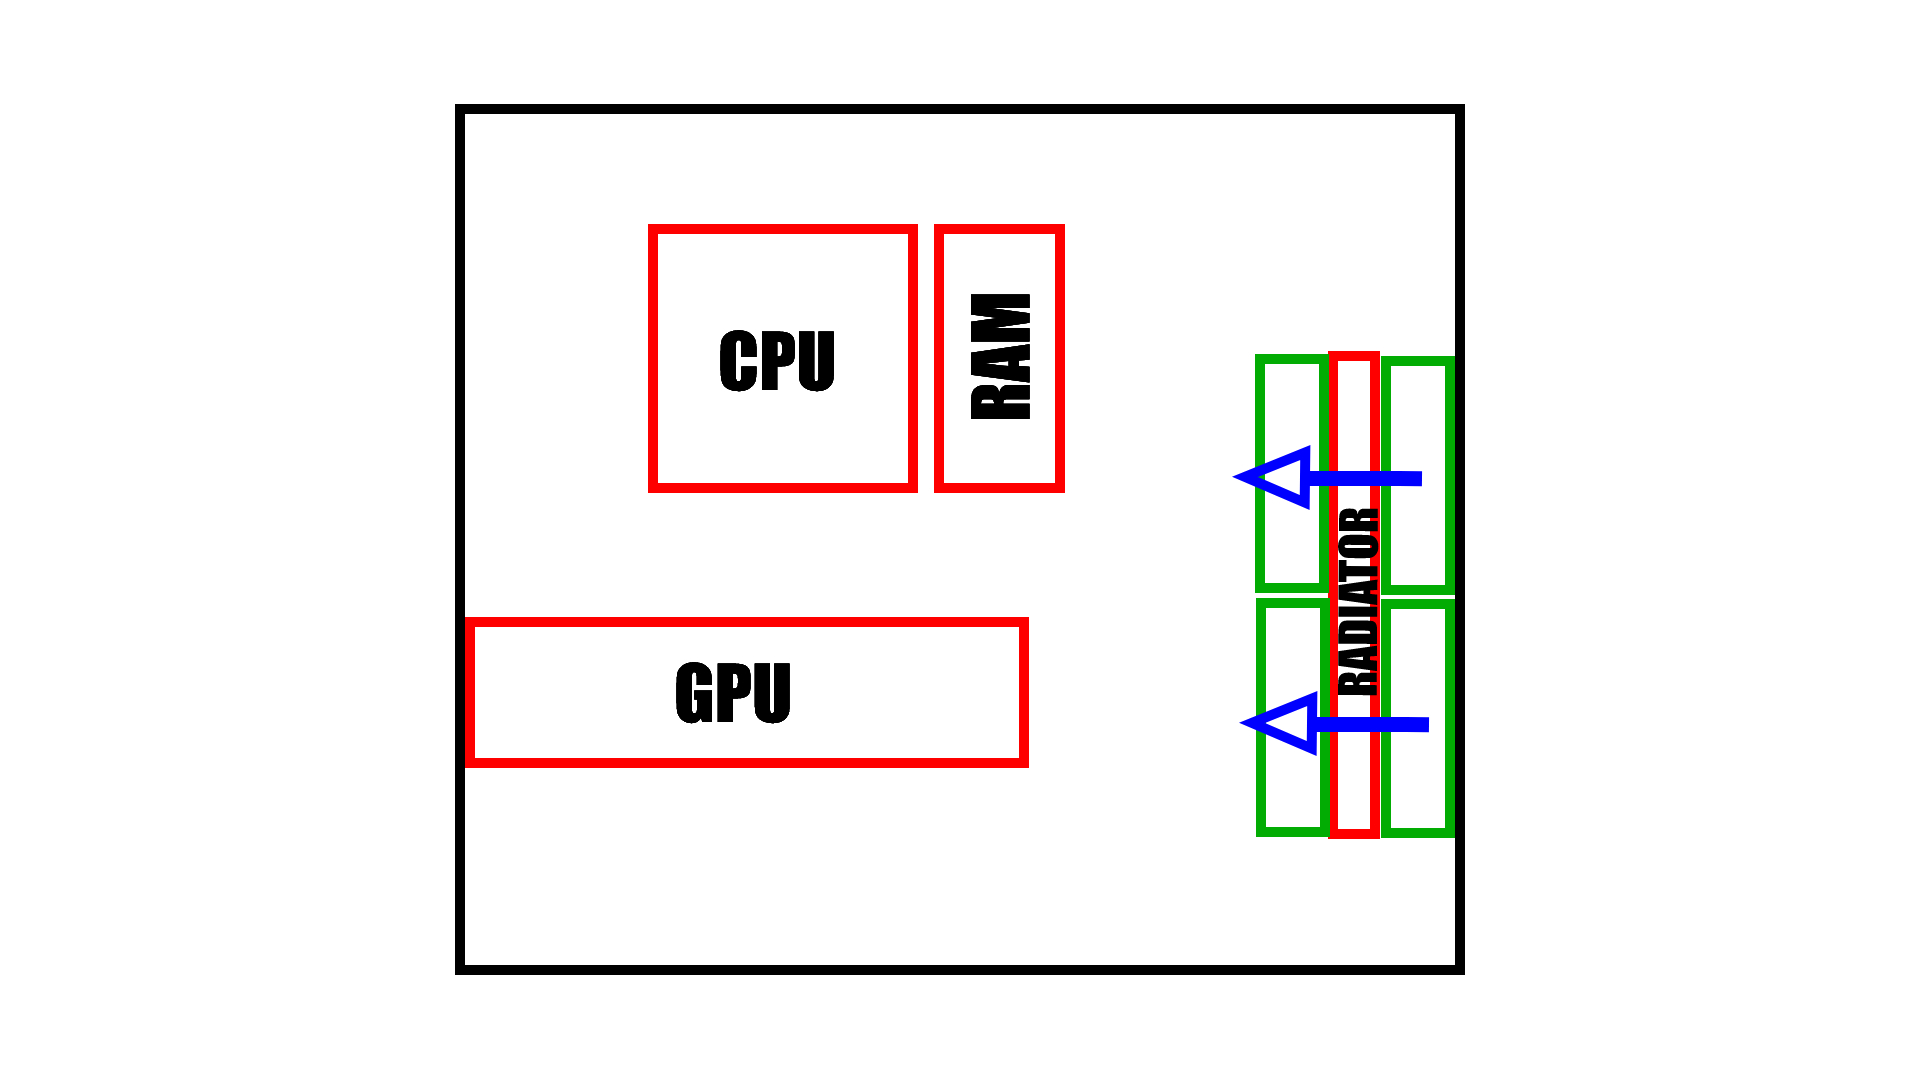
Push-Pull: This is a popular choice that can increase the effectiveness of an all-in-one CPU cooler, but requires additional fans and space within your case. A push-pull configuration uses the AIO’s included fans to push air through the radiator and then one to three additional fans mounted on the other side, also oriented to blow in, pulling the air through. It makes for a bulky radiator but increases its performance overall.
Also note that, when possible, it's best to mount your AIO at the top of your case (or the rear if it's a 120mm AIO) rather than the front. This way, the heat that the AIO moves from your CPU to the radiator gets immediately exhausted out of the case. When a radiator is placed in the front in a pull or push-pull orientation, the cool air from the outside gets warmed by your CPU heat as it travels through the radiator, then into the case and across your other heat-generating components before being exhausted out of the rear and/or top. Obviously, having cooler outside air that hasn't been pre-heated by your CPU is better for keeping your components cool.
Conclusion
Cooling is one of the most important considerations for anyone looking to optimize their PC. With this information, you’re armed to make the best decision for your particular setup. Ensure that your components have cool air and active airflow, choos one of the best CPU coolers that we've tested, and you’ll ensure the best PC performance possible this side of custom water cooling.

Chris is a regular contributor for Tom’s Hardware, covering mechanical keyboards, peripherals, and content creation gear.
-
Soaptrail In my old case i used the front AND top as intake fans, it worked well since my front of my case had too much blocking the flow of air. As long as the rear exhausts the air it works.Reply -
gan14 I just have to ask. Where did you get these crazy ideas from when you wrote this article.Reply
"Pressure" does not build in computer cases full of wholes. Warmer air also doesn't have time to "travel upwards" in a case where it is ejected in a few milliseconds. If warm air traveled upwards at the speed you think it does, buzzards using updrafts would be ejected into the stratosphere. If you did some tests instead of making MS Paint images, you could have figured those things out by yourself. -
TR909 For the AIO - putting your AIO in pull configuration gets the best cooling for the CPU, in the expense of some higher temps for the GPU - in Push configuration the radiator (being at the top) is fed with hot air coming from CPU, GPU, etc. so not ideal and not really convinced that manufacturers propose this as the 'best case'.Reply -
Matt_ogu812 "...............time you are taking off your side panel to do something inside your system, be sure the system is powered down and unplugged."Reply
So sad to have to tell people common sense things like this. -
lmcnabney Water cooling systems moving into the case has been a baffling move. When they first gained popularity the water lines would EXIT the case so that the radiator for the CPU's heat did its thing outside of the case. That way the entire case ventilation can be designed to cool the GPU/chipset/RAM without having to worry about the CPU. By having the radiator inside of the case it is either going to be dissipating CPU heat out of the case using pre-heated case air or be more effective cooling the CPU by bringing in external air, but then dumping all of that heat right into the case to make life hard on the GPU. The only good solution is to watercool both the CPU and GPU and blow the radiator(s) out of the case. That way the two big heat generators are having their heat ejected.Reply -
wmeyer Odd notions in the article with respect to "ideal" configurations. As this is supposed to be a technical discussion, I will assume that all can deal with terms like "eddy currents."Reply
Q: Given a pipe, will it be better to blow air in, or suck it out? A: Assuming the pipe is a simple shape, it won't make much difference. What goes in must come out.
Add some elbows, say three 90 degree turns, and the situation changes. It will be somewhat better to exhaust than to blow in. The reason is that pressurized air hitting the sharp turns will set up eddy currents and these will impede the flow. With an exhaust fan, the air seeks the easiest flow path, and the relative efficiency increases.
Consider then a PC. Multiple intake ports and exhaust ports. Numerous internal obstructions. Exhausting the air will be more efficient. It will also be quieter. Besides the obvious ports, most cases will have leaky gaps through which air may also flow.
A terrible example would be to blow air in through the front of the case where it immediately hits disk drives or other structural obstacles. Those will always create eddy currents.
A simple way to test things is to use smoke. You can purchase smoke tubes, or simply use a lighted cigarette. Moving the smoke source to the vicinity of an intake port you can see how well the air flows. At what distance does the flow cease to deflect the smoke?
Many years ago, Pamotor, a fan manufacturer, offered application notes on how to make cooling most efficient. These days, such references are more difficult to find. -
Greg7579 Reply
The author is correct in the way he described this in the very good article. There are nuances and every case is a bit different, but the best way to design airflow in a PC is the way he described it.gan14 said:I just have to ask. Where did you get these crazy ideas from when you wrote this article.
"Pressure" does not build in computer cases full of wholes. Warmer air also doesn't have time to "travel upwards" in a case where it is ejected in a few milliseconds. If warm air traveled upwards at the speed you think it does, buzzards using updrafts would be ejected into the stratosphere. If you did some tests instead of making MS Paint images, you could have figured those things out by yourself.
I've had this discussion with fellow PC builders several times in the past and there are arguments about how best to design the flow, but in my opinion the author nailed it.
I study high end builds constantly and am amazed at the way some serious enthusiasts place their fans.
The bottom line is if you have a lot of fans in a good case and use an AIO, it is going to cool pretty well even if you screw up the air flow. I just can't imagine why a few of my fellow PC building enthusiasts push hot air into the case through the radiator. I just saw a high-end build that did that....
I think the article is really good and teaches the basics very well. I think he should have mentioned the fan on the PSU because I see a lot of upside-down PSUs for various reasons. In fact, I just built one that way! LOL. -
Greg7579 Replywmeyer said:Odd notions in the article with respect to "ideal" configurations. As this is supposed to be a technical discussion, I will assume that all can deal with terms like "eddy currents."
Q: Given a pipe, will it be better to blow air in, or suck it out? A: Assuming the pipe is a simple shape, it won't make much difference. What goes in must come out.
Add some elbows, say three 90 degree turns, and the situation changes. It will be somewhat better to exhaust than to blow in. The reason is that pressurized air hitting the sharp turns will set up eddy currents and these will impede the flow. With an exhaust fan, the air seeks the easiest flow path, and the relative efficiency increases.
Consider then a PC. Multiple intake ports and exhaust ports. Numerous internal obstructions. Exhausting the air will be more efficient. It will also be quieter. Besides the obvious ports, most cases will have leaky gaps through which air may also flow.
A terrible example would be to blow air in through the front of the case where it immediately hits disk drives or other structural obstacles. Those will always create eddy currents.
A simple way to test things is to use smoke. You can purchase smoke tubes, or simply use a lighted cigarette. Moving the smoke source to the vicinity of an intake port you can see how well the air flows. At what distance does the flow cease to deflect the smoke?
Many years ago, Pamotor, a fan manufacturer, offered application notes on how to make cooling most efficient. These days, such references are more difficult to find.
Disagree on your "blow air through the front" comment. I would probably never exhaust out the front unless I had a radiatir there. I suck in with three big fans in the front and exhaust out the back and through the AIO on the top. I suck in from the front and bottom every time. But I build with expensive cases with good filters. I like pos pressure in the case to force air out through the tiny unfiltered spaces to keep it cleaner. All air coming in via fans is through a filter. -
Greg7579 Reply
I have had this argument many times and I think you are wrong. I have never understood the argument. Never suck air into the case through a hot radiator. Never.TR909 said:For the AIO - putting your AIO in pull configuration gets the best cooling for the CPU, in the expense of some higher temps for the GPU - in Push configuration the radiator (being at the top) is fed with hot air coming from CPU, GPU, etc. so not ideal and not really convinced that manufacturers propose this as the 'best case'.
The author is correct. (Maybe I misunderstood you.) -
newtechldtech ReplyGreg7579 said:I have had this argument many times and I think you are wrong. I have never understood the argument. Never suck air into the case through a hot radiator. Never.
The author is correct. (Maybe I misunderstood you.)
sadly the author and many of the people never use wind tunnels with AIO in which sucking the air into the case is the best but then wind tunnel them to the near top fans.
Sadly all what people do here is standard Mounting without any ANY innovation.
the best cooling is rad to the front taking in air and then wind tunnel to the nearest top fan front) and and optional rad at the top optional )
