How to Stream PC Games to Twitch
Get started broadcasting to Twitch from your PC
Game streaming to Twitch on a PC is much simpler than with a console, because, if you have the right hardware, you can play the game, broadcast and run your chat from the same computer. Below, we’ll explain what you need and how to get started streaming PC games to Twitch.
What You Need to Stream PC Games to Twitch
- A capable PC: Though the recommended specs will vary, based on the game and settings you wish to play at. We recommend that you use a system with at least a 6-core CPU (e.g. Ryzen 5 1600 or Core i5-8400 or better), 16GB RAM, and a graphics card from the past two generations (RX 570 or GTX 1060 or better). While playing League of Legends doesn’t require a lot of high-end specs on a PC, streaming needs more horsepower. Using GPU assisted encoding can help a lot, and Nvidia's most recent Turing architecture GPUs (GTX 1650 Super or above) can beat CPU encoding quality with very little performance hit.
- Your PC should also exceed the minimum specs for any game you want to play and stream. Check Can You Run It or Google to find the minimum and recommended system requirements, and ideally, you want to meet the recommended specs.
- Multiple monitors: It’s hard to play a game and view chat on one monitor. For the most comfortable and efficient stream, two monitors at a minimum are necessary. Use one for your full-screen game, the second for your chat, and alerts. If you have a third display, that can monitor your recording software.
- Headset: The best gaming headsets offer great quality audio for gaming and also have some noise-canceling abilities for chat.
- Microphone (optional): Though any old headset mic will do, one of the best gaming microphones will give you better audio quality.
- Webcam: In order for your audience to see your reactions, you’ll need a camera, preferably one of the best webcams. However, many of the top models have been in high demand during this pandemic.
- OBS Studio Software: This is a free download.
Setting Up to Stream PC Games to Twitch
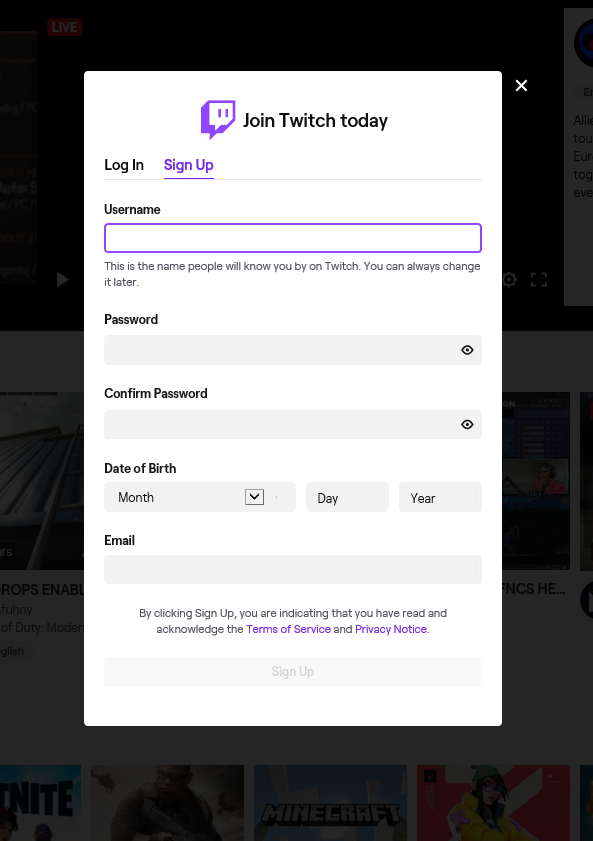
1. Create a Twitch.tv account. Navigate to over Twitch.tv and set up a login. If you have Amazon Prime, you can link it to Twitch. Doing so ensures free perks like games and in-game loot boxes.
2. Download and install OBS.
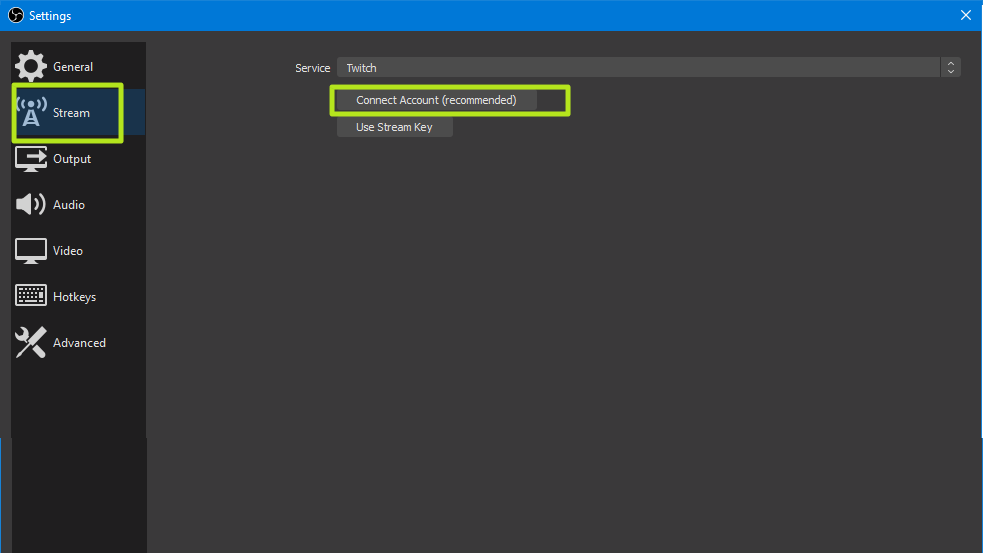
3. Connect OBS to your Twitch channel by navigating to File - Settings - Stream - Connect Account.
You can also connect by copying and pasting the stream key into OBS. The stream key is in your channel's Preferences menu.
4. Create an overlay in StreamElements, the graphical template that will go on top of your Twitch stream. OBS gives you a lot of freedom in building your stream overlay. Overlay building websites like StreamElements and StreamLabs integrate seamlessly with OBS.
5. Click the link button in StreamElements, after you’ve completed making your overlay.
Get Tom's Hardware's best news and in-depth reviews, straight to your inbox.
You will now see the link is copied to your clipboard in the lower right-hand corner.
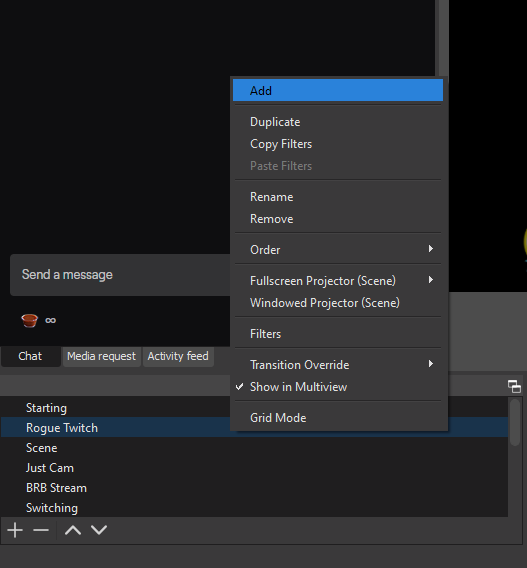
6. Right-click on Scenes in the lower-left corner of OBS and select Add.
7. Name your new scene Overlay and hit Ok.
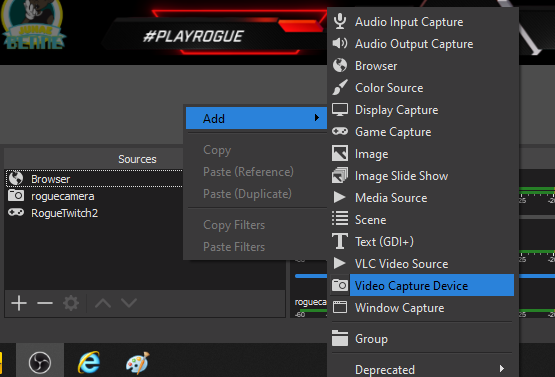
Add the overlay from StreamElements by right-clicking in Sources and selecting Add -> Browser and then pasting in the URL you copied from StreamElements. Resize the width and the height to the same dimensions as your overlay and click OK.
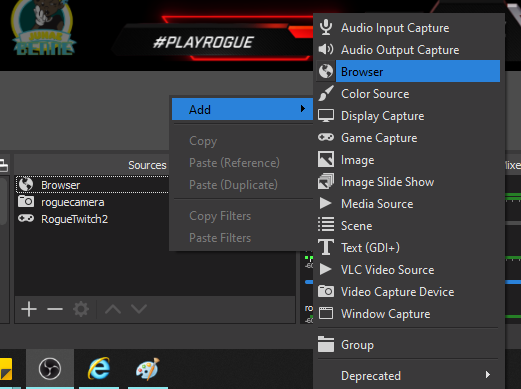
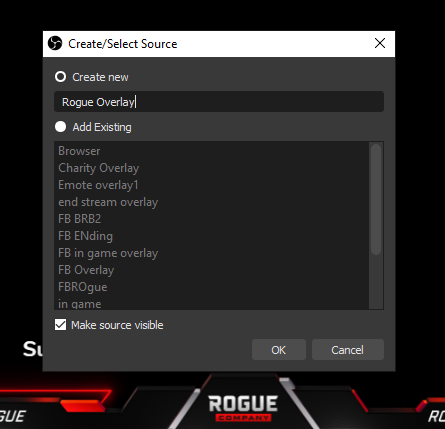
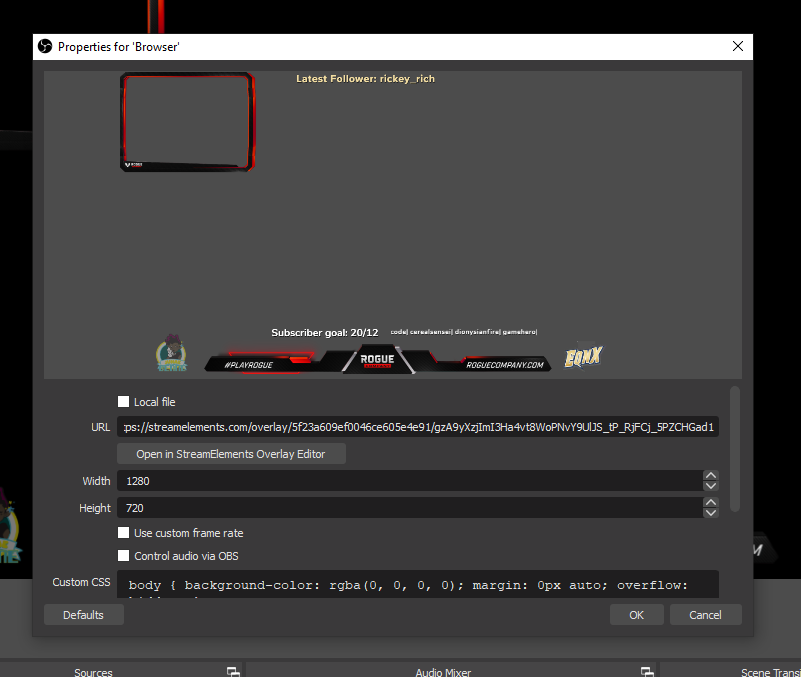
You’ll now see your overlay. Whether you’re building an overlay yourself or importing it from StreamElements, adding the process is the same, right-clicking Scenes, and adding an image, video, gifs, or text. If you’d like to solely add your stream alerts because you’re building your overlay on your own, add the alerts’ URL to Browser. It will go invisible because it activates when someone follows, subscribes, or hosts you.
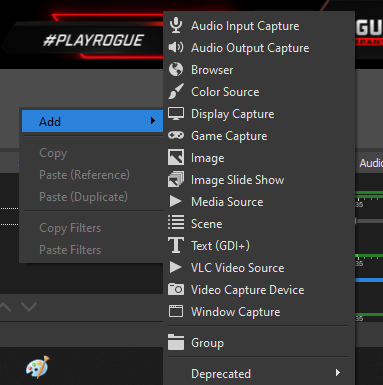
8. Add your webcam as a media source. Right-click on Sources and select Add -> Video Capture Device.
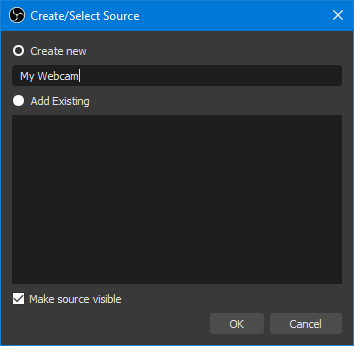
9. Select “Create new” and give your camera a name.
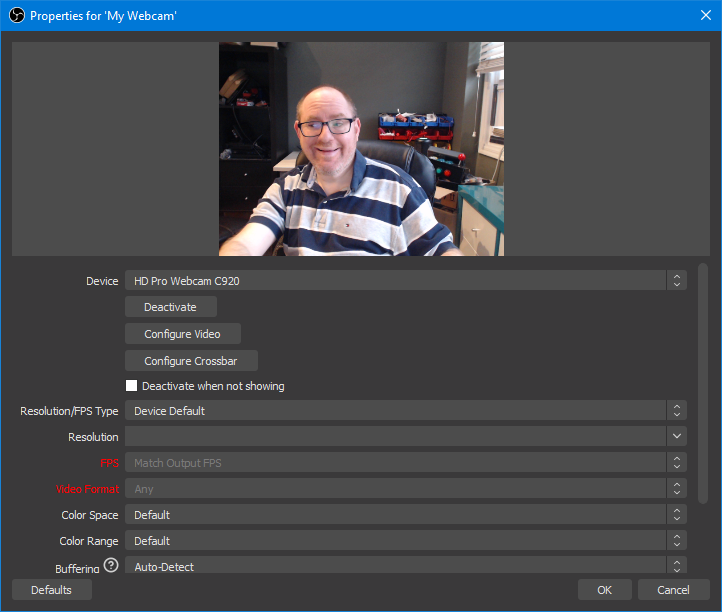
You’ll then get a list of settings for your camera and a preview. You can adjust these and then click Ok.
A great addition to a webcam is lighting. It’s essential to have lighting to highlight your features. Standing lightboxes, a ring light, or any type of lighting increases your production value. It helps your camera to function at it’s highest capability.
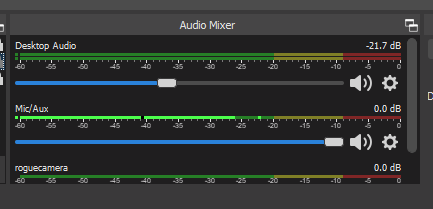
10. Add your microphone if you have one. A stand-alone microphone is a good investment for a streaming career. It allows a better sound quality output and a polished look. Having a mic leaves your headset free for party chats on your console. Adding a microphone to OBS is easy because it recognizes the mic and will create a channel for it under Audio Mixer. It does the same thing when it recognizes the Desktop audio is available.
If there is more audio you’d like to capture, you can manually add it in Sources by right-clicking- Add- Audio Input or Output Capture.
11. Broadcast your game by right-clicking Sources and selecting Game Capture -> Full-Screen Application. There will be a list of applications; click the game you’re playing. In this case, the game is Rogue Company.

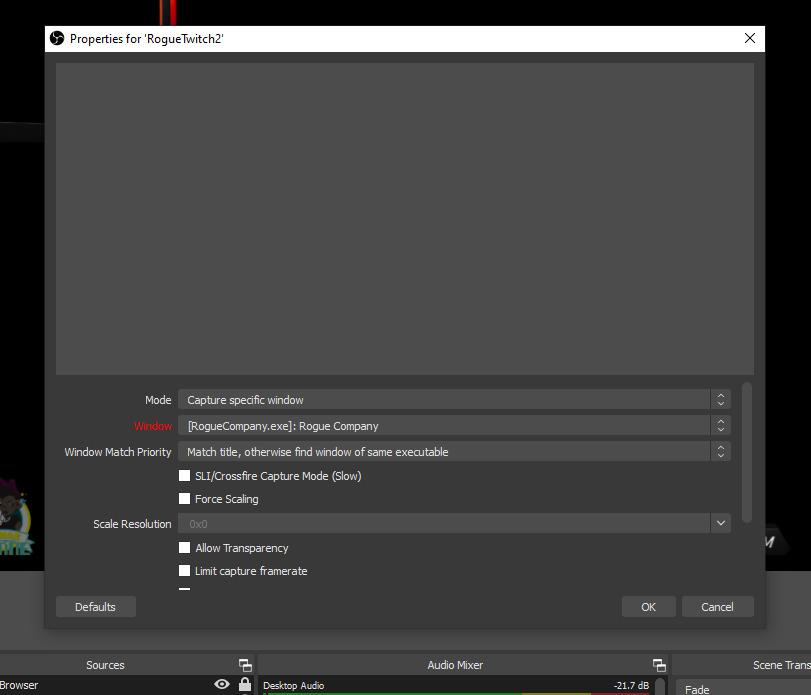

If you’d like to change your game, for example from Rogue Company to CounterStrike: Global Offense, there’s no need to create another source. It’s easier to right-click Game Capture - Preferences then select the full-screen application you would like to display.
12. Start your Livestream on Twitch. Your Twitch account is connected to OBS. To start your live stream click the Start Stream button in the lower right-hand corner. You can edit your stream title and game on your Twitch Stream Manager.
These are all the tools it takes to stream on PC. The place where you’ll spend the most time is getting your overlay to look how you want. Many streamers tweak their overlays often to match the games or seasons. With software like OBS and StreamElements, you can add as many overlays as you’d like without having to delete any. And you can take your overlays anywhere by saving them so, if you’re streaming from a new PC, you don’t have to rebuild your overlay or re-add your alerts.

Junae Benne is a freelance writer for Tom's Hardware US. She reviews gaming peripherals and covers streaming tutorials.
-
JarredWaltonGPU Reply
Step 1: Create streamEridanusSV said:Cool article.
But how to gain viewers tho? ):
Step 2: Stream every day
Step 3: Don't be a terrible host
...
Step n: Profit! -
eXPedient Demise The author is a bit out of date...... Twitch Studio makes things so much easier and straightforward. Highly recommend it for those starting out :)Reply -
Townshed55 I prefer StreamLabs OBS over regular OBS. Bonus is if you already use OBS it will import almost all of your settings and scenes. This is a good basic overview on how to get started but there are quite a few settings within OBS that can be tweaked depending on stream quality and what you're trying to do.Reply
I just started streaming recently and it's a lot of fun, even without many followers. I use the same name on Twitch as I do on here if anyone wants to take a look at the intro video and stream overlays that I've made for my channel. -
JunaeBenne Reply
Thank you! Gaining viewers is all about community. Give what you'd like to receive back :DEridanusSV said:Cool article.
But how to gain viewers tho? ): -
JunaeBenne ReplyTownshed55 said:I prefer StreamLabs OBS over regular OBS. Bonus is if you already use OBS it will import almost all of your settings and scenes. This is a good basic overview on how to get started but there are quite a few settings within OBS that can be tweaked depending on stream quality and what you're trying to do.
I just started streaming recently and it's a lot of fun, even without many followers. I use the same name on Twitch as I do on here if anyone wants to take a look at the intro video and stream overlays that I've made for my channel.
I started on StreamLabs their good too! Happy streaming
