Installing a Fluid Temperature Sensor: The Best $10 Upgrade for a Custom Loop
With a $10 fluid temperature sensor, the system is now so quiet, I can measure the increase in noise from the GPU's coil whine.
When we built the Mirror Maze system, one of the things we overlooked was installing a sensor to monitor the fluid temperature. Without knowing how warm the loop was really running, I delved into a paranoia-induced adventure with the fan controls. And though I got the system running quietly at a level I felt was safe and kept thermals well under control, I knew it was hardly optimal.
So, I did what any sensible obsessed enthusiast would do: Within one week of finishing the build, I busted off the drain port, painstakingly drained most of the fluid out -- with some heavy two-man acrobatic lifting to get all the fluid where I needed it to be -- ripped out the radiator tubes and chucked a temperature sensor into the loop. While I was at it, I also swapped the AMD Ryzen 7 3700X for a 3900X as the dent I put in the 3700X’s heatspreader during the build wasn’t doing thermals any favors, either.
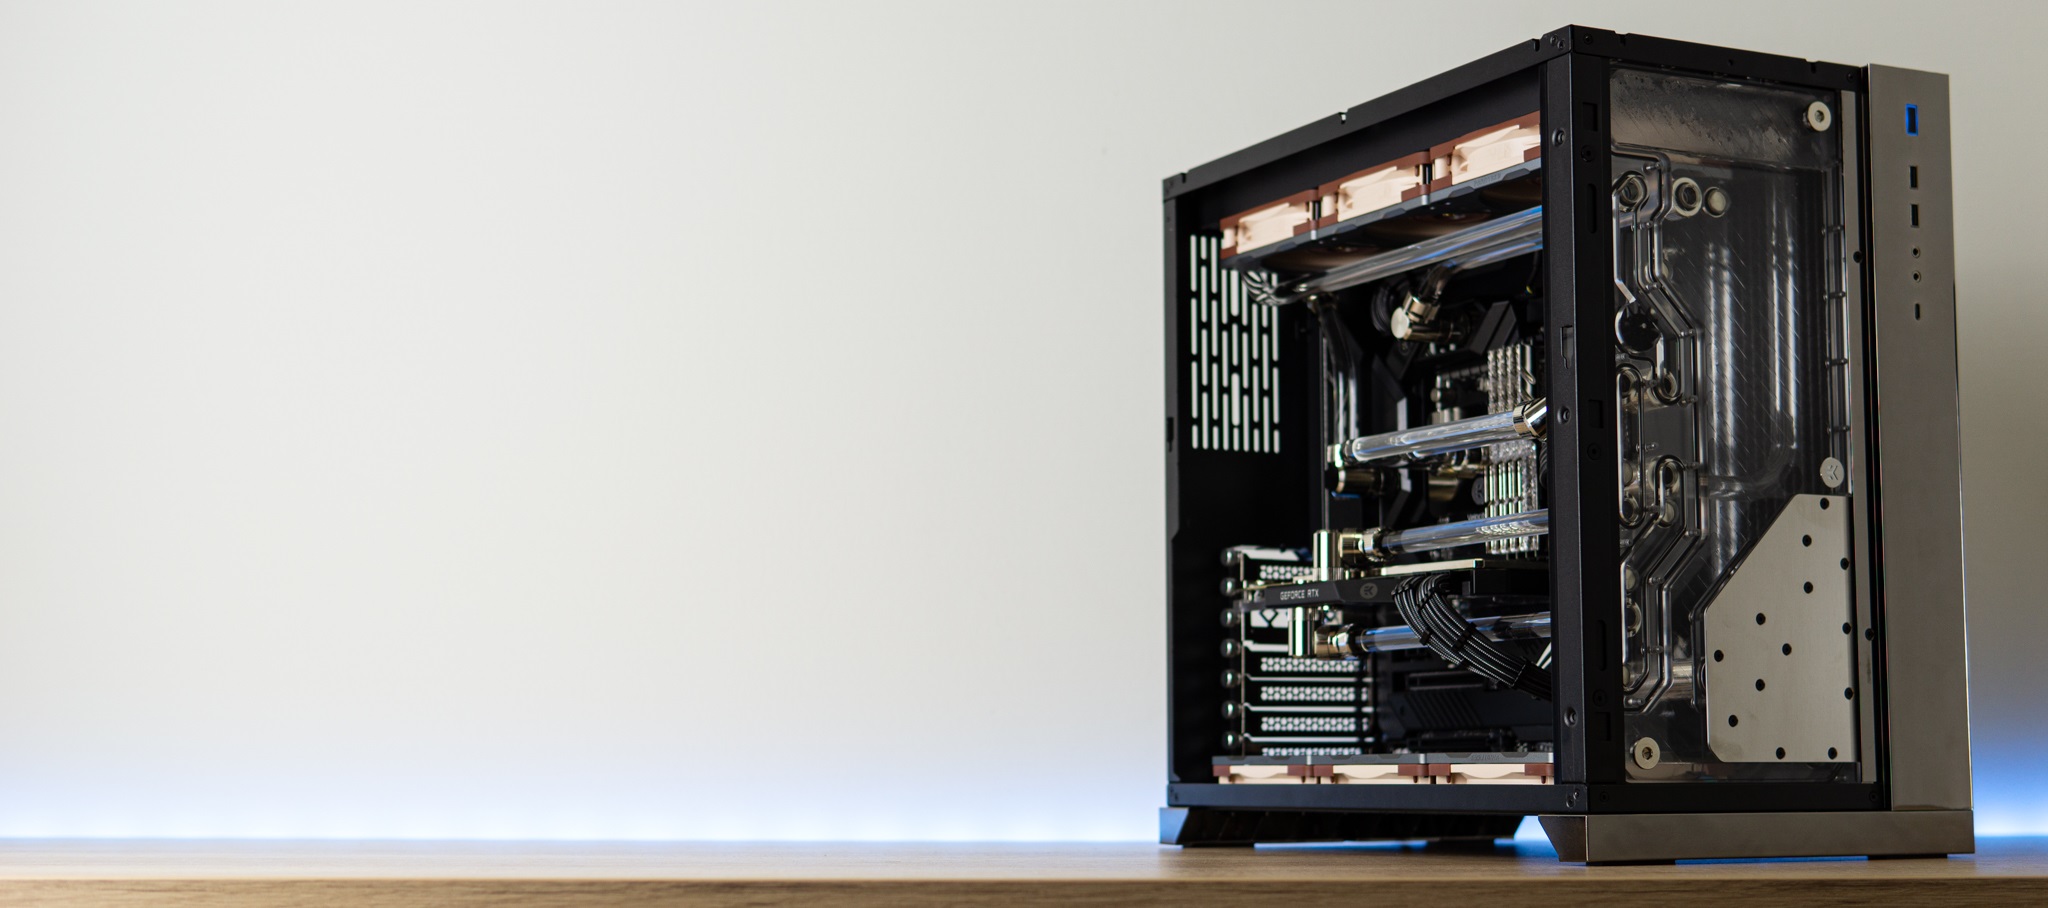
I was a man on a mission: This system had to run acoustically and thermally perfectly. After all, we did sacrifice the best looks in favor of acoustics by using nine brown Noctua NF-A12x25 PWM fans (even though, I personally dig the Noctua brown-and-beige color scheme), so it would be a shame to have them spinning any faster than is absolutely necessary.
This system had to run acoustically and thermally perfectly.

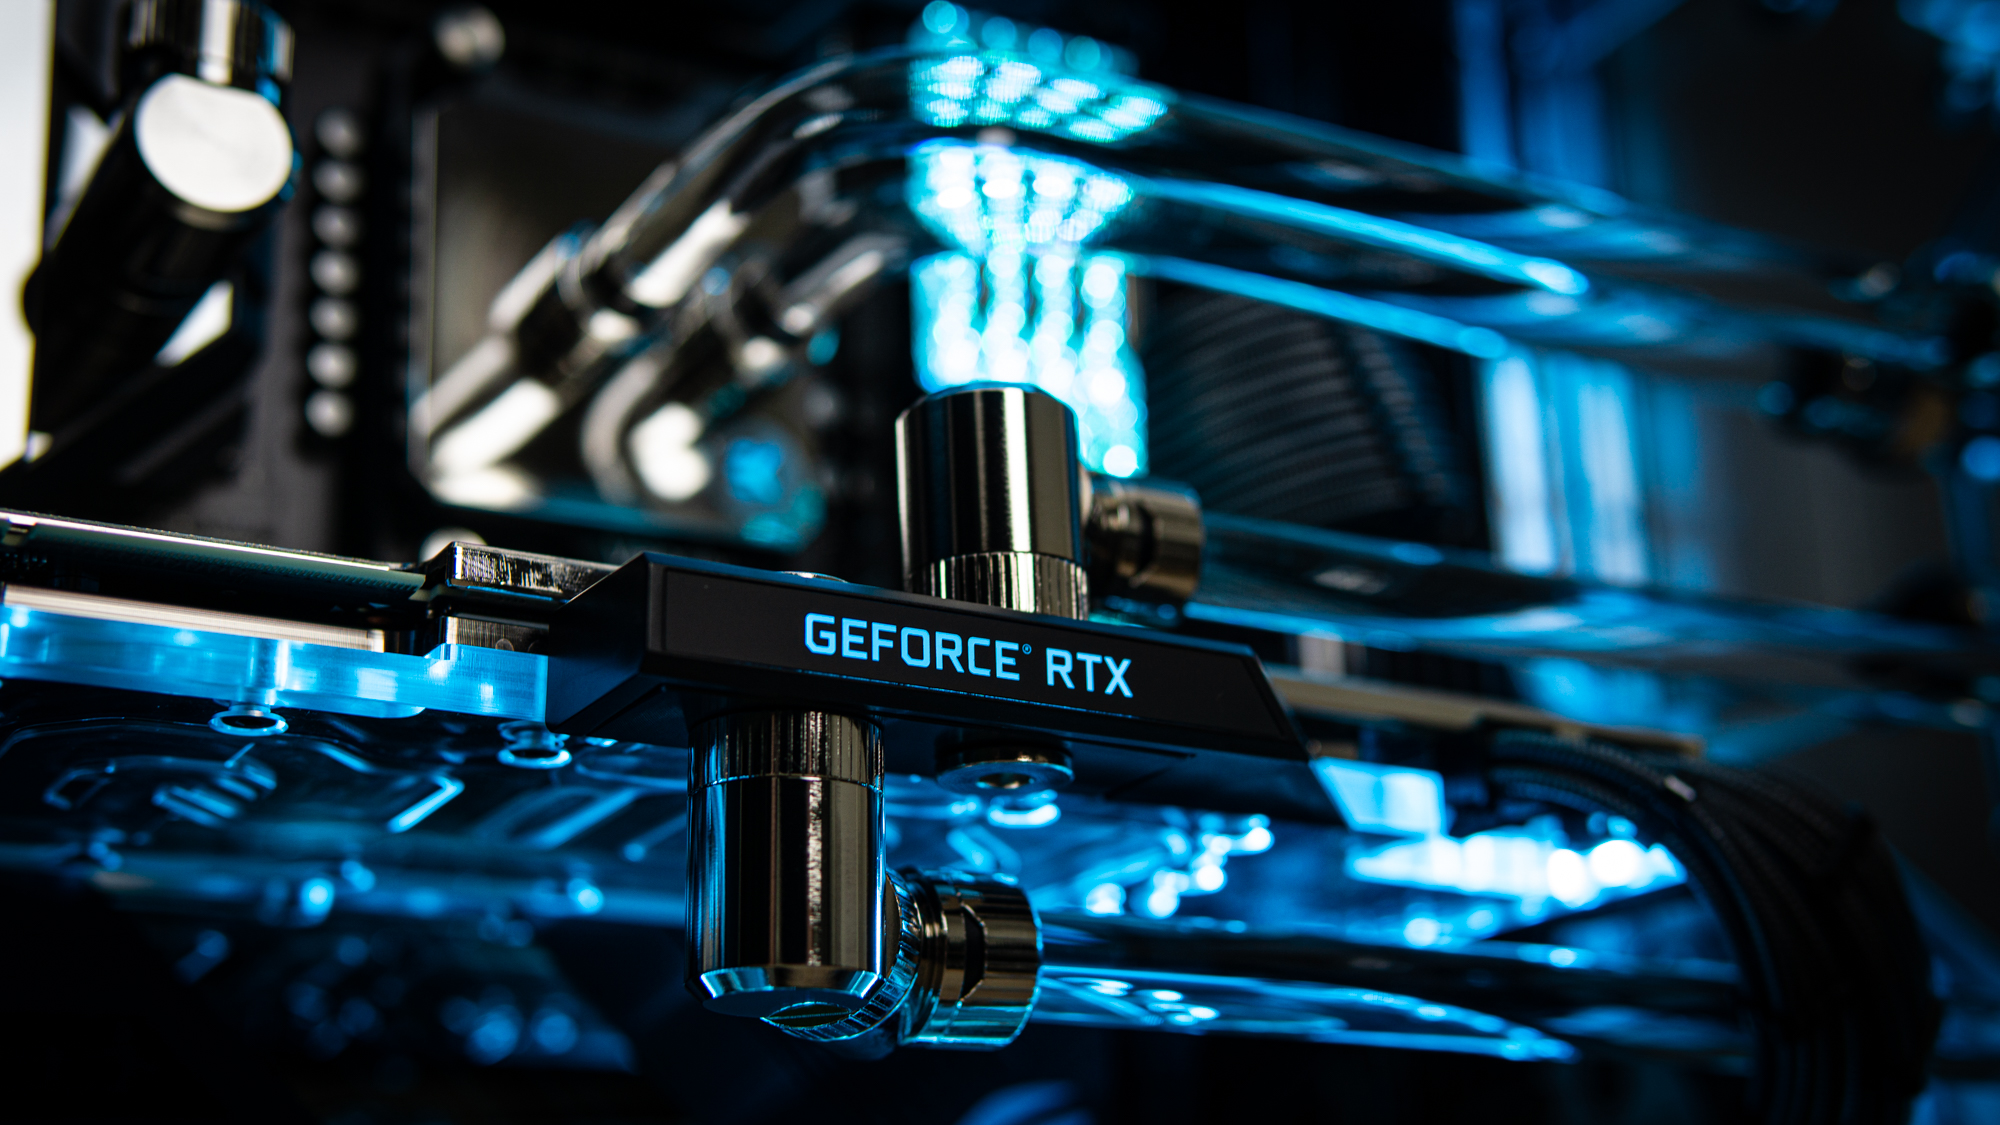
The temperature sensor I opted for was the Alphacool Eiszapfen G1/4” female to female sensor, which paired with a 7mm male-to-male EK-Quantum Torque Extender fit perfectly between an angled fitting, leaving the distribution plate and a fitting connecting to a run of acrylic tubing. I placed it right at the bottom of the system by the pump, as there was already a GPU power cable running here, cables for the fans, and cables for the pump, making it easy to hide the sensor’s cable in the wire highway.
This was at the first fluid outlet of the EK-Quantum Reflection O11D distro plate, meaning the sensor was placed between the two radiators in the loop order – but anyone familiar with watercooling will tell you that the temperature is pretty much equal everywhere throughout the loop, unless you’re running absurdly low pump speed. And even then, the differences are so minor that you’re still more likely to get different temperature readings from multiple sensors due to variances in their readout than actual temperature differences throughout the loop.
No, one sensor was plenty, and it didn’t matter where it went. I might want perfection, but there really is no point in populating all three sensor headers on the Asus Crosshair VIII Formula Motherboard.
Tuning to Perfection
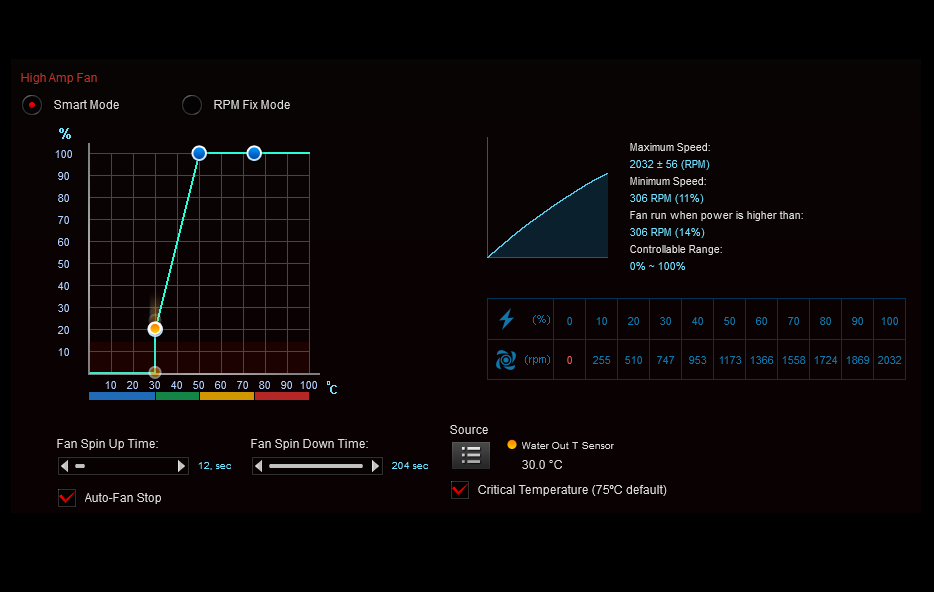
I then set all the fans to stop spinning when the fluid temperature is below 30 °C, which meant I couldn’t connect any of the fans to the CPU fan header, as Asus doesn’t allow CPU fans to stop entirely. At 30 °C they could start spinning, and by a fluid temperature of 50 °C I wanted them to run at full speed, though they should never need to reach this point. But he, just in case, you know?
Get Tom's Hardware's best news and in-depth reviews, straight to your inbox.
After all that, a little more finetuning was required.
The first thing I noticed was that the Noctua fans ran much quieter on radiators than as a free intake at the bottom of the case, so I dropped the intake fans’ speed by 10 percent across the board, which seemed to match the radiator’s fans for noise levels. I also set the side intake to always spin, as I found that totally passive, the loop would still warm up to 30 degrees idle, making the system swing back and forth between passive and idle quite often. Turning the side intake to always run kept the loop a hair under 30 degrees most of the time during normal desktop use. Its a bit of a shame that we didn't achieve fully passive desktop use, but the Noctua NF-A12x25’s are totally inaudible at 750 RPM on a radiator anyway, especially when pointed away from the user.
Under load, when running Destiny 2 or Horizon Zero Dawn, the highest fluid temperature I ever observed was 38 °C, but that was after hours of gaming in a small, closed room with no airflow -- it was getting warm in here. The internet also told me that the highest Delta-T you want the fluid at over ambient is around 15 degrees, and while higher isn’t necessarily a direct cause for concern until you reach the pump's temperature limit (usually at about 60 degrees Celsius), at this point I was within that norm for a 25 degrees C room and happy with the noise levels, so I decided that was that and saved the fan profile.
So, just how quiet was the Mirror Maze PC then?
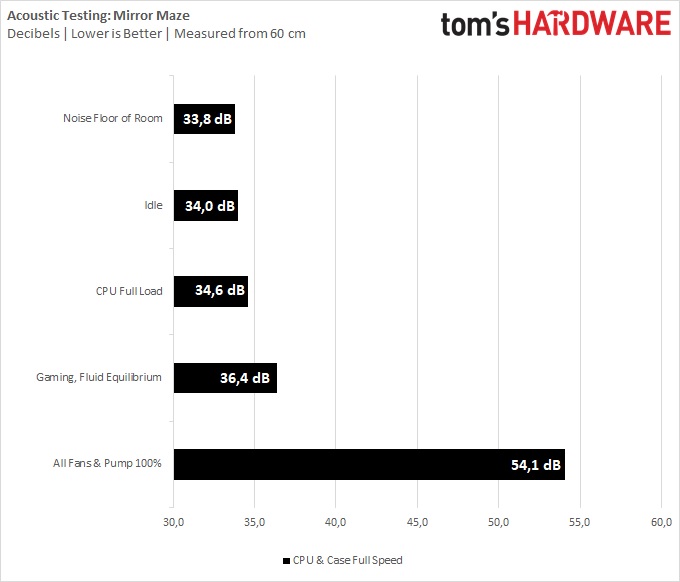
With the set fan curves, in-game, the fluid temperature hovered somewhere around 36 to 37 degrees C, with the 3900X's temperature at 62 °C and the RTX 2080 Super graphics card running at just 55 degrees C. The following chart details the noise levels in different scenarios.
As you can see, the system is extremely quiet. Idle, it isn’t audible over the noise floor of the room, unless you get very intimate with the case. Putting all 12 cores of the Ryzen 9 3900X under full load does practically nothing to raise noise levels, even though the fans for the top radiator and intake enter duty. It's so quiet that when my friend entered the room and saw the system, he commented on how quiet it runs, and he wouldn't believe me when I told him that Prime 95 was running for the past hour at smallest FFTs (maximum heat generation).
It’s only when you game for extended sessions that the fluid warms up enough to warrant higher fan speeds and consequently noise, and even then, the noise levels are still extremely low.
For laughs, I also measured the noise level of the coil whine the GPU produces under load in a cold loop before the fans spin up, and it measured 35.2 dB -- right in between the CPU full load measurement and the noise level of an extended gaming load.
To give a point of reference, I set the fans to full speed and measured how much noise the system is capable of producing with the cooling loop running at maximum capacity, and it's safe to say that the noise level there is an order of magnitude higher. The system can get extremely loud. With everything at full blast it's uncomfortably loud, but there is no reason to ever run it like this unless your only goal is pushing overclocks.
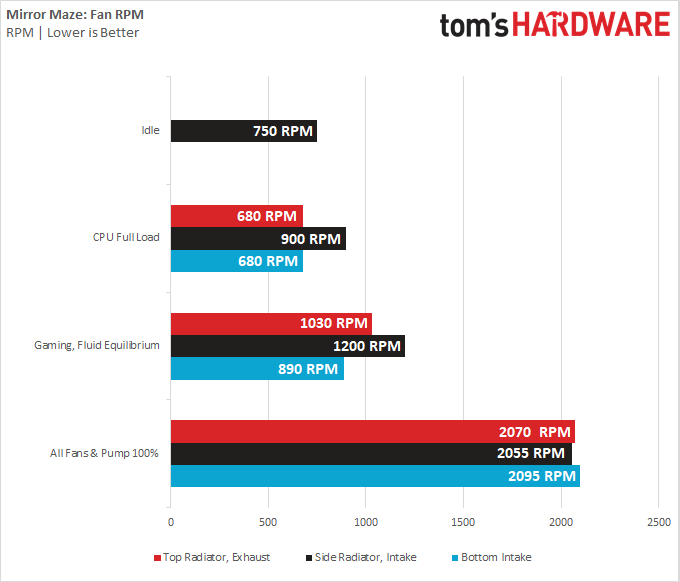
To shed some more light on the cooling capacity, the above chart details the fan speeds in the different scenarios. it's clear that the cooling loop, despite using 28-mm thin radiators, is running nowhere near its capacity. Because it's so over-dimensioned, the quiet Noctua spinners hardly need to put any effort in to keep the system cool.
Oh, and in case you were wondering, the CPU is running with AMD Precision Boost Overdrive enabled, and the GPU is overclocked with the power limit at 116% (it won't go higher), a core offset of +100 MHz and its memory at +1000 MHz.
Basing the fan curves on the coolant temperature is a much better method of controlling the fans in a liquid loop than with a fixed fan speed, or based on the CPU temperature. When I was running it off the CPU temperature, the fans would spin up significantly at the slightest CPU load spikes, which the loop can absorb anyway. Before the mod they also wouldn’t spin up at all when the GPU was spitting well around 250 watts into the loop – because for some ridiculous reason, it’s still not possible to set motherboard-controlled fan curves based off of the GPU temperature. So before installing the sensor, the only way to have the fans speed up because of the GPU was to set a curve based on the CPU temperature, and then wait for the CPU to warm up from the GPU warming the loop up. Sounds stupid, right? It is. Nobody should control a liquid loop like that.
So long story short: If you’re running a custom loop and your motherboard supports a standard two-pin thermal sensor, do yourself a favor and spend the $10 for a sensor, $10 for fresh coolant, and the afternoon it takes to set up a control mechanism based on what really matters, the fluid temperature. If your motherboard doesn't have this header, you might need to spend a little extra to get a controller that can do this for you, but I reckon it'll still be well worth the effort and expense.
Niels Broekhuijsen is a Contributing Writer for Tom's Hardware US. He reviews cases, water cooling and pc builds.
-
neojack very good idea, i ordered the same sensor.Reply
to canada it ships from austria though... 1 month for shipping delays, total price 25 CAD
to USA it ships from modmymods and costs like 5USD -_- -
Olle P My temperature sensor is usually called "hand".Reply
I have an Alphacool Eisball reservoir on top of my computer, within arms reach. If/when I want to know the water temp I just grab the reservoir.
Since the pump is running at a constant speed and there are no fans blowing at the convector I have little reason to constantly monitor the water temperature. -
grimfox I've been touting the benefit of using a fluid temp sensor since I did my first loop. For silent systems or any system that is cooling more than one component it's very important to know the fluid temp.Reply
I don't really understand why it's not something that isn't included by default in a pump or common fitting like an elbow. -
projct What you should really do if you want it to be silent is use a controller that can target the Delta-T of water temperature over ambient temperature, like an aquaero octo. This has the added benefit of not screwing up your fan profiles if your ambient temperature swings quite a bit, like mine does. a/DdcmM5OView: https://imgur.com/a/DdcmM5O.jpgReply
