Upgrade And Benchmark Your 2012 MacBook Air's SSD
Upgrading Your MacBook Air's SSD
Apple's MacBook Air isn't known for its serviceability. You cannot swap out the system's CPU, its memory, or any of its I/O. But you can switch out its SSD. Granted, the storage interface is proprietary, preventing you from using a standard 2.5" drive or even mSATA. However, OWC does make it possible to take Apple's svelte, but not particularly flexible MBA, and upgrade its capacity.
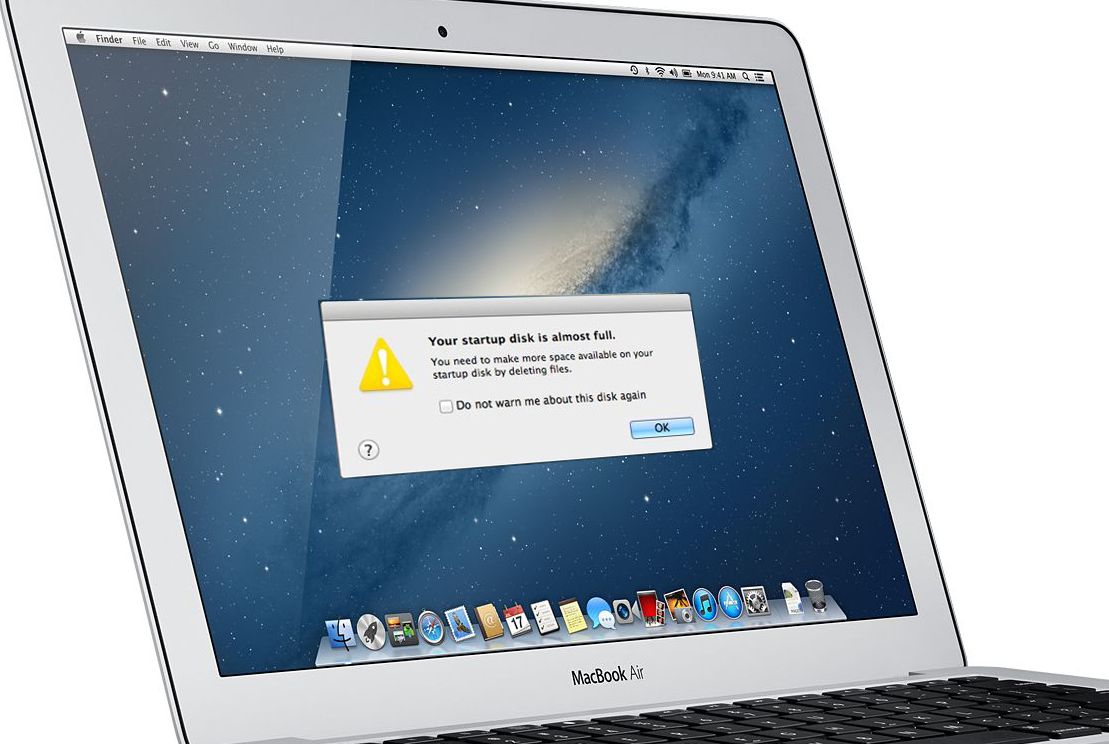
These guides have been done before, though. In fact, OWC's online instructions are pretty easy to follow. So beyond simply performing the upgrade on one of our in-house MacBook Airs, we wanted to explore the new drive's performance, working around Apple's deliberate disabling of TRIM on third-party devices, and getting the most out of our old SSD through external connectivity. After this, you shouldn't have to worry about seeing "Your startup disk is almost full" for quite a while.
OWC Aura Pro 6G + Envoy
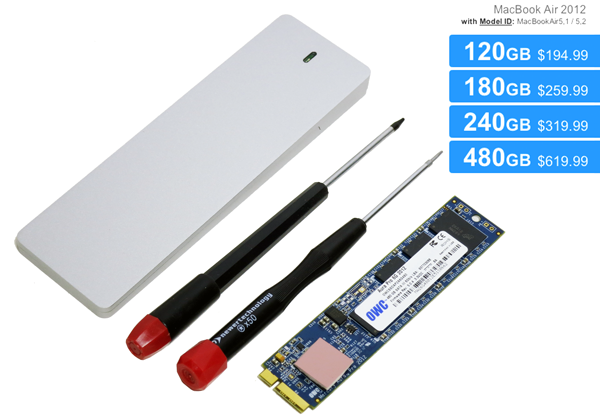
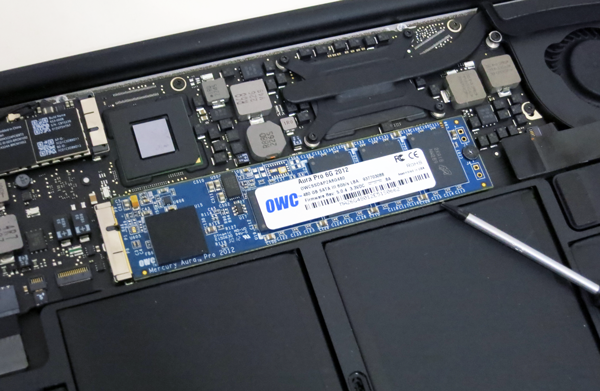
To date, OWC is the only SSD vendor offering an aftermarket storage solution for the MBA. Dubbed the Aura Pro, OWC's drive is based on SandForce's second-generation controller and synchronous NAND flash. Architecturally, it's similar to SSDs like OCZ's Vertex 3 and Corsair's Force GT.
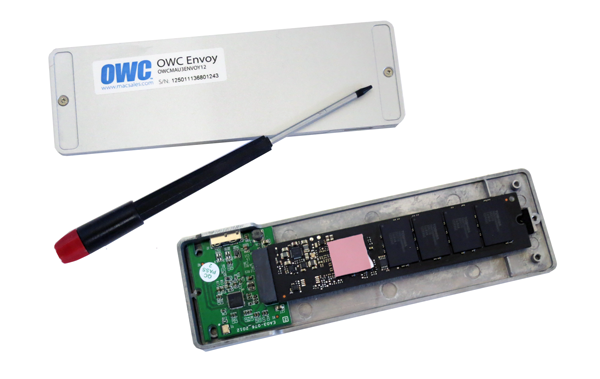
The best part is that OWC supplies an entire kit to help simplify the upgrade. A 240 GB package sells for $320, which sounds really pricey to PC enthusiasts growing more accustomed to spending less than $1/GB. However, OWC includes the Torx T5 and pentalobe-compatible drivers needed to access and remove Apple's stock SSD. You also get a USB 3.0-enabled aluminum enclosure called the Envoy, which houses your existing SSD. By creating an external storage device, you're able to repurpose solid-state storage you already paid for. The Envoy's mobility is nice, and we like that nothing goes to waste.
Step One: Remove The Back Cover
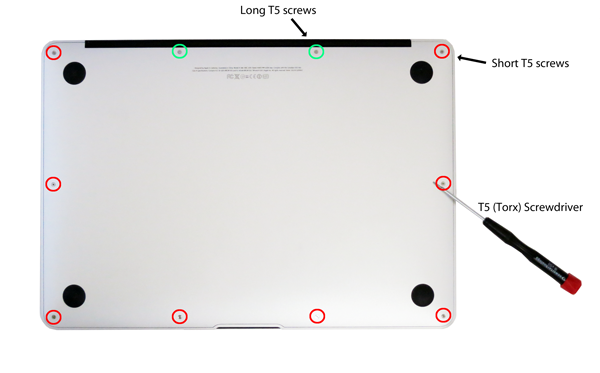
The actual upgrade process is pretty simple. First, you need to remove the 10 T5 Torx screws securing the MacBook Air's back cover. Notice that not all of the screws are the same length. The two top screws (circled in green) are a bit longer. Remember to keep them separate from the others, since you'll want the chassis to go back together the way it was disassembled.
Step Two: Remove The Stock SSD
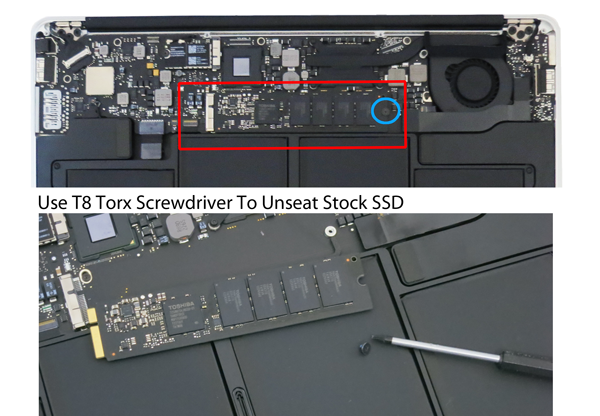
Once you pull off the back cover, you have a good view of Apple's stock SSD (highlighted in red). It's only secured by a single T8 Torx screw. Remove that and the drive should pop out when you lift up on it and slide it over to the right.
Step Three: OWC Envoy + Stock SSD
You're still going to want to put that stock SSD to good use, though. This is where OWC's Envoy comes into play. Use your T8 Torx screwdriver to open up the Envoy's top cover, and drop in the drive. Reattach the enclosure's screws, and you have an external USB 3.0-capable repository to complement your MacBook Air's internal capacity.
Get Tom's Hardware's best news and in-depth reviews, straight to your inbox.
Step Four: Upgrade Your MBA With The Aura Pro 6G
Now it's time to drop the Aura Pro 6G into your MacBook Air. Simply line up the key notch on the SSD, slide it into the slot, and secure it with the same T8 Torx screw. You can now close up the system (reversing the process from step one).
Step Five: Getting Your System Up And Running
Even though you've finishing installing the Aura Pro 6G SSD, that was only the hardware component. Remember that there still isn't any data on the drive, so you need to either clone your old SSD or install a fresh copy of OS X.
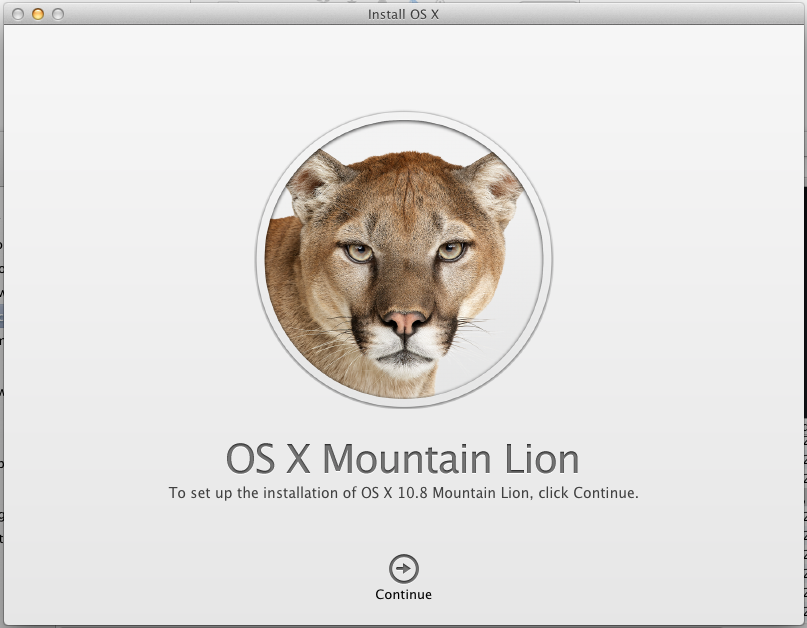
If you'd rather start from scratch, plug the Envoy with your old SSD into one of the MBA's USB ports and press the Option key as you boot up. Then, boot from the recovery partition and install OS X to your new SSD.
If you want to clone your existing installation, start with the same process. But instead of booting from the recovery partition, select the original OS X installation on the old SSD.
Step Six: Enable TRIM In Mac OS X
TRIM is the command that lets an operating system tell an SSD which blocks of data are no longer in use and can be wiped, preparing them for the next write. Without this, the process of reading, deleting, or moving data can slow down as the SSD maintains information that is no longer used. Unfortunately, Apple only enables TRIM on its own drives, in a move to perhaps discourage customers from going the aftermarket route. Fortunately, the restriction isn't hardwired. There's a bit of terminal window work to lift the Apple SSD requirement, but it's all covered in sufficient depth at Github.
Be forewarned that there are programs out there written to enable TRIM support with a single click. They're often unreliable, though, and some are even outdated, compatible only with Snow Leopard or earlier versions of OS X. If you want to do this right, follow the instructions linked above.
Note also that OWC's official party line is that you do not need to enable TRIM on the Aura Pro due to SandForce's DuraWrite technology. The reasoning behind this is that DuraWrite frees up space on the drive that can be used for garbage collection, similar to what TRIM already does. The rub is that DuraWrite requires compressible data to operate on. In a typical use case, you're going to have some information that can be compressed. But if you're dealing with exclusively incompressible data, DuraWrite won't help, and you're going to be missing TRIM support. For that reason, we're enabling it. Check out this presentation by LSI's Kent Smith at the Flash Memory Summit in 2011 for more (specifically, slide seven).
How Does 4 KB Random Performance Look?
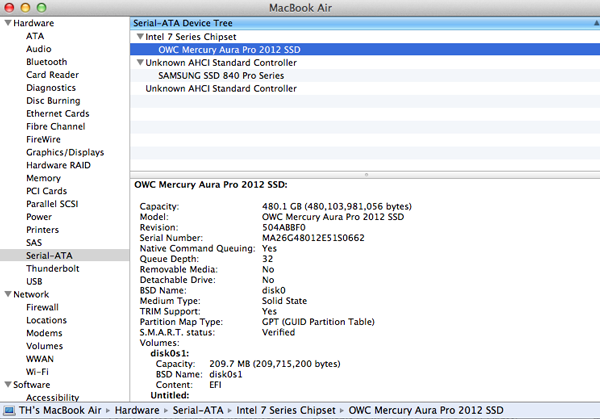
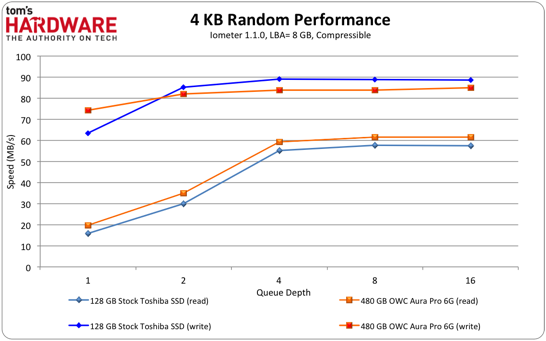
And how about performance before and after the upgrade? According to Iometer, random read and write speeds look fairly similar, even though we're upgrading from Apple's 128 GB Toshiba-sourced SSD to OWC's 480 GB SandForce-based Aura Pro 6G. OWC's solution does deliver slightly faster random read results, while registering slightly slower random writes. But the results are close in both cases.
Now, here's something interesting. If you look closely at the controller on our stock SSD (on page four), you'll see that it's silk-screened with Toshiba's name. Right underneath, though, is SandForce's brand. So, the drive in our MacBook Air was already SandForce-based. And that's likely why our performance data seems so much alike.
How Does 128 KB Sequential Performance Look?
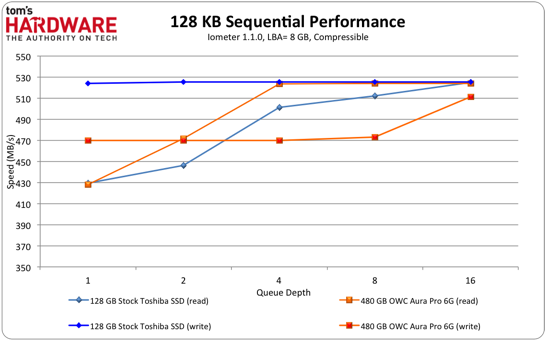
Writing large files sequentially to the Aura Pro 6G reveals ~50 MB/s-lower performance than the stock 128 GB SSD at a queue depth lower than eight. On the other hand, sequential reads are about 20 MB/s faster on OWC's drive at queue depths between two and four. Where do those differences come from? Toshiba's drive employs the faster Toggle-mode NAND interface, while OWC's uses synchronous flash. Of course, the higher-capacity Aura Pro is better able to saturate each channel with more physical die.
How Does Incompressible Performance Look?
In order to maximize performance, SandForce-based SSDs compress data on-the-fly before writing to the NAND. With fewer bits to handle, writes naturally occur faster. The clear caveat is that throughput is highly dependent on the lossless compression SandForce's controller can achieve. A great many data types are quite compressible. But some files (multimedia, for example) tend not to be.
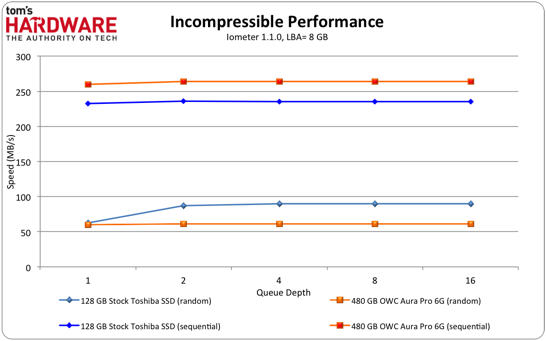
According to Iometer, the Aura Pro 6G is a bit faster than Toshiba's stock SandForce-based drive when it's presented with incompressible sequential writes, but slower than the SSD Apple bundles with its MacBook Air when we run random writes through it.
-
mayankleoboy1 Any Apple product is absolutely perfect. Why would i try to change anything in it, and commit a sin ?Reply -
Someone Somewhere Is it just me or does the warning window on the first slide look photoshopped on?Reply -
ubercake Every OWC drive we've used to replace the stock drive in the Macbook Airs at my place of employment has failed within 2 months. Anyone else having the same luck or is it just my supplier?Reply -
monkeysweat not a huge fan of the sandforce / vertex drives.. I had a vertex2 and had 2 of them die within a month because of my computer going to sleep... they sent me an agility 3 to replace the last one, now I'm scared to let my PC sleep,, I would be extra worried in a MBA as you would want it to go to sleep often... IMO would be better just to order a MBA with the amount of storage required or spend 150 bux on a nice large external drive and be done with it.Reply -
razor512 That other SSD seems to require a heatsink (which it was using that metallic case for, if you remove it and place it in the macbook air, will it overheat?Reply
