Tripp-Lite SMART1000LCD Tear-Down
Dim And Dimmer
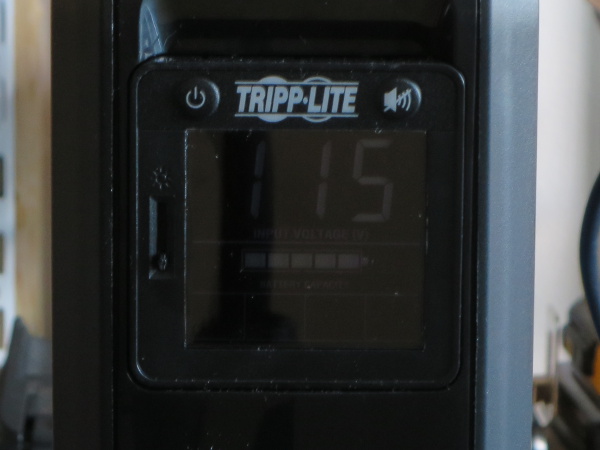
If bright status LEDs and backlit LCDs bother you, the SMART’s display has an intensity slider that lets you dim it all the way down to off. With transmissive LCDs, no backlight renders the display unreadable. But this is a transflexive panel. It can work with both backlight and ambient illumination, much like LCD watch and calculator displays. Here, the only ambient light I had was daylight through my window blinds hitting the LCD almost perpendicularly. Despite those intentionally poor lighting conditions, the unlit LCD remained readable.
Party Trick
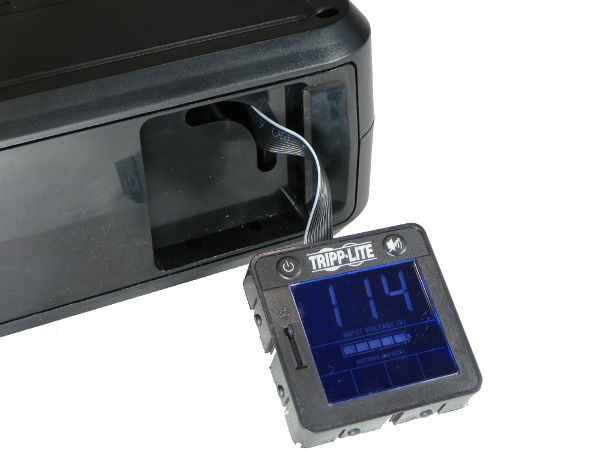
If the LCD’s orientation clashes with your application, the display and control module can be snapped out by prying them from the top, rotating them 90° and snapping them back in. Standing or lying down on one side, there is enough slack to put the display just about anywhere you want.
You do not see manufacturers allowing their customers to expose internal wiring – however little that is – very often these days.
Naughty Bits
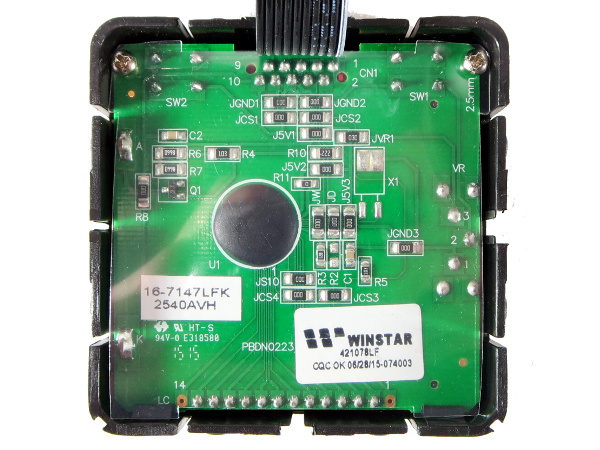
Flip the module over after pulling it out and you are treated to the sight of its PCB, protected by a sheet of transparent insulation. The design of this sub-module is apparently contracted out to Winstar.
Left And Right Sides
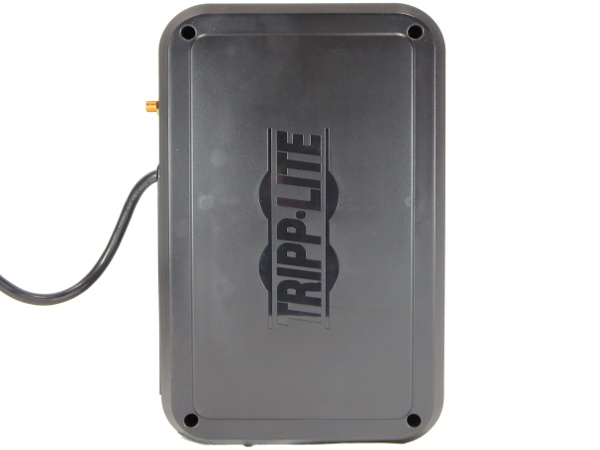
The two sides are practically identical with a large Tripp-Lite logo and four screw wells. The only difference is that one set of screw wells actually has screws, while the other side is screwed into from the other side. Cutting the shaft length in two like this makes the unit look symmetrical and also improves structural integrity: half the length between the panel and screw means half the leverage against the cover. With only four screws holding the whole unit together, mechanical failure is not an option.
Rear View
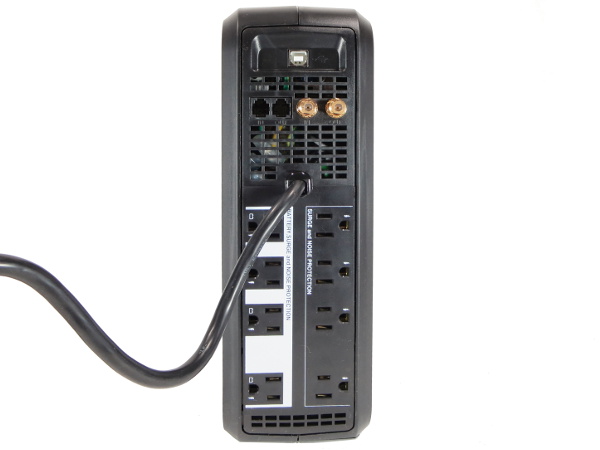
Instead of listing everything on the back, which you can already see for yourself, I will focus on what is not present: a breaker. If I thought that CyberPower not putting the correct breaker rating for its unit’s cord was a little disappointing, Tripp-Lite knocks my sentiment up a notch by omitting the component altogether. In many countries, this is a violation of electric code for good reason. Distribution panel breakers can take several minutes to react to mild overloads, and if you plug a #16 cord rated for 13A in a circuit with a 20A breaker, the cord could be overloaded to over 25A for a long time before power gets cut off. I’ll let you imagine how that story can end.
My apartment has 20A breakers throughout, which makes the SMART1000 potentially unsafe to use unless I add my own breaker in-between.
Get Tom's Hardware's best news and in-depth reviews, straight to your inbox.
Bottom View
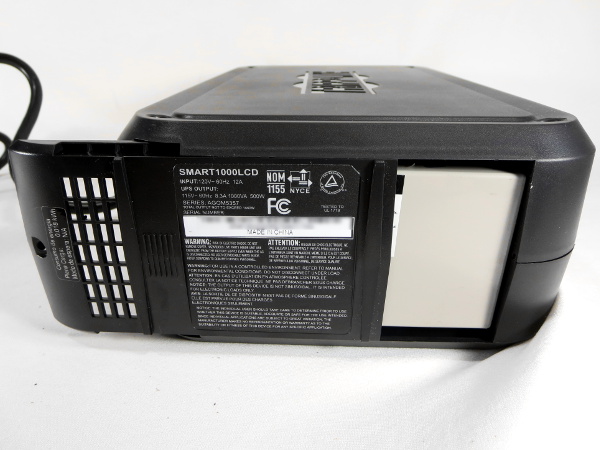
The battery door occupies almost all of the bottom surface and slides inside tracks molded into the side panels. One screw prevents it from accidentally sliding out, while some vents near the front keep a bit of airflow going through the battery compartment to prevent hydrogen accumulation. The rest of the door is covered by the product label. There is also a small sticker between the screw and vents reminding us of that 18W figure on the packaging.
Label Commentary
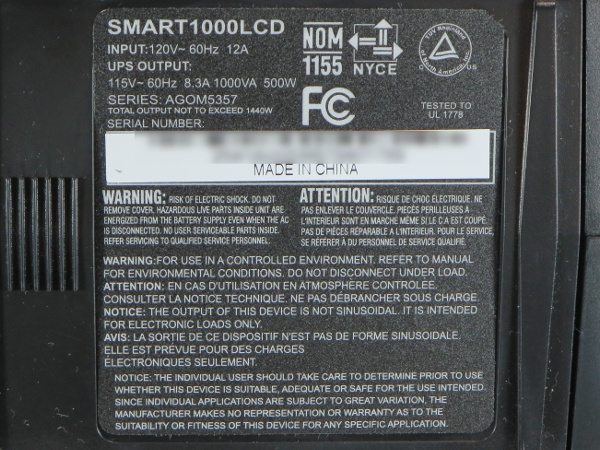
Instead of molding generic info directly into the body, Tripp-Lite has unit-specific labels, complete with serial number. From the NOM (Norma Oficial Mexicana) NYCE mark, this model is intended for sale in Mexico.
Aside from the usual “no user-serviceable parts inside,” which I merrily disregard in a moment, we also get a warning against unplugging the unit while turned on, non-sinusoidal output and a mention of your responsibility for evaluating the device’s appropriateness for any given application.
Can Tripp-Lite's customers resist the temptation of pulling the plug on their new UPS to test it? For many, that’s how they'll determine whether this UPS gets the job done without waiting for a power outage.
Battery Compartment
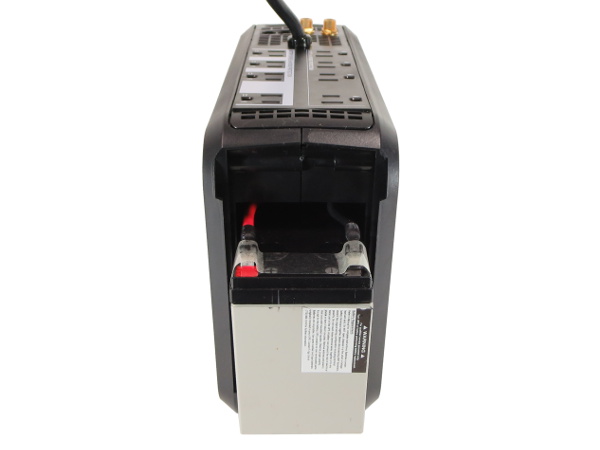
With the stopper screw removed and the door out of the way, we gain access to the UPS’ single battery and its terminals. The battery effortlessly slides out by a few centimeters while the wires are still attached for better access to its spade terminals. This makes plugging and unplugging a little easier, especially for those first few times where the connectors fit very tightly.
The Battery
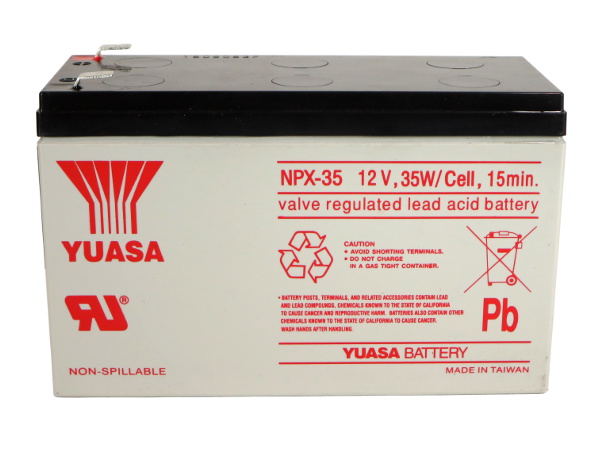
If you didn't guess already, the main reason behind this unit’s diminutive footprint and light weight is its use of a single YUASA NPX-35 VRLA battery instead of the pair of 6-9Ah 12V batteries used in many other 1000VA and up competitors. As a result, the power source has to work more than twice as hard (provide over twice as much current) to drive a given load. That translates into reduced usable capacity.
To power 1000VA from this battery, the inverter needs to draw over 80A.
Battery Specs
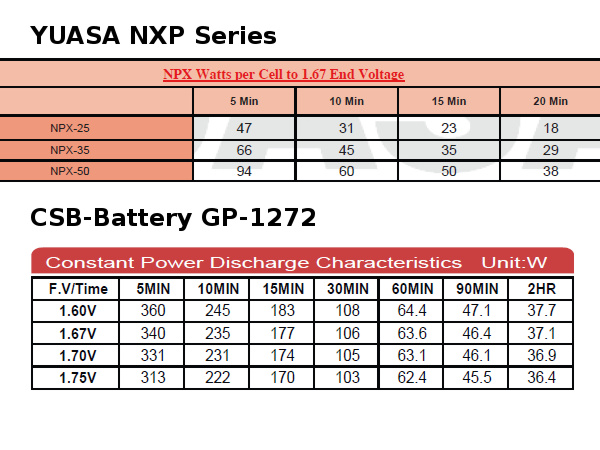
While the battery’s markings already do a good job of explaining what the NPX-35 model stands for (15-minute discharge down to 1.67V, while providing 35W per cell or 210W for a six-cell battery), a comparison helps put things into perspective. Conveniently enough, the CSB GP1272 that I have been using as my UPS battery reference has the same physical dimensions.
The NXP offers substantially better performance with 35% lower internal resistance (15mΩ vs. 23mΩ) and 19% higher output (177W vs 210W) on the 15-minute constant power discharge spec. It looks like I may have a new brand to consider the next time I need VRLA batteries and can get them for a reasonable price.
MORE: CyberPower LX1500GU-FC UPS Tear-Down
MORE: SurgeX SA-1810 Tear-Down
MORE: Tripp-Lite isobar Surge Protector Tear-Down
MORE: Monster PowerCenter HT 800G Tear-Down
-
beetlejuicegr It is getting boring to realize everytime that behind brandnames, shiny boxes and marketing show offs, the reality is sticky messy and sometimes even dangerous.Reply
Where is the quality of products check if there is any? -
turkey3_scratch Turdy. The majority of UPSs out there just suck eggs. Then you have all these people who think they need a UPS when they really don't, only to get some crappy UPS that probably makes their computer only less safe. If you want a good UPS, expect to spend multi-hundreds of dollars for something of quality. And even then, you have to have a legitimate reason to own a UPS in the first place; these misconceptions that everyone needs a UPS is ridiculous, then people go buy garbage like this and think, "yay now my computer is safe" when it would have been perfectly fine without the UPS.Reply -
Daniel Sauvageau Reply
The lack of a breaker is not so much a quality issue as much as it is a horrible cost-cutting decision and inexcusable in a $120+ UPS. Or an UPS of any size for that matter given how even $2 power bars from the dollar store usually have an inexpensive breaker-switch.17968946 said:Where is the quality of products check if there is any?
Where UL1363 is concerned, an extension rated for 15A or less (12A here) is required to have a cord with #14 gauge wire. Also, a relocatable tap with more than four outlets must have a breaker. I haven't read UL1778 to see if there were exceptions for UPS - I don't see why there should be any considering how UPS are effectively relocatable power taps with some battery-backup outlets on top. (Edit: I had a glance at UL1778 and wire gauges thinner than #14 are only mentioned for control wires.) -
razor512 This is a pic of the inside of my cheap APC UPS (took it a long time ago), took it apart many years ago to remote the alarm speaker.Reply
https://i.imgur.com/wkLhvEP.jpg
Luckily it works without the battery being in there,and the construction was not a complete mess.
-
falchard I still don't understand the point of the Coax protection unless your house was wired really badly in the '80s. I would be nervous about completing a circuit to ground by having both the coax grounded at the demarc and grounded to the UPS.Reply -
Daniel Sauvageau Reply
It is a standard battery size, you can get good replacements for less than $30 if you don't want to pay the UPS manufacturer's convenience premium for officially approved batteries.17971562 said:Battery replacement in these UPS devices is expensive unfortunately. -
alphax45 So based on all we have seen what is the "best" UPS for someone that want's to ensure a mid range home PC is getting clean power and the ability to shut down safe in case of power outage?Reply -
nukemaster Reply
Any recommended places to get decent batteries?17972300 said:
It is a standard battery size, you can get good replacements for less than $30 if you don't want to pay the UPS manufacturer's convenience premium for officially approved batteries.17971562 said:Battery replacement in these UPS devices is expensive unfortunately. -
warezme Great review and thank you for all that information. Unfortunately, I'm not surprised by all you found and will likely find in the future.Reply
