Tom's Hardware Verdict
A high-end version of the trusty Creality workhorse that needs (almost) no mods. However, the build plate is a little too sticky out of the box.
Pros
- +
Quality prints
- +
Easy assembly
- +
Auto bed leveling
- +
Direct drive
- +
Quiet operation
Cons
- -
Too sticky build surface
- -
Pricey
- -
Odd cooling fan placement
- -
No touch screen
Why you can trust Tom's Hardware
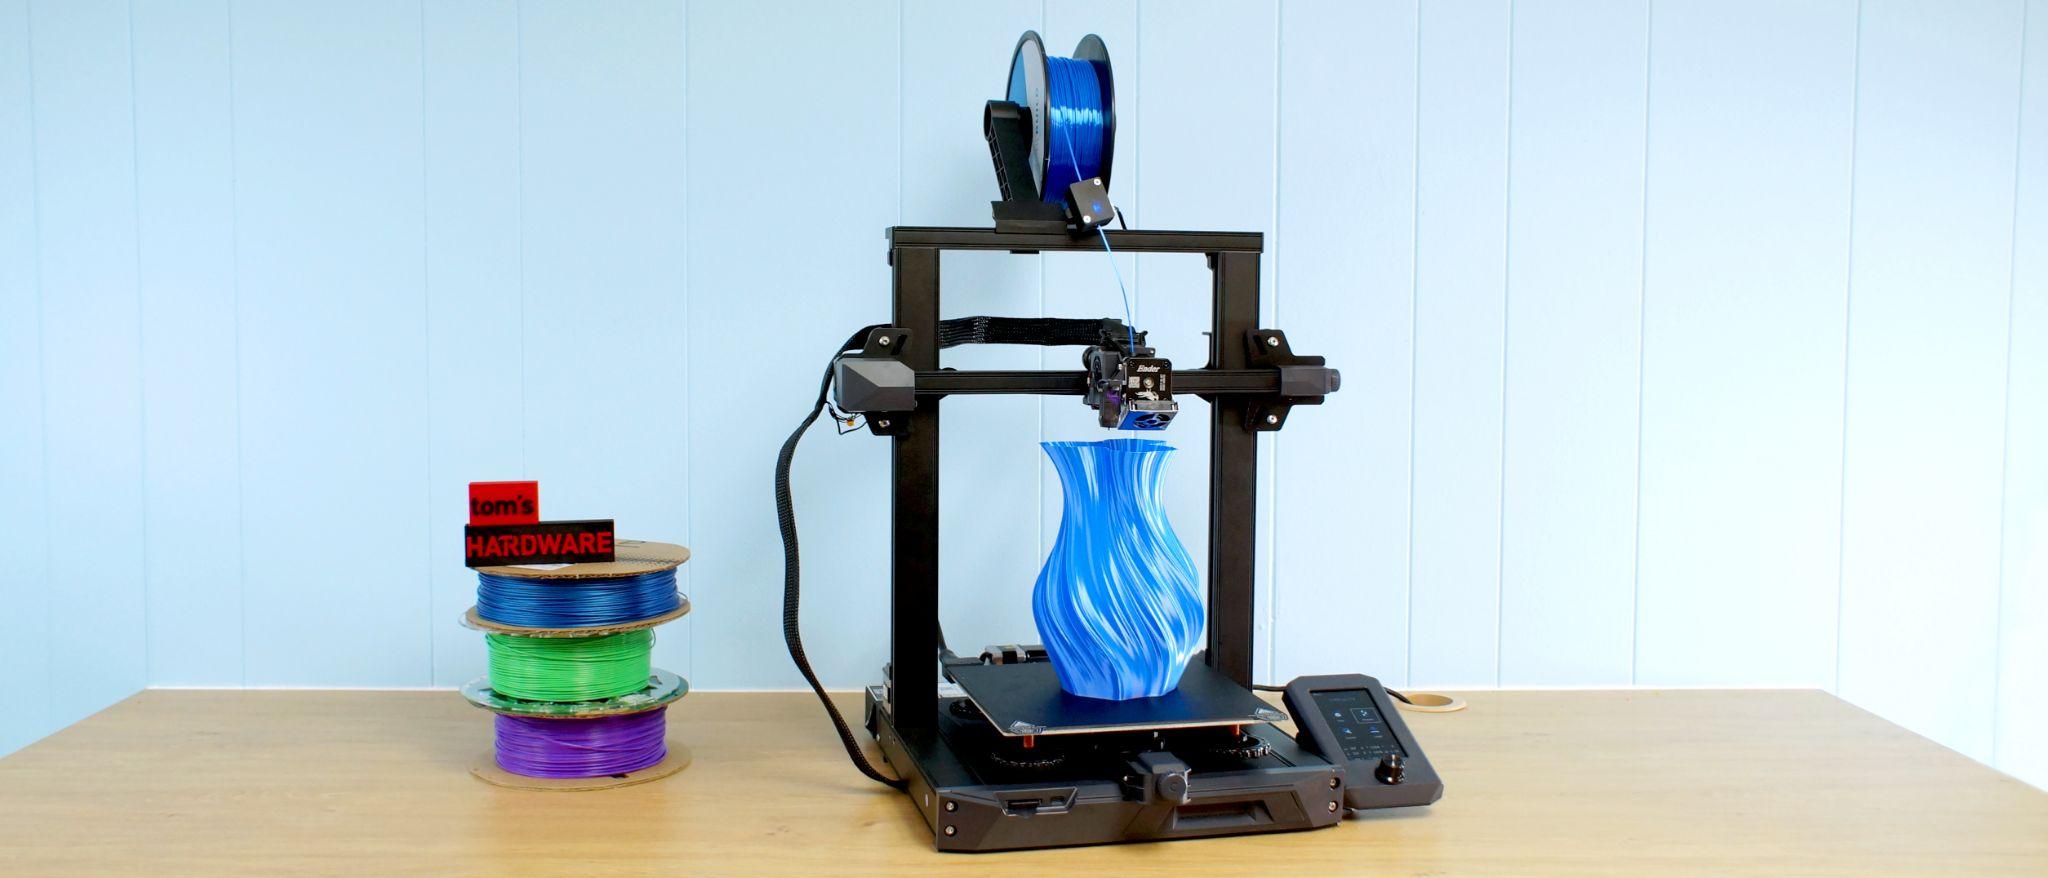
The Creality Ender 3 S1 is a deluxe version of the popular Ender 3 style of 3D printers. It has a direct drive, dual Z axis, auto bed leveling, silent stepper motors, a removable flex plate and a color display screen. It’s full of little touches to make life easier, like a slot for a full sized SD card, tensioning knobs and a built-in drawer to stash your tools.
The only thing missing is an all metal hotend, which is reserved for the Creality Ender 3 S1 Pro.
Retailing at $429 on Amazon, the printer comes with a side of sticker shock. Yes, this printer is a bargain when compared to a Prusa MK3S+, but it’s nearly double what you expect to pay for a typical Ender 3.
Older versions of the Ender 3 were beloved for their low price and moddability. You can easily pick up an Ender 3 Pro for $200 and add the upgrades you like best for a custom machine. But it would take about $288 worth of parts from the Creality store to bring an Ender 3 Pro up to the level of this machine.
I had the Ender 3 S1 out of the box, leveled and printing in about 30 minutes. This is a good printer for makers who want to bypass all the tinkering and get right to the printing.
Specifications: Ender 3 S1
| Machine Footprint | 487 x 453 x 622 mm (19 x 18 x 24.5 inches) |
| Build Volume | 220 x 220 x 270 mm (8.5 x 8.5 x 10.5 inches) |
| Material | PLA/PETG/TPU/ABS |
| Extruder Type | Direct Drive |
| Nozzle | .4mm (Interchangeable) |
| Build Platform | PC Coated Spring Steel Sheet, heated |
| Filament Runout Sensor | Yes |
| Bed Leveling | CR Touch |
| Connectivity | SD card, Type-C USB |
| Interface | Color LED screen with Control Knob |
Creality Ender 3 S1: Included in the box
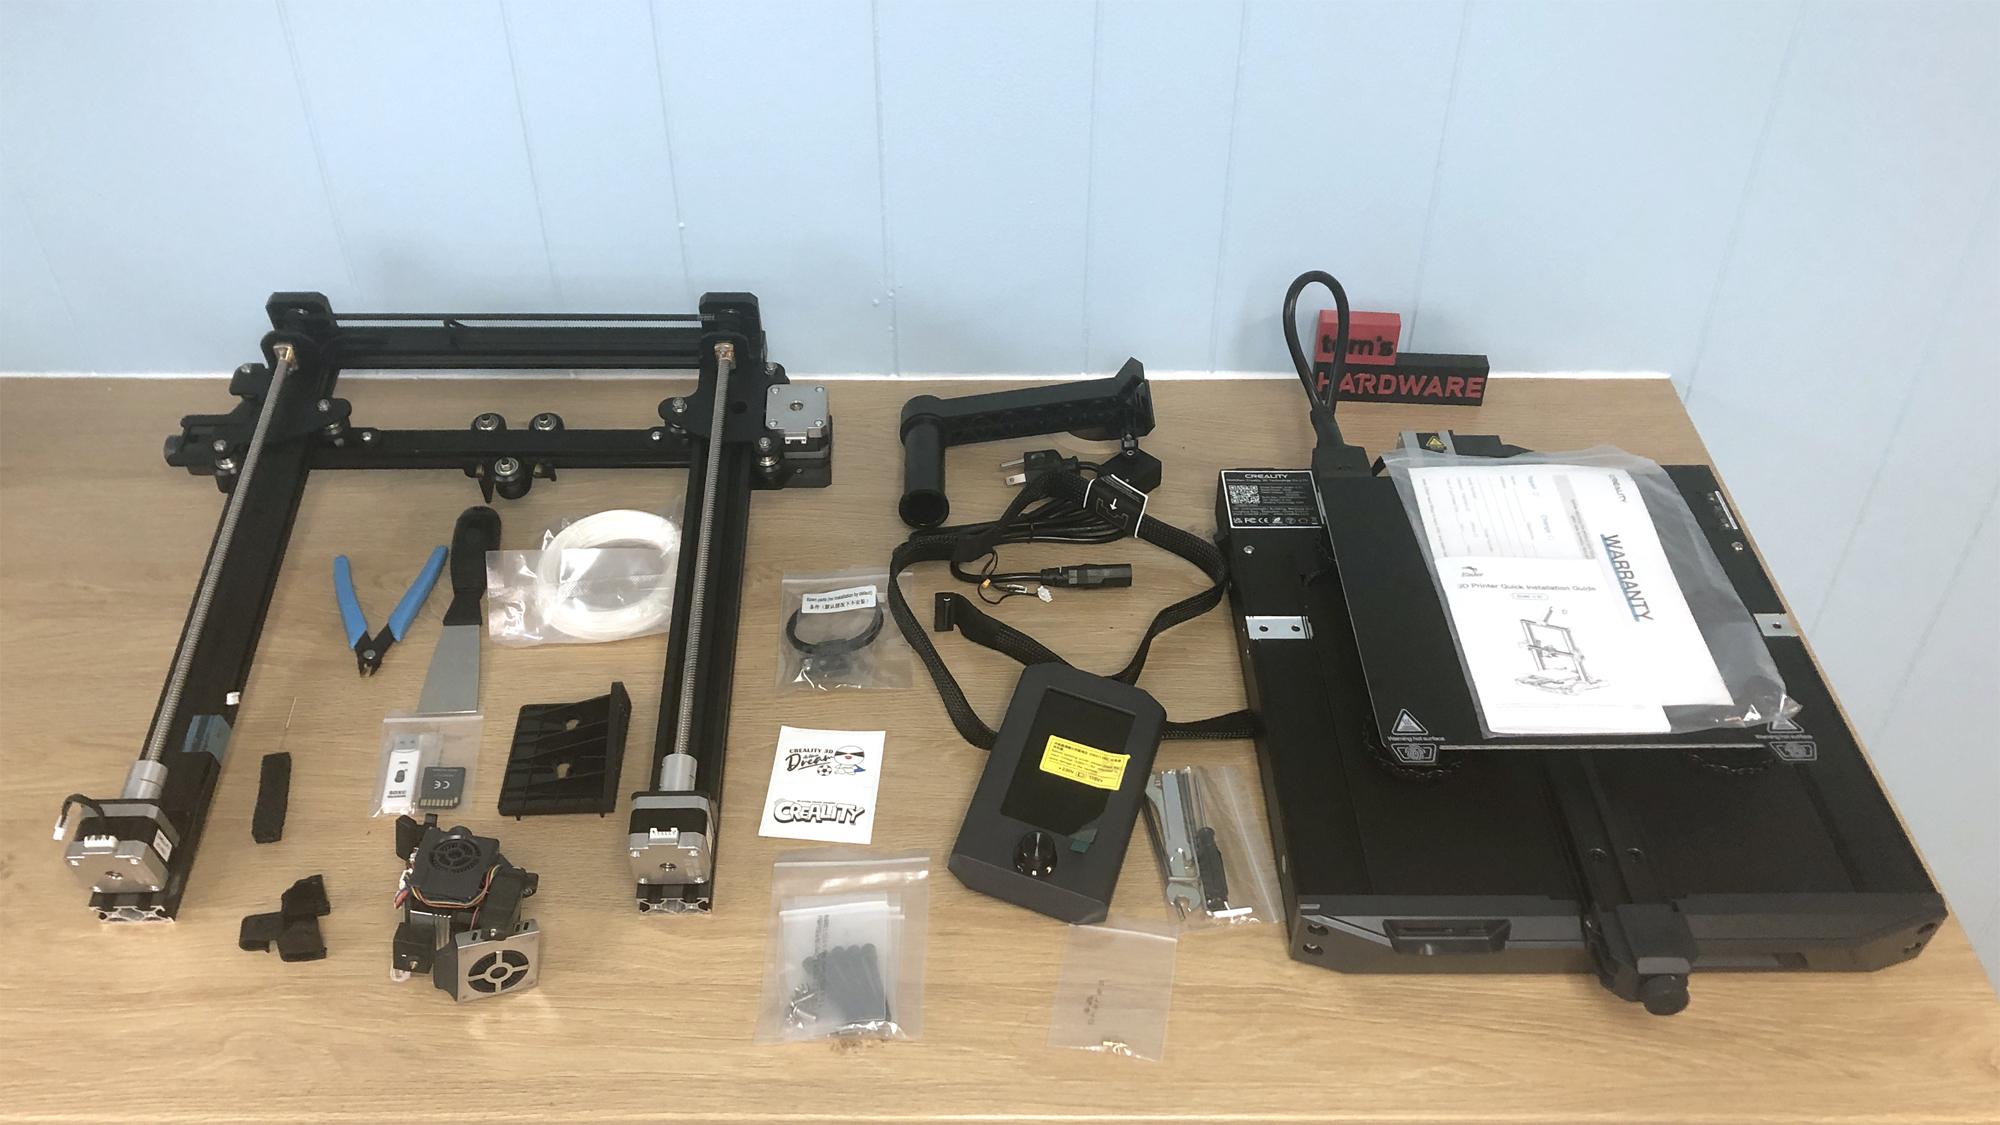
The Ender 3 S1 comes with everything you need to get your printer set up. You get tools to build and maintain the printer, side cutters, a metal scraper, a nozzle cleaner, a spare nozzle, an extra Z limit switch, and a full sized SD card with a USB adapter. There’s also a small sample of white PLA to print your first model.
The SD card has three short videos on assembling the printer, using the auto level and how to do a manual level. You also get a PDF copy of the manual, a copy of Creality Slicer 4.8.0 and models in both pre-sliced .gcode and .stl format.
Get Tom's Hardware's best news and in-depth reviews, straight to your inbox.
Design of the Creality Ender 3 S1
The Ender 3 S1 has evolved into a polished looking machine with a sleek black and gray frame. Gone are the binder clips and zip ties that held earlier models together. Flat cables in neat mesh sleeves replace all that bulky wiring, and the bed is kept in place with magnets. This is the first Ender 3 to come equipped with a direct drive, the Creality Sprite, which also eliminates the need for tubing.
There’s no ugly QR code plastered on the X gantry this time around. If, for some reason you forget where your printer came from, a more subtle QR code can be found printed on the front of the hotend.
The dual gear Creality Sprite was developed in house and works beautifully. It’s a little industrial looking compared to the rest of the machine, but the lack of plastic housing serves to cut down on weight. It’s not quite perfect – the drive is still lined with a PTFE tube, which limits its maximum nozzle temperature to 260 degrees. If you need higher printing temperatures, the even newer Ender 3 S1 Pro has an all-metal hotend.
I should mention the Creality Sprite Extruder is shipped unmounted and attaches with a few easy to reach screws. It’s meant to be simple to remove, so you can swap it with a laser kit, purchased separately. We’ll be reviewing the laser at a later date.
One thing I didn’t like is the awkward front-mounted parts cooling fan, which makes it hard to watch your first layer go down. The machine also comes with a run out sensor mounted near the spool holder and power loss recovery.
The Creality Ender 3 S1 has auto bed leveling, but kept the manual springs and knobs for backup. Speaking of springs, Creality finally upgraded the Ender’s notorious weak springs for stiffer orange ones, meaning this machine will hold its bed level for quite a bit longer. An extra Z axis switch is included, but is only needed if the CR Touch system fails and you need to switch to all manual leveling.
A final intriguing addition is a dual Z axis upgrade, something normally reserved for larger printers. The two lead screws are kept in sync with a belt for added security. The extra Z axis ensures smoother prints by giving the X gantry more support.
I have a mixed reaction to the supplied build plate – I love that they upgraded to a steel flex plate, but am disappointed that Creality gave it a ridiculously sticky PC coating. I had several silk PLA models lose their bottoms to this plate. Using a glue stick seems to help, but you’ll want to use extreme care with delicate prints. You can also replace the build plate with, for example, a smooth PEI flex plate from Comgrow for $24.
The display screen is the same as the Ender 3 V2, which still uses an old-fashioned knob selector. The menu system is simple to read and makes it easy to find what you need.
The Creality Ender 3 S1 is mostly pre-assembled (another first for the Ender 3 line) and comes together with a handful of neatly labeled bolts and screws. The paper manual is only suitable for eagle-eyed customers; everyone else should follow the larger PDF or video instructions included on the SD card.
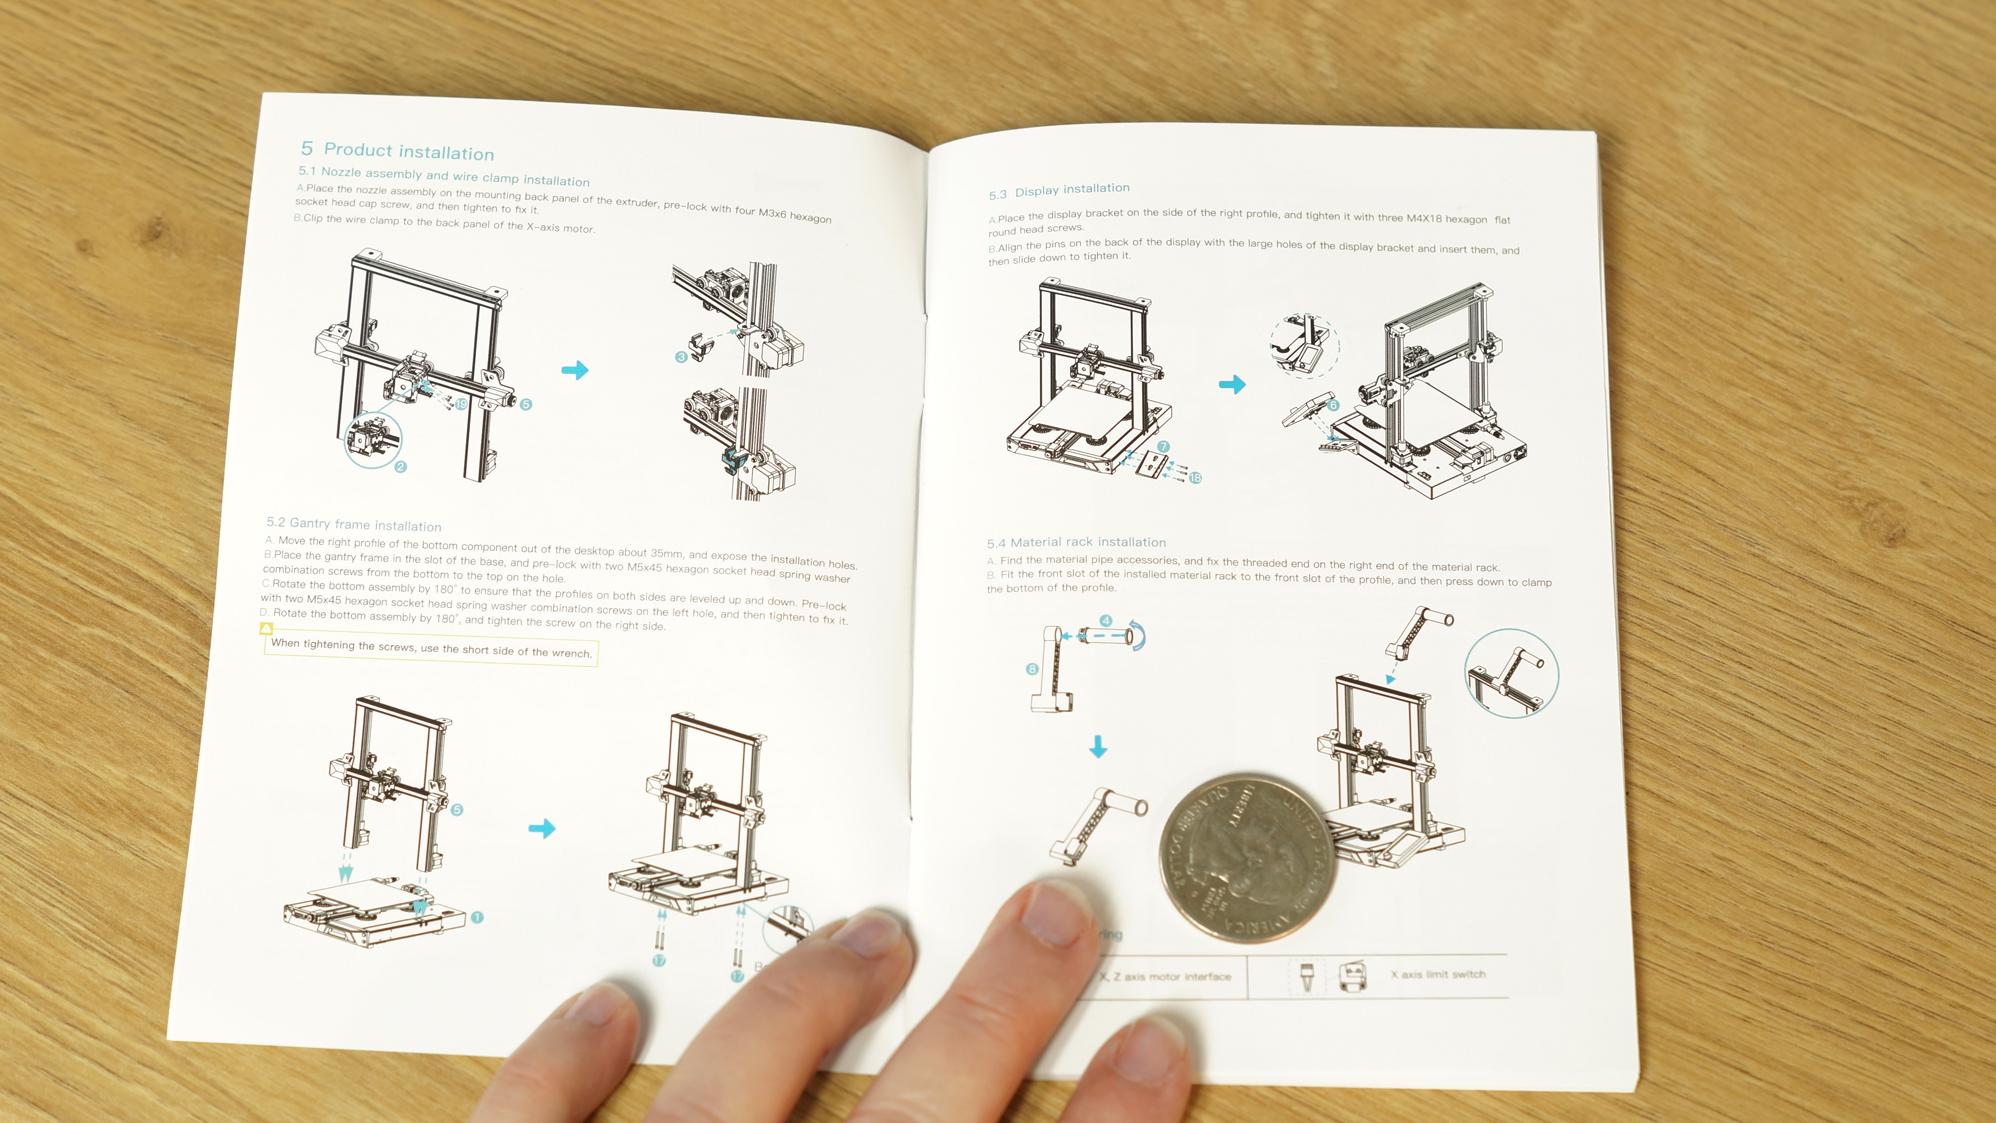
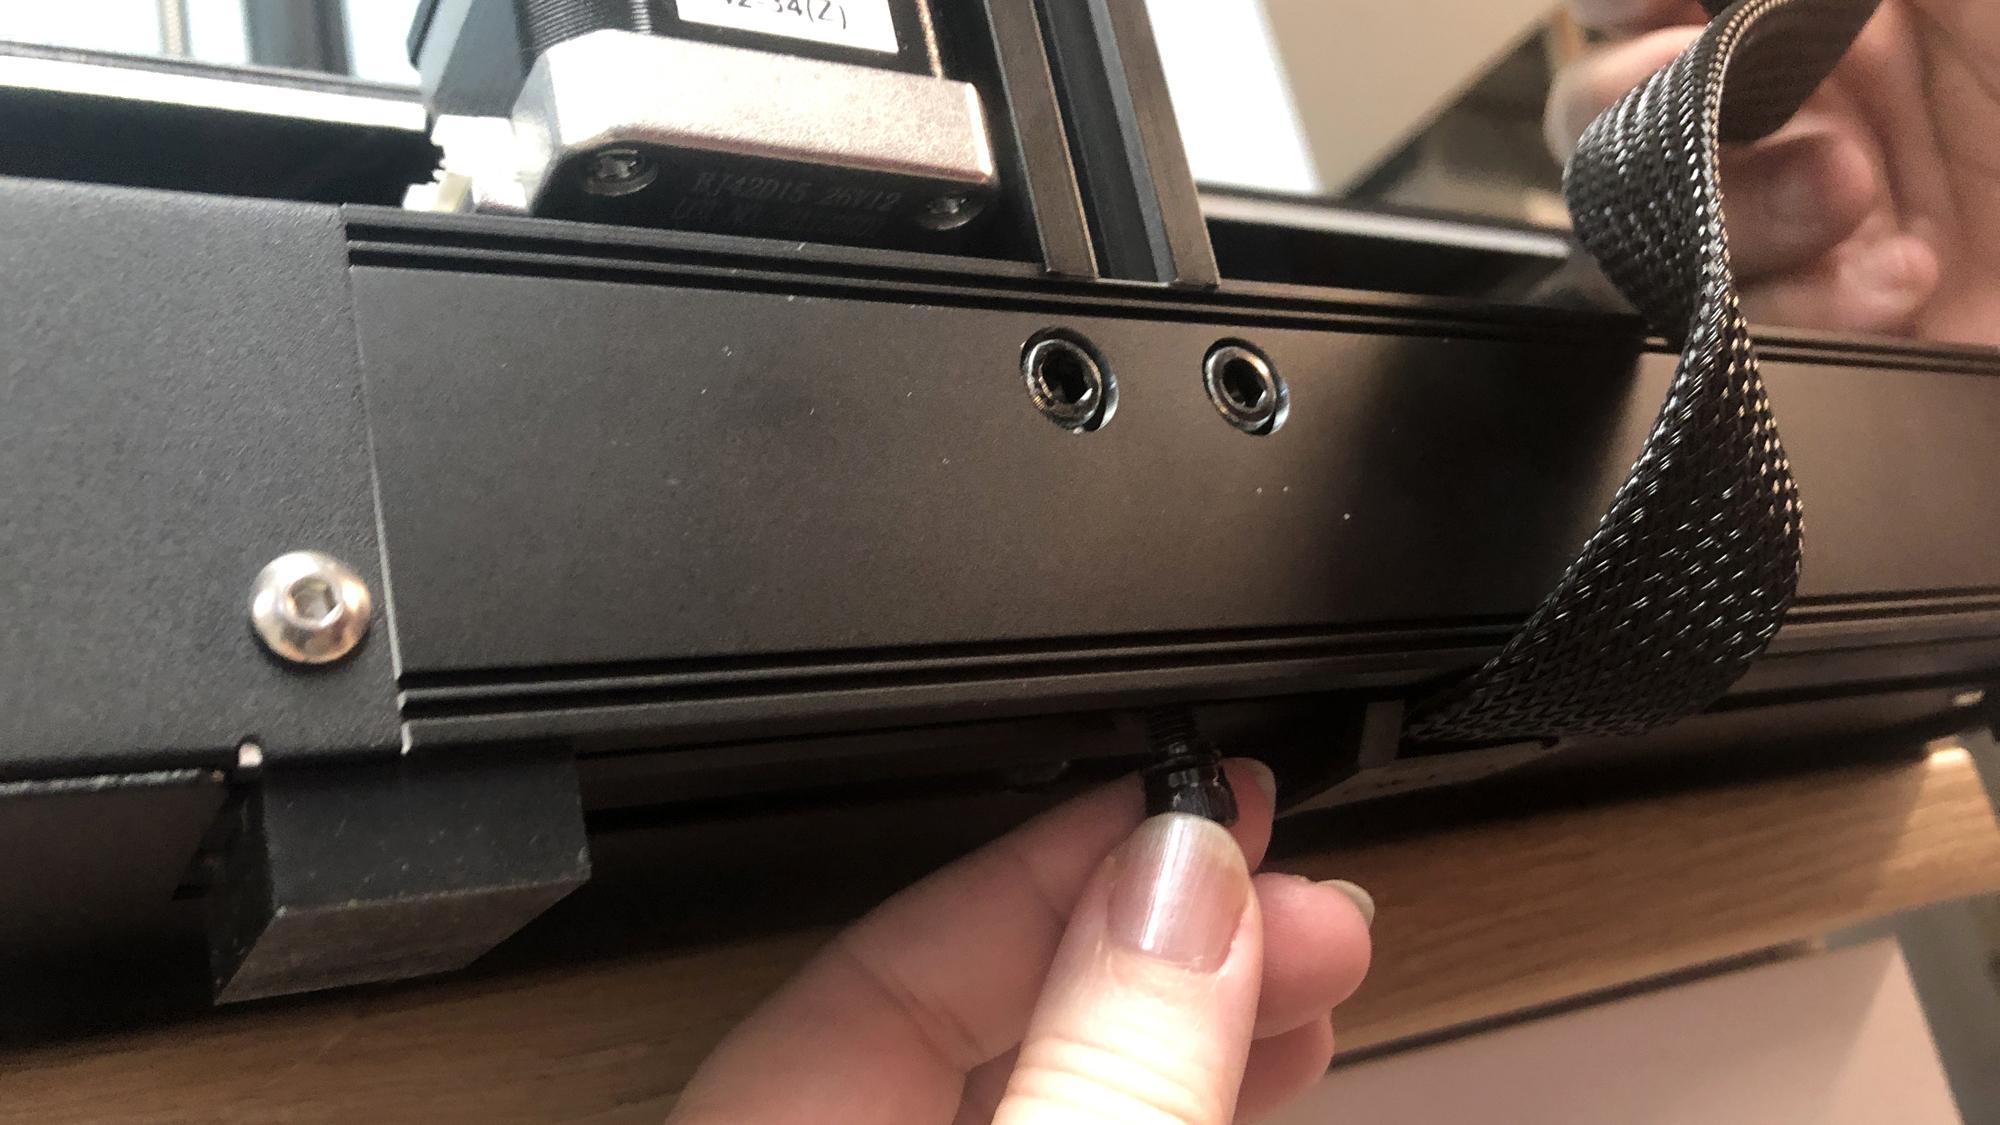
I installed the gantry first. It fits into slots on the base unit and is held in place with 2 screws and 2 bolts on each side. Then I fitted the hotend assembly onto the X gantry with four screws. The control screen bolts to the side with 3 screws and the spool holder snaps into place on the top.
Wiring is very simple as everything is already attached to the frame and only needs to be plugged in.
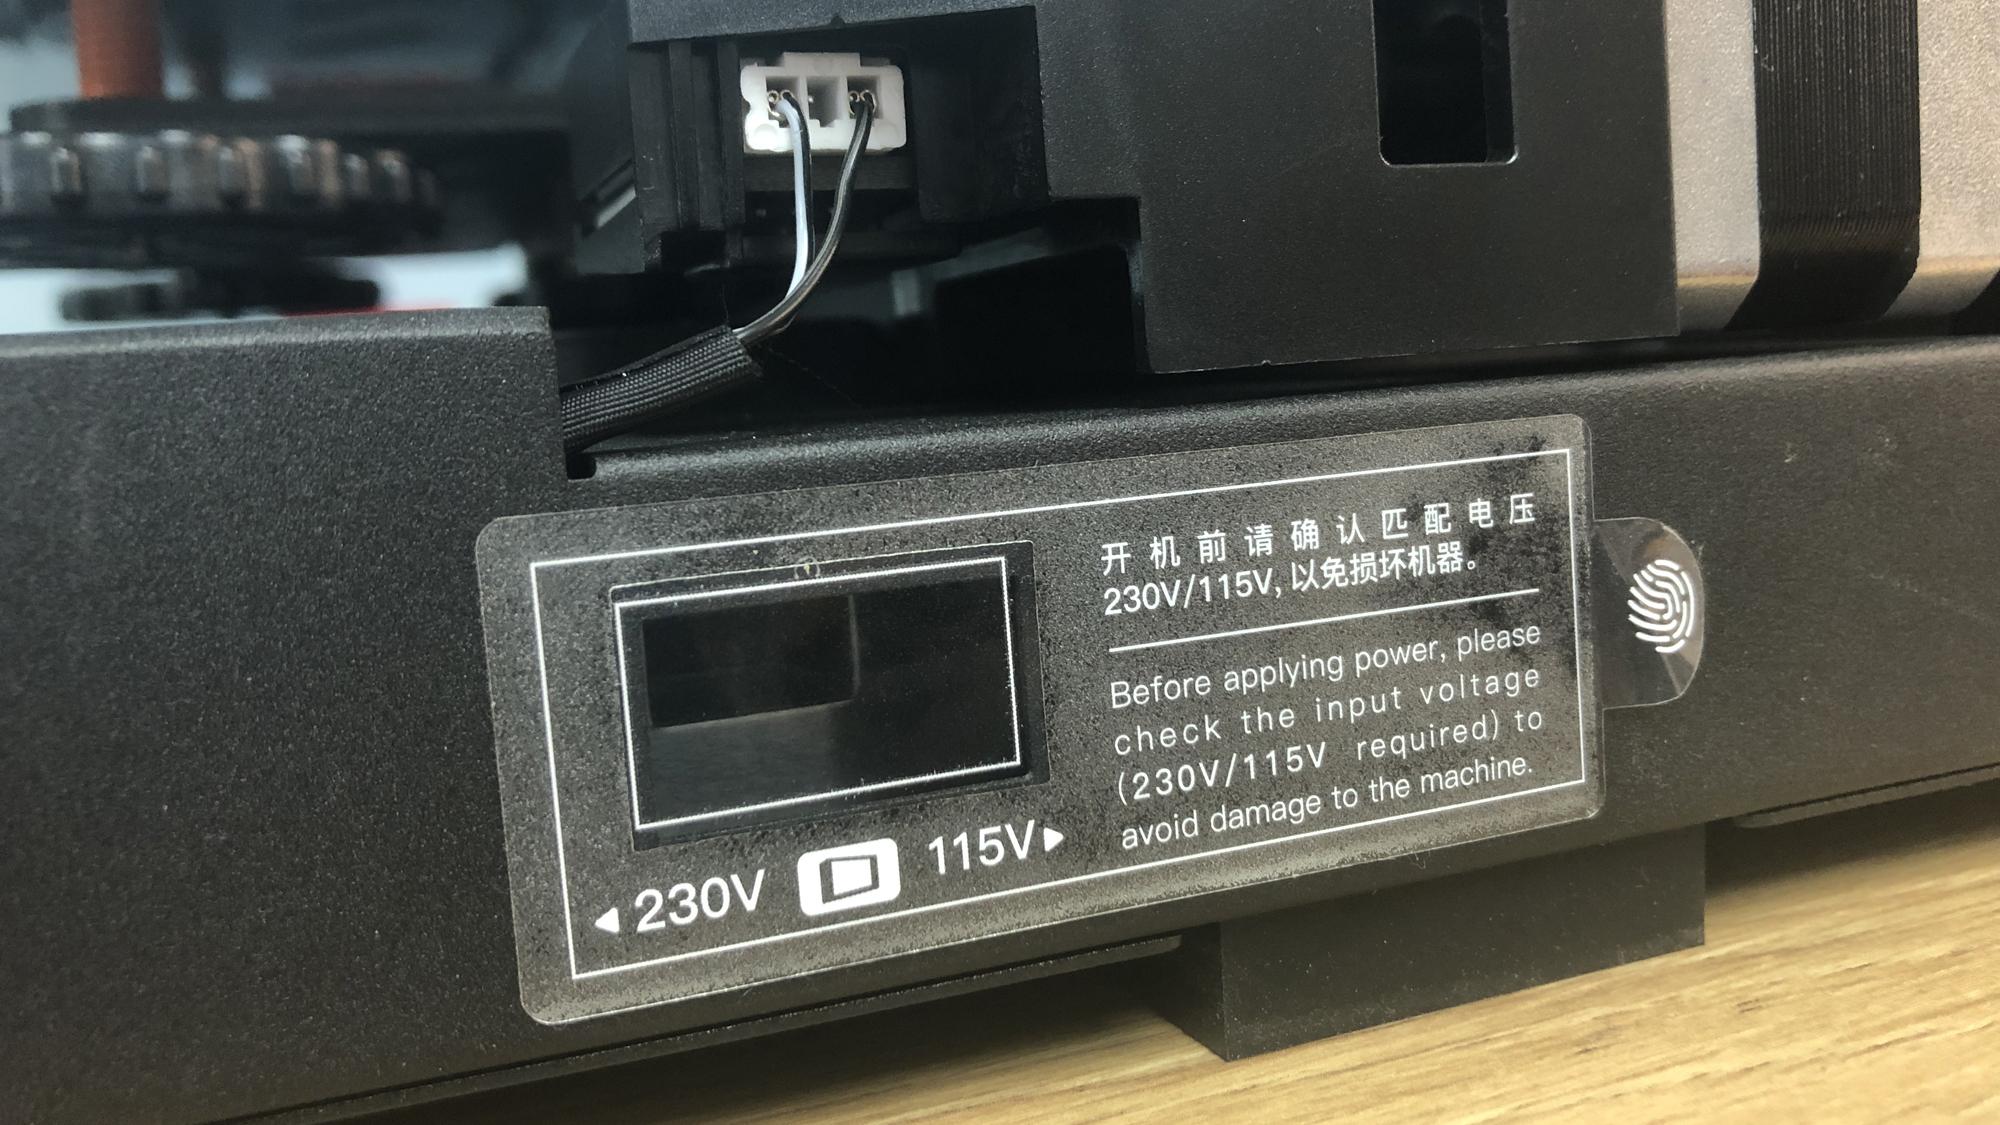
Last, flip the power supply switch to match your main household electric, which is 115V in the U.S. Creality placed a giant sticker to make sure you don’t overlook the hidden switch.
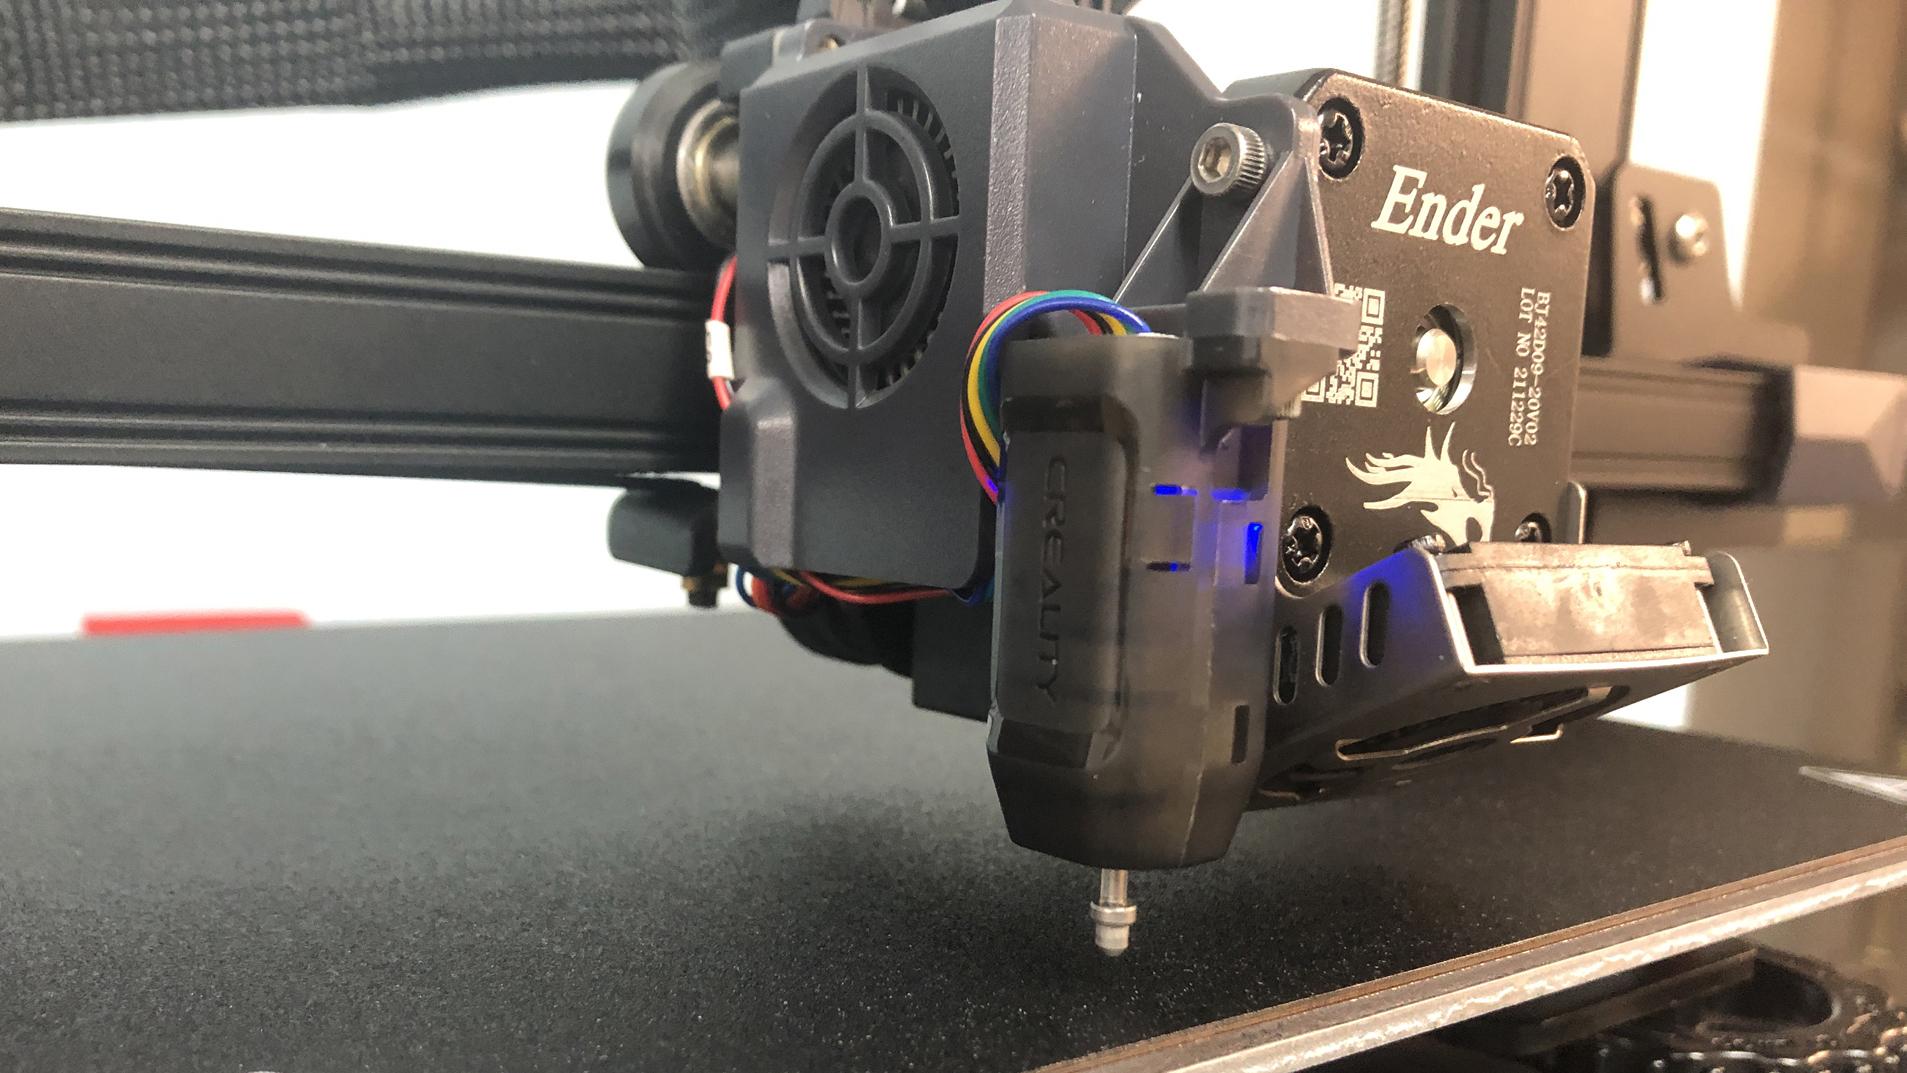
The Ender 3 S1 comes with a CR Touch installed, Creality’s answer to the popular BL Touch. It's a metal probe that physically taps the build surface and works with both metal or glass bed surfaces.
To level the printer for the first time, select Level from the main menu. The printer will immediately go into its leveling routine without preheating and tap 16 points around the bed.
Next, check the Z Offset. Click Prepare from the main menu and scroll down to Z offset. Slide a piece of paper under the nozzle and adjust the offset amount until the nozzle just scrapes the paper. When I leveled the Ender 3 S1 here for testing, it didn’t need any adjustment, but it’s always good to check.
If the CR Touch is unable to level the bed, you will need to do a manual level. Directions for this are in the manual.
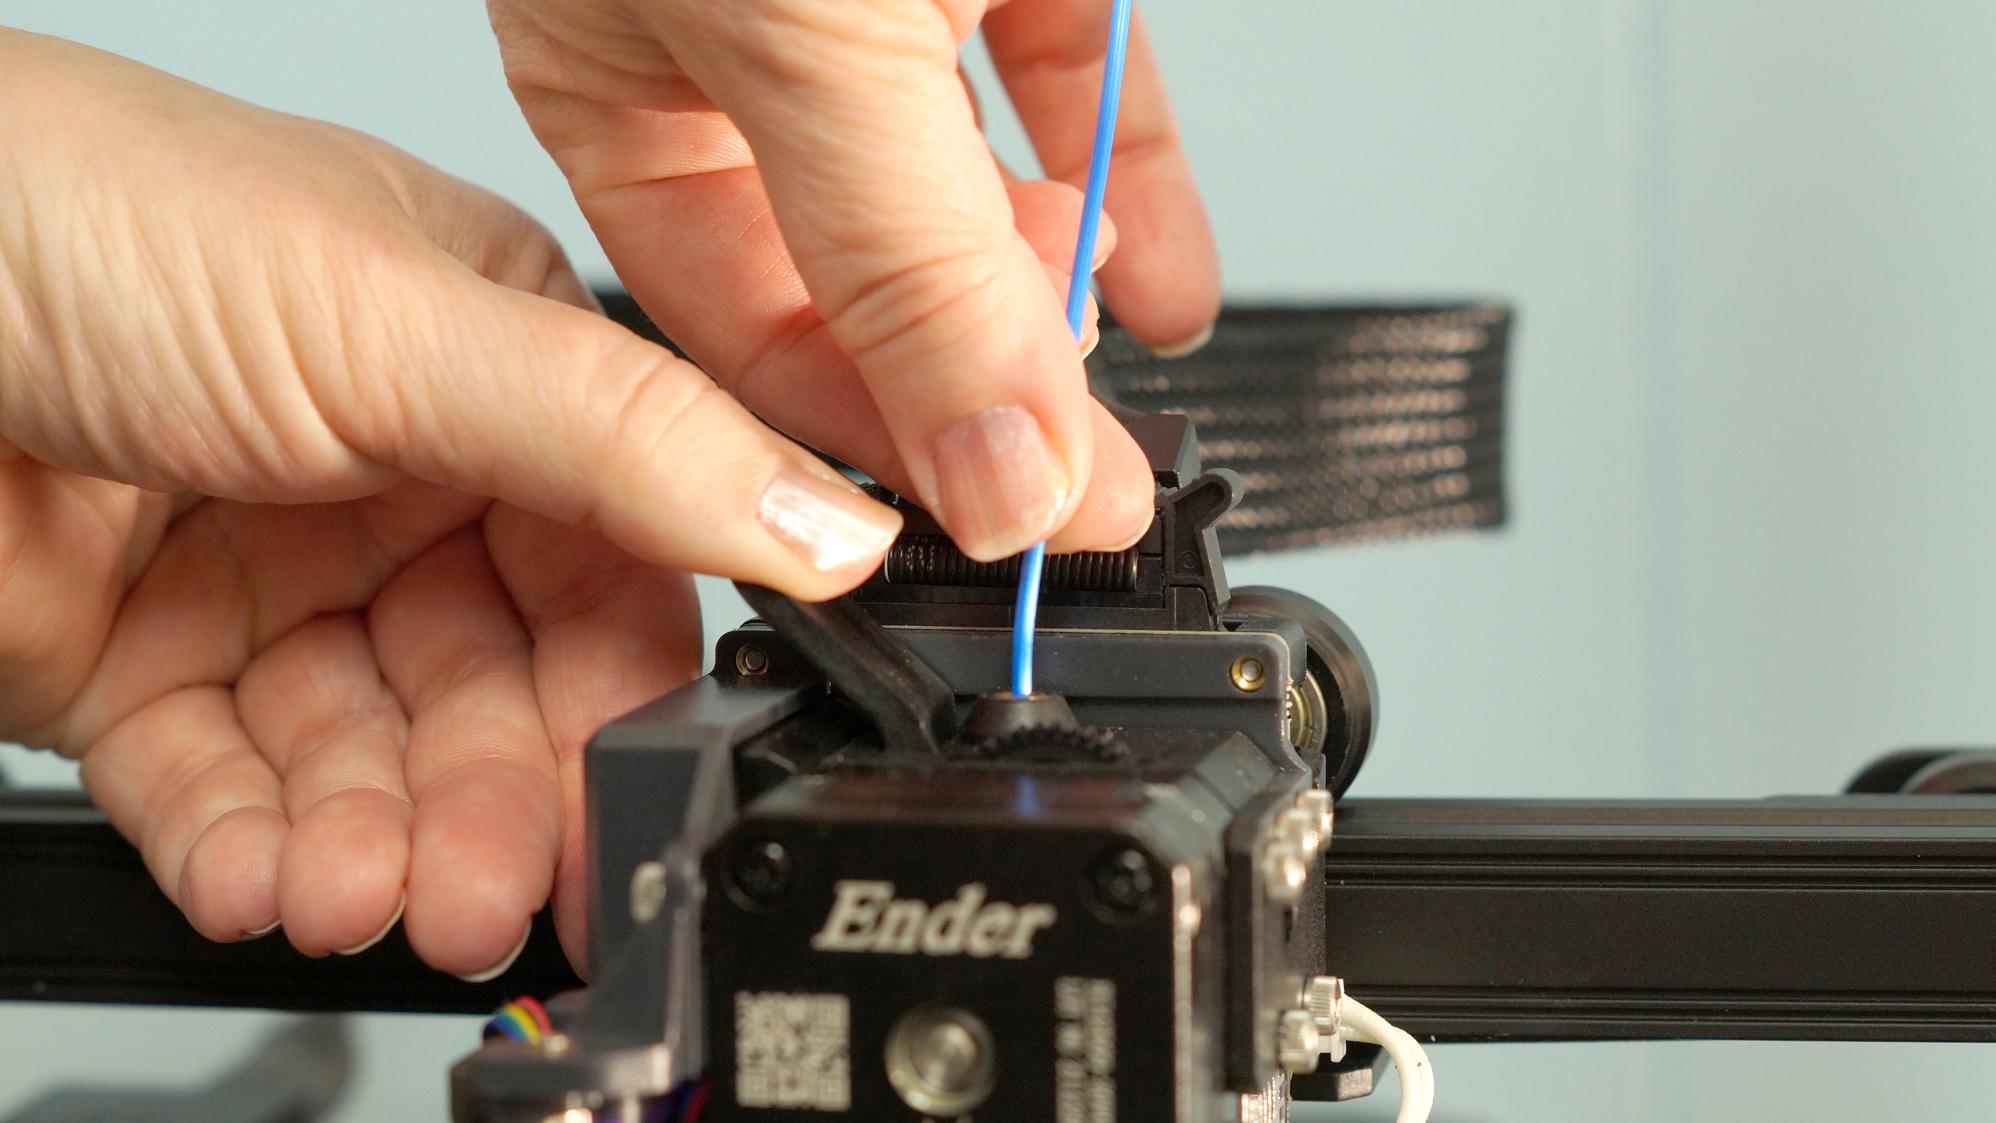
I’ve loaded filament into several direct drive machines, and the Creality Ender 3 S1 confounded me for a moment. Like previous Ender 3 models, there’s no filament loading routine in the control panel. I thought this was an oversight until I reexamined the manual.
The filament path on the Creality Sprite is so short that you can load and unload the filament entirely by hand. To load the drive, preheat the machine and put filament into the top hole. Push the lever to release the tension spring and push the filament in. Reverse the process to unload.
If you’re changing colors, switching material or running cleaning filament, you can still tell the machine to extrude a larger amount by using the control panel. However, for most filament swaps, you only need to hand push an inch or so of filament through the drive.
Preparing Files / Software for Creality Ender 3 S1
The Creality Ender 3 S1 comes with a copy of Creality Slicer 4.8.0. You can also use Cura and PrusaSlicer, which are both popular programs available for free download.
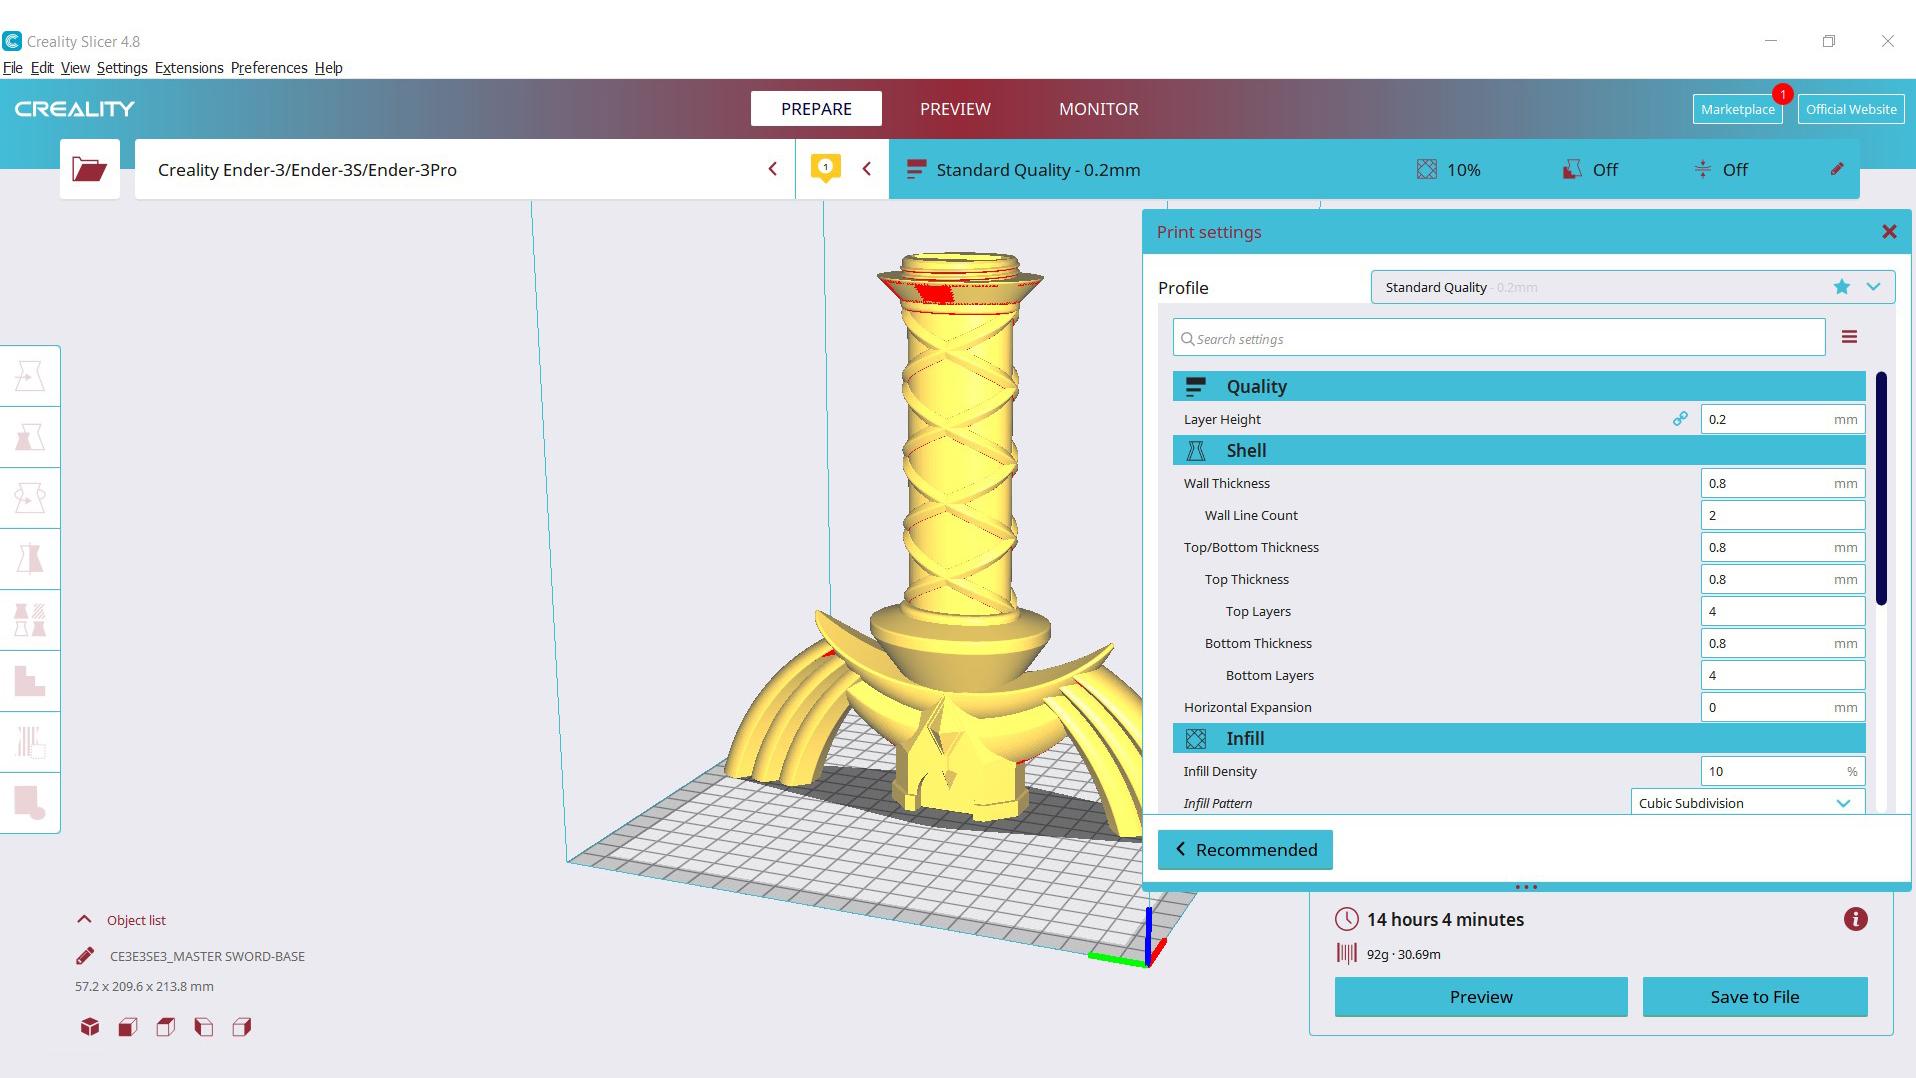
The latest version of Cura (4.13.1) doesn’t have a profile for the Ender 3 S1, but you can use the profile for the Ender 3 Pro and adjust the build height to 270. PrusaSlicer has a profile for the Ender 3 S1 ready to go.
Printing on the Creality Ender 3 S1
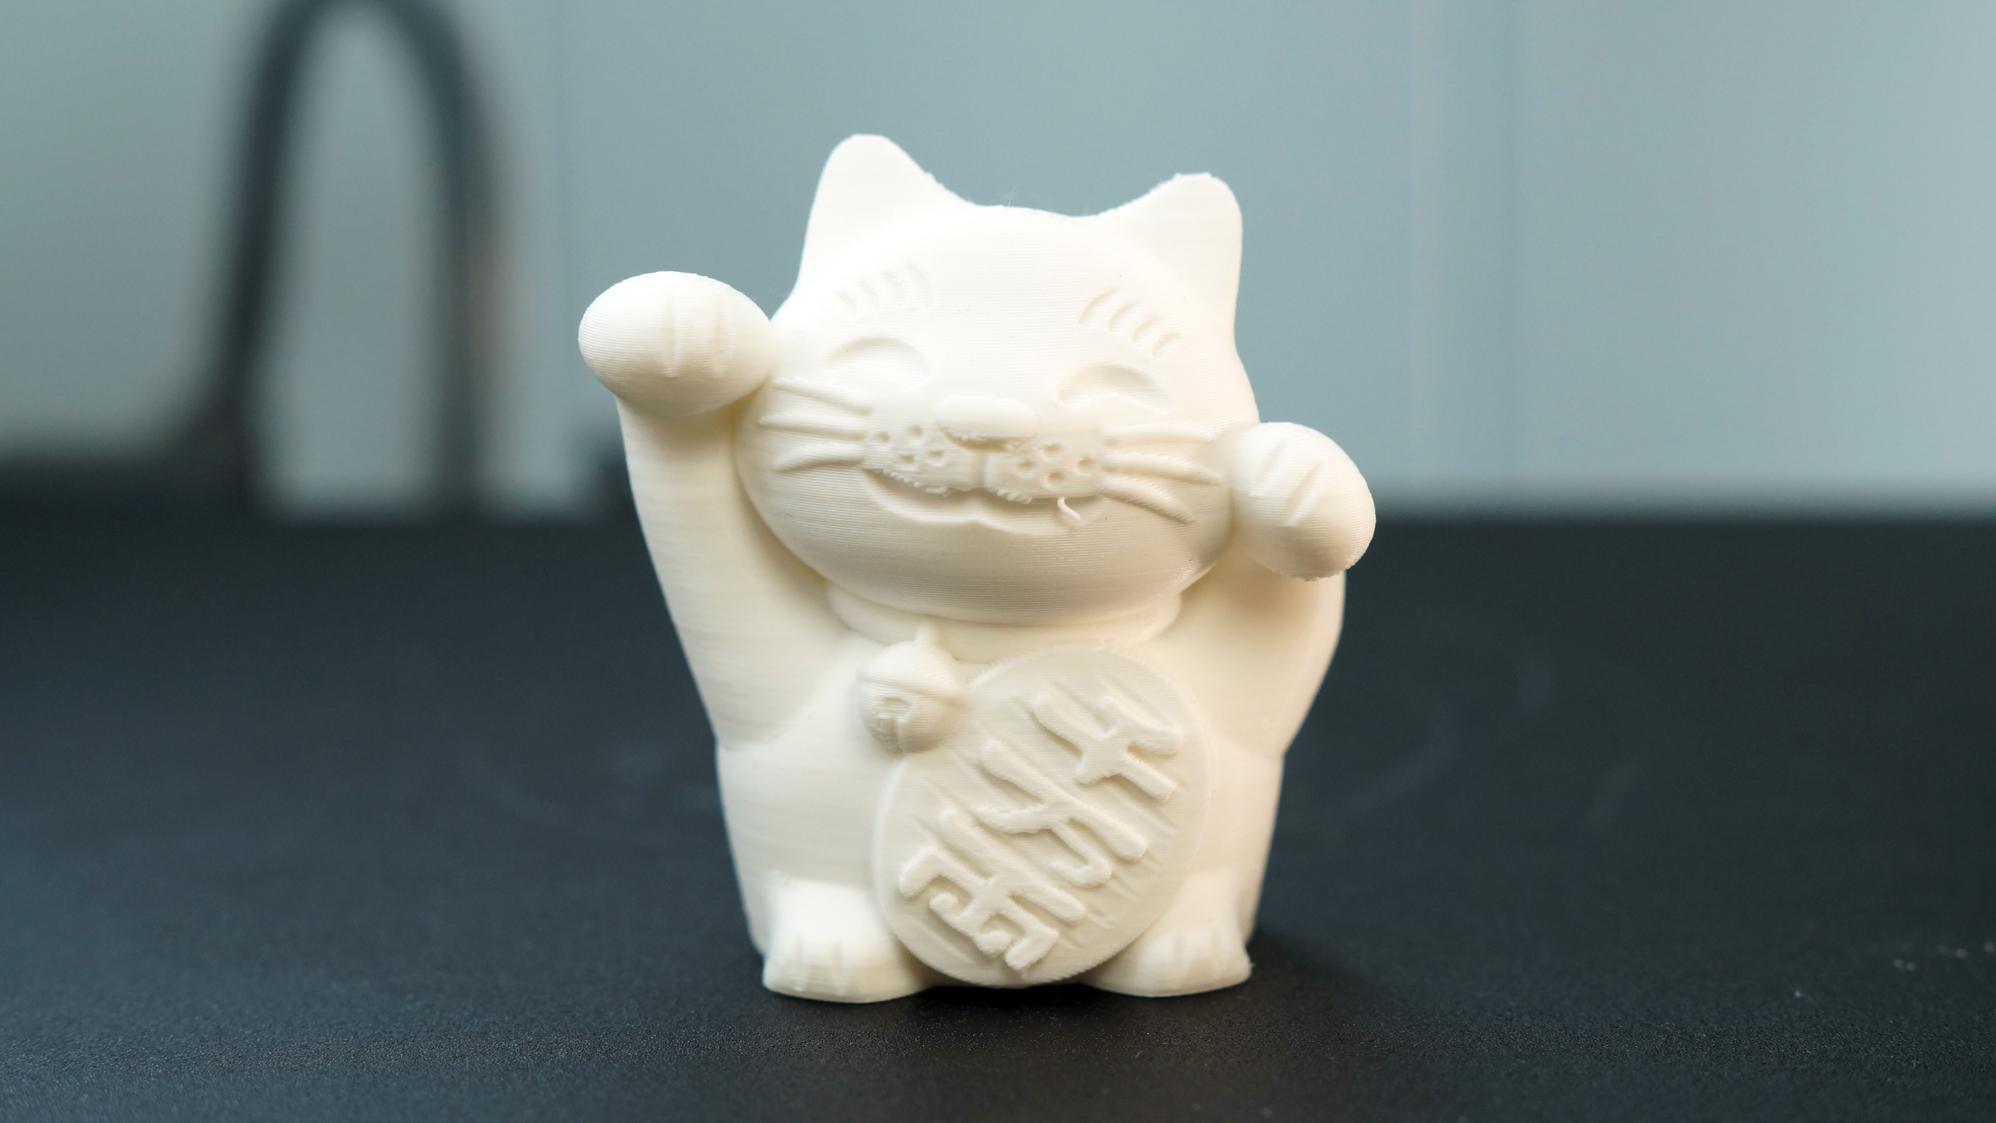
The Creality Ender 3 S1 provides great print quality right from the box. My first print was a pre-sliced Cat from the SD card. I used the supplied sample PLA and it turned out great, with one stray thread at the mouth from the overhang.
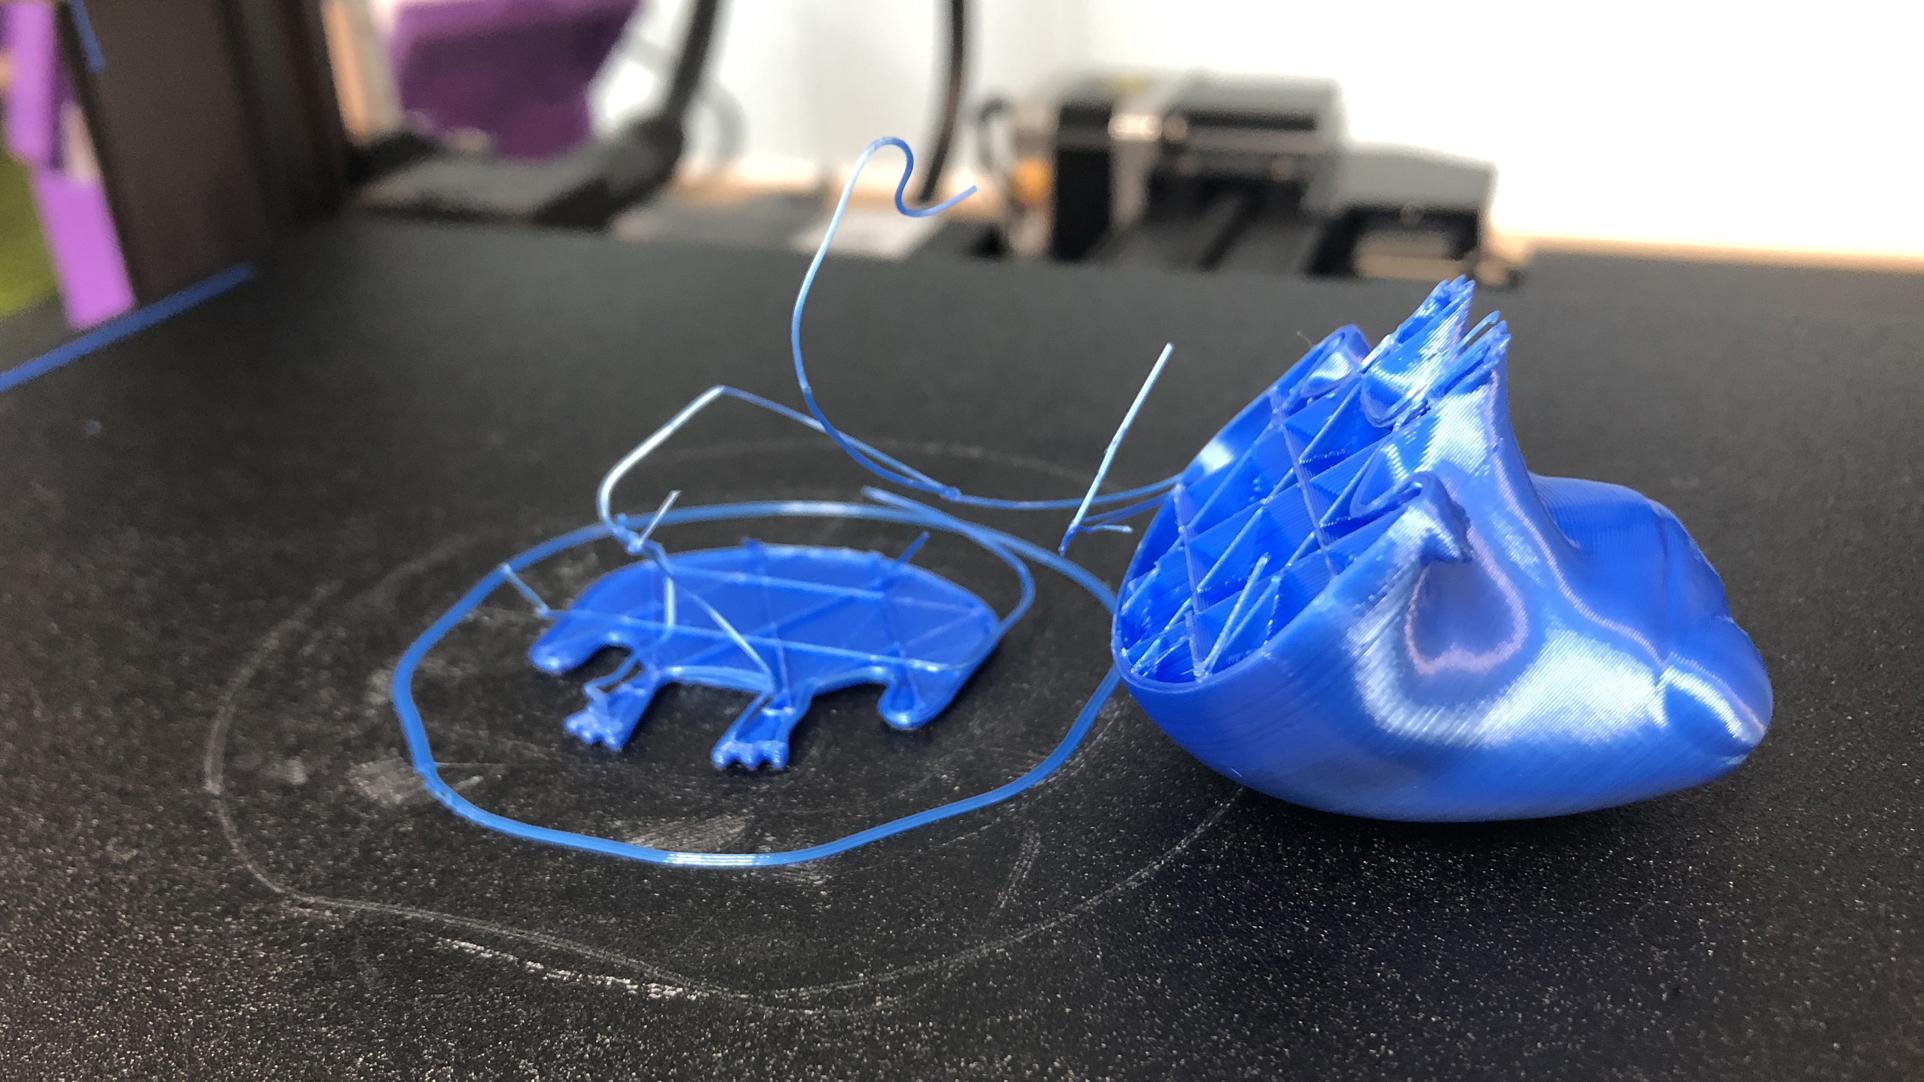
After a first successful print, I jumped right into silk PLA (Matterhacker’s Build Series Silky Blue PLA) and my favorite easy model – Fred the Frog. This is when I found out the new PC coated bed is tenaciously sticky. You need a little less squish on this print surface–and some glue stick for good measure. This bed never releases prints on its own – you always have to flex or pop it off with a scraper. Fred left a few layers behind when I tried to snap him off the plate by hand.
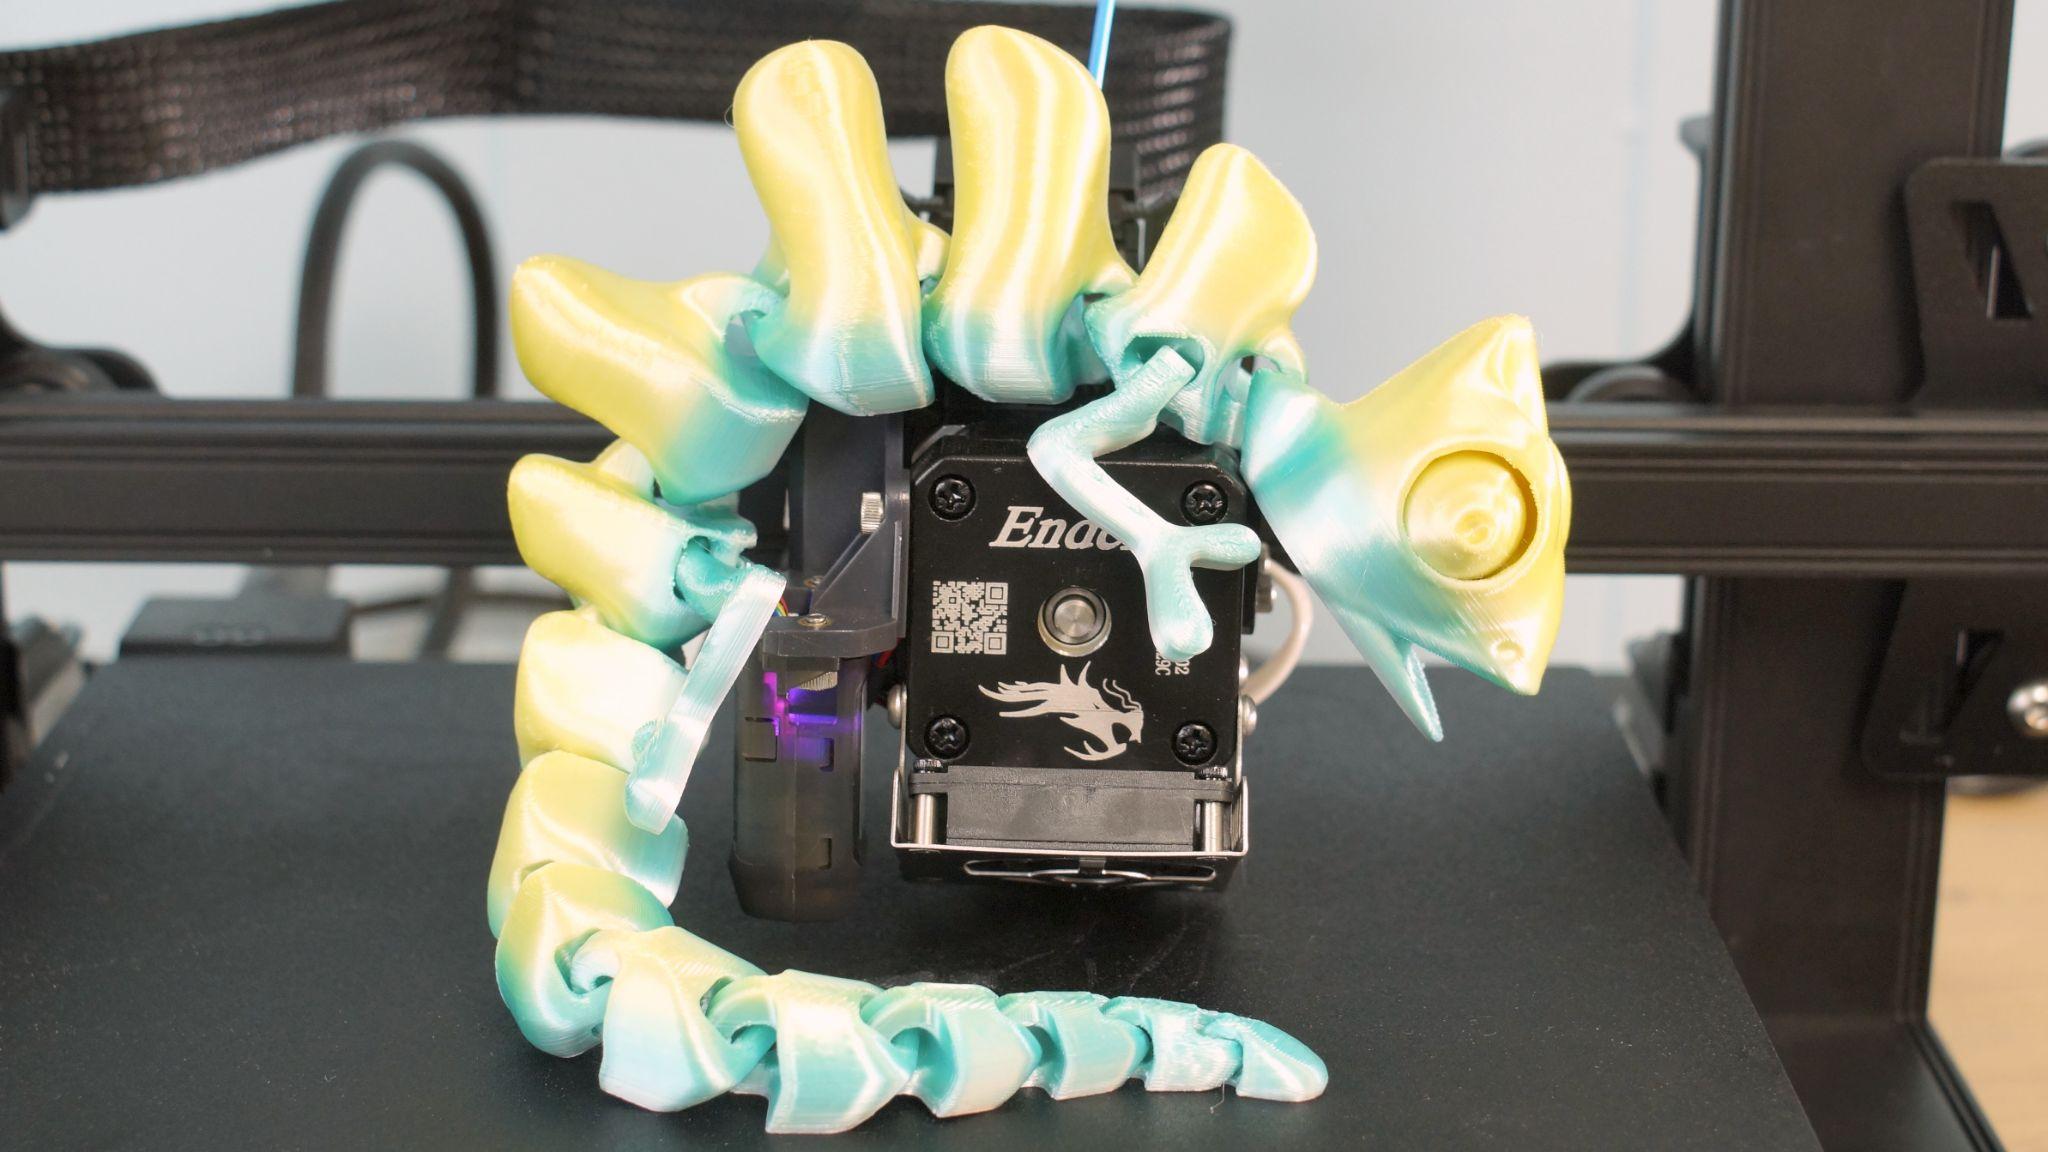
After adjusting my Z height to compensate for the stickiness, the Creality Ender 3 S1 handled silk PLA and articulated prints well. Here’s a free Chameleon print from McGybeer, printed at .2 mm layers with Inland Rainbow 2 PLA.
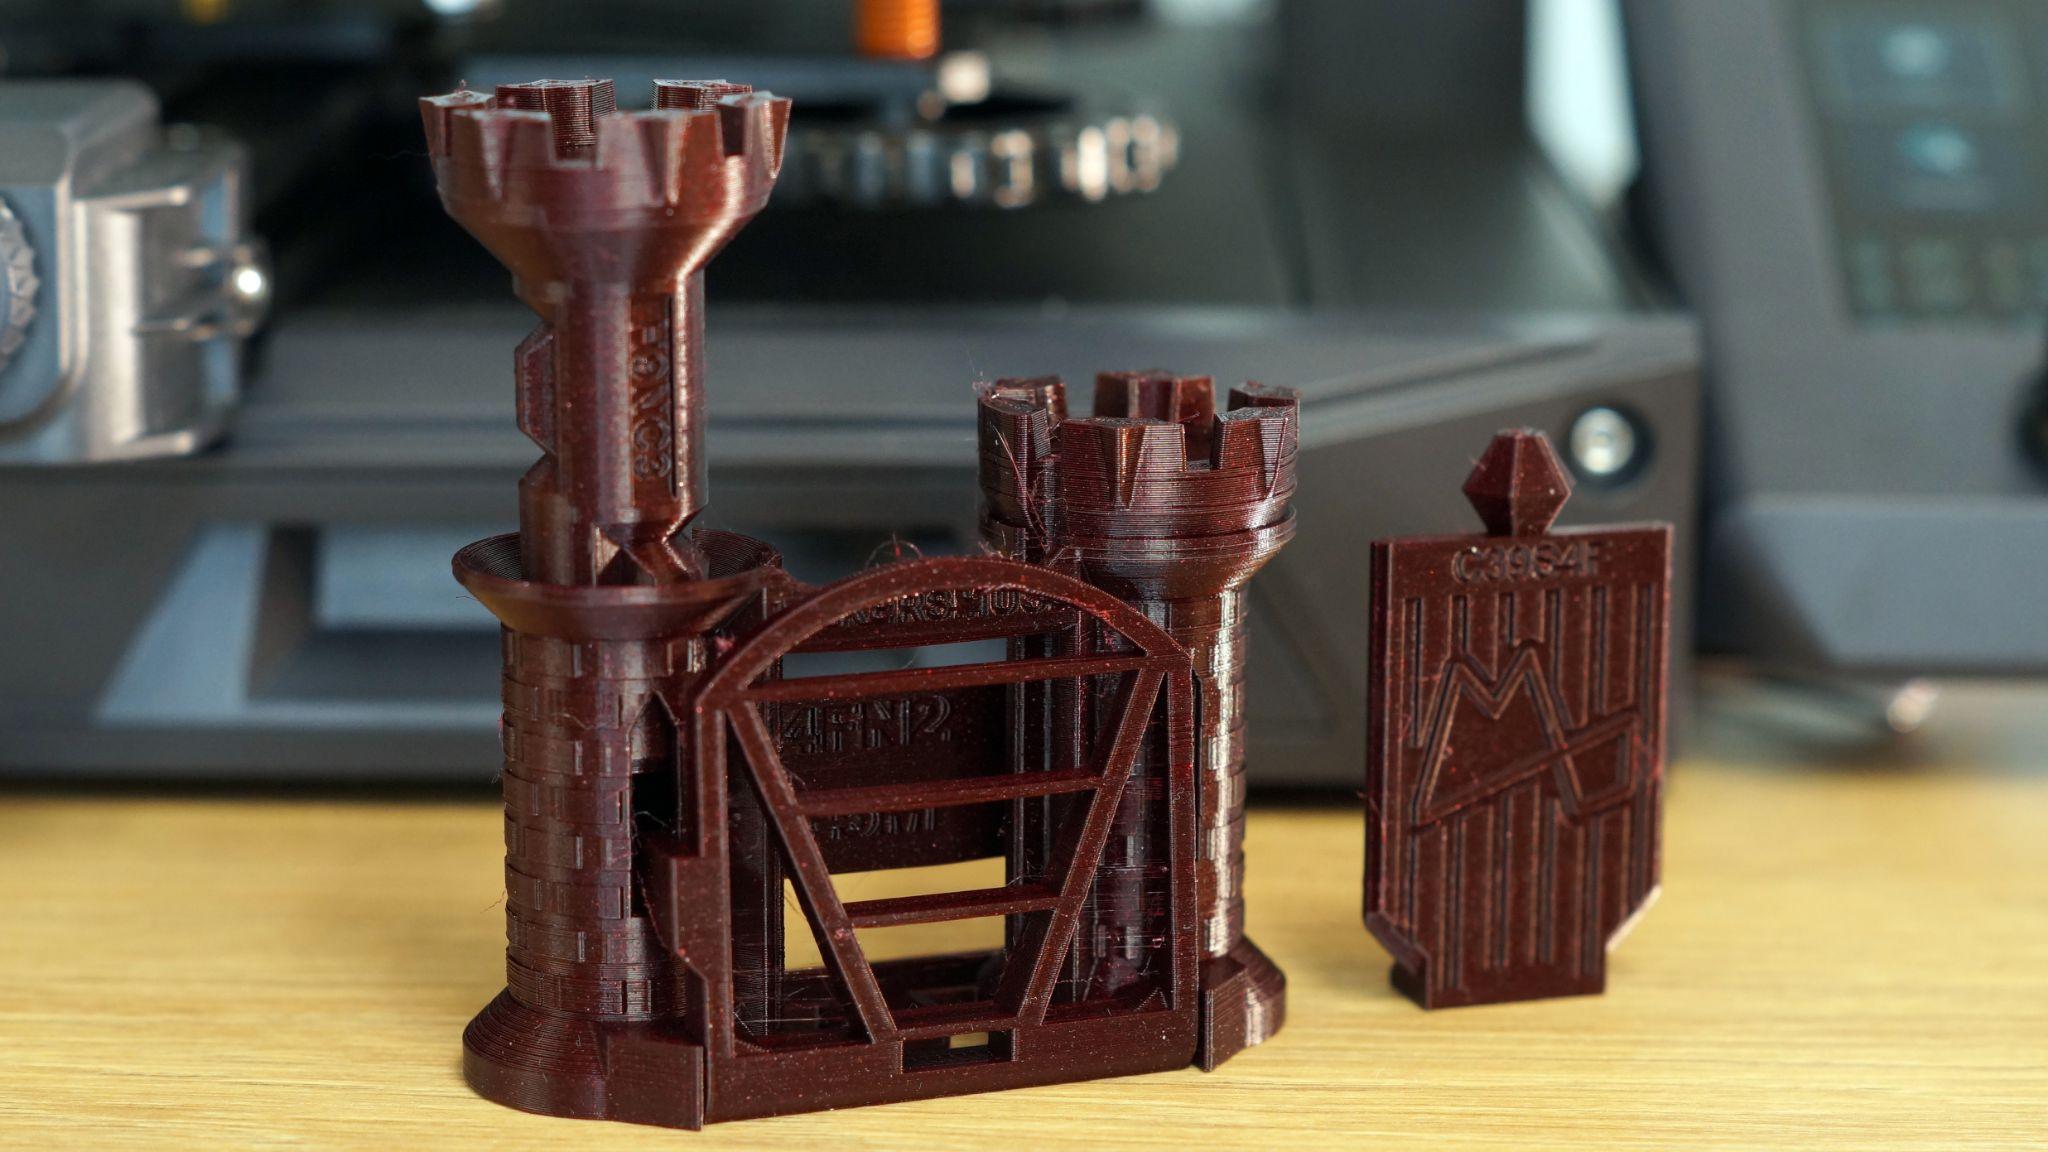
Next up is a Calibration Castle test print from YouTuber Maker’s Muse. This print is designed to stress test your FDM printer, and the Ender 3 S1 passed with flying colors. The print in place maze nestled inside the tower unscrews as it should, the overhangs on the draw bridge were near perfect and the print in place gate popped right out. I printed at a 0.16 layer height in Protopasta recycled PLA.
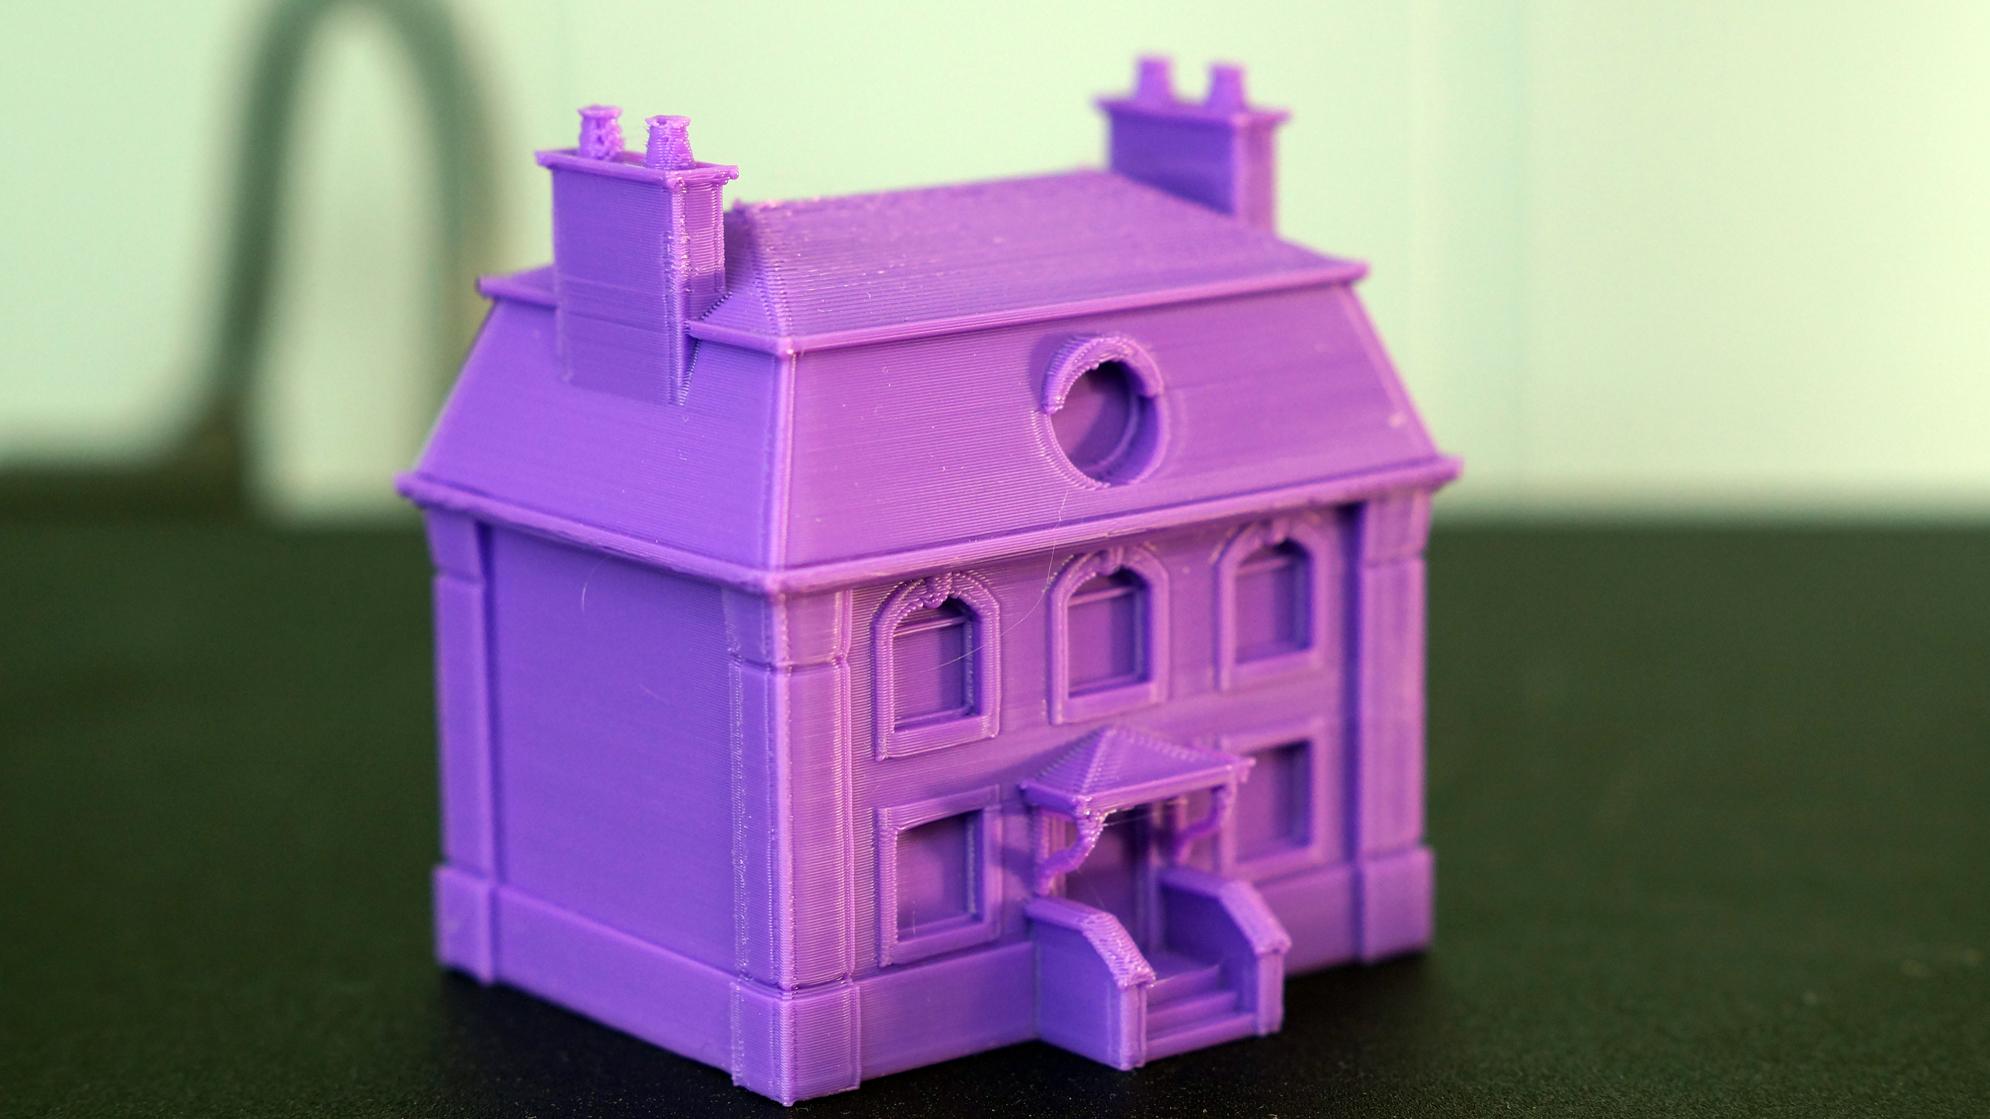
I was searching for new calibration prints, and found this interesting house from tmpx64. All the fine details, including the pesky gutters, printed great. It printed at 0.2 layer height in Printerior purple PLA.
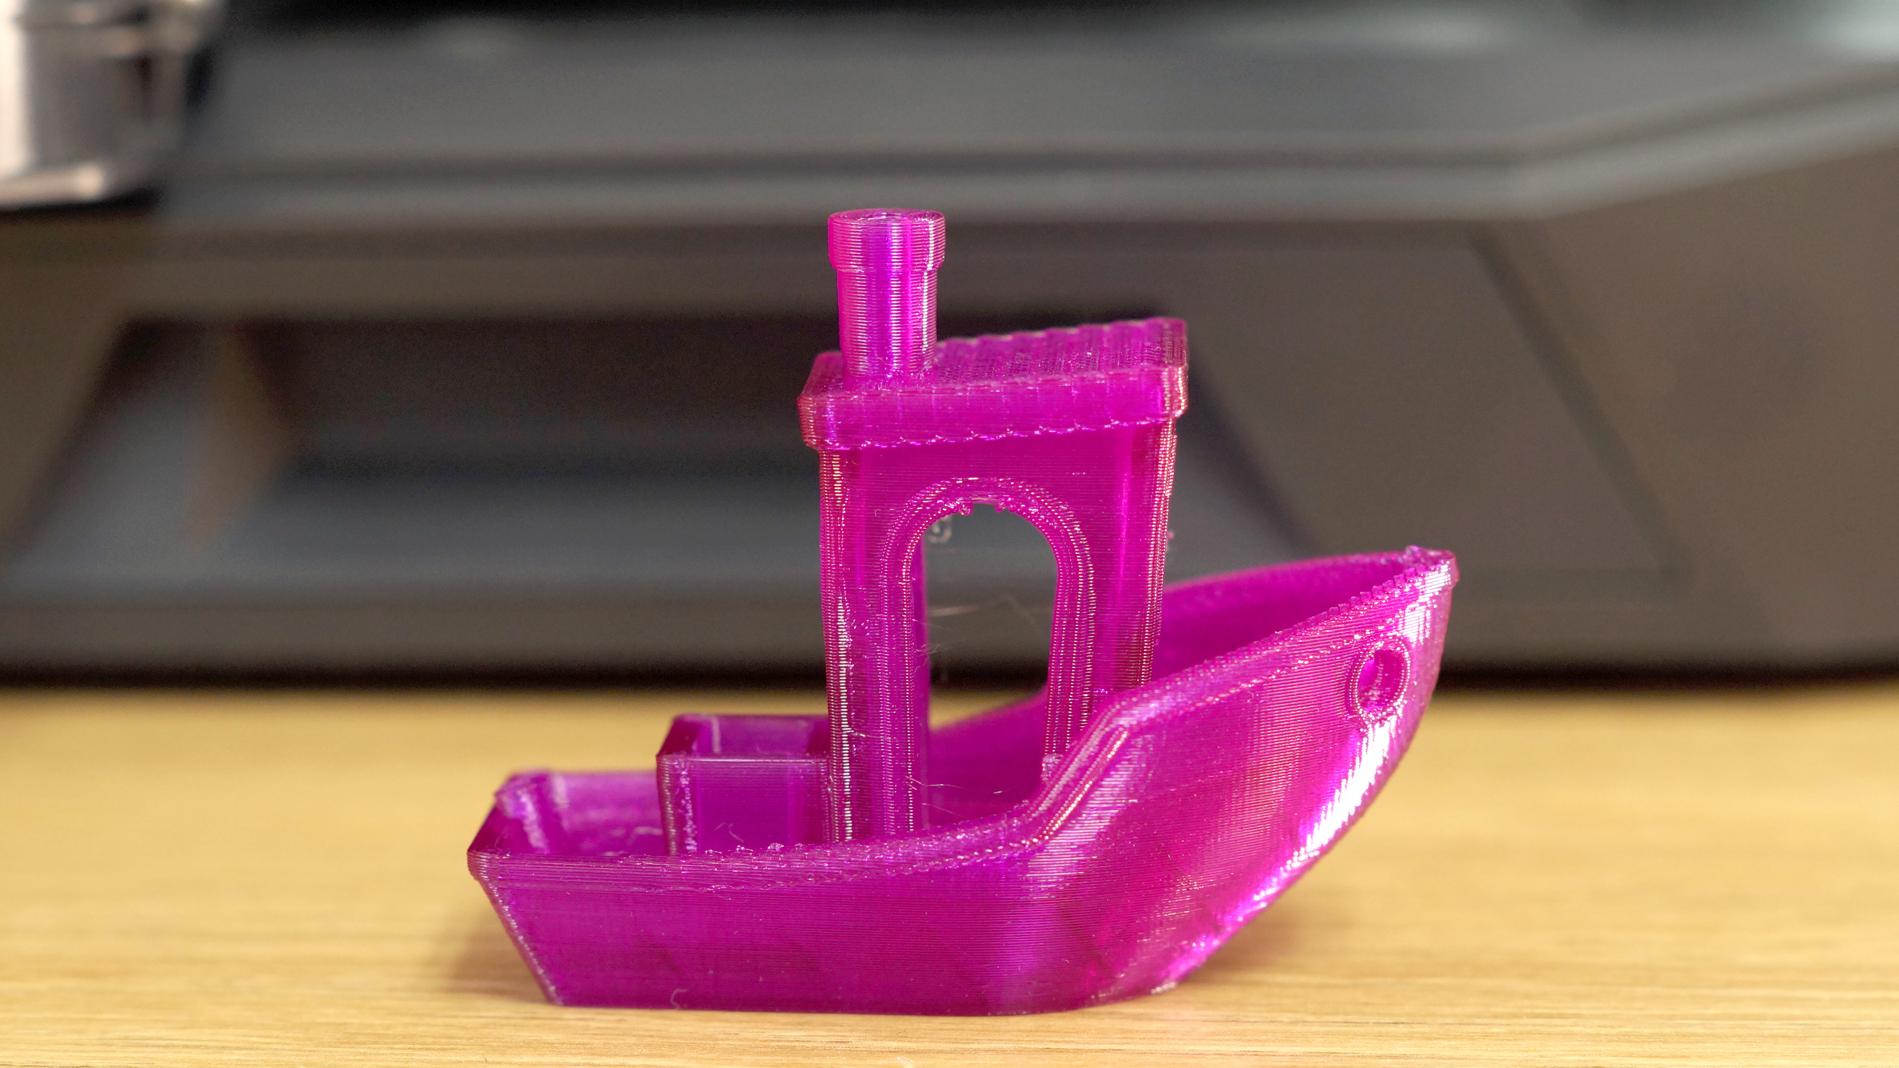
I did a quick check with TPU, and as expected, the Creality Sprite direct drive had no problems with stretchy filament. This Benchy is printed at .2 layer height in Matterhacker’s Build Series TPU in translucent purple.
Bottom Line
The Ender 3 S1 offers a near perfect printing experience that’s a welcome change from its budget minded predecessors. It’s easy to assemble and the CR Touch leveling system worked perfectly. I only needed to adjust the Z to compensate for filaments that need less squish. You get beautifully smooth prints even at standard print settings.
The steel coated build plate is a step in the right direction. However the coating is way too aggressive. It might wear down with time, but after a few weeks of printing, I still needed to use a glue stick and a lot of care when removing prints.
If you’re looking for a less expensive printer with the same build size, auto leveling and direct drive, check out the Anycubic Kobra. Priced at $319, it’s an Editor’s Choice and our pick for Best Printer for Beginners.

Denise Bertacchi is a Contributing Writer for Tom’s Hardware US, covering 3D printing. Denise has been crafting with PCs since she discovered Print Shop had clip art on her Apple IIe. She loves reviewing 3D printers because she can mix all her passions: printing, photography, and writing.
