Dothan Over Netburst: Is The Pentium 4 A Dead End?
Installation, Step-by-Step
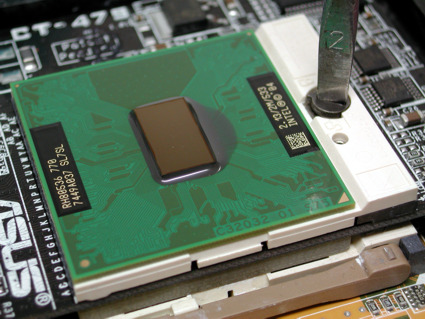
After inserting the socket adapter into the mainboard, lock it into place using the socket's lever. Then secure the processor itself by turning the screw on the adapter card.
We're assuming that before beginning installation, users will already have upgraded their mainboard's BIOS.
Closing the socket on the adapter works just like tightening any normal screw. Half a clockwise rotation is enough to secure the processor. Be very careful when handling the CPU, as it is very easy to inadvertently damage the die, making the unit unusable.
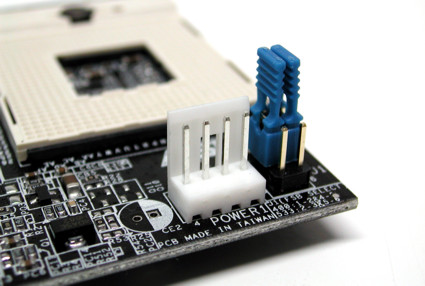
The CT-479 socket adapter requires additional power, which it draws from a floppy-drive power cable
The two jumpers on the adapter determine the Pentium M's front side bus speed. For an FSB of 400 MHz, jumper J1 has to be set to 1-2 and 4-5; for 533 MHz, the correct settings are 2-3 and 5-6.
Cooling: Barely Worth Mentioning
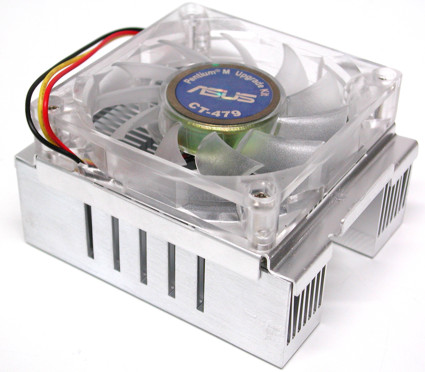
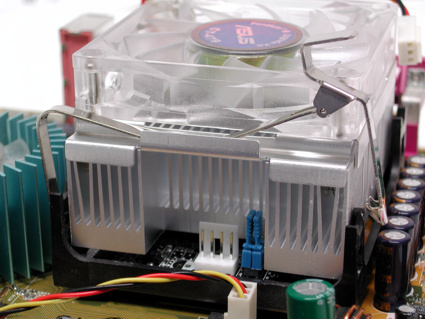
The cooler that ships with the adapter is made completely of aluminum. As a result, it is very light, weighing only about half a pound (234 grams, to be exact.)
The CT-479 can only be used with the cooler that is included in the upgrade kit, since the processor is raised by about 1/3 inch (8 mm) by the adapter card, and there are also jumpers and power connectors on the little circuit board. The fan is very quiet indeed. Additionally, since the BIOS can monitor the Pentium M's core temperature, overheating prevention measures will work, and Asus' own Q-fan feature, which regulates fan speed, can also be used. Q-fan can automatically vary the fan's speed between 68% and 100%.
Get Tom's Hardware's best news and in-depth reviews, straight to your inbox.
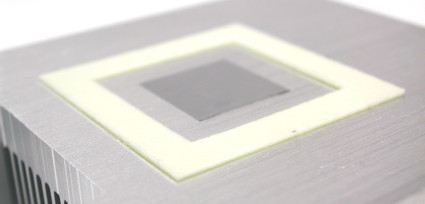
The cooler comes with a thermal interface pad.
The thermal interface pad is framed by rubber foam, which rests on the CPU's organic package when the cooler is installed. This is supposed to prevent accidentally twisting the cooler and chipping the die.
The cooler is held in place using retention clips that are easily attached.
When installing the cooler, the best method is to start out by placing it on the CPU, aligning the clips with the socket, then holding the cooler's edges in place with one hand and attaching the clips with the other. Otherwise, there is a chance that one side of the cooler could twist up, leading to damage to the die. Asus chose to use a 70 mm fan, which is very rare for CPU coolers. This basically narrows the available alternatives down to a few fans offered by Papst, namely the 712F/2L (3,300 RPM) and the 712/F2 (5,300 RPM).
Current page: Installation, Step-by-Step
Prev Page Test Subject: Asus P4C800 Next Page Starting Up For The First Time
Patrick Schmid was the editor-in-chief for Tom's Hardware from 2005 to 2006. He wrote numerous articles on a wide range of hardware topics, including storage, CPUs, and system builds.
