Tom's Hardware Verdict
The Dygma Raise is extremely expensive. But its stellar configurability, luxury build quality and ability to adapt to your most comfortable writing position are worth the investments in both time and money. And its flexible layer system eliminates the compromises you usually find with 60% keyboards.
Pros
- +
Premium build quality
- +
Highly customizable
- +
Bright RGB that’s really useful for tracking the keyboard mode
- +
Very comfortable to use, with split wrist rests and optional tenting
Cons
- -
Pricey
- -
Bazecor software is still in beta
- -
Layered typing has a learning curve
Why you can trust Tom's Hardware
You might do a double-take when you see the Dygma Raise’s price, but the $349 buys you an amazingly flexible keyboard that can start as a traditional compact mechanical gaming keyboard and end up a split, tented, ergonomic powerhouse. Customizable with your choice of eight hot-swappable Cherry MX and Kailh switches, eight keycap languages (including a couple of sets with just dashes and no characters if you really want to show off your elite touch-typing skills), and an optional tenting kit, the Dygma Raise is incredibly tweakable.
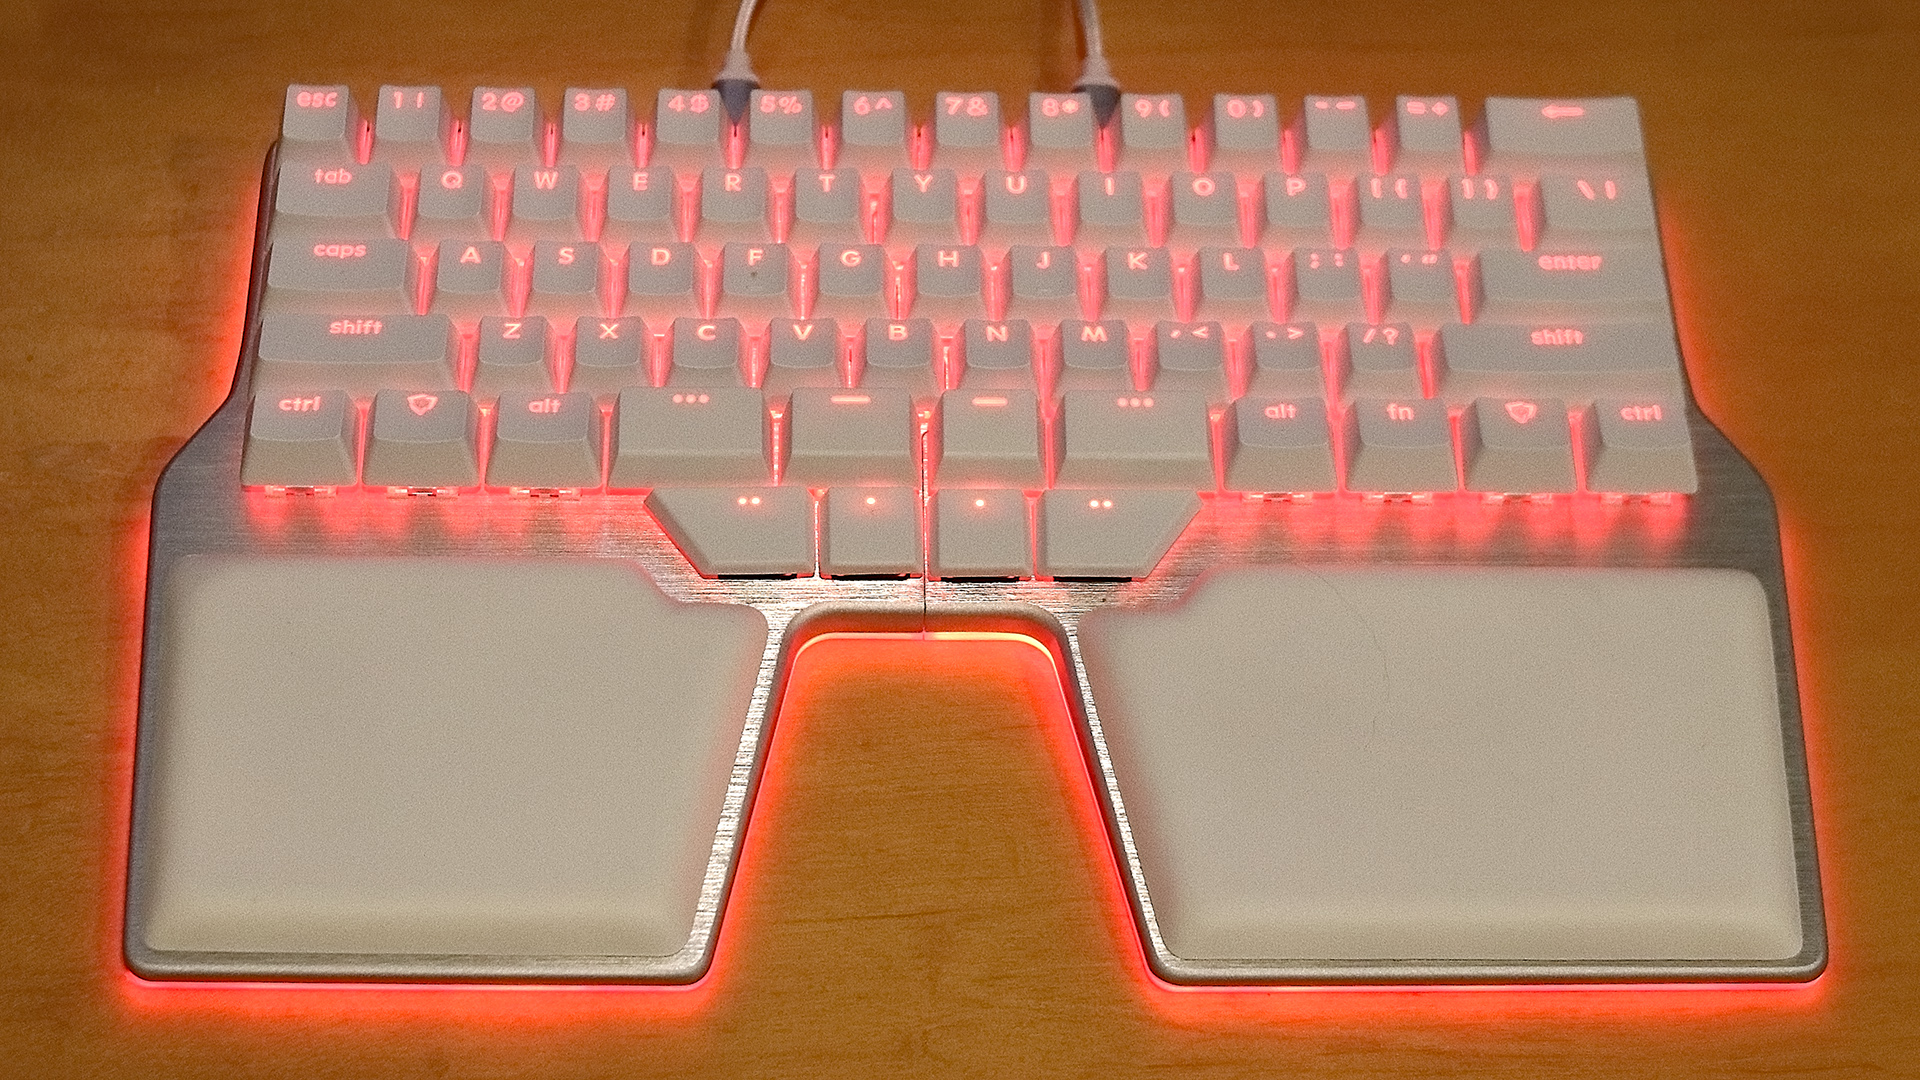
At first glance, the Raise appears to be a compact, 68-key mechanical keyboard with little distinctive about it besides a four-way split space bar with a few extra keys below, and a pair of upscale wrist rests. Unlike some ergonomic solutions, the layout is 100% traditional, which should delight touch-typists and gamers who long ago memorized the QWERTY layout. Pull the two halves of the keyboard apart, though, and the Raise goes from traditional layout to ergonomic comfort.
The Ace in Dygma’s hand, though, is its extreme programmability. The Dygma Raise looks limited for gaming or advanced productivity usage–after all, not only are there no function or page navigation keys, there aren’t even cursor arrows. But with its Bazecor configuration software, you can define up to 10 layers of alternate keypresses for each key that you can easily access by switching layers using the keys below the split spacebar.
You can also program “Superkey'' combos that can be accessed by double-tapping or holding specific keys. However, this approach takes a bit of practice. But once you master it, you can access virtually any possible key combination without having to stretch your fingers or move your hand from the home row. Super-bright RGB keys and a surrounding RGB underglow around the base indicate when you’ve swapped layers. You can see visible reminders where you’ve embedded your function keys, cursor arrows and other absent keys.
All this functionality fits in a package just over half the width of the Cloud 9 C989 ErgoFS keyboard. It may have a Lexus price, but it also has Lexus quality, Ferrari performance, and the modability of a Civic street racer.
Dygma Raise Specs
| Switches | Kaith Speed Copper |
| Lighting | Per-key RGB, plus base underglow |
| Onboard Storage | 10 profiles |
| Media Keys | None |
| Interface | USB C |
| Cable | 59-inch USB C to USB-A |
| Additional Ports | None |
| Keycaps | Double-shot PBT |
| Construction | Aluminum base |
| Software | Bazecor |
| Dimensions (LxWxH) | 12.5 x 7.9 x 1.3 inches |
| Weight | 1.5 lb |
Design
In its closed configuration, the Dygma Raise is an unassuming 60-percent keyboard, lacking function keys, cursor arrows and a number pad. Though it’s compact width-wise at 12.5 inches, its vertical length is greater than a typical 60-percent layout due to the built-in wrist rests, which include comfortable soft, leatherette-covered neoprene-and-foam pads that can be removed for cleaning. With its attractive aluminum base, quality white keys, and wrist rests (a black model is also available), the Raise has a classy, high-end look. The RGB-backlit Dygma Raise logos are hidden beneath the base, so the only visible branding are the Dygma logos on the Windows keys.
In its closed configuration, it’s just over half the width of the Cloud 9 C989 ErgoFS ergonomic mechanical keyboard. The layout is traditional QWERTY with no unusual ergonomic curves to the key placement. The only oddities are the four keys that sit where you’d usually find the spacebar, and four more directly below it, which are fully programmable and can be used for layer shifting and to add often-used-but-missing keys back to the keyboard.
Get Tom's Hardware's best news and in-depth reviews, straight to your inbox.
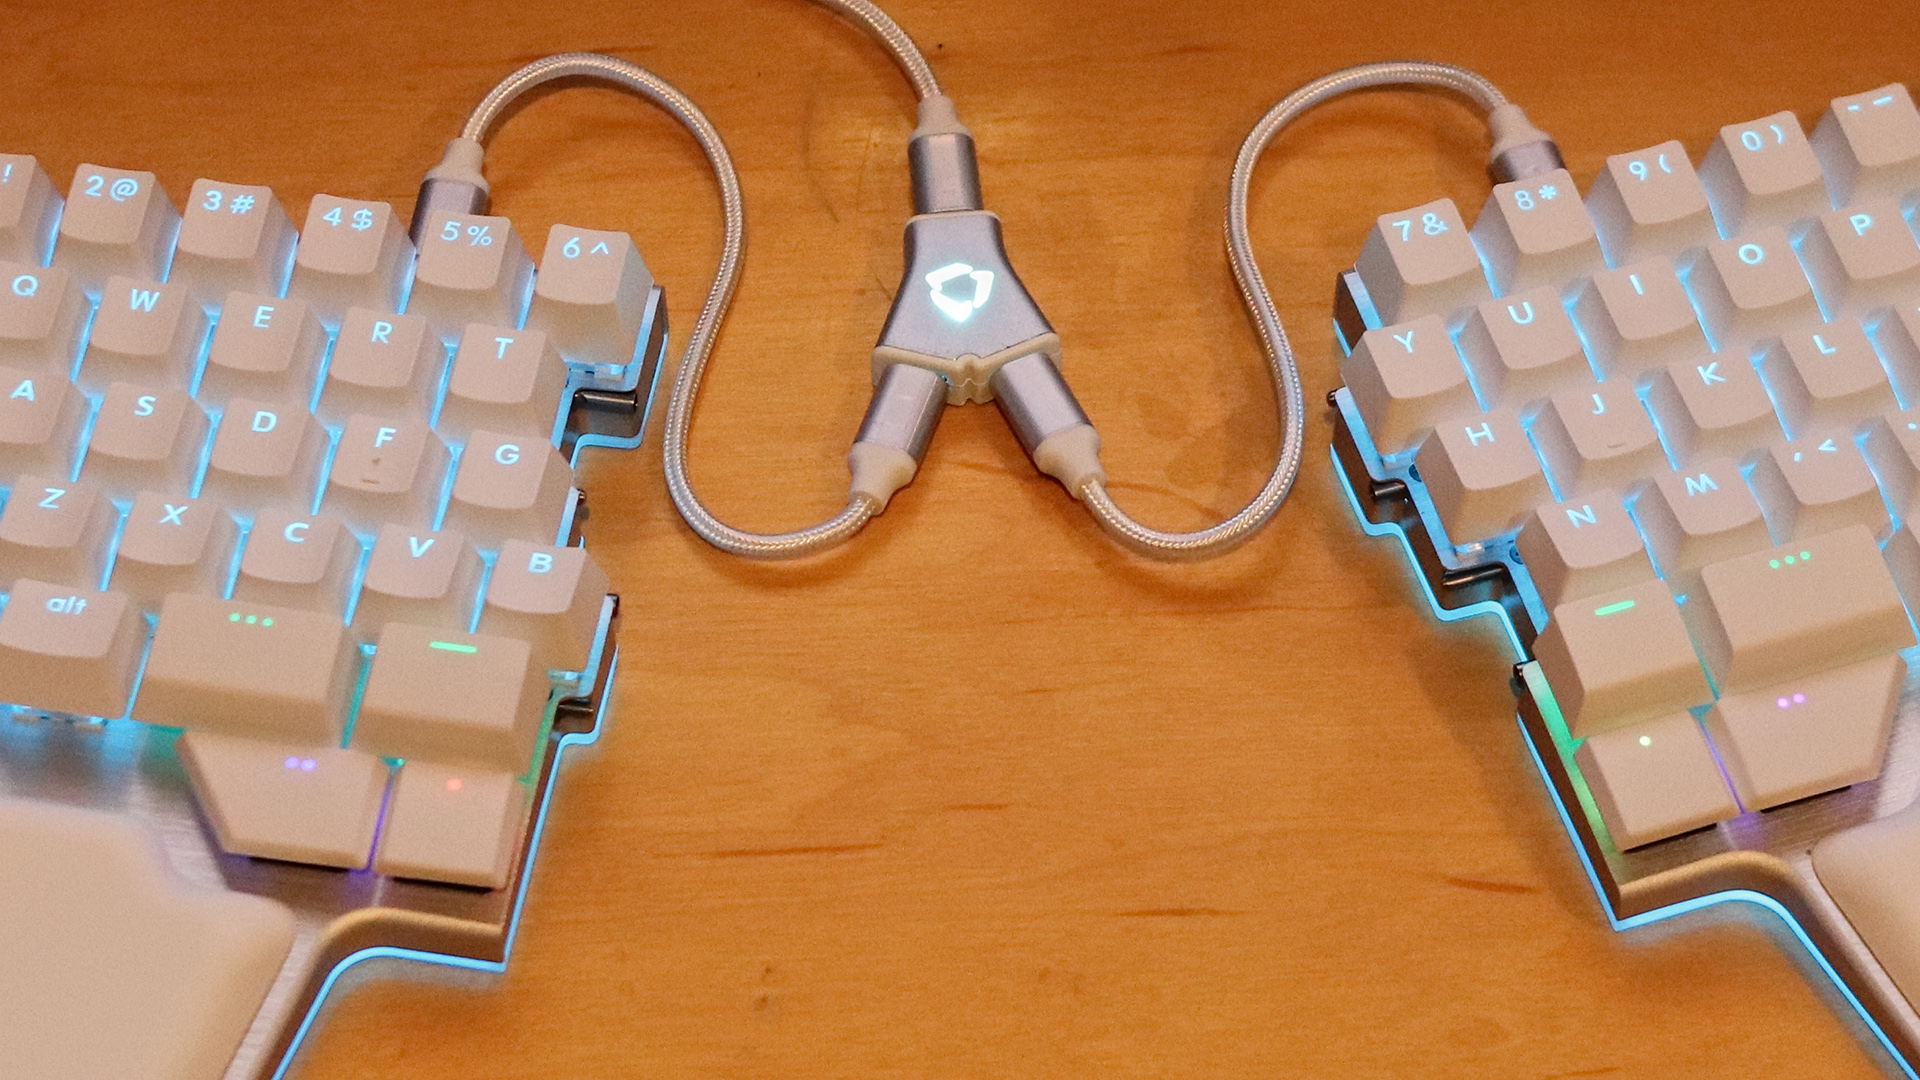
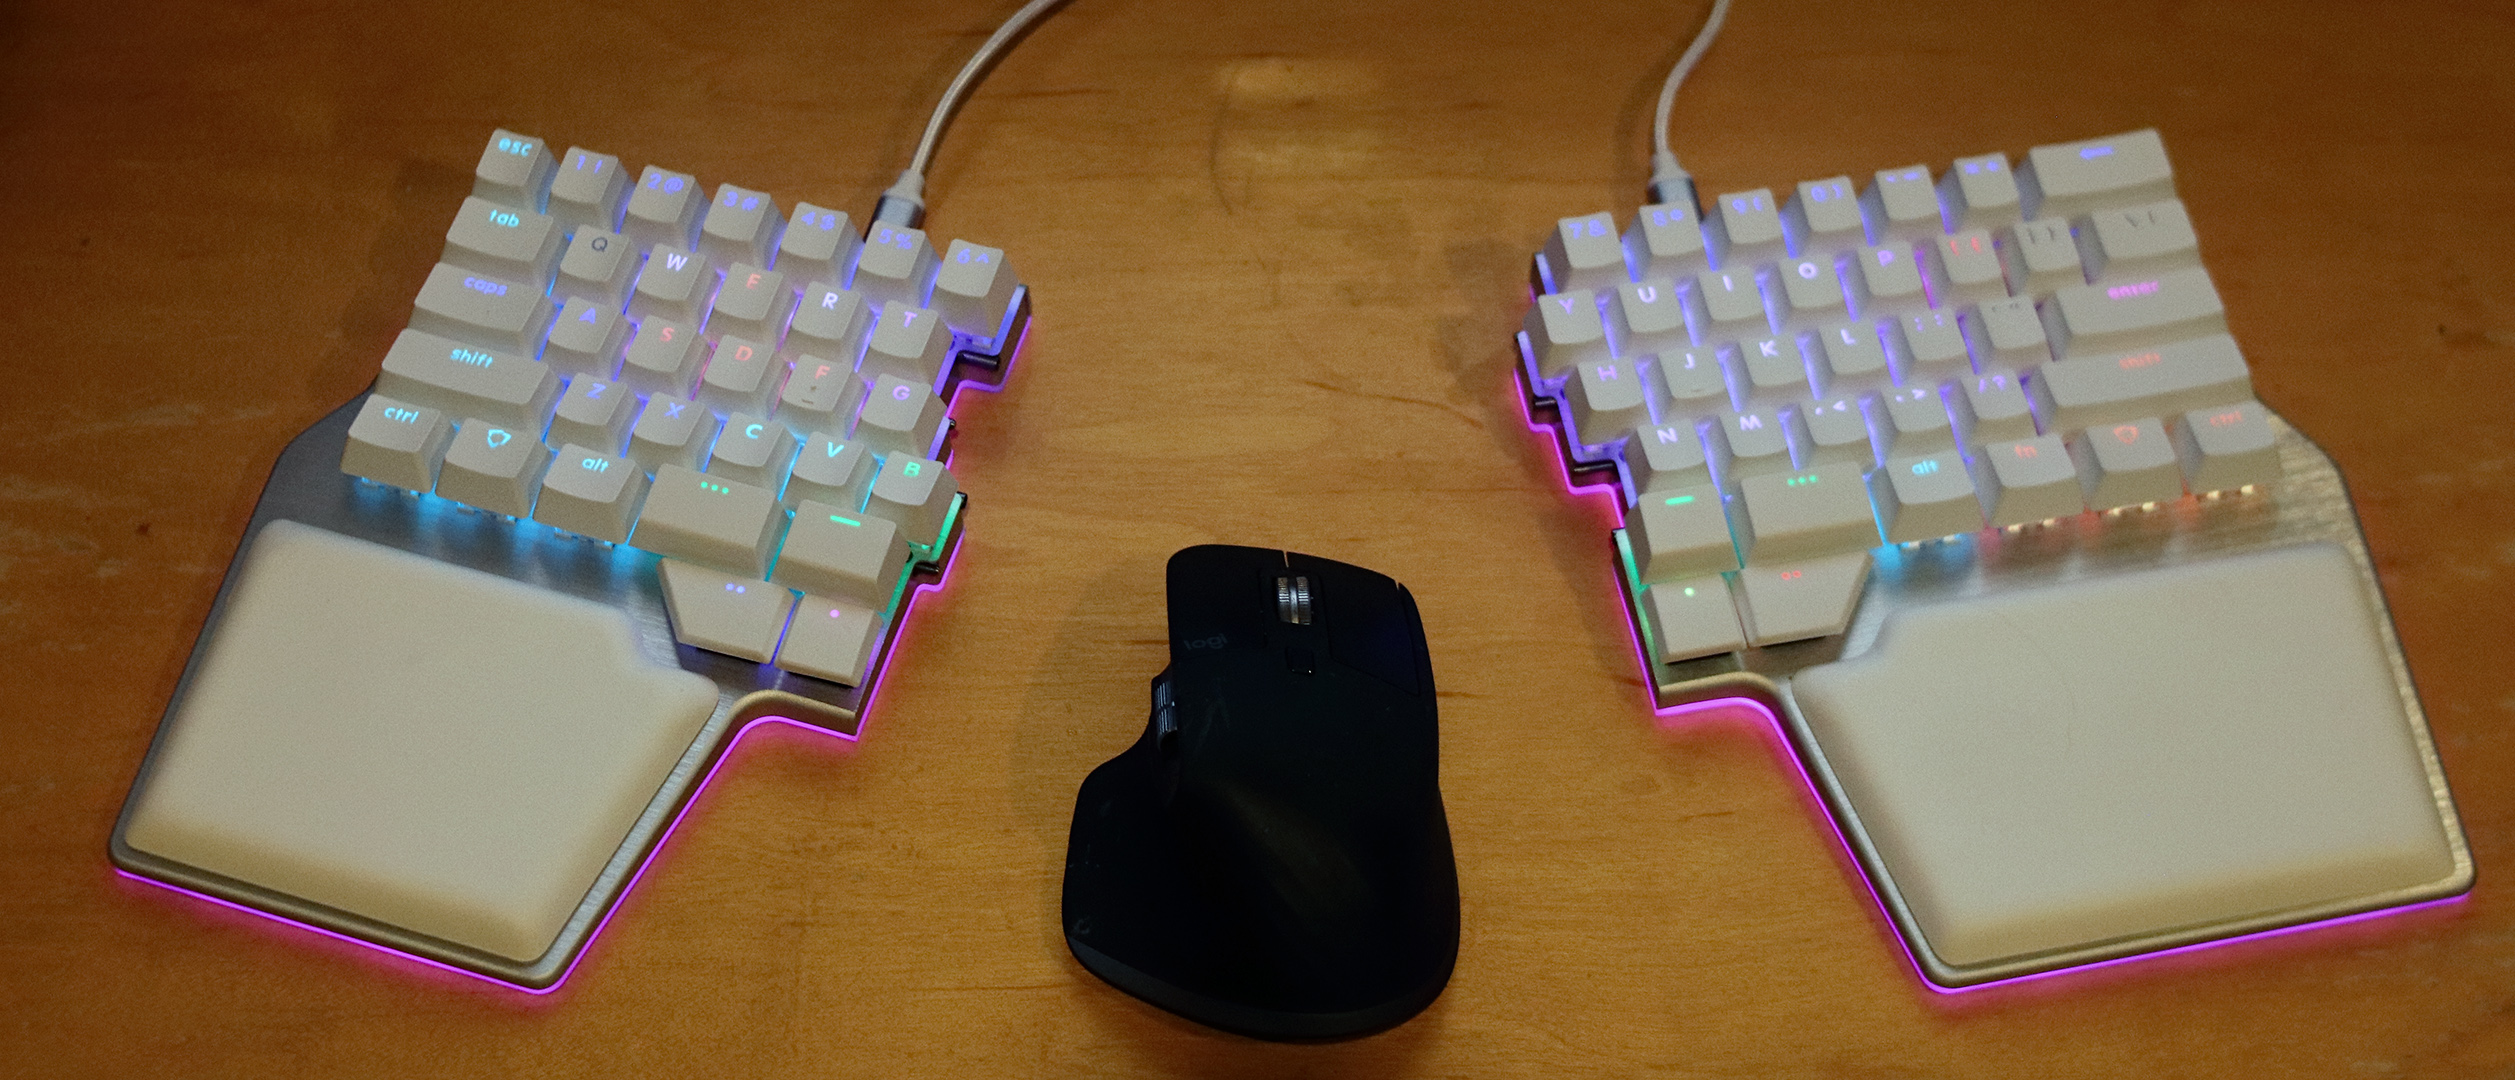
You can make the keyboard much wider by splitting it apart. Just pull the two sides to separate them. Each half connects via a 7.8-inch USB C cable to the Neuron, a tiny, LED-lit Y-shaped gadget that holds the Raise’s controller and memory. It connects via a third USB C connector to your computer using an included 59-inch braided USB C-to-A cable. You can set the two halves about 15 inches apart using the standard cables, and an additional 19.7-inch cable can be swapped in for one of the shorter cables, allowing you to place the halves just over 27 inches apart. The Raise can likely accommodate whatever arm position you find most comfortable for typing. If you choose to use it in a non-split configuration, four small rods securely hold the two halves together when typing on the unified setup.
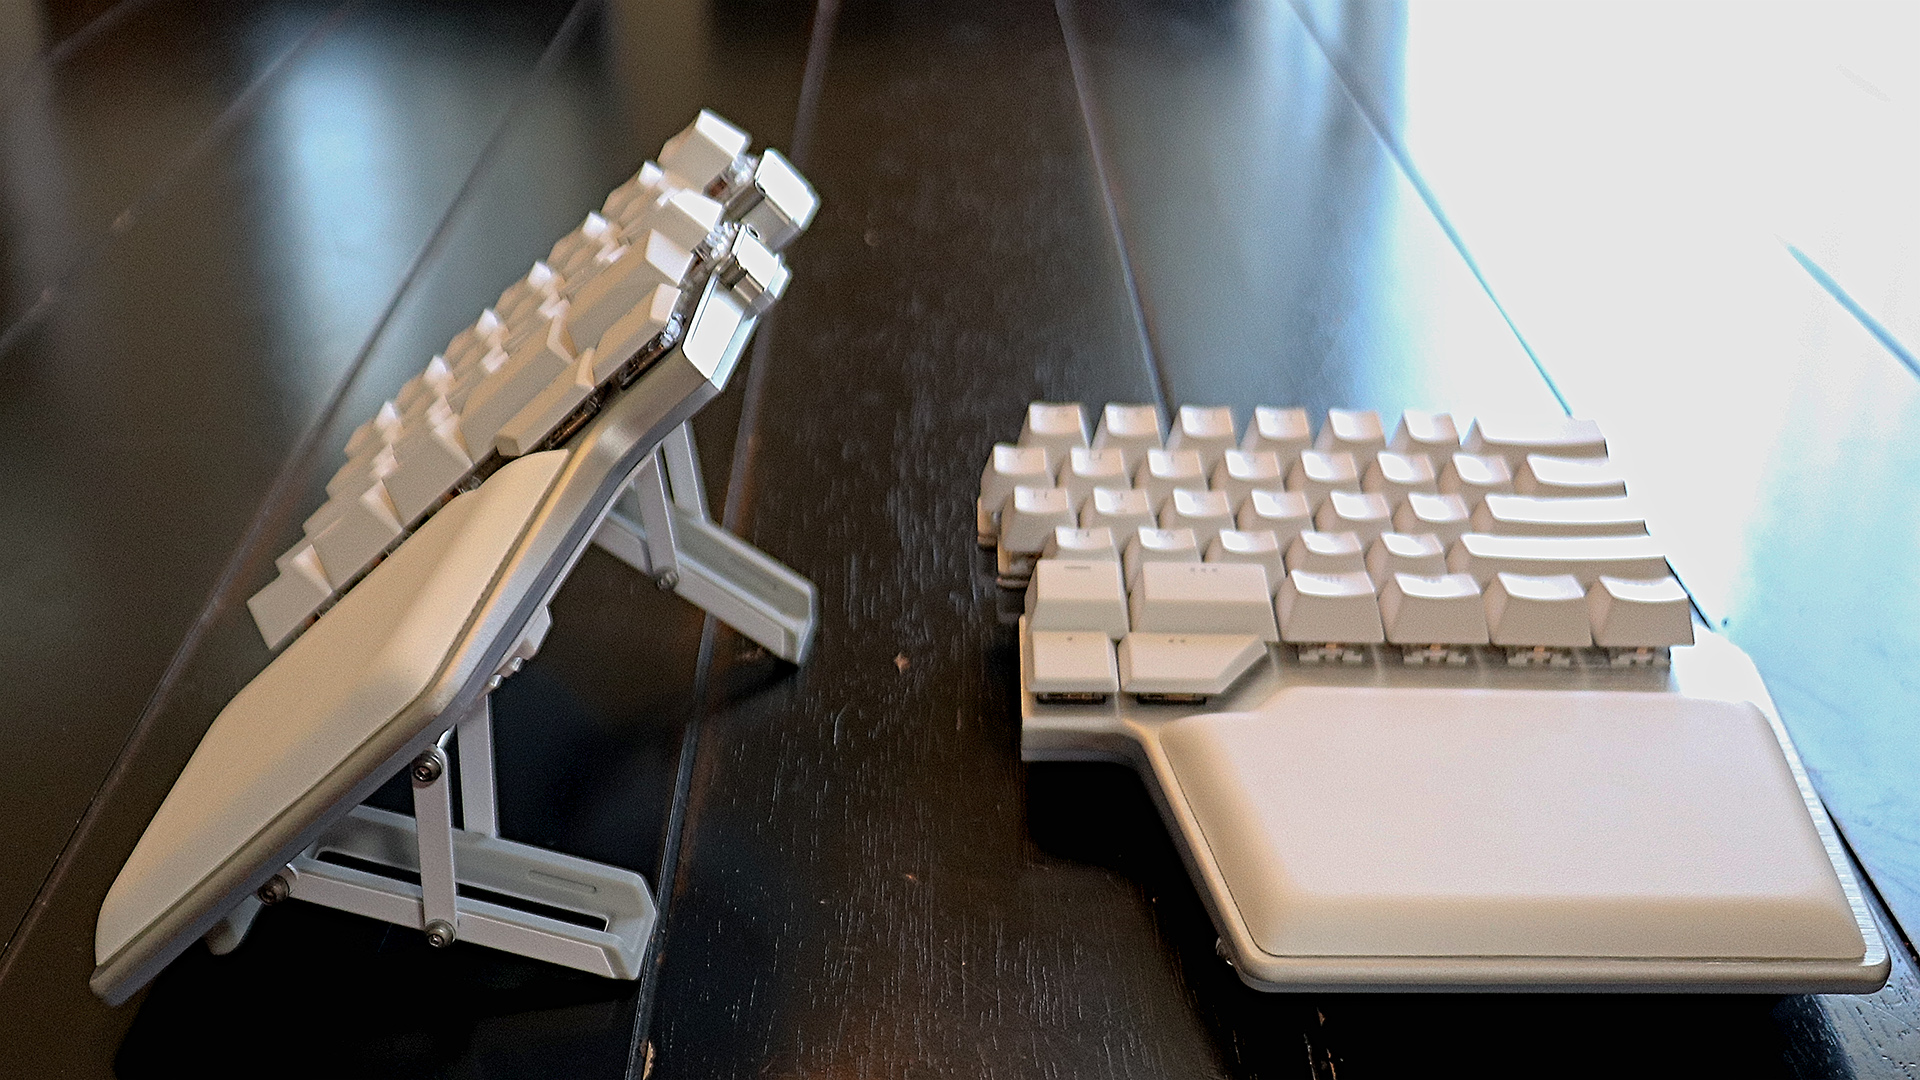
If you want to take ergonomics to the next level, Dygma offers an optional $89 tenting kit. This solid metal, exquisitely designed kit screws onto the back of the Raise (it even includes the needed screwdriver) and provides a sturdy base for using the keyboard in a 10, 20, 30, or 40-degree tenting angle. You can retract the legs fully to use the keyboard in a flat configuration, but they add about a half-inch of thickness. While the kit is pricey, the sturdy metal construction and grippy rubber feet keep the keyboard solidly in place much better than the flimsier plastic tenting solutions on keyboards like the Kinesis Freestyle 2.
The Raise’s doubleshot PBT keys are attractive and cleanly pass through the RGB lighting. My review model had standard English QWERTY lettering, but you can also choose keycaps with nothing but dashes on them, which you might consider if you’re going to dramatically customize your layout or you just really want to show off your epic touch-typing skills. They include dashes rather than being fully blank because the RGB backlighting on the Raise isn’t just for show–it’s very useful for highlighting custom key layouts (such as making the keys that double as cursor arrows orange) in different programming layers.
Along with bright, consistent per-key backlighting behind each key, there’s also RGB lighting around the base, visually indicating when you’ve shifted the keyboard to a different layer layout.
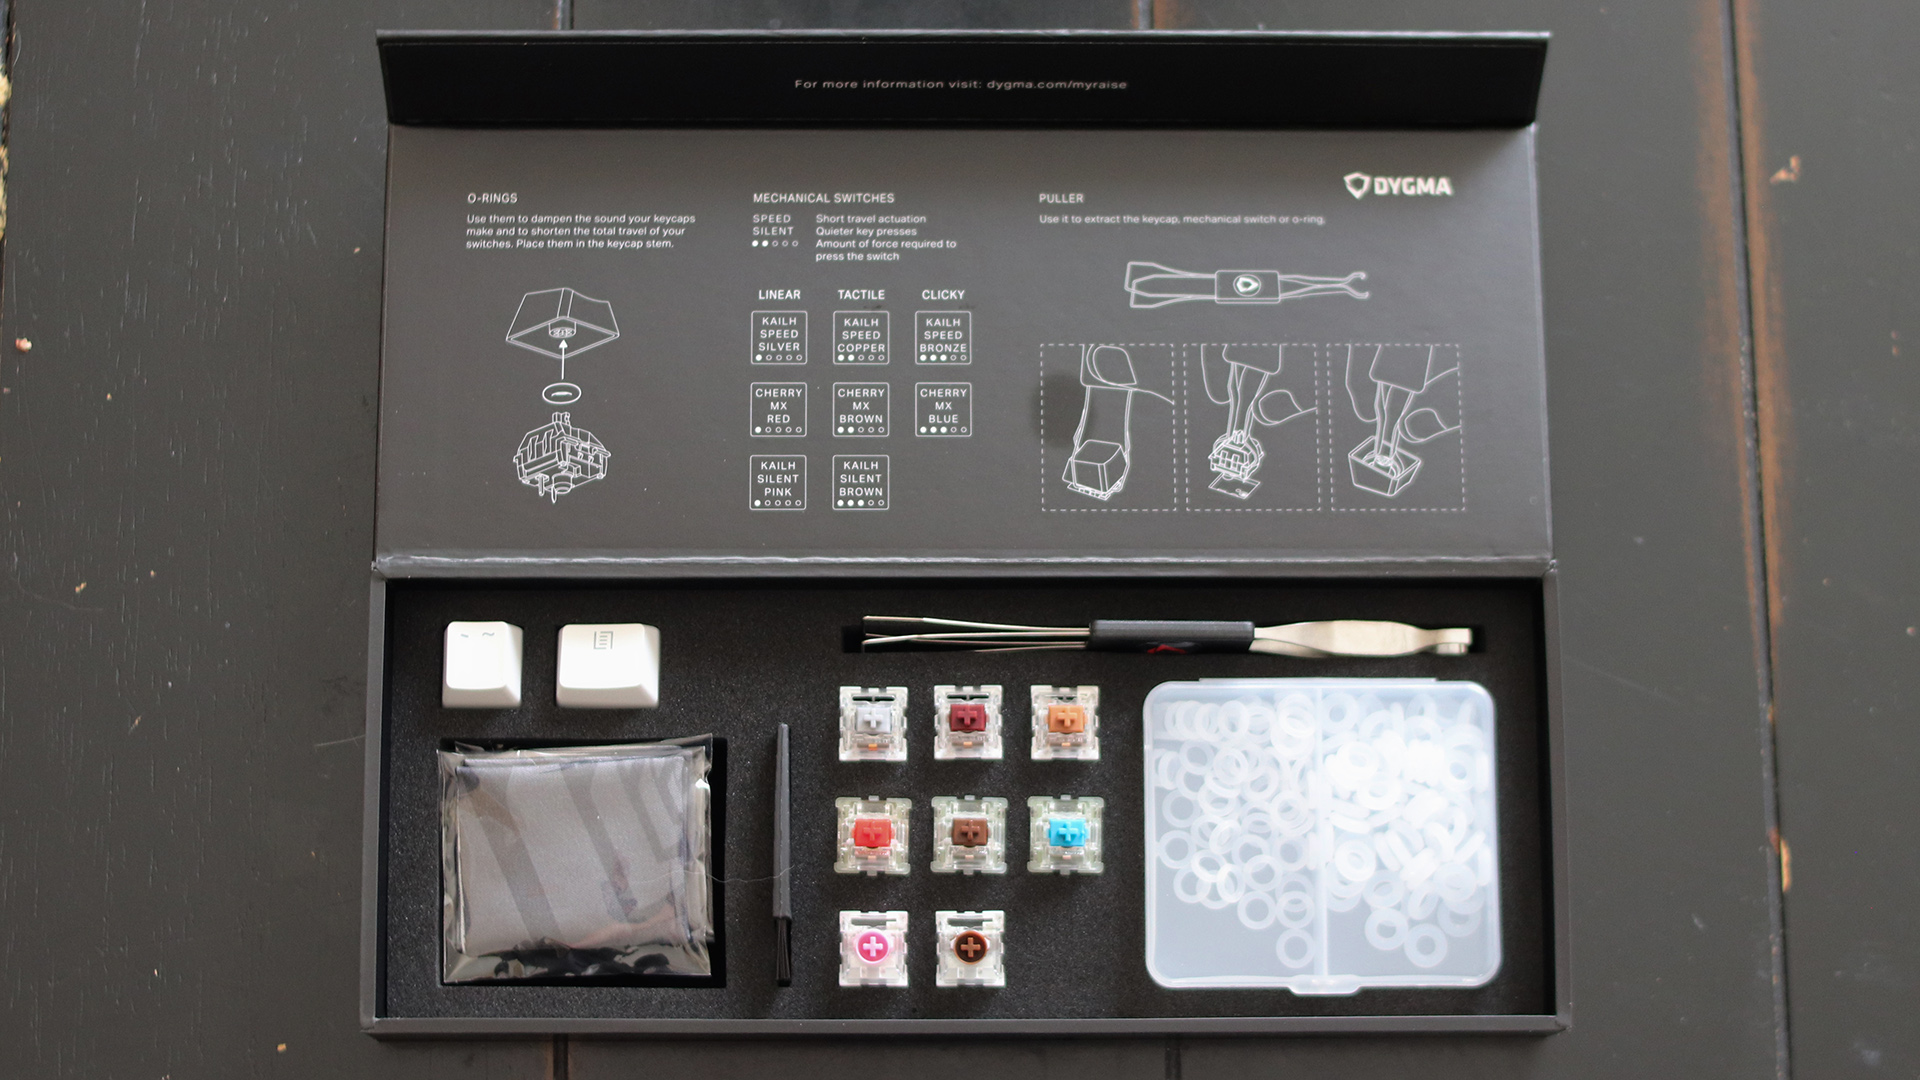
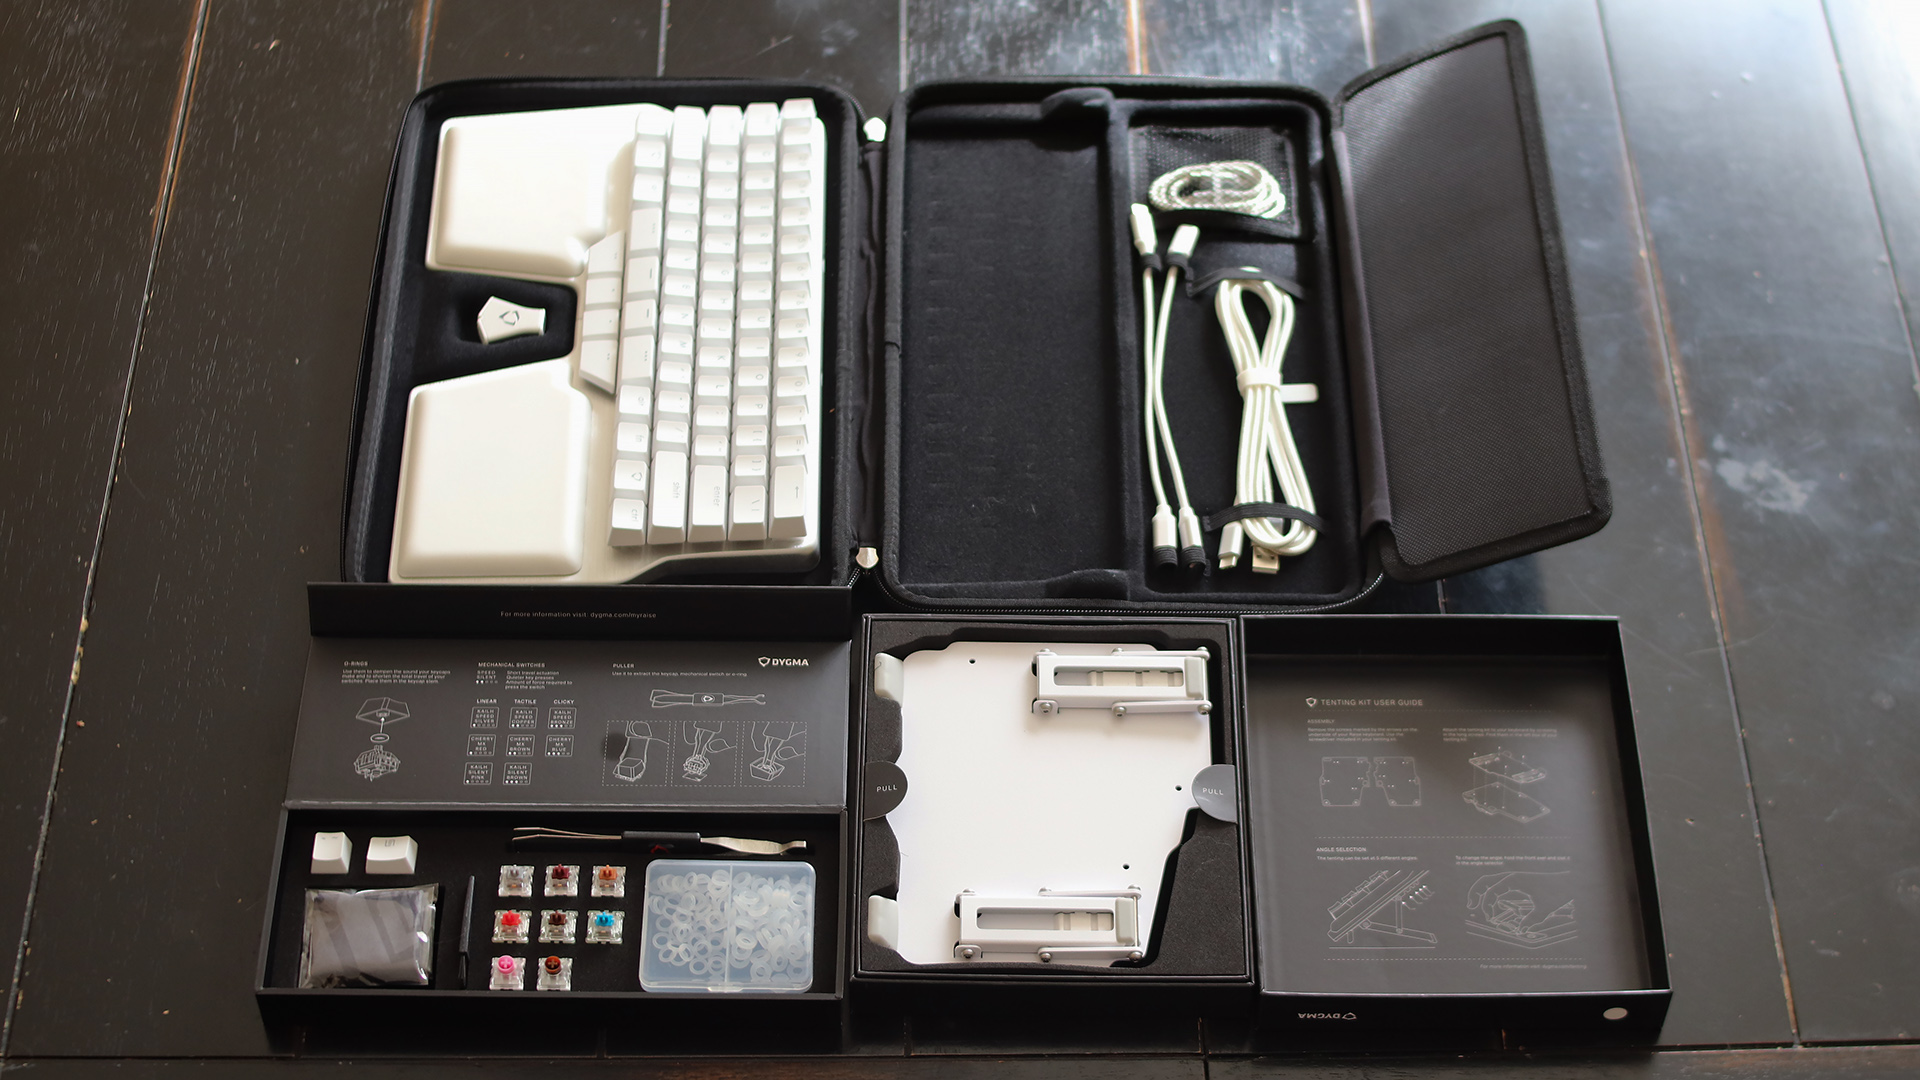
Once you’re used to using your split, possibly tented, highly programmed keyboard, of course, you might not be happy with returning to a traditional design when traveling or heading to the office. Dygma has you covered by including a sturdy, compact, padded carrying case for the keyboard and cables. You’ll also get another small box containing Dygma’s Enhancement Kit, which includes a tilde and menu key, switch puller, two sets of o-rings you can place between your switches and keys, and a sample of each of the eight switches Dygma offers for the Raise so you can compare their feel and sound.
Typing Experience
Whether you like the smooth action of linear, the confirming feel of tactile, or the audible feedback of clicky switches, Dygma has you covered. You can specify Kailh Speed Silver, Copper, or Bronze; Kailh Silent Pink or Brown; or Cherry MX Red, Brown, or Blue switches when you order your keyboard. Our review unit came with tactile-but-quiet Kalh Speed Copper switches installed, and we also ordered a set of ultra-clicky Kailh Speed Bronze switches to swap in and try. (Dygma offers full sets of switches for $45-69, depending on model.)
The factory-installed Kailh Speed Copper switches might be my new favorite switch when I need a keyboard that doesn’t audibly alert everyone within 30 feet that I’m writing. With 3.5mm of total travel and definite tactile feedback as you pass the 1.1 mm trigger travel using 50 grams of force, they’re really comfortable to type on for long periods. Generally, I’m most accurate with a clicky keyboard, but the tactile feedback was good enough with the Speed Coppers that I managed similar accuracy to what I get with the noisy Cherry MX Blues on the Corsair K70 RGB Mk 2 that’s my daily driver.
To test the hot-swapping and the difference in feel with clicky keys, I used the key puller included with the keyboard to carefully swap in Kaith Speed Bronze switches. The process was easy, just requiring patience to carefully pull out and replace each switch without bending the contacts on the back. The Speed Bronze switches have the same travel and actuation as the Coppers, but they’re loud. Seriously loud. It’s like connecting an amplifier to Cherry MX Blues. They’re just as comfortable as the Coppers for high-speed typing, and you’d be hard pressed to find stronger audible feedback. As a writer who loves audible feedback, these would be my switch of choice, but they’re a really poor option if you share an office.
The double-shot PBT keycaps feel great. They’re thick, with a subtle curve at the top, and enough space between them that they don’t feel crammed in like on some compact keyboards.
While the feel is great and can be customized to your taste, the technique needed to get the most out of the Dygma Raise can take some time to master. As we’ll cover in depth in the Software section, the keyboard uses the “One-Shot Layer” (OSL) keys around the space bar to swap between layers, which are alternate sets of functions for each key. In addition, you can program keys to react differently if they’re double-tapped or held down. The result is that, with a little tweaking, you may find that you don’t miss many of the dedicated keys that are absent on the Raise.
After using the Raise for a couple of weeks, I instinctively knew to hold down the OSL key and use the keys in the lower right corner as cursor arrows, or to press OSL and a number key for a function key. It’s really easy to put commonly used keys a tap or two away, but getting used to using those combos will likely take a while. When you’ve mastered it, though, you’ll likely find that a quick OSL combo without having to move your hand is more comfortable and faster to type than reaching a few inches to the right for a key like Print Screen and then finding the home row again.
Gaming Experience
The Dygma Raise’s programmability and split design make it a flexible gaming solution. For FPS games like Call of Duty: Warzone, which mostly use the left side of the keyboard since you’re mousing with the right, you can push the right side of the Raise completely out of the way. Alternatively, you can disconnect it, providing more desk space for mouse movement (or snacks). The wide selection of hot-swappable switches means you also can choose the throw and linearity that works best for your gaming style.
While it took me a while to get used to typing on the Raise (those arrow key instincts are hard to retrain when typing and editing on the fly), I adapted much more quickly to using it in games, which tend to focus on the core letter keys. But what really unleashed it was when I broke out the Bazecor software and did some custom programming. The ability to set up custom layers makes it easy to put keybinds for a specific game on their own layer in a logical arrangement. For Digital Combat Simulator, for instance, I left the top two layers at my typing default, but created a third layer (accessible with a press of one of the OSL keys below the spacebar) with keys laid out for quick and logical access: Camera views across the top row, the second row devoted to arming and selecting weapons, radar modes below that, and the all-important chaff and flares on the split spacebar where they can be quickly accessed when under threat.
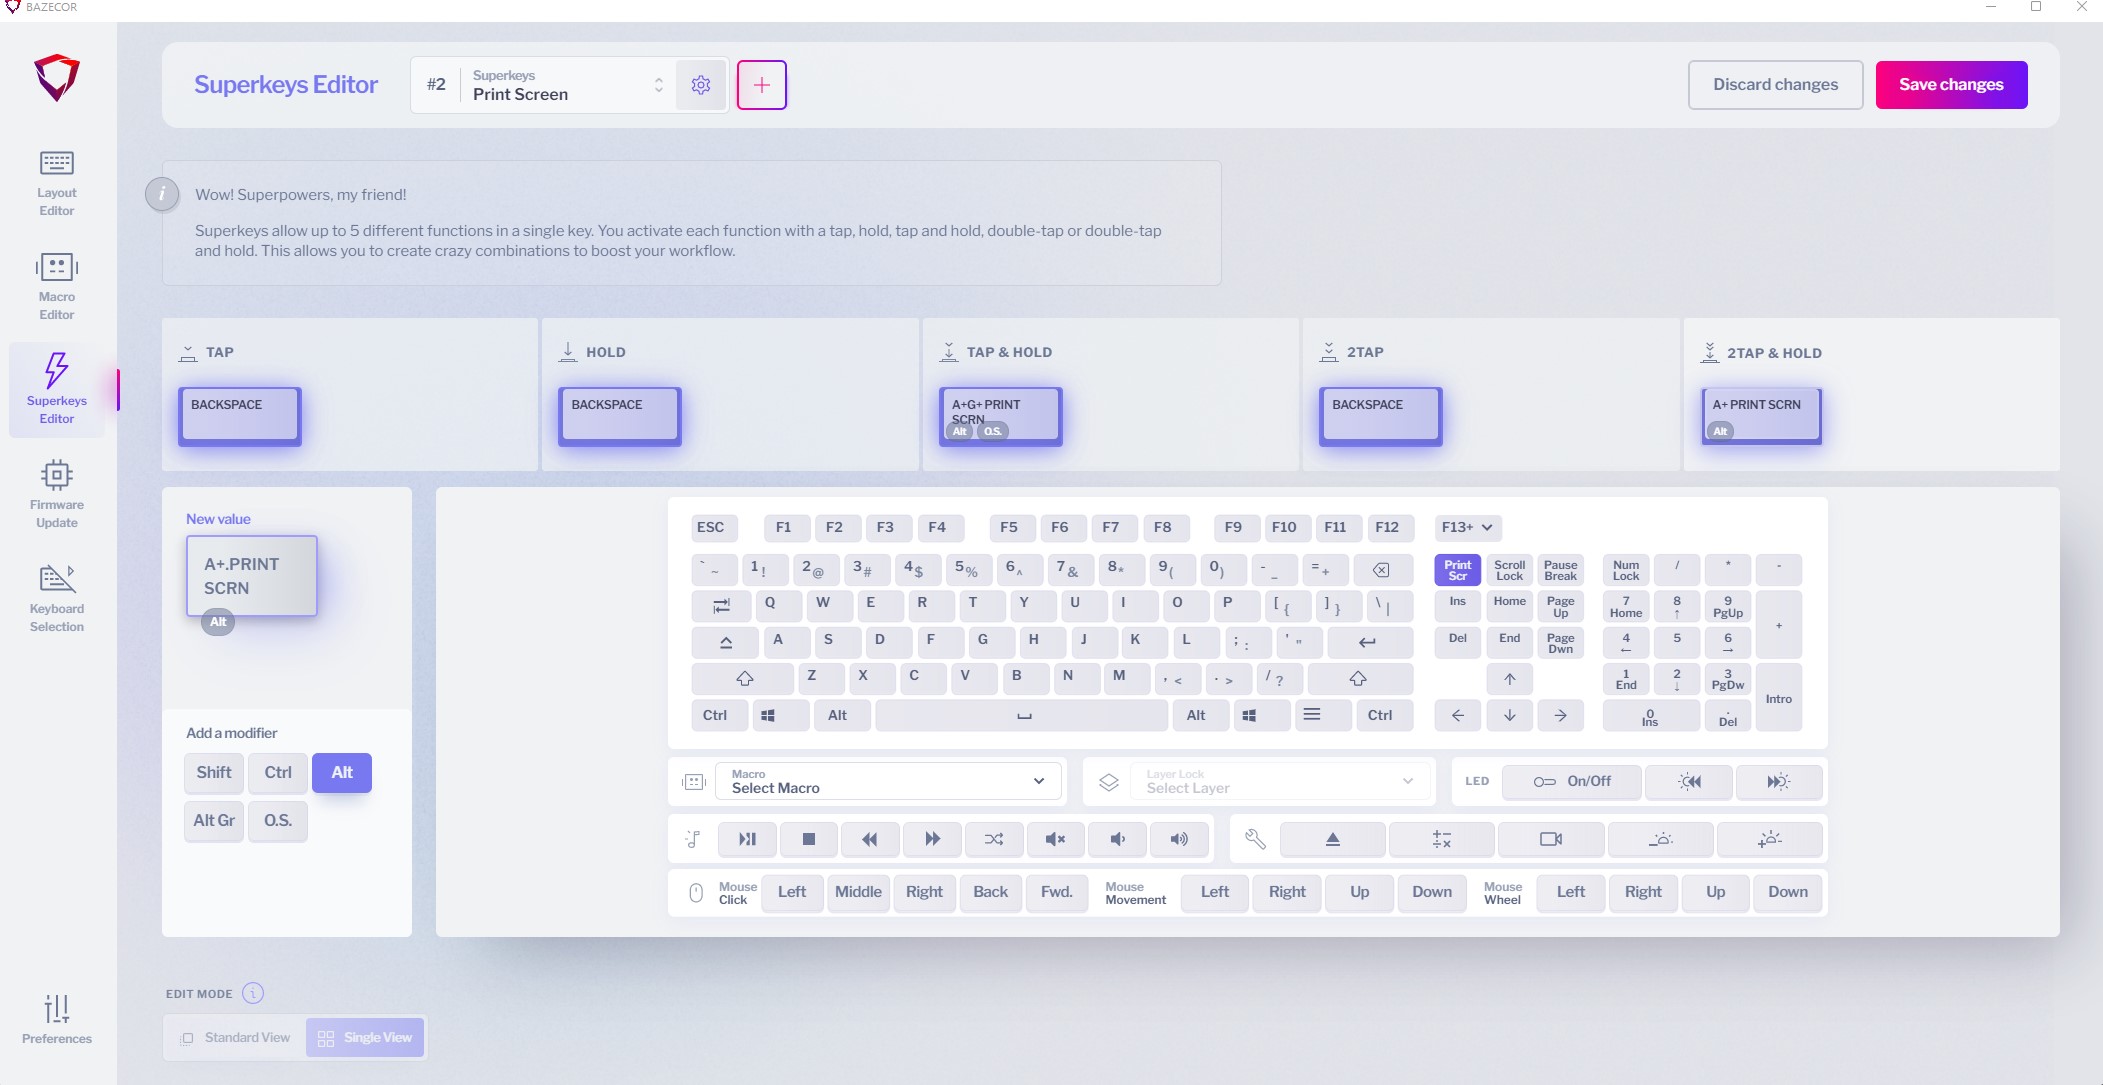
The ability to set up “Superkeys” accessible by holding or tapping-and-holding a key is great for setting up macro-like functions that can be very quickly accessed during a game. For example, I set up double-tapping the \ key to send Windows-Alt-PrintScreen, to capture a screenshot (see how to take screenshots in Windows) from the game; this takes two hands on a traditional keyboard. I also configured the ] key next to it to send Windows-Alt-R on a double-tap, to start and stop screen recording.
Software
To get the most out of the Raise, you’re going to want to spend a bit of time in the Bazecor configuration software. Out of the box, it has two layers programmed, the base layer and the second layer that’s accessed through a tap of a One-Shot-Layer (OSL) key. You can set up multiple OSL keys, taking advantage of the four extra keys below the spacebar, and potentially the far right and left edges of the spacebar as well.
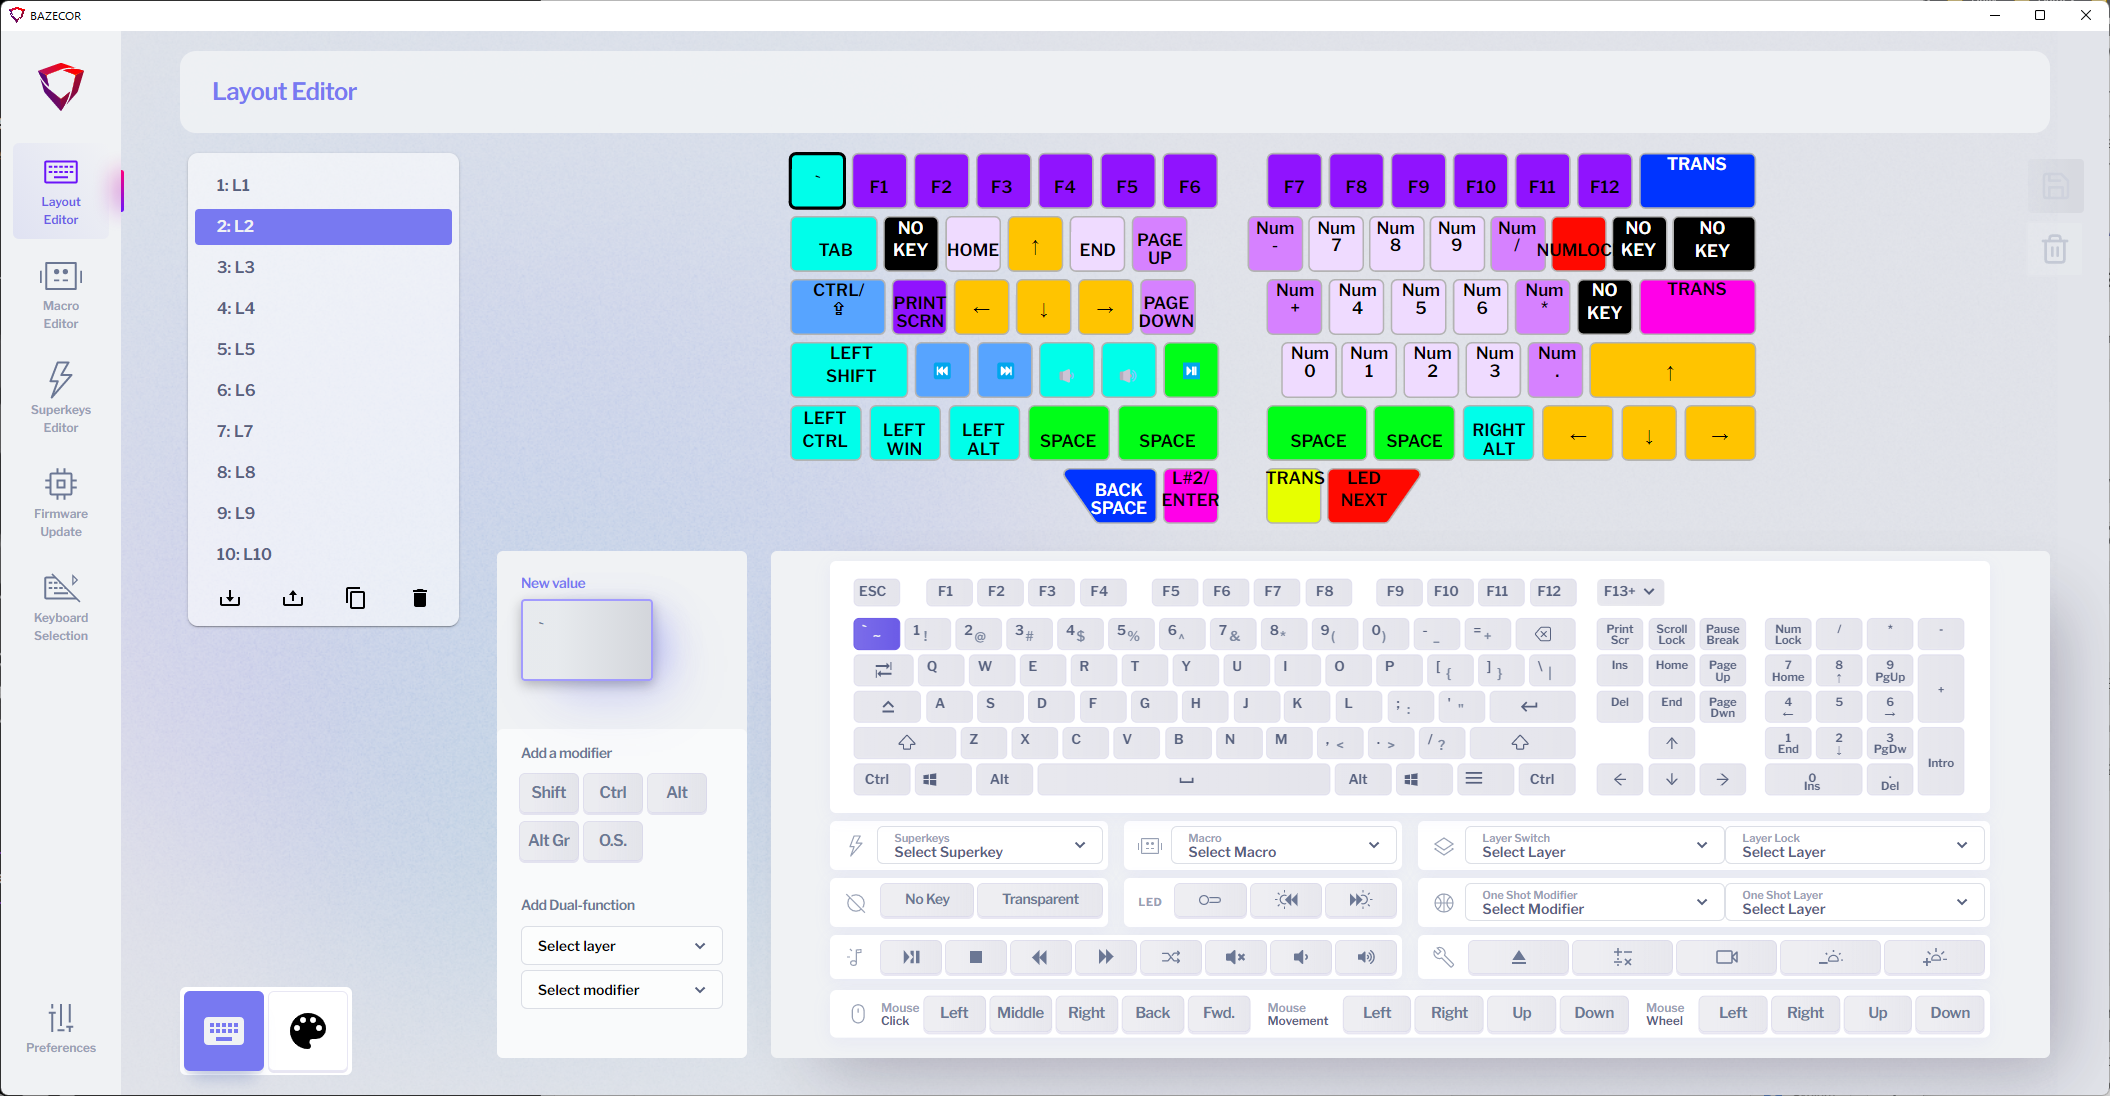
The default Layer 2 setup likely covers needed “missing” keys for most users, with a cursor arrow set for each hand, function keys, page navigation keys, and an embedded keypad. When you tap the OSL key to shift to layer 2, the RGB lighting pattern shifts to highlight the various functions by changing their colors. (Orange for cursor arrows, purple for function keys, etc.) The default setup is easy to learn, and when you order, Dygma will even send you an email offering to generate a custom configuration tweaked for how you will use the keyboard.
The layer editor is easy to use, with a representation of a full keyboard with keypad and media keys below the image of the Dygma Raise, as well as selectors for macros, superkeys, mouse inputs, and layer assignments. Just choose a layer, click a key, and select the key or function you want it to represent, and optionally add a modifier such as Shift or the Windows key. If you don’t define a key on a layer, it’s “transparent” and will pass through the default keypress from the bottom layer.
If you press and hold the OSL key, it will work like a Shift key for that layer. Tap it once and the next keypress will be from the new layer, then you’ll be back to the initial layer. If you double-tap the OSL key, you’ll stay on the new layer until you tap the OSL key again. You can define specific keys or key combos to jump directly to any of the 10 layers. I can’t imagine remembering key assignments for 10 different layers and using them all together at once, but the wealth of layers is handy if you want to, for example, set one layer up for FPS games, another for your video editor, and a third with macros for an MMO.
And the layers aren’t the only way to add additional key functionality. When I first started using the keyboard, the only critical key I noticed missing was Pause, which is used frequently in Microsoft Flight Simulator. Instead of redefining a key on a different layer as Pause, I used the Superkeys Editor to add it. Superkeys allows you to define up to five different functions for a single key, accessible by tapping, holding, tap & hold, double-tapping, or double-tapping & holding.
At first, I tried setting up double-tapping the Backspace key as Pause, but it turns out you often double-tap Backspace when typing, so this was a poor default as I would trigger Pause when meaning to delete characters. Instead, I assigned it to double-tap-and-hold P. You’ll need to be selective about how you assign Superkeys, as there are keys you might double-tap or hold during regular typing, but the double-tap is timed by default in such a way that you won’t typically engage it in normal typing, and you can adjust the sensitivity to match your typing rate. You can assign multiple keypresses to a single superkey, and I found it really useful for setting up a single key to send multi-key combos for in-game screenshots and recording that would normally require me to remove my hand from the mouse or joystick to initiate.
There’s also a full macro editor that lets you create macros that send any combination of text strings, individual keypresses (and specify either key press-and-release or just key-press or key-release if you need to simulate holding down a key while doing something else), media functions such as pause and volume control, mouse button presses, and mouse wheel movements. You can also add delays between presses if needed. You can easily move entries within a macro, and create a copy if you want to create a modified version of an existing macro.
The Bazecor software is intuitively designed, but if you do run into questions, Dygma has an extensive help section on its website. The help isn’t limited to troubleshooting–you’ll also find things like downloadable Dvorak keyboard layouts and cool hacks like a script that lets you assign the often-used-by-developers tilde (~) and grace accent (`) characters to Shift-Esc presses. The Dygma Labs YouTube channel also has a series of Bazecor tutorials and updates on new features. I tested using the publicly available Bazecor 1.0 beta and didn’t run into any functionality issues.
Bottom Line
It’s obvious from Dygma’s website that the Raise was designed by keyboard enthusiasts. The company’s done an excellent job offering regular enhancements to its Bazecor software and keeping customers posted on the progress of new products like its recently released tenting package and the next-generation wireless Defy keyboard that was in the Kickstarter phase when this was written.
The Raise is one of the most flexible, configurable keyboards I’ve ever used, both from mechanical and software standpoints. The eight keys in the spacebar area do a lot to alleviate the limitations of typical 60-percent layout keyboards, because you can dedicate a couple of them to most-used keys and swap layers to easily get to other functions that aren’t present by default. It took a bit of getting used to the tenting, but I found a 10-degree tented position was more comfortable on my wrists for extended typing, and didn’t require the significant adjustment like a more severe 40-degree angle.
Really, the biggest issue with the Raise is that if you love it, you may end up getting a lot of use from the bundled carrying case. Its multi-layered setup is really efficient and comfortable for extended typing sessions. And once you build the reflexes you need to take advantage of it fully, you’ll have a hard time switching back to a laptop keyboard or a traditional keyboard on a work PC. It only took a few days to get used to double-tapping the layer key and using ESDF as cursor movement keys, but if I switched back to a traditional keyboard it then required readjustment to get used to using the dedicated arrow keys again. The Raise worked best for me when it was the only keyboard I used.
If you’re willing to be exclusive with the Raise and stop seeing other keyboards, you’ll find it packs a ton of flexibility and comfort into a very compact package.
There aren’t many alternatives if you’re looking for a split, mechanical gaming keyboard. Cloud Nine’s C989 ErgoFS is an excellent, switch-configurable full split keyboard complete with a numeric keypad, but it’s so big you may not have room on your desk to split it very far. The Ultimate Hacking Keyboard is another separable split keyboard option that’s even smaller than the Raise, since it lacks wrist rests by default, but it also lacks backlighting and the software only allows you to assign three total layers to compensate for the 60-percent layout. If you’e willing to step away from traditional layouts completely, the ErgoDox 76 ‘Hot Dox’ V2 is a customizable split design that uses the unusual ErgoDox layout. It is optimized for comfort, but comes at the expense of a very steep learning curve, especially given its blank keys.
At $349, the Raise is pricey as heck. But it’s comfortable, configurable, and a tweaking fan’s dream. The solid build and classy look, along with nice touches like the useful carrying case and Enhancement kit with samples of alternate switches, help ease the sticker shock. If you can commit to a single keyboard for all your gaming and work, you could be buying into a long, happy relationship.
-
gg83 Insane price. It's exactly what I want though. With the underglow and stuff. I wonder if they have pudding keycaps for it.Reply -
eichwana I looked at this keyboard when I was deciding which split mech keyboard to get. I ended up with the ergodox ez, which I find to be an insanely premium product. It’s got a really high learning curve, but once you get past that and tailor it for your needs you may find it fitting your needs.Reply
