How To Build A $1,500 Gaming PC
Our Best $1500 PC Build starts to bring aesthetics to the forefront with a sleek and accessible Cooler Master MasterBox 5 case, which features a windowed side panel (finally) and a PSU shroud that makes for a classy look. The Lobotomy is the first Core i7 system on our list, and it's also the first (and only) build that features an X99 platform (in the form an an ASRock X99 Extreme4 motherboard) and an Intel Core i7-6800K processor, with six cores and 12 threads that we easily overclocked to 4.0 GHz with a budget-friendly (yet effective) cooler—the Deepcool Gammaxx 400. However, we're shocked at the use of the 16GB (2x8GB) G.Skill Ripjaws V DDR4-2666 memory, a dual-channel kit that doesn't take advantage of the platform's quad-channel memory controller. But we suppose that's why it's called the Lobotomy.
The Lobotomy build is also the first in our series to sport a GTX 1080, in this case, Zotac's GeForce GTX 1080 AMP! Edition graphics card. This is enough graphics horsepower to fuel the most demanding game titles at punishing settings. The recent price drop for GTX 1080 graphics cards makes it even more attractive for a build with a limited budget. The EVGA 650W GS power supply has plenty of juice to run the attached hardware, and a 120GB Sandisk Plus SSD does indeed make boot times noticeably quicker. The 1TB WD Caviar Blue 7,200RPM HDD makes up for the low capacity of the primary storage.
Specifications
| "Lobotomy" by SR-71 Blackbird | |
|---|---|
| Case | MasterBox 5 EATX |
| Cooling | Gammaxx 400 |
| CPU | Core i7-6800K |
| Graphics | Zotac GTX 1080 |
| Memory | Ripjaws V Series DDR4-2666 16GB (2x8GB) |
| Motherboard | X99 Extreme4 |
| PSU | CX550M |
| Storage | Plus 120GB SSD |
| Storage | Caviar Blue 1TB 3.5 inch 7200RPM |
Now let's perform a Lobotomy...? (Let's build the Best $1500 PC Build).
Case
Begin by removing the Cooler Master Masterbox 5 case from its box and setting it in your workspace. The manuals and hardware bag are resting on top of the case, so be sure to take those out before sliding the chassis out.
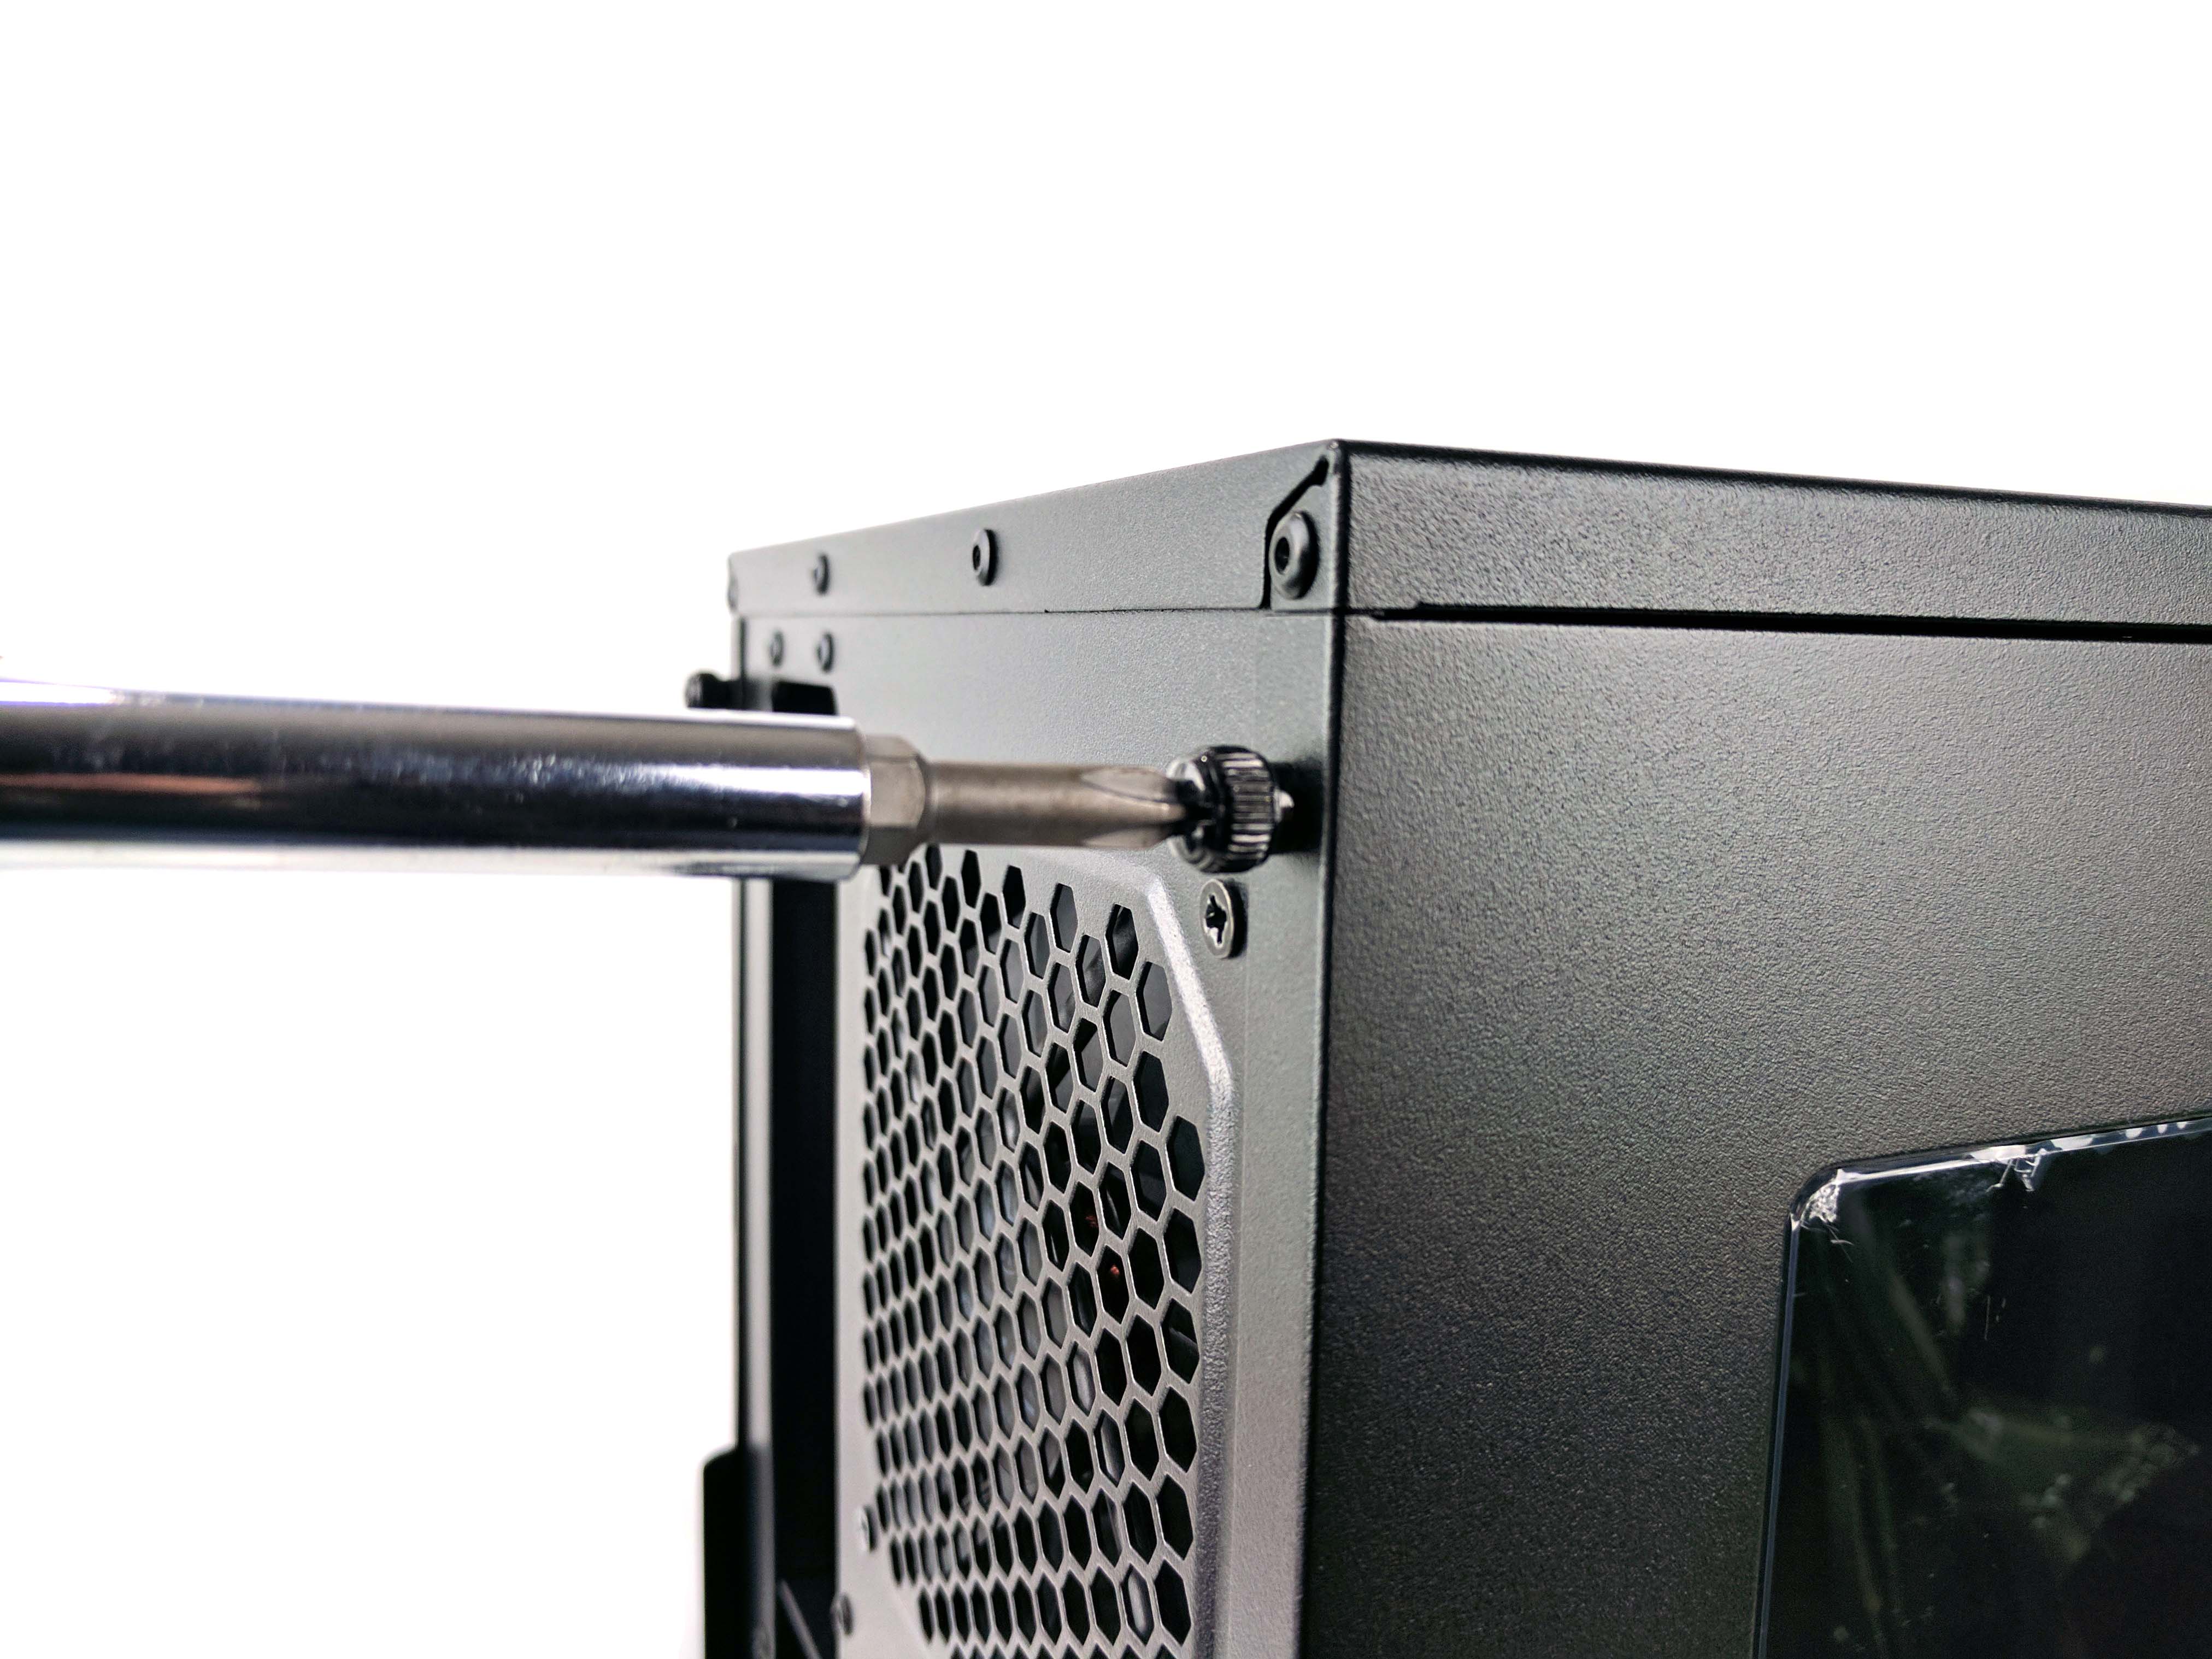
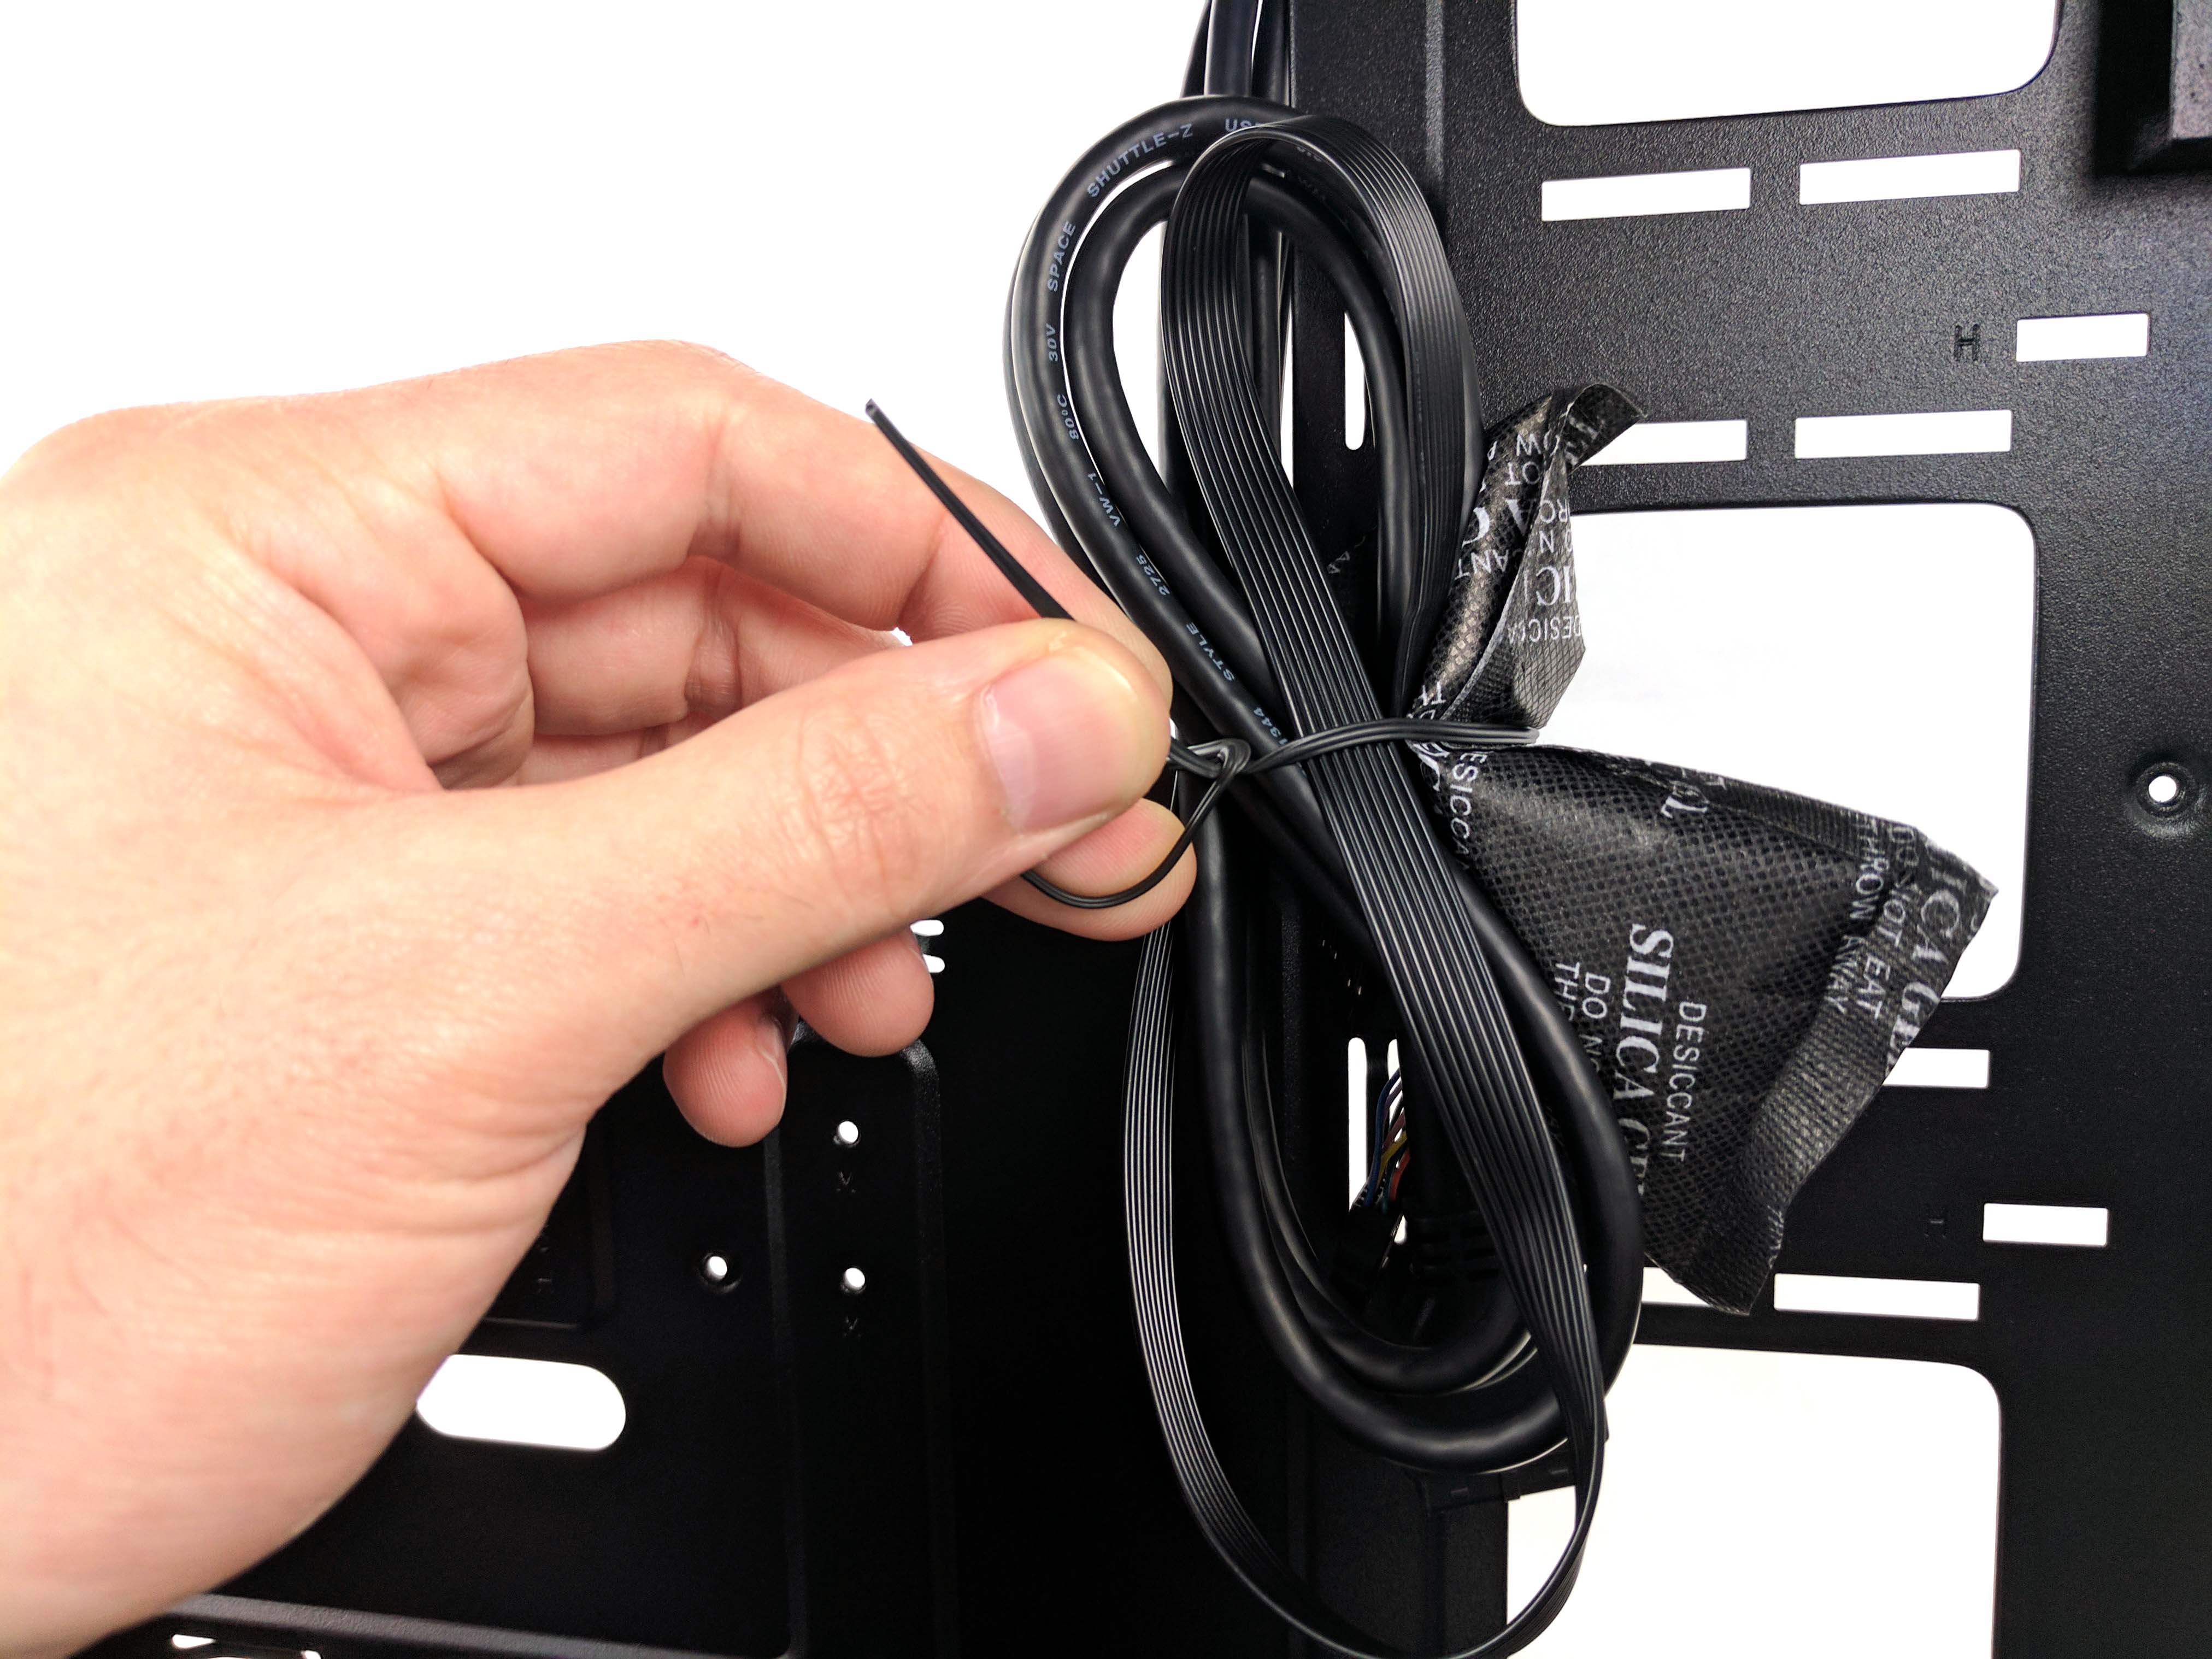
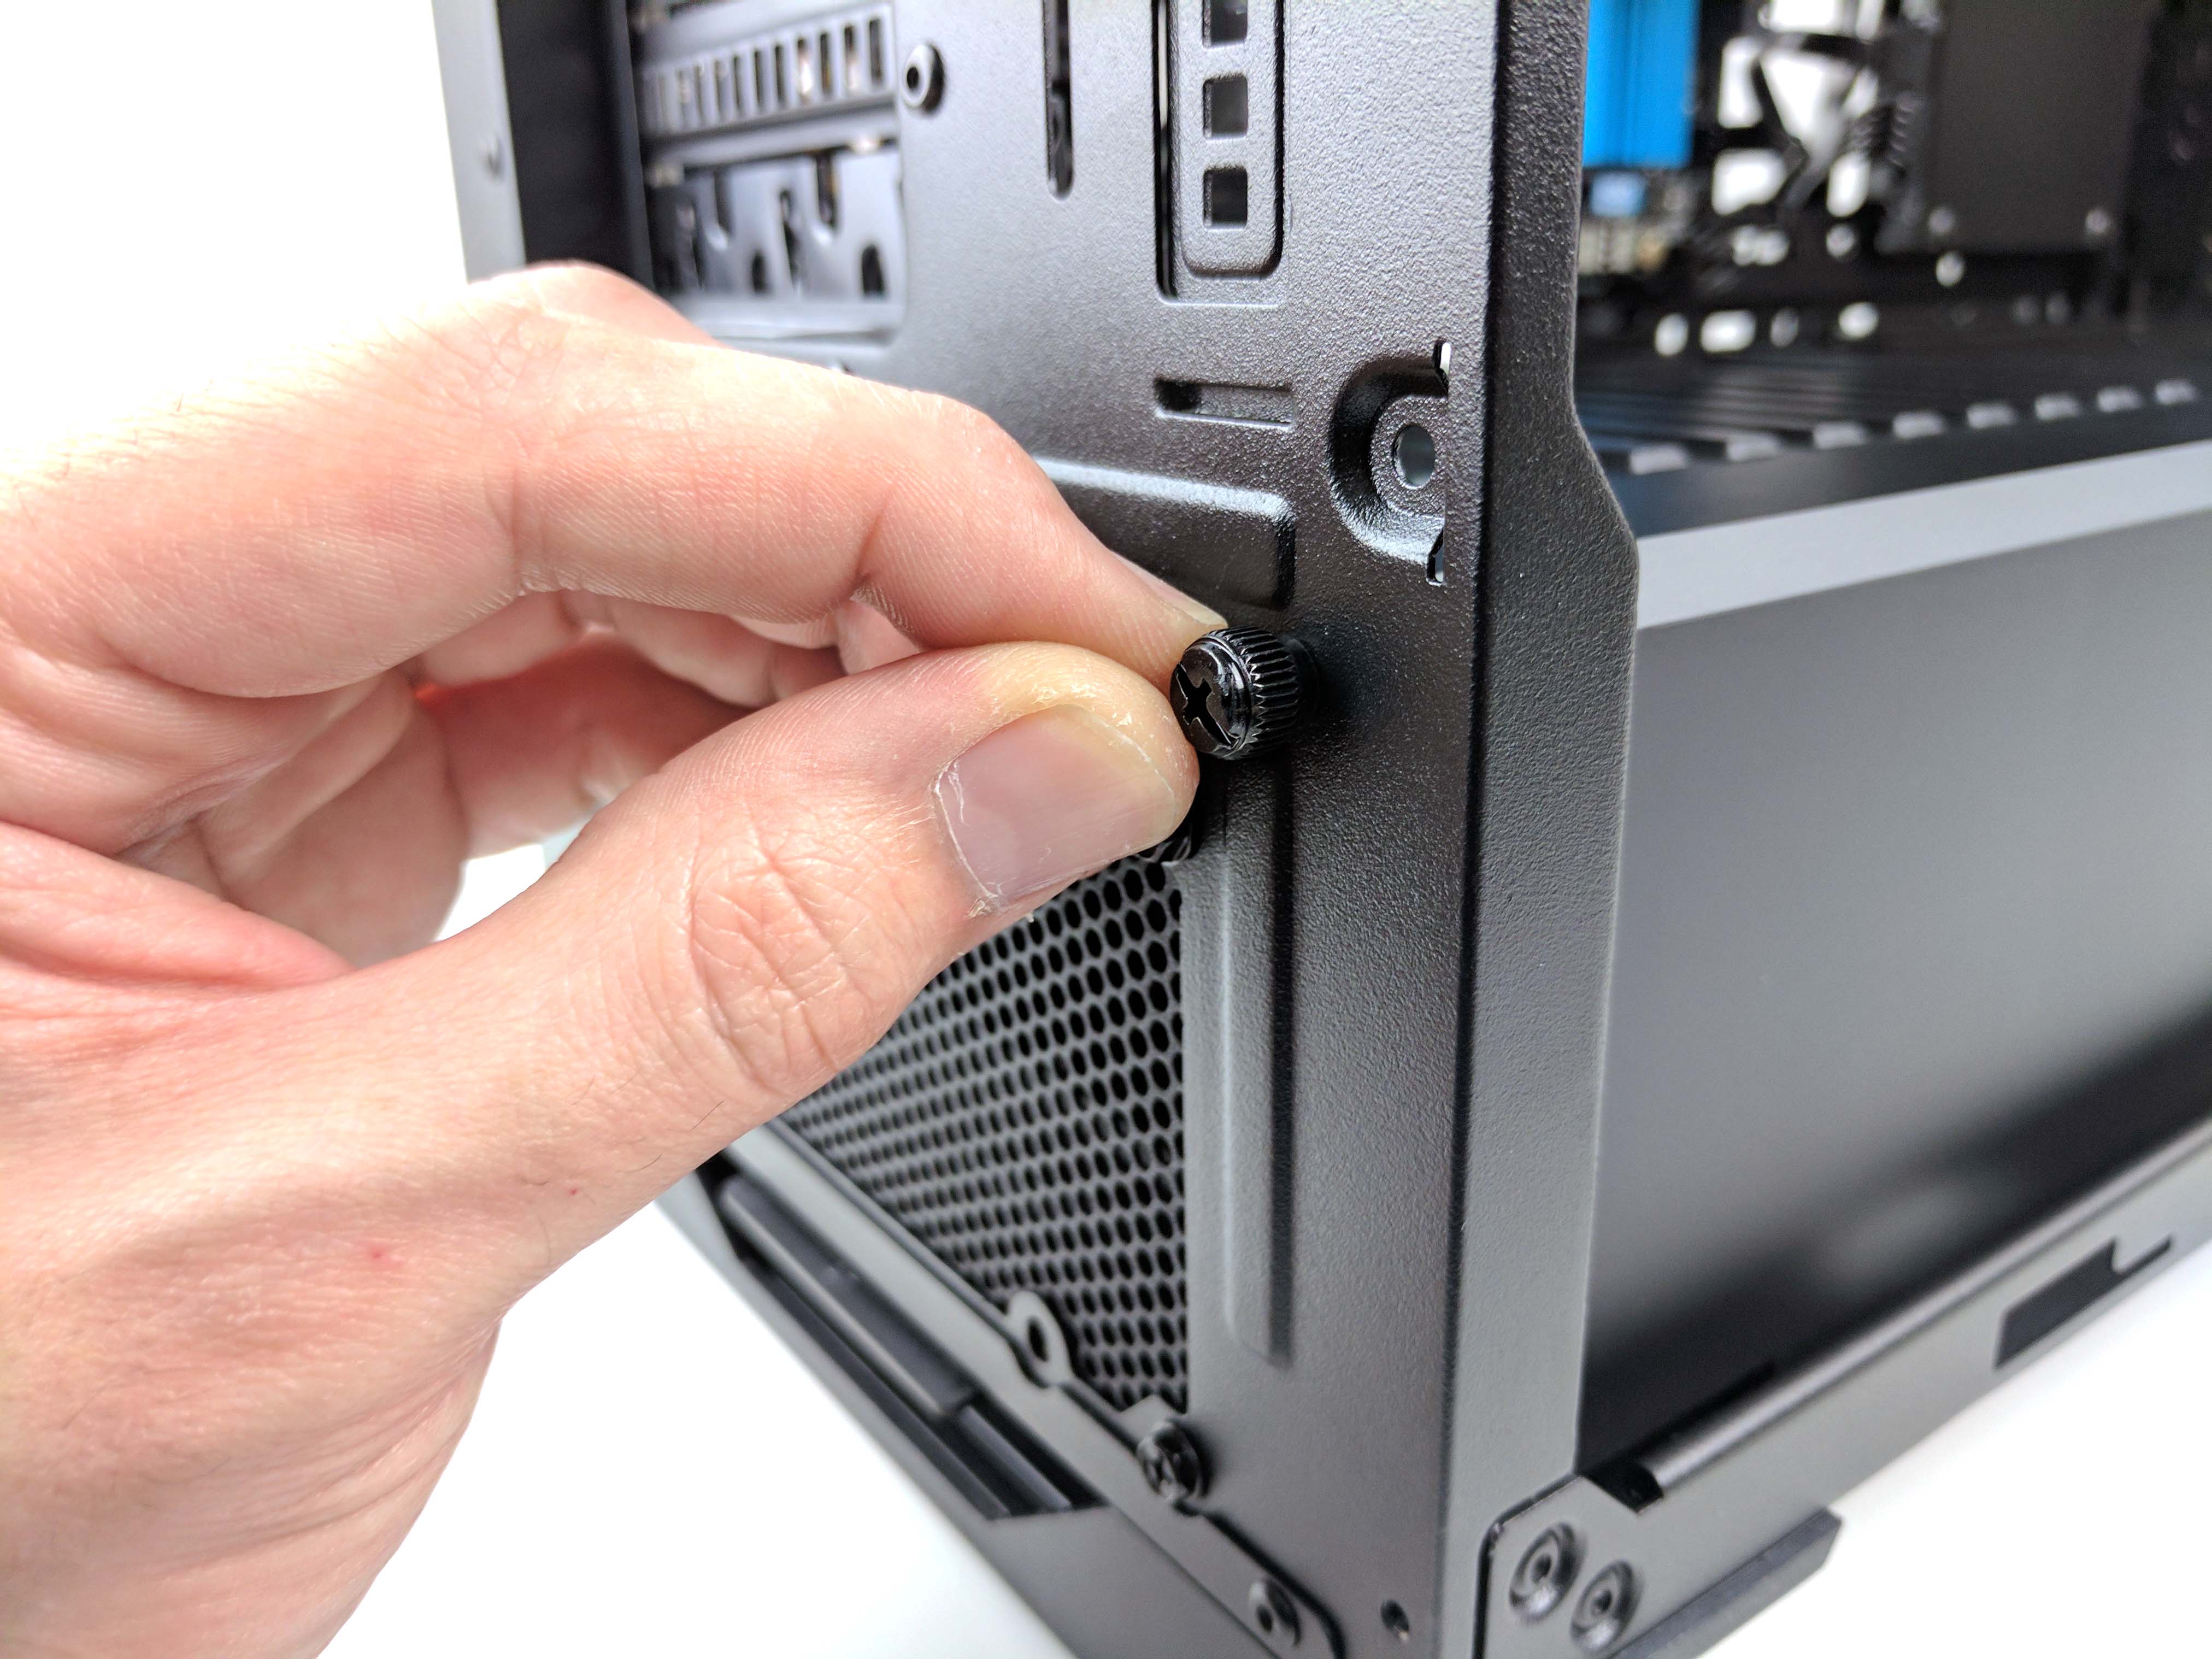
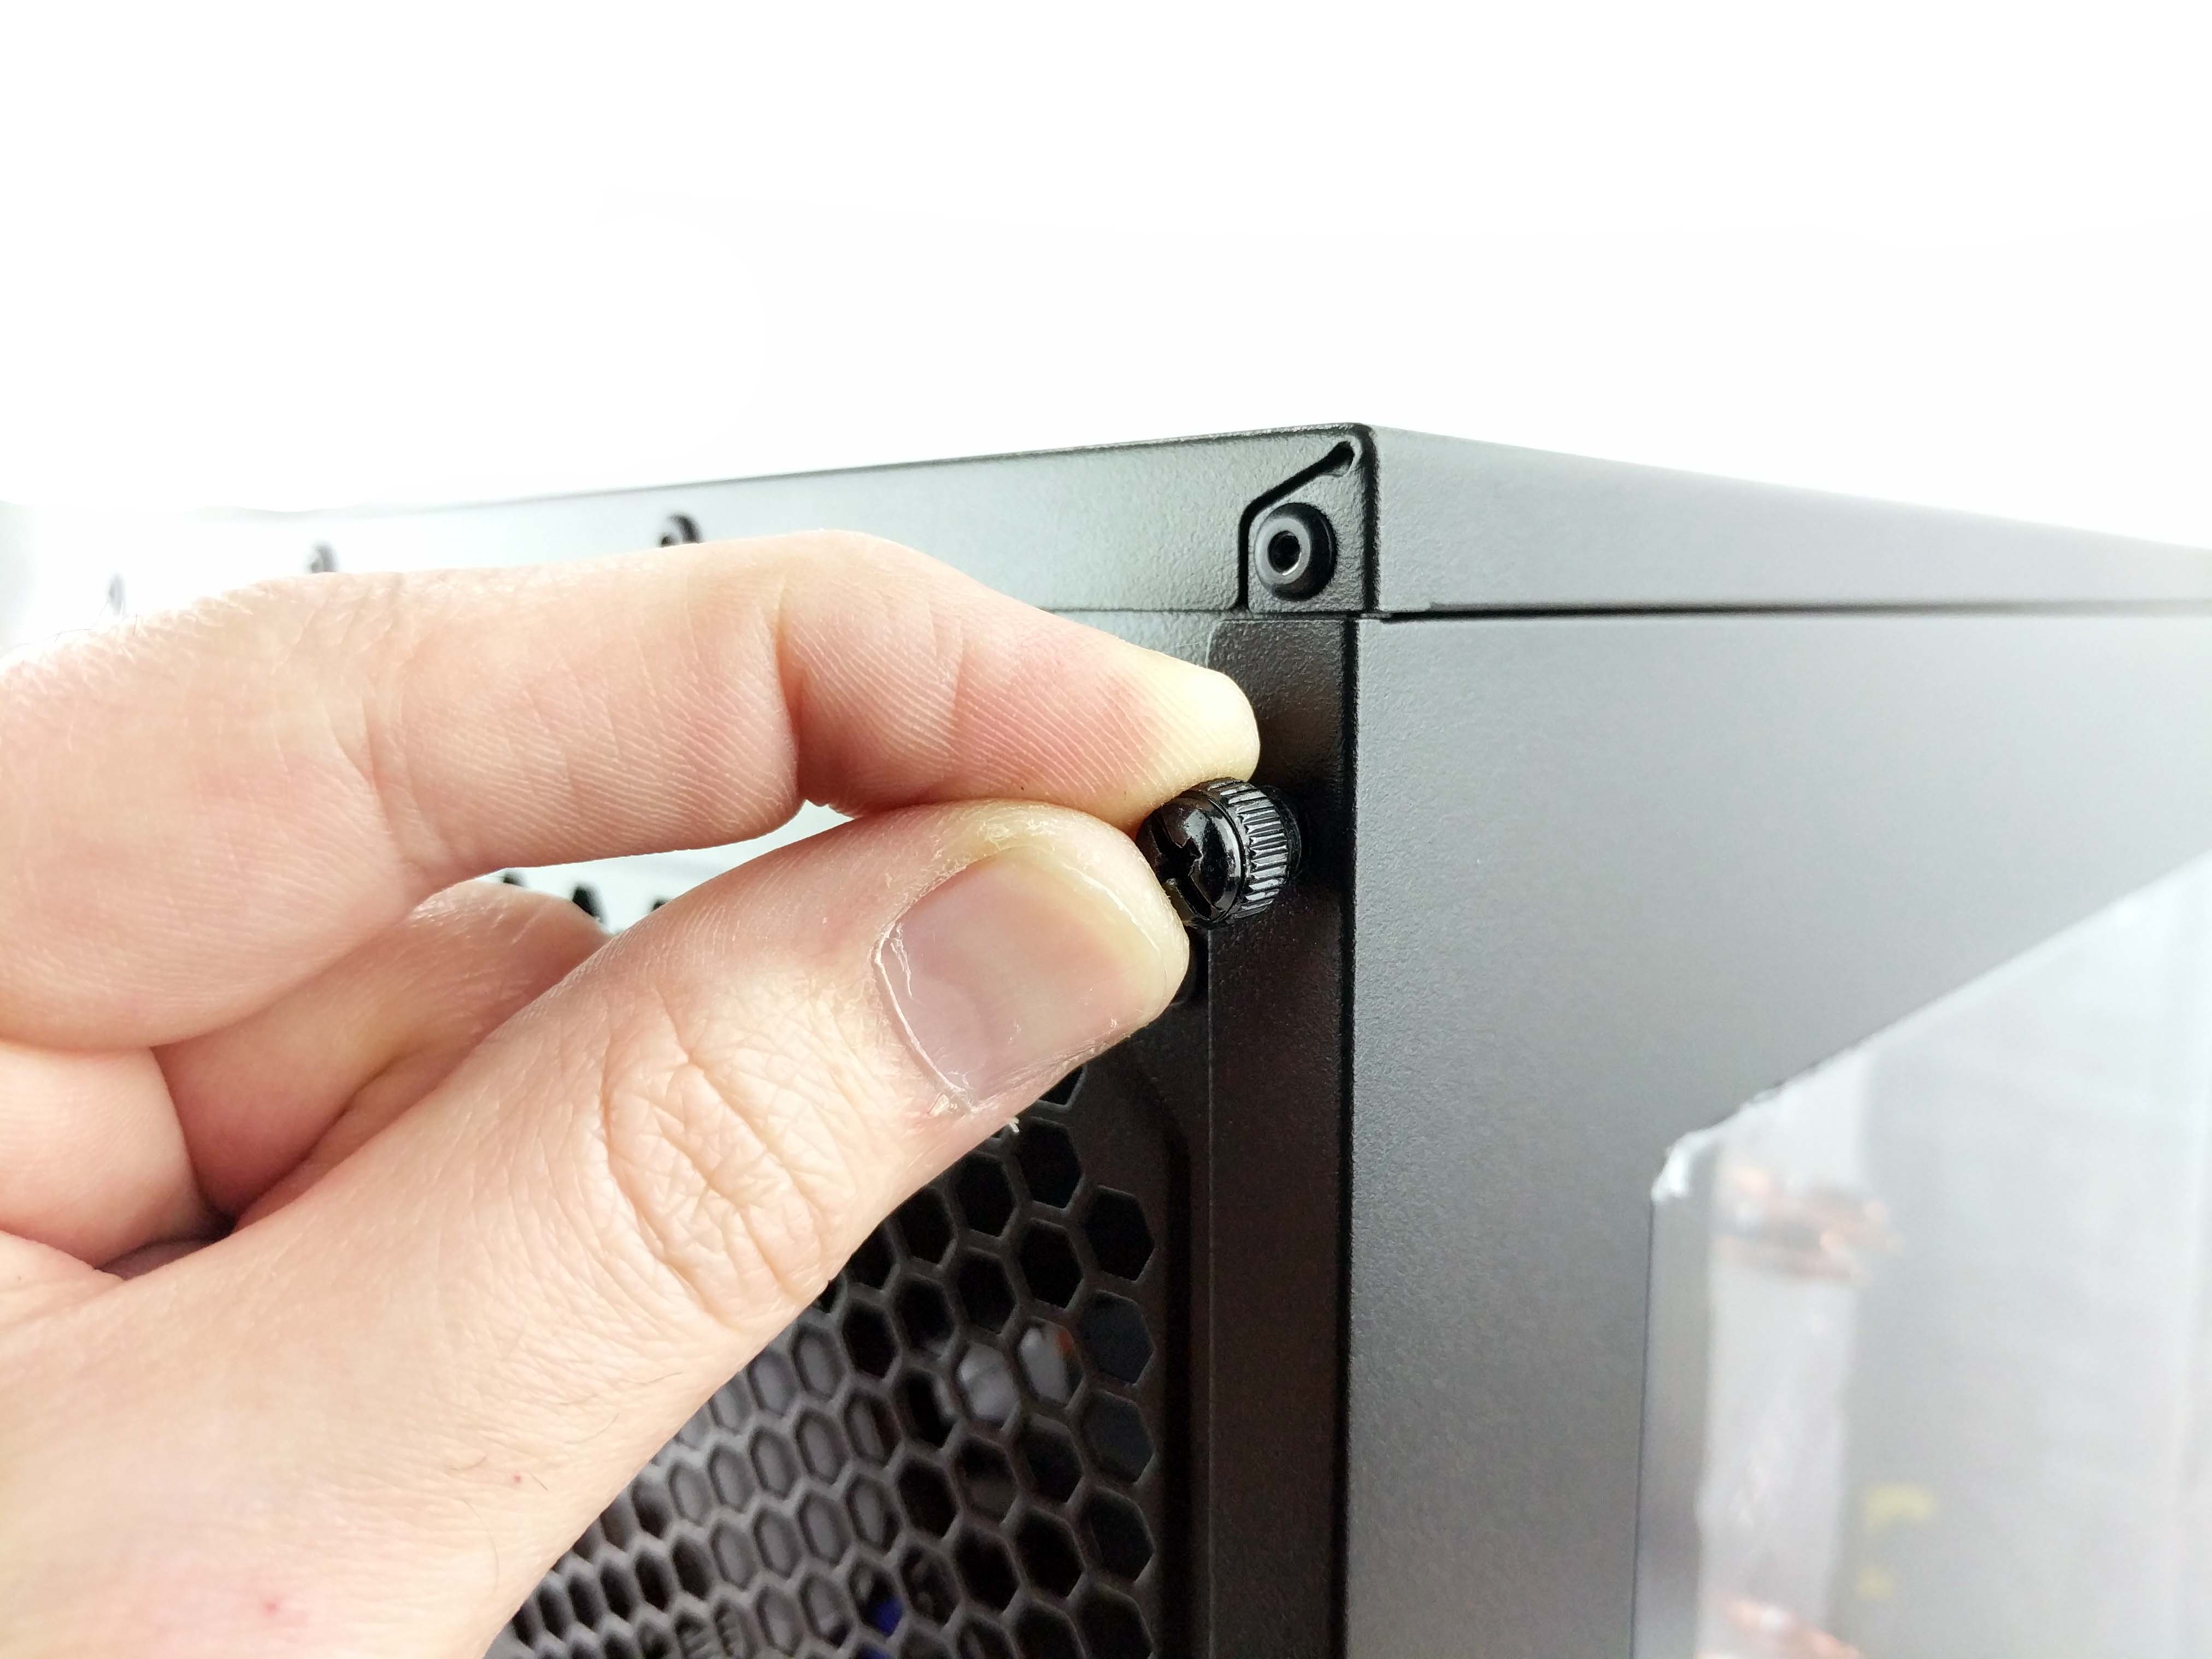
Take off the case's side panels by unscrewing the thumbscrews on the rear of the chassis. You may need to use a screwdriver to loosen them up. Slide the panels toward the back end and lift them away. Untie the the internal cabling and silica bag from the case and pull the wiring through the big hole in the motherboard tray (flooring of the case). Let the cables hang behind the main chamber of the chassis.
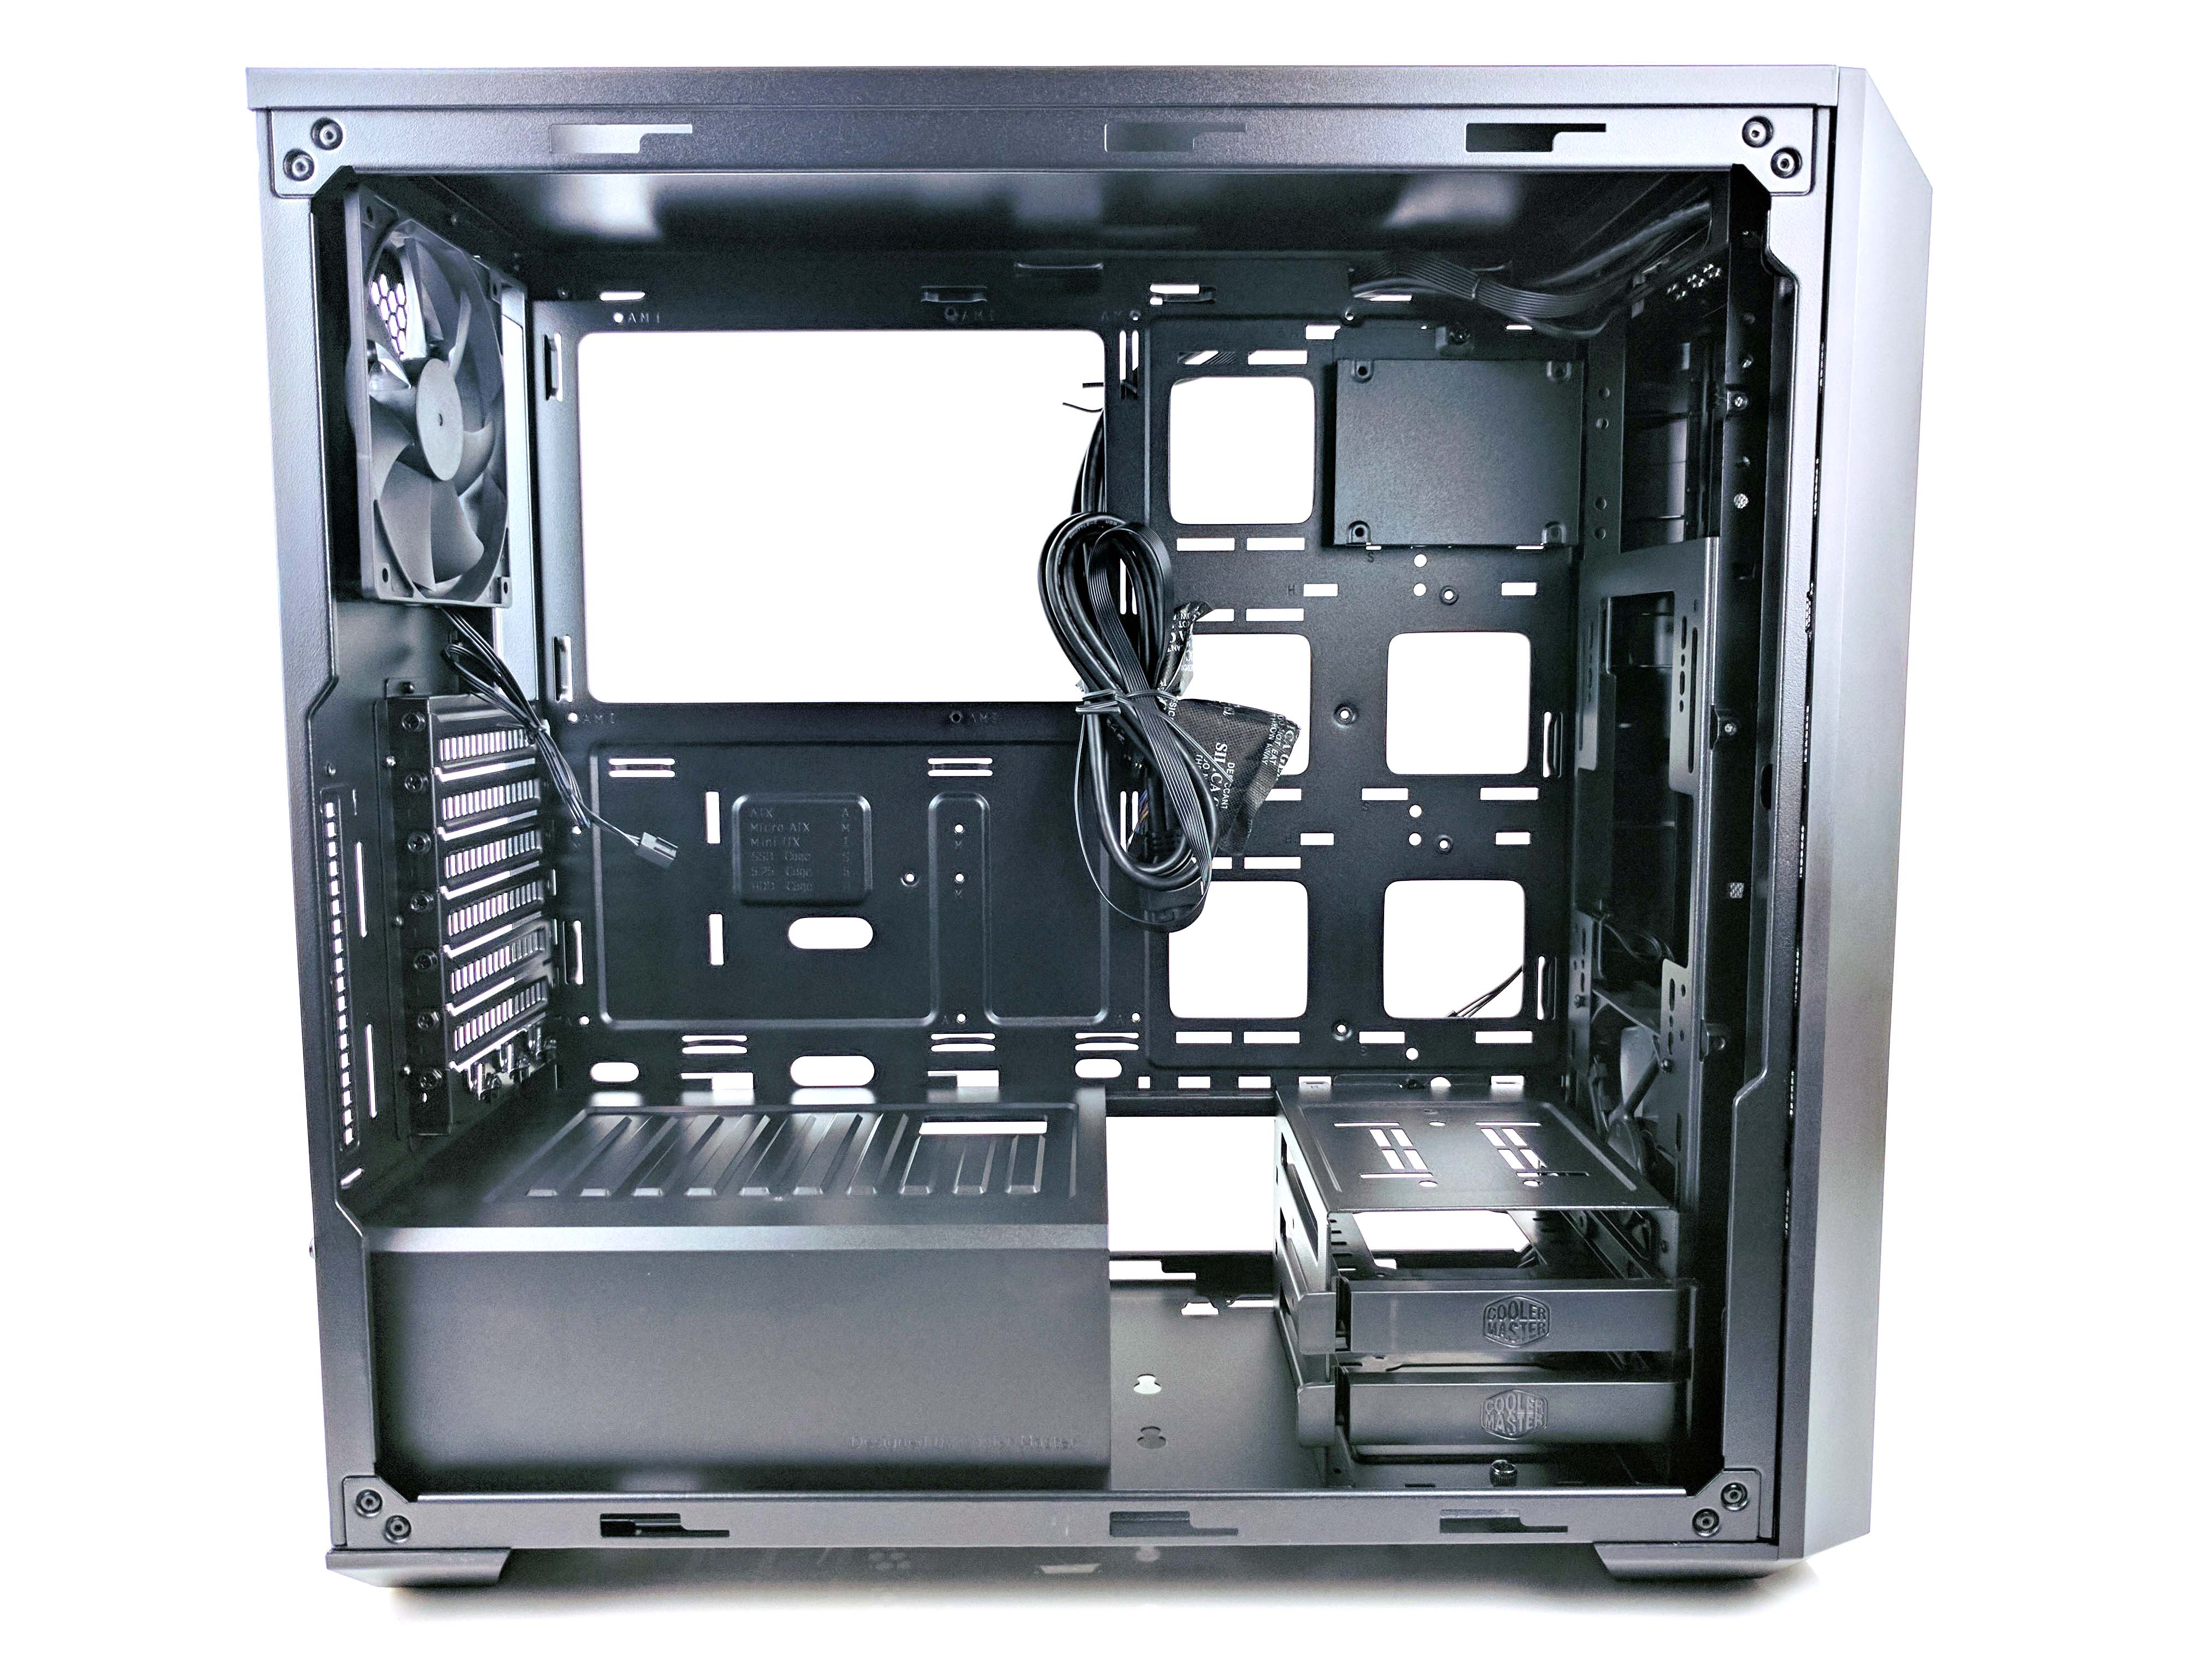
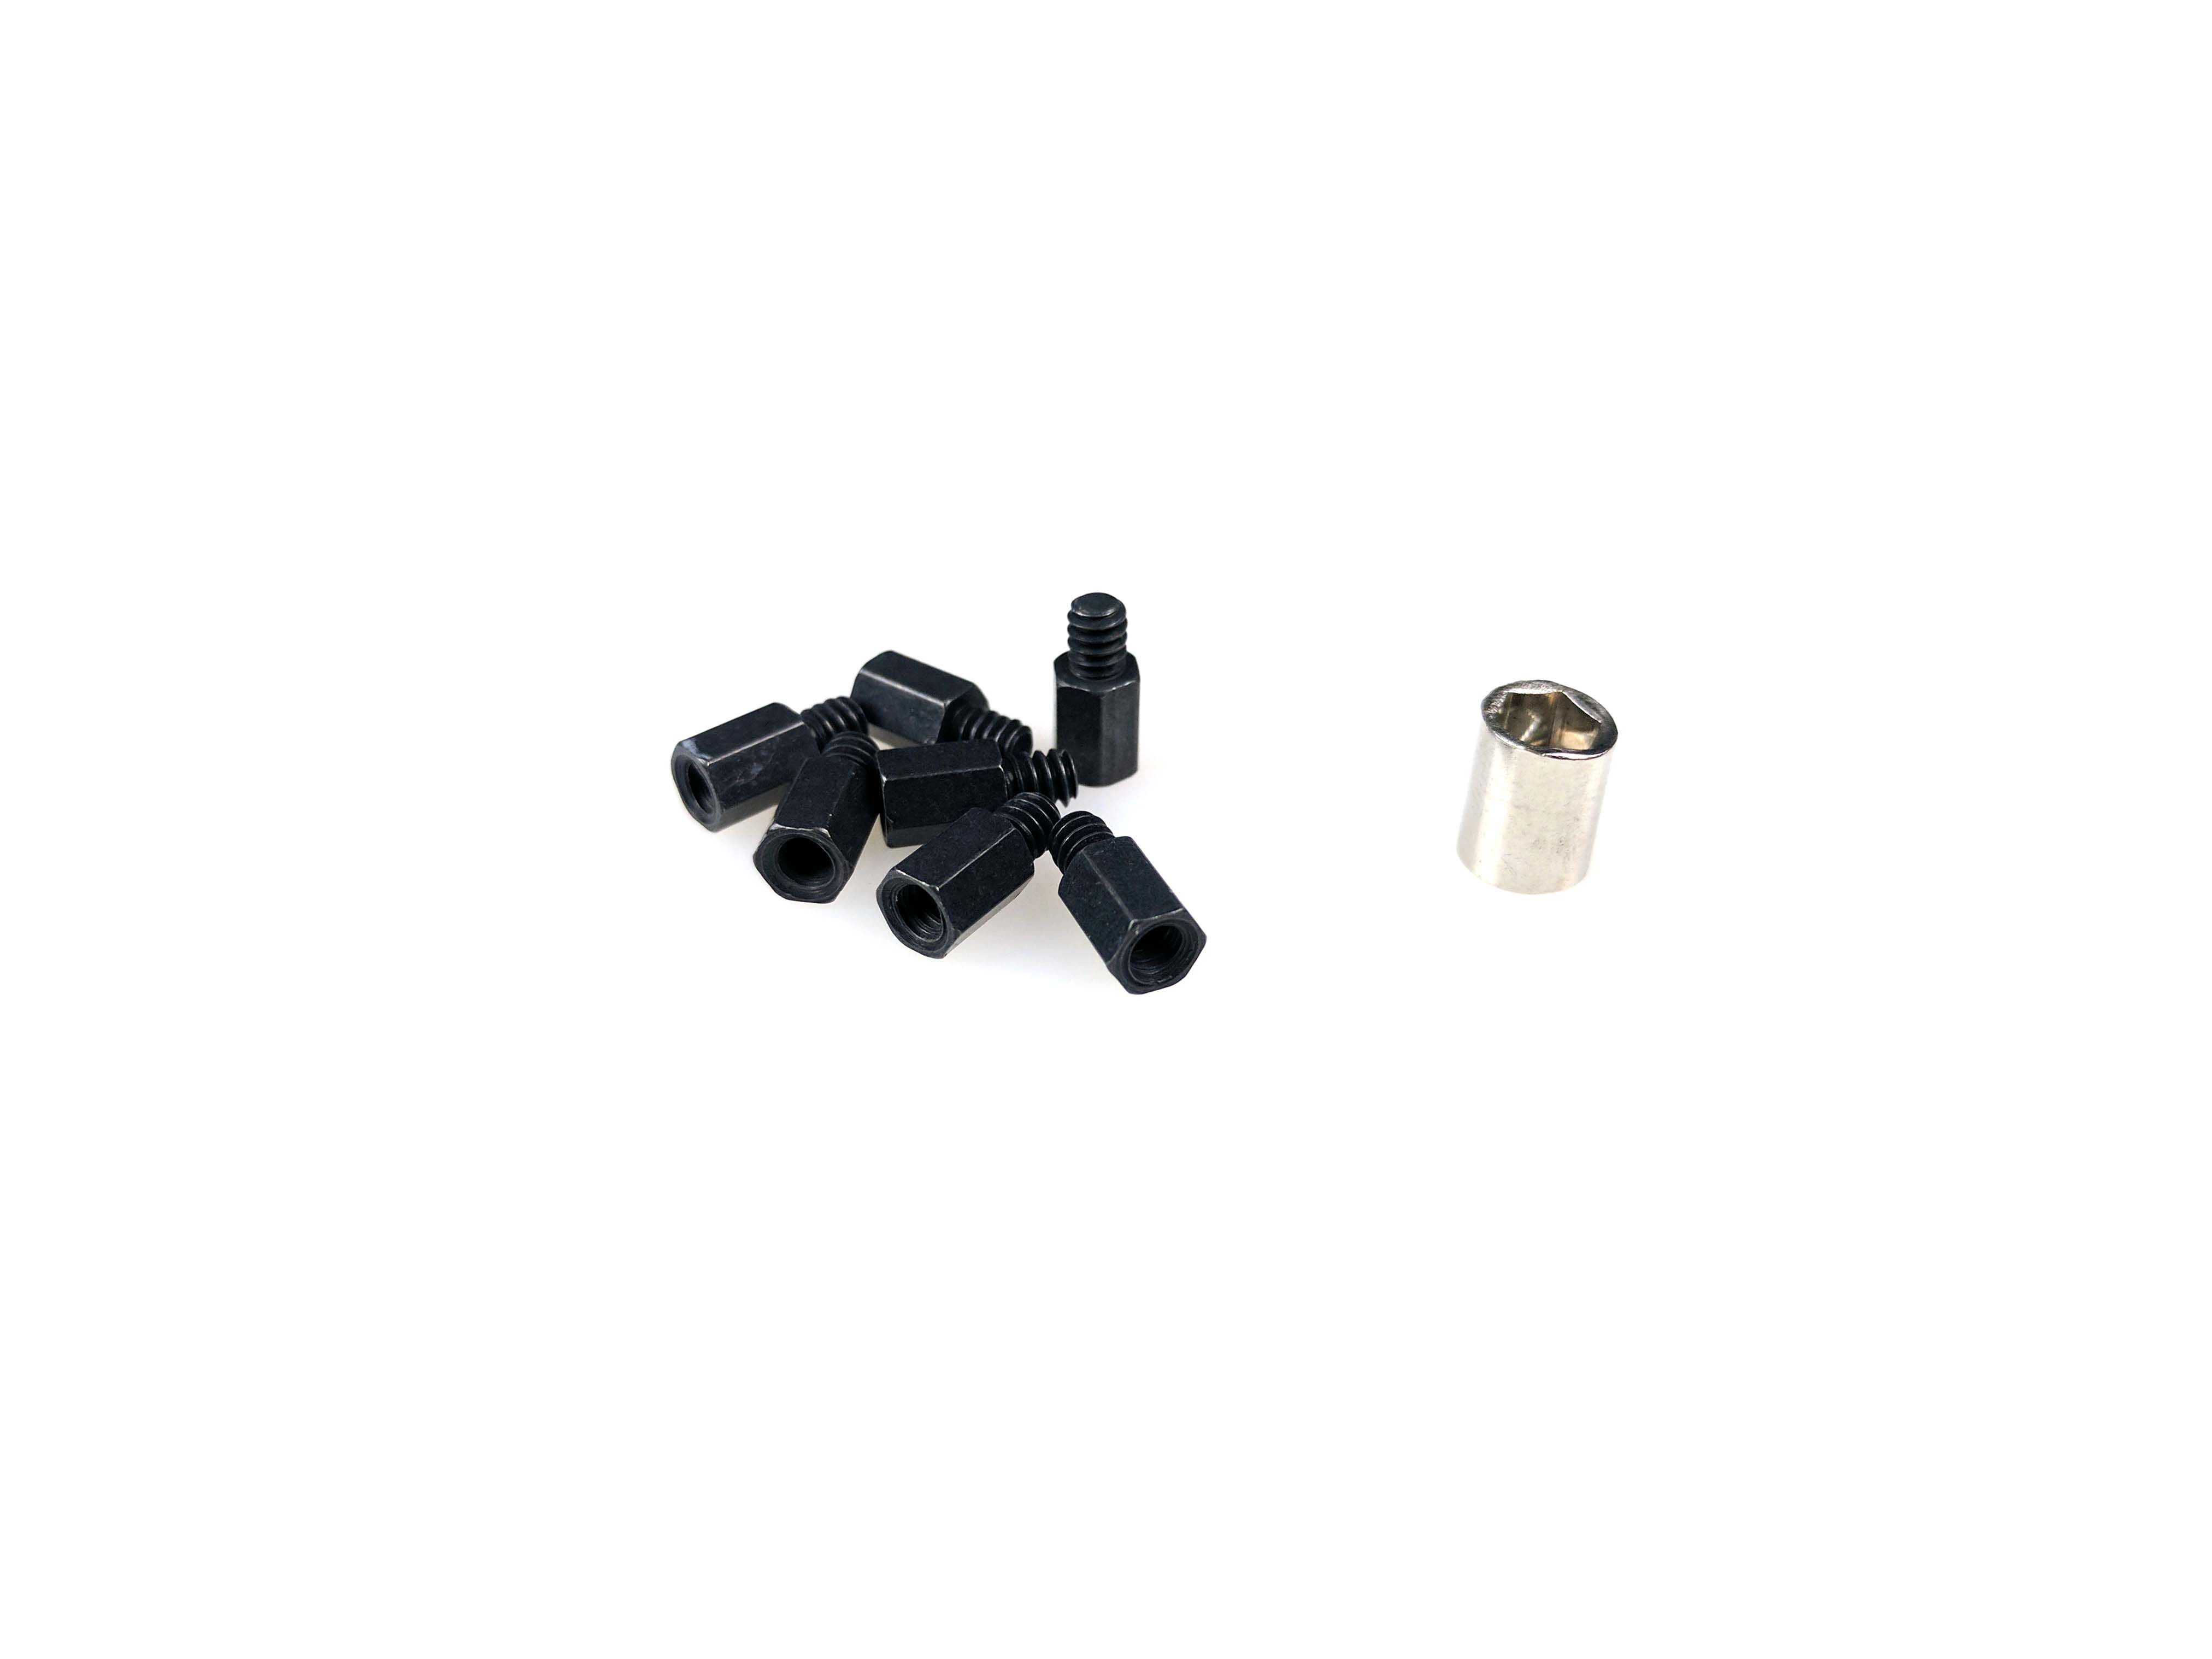
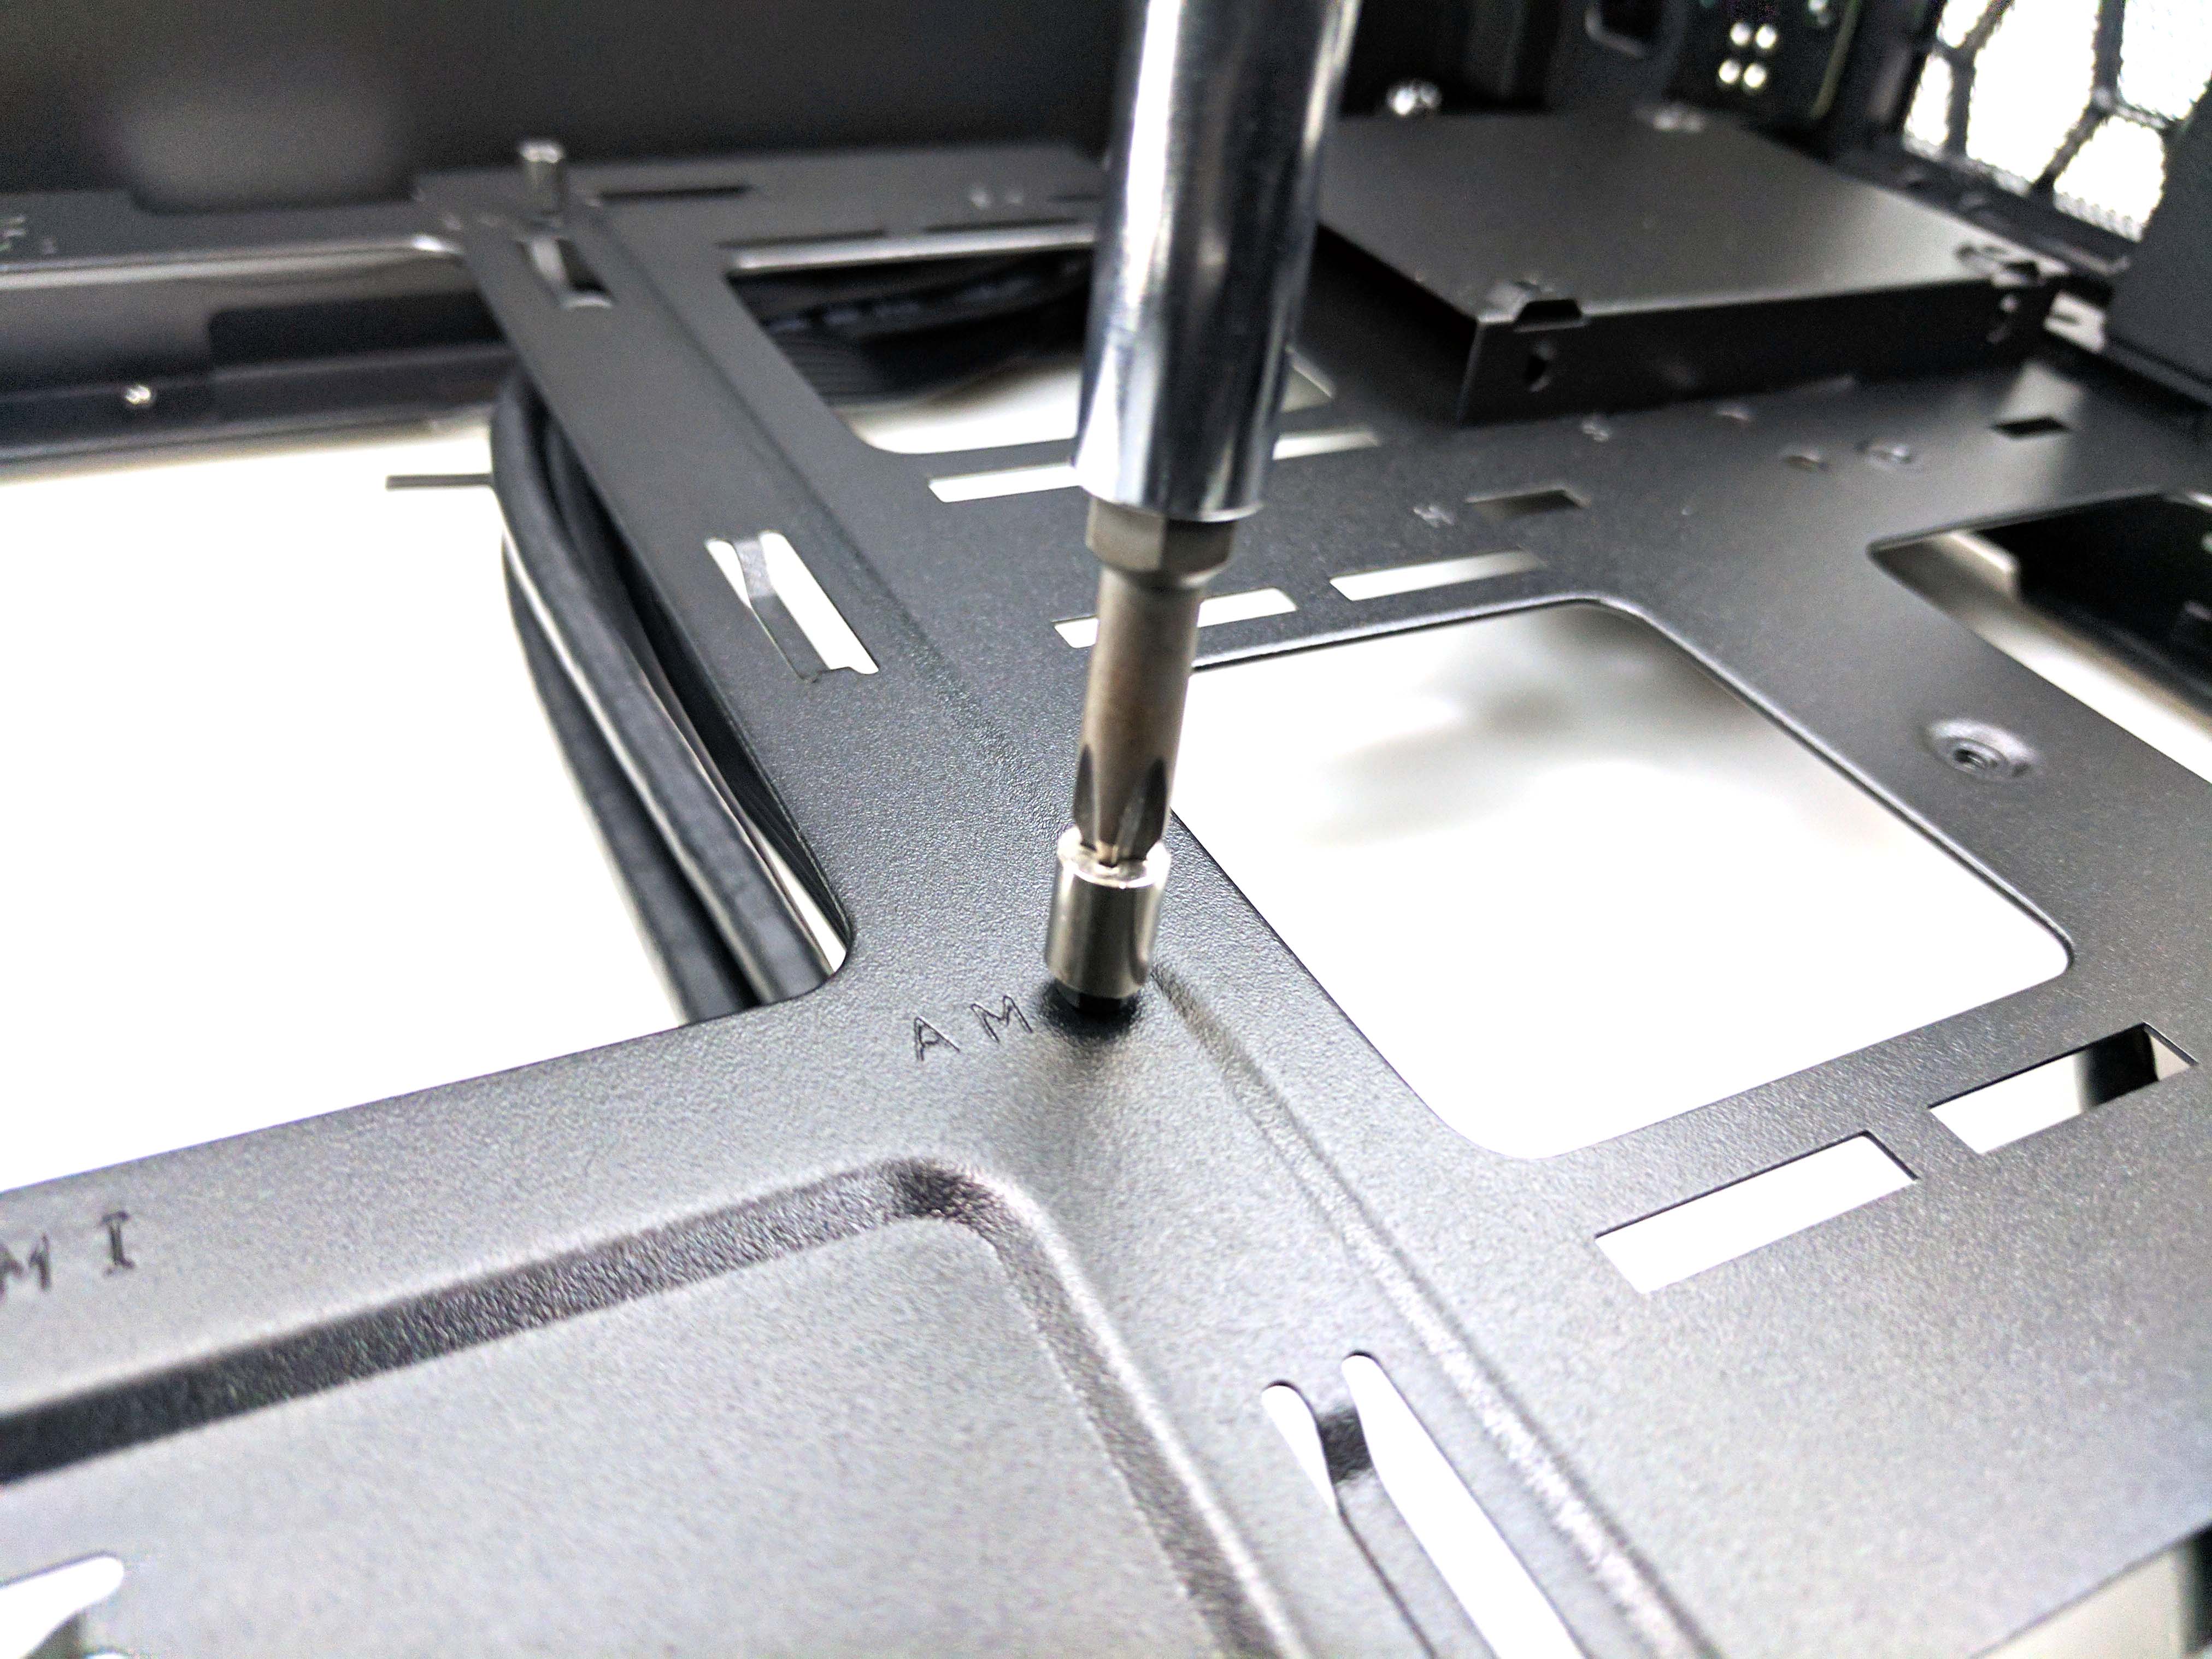
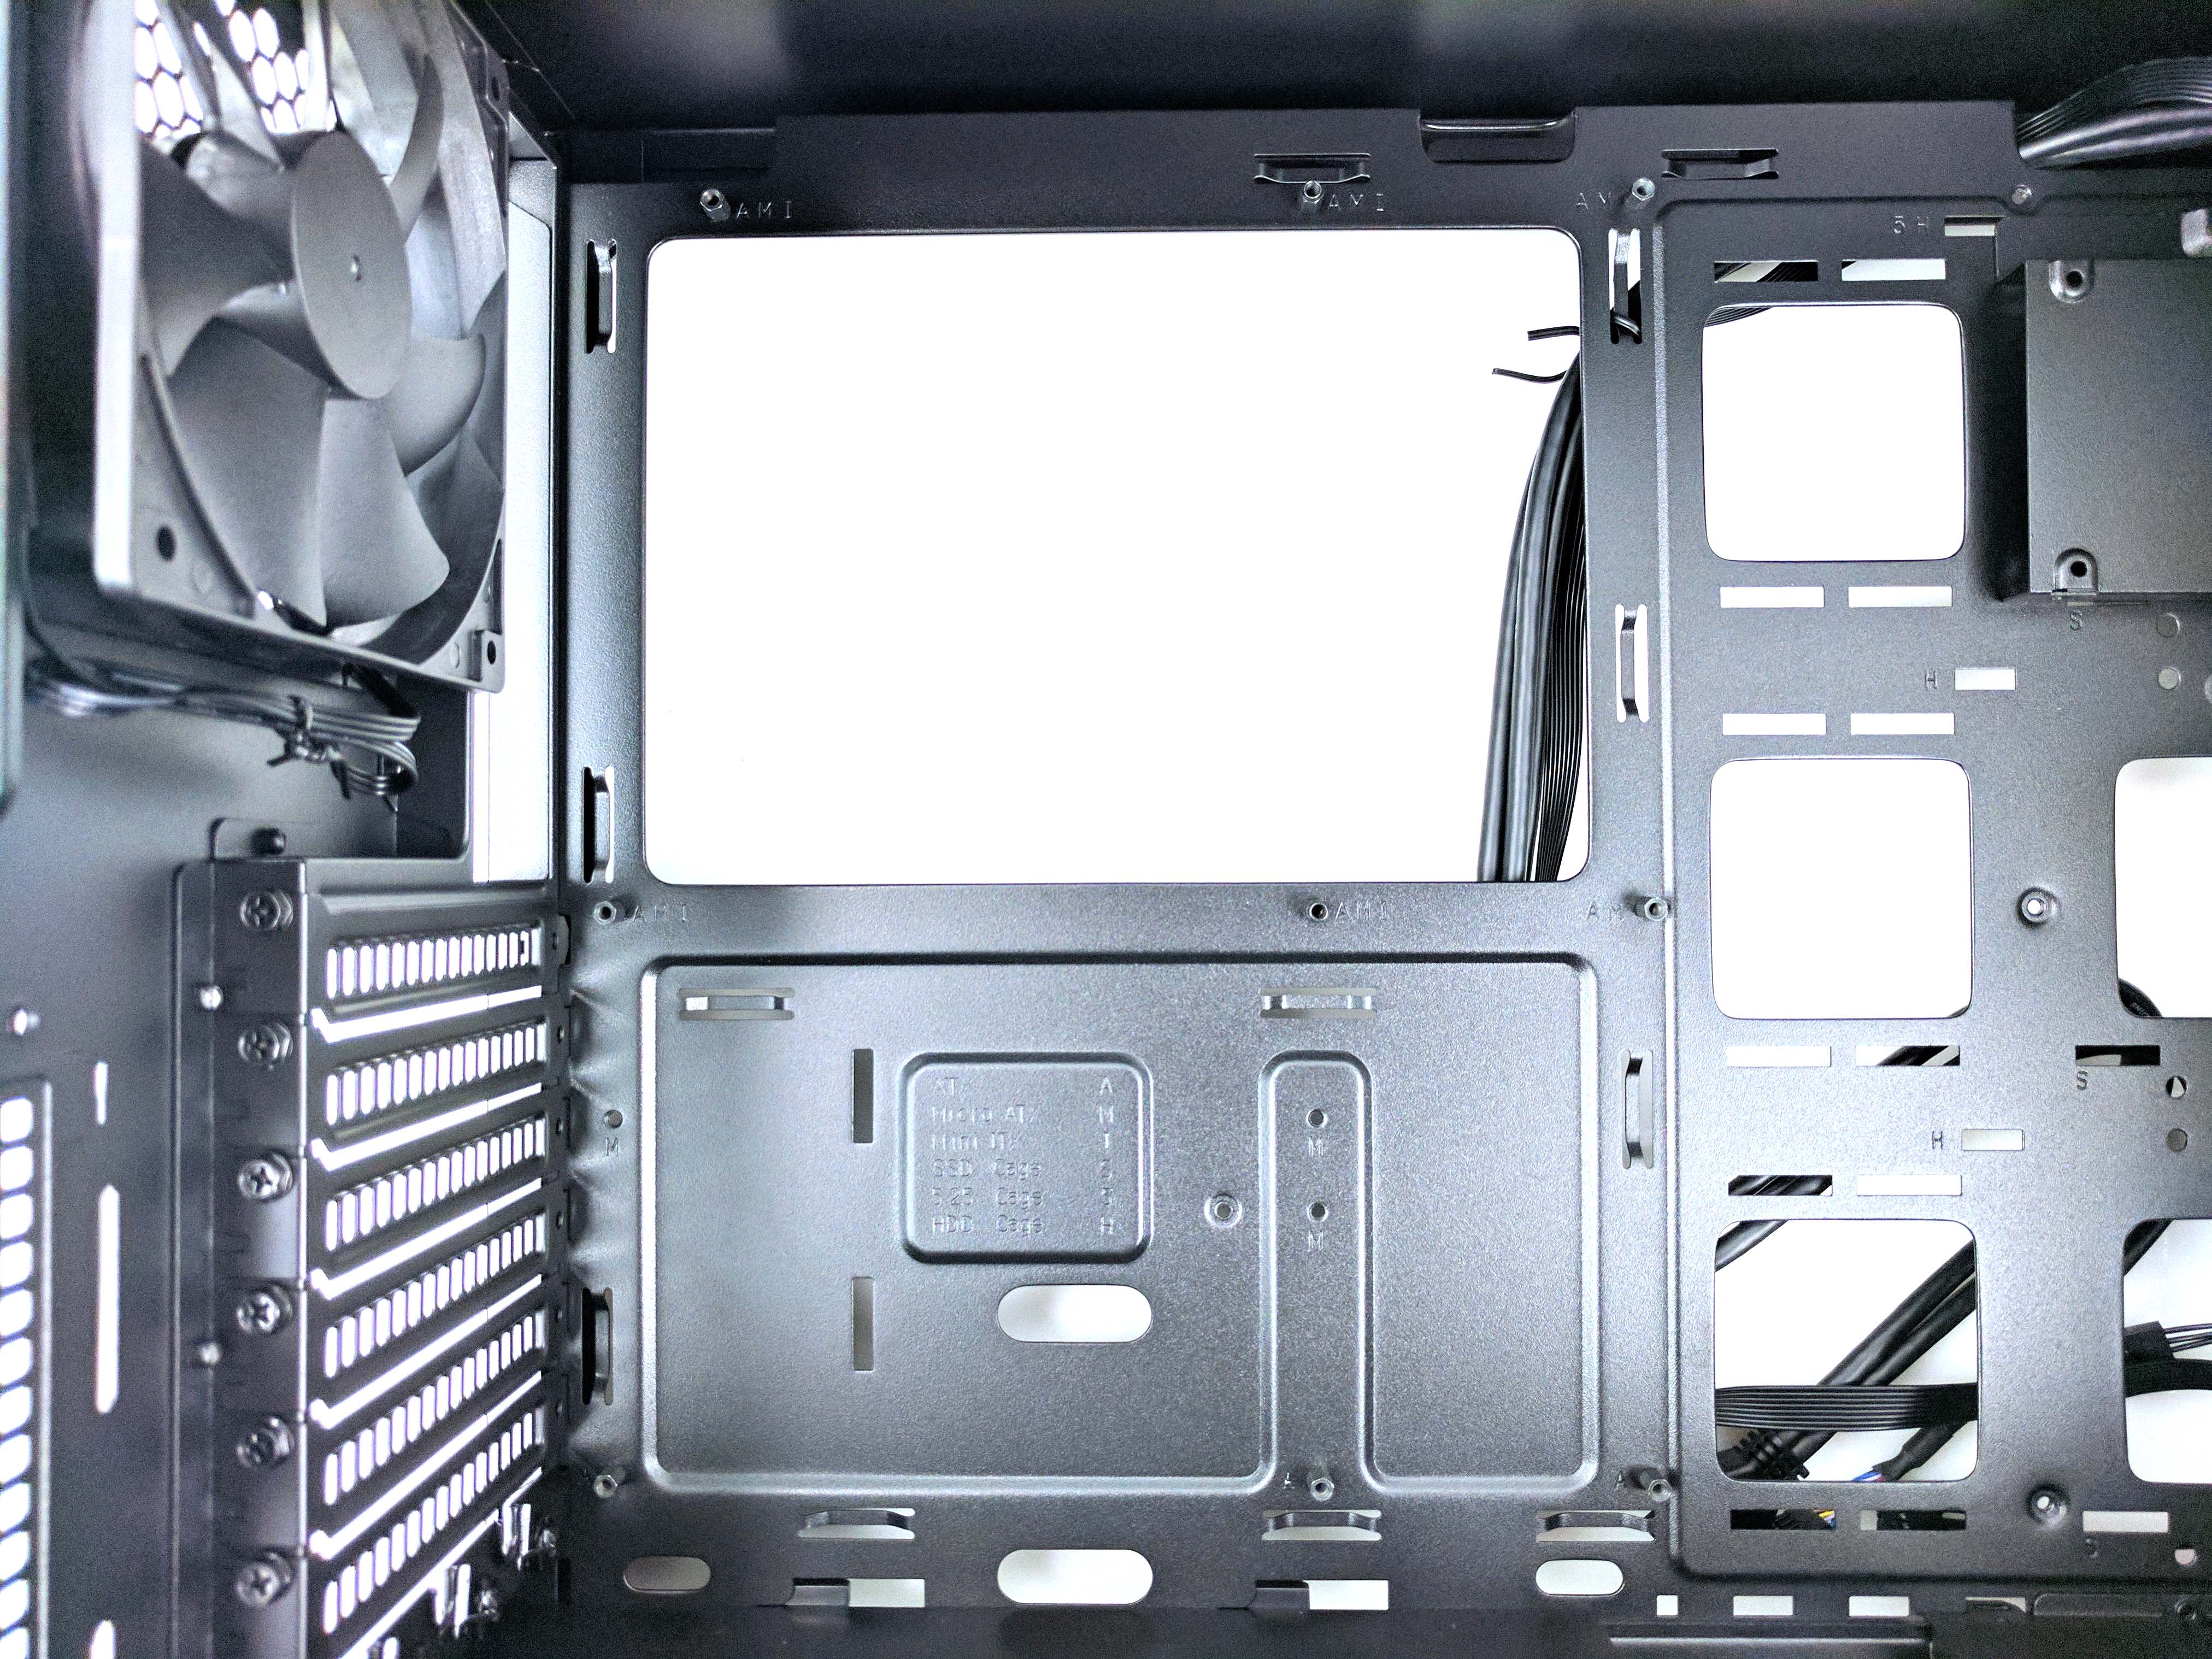
Locate the motherboard standoffs and the tool from the hardware bag. Install the posts to the holes in the motherboard tray marked A by using your hands to thread them into the case. Tighten them with the provided standoff tool and a screwdriver until they are snug. One of the motherboard's holes won't have a post (the hole marked M by the third PCIe slot from the CPU area), but this is perfectly okay and nothing to be alarmed about.
Power Supply
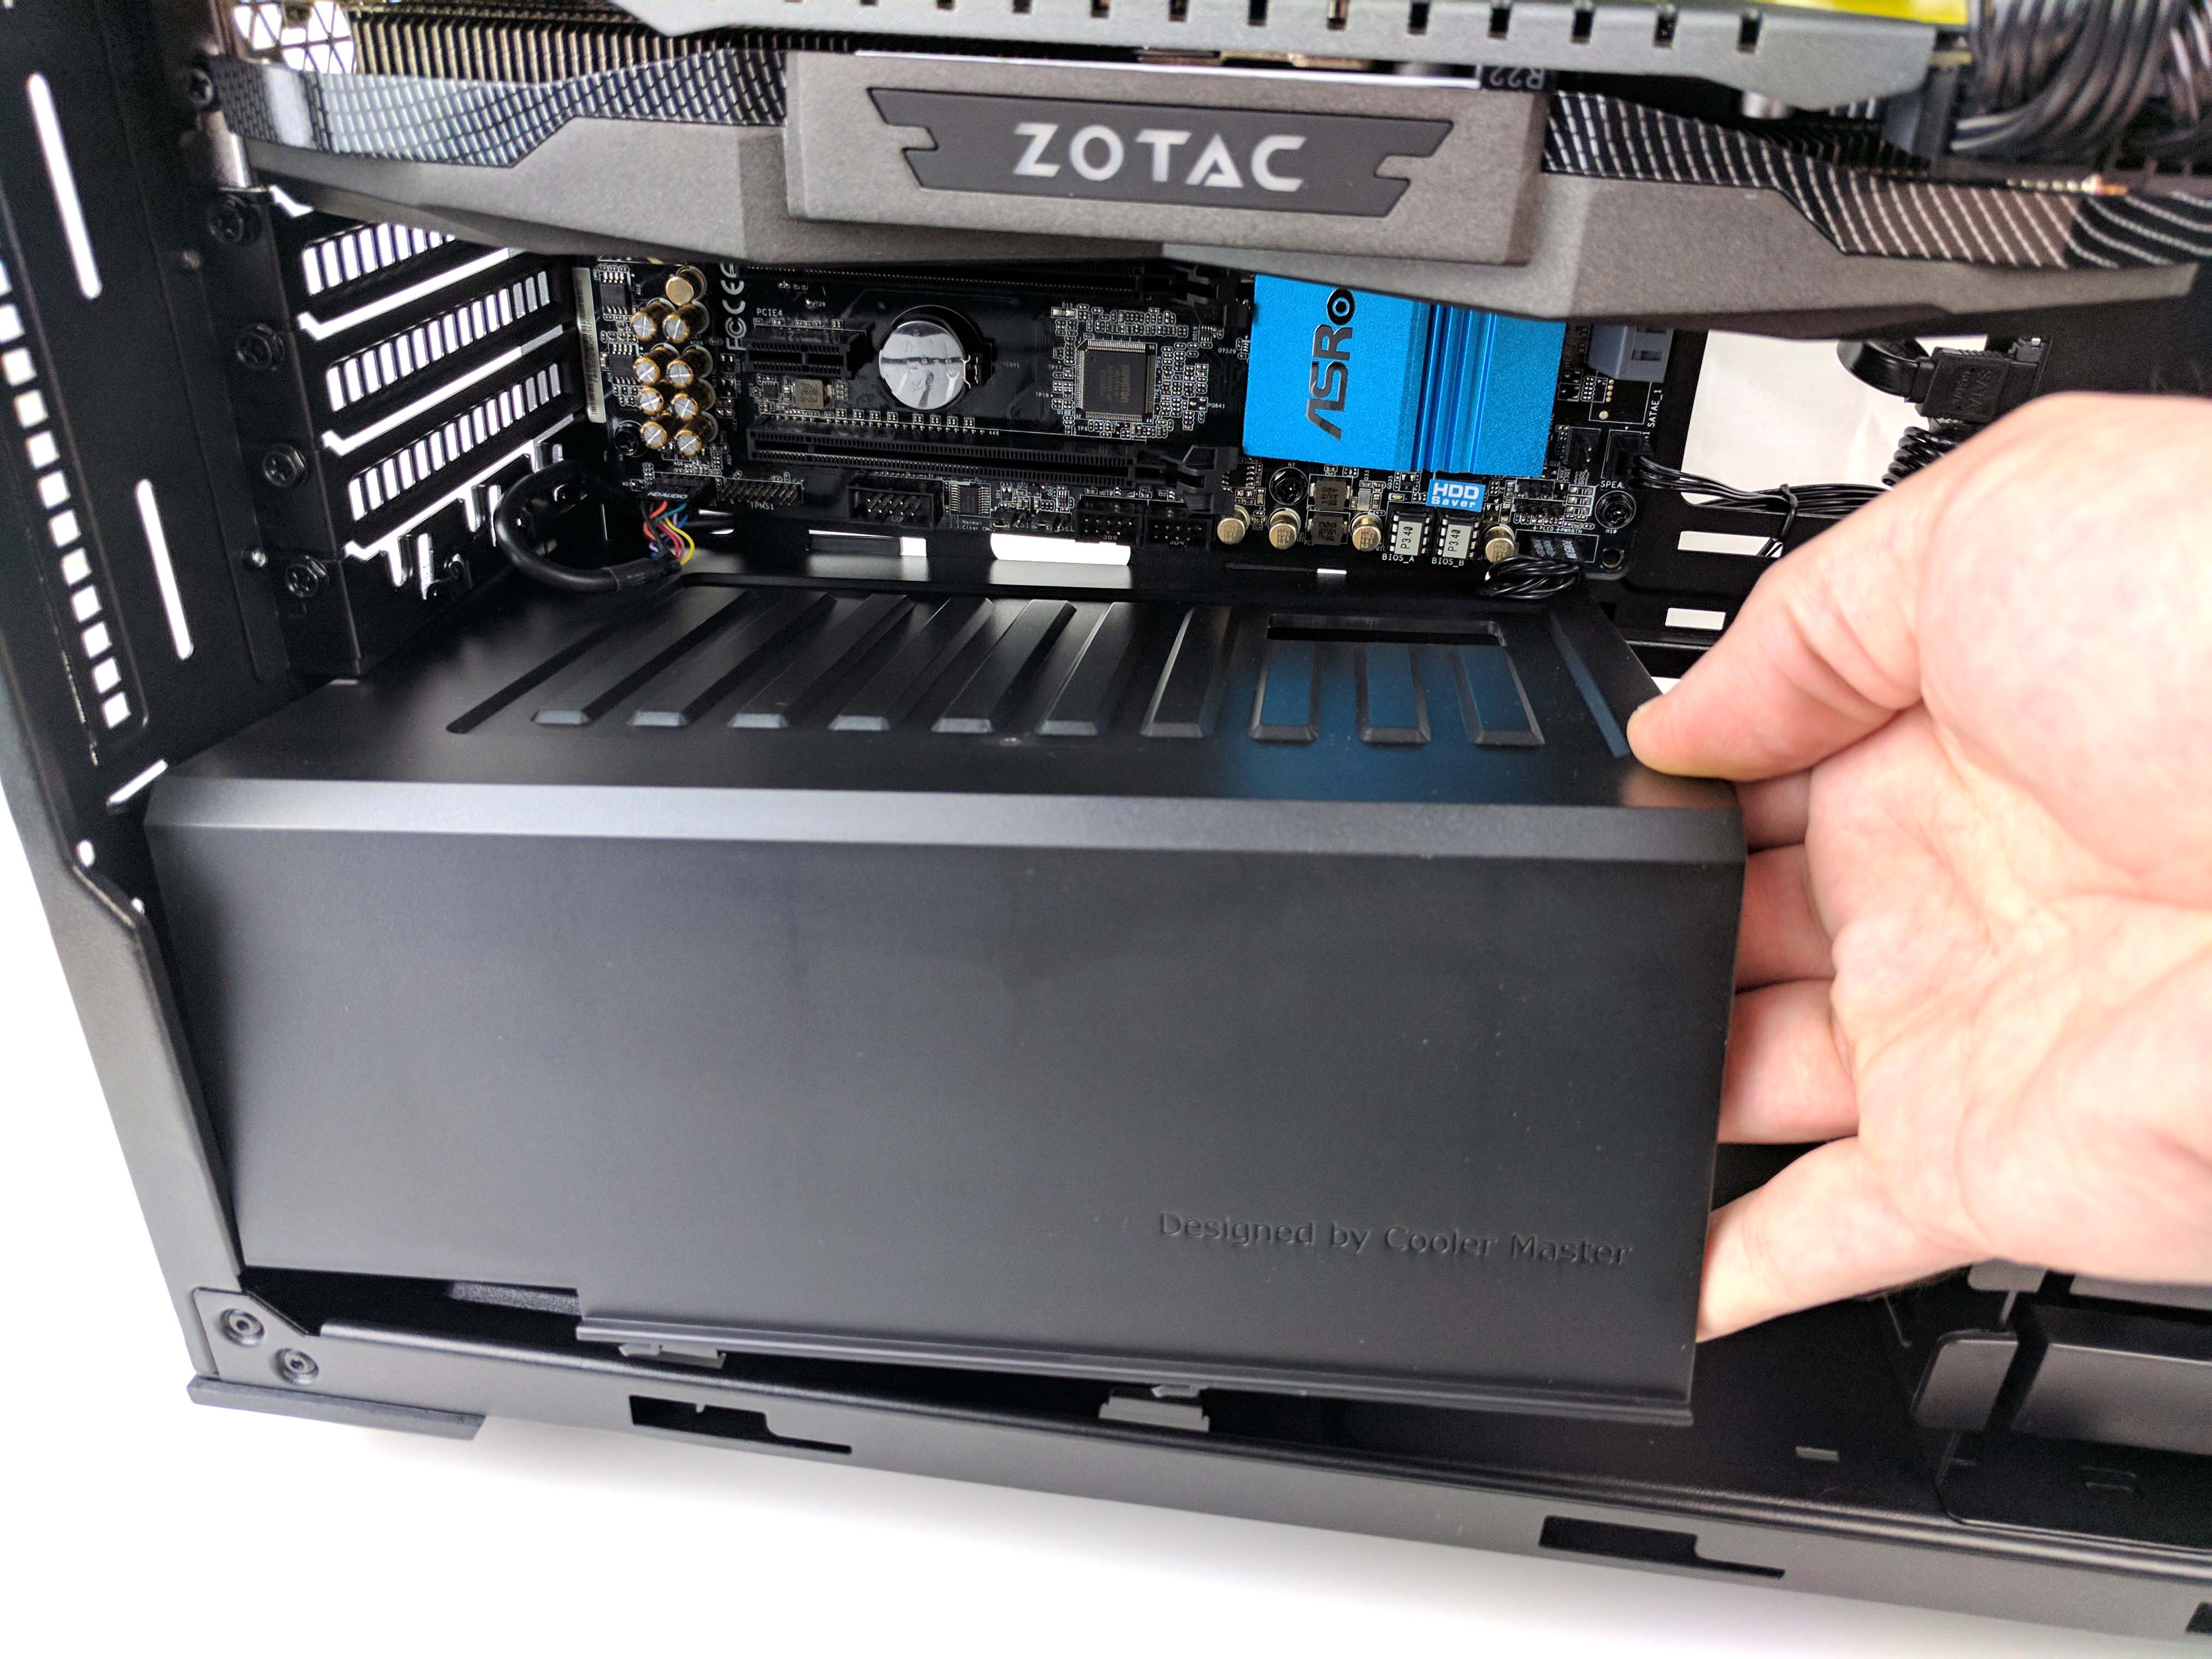
Take out the case's PSU shroud by loosening the thumbscrew in the back of the case with a screwdriver and sliding the shroud towards the front of the case. Lift up on it to detach it from the chassis and set it aside until the end.
Get Tom's Hardware's best news and in-depth reviews, straight to your inbox.
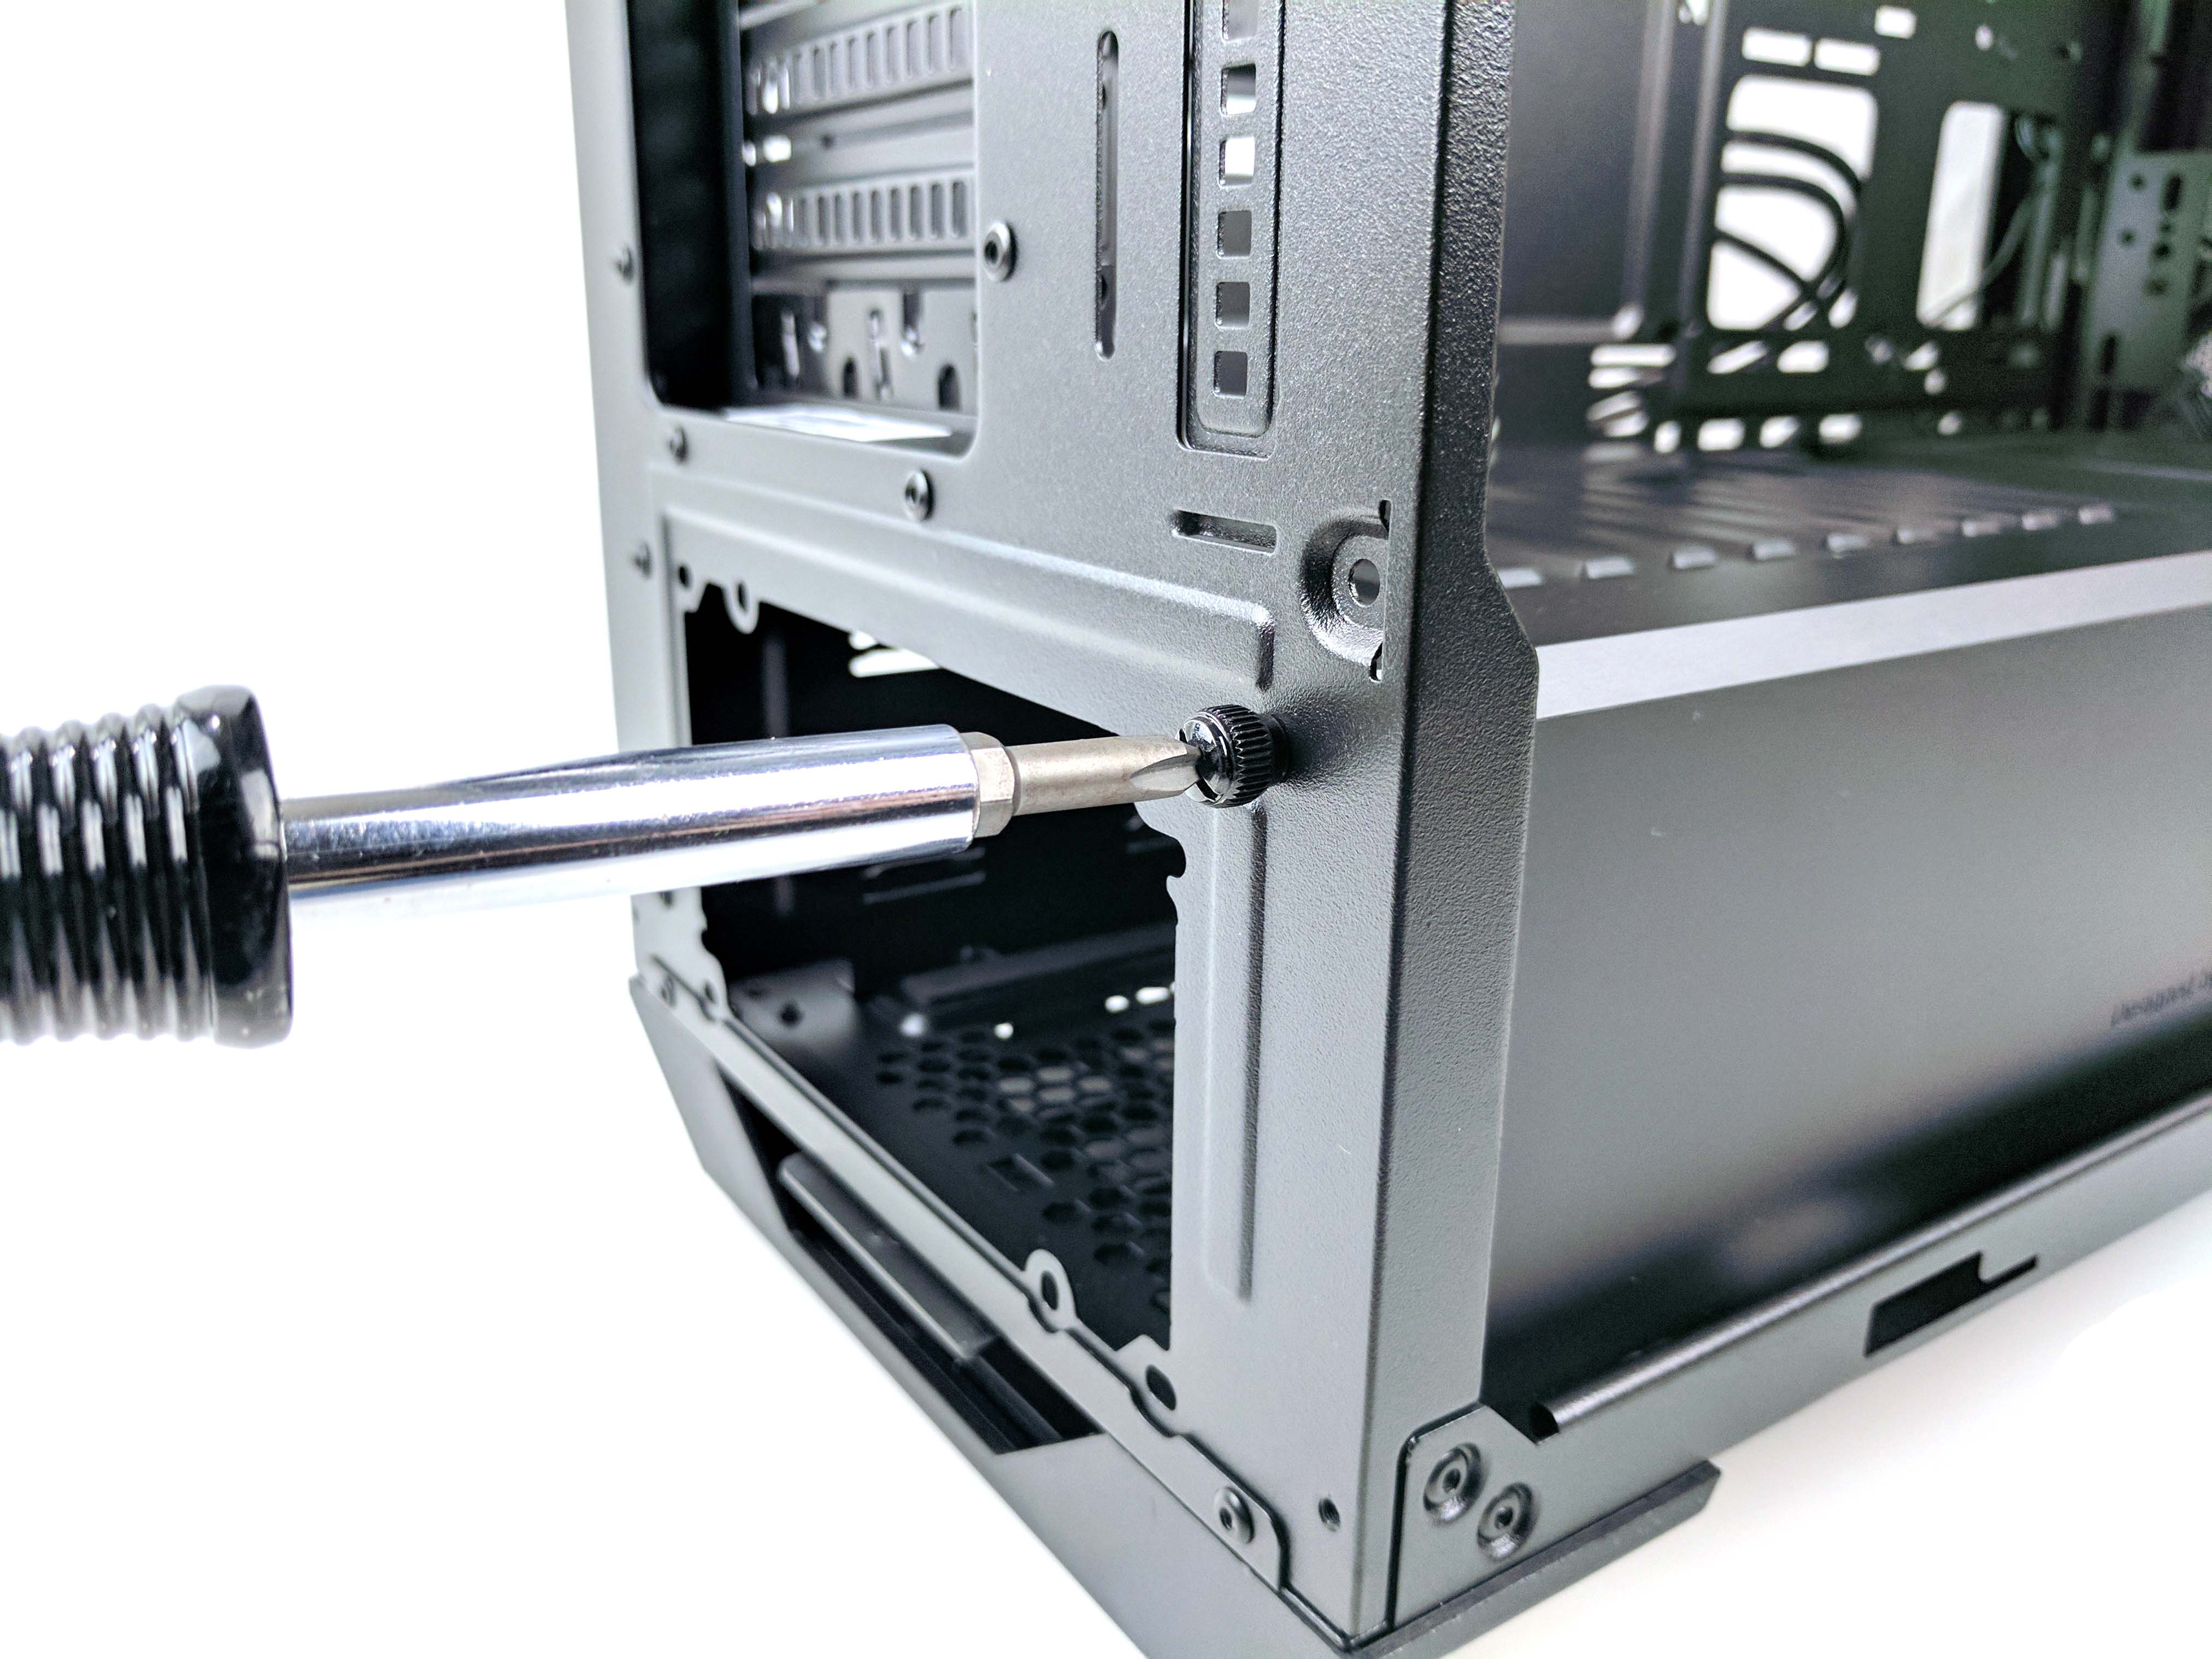
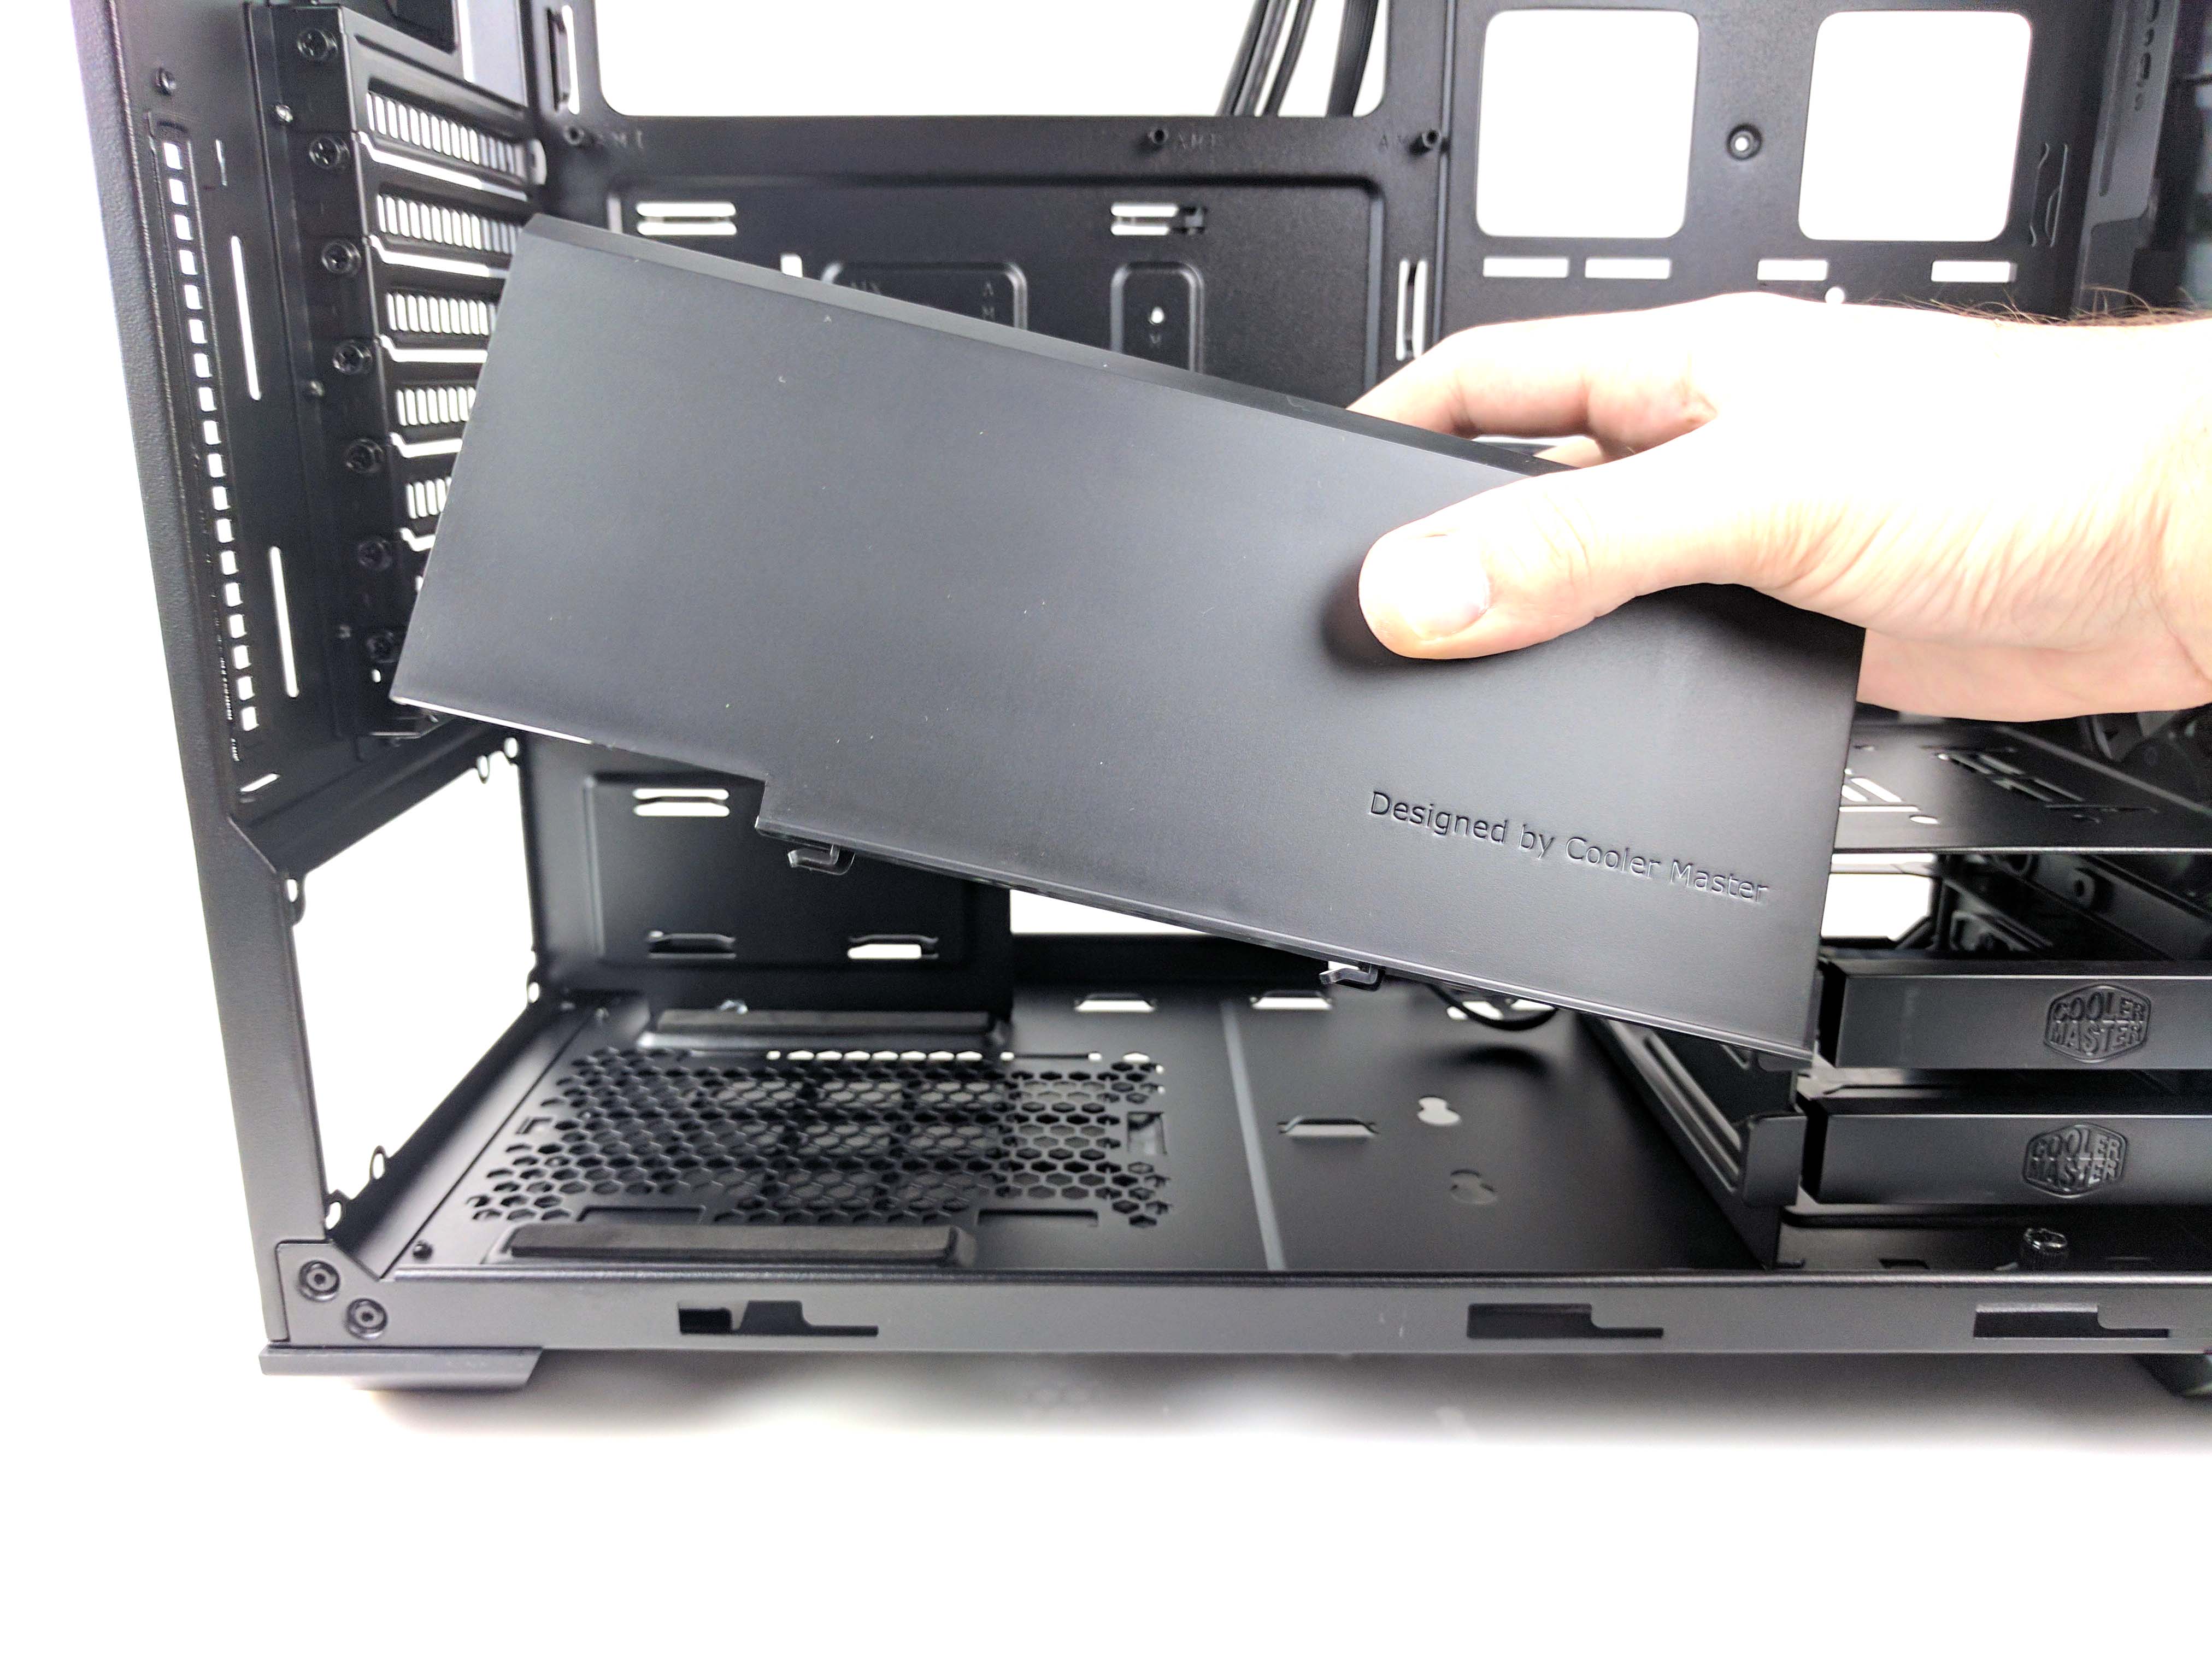
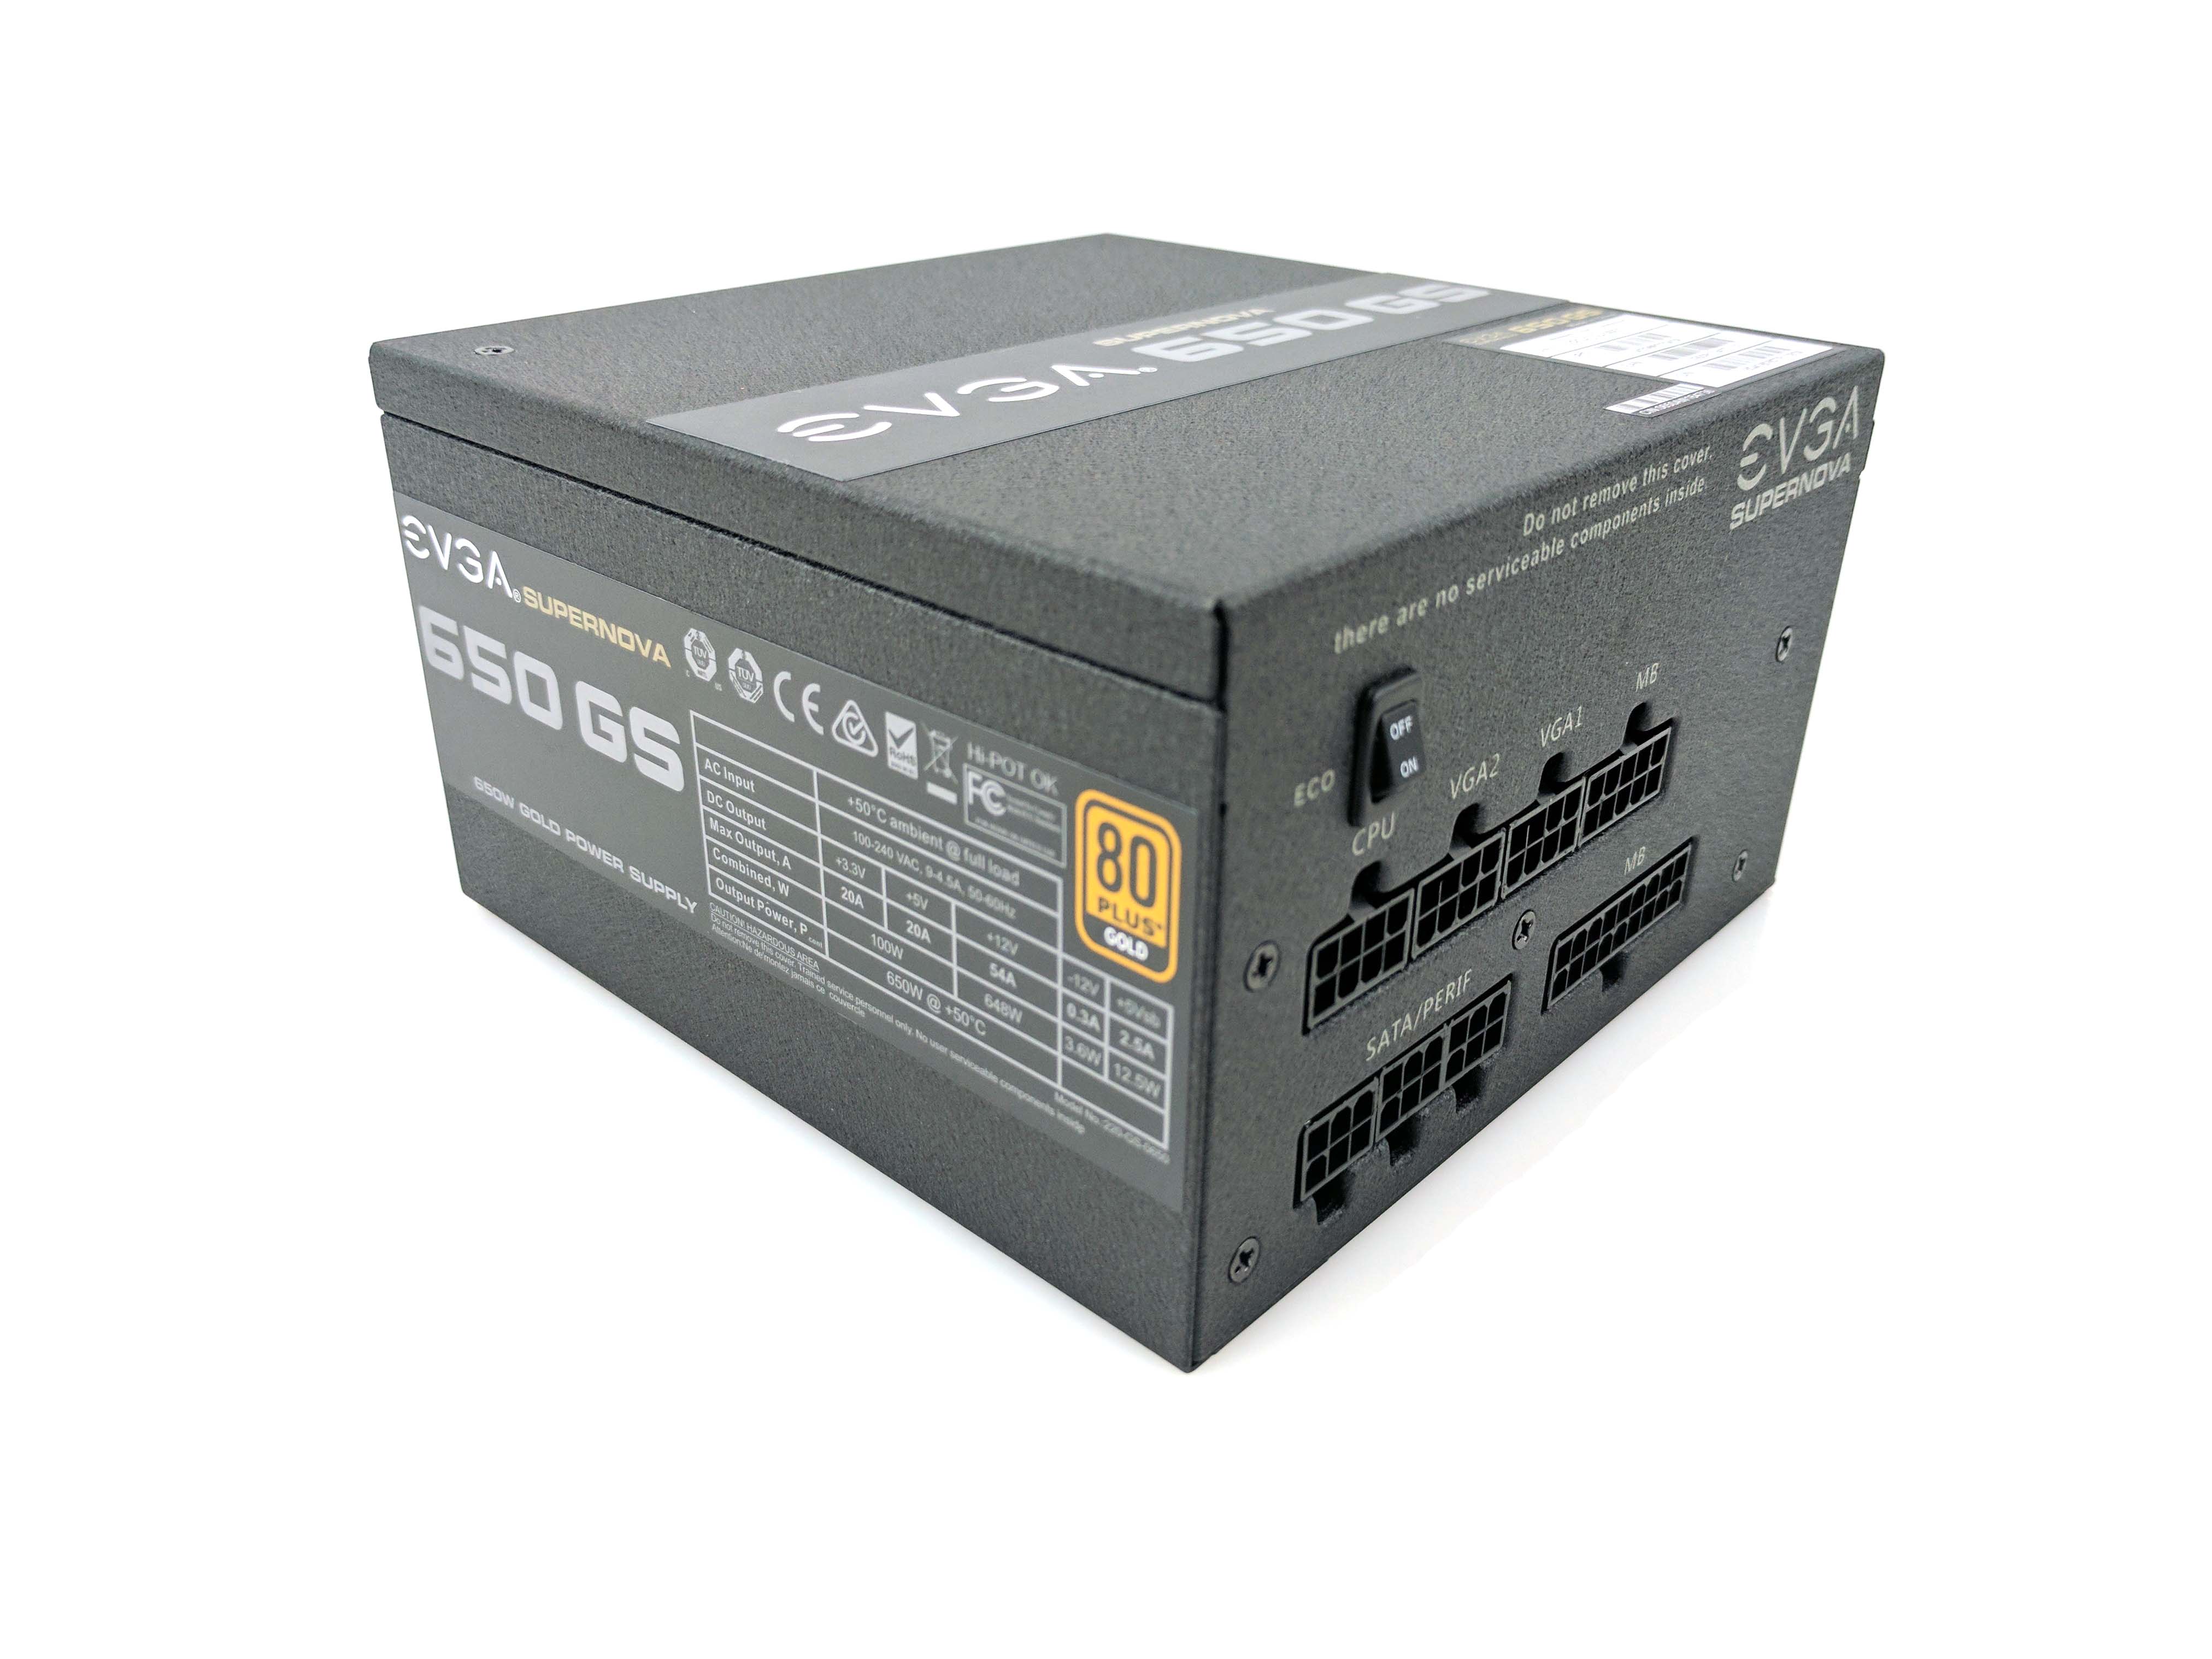
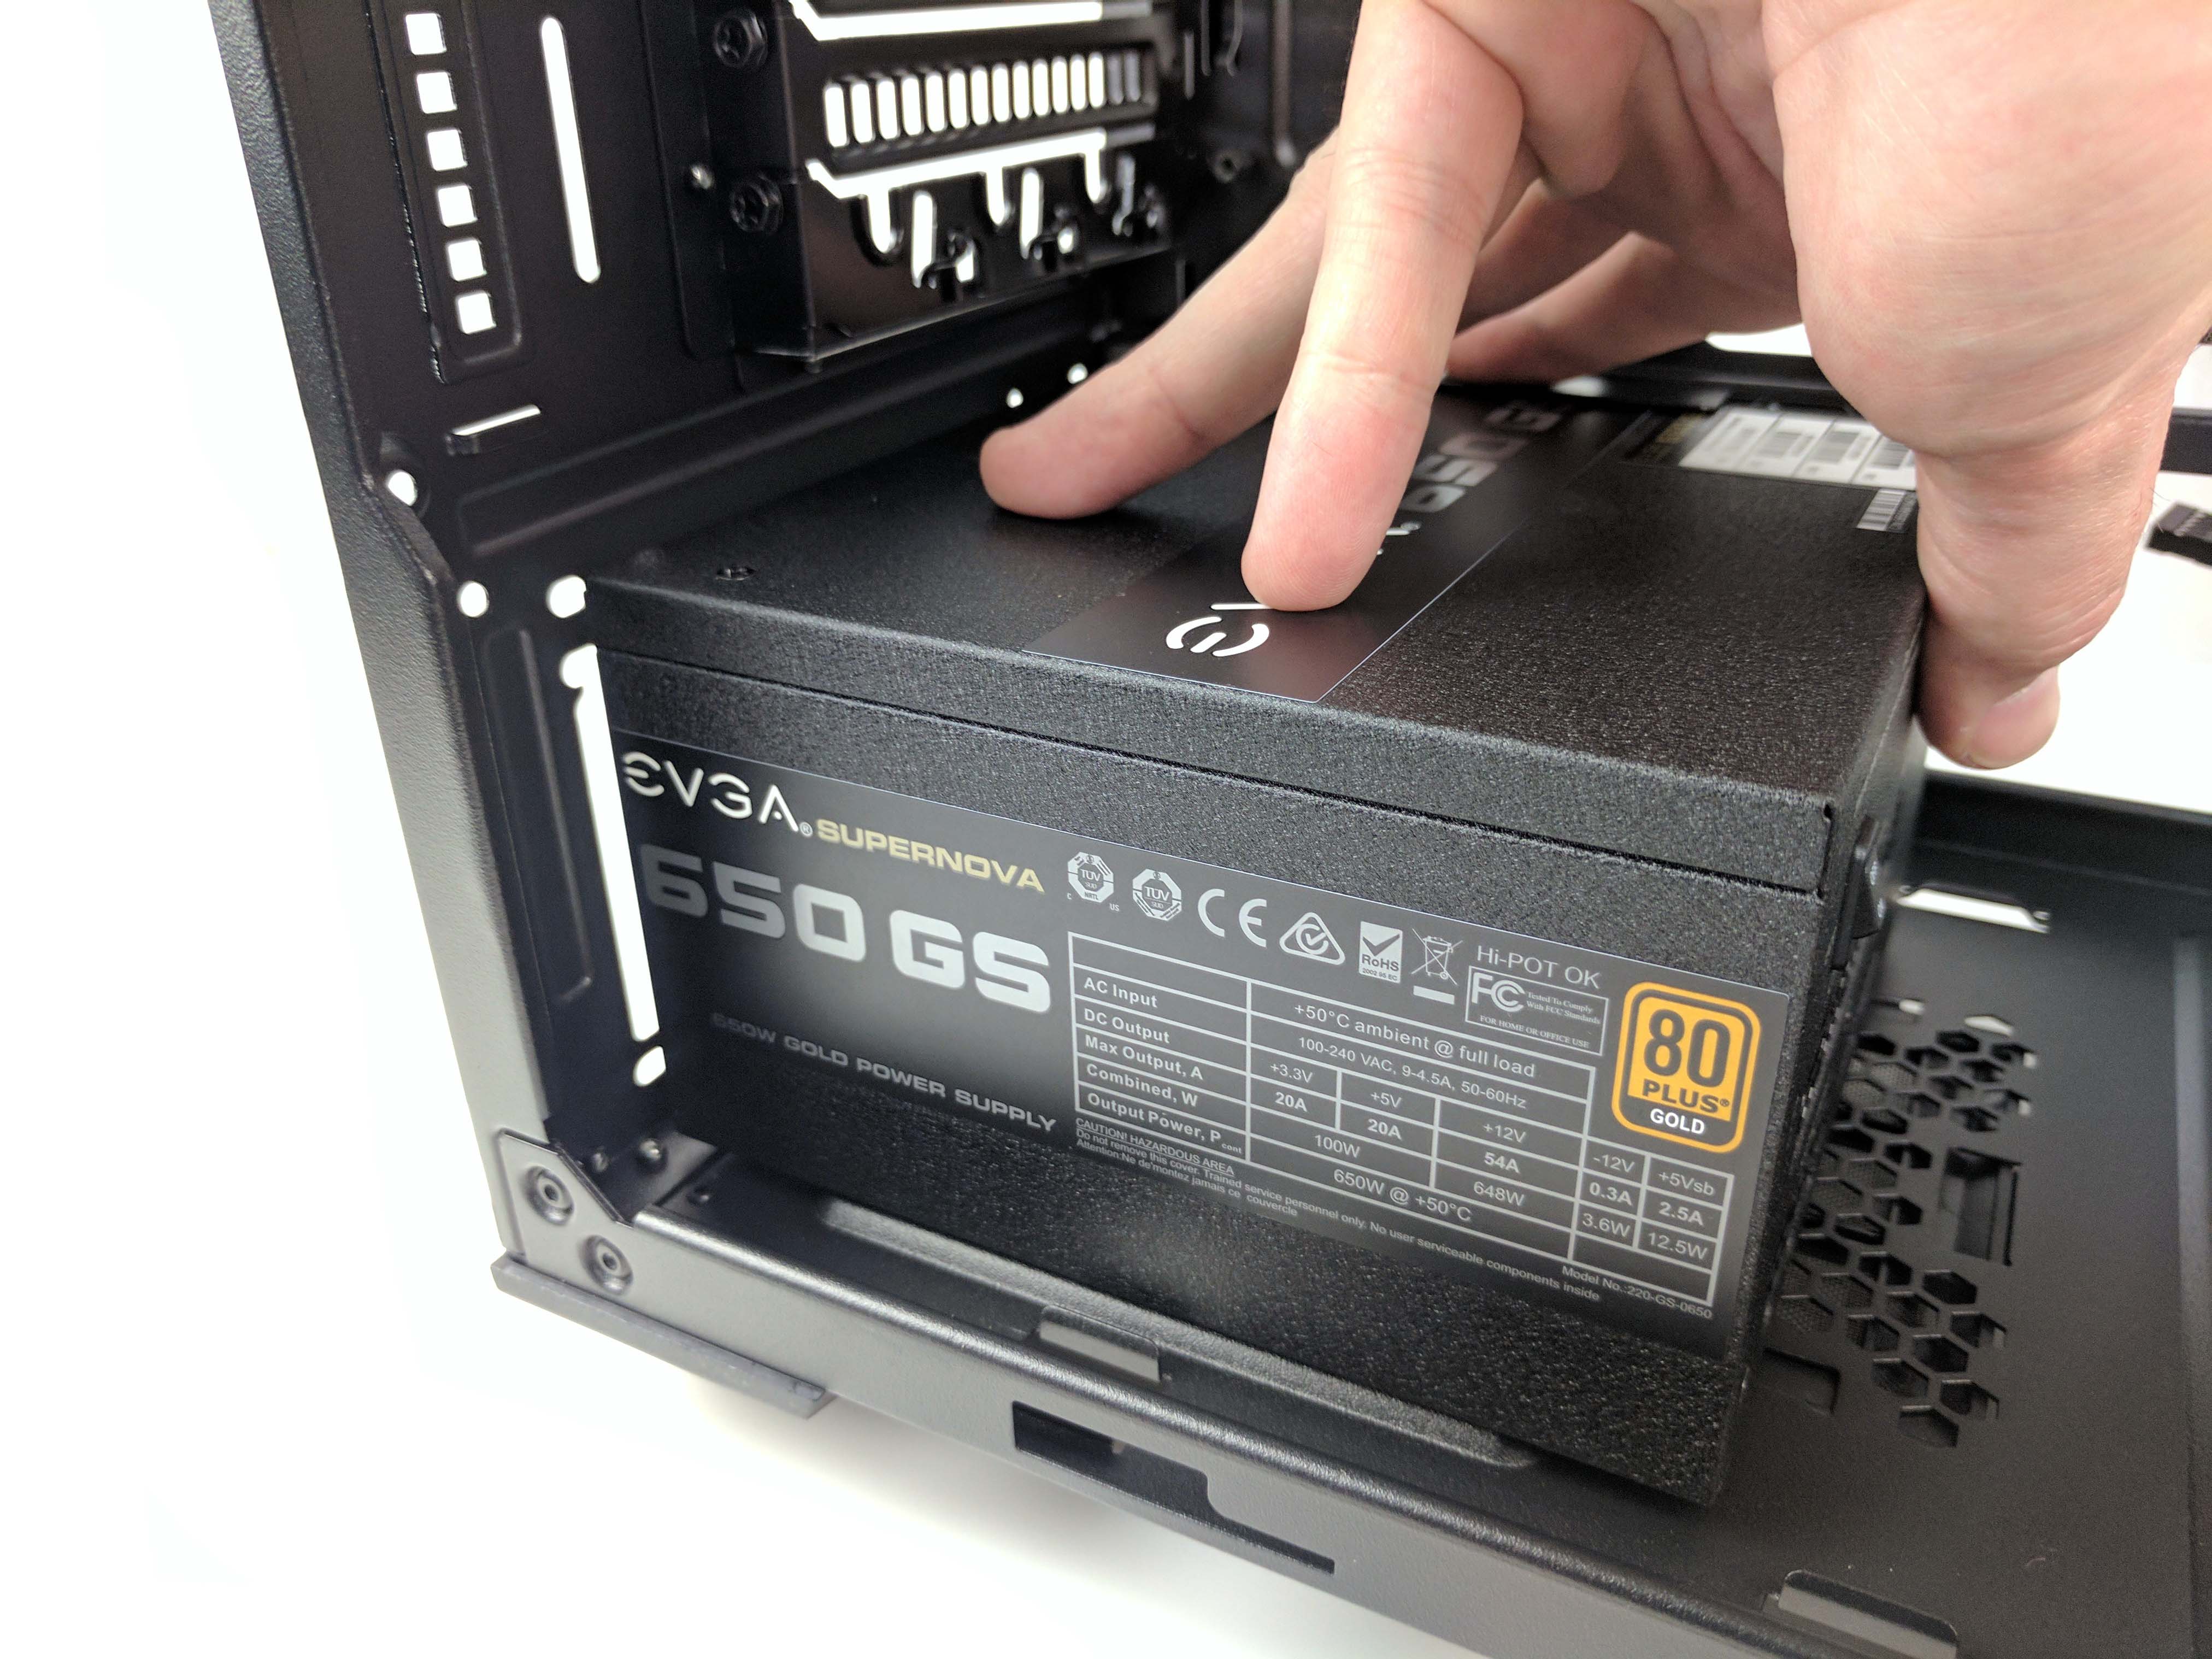
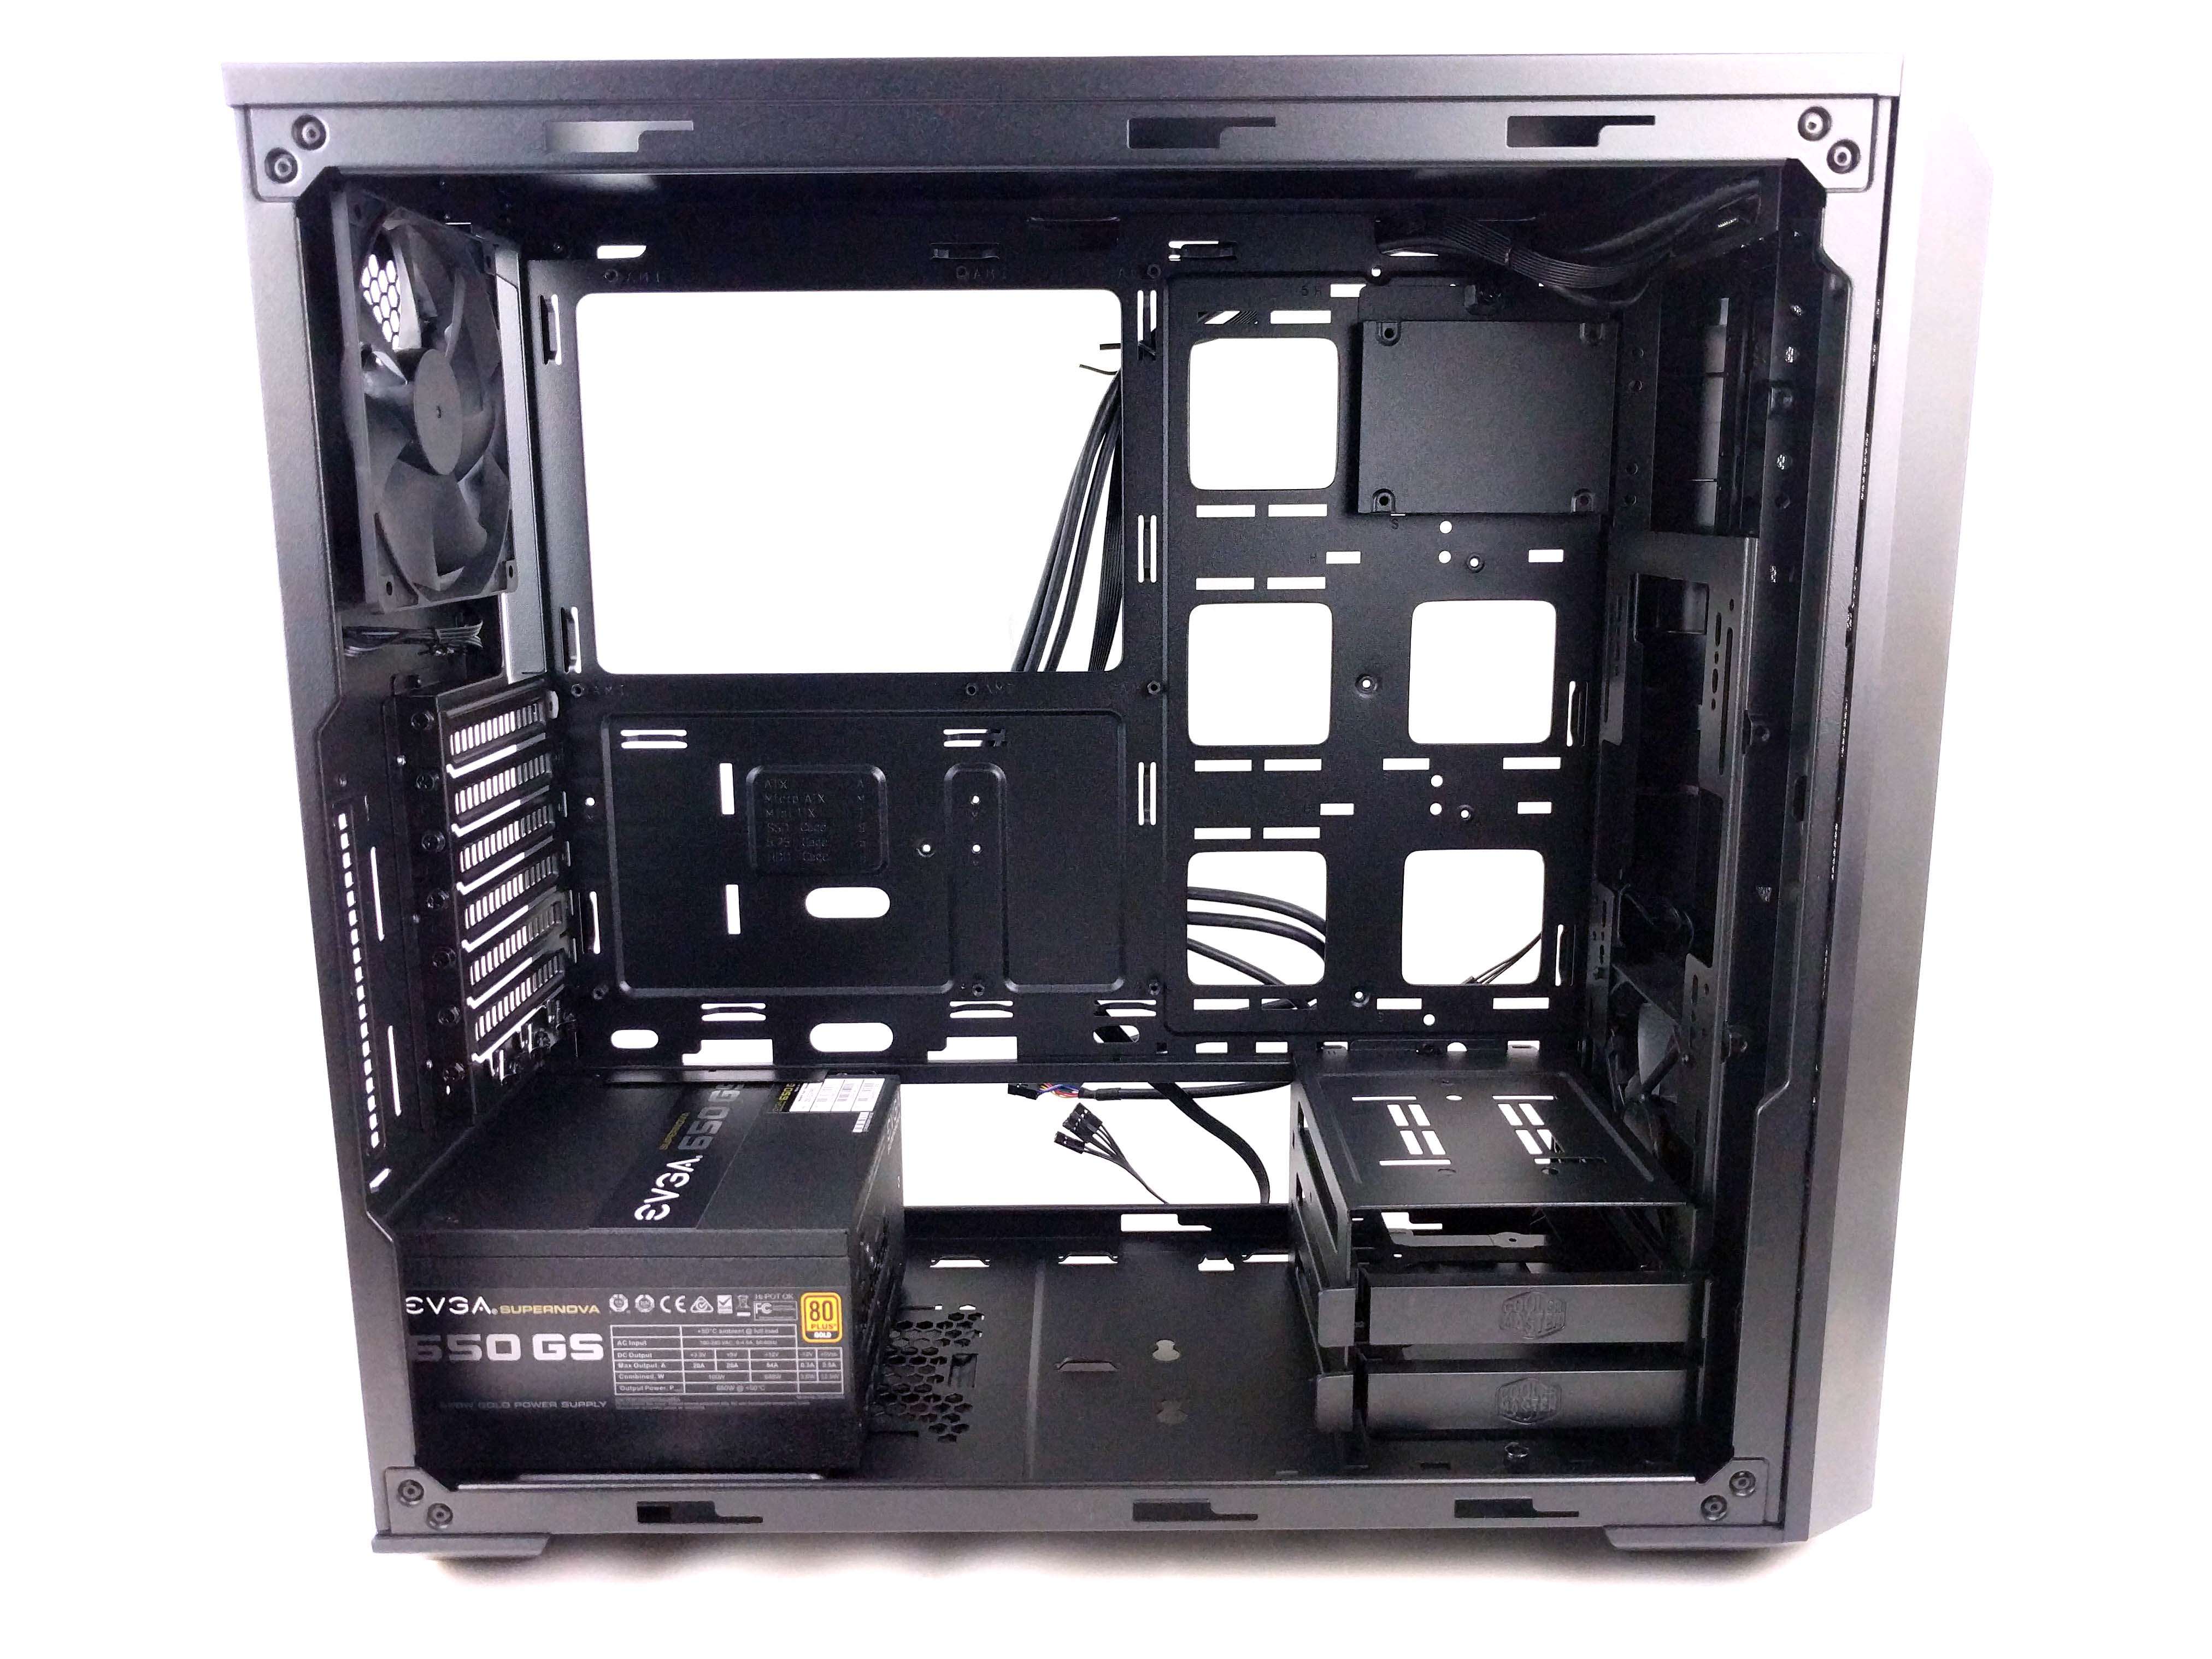
Remove the EVGA 650W GS power supply from its packaging, setting the modular cables aside for now. Lower the PSU into the case, fan down, and line up the power supply's screw holes to the case. Secure the PSU to the chassis with the provided screws. Set the case aside and get ready to prepare the motherboard.
Motherboard & CPU
Remove the ASRock X99 Extreme4 motherboard from its box and protective static bag. Use a pair of cutters to sever the zip ties holding the foam to the board, but keep using the foam as a place to rest the motherboard (its a great coaster upon which to work).
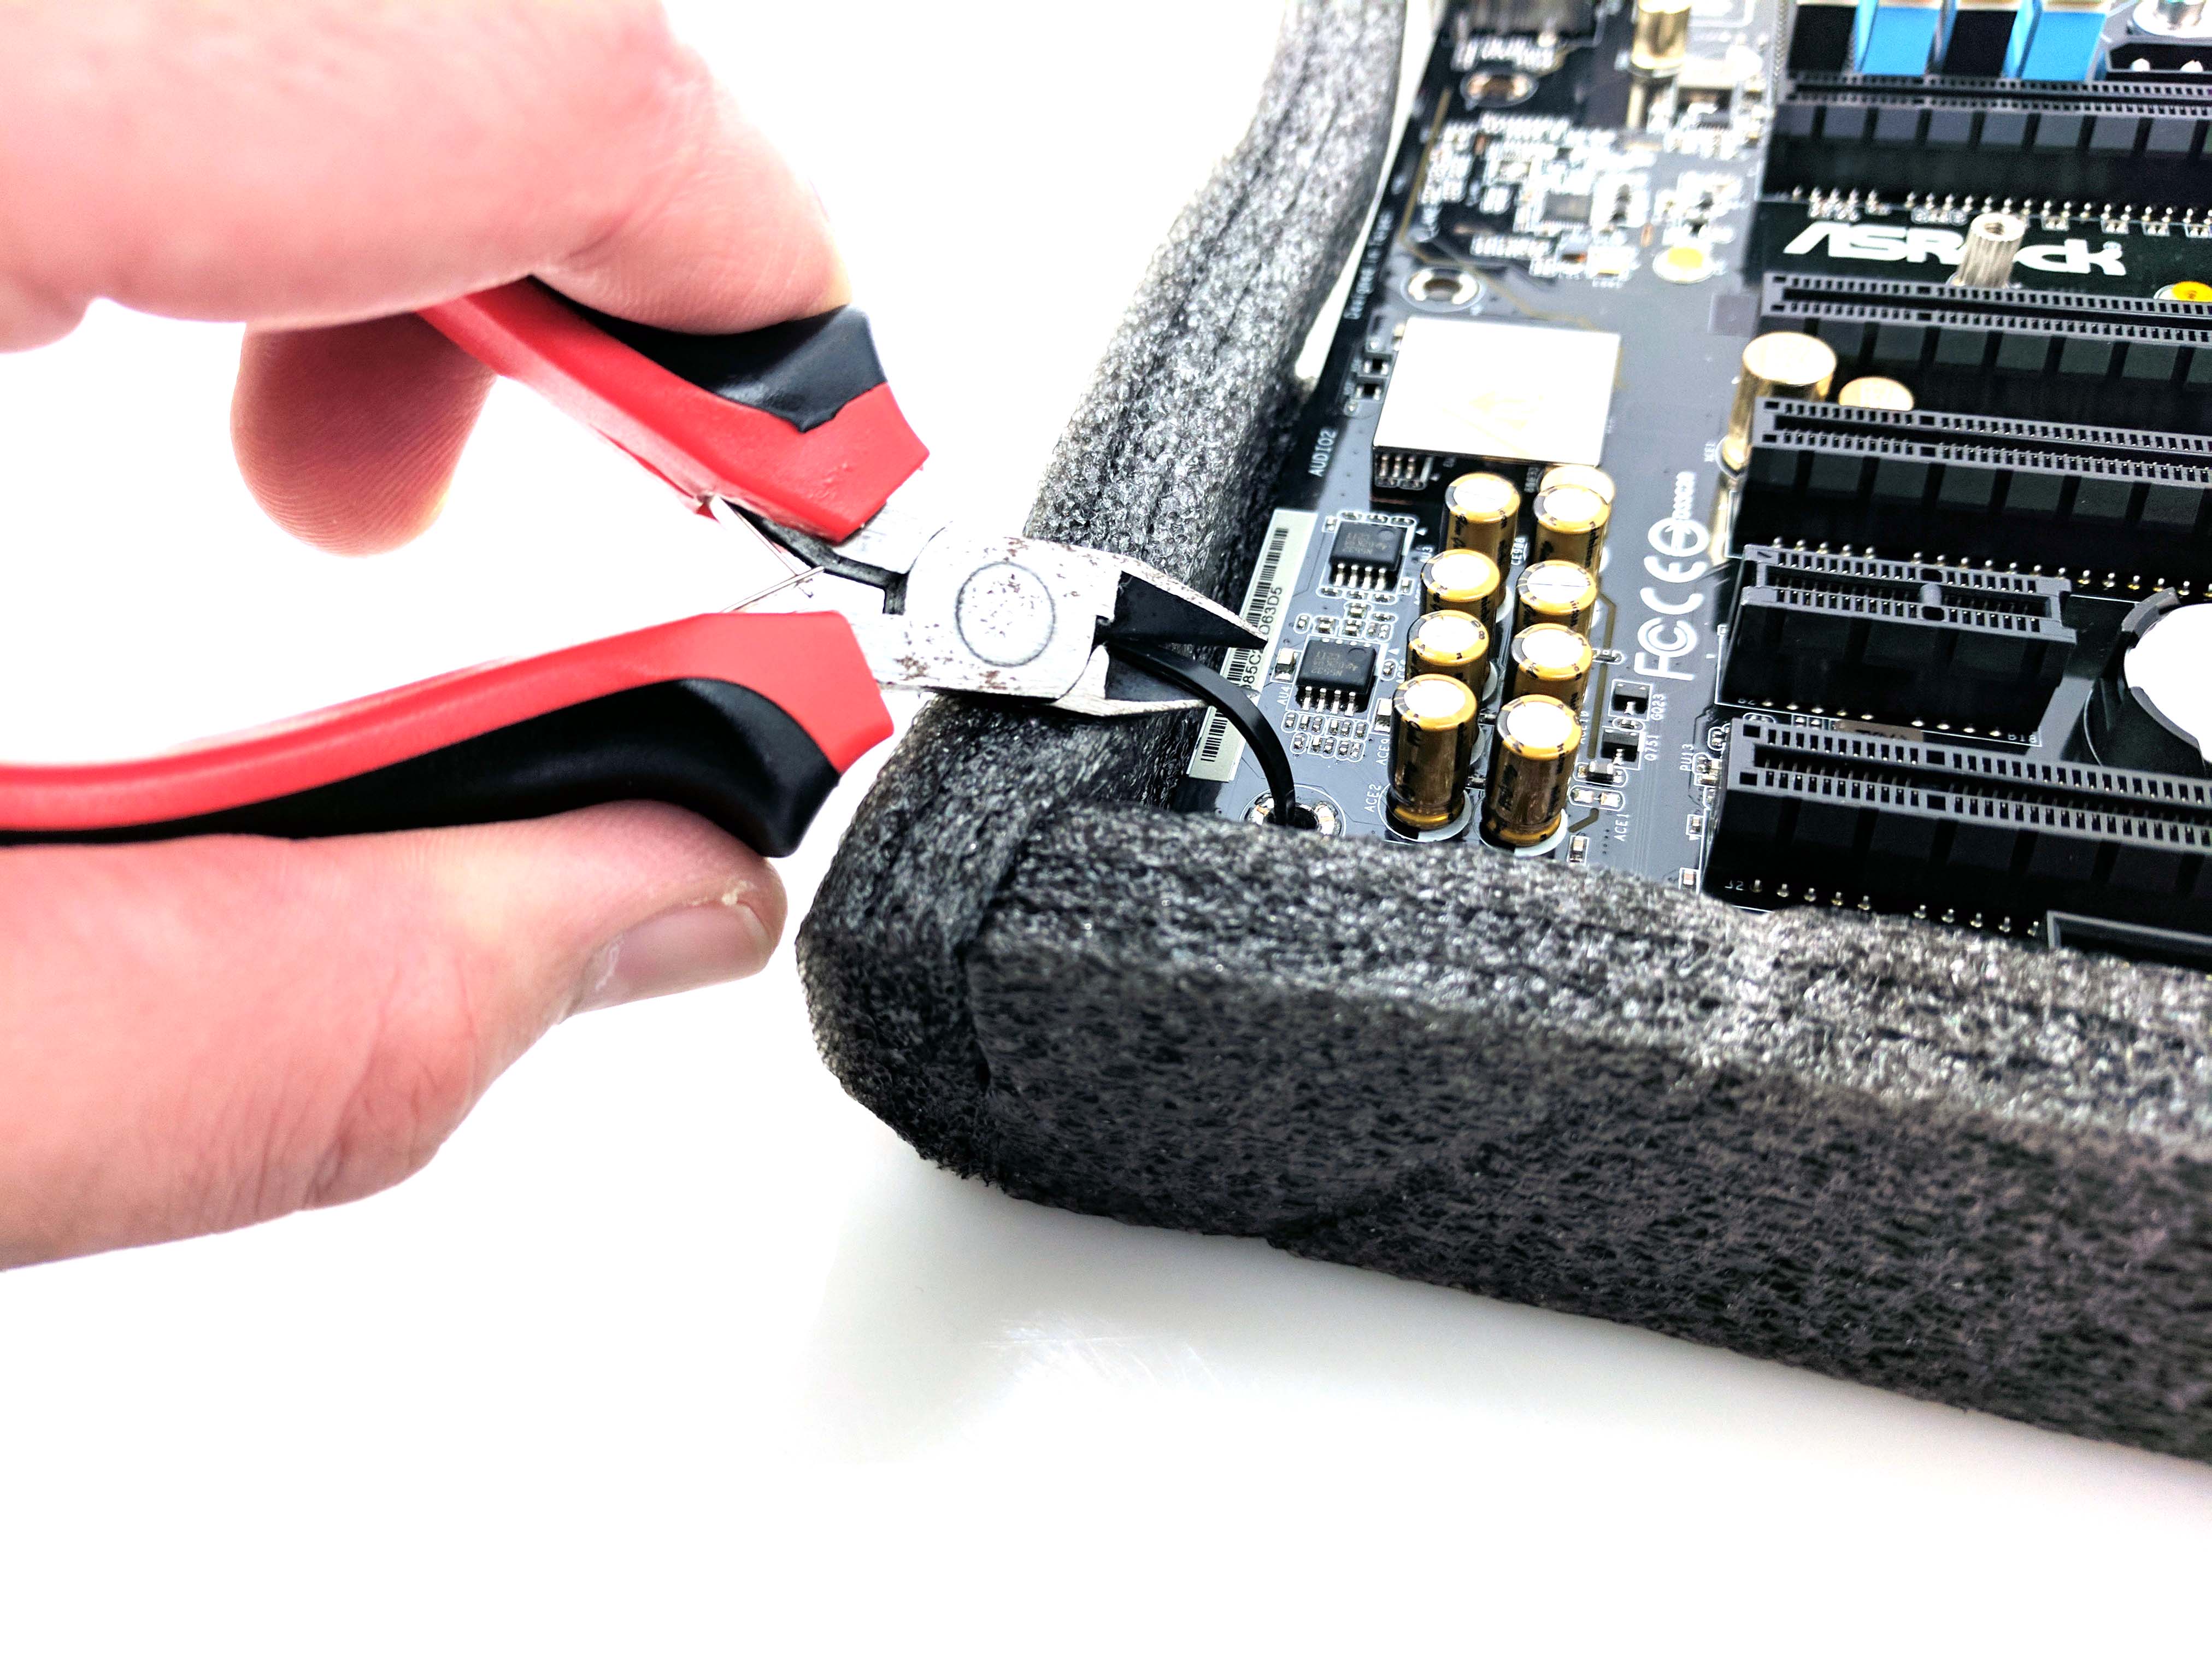
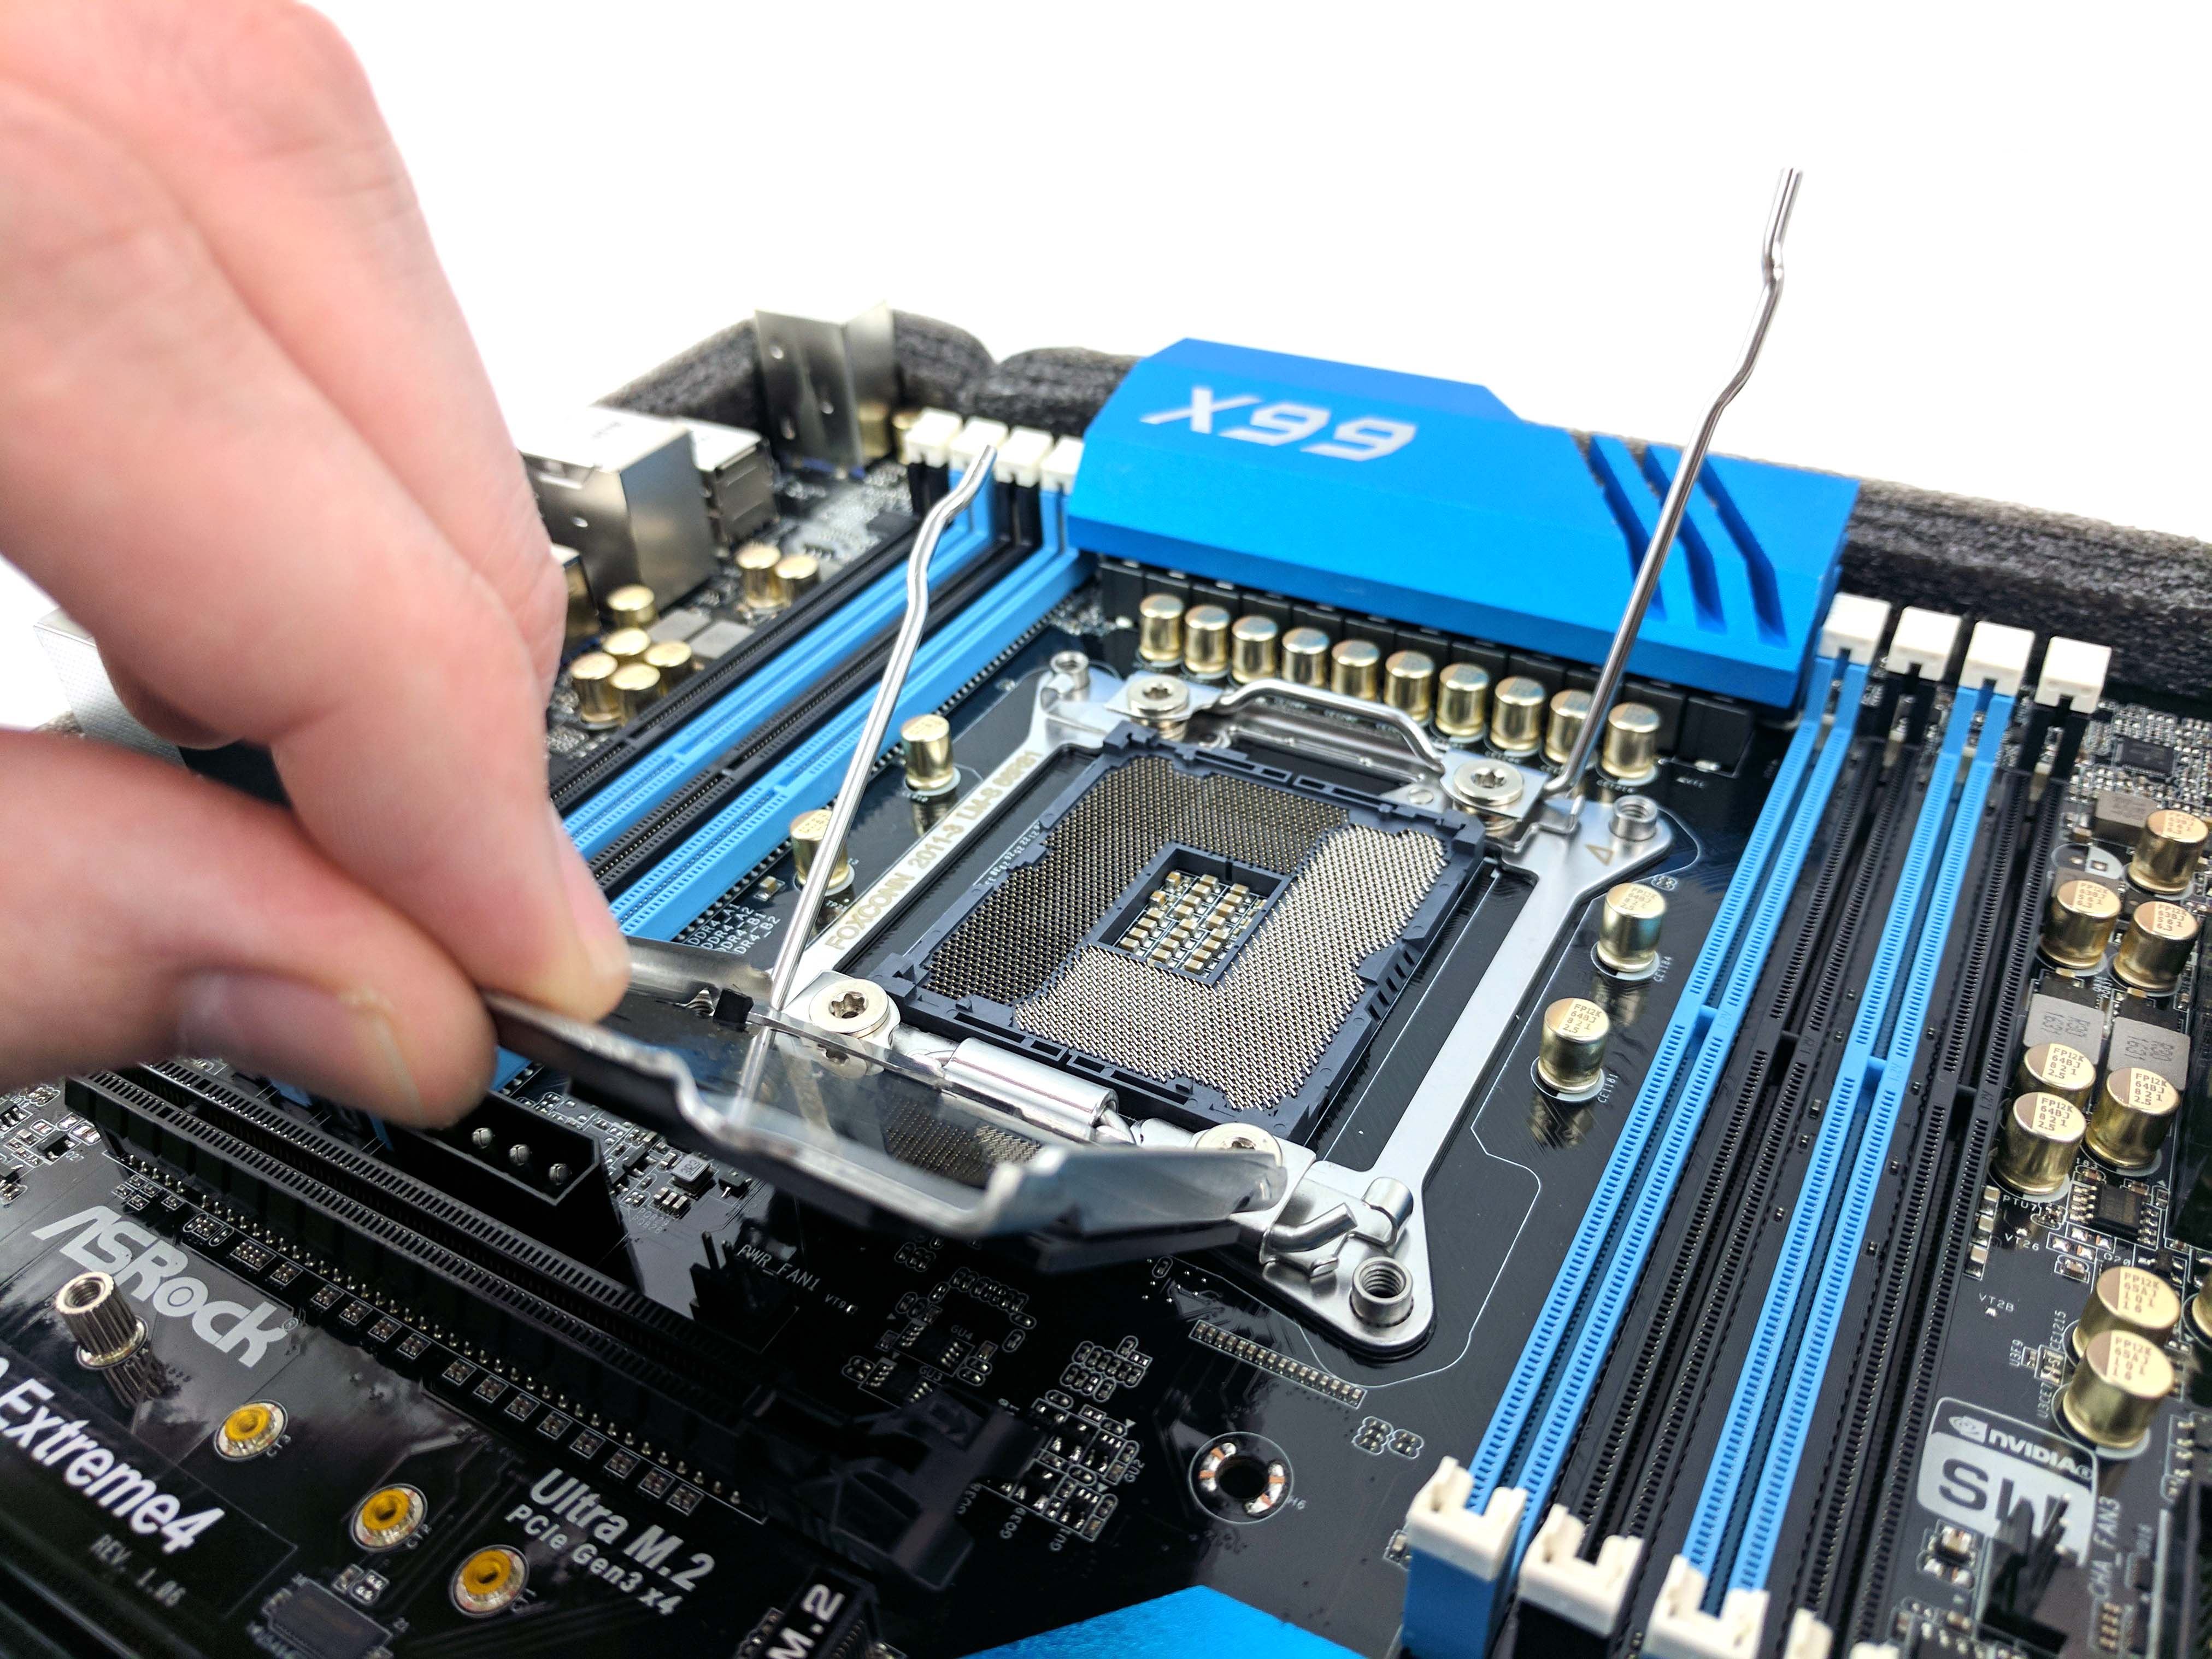
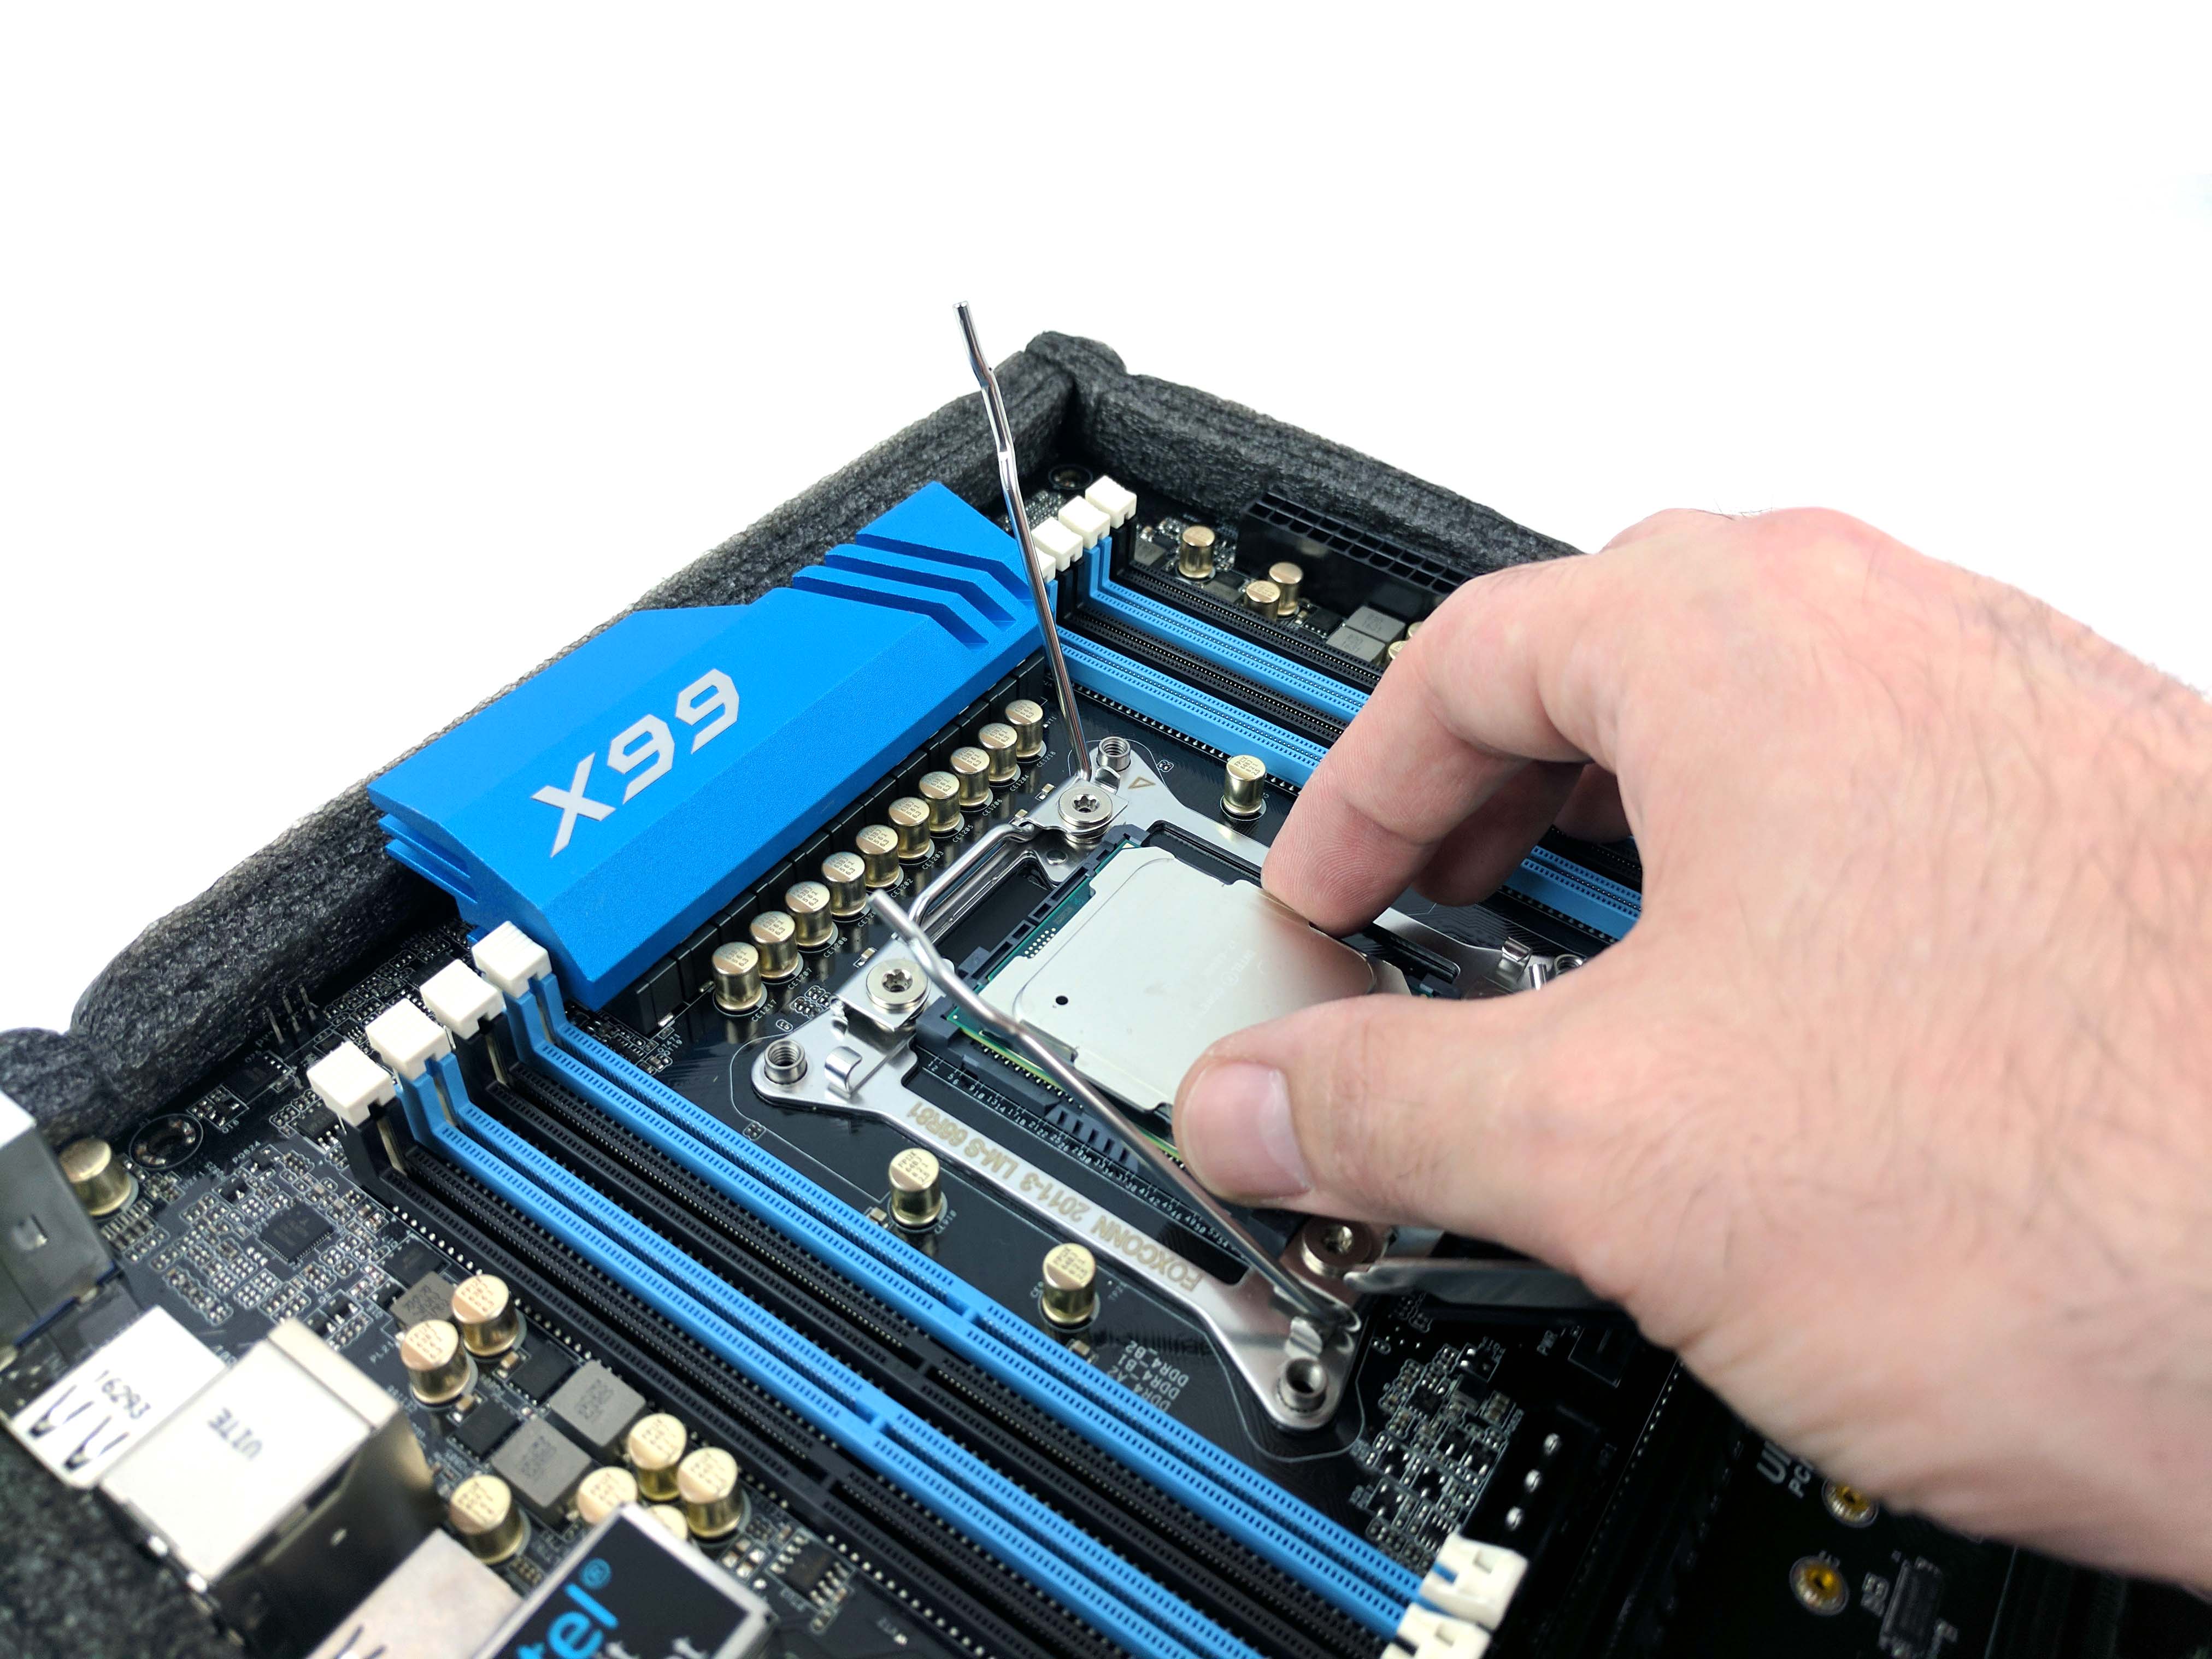
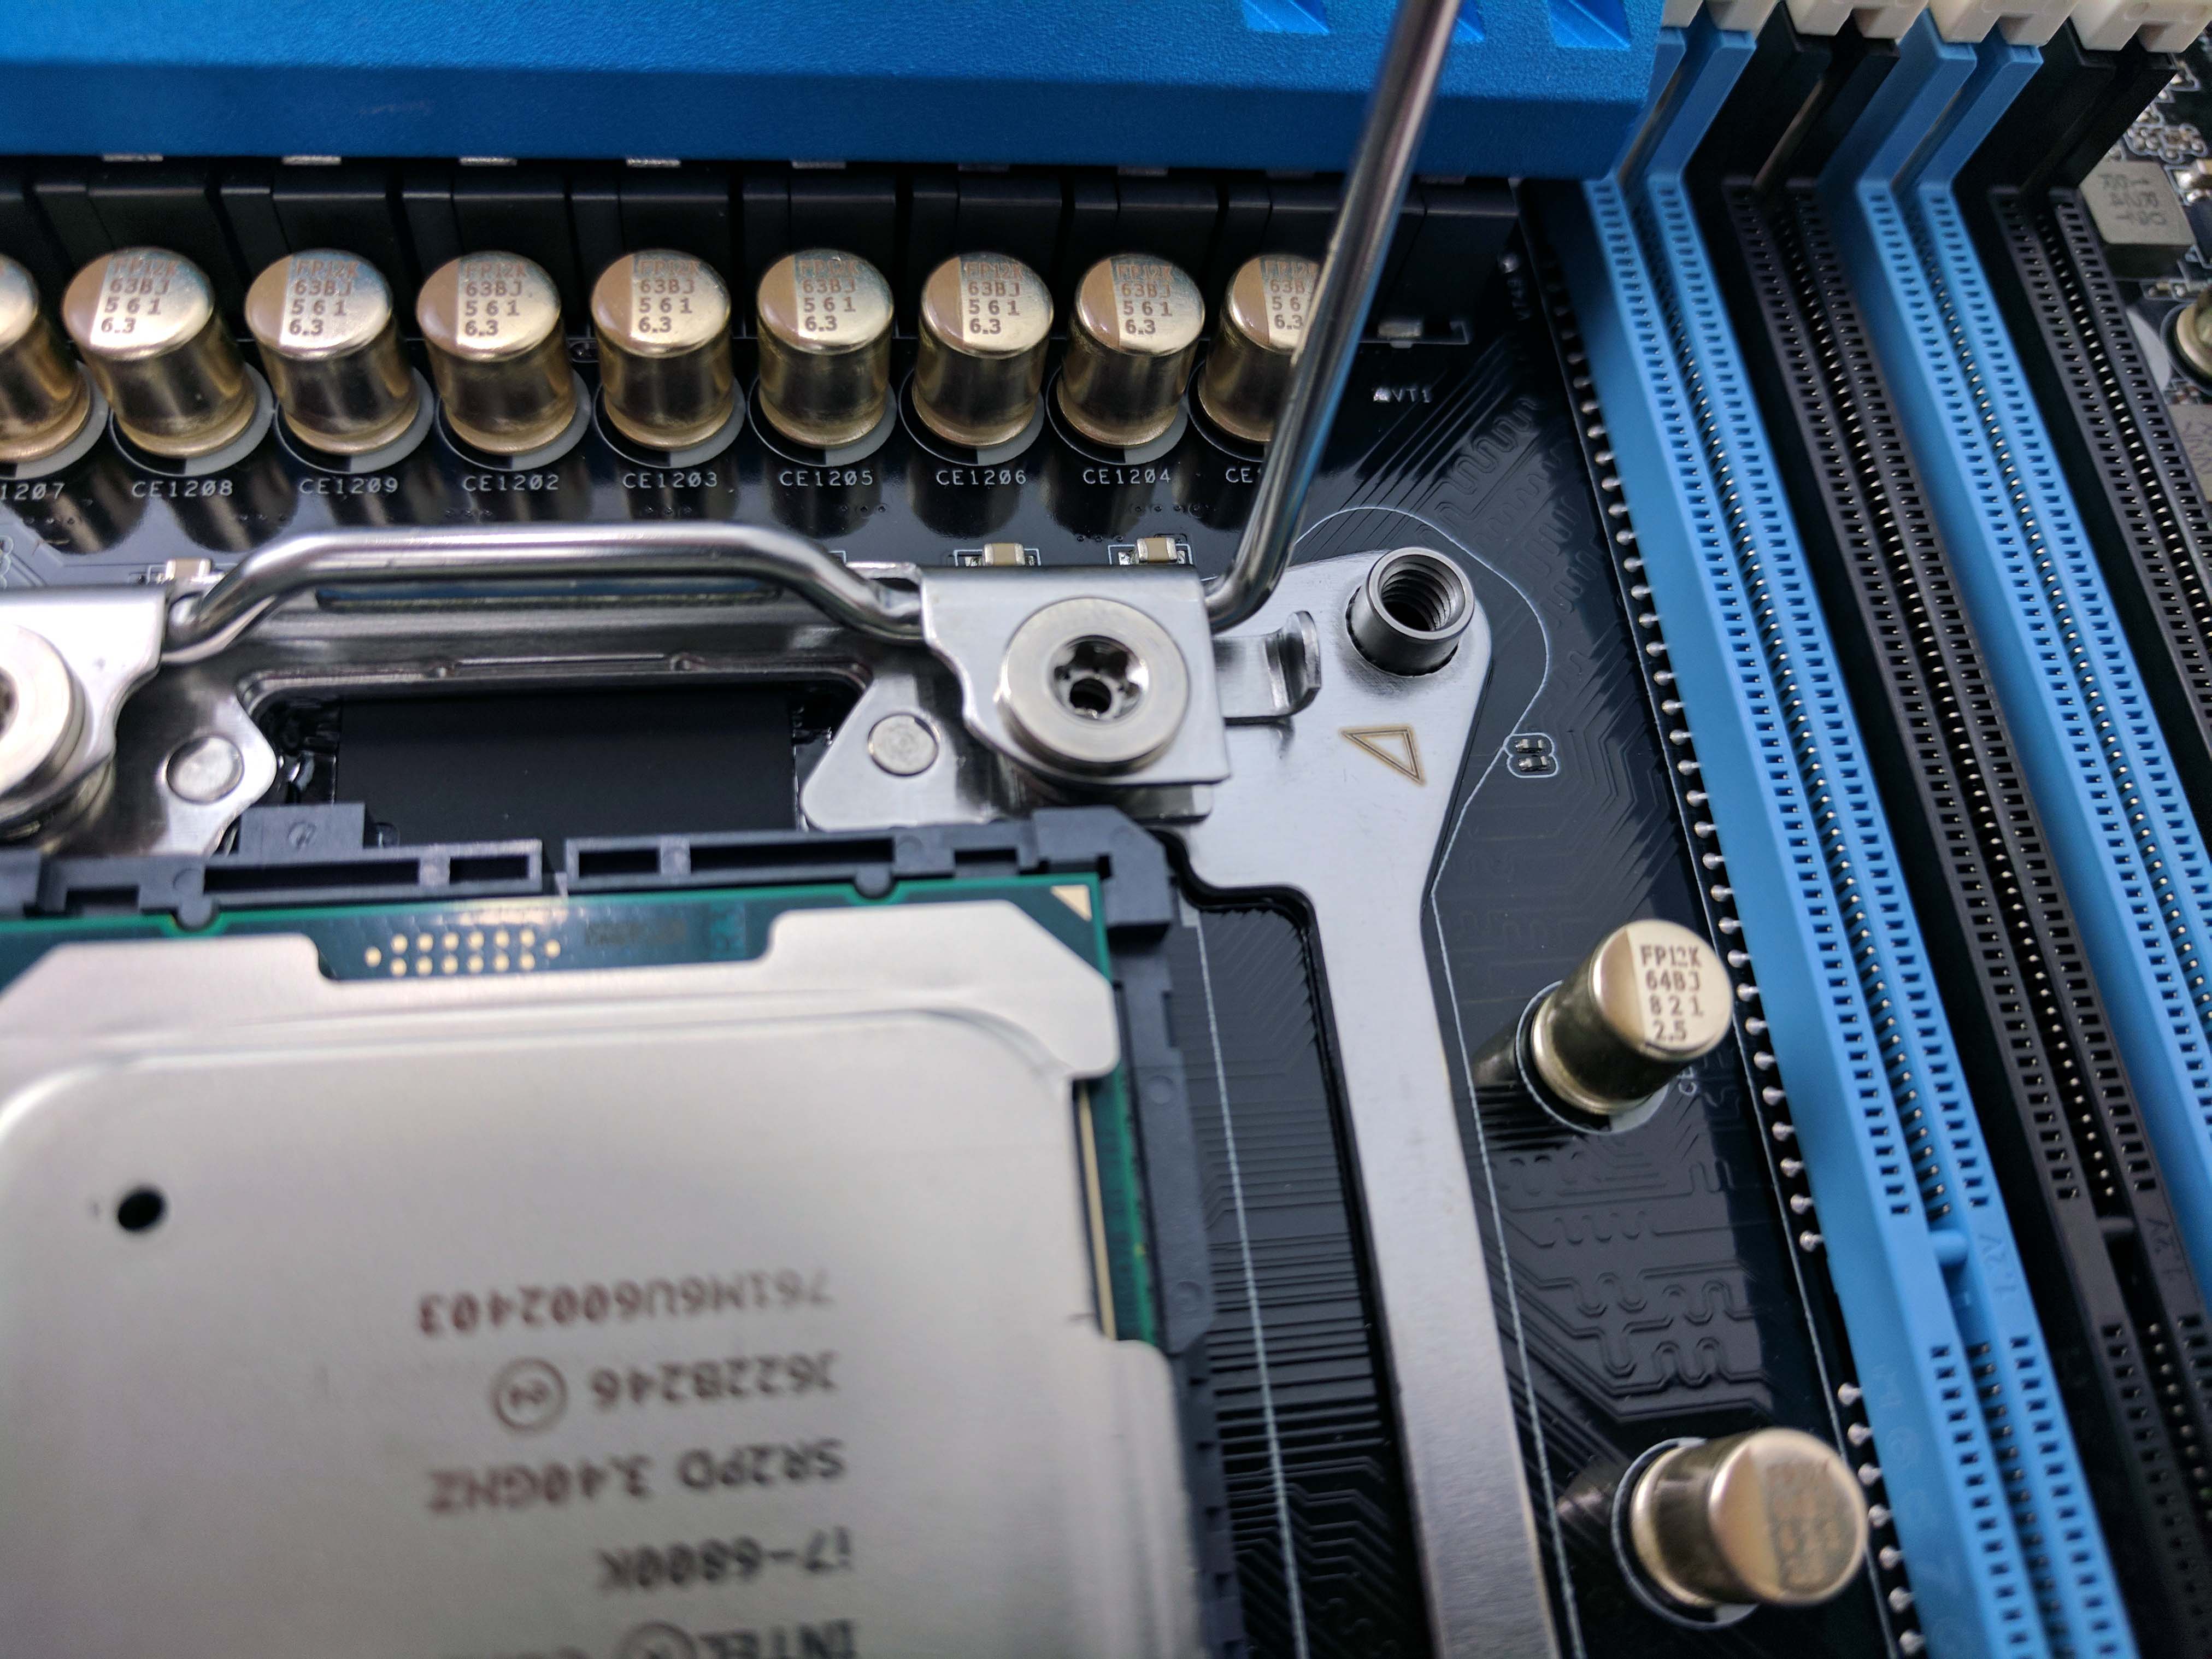
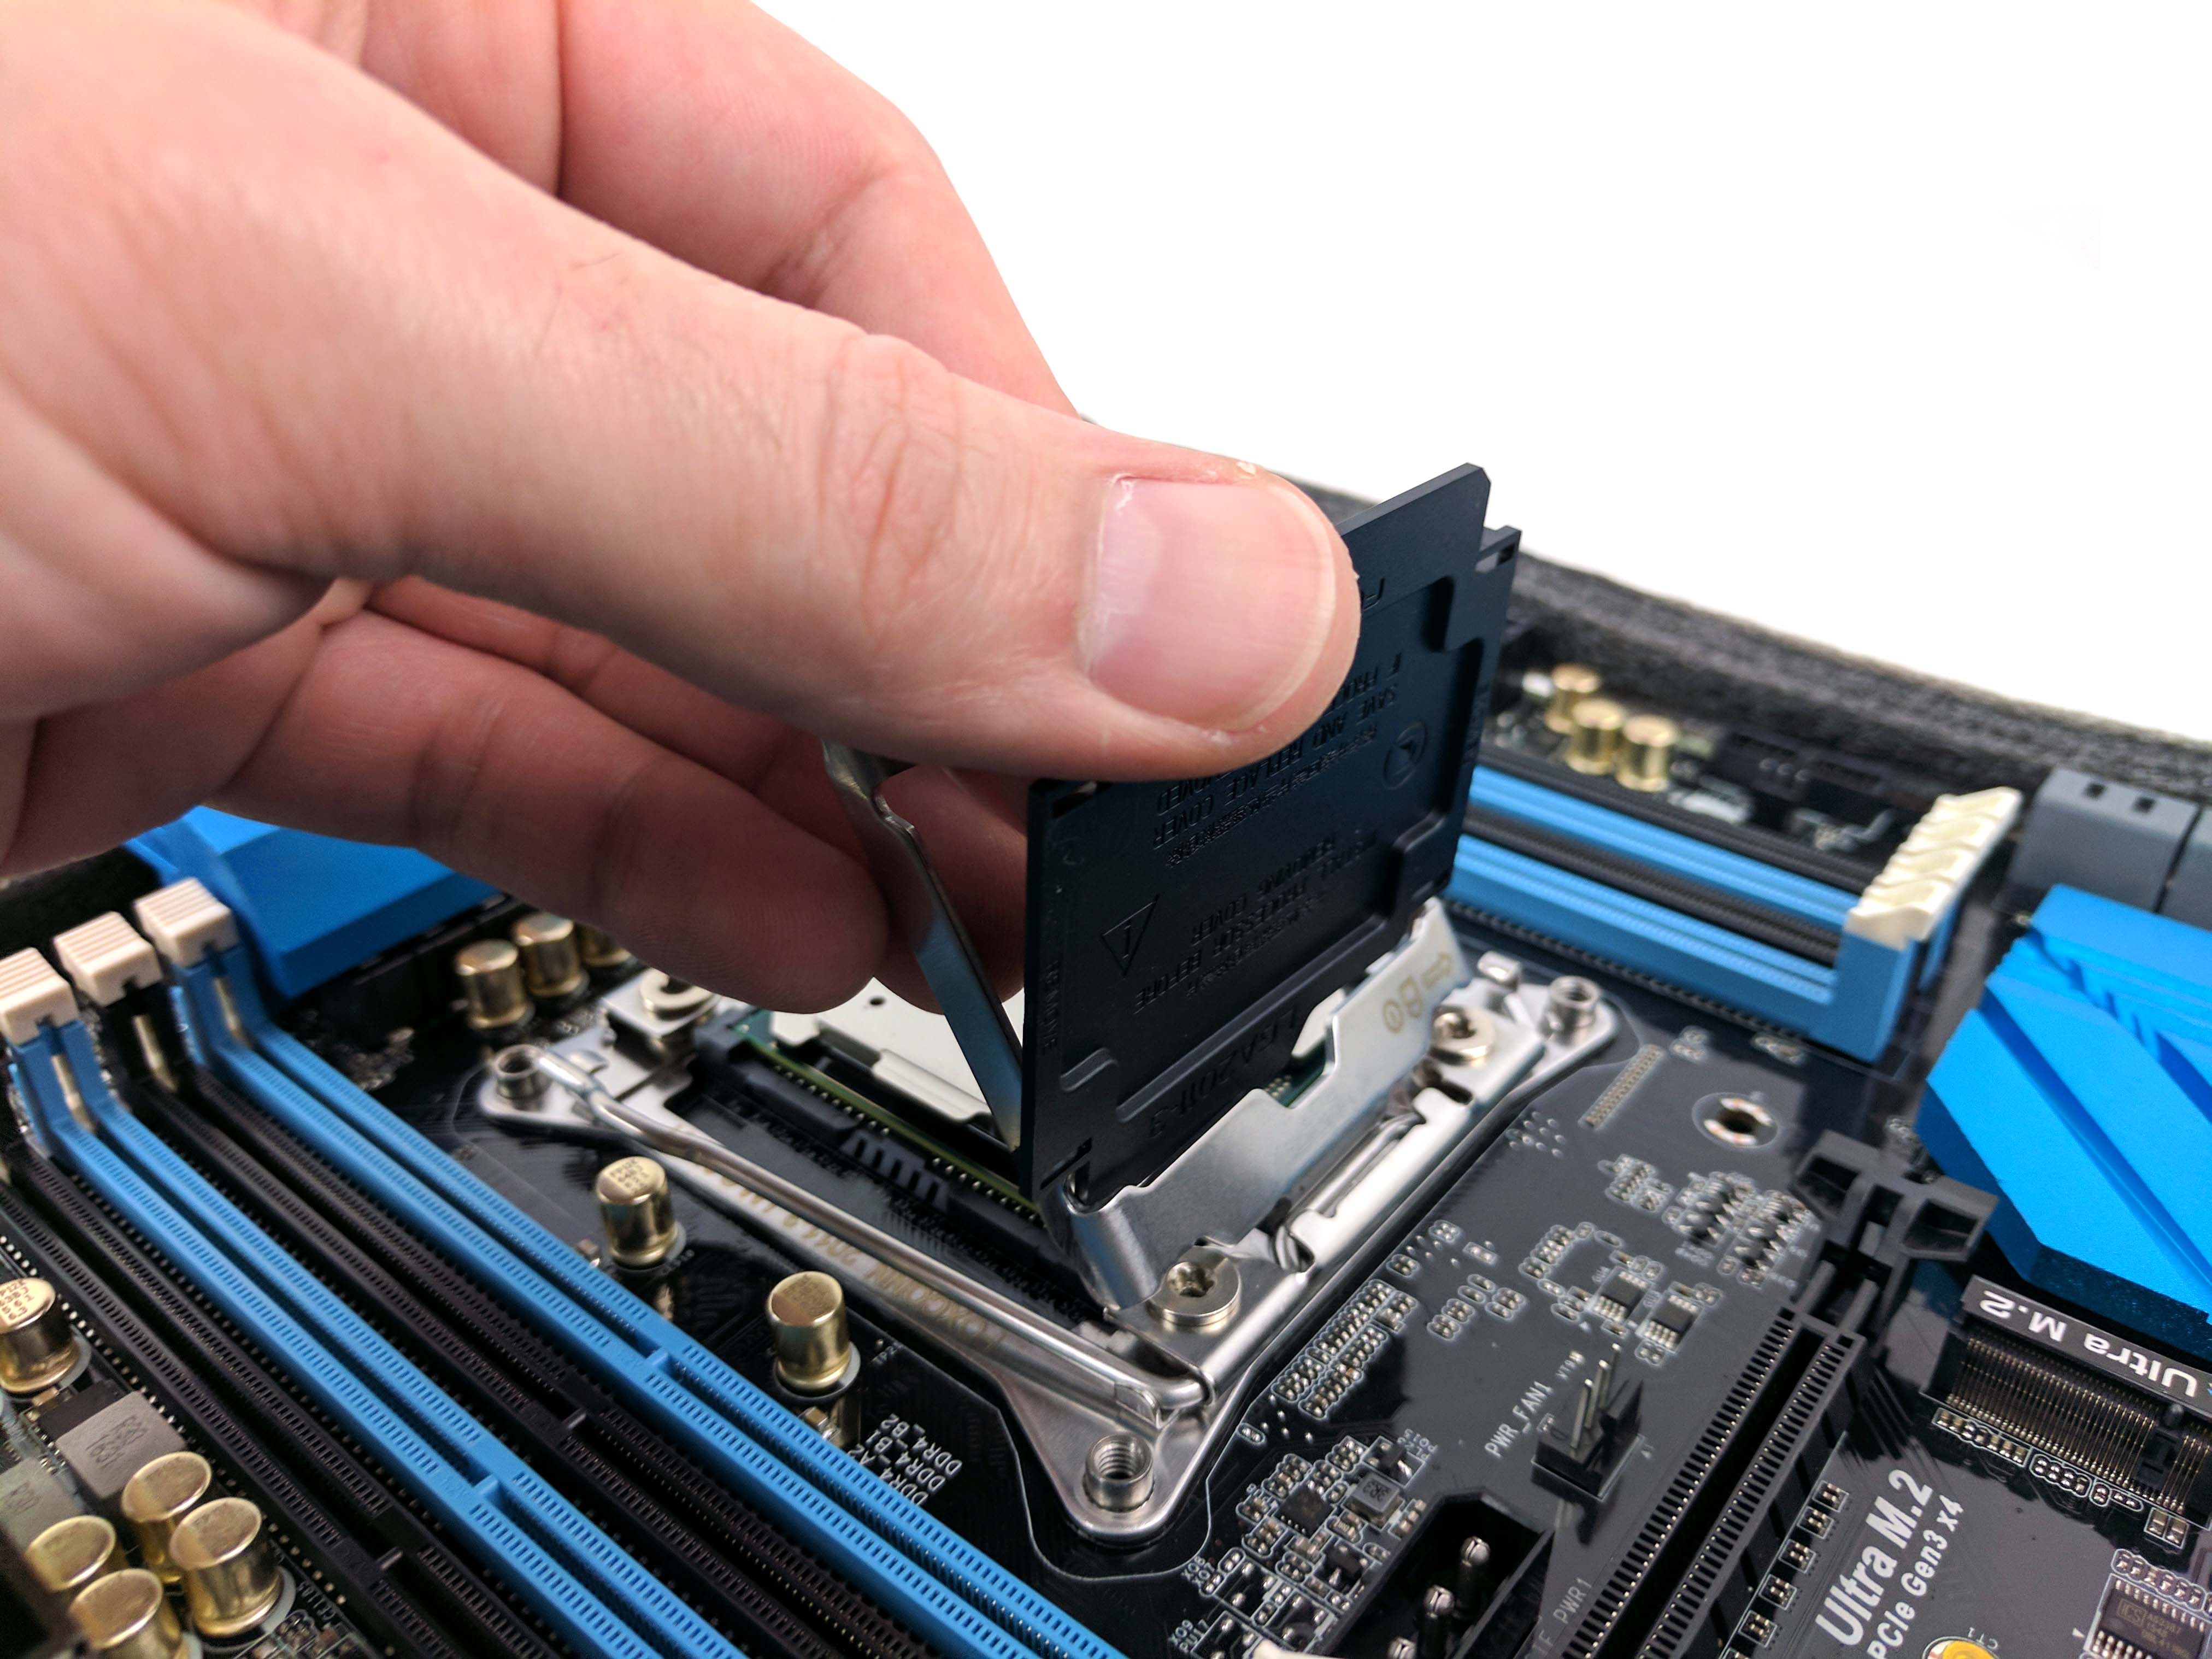
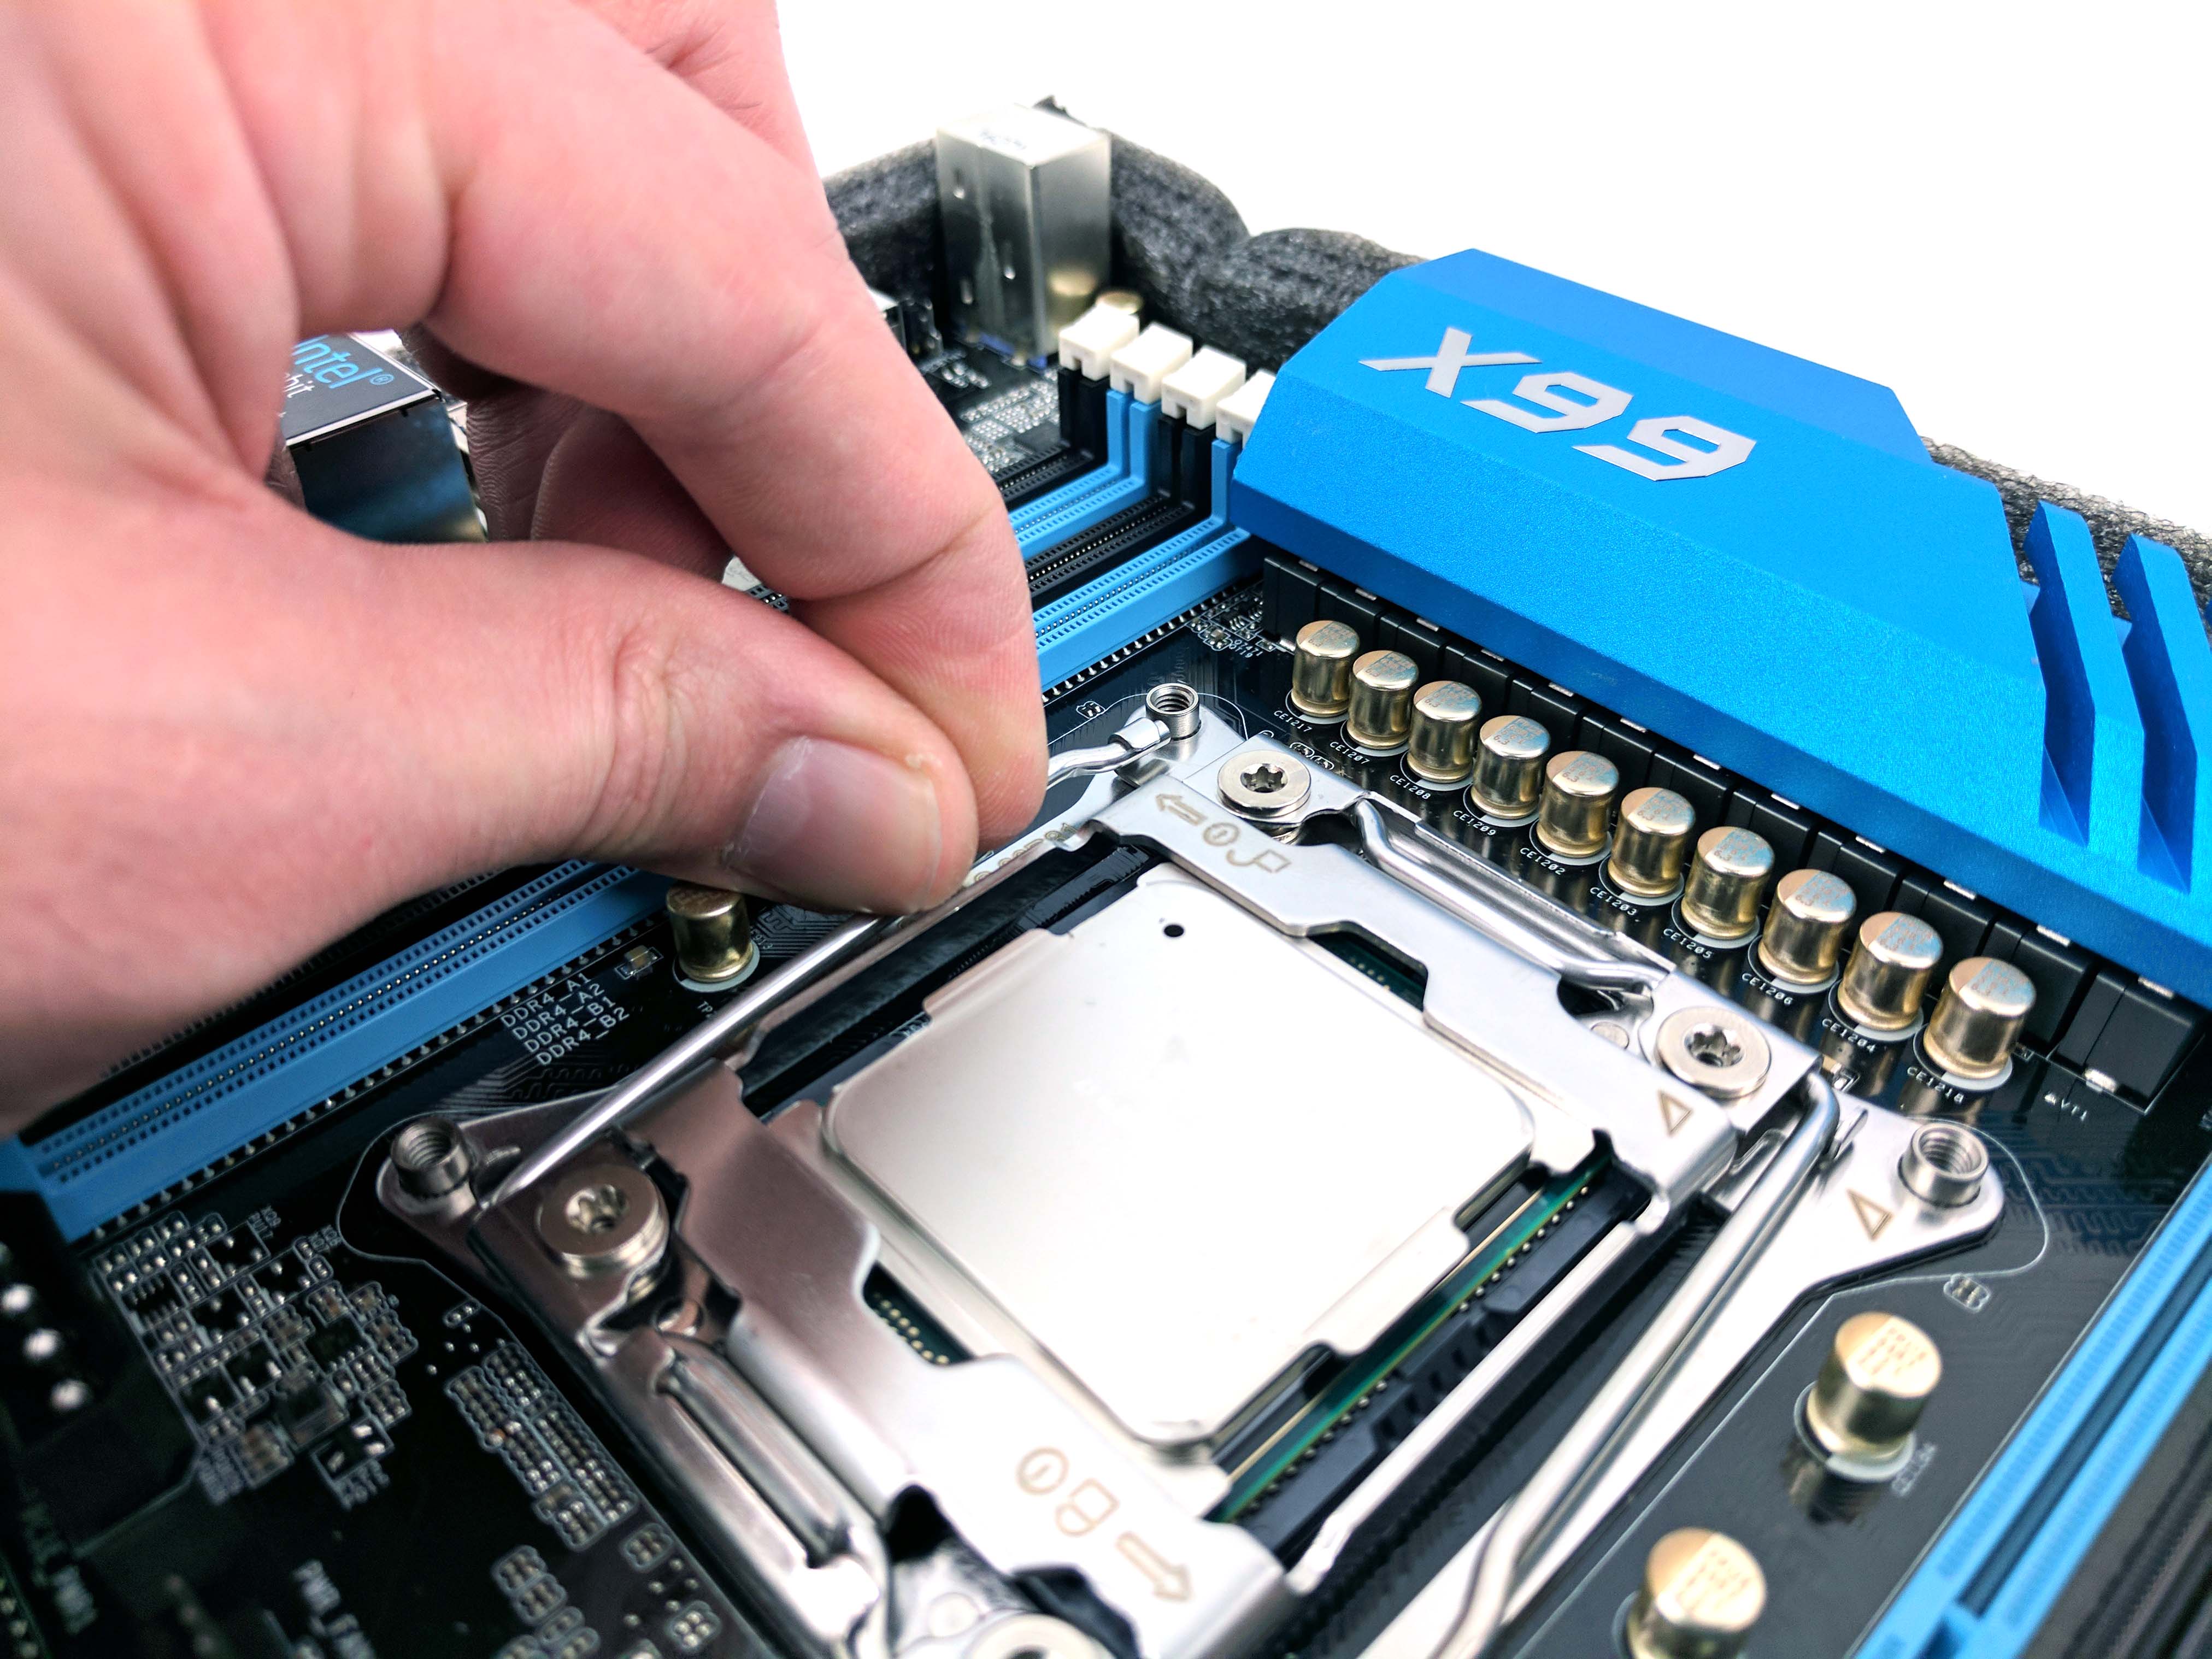
Open the CPU socket on the motherboard by unhooking the left arm and raising it, followed by the right arm. Pull up on the clamp to expose the socket. Remove the Intel Core i7-6800K from its packaging (discharge any static or wear a static wristband before handling the CPU). Line up the marked corner (a triangle) of the CPU to the marked corner of the CPU socket and lower the processor into place. The writing on the CPU will appear upside down with this particular CPU and motherboard combination.
Punch out the protective plastic cover of the socket clamp and lock the processor in place by first lowering the clamp onto the CPU, followed by lowering and hooking the right and then left arms into place.
Memory
The Lobotomy earns its name with a 16GB (2x8GB) dual-channel kit of G.Skill DDR4-2666 memory (which discards the X99's quad-channel memory controller for dual-channel operation). The two modules makes you realize there are eight DIMM slots on the motherboard (six of which are ominously empty), and it leaves you wondering which ones to use for this dual-channel memory selection.
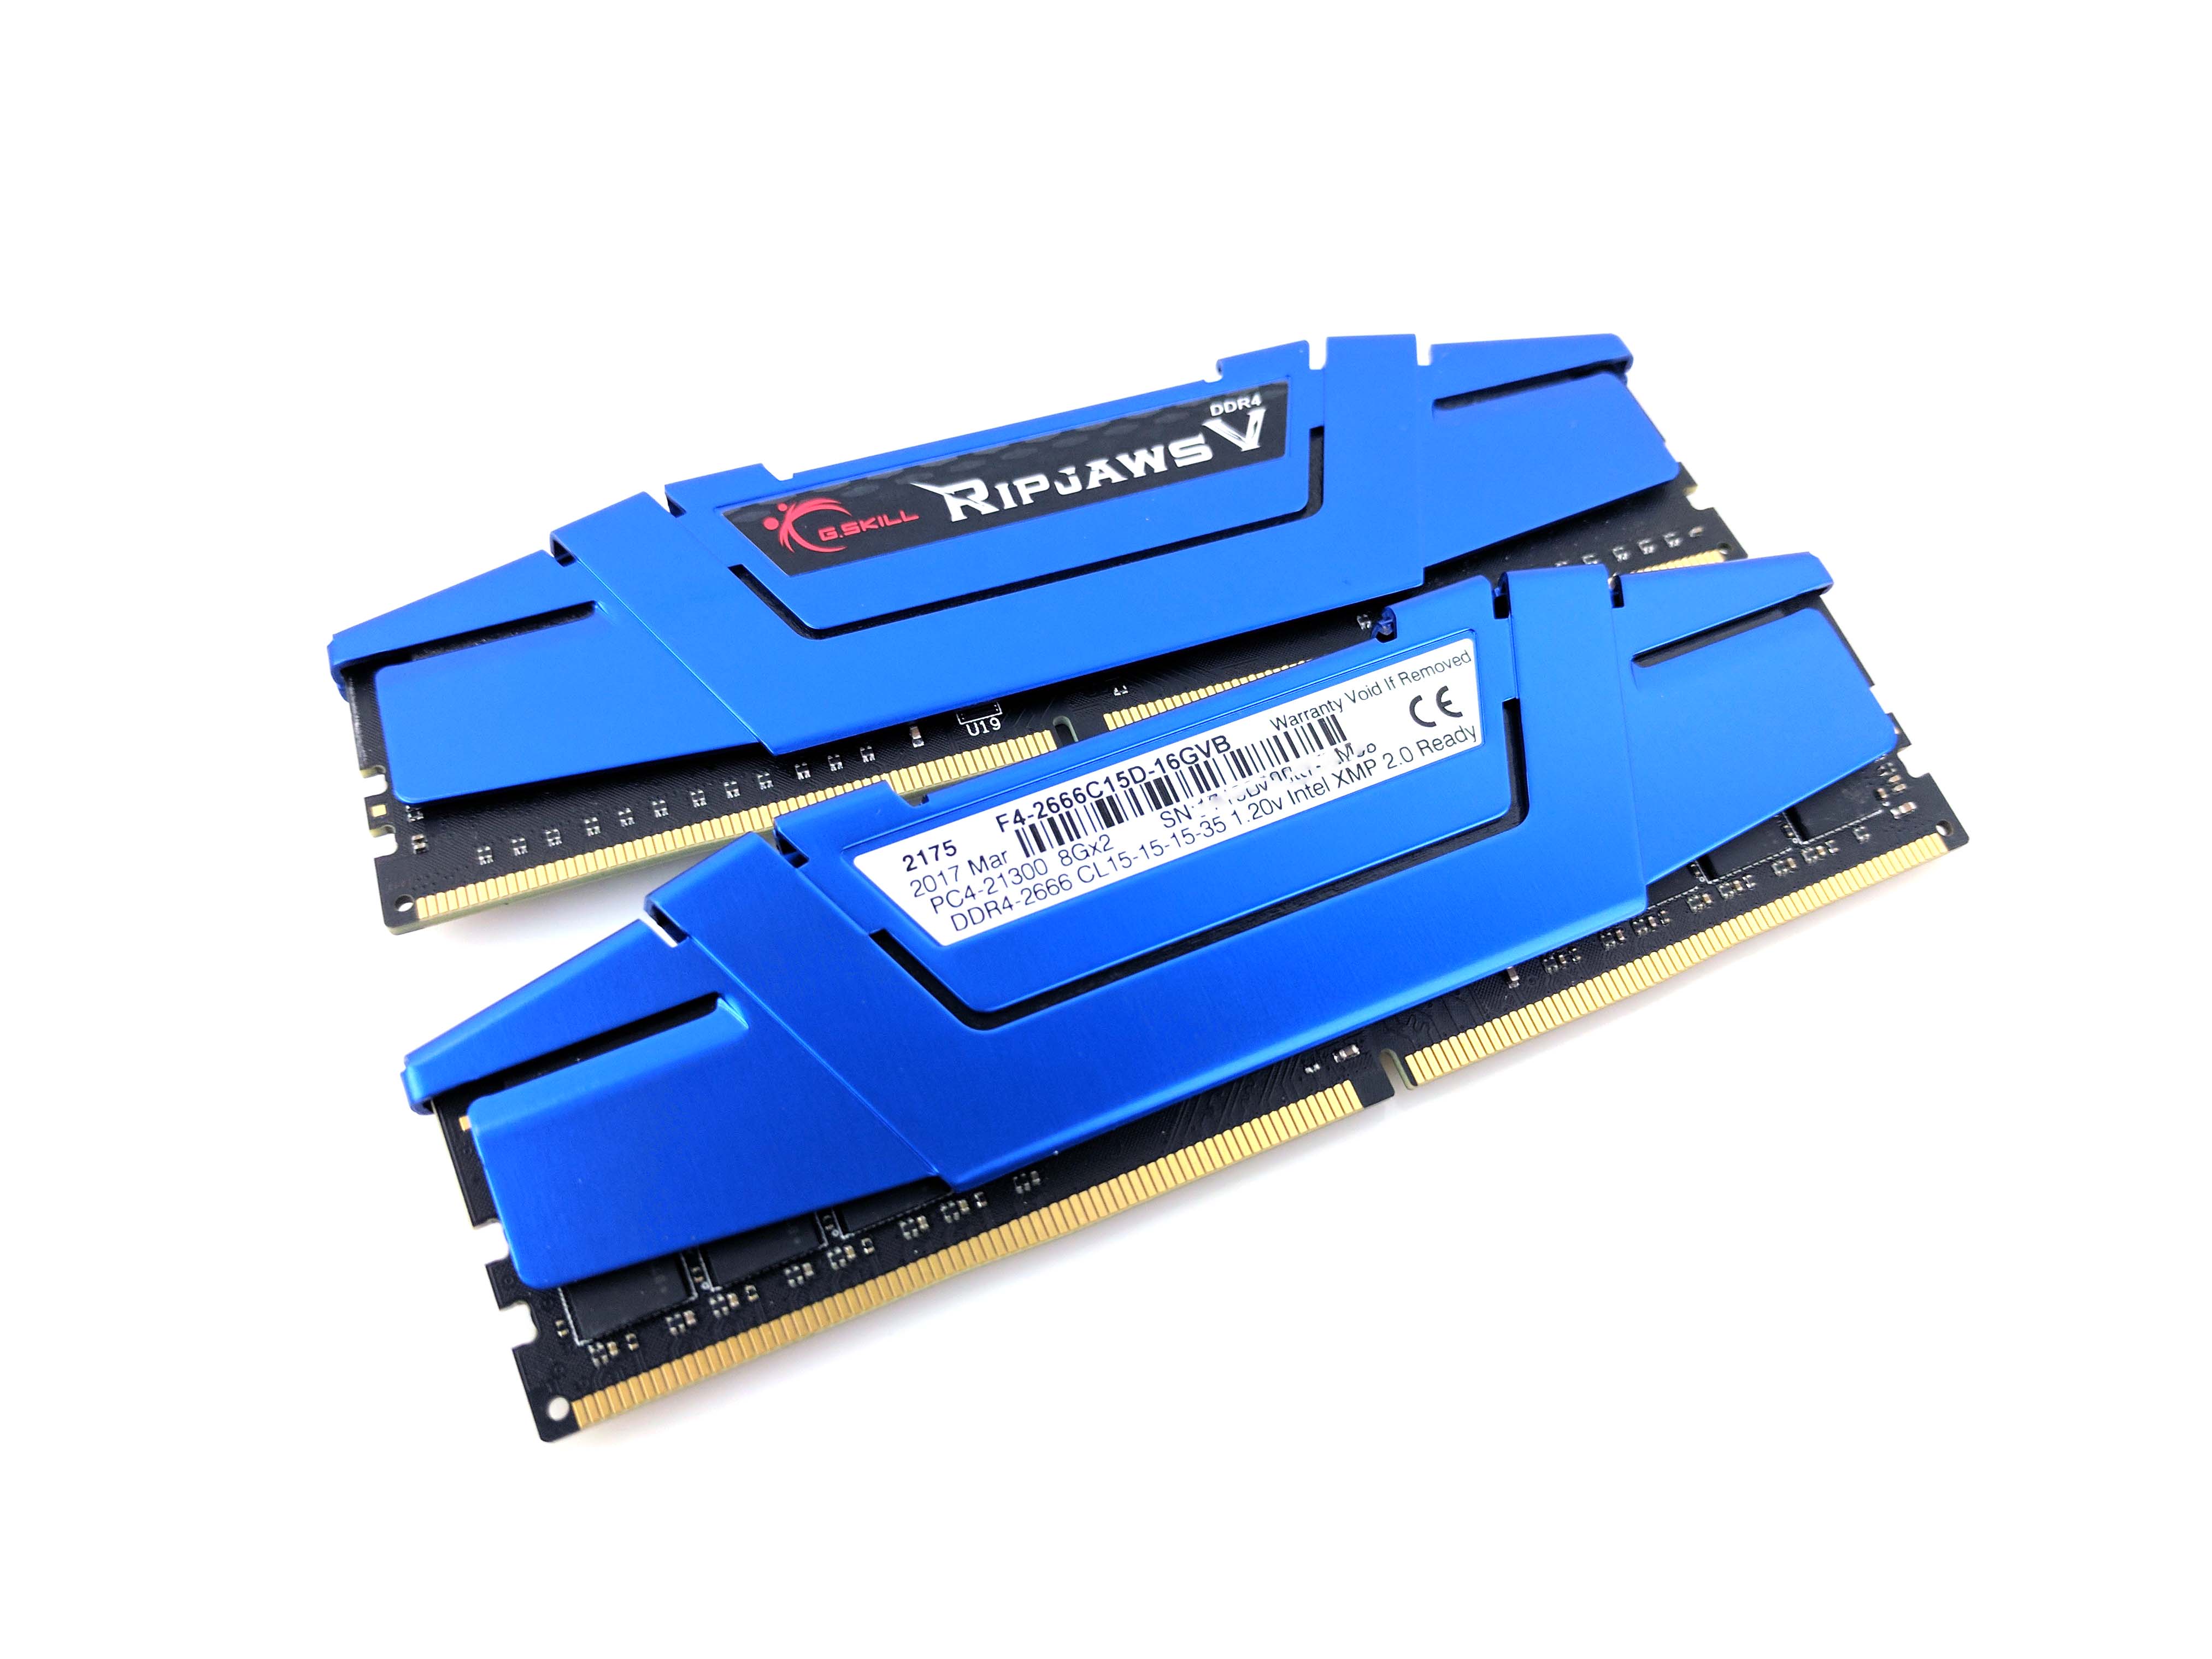
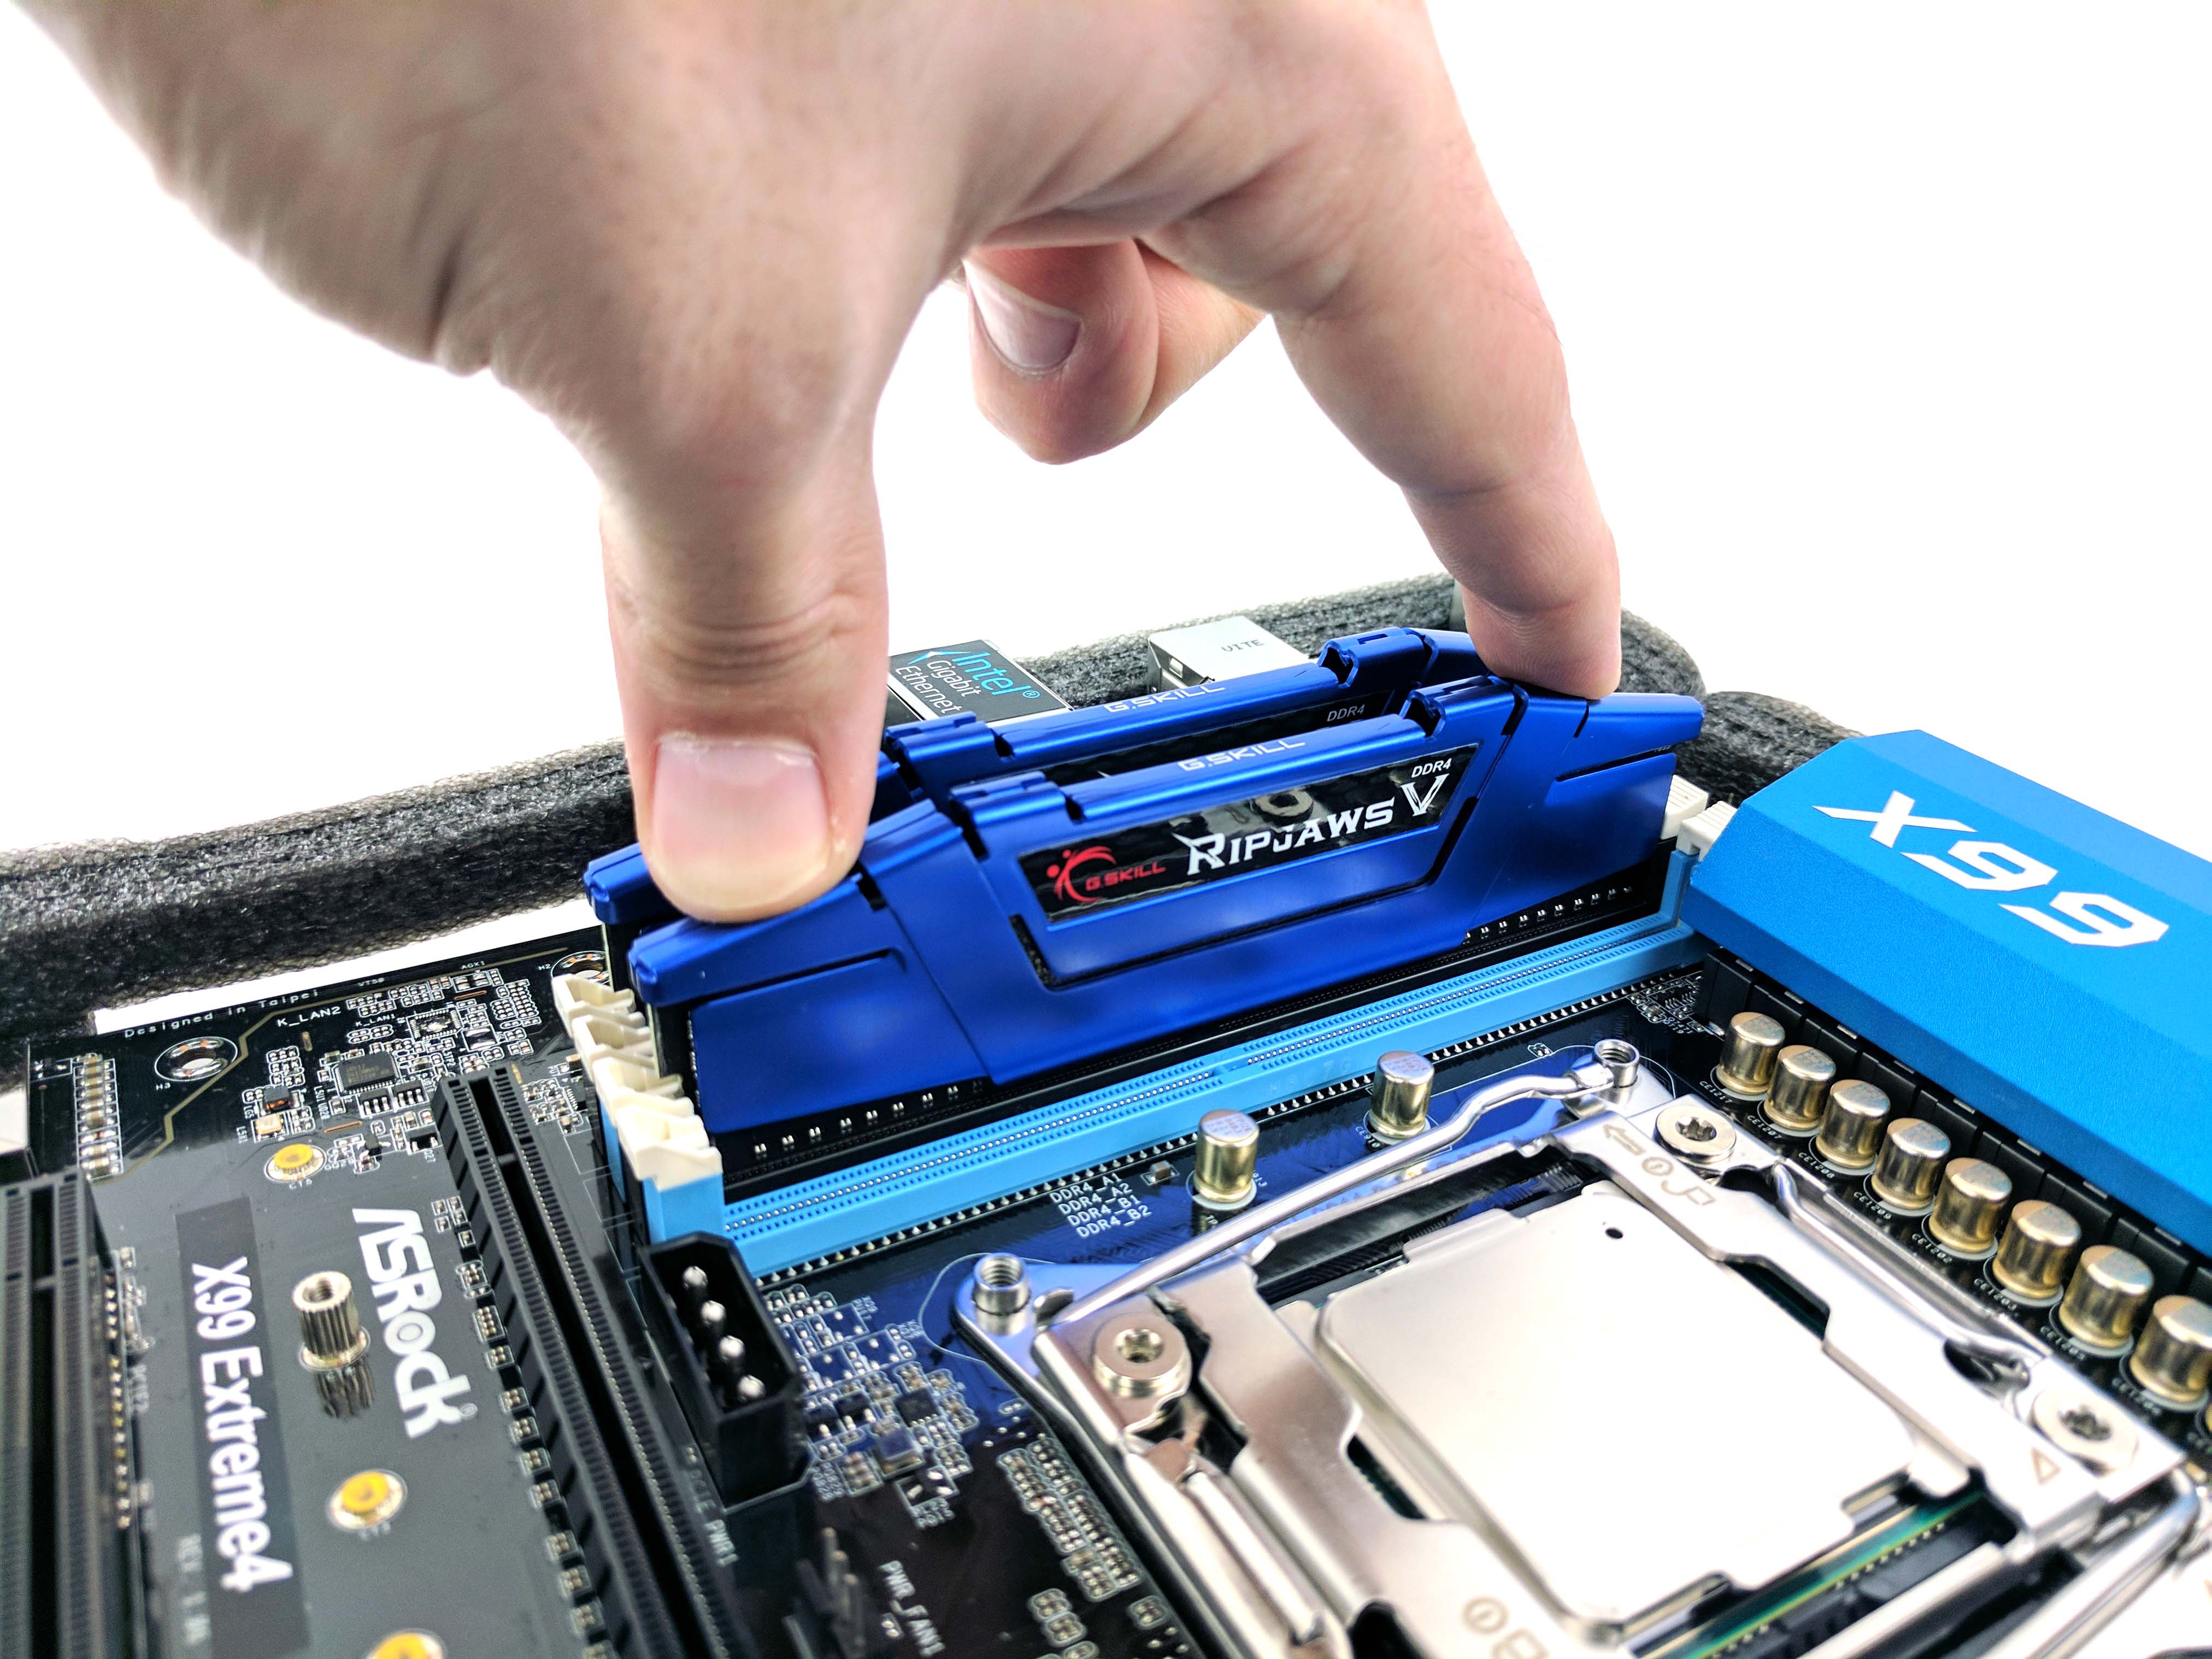
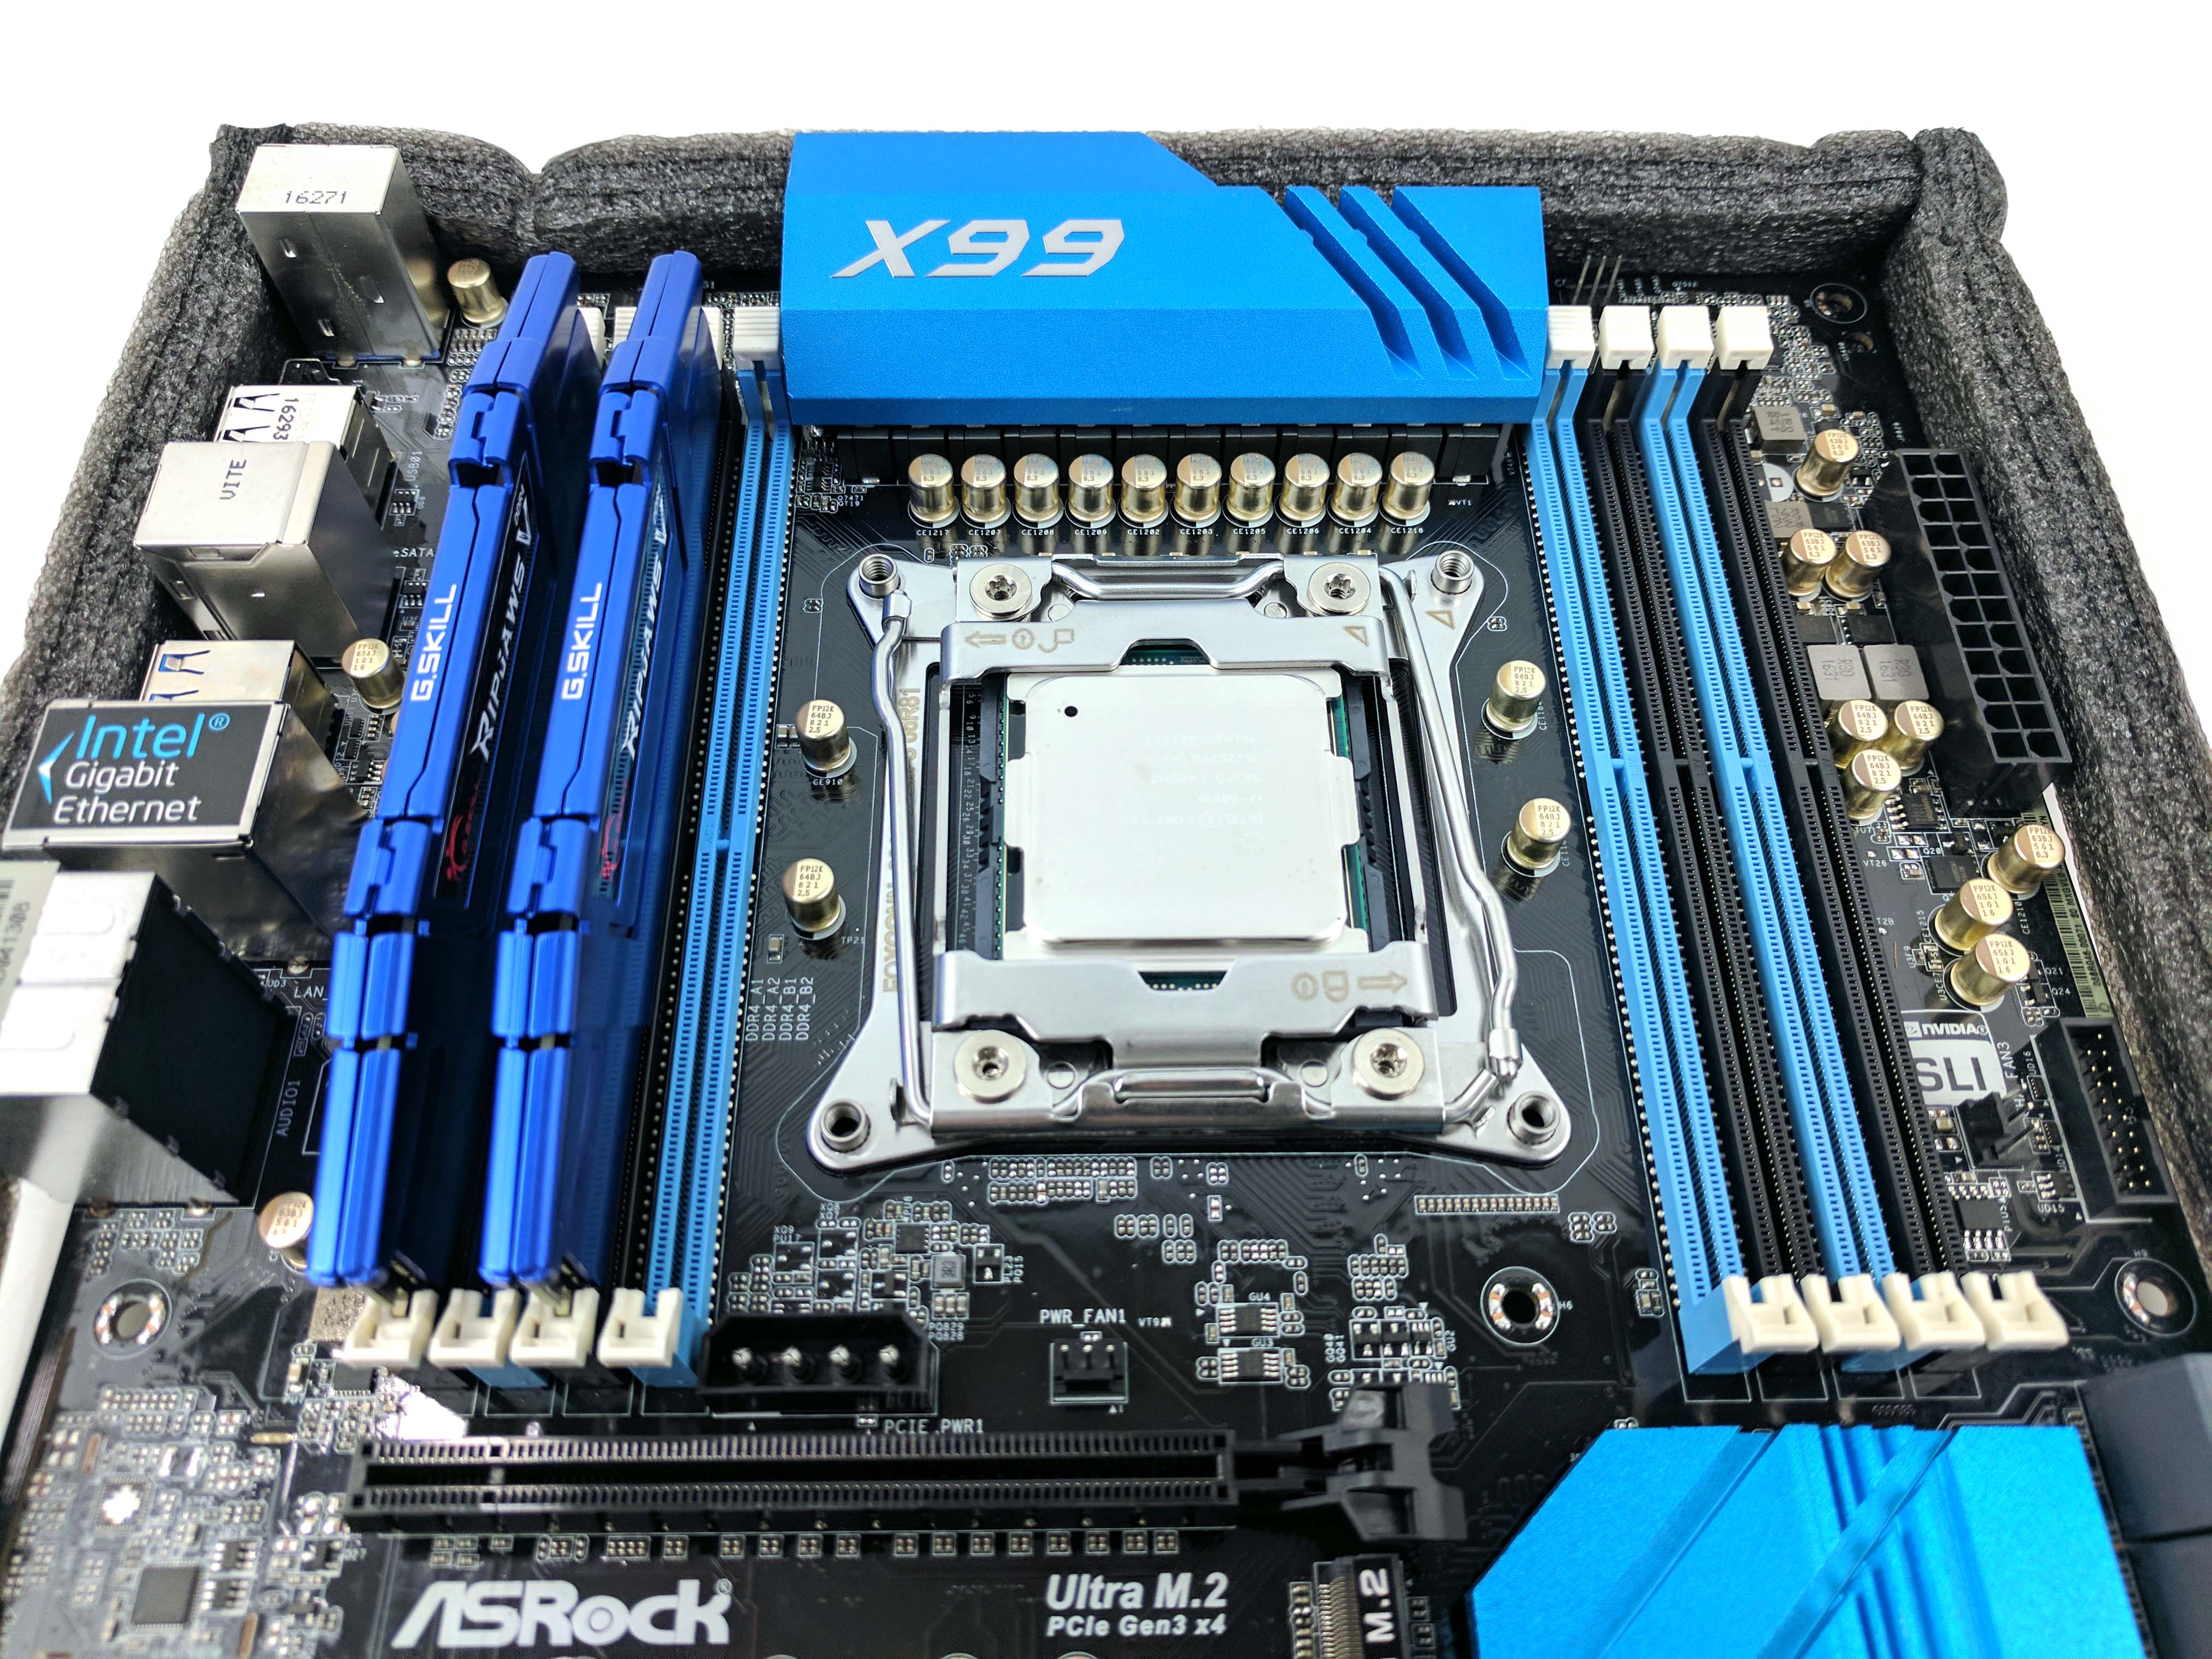
According to the motherboard manual, DIMM sockets A1 and B1 (the first and third black DIMMs, from left to right and to the left of the CPU) are prioritized, and the motherboard will automatically detect the memory kit and operate in dual-channel mode. Remove the memory from its packaging, unlock the appropriate DIMM slot retention clips on the motherboard, and line up the RAM's notches with the notches in the slots. Apply pressure to lock the memory into place.
Installing The Motherboard
Reach back into the motherboard box and locate the rear I/O backplate. Install it to the chassis from the inside of the case by applying pressure to the corners. Take the motherboard off its foamy coaster and lower it into the case, lining up the rear I/O ports with the backplate.
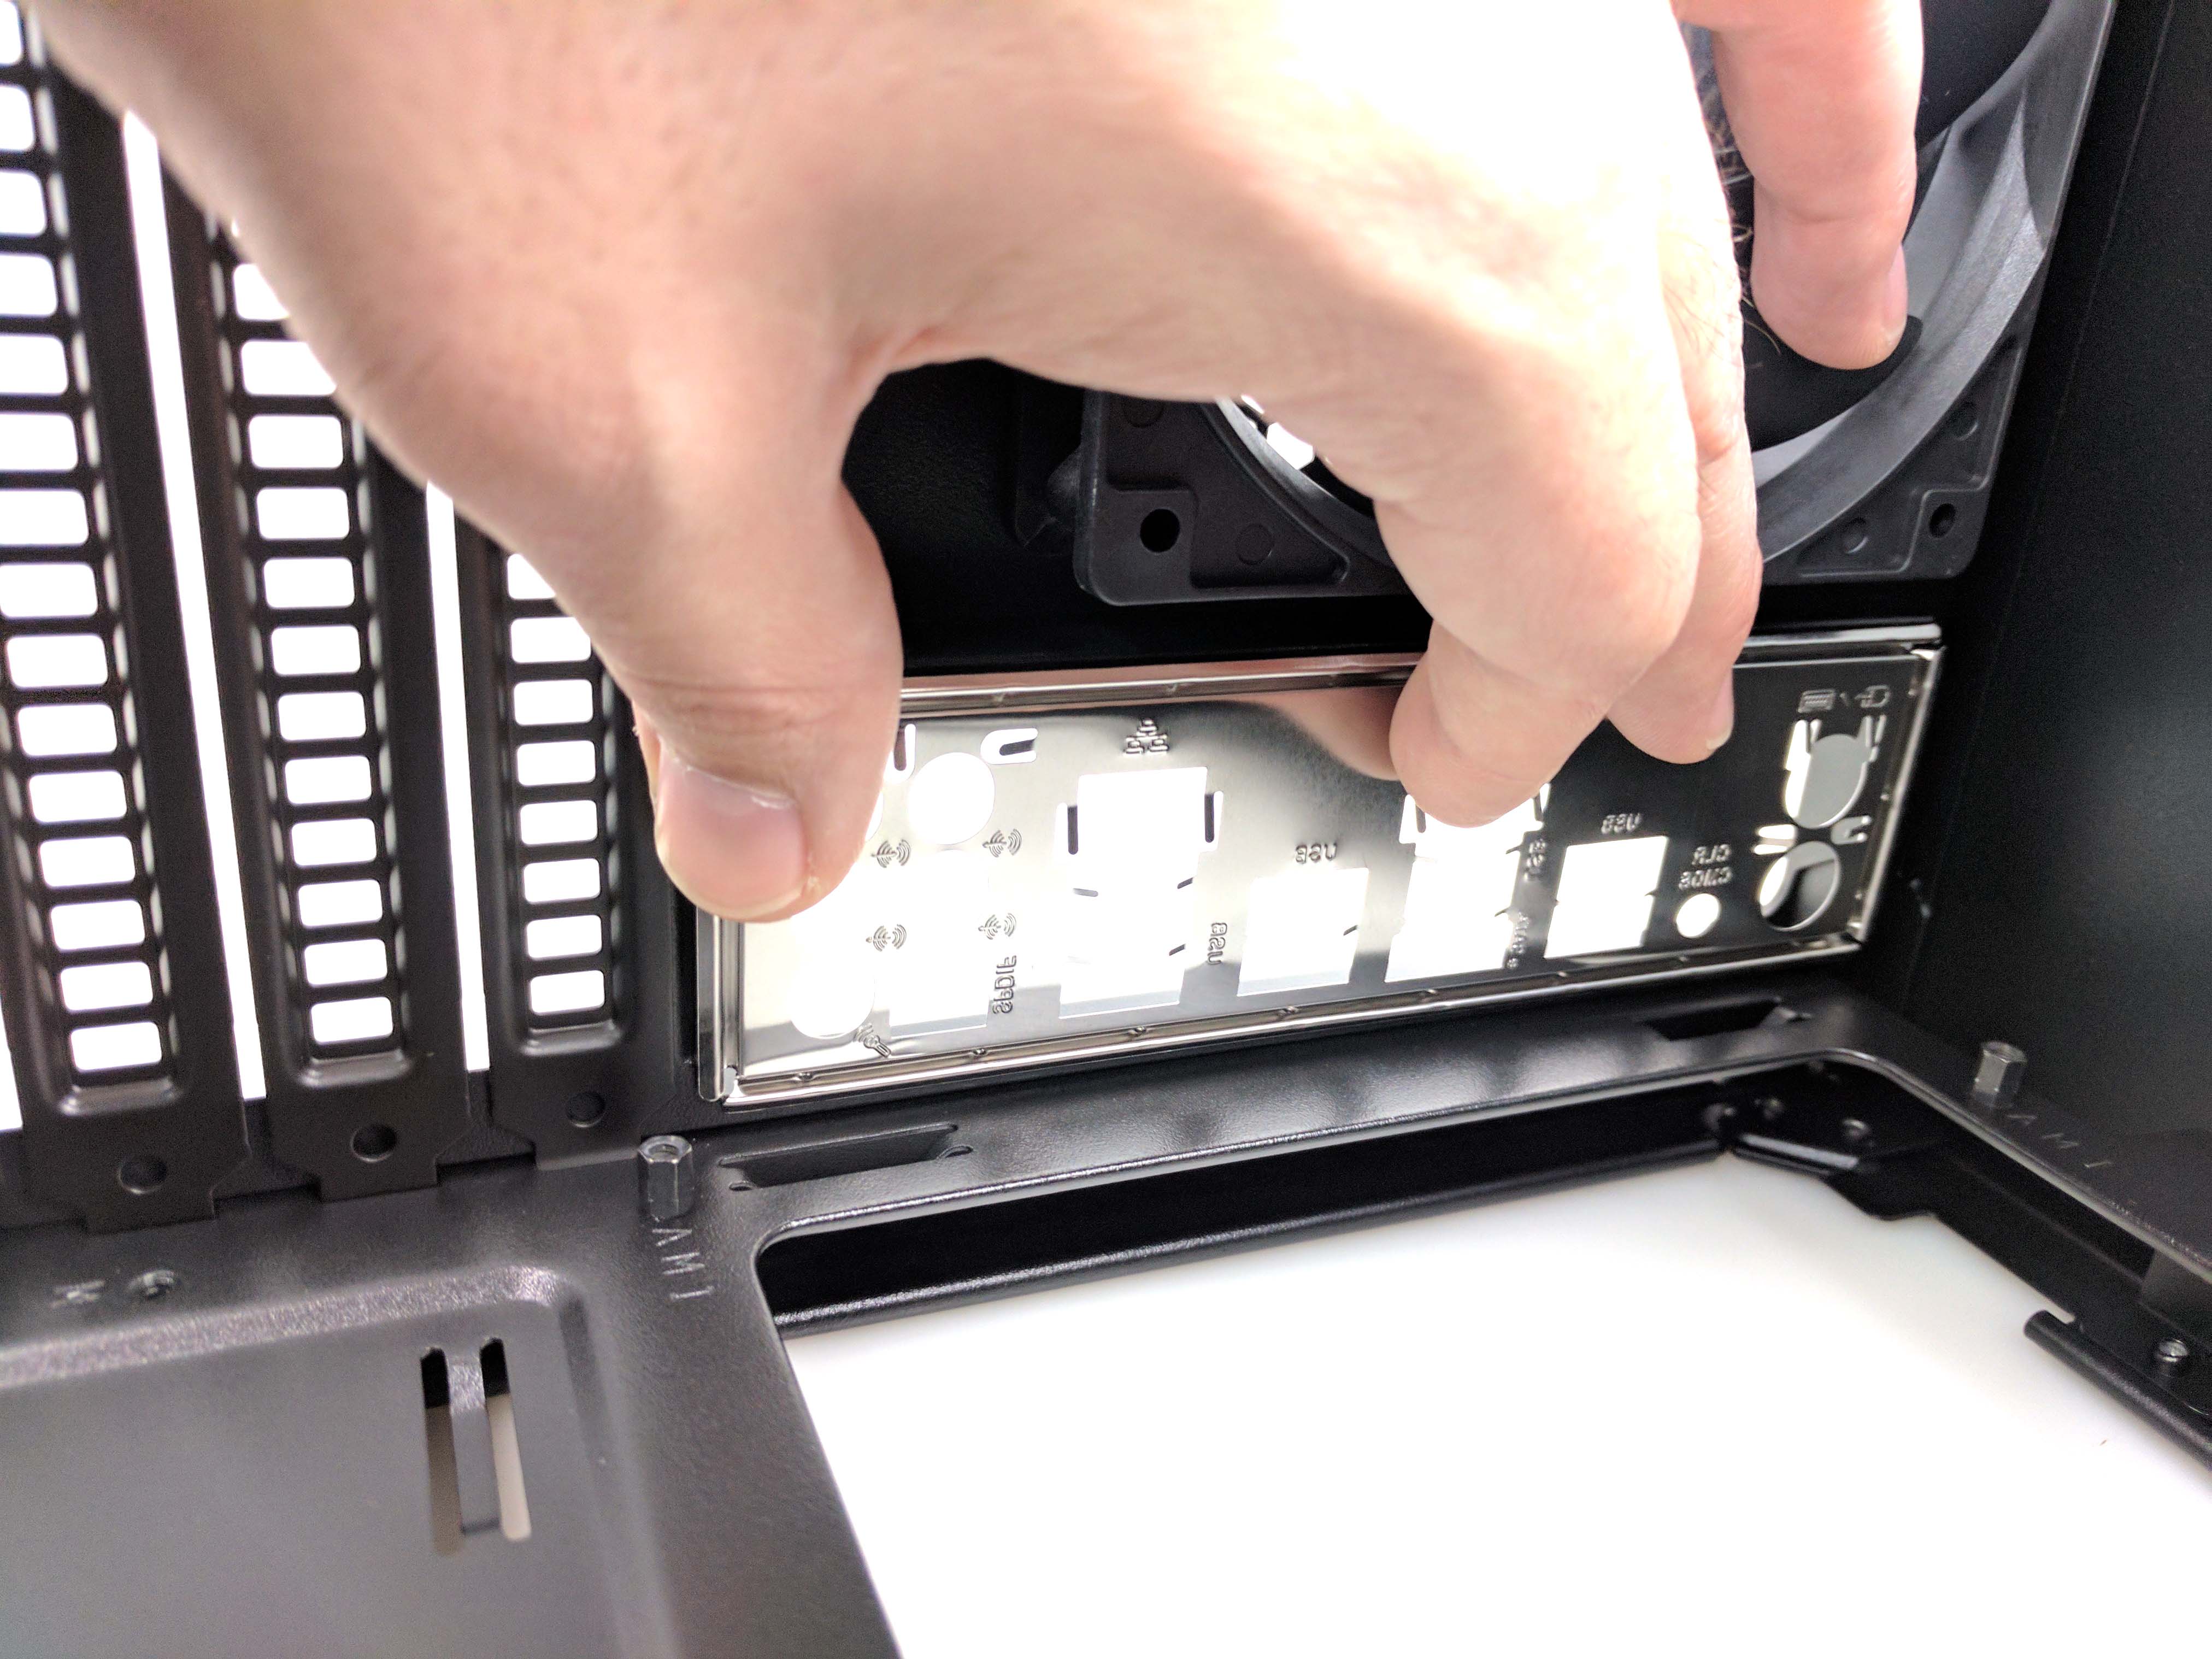
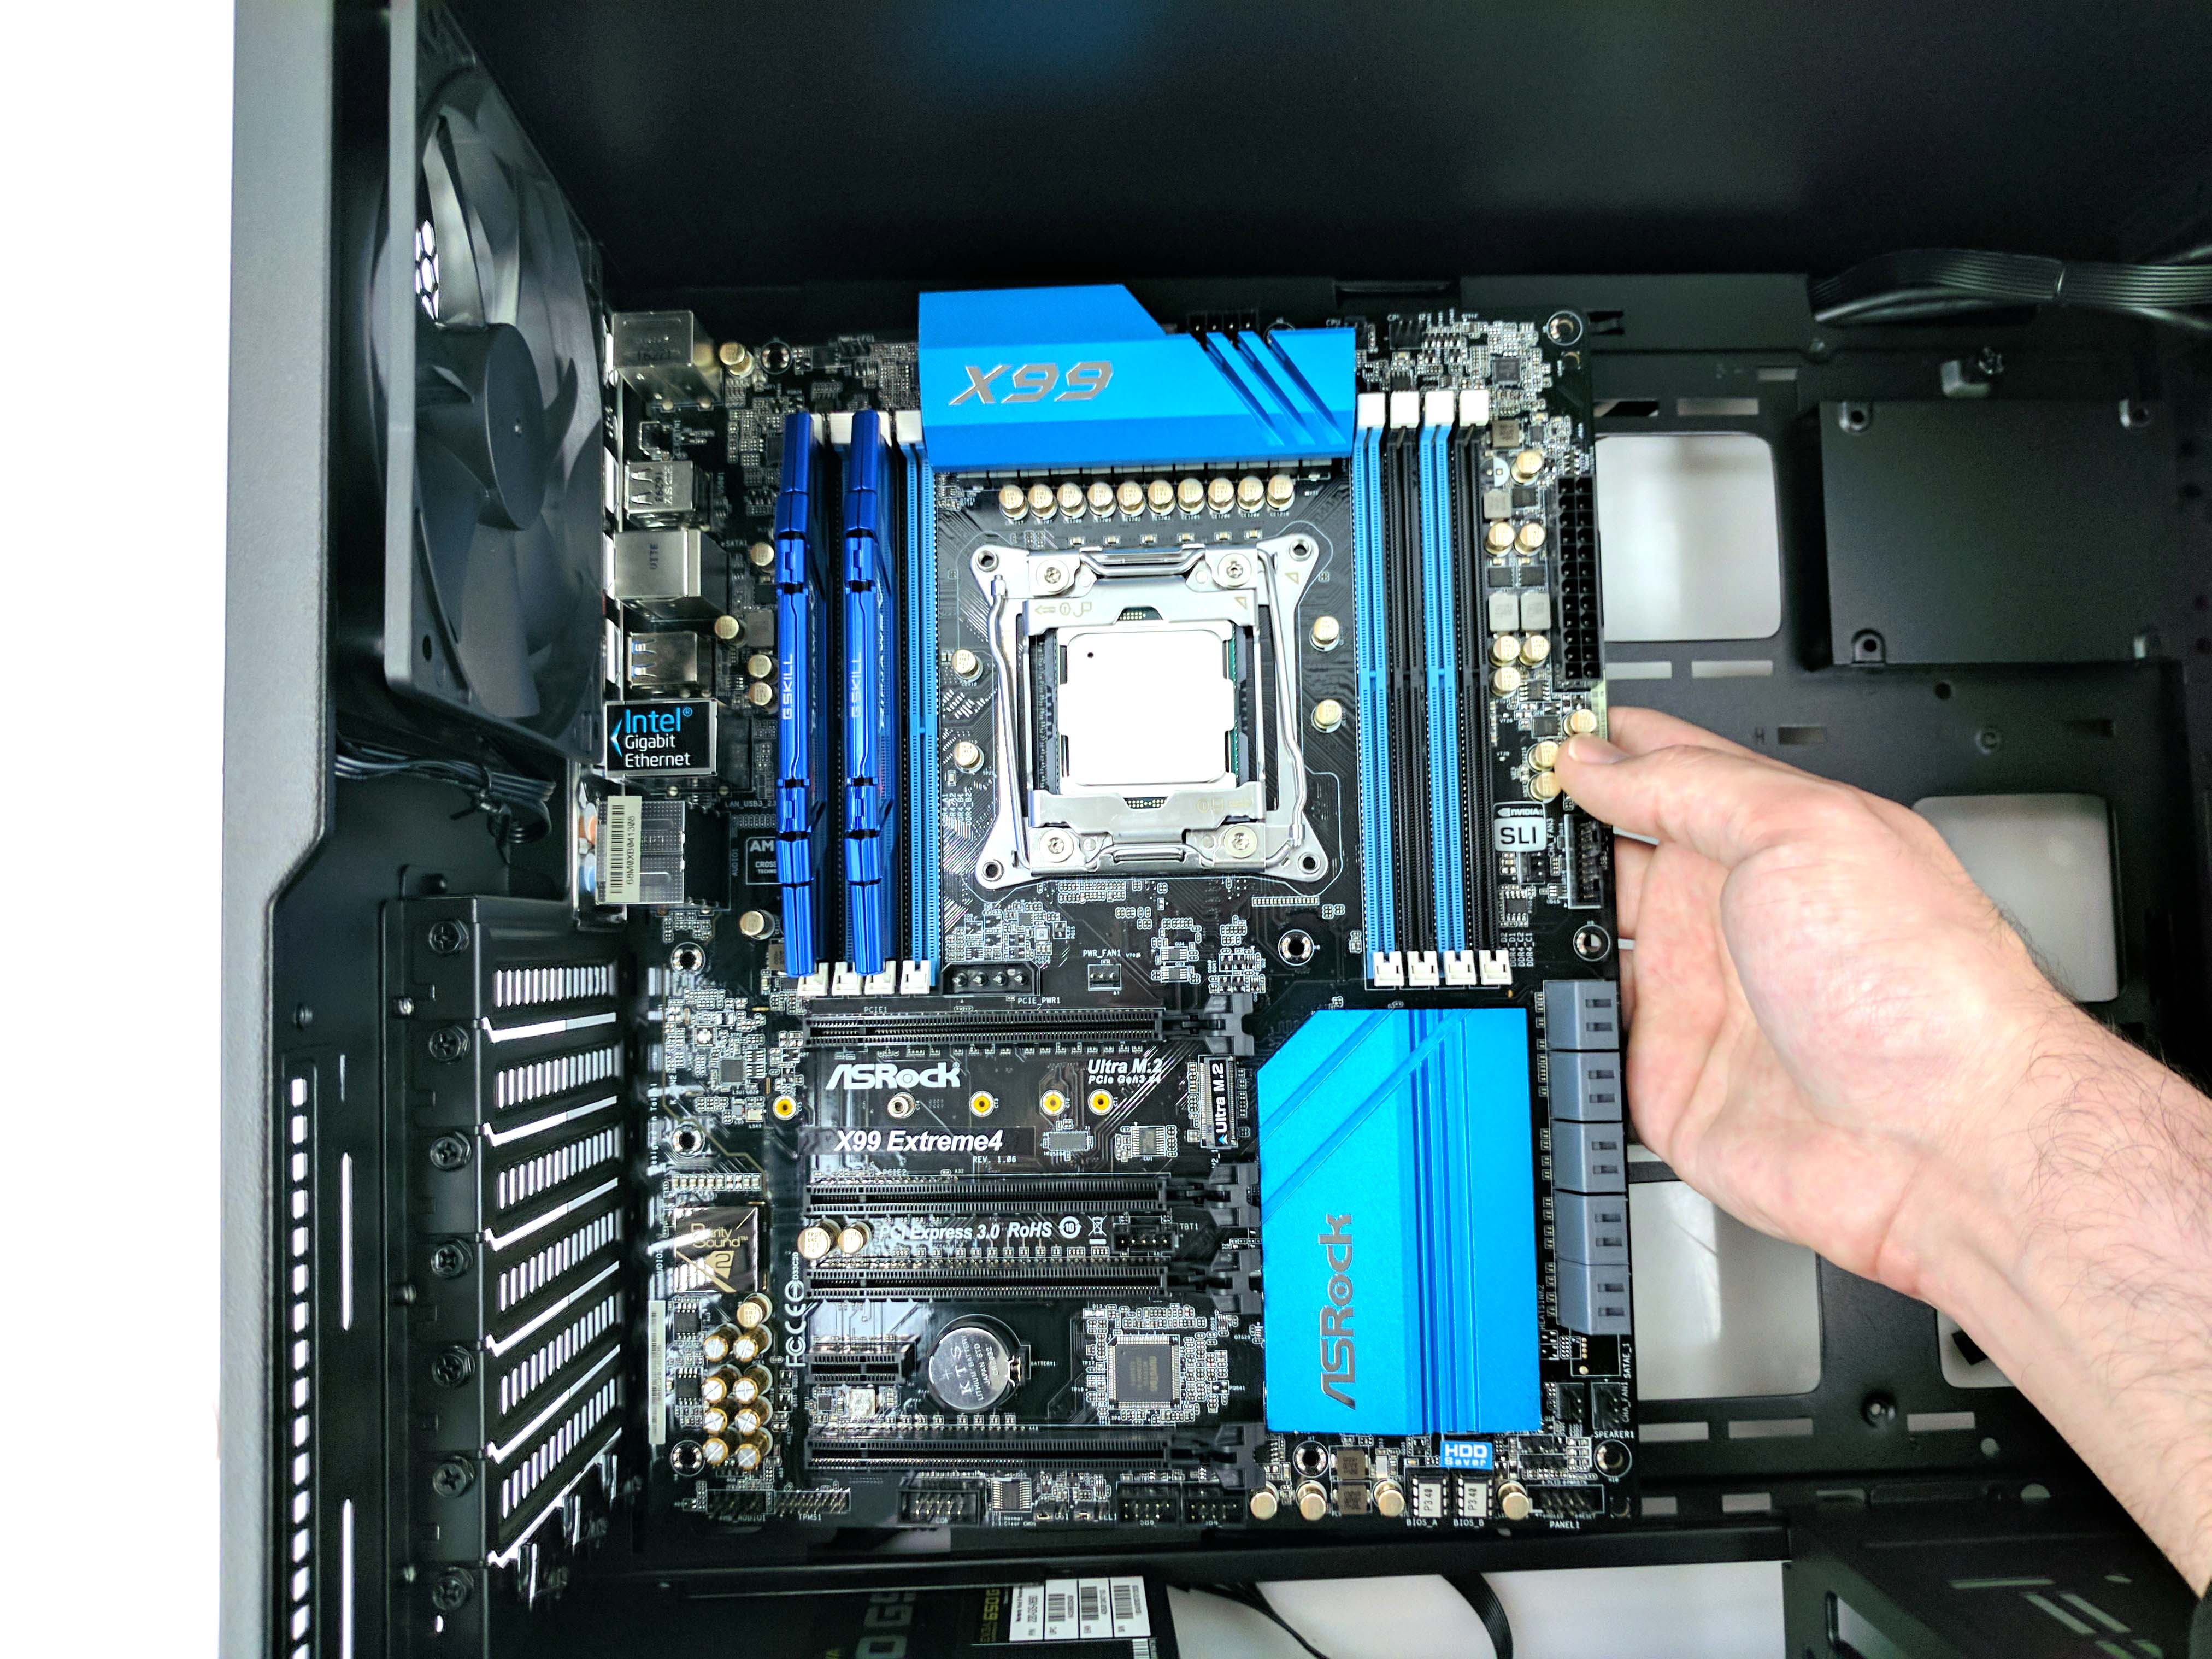
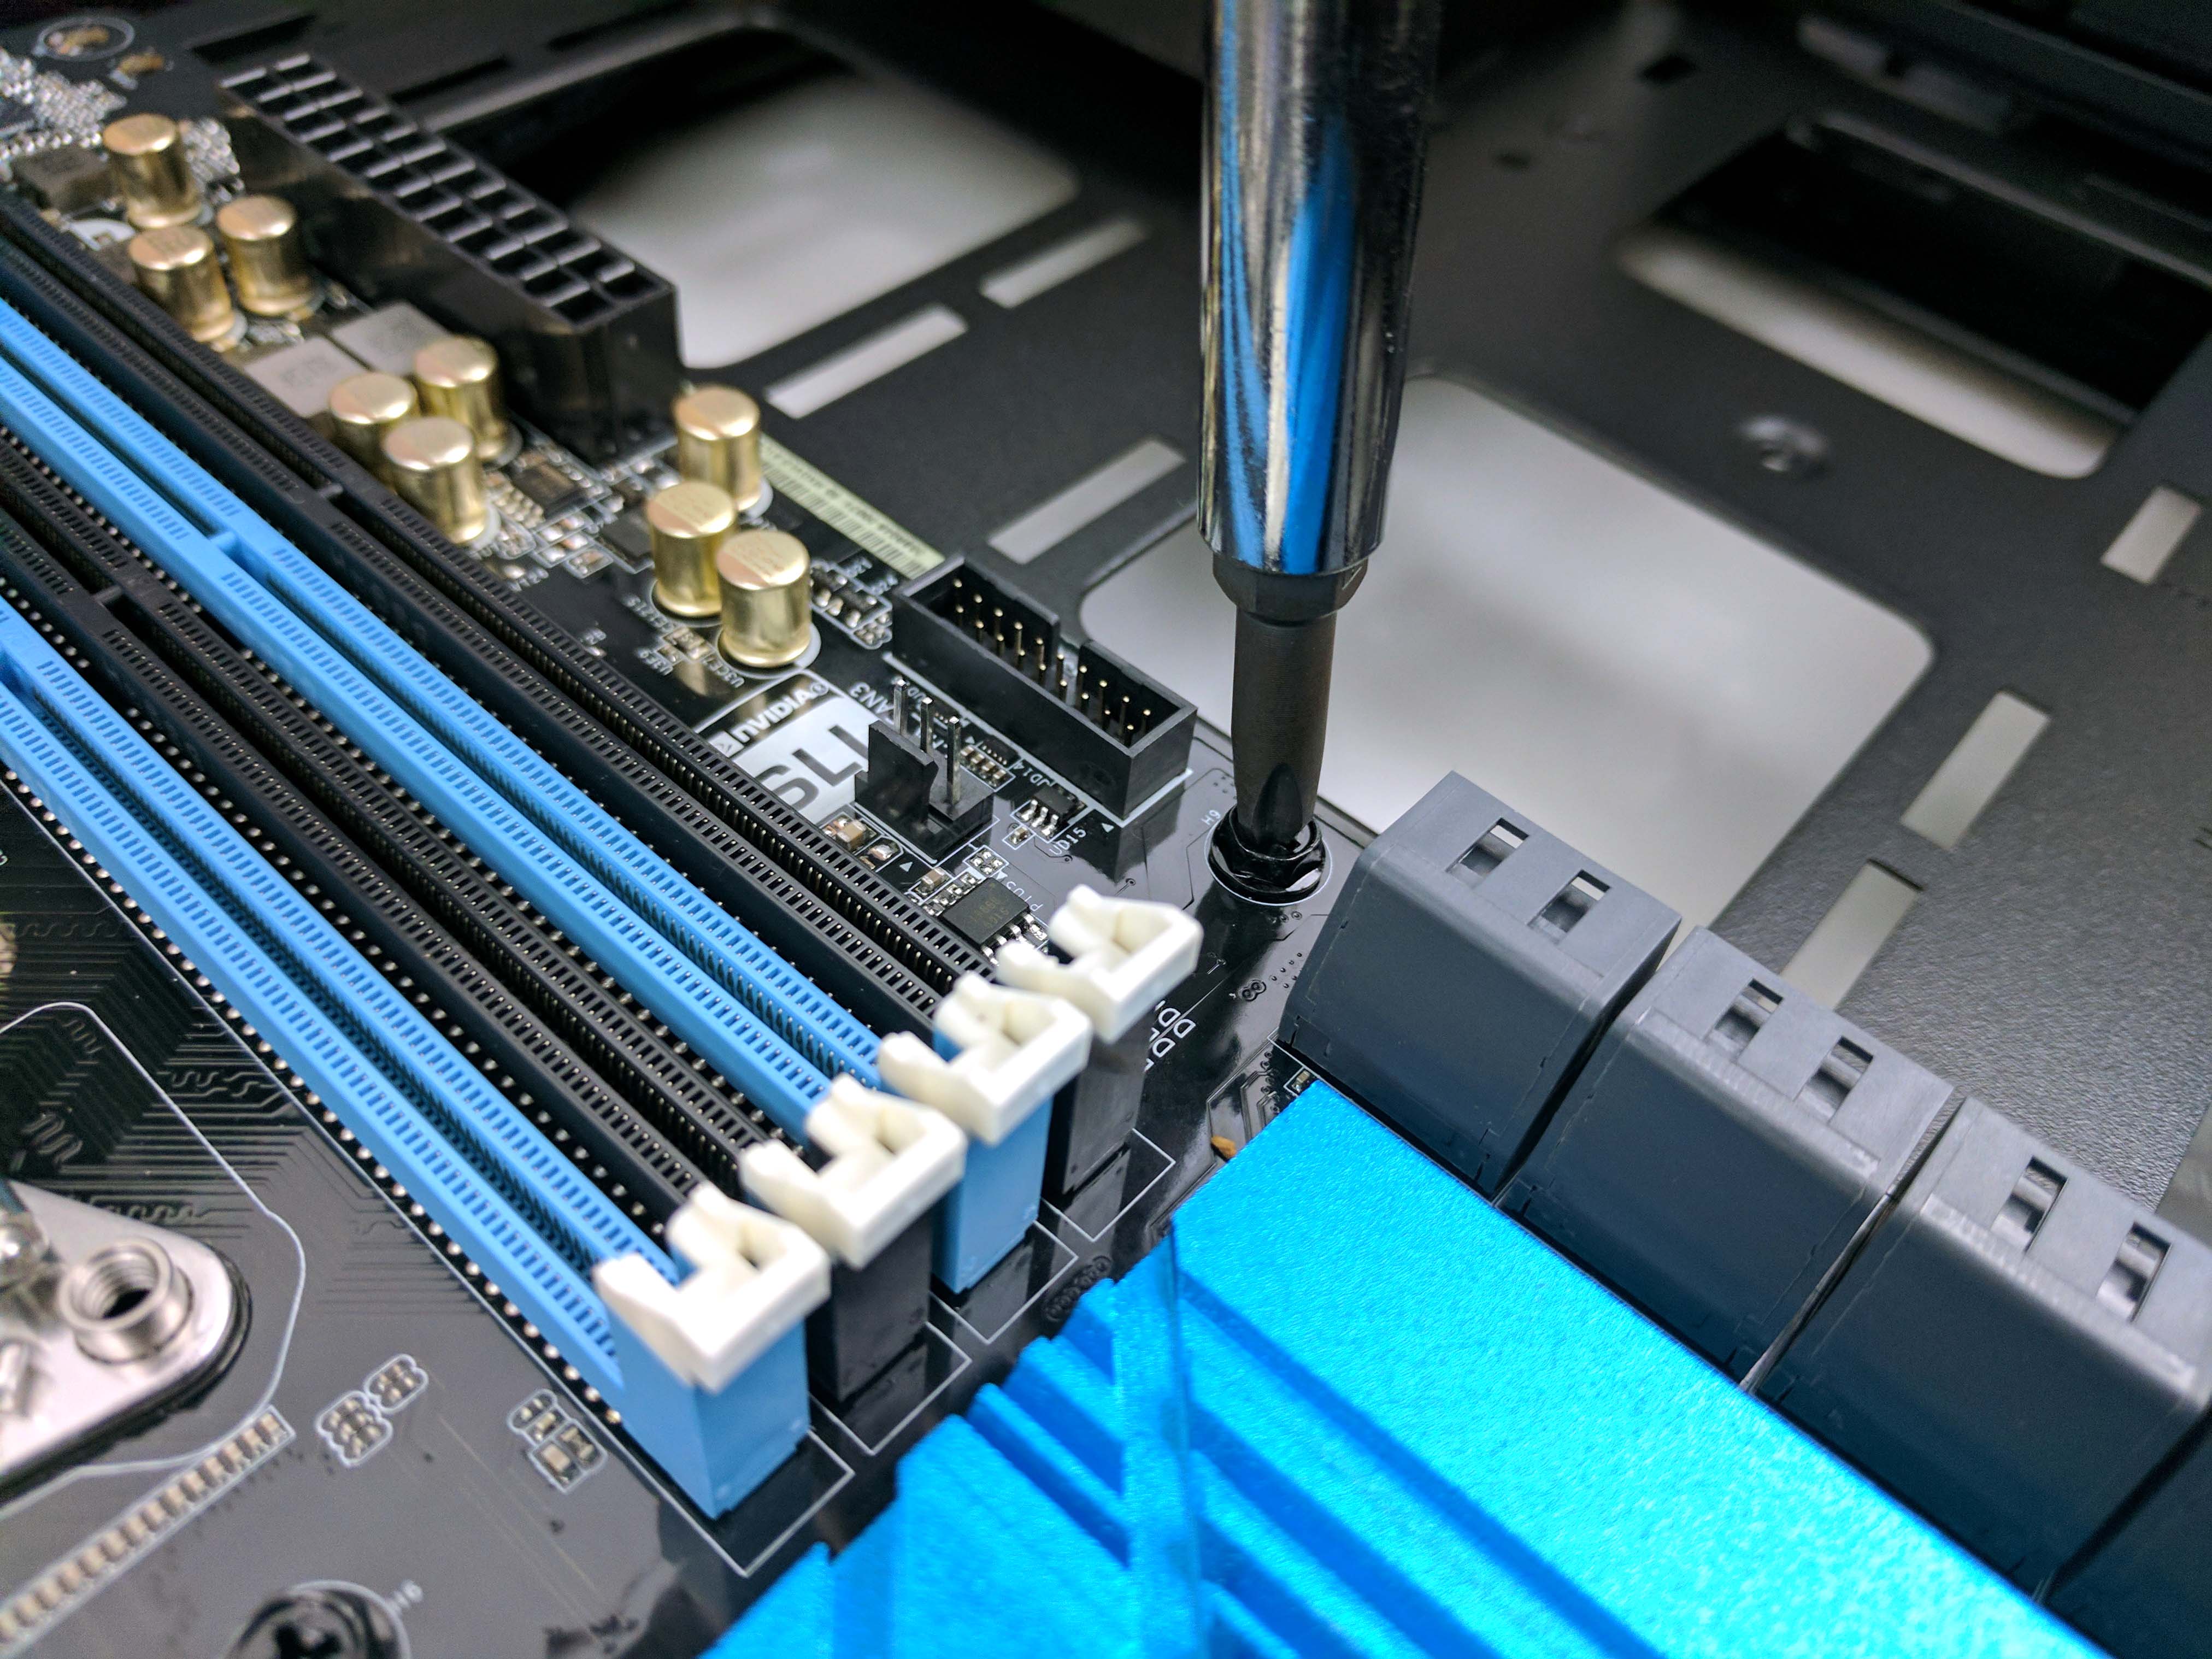
Use the fat-headed, thick-threaded screws from the case's hardware bag to secure the motherboard to the case standoffs. One of the motherboard's mounting holes (the one by the third PCIe lane from the CPU) will not have a post to screw into, but again, this is normal and won't affect the build in any way.
Storage
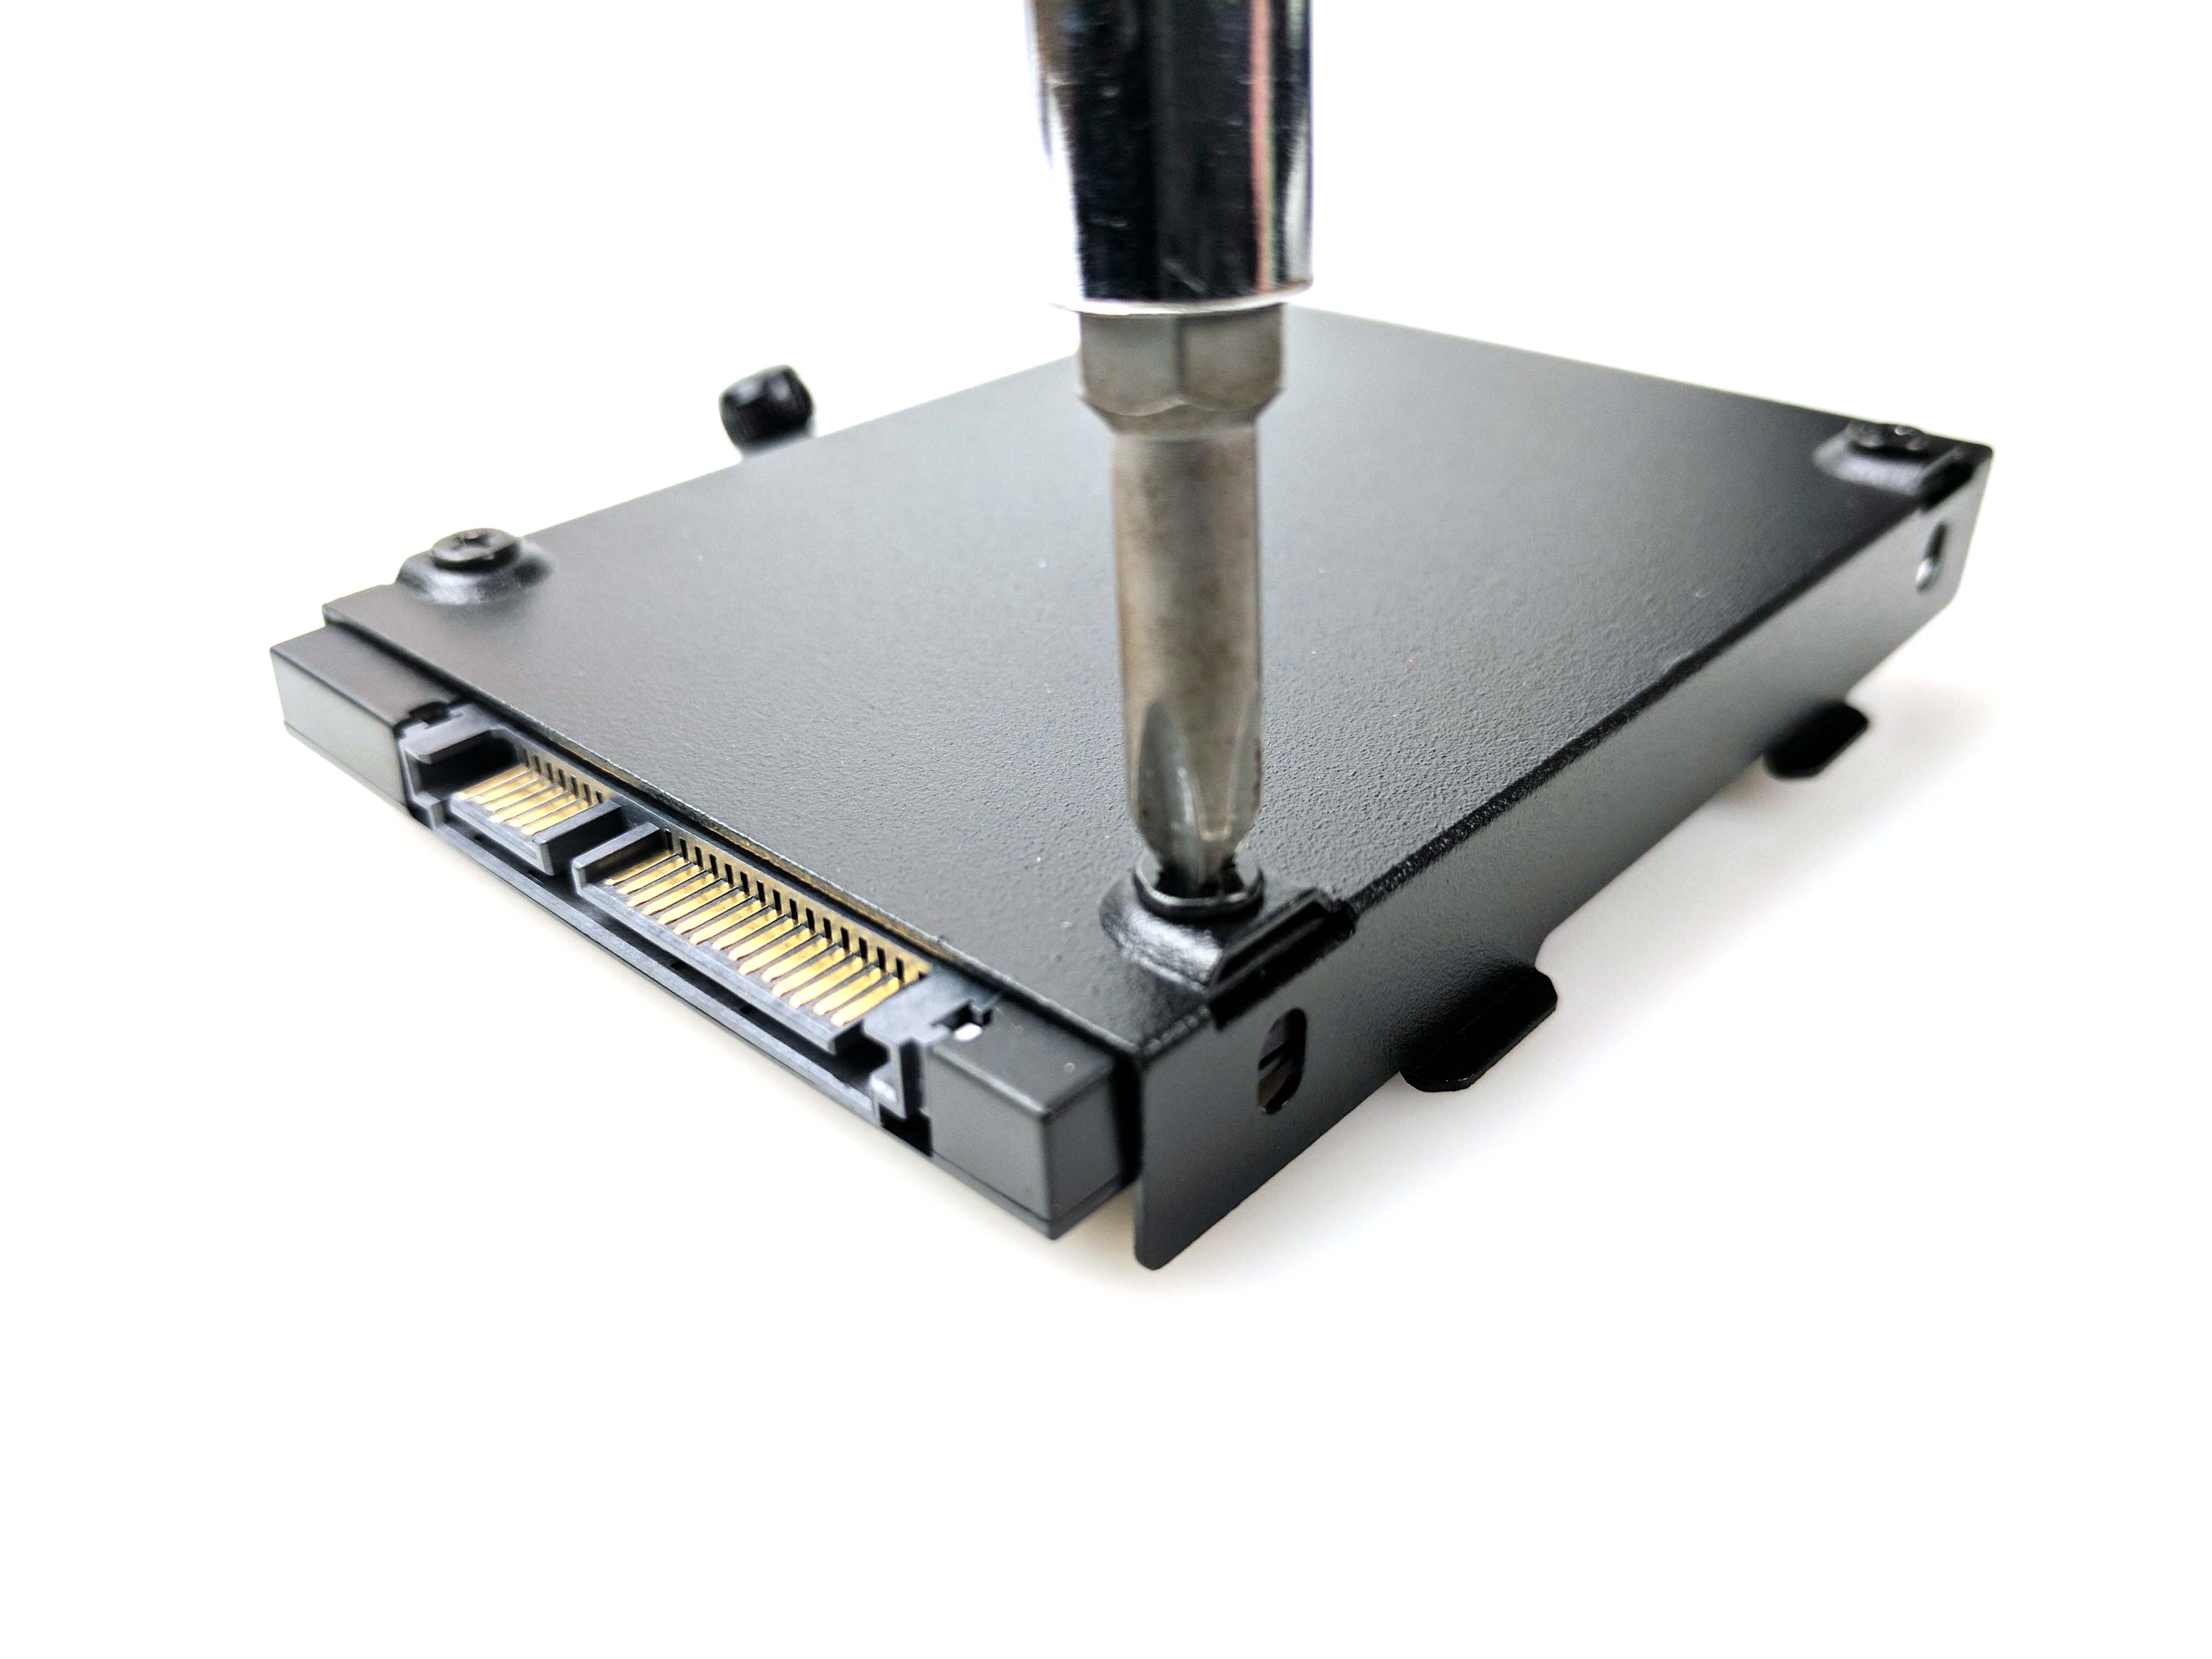
Next we'll mount the 2.5" SSD and 3.5" HDD to the case. Start by removing the case's only 2.5" drive cage (located in the upper right of the main chamber) by loosening the thumbscrews (you may need a screwdriver), holding it in place, and lifting up to free it from the chassis. Remove the 120GB Sandisk Plus SSD from its package and peel off the protective sticker on the bottom of the drive. Slide it into the tray so that the holes in the bottom of the SSD (opposite side of the label) line up with the holes in the drive cage, with the SATA power and data leads positioned on the left side (if the thumbscrew is on top), as seen in slide 2 in the album below. Secure the SSD to the cage using four of the short, thin-threaded screws from the case's hardware bag.
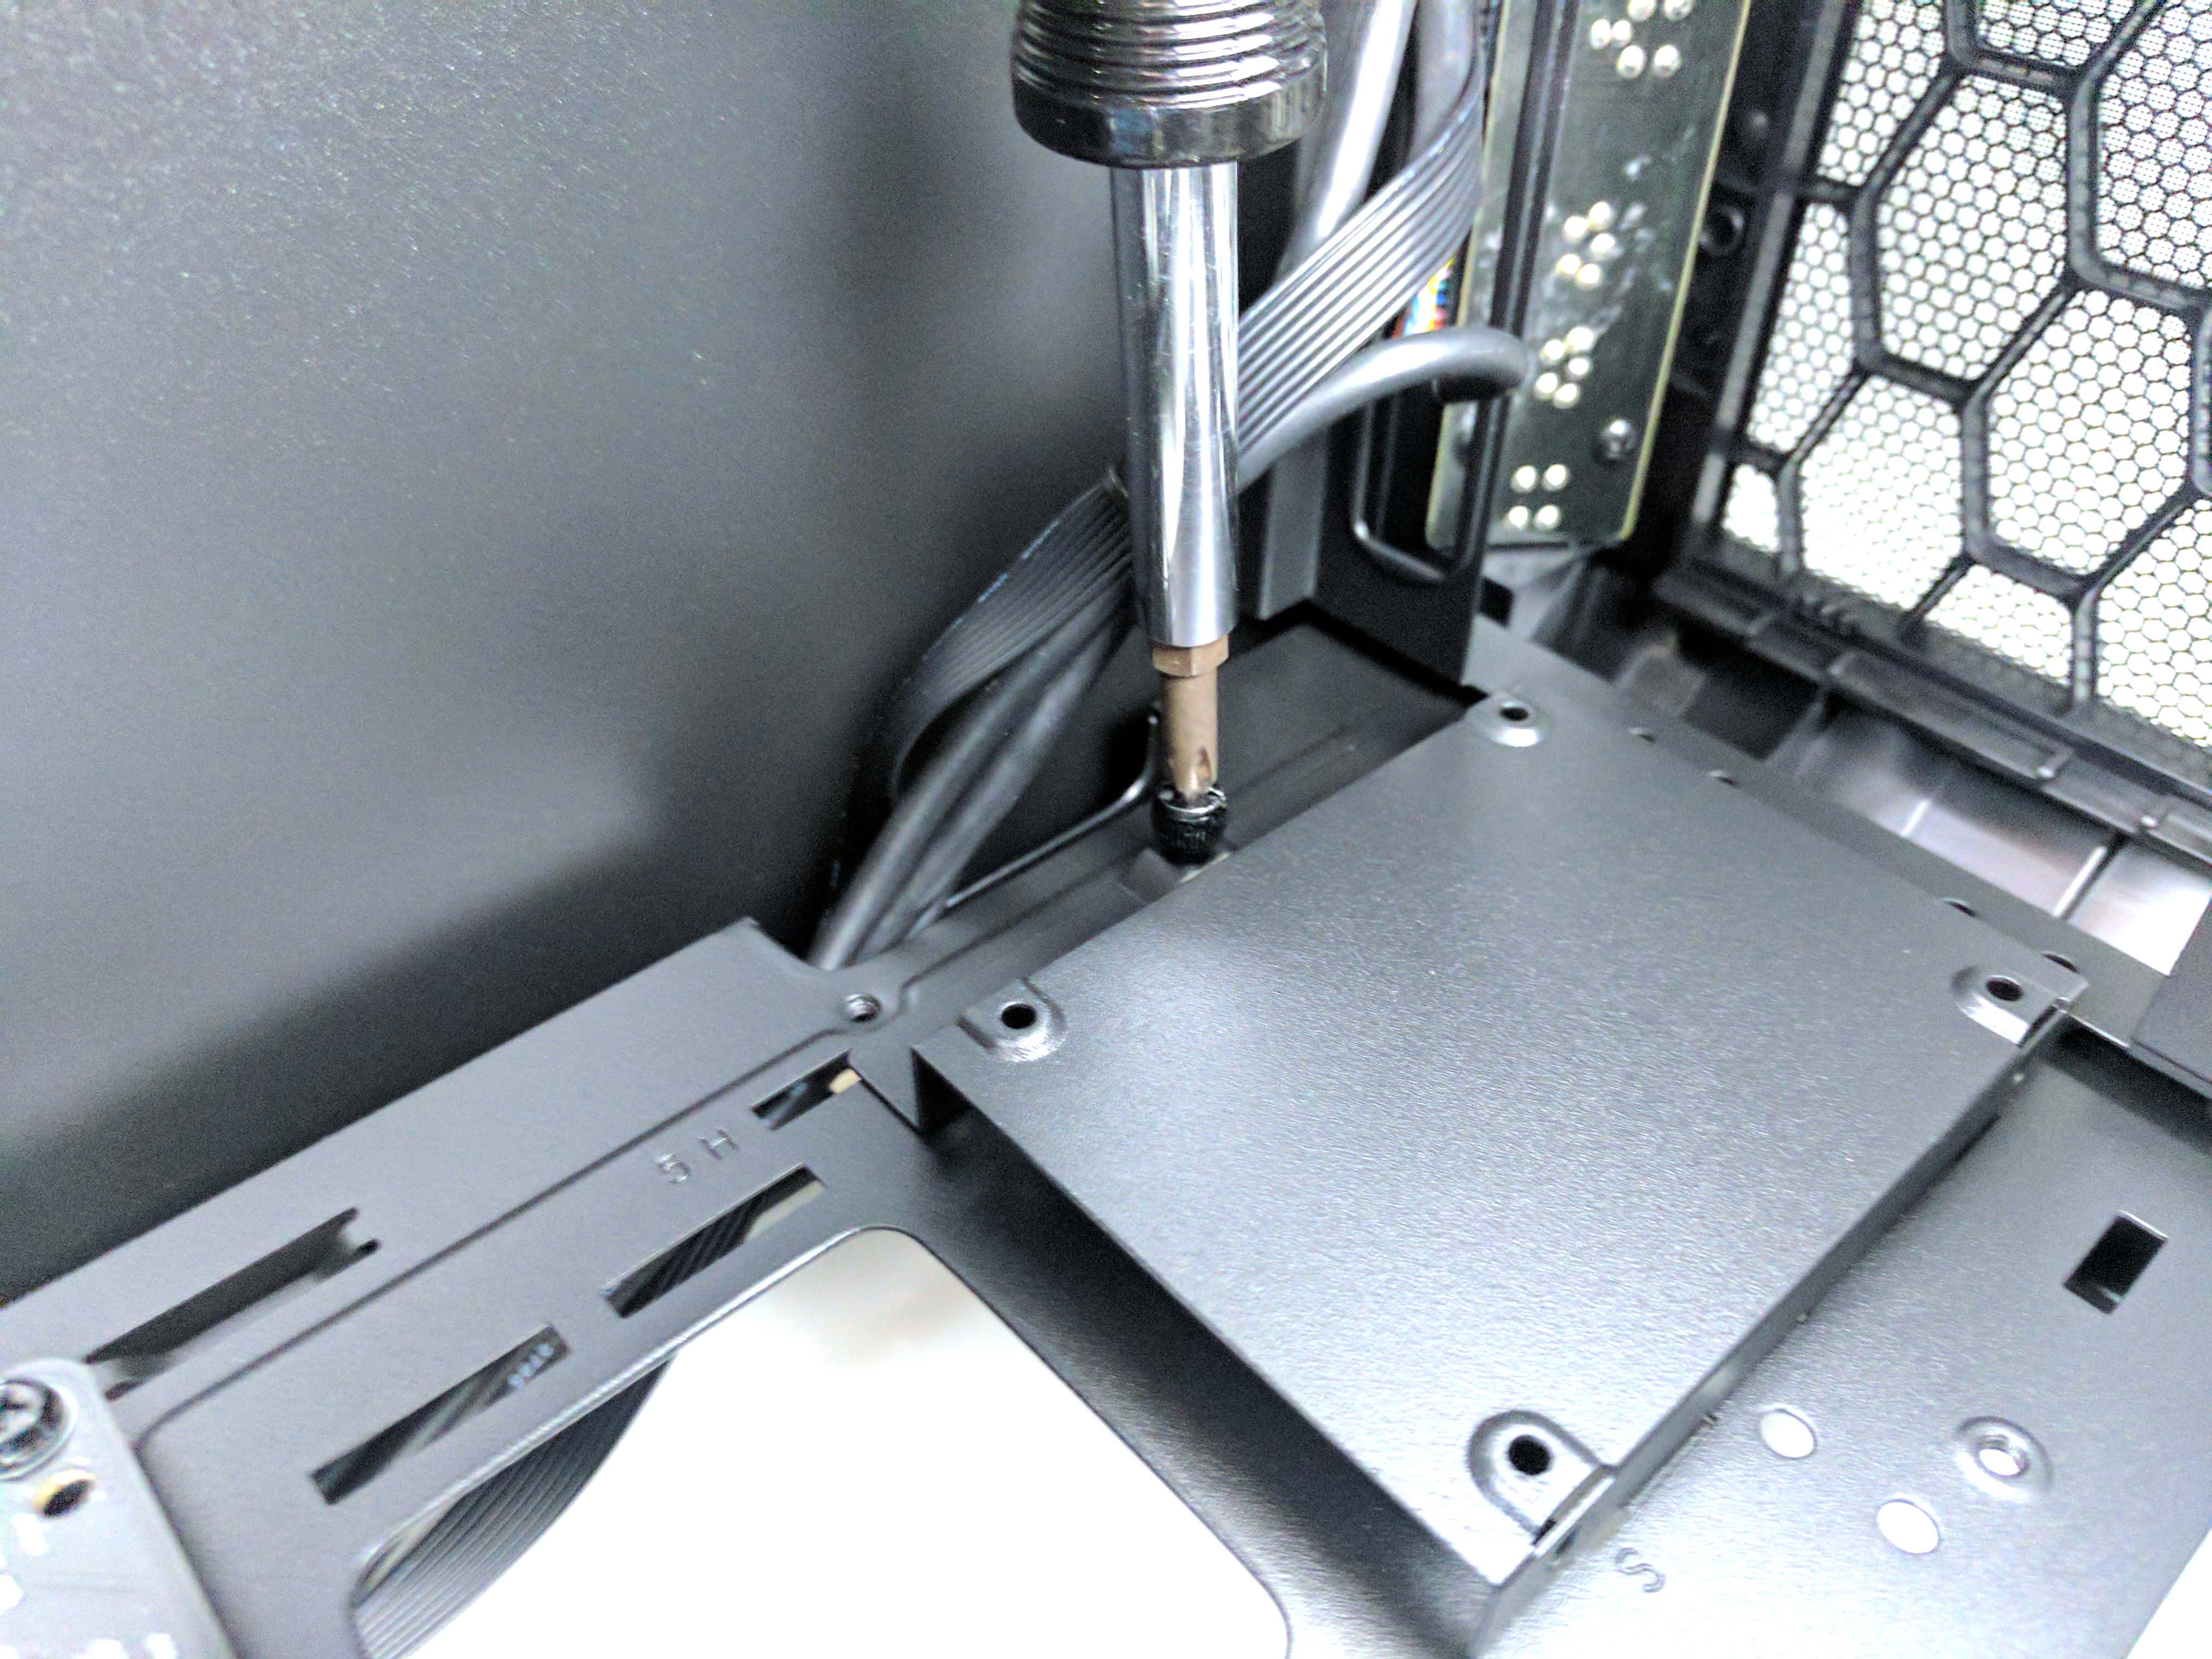
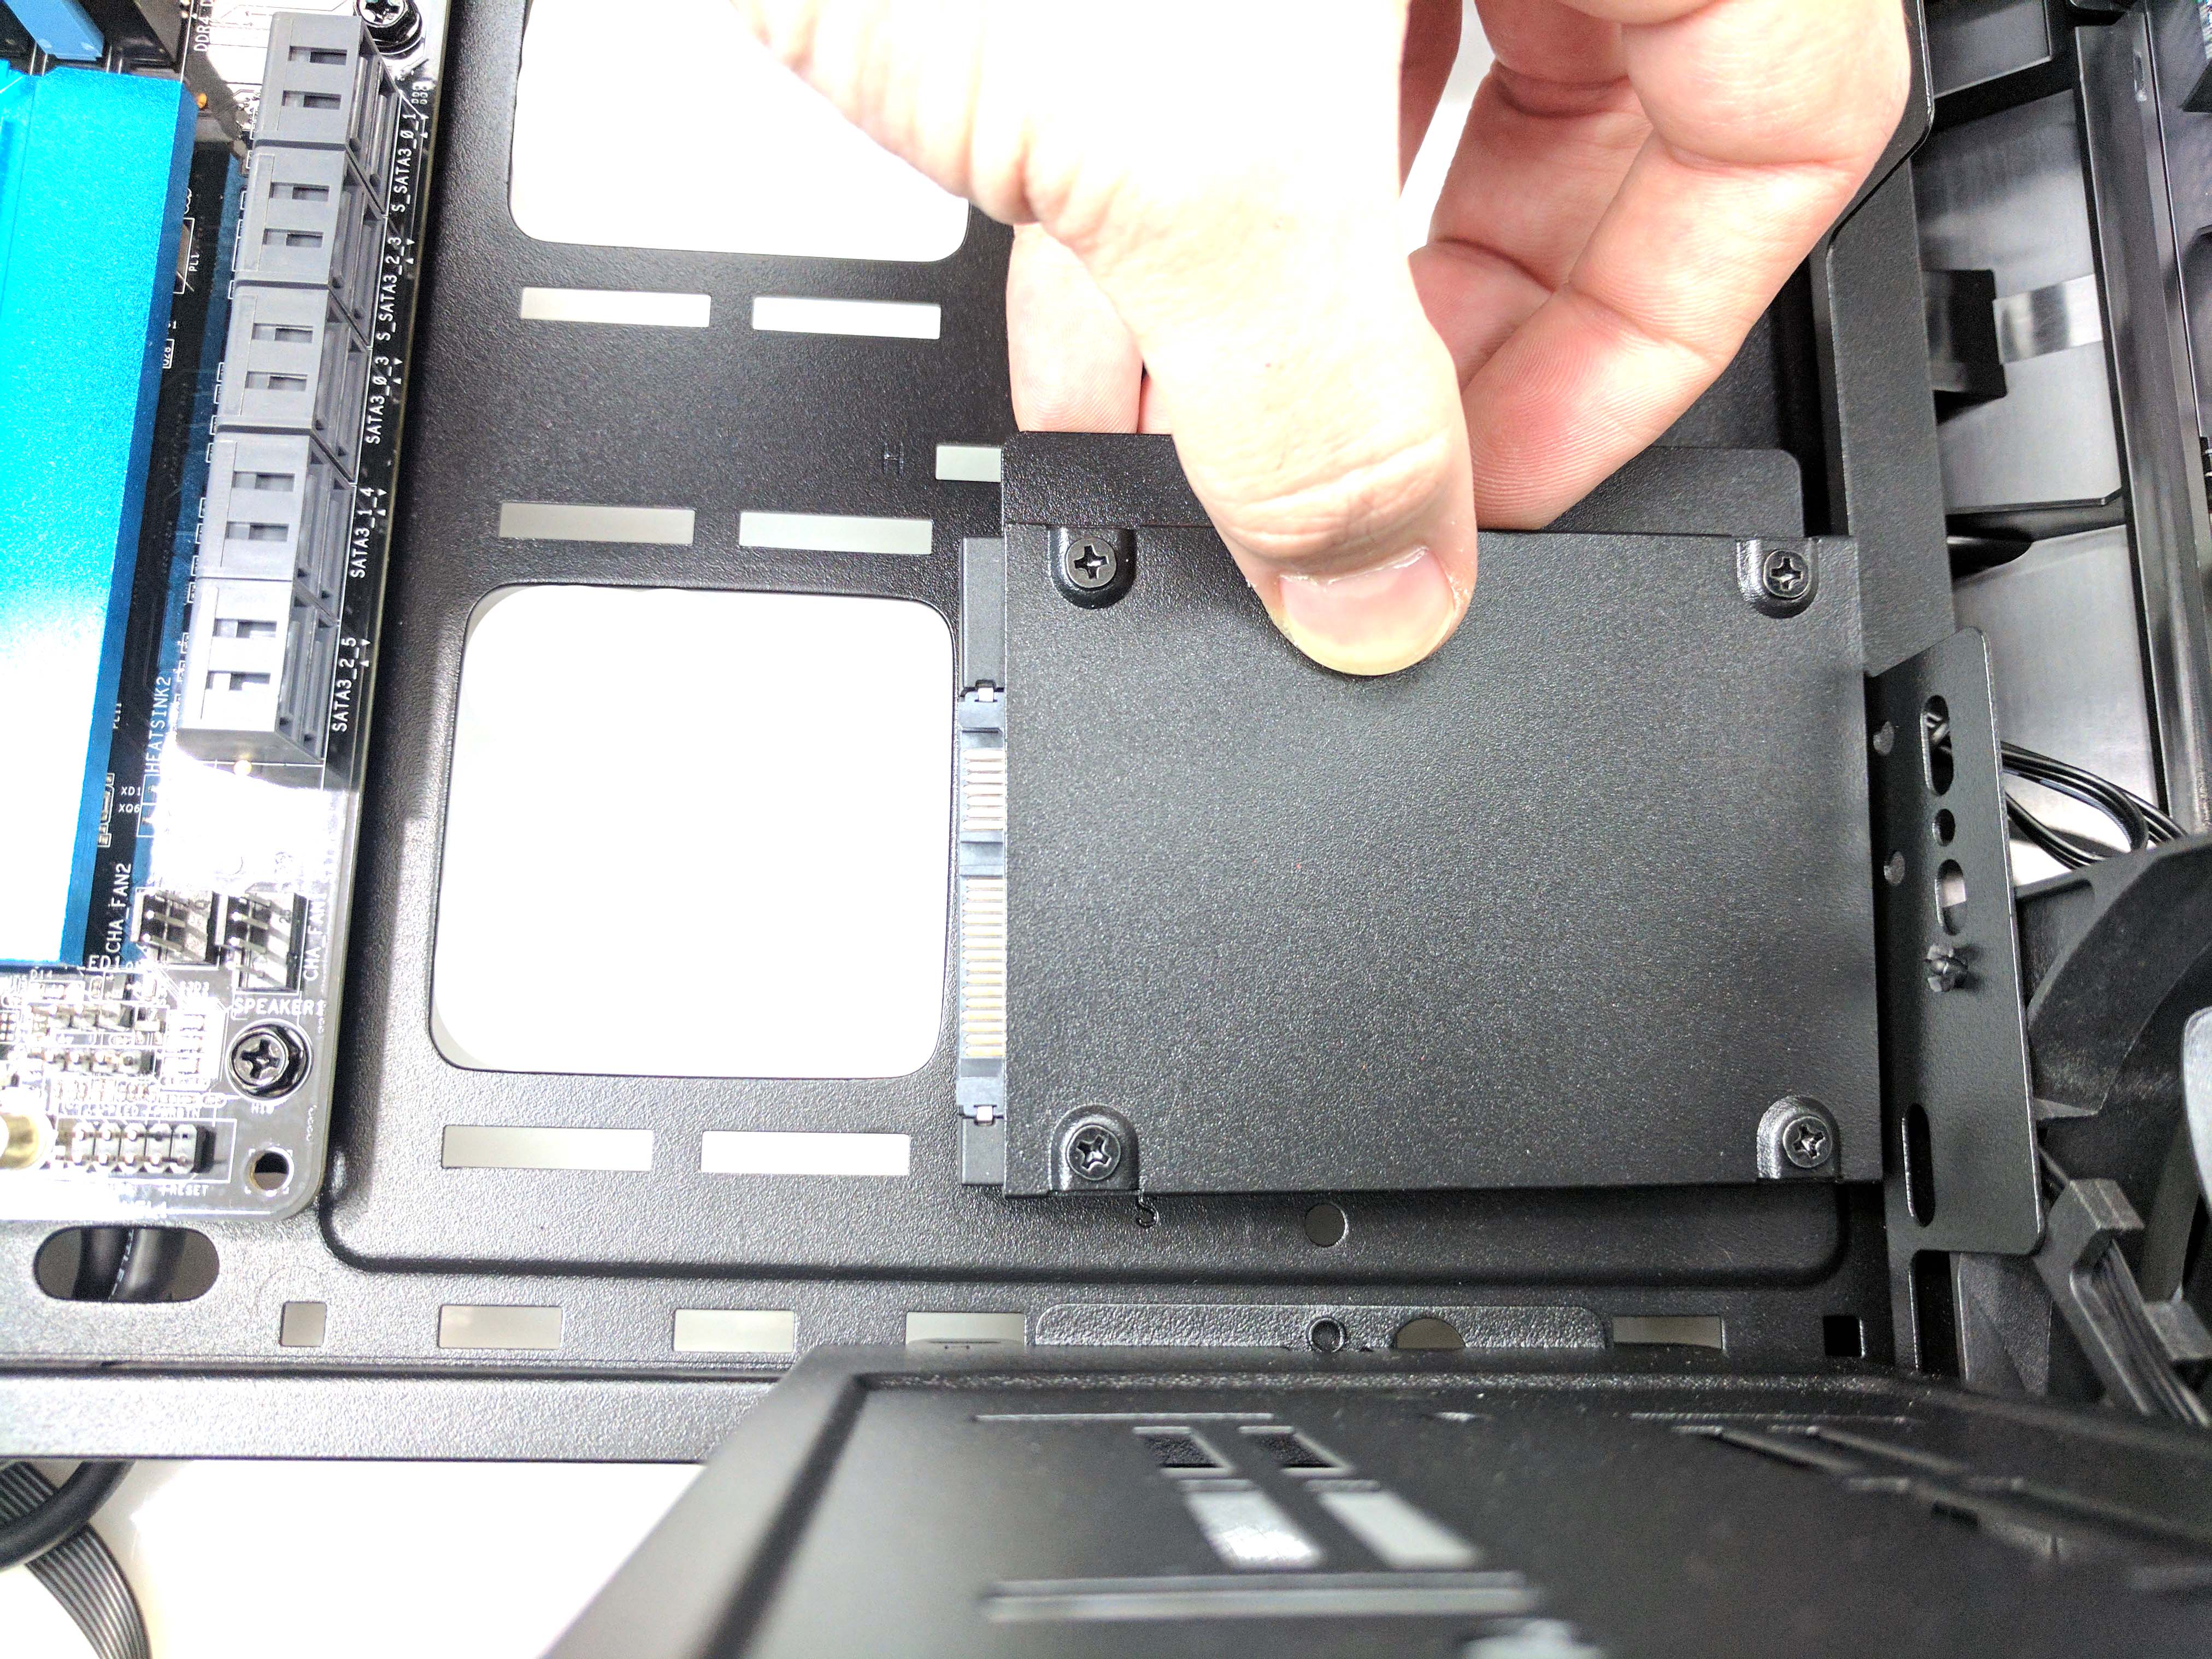
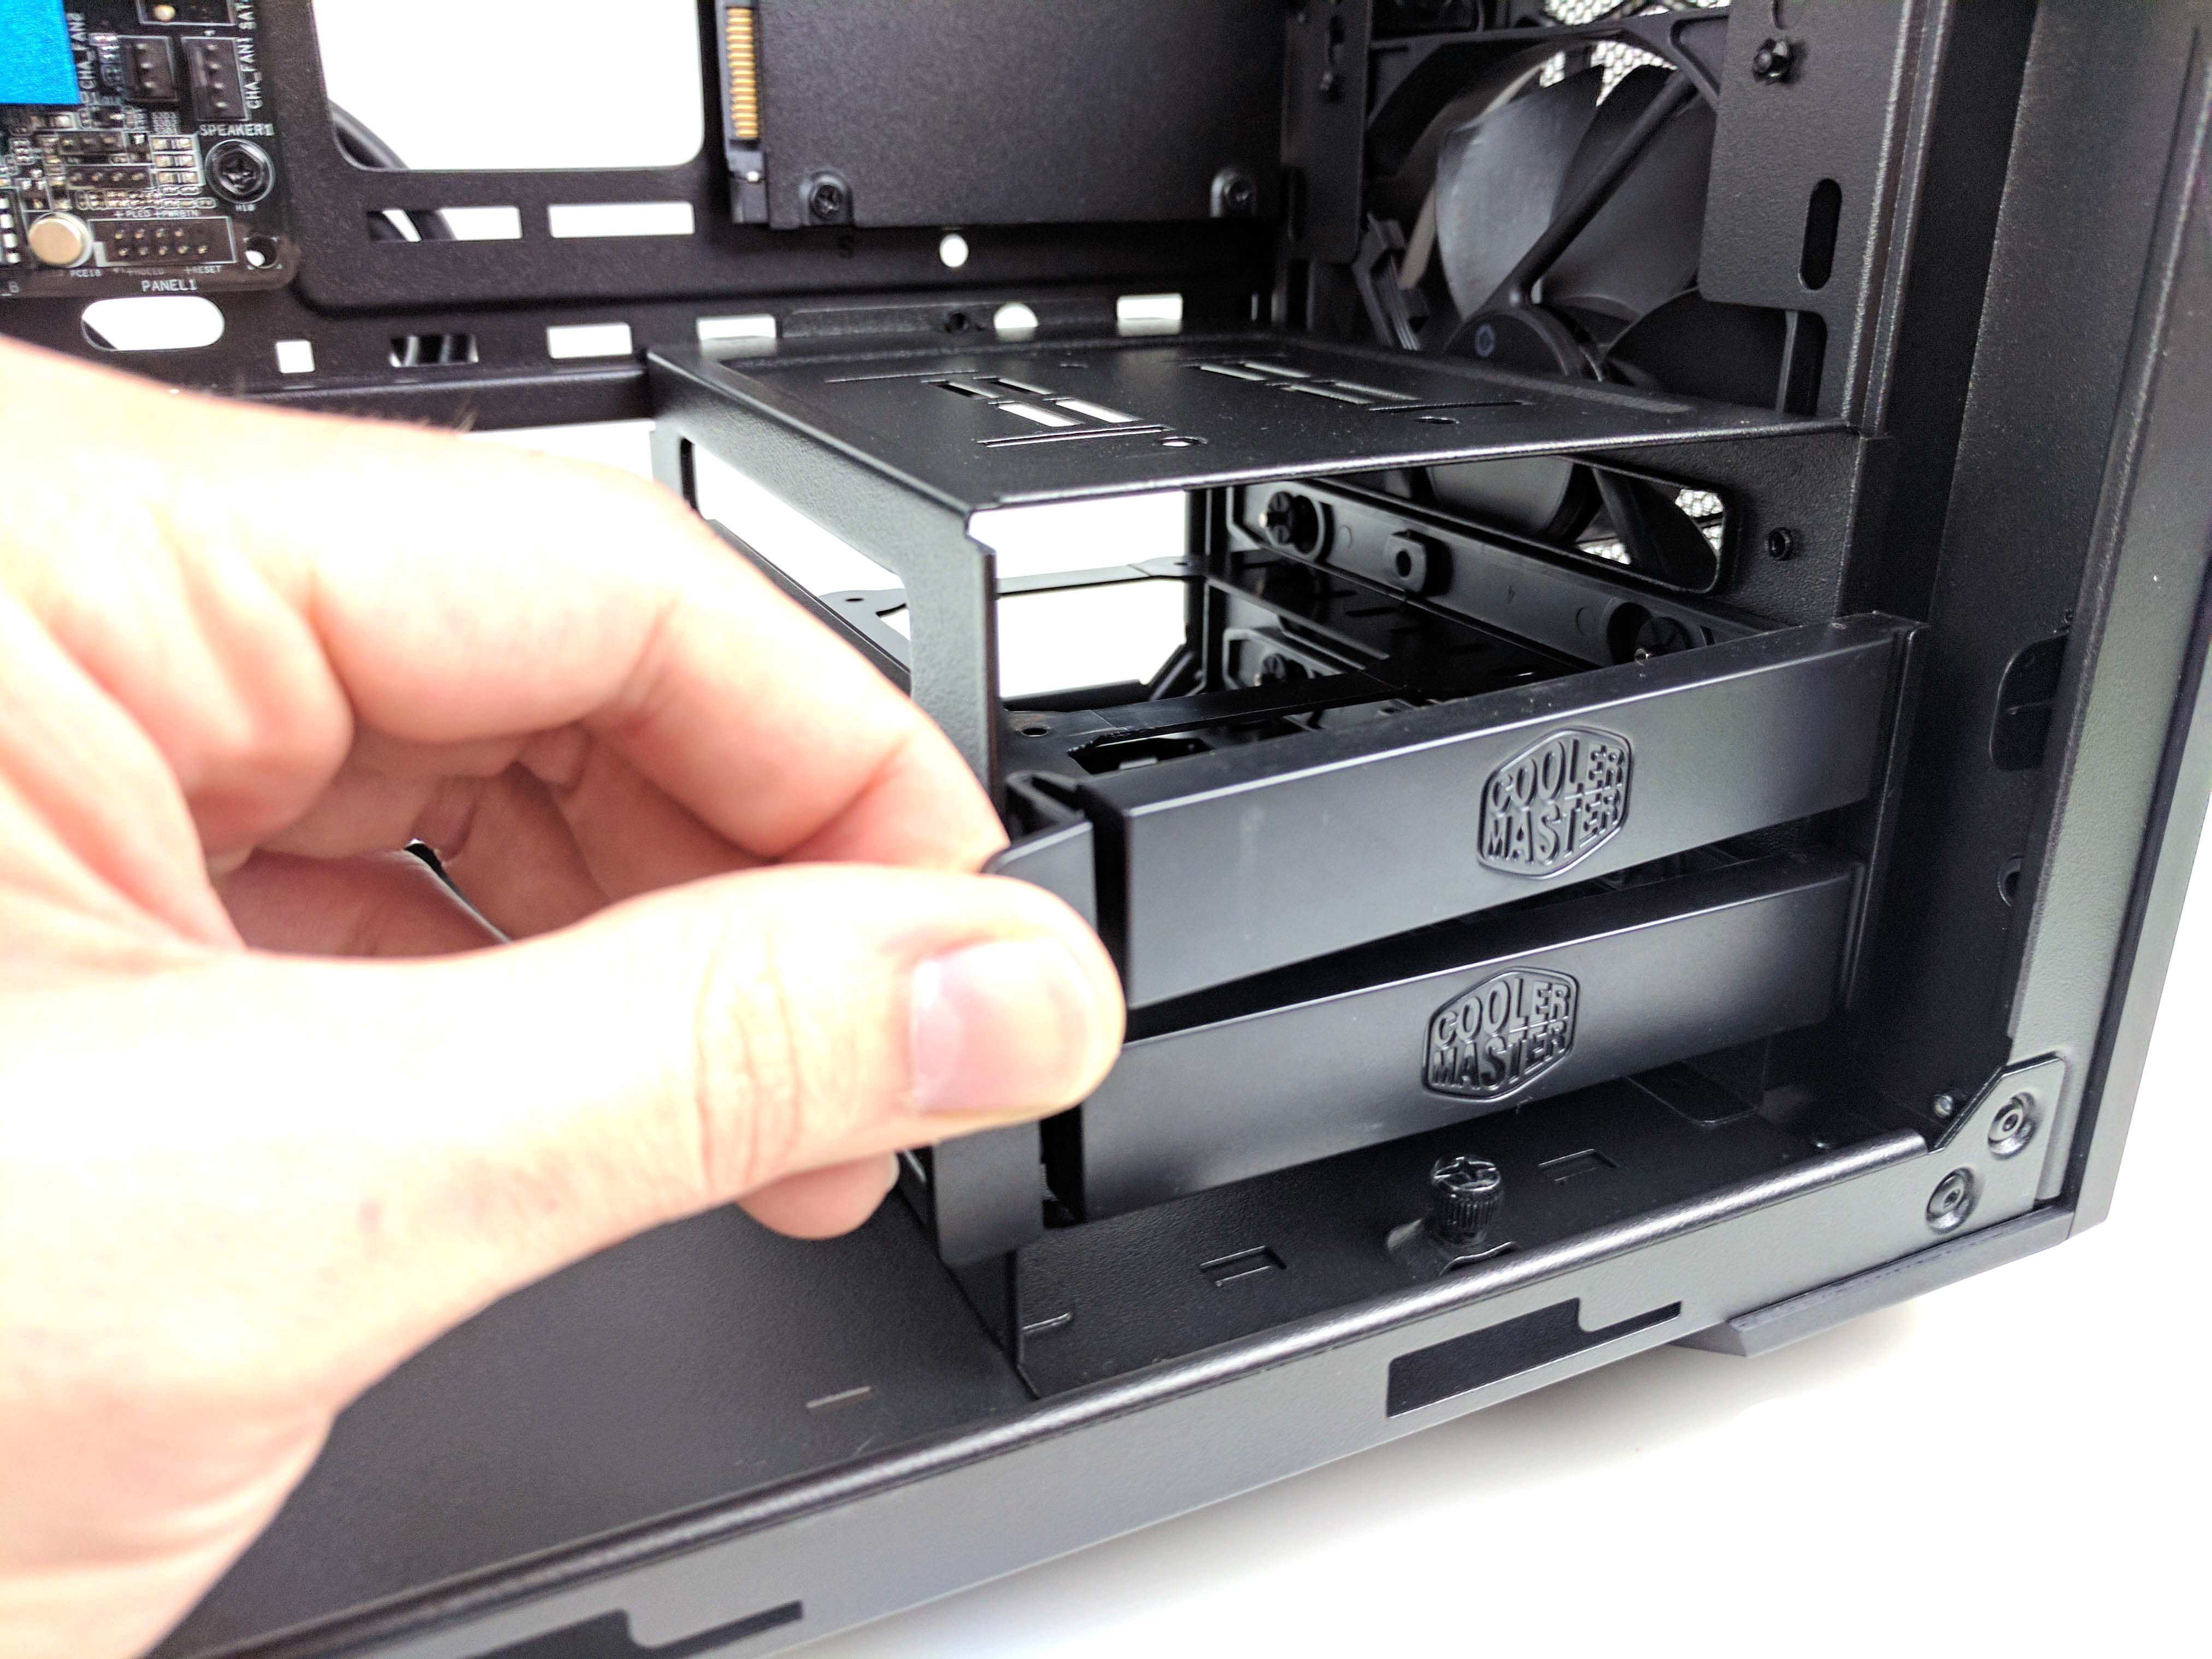
Replace the 2.5" SSD cage to the case. However, instead of mounting it to the top of the case (where it was originally), we chose to mount it as low as possible (on the bottom slot, closest to the 3.5" drive bay) so that we could use a single SATA power cable (which we'll get to shortly) to handle both drives.
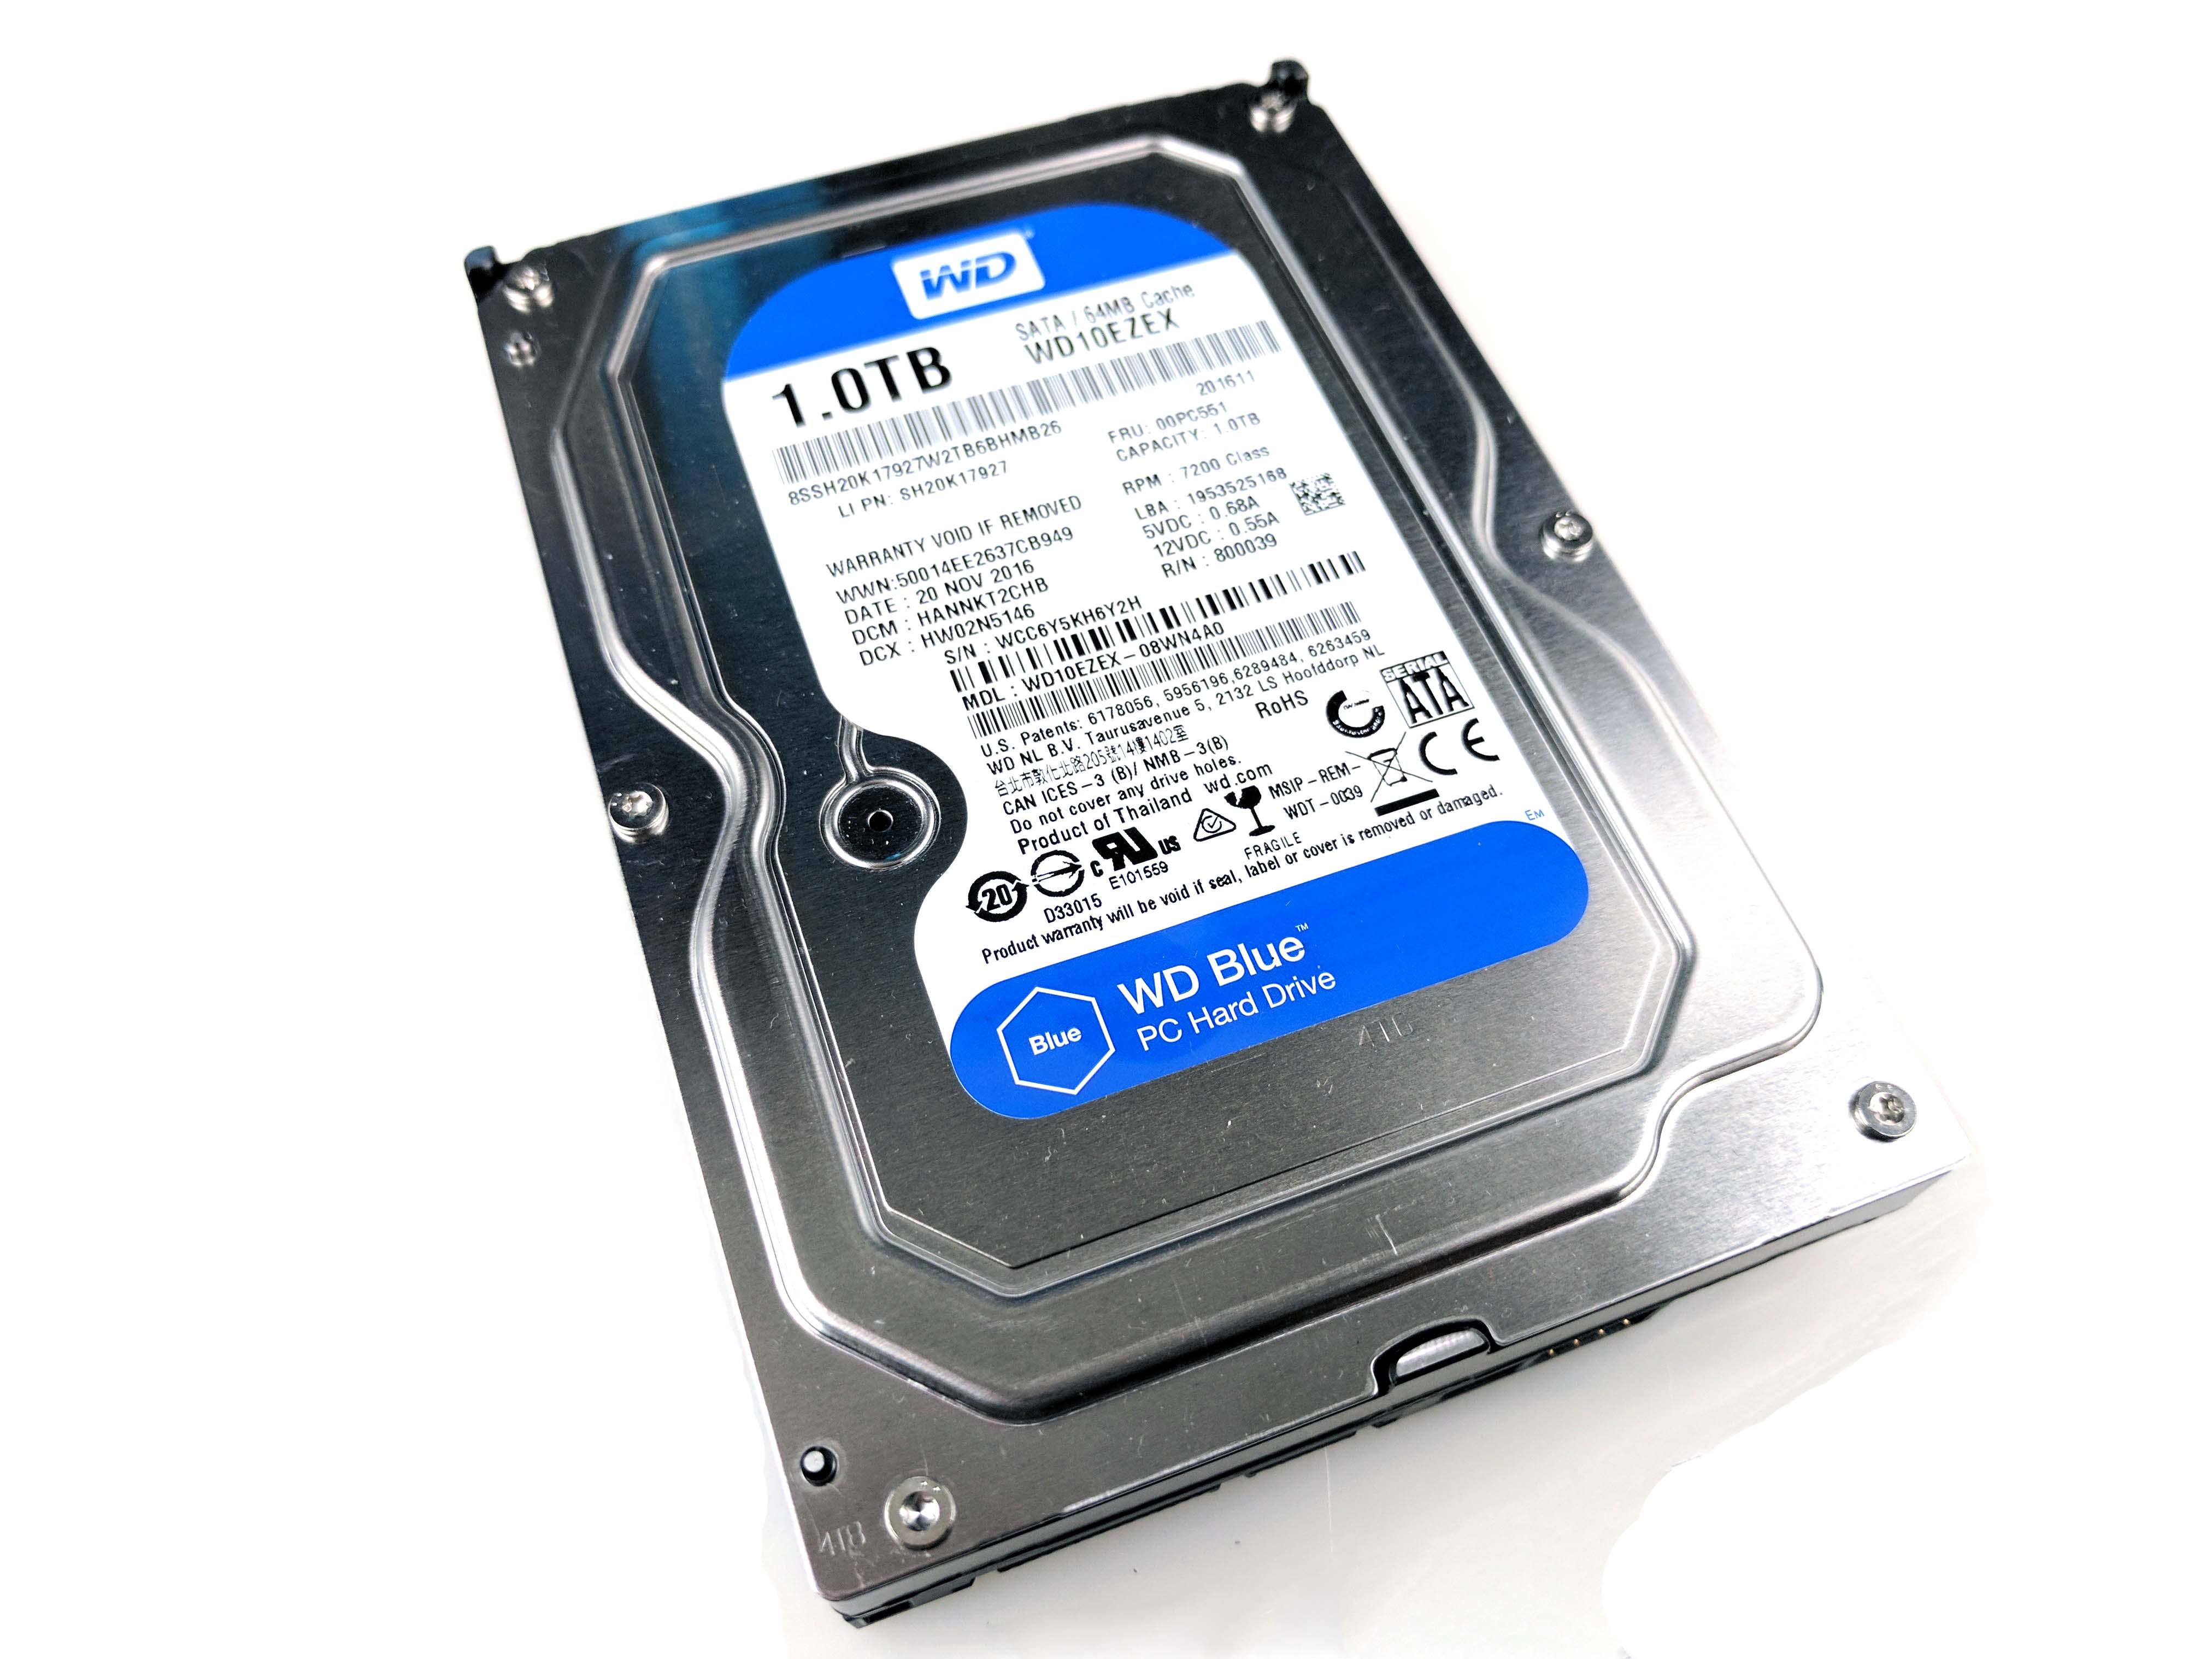
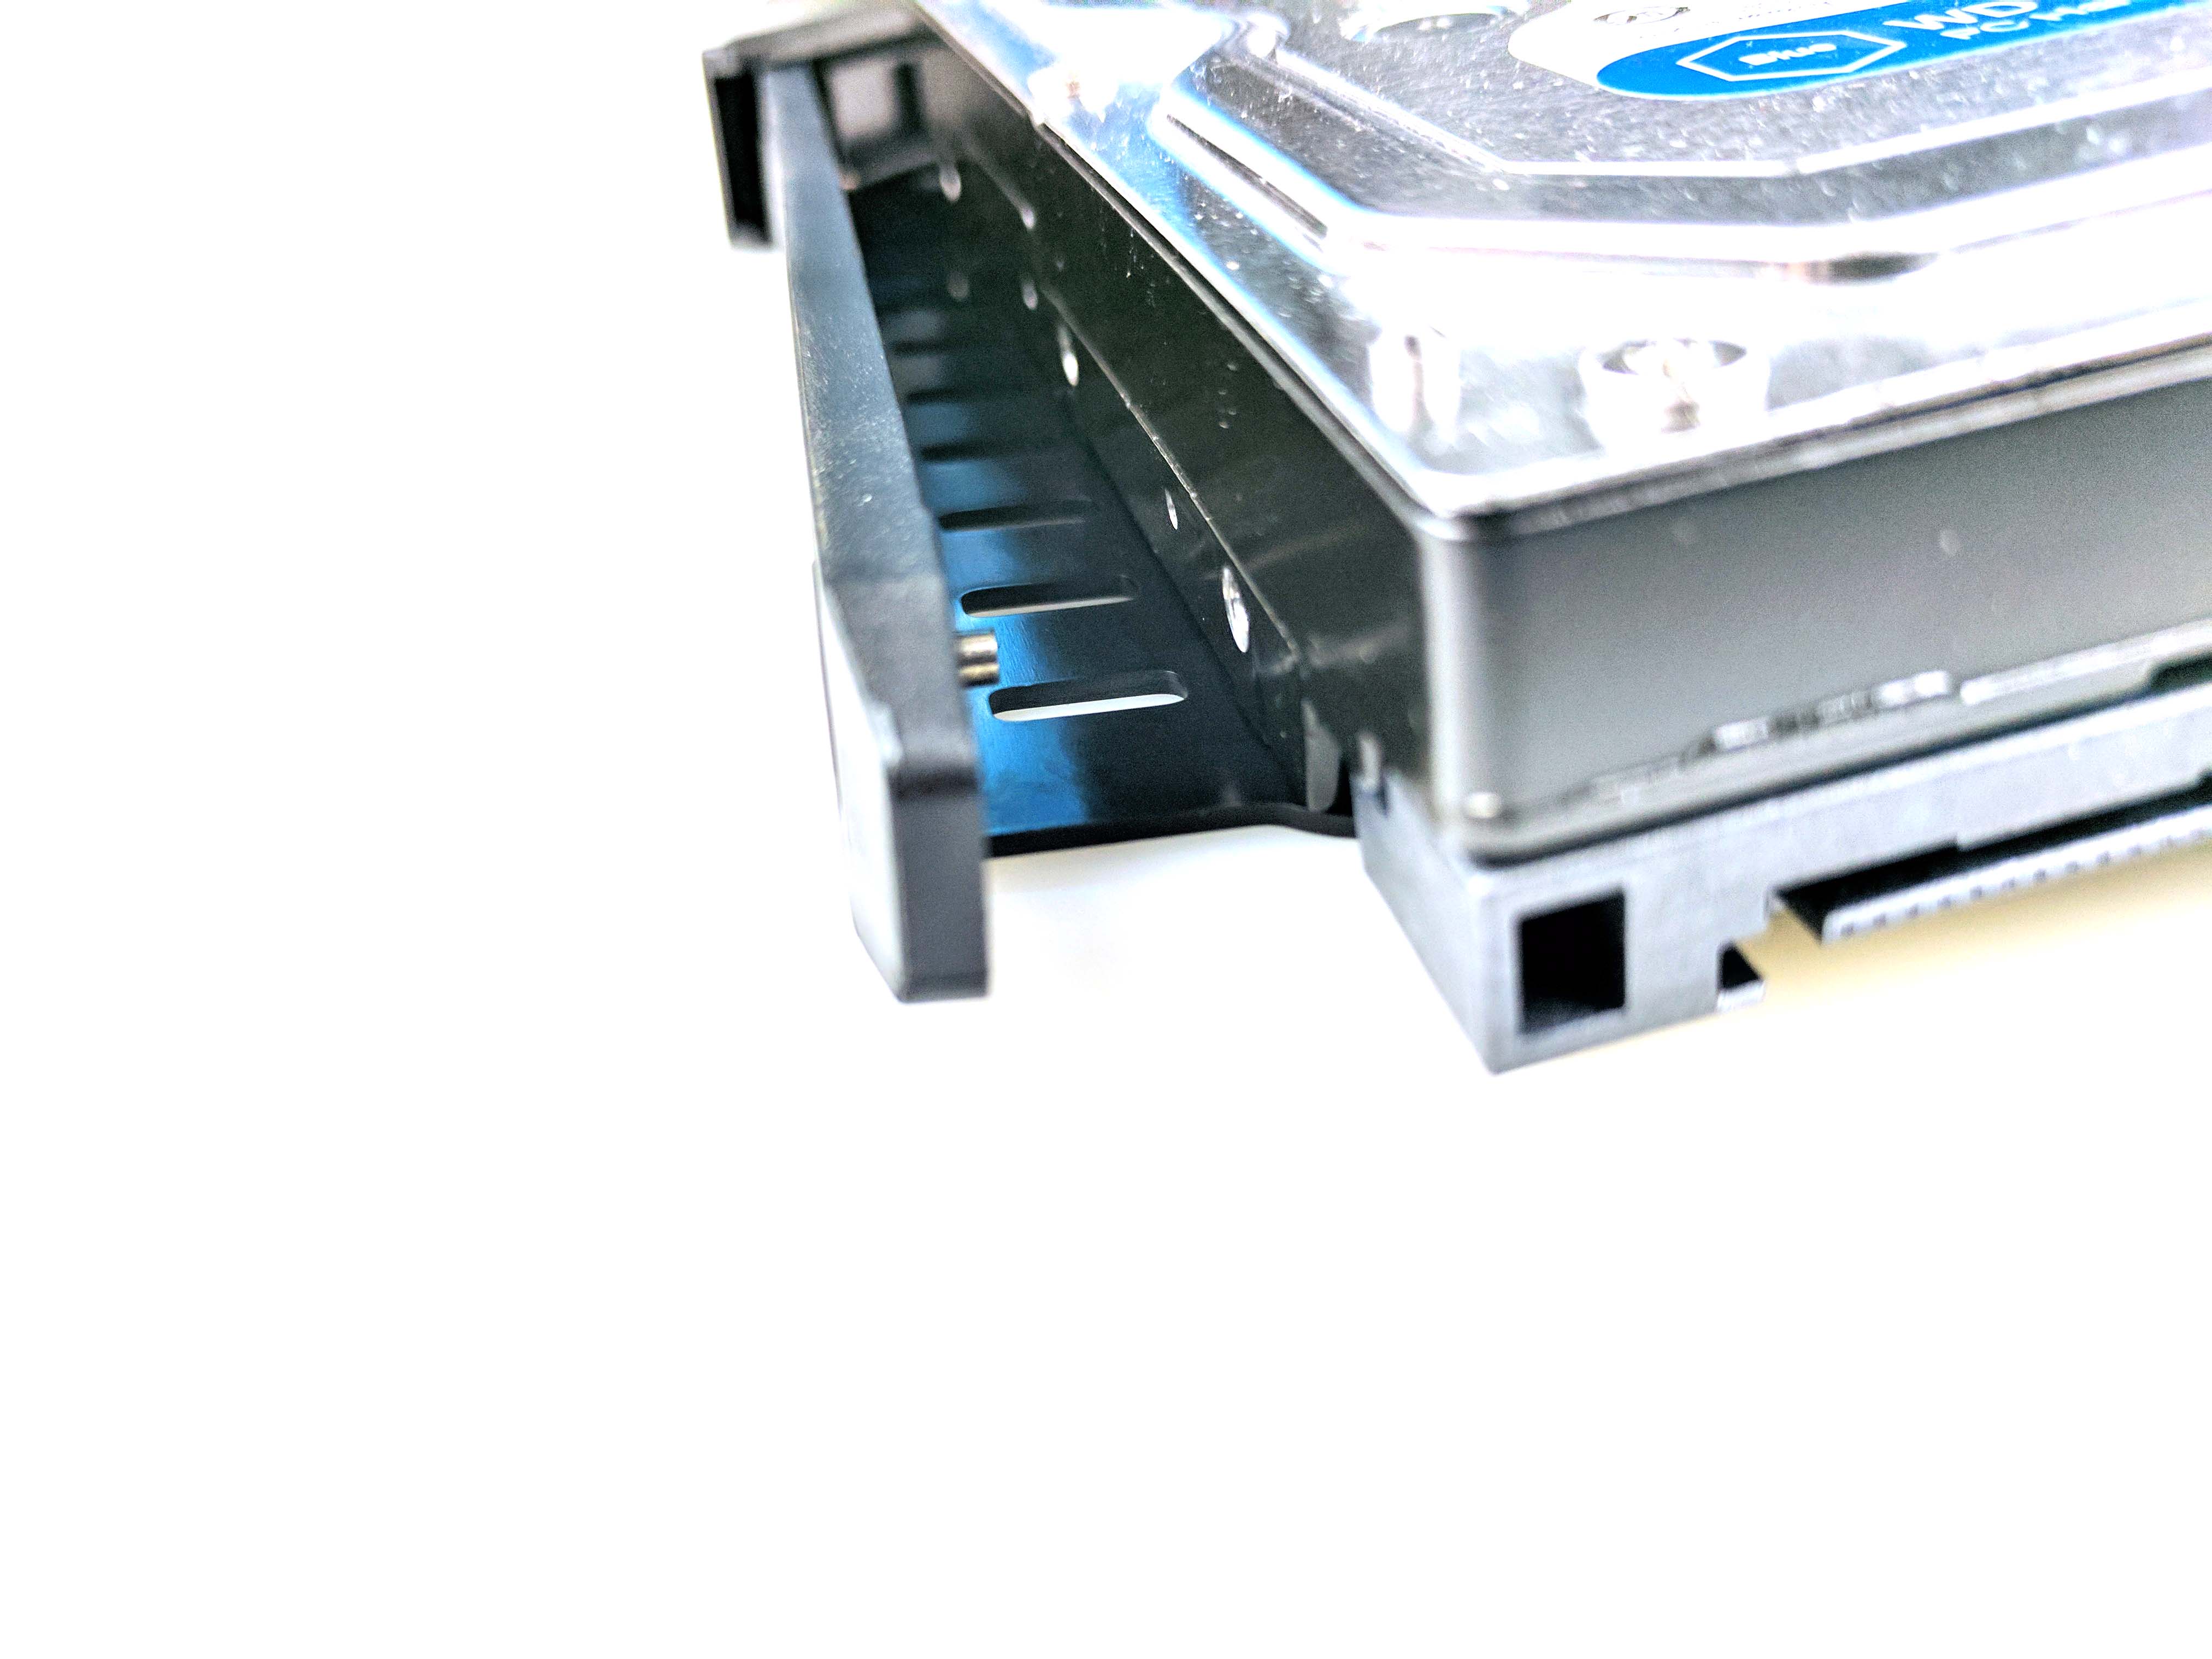
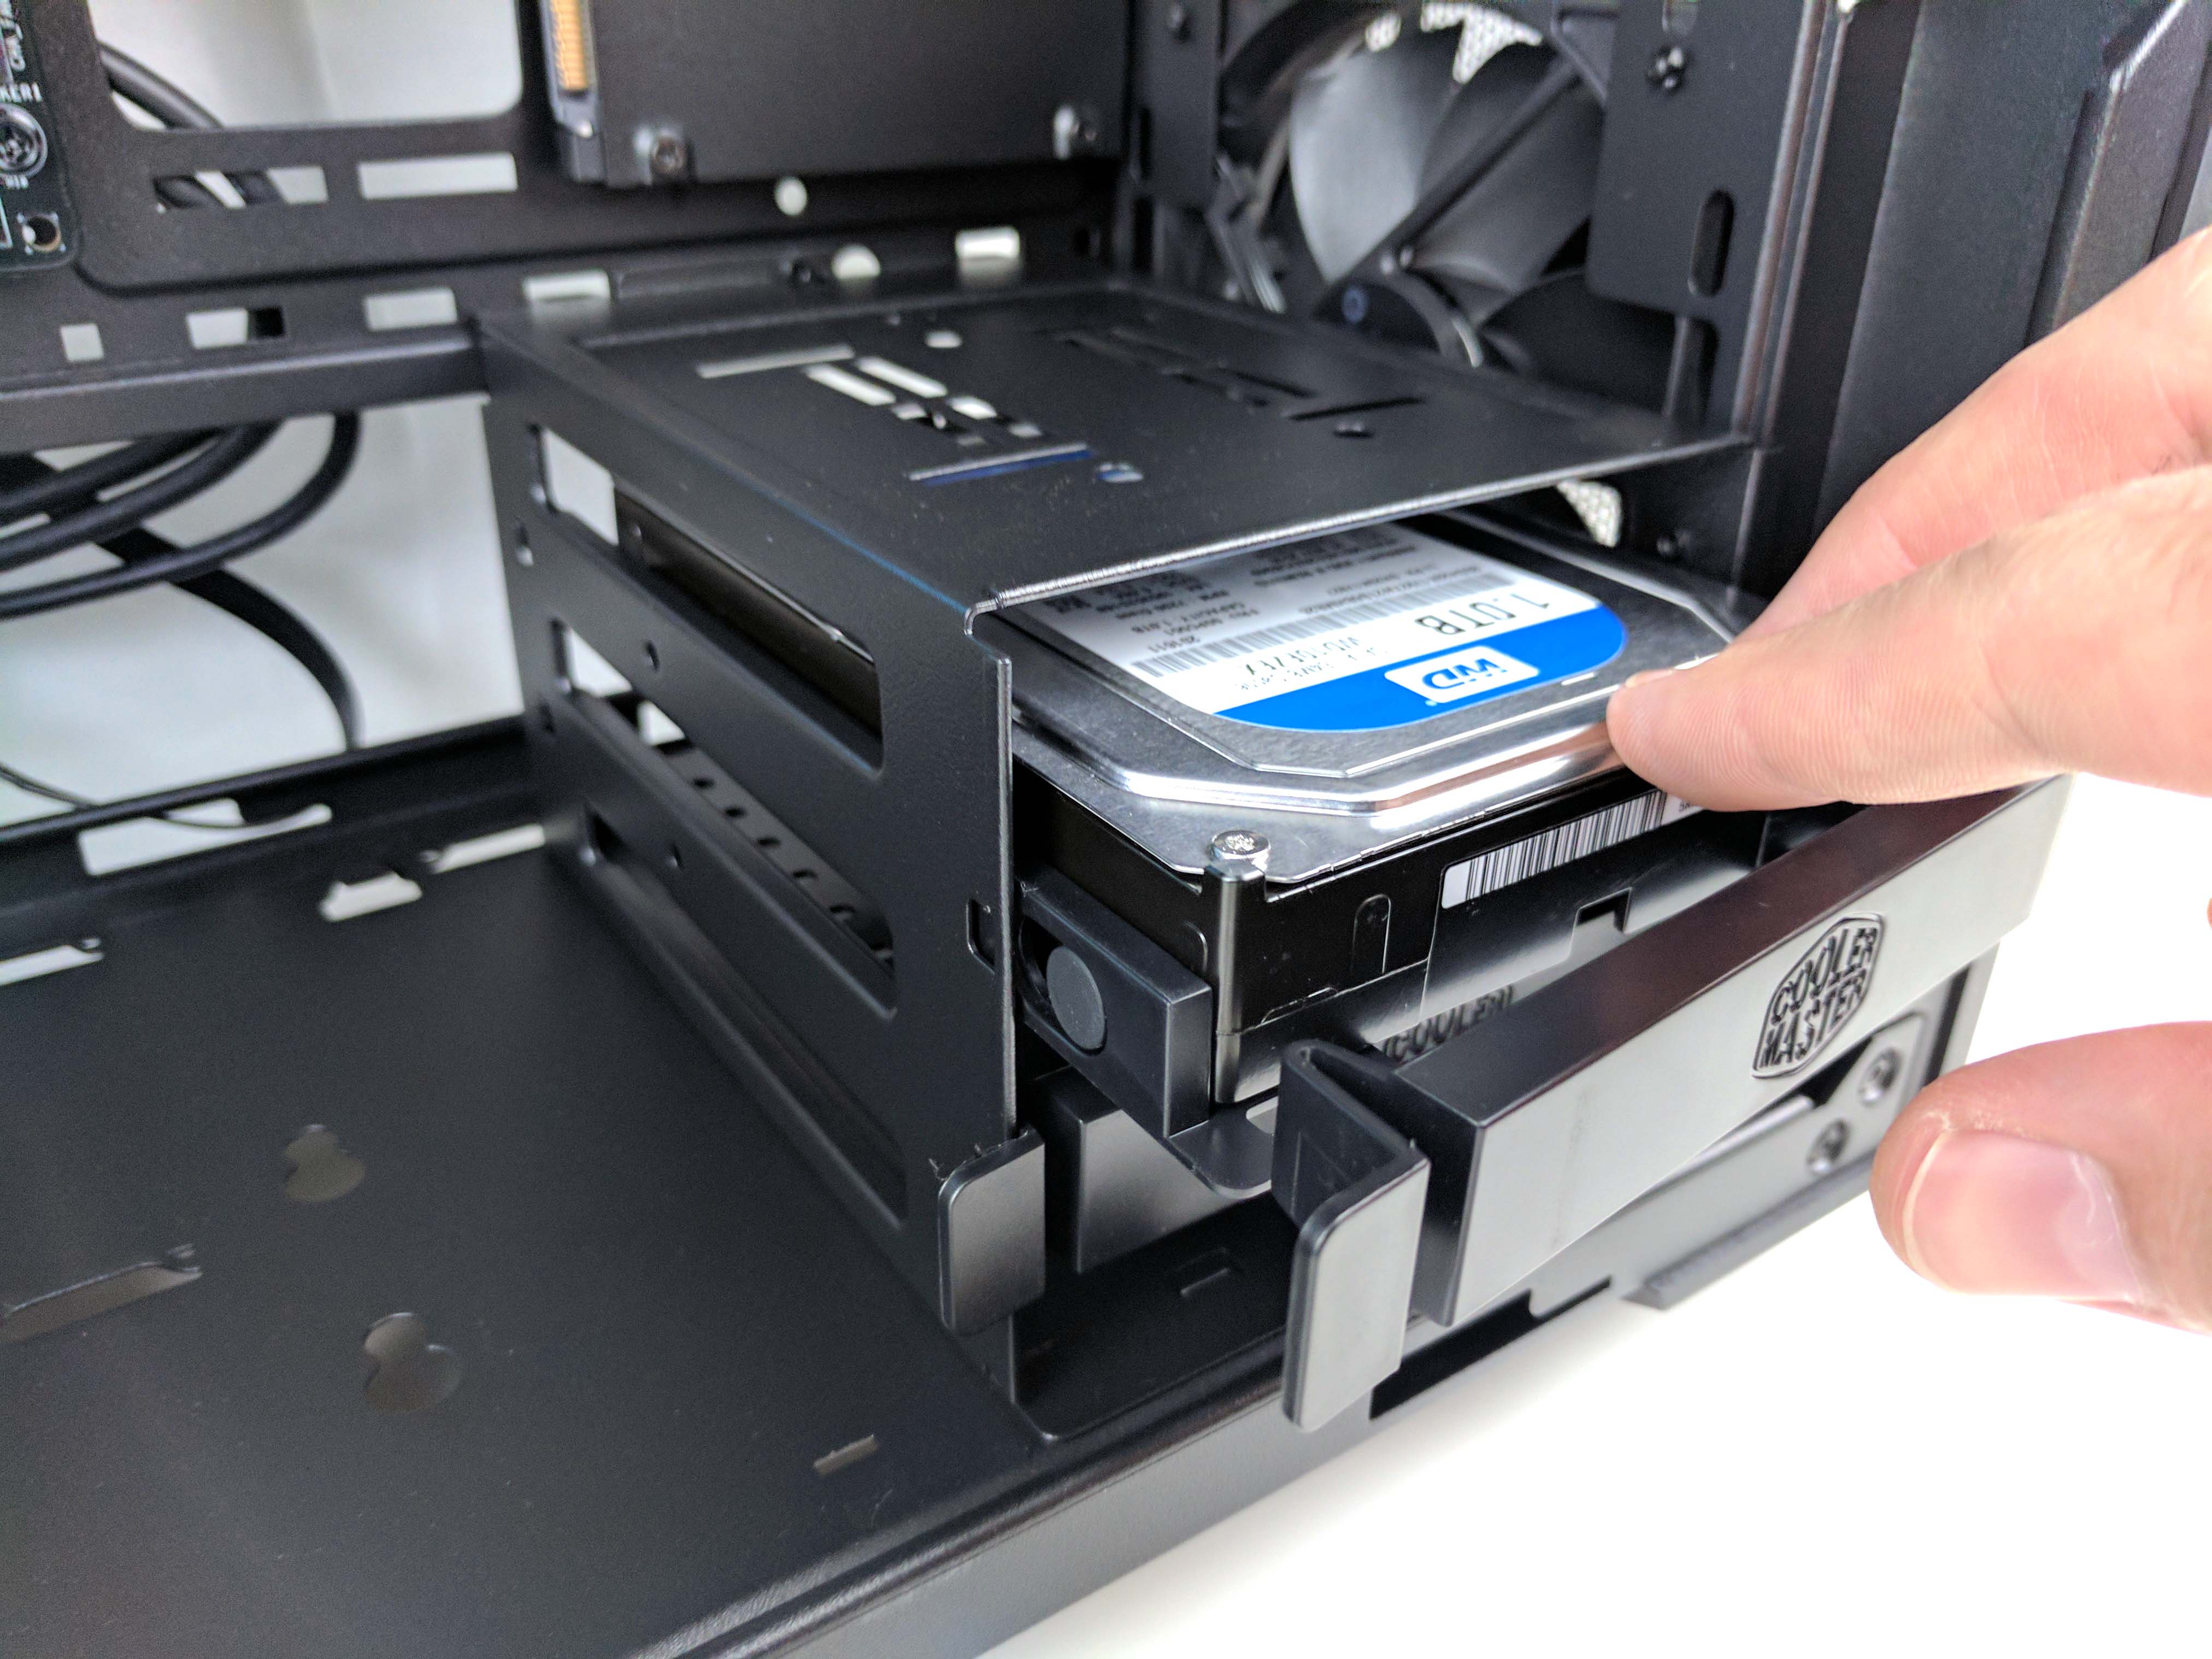
Speaking of which, remove the 1TB WD Blue HDD from its packaging and pull out the top plastic HDD tray in the 3.5" bay by pulling the clip to the left of the tray towards you and sliding it free of the chassis. Line up the posts of one side of the tray to the HDD's holes, with the data and power ports facing into the case. You may need to work the tray a bit to get the other side's posts to their positions, but once you have the HDD secure to the tray, slide it back into place in the 3.5" bay.
Connecting The Front Panel I/O & Ports
Next, we'll connect the case's internal wiring.
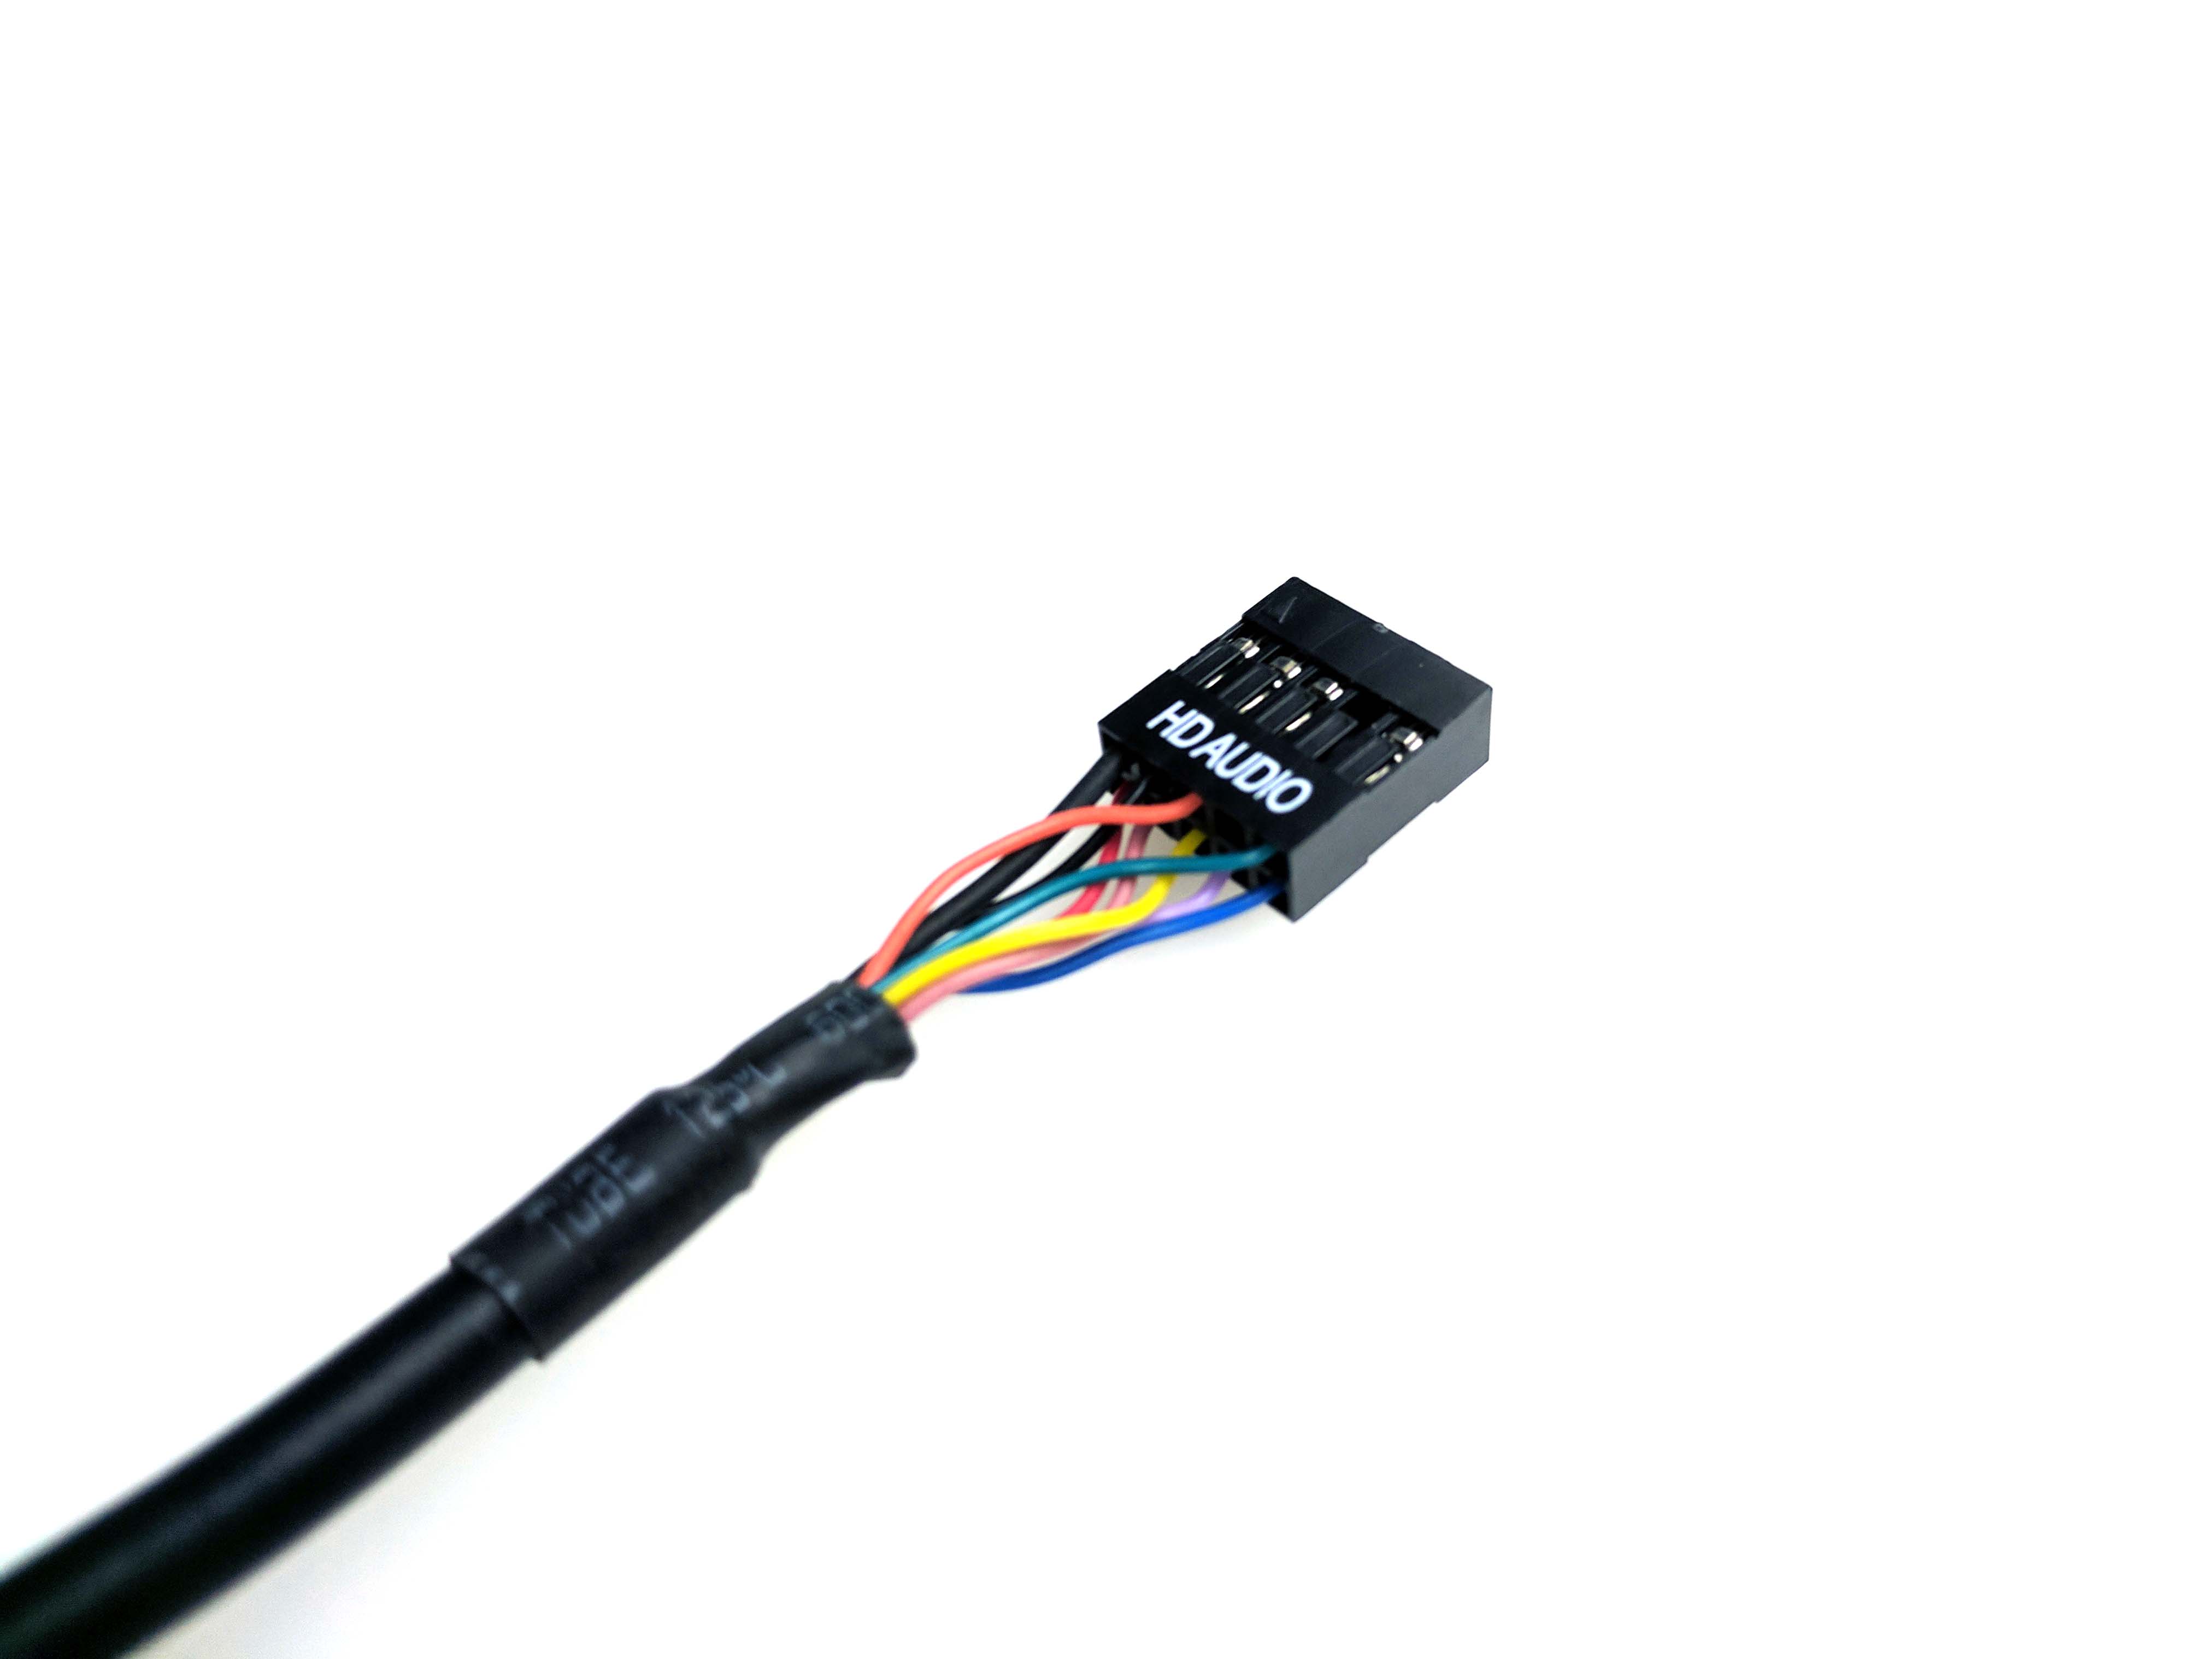
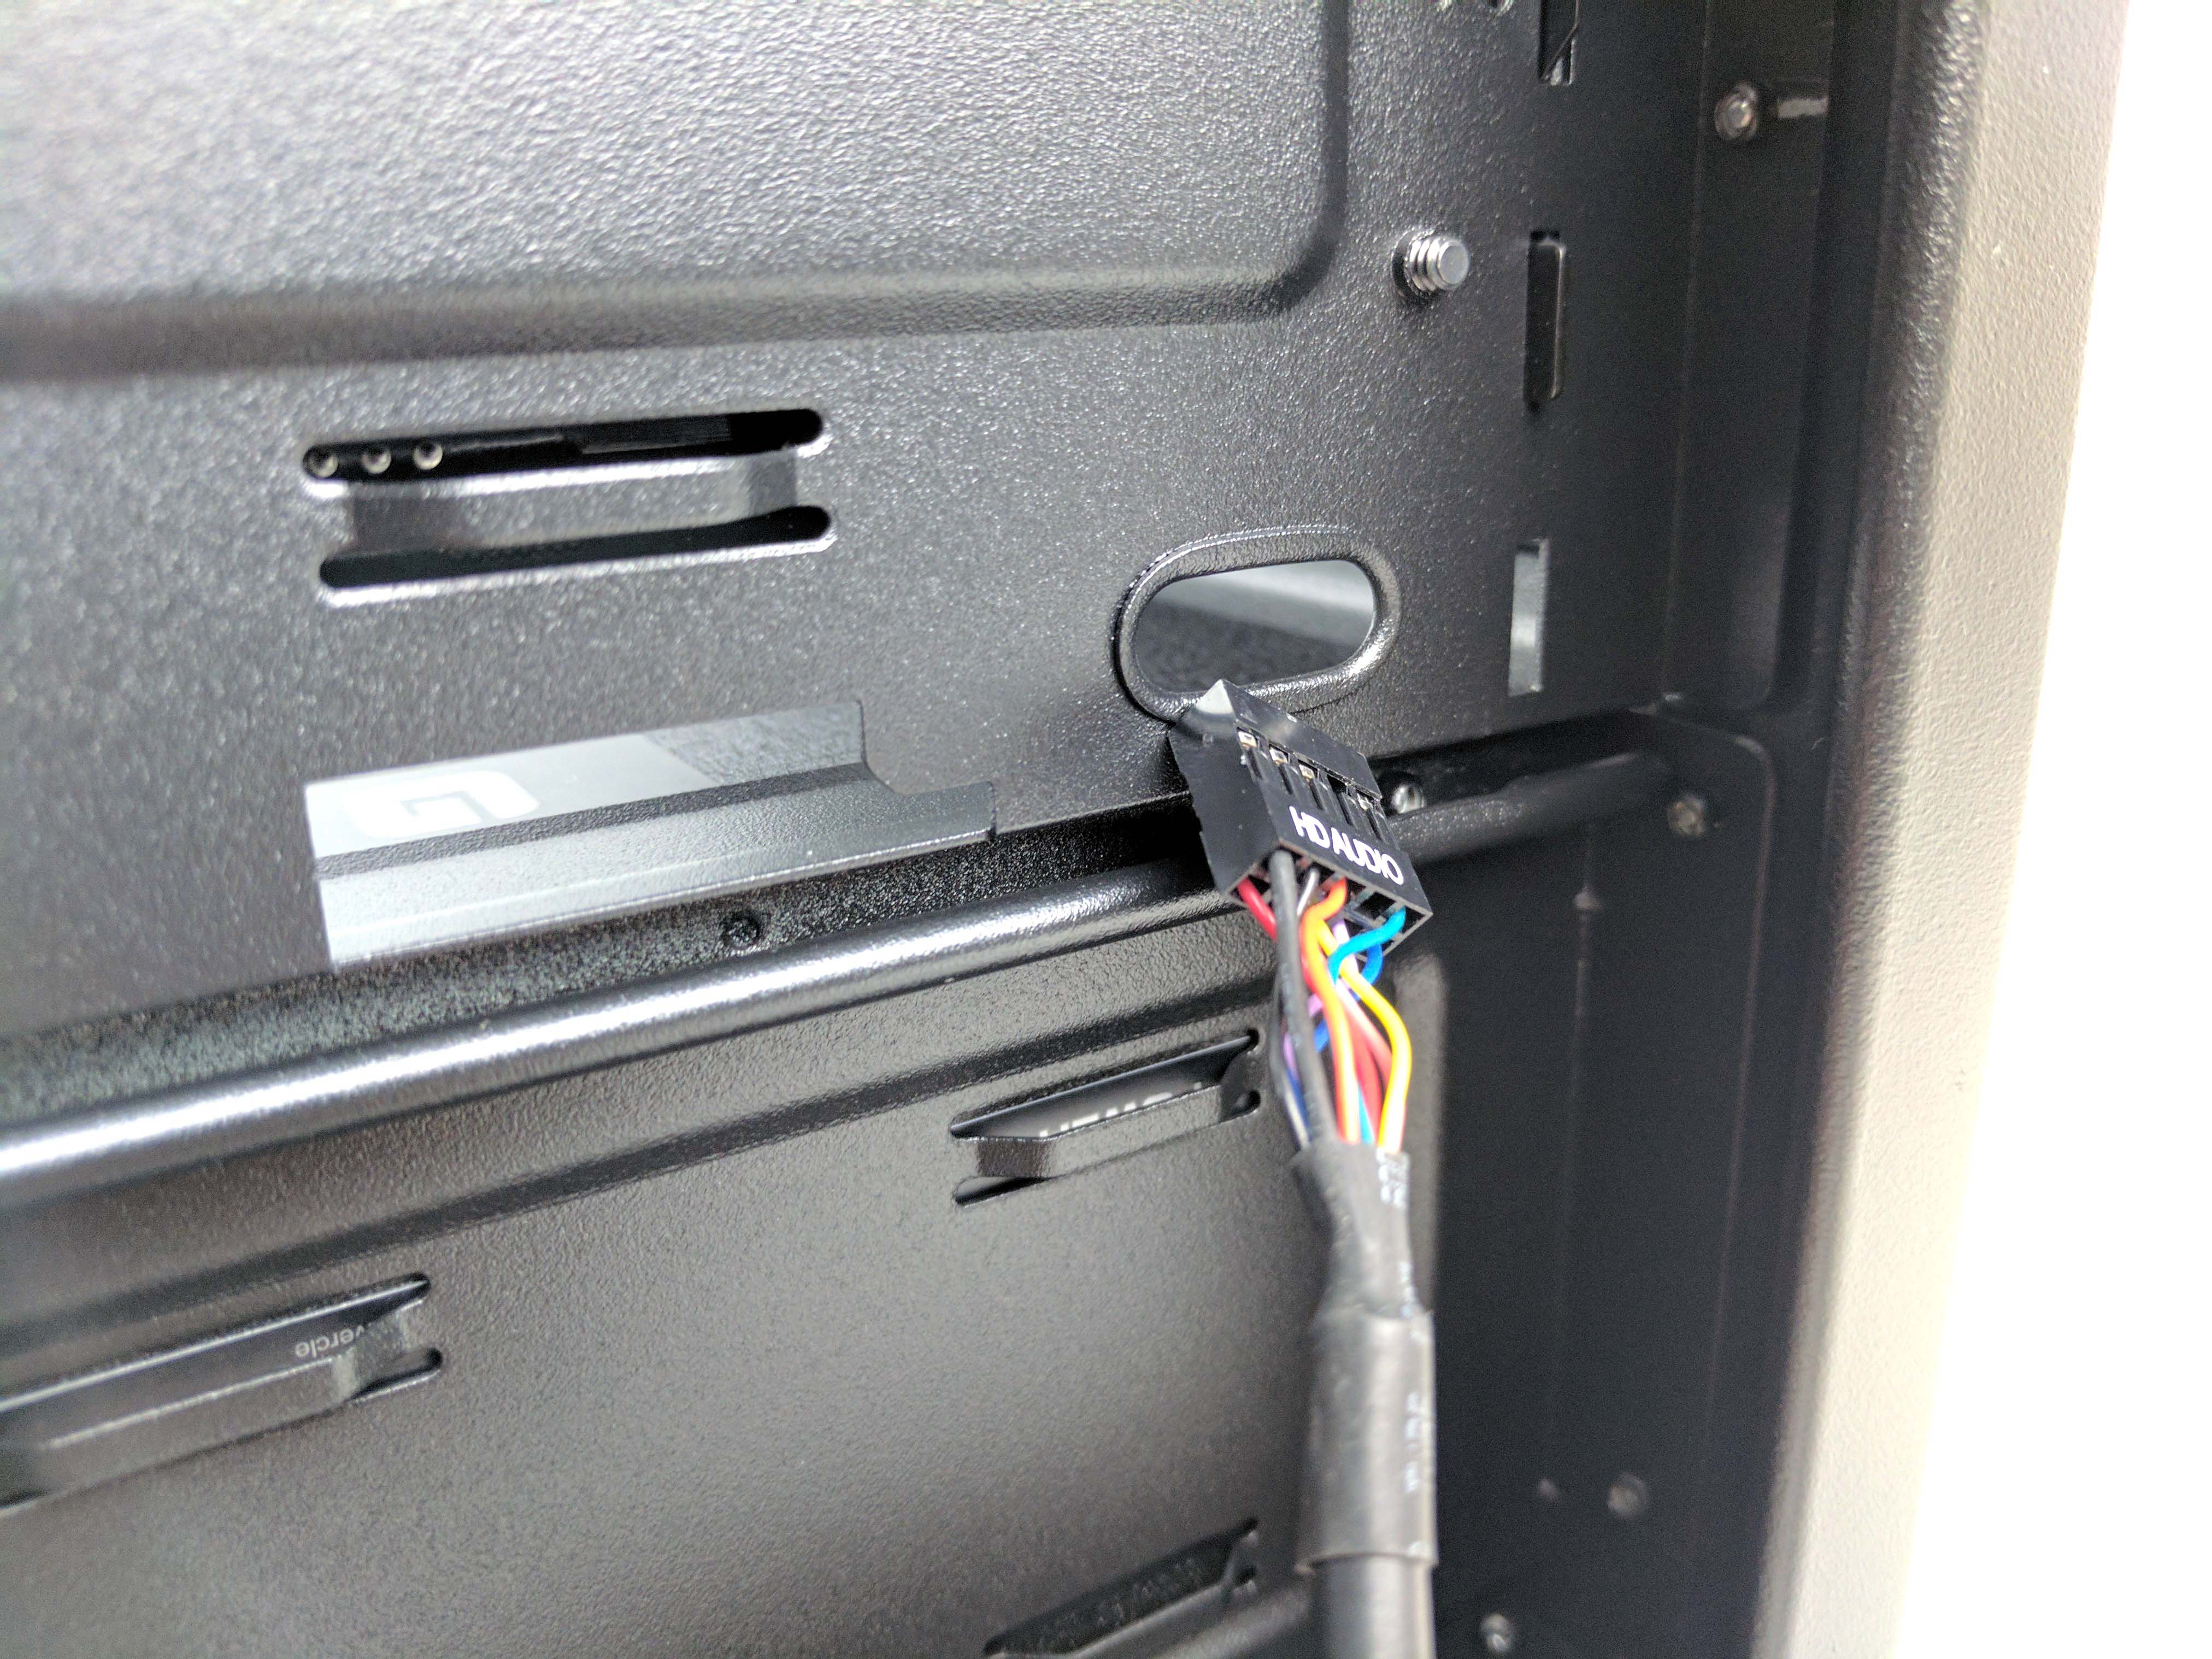
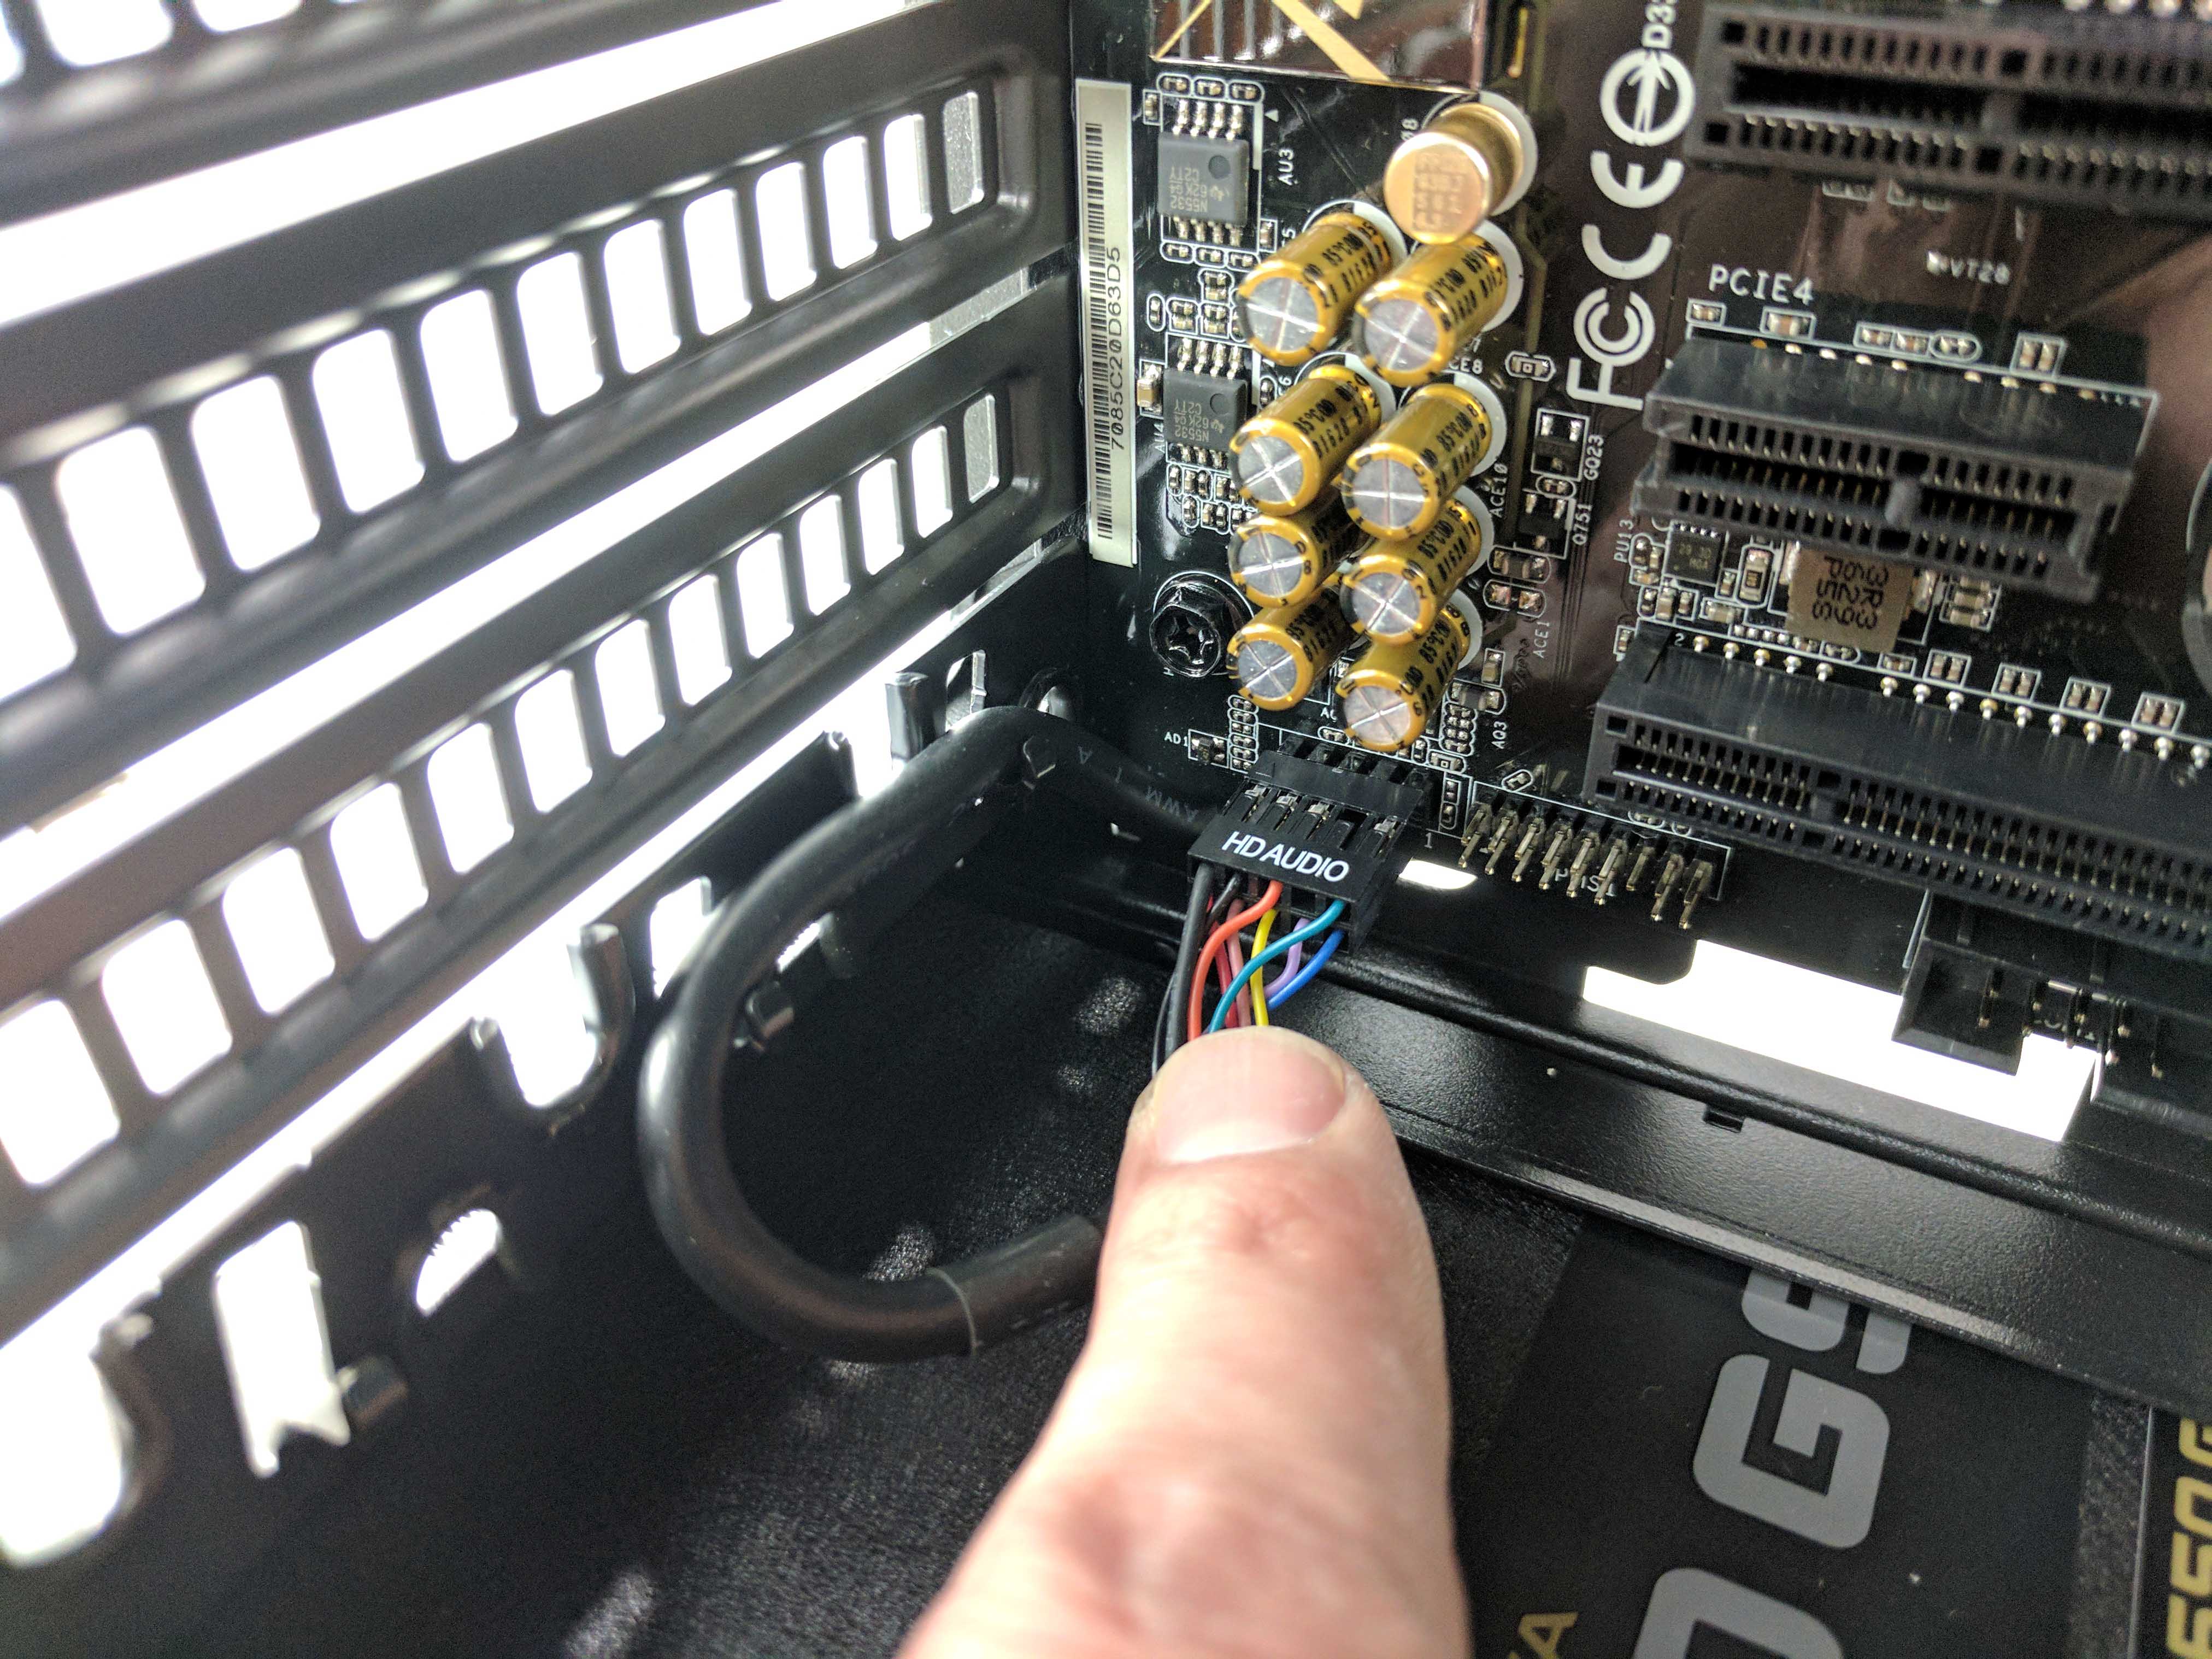
Start by isolating the case's front panel audio cable (currently hanging on the backside of the main chamber where the motherboard resides). Feed the audio cable to the hole in the bottom of the case, above the PSU and furthest to the right (if looking from the right side of the case, where the cables originate). This will put the wire closest to where it attaches to the motherboard. Plug in the front panel audio cable to the appropriate leads on the motherboard, and lay the excess into the plastic hooks above the port, below the PCIe slots (above the PSU).
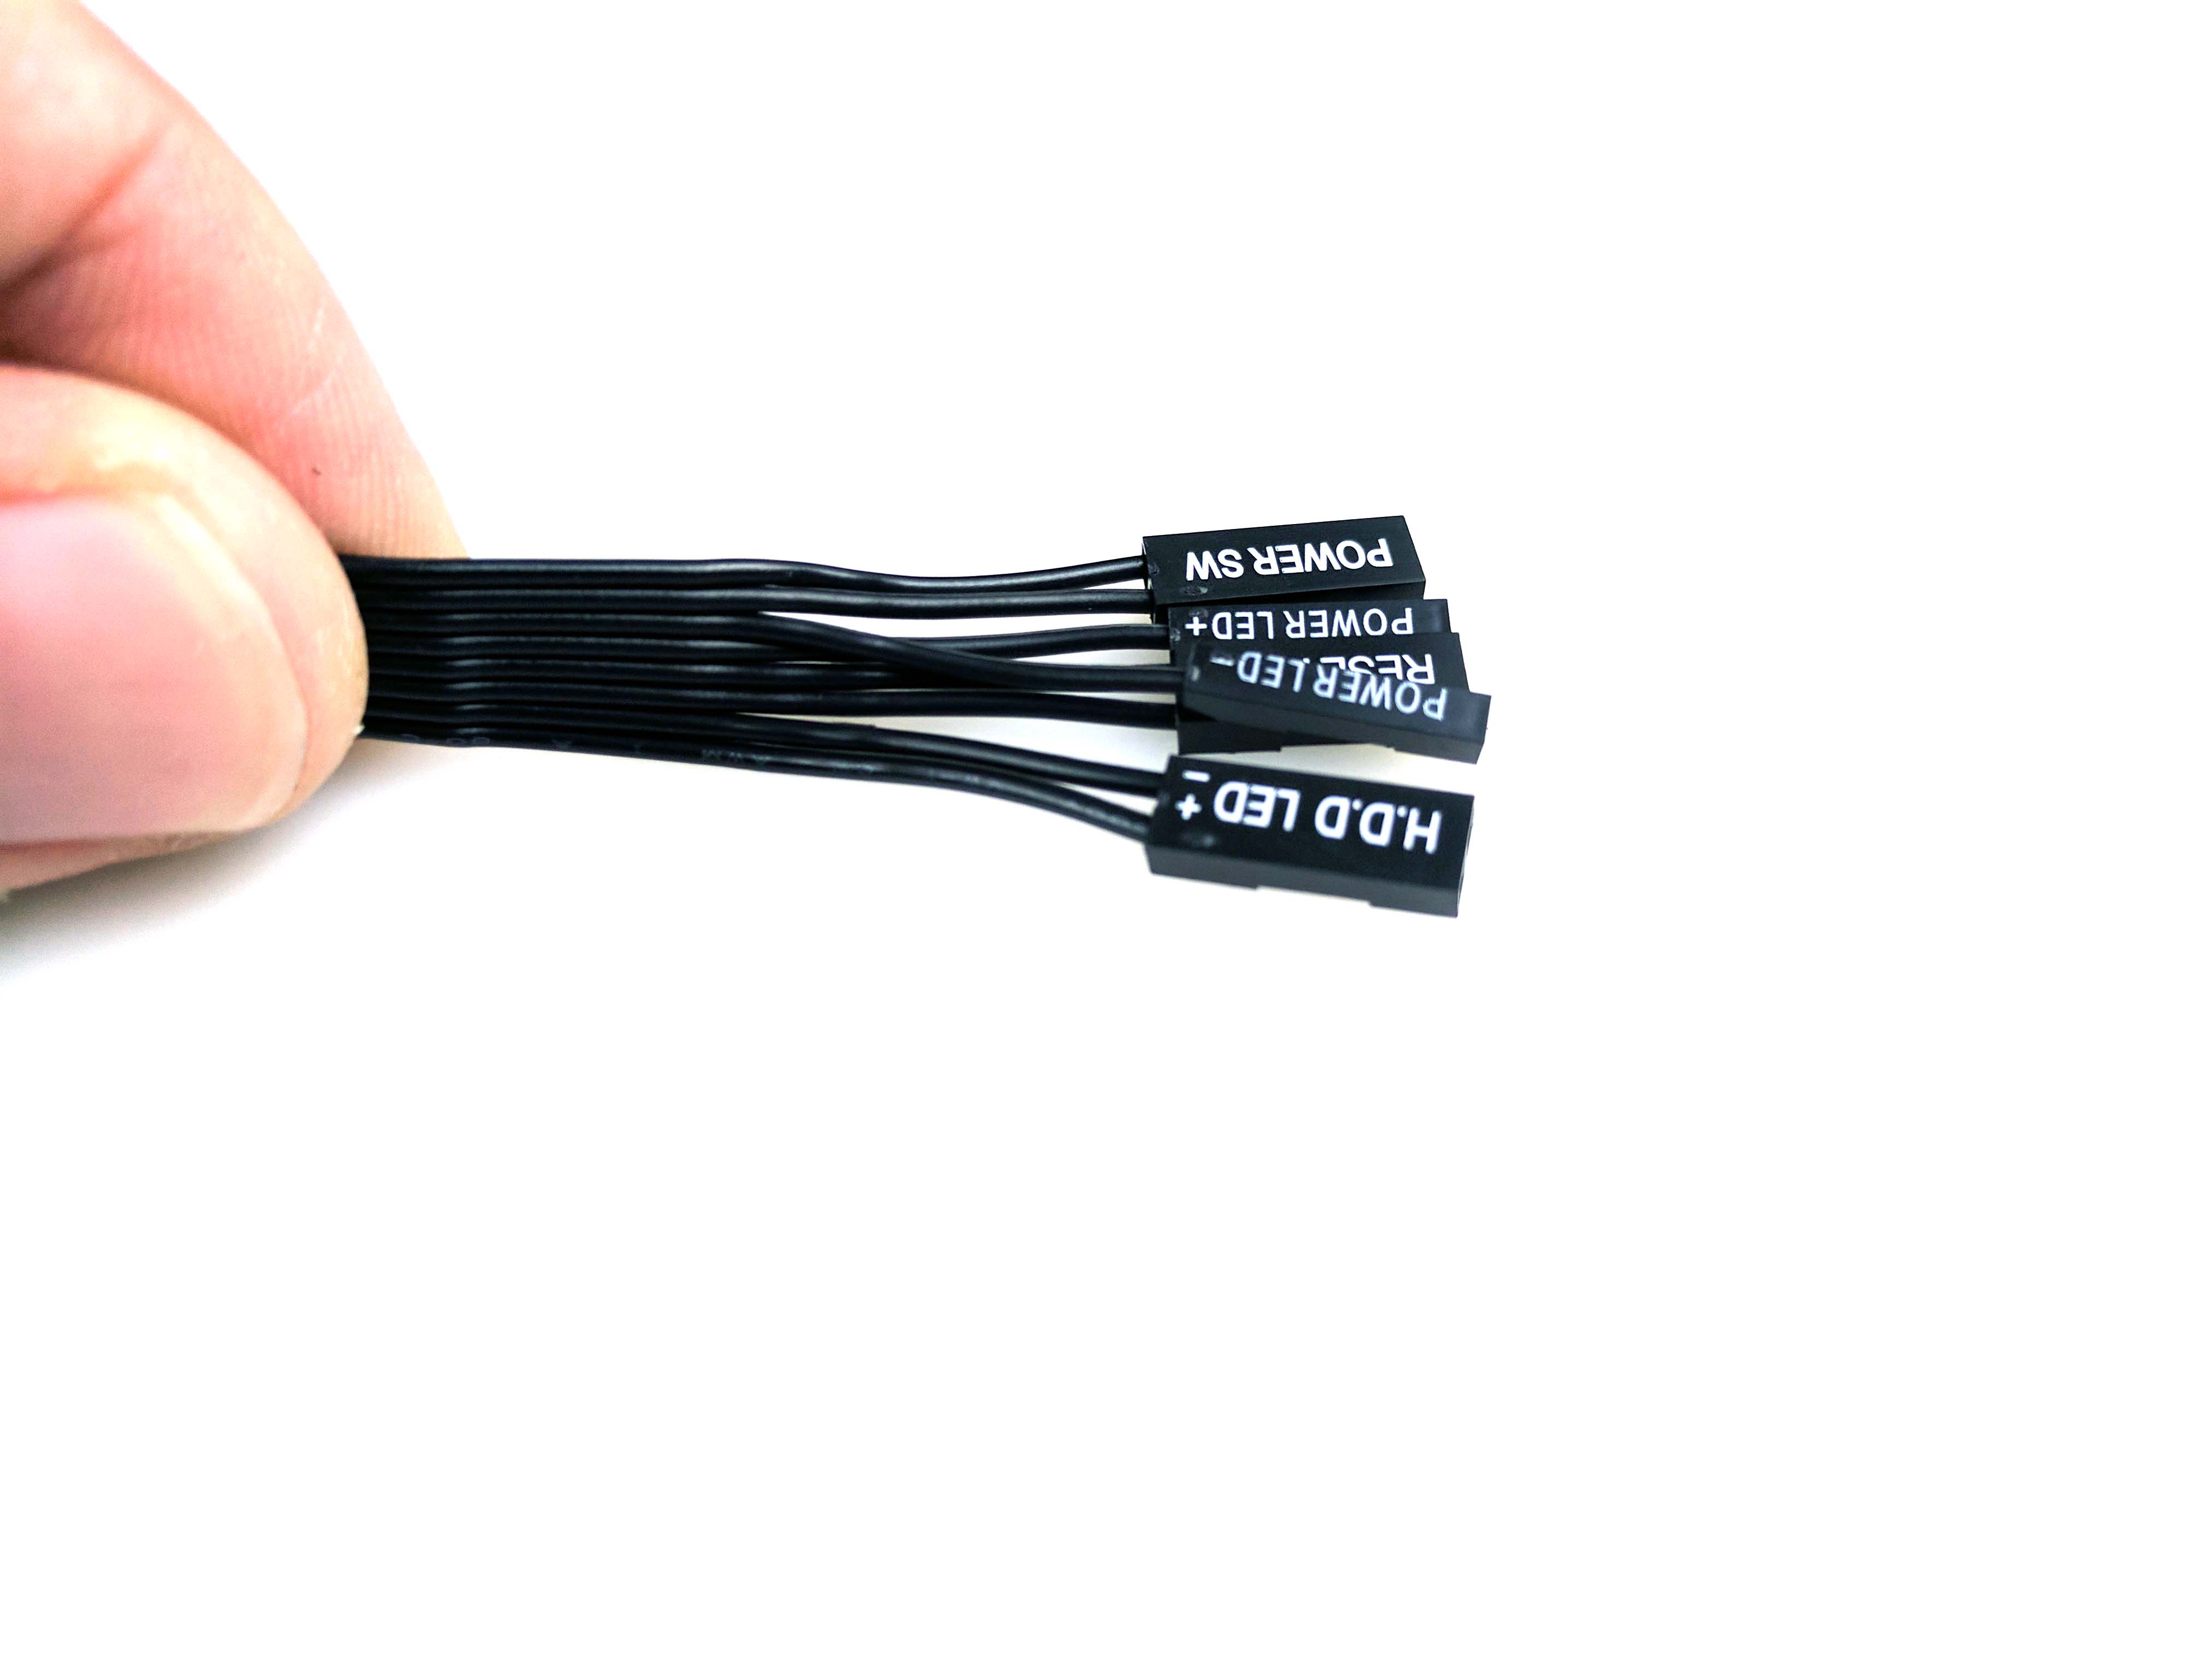
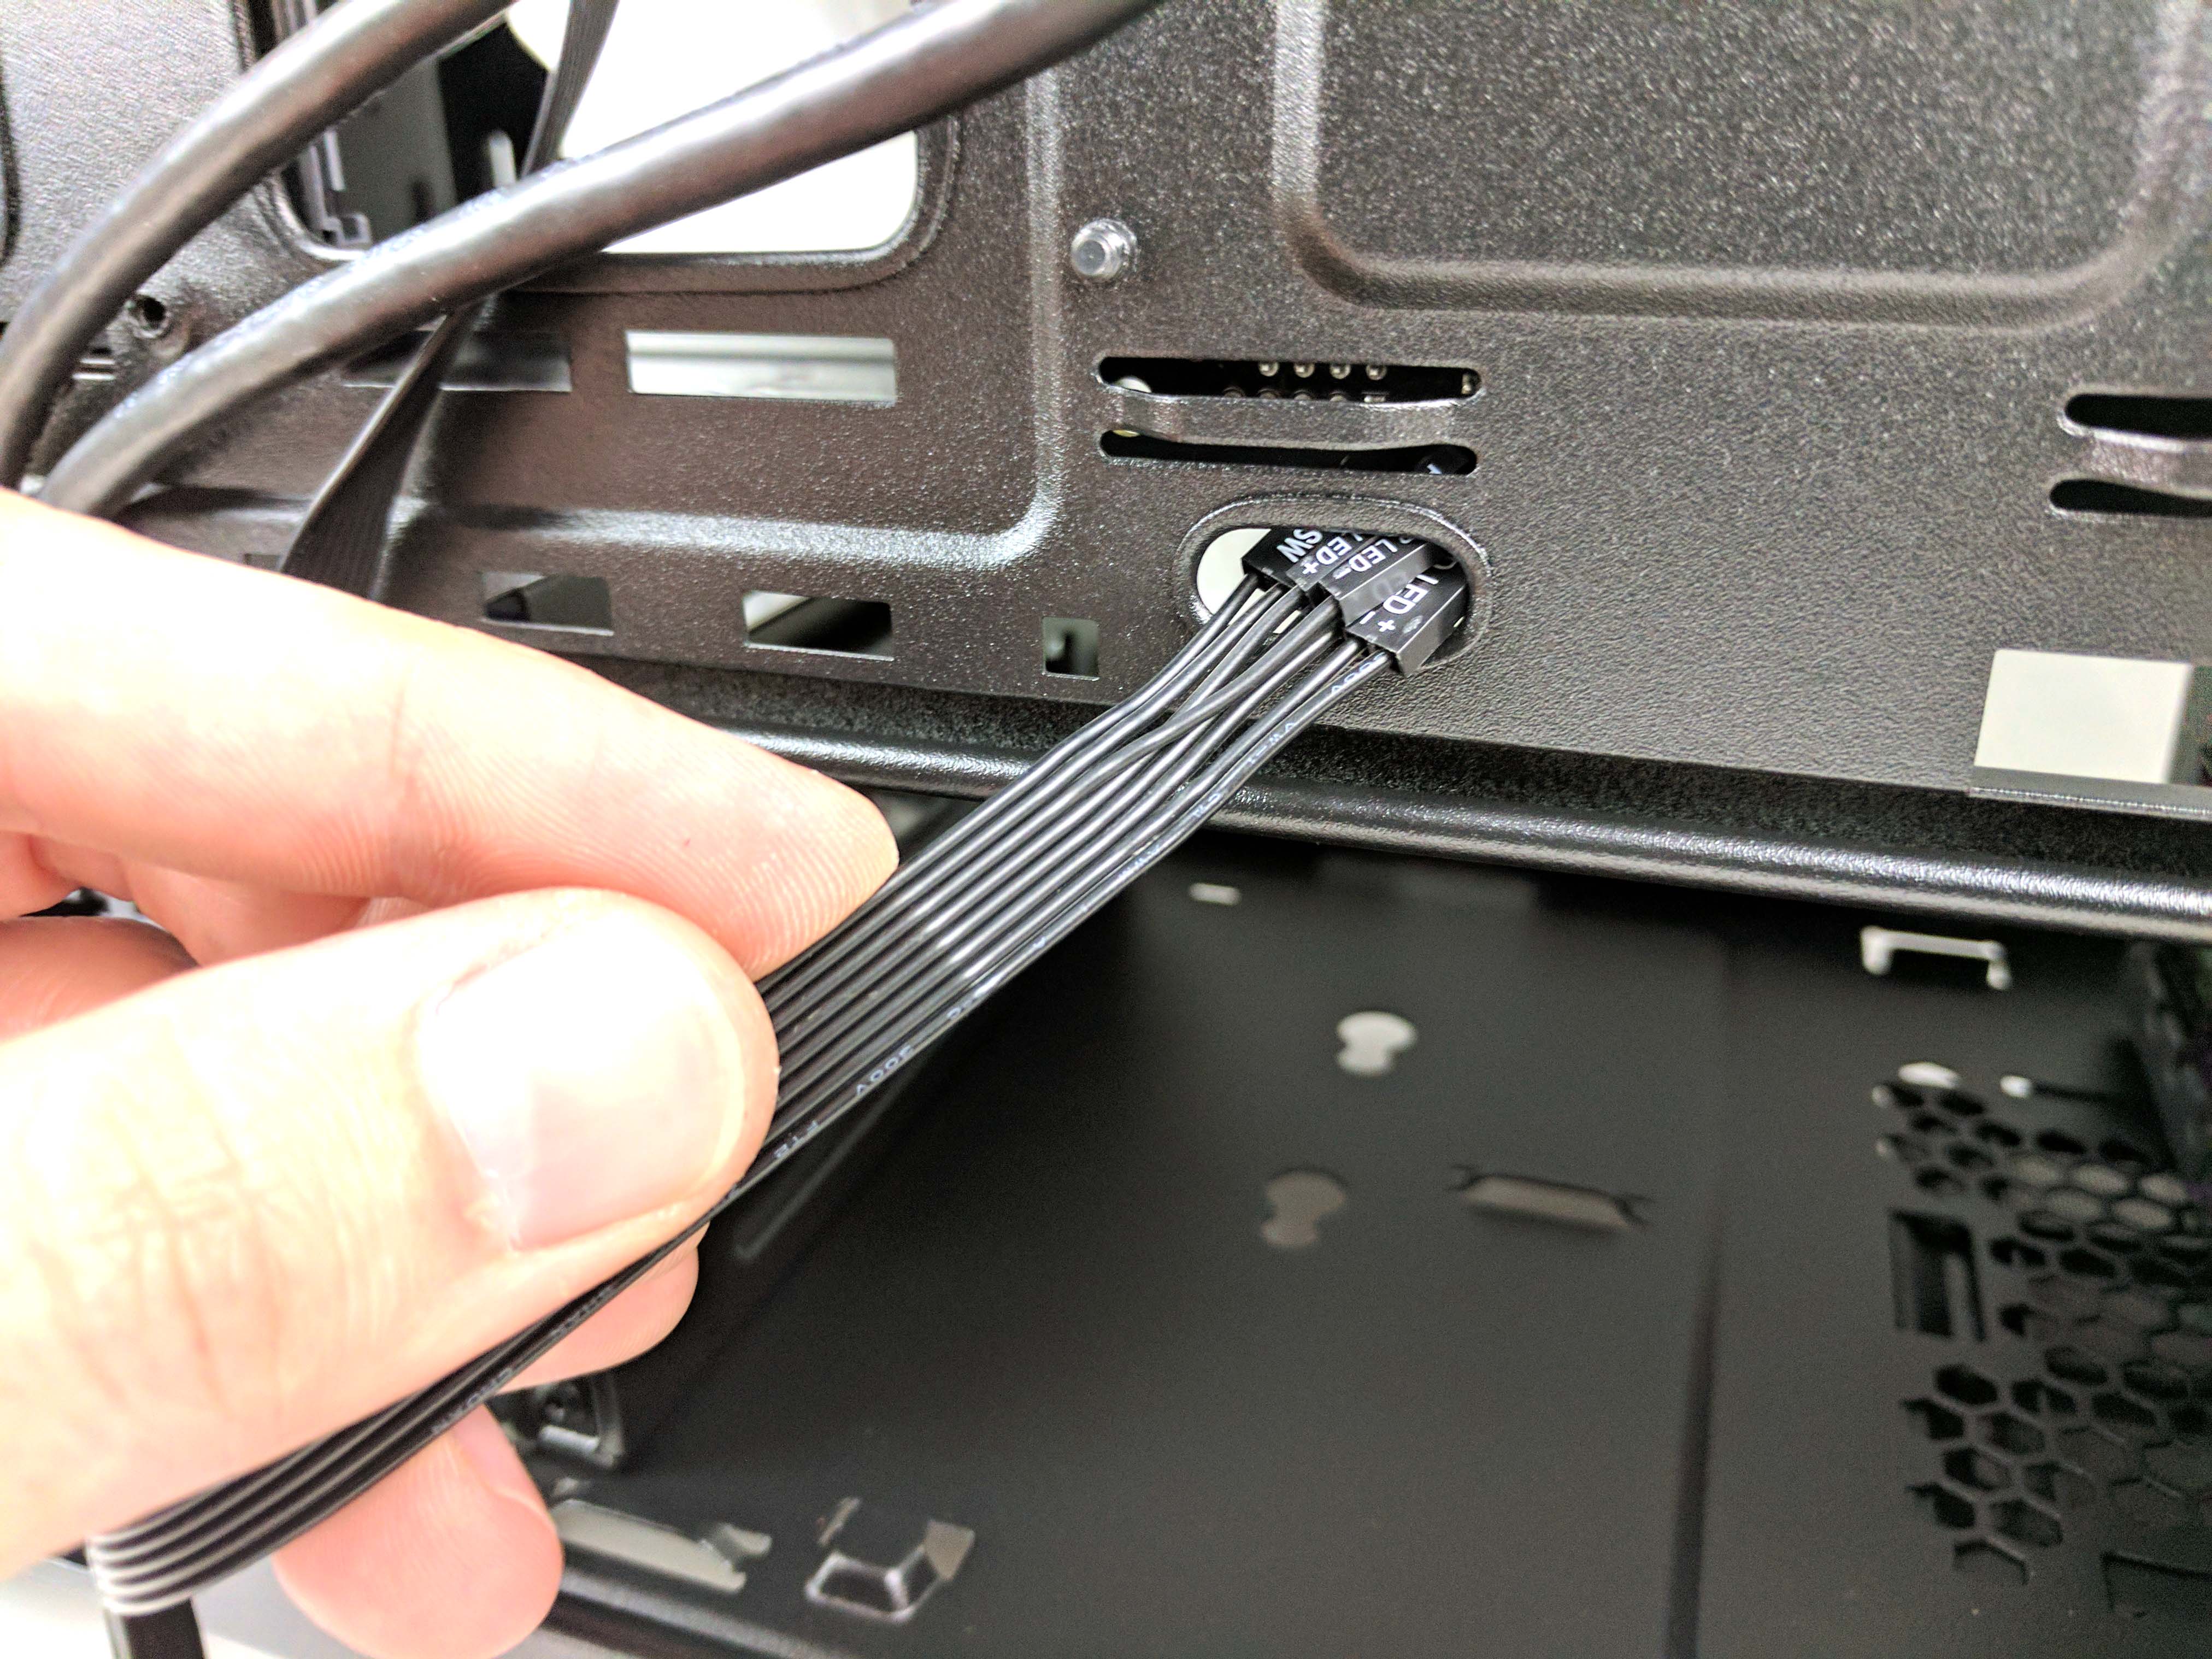
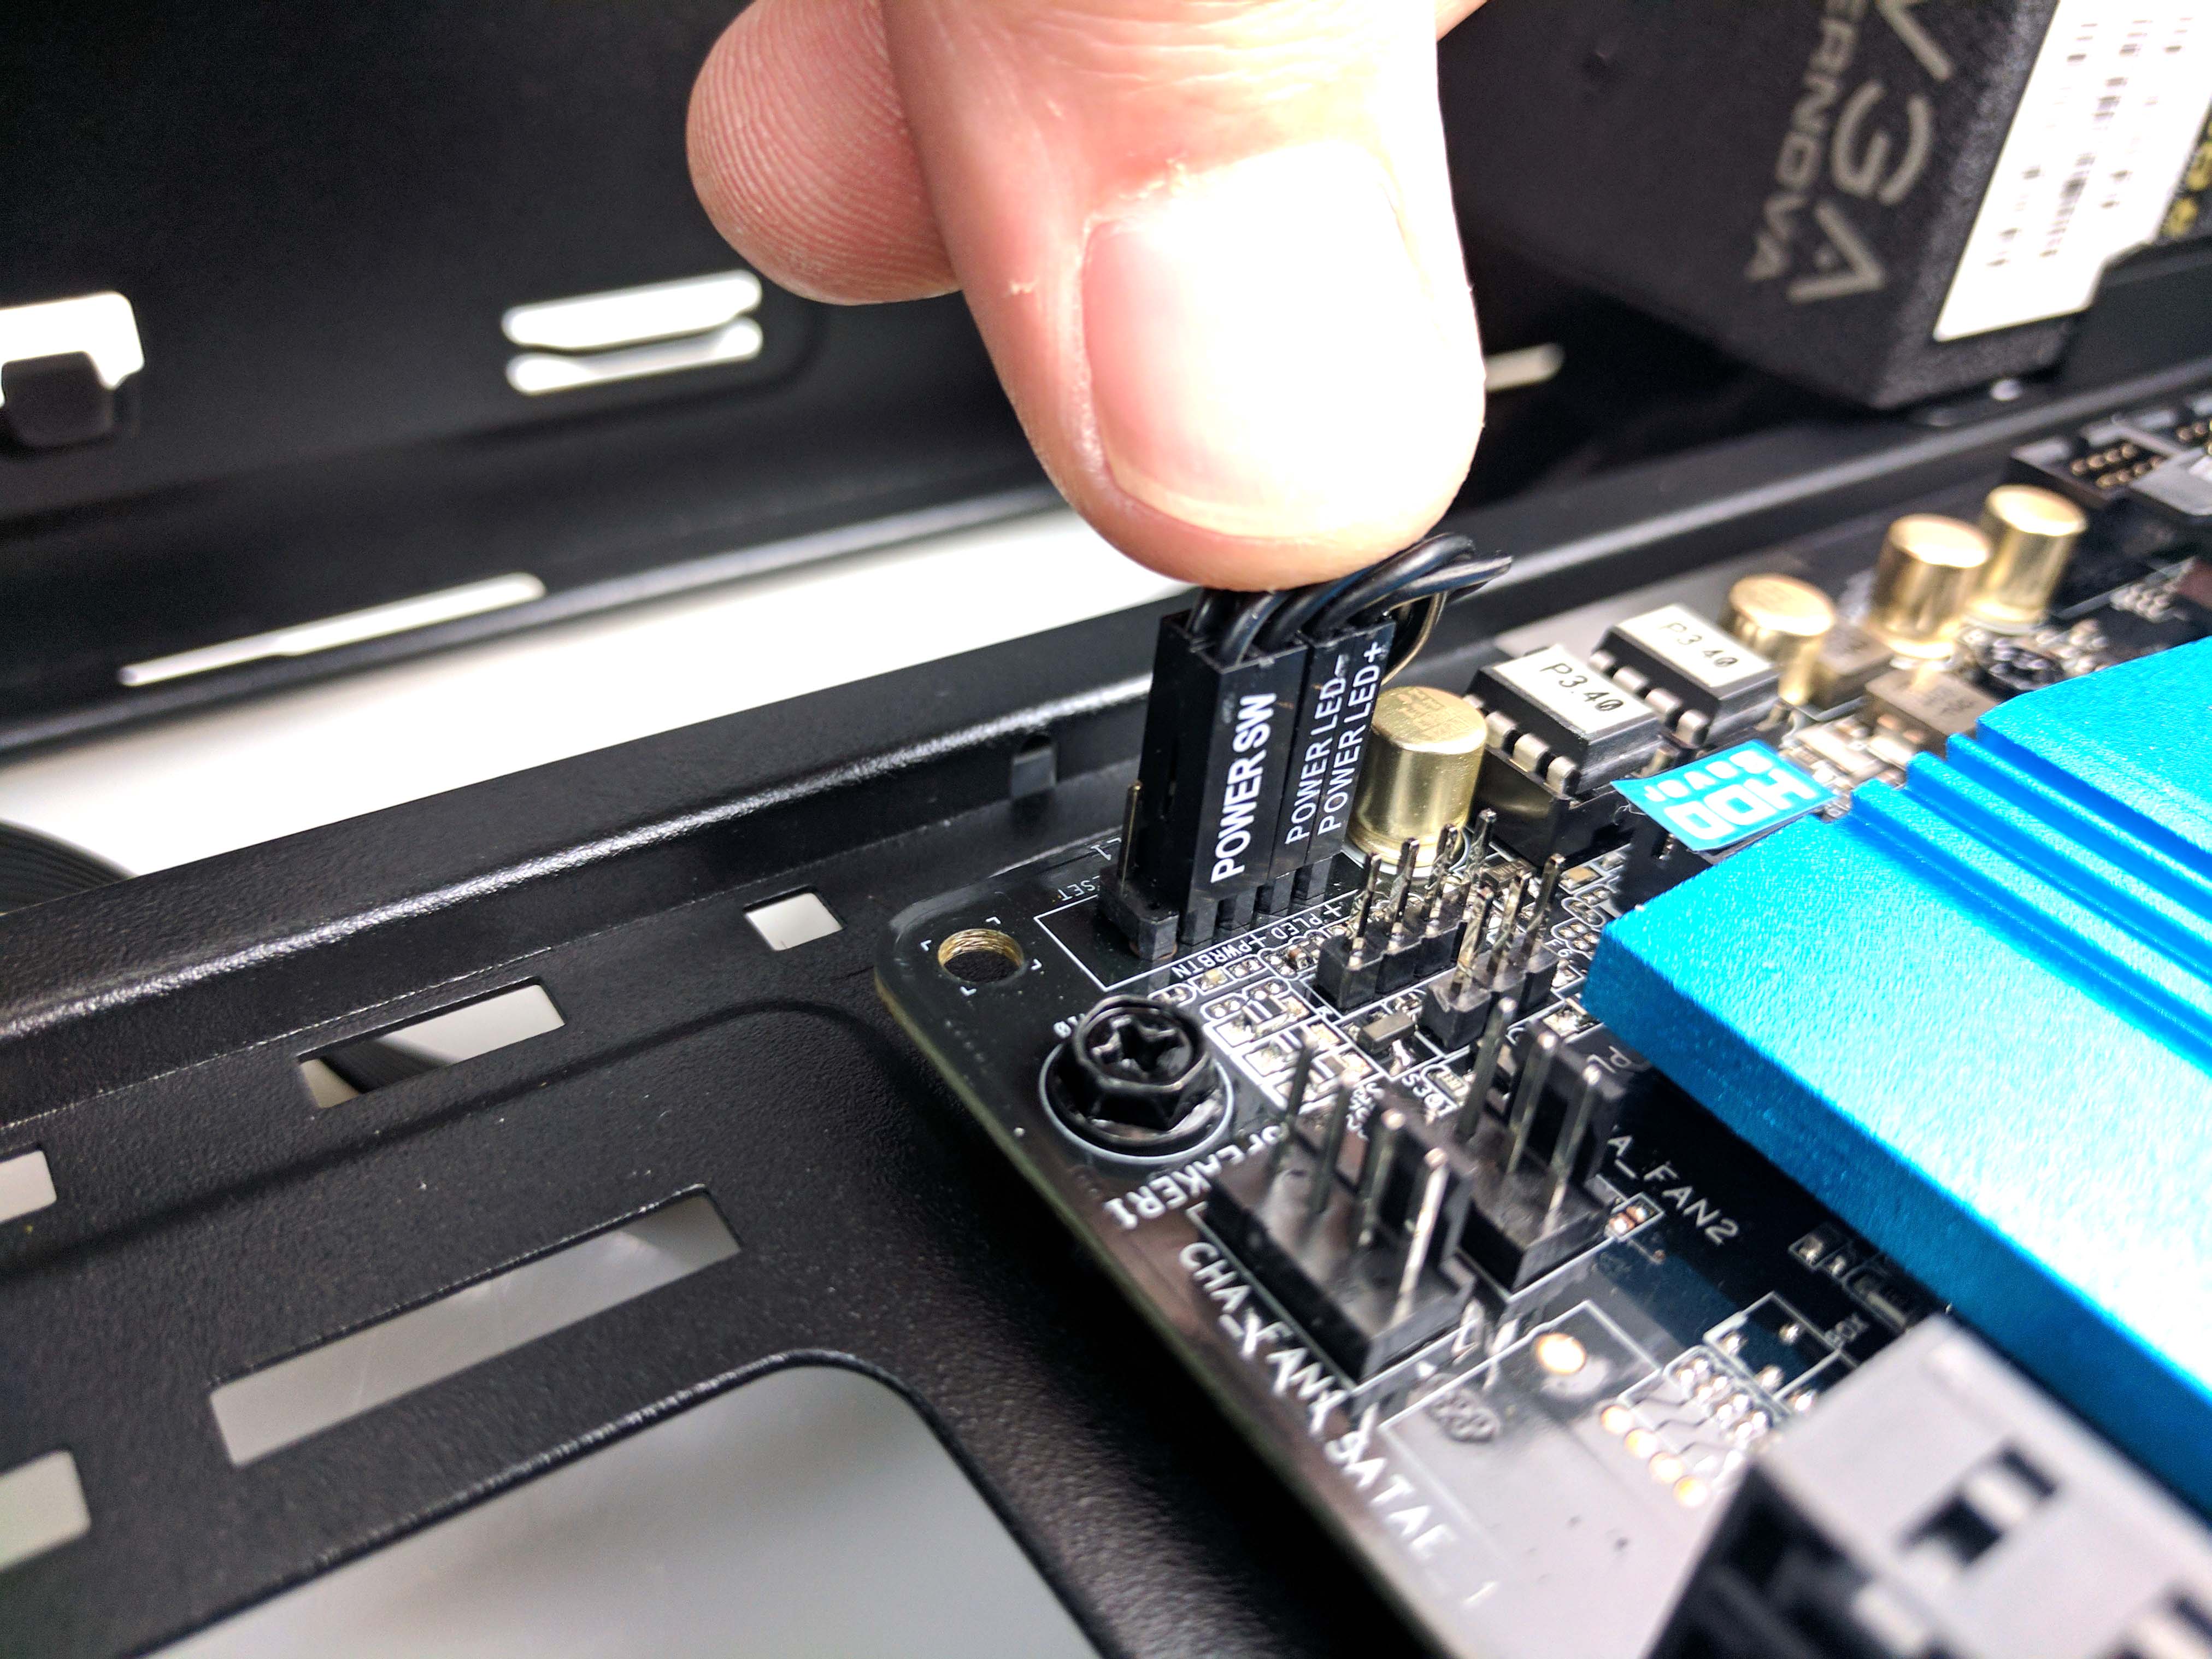
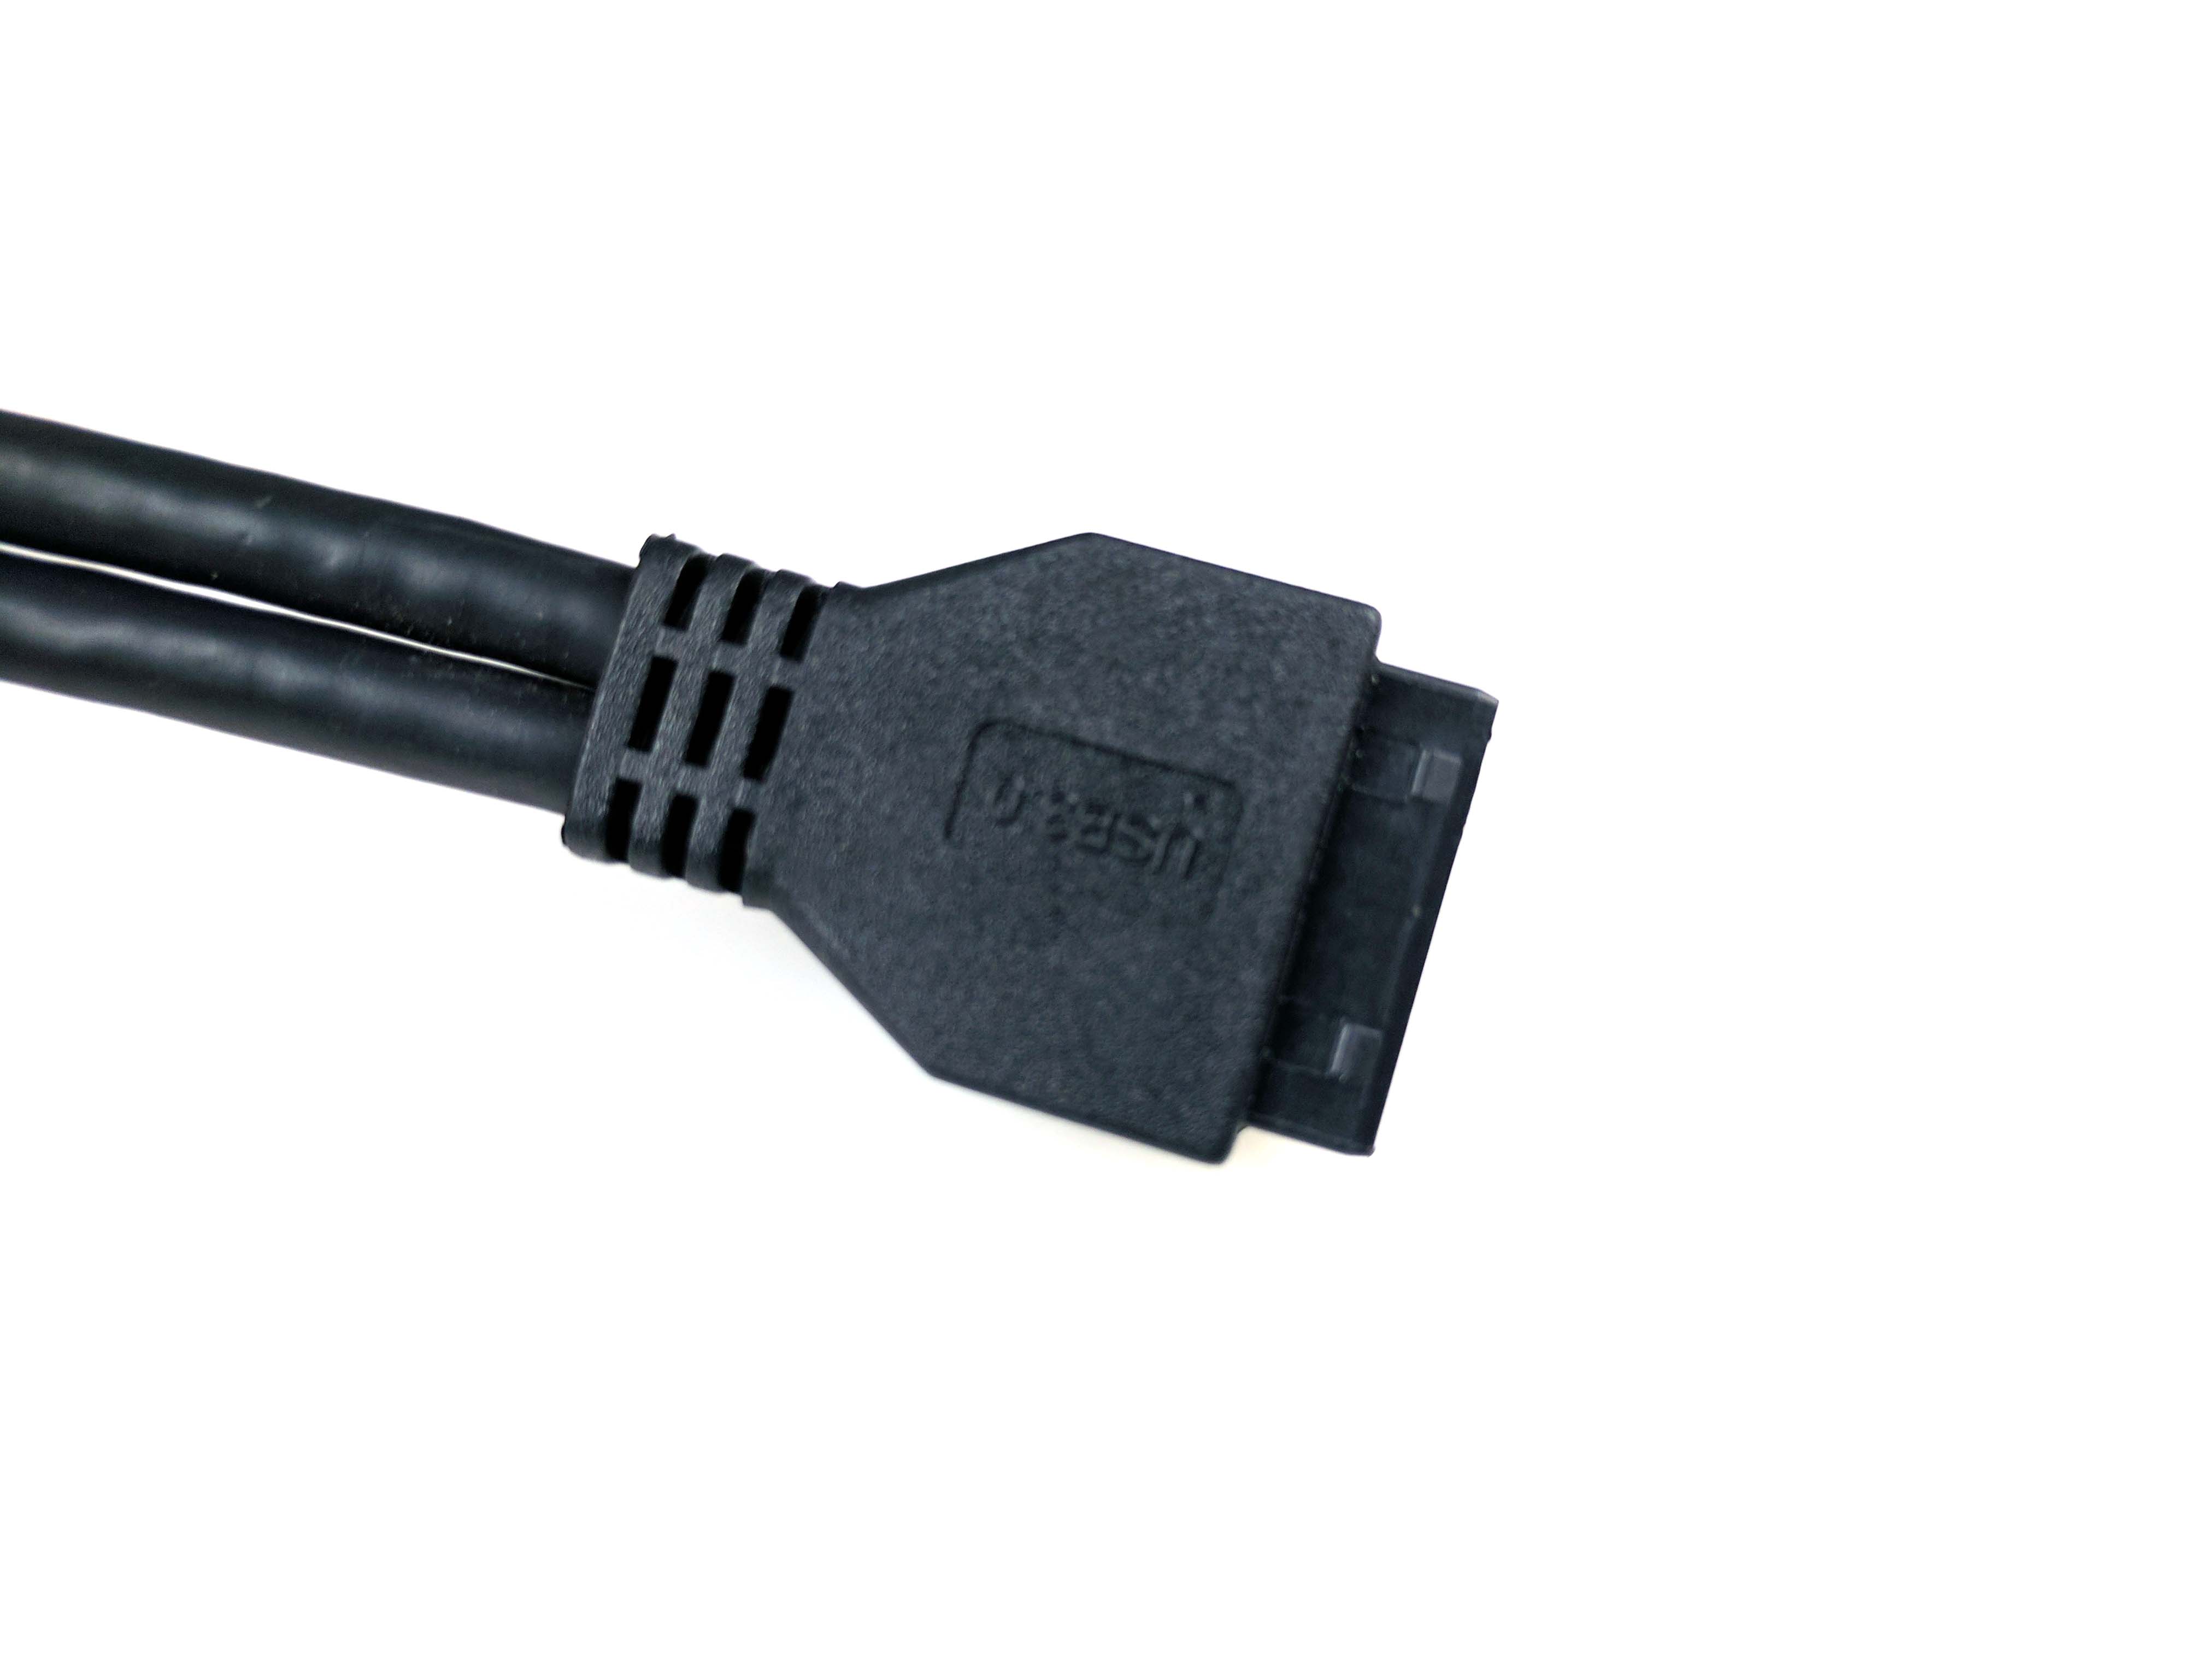
Locate the case's front panel I/O leads (Power Switch, Power LED +/-, HDD LED, Reset Switch) and feed them to the hole on the bottom left (if looking from right side, like before) of the chassis, which also places them almost directly where they plug into the motherboard. Connect the labeled wires to the appropriate motherboard leads (located in the bottom right corner of the motherboard), using your manual for reference if you can't read the tiny text printed on the motherboard. If you did it right, all of the text on the case leads will be visible on both sides. Pull the excess back behind the main chamber of the chassis (under the motherboard) and let it hang.
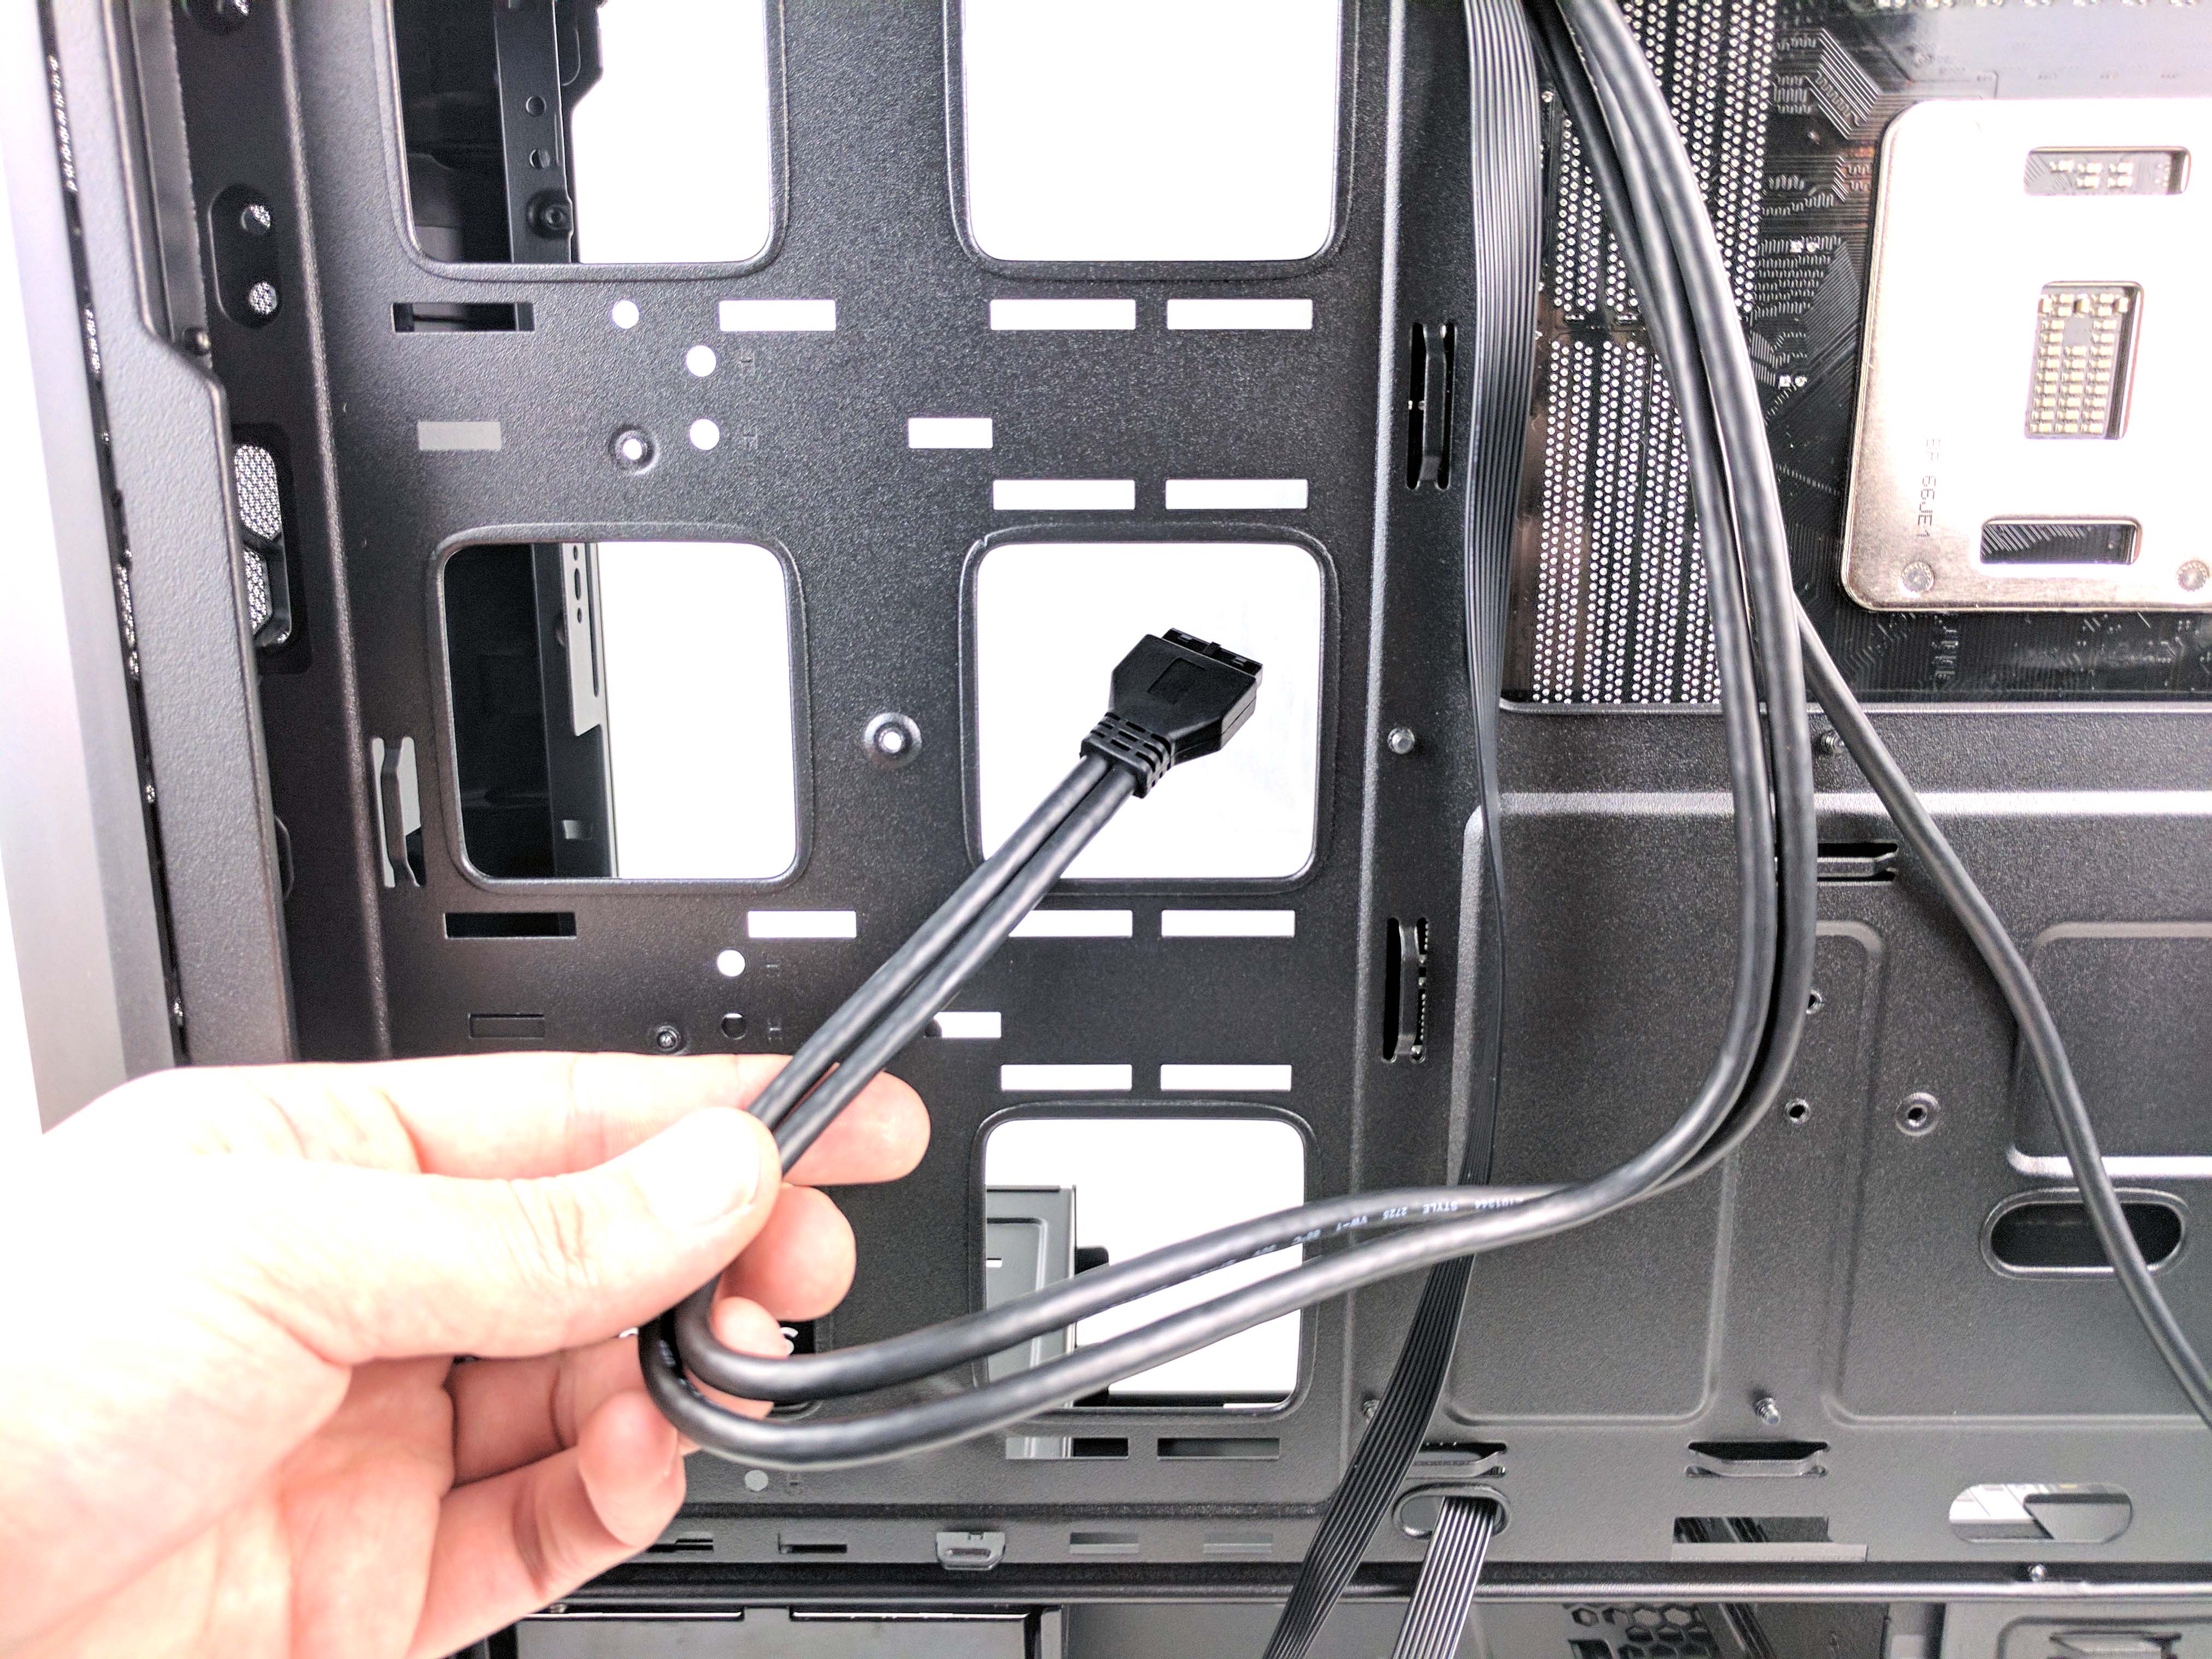
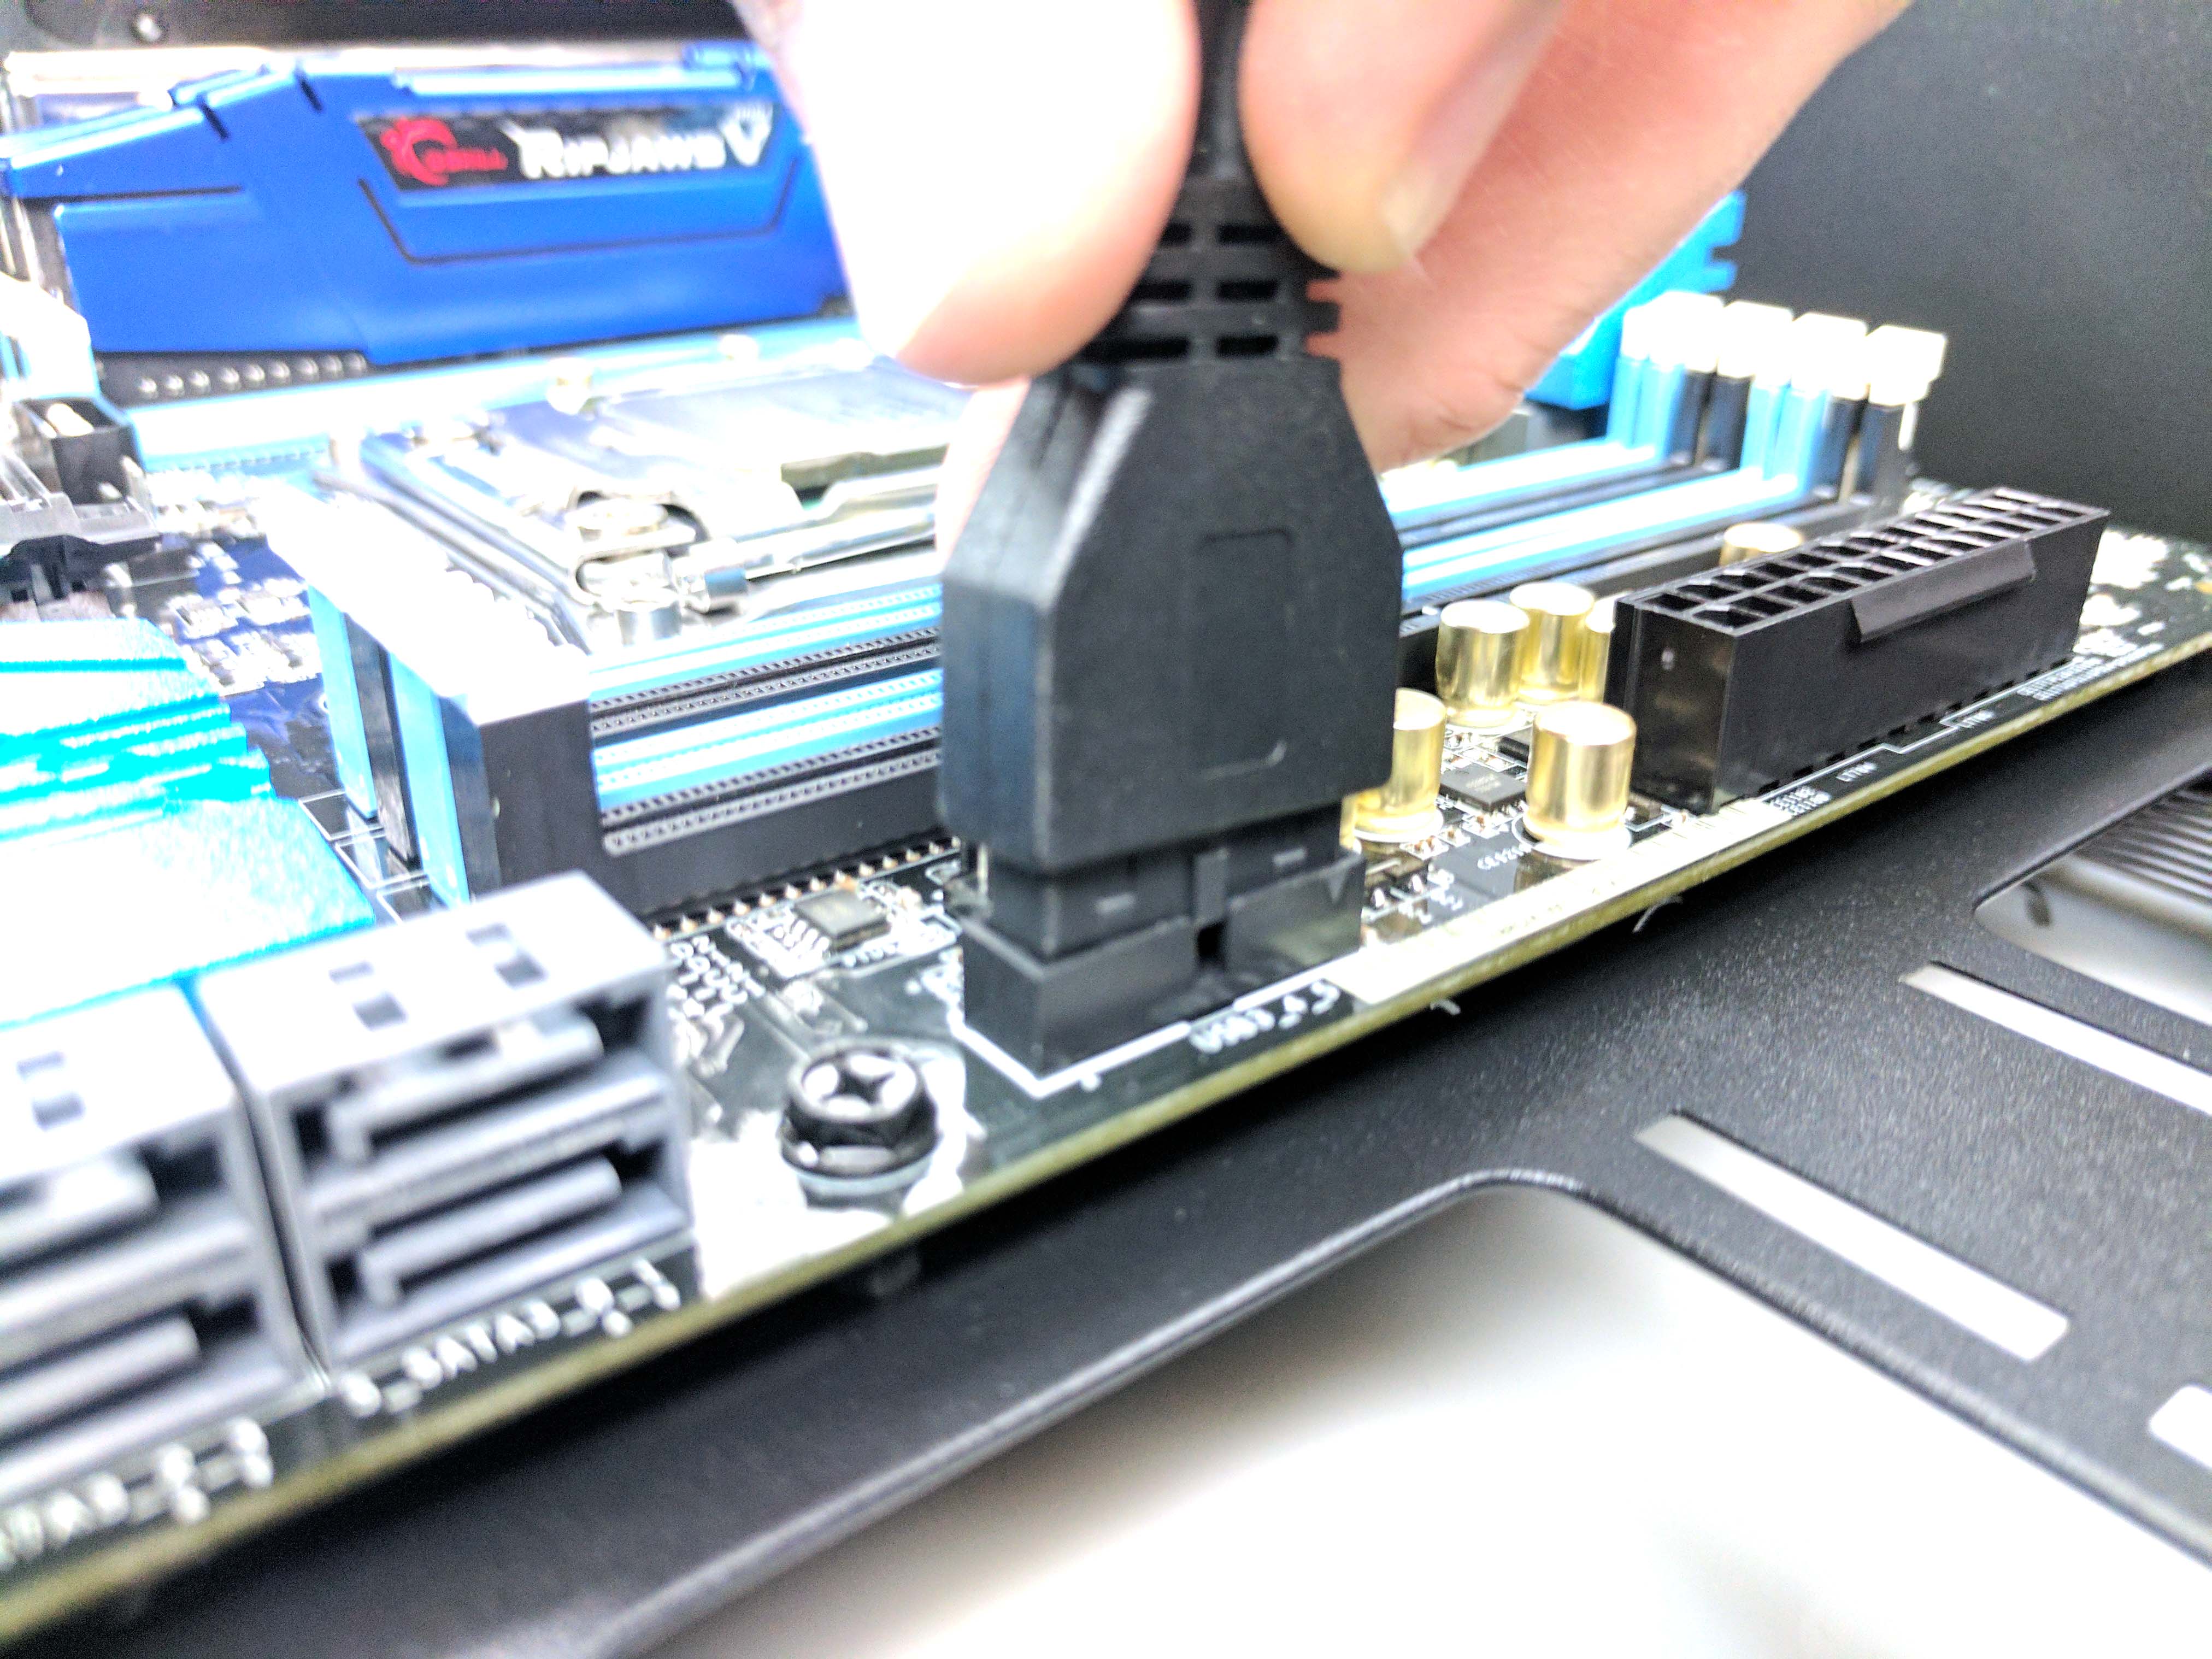
Run the USB 3.0 cable through the middle hole and into the case's main chamber (vertically, and closest to the motherboard; see the 8th picture in the album above). Let the excess loop hang naturally in the main chamber and plug it into the motherboard.
Routing The Main Power Cables
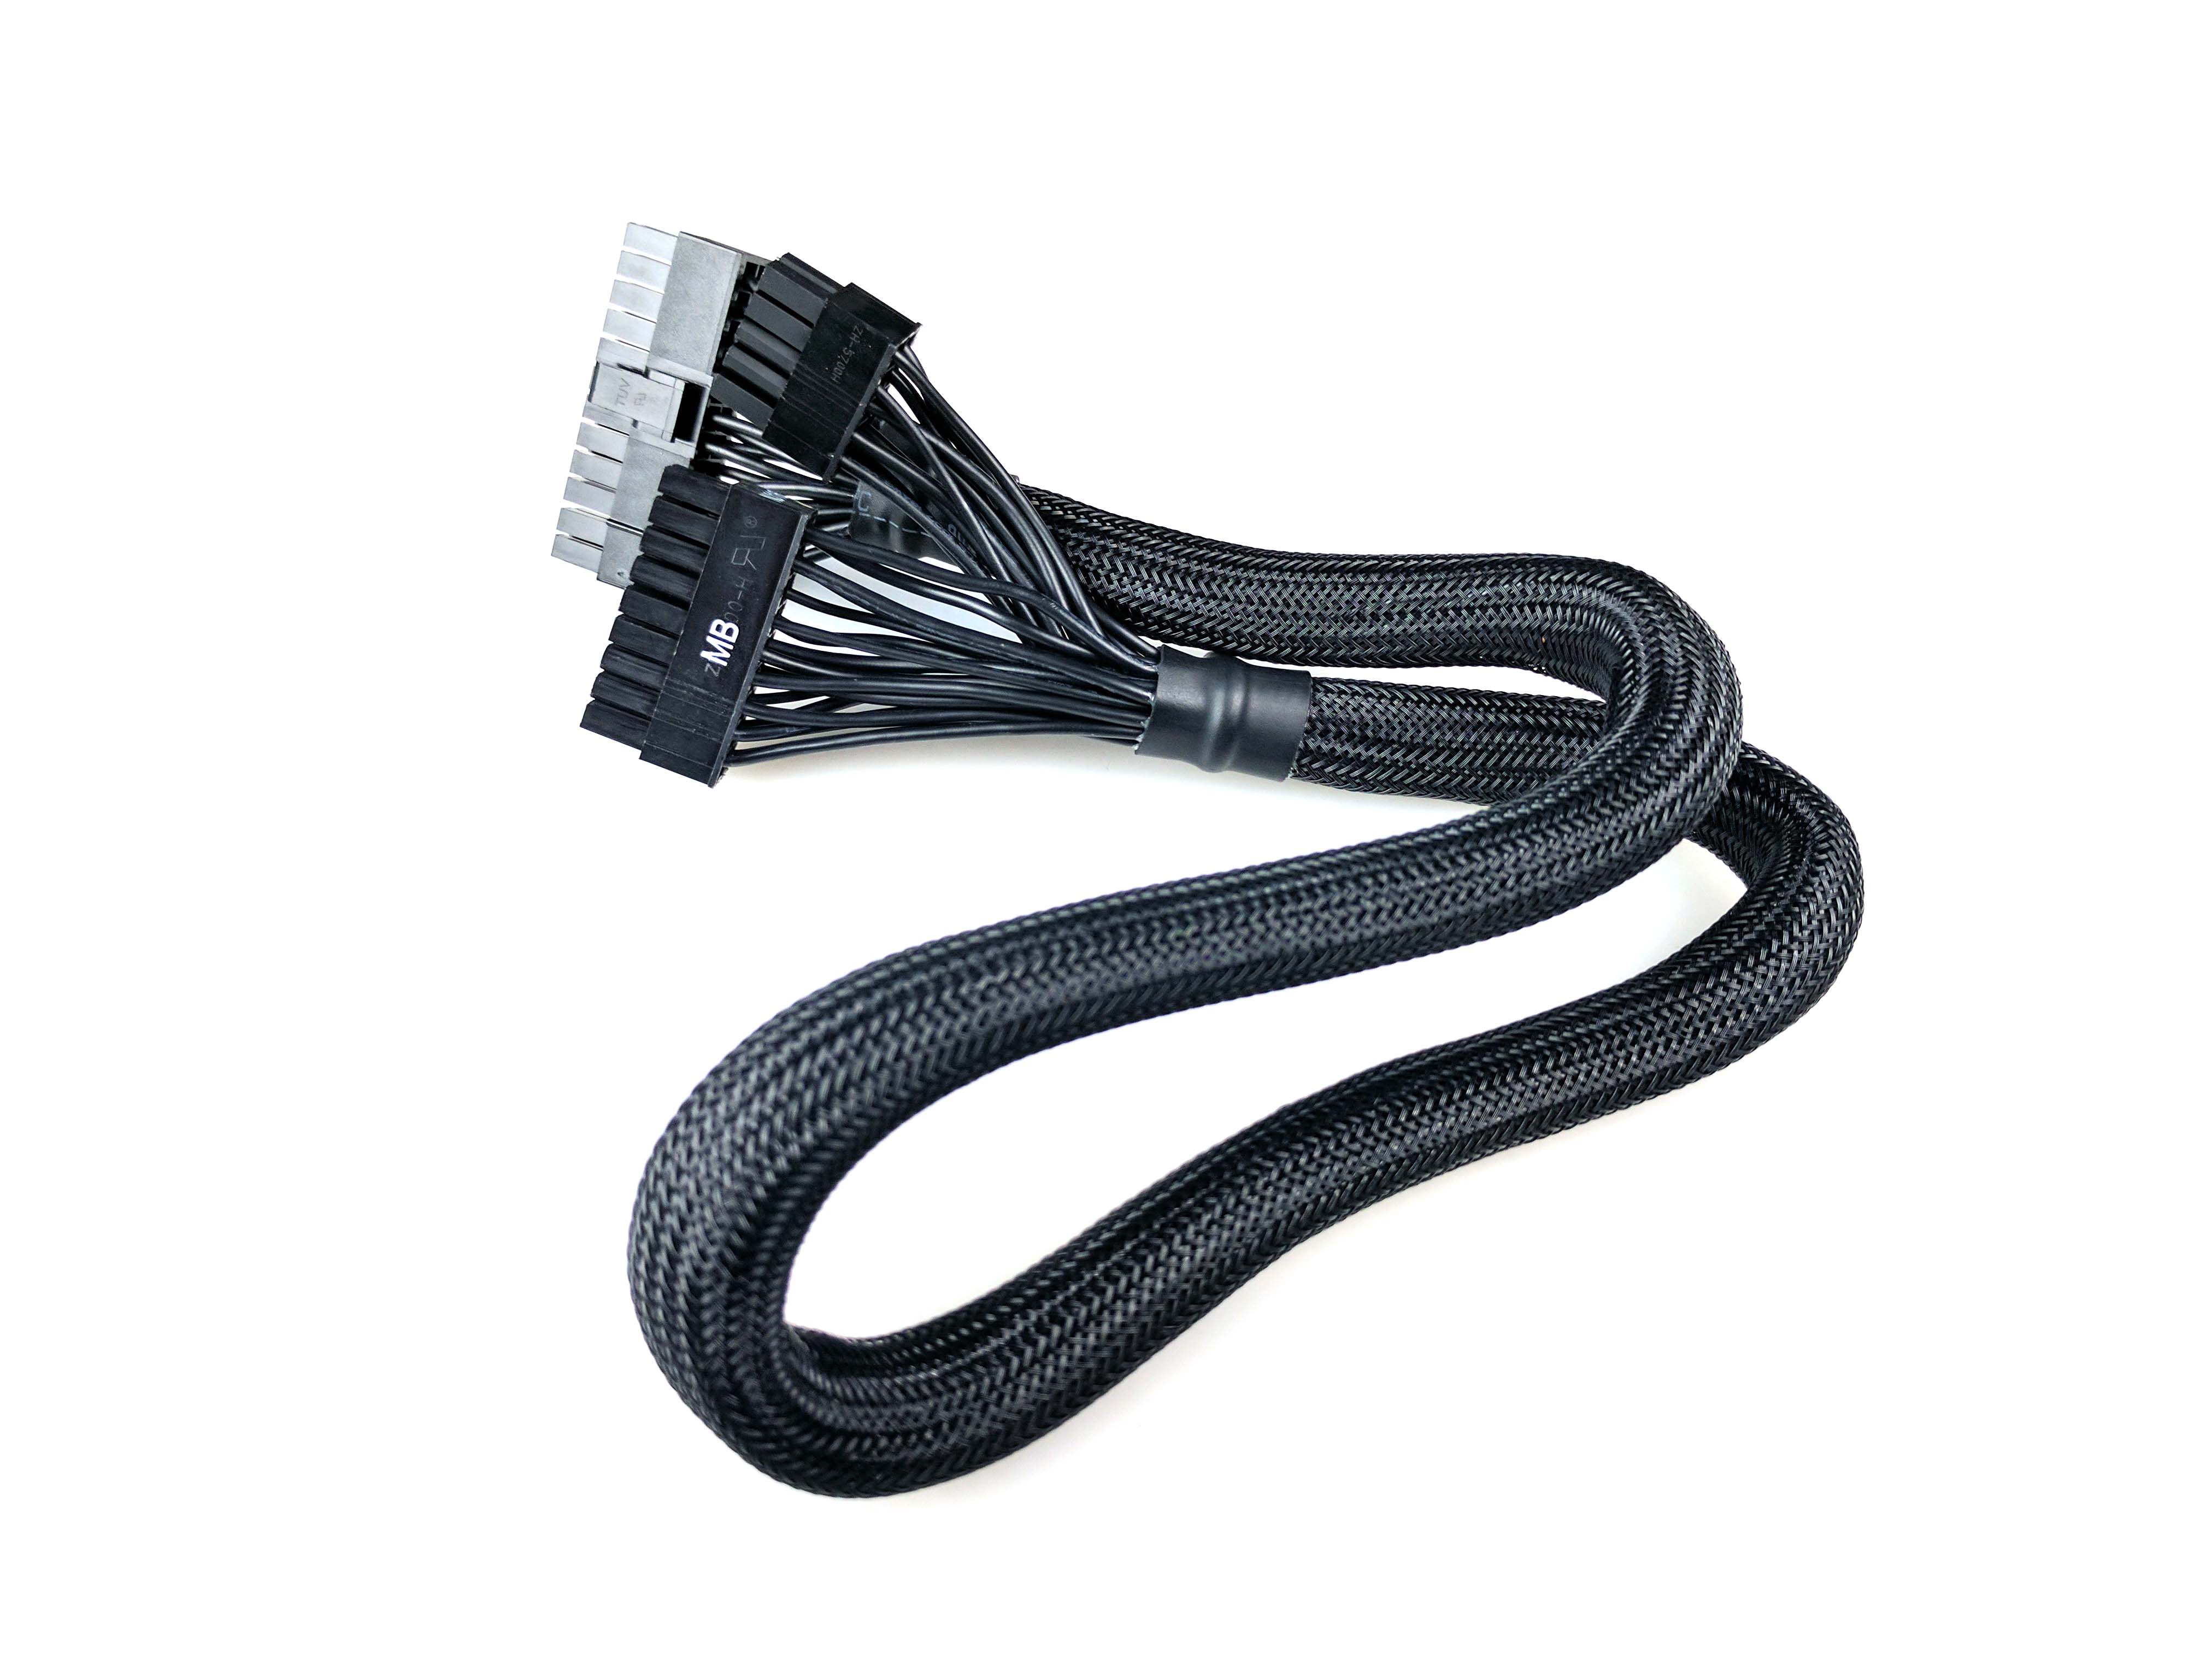
Get the main 24-pin ATX power cable (labeled MB) from the PSU box. Unwrap it and save the tie wrap for later. There are two leads that connect to the power supply: a longer connector and a shorter connector. Plug the longer connector into the PSU, followed by the shorter connector. Doing it this way is easier if you don't have small hands.
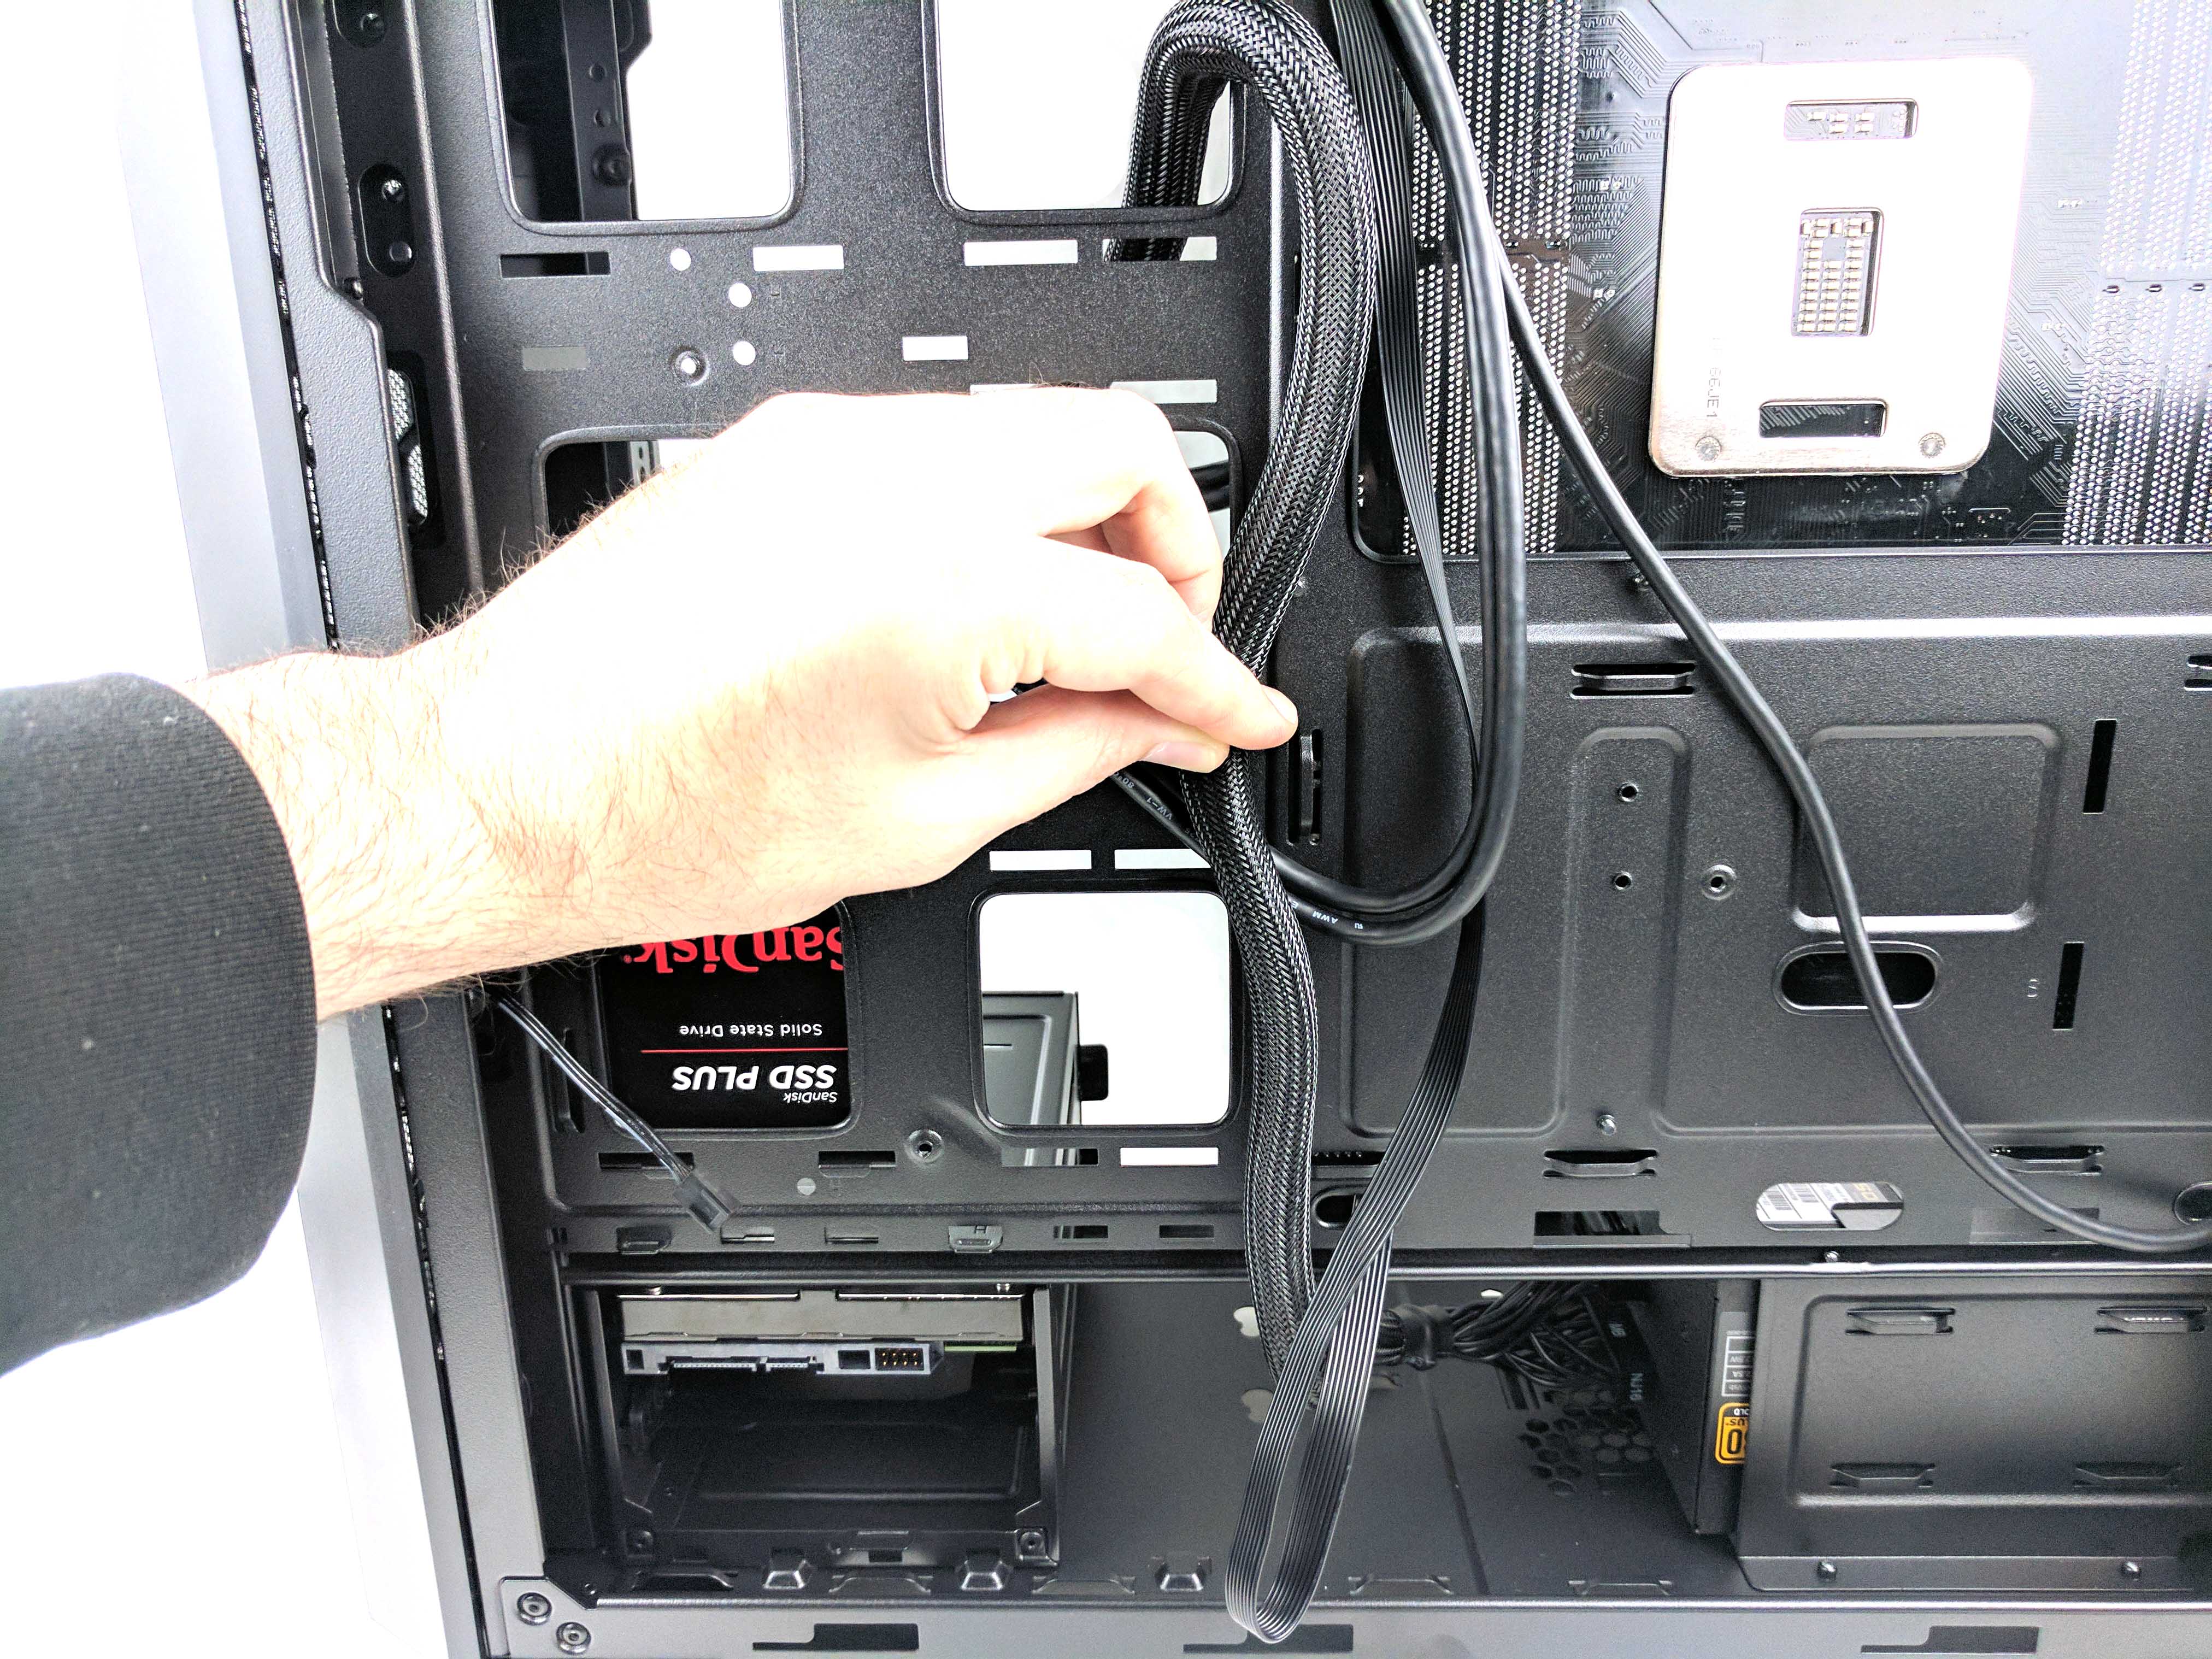
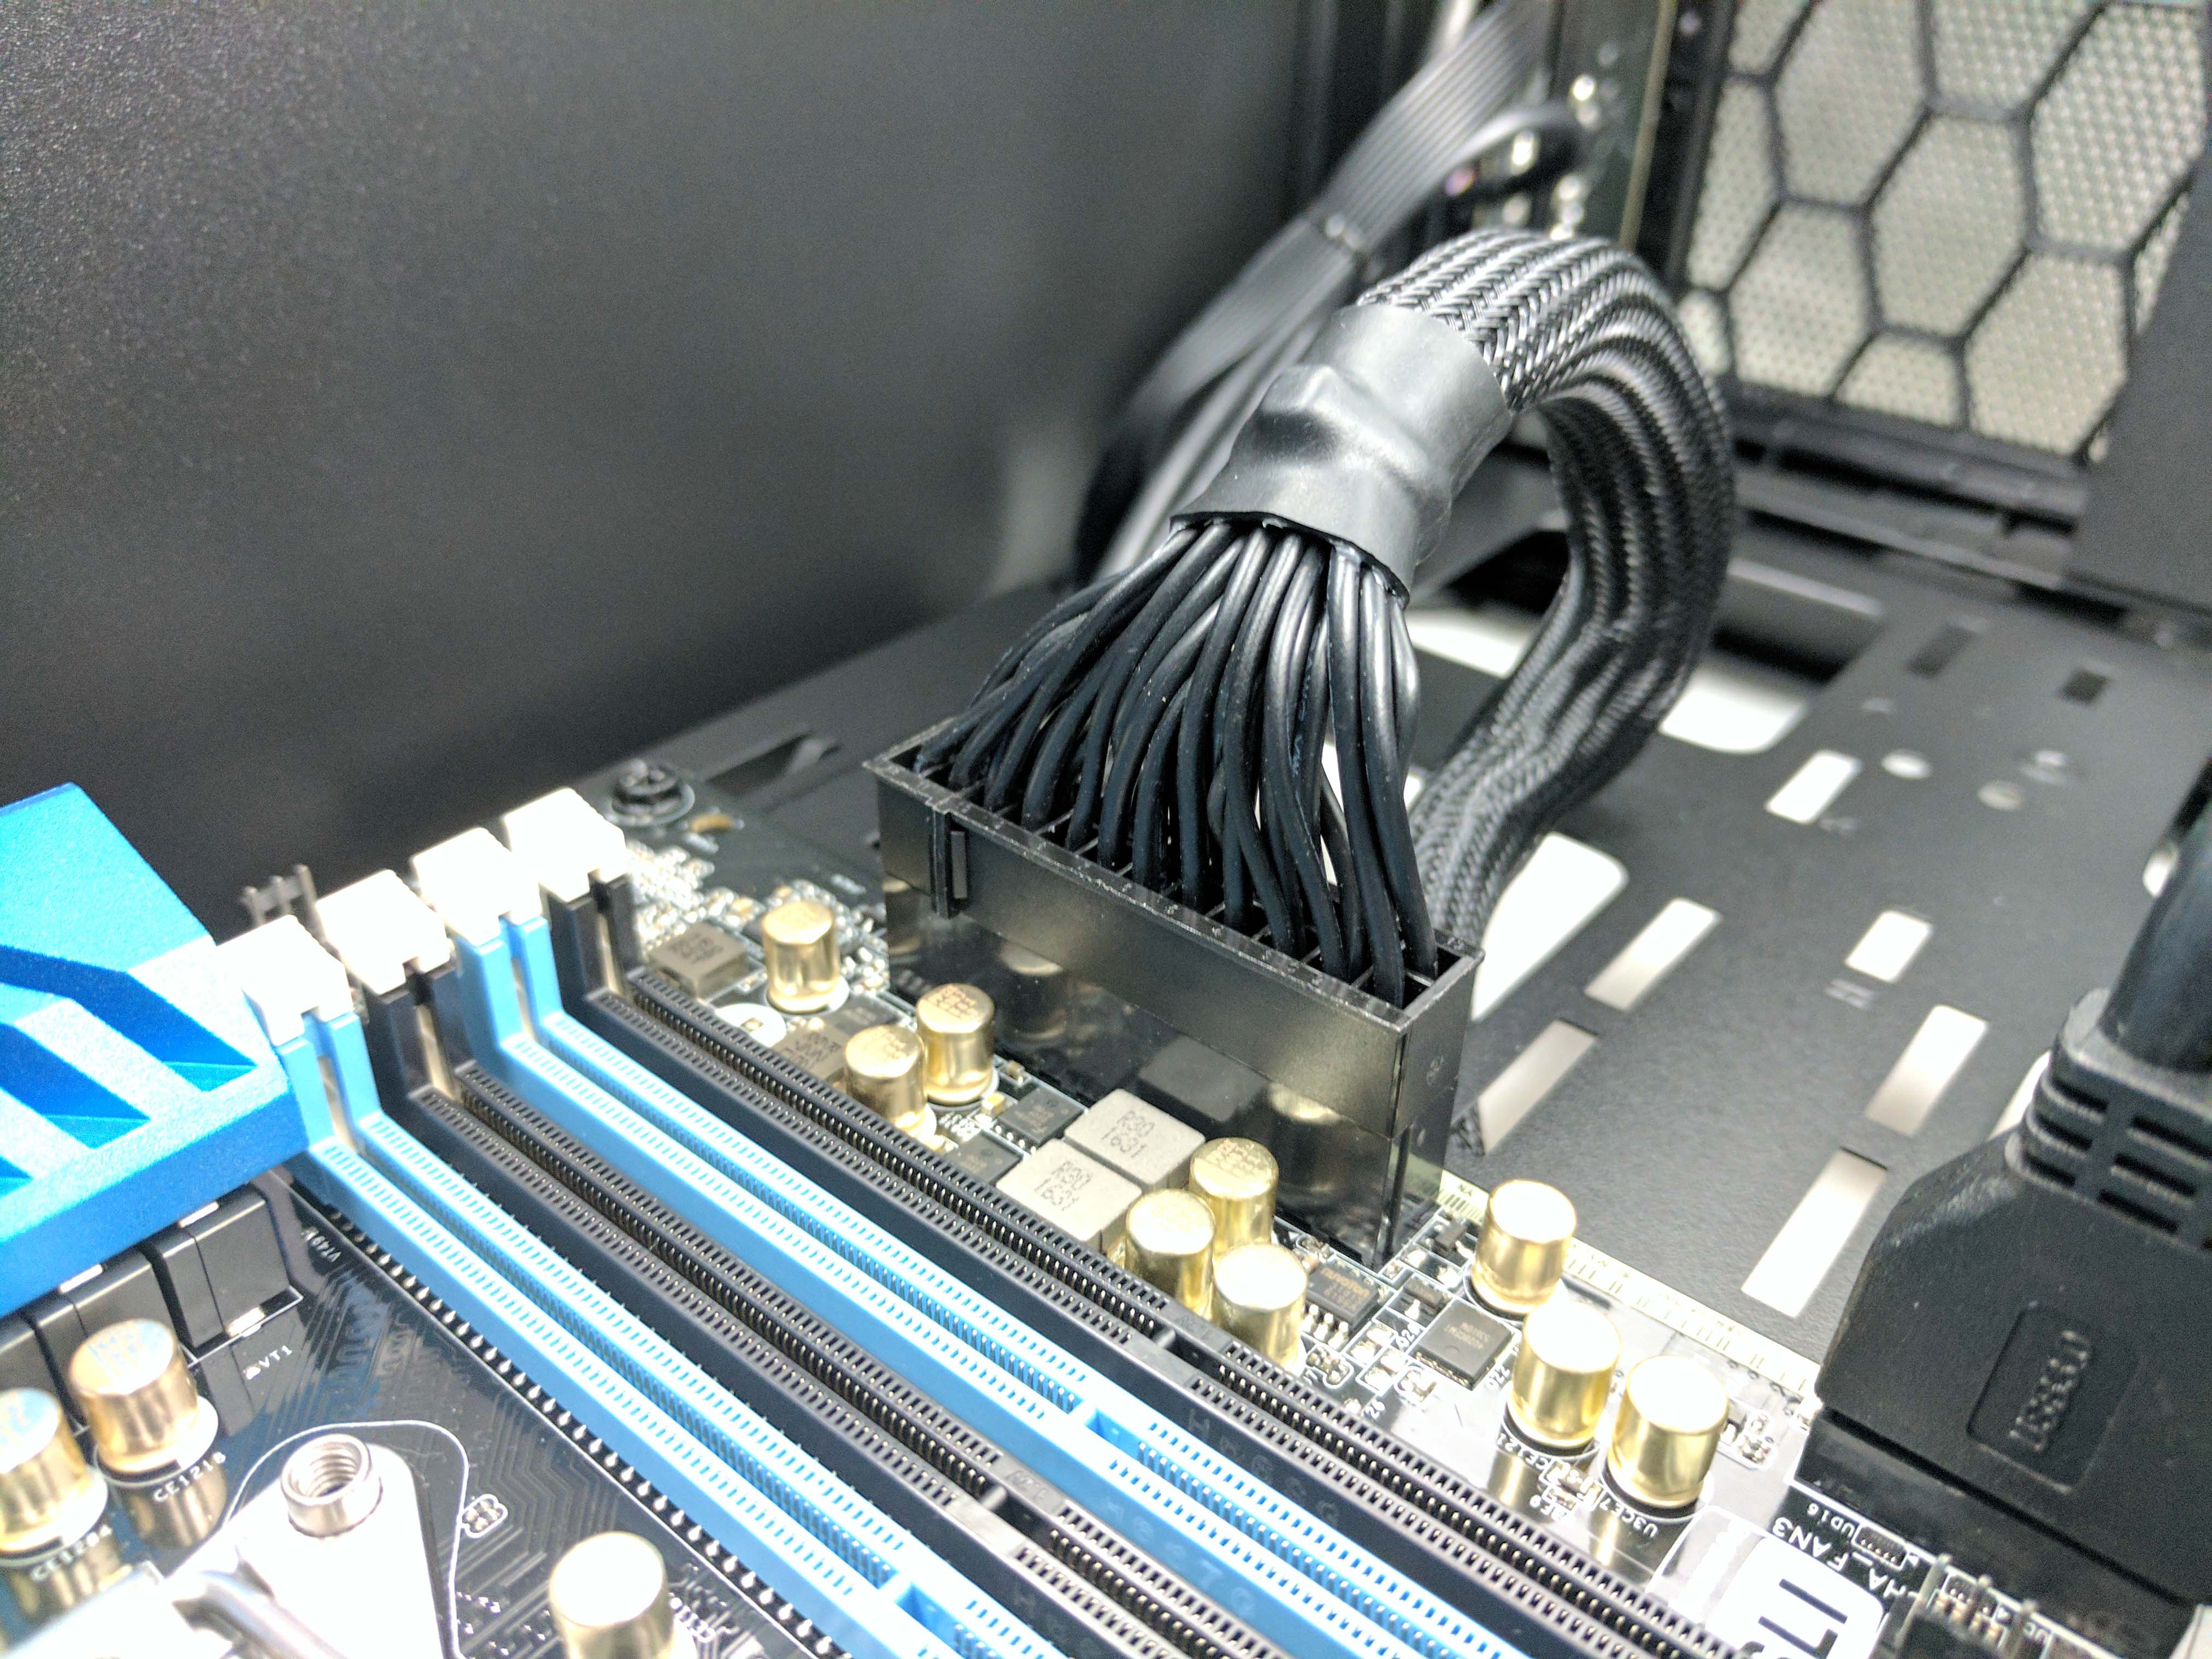
Run the cable directly under the right-side edge of the motherboard and feed it through the top hole (vertically, closest to the motherboard), as seen in the 3rd slide in the album below. Use the saved tie wrap to secure the ATX power cable to the chassis between the top and middle vertical holes, along with the previously run front panel connectors, using the case's built-in wrung. Plug the cable into the motherboard and put the excess into the main chamber of the case.
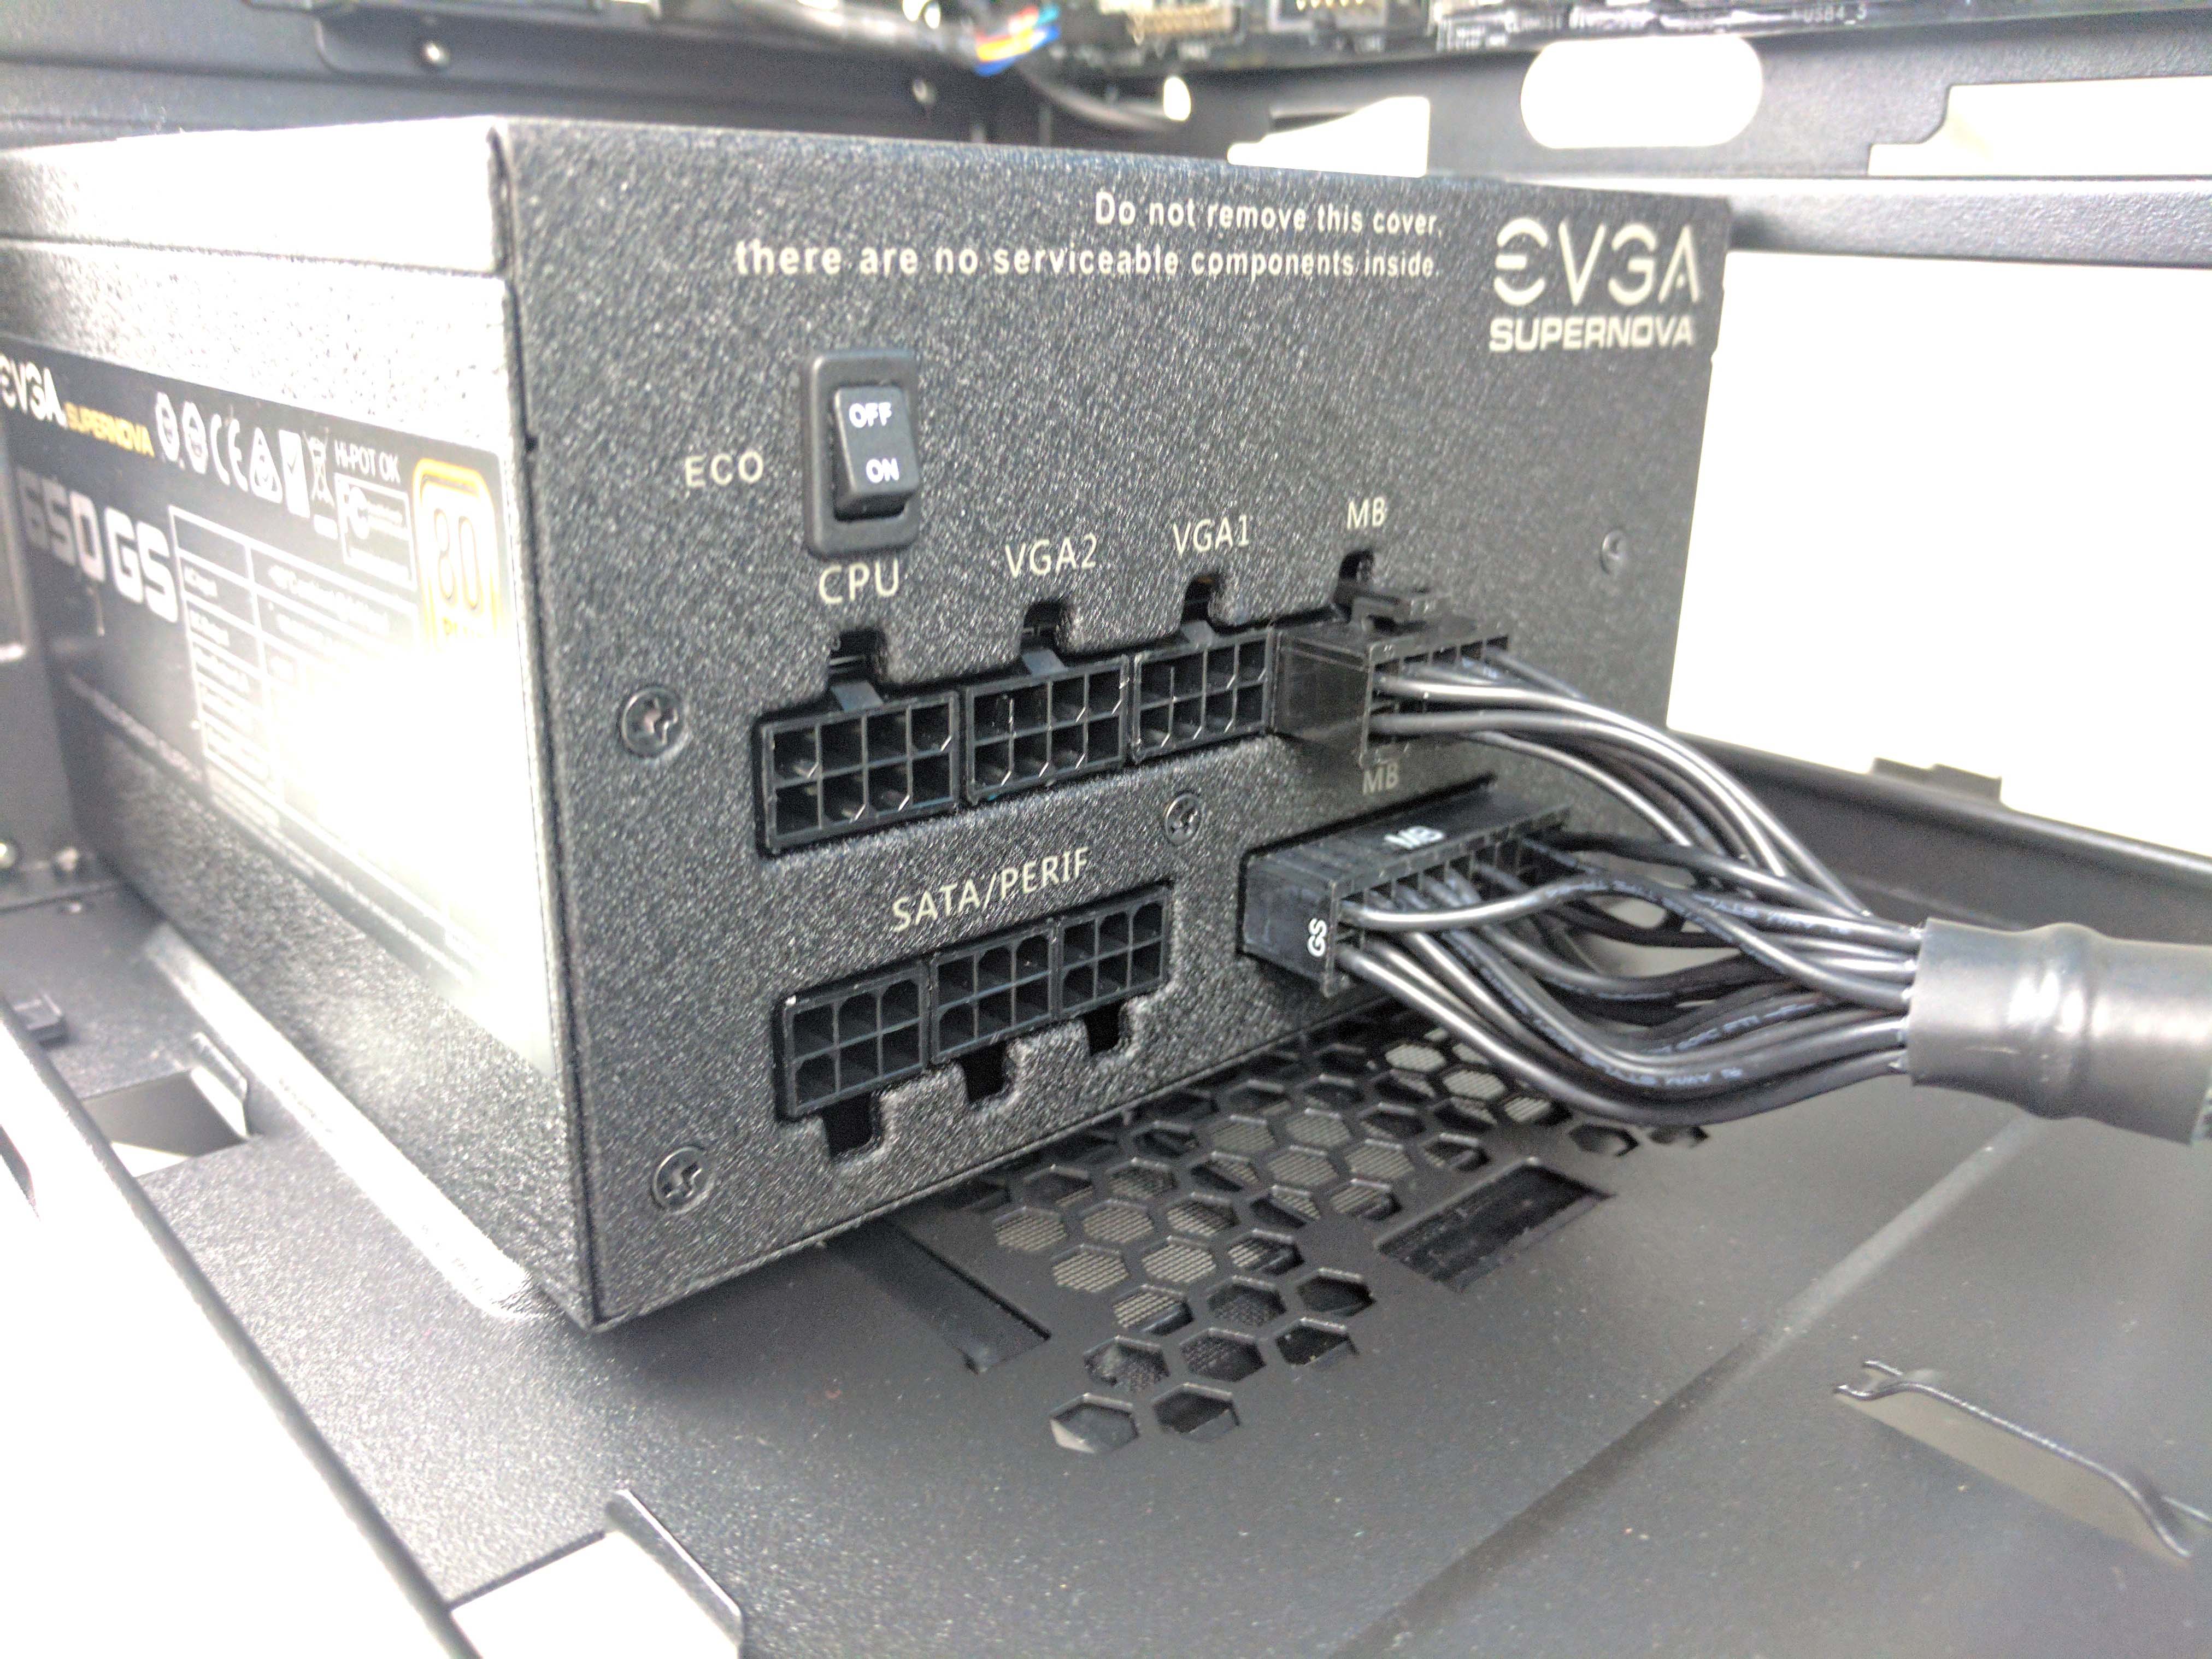
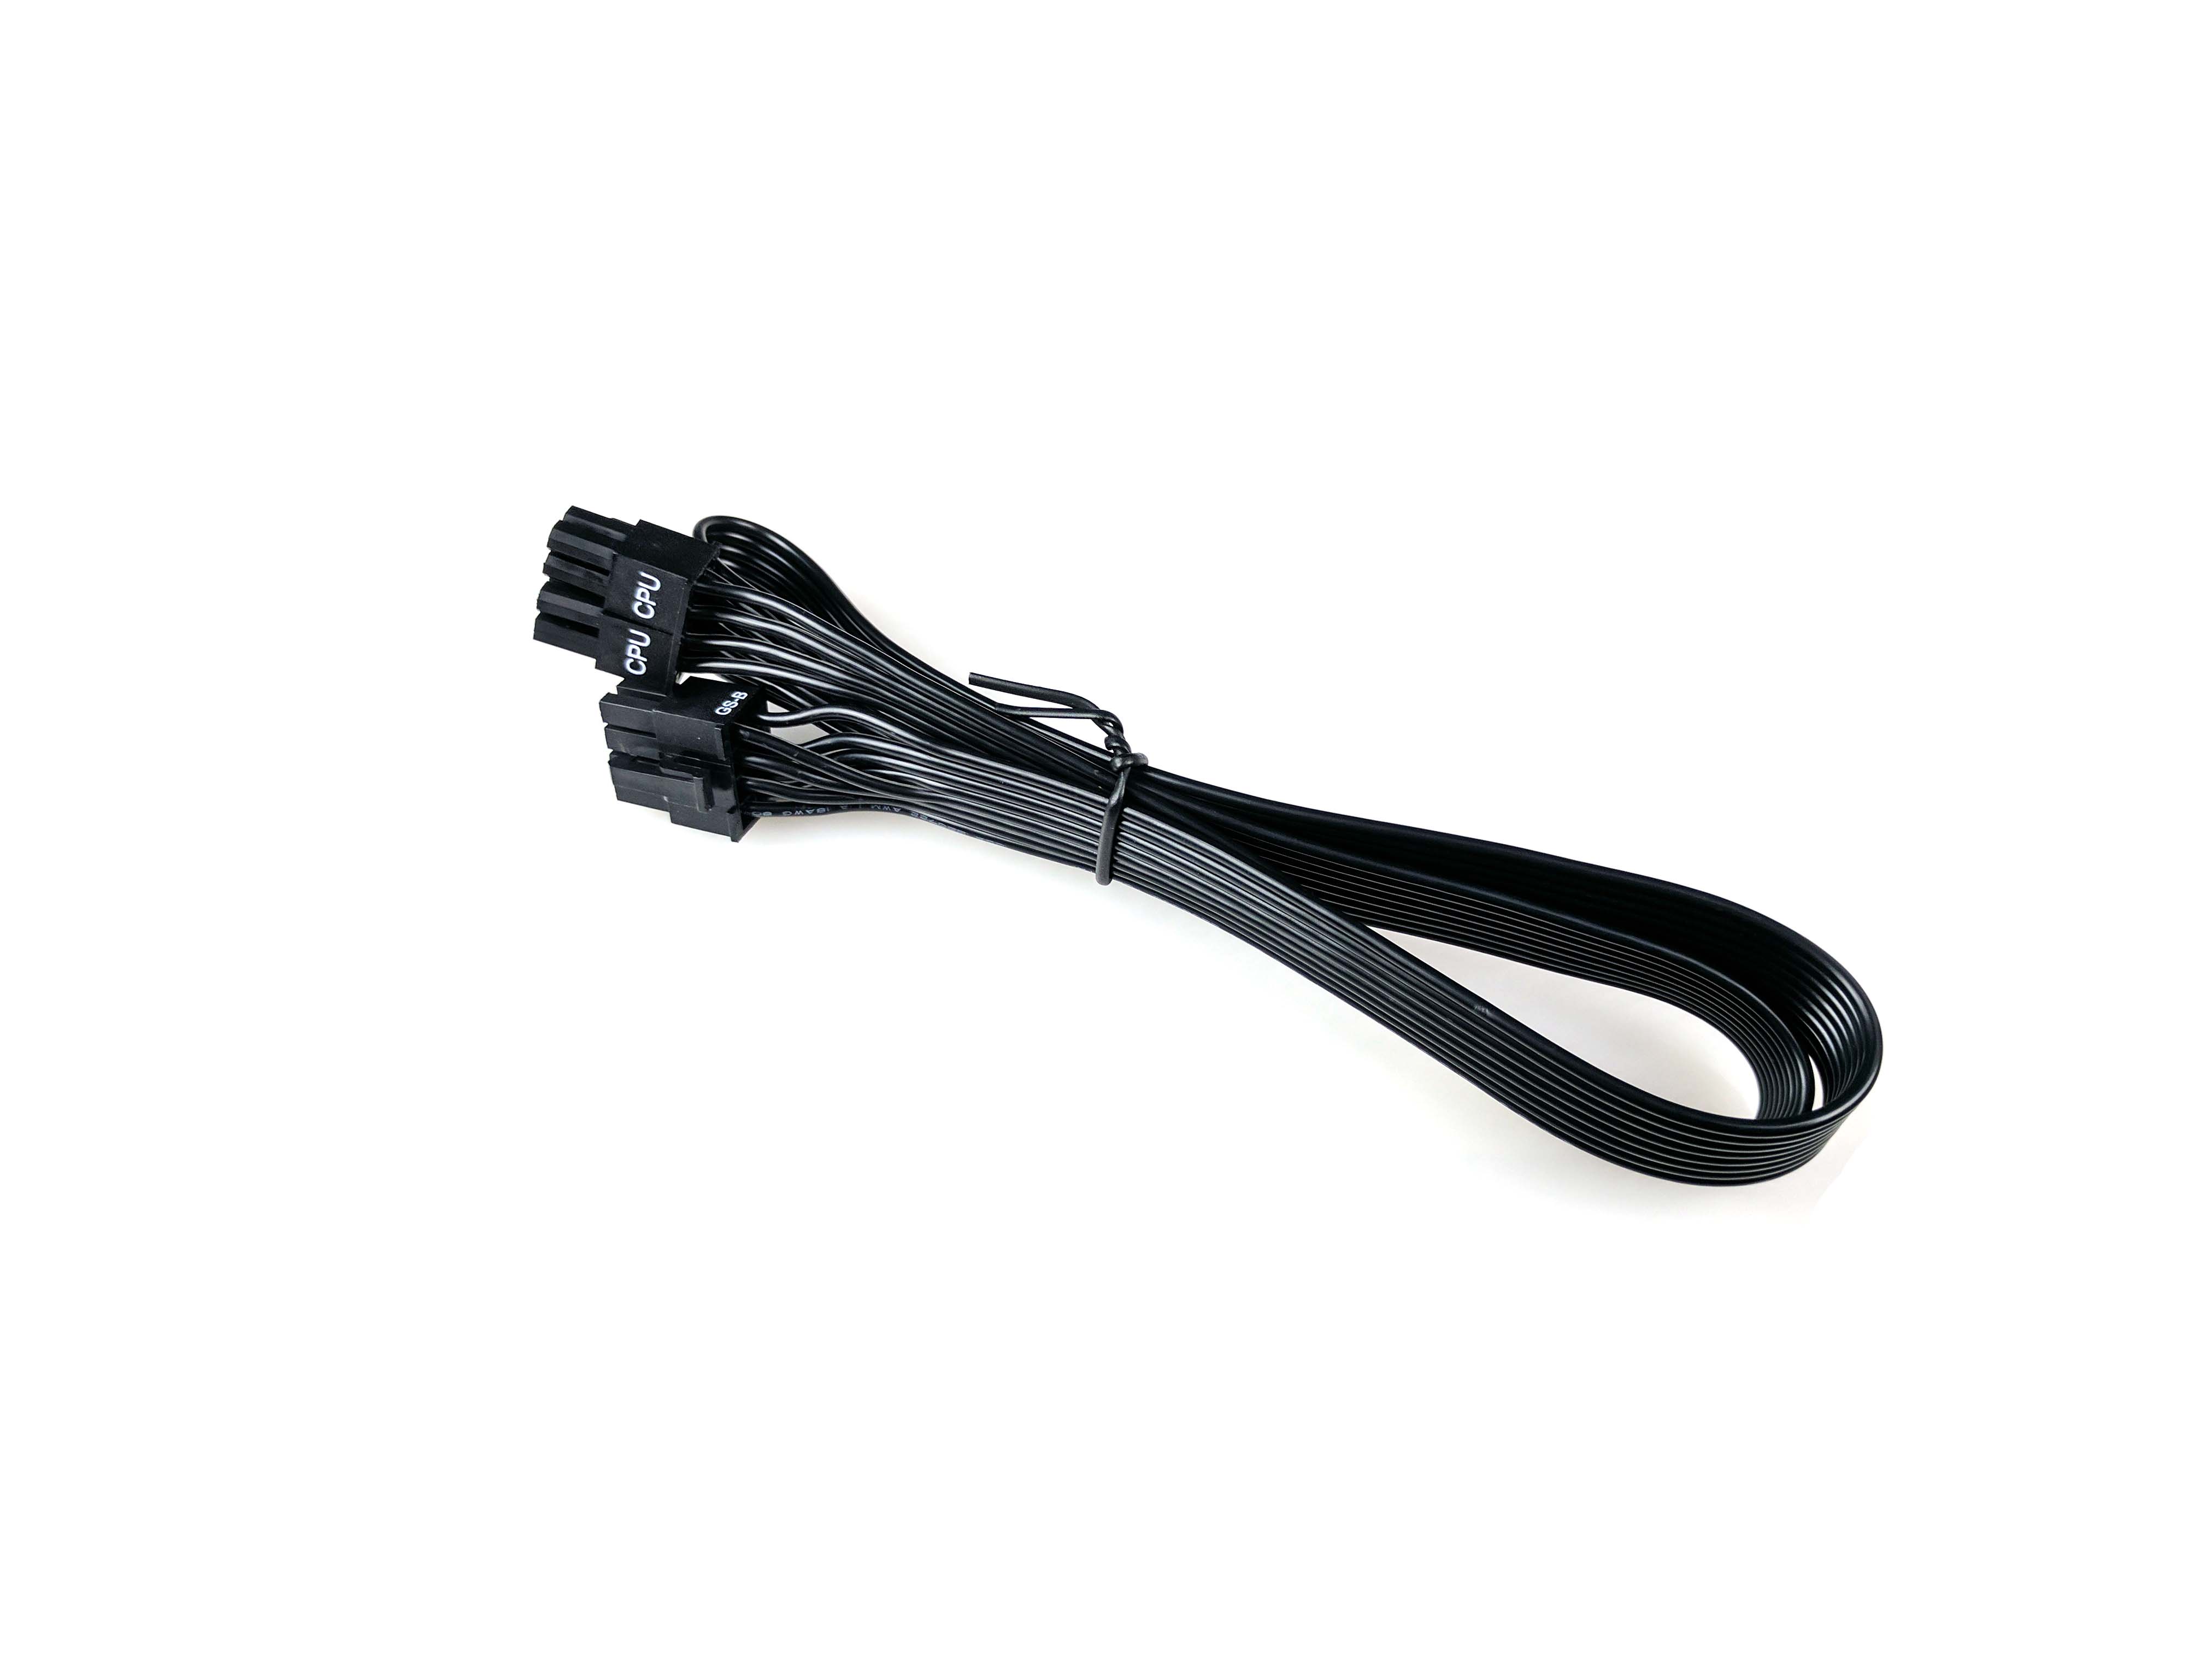
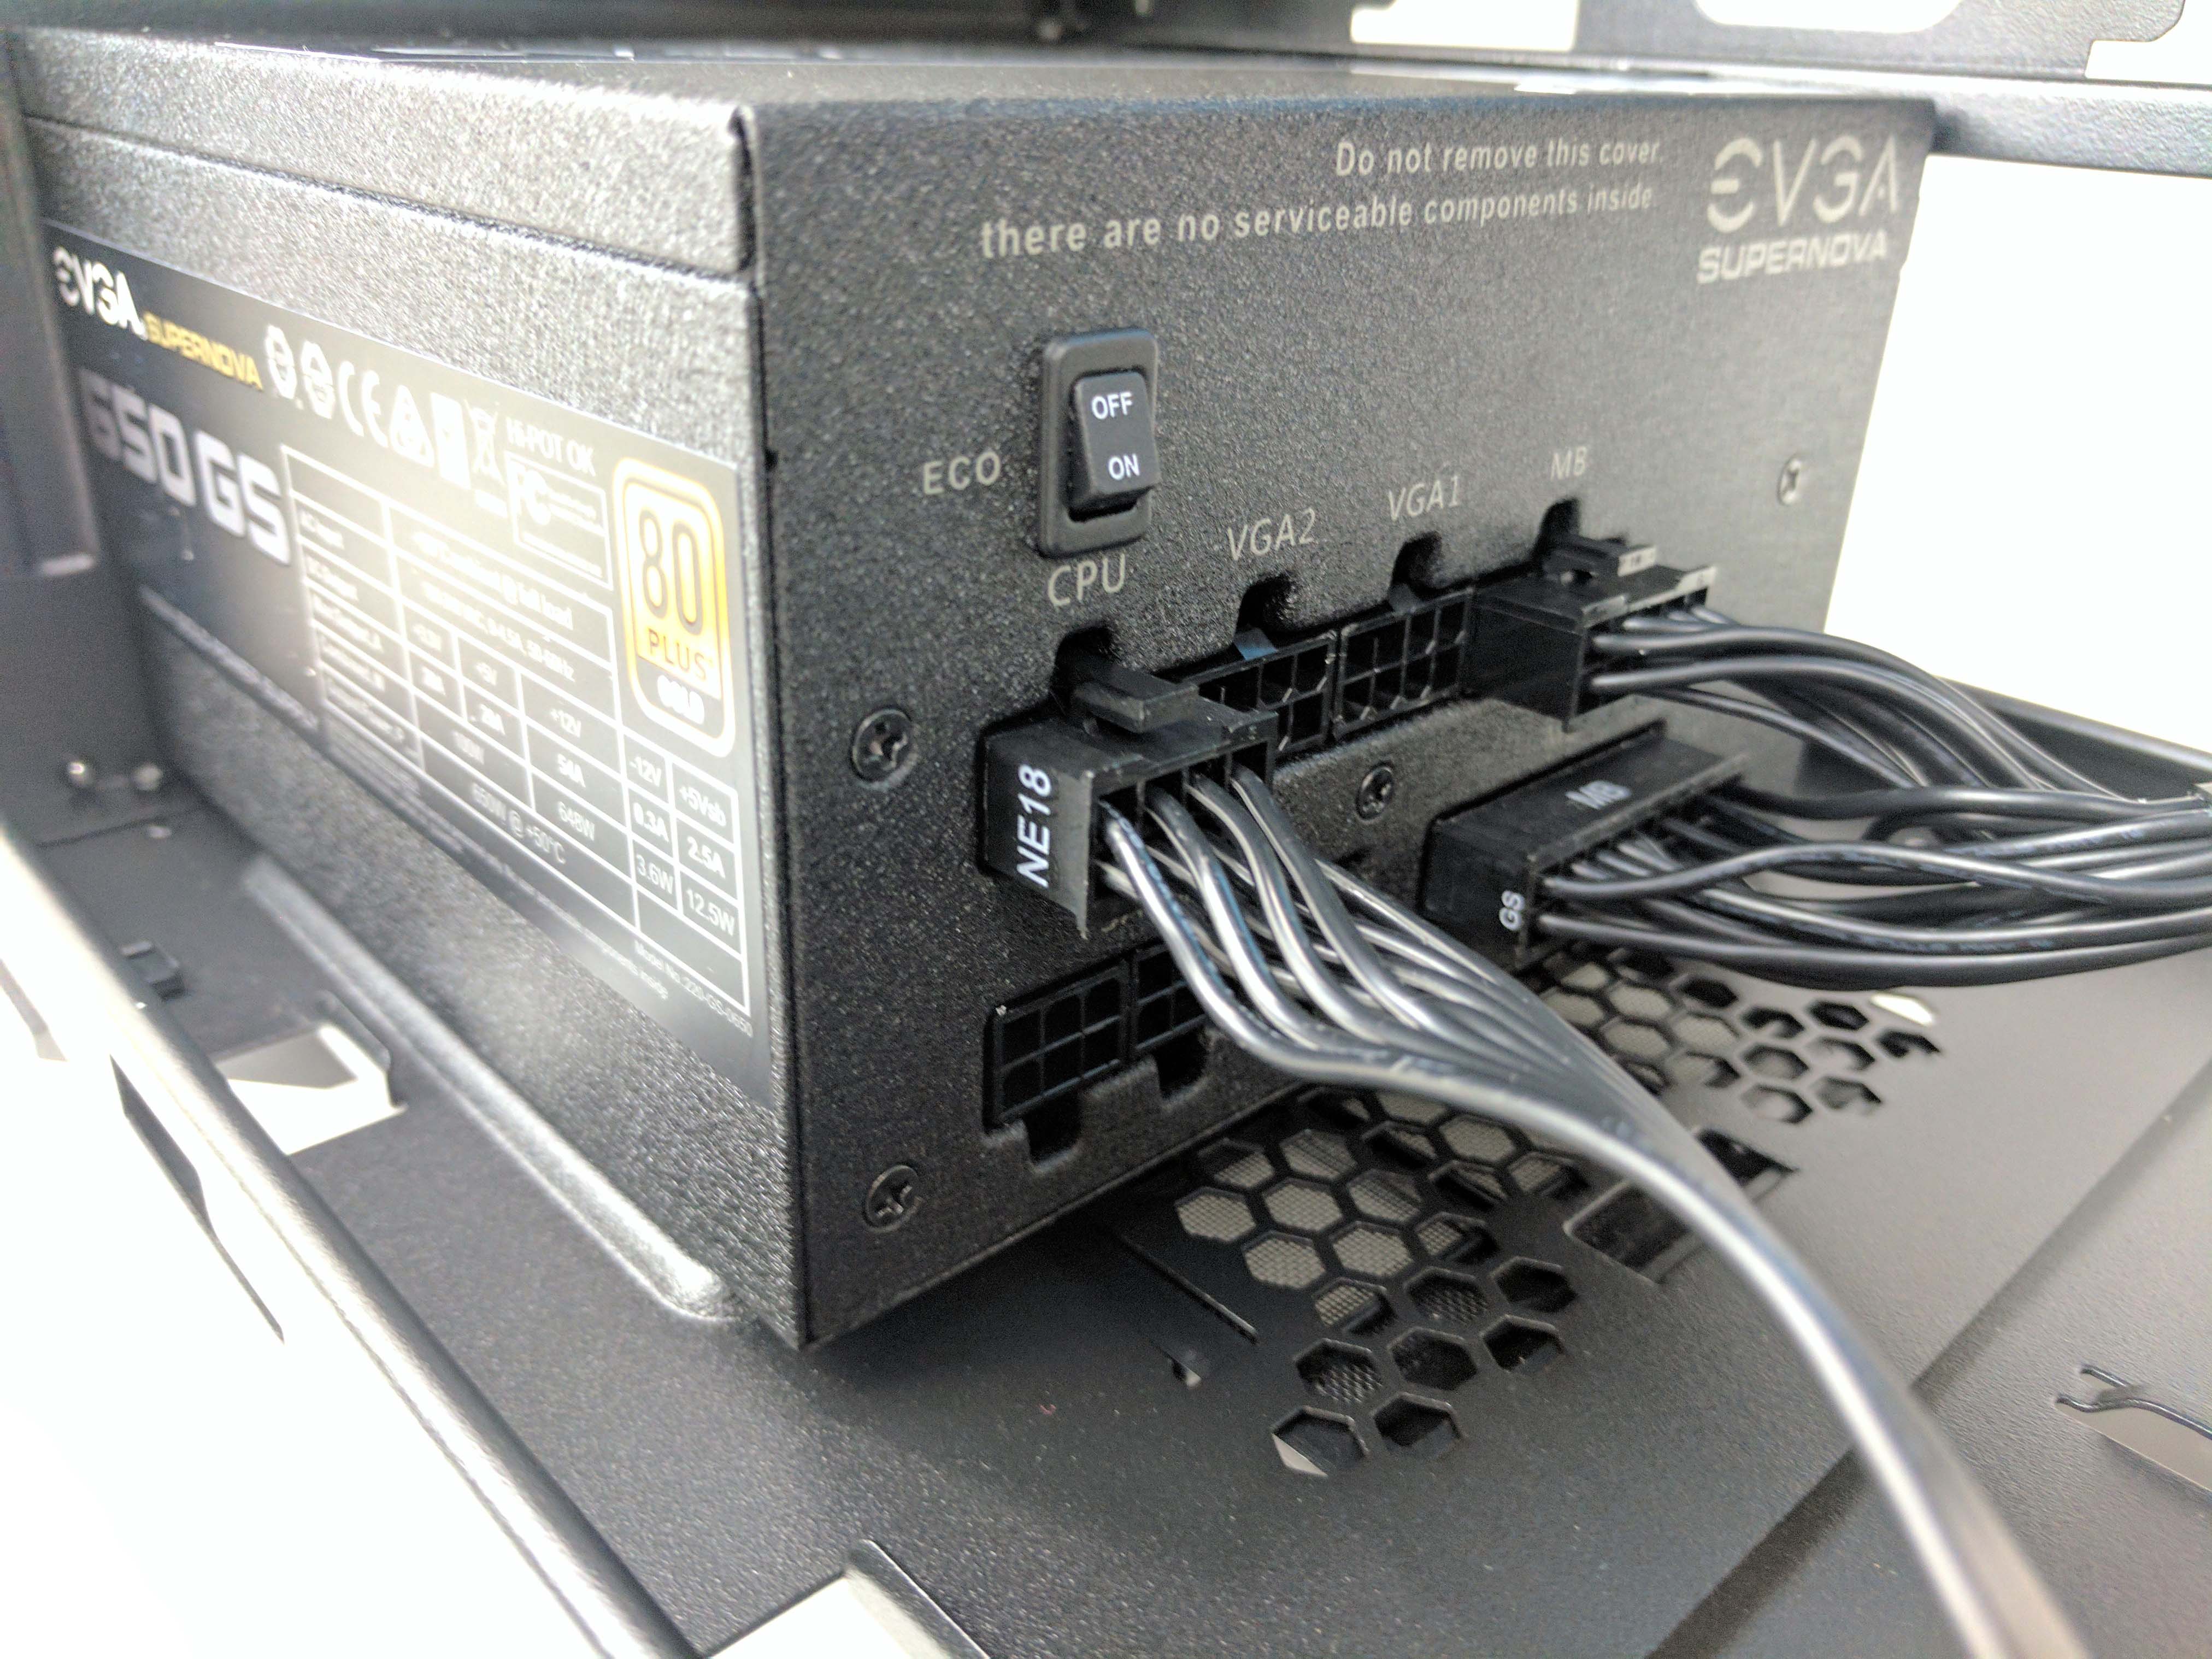
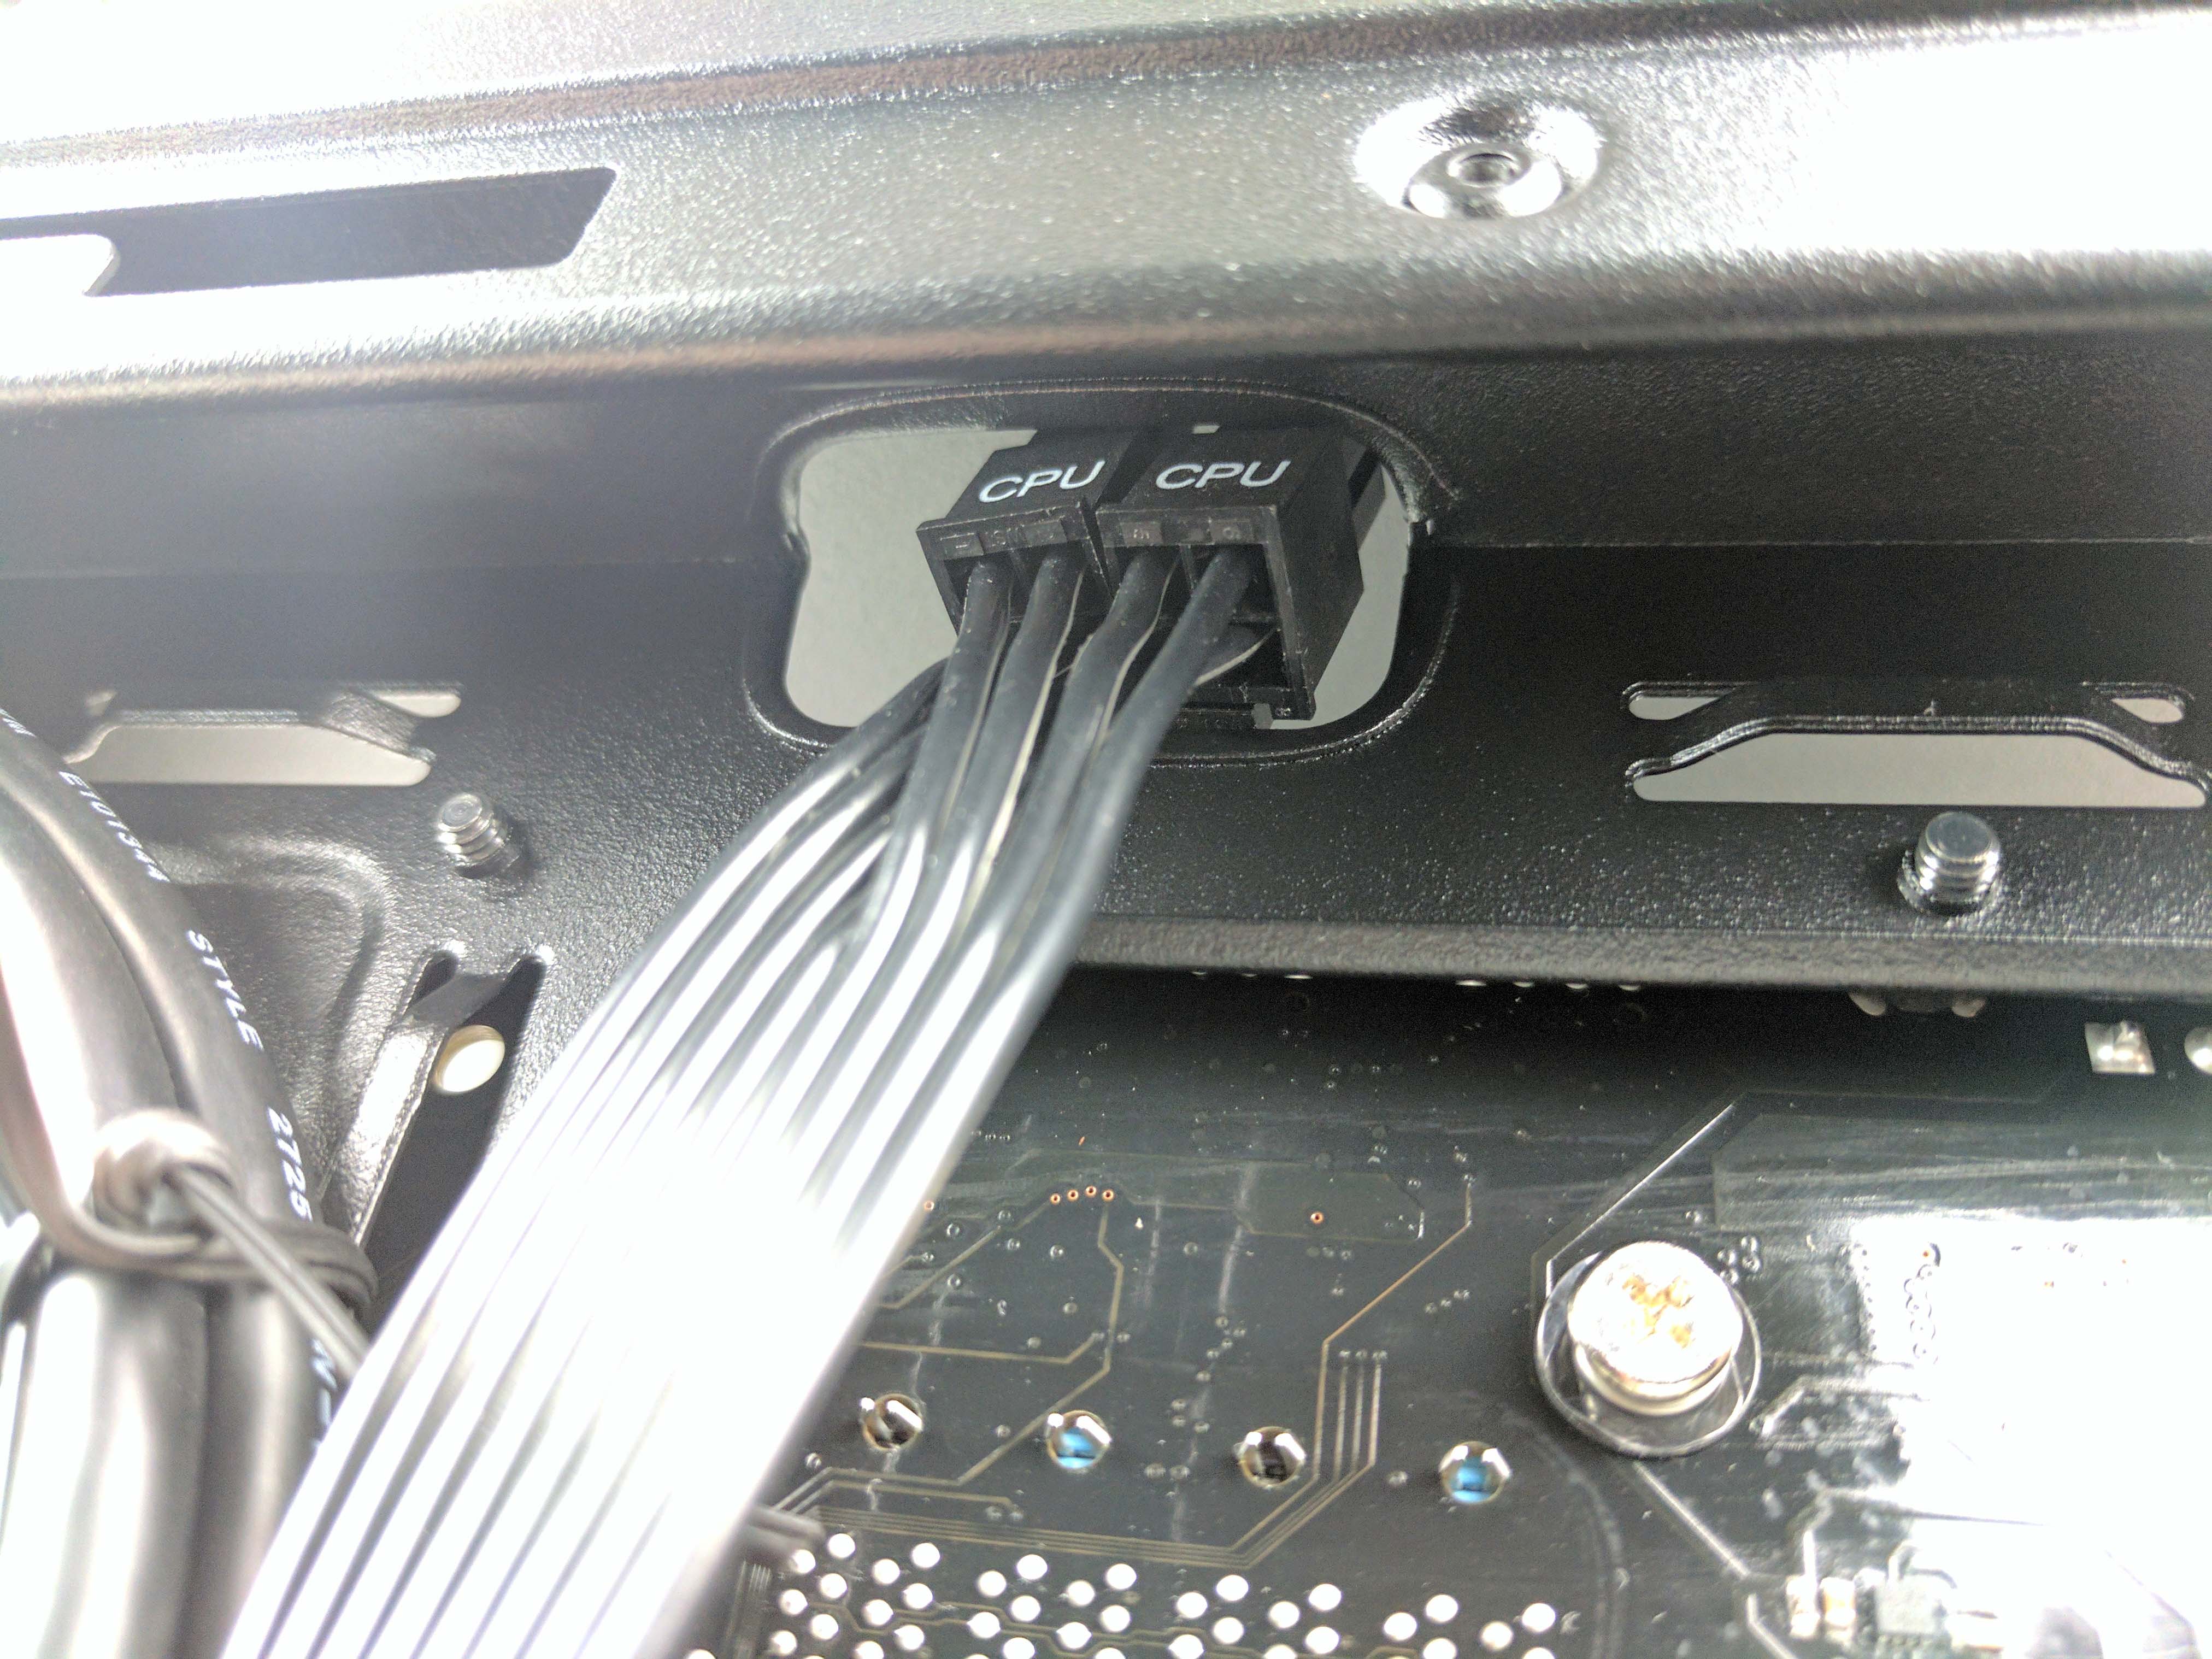
Remove the 4+4-pin CPU power cable from the PSU box and untie it. Connect the solid 8-pin side of the cable to the PSU port marked CPU and run the cable to the backside of the case (behind the motherboard). Run the cable straight to the top of the chassis and feed it through the smaller hole (see the 5th picture in the album below), putting the cable almost exactly where it needs to be plugged into the motherboard.
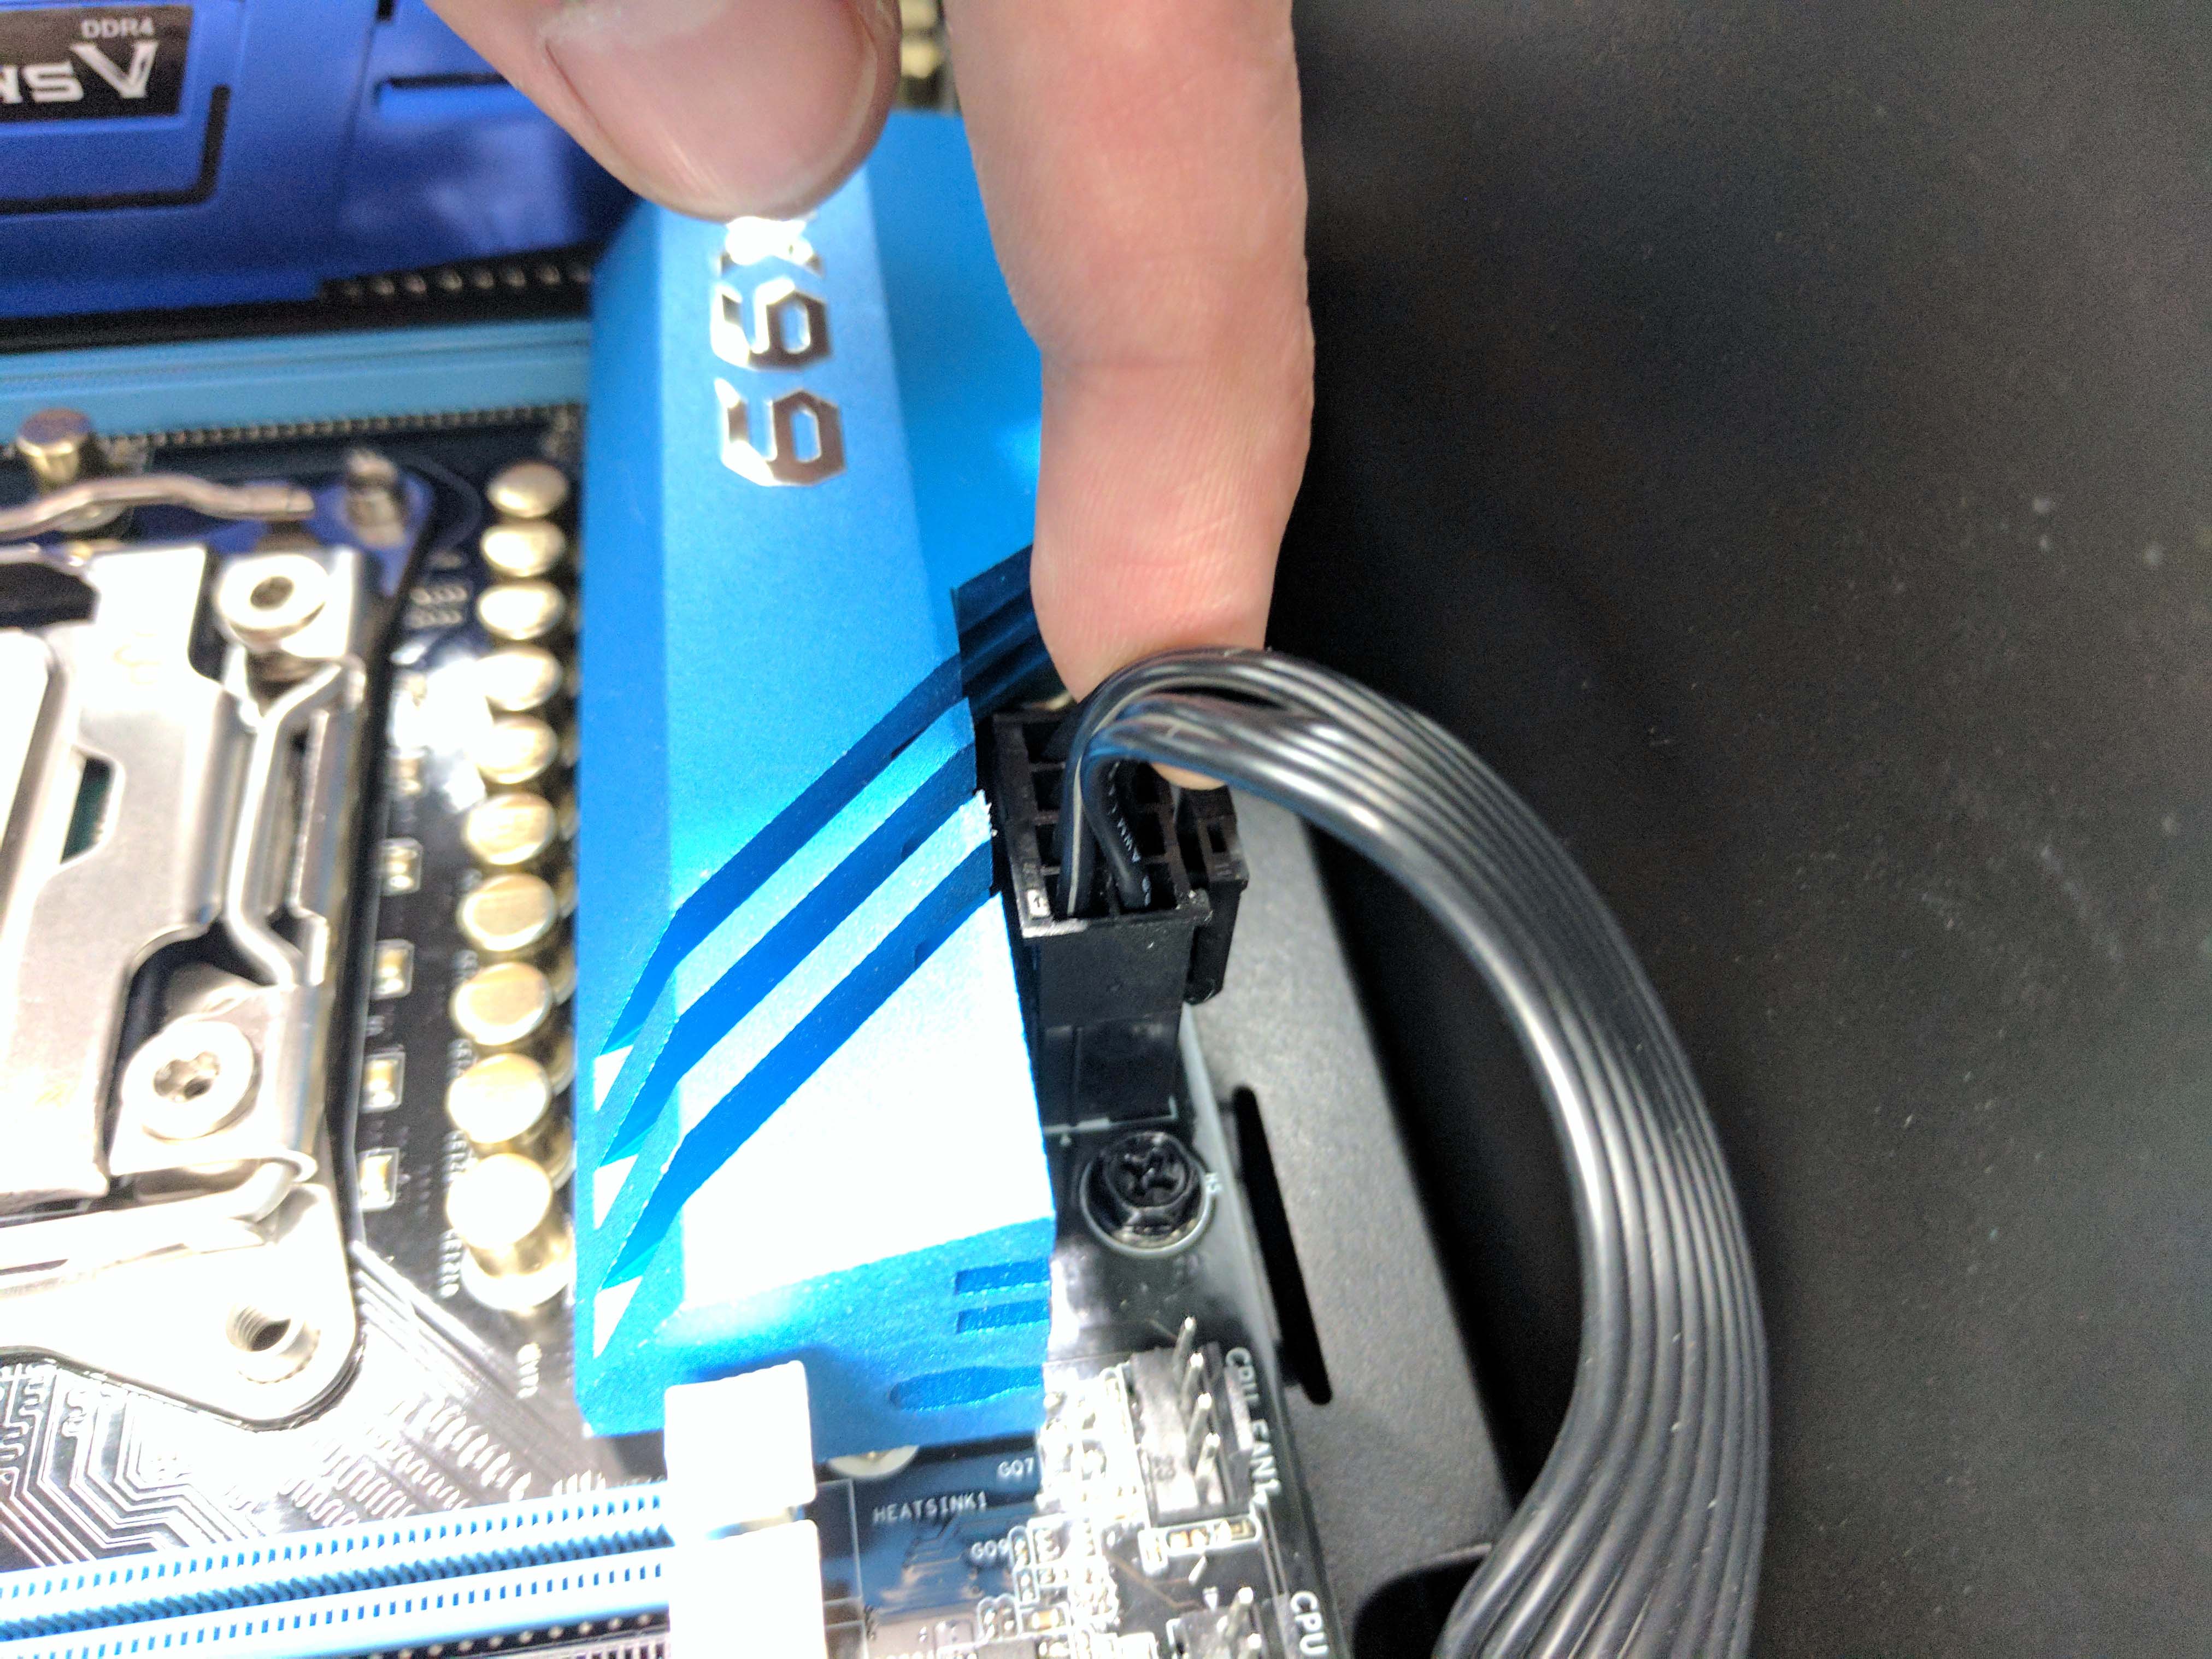
Tie in the CPU cable with the other wires using the existing tie wrap on the middle wrung and attach the 4+4-pin connector to the CPU power socket on the motherboard, leaving the excess in the main chamber of the case (there won't be much).
Fans
Before you fill the case with more power cables, take a moment to plug in the rear fan cable to the leads marked PWR_FAN1 on the motherboard (see the 1st picture below). You can run the cable along the top of the PCIe x16 slot closest to the CPU and under the molex connector, up along the left side of the left-most memory modules, and tucked between the rear panel audio ports and Intel Gigabit Ethernet port. This isn't an elegant solution, but it's the shortest distance to an available fan port.
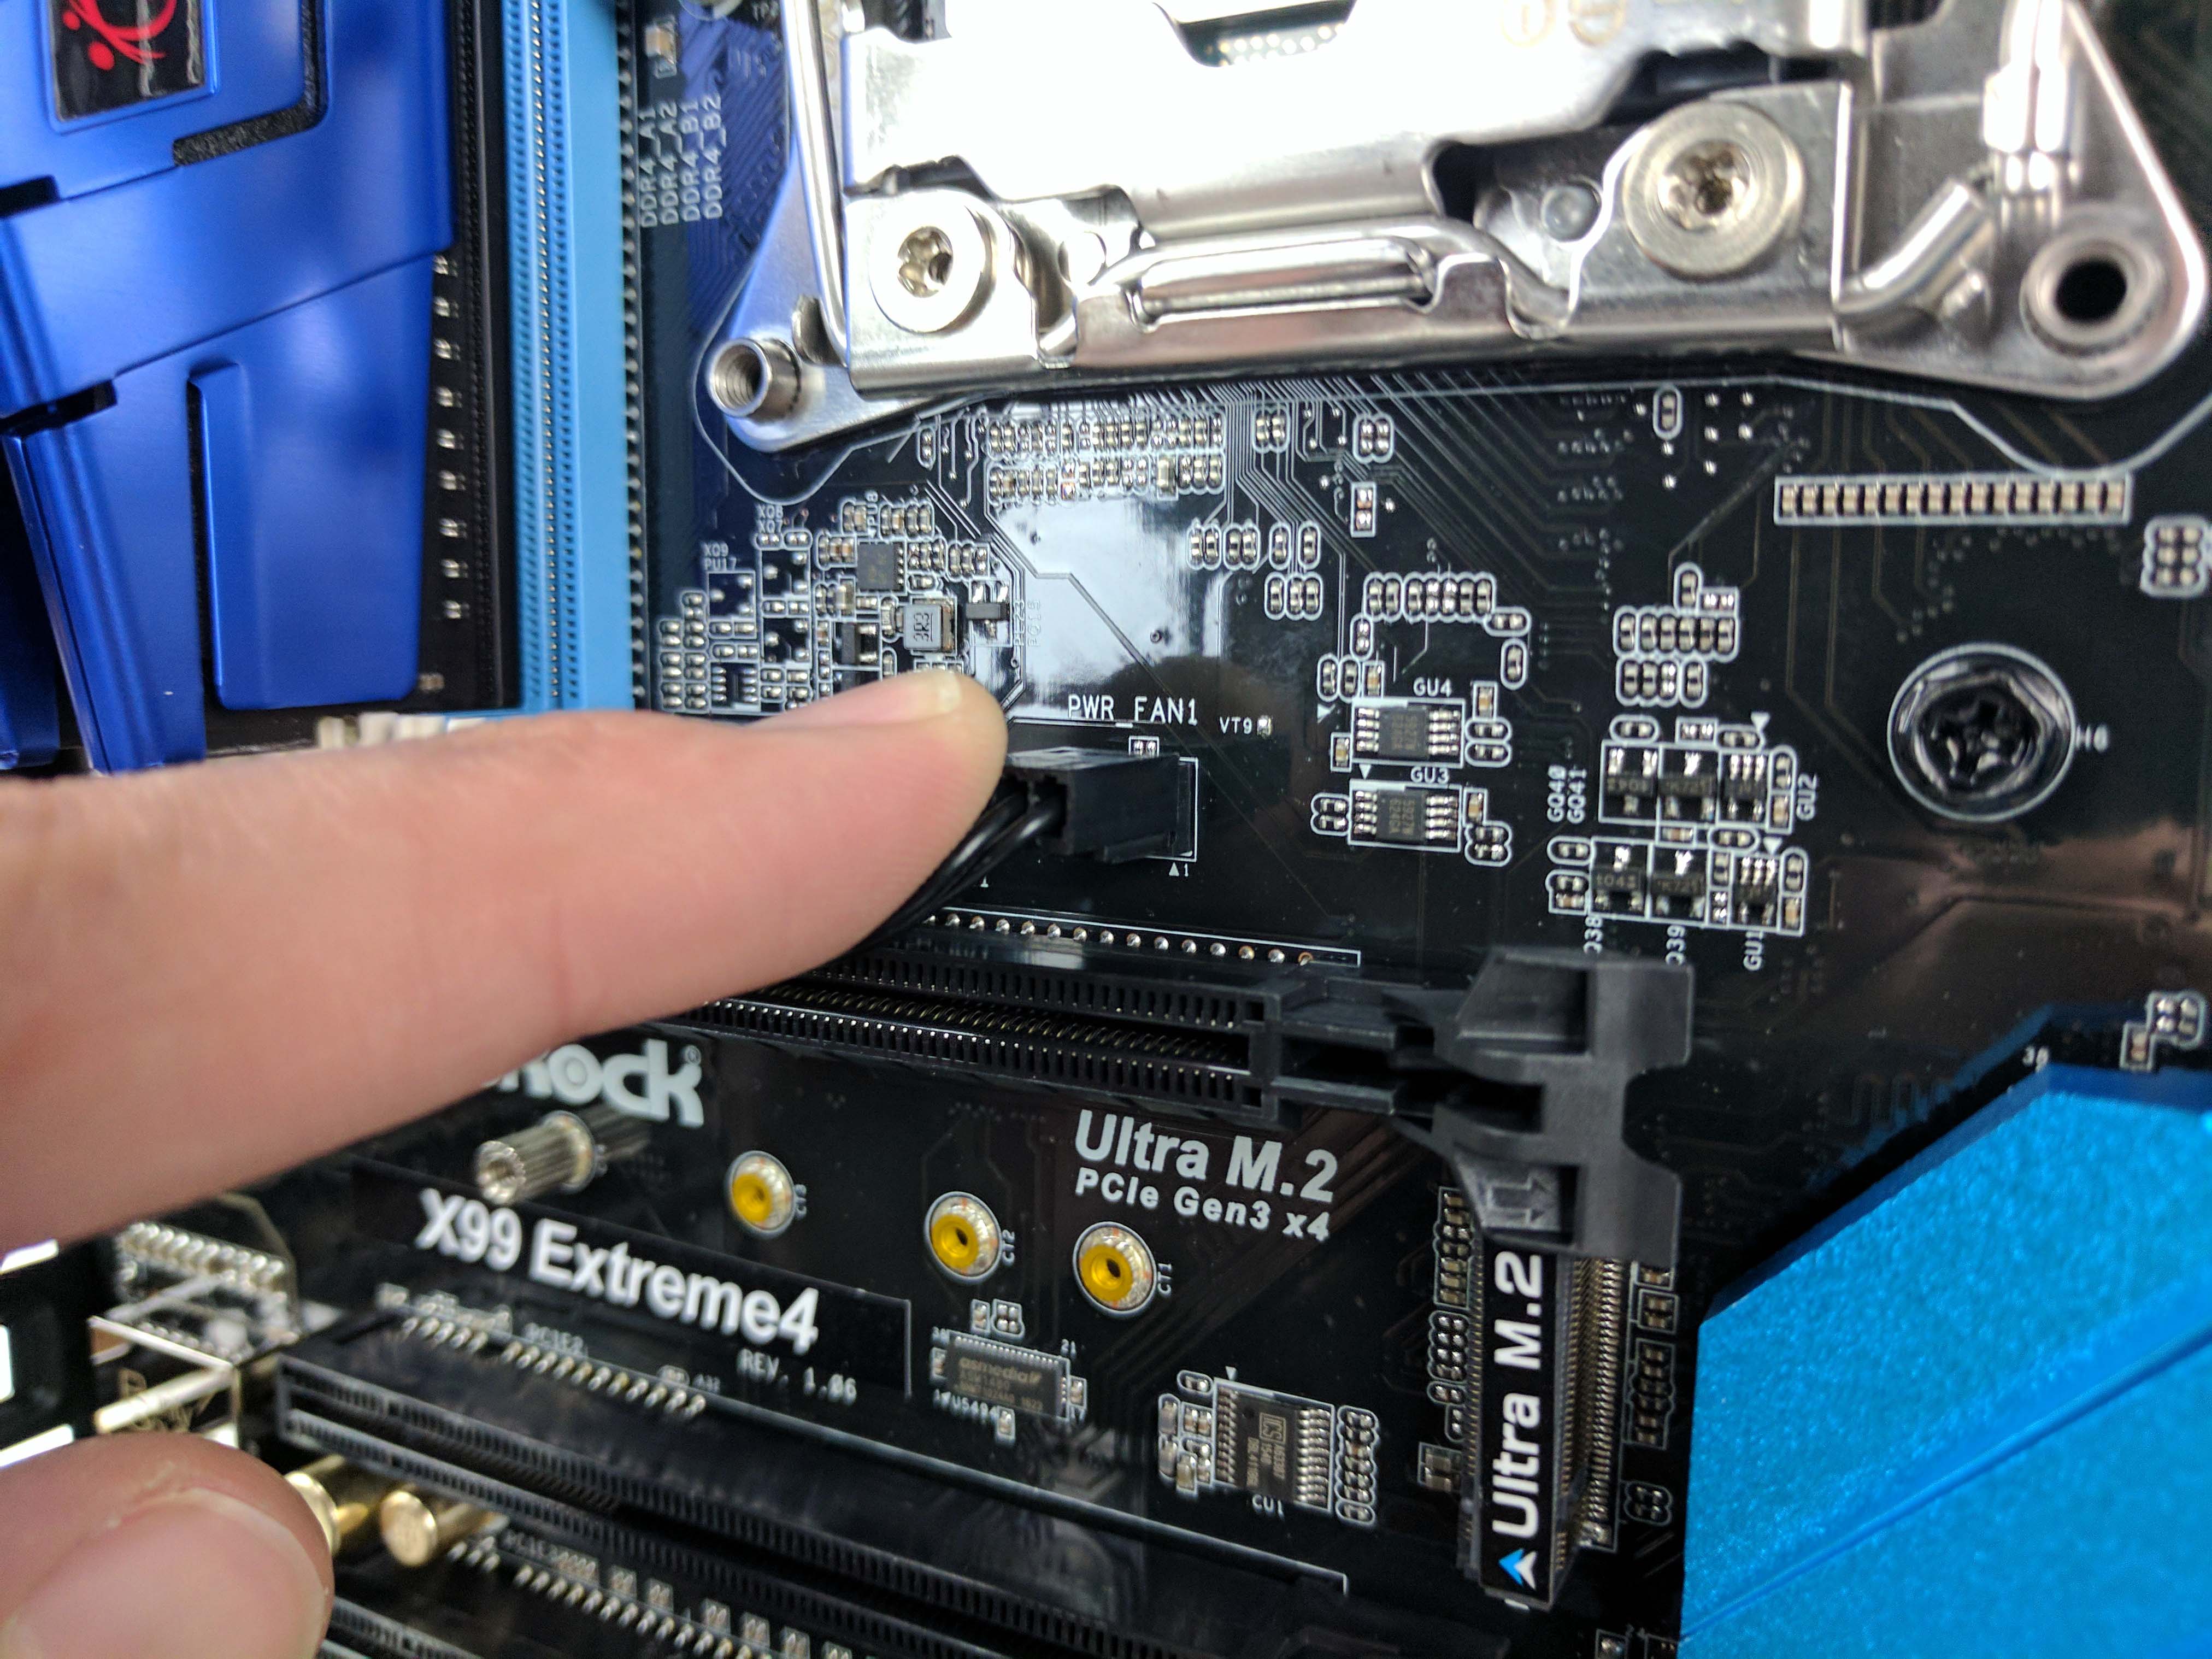
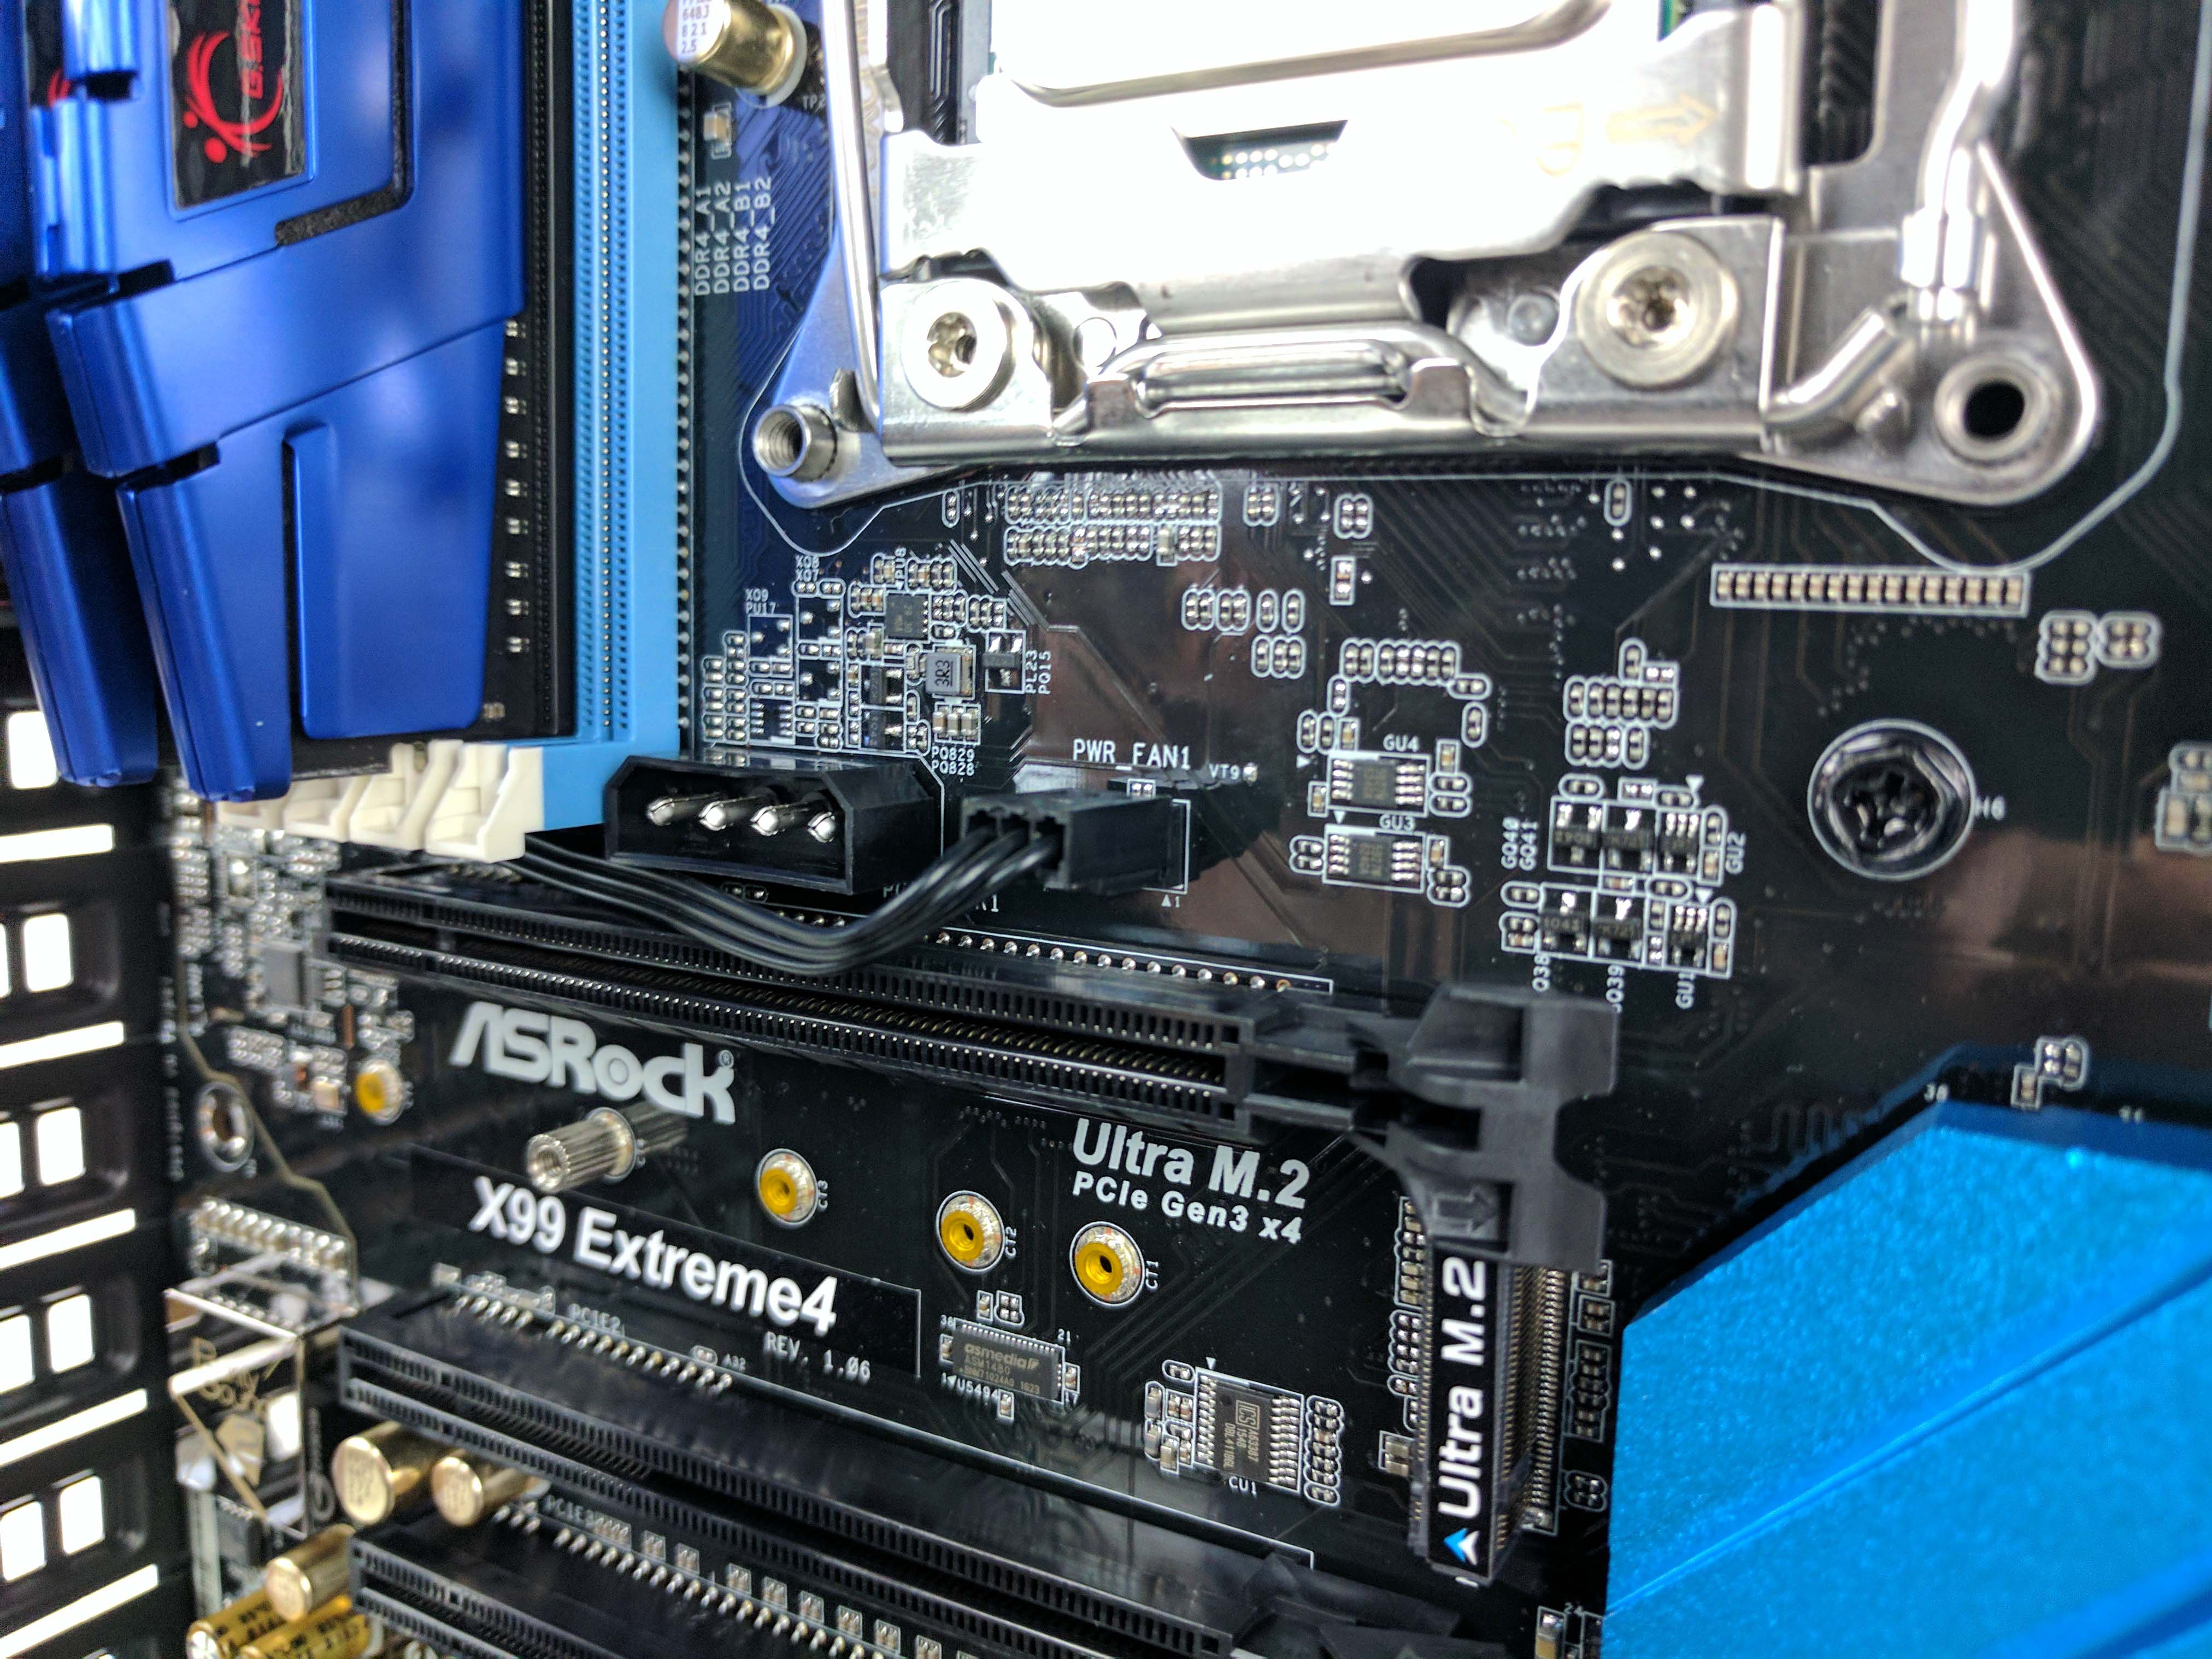
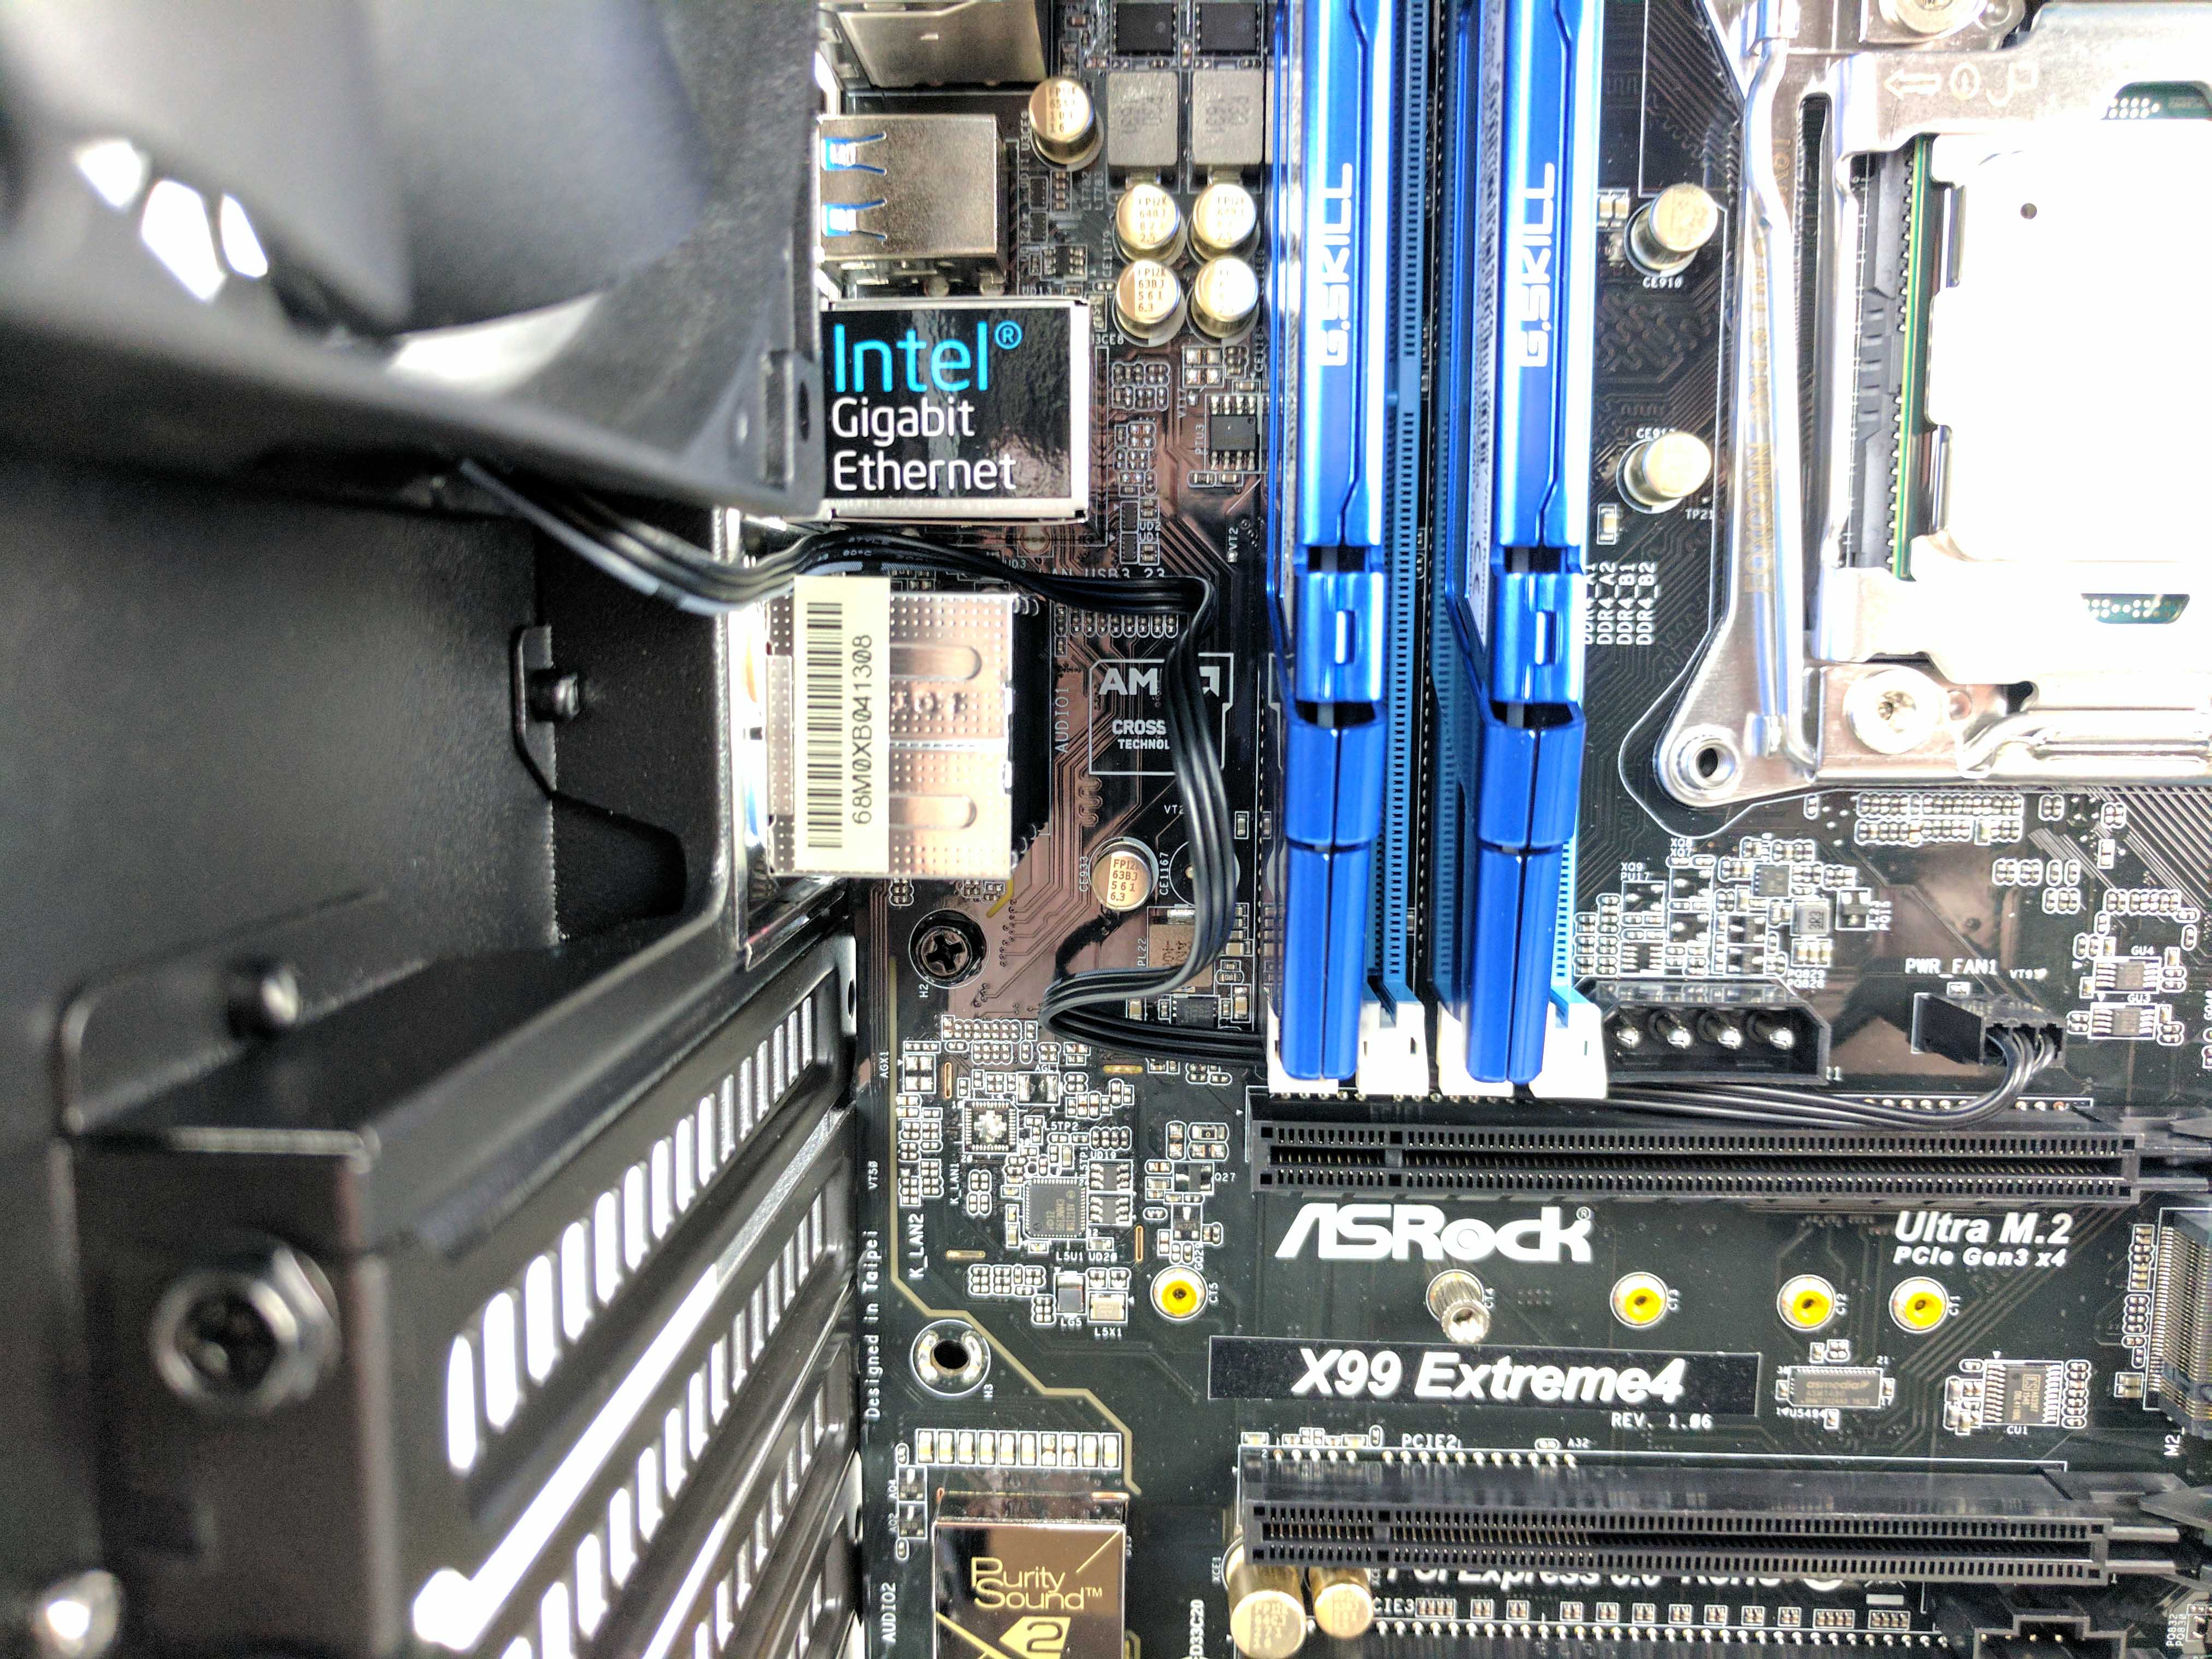
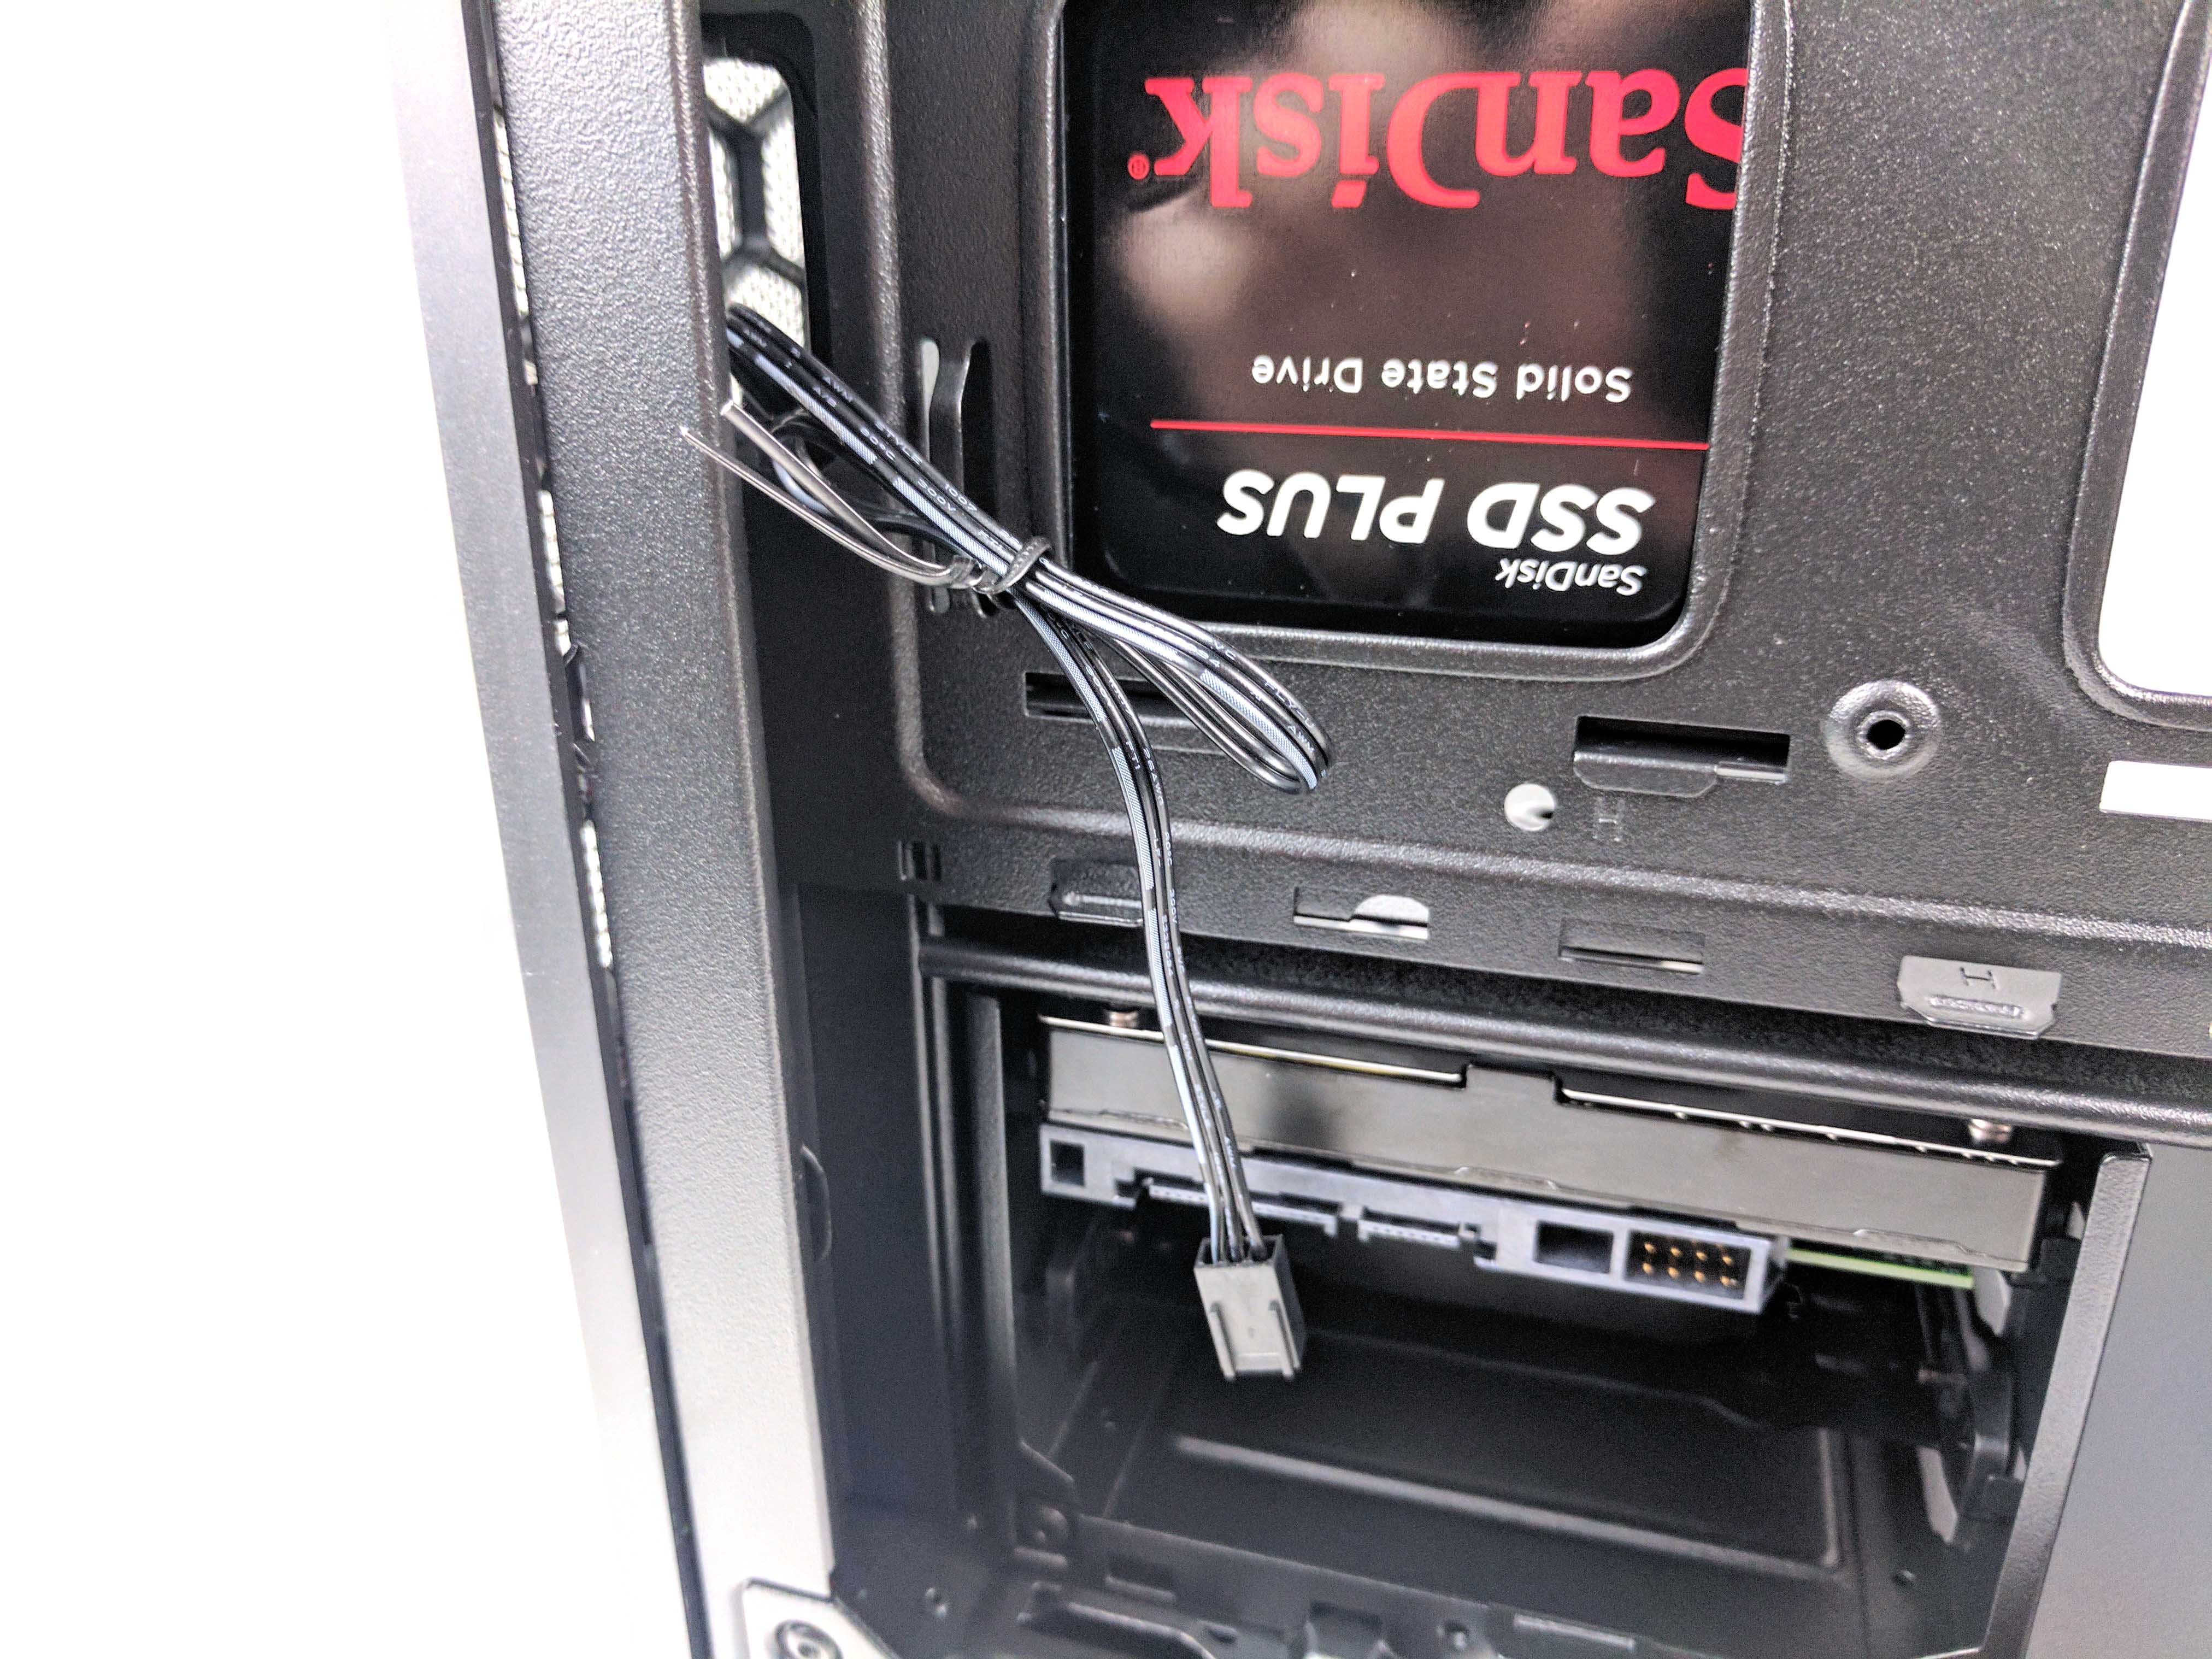
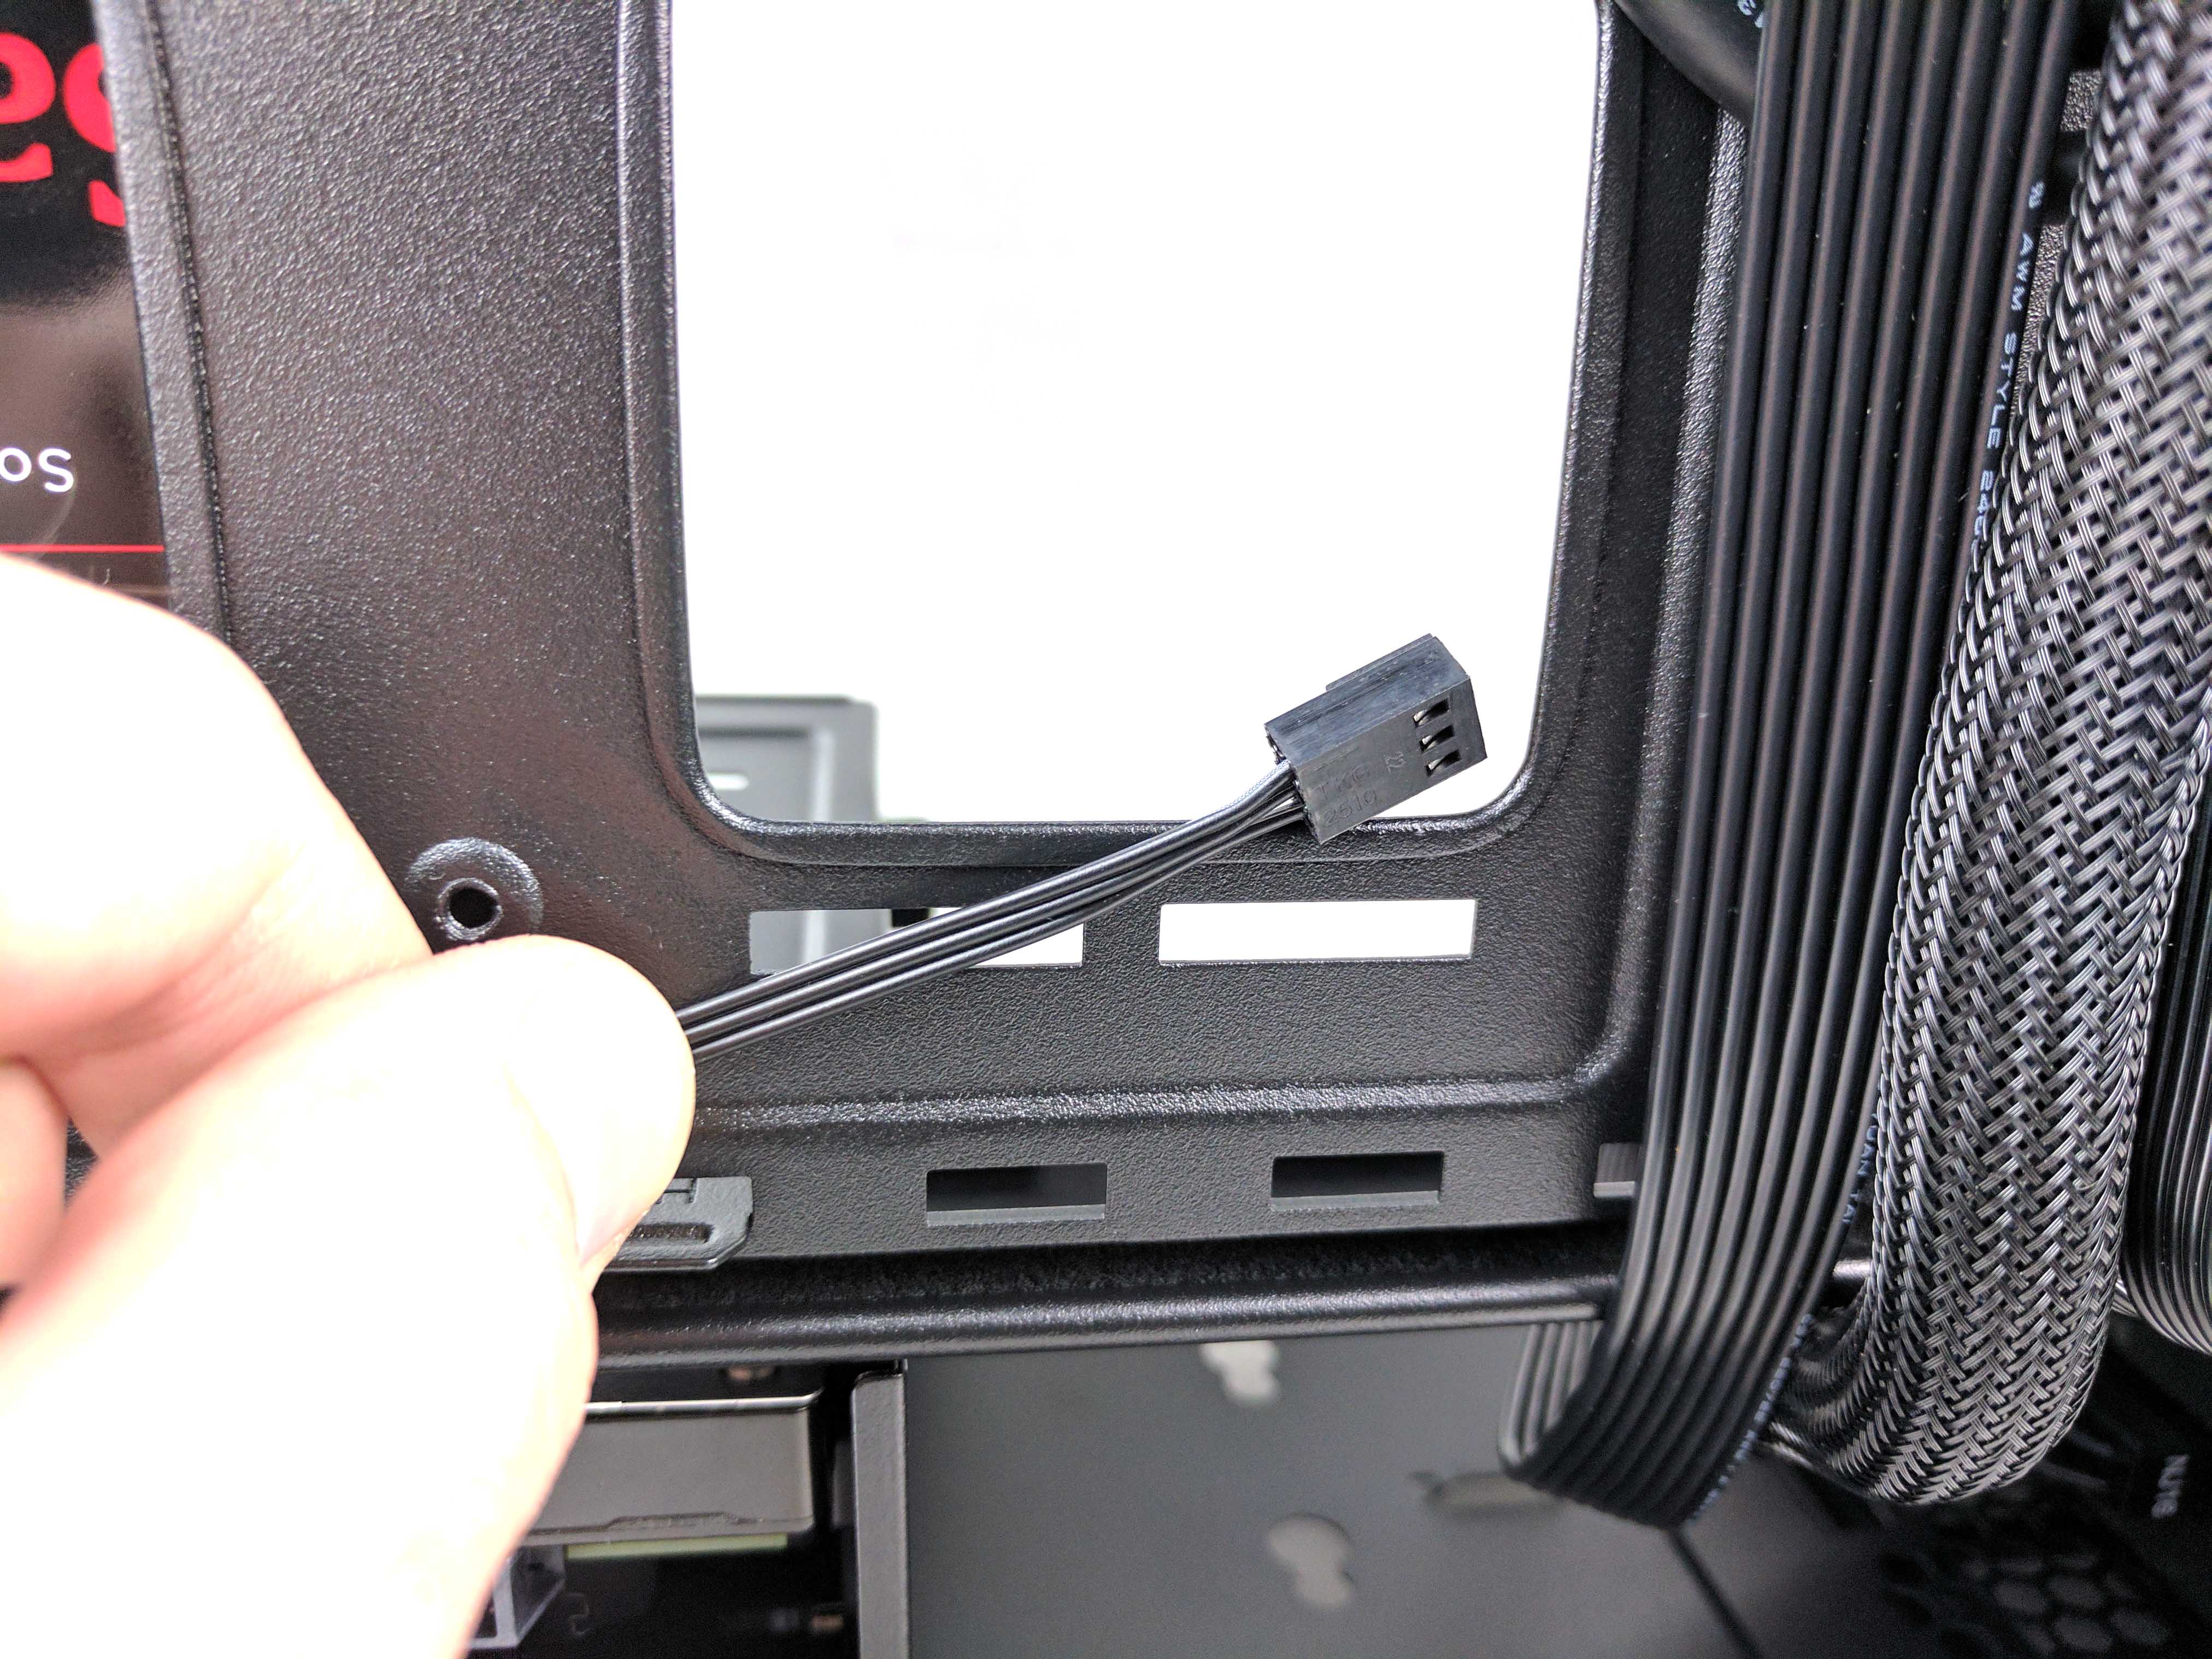
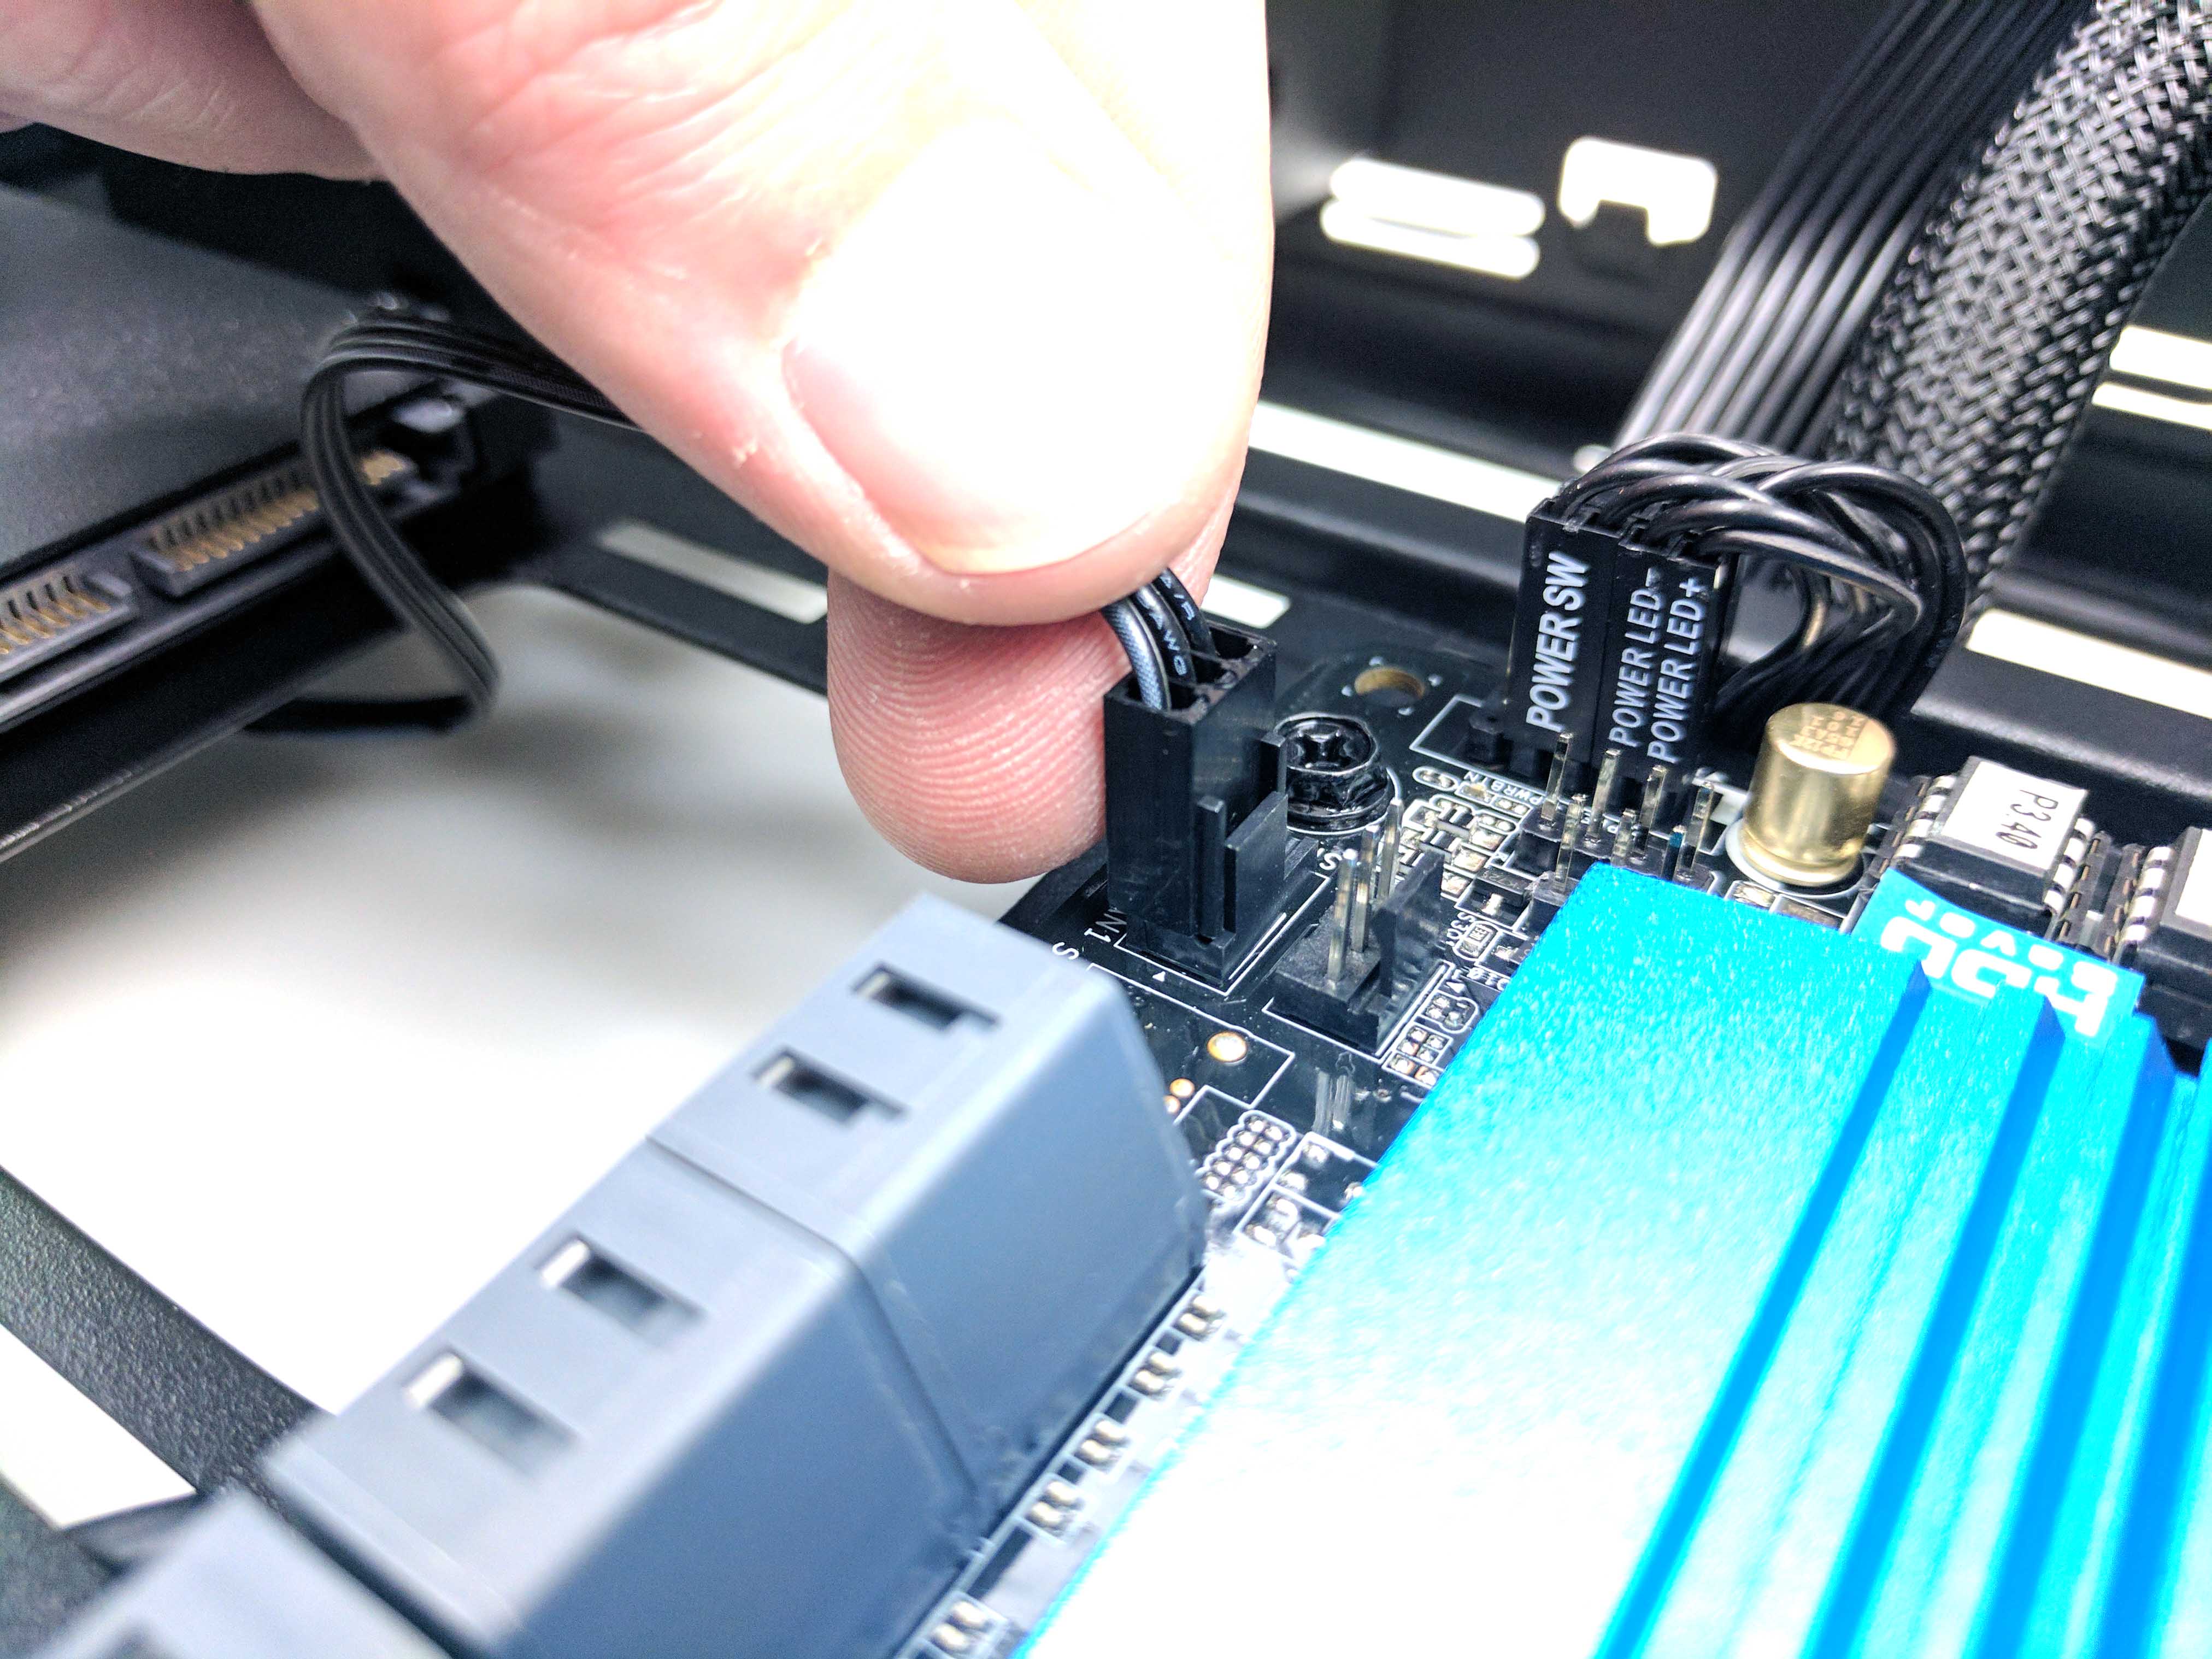
Locate the front fan's cable hanging behind the mounted SSD. Untie it (save the tie wrap) and feed the wire through the hole directly next to the SSD (towards the bottom of the upright case) and towards the motherboard. Attach the fan cable to the motherboard's CHASSIS_FAN1 port, located near the front panel I/O connectors. Tie the fan cable to the case at the bottom hole using the saved tie wrap.
SATA Power & Data Cables
As ambitious (and unnecessary) as it may seem, we decided to power both of the storage drives with a single modular power cable. This installation method banks on the fact we mounted the 2.5" SSD as close as possible to the 3.5" drive bay, as well as mounting the 1TB HDD in the top tray of the bay. You could just as easily place the drives elsewhere and use two separate modular power cables, but our personal preference calls for fewer cables.
Remove one of the SATA power cables from the PSU box and untie it (save that tie wrap). Connect the 6-pin plug to the PSU's SATA/PERIF ports and run it behind the motherboard (like all the other power cables thus far) and up towards the top of the case. Use the tie wrap to secure the SATA power cable and all the other previously run wires to the case at the bottom wrung.
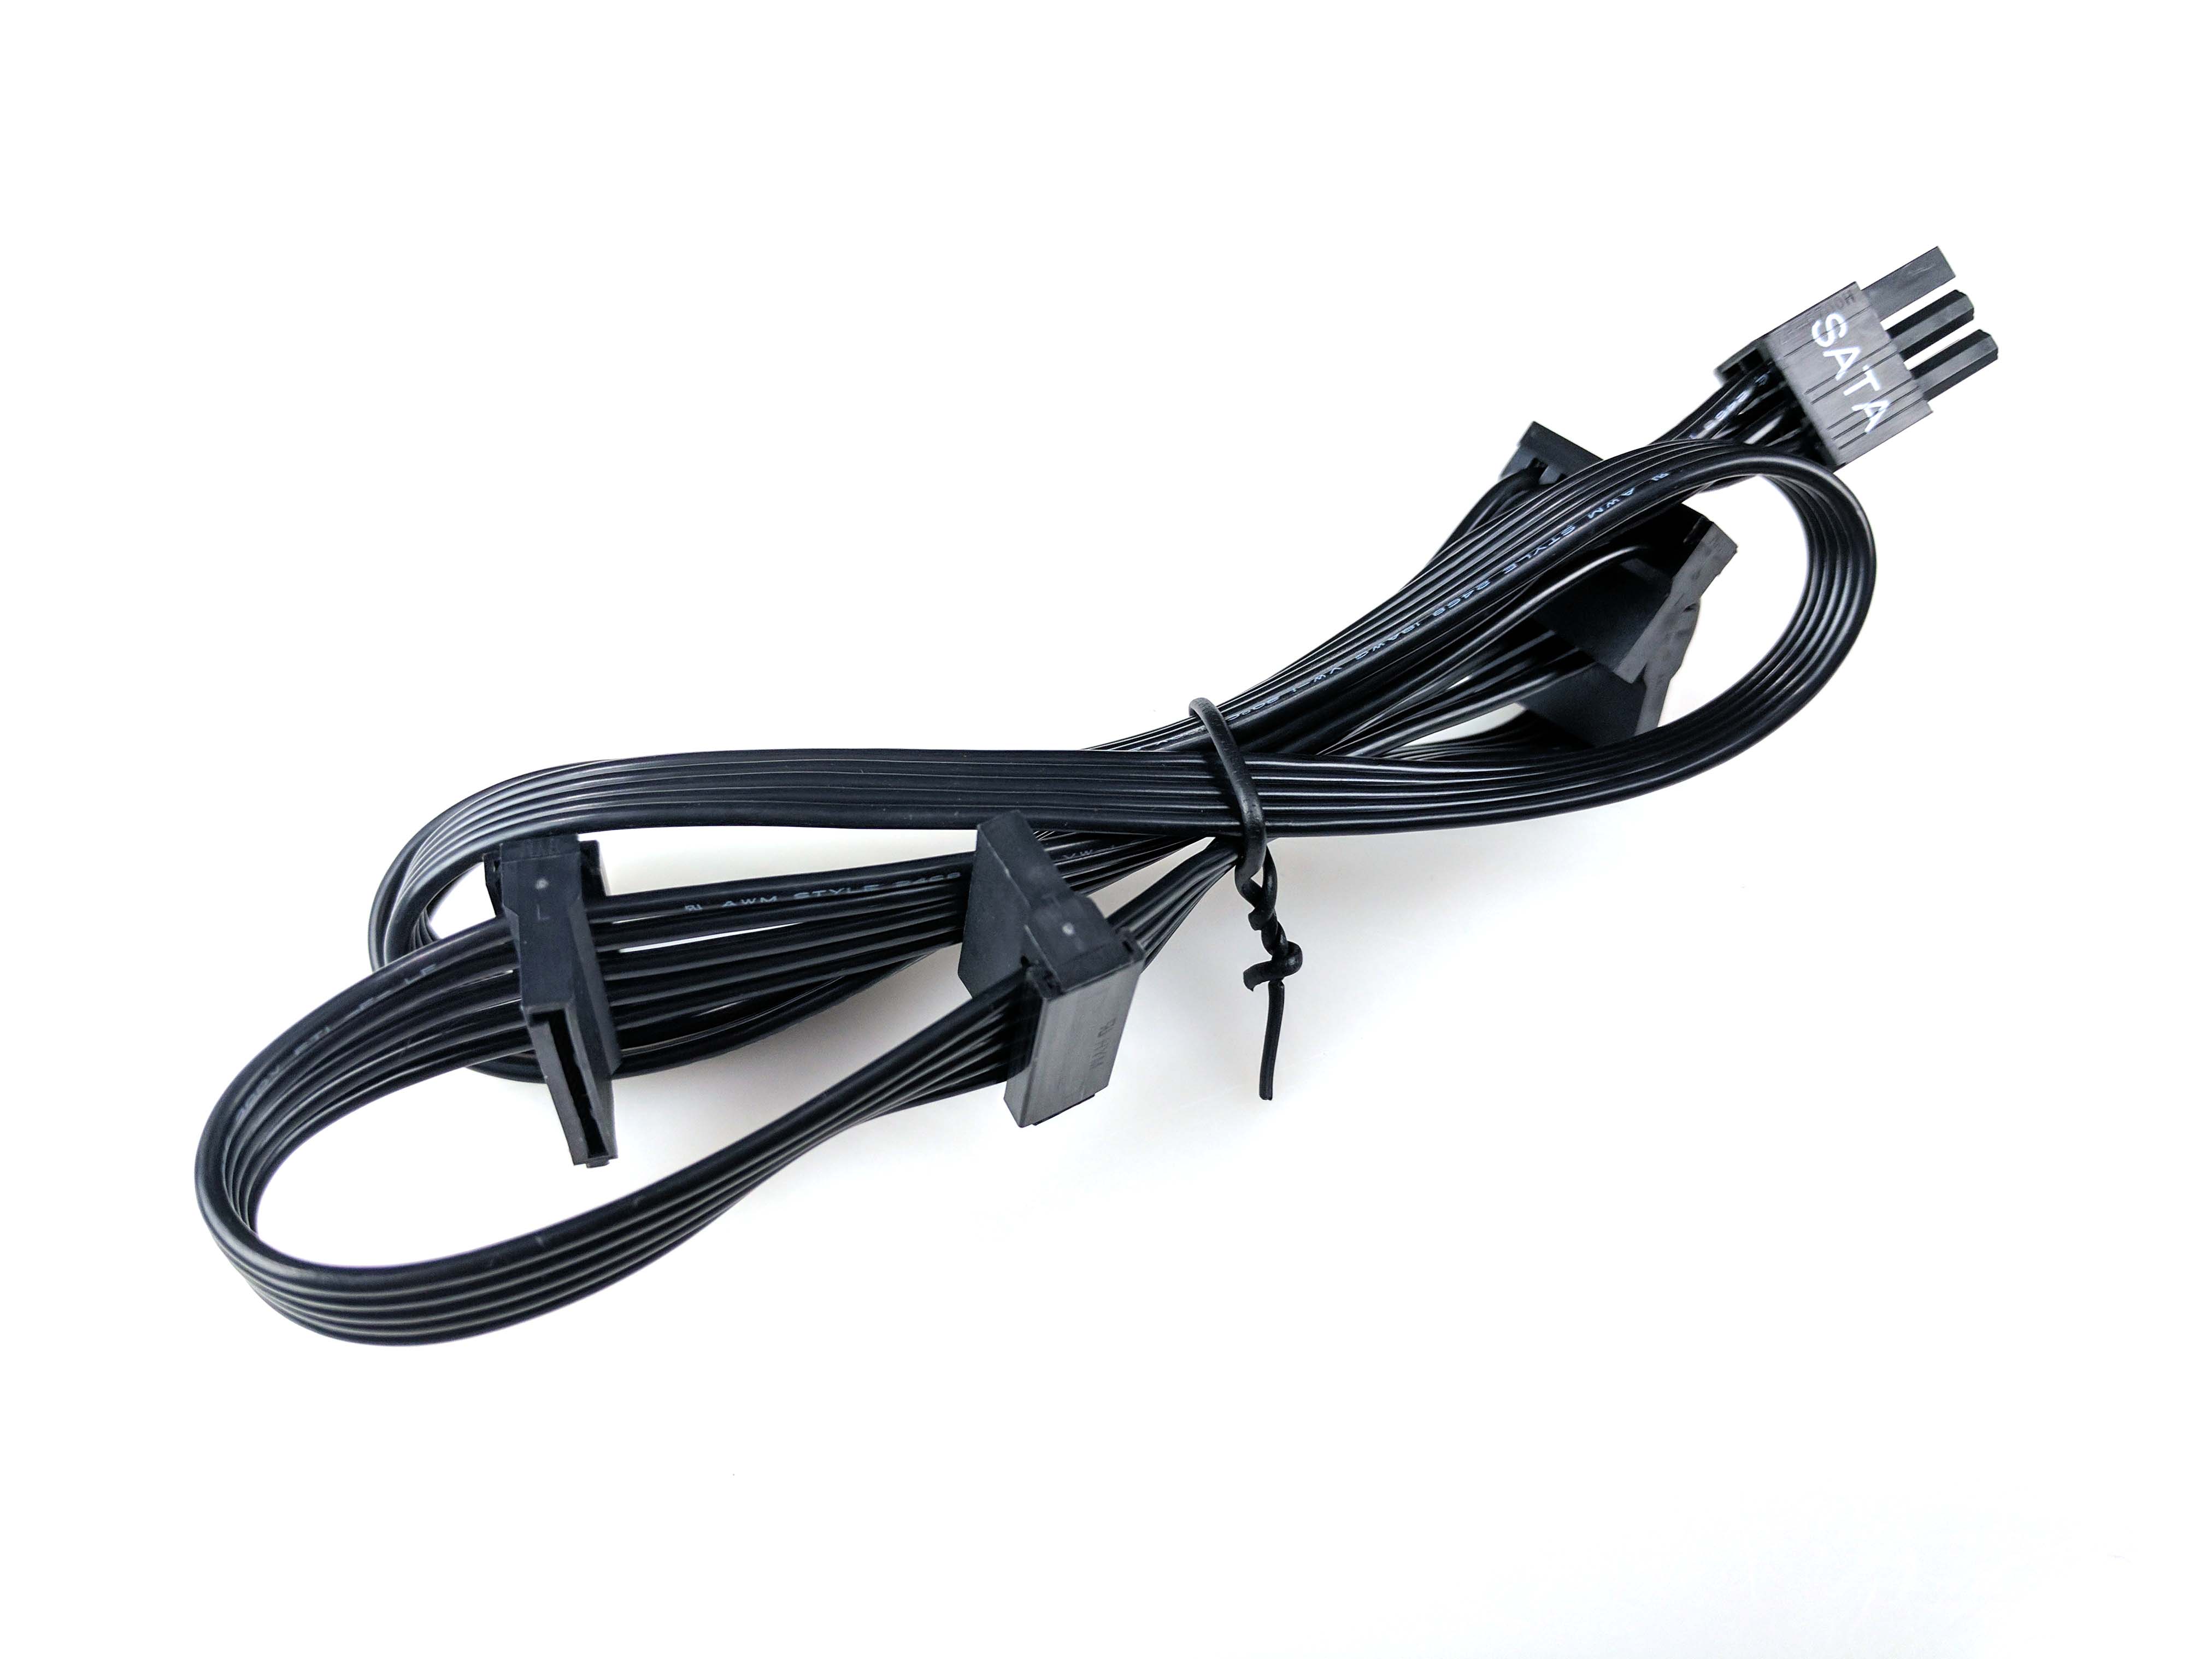
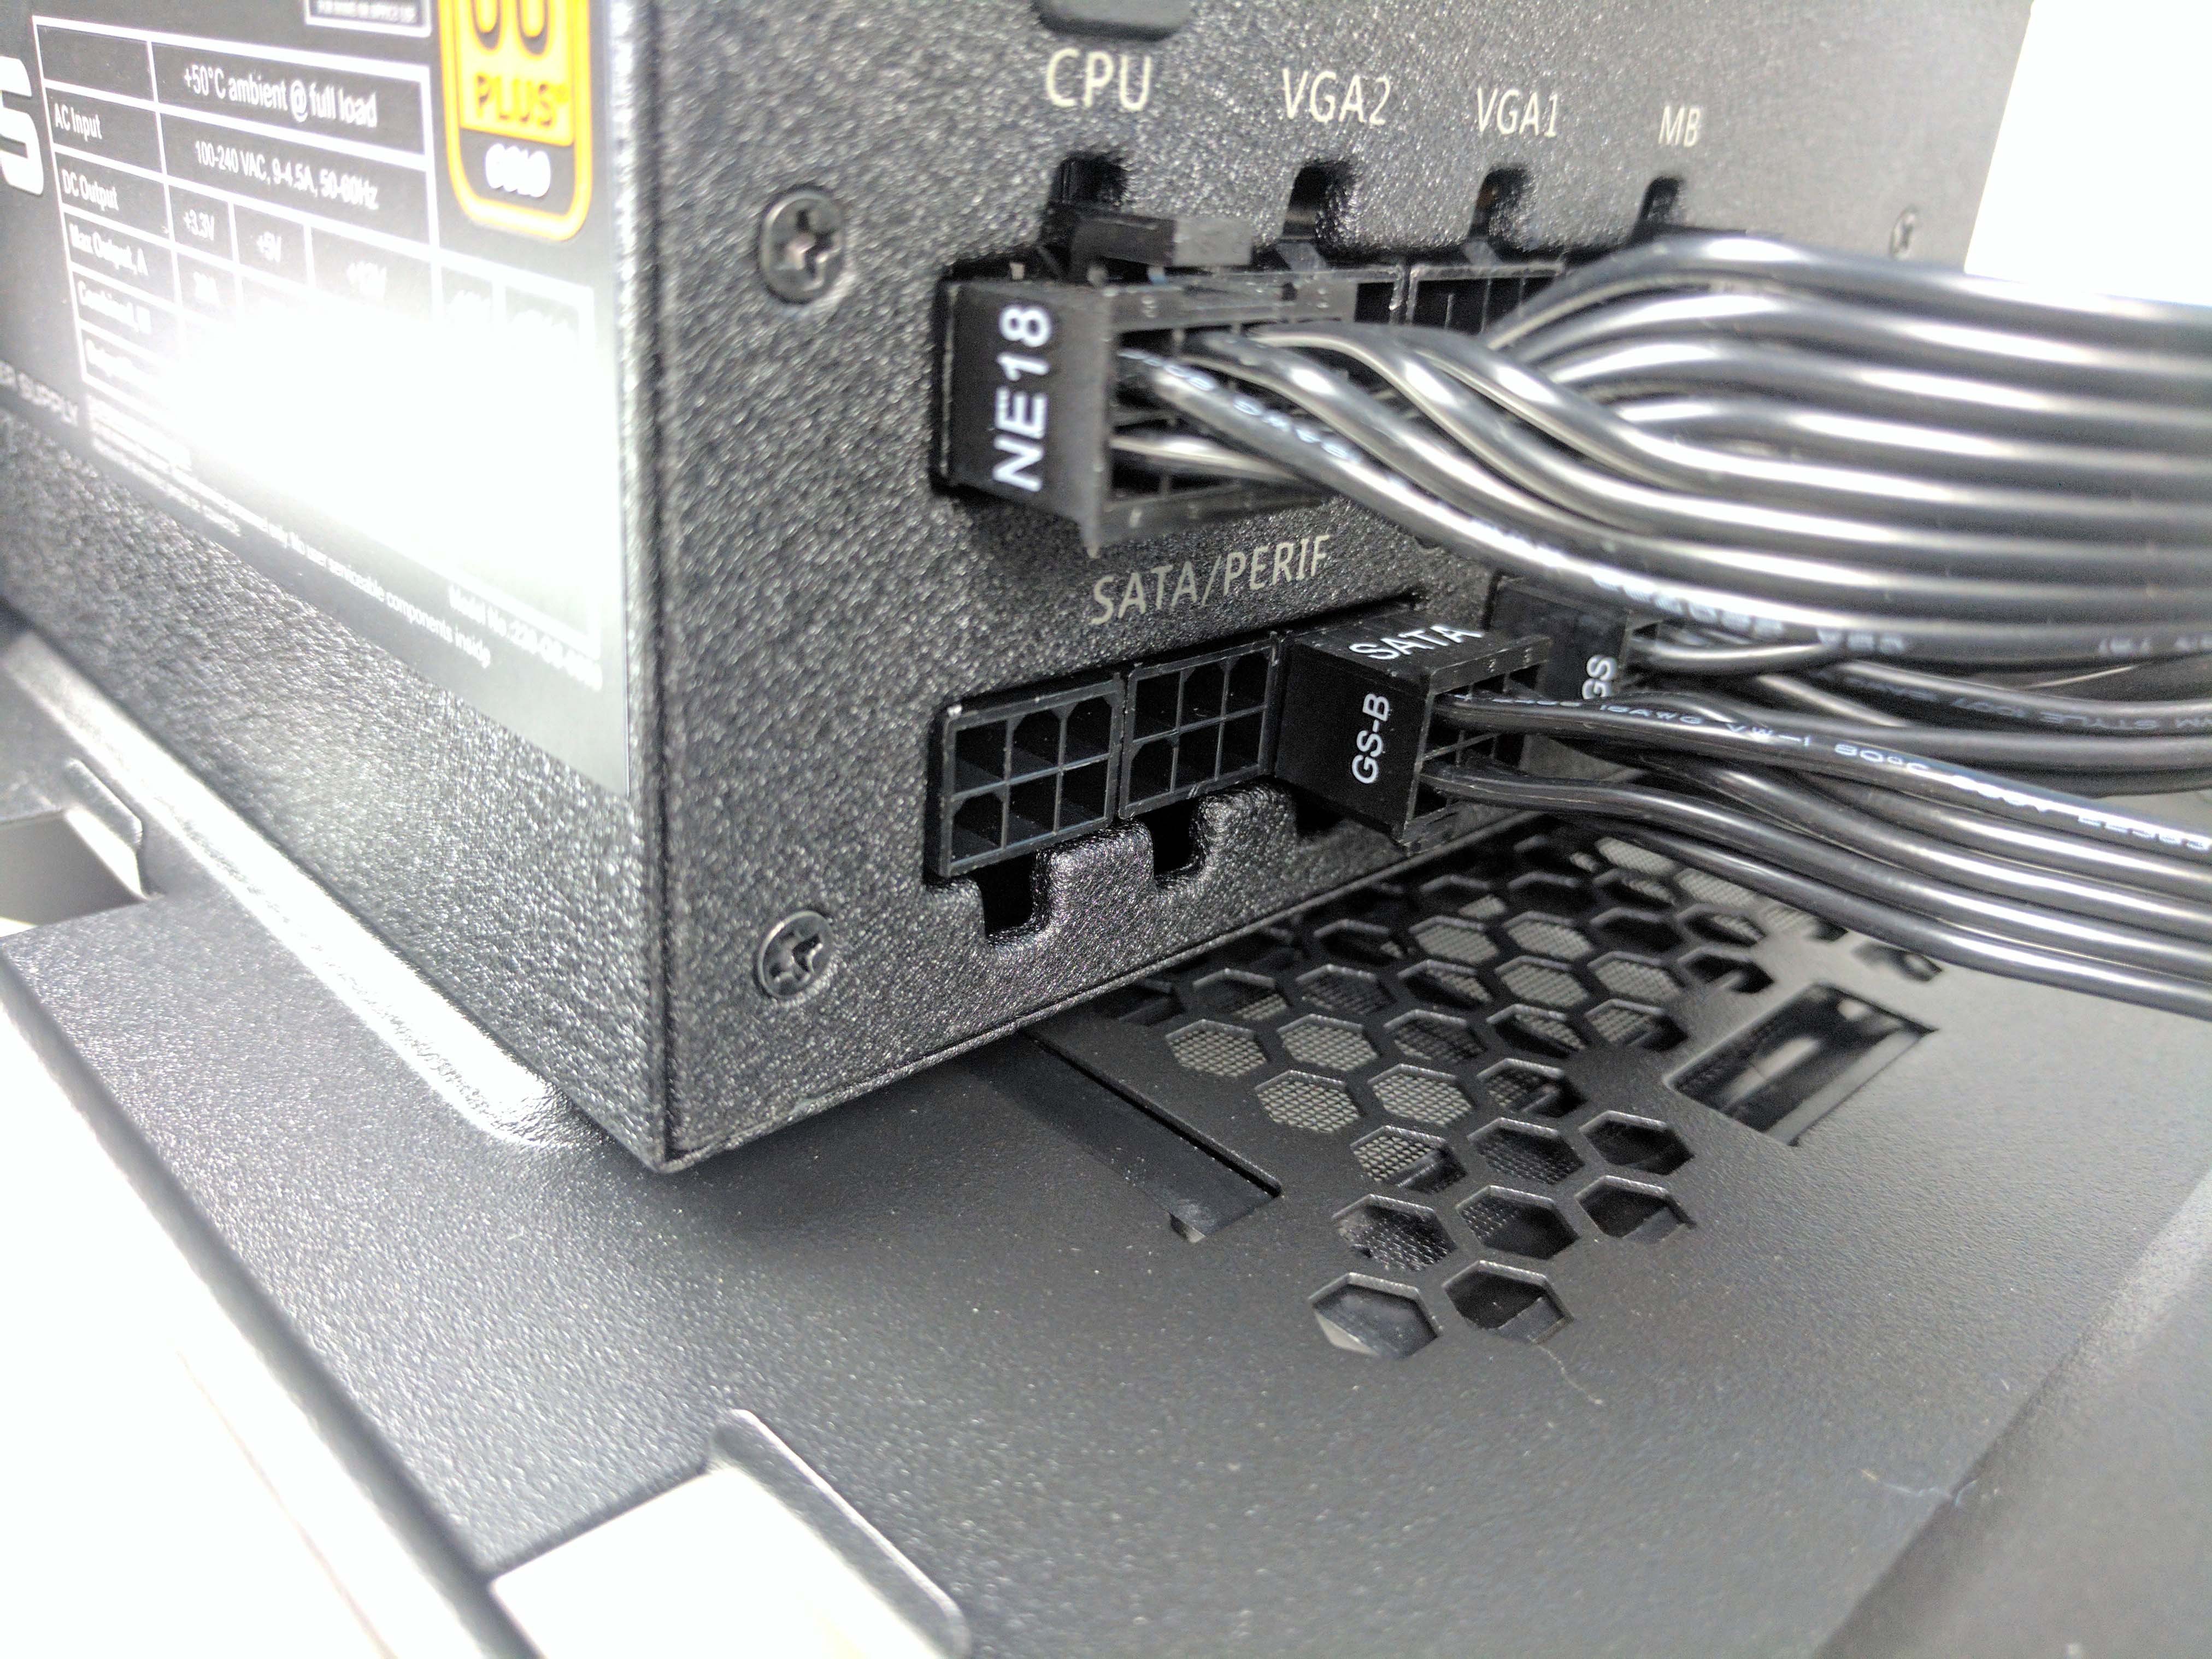
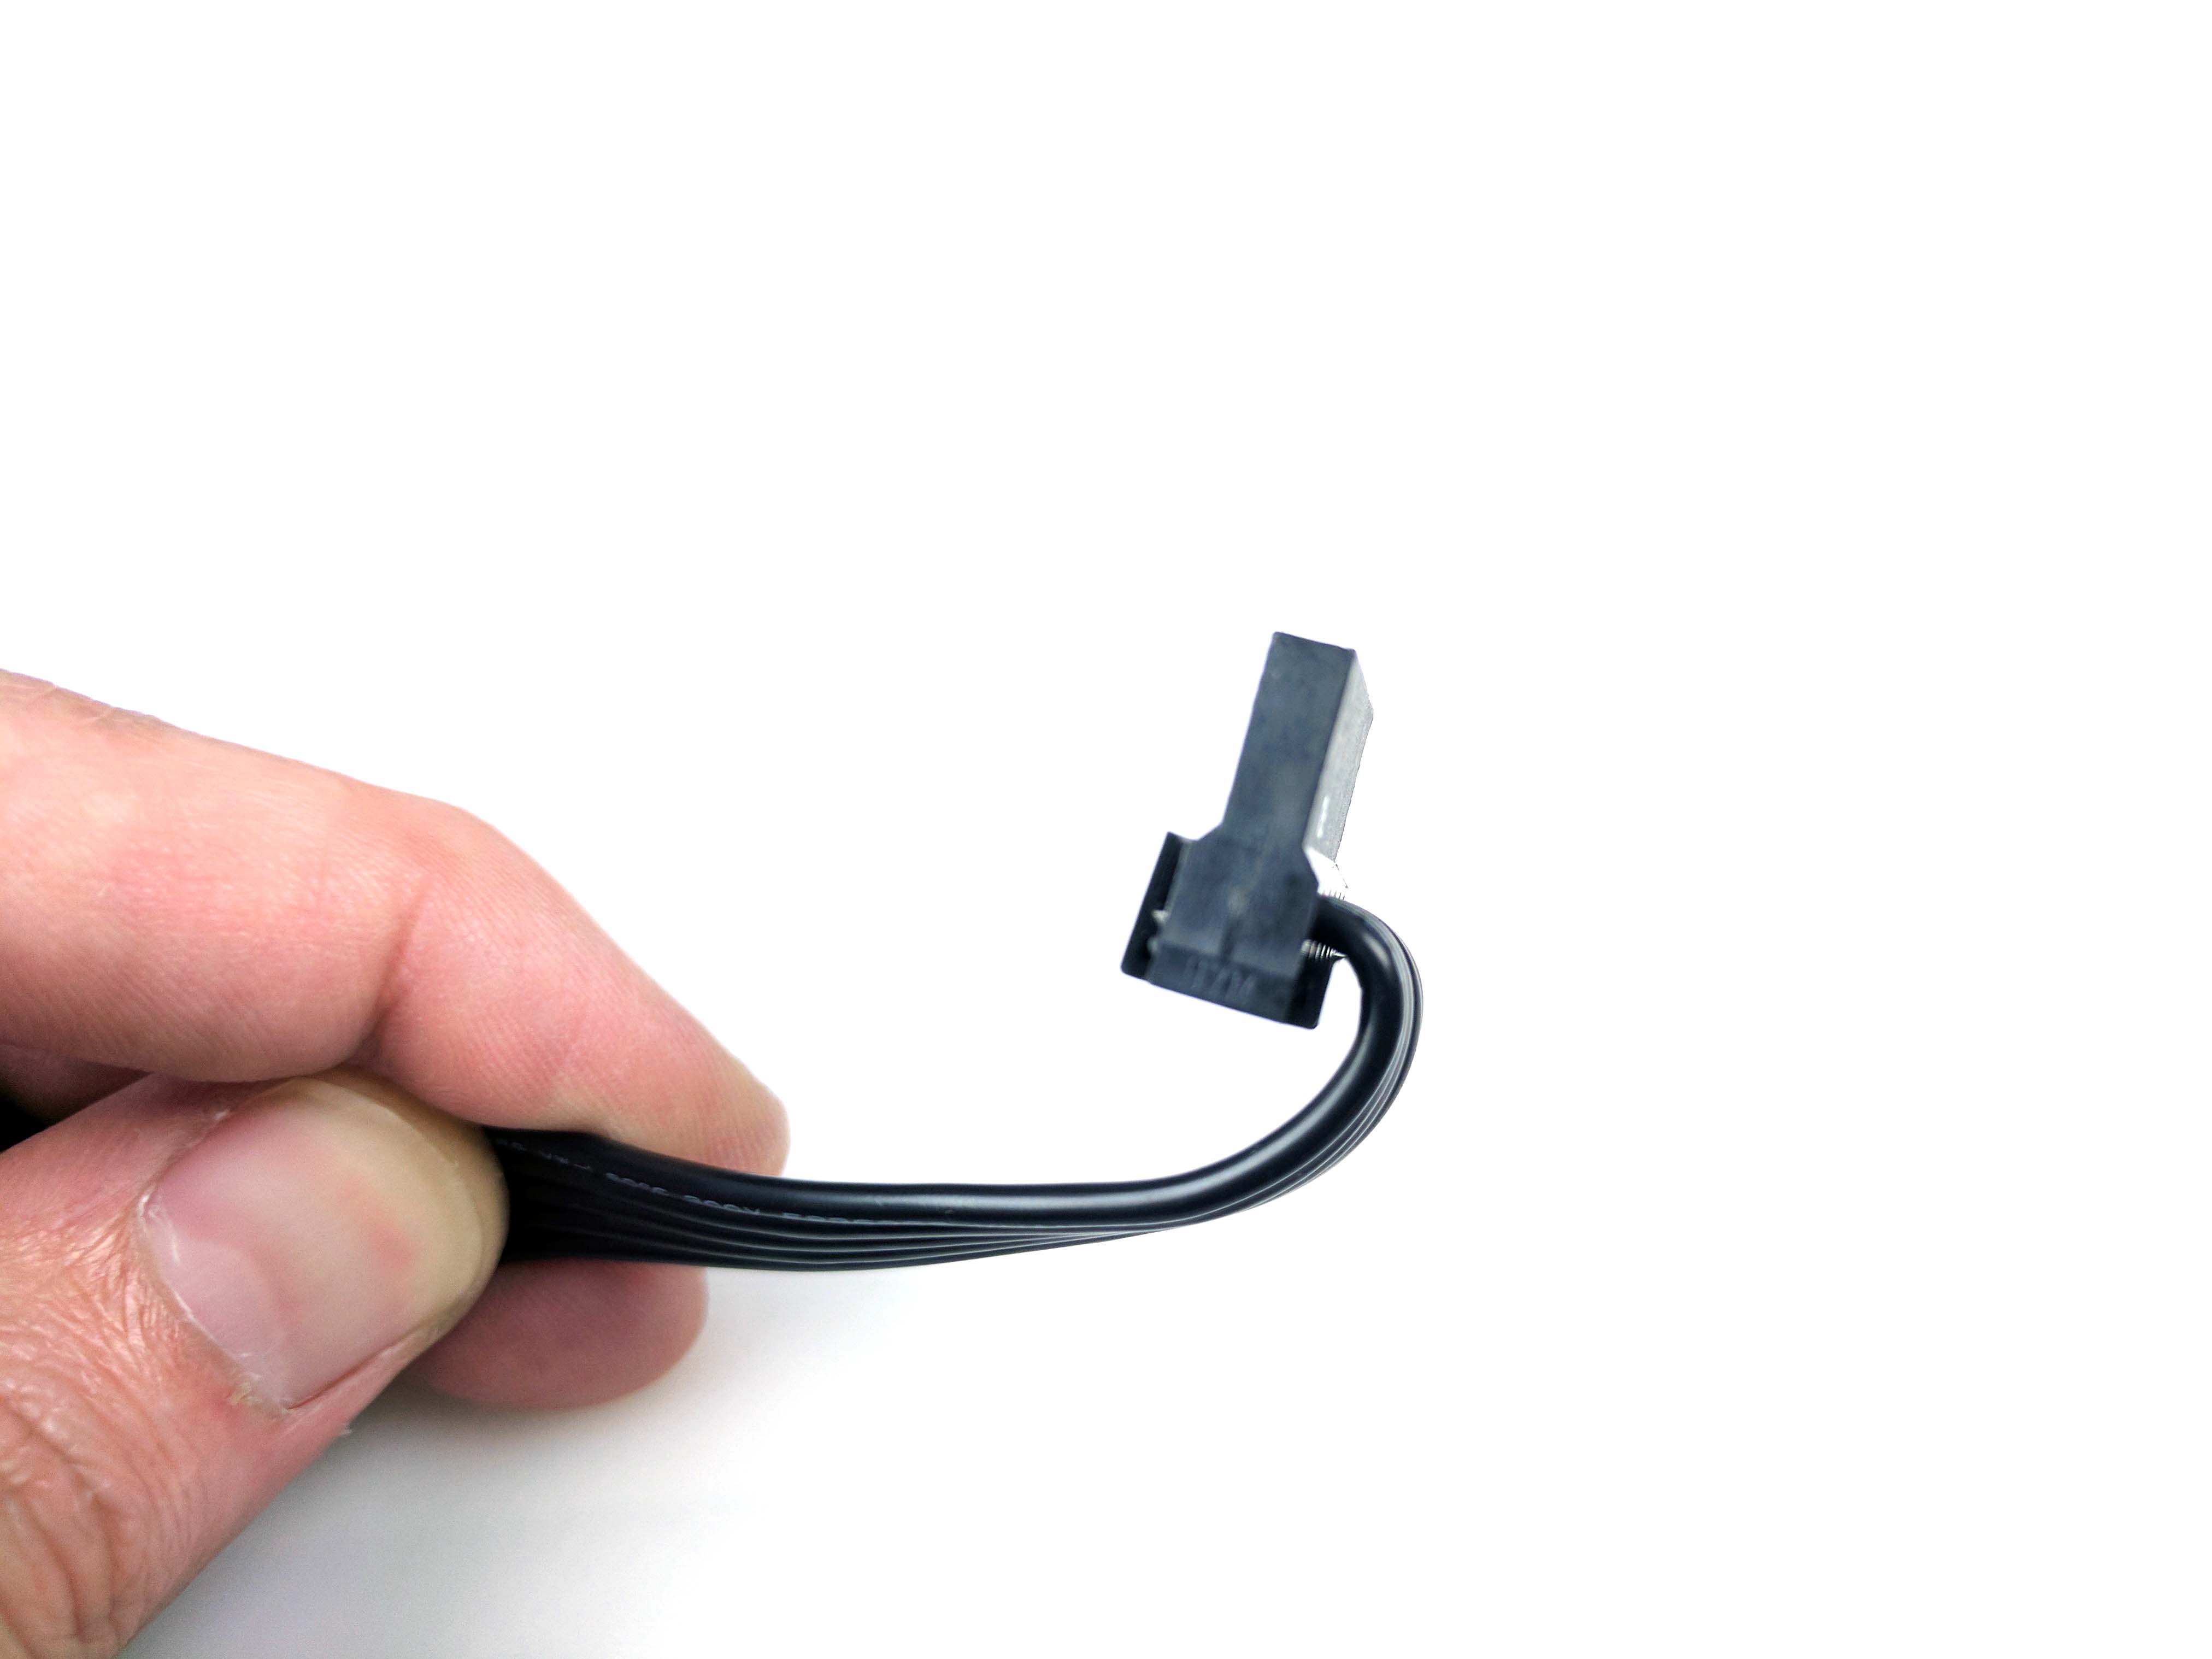
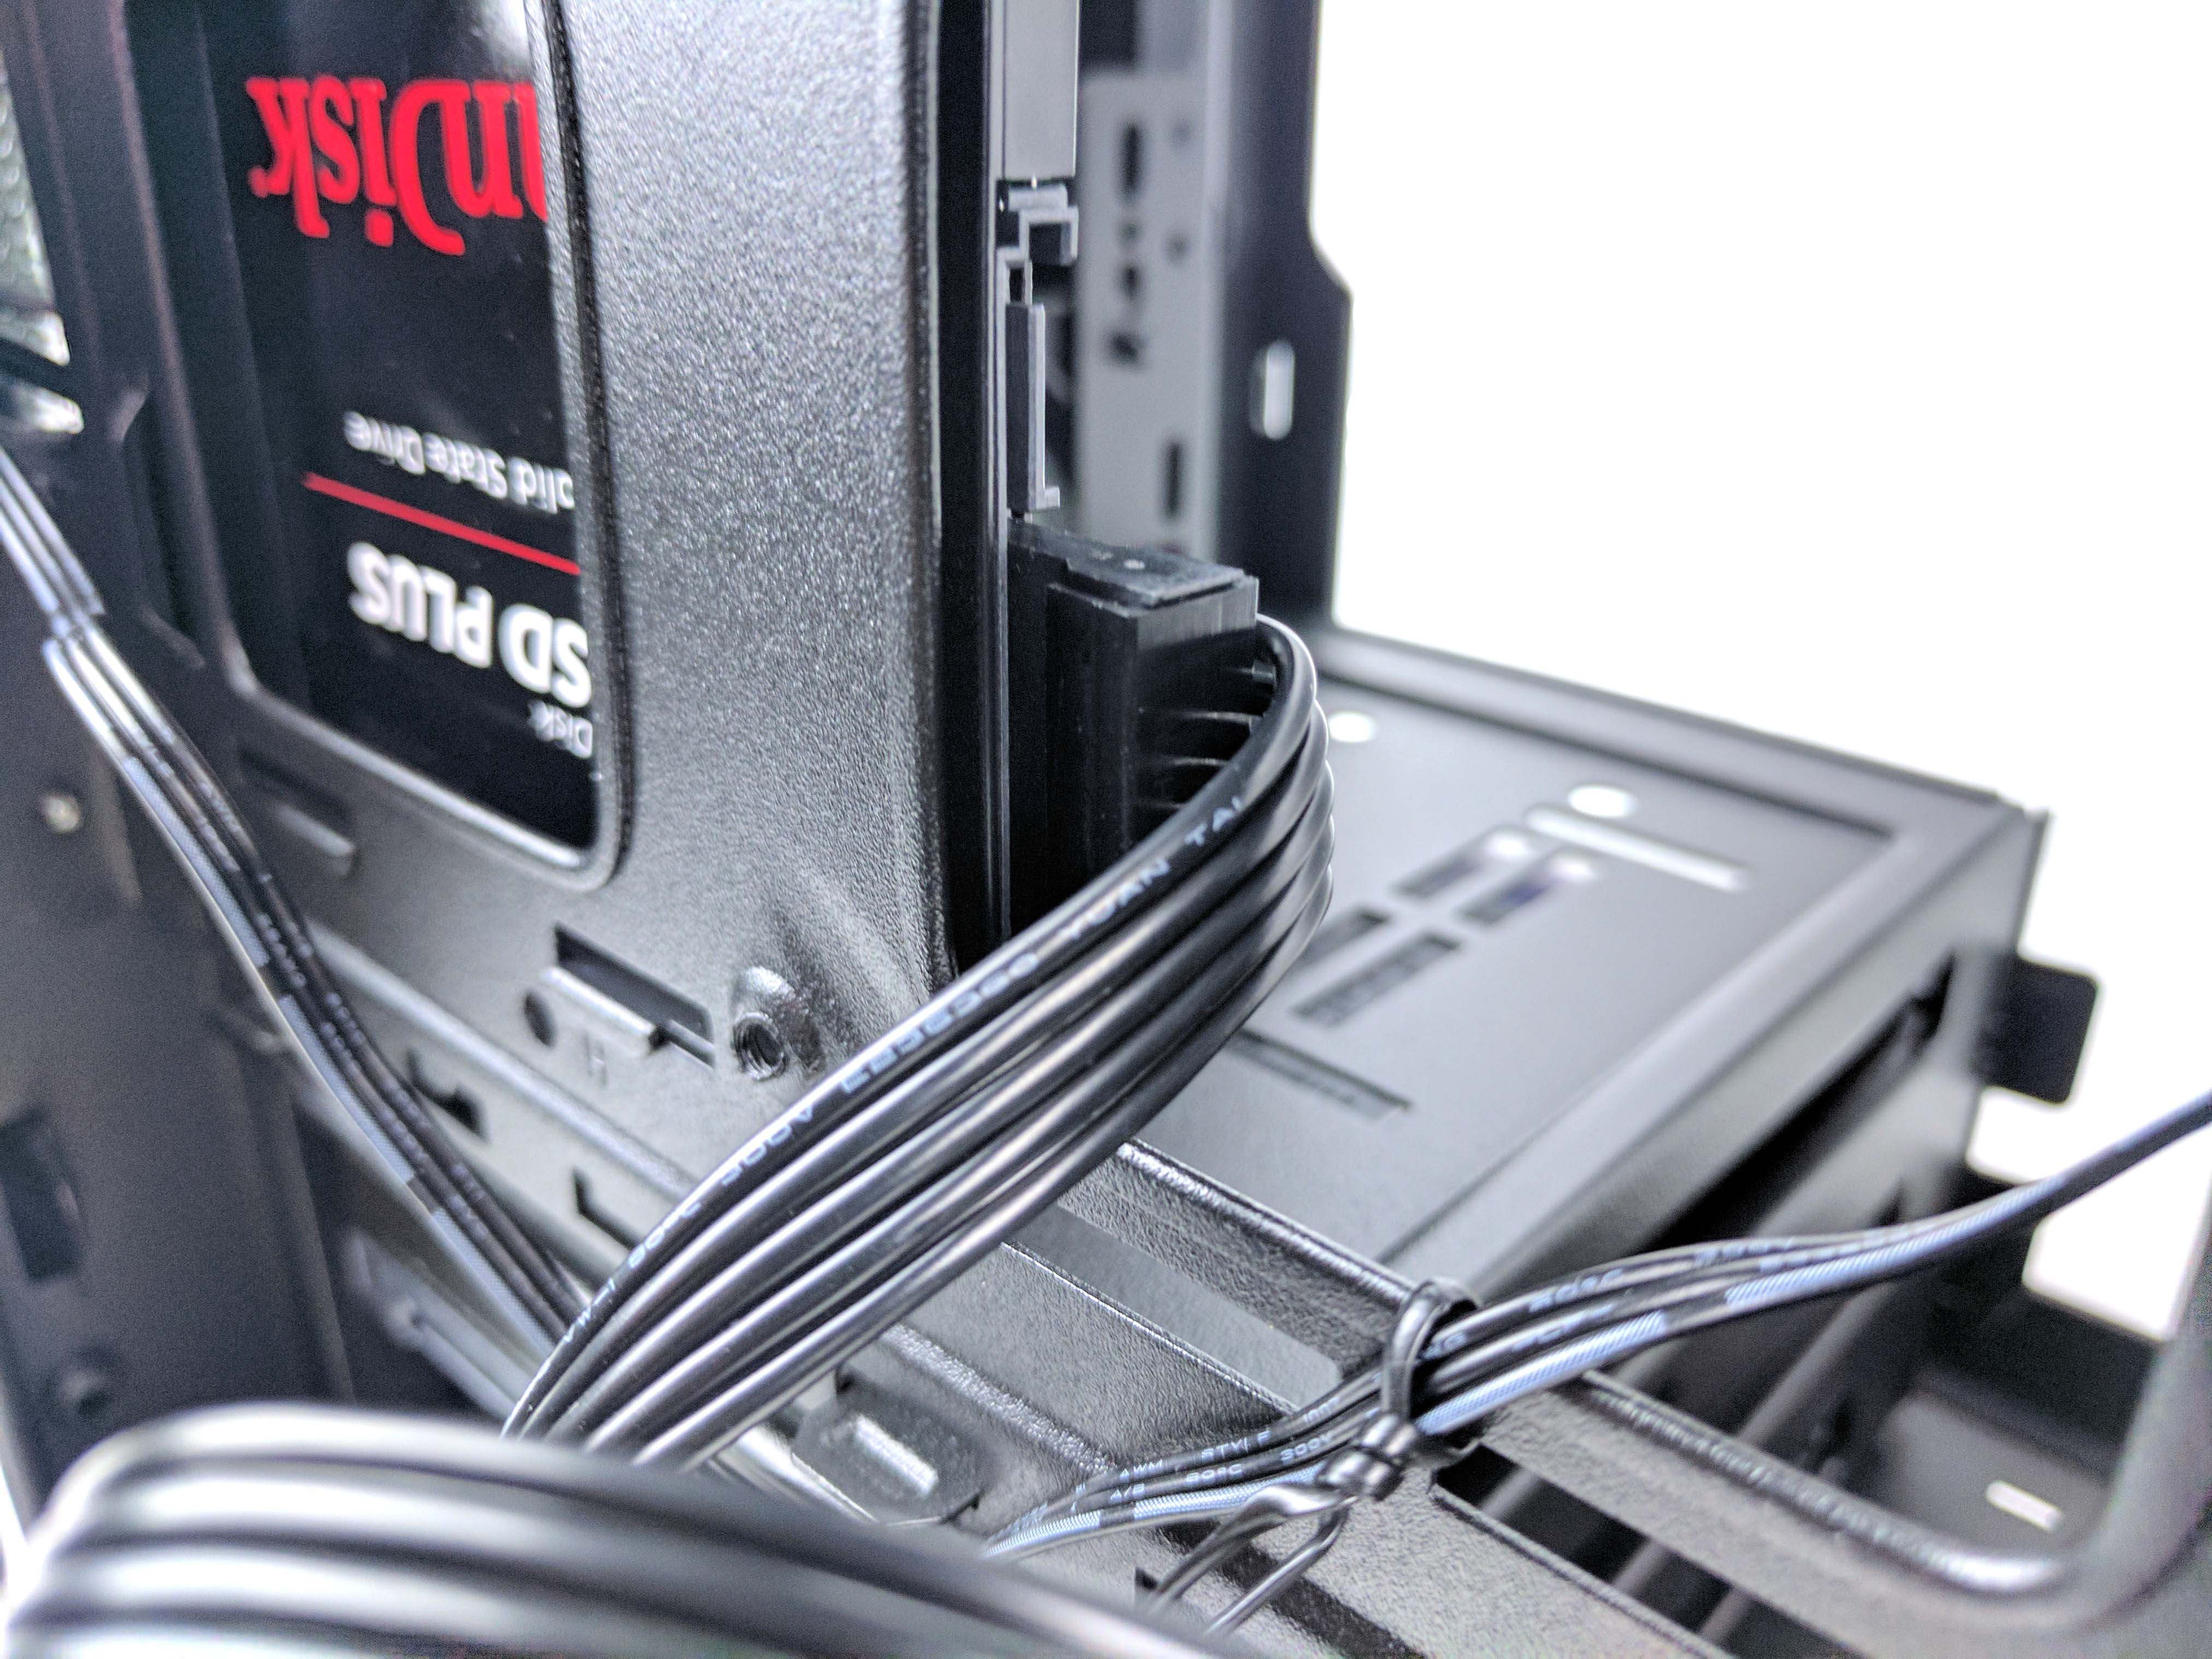
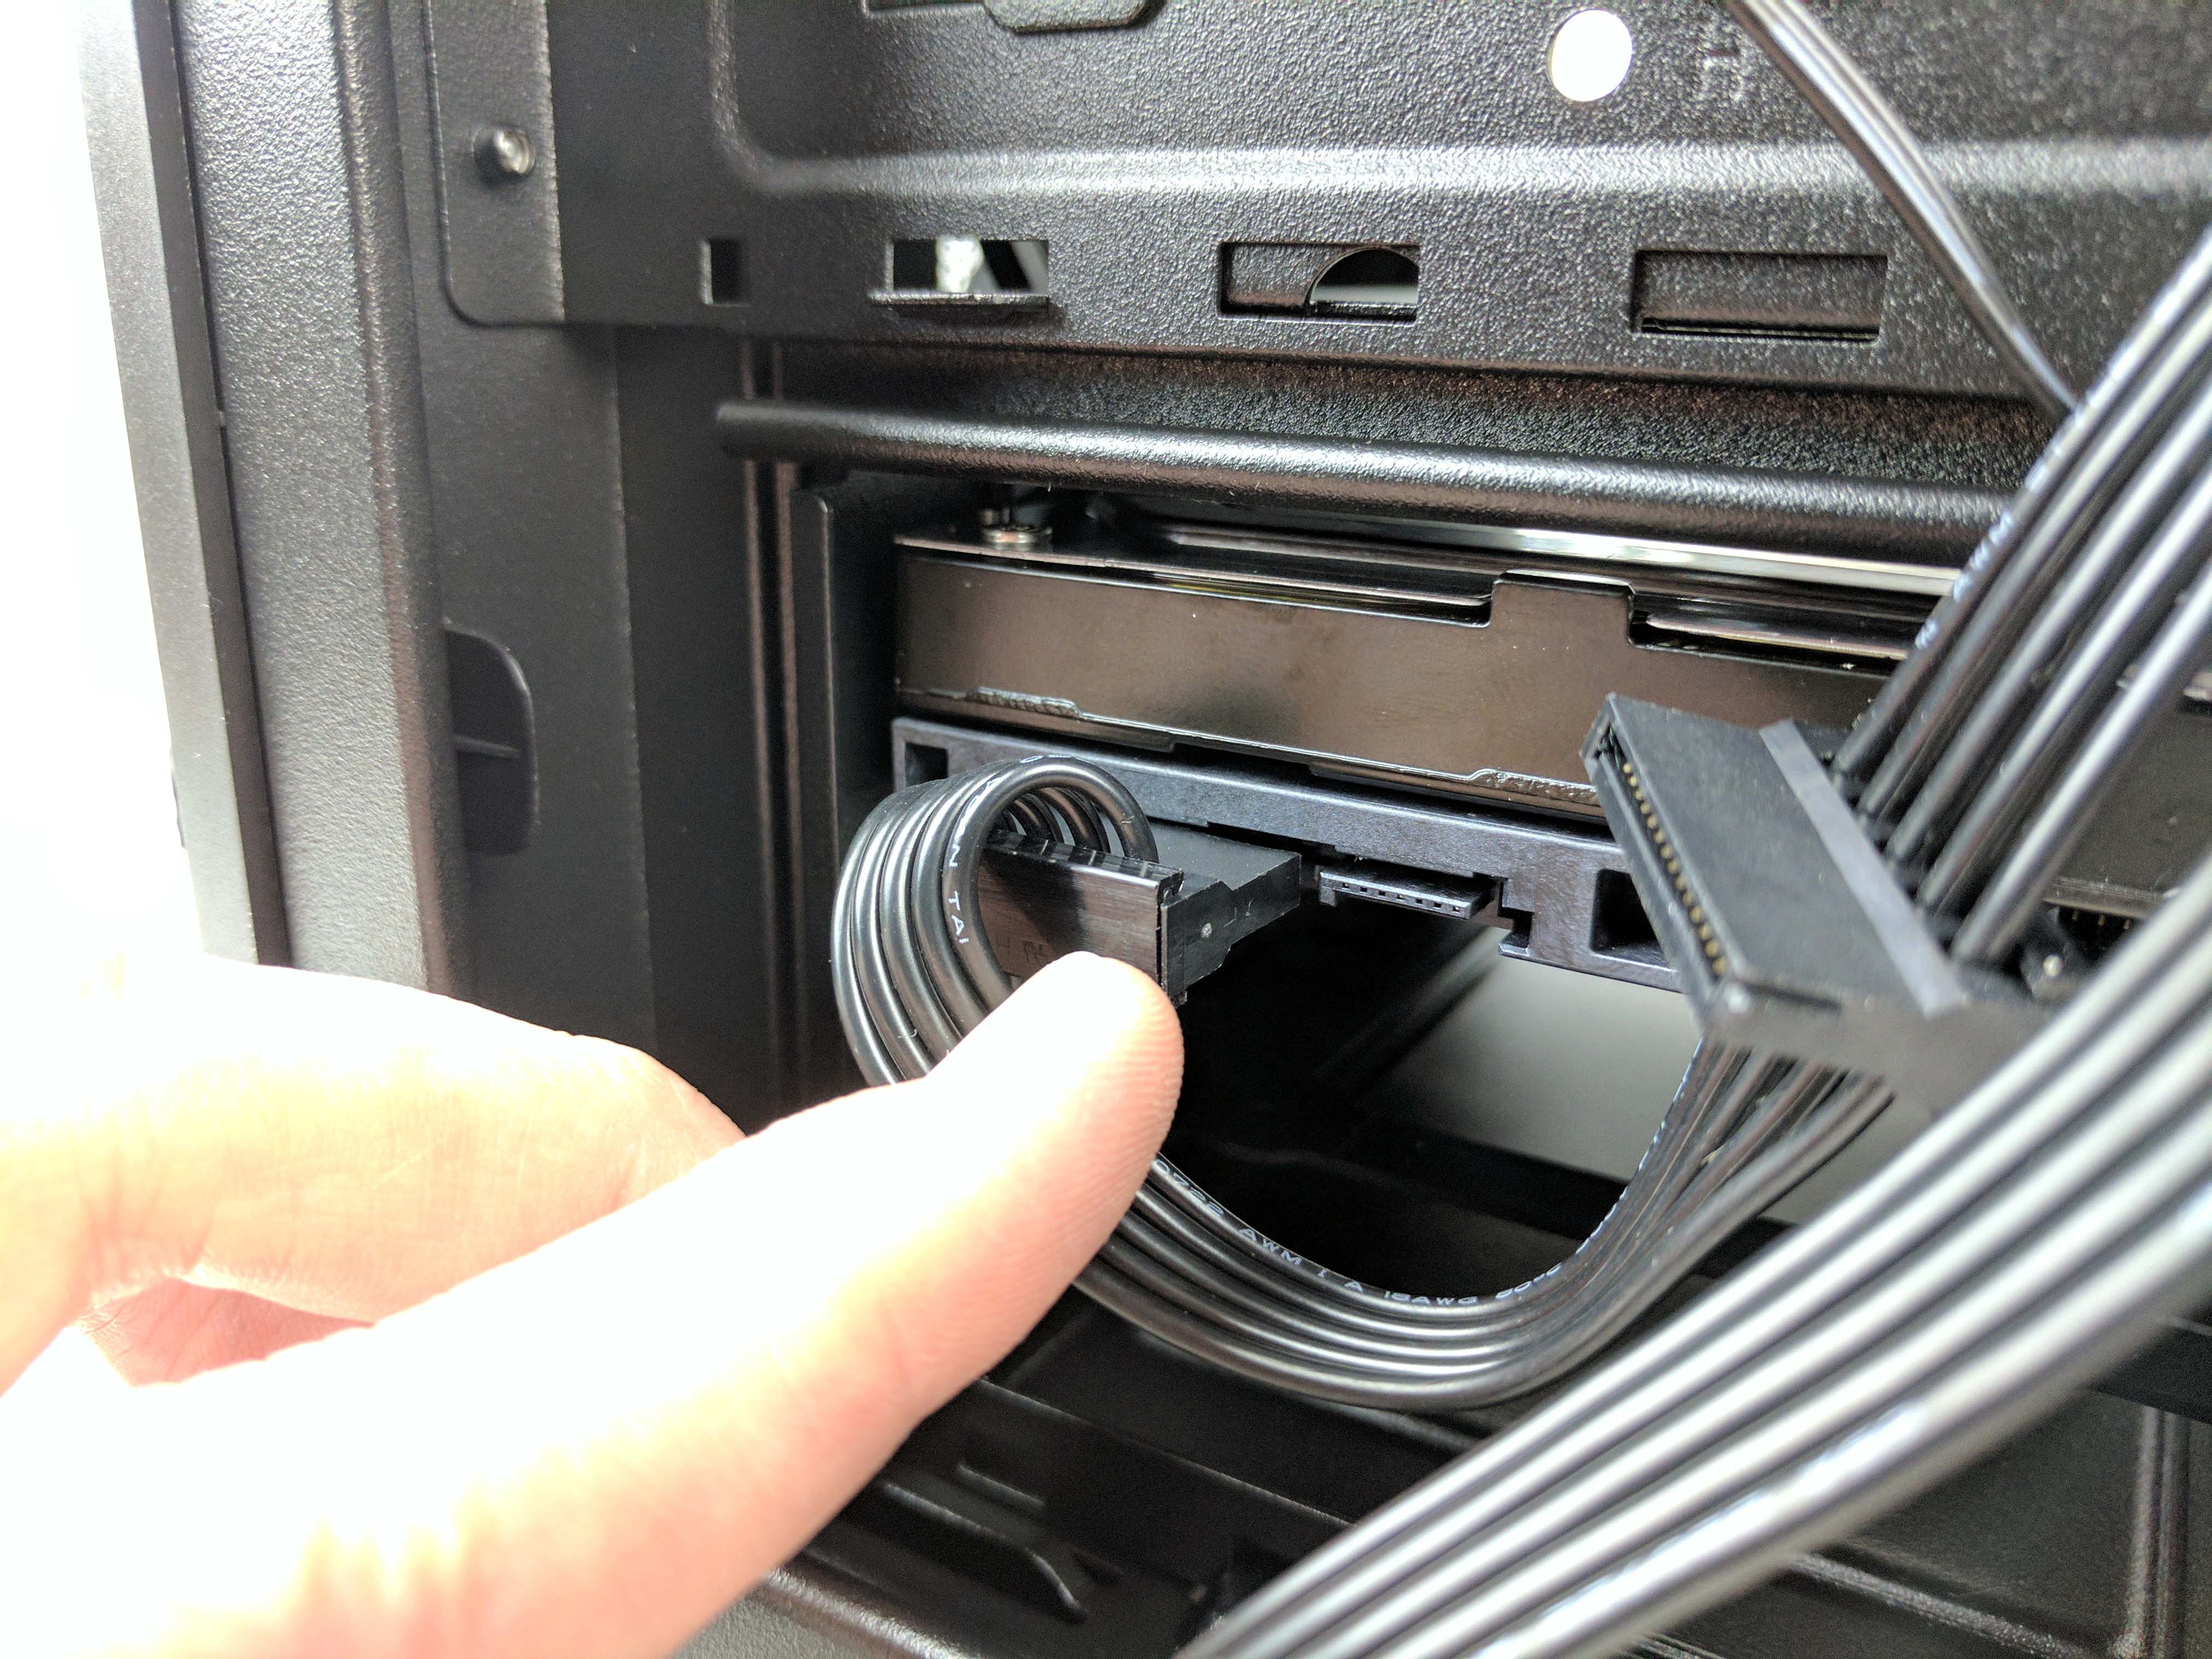
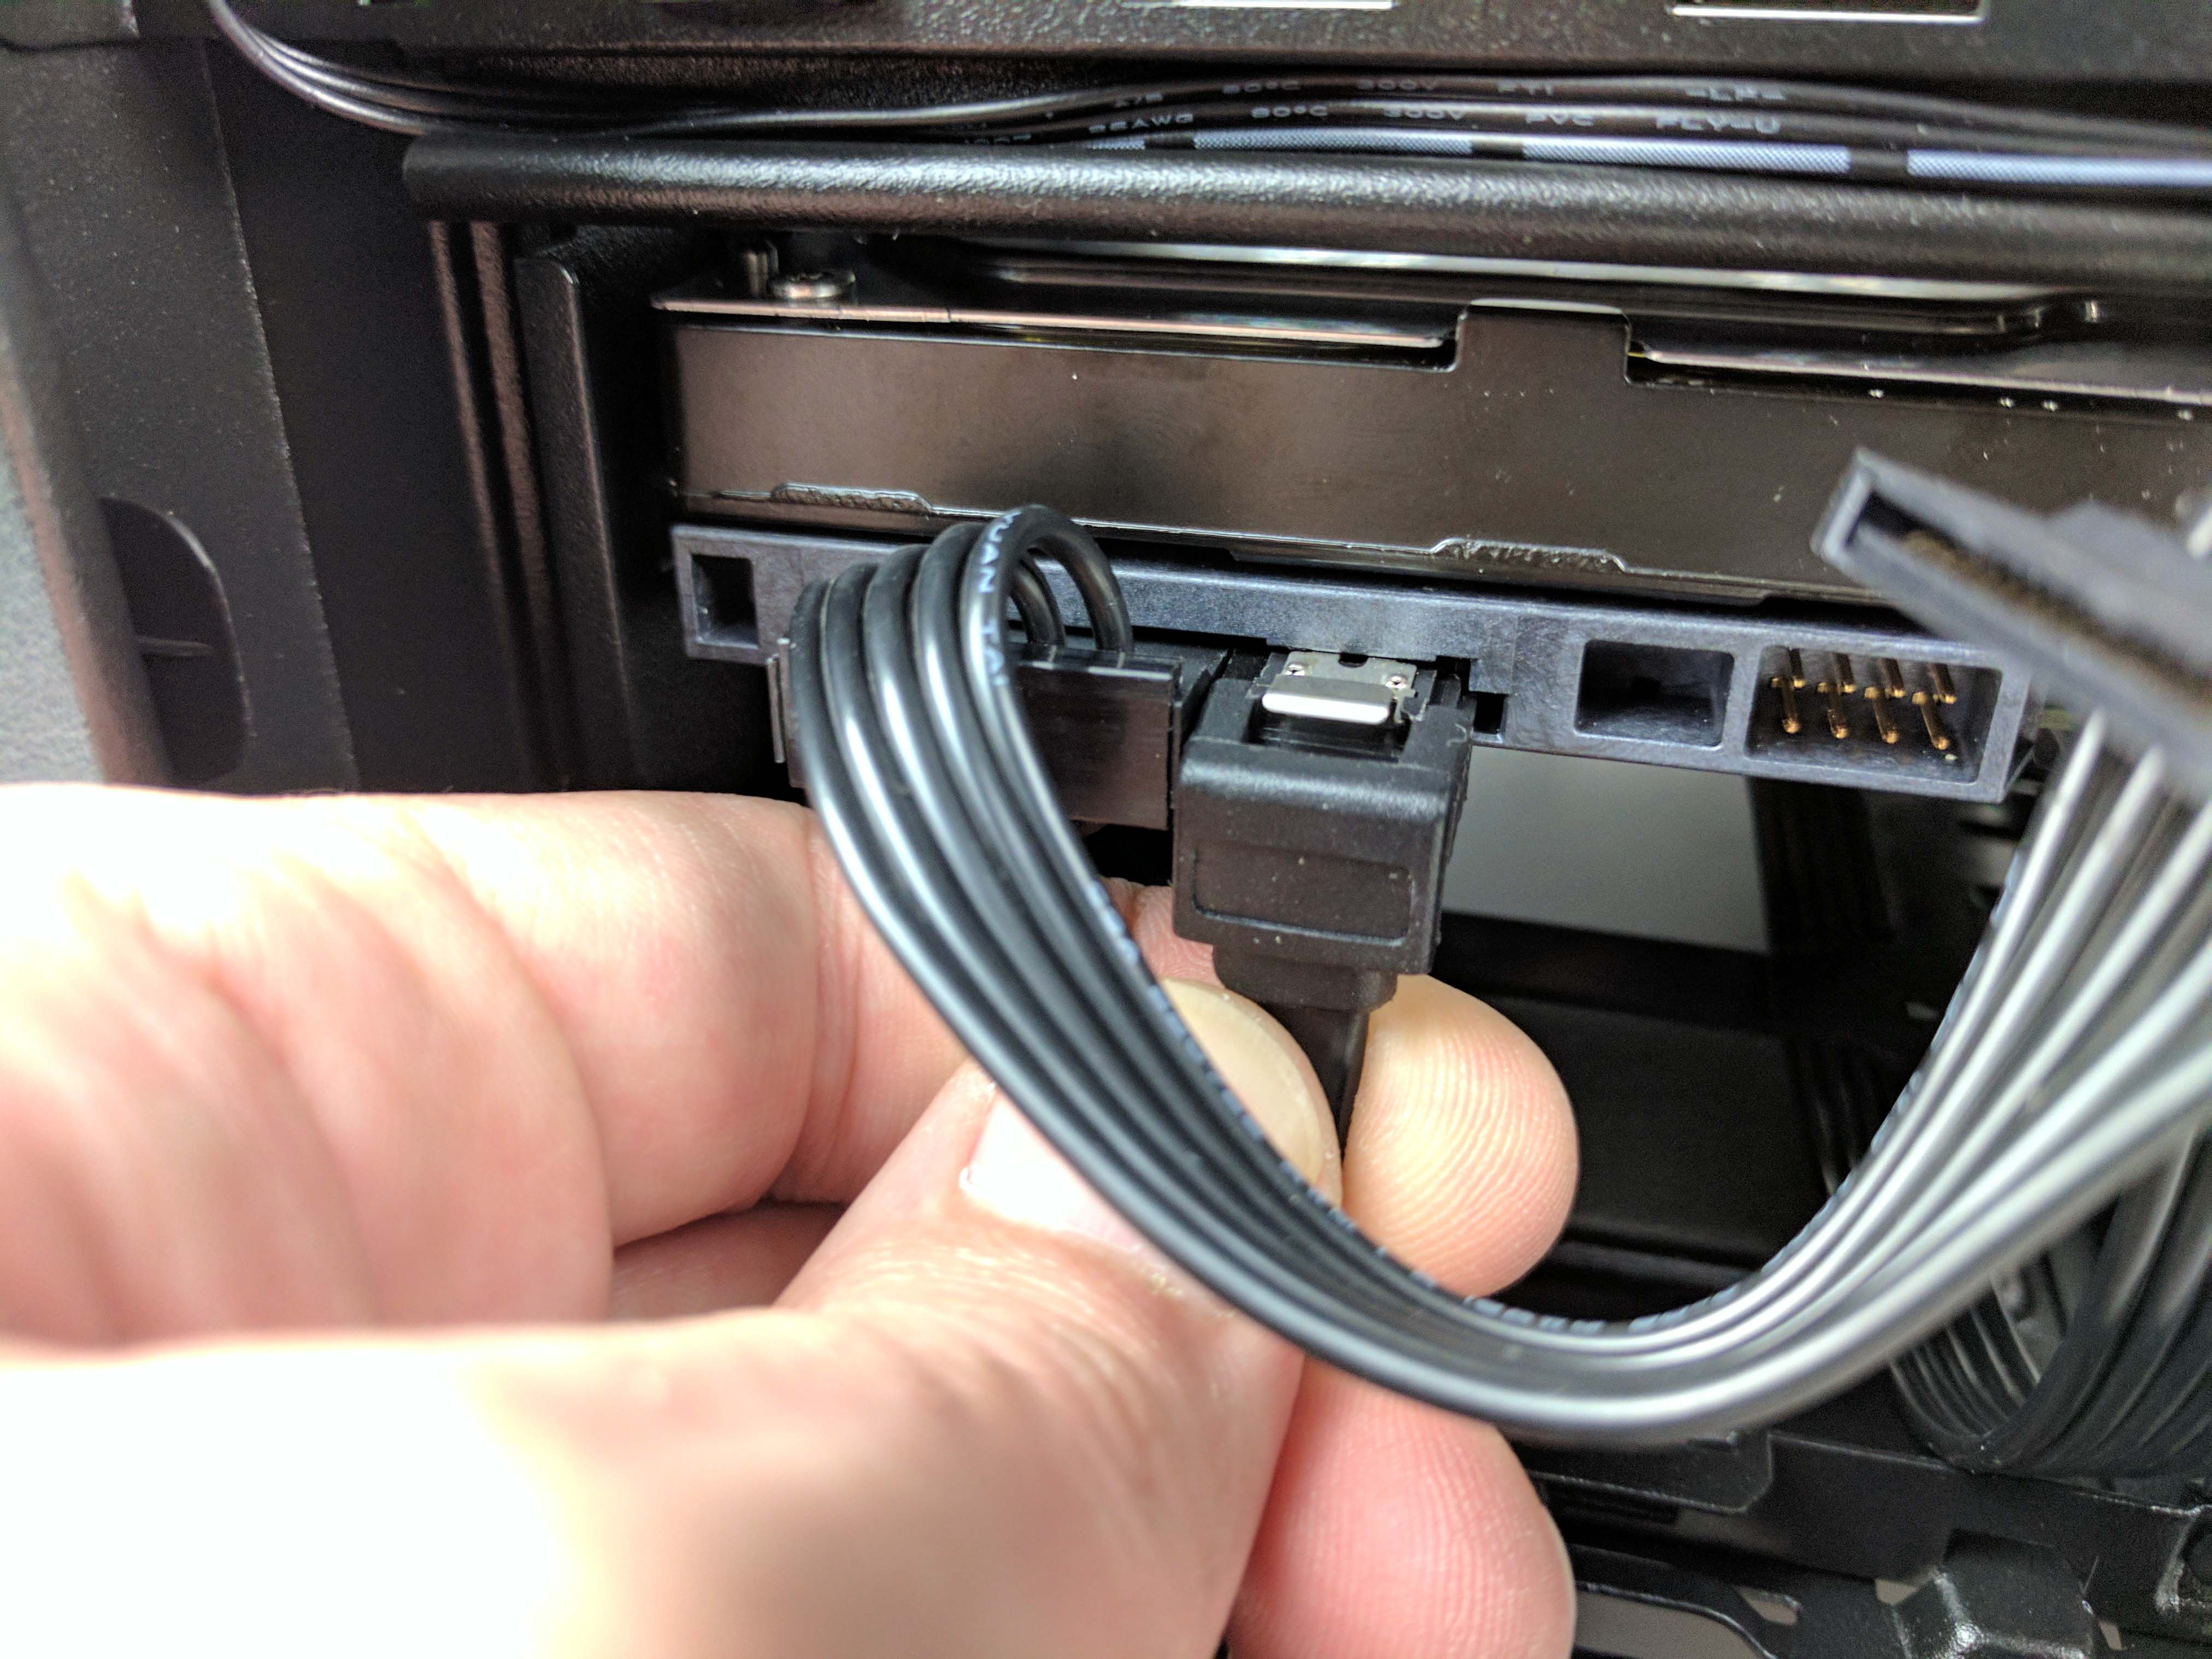
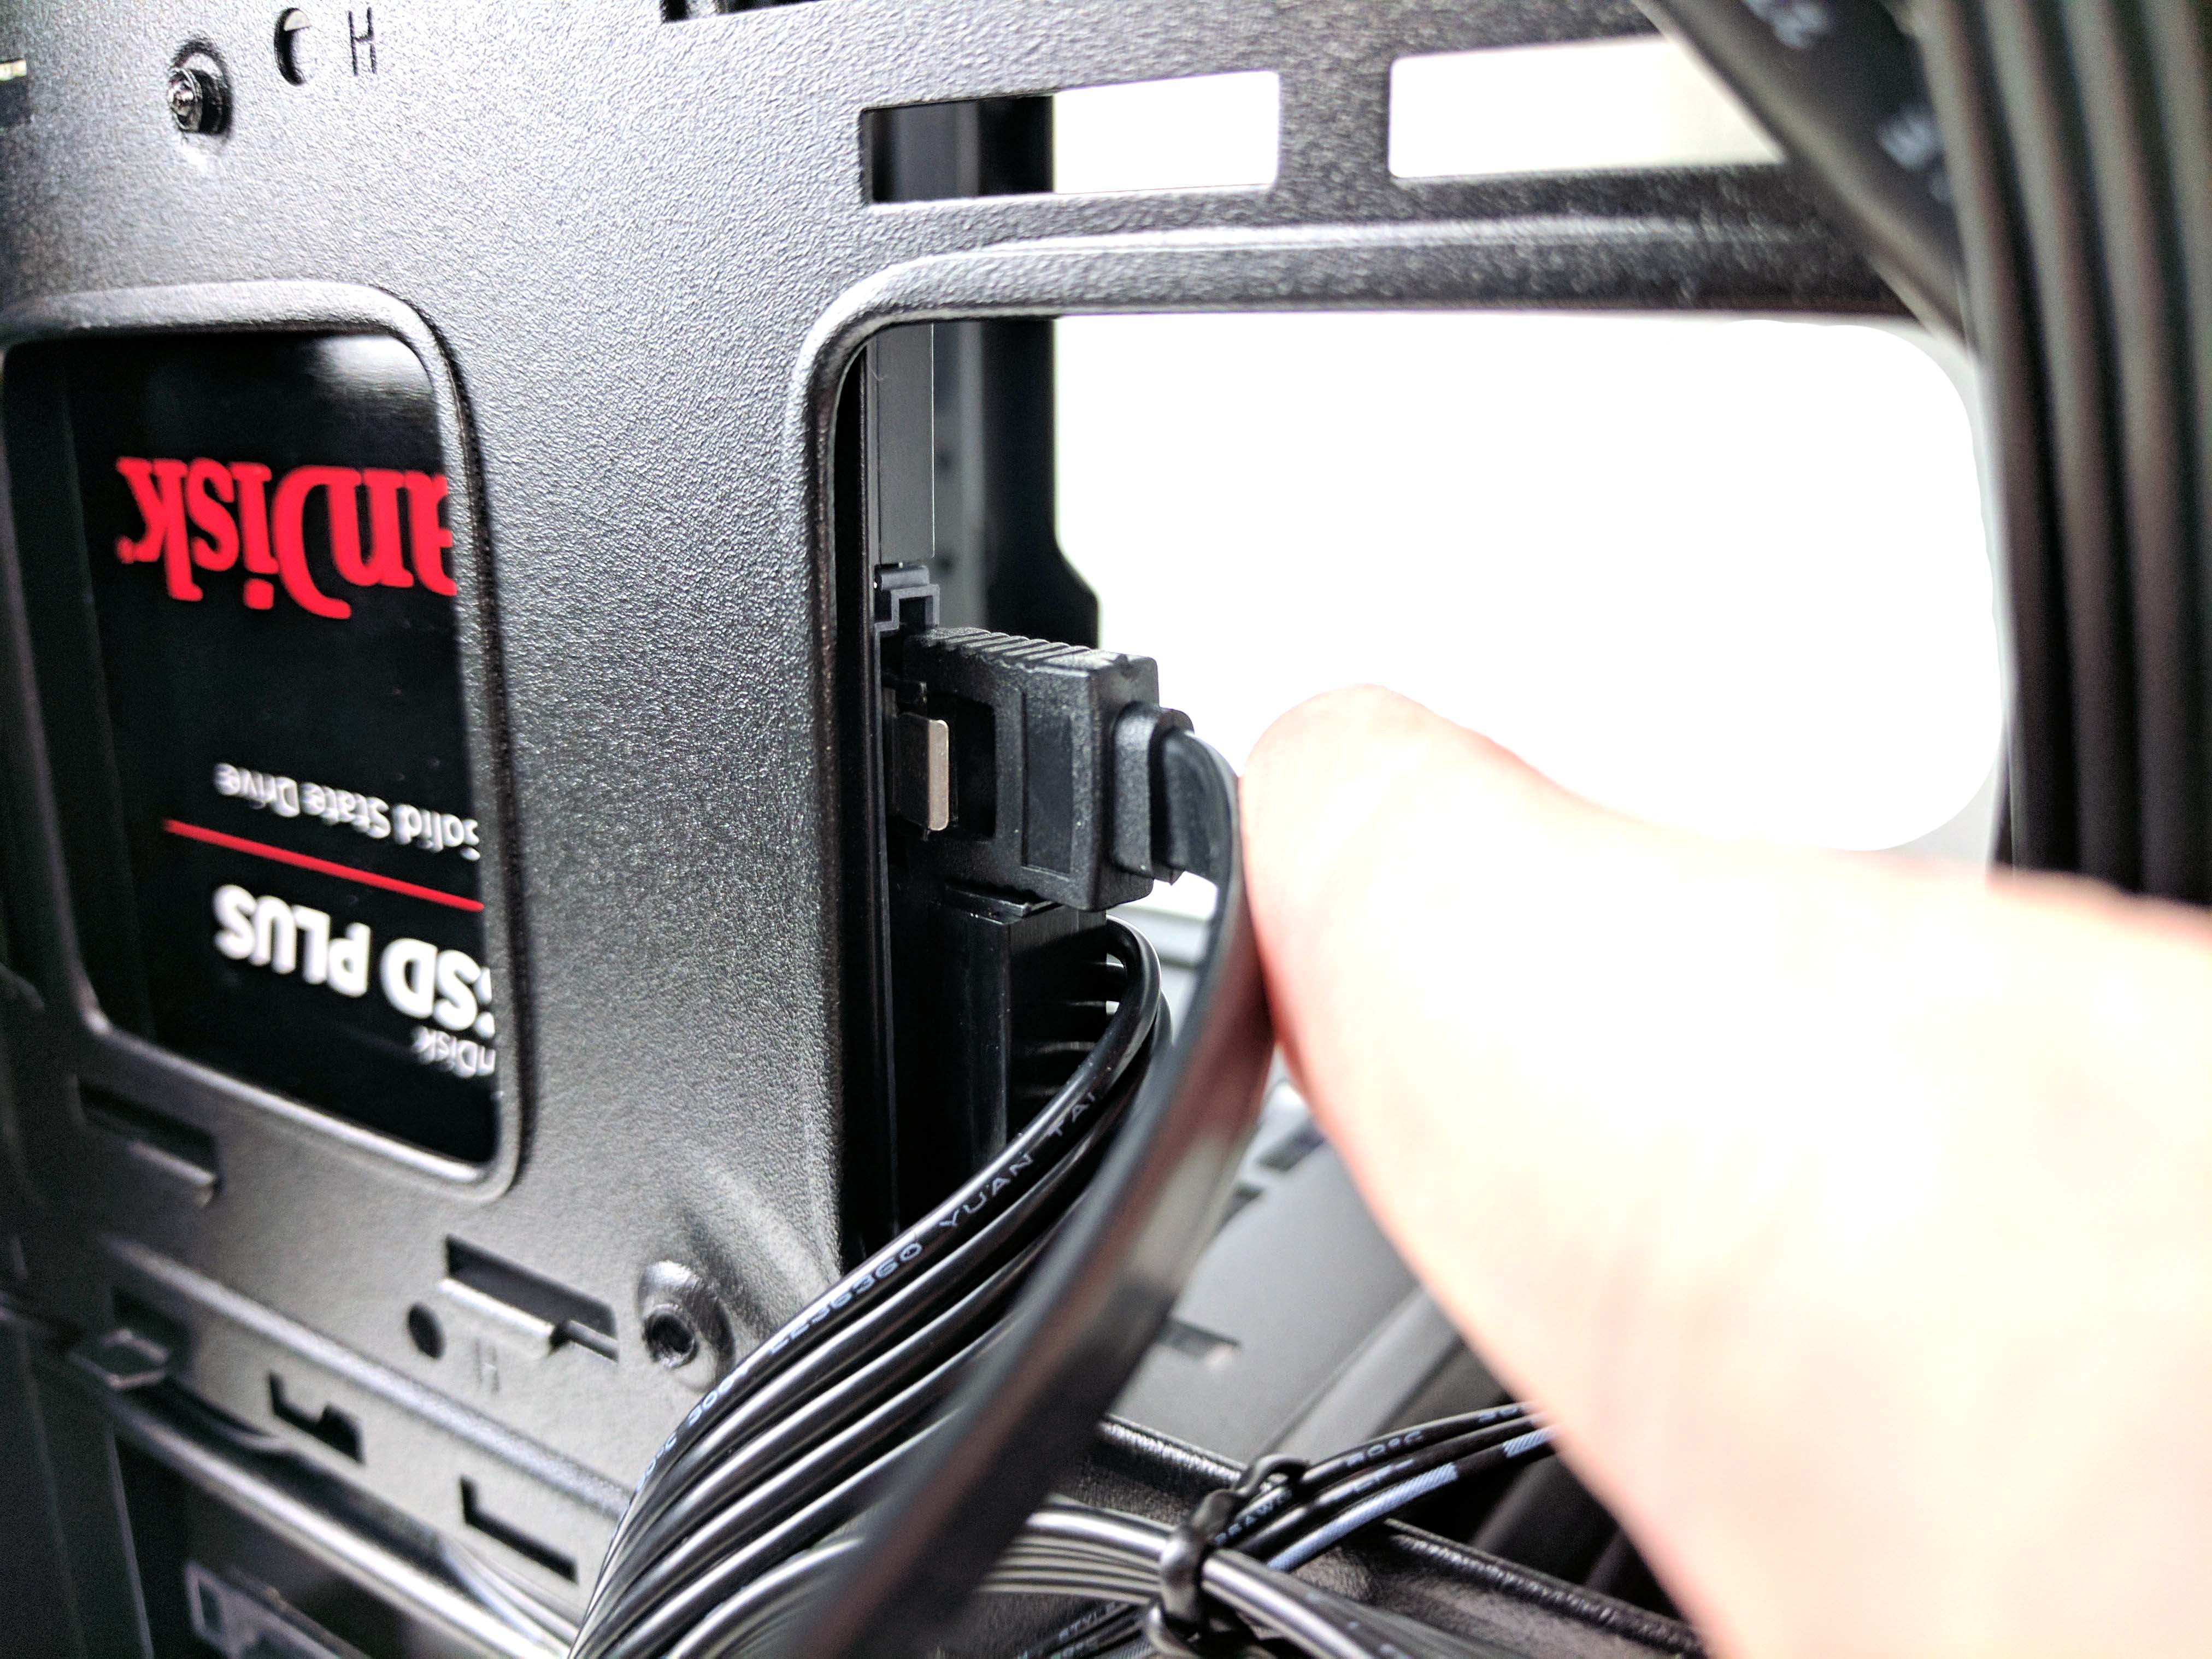
Bend the very last SATA power lead in the line and plug it into the SSD. Feed the other connectors to the 3.5" bay and plug the first in the chain into the 1TB HDD. You'll need every bit of slack between the two SATA power leads to make it. The remaining slack from the first lead to the PSU can be tucked under the HDD. Tie down the SATA power cable with the front fan cable and its existing tie wrap so that the SATA cable isn't visible from the main chamber.
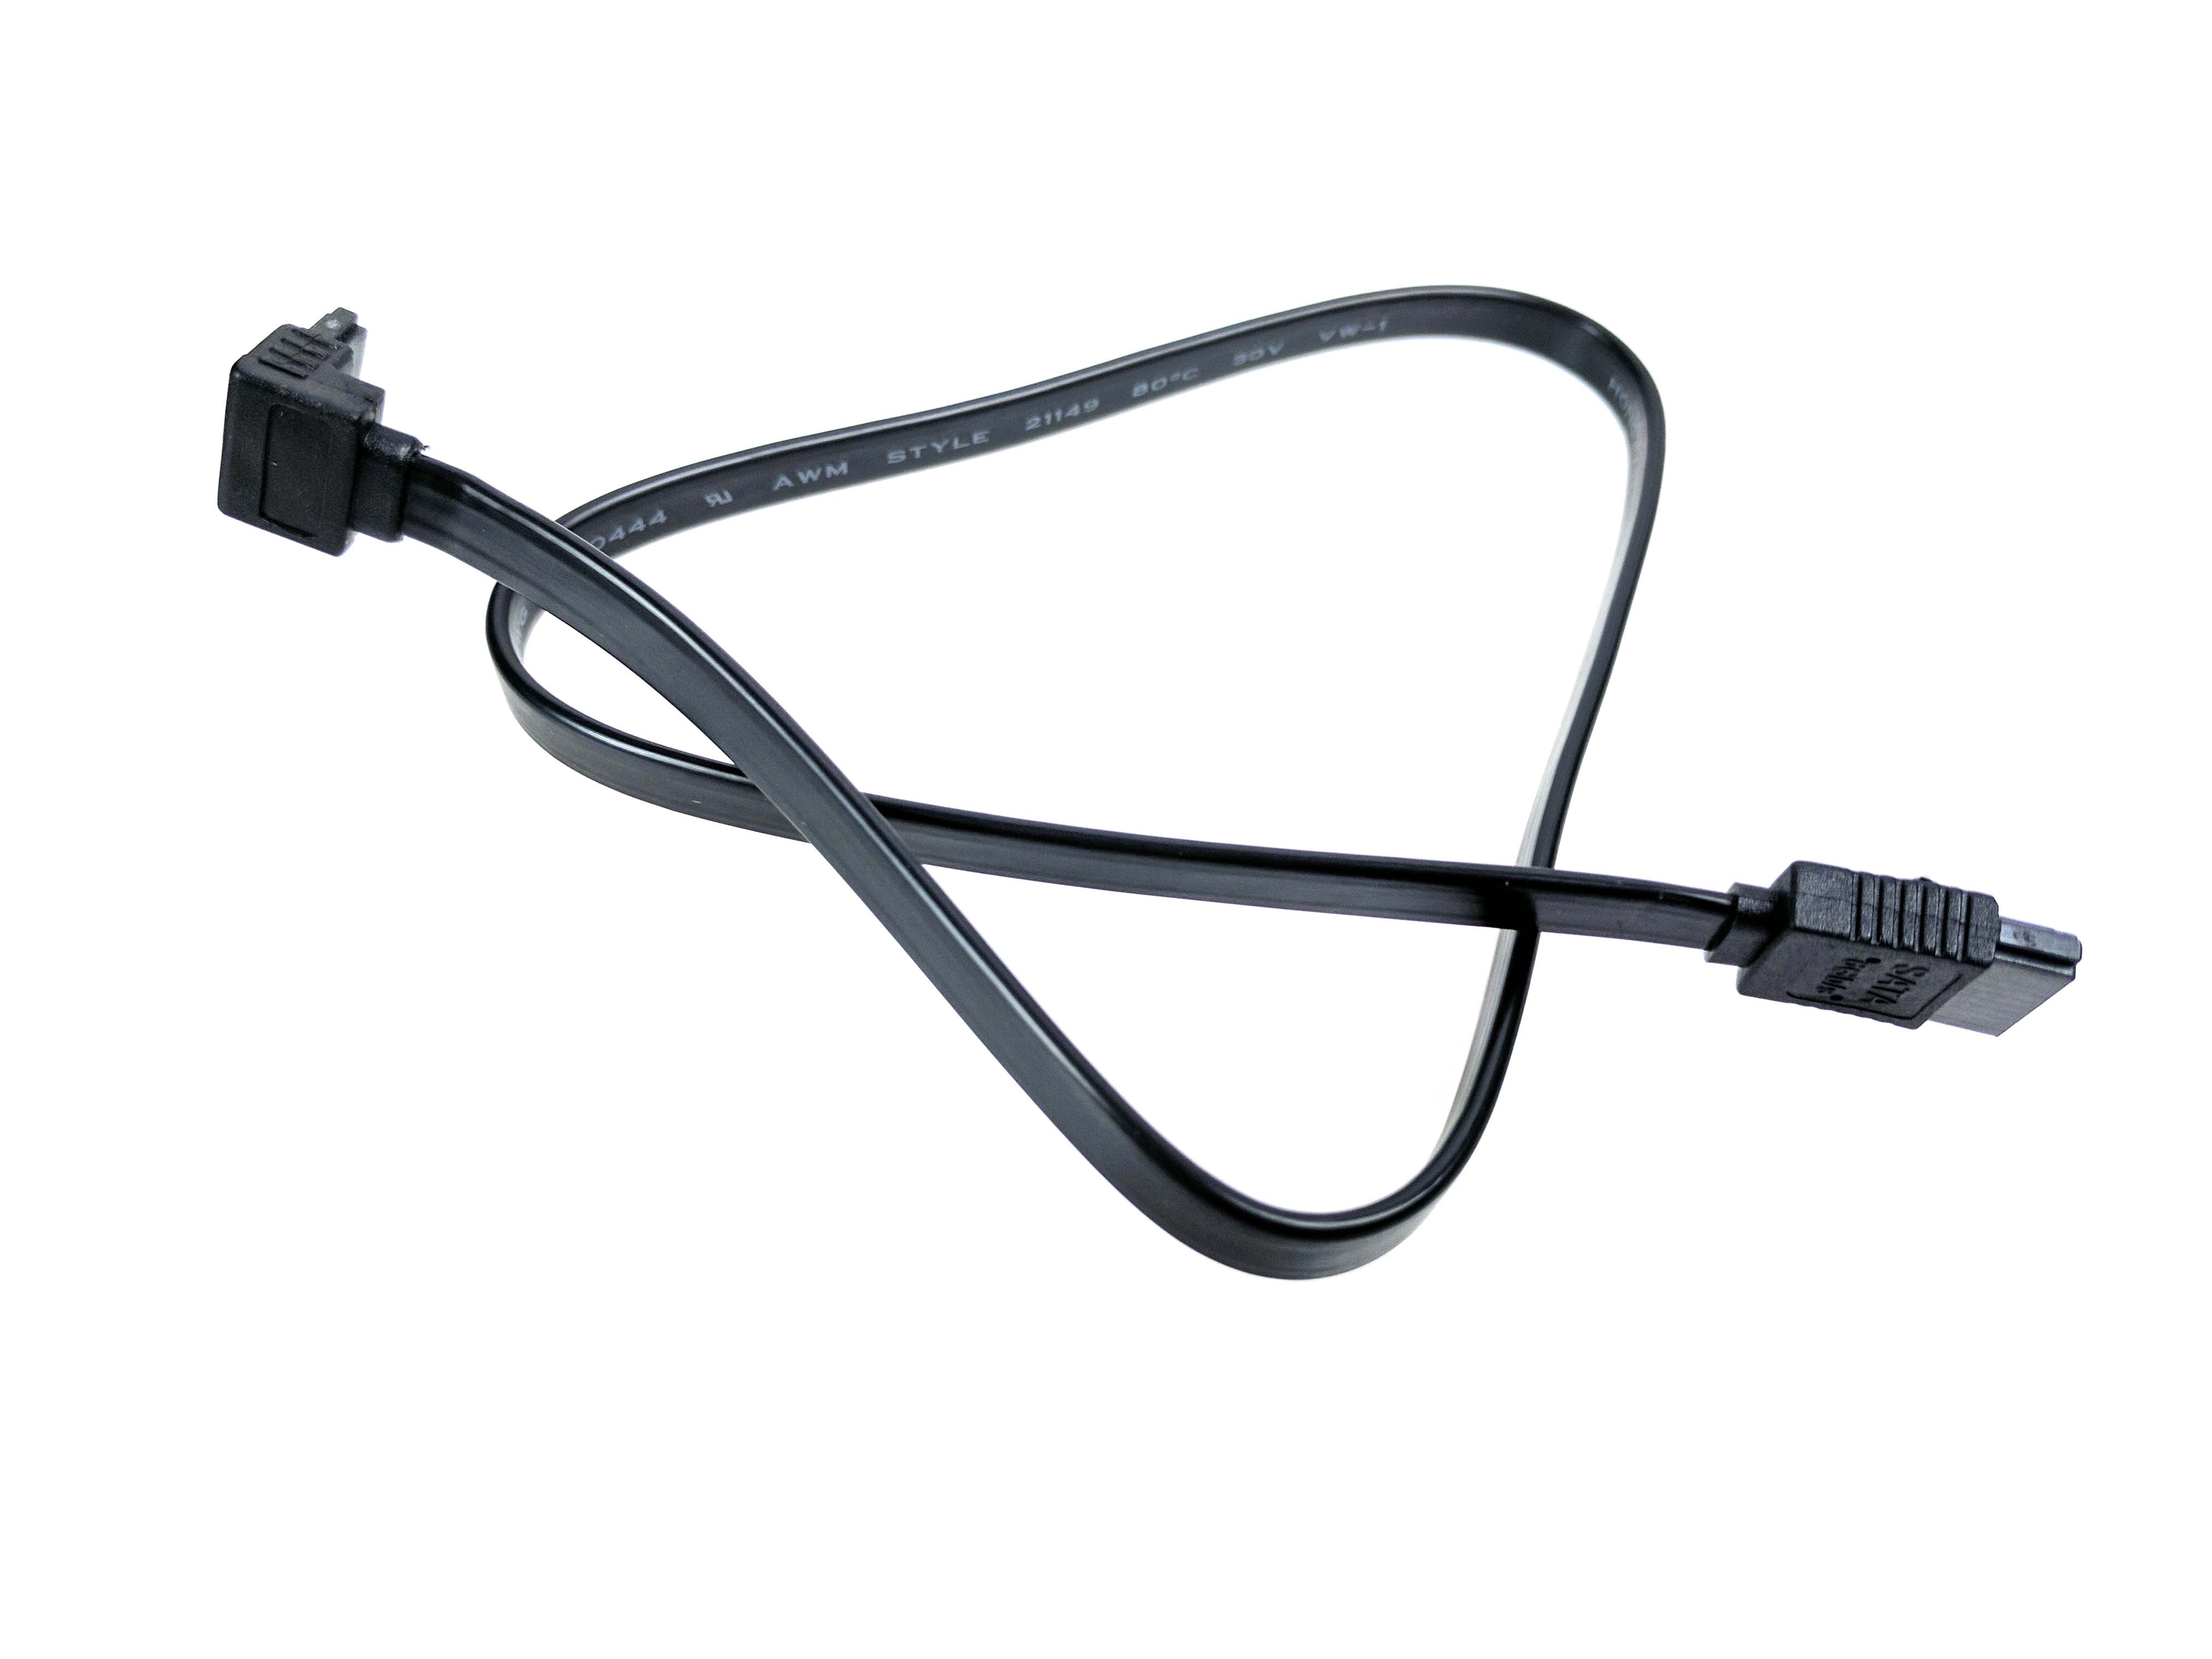
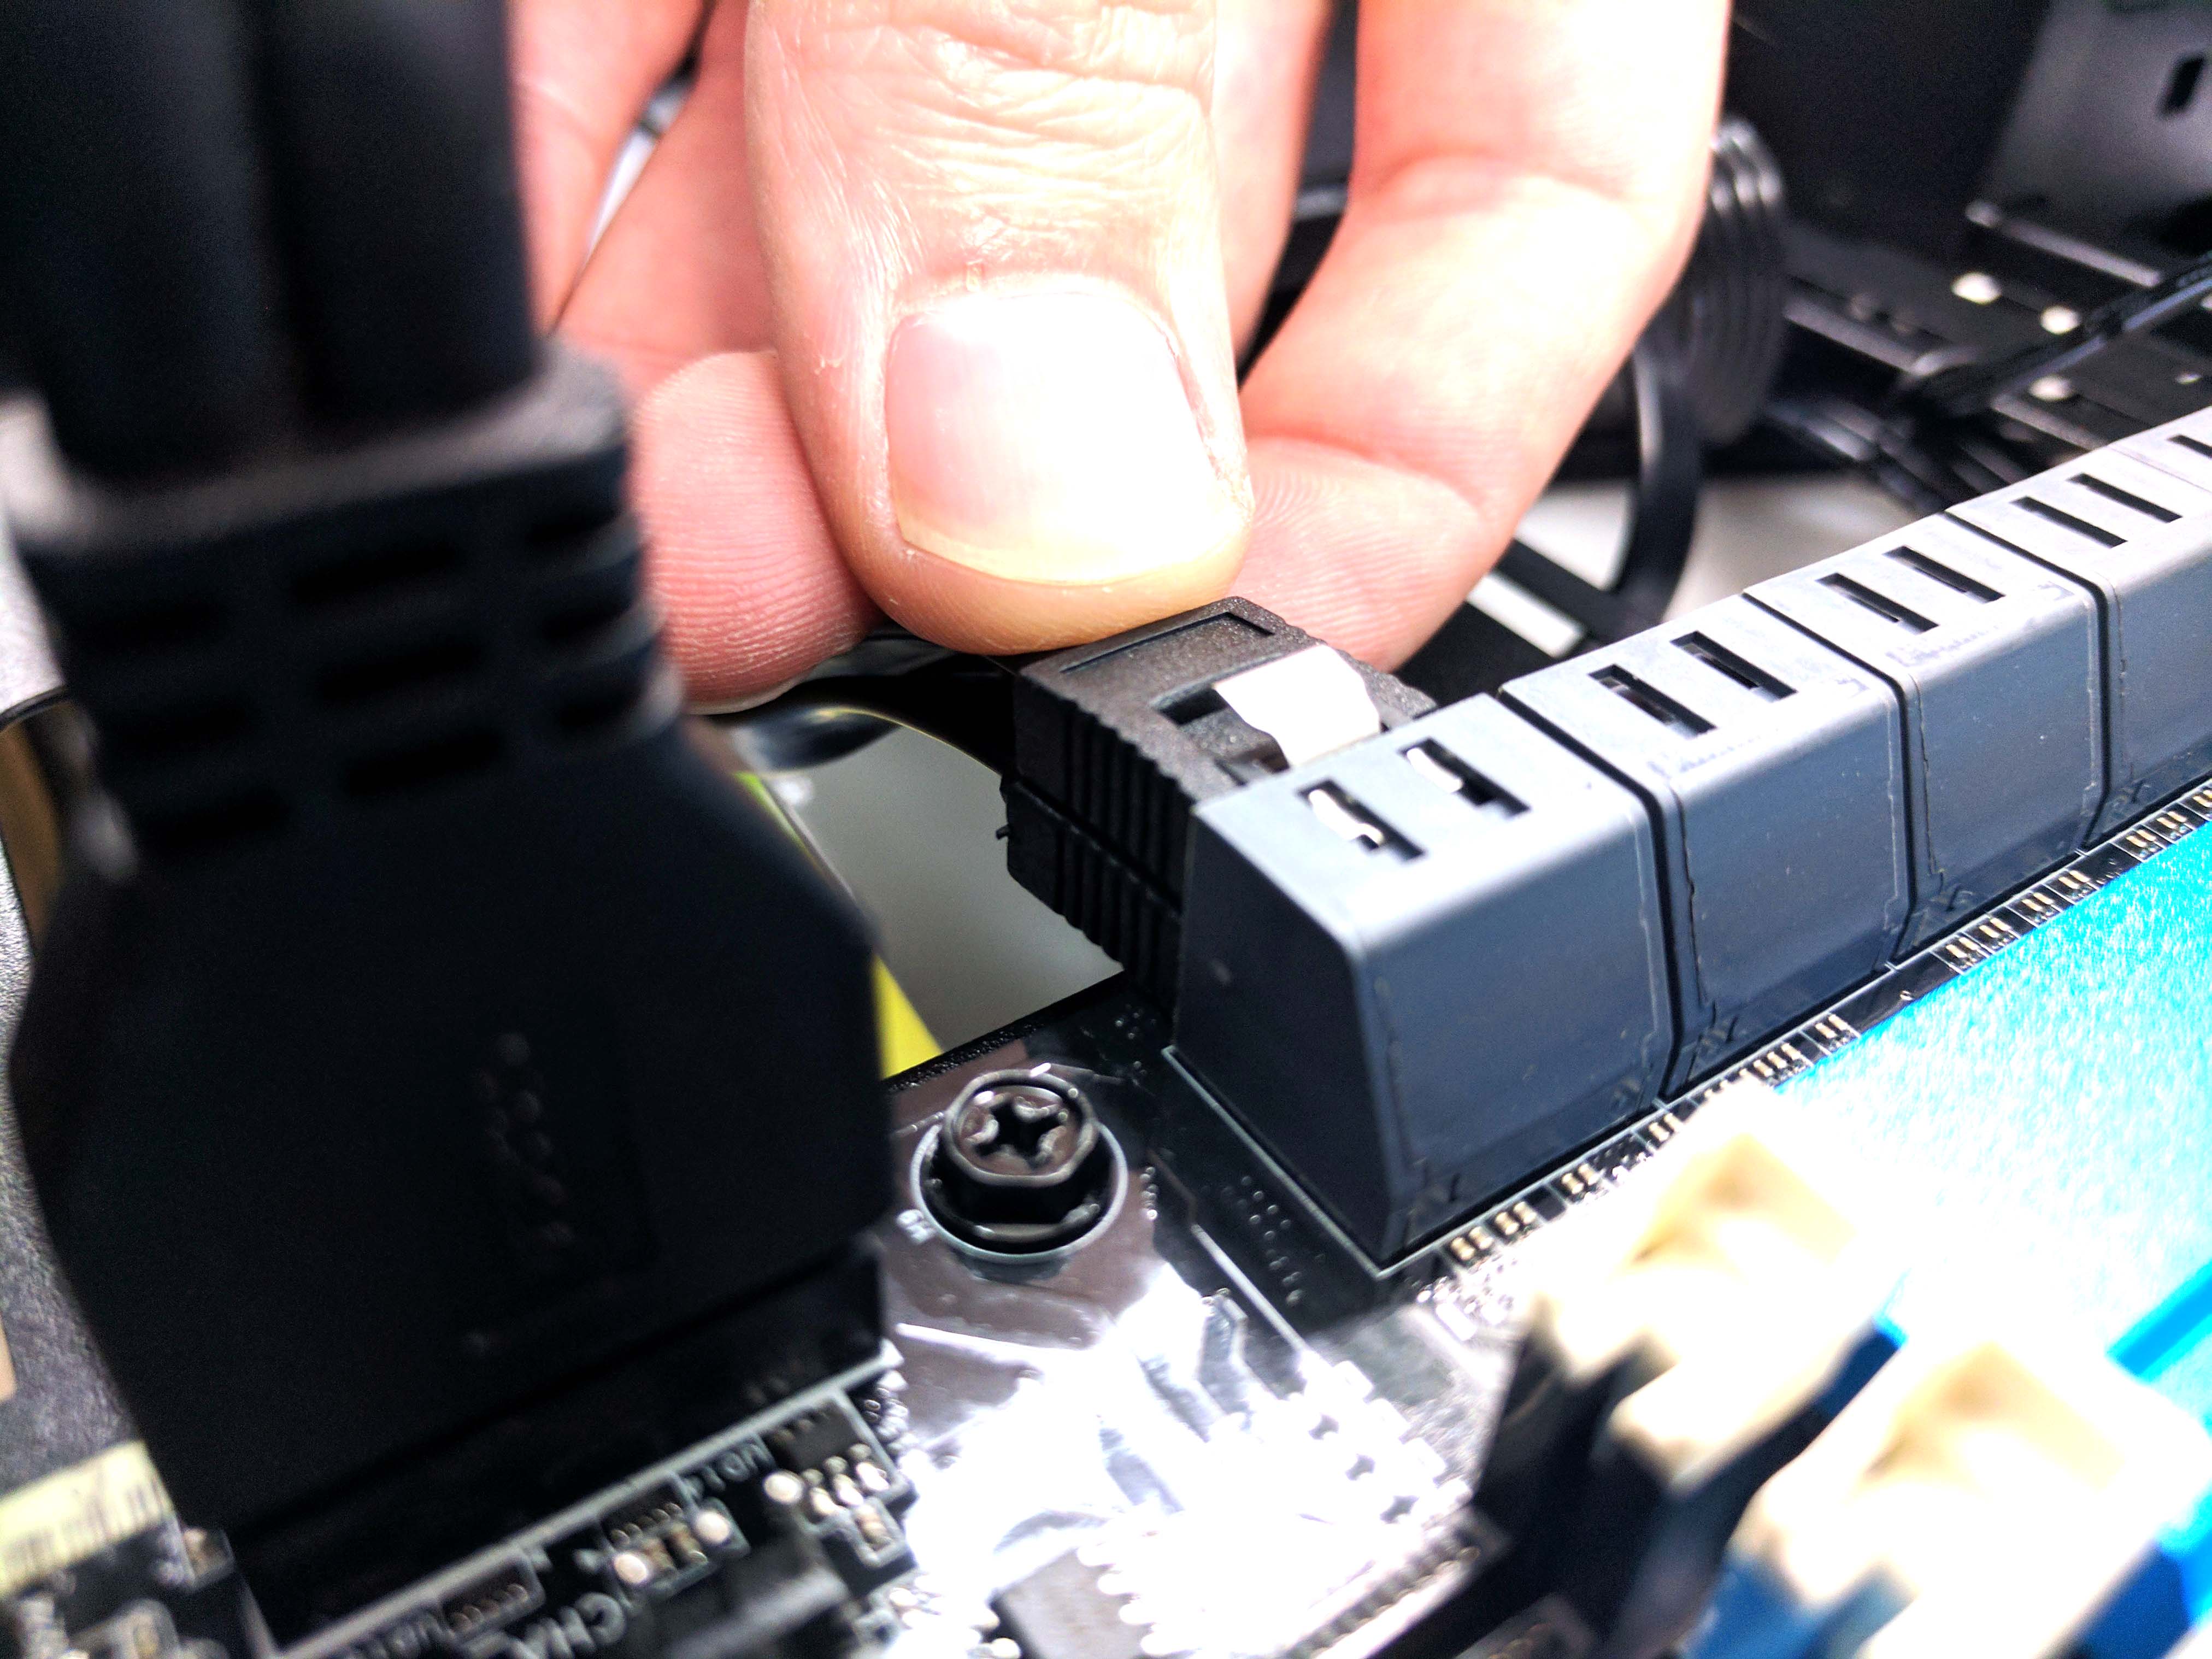
Next, pull one of the packages of SATA data cables from the motherboard box. There will be a cable with one angled connector, in addition to one with two straight connectors. Plug the angled connector into the 1TB HDD in the 3.5" drive bay (see picture 2 in the album below) and let the SATA data cable hang for now. Plug the other straight SATA data cable into the 2.5" SSD and bend it in the same direction as the power connector (being careful not to damage the port on the SSD with too much pressure). Run the SSD SATA data cable down towards the HDD bay, but loop it naturally and feed it into the center hole (vertically) near the SATA 6GB/s ports on the motherboard.
Plug the other end of the SSD data cable into the SATA_0 port (port closest to CPU,on the bottom of the stack). Feed the HDD's data cable (currently hanging on the backside of the main chamber) up the same way as the SSD SATA cable and plug it into the SATA_1 port (directly above the SATA_O port). Tuck the excess of both SATA data cables into the 3.5" bay (under the HDD) and use one of the saved tie wraps to secure the SATA data cables to the SATA power cables neatly behind the 3.5" drive bay (so that the bundle of wires aren't visible from main chamber of the case).
Final Power Cables
Finally, grab a PCIe power cable (with two 6+2-pin leads) from the PSU box and attach the 8-pin side of the wire to the power supply's VGA1 port. As you feed it to the backside of the case, tuck the cable between the braided 24-pin ATX power cable and the other flat cables. This will reduce the bundling effect as you add more cables to a tie-wrapped point.
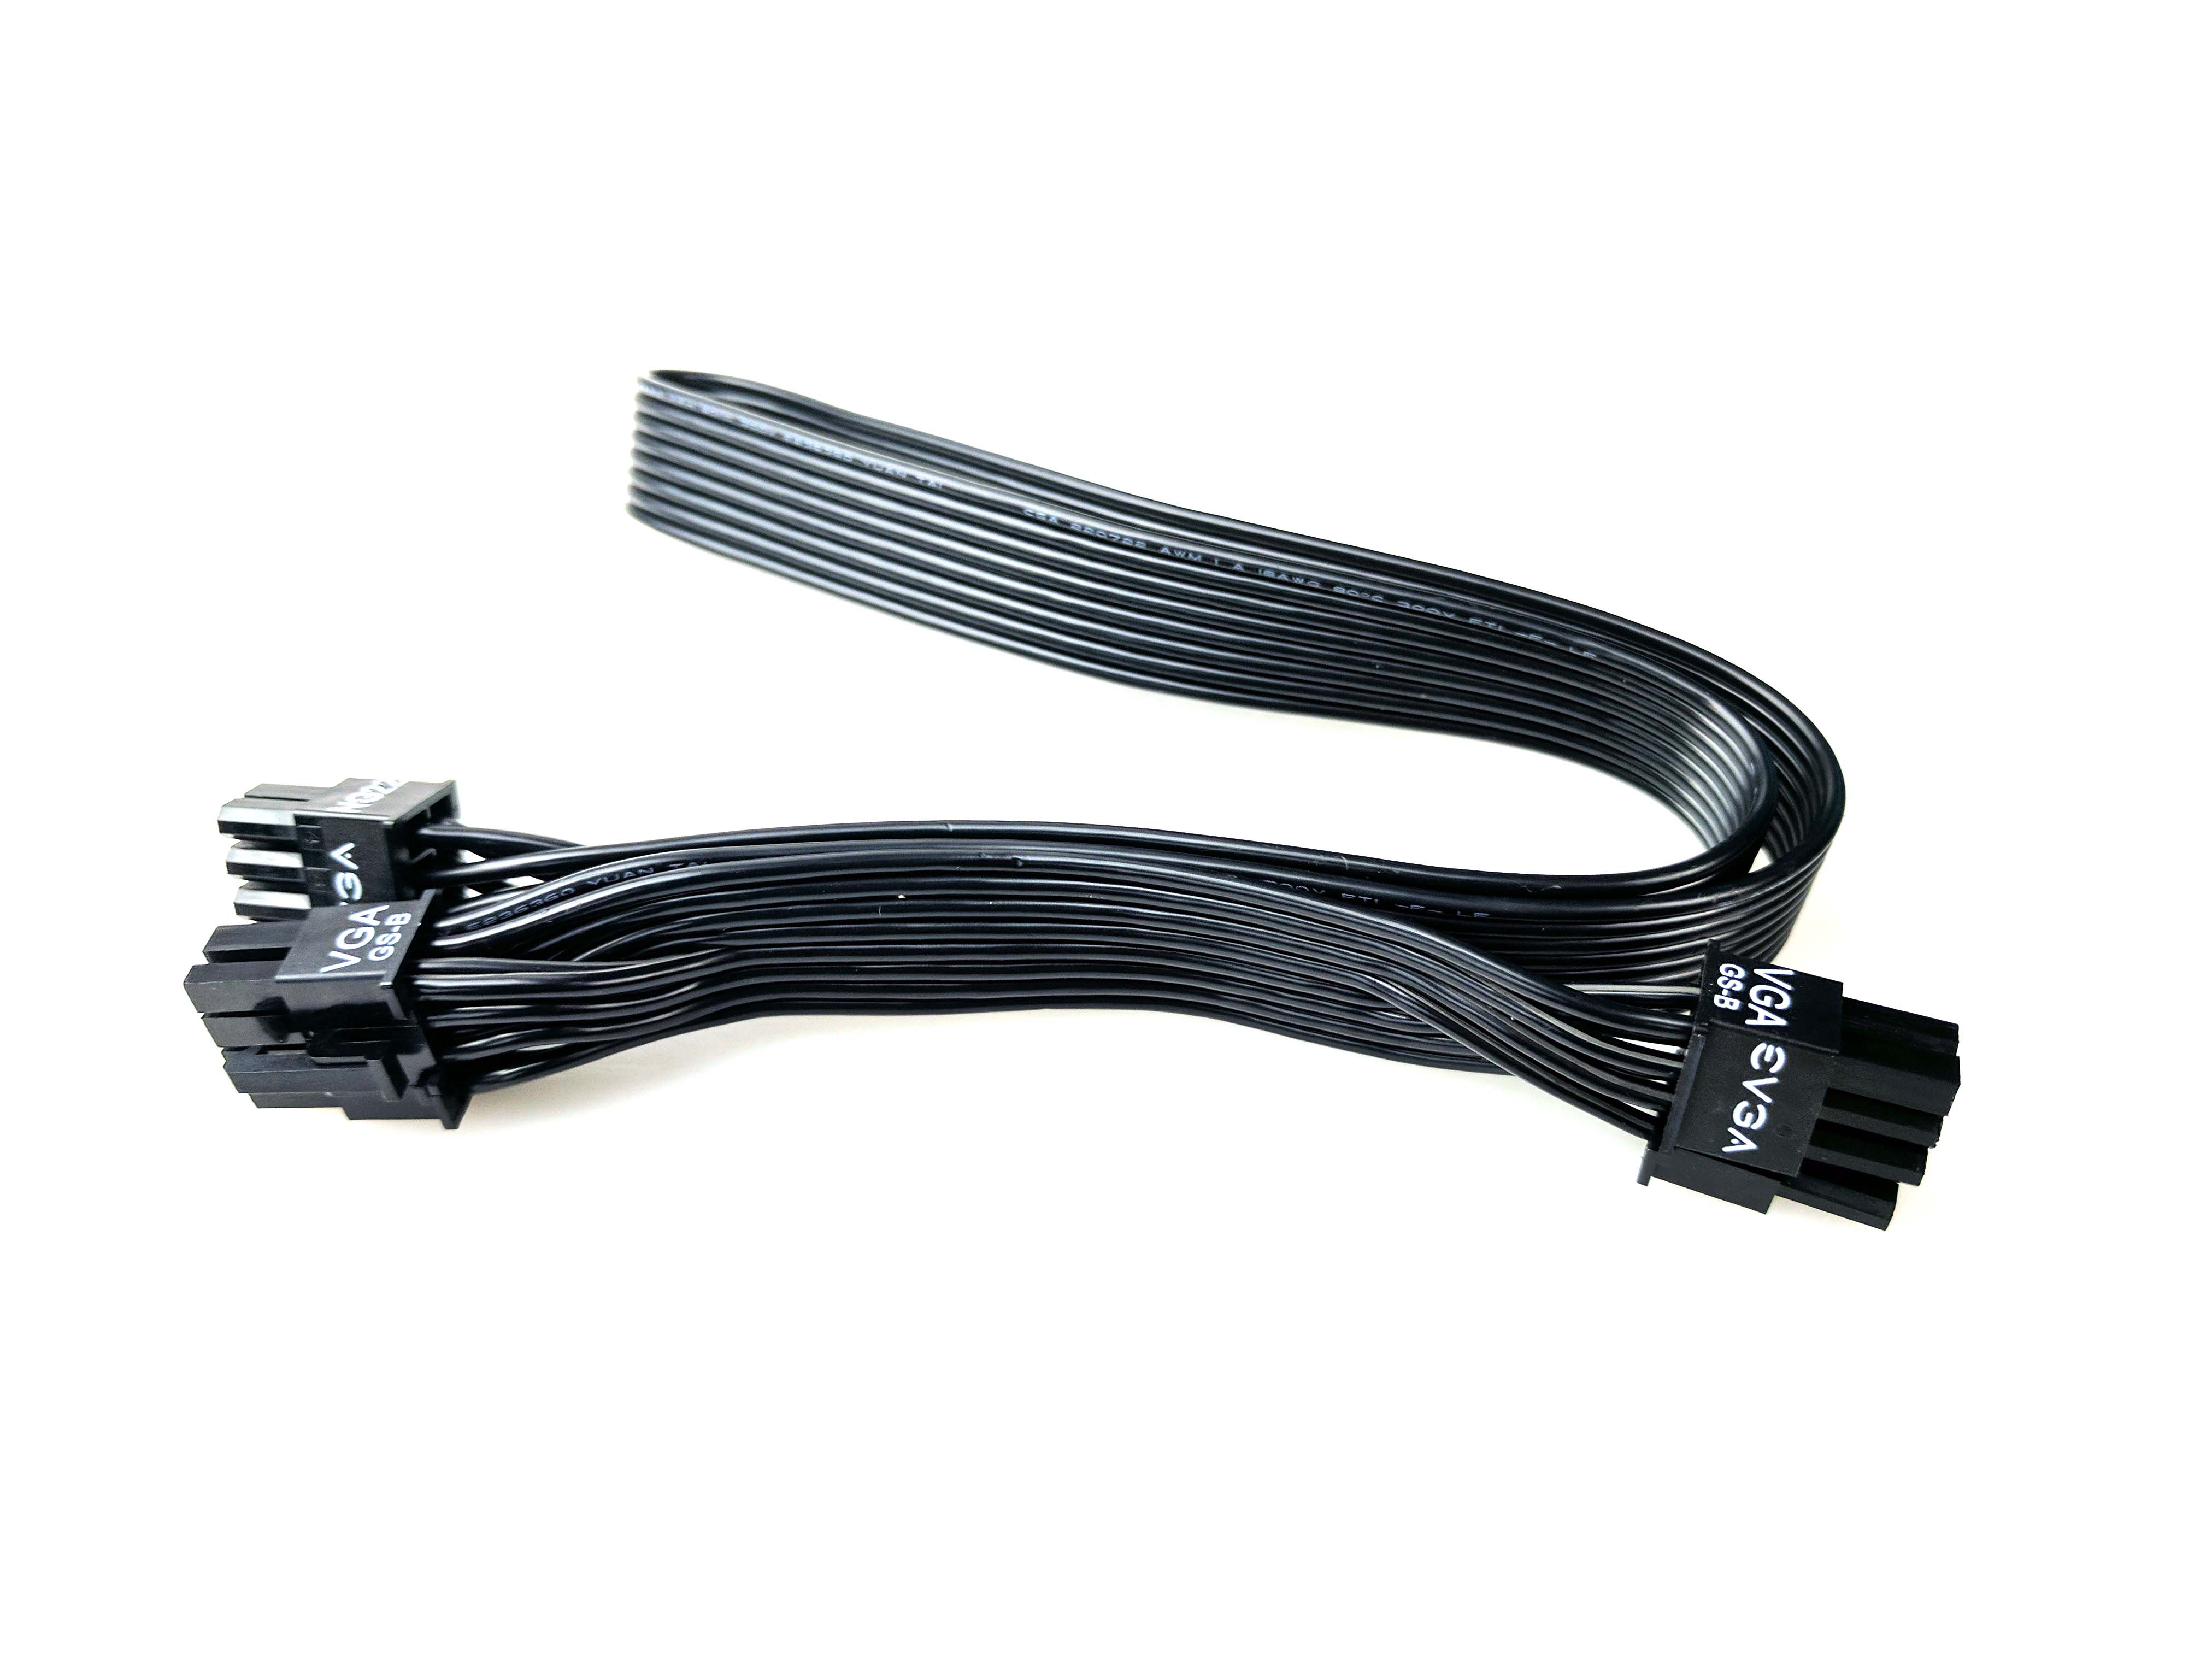
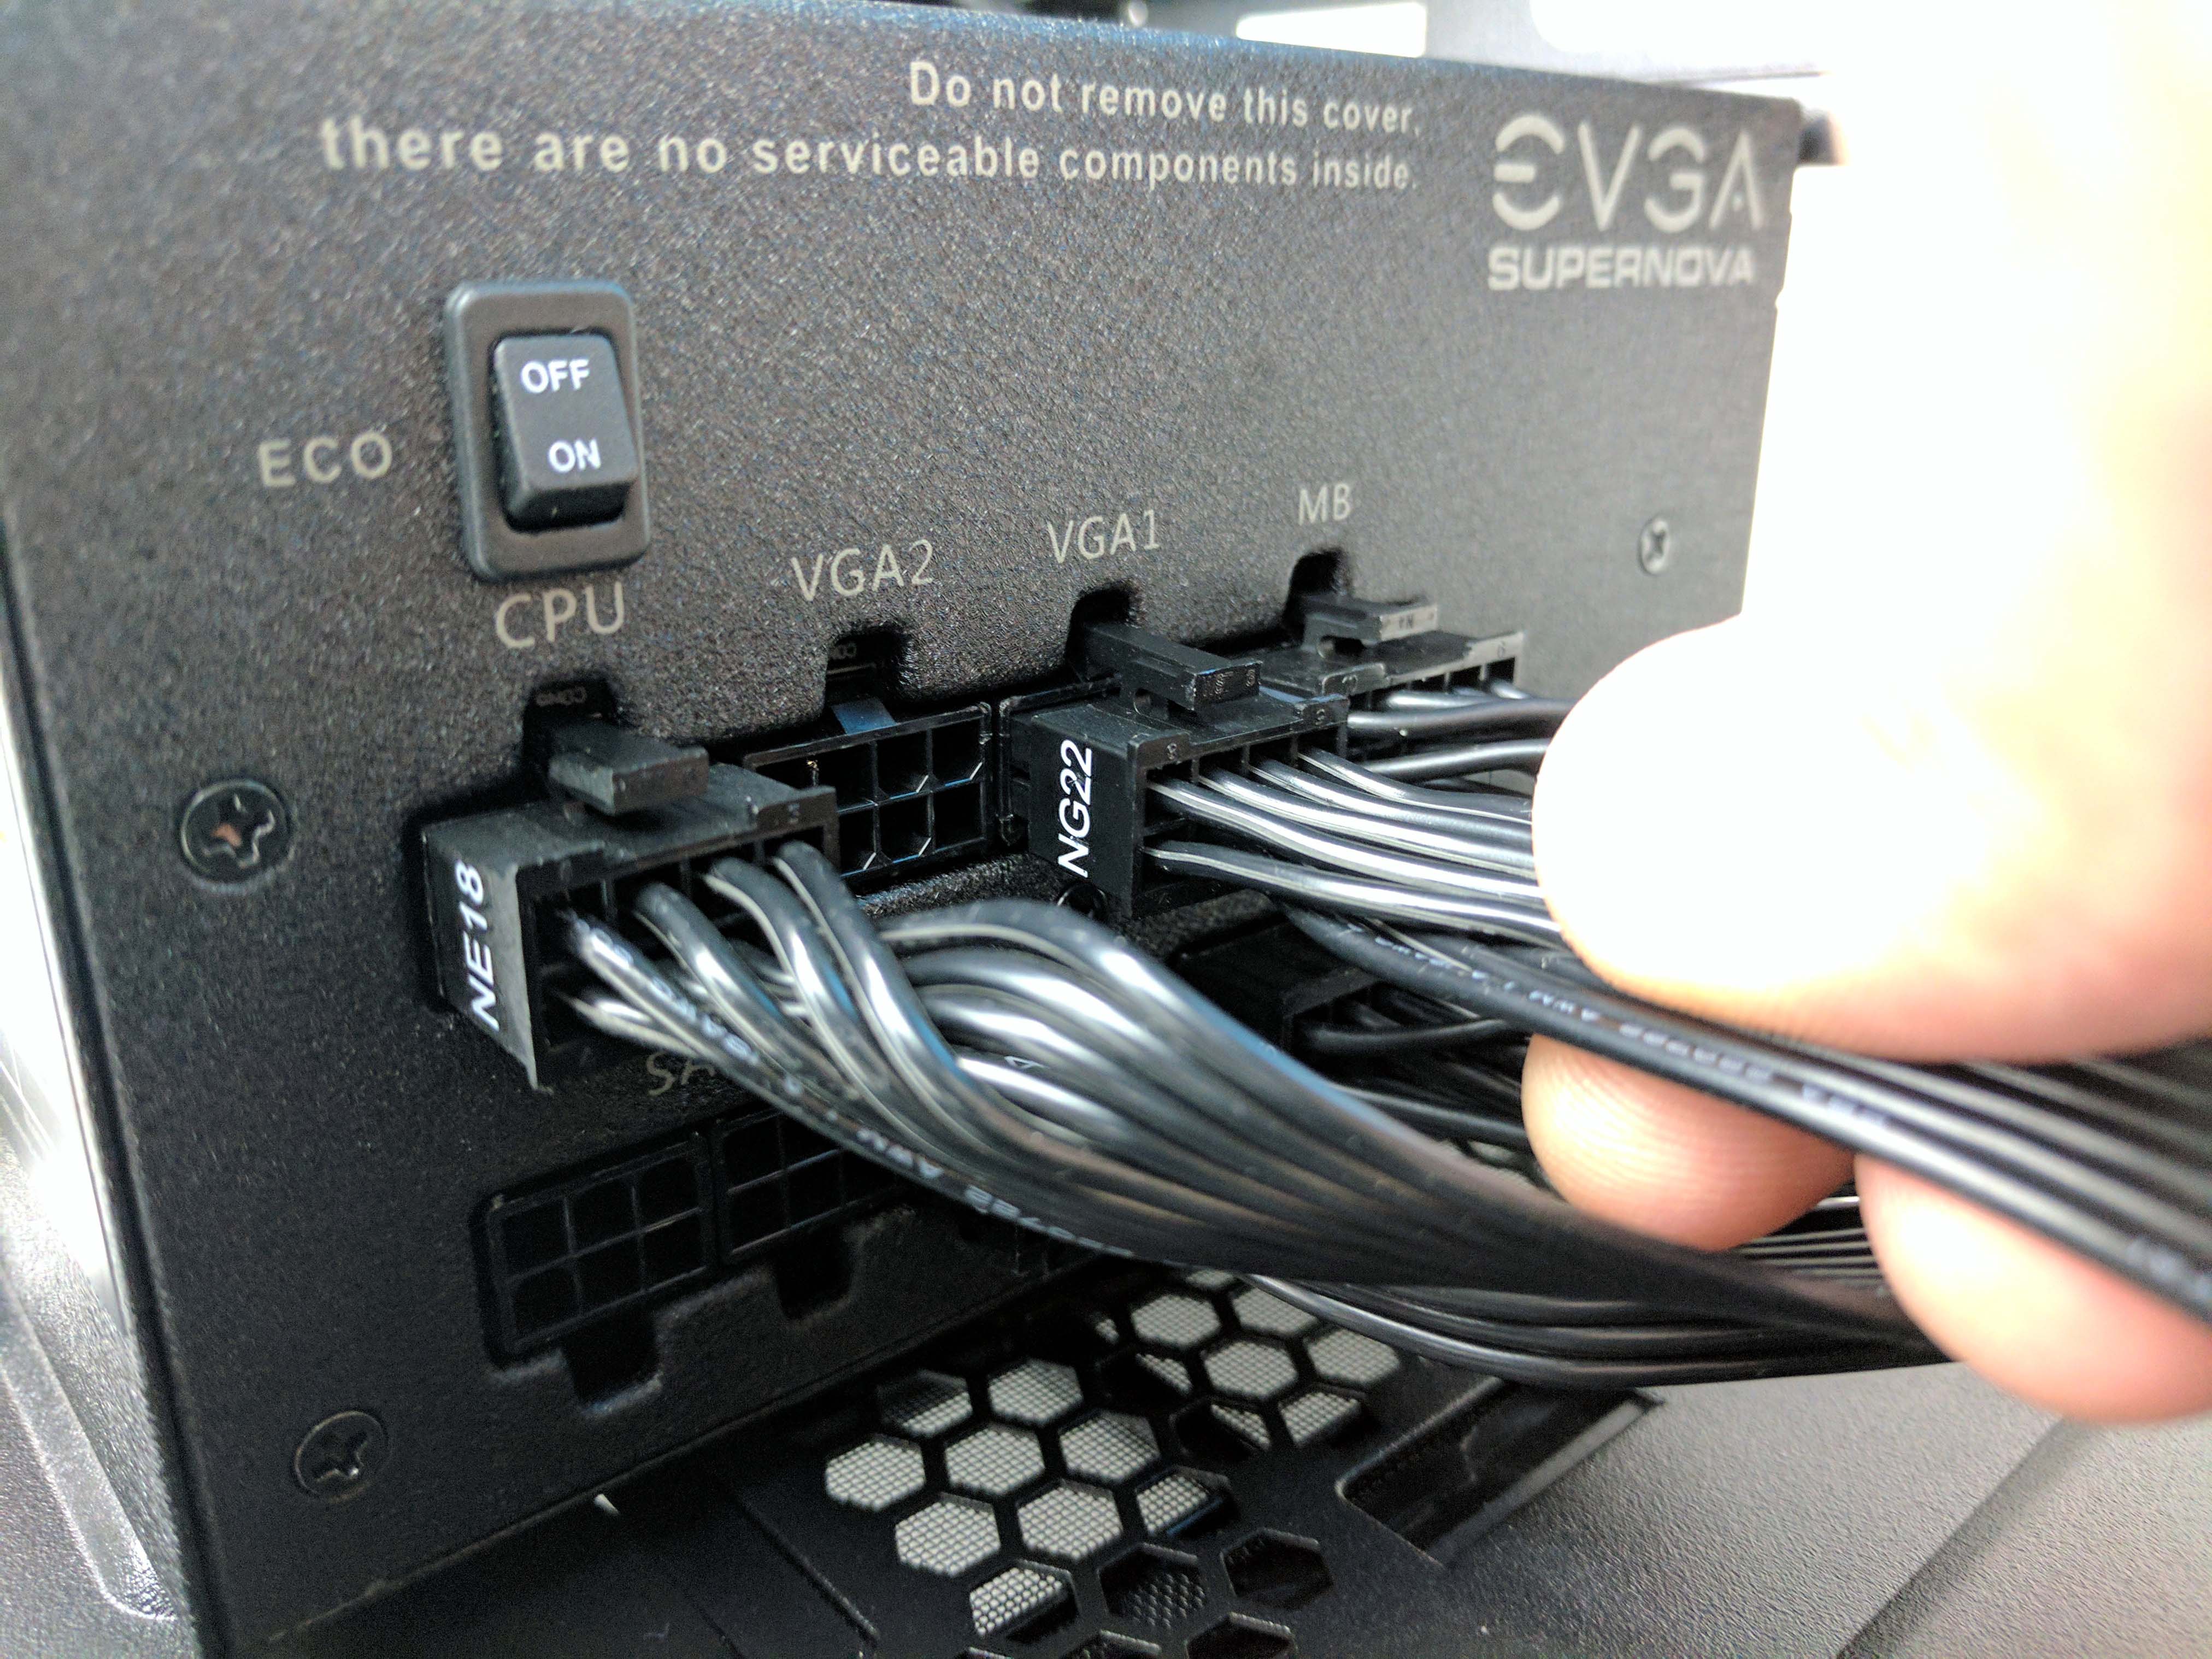
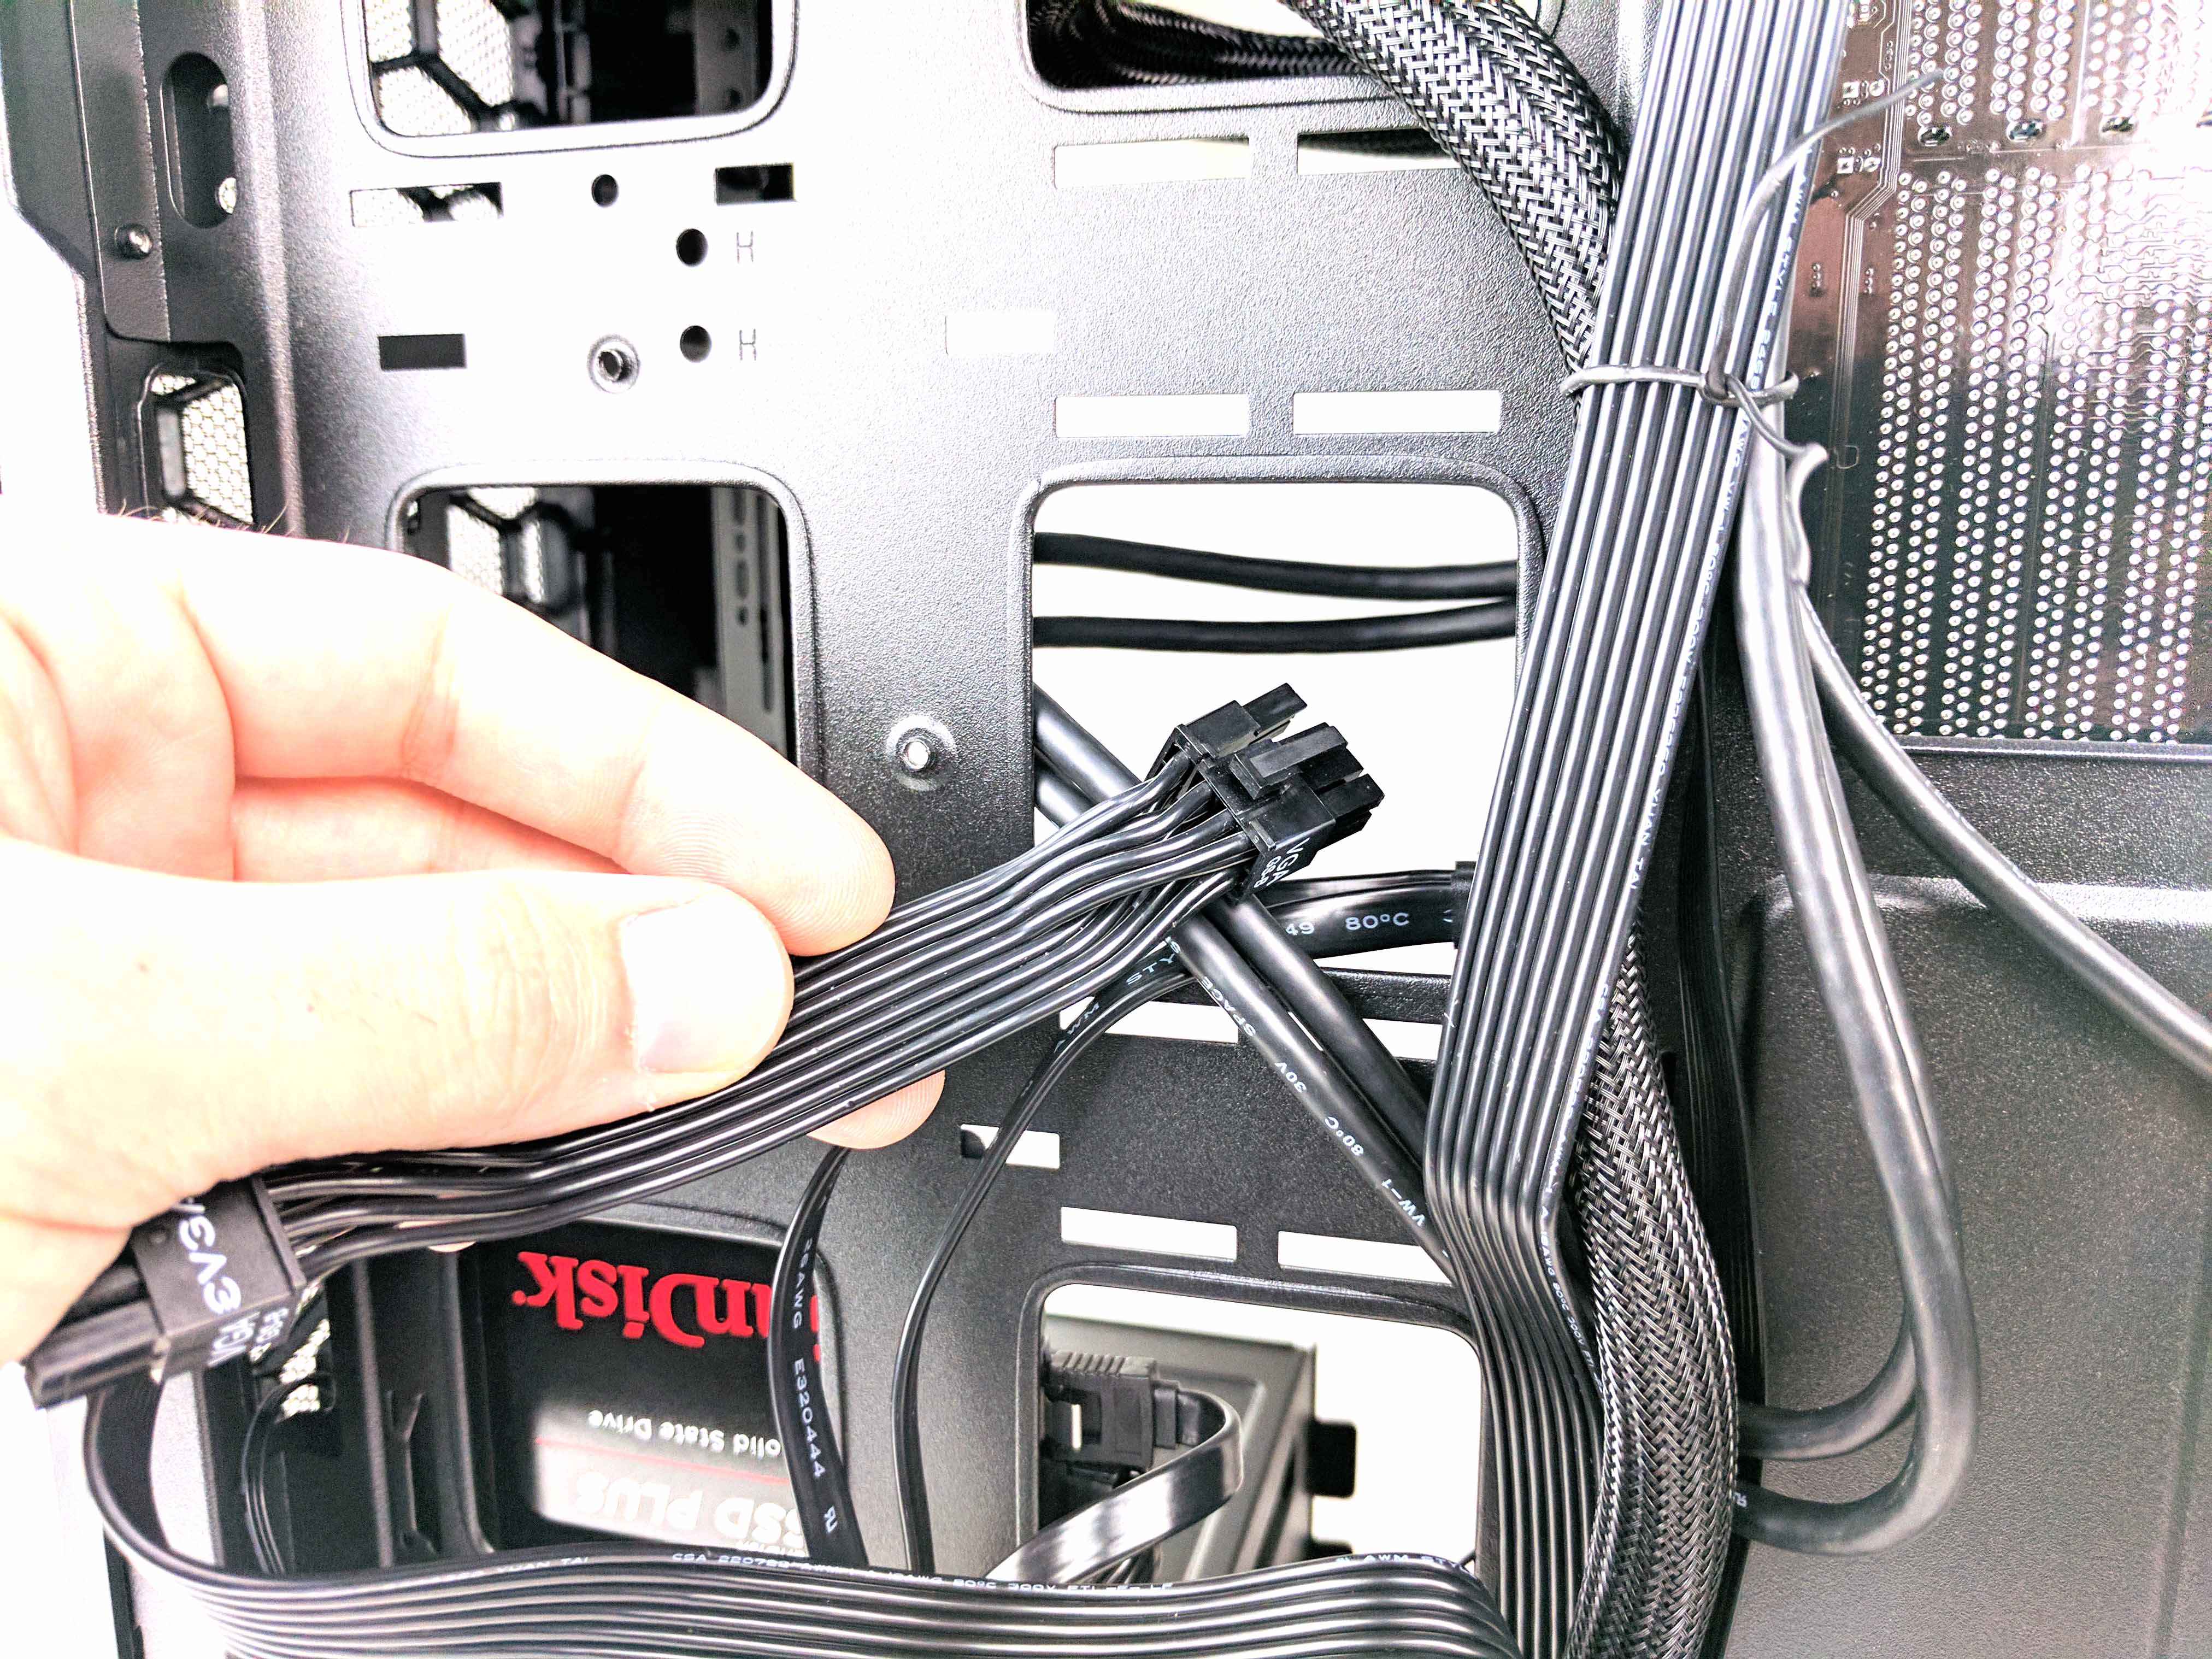
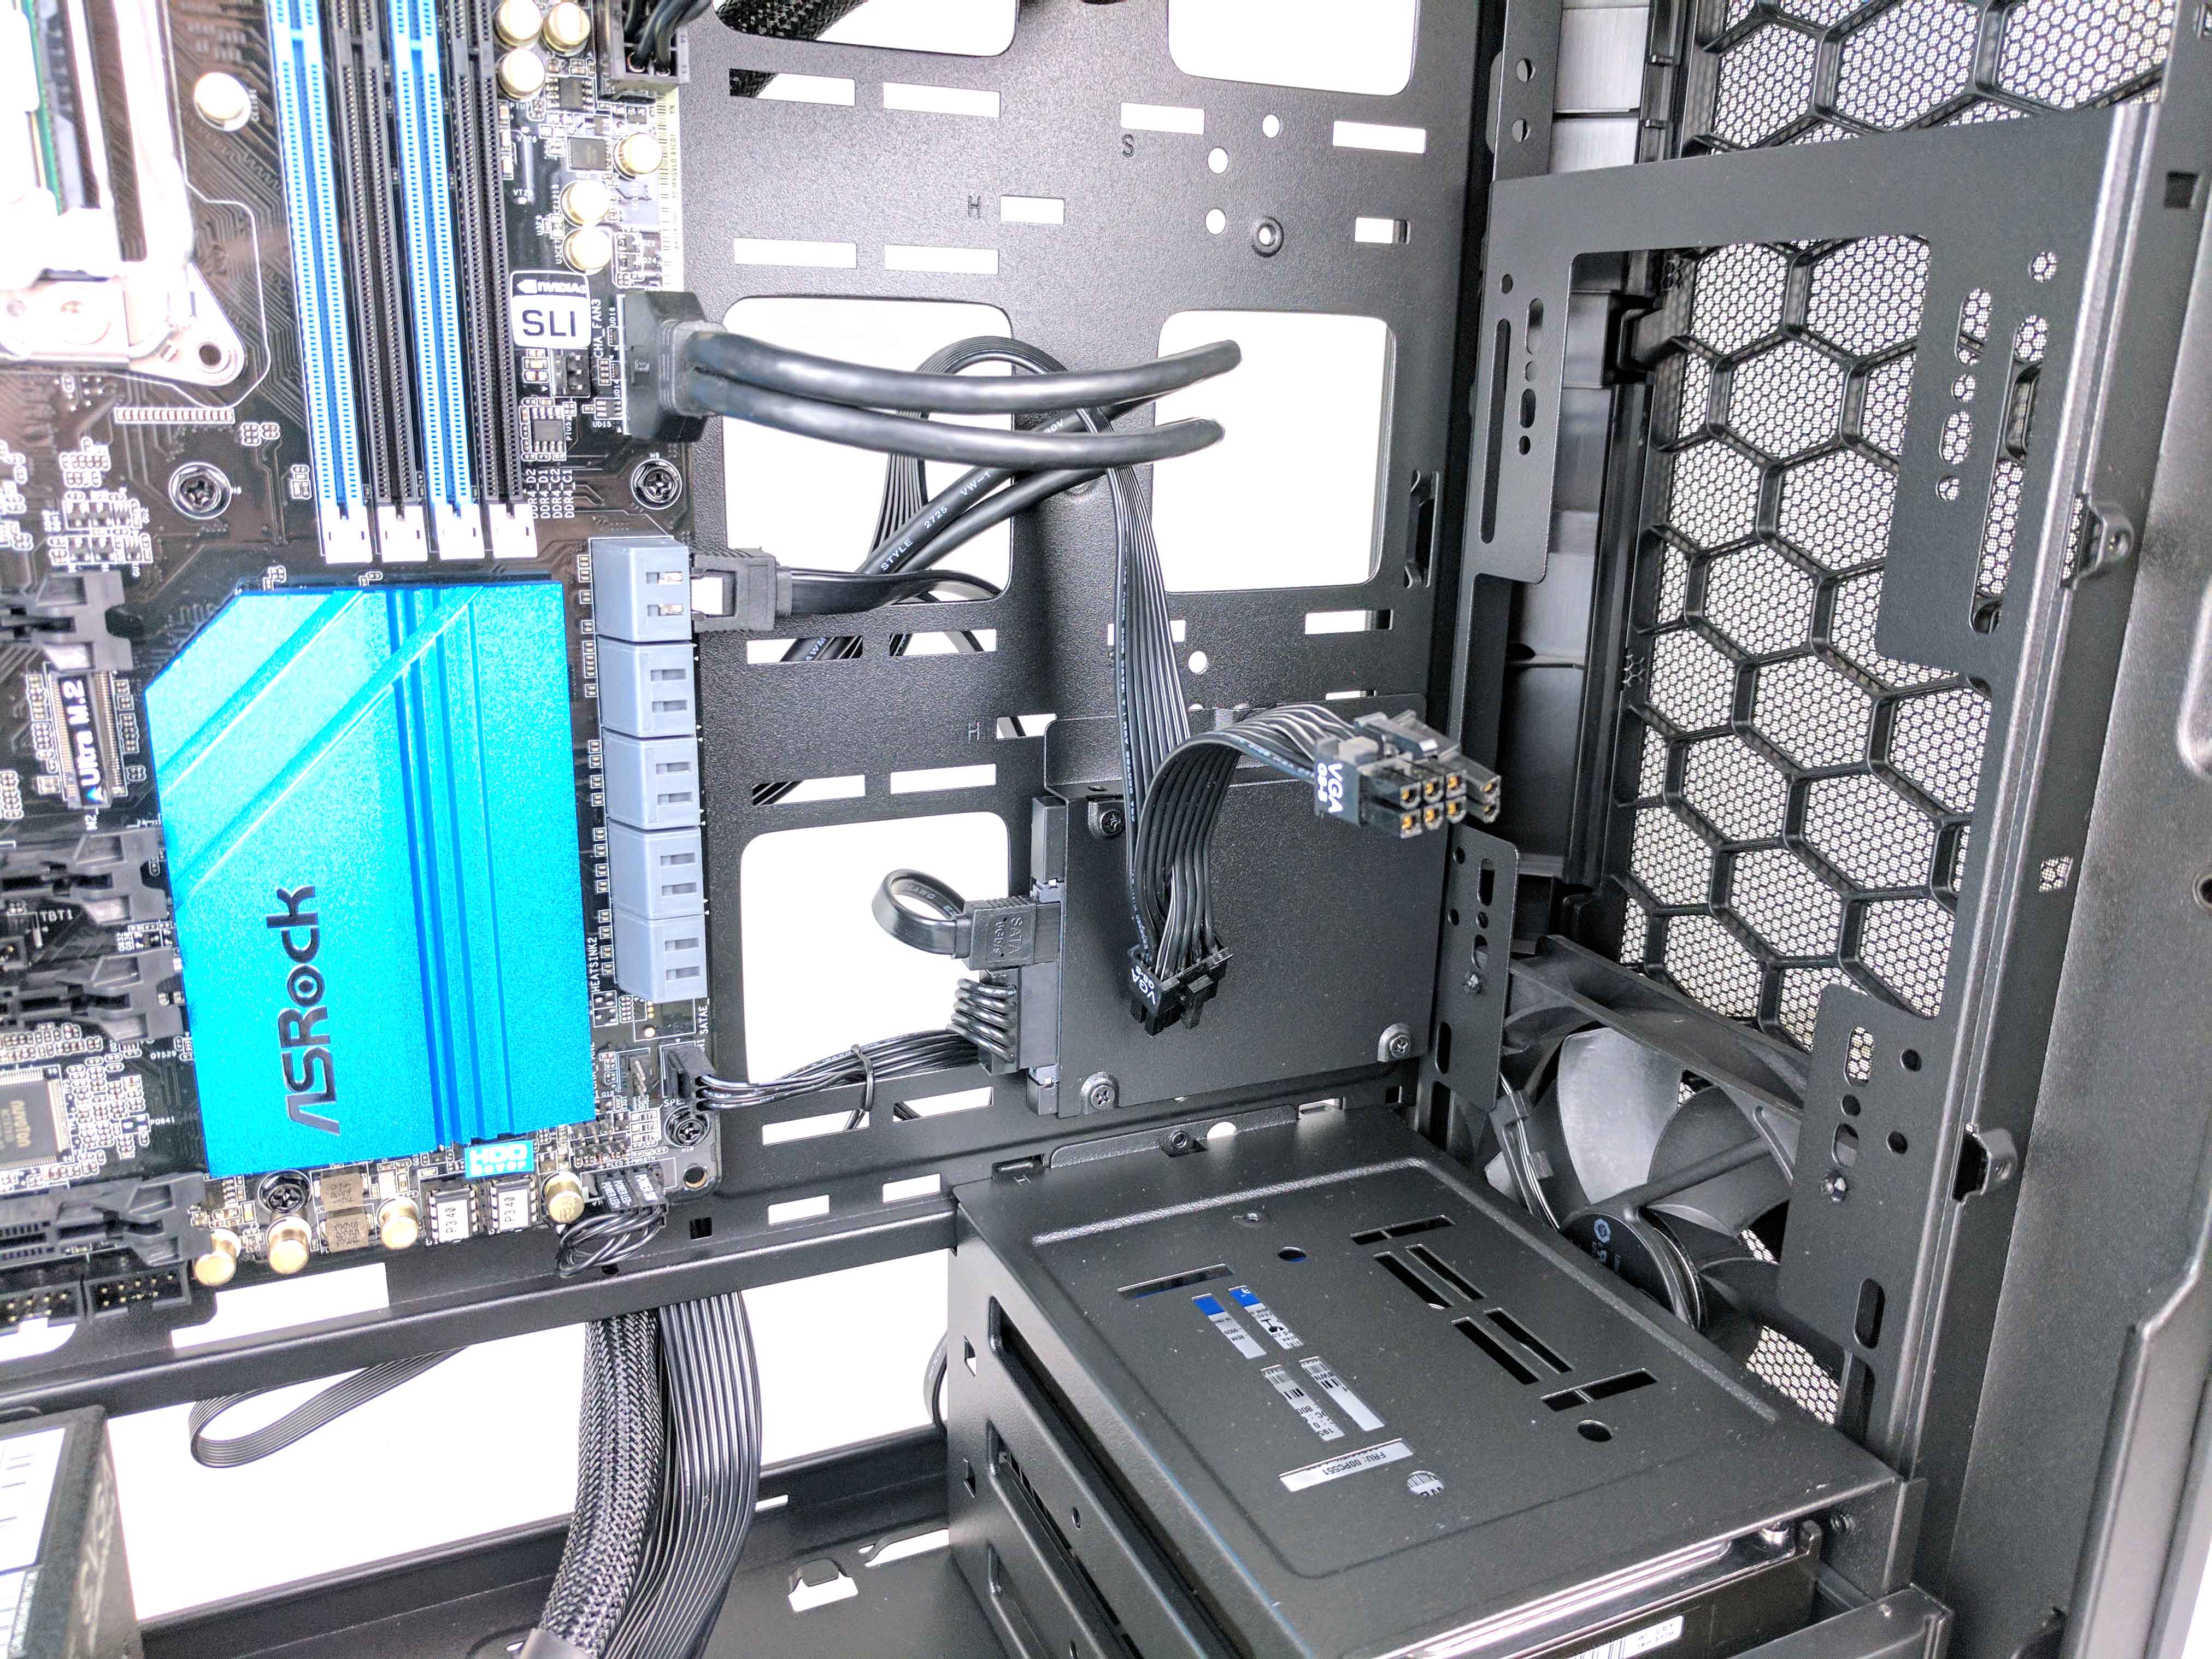
Feed the cable into the middle (vertically) hole closest to the motherboard (the same hole through which the USB 3.0 and SATA data cables are fed, 6th picture in the album above), behind the other existing cables. Tie the PCIe power cable in with the others at the bottom wrung, leaving as little slack as possible between the PSU, tie wrap, and the hole where it is fed. Let the PCIe power cable hang in the main chamber of the case for now.
Cooler
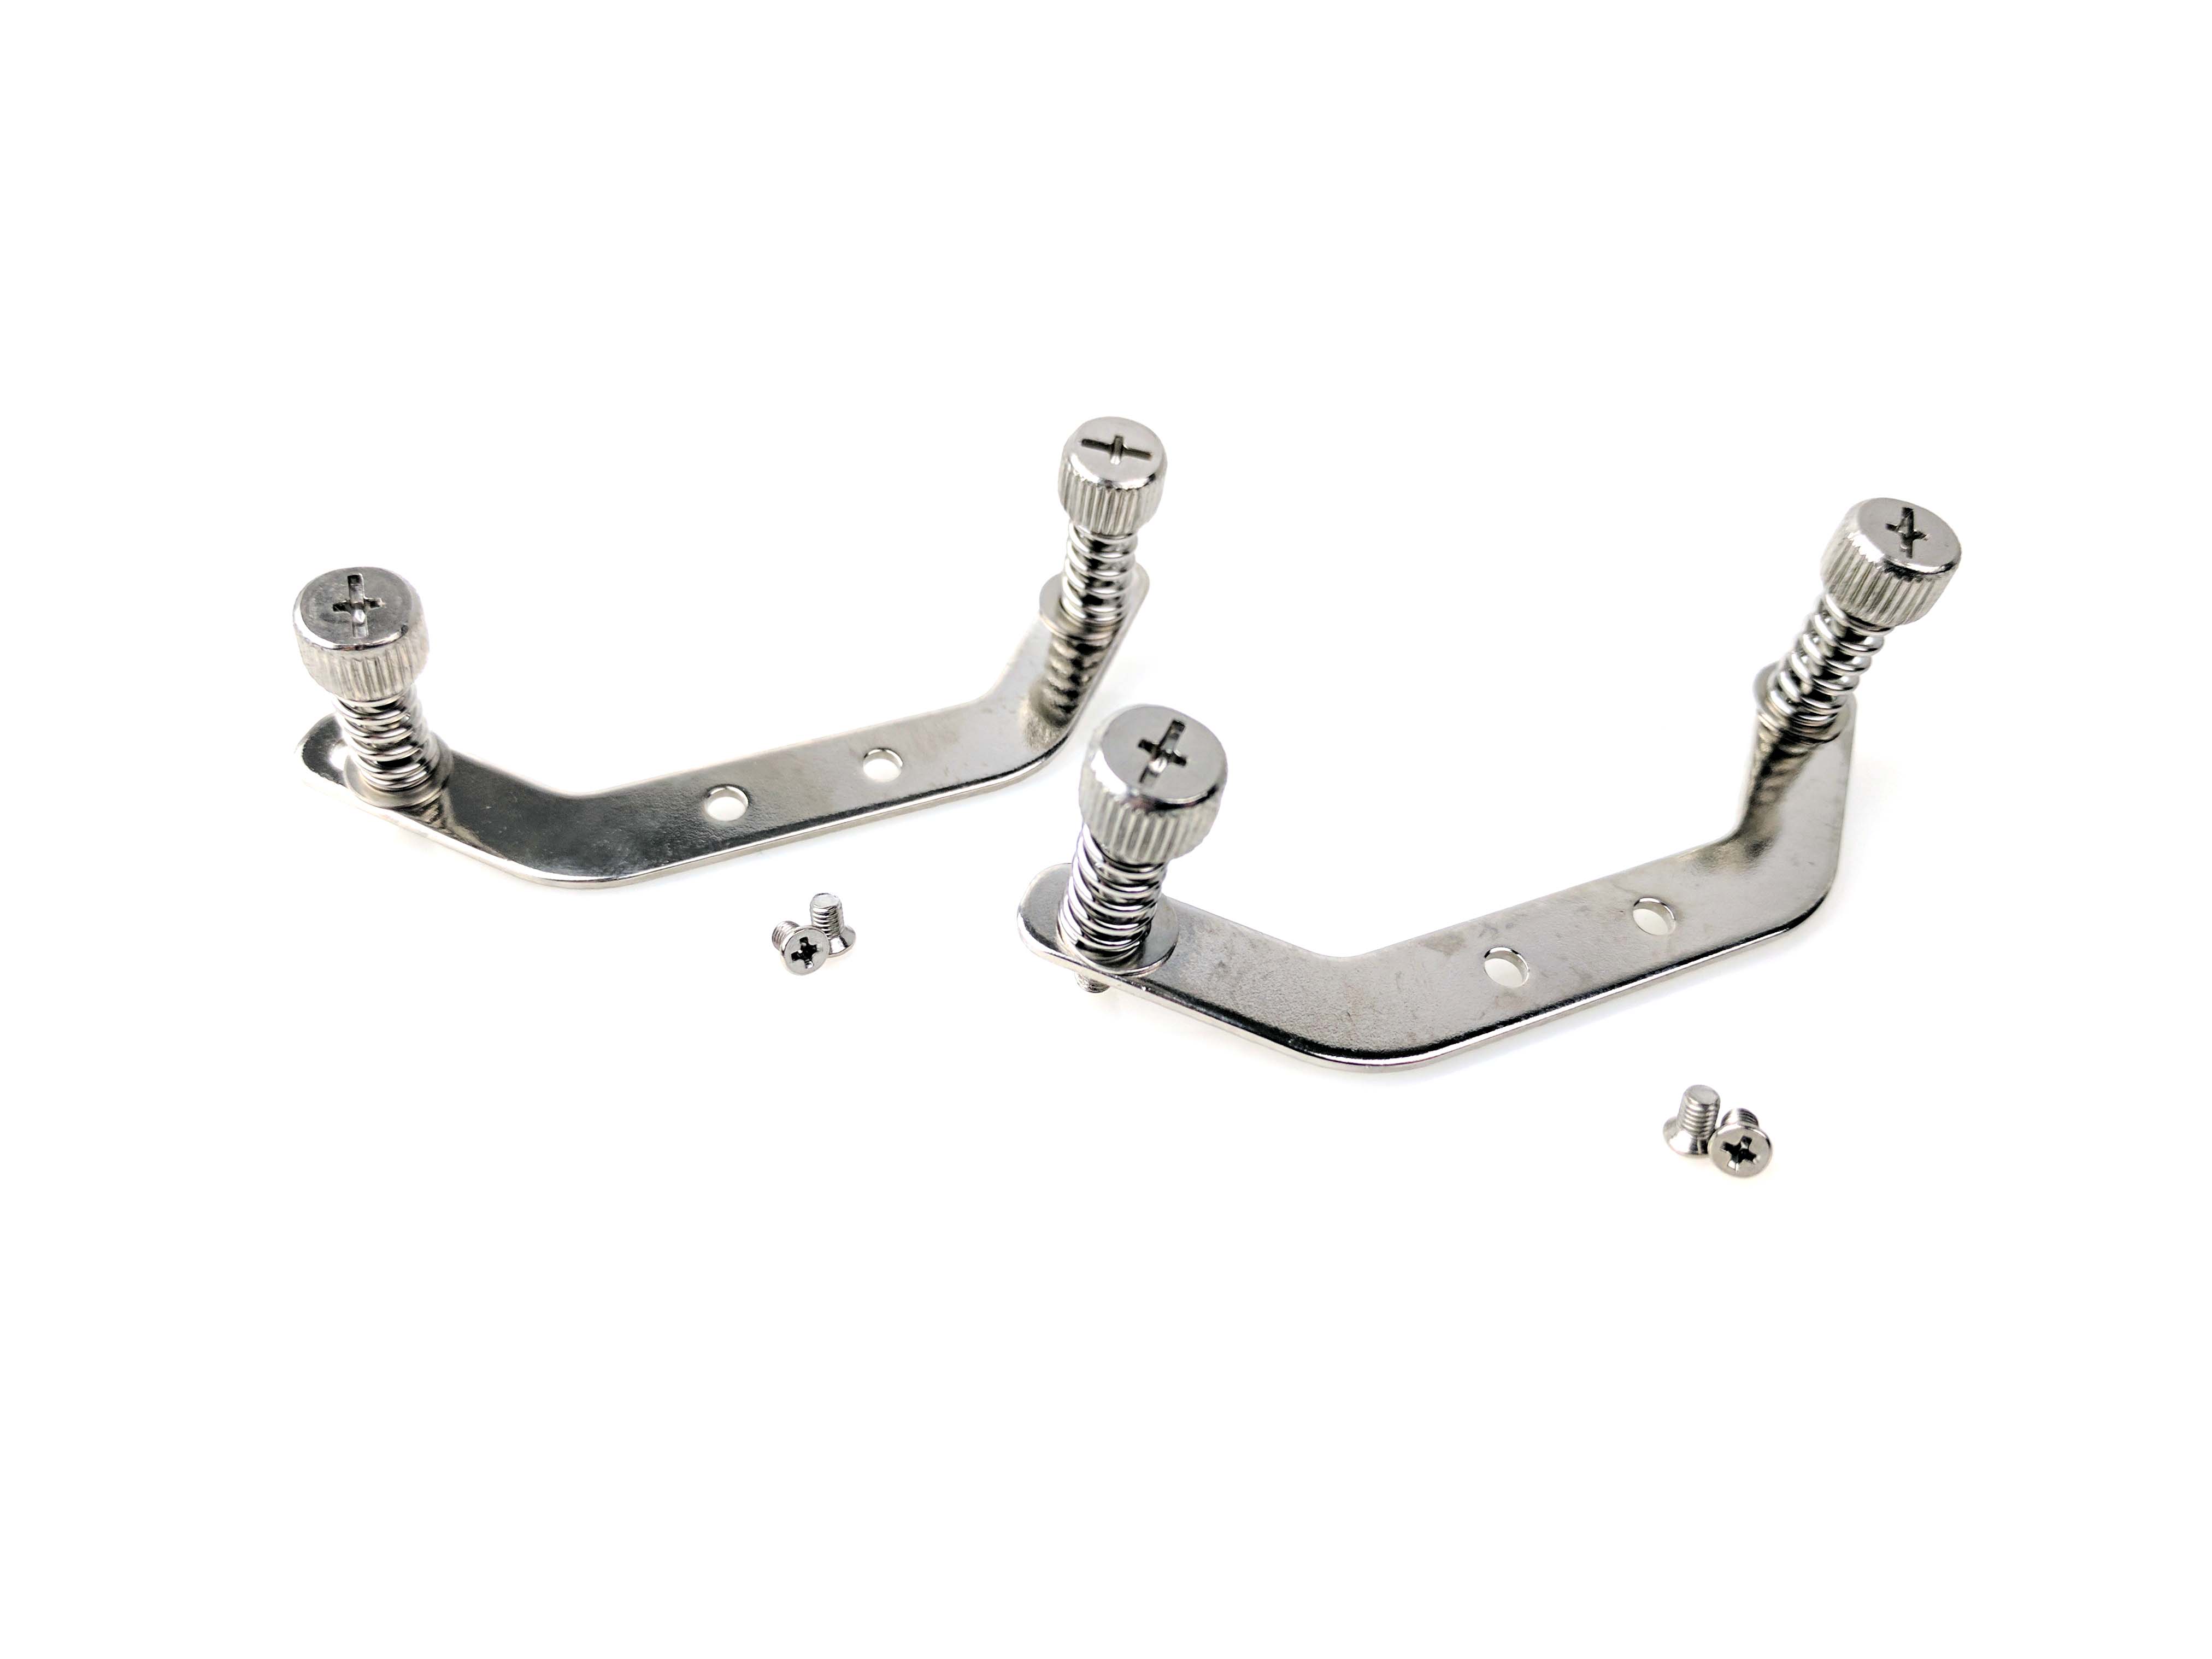
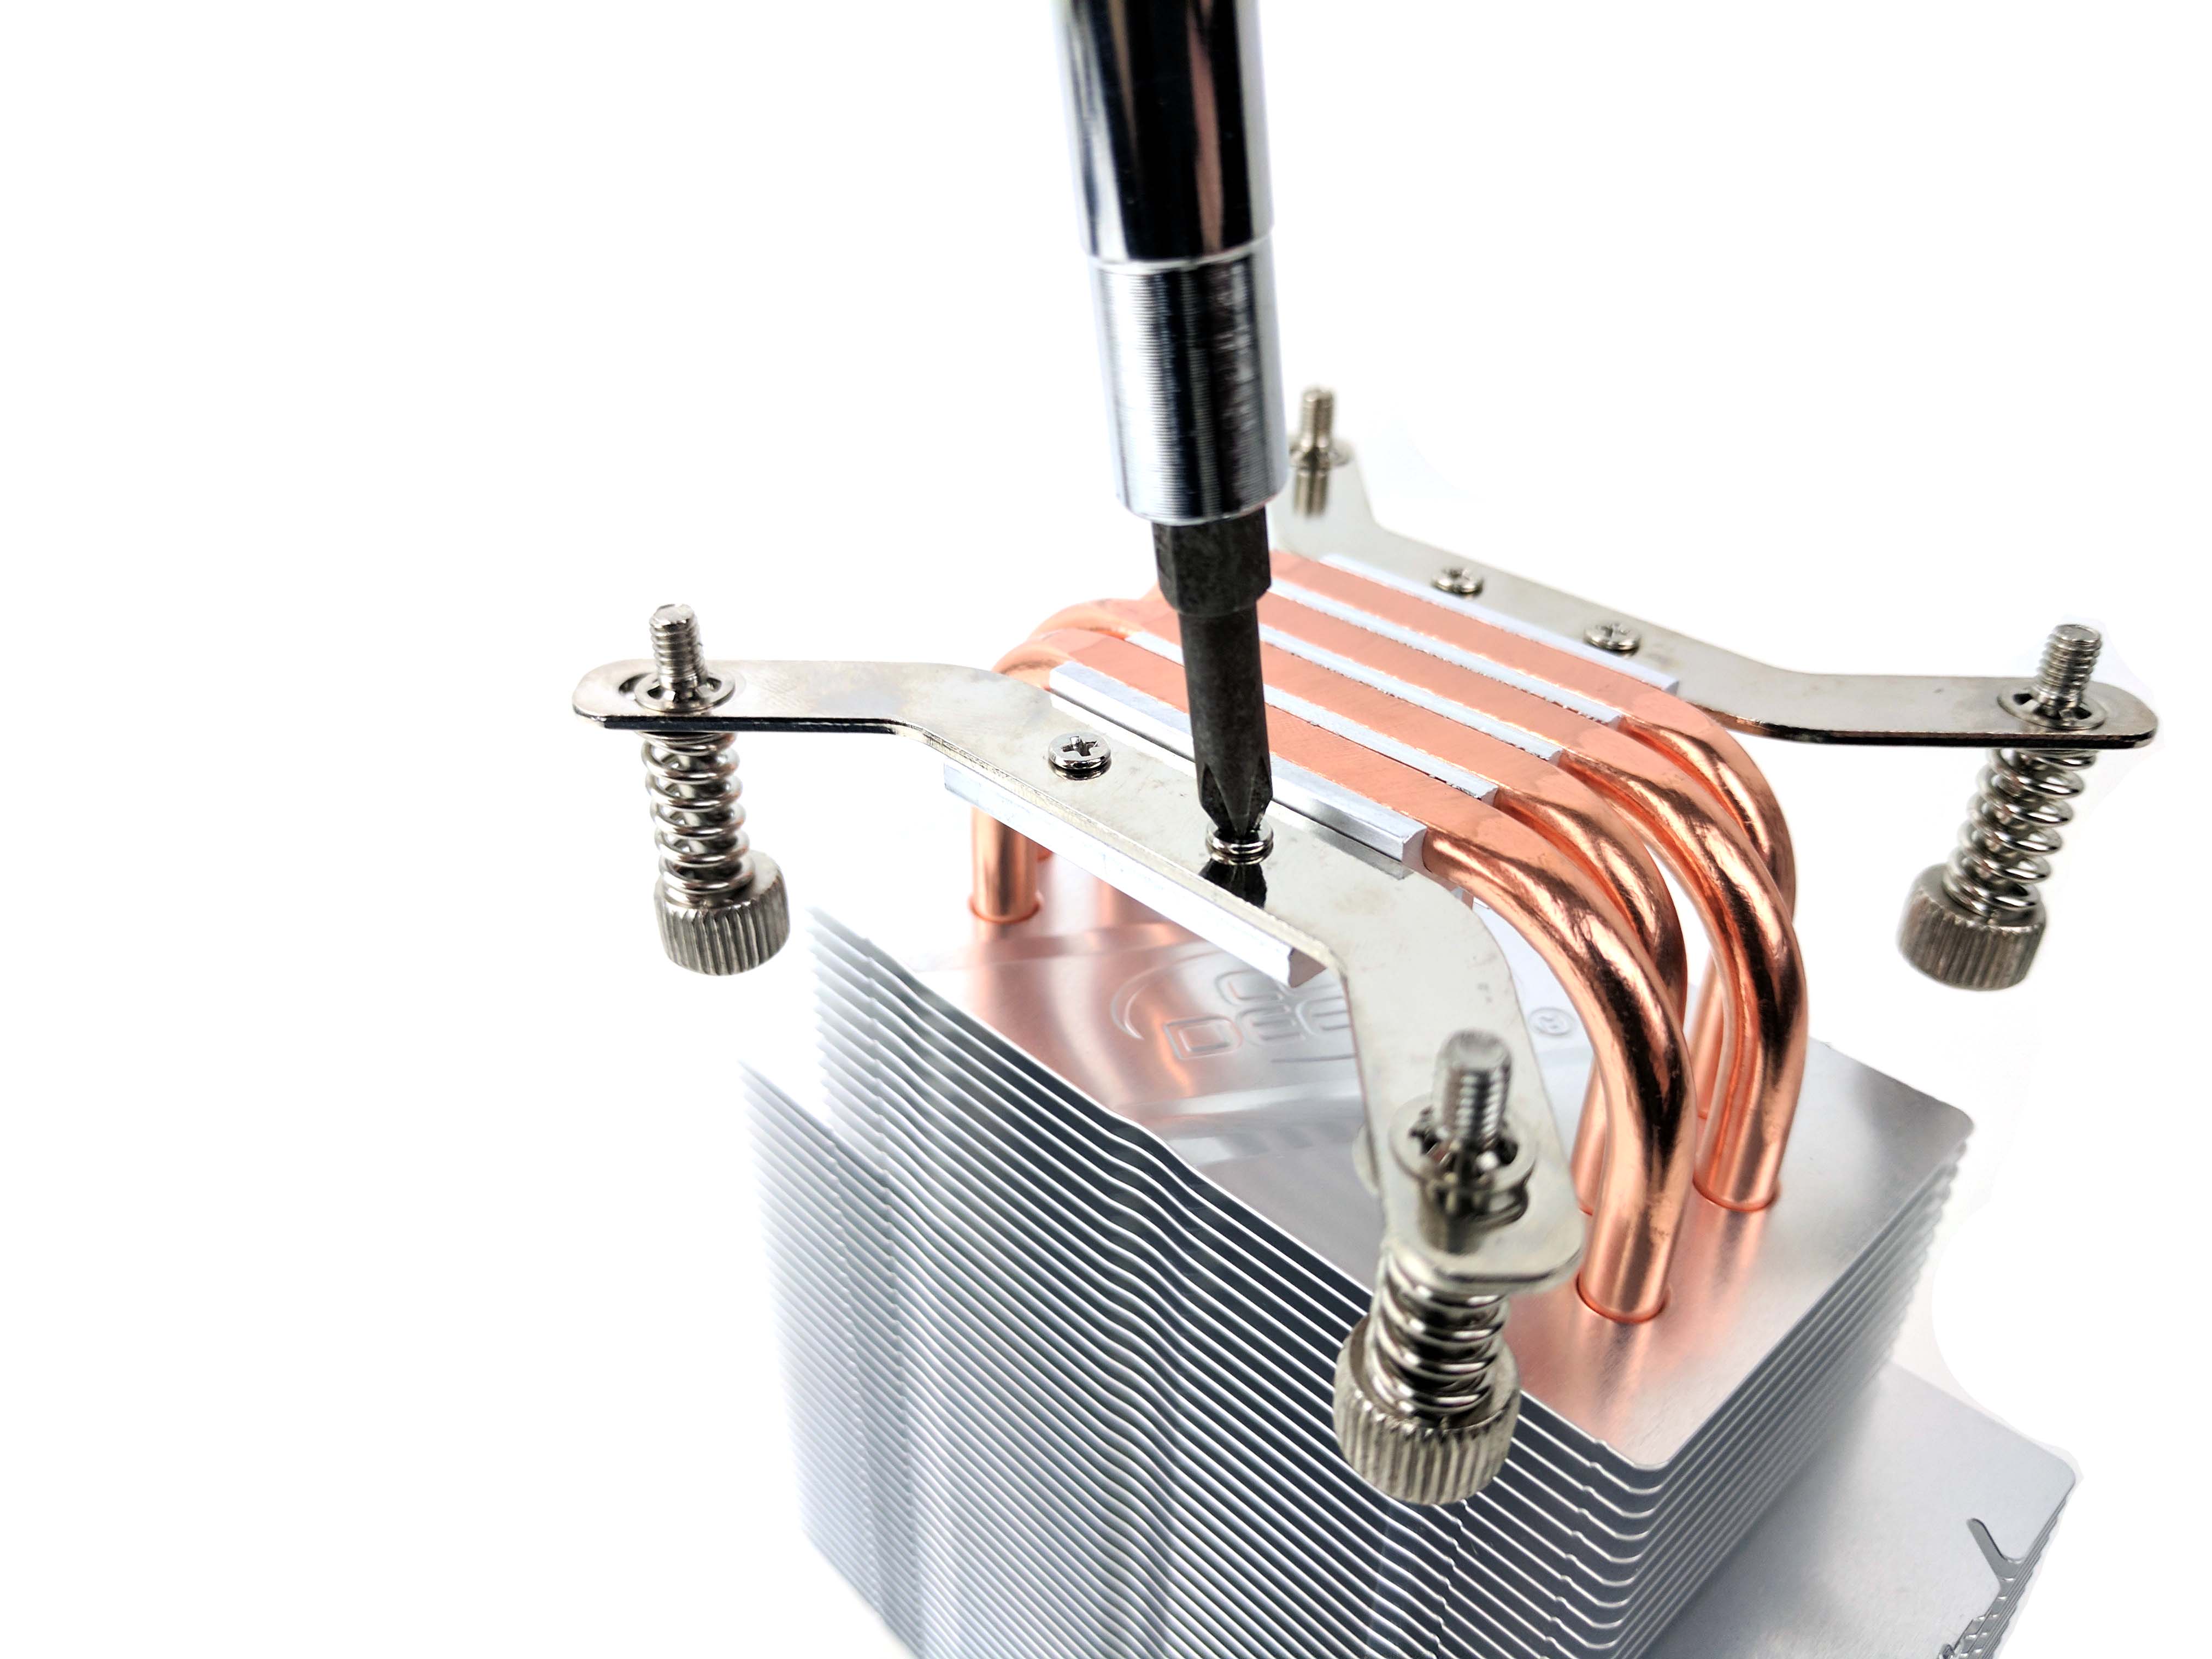
Remove the Deepcool Gammaxx 400 CPU cooler from its box and detach the fan from the heatsink by pulling the metal retention clip up and out of the cooler's fins. Set the fan aside and grab the LGA 2011 mounting brackets (shown in the 3rd picture of the album below) from the cooler's box. Flip the heatsink so that the underside (where it makes contact with the CPU) is exposed and attach the curved brackets using the provided screws (as shown in the final picture in the album below). You may need to use a screwdriver with a smaller Phillips head to properly thread the screws.
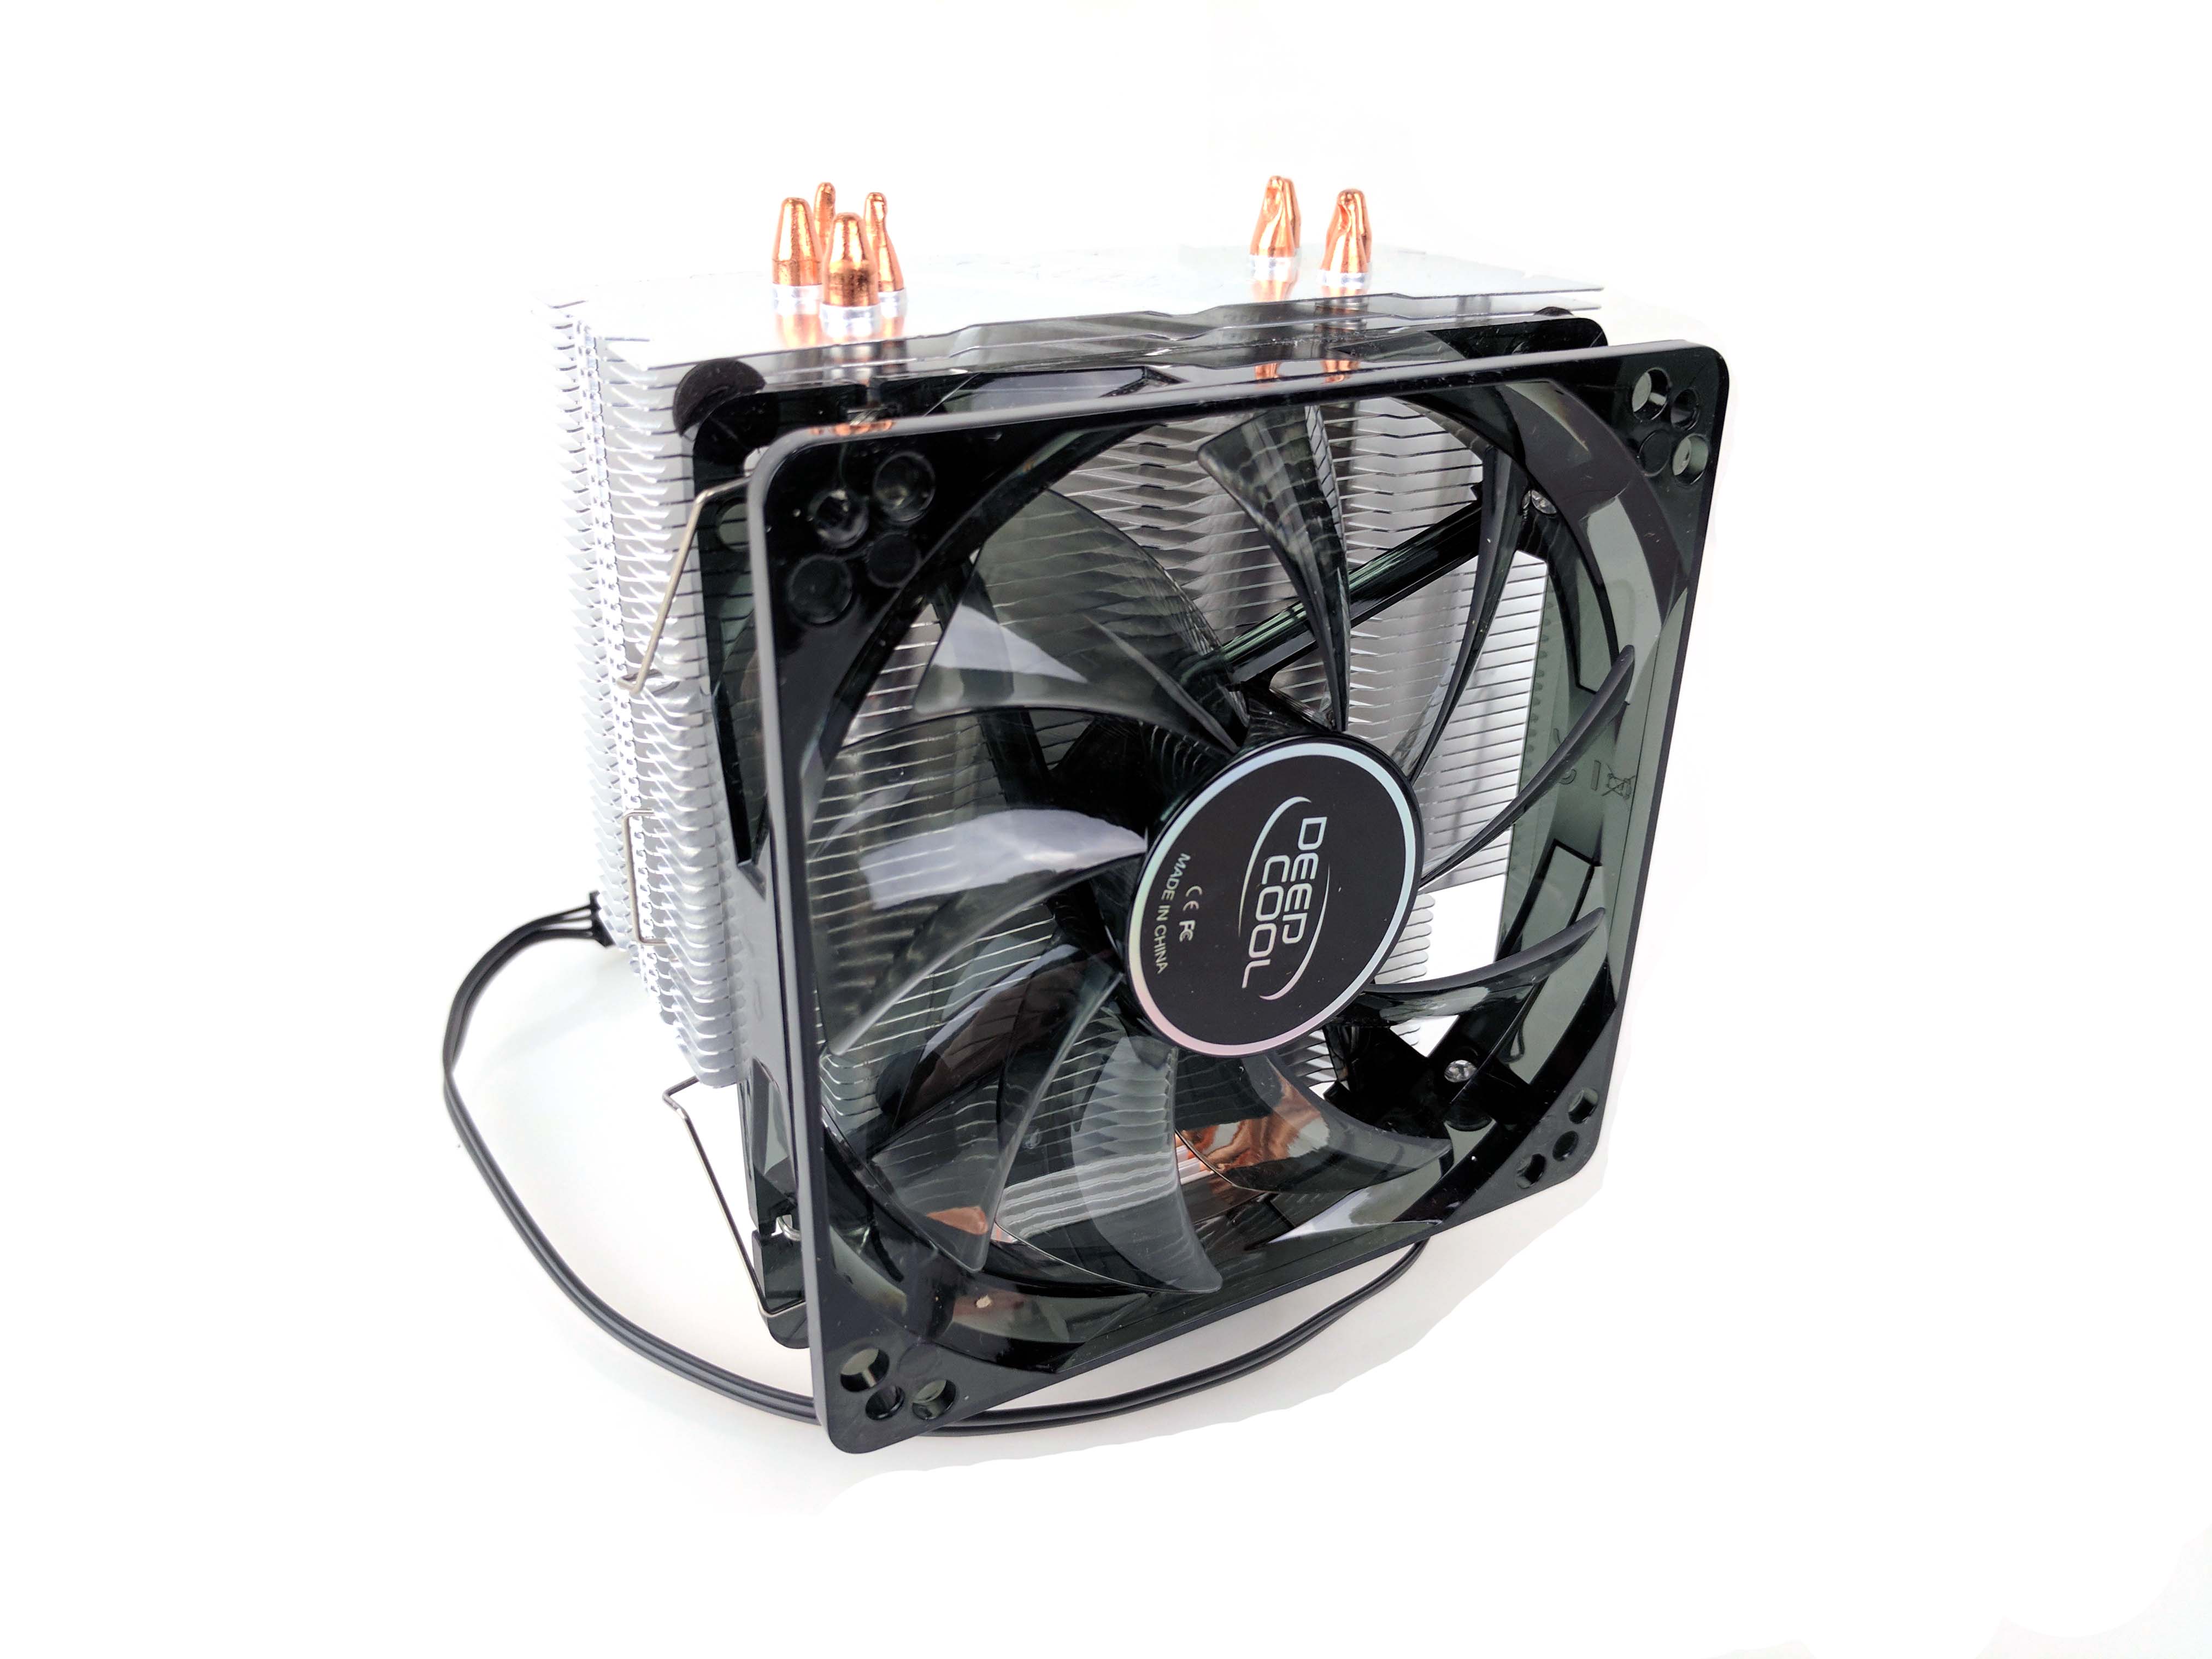
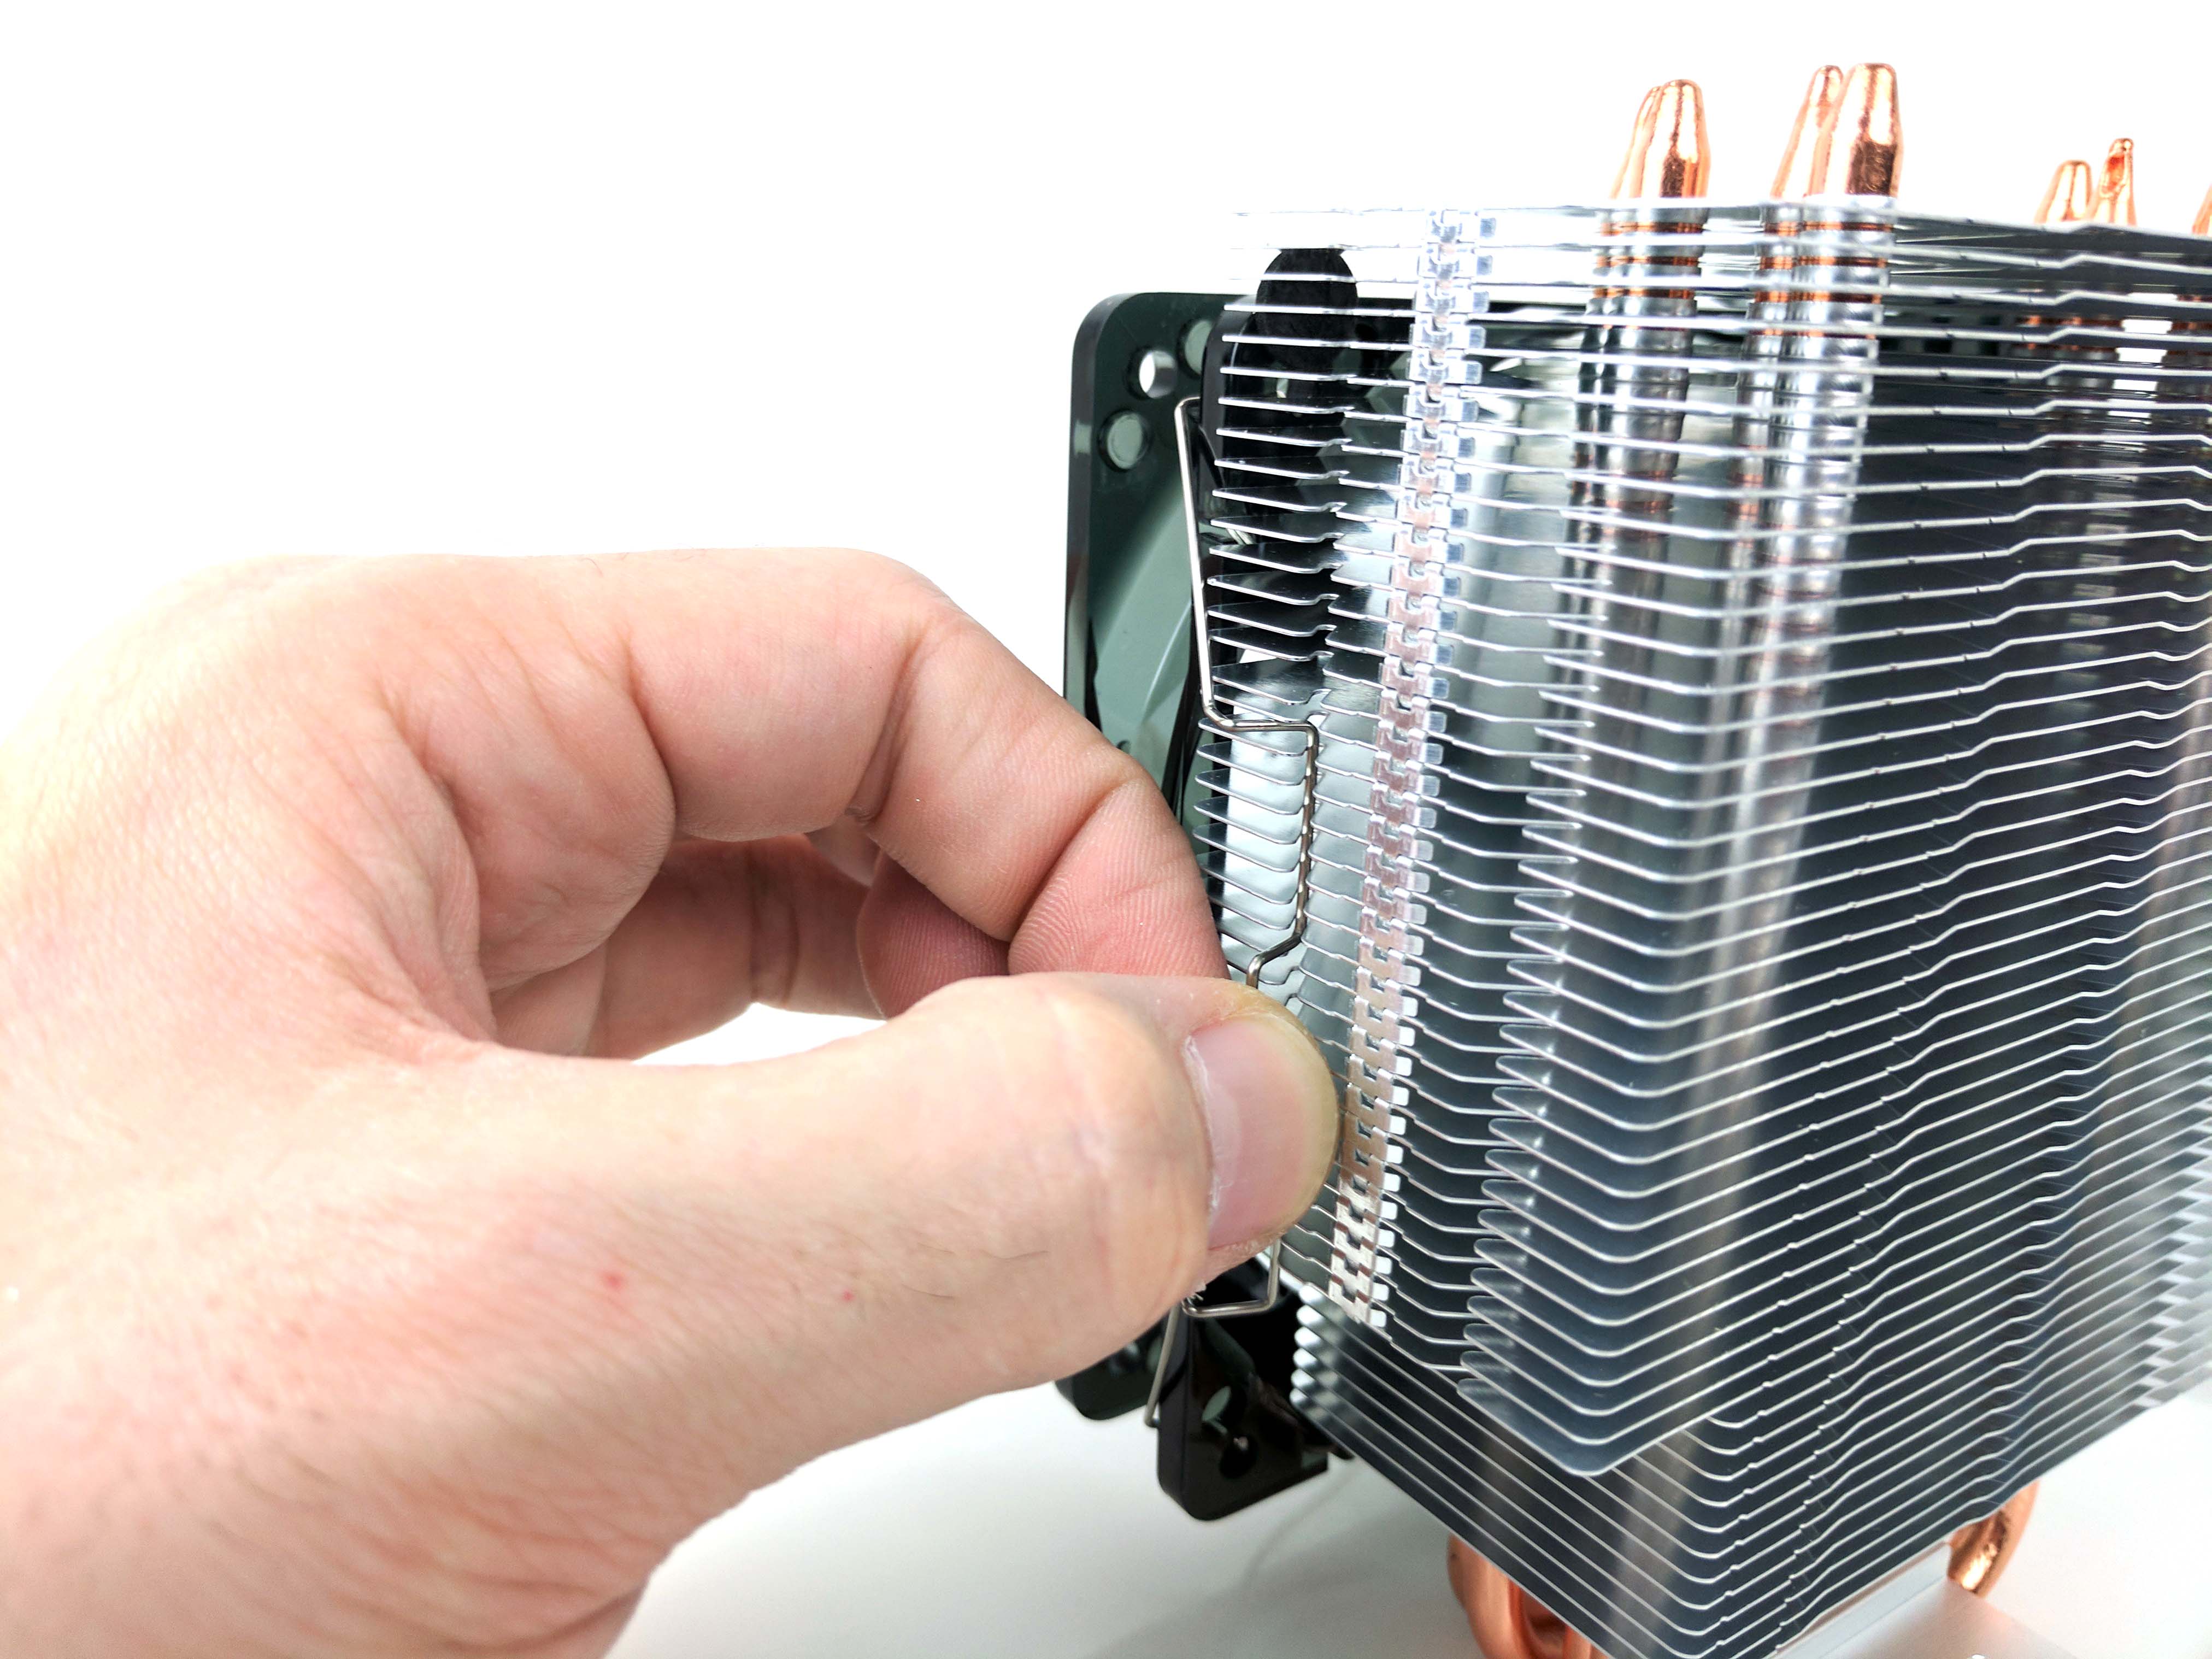
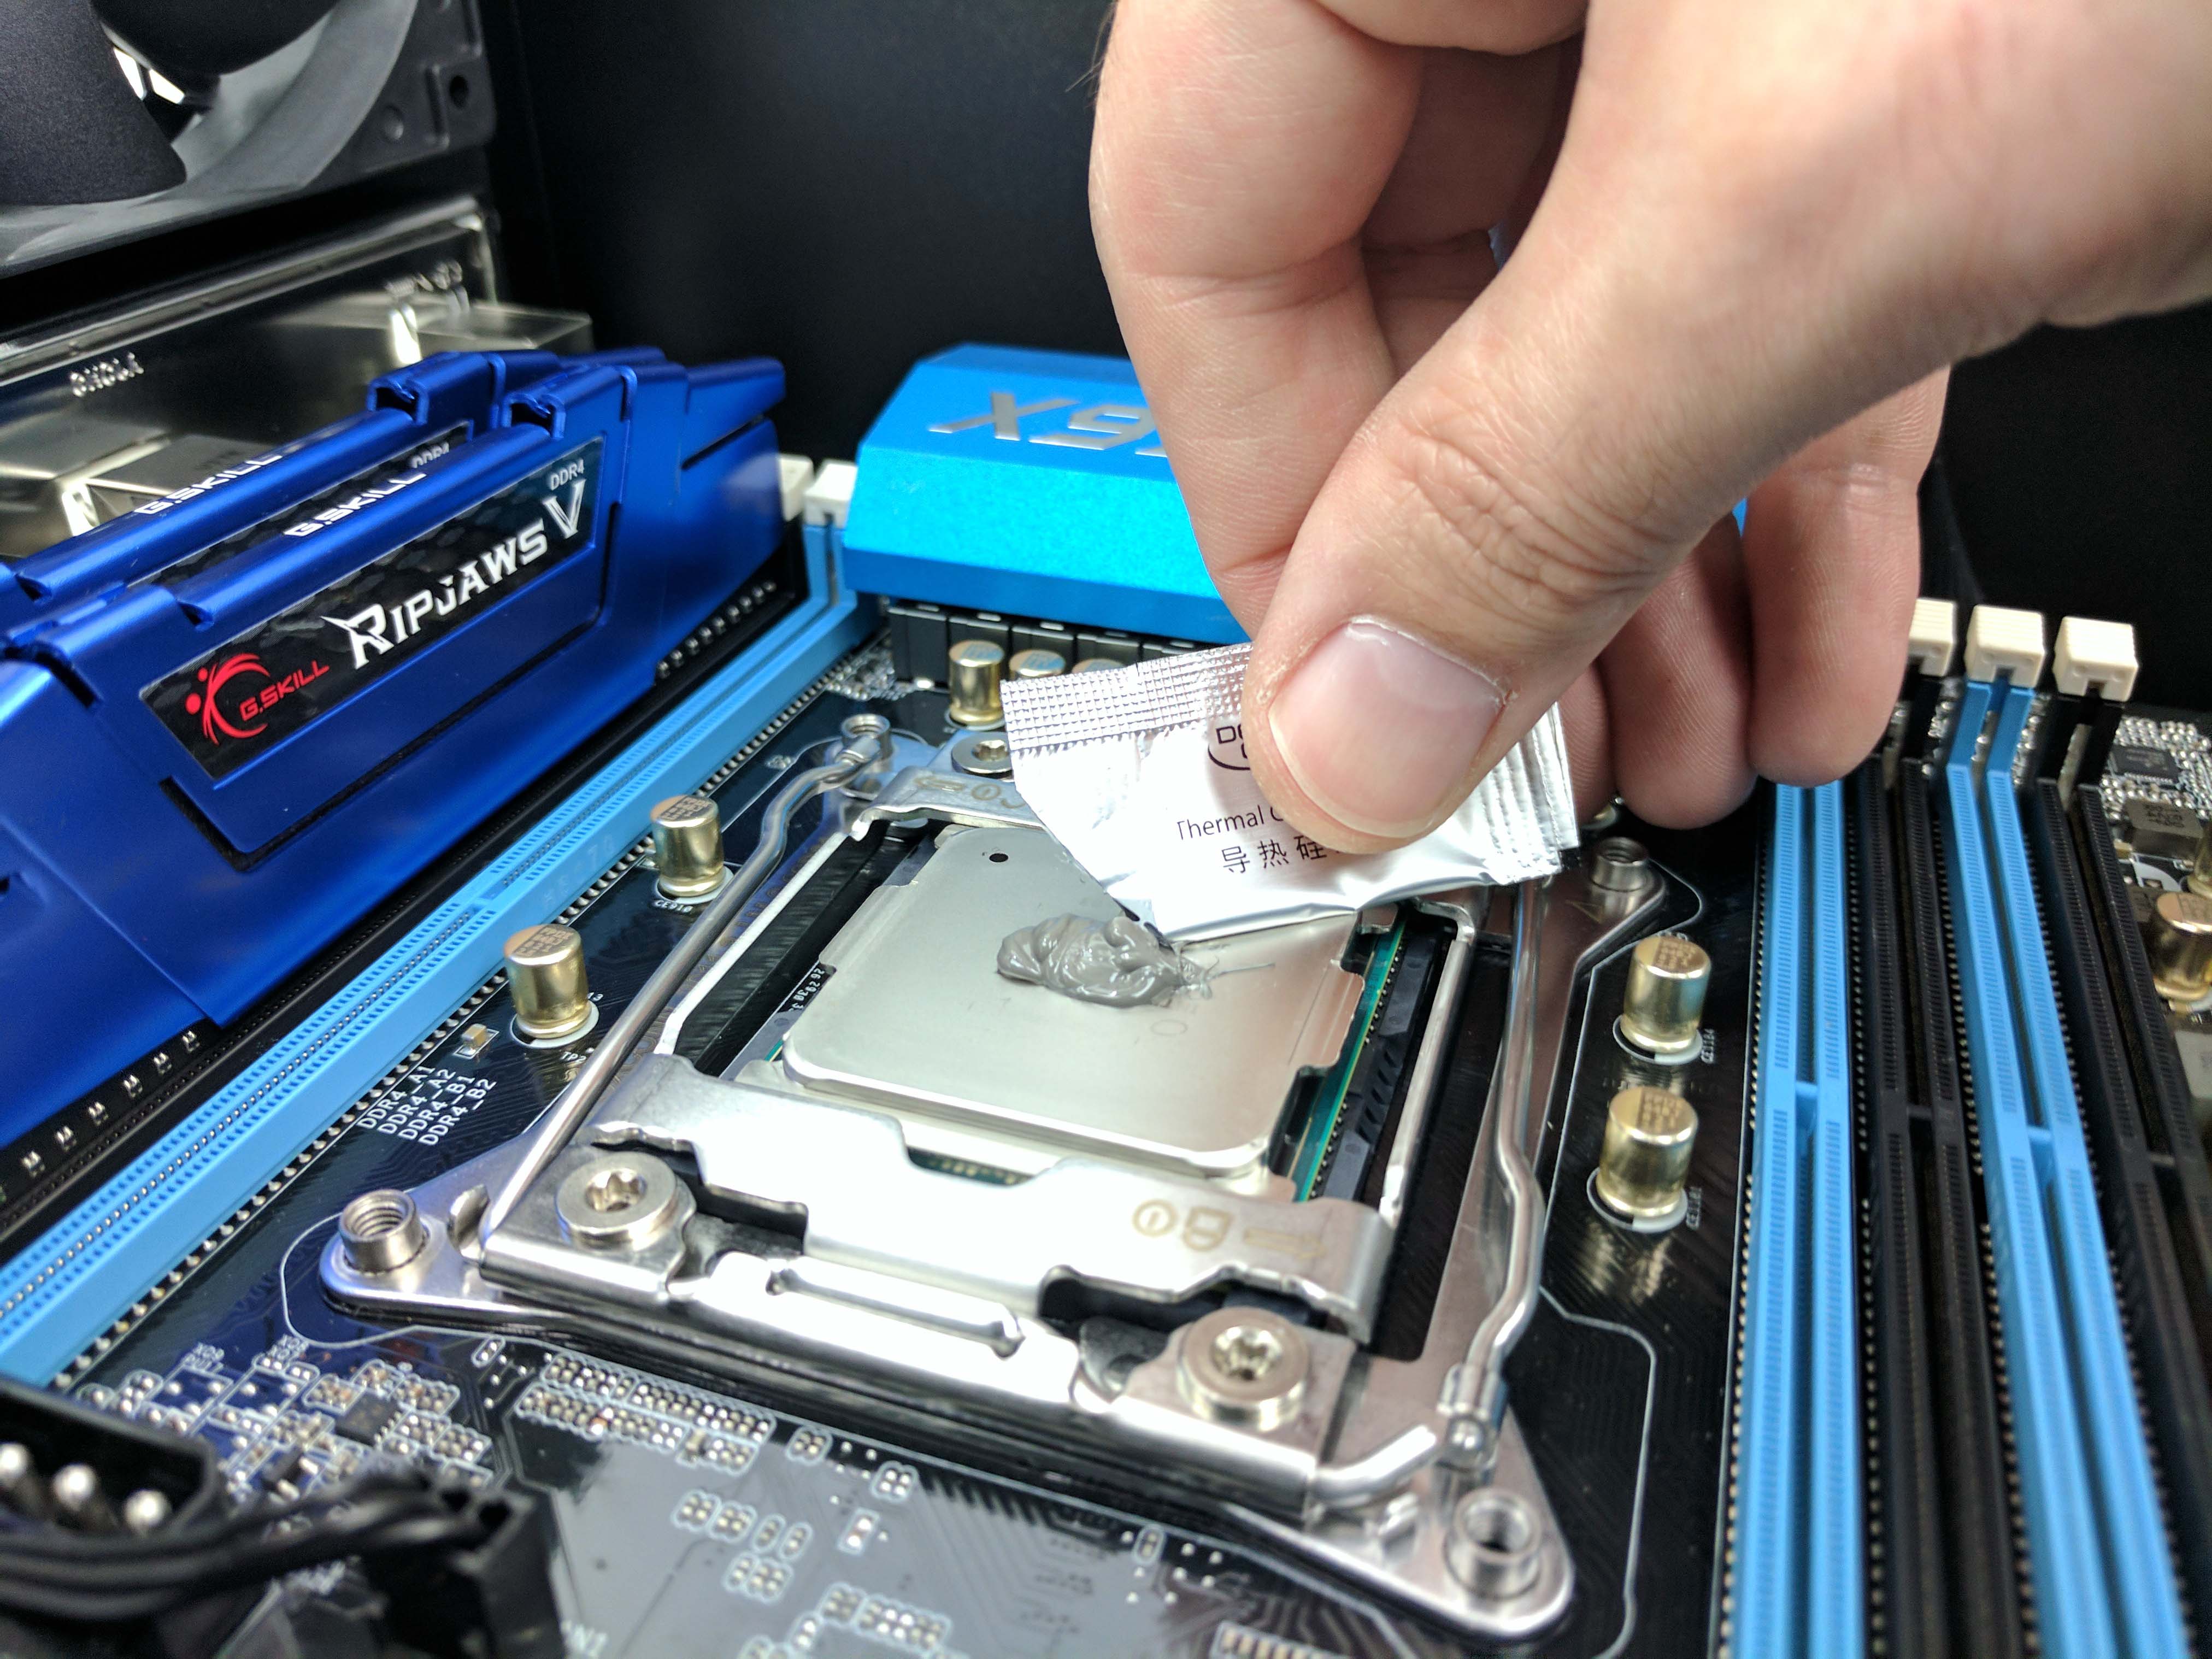
Locate the cooler's provided thermal compound—a small silver pouch that resembles a tiny toothpaste tube. Carefully (and without squeezing it) tear it or use scissors to get the thermal paste tube open. Position the open end of the tube directly over the center of the CPU and squeeze the thermal compound onto the processor. This process can get tedious with the tiny and malleable tube, and we felt the amount of paste was lacking for the larger LGA 2011 socket CPU. We'd recommend using a different thermal compound to get proper coverage on the CPU without having to messily squeeze the tube for every last bit of thermal paste.
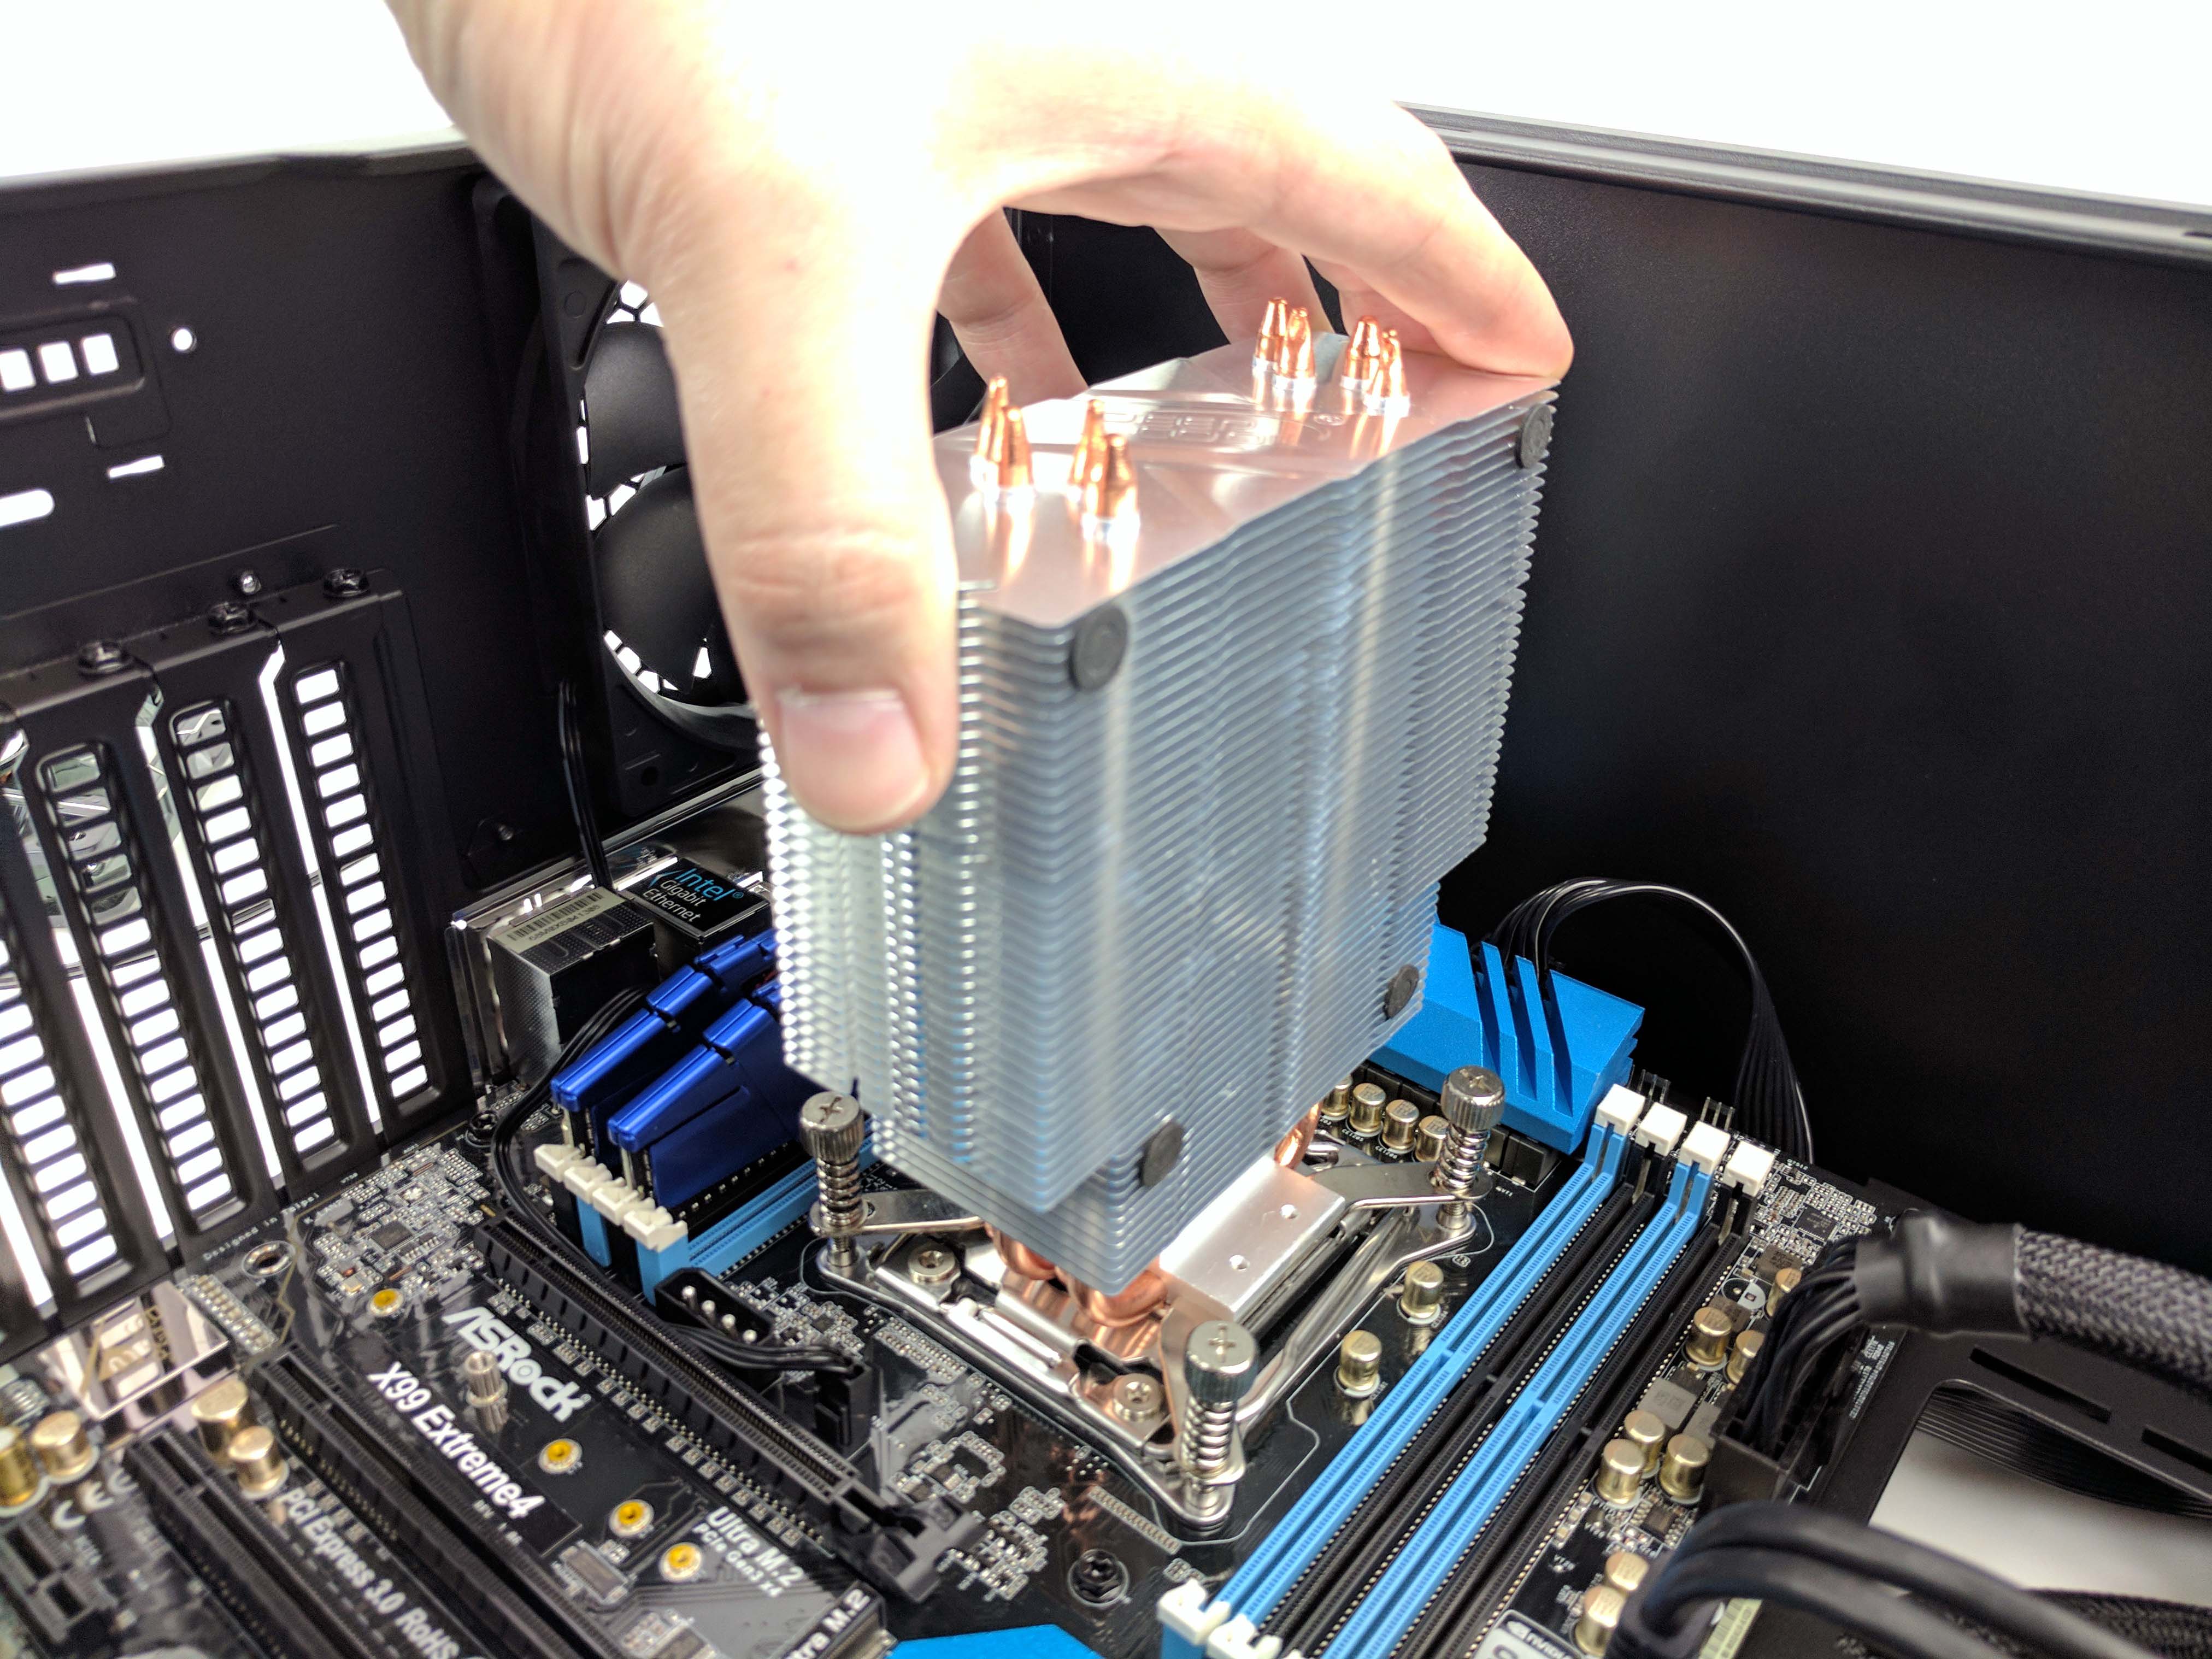
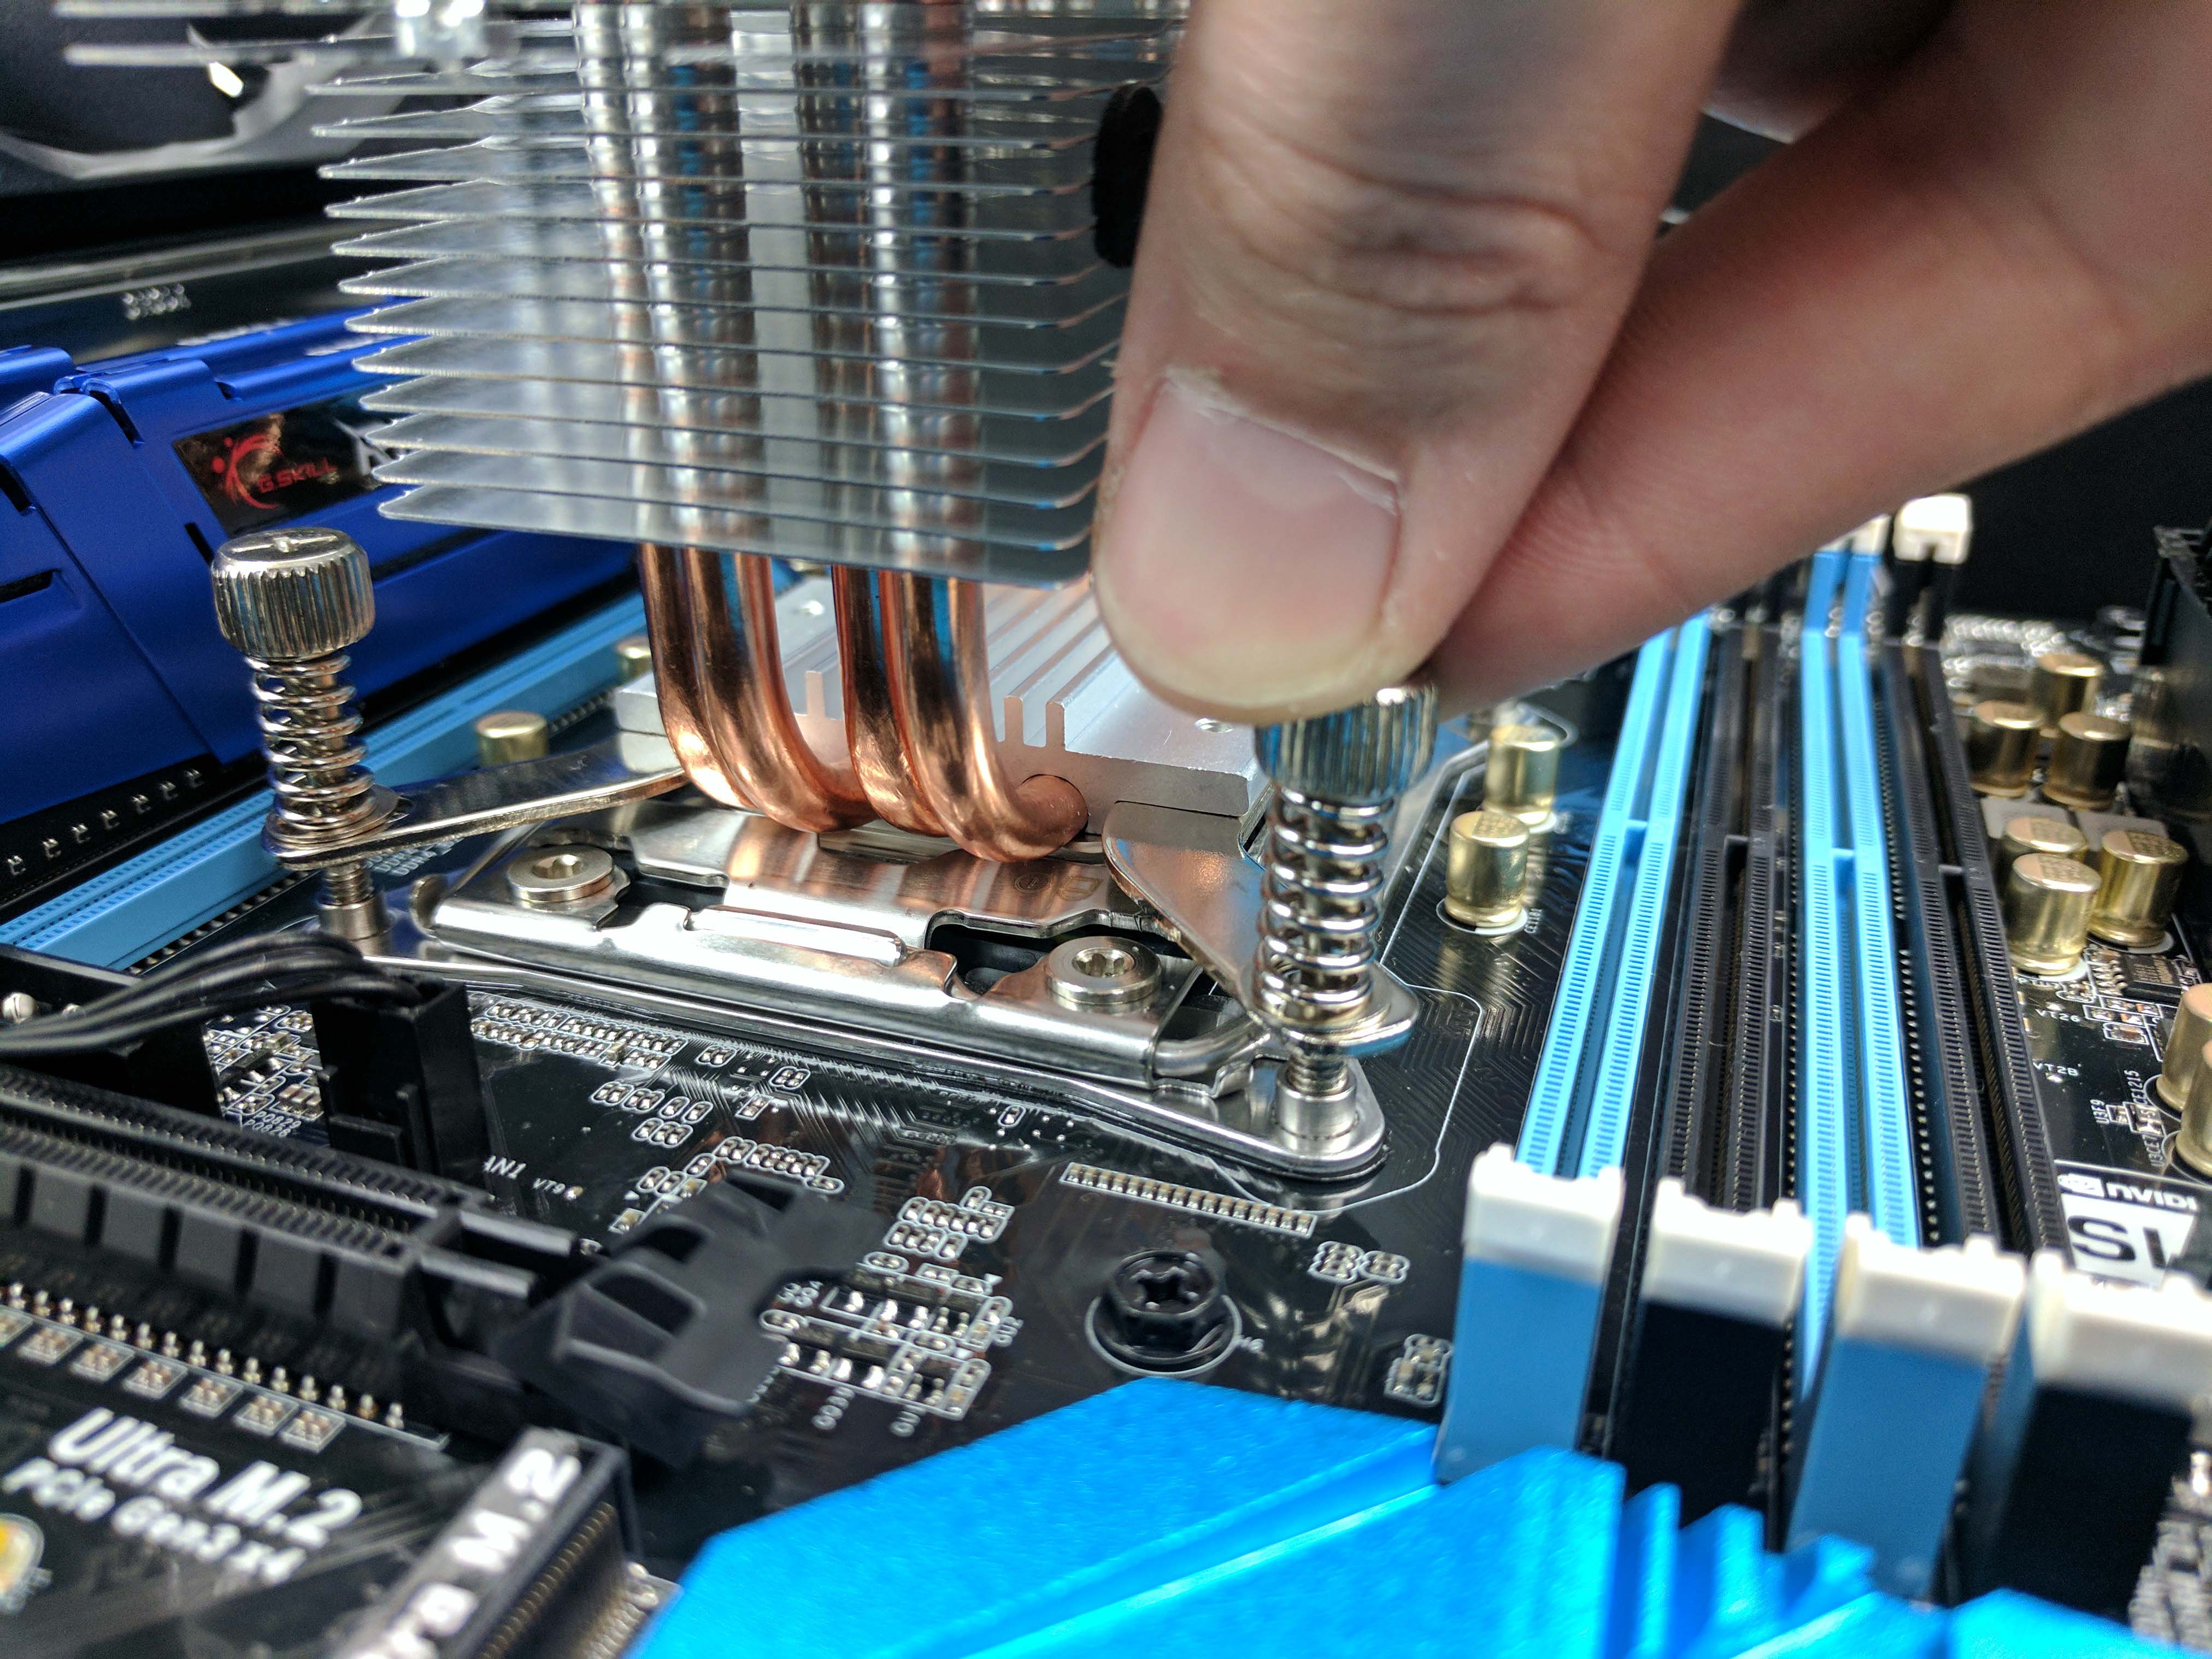
Carefully lower the heatsink onto the processor (with the padded side of the heatsink facing the front of the case) and line up the spring-loaded thumbscrew posts to the motherboard's threads (the four corners of the ILM). Get each of the four posts to thread, and then tighten them evenly until they are all snug. You can use a screwdriver for the last bit, but we found it just as easy to use our hands.
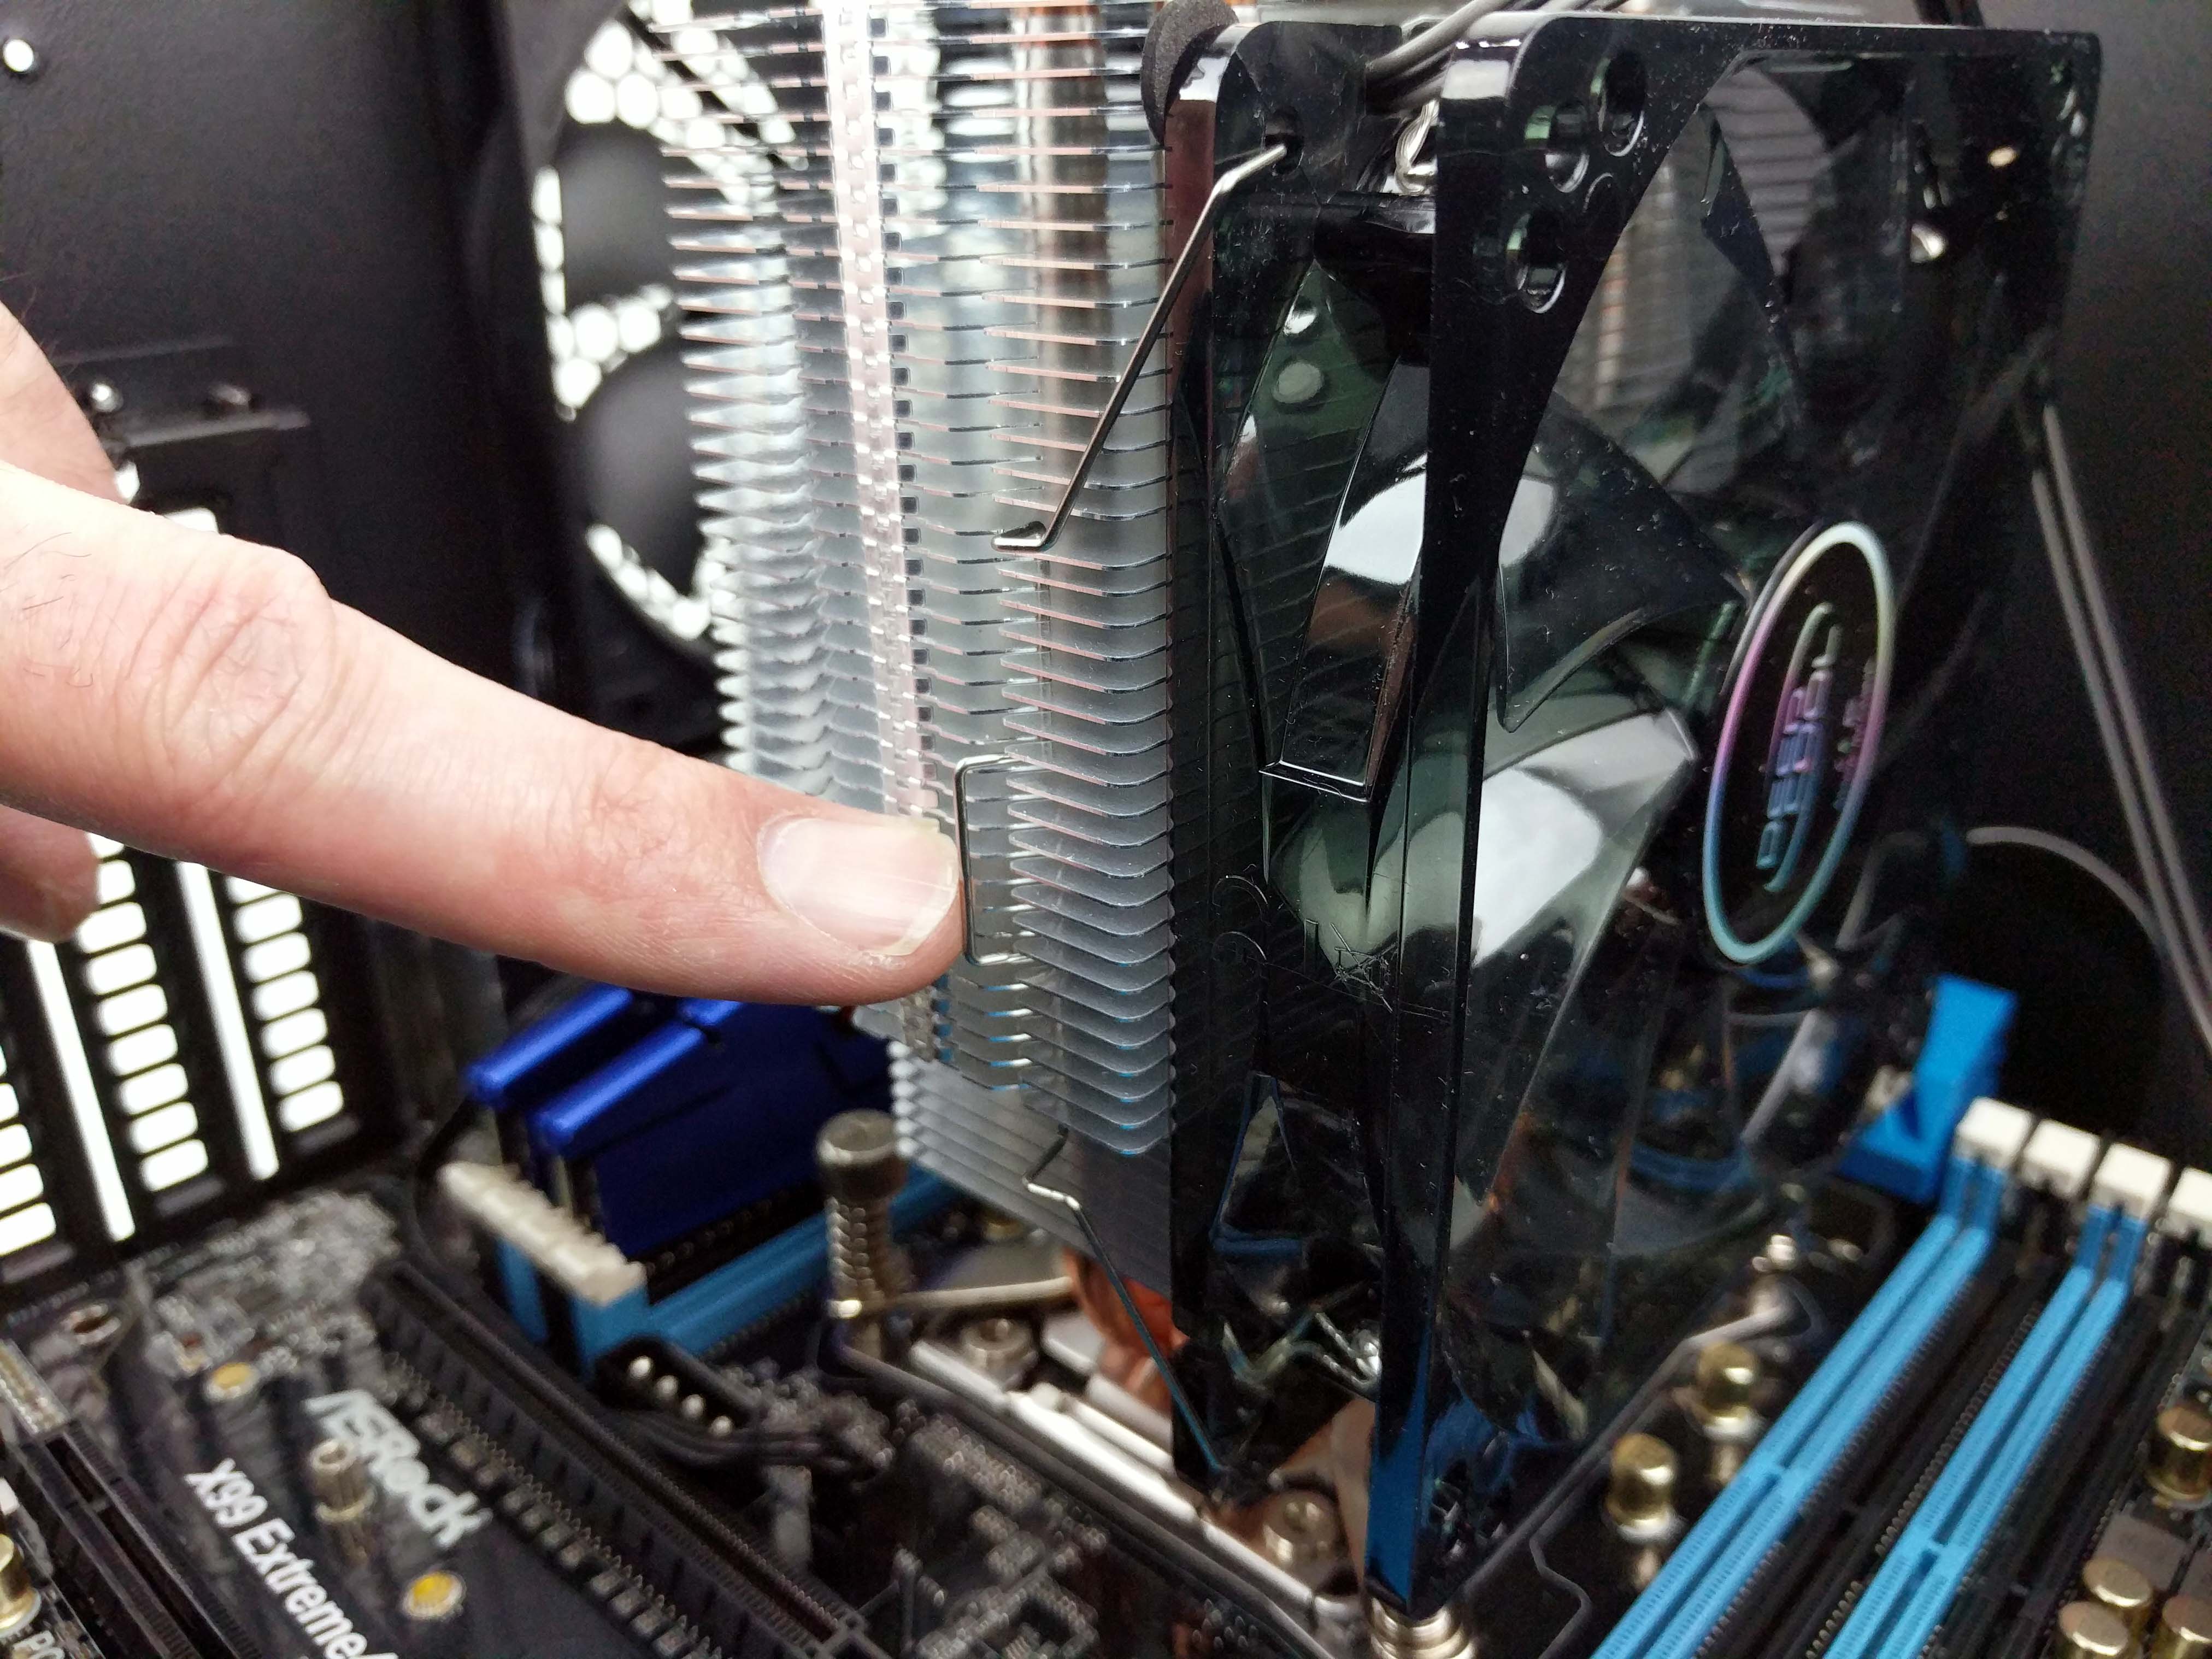
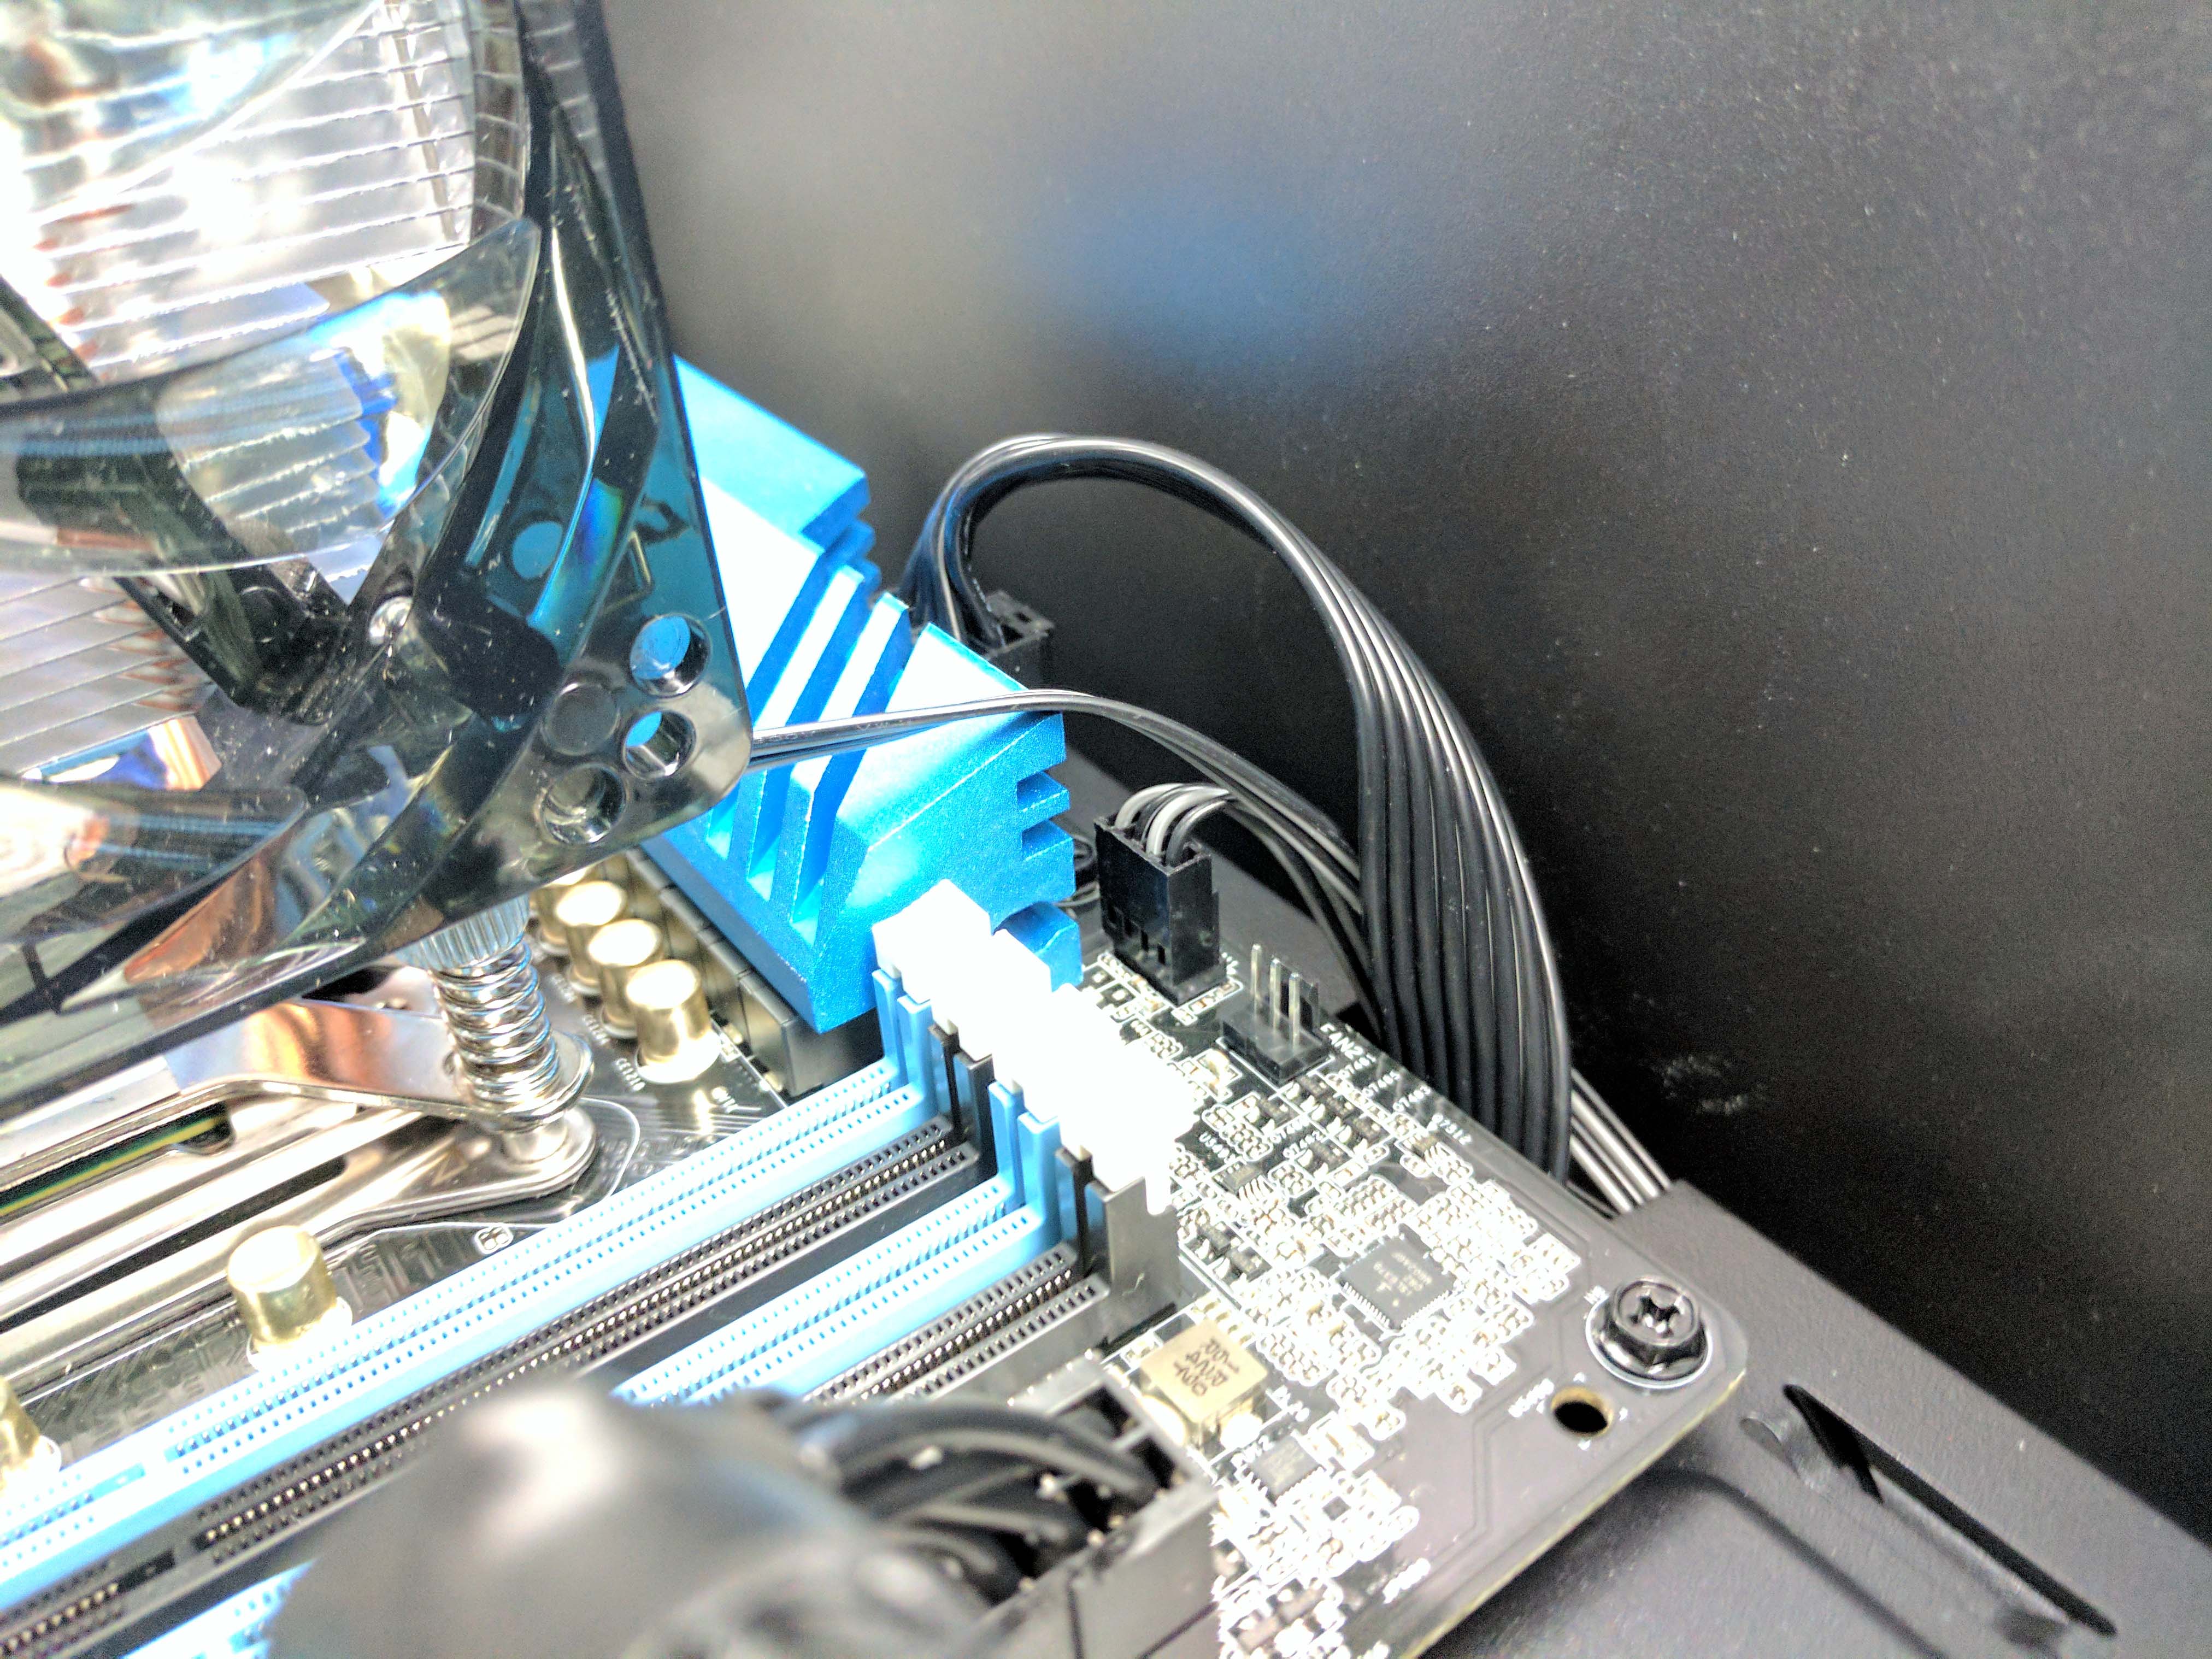
Reattach the CPU fan to the heatsink (in its original orientation) using the metal retention clips, one side at a time. Be careful not to let the clip crush the fins as you secure the fan. If you have trouble, always start by hooking the fan's mounting holes with each side of the clip first, and then pull the clip over the heatsink's fins. Plug the fan cable into the CPU1 leads on the motherboard and tuck the excess cable into the hole with the CPU power cable, feeding it to the backside (right side) of the case's main chamber.
Graphics
All that's left is to install the graphics card. Begin by removing the screws holding down the 2nd and 3rd PCIe slot plates, which are accessible from the main chamber of the case (not on the exterior). Free the Zotac GeForce GTX 1080 AMP! graphics card from its packaging and peel off the protective stickers.
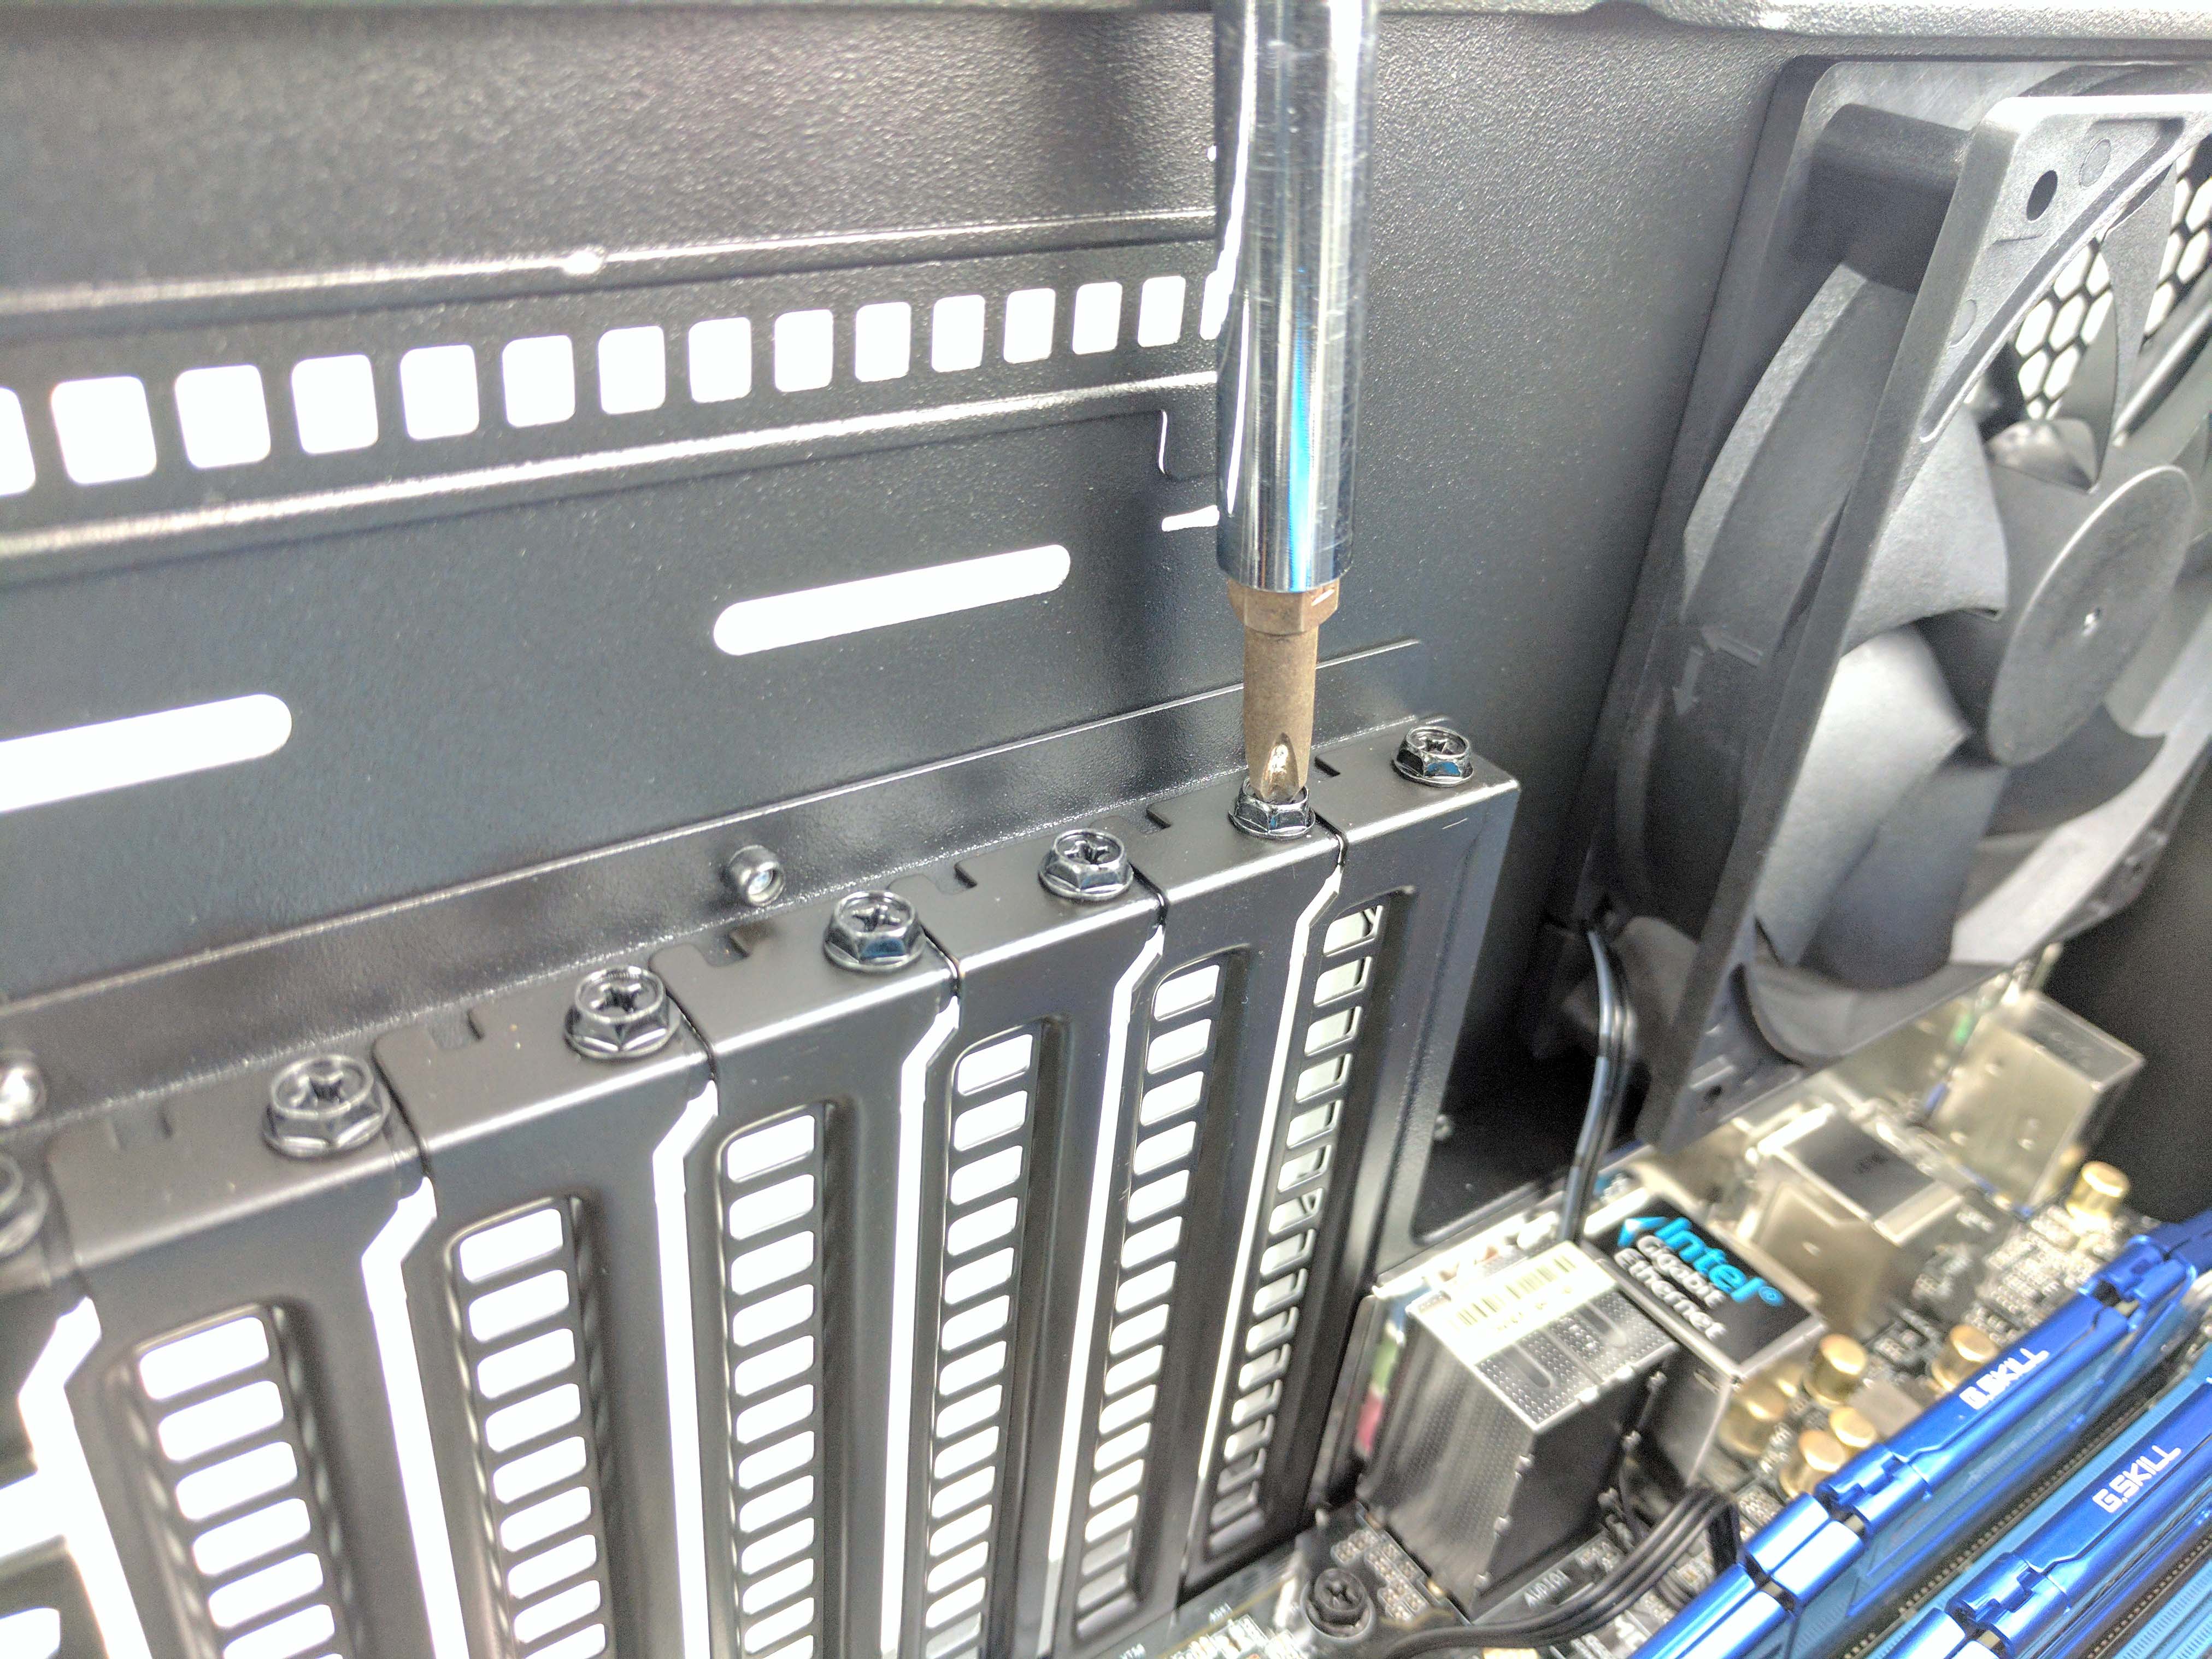
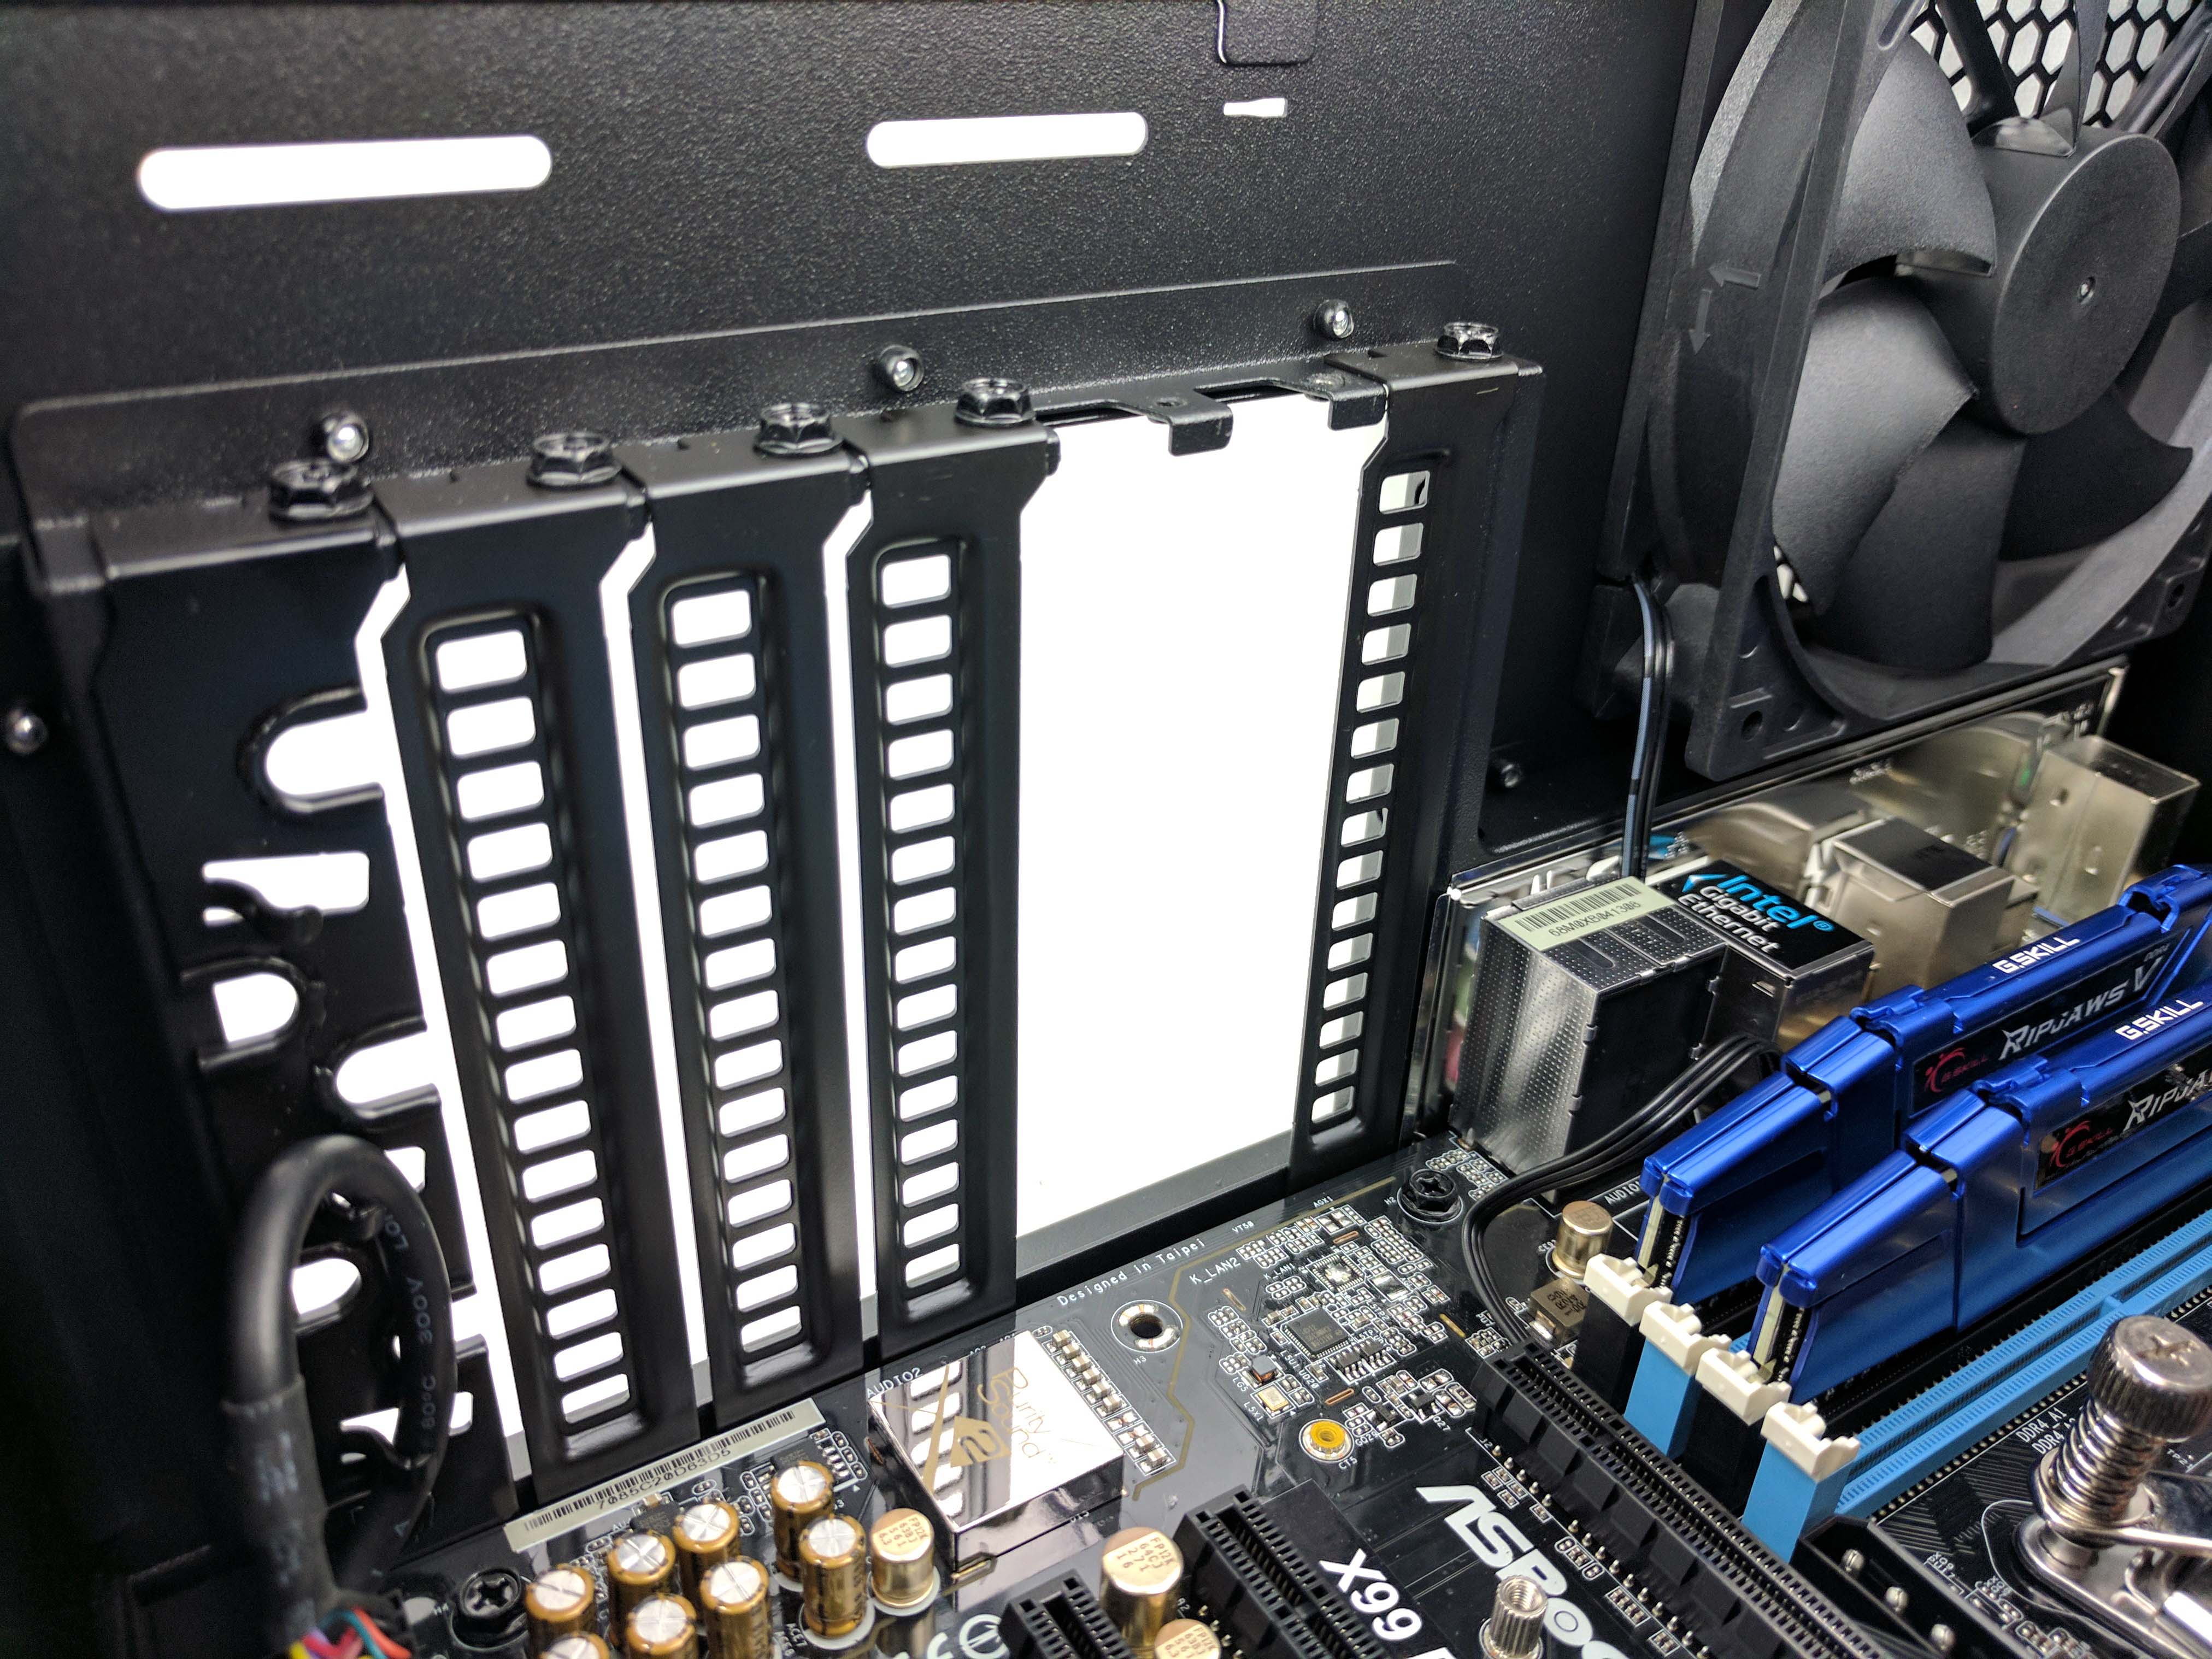
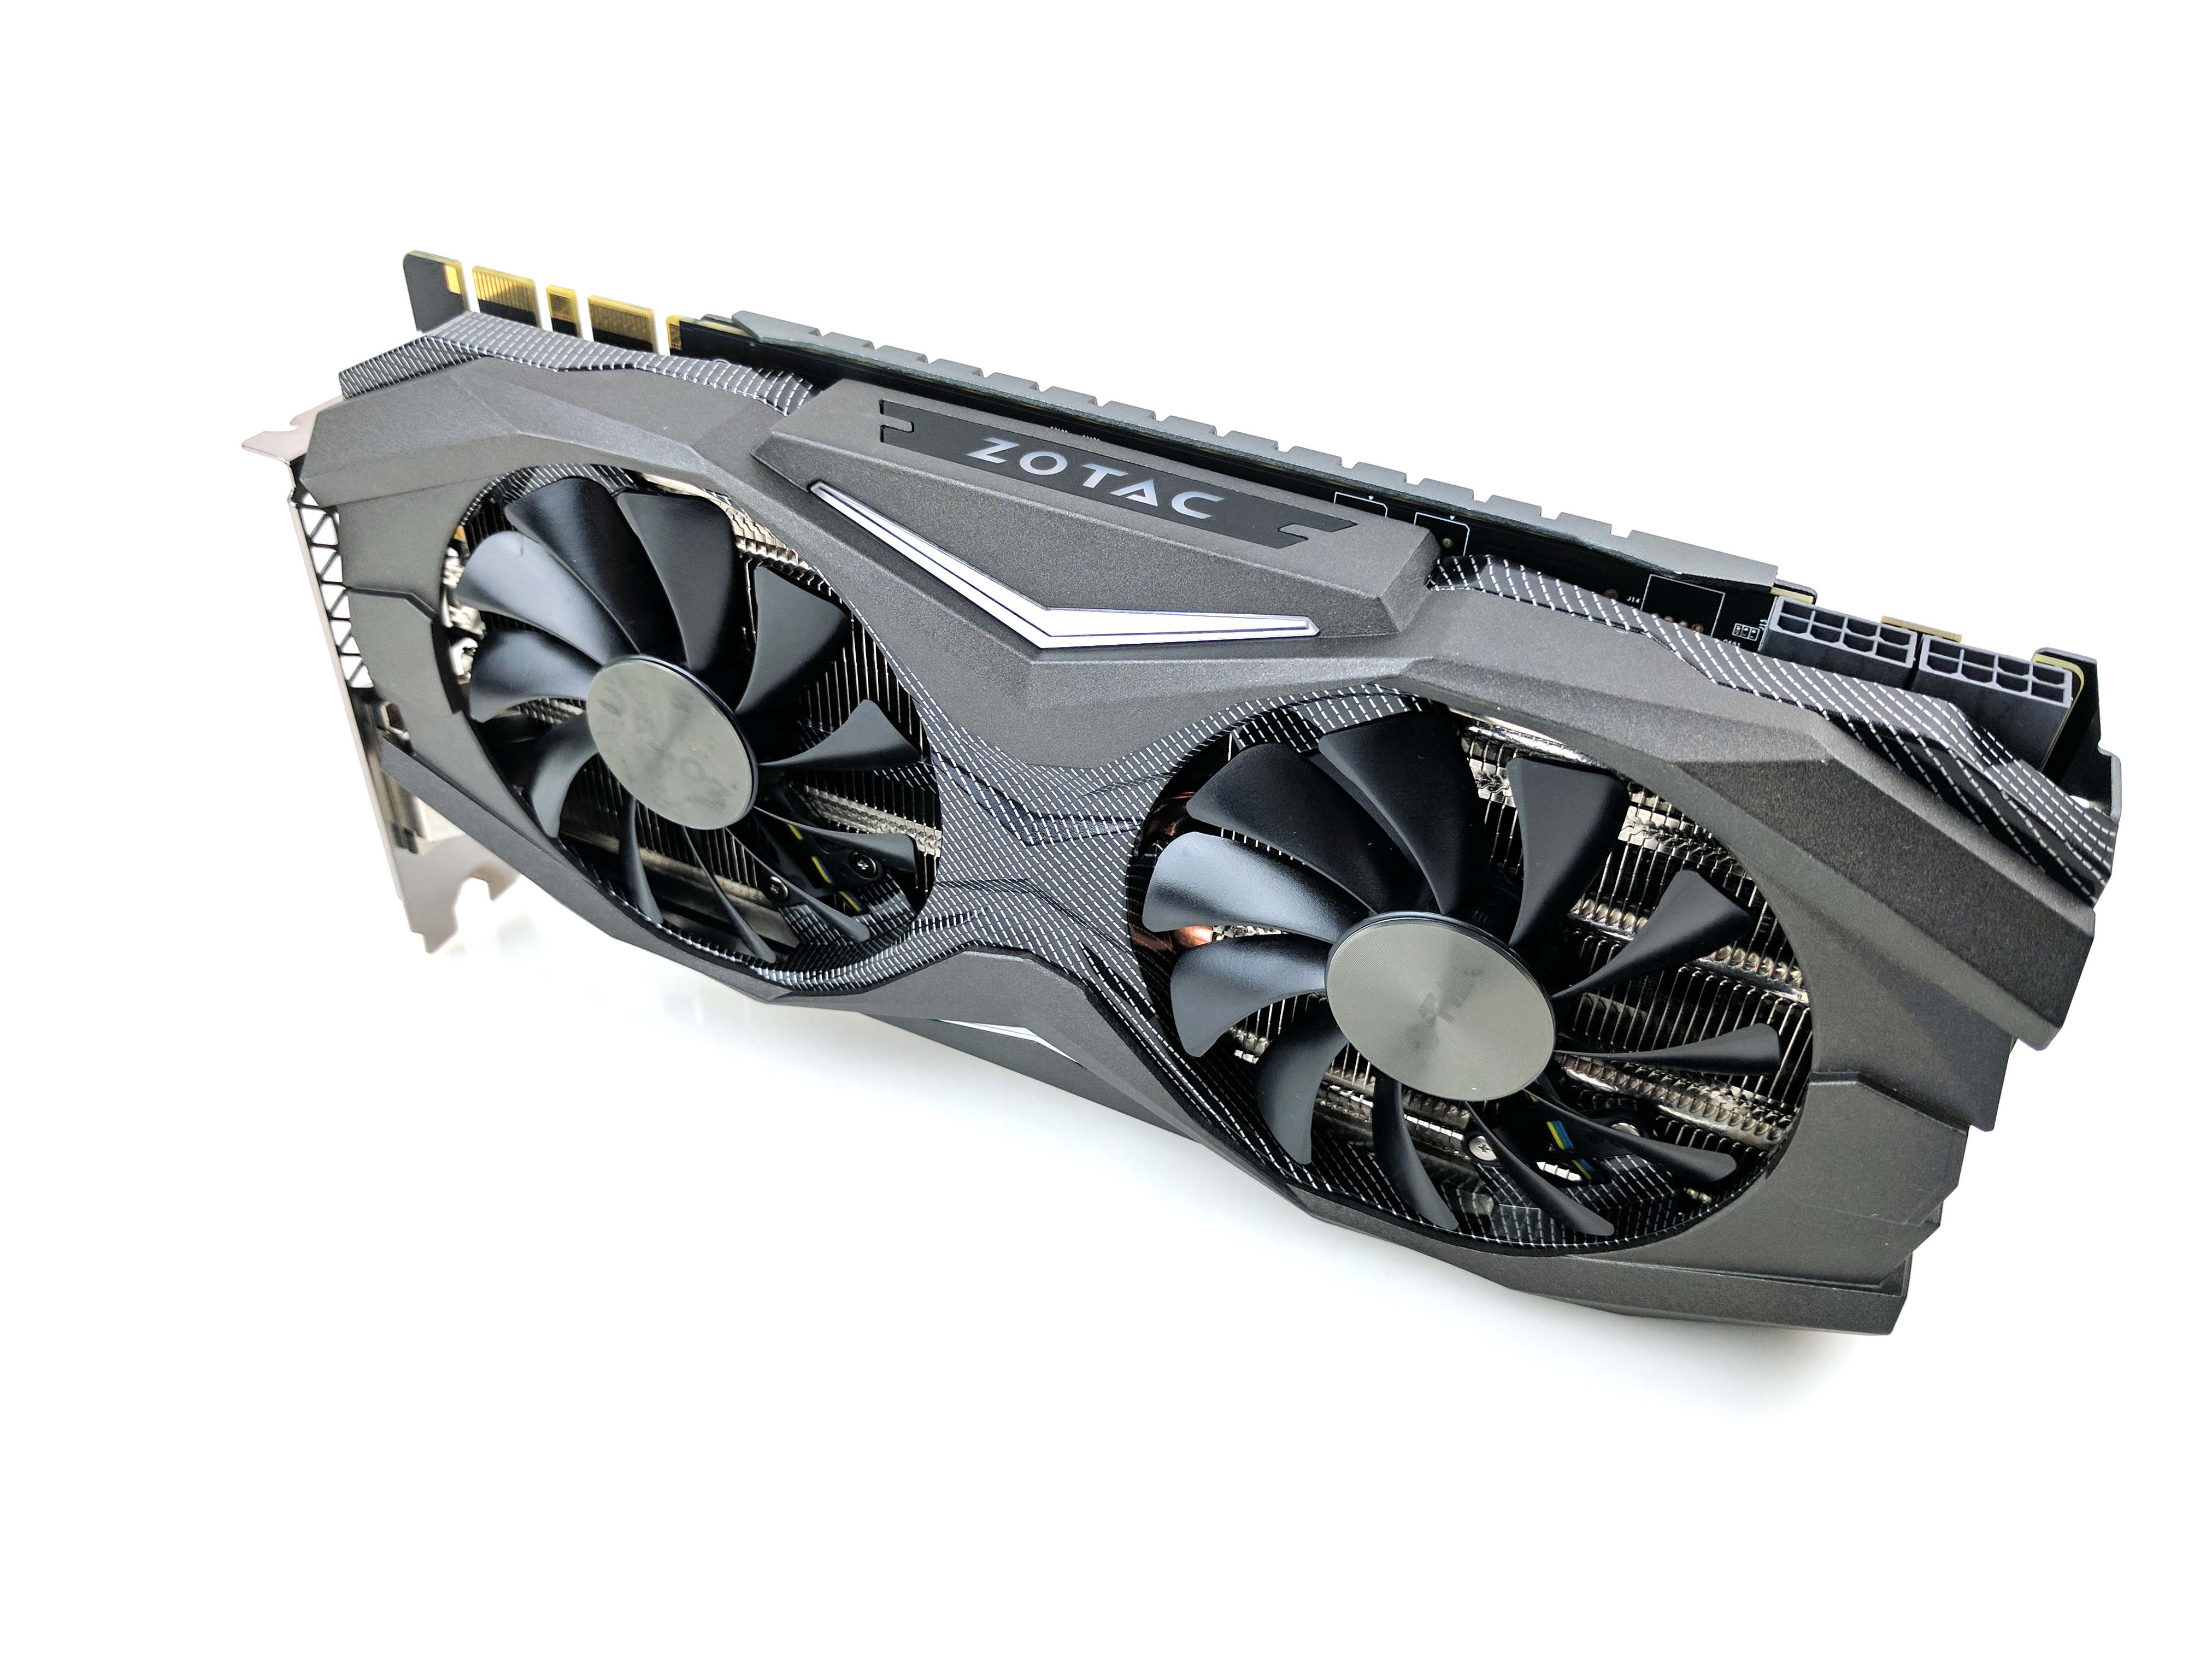
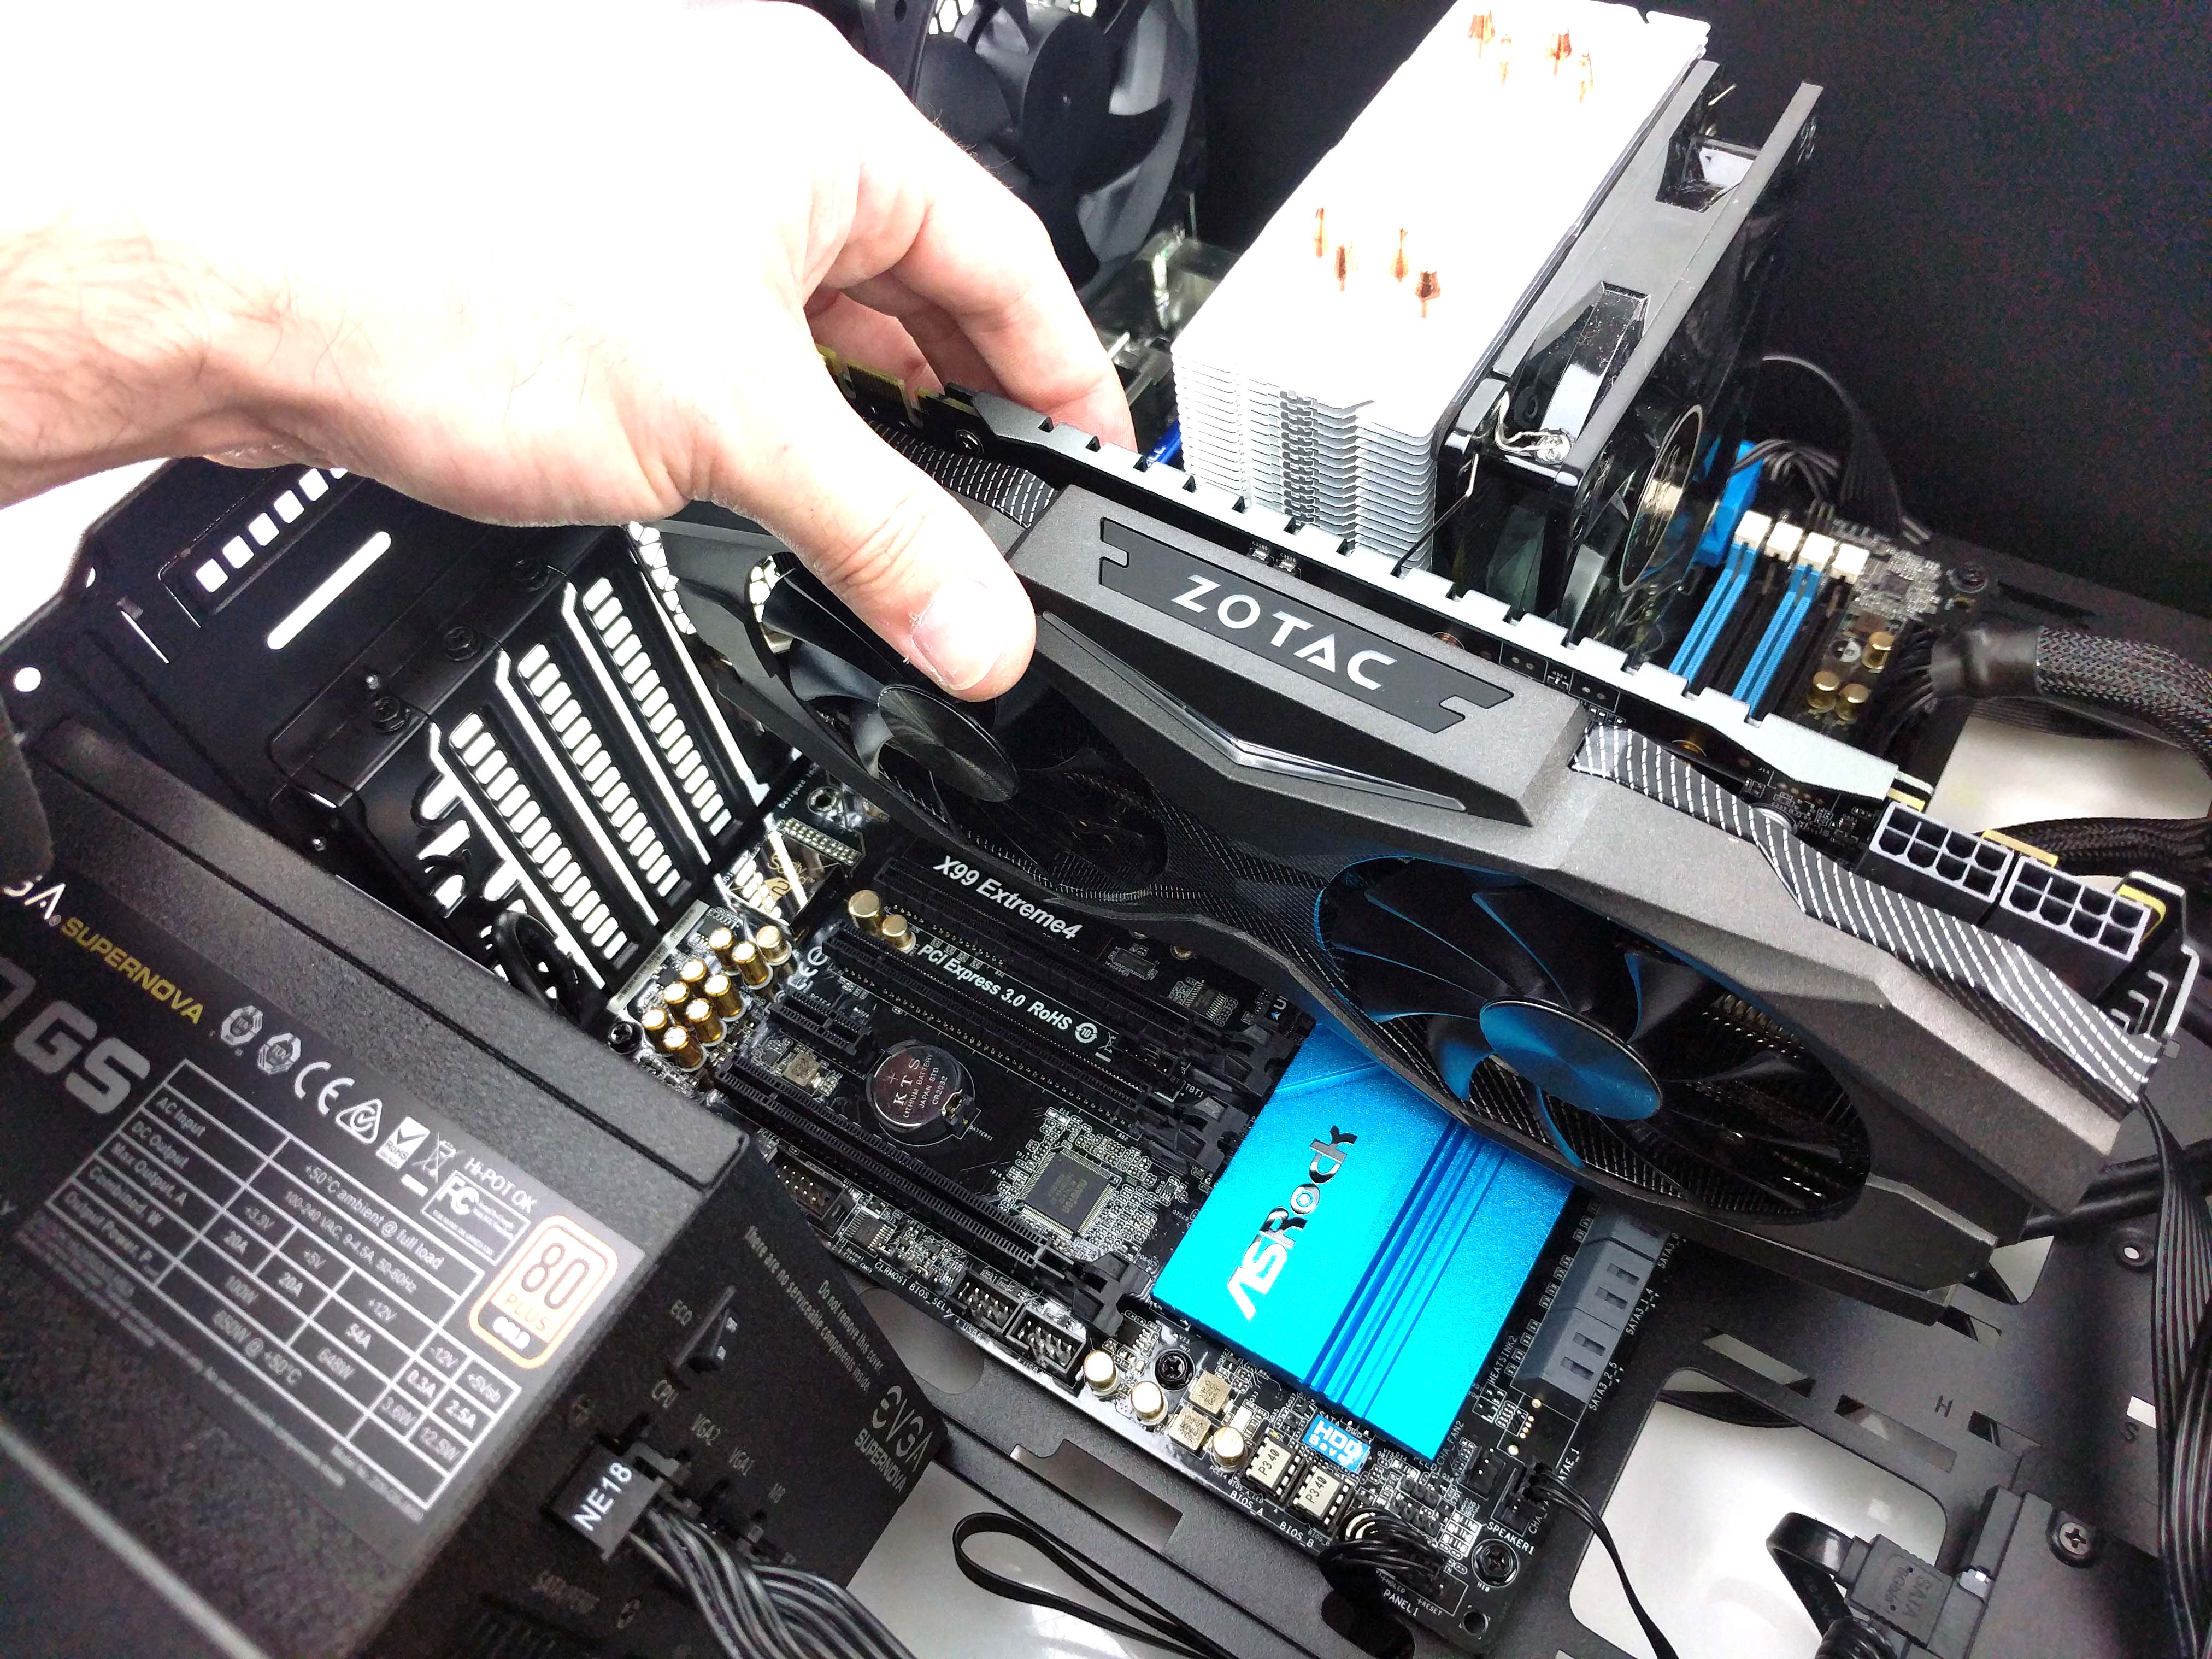
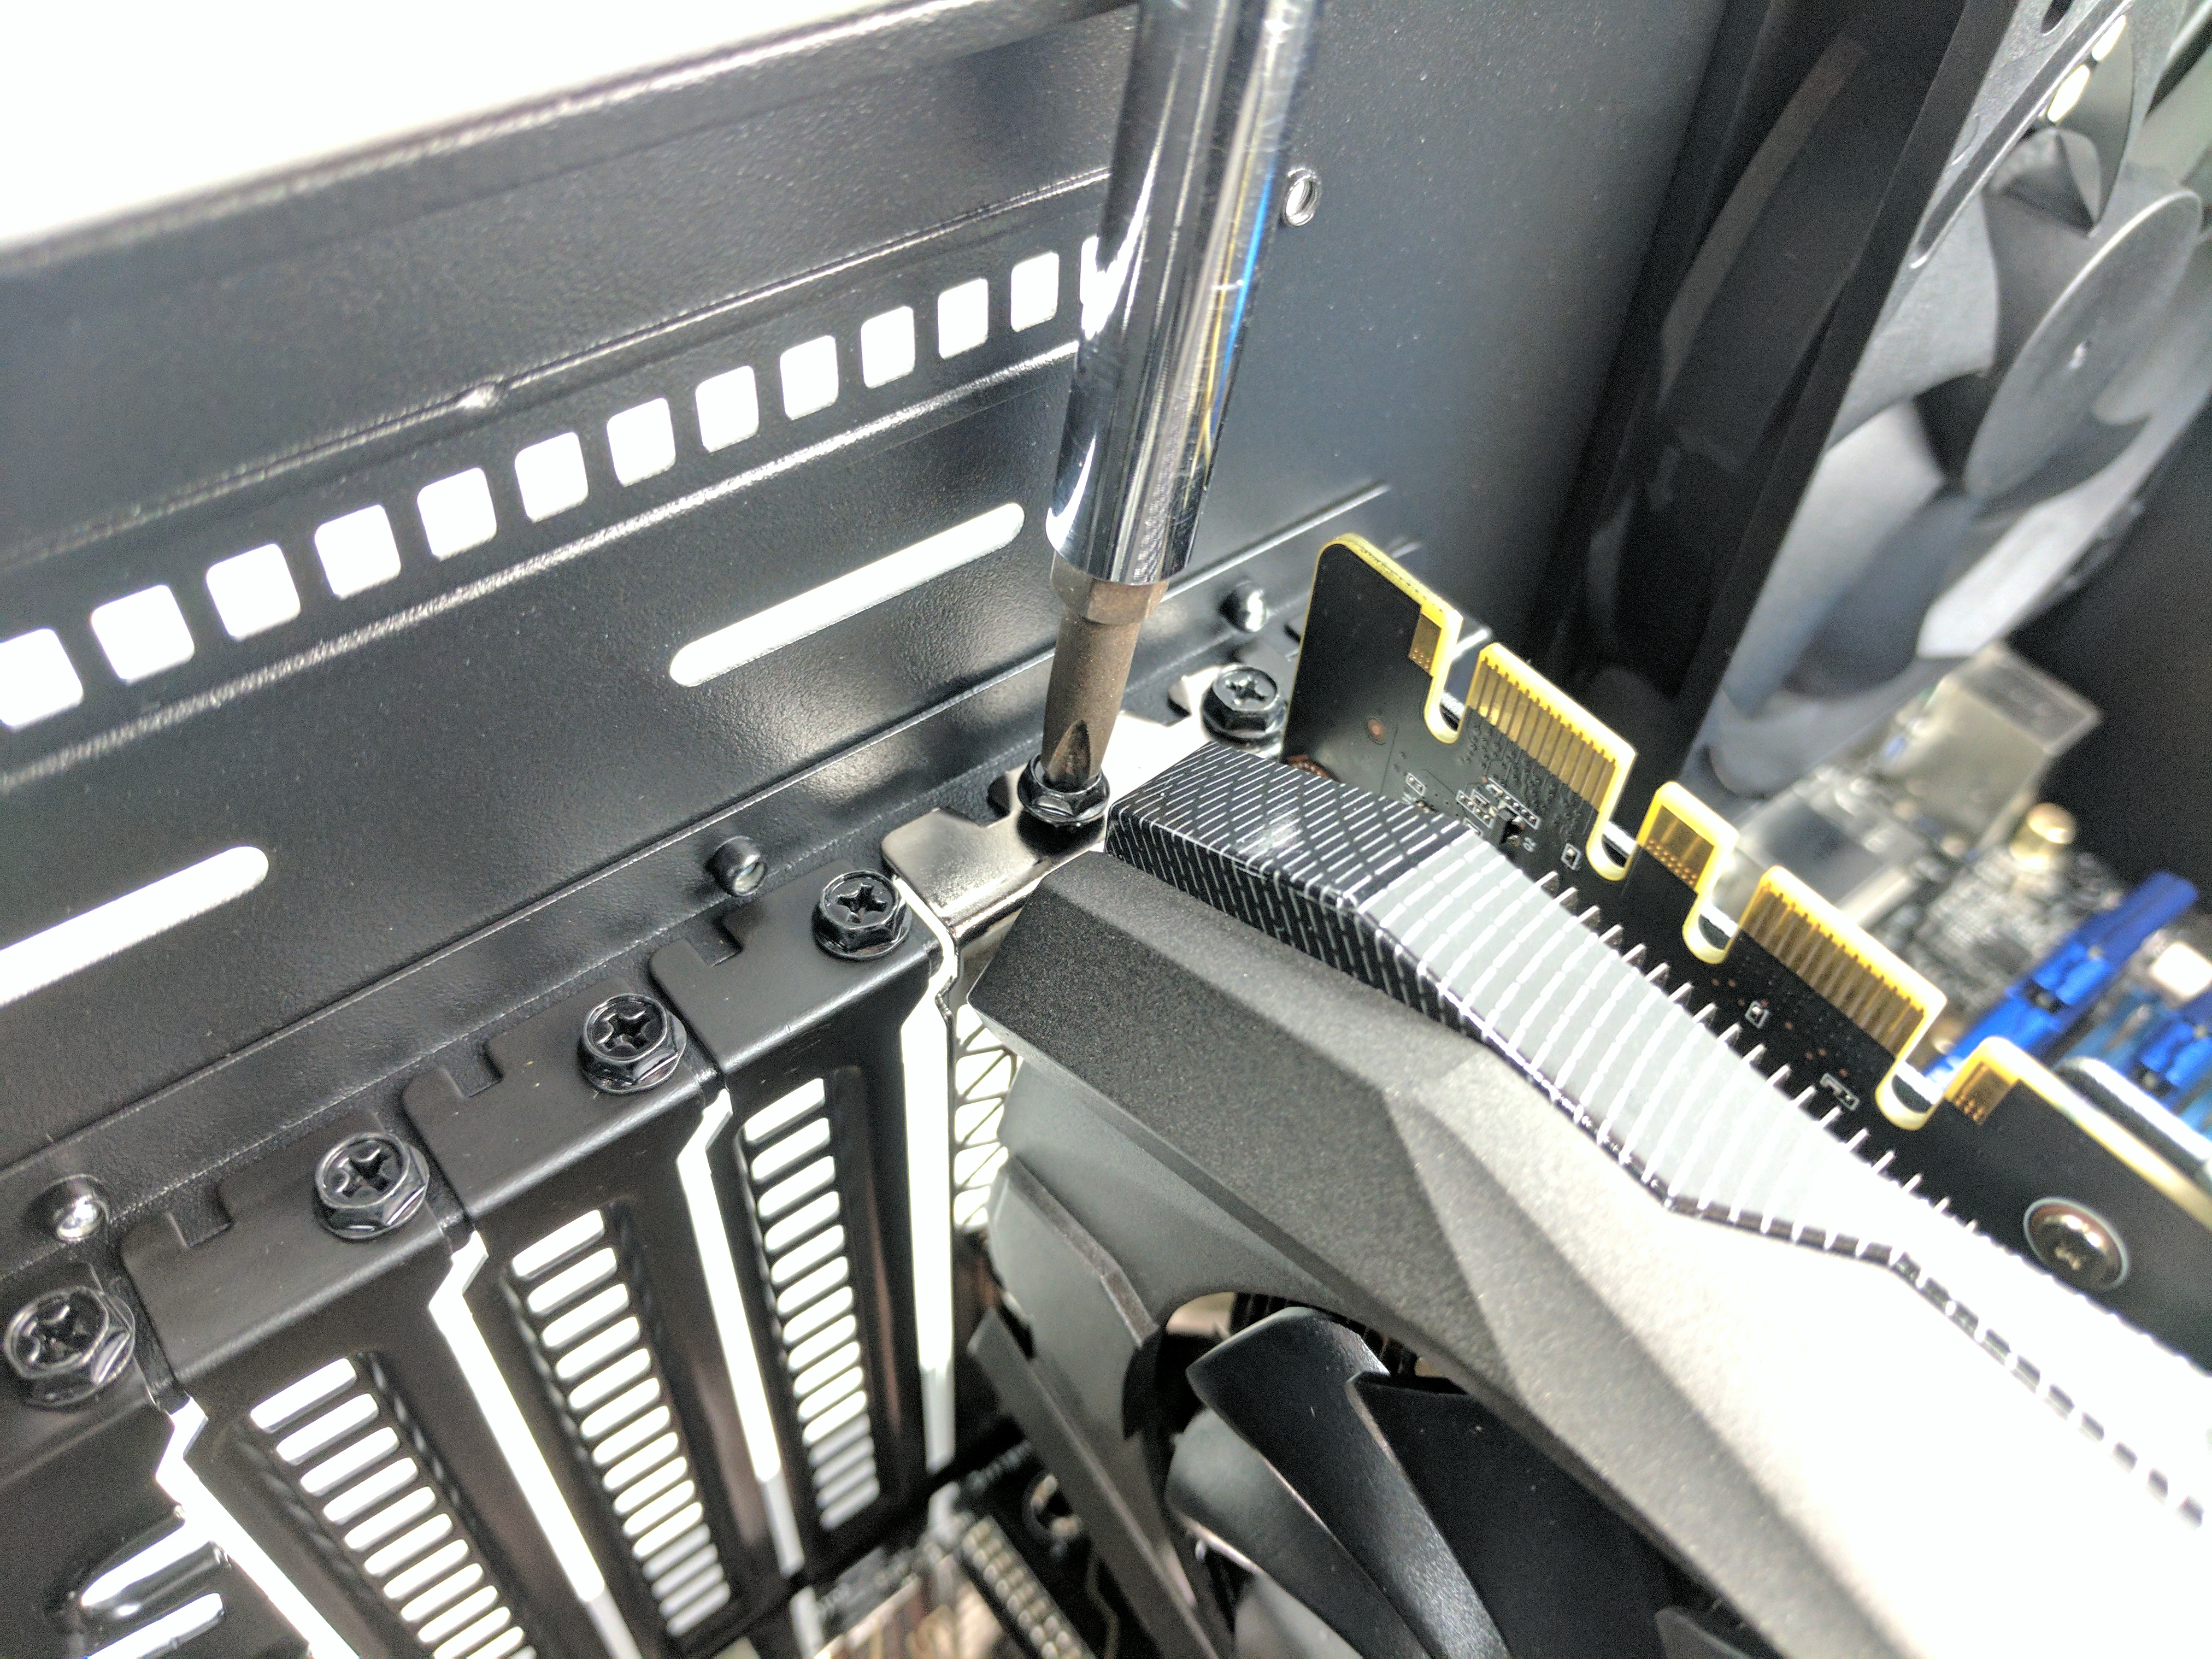
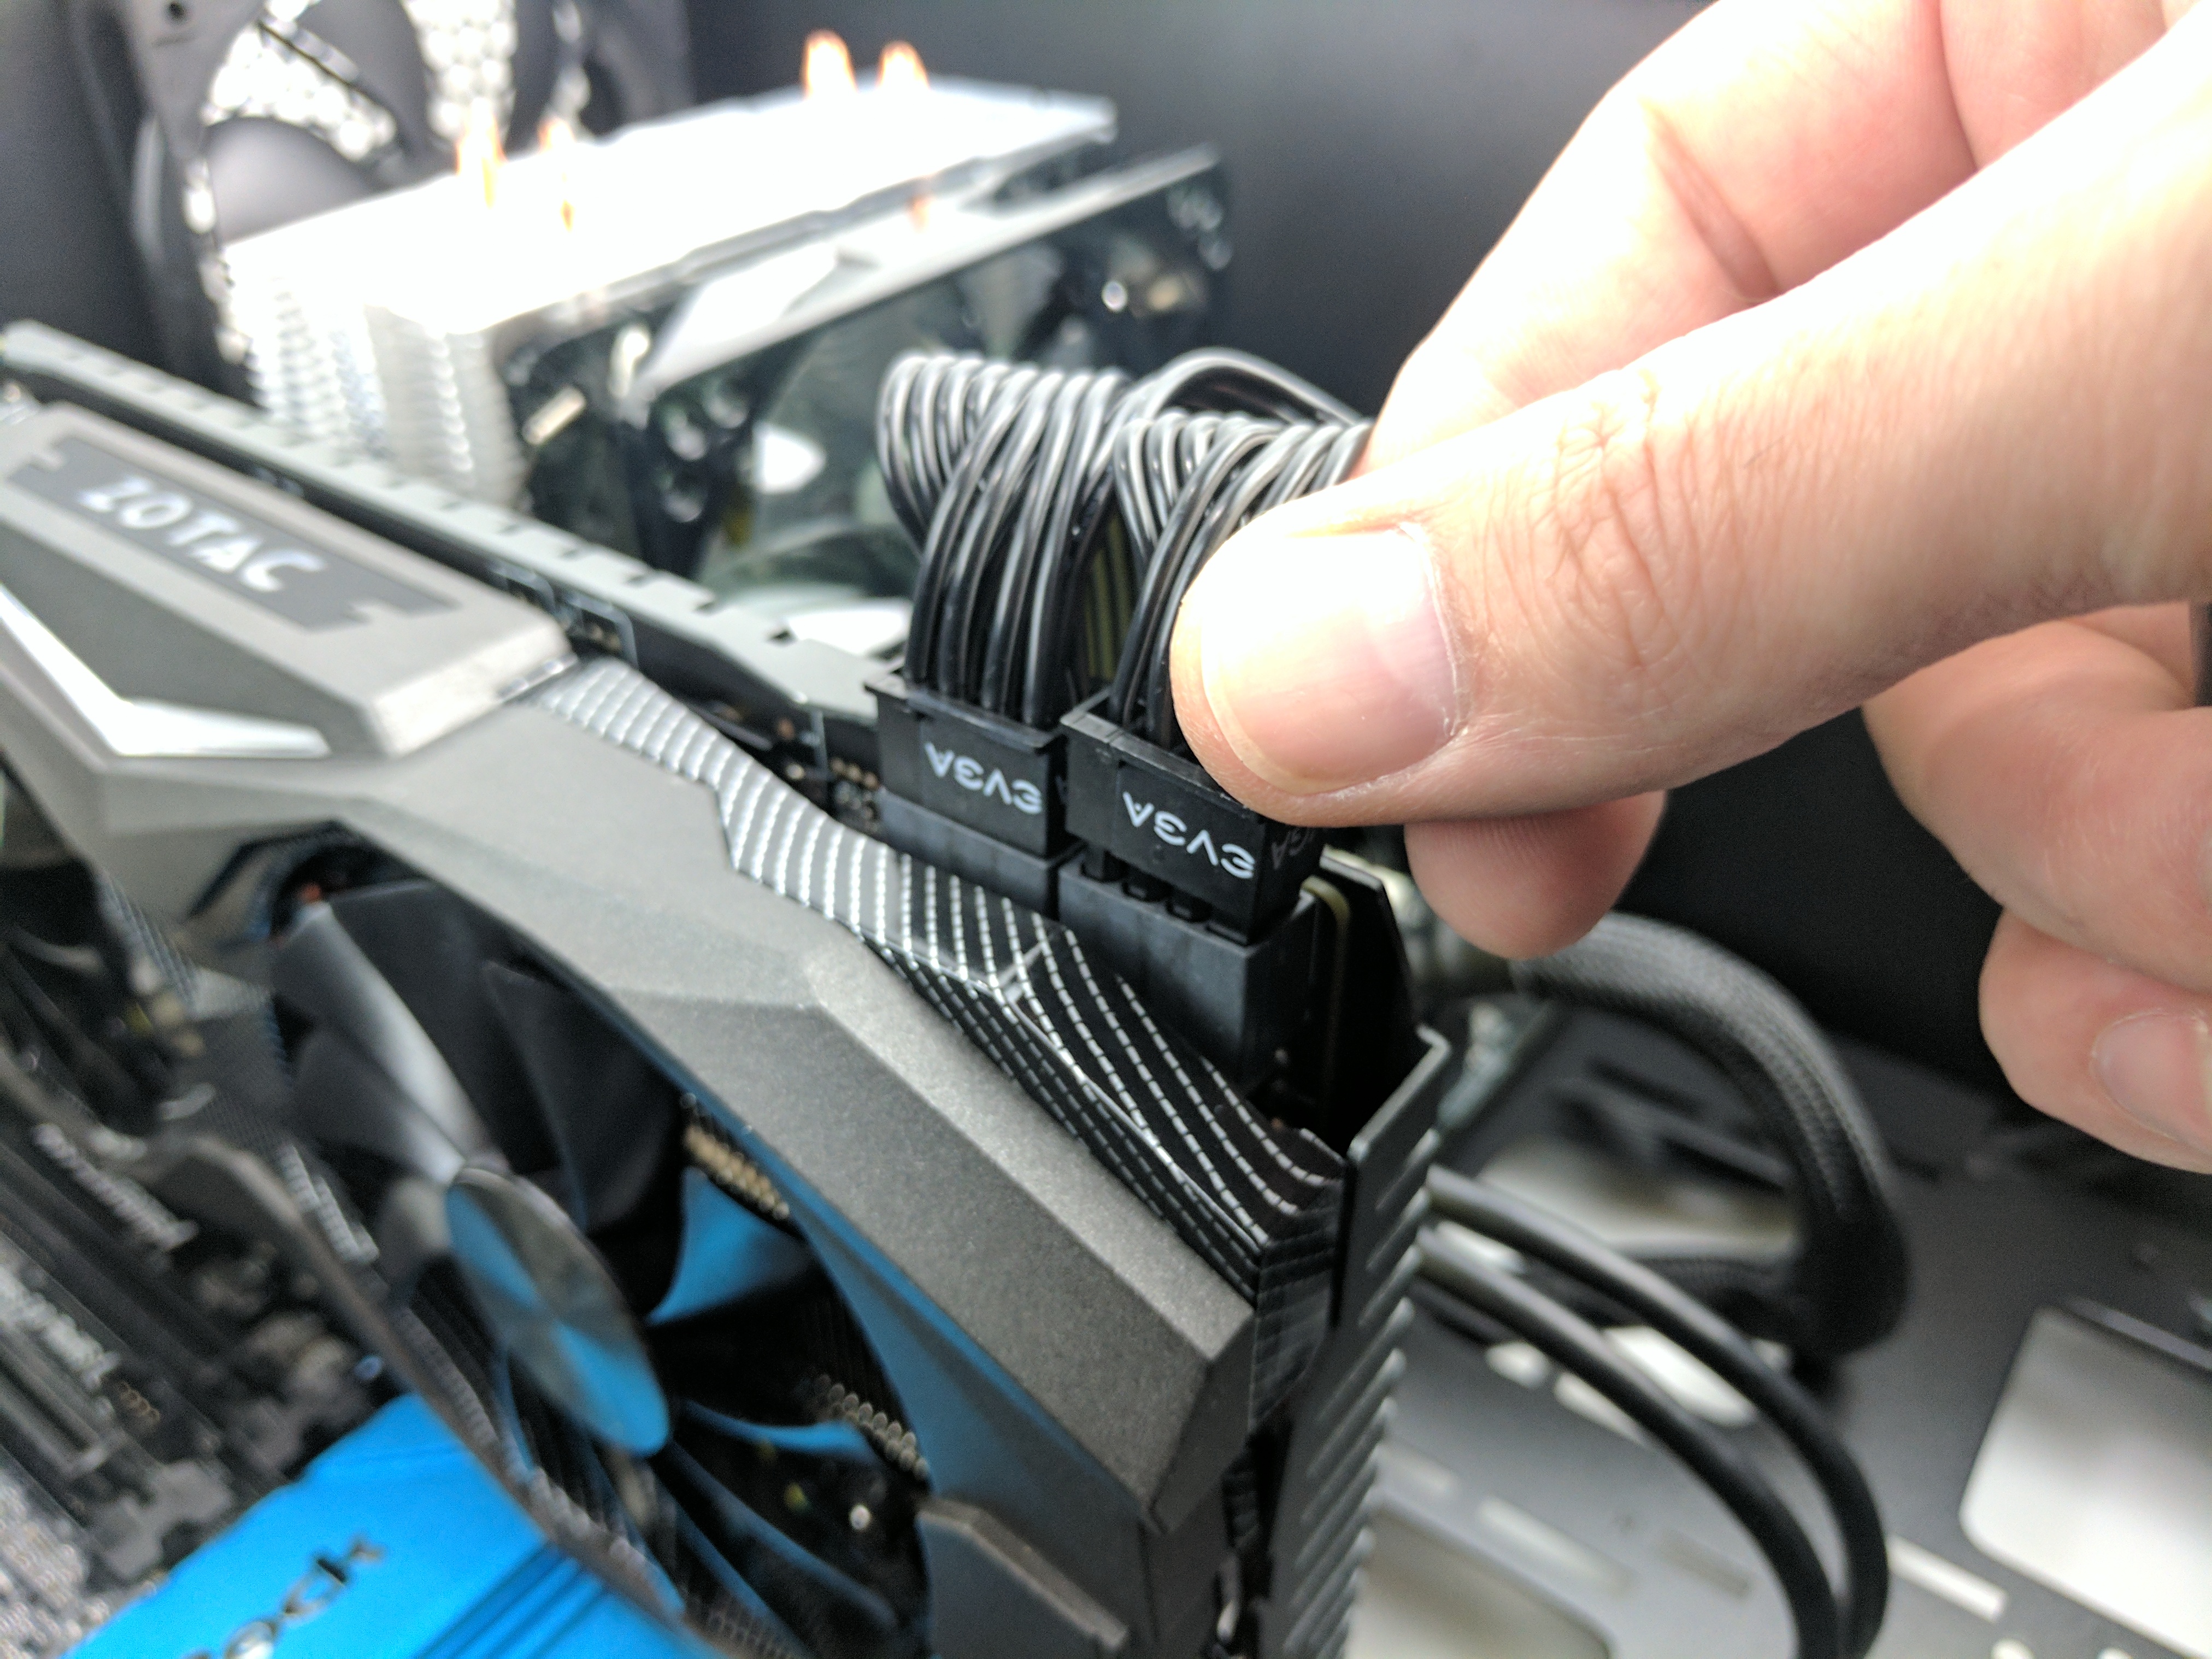
Lower the graphics card into position in the PCIe x16 slot closest to the processor, making sure the backplate tucks behind the motherboard properly and that the contacts are lined up. Apply pressure to insert the card into the slot. Replace the rear PCIe slot screws to secure the graphics card to the case and finish up by attaching the 6+2-pin PCIe power cable to the two 8-pin leads. You may need every bit of slack from the power cable to reach the connector.
Finishing Up
Now that all the components are installed, you just have to replace the PSU shroud by lowering it into the case guides (above the PSU) and sliding it towards the back of the chassis. Replace the thumb screw (on the rear panel of the case) that holds the shroud in place. Line up the left and right side panels with their respective guides in the case's edges and slide them towards the front of the case. Secure them with thumbscrews.
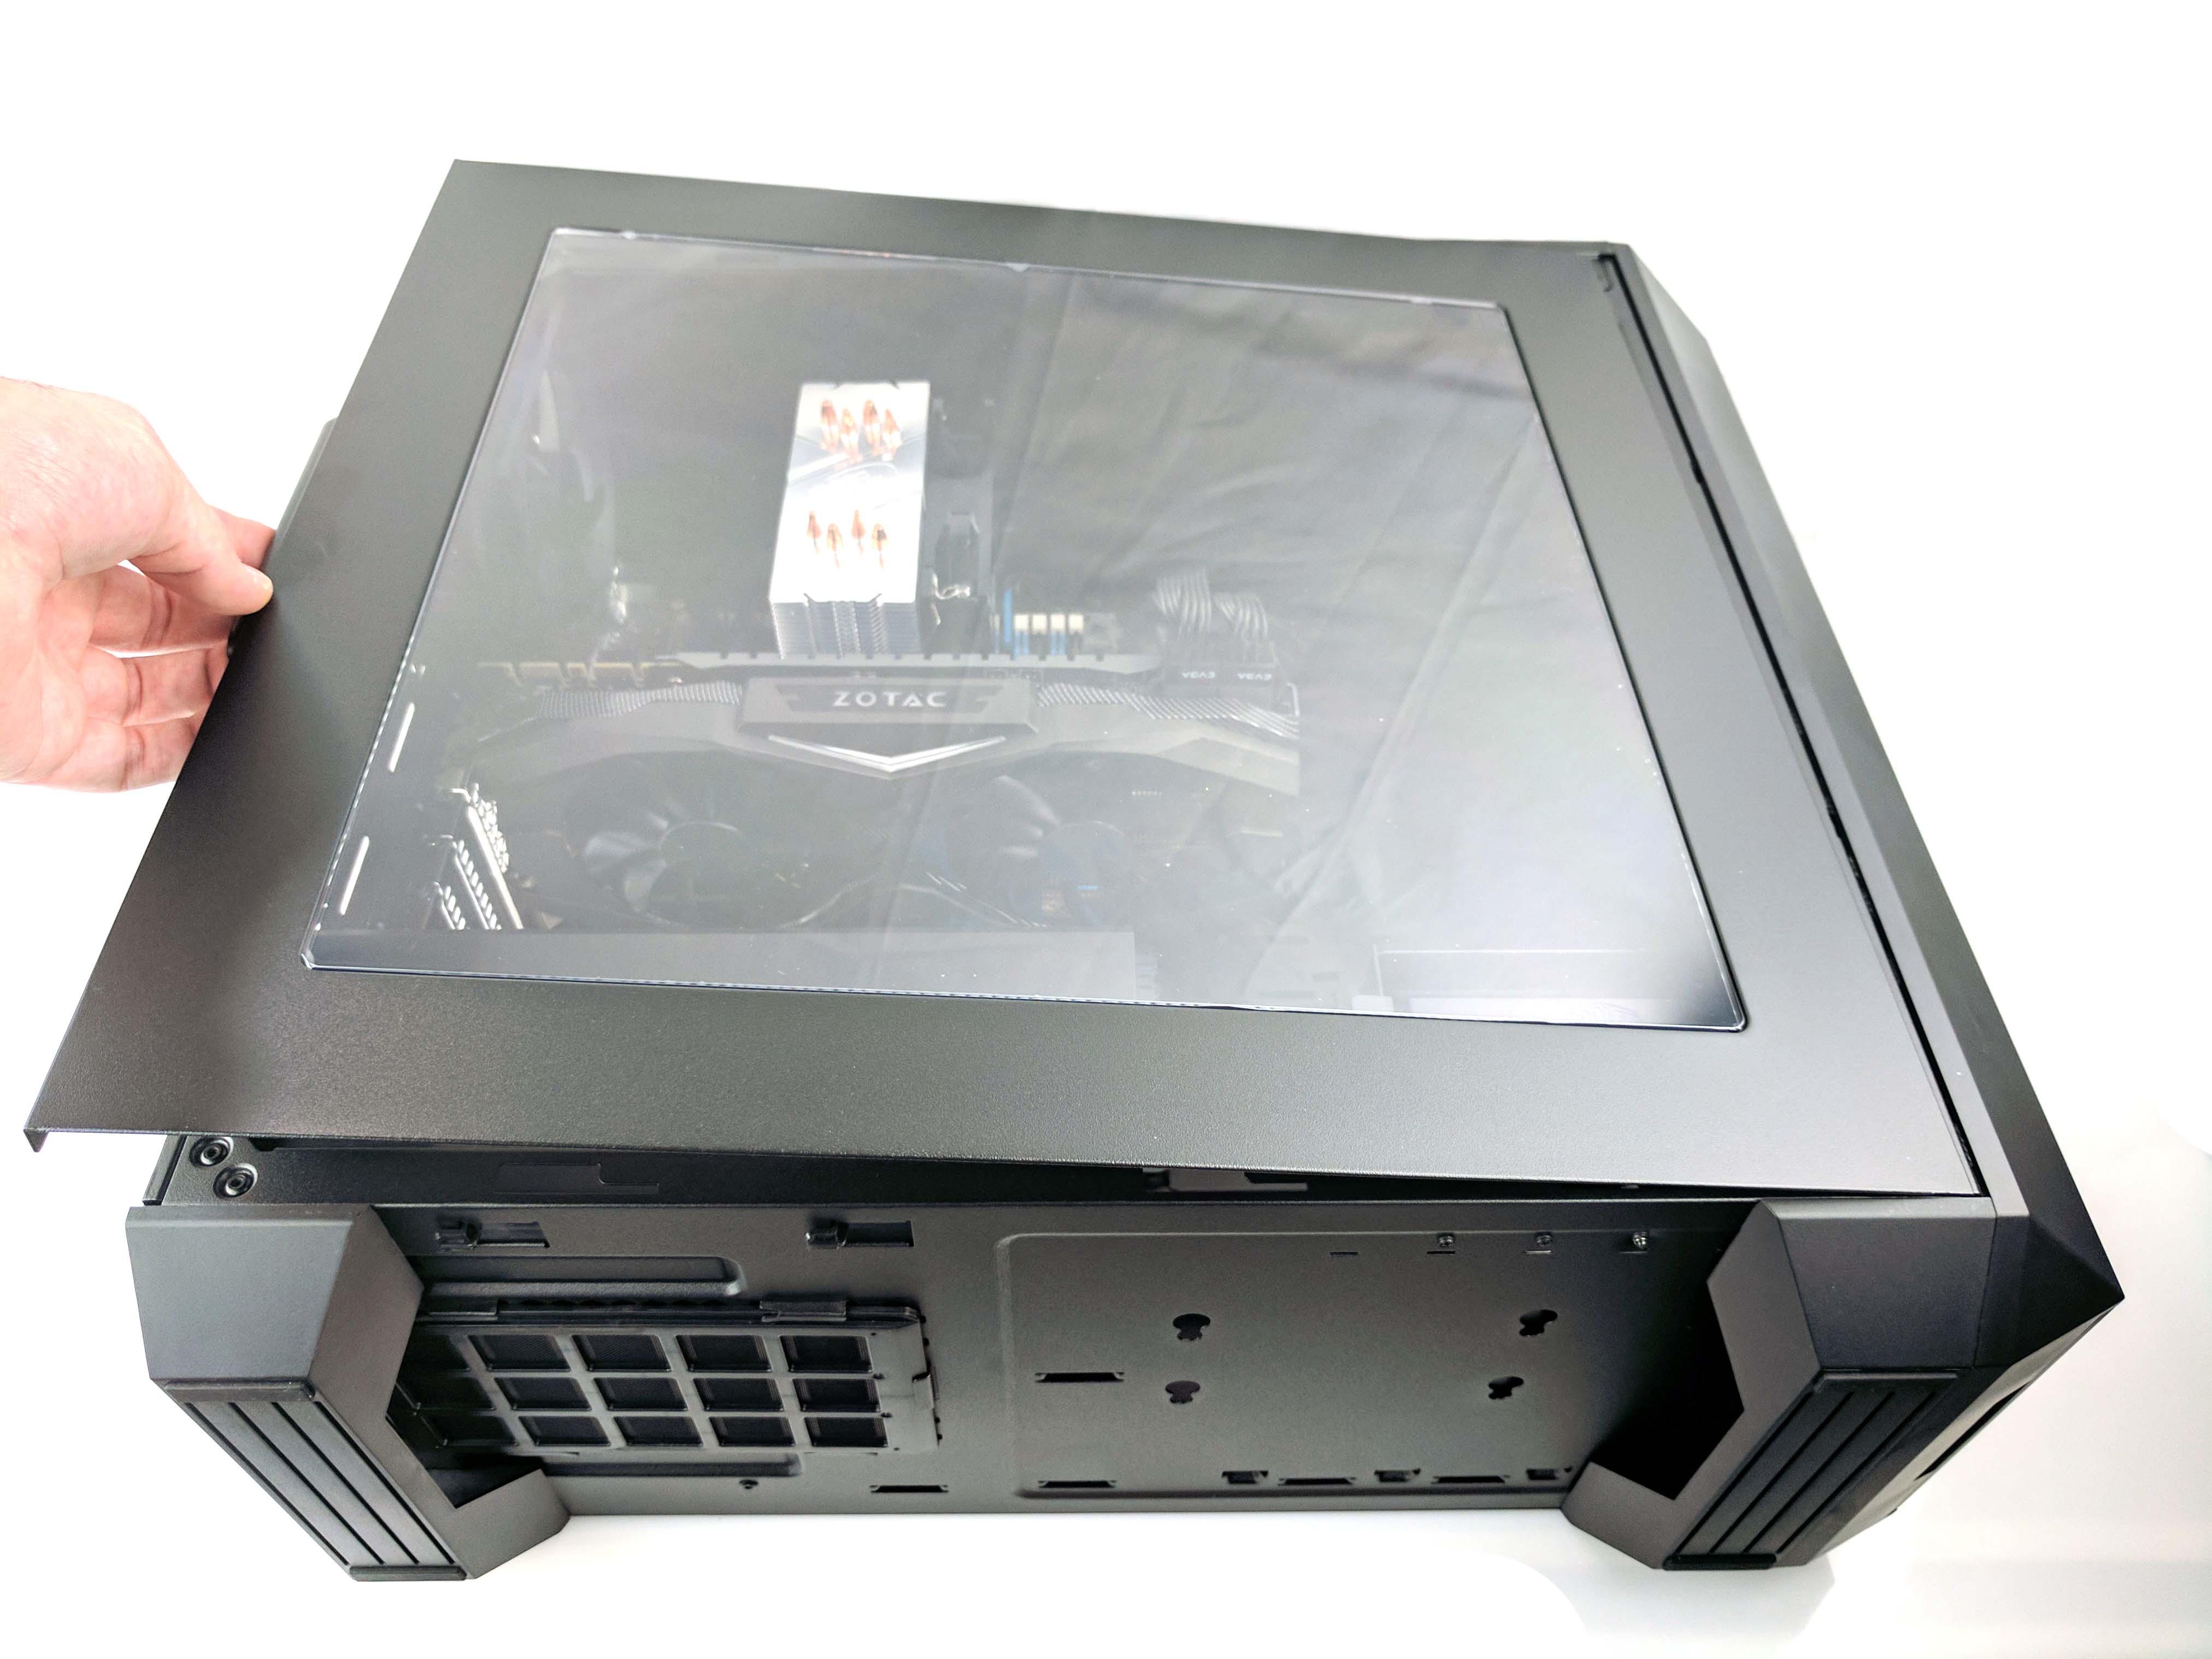
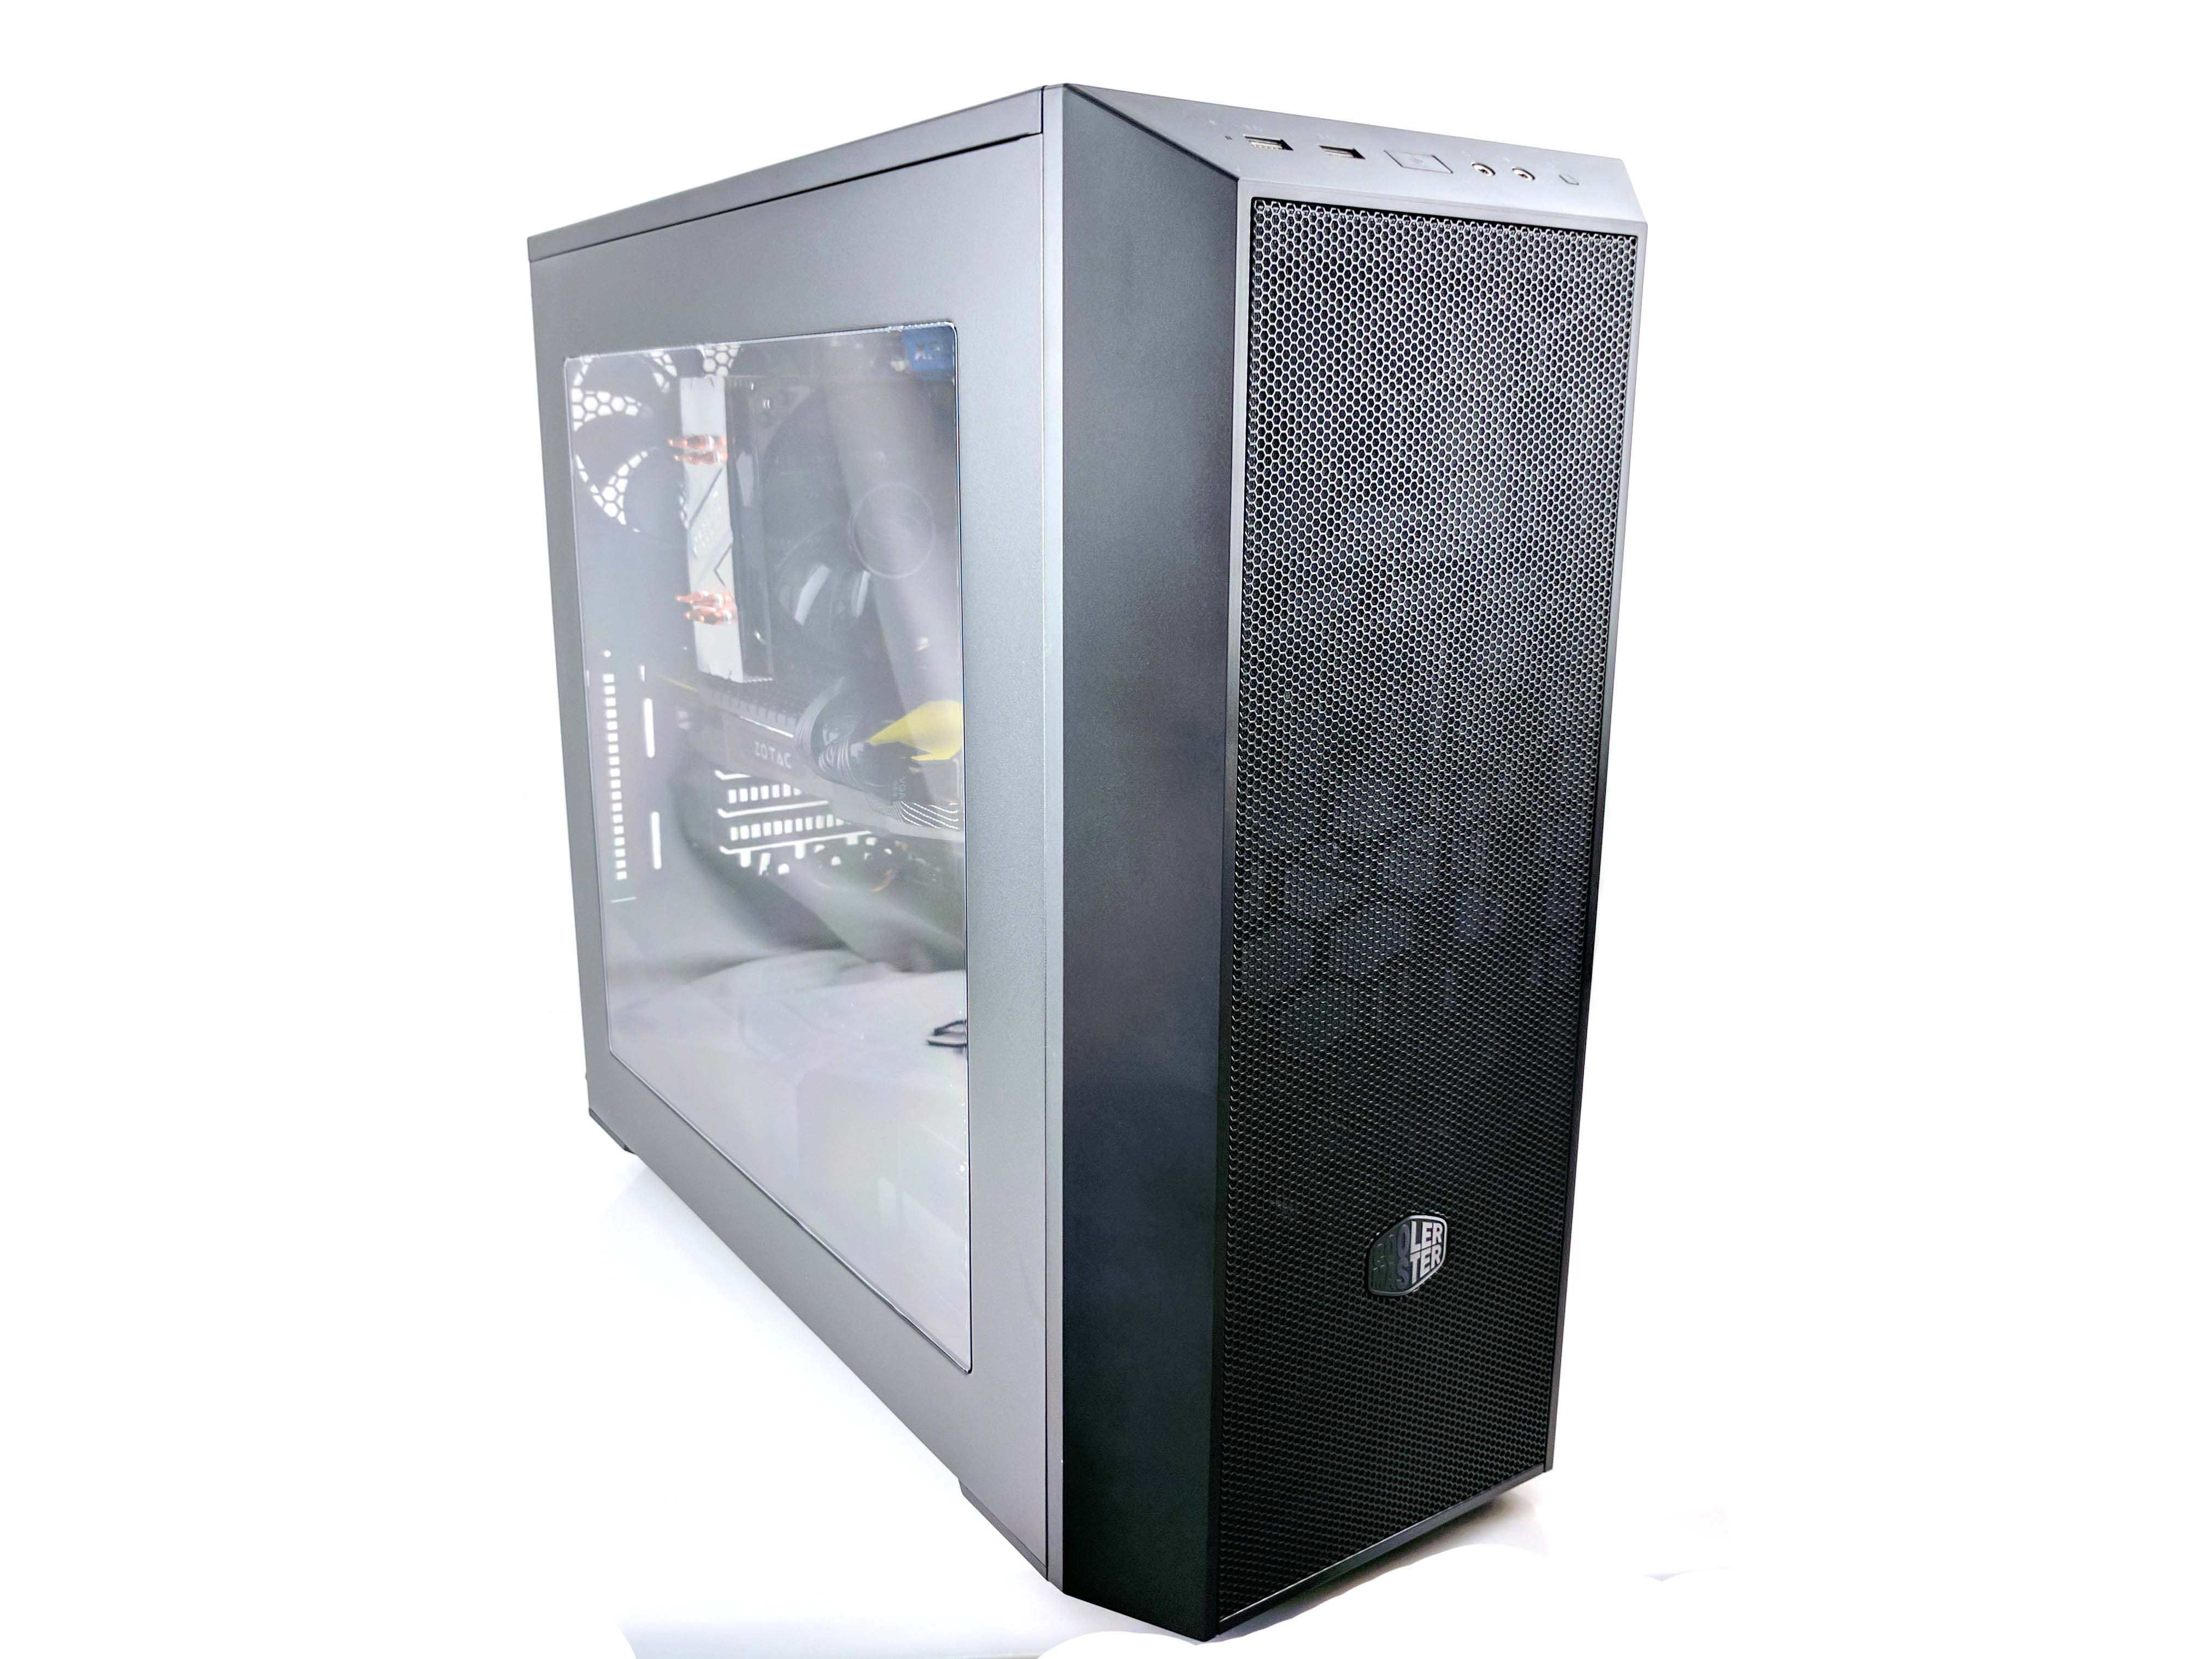
Connect your display, power plug, and peripherals to your new $1500 gaming rig (the Best $1500 PC Build) and enjoy!
Setup & Overclocking Tips
Make sure you download the latest BIOS and drivers from ASRock's website to ensure the best performance and compatibility. To update the BIOS, download and unzip the file on a different computer and place it on the root directory of a thumb drive. Place the USB storage into the Lobotomy and turn it on. Press F6 to access Instant Flash.
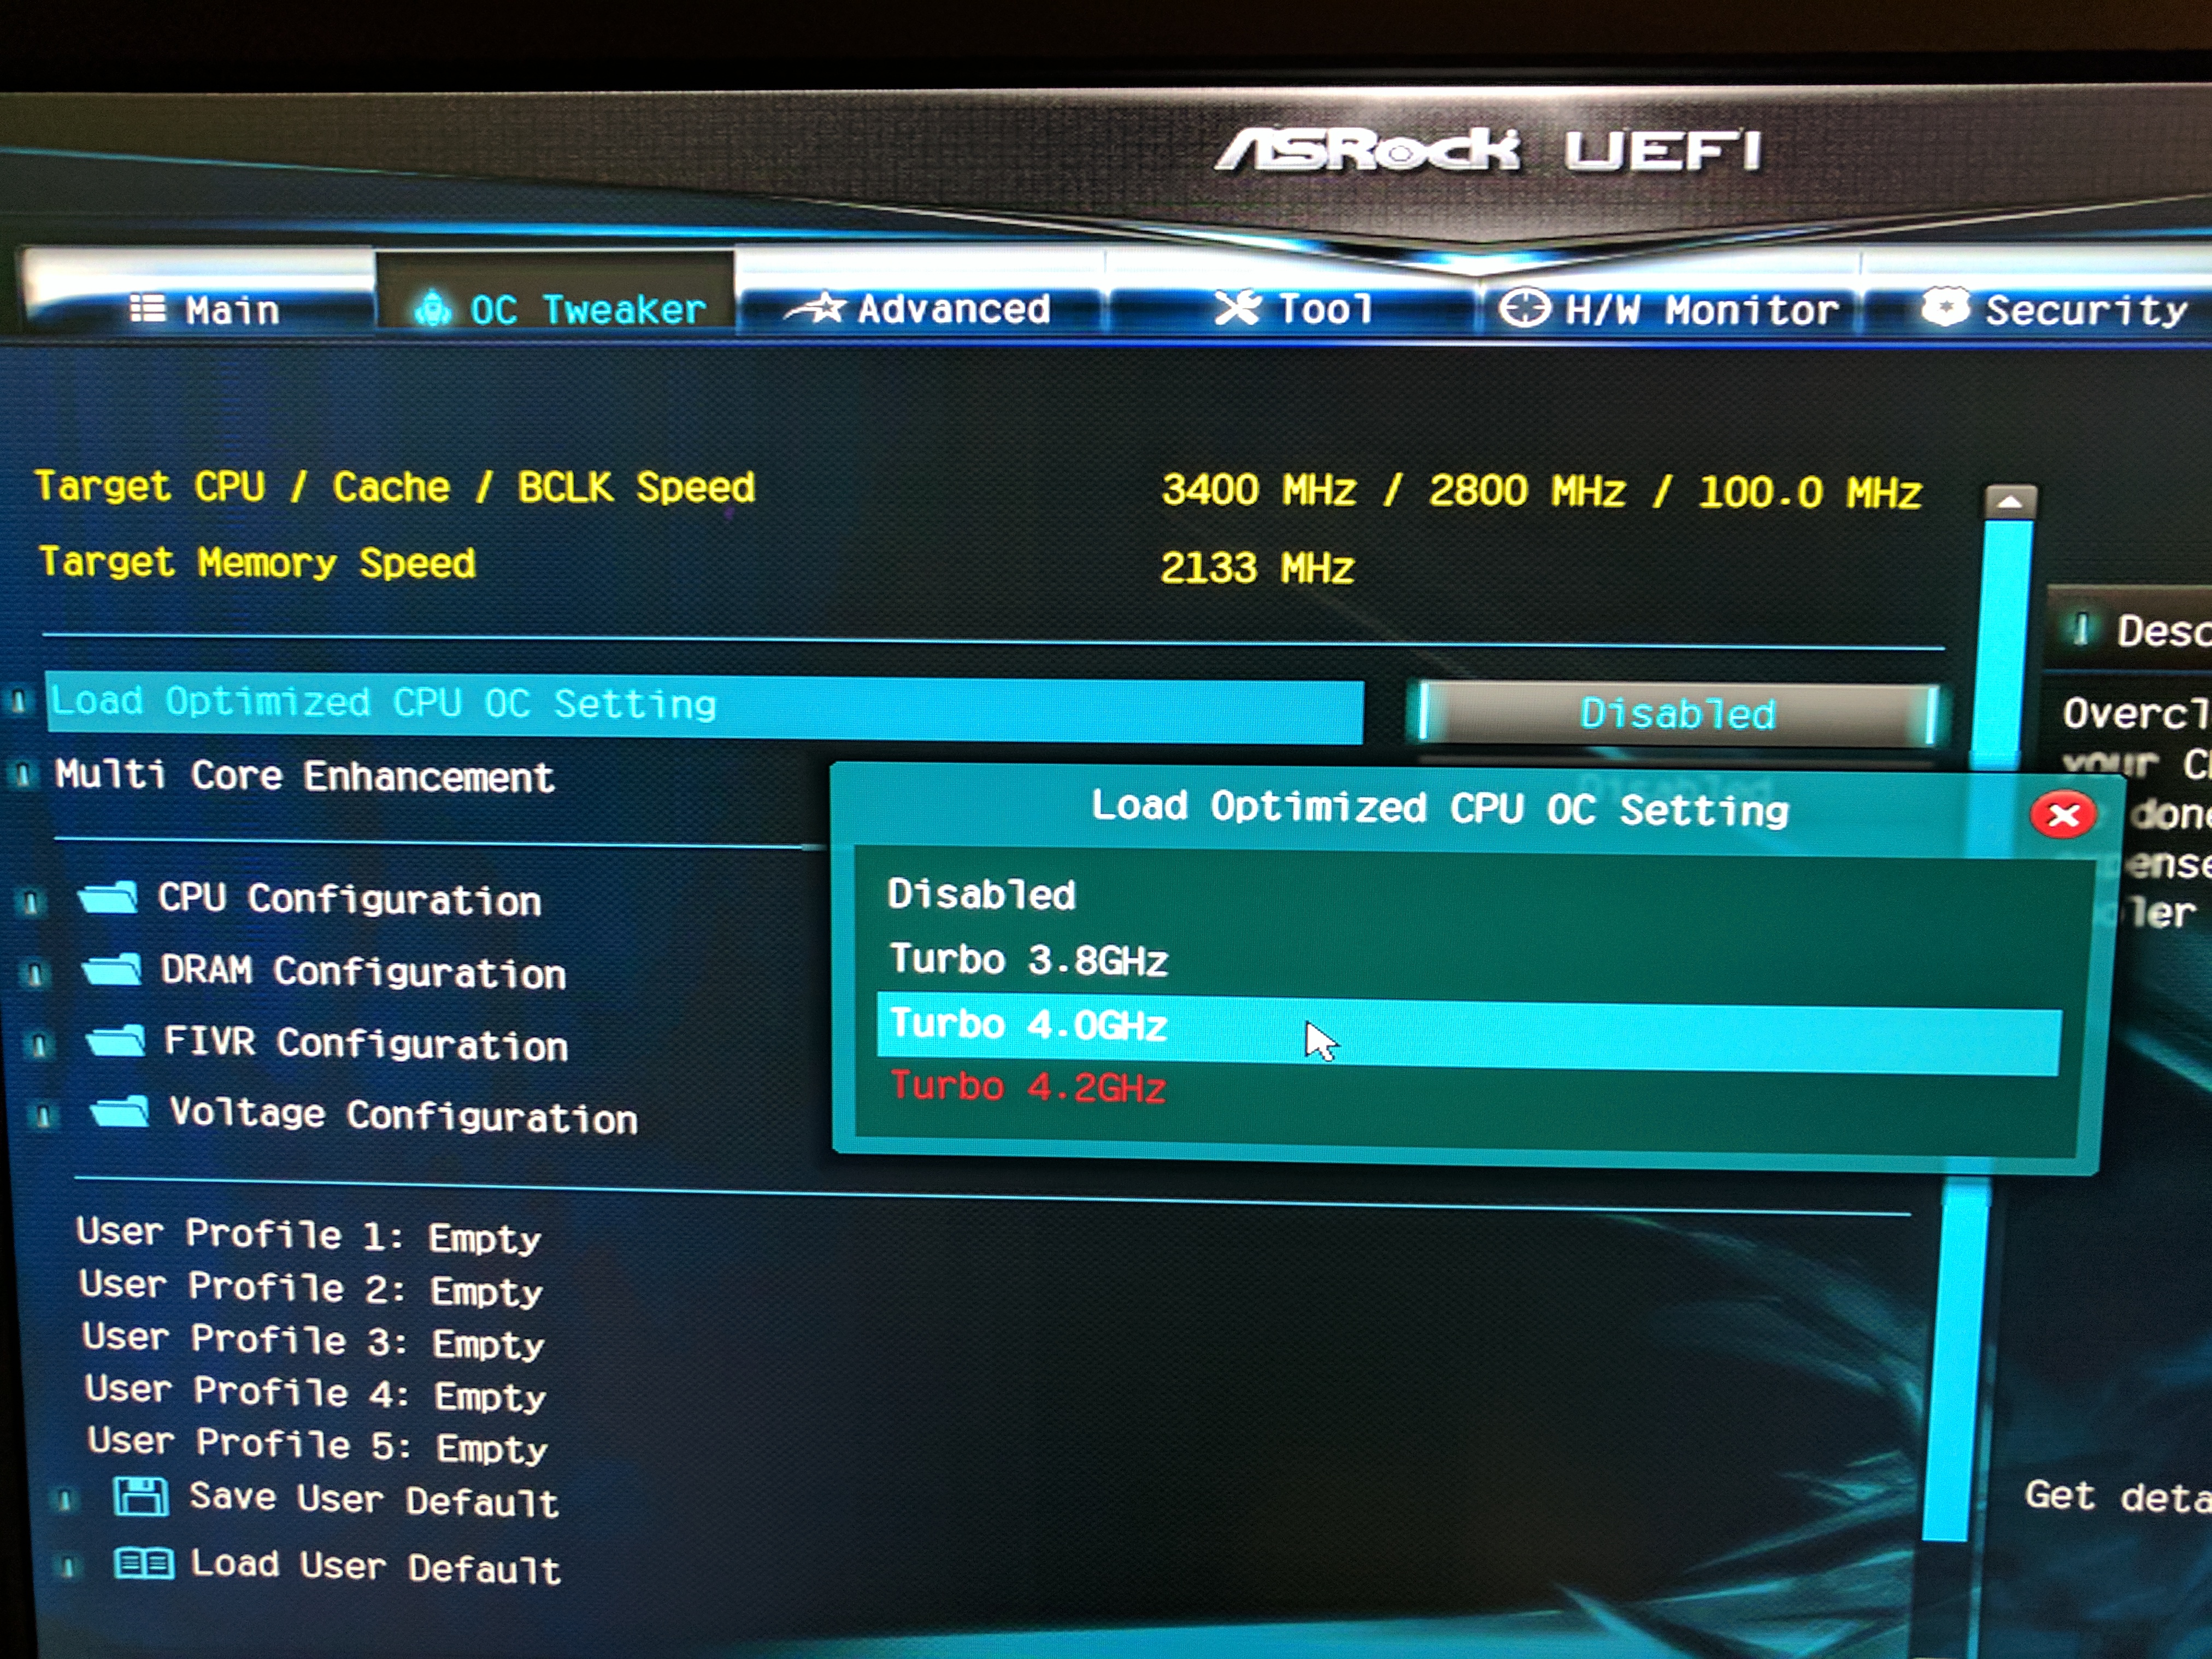
To overclock the Intel Core i7-6800K, we turned to ASRock's optimized CPU OC presets in the BIOS. Boot up the machine and press the F2 or DEL key to access the BIOS. Navigate to the OC Tweaker tab towards the top of the screen by clicking it with the mouse. Click on the Disabled box next to where it says "Load Optimized CPU OC Setting." A new menu will pop up with preset turbo boost frequencies. We selected the Turbo 4.0 GHz setting, but there may be room to push it further with the Deepcool Gammaxx 400 cooler.
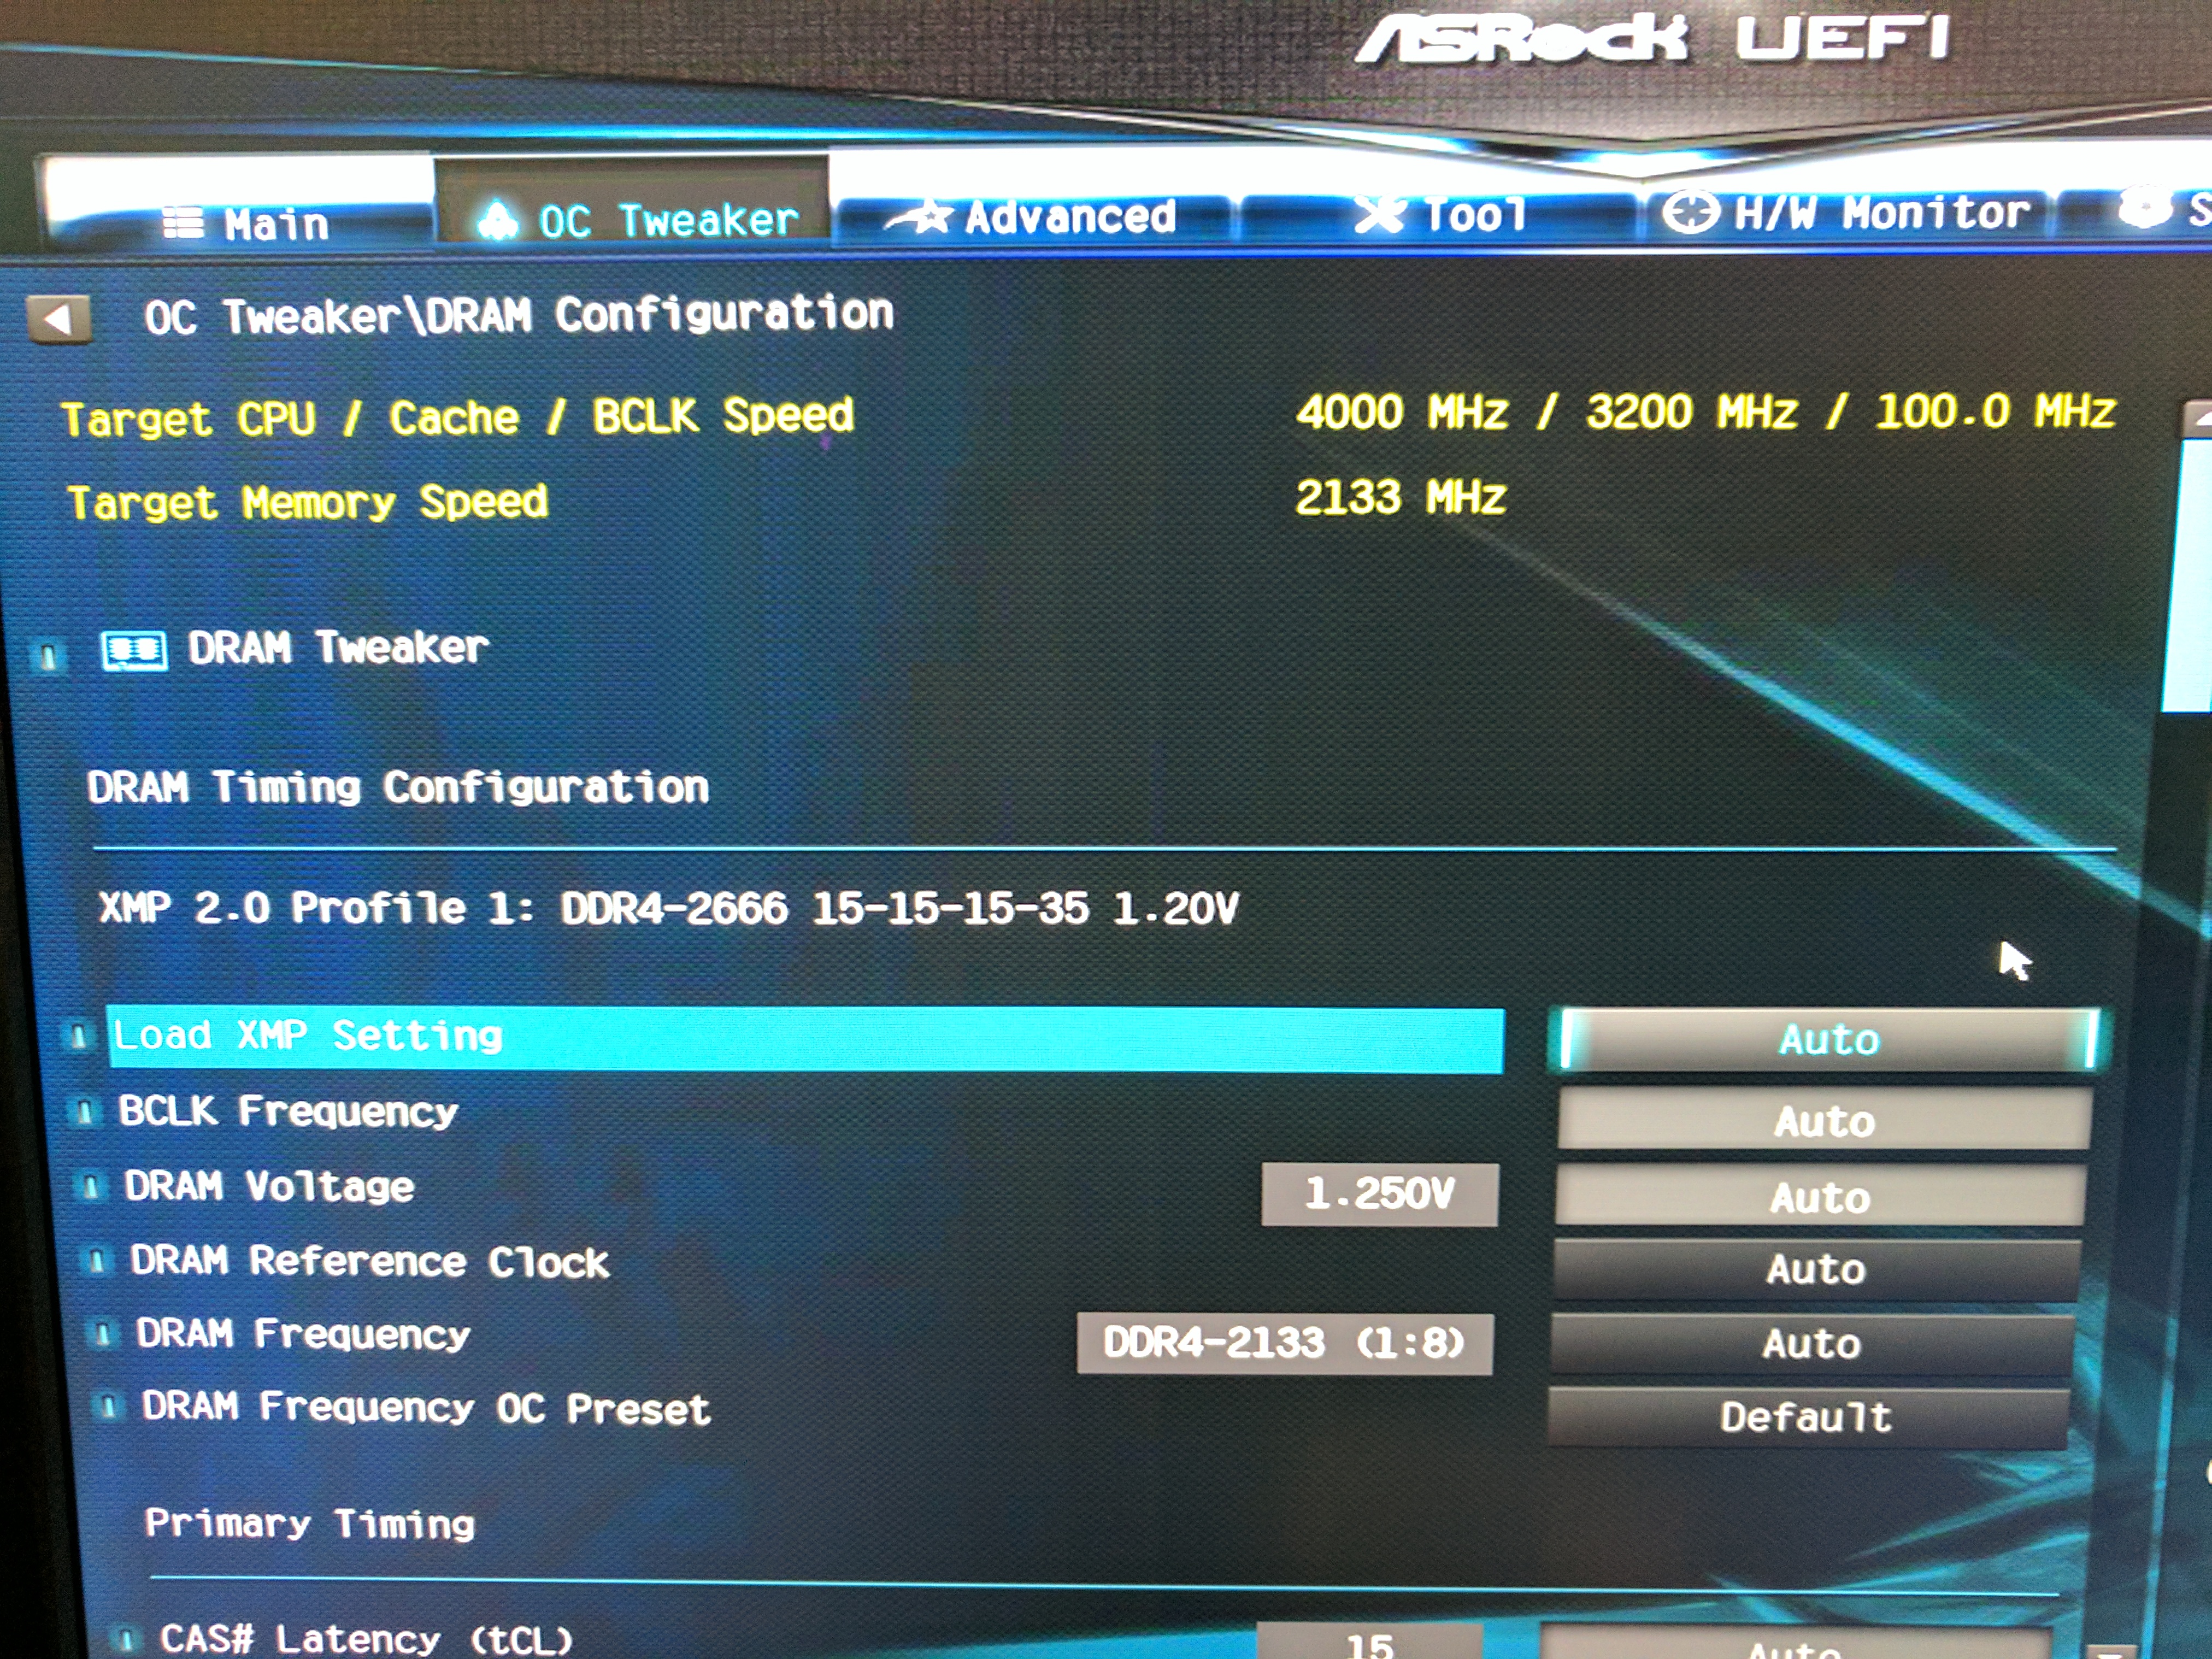
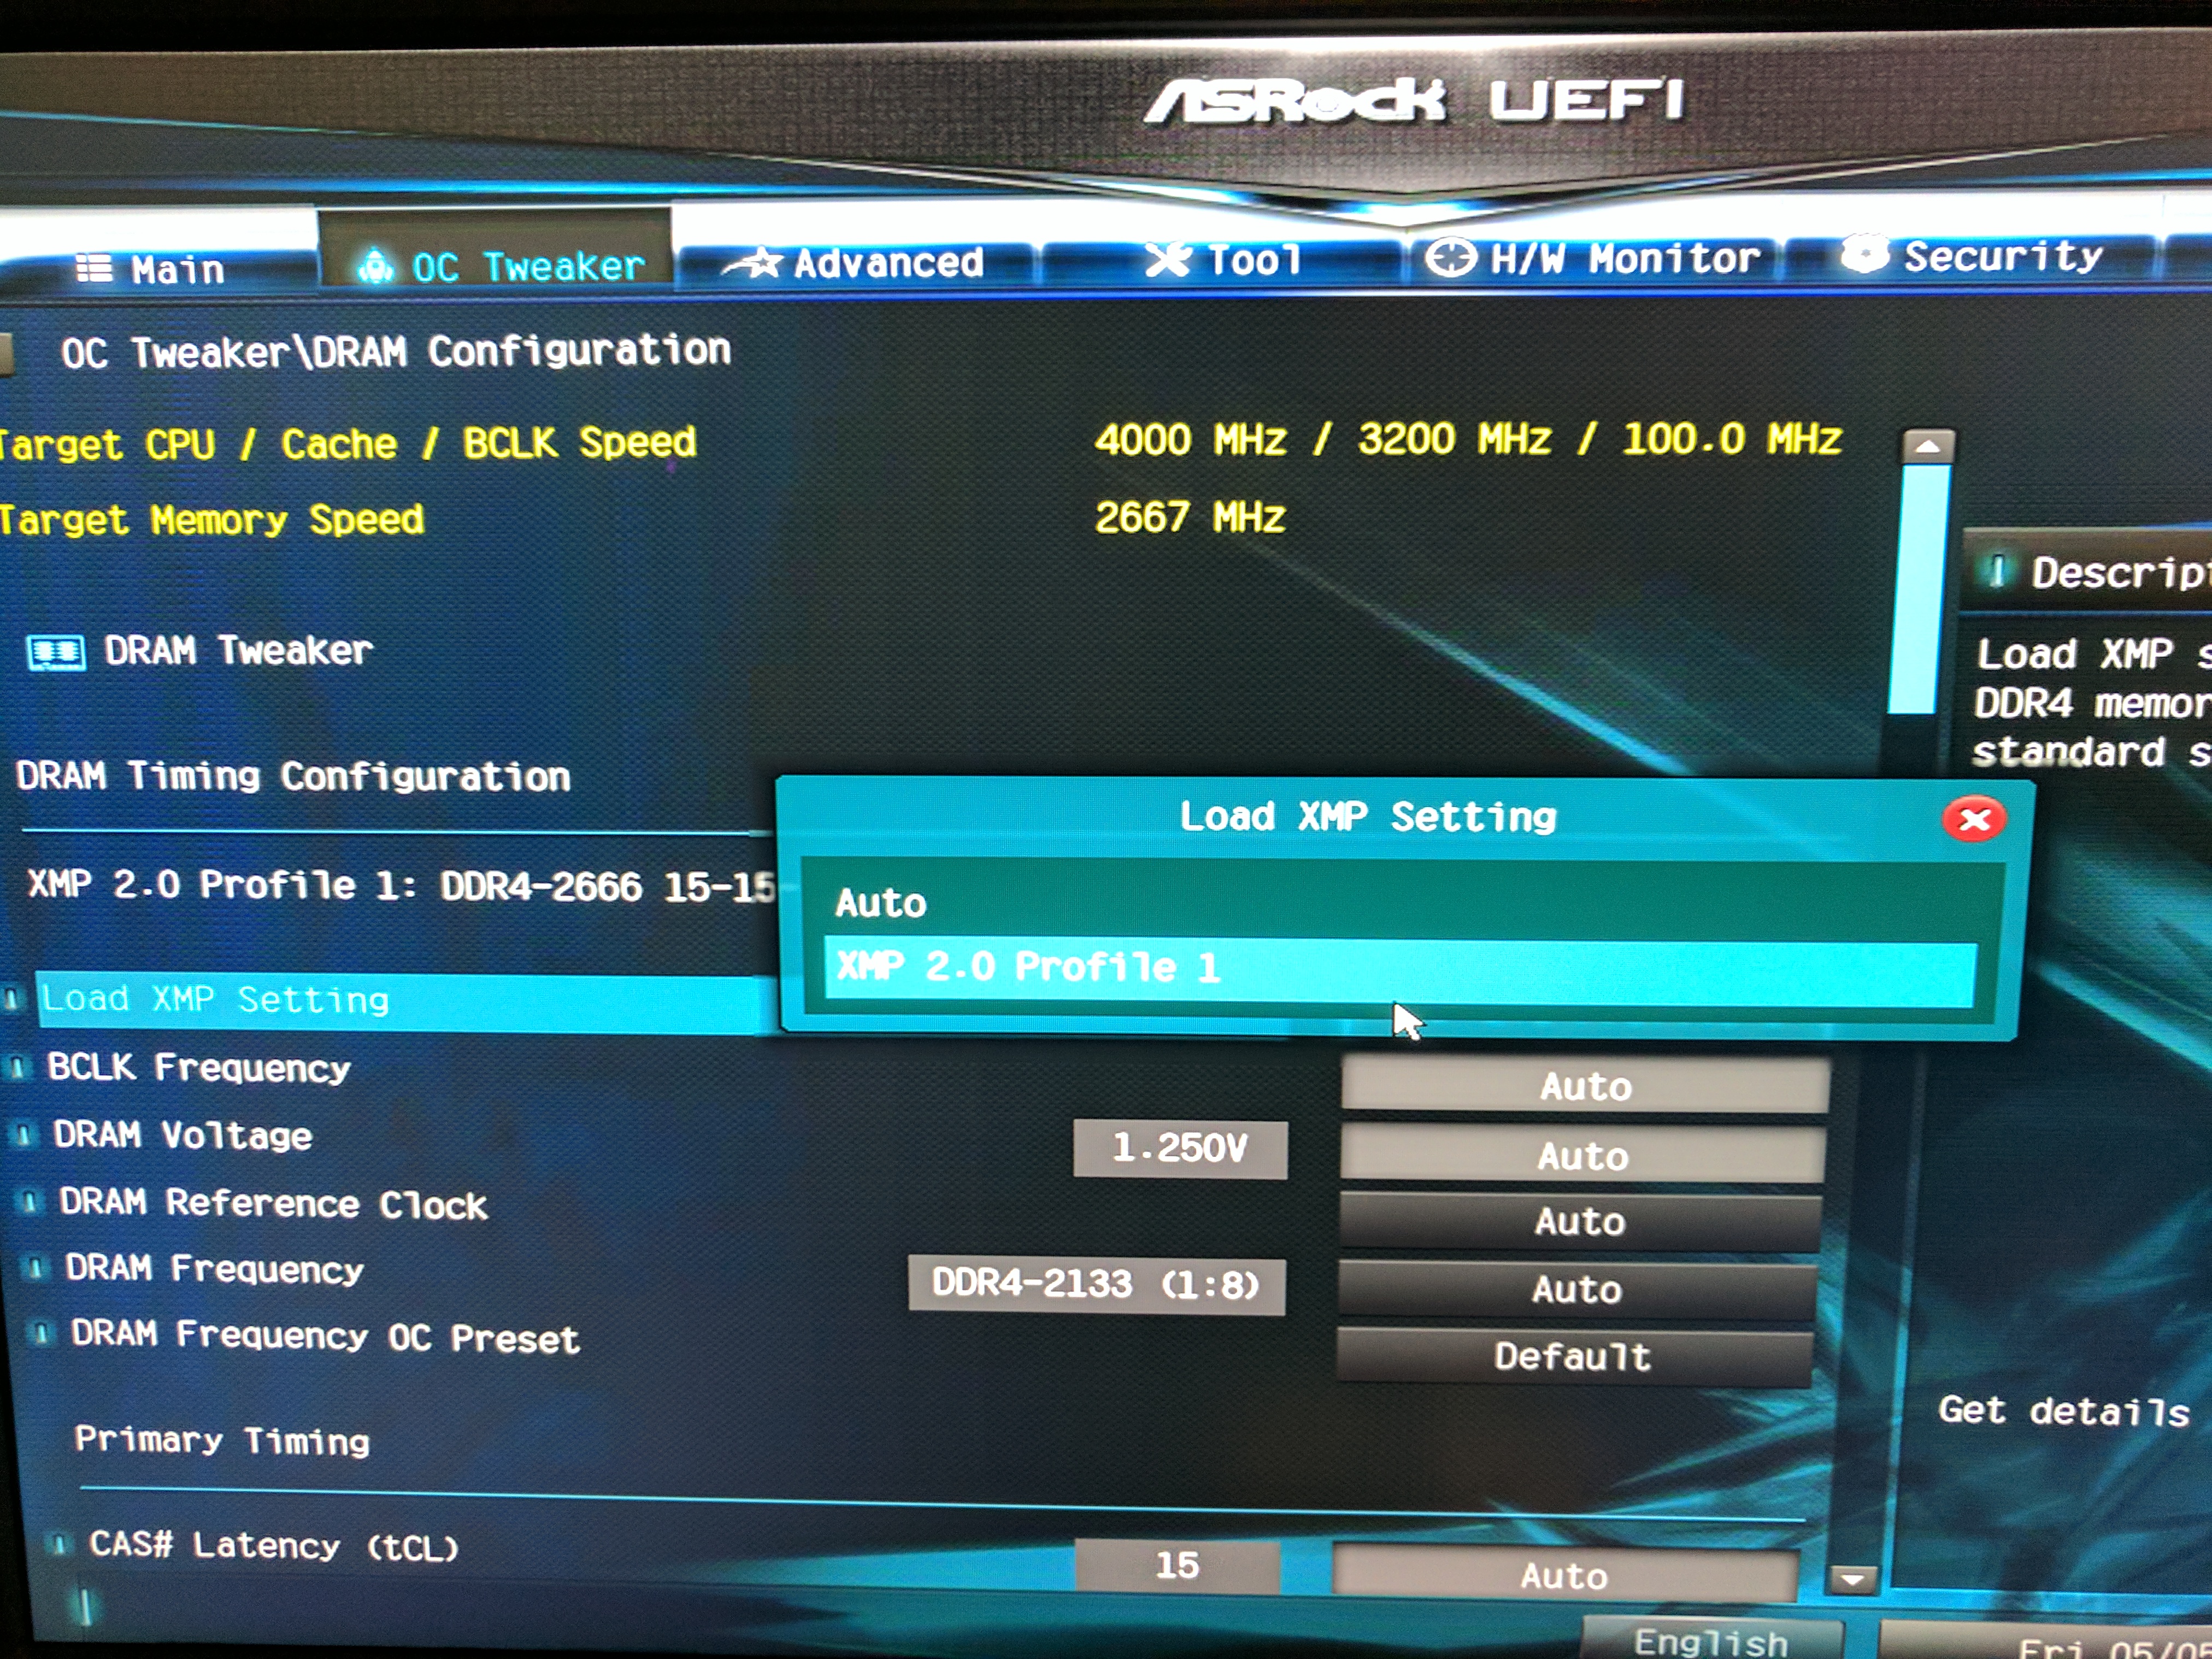
To set the memory frequency and timings, click on the DRAM Configuration folder on the same OC Tweaker tab. This will bring you to a new page. Click on the box labeled Auto next to the Load XMP Setting bar. This will cause a pop up to appear. Click on XMP 2.0 Profile 1, then hit F10 to save the BIOS settings and exit.
Benchmark Results
The Intel Core i7-6800K is clocked at an all-core frequency of 4.0 GHz, and the 16GB (2 x 8GB) G.Skill Ripjaws V DDR4-2666 features CAS timings of 15-15-15-35. The Zotac GeForce GTX 1080 AMP! graphics card is factory-overclocked to a 1683 MHz base clock and a boost speed of 1822 MHz.
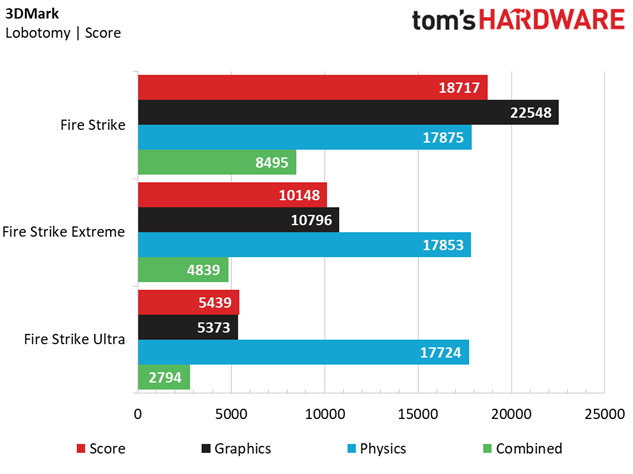
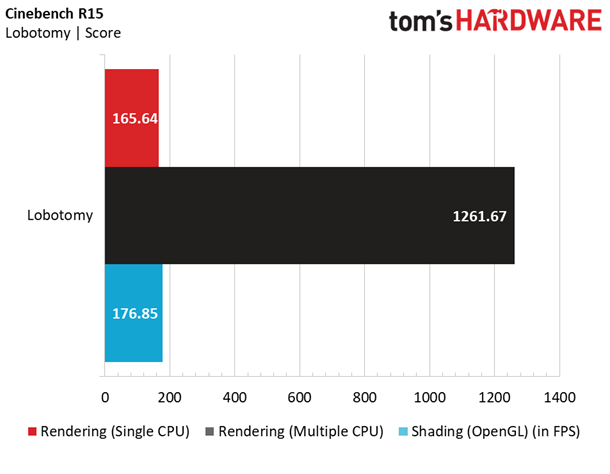
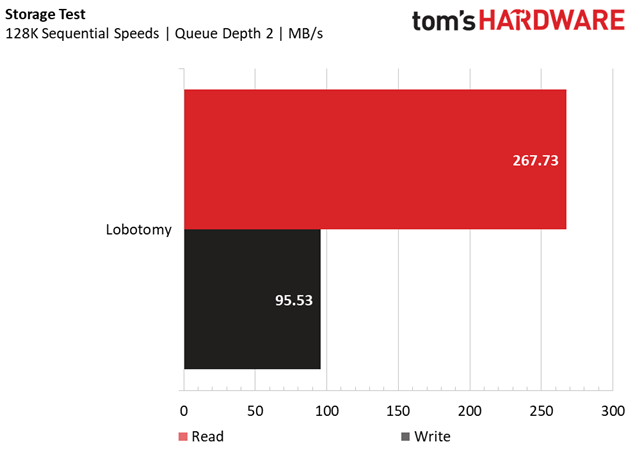
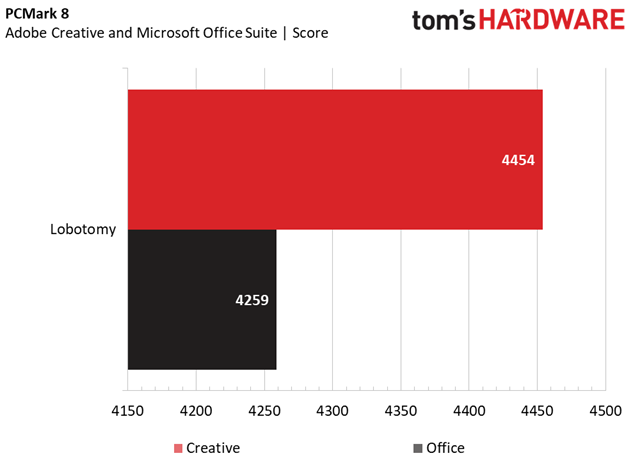
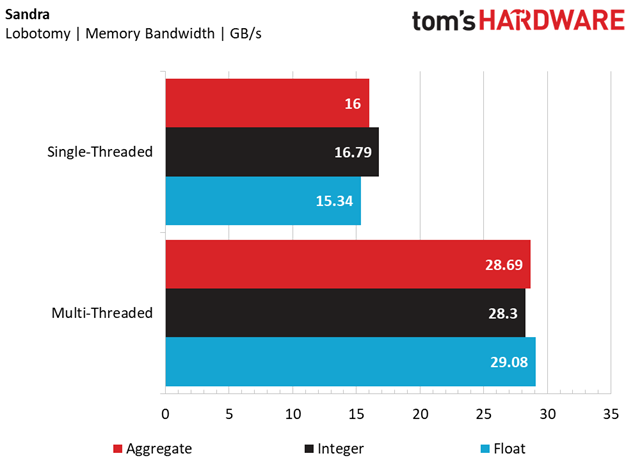
The 3DMark Fire Strike results portend gaming greatness, highlighted by high Physics scores across the gamut of Fire Stirke tests thanks to the Lobotomy's 6-core CPU. The Cinebench results also speak to the processor's higher core count, with multi-threaded performance that beats quad-core CPUs by about 200 points.
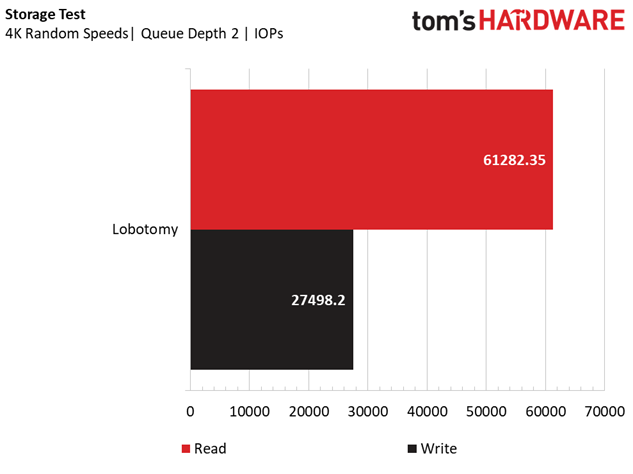
The storage test results are somewhat disheartening, with dismal sequential read performance and sequential write speeds similar to a standard HDD. The 4K random read and write IOPs make up for that somewhat, but this isn't a performance SSD by any means. It's still decidedly better (faster) than a traditional HDD for a main volume.
Memory bandwidth is similarly stunted, with the dual-channel kit of RAM not living up to the full potential of the X99's quad-channel controller, which results in lower total peak memory bandwidth in our single-threaded Sandra tests. The Lobotomy achieves lower-than-average scores (for a system with an SSD, 16GB of memory, a GTX 1080, and a 6-core Intel processor) in PCMark 8.
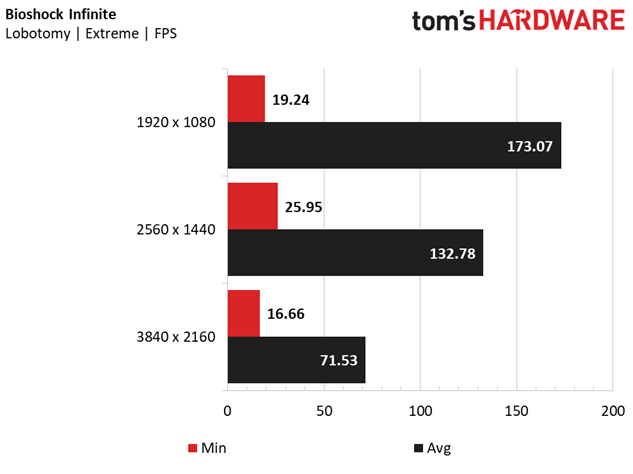
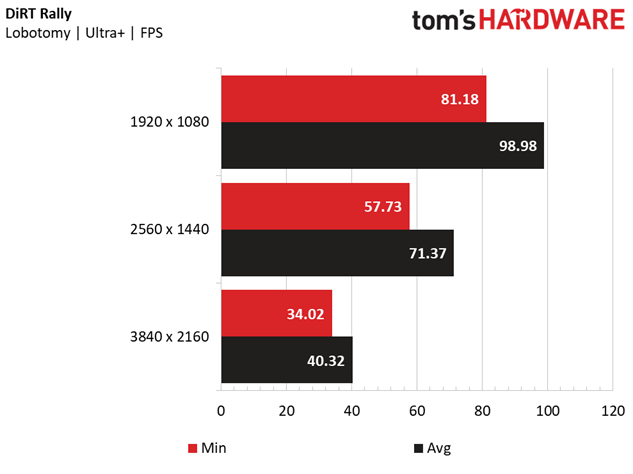
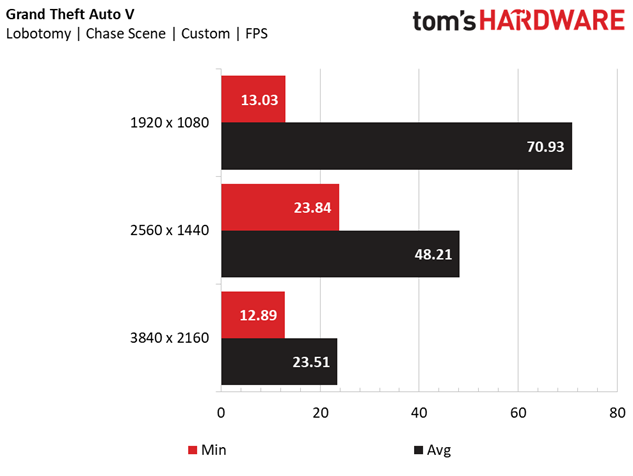
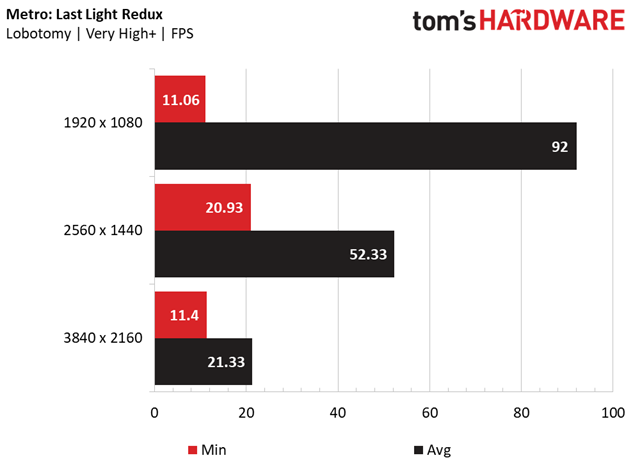
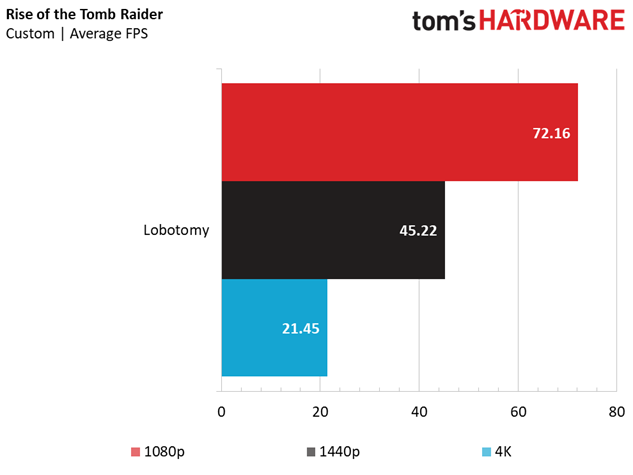
The memory and storage subsystems don't hold any weight in the gaming benchmarks, and the results are more on par with what you'd expect to see in a $1,500 PC Build. The Lobotomy achieves playable framerates at 2560 x 1440 in hardware-punishing games such as Rise of the Tomb Raider, GTAV, and Metro: Last Light Redux, and 4K can be achieved by backing off on some of the details and AA settings. There's no problem getting above 60 FPS in Bioshock Infinite at 4K, and DiRT Rally is quite playable (about 40 FPS) at the most demanding settings at 3840 x 2160.
Final Analysis
Our Best $1500 PC Build is the ground level budget point for an Intel Core i7-6800K and an Nvidia GeForce GTX 1080, placing its capabilities at the top of the enthusiast gaming heap. This rig goes by the name Lobotomy, a nod perhaps to the 16GB of G.Skill DDR4-2666 memory's dual channel operation, which discards the AsRock X99 Extreme4's quad-channel memory capabilities. We're sticklers for investing in the full potential of a platform, and would highly suggest going with both of the PC's proverbial frontal lobes (a quad-channel kit of RAM) in place of the suggested dual-channel configuration.
We are big fans of the Cooler Master Masterbox 5, which is the first entry in our series to feature a windowed side panel (finally), in addition to a PSU shroud, ample cable management options, and easy-to-use drive bays. It offers great expansion options (you can purchase additional components for the chassis) and plenty of room to work, and it's an ideal starting point for any build if you want a sleek and stylish case. The EVGA 650 GS PSU is also an ideal choice for the hardware's power requirements.
We're suspicious of how relevant the aging X99 platform (and Intel Core i7-6800K) is when X299 CPUs and motherboards are starting to hit the market, but we can't fault the community for voting for this rig at a time when AMD Ryzen, Intel X299, and the GTX 1080 Ti weren't available yet. However, pricing out an Intel Core i7 build with a GTX 1080 and 16GB of memory is a tough task at the $1,500 price point no matter which way you slice it, and we're impressed that our first Core i7 entry wasn't just a mainstream quad-core CPU, but a 6-core X99 platform.
If the newest generation of Intel products or AMD Ryzen platforms are readily available, we wouldn't blame you for looking at those as options if you can manage to find a motherboard/CPU pairing at around the same cost as this configuration. Indeed, you could get the top-of-the-line Ryzen 7 1800X for half the price of this Intel CPU, and an X370 motherboard for half the price of this X99 offering, and that $600 savings could practically buy a second graphics card . . . but we'd probably spend it on upgrading the memory and the SSD.
Indeed, the storage is almost a farce; the 120GB Sandisk Plus SSD feels like having a thumb drive for a primary boot partition. Sure, it's faster than a traditional HDD, and there is a 1TB HDD to house your game library, but the capacity and sequential read/write speed of the SSD leaves us wanting. We saw similar performance shortcomings with this particular SSD in our DRAMless SSD Roundup. However, the budget was tight enough that SR-71 Blackbird had to sacrifice capacity and speed for something that was simply adequate (and it is still better than just a 7,200RPM HDD). A larger, more performance-driven SSD would most certainly improve your overall experience with this build if you have more cash to throw at it.
MORE: Best Deals
MORE: How To Build A PC
MORE: All PC Builds Content
Derek Forrest was a contributing freelance writer for Tom's Hardware. He covered hardware news and reviews, focusing on gaming desktops and laptops.