GeForce GTX 1080 Ti At 2.5 GHz+: Overclocking On Air, Water, And LN2
Preparing The GeForce GTX 1080 Ti For LN2
Now we're talking about extreme overclocking. Hopefully, you're ready to put some effort into preparing the hardware. Good work here is the key to success later on.
Waterproofing
We've covered the steps to overclock CPUs under LN2 multiple times; the same principles apply to graphics cards as well. If you'd like a little more background, check out De-Lidding and Overclocking Core i7-7700K with Water and LN2.
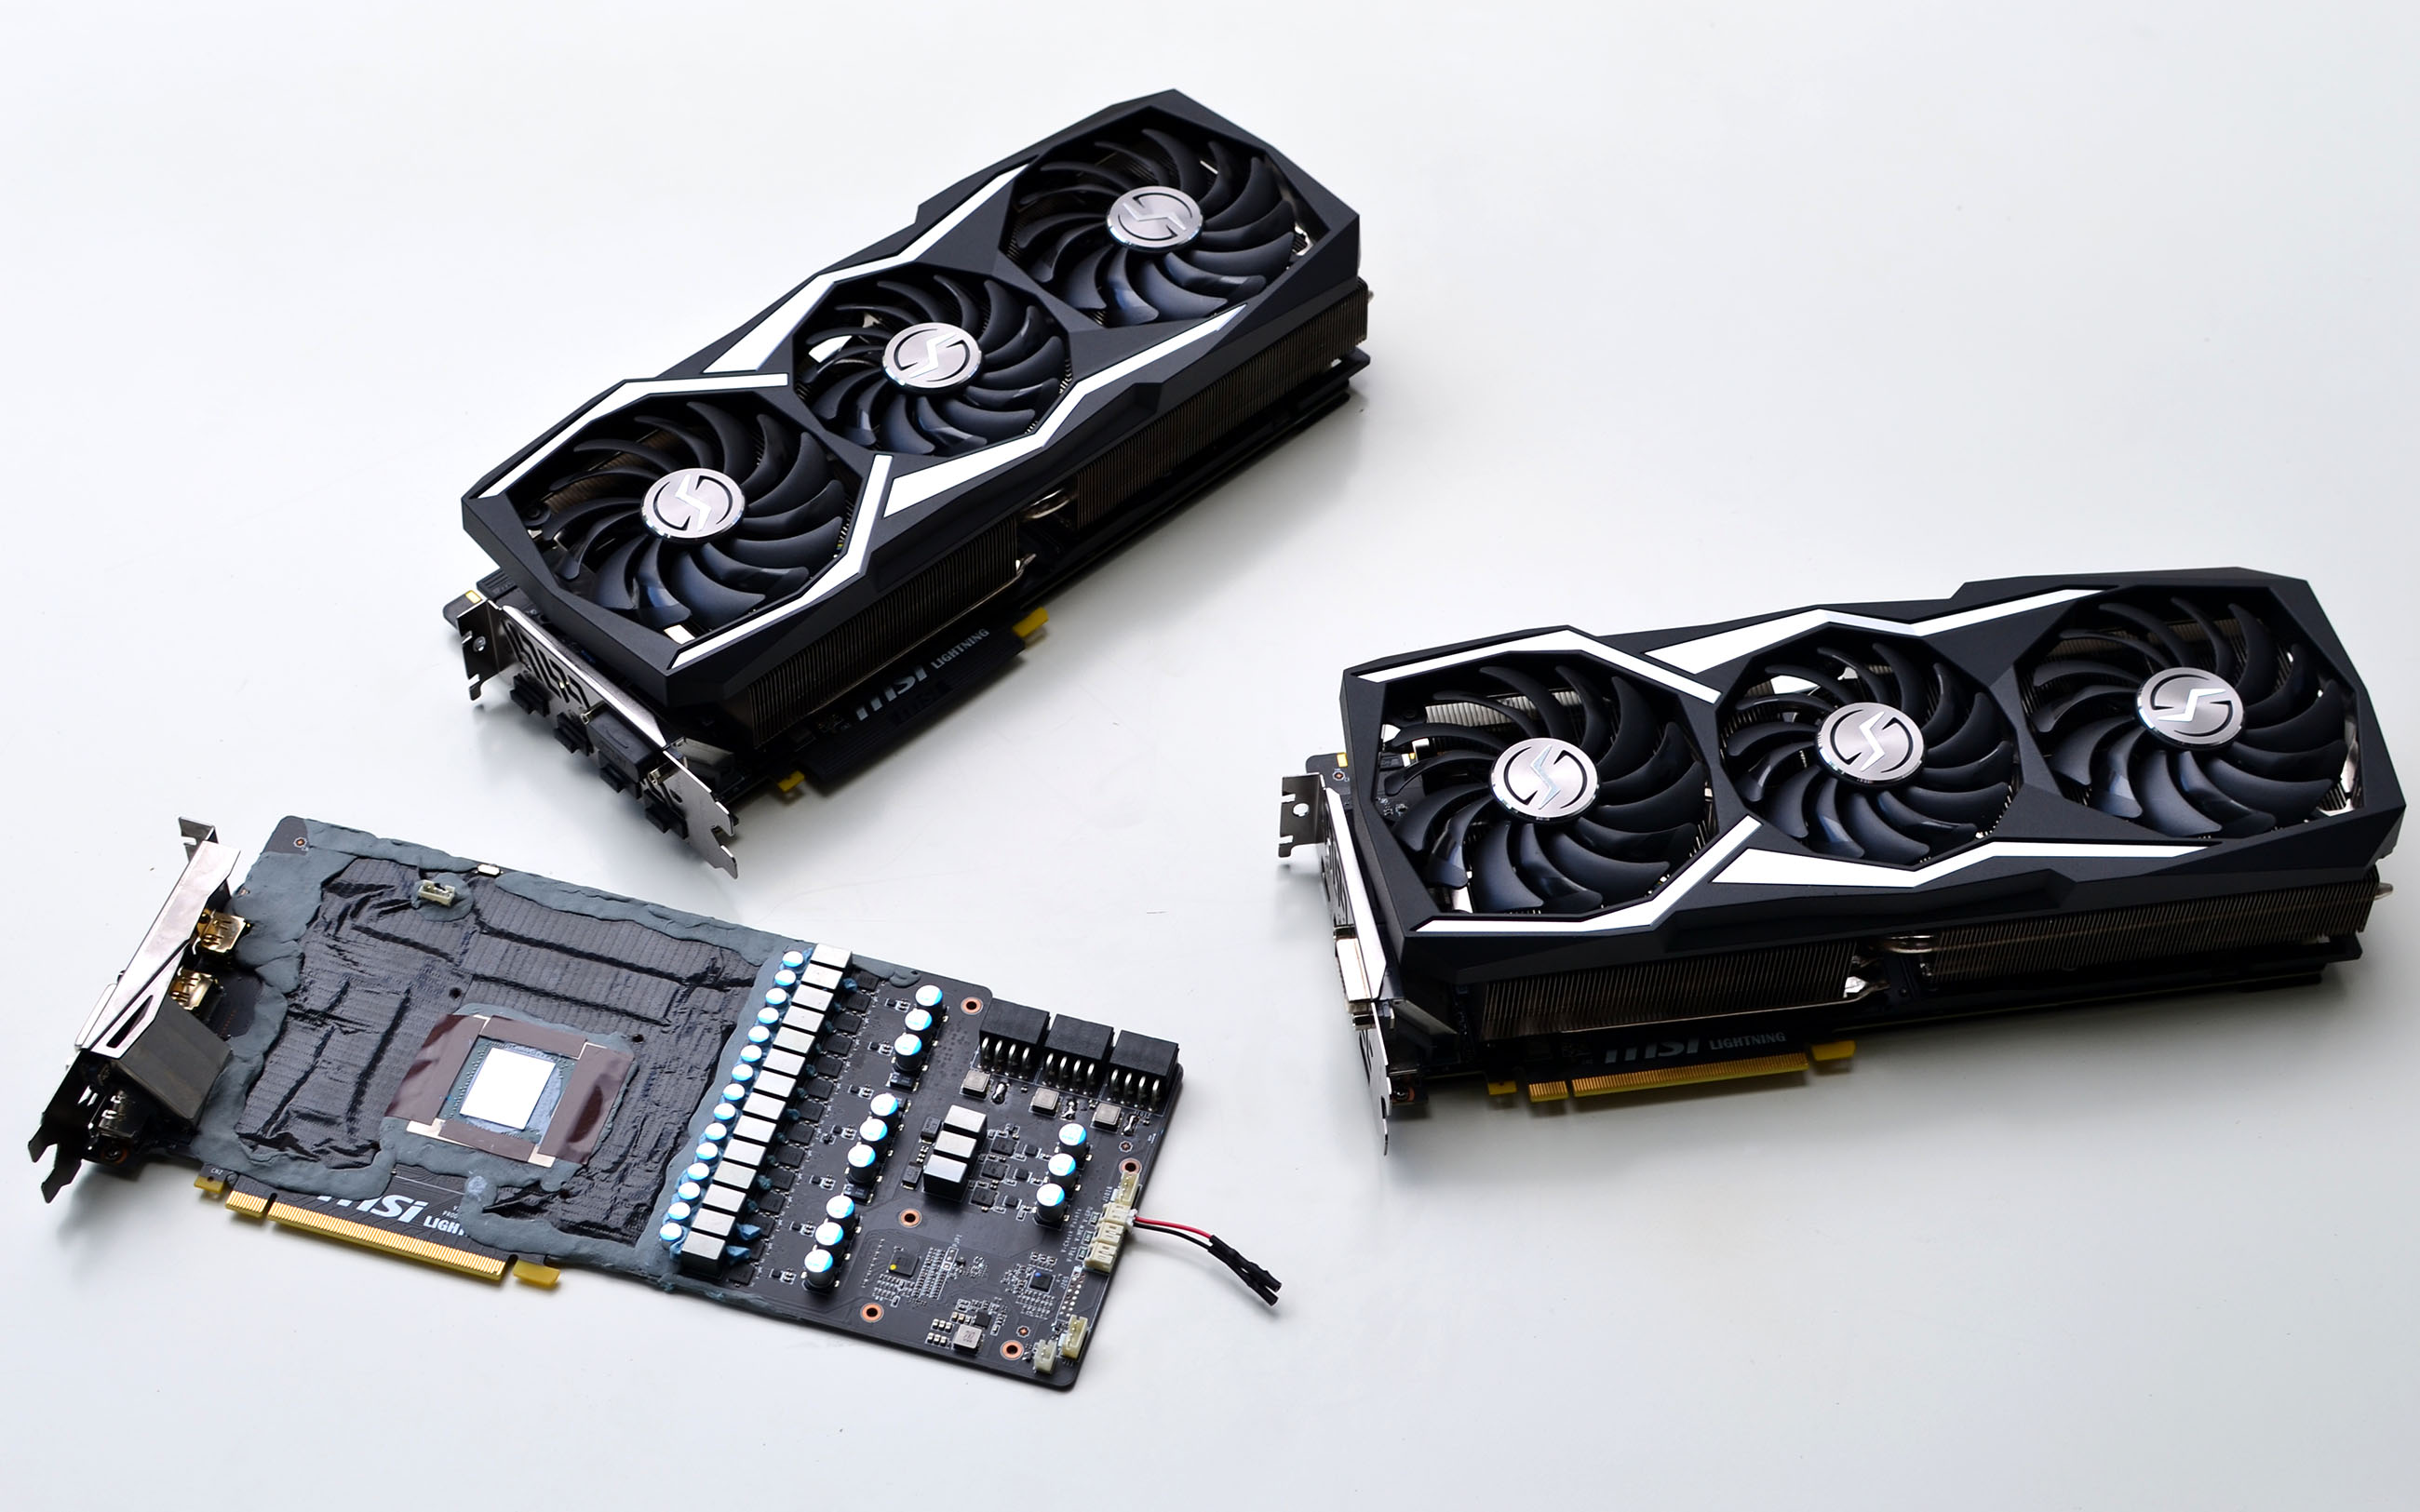
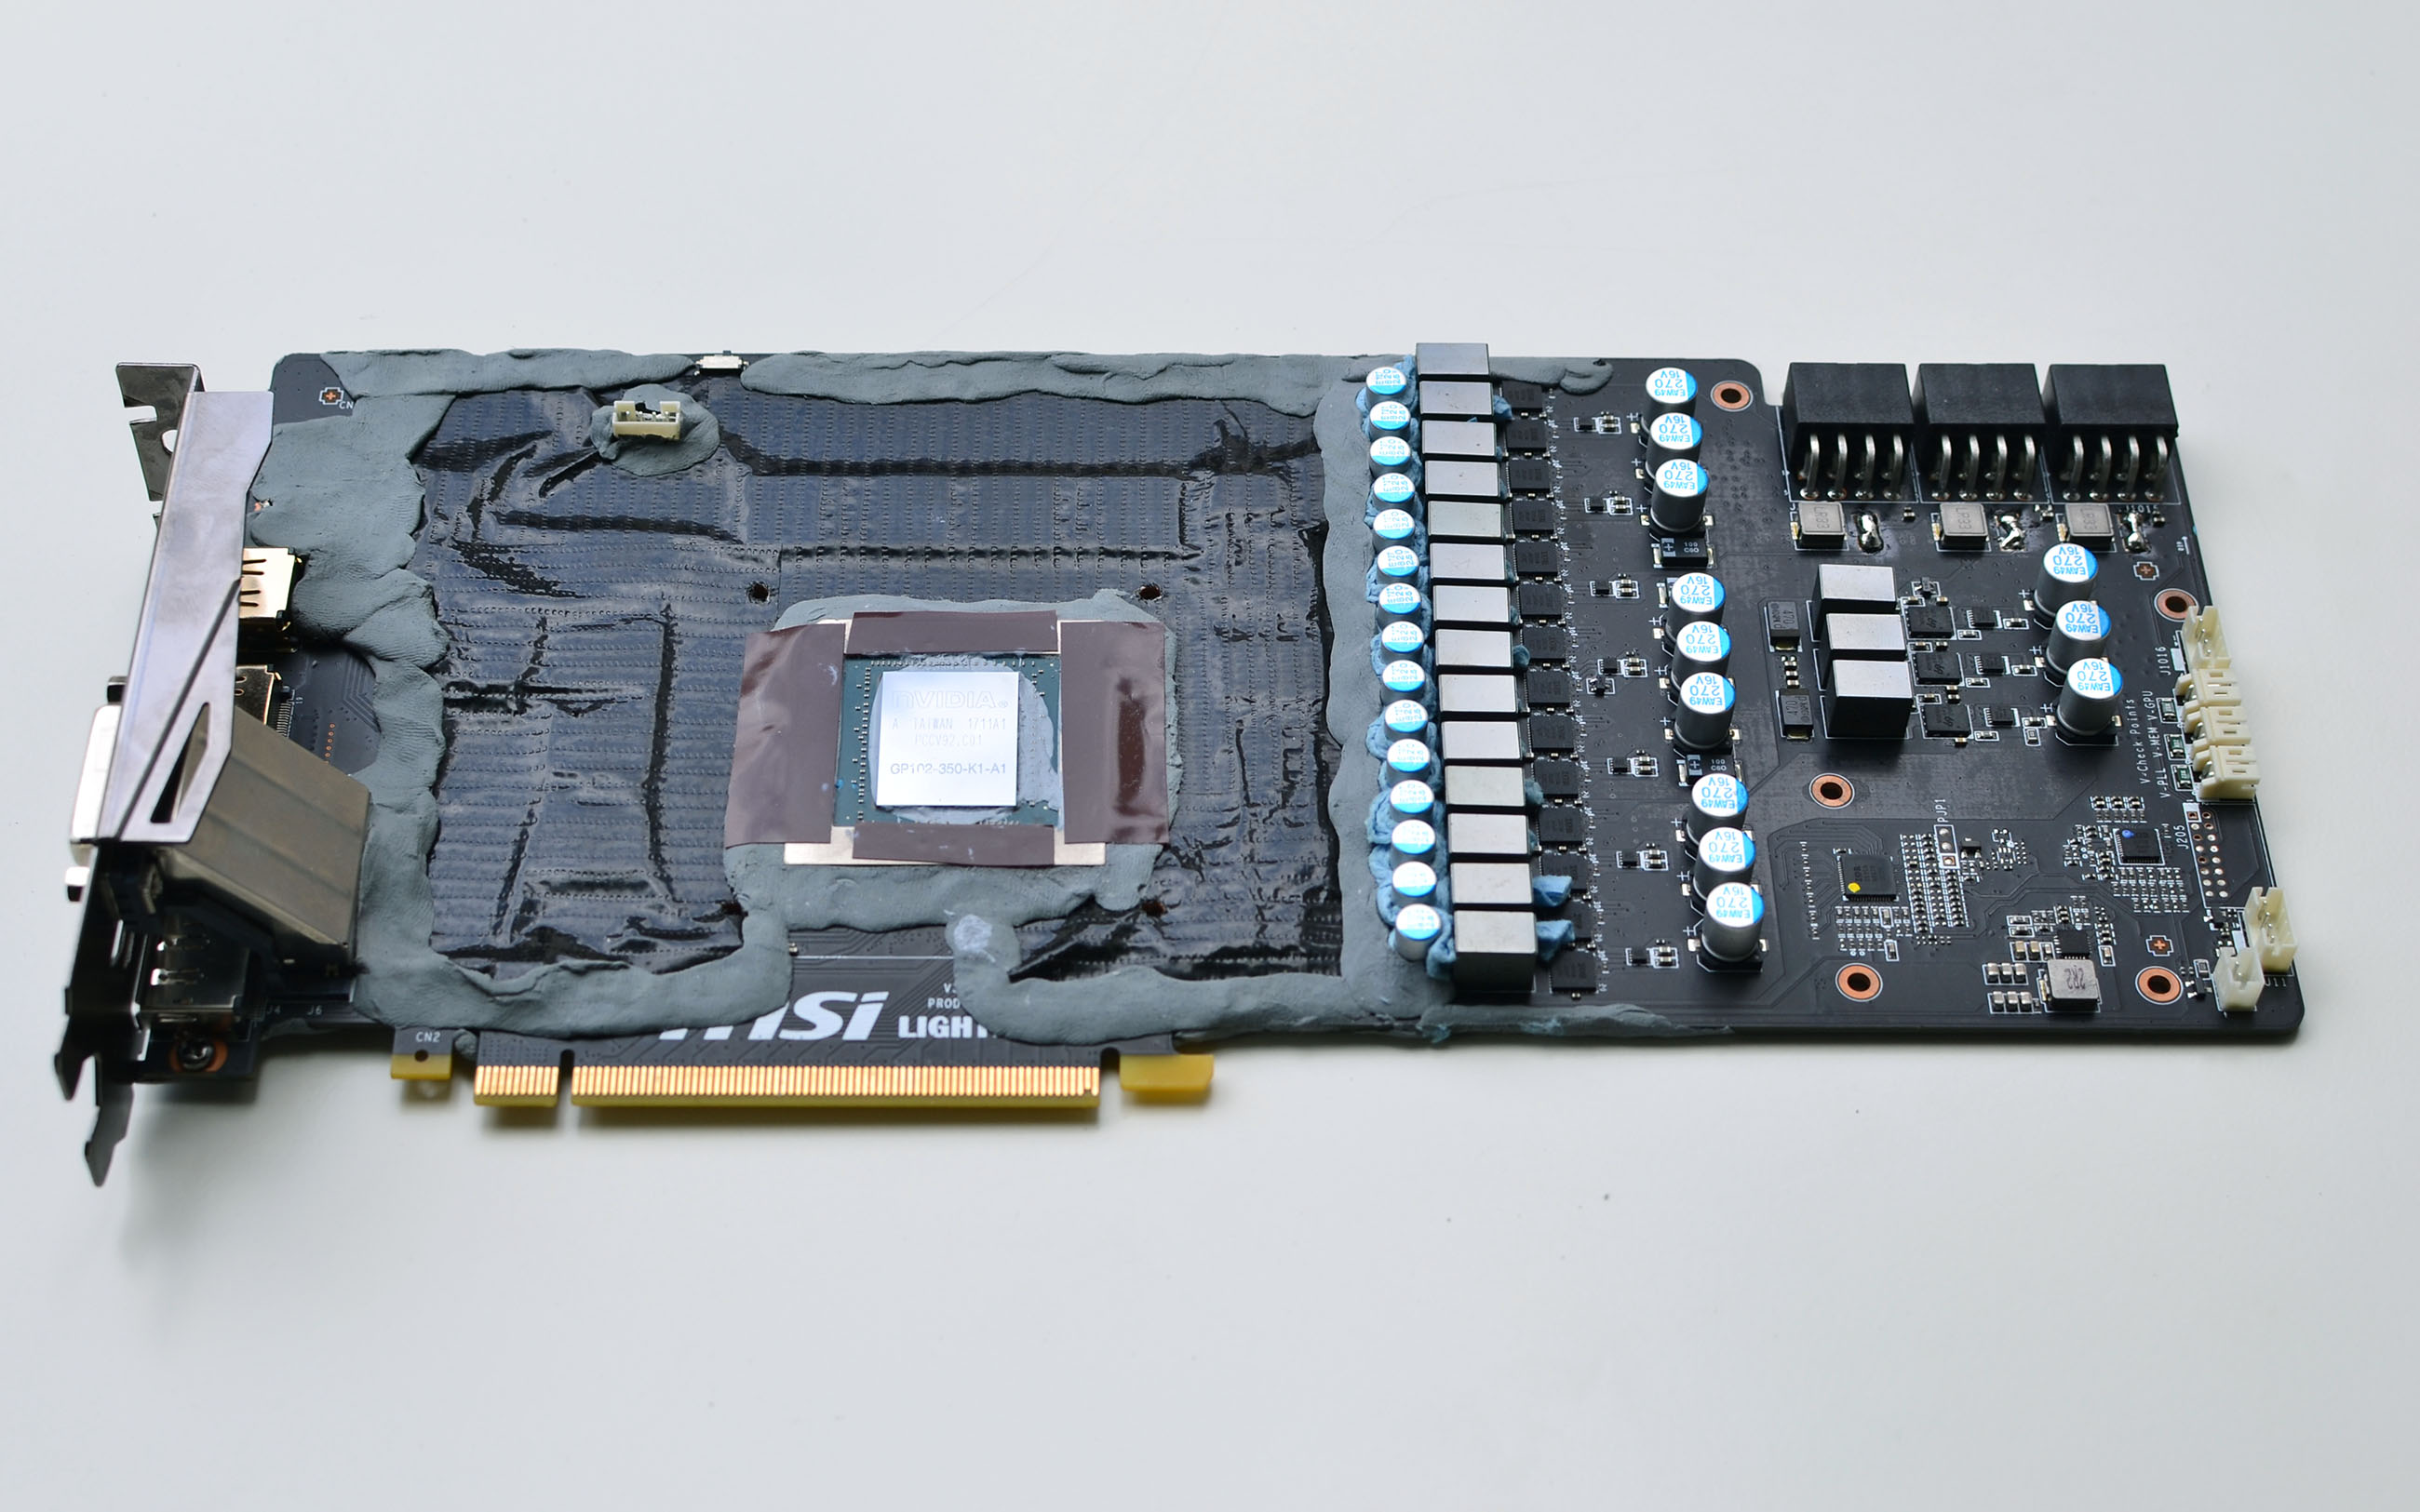
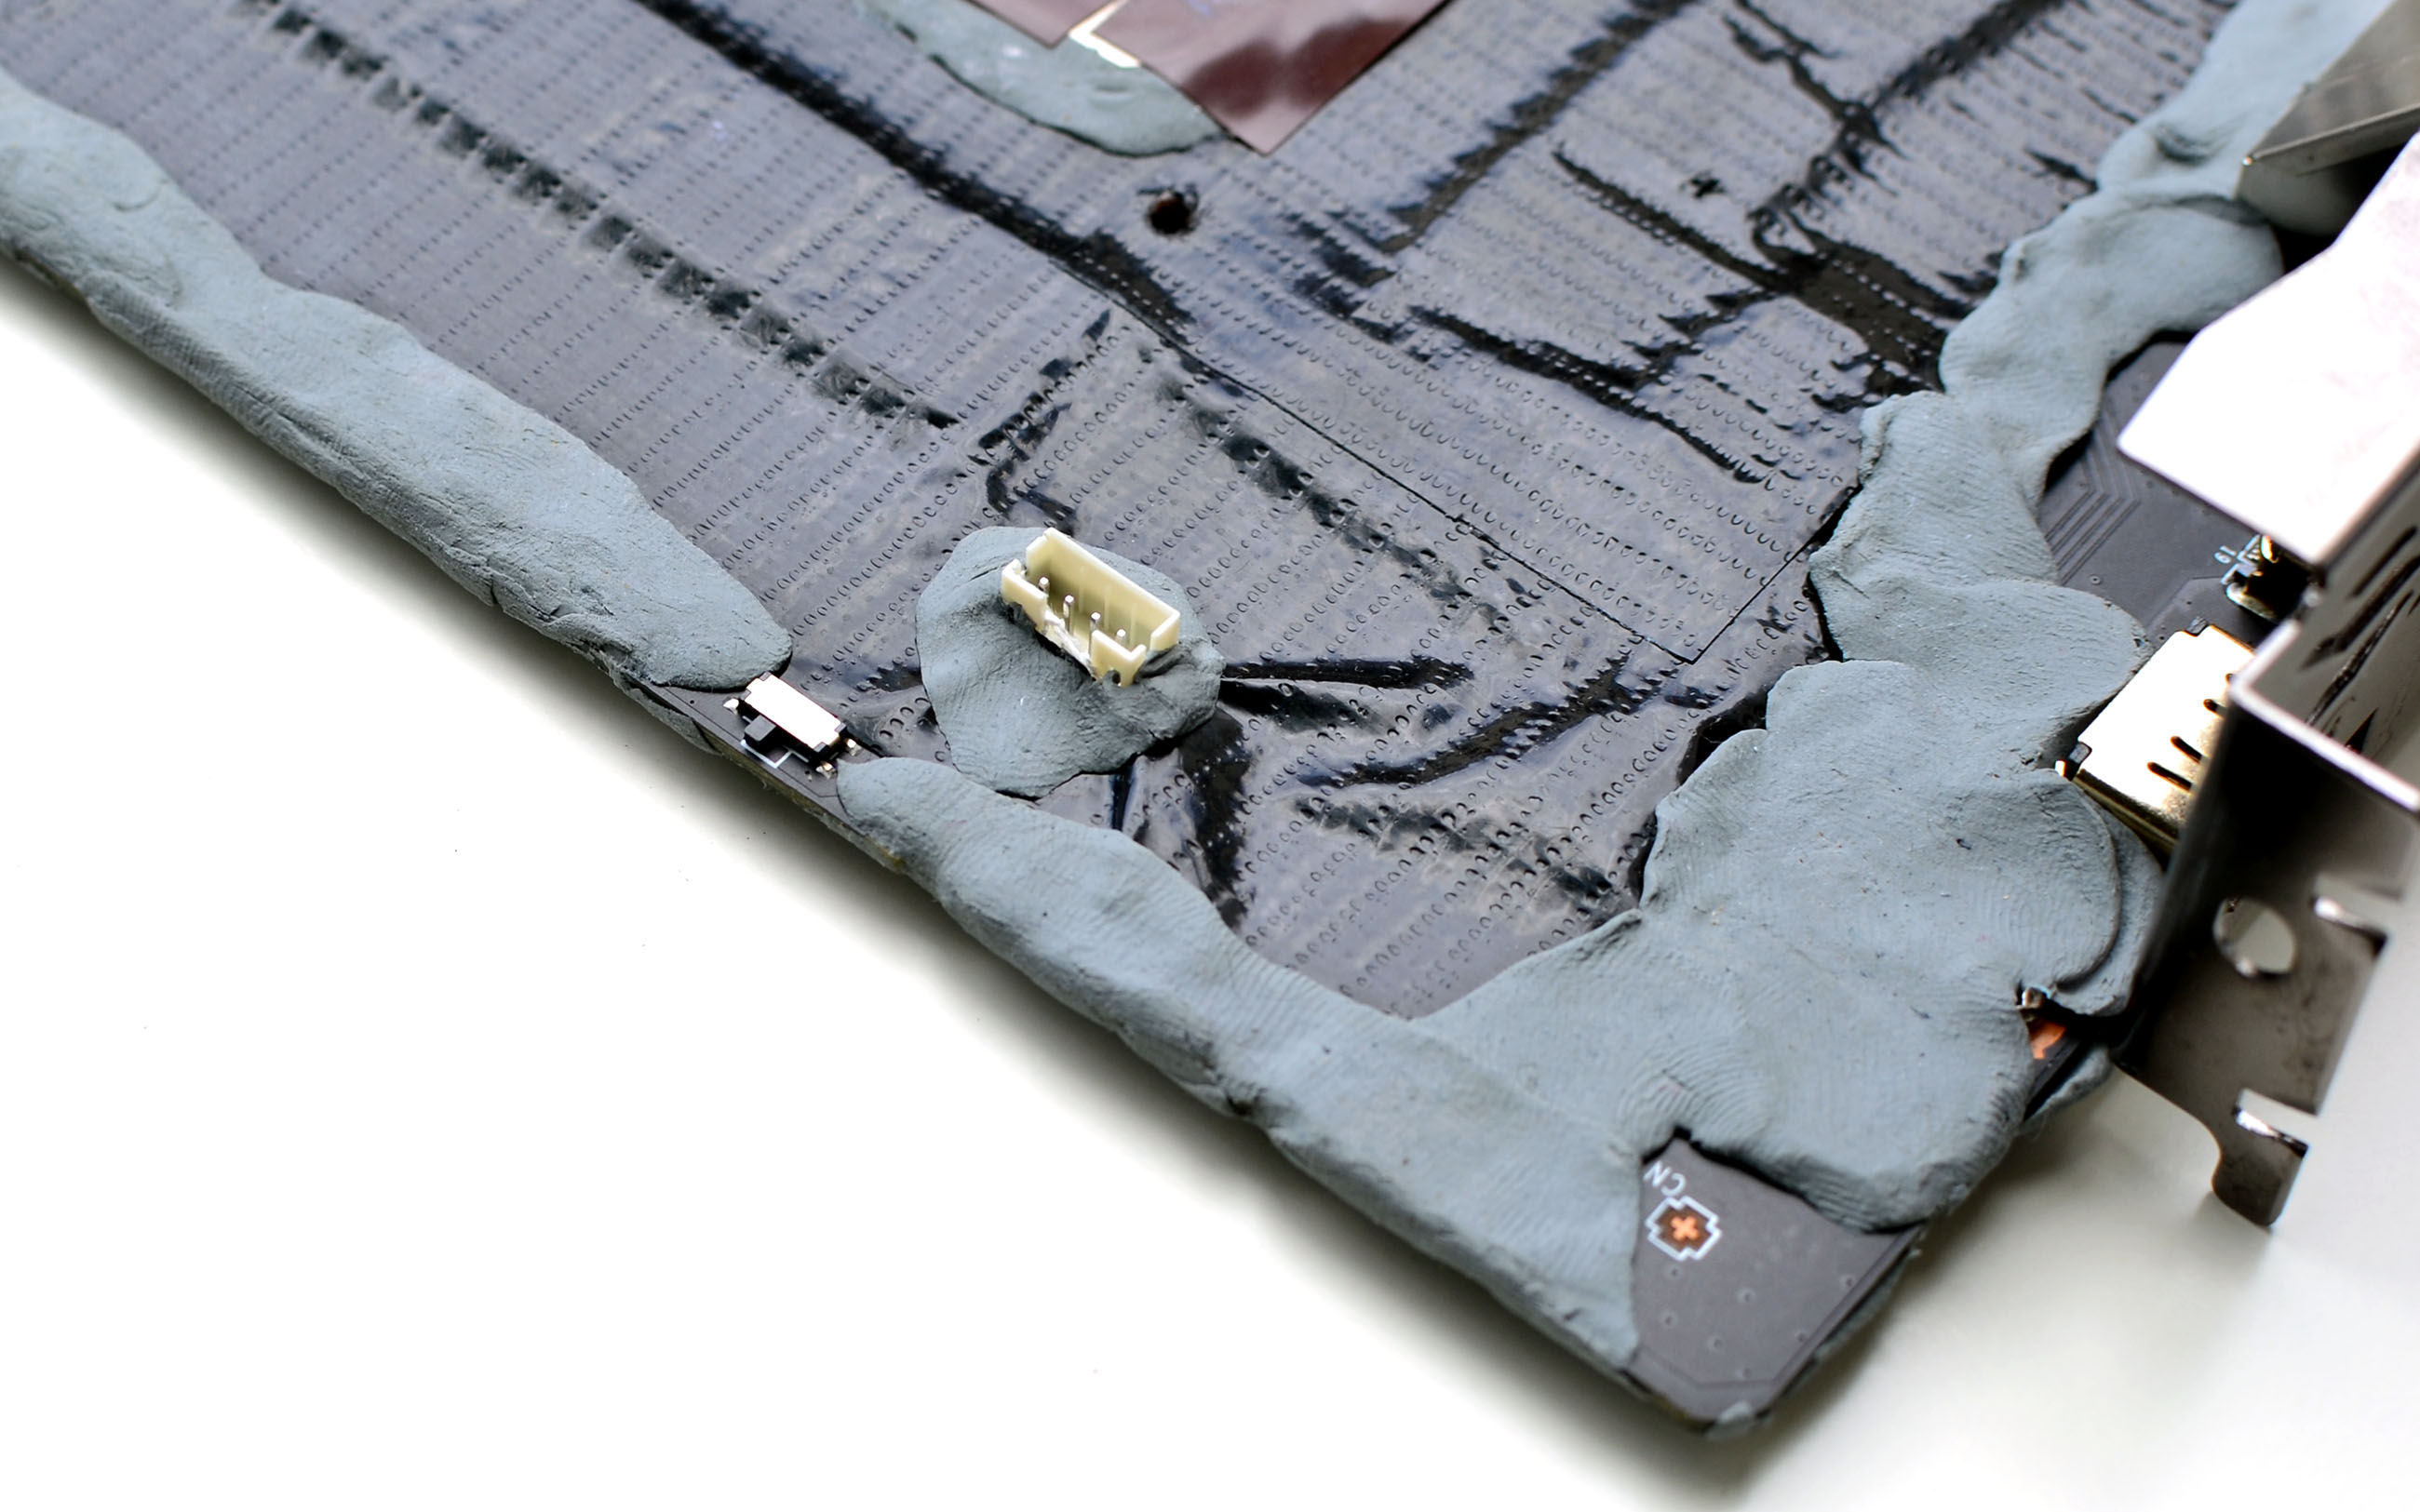
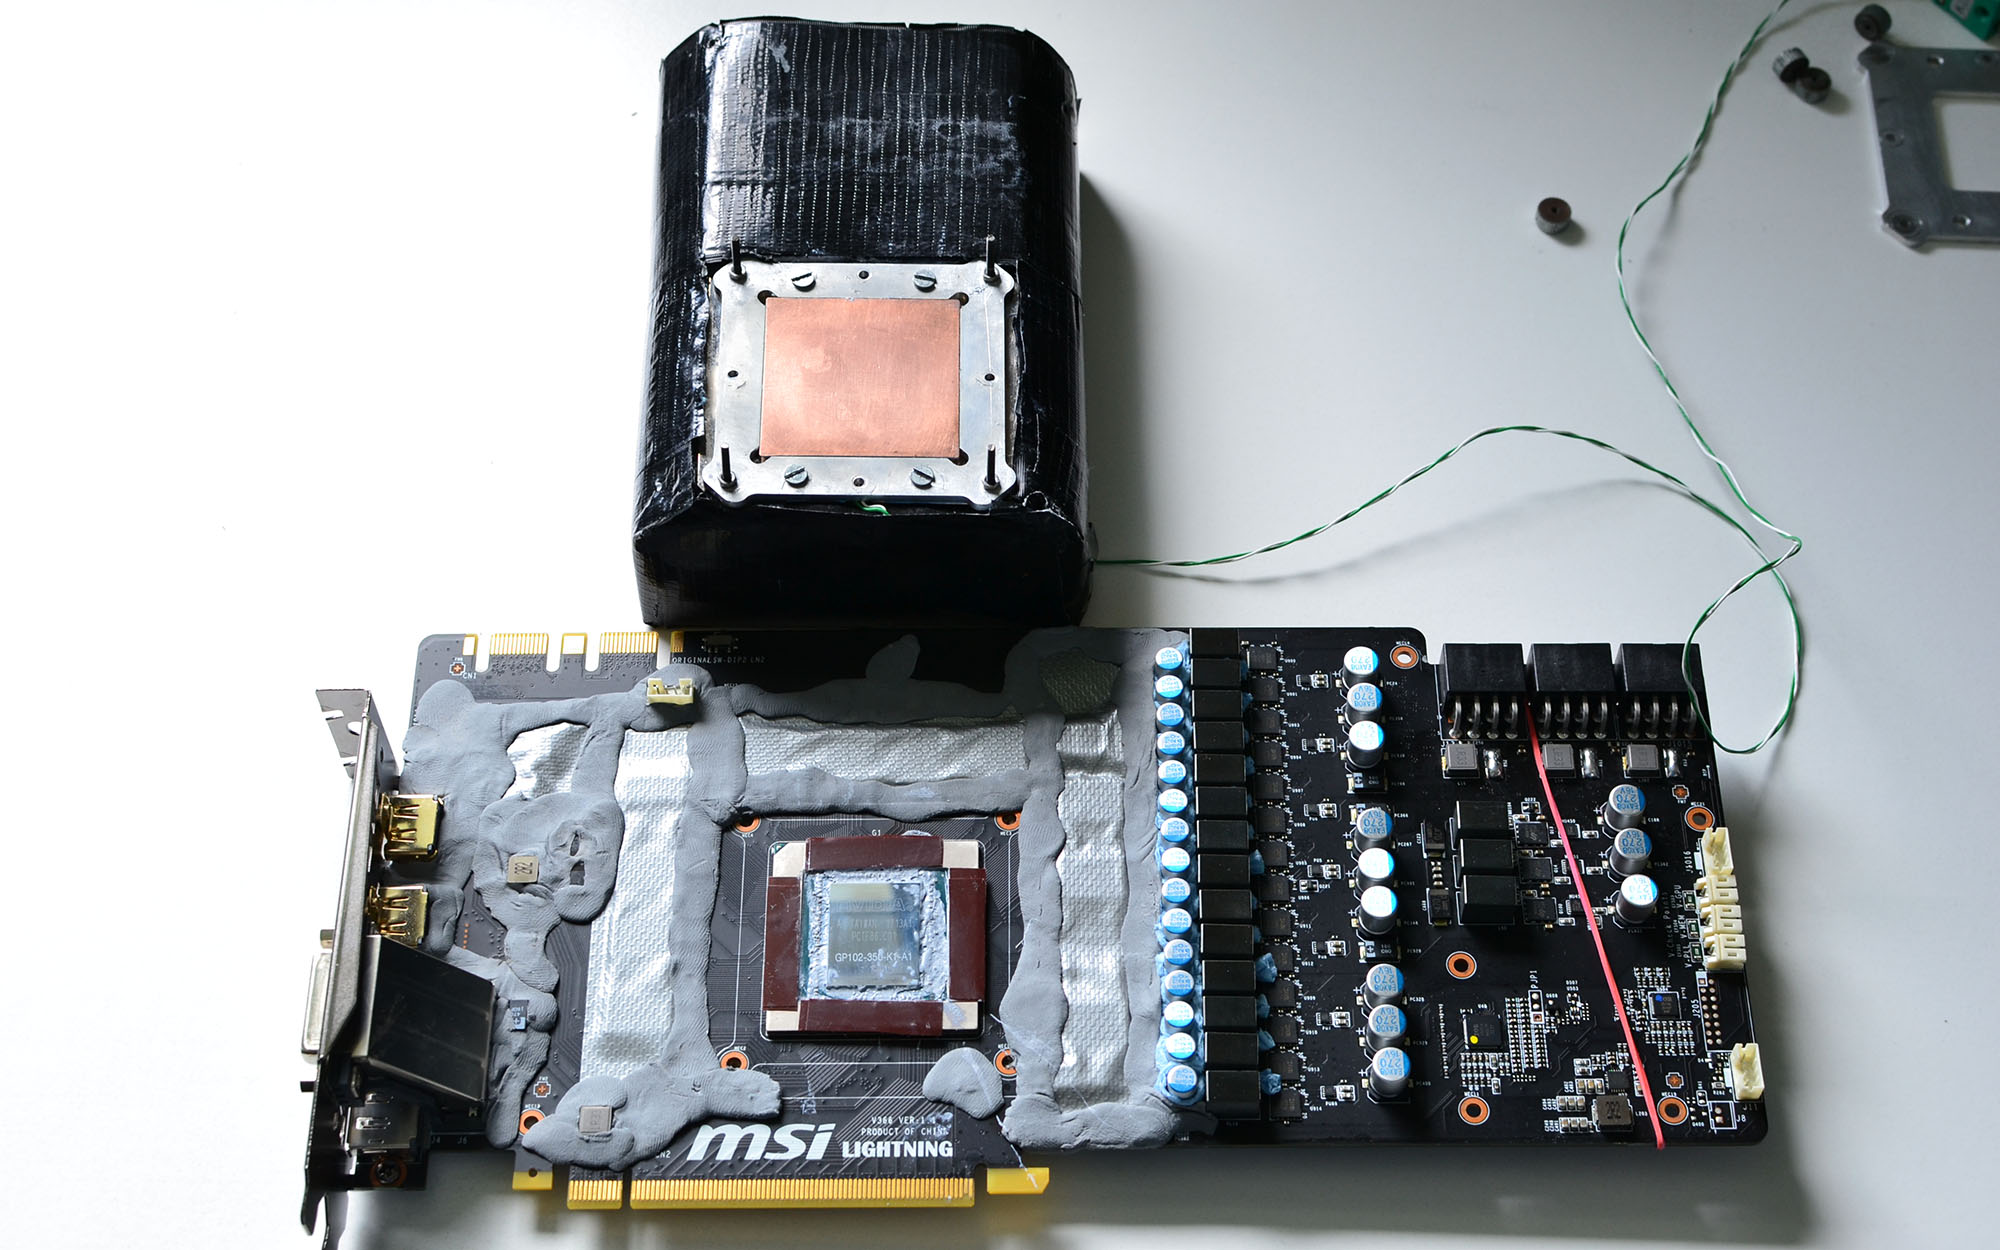
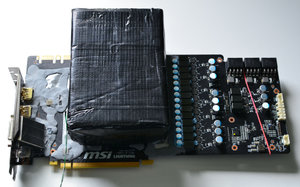
Unlike the top side of a motherboard, graphics card PCBs typically employ a lower profile; there are fewer tall components, making the on-board hardware easier to isolate. My favorite method for sealing everything off involves wide adhesive tape and kneaded eraser. It's quick to apply, easy to remove, and watertight.
You'll want to lay down long bands of tape on the areas in need of protection, and seal the boarders with kneaded eraser to keep water from seeping in. The straight sections between the capacitors and coils are filled with absorbent paper towels (blue). Don't try shoving eraser in there. While it'd be easy to apply, removing it would be almost impossible.
There's no need to protect that area to the right of the VRMs. It warms up enough during operation that the PCB remains at a positive temperature, and therefore avoids forming condensation. Just be careful. If the card is powered off for too long with LN2 applied, this barrier won't keep the board warm.
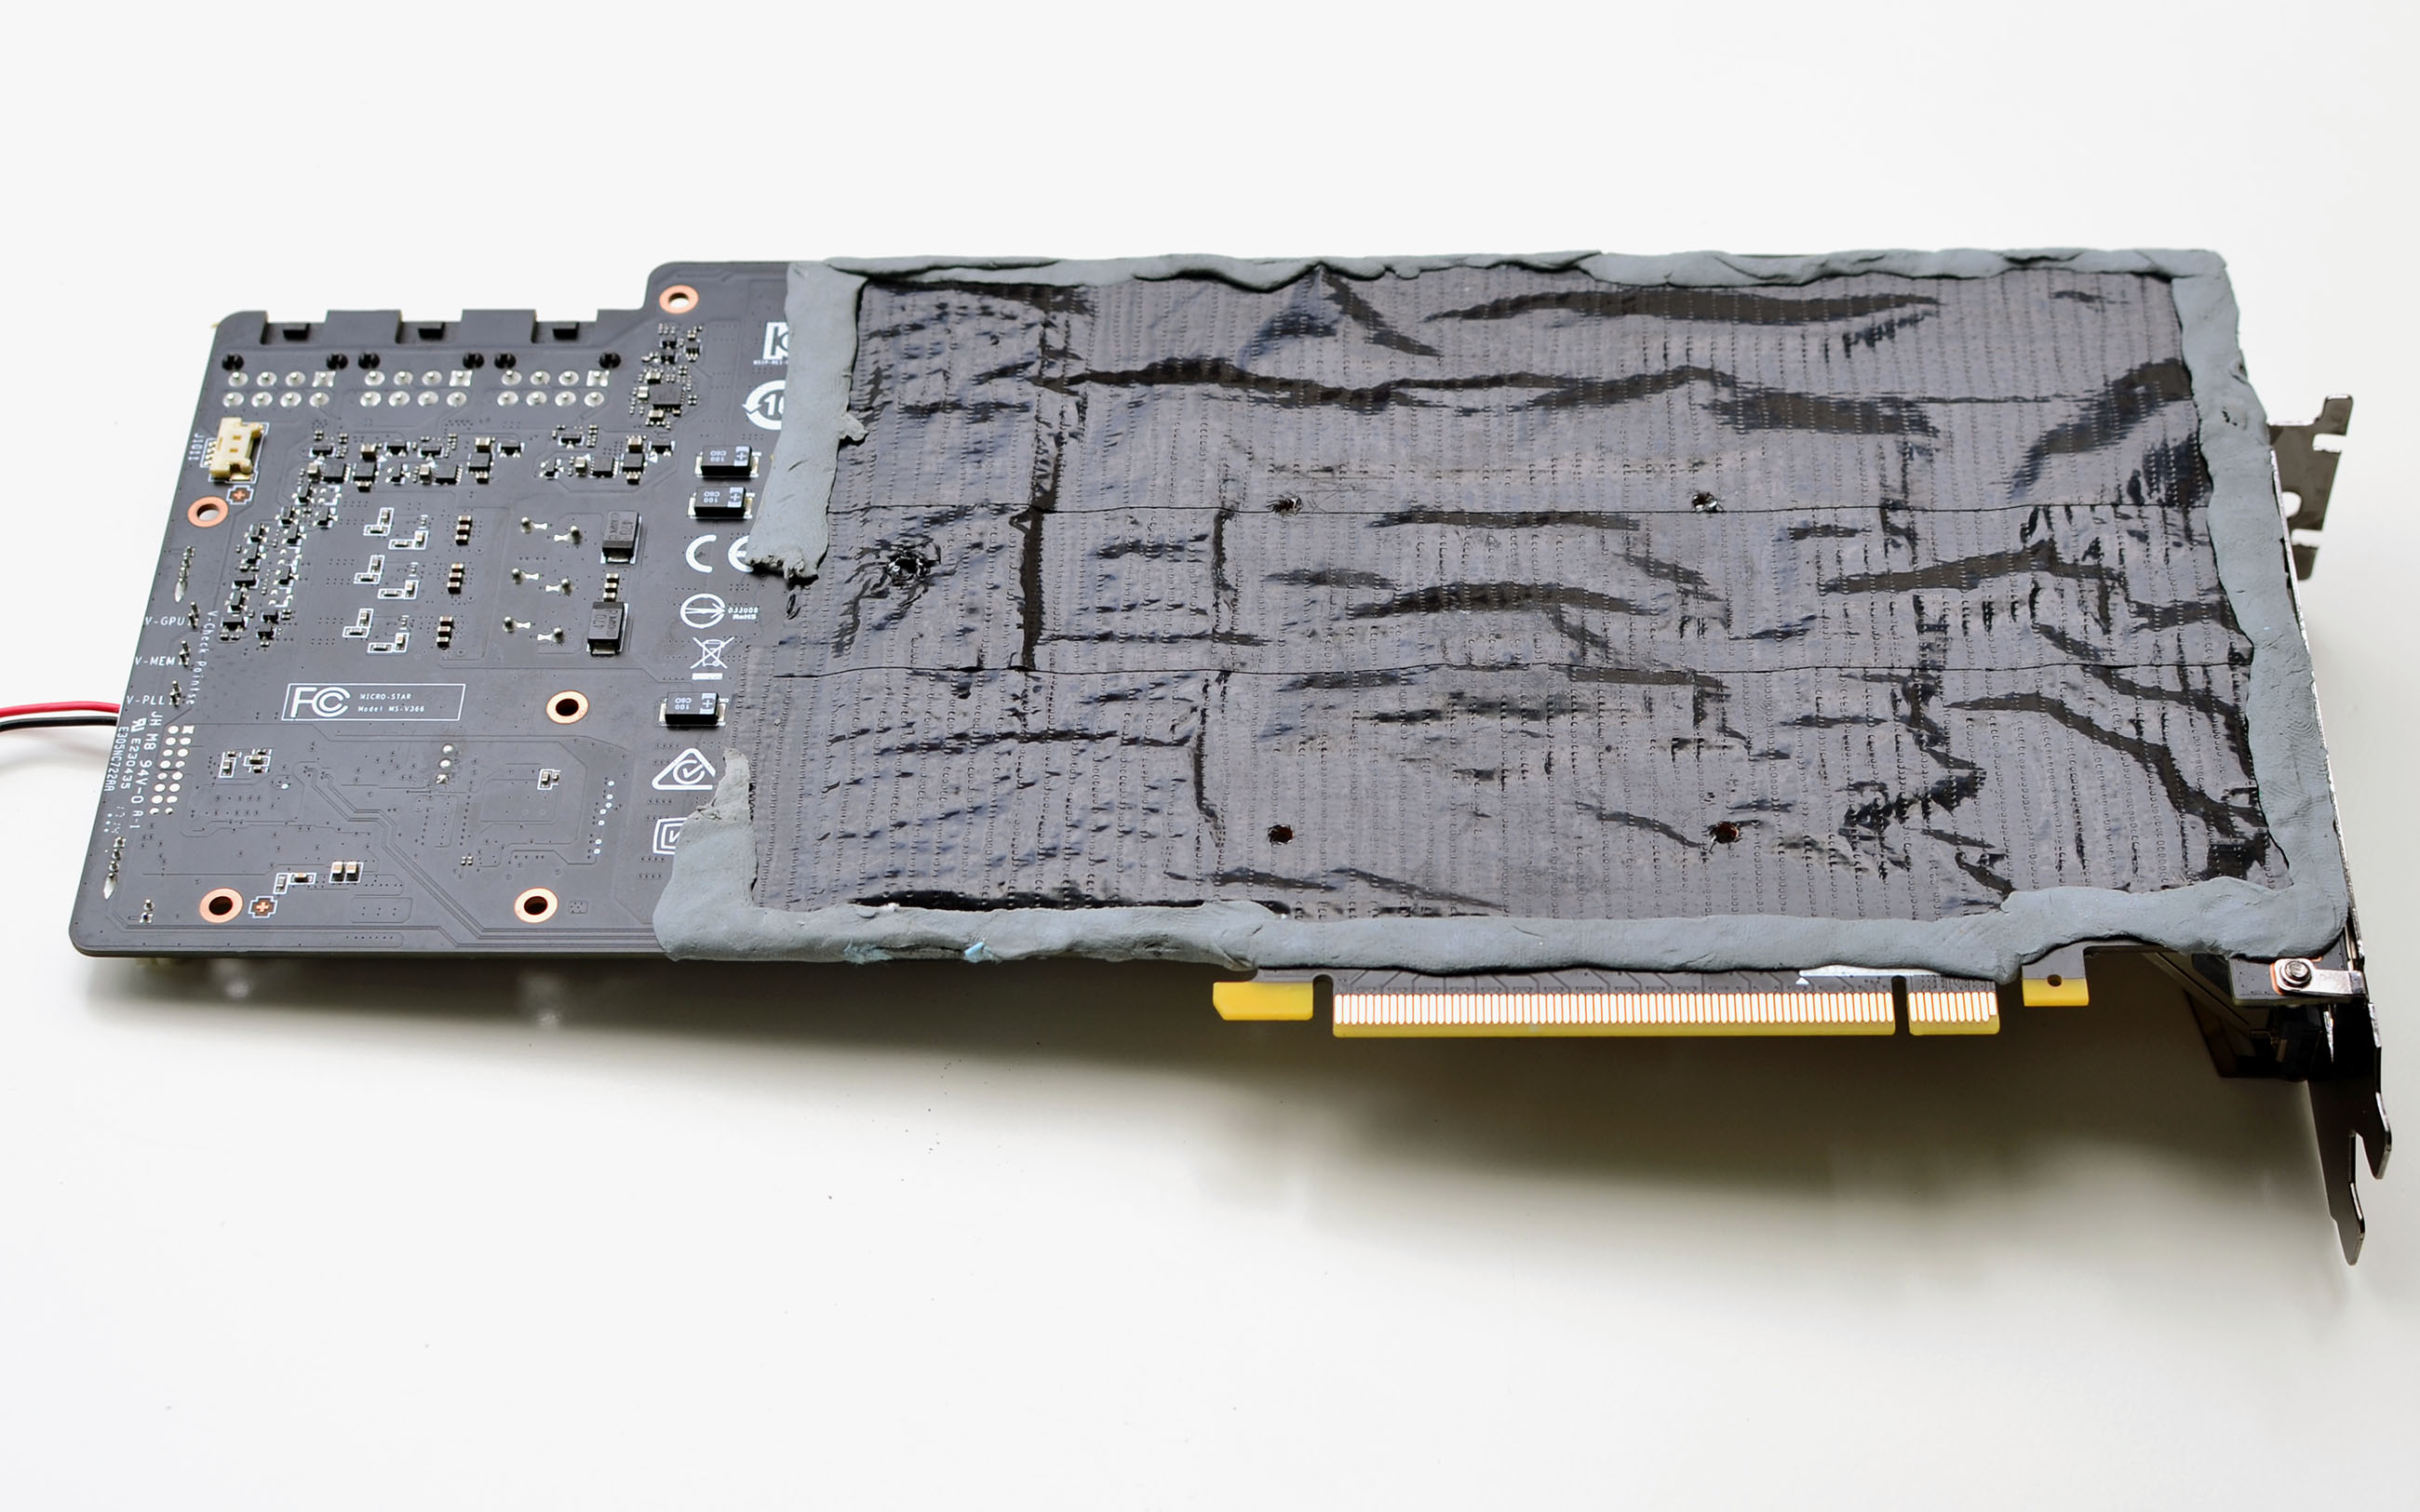
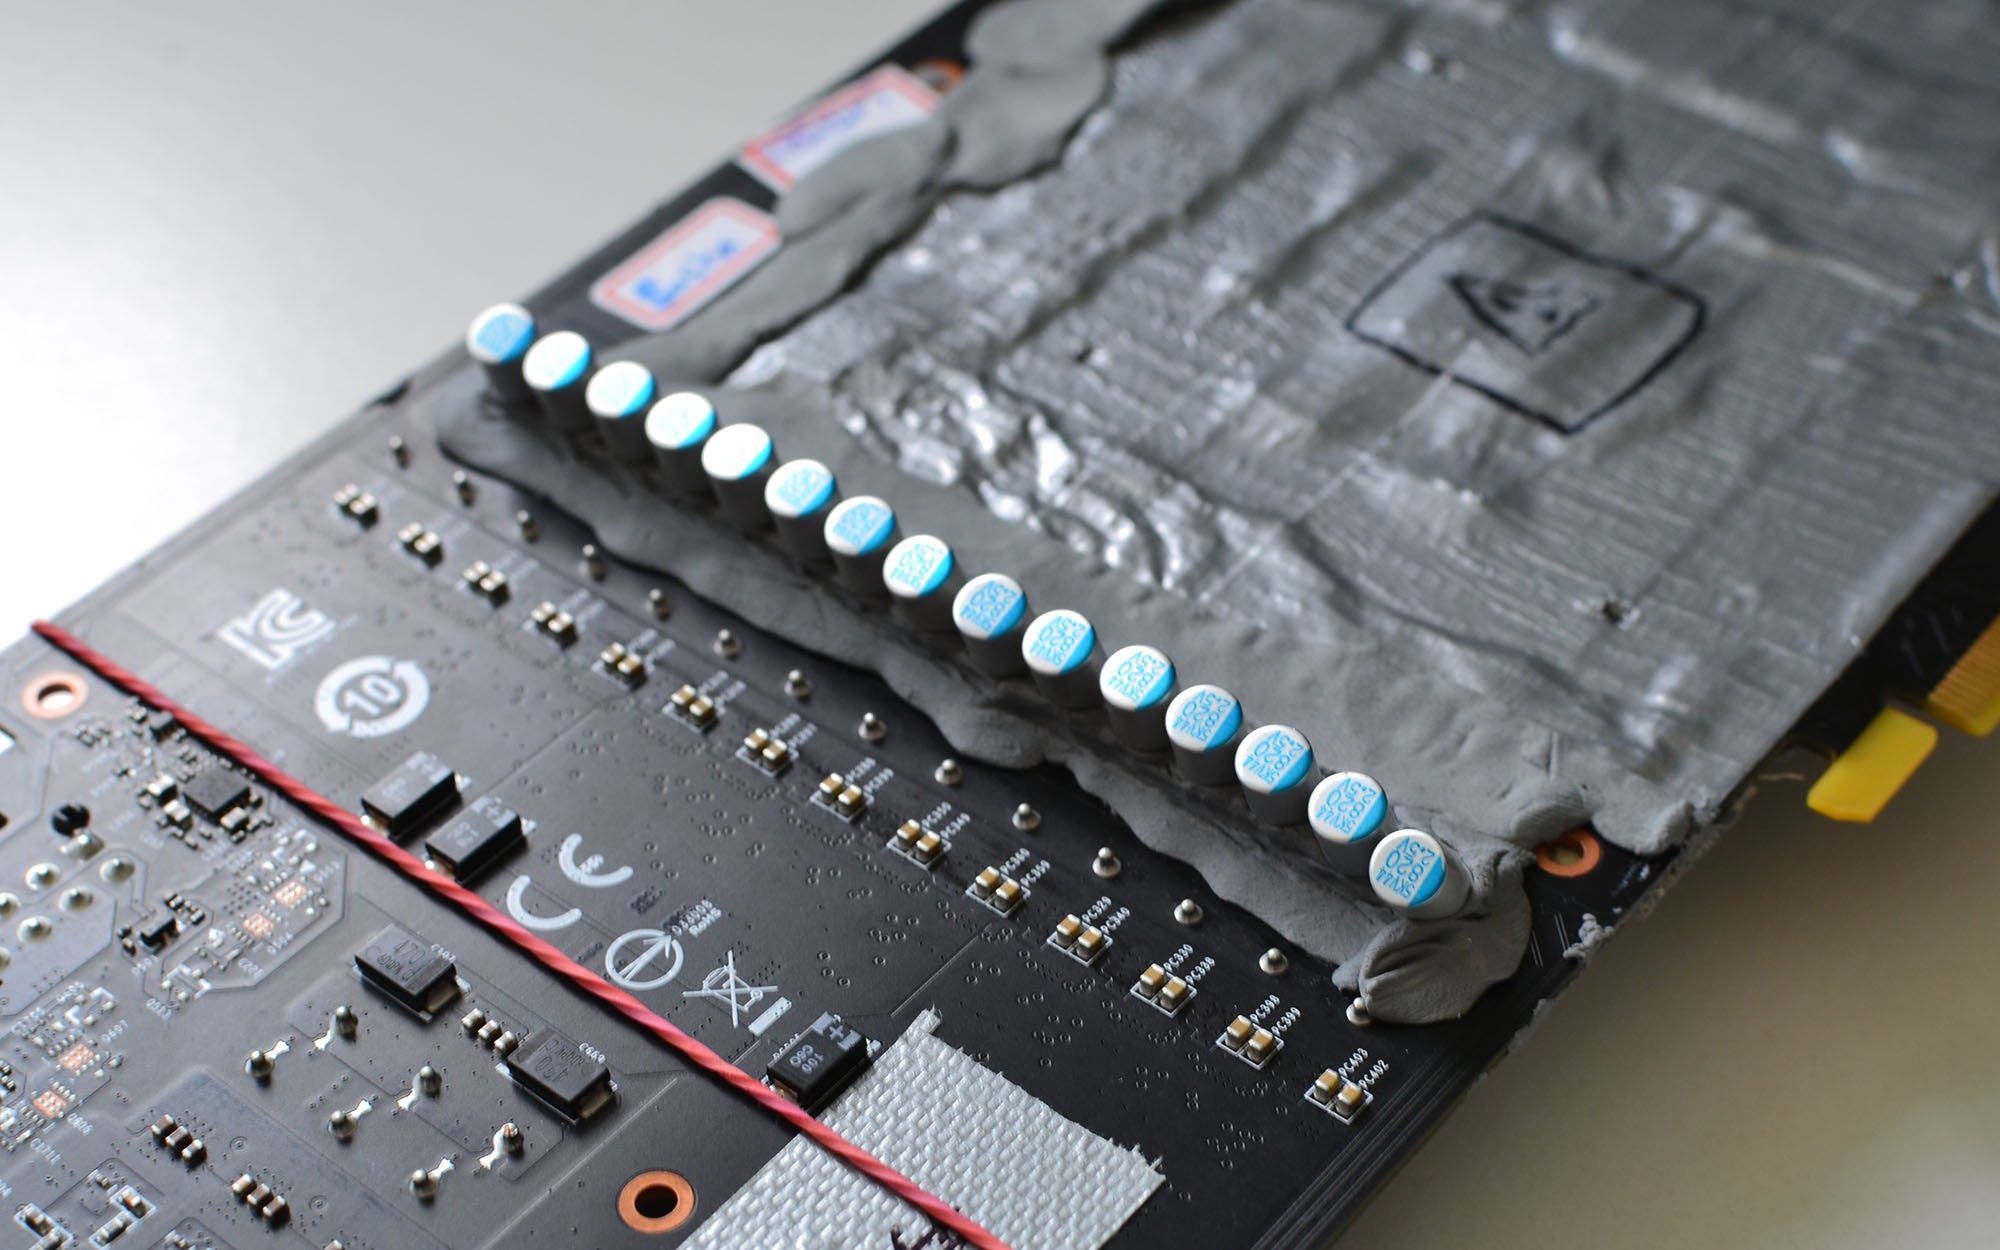
The back side is even easier to protect.
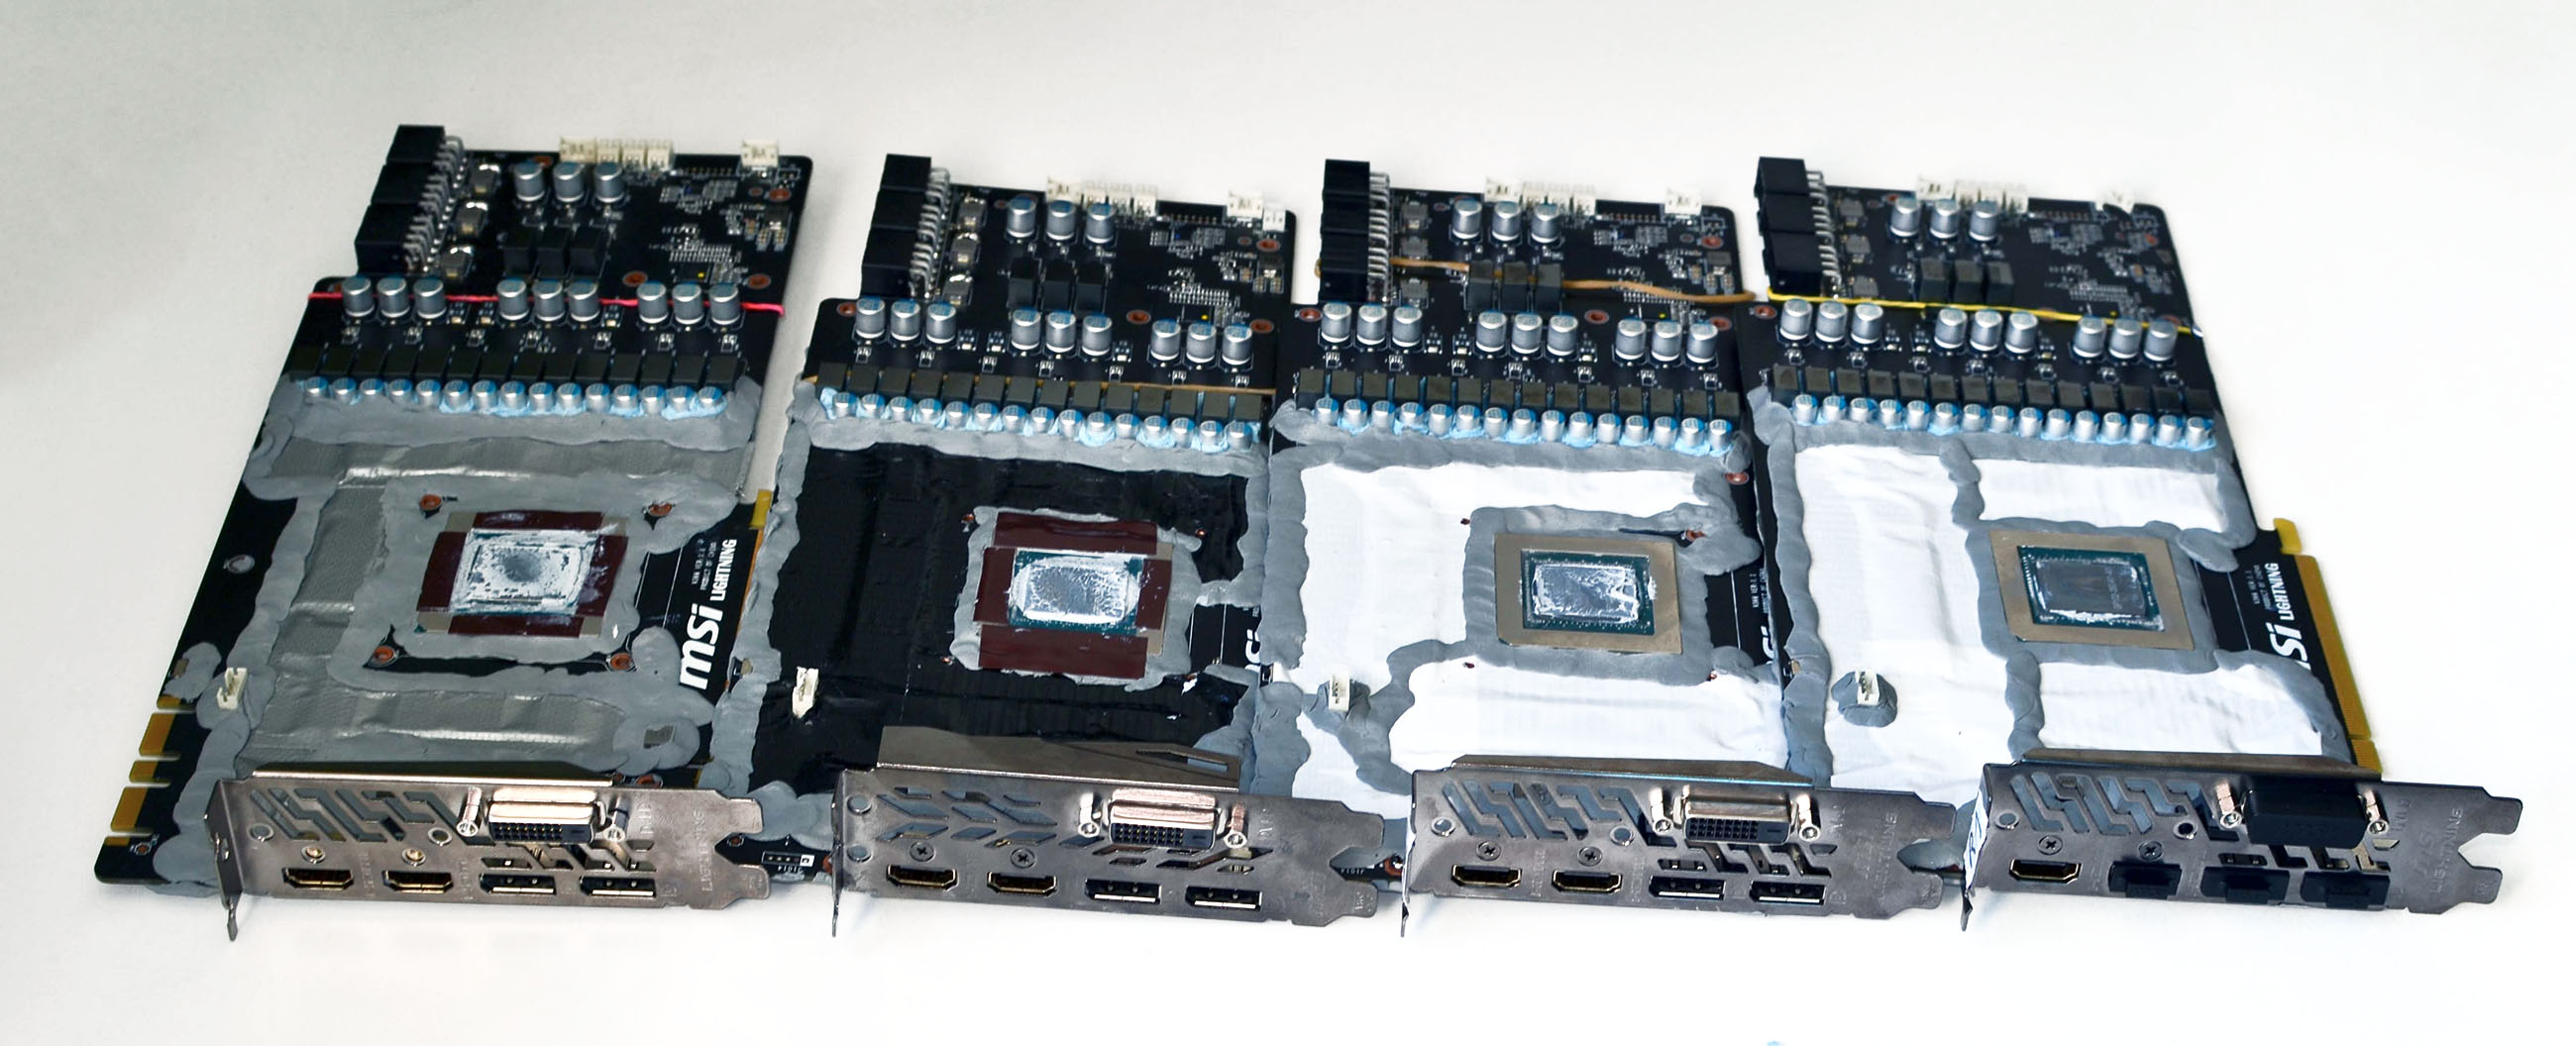
In the image below, you see all four of our waterproofed test samples. Don't get distracted by the colors; this is just from using different rolls of tape to prepare the cards.
Get Tom's Hardware's best news and in-depth reviews, straight to your inbox.
The first six GeForce GTX 1080 Ti Lightning Zs we prepared were for MSI at Computex 2017. Our method proved successful at the show, and nobody complained about how they looked. By repeating our process, these four cards only took an hour each to get ready.
Over the years, I've developed a technique for protecting GPUs that involves a lot of tape. You probably already know the golden rule of engineering: if it moves and it shouldn't, use tape; if it doesn't move and it should, apply WD-40.
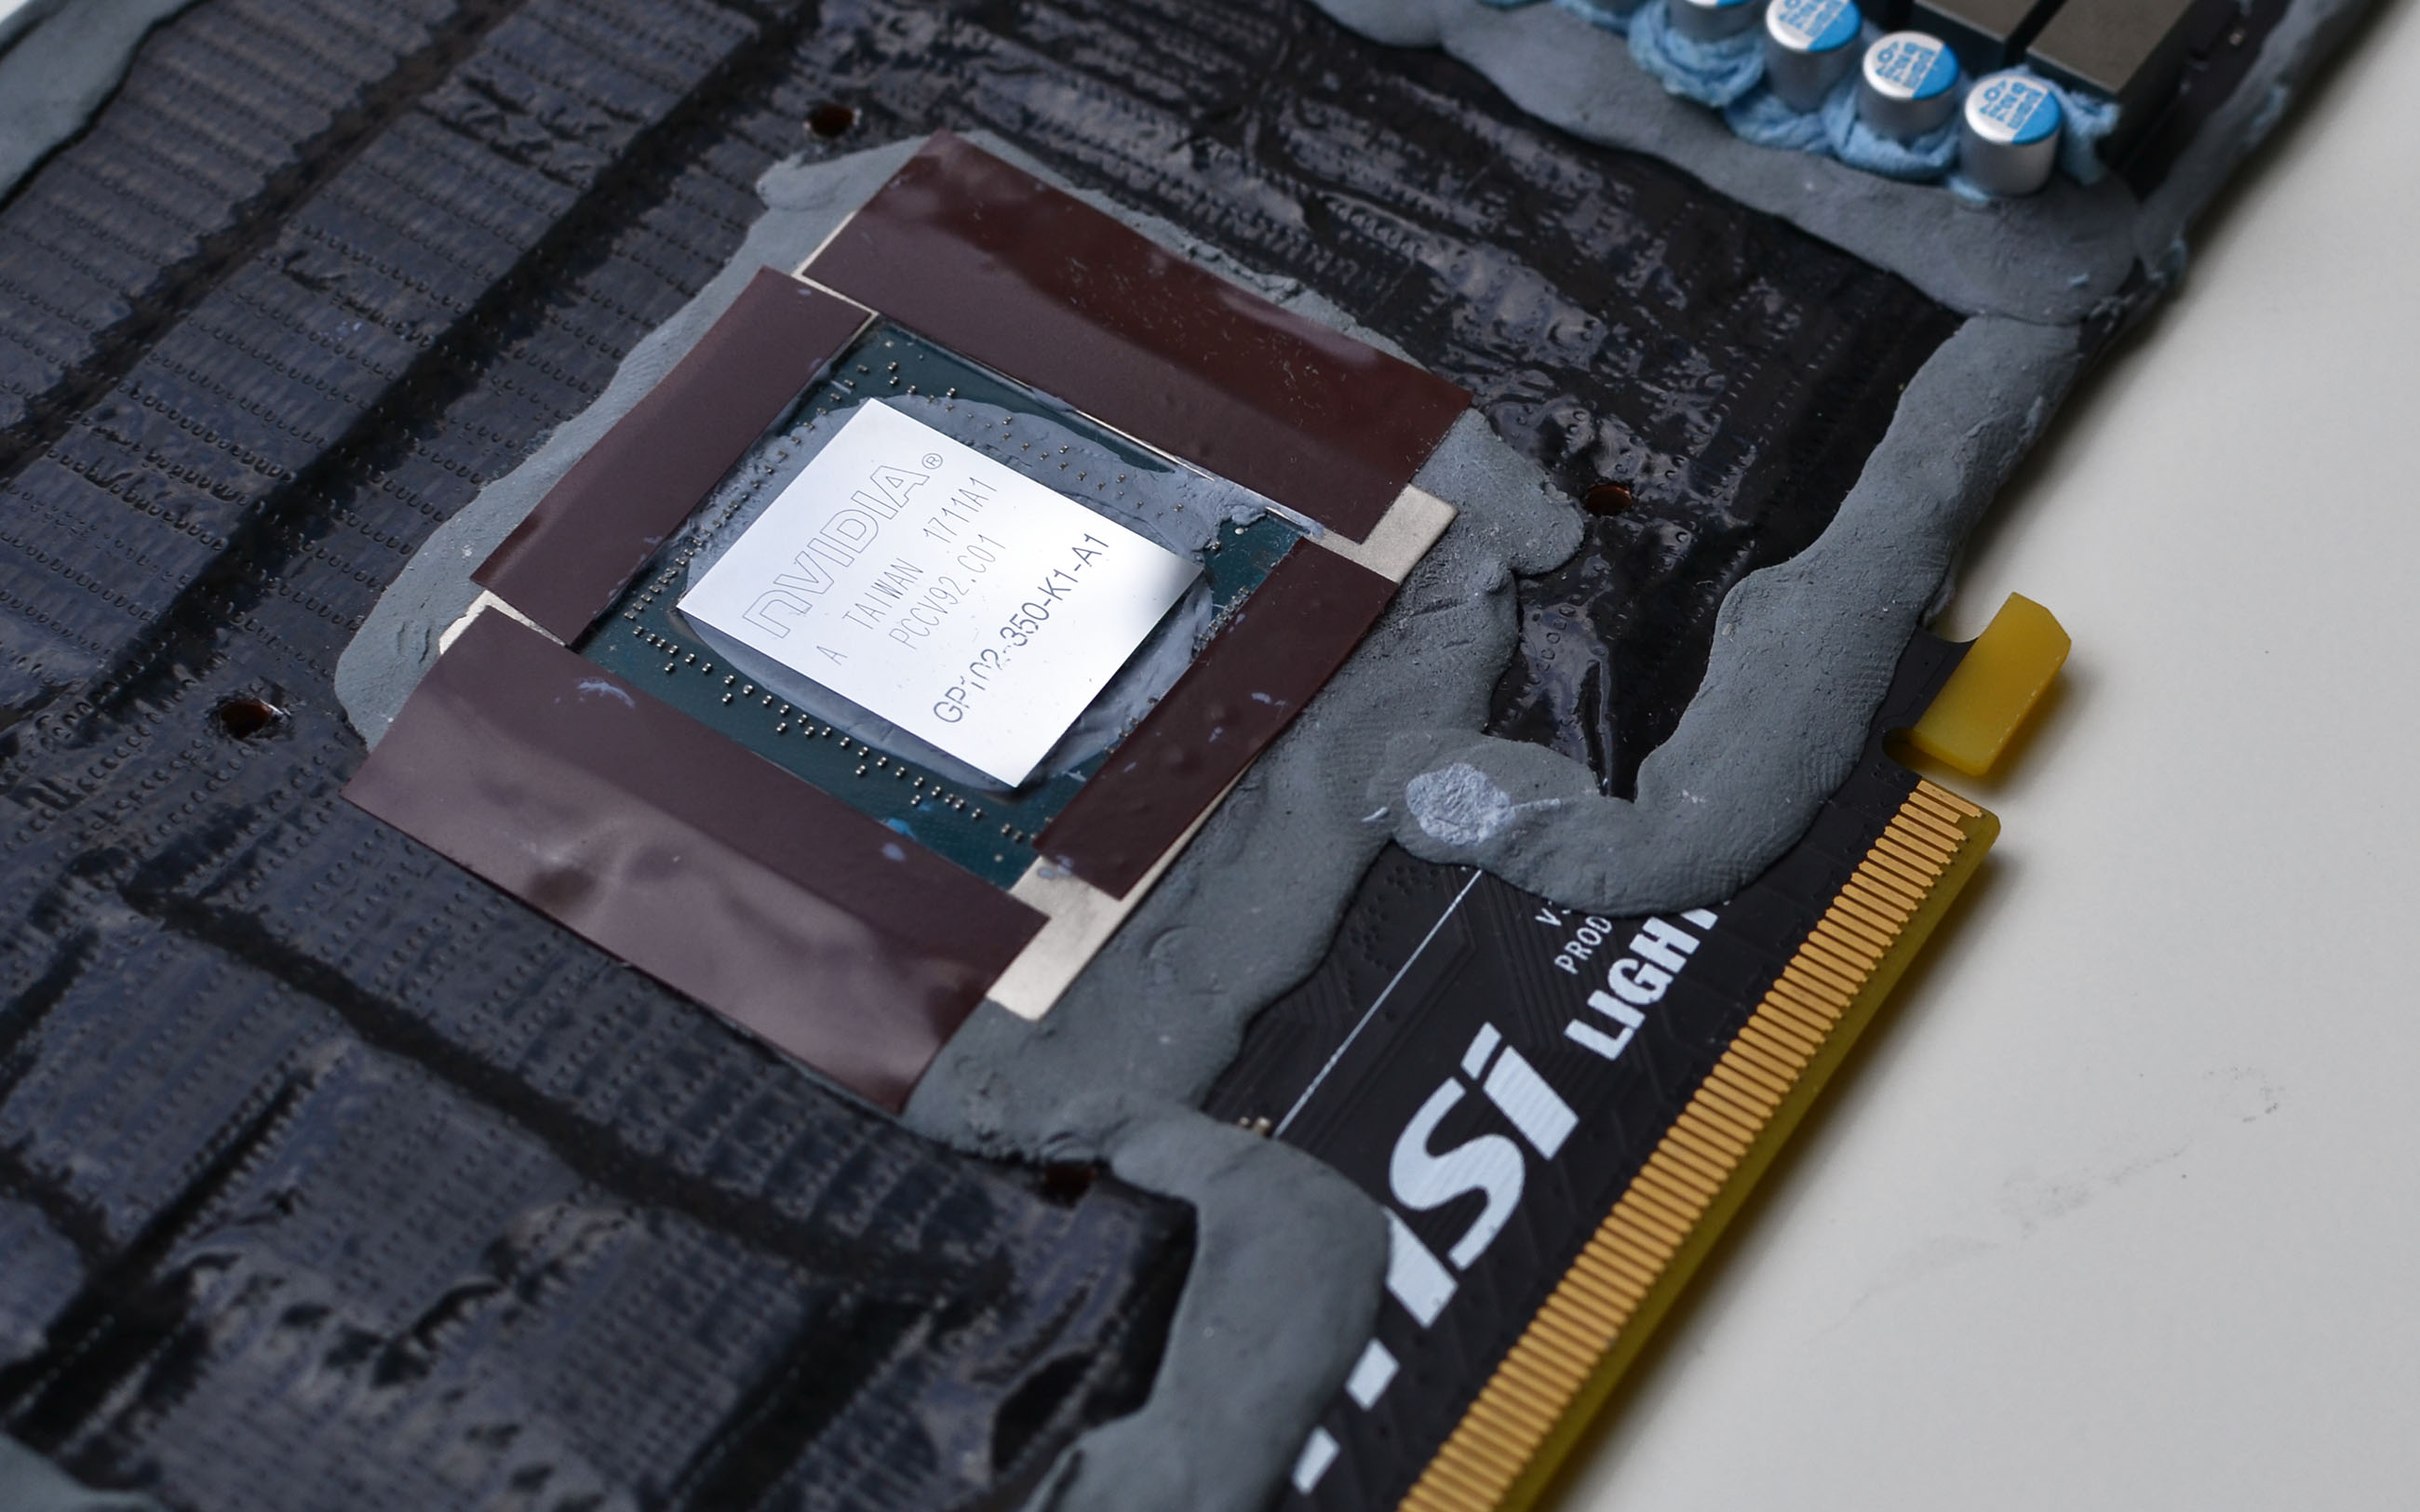
GPUs dissipate massive amounts of heat. Imagine 1000W, the power of an electric space heater from one meter, but concentrated on a surface measuring hundreds of square millimeters. Not surprisingly, the cooler pot installation process is absolutely critical. If the pot isn't positioned correctly, you risk a poor overclock or, worse, damaging the GPU die. In order to ensure the pot is fastened securely, we add layers of tape around the GPU. You need enough so that the pot touches the tape before it touches the die, but not so much that you end up with a thick layer of thermal paste inhibiting heat transfer.
Our Power Mod
These cards have sensors that ensure power consumption never exceeds a certain wattage. If that limit is hit, the clock rate scales back as a protection mechanism. But with the right tools, this limit can be deactivated, or at least raised high enough that it'll never be reached.
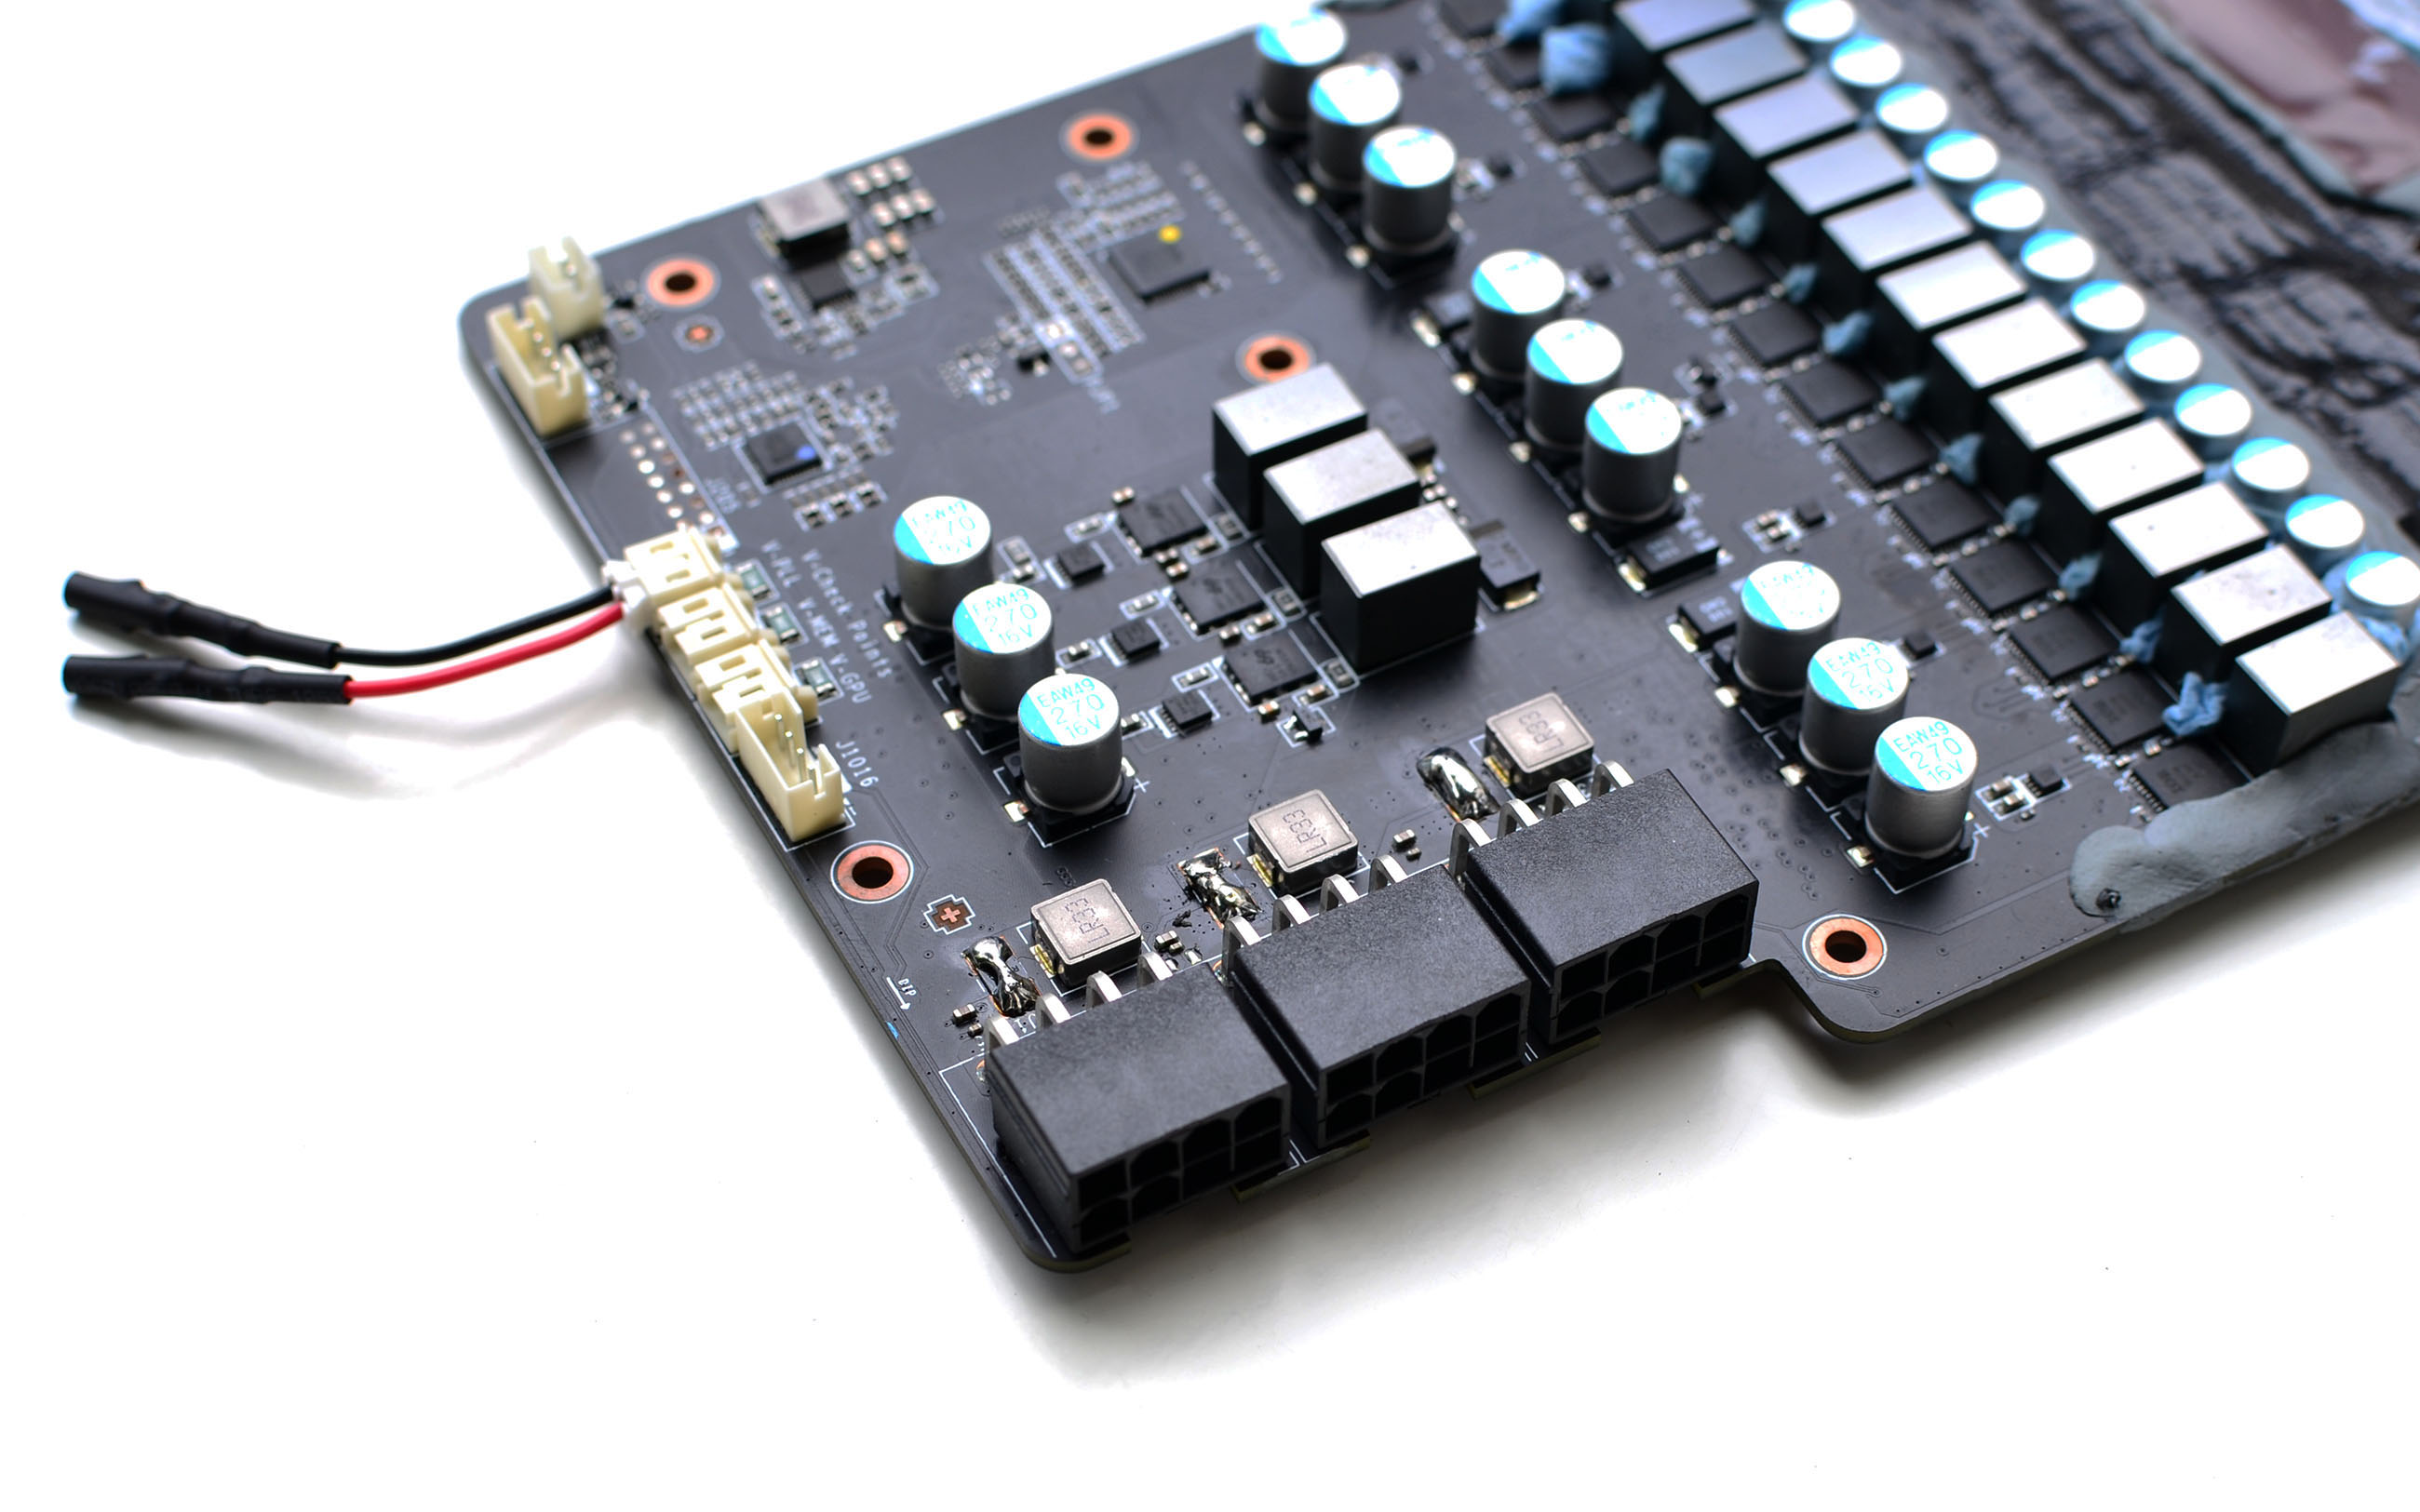
In order to trick the sensor, simply solder a wire between its input and output. This effectively blinds the sensor, which will no longer send an alert.
In the following image, you can see solder marks near the eight-pin power connectors. During our tests with LN2 and the extreme BIOS, we modified two of our four cards and never saw their frequency drop. It may seem like such a modification isn't useful. But for a card with its warranty already voided, you may as well do it and ensure that clock rates never throttle.
Capacitor Mod
A lesser-known cap mod involves adding capacitors, which help smooth voltage. A more stable voltage enables better overclocking.
While adding capacitors isn’t particularly difficult, pay attention to their polarity markings. Reversing the polarity can end with smoke or a pop. Also, choose components with the right voltage, capacity, and tolerance. Your soldering work should be clean, and the capacitor legs need to be trimmed as short as possible.
For certain older or entry-level cards, this mod can sometimes help. But a crummy power supply with a cap mod still leaves you with a crummy power supply. The capacitors won't work miracles.
In the case of MSI's GeForce GTX 1080 Ti Lightning Z, we didn’t see any benefit from adding caps. Then again, the factory power supply is solid, and it didn't limit our overclocking efforts in any way. Thus, it only made sense to test one of our four samples with this capacitor mod.
Voltage Check
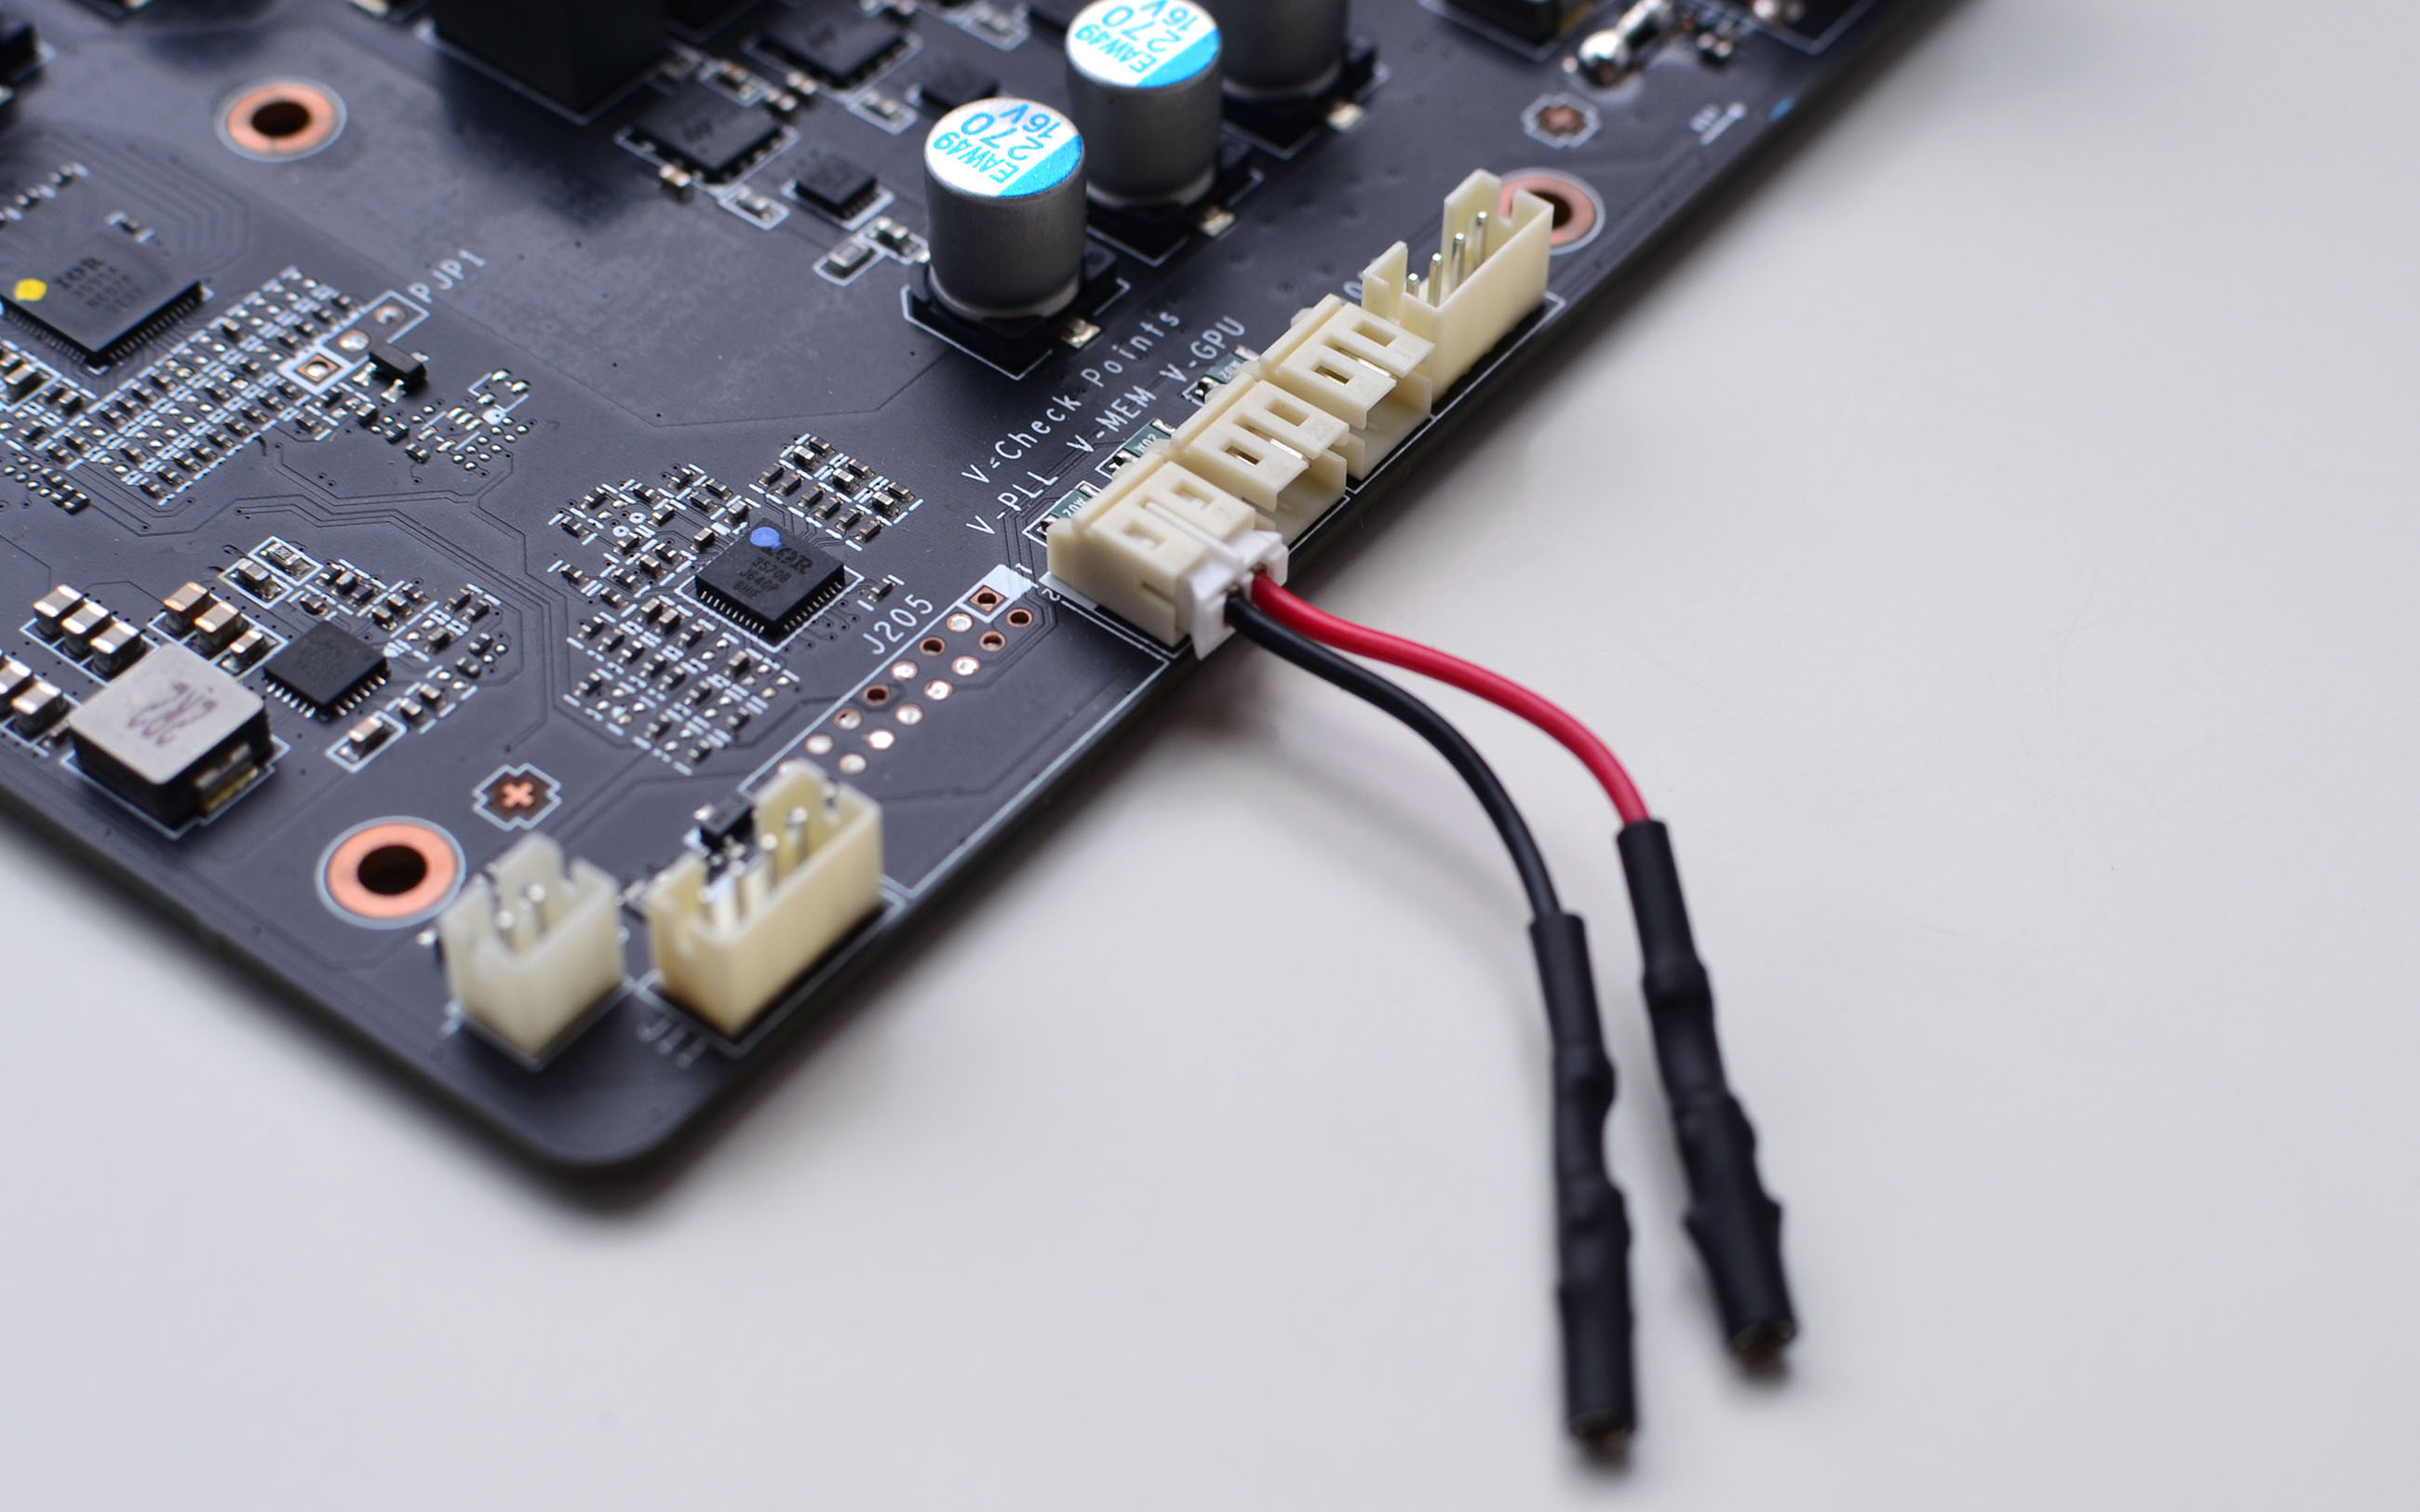
This is what we call easy prep: take the connector and plug it into the card. All done! Really, though, these connectors are great for hooking up a multimeter for observing supply voltage to the GPU, memory, and PLL.
BIOS
MSI's card has two available BIOSes and a switch to select between them. So, we updated the secondary firmware with a special version provided by MSI for extreme overclockers. Without this BIOS, some of Afterburner's functionality won't work (the Power Limit can't be raised very high, for instance).
Installing The Cooling Pot
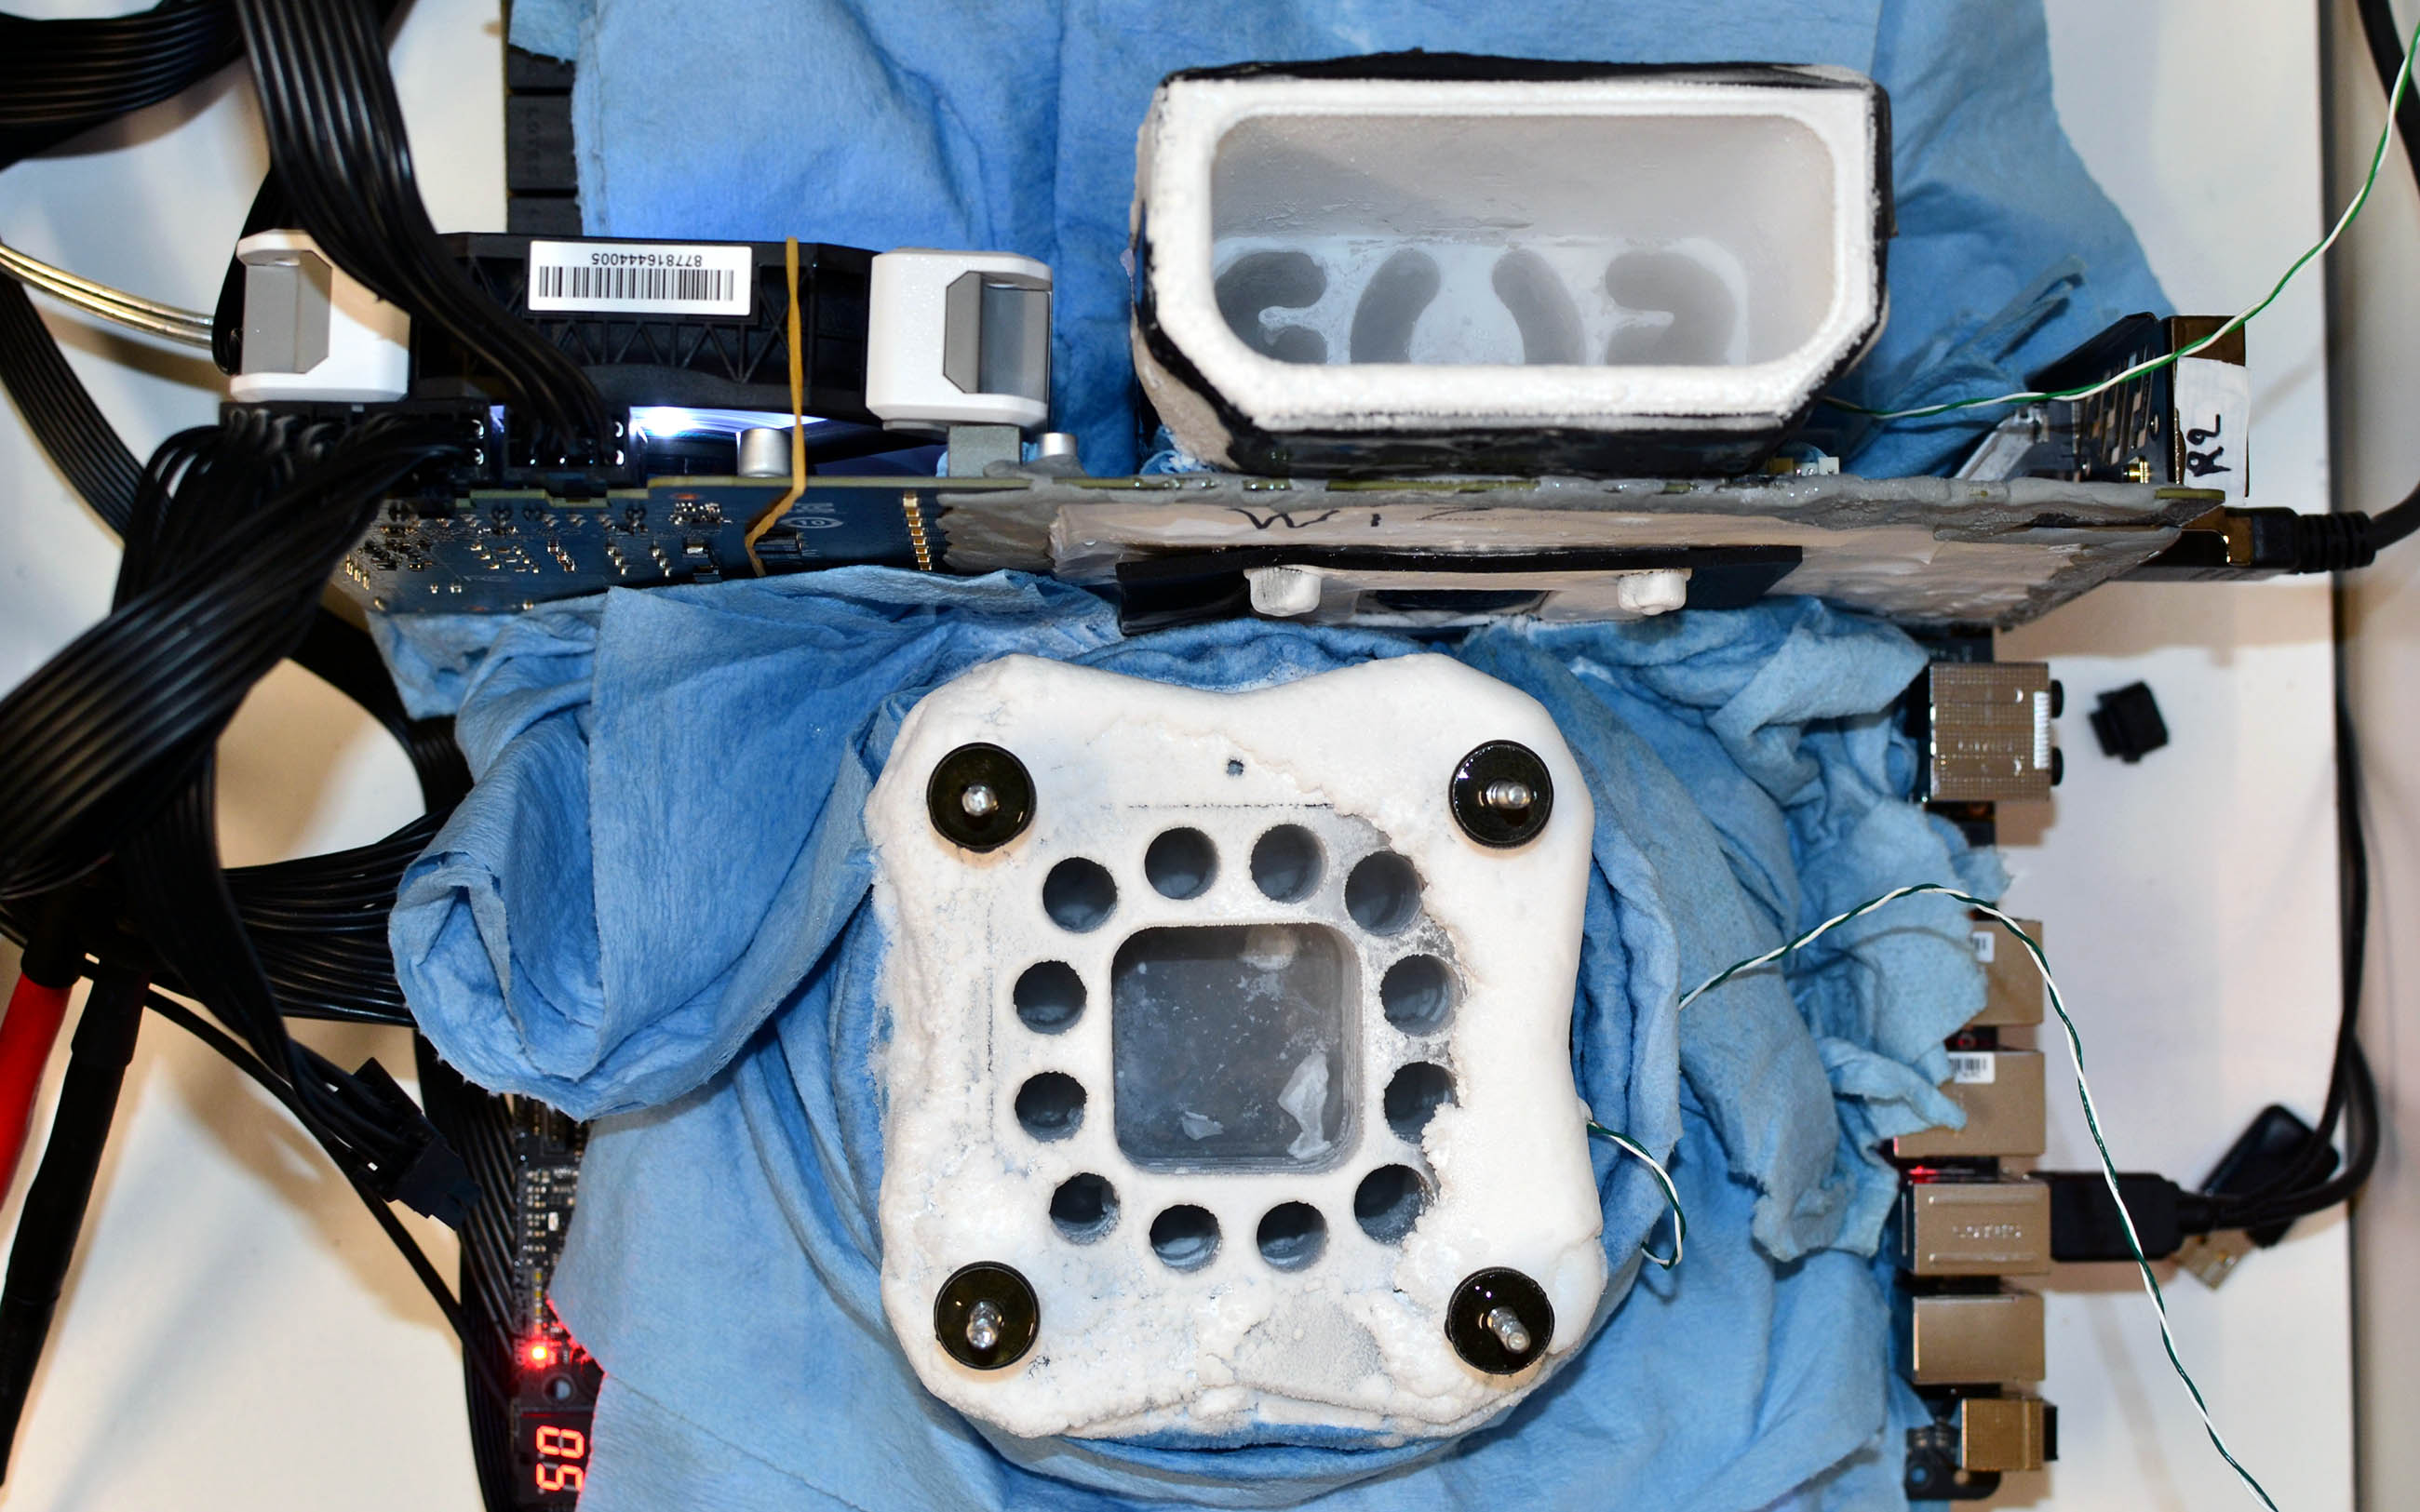
The last step before starting our tests is installing the cooling pot. It must be secured to the GPU. At that point, we're able to start pouring liquid nitrogen into it. This cools the pot, chilling the GPU underneath.
Given that the pot is relatively heavy (nearly 2kg), it must be positioned correctly in order to avoid damaging our card. A plate, some screws, and nuts are used to hold the assembly in place.
It's important to use the correct amount of force when tightening screws. After all, you can exert hundreds of pounds of pressure on a single point without even realizing. To avoid bending the PCB or desoldering the GPU package, we use a backplate for reinforcement.
At last, we catch a glimpse of our completed installation. The top pot cools the GPU, while the one on the bottom sits atop our host processor. The fan on the left side of the image cools the VRMs.
MORE Best Graphics Cards
MORE: Overclocking GeForce GTX 1080 Ti To 2.1 GHz Using Water
MORE: How To: Optimizing Your Graphics Card's Cooling
Current page: Preparing The GeForce GTX 1080 Ti For LN2
Prev Page Overclocking Under Water Cooling Next Page Overclocking GP102 Under LN2-
blppt Probably the EVGA FTW3 ELITE GAMING or Kingpin model (also perpetually unavailable). Thats all I can think of off the top of my head.Reply -
reimanrules Sorry if I come up as ignorant, can you tell me what PCA stands for? Thanks in advance.Reply -
Defekter_Engel I wonder if anyone has tried a closed loop LN2 circuit. Would keep it from changing state from liquid to gas. Downside being it would take a butt-ton of equipment.Reply -
TJ Hooker @reimanrules pretty sure PCA = printed circuit assemblyReply
@Defekter_Engel it's the boiling (i.e. changing state from liquid to gas) of the LN2 that keeps it cold. Also, trying to keep it liquid would result in extreme pressure building up. -
Tim_124 Vanilla 1080ti’s get to 2050mhz under air, and 2050-2100mhz under water. I’ve read reviews of lots of top of the line 1080ti’s and have yet to see any cards improve on stock performance. Unless the acoustics of the cooling solution are superior there is absolutely no benefit to any of these high end cards. GP102 is the undisputed king of GPU’s, but it doesn’t appear to benefit at all from enhanced power delivery systems. Not worth spending any money on them.Reply -
nitrium Reply
Wouldn't work. Liquid nitrogen is only cold when it is allowed to evaporate. In a closed loop it actually wouldn't be cold anymore at all - it would simply be at room temperature but with 2200 psi of pressure. Water is far more effective at transferring heat than liquefied (under pressure) nitrogen gas.20443483 said:I wonder if anyone has tried a closed loop LN2 circuit. Would keep it from changing state from liquid to gas. Downside being it would take a butt-ton of equipment.
-
derekullo Evaporation is endothermic.Reply
Condensation is exothermic.
Staying the same is thermally neutral.
Condensing room temperature nitrogen gas to liquid would be an exothermic phase change. (This is what you pay for when buying LN2. Nitrogen gas itself is quite literally all around you, although with some "impurities" like oxygen.)
Pouring your liquid LN2 into an area with standard atmospheric pressure allows the liquid to evaporate and expand.
The ideal gas law states that when a gas expands it also becomes cooler.
On the opposing side when a gas is compressed it becomes hotter.
(This heat is what supplies our sun with the temperatures necessary for nuclear fusion.) -
redgarl Reply20443319 said:Probably the EVGA FTW3 ELITE GAMING or Kingpin model (also perpetually unavailable). Thats all I can think of off the top of my head.
My 1080 FTW died twice in 10 months... these were two brand new cards. Hell no, EVGA PCB quality is far from MSI.
-
derekullo If you want to talk theory then you want a liquid with a super high specific heat or heat capacity that is also liquid at common temperatures to avoid having to deal with internal pressure.Reply
When talking about closed loops you always need a radiator or some device to remove heat from the system.
LN2 in the conventional sense does not need a radiator due to it achieving its heat removing properties by evaporation.
https://en.wikipedia.org/wiki/Heat_capacity#Table_of_specific_heat_capacities
https://www.aiche.org/resources/publications/cep/2015/september/cool-down-liquid-nitrogen
Specific heat is the ability of a material to store thermal energy
Water: 4.18
Ammonia: 4.7
Hydrogen gas: 14.3
Liquid Nitrogen: 1.08 at 1 atmospheric pressure
Technically Ammonia has a higher heat capacity than water, but due to ammonia boiling at −33.34 °C you would need to keep the temperature of your closed loop below that which is achievable.
The issue with ammonia comes with ammonia's acidity slowly corroding most metals along with its toxicity to most forms of life.
Depending on how much ammonia is in your loop it could be highly hazardous if your house were to lose power and your loop was unable to sustain the pressure of all the ammonia flashing to gas.
Hence why consumers don't use ammonia for cooling.
(Industry might for some obscure purpose, but other chemicals are much safer)
As for hydrogen:
It requires a massive amount of energy to make it a liquid, -252°C or 21 kelvin.
This means super insulting your pipes as well.
We can't have room temperature air causing convection/conduction to occur against our 21 kelvin pipes.
On top of that any leaks you might have require the evacuation of the neighborhood.
I couldn't find the specific heat of liquid hydrogen, but it's best to not try to find it lol.
Now we full circle back to liquid nitrogen;
Cooling nitrogen to its liquid state, -196 °C or 63 Kelvin, requires a lot of energy.
We again need to super insulate the pipes against heat transfer.
Liquid nitrogen also has a specific heat 1/4 that of water.
This means that it will heat up much faster than water causing your radiator to work even harder to cool it back down to a liquid state.
You can make a closed liquid nitrogen loop with a highly specialized radiator such as one implementing a peltier heat pump, but the thermal properties of liquid nitrogen make it highly inefficient.
This makes liquid nitrogen only suitable for short term record-breaking through its heat transfer through evaporation
