System Builder Marathon Q2 2015: $1600 Gaming PC
For this quarter’s SBM, we built a gaming PC with a GeForce 980 paired with a Core i5. Can it keep up with our i7-based builds from previous SBMs?
Hardware Installation
CPU & RAM Cooling
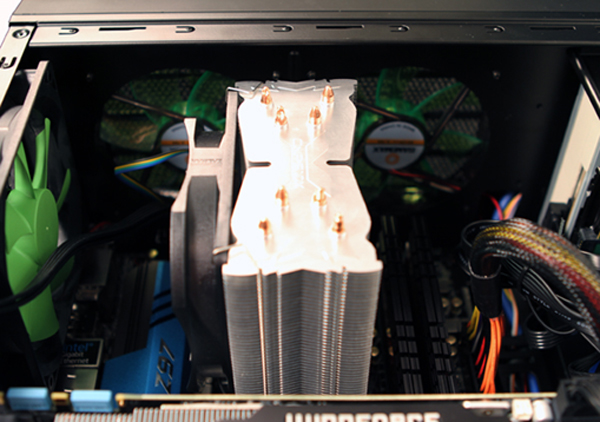
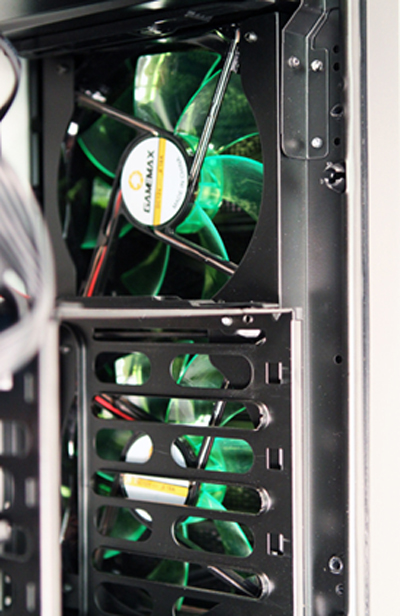
There were two key components I wanted to emphasize with my cooling: the CPU and memory modules. The DIYPC case I picked has five 120mm fans. Originally, the top fans were blowing air out of the case, but since they were positioned right above the CPU cooler and the RAM’s heat sinks, it made sense to flip them both over and have their air blown downwards. If I had a decent piece of plastic board, the right tools and the time, I would have loved to build an air channel that would separate the airflow between the CPU cooler’s fan and the rear fan, but I didn’t. In this configuration, the rear fan will not only push out hot air from the PC, but it’s also going to get some of the fresh air meant for the CPU.
One other possibility to maximize CPU and RAM cooling would be to position the CPU cooler fan on the other side of its heat sink, letting the front-top fan blow fresh air over the CPU cooler and RAM at the same time. If that were possible, I could have kept the rear-top fan in its original position where it'd help exhaust hot air out, along with the rear fan. Ultimately, this wasn’t possible since the Zalman fan was too thick and wouldn’t fit between the CPU cooler’s fins and the RAM's heat sinks.
Storage & Graphics Card
Next, I wanted to address where to put the storage drives. I expected that the hard drive and SSD would generate some heat, so I wanted to make sure I did something to lessen their thermal footprint.
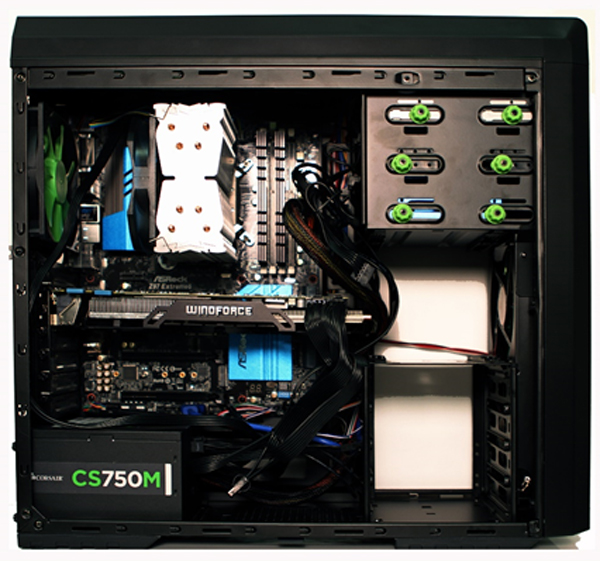
In the “Big Build’s Overview” picture, you’ll notice an empty space between the motherboard and the the front panel’s fans. That space was originally occupied by two hard drive cage. The middle one is removable and slips right out. The bottom hard drive cage, unfortunately, is riveted into the case’s frame and cannot be removed without some heavy-duty modification. The good thing, though, is that the hard drive trays inside the bottom cage are removable. As a result, in order to maximize the amount of fresh air going into the front of the case, I emptied out that entire section and put the hard drive and SSD inside the hard drive cage at the top of the case where they’ll both sit right below the DVD writer.
There were two advantages to moving and isolating the storage drives into the top hard drive cage. The first was that by not using the lower cages, I can get cool air in from the front of the cage and direct it towards the GPU. A second benefit is that I have one less set of power cables to run from the power supply to the lower cage area. Now I only have a single SATA power cable that goes from the power supply to the top hard drive cage, and by having just that one cable, airflow towards the back of Big Build is going to be a little less obstructed.
The Case
Overall, the design of the DIYPC case isn’t too bad. There’s plenty of space to work with. However, there were a couple of issues I had to work around.
First, the top hard drive cage holding the Samsung DVD writer, Seagate HDD and SanDisk SSD was too close to the motherboard’s main power harness and memory slots. Not only did I have to unplug the power harness and remove the memory modules to install the three storage devices, but I still had to use some of my old desktop support yoga skills to get the SSD into the cage, as some of the soldered parts on the motherboard stuck out and got in the way.
Get Tom's Hardware's best news and in-depth reviews, straight to your inbox.
The second thing I didn’t care much about the DIYPC case were those lower hard drive cages that I ended up removing. Running the cables to the drives when I initially put the machine together was awkward. Because of the way the mounting holes were positioned, the SSD would only go in rear-first, while the hard drive went in front-first. At that early point in the build, the way the cables were laid out didn’t work for me, so moving the drives up into the top fixed the minor aesthetic problem I was having and helped with airflow.
Graphics Card Drivers
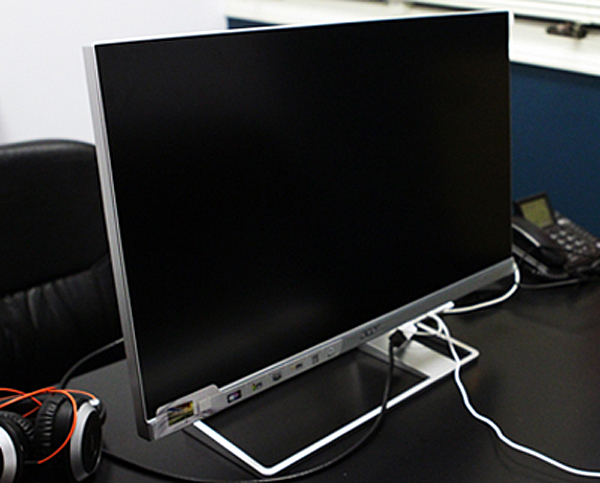
When I started working on Big Build, I initially used a single Acer S277HK 4K display. Armed with the CDs that came with the ASRock motherboard and Gigabyte GeForce GTX 980, I installed the necessary drivers, and then updated them over the network. Everything seemed fine until the day I moved the Big Build to its open test area in the office. As I plugged in three new 4K displays into the Gigabyte card’s DisplayPort outputs, just one of the interfaces worked. The second and third ones weren’t putting out any signal at all.
After spending some time swapping cables around and verifying that the monitors weren’t misconfigured or defective, I uninstalled the Nvidia drivers and software, only to find that the native drivers were working fine as all three displays came up and successfully displayed the Windows 8 desktop. Eventually, I was able to re-install the latest Nvidia drivers (version 353.05) again and got all three 4K monitors running.
-
Math Geek i like that the builds finally contain both ssd and hdd as well as some alternative cooling solutions this time around. nice to see that there are other options for cooling besides the normal suggestions that still do a nice job. that case also seemed like a decent choice though for the money, i'm sure there are better ones you could have gotten.Reply
now cue the corsair psu haters in 3....2.....
edit: i see a lot of different ideas of what "could" have been done with the money, but honestly we all know what these suggested parts can do already. using non-traditional parts in the build gives up numbers on some pieces we may not have tried out before. the numbers may not be overly positive but i learn something from them either way. so maybe take this as a lesson on "what not to do" and move on if you're so inclined. always nice to see stats on machines built with "other" parts at least for the learning opportunity :) -
balister Is there a typo with the price on the gtx 980 or did you pay more for it when you got the components? I'm showing that the price of the system (minus Windows and not counting in shipping) of ~$1295 (a little over $200 shy of the $1600 mark).Reply -
SylentVyper There is a LOT of waste in this build. You can get the same build, with all the same specs, while paying $300 less.Reply
You can get RAM for almost half that price, a good SSD for about half that price, and an SLI-capable motherboard for half that price. -
AdviserKulikov According to tom's own benchmarks, RAM doesn't have a significant impact on performance in gaming, any reason why the gaming PC is featuring memory overcosted by about $50-$60?Reply -
Jeffs0418 There are some major typos and incorrect links here. Somehow I doubt the GTX980 price of $169.99...Reply
If it is I want one! -
10tacle Wow they were only getting to 4.2GHz at 1.24v and hitting 89C+ on three of the four cores. That is not good. Not sure if it's a bad chip, but even that mid-range cooler should do way better than that. For comparison with my 4690K on a Noctua NH-D14, in the summer I scale back my overclock and run at 4.3GHz at 1.12v and hit mid-50C even with a 78F indoor A/C setting.Reply -
Andrewst1021 A lot of waste, 8 gb of ram and a cheaper case would of put you just shy of the gtx 980ti price range.Reply -
WHComp You can get an Intel Xeon E3-1231v3 for $7 more on newegg: http://goo.gl/qlzkrAReply
I am not a gamer but I do build a lot of CAD workstations at work. I do not see why the xeon is not a massive improvement over the i5. It is missing the integrated graphics, but that should not matter for gamers same as it works for my CAD workstations.
I have wondered about this for a long time, someone please explain. -
Aspiring techie Was it possible to mount a case fan on the other side of the Zalman cooler, or did I miss something? If it was, then you could have gotten the temps down by a few degrees in a push-pull configuration.Reply
