Desktop Linux For The Windows Power User
Updating Your System Files And Drivers
Update Your System
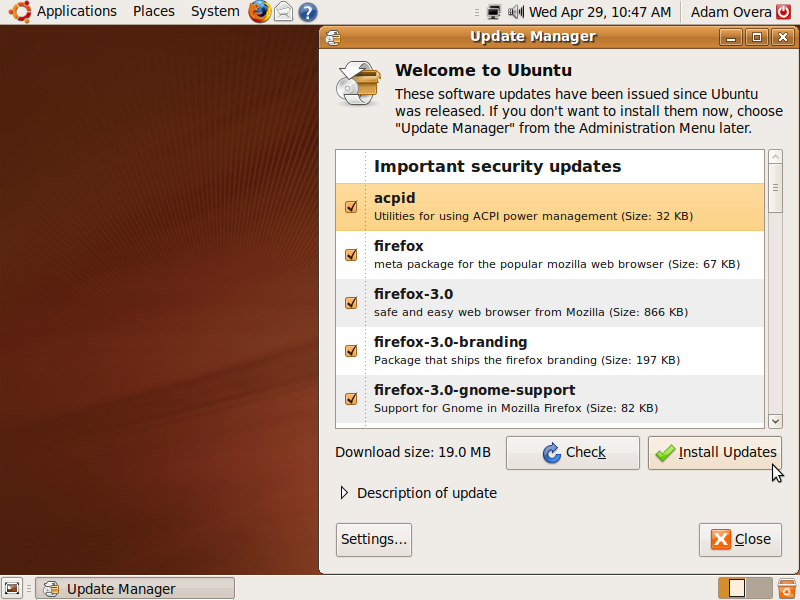
Within roughly five minutes, the Update Manager will appear and automatically search for updates. Once opened, it may take a few moments for the Update Manager to find all available updates. When it has finished, click Install Updates.
Note: If you chose 8.04 LTS instead of 9.04, a red downward-pointing arrow should appear in the notification area. This is the symbol for critical updates, while non-critical updates appear as an orange sunburst. Click on the red arrow to open the Update Manager if it hasn't already opened yet.
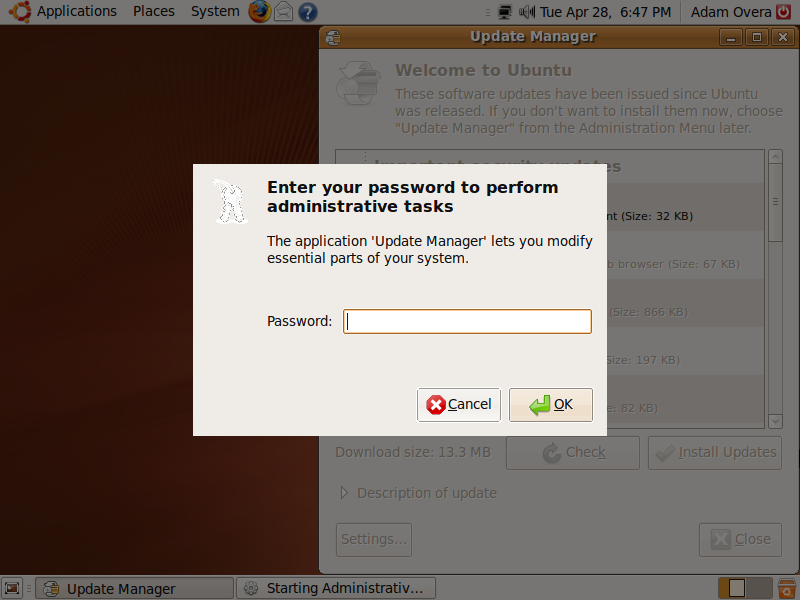
The screen will shade and you will be prompted to enter your password. This will happen every time you do an activity that requires changes to be made to system files.
When the updates are finished installing, click the user/power button in the far right of the upper panel and then choose Restart.
Activate Proprietary Drivers
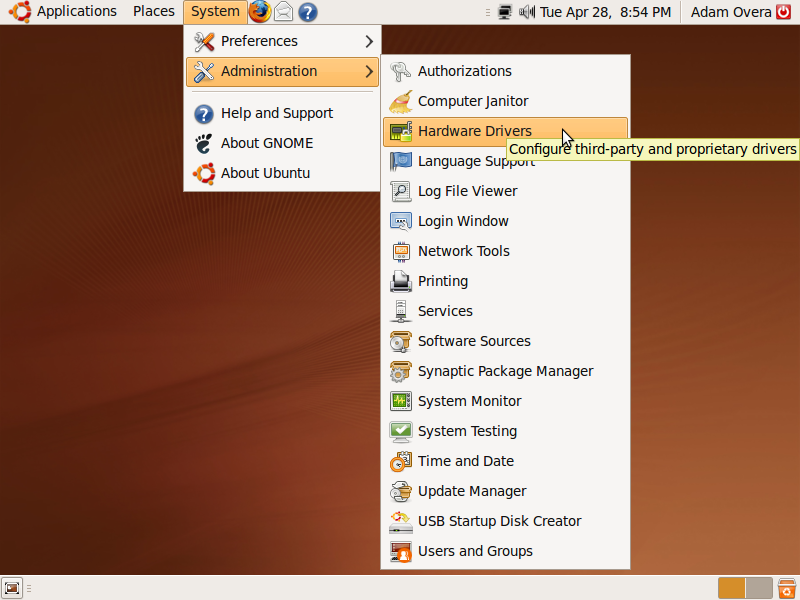
When your computer restarts, get back into the desktop. If an “add-in card” icon doesn't appear in the notification area within a few minutes, click the System menu. Go to Administration and then click Hardware Drivers.
Get Tom's Hardware's best news and in-depth reviews, straight to your inbox.
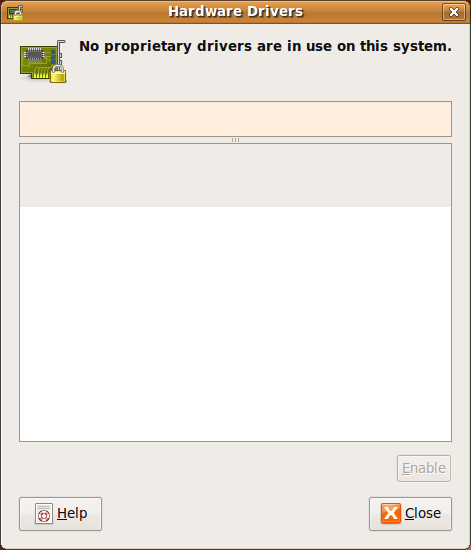
Since Ubuntu 9.04 is still so fresh, new proprietary drivers may not be available, in which case you do not have to do anything at this stage. When AMD, Intel, or Nvidia releases new drivers for your video card, this is where you'll go to enable them.
If, by the time you read this, there are new proprietary drivers available, select the one with the highest version number and then click Enable. After enabling new drivers, you must restart your system.
Current page: Updating Your System Files And Drivers
Prev Page The Desktop Next Page How Do I Install Software?-
jgv115 An easier way of installing programs is in the terminalReply
type:
sudo apt-get install *app name here*
-
DjEaZy ... i'm a n00b in LINUX, but UBUNTU... it iz a nice start... the GUI iz easy to pick up... the rest iz reading forums... i got even crysis to work in Ubuntu... just the problem waz, that there waz no textures... with WINE and DX instaled the need for speed series runs pretty fine... all OpenGL games, that i played, run fine too... the interesting thing where you can consider using Ubuntu iz a old computer for internet browsing... if tha CPU iz approx 1Ghz, tha RAM 256Mb, and a 5 series GeForce or 9 Series Radeon to do the COMPIZ eyecandy... then YOU have a better-than-Vista visual and browsing experience...Reply -
wicko Meh, I've killed my XP install and I use Windows 7, which I actually like. Ubuntu doesn't cut it for me due to the lack of games.. otherwise I'd be all for alternatives.Reply -
arpikusz Great article. Really like that you outlined how to install all the "good little stuff" and not just the OS it self. Thumbs up!Reply -
thepinkpanther as soon as ubuntu can run .exe without a hitch, windows is out the...ugh...window.Reply -
Sir you are wrong. GoogleEarth and AdobeFlash is fully 64-bit compatible.Reply
One issue that you may encounter is GoogleGears that is 32bit only, but you can easily find Gears for 64 bit (without Google trade mark). -
fordry06 Ya, I have multiple games that will not work no matter what i do. I have tried configuring WINE manually and Play on Linux and Steam games will not function properly for me, neither does Trackmania. Im not sure if its becuse i have SLI or what but it simply doesn't work. I would love to use Linux as my primary OS, but when i install Windows 7 and ALL of my drivers are installed and working correctly automatically without any hassle, even nvidia video drivers, that is something that Linux is not capable of yet with alot of systems. Until the majority of programs and drivers work natively with Linux, it will just be a niche OS on desktop computers.Reply -
ahmshaegar Well, let's get this out of the way first: Linux is my primary OS. And I realize it's a kernel, so piss off you pedantic bastards.Reply
@thepinkpanther: Linux ain't Windows. Linux is Linux, so if your goal is to run Windows apps all day, I don't think choosing Linux as your primary OS makes the most sense.
@fordry06: That certainly is a problem. Now, most hardware manufacturers don't disclose all the information about their hardware, so it's quite hard to write perfectly working drivers for OSes other than Windows. Although it's not Red Hat/SuSE/Ubuntu/(Insert Linux vendor here)'s fault, as a user, you don't really care about that, do you? Basically, for a lot of hardware out there, you have to fight to get it to work in Linux. For me, I got a bog standard laptop. In Ubuntu 9.04, pretty much everything I use worked out of the box. Now, certain things aren't working as well, such as my card reader only reading SD and MMC cards in Ubuntu... but I don't use anything other than SD cards. So for me, it's working just fine. For others... not so much. And regarding your games in Linux, see what I said above to thepinkpanther. Linux ain't Windows.
Well, having gravitated away from games, and not being particularly loyal to any company or OS or anything, I really honestly don't care if I'm on *gasp* a Mac or Windows or Linux. So it all works out for me. Hey, if you really want me to get philosophical then let me just say that I think you can enjoy life best when you stop caring about all the trivial things. Why should I care what Microsoft has to say about Apple or vice versa? Why should I care when a Linux zealot declares the start of the nineteenth Crusade against Sata- er, Bill Gates?
Flame on! or not. -
Great article Adam! You are a man after my own heart! I rule over my computer with an iron fist and judiciously gut every MS OS I've own. I also drink no one's kool-aid (XP: 1.5GB Disk space, 19 running processes; Vista: 10GB Disk Space; 30 running processes). Ubuntu 9.04 is my primary OS and I absolutely love the amount of control I have. I now have no use for vista except for games. (Still working on that). :pReply


