Build Your Own (Physical) 3D Models
The Roughing Pass
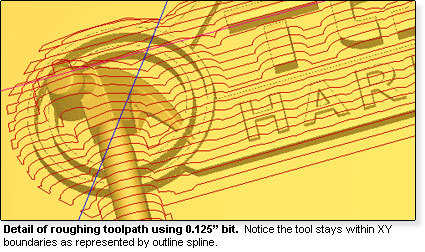
After importing and aligning the model to relate to the position of the stock, we want to make what is referred to as a roughing pass. In this step, the mill takes out excess material with a larger bit, which then allows a smaller bit to enhance model detail without breaking or being worked to overload. In this case the size of the roughing bit is 0.125" or 1/8". For a roughing pass an allowance is usually set, which leaves more material than necessary on the model. For smaller models this amount is usually in the neighborhood of 0.03" or greater. The allowance prevents the bit from reducing any stock which is contained within the dimension of the model subsequently refined by the finishing pass.
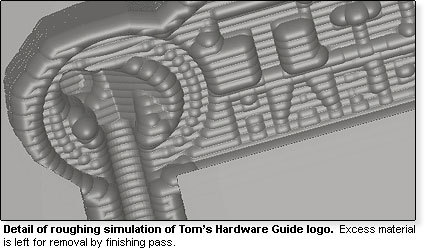
Before we actually proceed to the milling process it is important to check the GCode and make sure there are no errors in programming. This can be done with an integrated simulator made available in the program. The interpreter simulates the physical movements of the milling bit on a piece of virtual stock, alerting the operator if there are any steps that could interfere with the job. As you can see by the simulation, the roughing pass leaves a fair amount of variance that will be removed in the detail pass.
The Finishing Pass
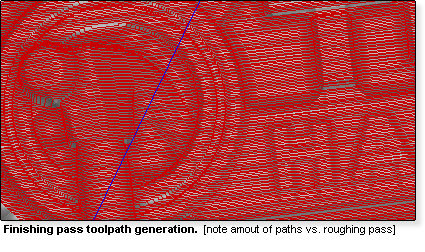
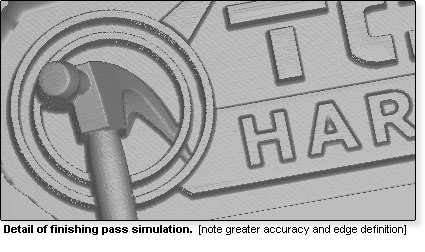
The second part of creating the GCode is to program a detail pass, which is carried out with a smaller bit, in this case 0.028". This pass will finish the model to mirror its 3D counterpart by removing excess stock and creating finer curves and edges. Since this bit is a great reduction in size from the roughing bit, more toolpaths must be created to machine the same area, while maintaining detail and a smooth surface.
Once again, the toolpath for this secondary procedure is simulated, as a failsafe to ensure proper machine code.
Now that the toolpaths have been created, we simply save them in a file and transfer them to the computer connected to the CNC mill.
Get Tom's Hardware's best news and in-depth reviews, straight to your inbox.
Current page: The Roughing Pass
Prev Page Brief Overview On CNC Milling And The Coding Interface Next Page Prototype Molding Vs. High Volume Production


