Build Your Own (Physical) 3D Models
Peeling Back The Rubber - There Is The Mold
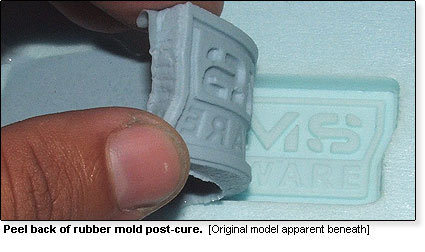
Now that the rubber has cured, it's time to peel back the surface and remove it from the model. I'm not an agent for Smooth-On, but I must say they make a fantastic product; the cost for the silicone can be a little pricy, but you get what you pay for. As expected, the mold released easily and formed a near perfect capture of the model surface. For those of you familiar, you must be aware that silicone is capable of capturing fantastic minutia. When first experimenting I made copies of my fingerprints and replicated them in resin with great detail.
The mold is finished and now just needs something to fill it with in order to make a replica. The OOMOO 30 is a little too soft to be used for plastic injection. The stress from plastic forced into the mold under pressure would cause deformation along the edges and lead to a faulty and distorted rendition. Since the mold is only single-sided, a pourable plastic resin can easily be used to fill the cavity. Pourable resins have some disadvantages related to tensile strength when compared to plastic used for injection. For this reason, they are commonly used for prototyping, but in this case high tensile strength isn't necessarily a priority, so they'll fit the bill.
Liquid Plastic Fills To Fill The Mold
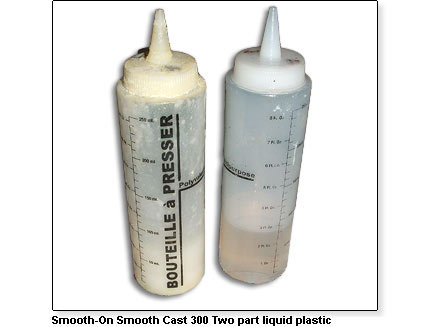
Smooth-On also makes a line of pourable resins under their Smooth Cast line, which have different physical properties and applications; similar to the two part catalyst process used for the silicone rubber, these also require a 50/50 mix ratio. I've added the compound to metered condiment bottles to assist in measurement and ease of use.
These resins are thixotropic, which means they gel and solidify after being mixed. The chemical reaction also generates a great deal of heat that assists in the curing process. One has to be mindful of this reaction over a large area, as sometimes the heat is enough to melt the mold or cause other damage. Since the amount being mixed is small, I'm going to use a shot glass to prepare the pour, using the same half/full mark technique as for the silicone. Both parts of the mixture start clear, but upon mixing and curing turn to a solid, opaque white.
Get Tom's Hardware's best news and in-depth reviews, straight to your inbox.
Current page: Peeling Back The Rubber - There Is The Mold
Prev Page Pouring The Silicone Rubber And Making The Badge Next Page Liquid Plastic Fills To Fill The Mold, Continued
