Nixeus NX-VUE24A Monitor Review
FreeSync and G-Sync monitors are selling at a premium but Nixeus breaks that trend with a value-priced 24-inch model the runs FreeSync from 30 to 144Hz. Today we check out the NX-VUE24A.
Why you can trust Tom's Hardware
OSD Setup And Calibration
The OSD is operated by four buttons that require firm pressure to operate. After the joysticks and controllers we’ve seen on other monitors, traditional keys seem a lot less intuitive.
OSD Tour
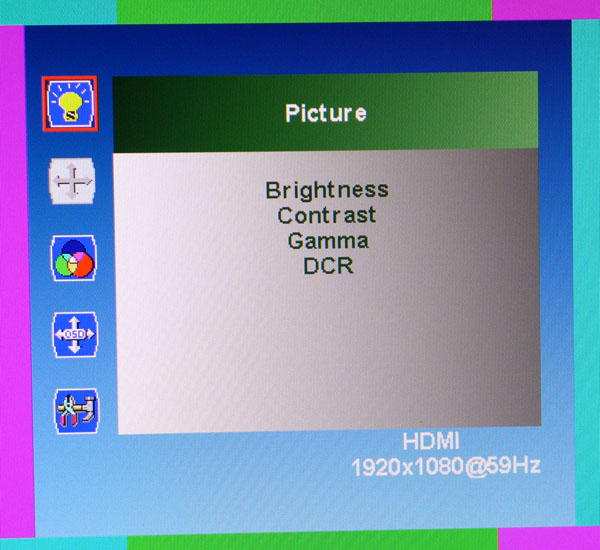
Pressing the far-left key brings up the OSD. Its default screen position is down in the lower-right corner which is convenient. That way it doesn’t interfere with test patterns. The first sub-menu covers the image’s luminance controls. The gamma setting are a little unusual. Rather than values like 2.2 or 2.4, the option is either on or off. On page five we’ll show you the difference. In a nutshell, neither setting tracks 2.2. One is too dark and the other too light.
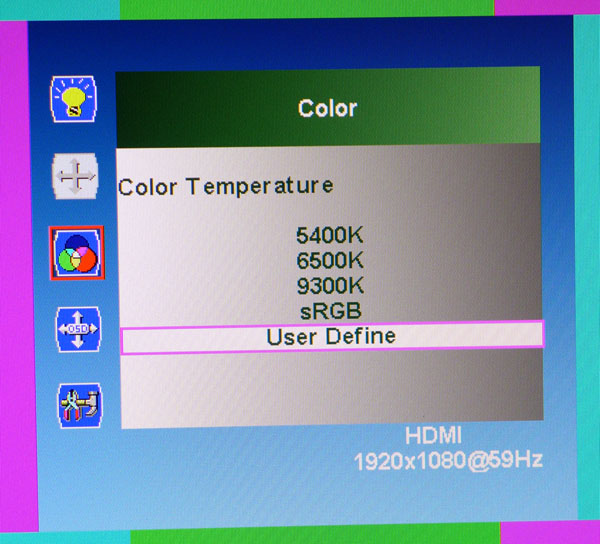
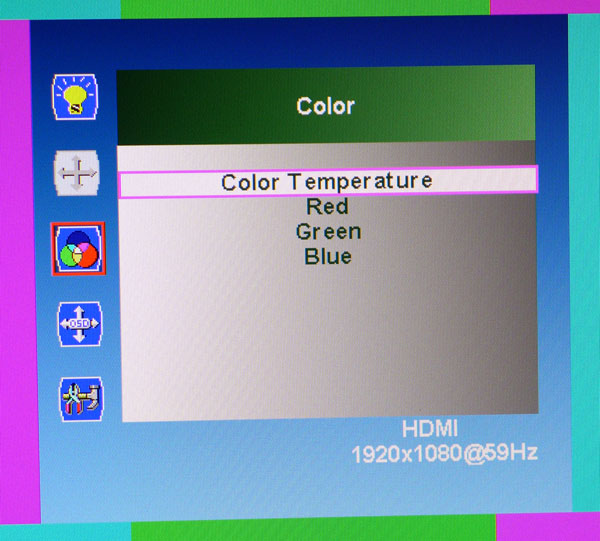
The Color menu breaks up the modes by temperature plus sRGB and User modes. 6500K is the default and runs visibly warm. sRGB is pretty close and cannot be calibrated. User is also a good choice and has the added benefit of increasing output. User Define unlocks the RGB controls for a grayscale calibration.
Once enabled, the RGB controls are a bit of a pain to use. You have to select each color separately, then adjust. After a little back and forth our fingers were sore from so many button presses. Luckily our efforts were rewarded with excellent results in the benchmark tests.
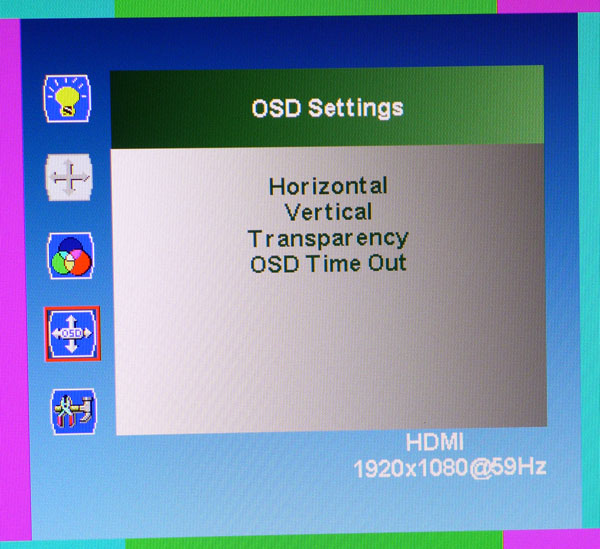
The OSD can be positioned anywhere on the screen you like. You can also specify its transparency and extend the timeout up to 60 seconds.
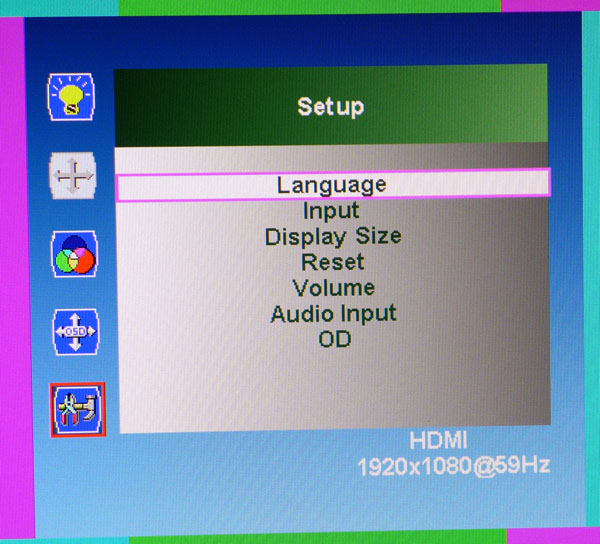
The OSD is available in six languages. There is an input selector here but the NX-VUE24A will automatically switch to the first active signal it sees. You can also switch sources by pressing the third button.
Display Size has Full Screen and 4:3 options. Reset will return all settings to their as-shipped values. Volume should be set to maximum to get the most out of the tiny speakers. They’re fairly tinny and not terribly loud but they’ll work in a pinch. Unfortunately there is no headphone output so you’ll have to connect your cans (or extra speakers) to your PC. Audio Input switches between digital (HDMI or DisplayPort) and analog.
Get Tom's Hardware's best news and in-depth reviews, straight to your inbox.
OD is the overdrive function and has Off, Median and Strong settings. We couldn’t measure a difference in response times between Median and Strong but the higher option adds visible ghosting. Median looks OK in our moving photo tests. We also confirmed that OD works in FreeSync mode. After trying all three settings during gameplay, we preferred to leave it off.
Calibration
The NX-VUE24A has very accurate grayscale and color but its gamma cannot be set to the optimum 2.2 standard. If you don’t calibrate set the mode to User Define and Gamma to On. Then adjust Brightness to taste. sRGB is a good mode as well but its output is limited to about 170cd/m2. Full brightness is only available in the User mode. If you do calibrate, turn Gamma On first as it will change the white point visibly. Below are our recommended settings. Please give them a try to optimize your NX-VUE24A.
| Nixeus NX-VUE24A Settings, Best Uncalibrated | |
|---|---|
| Color | User Define |
| Gamma | On |
| Brightness | 84 |
| Contrast | 50 |
| DCR | Off |
| OD | Median |
| Calibrated | |
| Color User Define | Red 74, Green 71, Blue 68 |
| Gamma | On |
| Brightness 200cd/m2 | 84 |
| Brightness 120cd/m2 | 37 |
| Brightness 100cd/m2 | 29 |
| Brightness 80cd/m2 | 22 |
| Brightness 50cd/m2 | 14 |
| Contrast | 50 |
| DCR | Off |
| OD | Median |
Current page: OSD Setup And Calibration
Prev Page Packaging, Physical Layout And Accessories Next Page Brightness And Contrast
Christian Eberle is a Contributing Editor for Tom's Hardware US. He's a veteran reviewer of A/V equipment, specializing in monitors. Christian began his obsession with tech when he built his first PC in 1991, a 286 running DOS 3.0 at a blazing 12MHz. In 2006, he undertook training from the Imaging Science Foundation in video calibration and testing and thus started a passion for precise imaging that persists to this day. He is also a professional musician with a degree from the New England Conservatory as a classical bassoonist which he used to good effect as a performer with the West Point Army Band from 1987 to 2013. He enjoys watching movies and listening to high-end audio in his custom-built home theater and can be seen riding trails near his home on a race-ready ICE VTX recumbent trike. Christian enjoys the endless summer in Florida where he lives with his wife and Chihuahua and plays with orchestras around the state.
-
iam2thecrowe Just cant wait for the day where every monitor is freesync/gsync and dont have to toss up between features/price/panel quality so much to find what suits me best.Reply -
thor220 It's good to see Free-Sync monitors getting larger ranges, especially at this price point. I'm waiting for one's that can use the full Free-Sync spec down into the single digit FPS, that way even people with entry level cards will be able to benefit from this technology.Reply
No USB isn't a huge deal for 99% of the people and I don't think it should really be a strike against this monitor. Sure it's present on higher end models but who's to say that contributes to a monitor's worth in the first place? USB hubs are so cheap, I don't think anyone uses USB as a metric for picking a monitor.
While they did fudge the brightness number, this monitor can still go above safe brightness settings. Unless you need to burn out your eyes, most people won't even notice it.
Perplexed as to why "TN Panel" is listed as a con when in this very review it's stated that being a TN panel isn't indicative of poor quality or color. This monitor has good color, especially considering it's a gaming monitor. -
photonboy thor220,Reply
As said "viewing angles" are one drawback. As for color, the TN may not be "poor" but it is not as good as IPS (IPS has drawbacks like more ghosting though).
Other:
It should be "LCD panel" not "LED panel" in the article. It is an LED monitor but that just refers to the choice of backlight. The "panel" is the IPS, TN or other technology that filters the backlight to produce individual pixels. -
crisan_tiberiu Thor220, i dont know about the range of freesync and gsync on the low side, but under 24 Hz the slideshow effect kicks in. It is all about the human eye.Reply -
iam2thecrowe Reply
Coming from a TN panel to a VA panel, i would never go back to TN. Considering recent VA and IPS panels have low response (not quite as low as TN but good enough to minimize ghosting/blur), low input lag and high refresh rate capabilities, I would say they are now preferable over TN, but a premium price is normally paid. Maybe some competitive gamers may see TN as preferable for lower response times, but i would say most gamers aren't on a competitive level and can enjoy the higher image quality of a VA or IPS panel.16877315 said:Perplexed as to why "TN Panel" is listed as a con when in this very review it's stated that being a TN panel isn't indicative of poor quality or color. This monitor has good color, especially considering it's a gaming monitor. -
quilciri response time and ghosting are separate issues. Refresh rate helps with ghosting, but response time does not. IPS/PLS panels are unfortunately not as good as TN (on average) with ghosting and overshoot (and of course, response time).Reply
http://www.tftcentral.co.uk/articles/response_time.htm
http://www.tftcentral.co.uk/articles/motion_blur.htm
Both technologies have not yet achieved the gold standard of response an motion clarity that was CRT, though :D
-
DongleKin If you want to test freesync at low frame rates, just underclock the graphics card until you're in the 30s of FPS.Reply -
milkod2001 Unless you are professional FPS gamer who really needs very fast response times you might be better served with 27' 1440 PLS korean imports for the same price.Reply
Bigger screen and resolution not to mention colours.
This monitor would be great if sold under $200. $350 for TN 1080p panel even with fast response time is a joke. -
quilciri Reply16881305 said:Unless you are professional FPS gamer who really needs very fast response times you might be better served with 27' 1440 PLS korean imports for the same price.
Bigger screen and resolution not to mention colours.
This monitor would be great if sold under $200. $350 for TN 1080p panel even with fast response time is a joke.
The Last widely manufactured overclockable Korean IPS, the QNIX 2710, has issues; one of which is being hit or miss when overclocking and getting the true frame rate you've overclocked to vs. skipping frames. It also has significant ghosting and overshoot. It's a good monitor, but definitely has compromises. "you get what you pay for" is true here.
http://www.tftcentral.co.uk/reviews/qnix_qx2710.htm
...it's a damn shame about overlord computers; I hope Scribby recovers. Even so, I don't think the company was going to be around much longer with the falling prices of 120hz+ adaptive sync monitors.
That reminds me... Manufacturer refurb'd Acer XG270HU's are on Ebay from the Acer store for $330 & free shipping right now. I totally bought one then posted on slickdeals :)
