Sky's the Limit Video Editing: Pinnacle Studio 9
Studio: Logical Video Editing, Continued
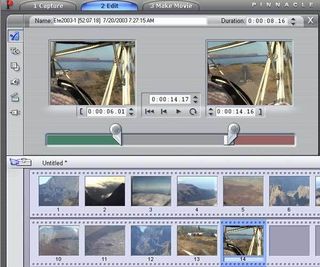
The second step, "Edit", is self-explanatory. This also includes what is known as DVD authoring for users planning a DVD production. The DV sequences that have been inserted, which "Studio" has automatically divided, appear at the top left as thumbnails. On the right is the preview window that allows you to check what you just did at any time. For actual editing, you have a timeline in the lower screen area. Depending on your needs, you can display the preview window a film spool with a still of the clip, or you can select the image according to tracks that show you the revisions, soundtracks and information about modification at a glance. To edit, all you need to do is to drag a clip to the timeline.

The toolbox icon above the timeline allows you to switch between video and sound editing. At the top left are the menus for film editing (cutting, effects, titles, mixing, etc.) You can also display this menu by double-clicking on the clip. Naturally, you can also import MP3 audio files and JPEG images. Once editing has been done, you may need to generate another DVD menu. Pinnacle Studio offers comprehensive authoring functions for this.

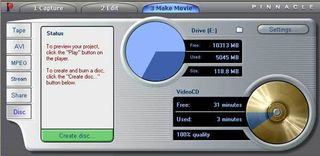
Only one step remains - output ("Make Movie"). Depending on area of application, you can choose between several formats for saving to the hard disk. Pinnacle prefers MPEG, Real Video and Windows Media. The AVI allows the user to engage various plug-ins as needed, such as DivX and Co. However, DivX is not included in the package - it has to be installed manually.
In addition to the default standard quality, you can also choose any quality settings for each format. But you can also just transfer the finished film immediately to a videotape or CD/DVD. If you choose DVD, Studio creates a video DVD for you with a menu and everything that goes along with it, so that it can be played back on standalone DVD players.
Stay on the Cutting Edge
Join the experts who read Tom's Hardware for the inside track on enthusiast PC tech news — and have for over 25 years. We'll send breaking news and in-depth reviews of CPUs, GPUs, AI, maker hardware and more straight to your inbox.
Current page: Studio: Logical Video Editing, Continued
Prev Page Studio: Logical Video Editing Next Page Interface: Evolution Yes, Revolution NoMost Popular

