6 Best 3D Printer Slicers and How to Use Them
Prepare your designs for 3D printing with the right app.
A 3D slicer is an application takes a 3D model and converts it into a G-code file with a series of layers and instructions that a 3D printer can understand. Each slice corresponds to the cross-section of the 3D object at a specific height in the Z-axis. The slicer allows you to adjust various parameters affecting the printing process, like layer height, print speed, infill density, support structures, and cooling settings.
Even if you have one of the best 3D printers, you need a good slicer in order to get quality output and perform important functions such as resizing, rotating or changing colors in your model. While every printer comes with its own application – often a branded version of Ultimaker Cura – it’s not always your best option. Below we’ve listed the six best slicers so you can find the one that works for you. And we’ve got some steps to walk you through the basics of each.
1. PrusaSlicer
PrusaSlicer was developed by Prusa Research for Prusa 3D printers but also supports a wide range of third-party models. If you don’t see your 3D printer on the list, you can easily add it. It has a user-friendly interface, and it supports multi-material 3D printing. PrusaSlicer has active development and updates; you will be prompted to update it several times.
The software is completely free. To slice 3D models on PrusaSlicer, you can follow the steps below.
1. Download PrusaSlicer and launch it.
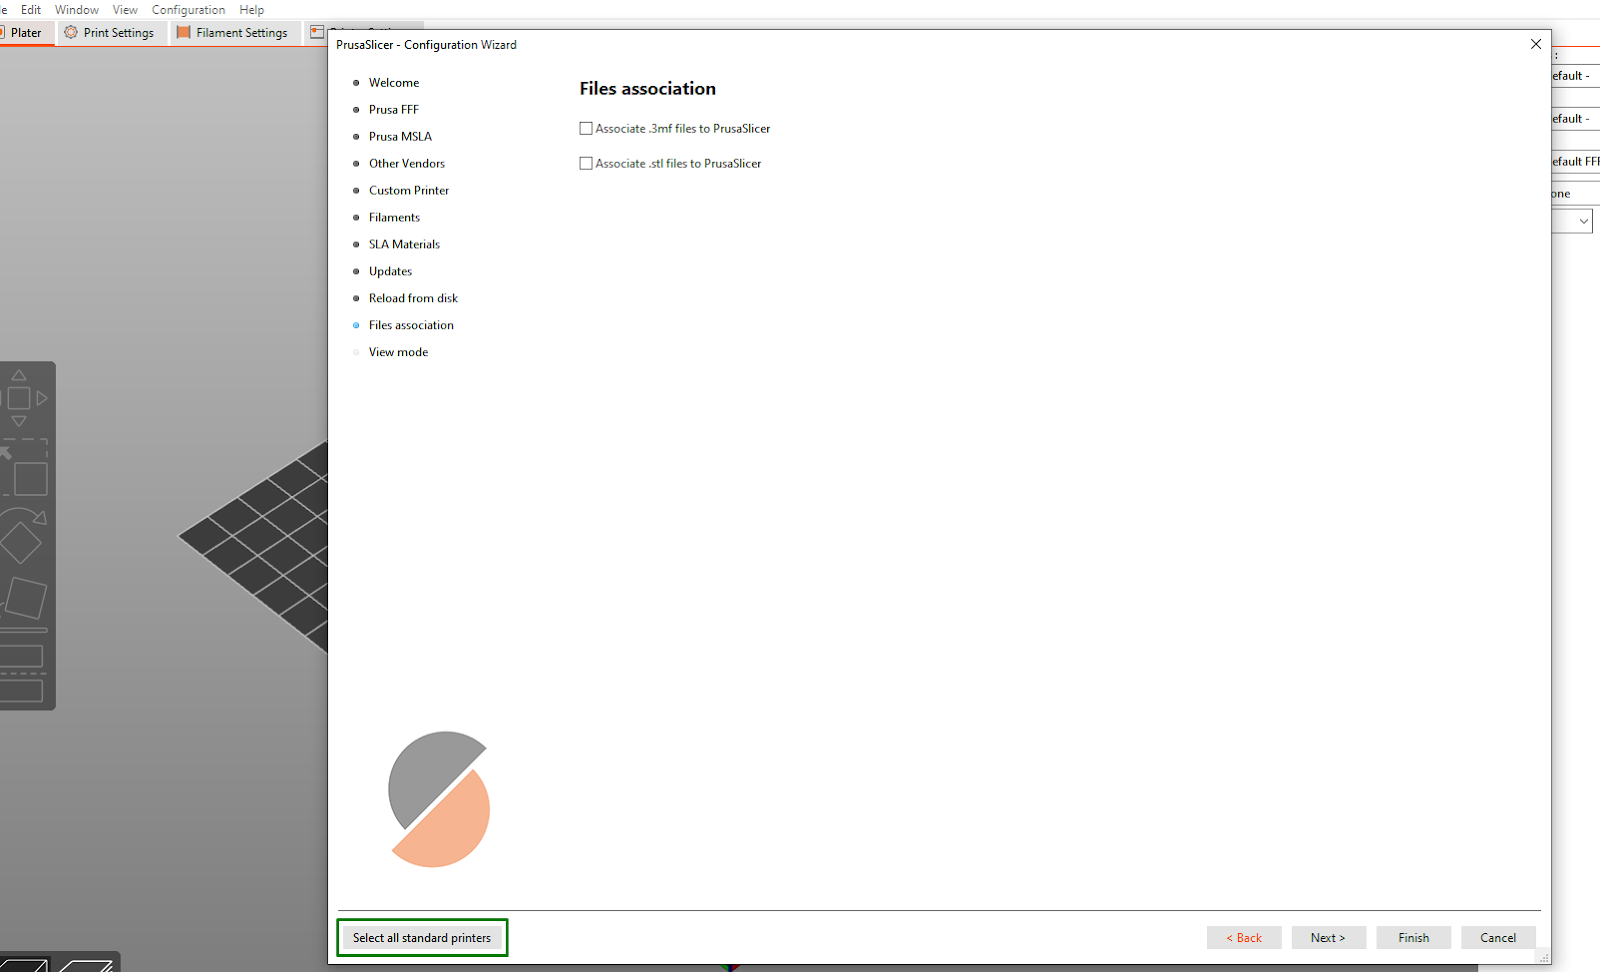
2. Set up your 3D printer profile by choosing the Prusa printer or adding the version you own. To do this, choose Select all standard printers, as shown below.
3. Select your 3D printer version from the list displayed. You can choose Prusa 3D printers or any other you have and continue setting your profile.
Get Tom's Hardware's best news and in-depth reviews, straight to your inbox.
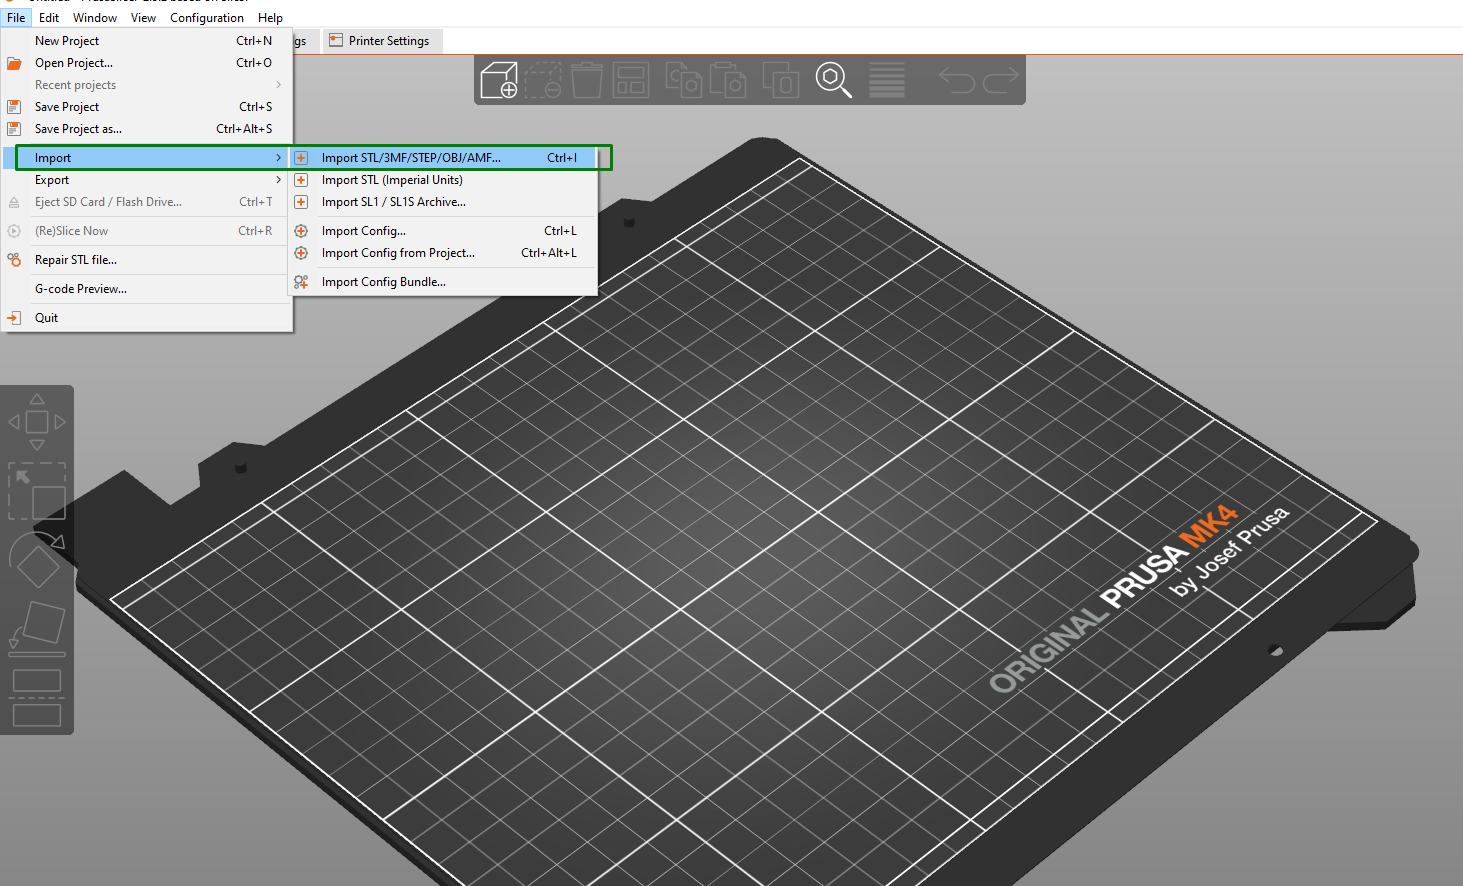
4. Import your 3D model by going to File > Import.
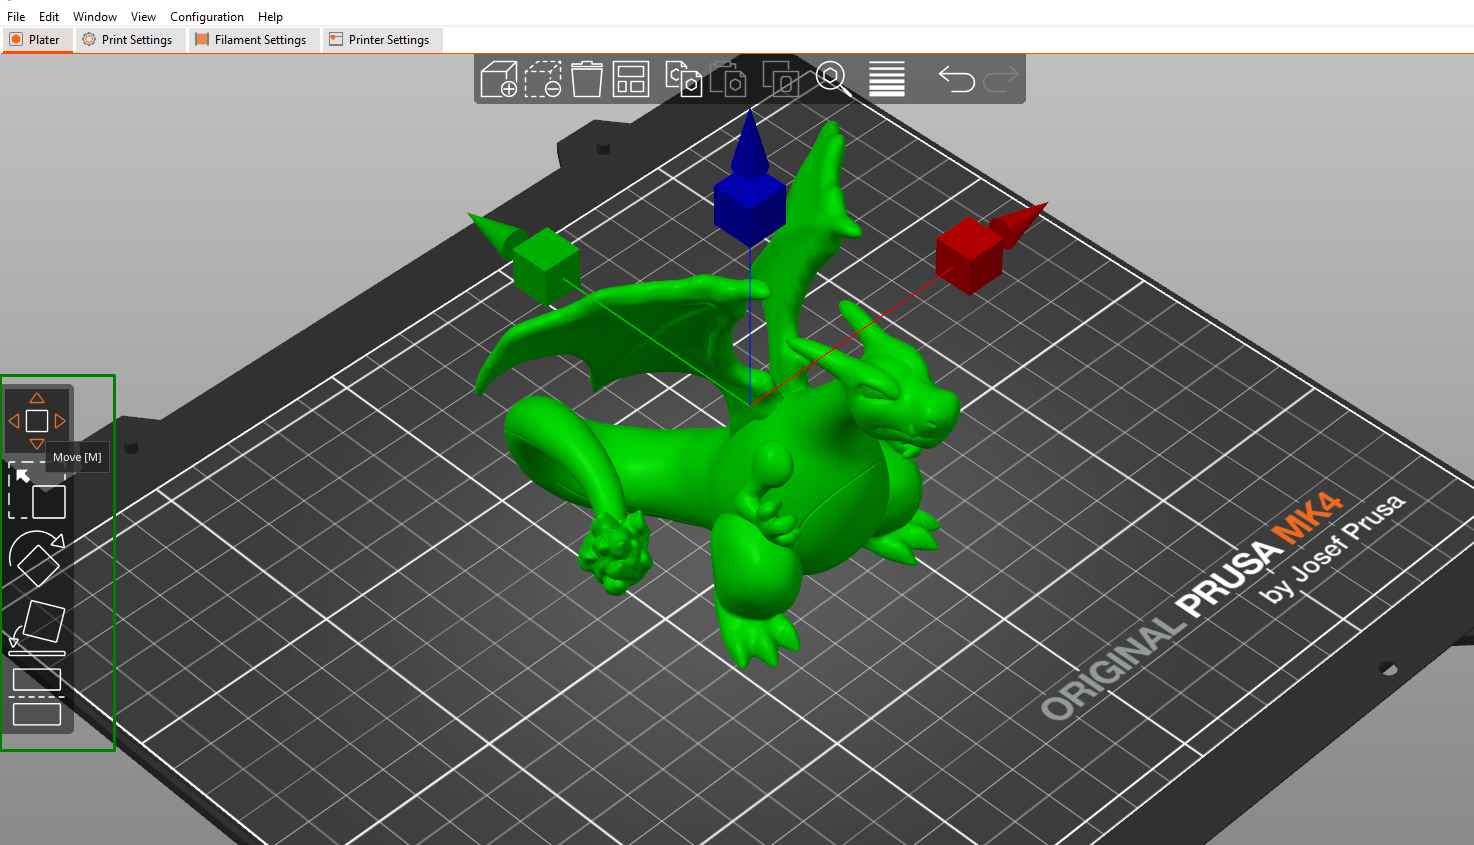
5. Position and scale your 3D model to ensure it’s 3D printed at a proper angle and fits the 3D printer bed well. You can use the move, rotate, and scale tools available on the left section of the interface to do this.
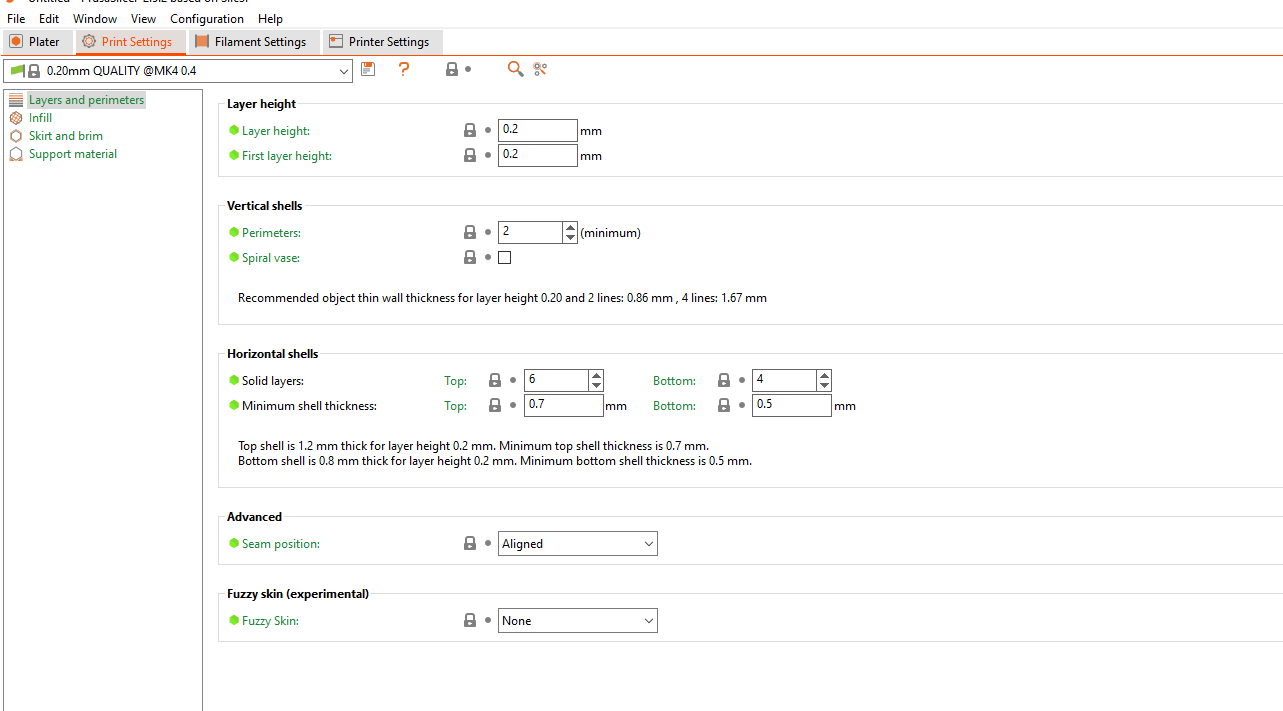
6. Apply the necessary settings like the material, supports, infill, and other print settings.
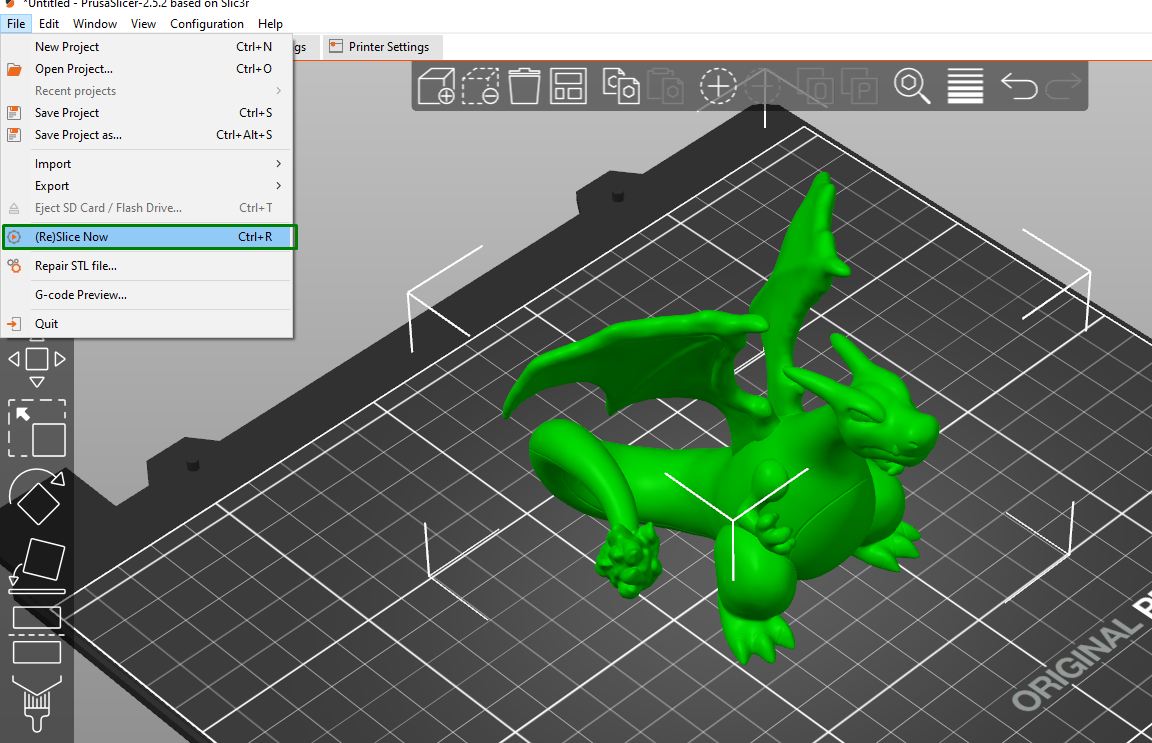
7. Slice the model by going to File > (Re)Slice Now, and you will see the slicing progress on the bottom section of the interface.
8. Click Export G-code to export your G-code.
2. IdeaMaker
Ideamaker was developed by Raise3D, a manufacturer of 3D printers. The slicer is well known for generating advanced supports and allowing users to customize support structures for overhangs and complex geometries to achieve better print quality and reduce the need for extensive post-processing.
In addition to being a 3D slicing software, IdeaMaker can repair your 3D models. For example, you can remove duplicate and isolated faces, fix holes and orientation, and flip mesh orientation. It is free, and it supports multi-material 3D printing like PrusaSlicer. Follow the steps below to slice your 3D models in IdeaMaker.
1. Download IdeaMaker from the Raise3D website and install it.
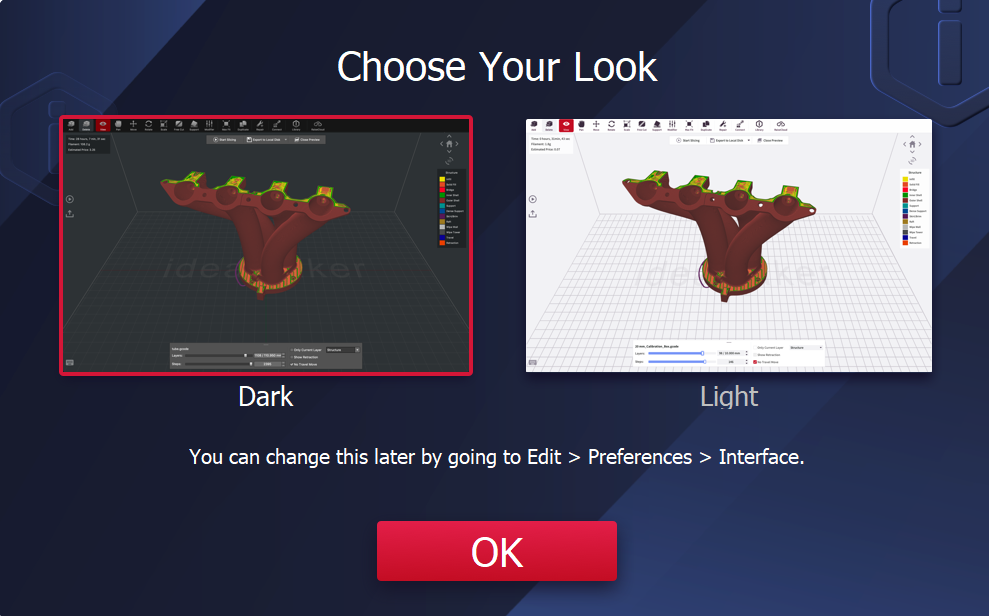
2. Choose the interface's look, either dark or light.
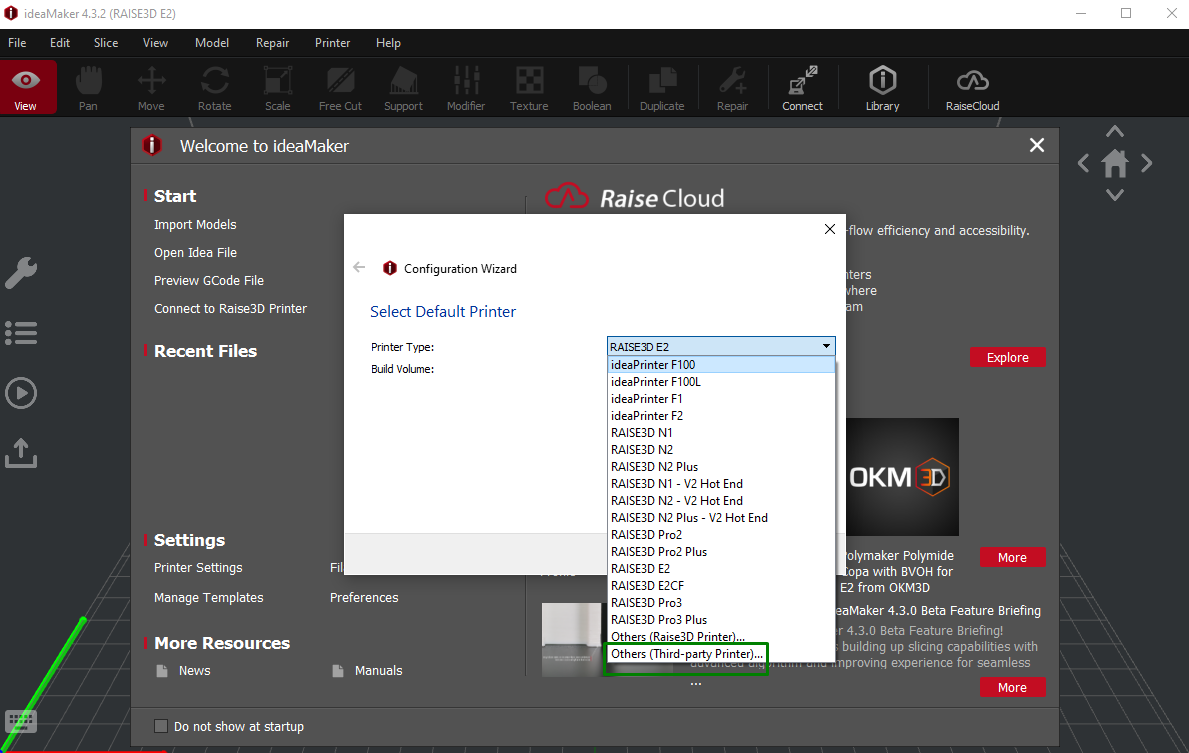
3. Select your 3D printer by choosing the Raise3D version or other types by selecting Others (Third-party printer).
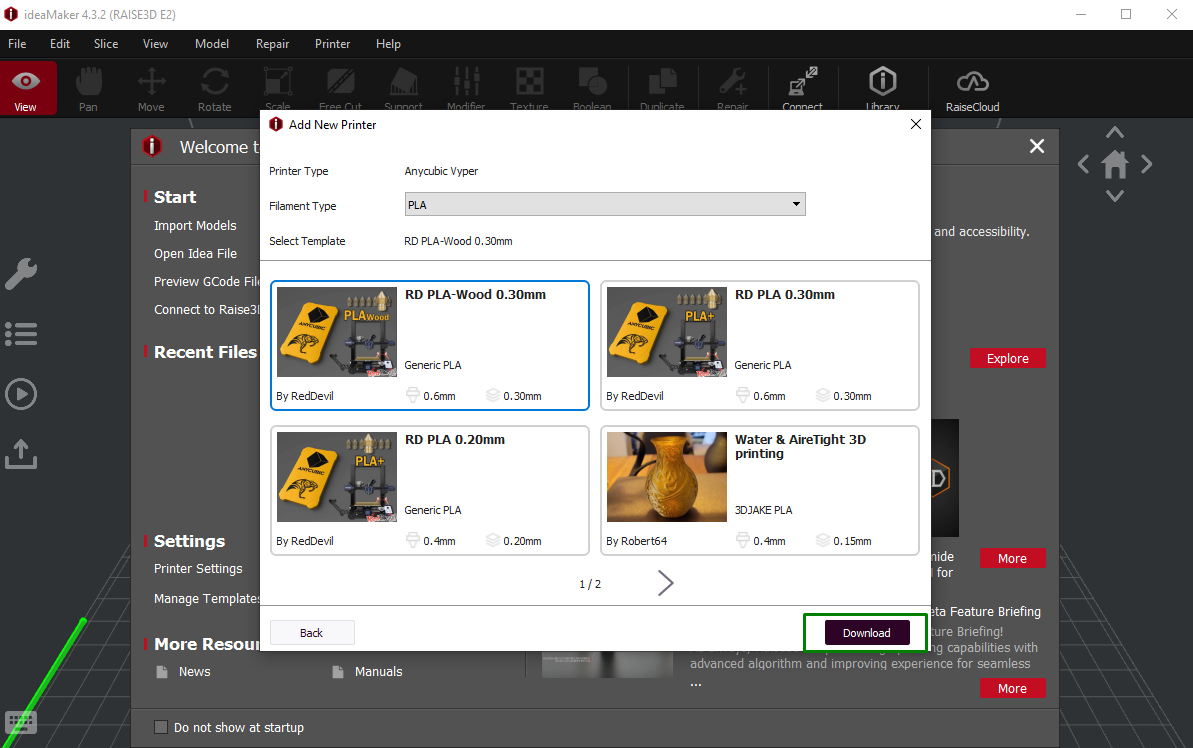
4. Choose the profile and material for your 3D printer. You can download and import it if it’s not built into the software.
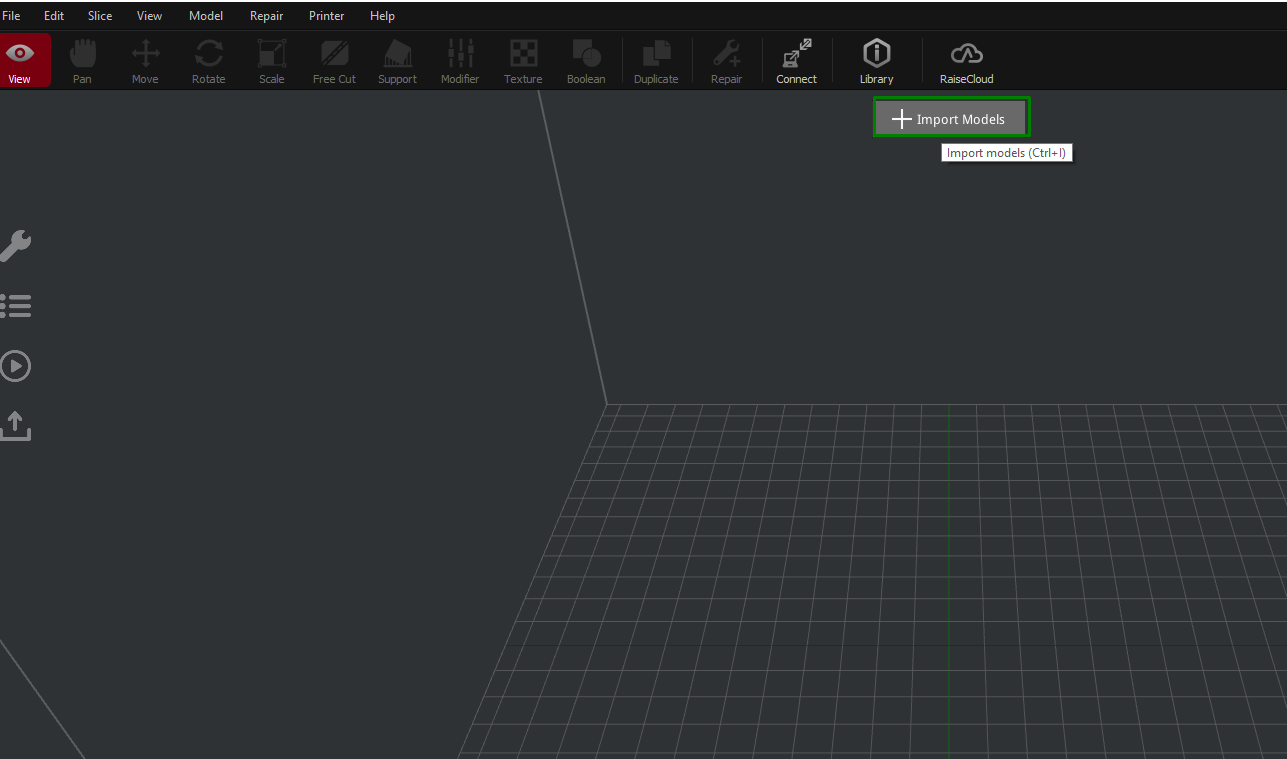
5. Click Import Models to import your files to the software. Or you can go to File > Import Models.
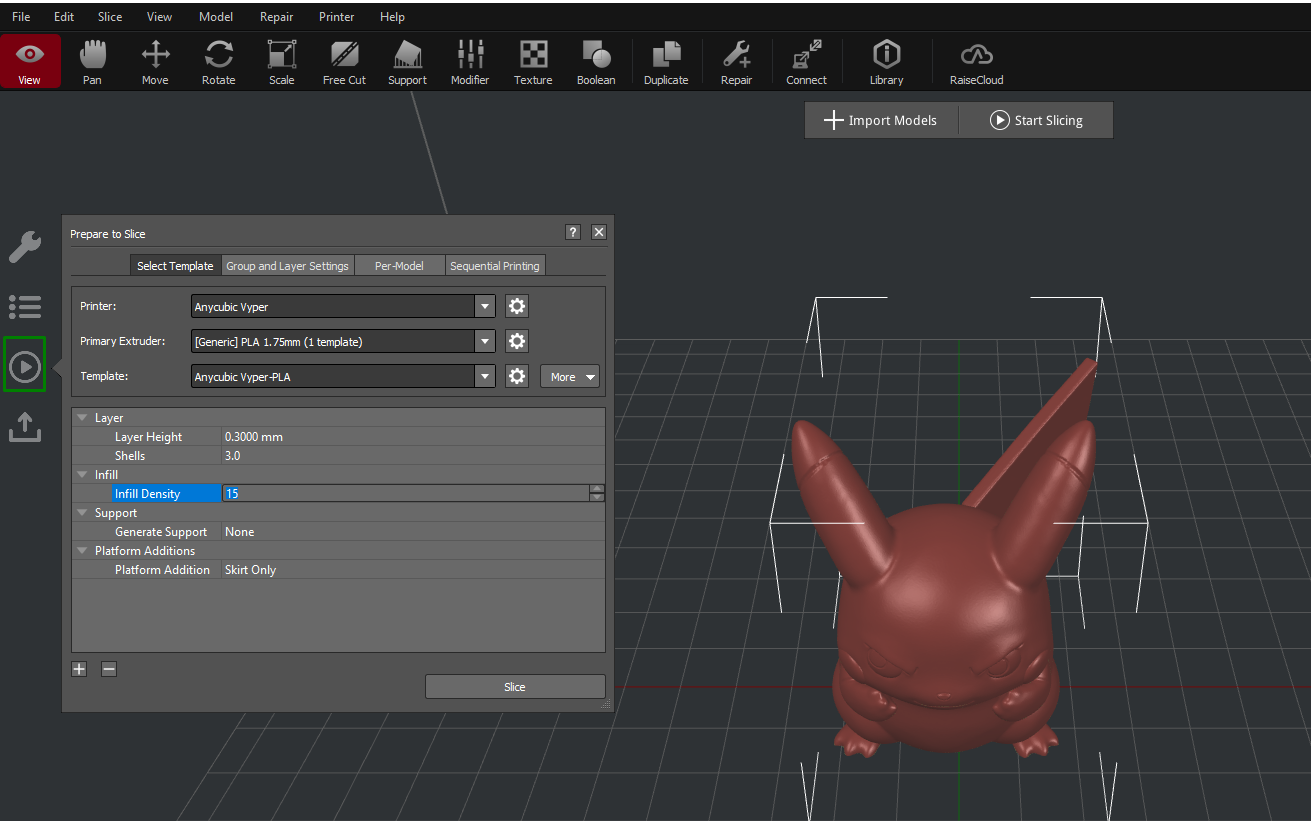
6. Apply the various settings for your model by clicking on the play icon.
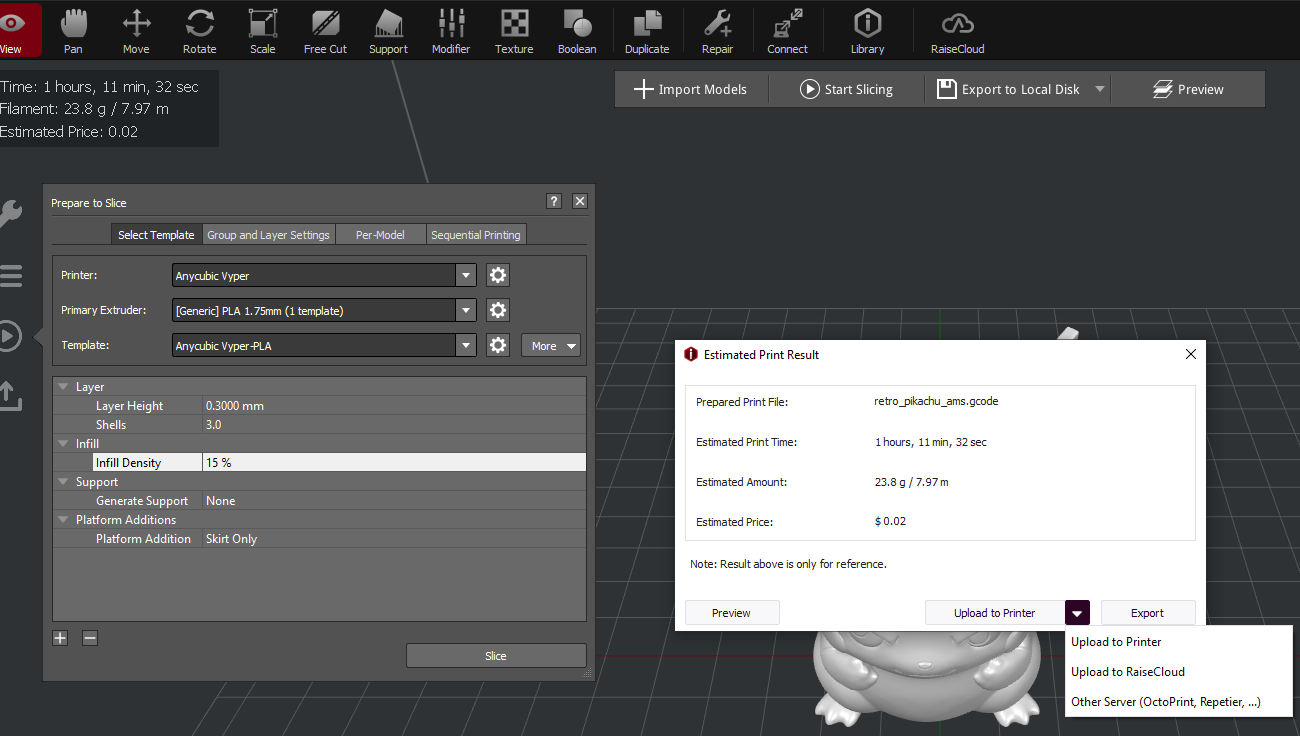
7. Click on Slice to slice the model. After slicing, you will see an option to either preview the file, upload to a printer, or export it to your computer.
3. Ultimaker Cura
Cura is a free and popular 3D slicer developed and maintained by Ultimaker. Cura is so popular that many 3D printer makers – Elegoo for example – have their own branded versions of the app that come with their printers’ profile preloaded. However, these aren’t necessarily the latest and greatest versions with all the features so you may prefer to download Cura directly from Ultimaker.
In addition to having the common 3D printer settings, Cura has other key features like the tree supports. You can add them manually or generate them automatically, and these supports are easy to remove from the print.
There is a “Custom mode” feature in Cura that provides you with more than 400 settings for precise control. In addition, you can integrate it with popular 3D modeling software like Autodesk Inventor, Solidworks, and Siemens NX using the CAD plugin to send your designs directly to the slicer from the CAD software. Follow the steps below to slice your designs in Cura.
1. Download and install Cura from the Ultimaker website and launch it.
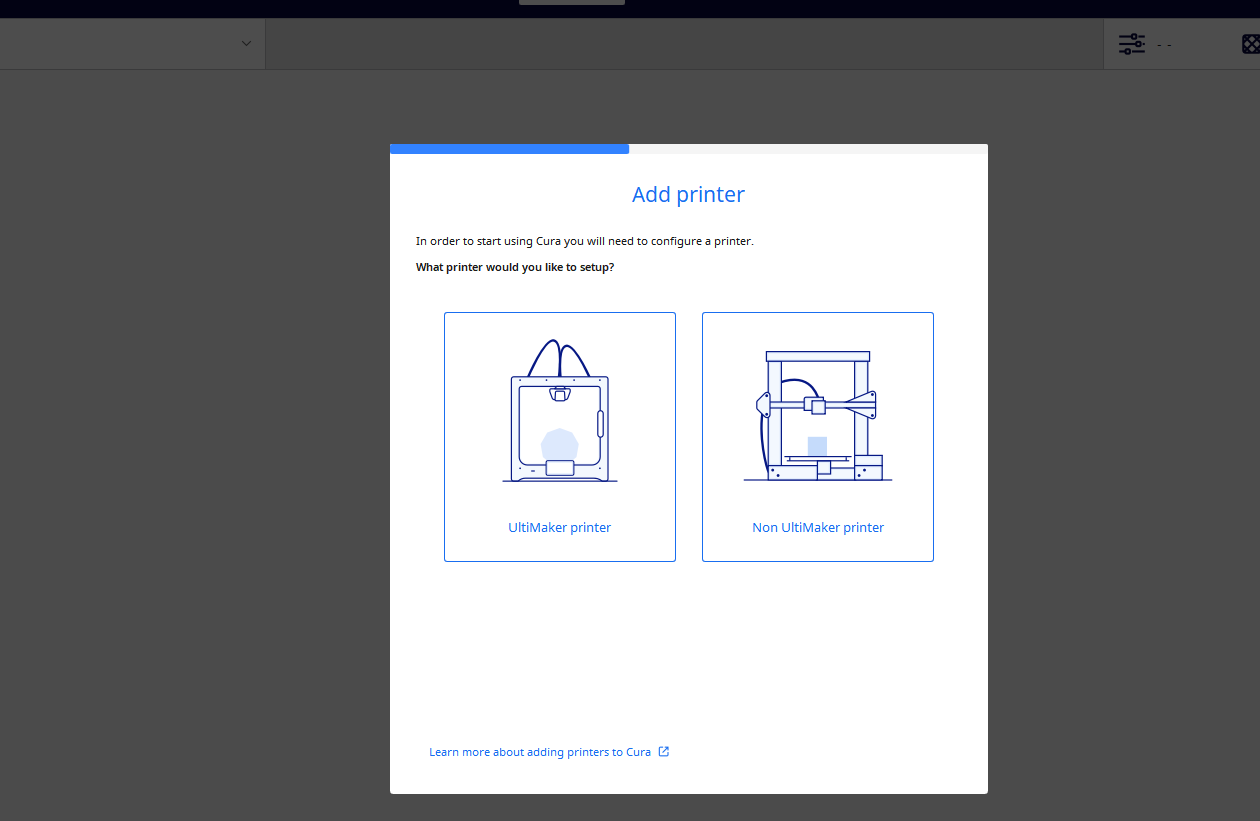
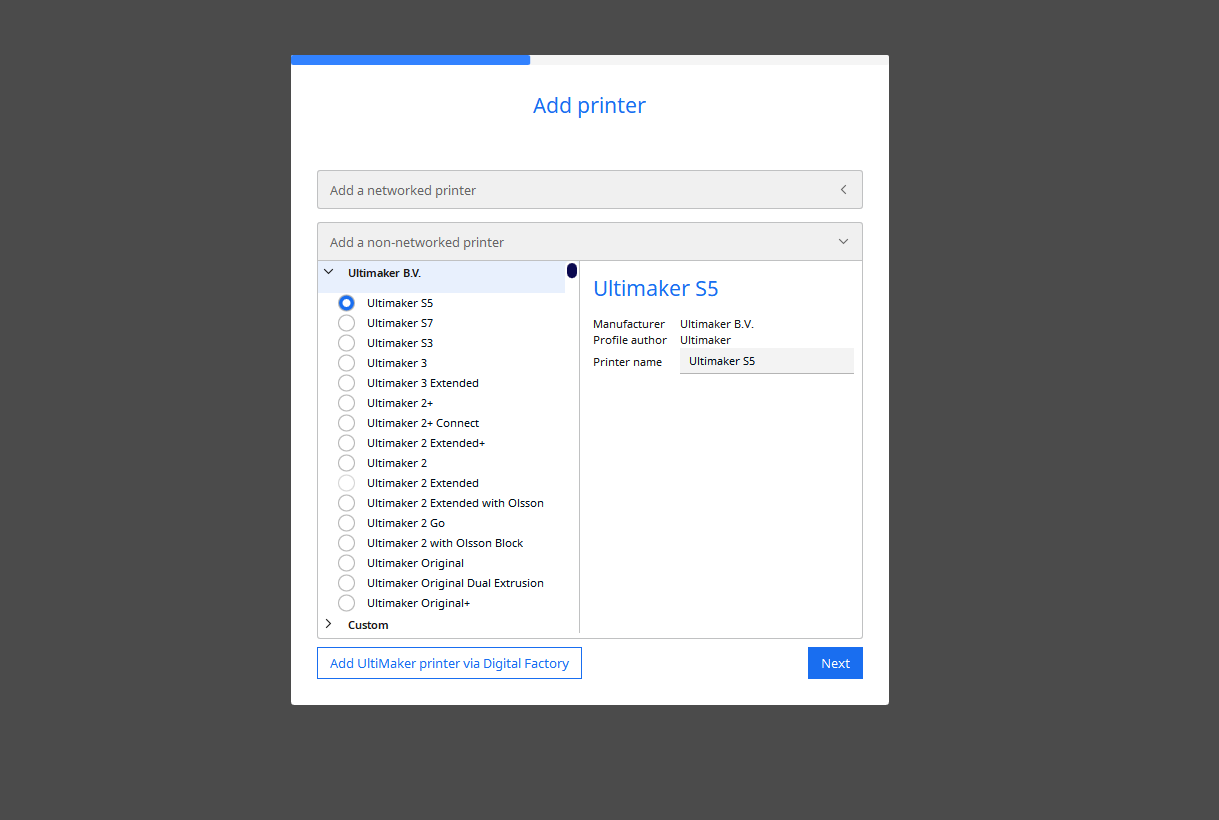
2. Add your 3D printer by choosing Ultimaker printer or Non Ultimaker printer in the window displayed.
3. Choose your 3D printer from the list displayed and proceed.
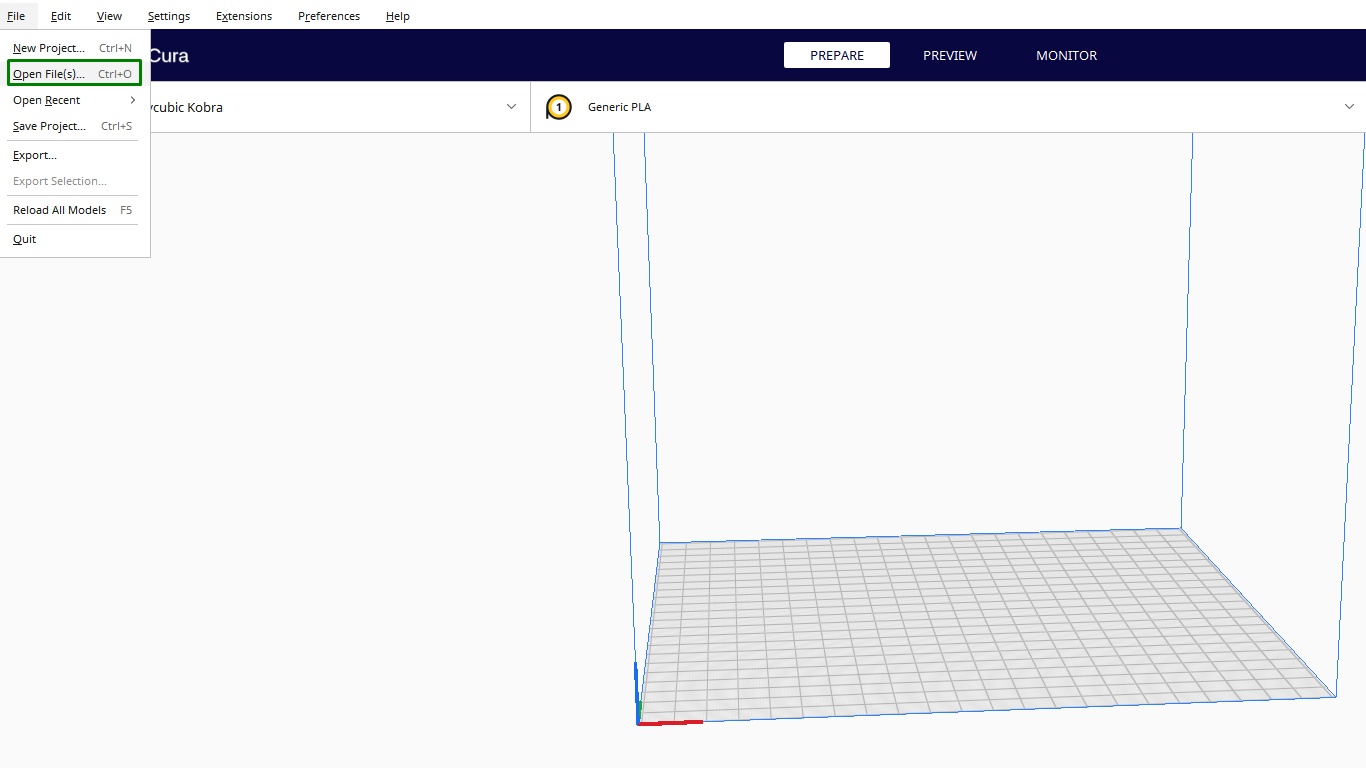
4. Go to File > Open File(s) to import your 3D models to the software.
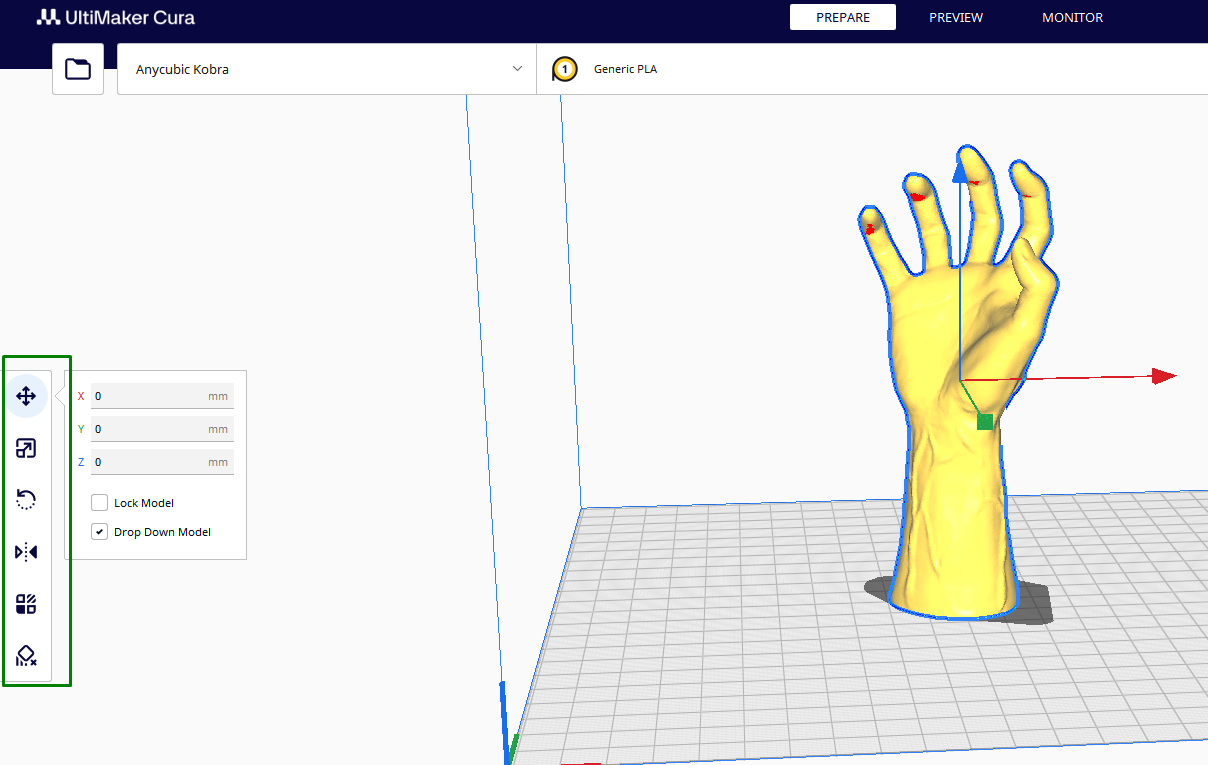
5. Move, scale, rotate, or mirror the object using the tools in the left section of the interface, as shown below.
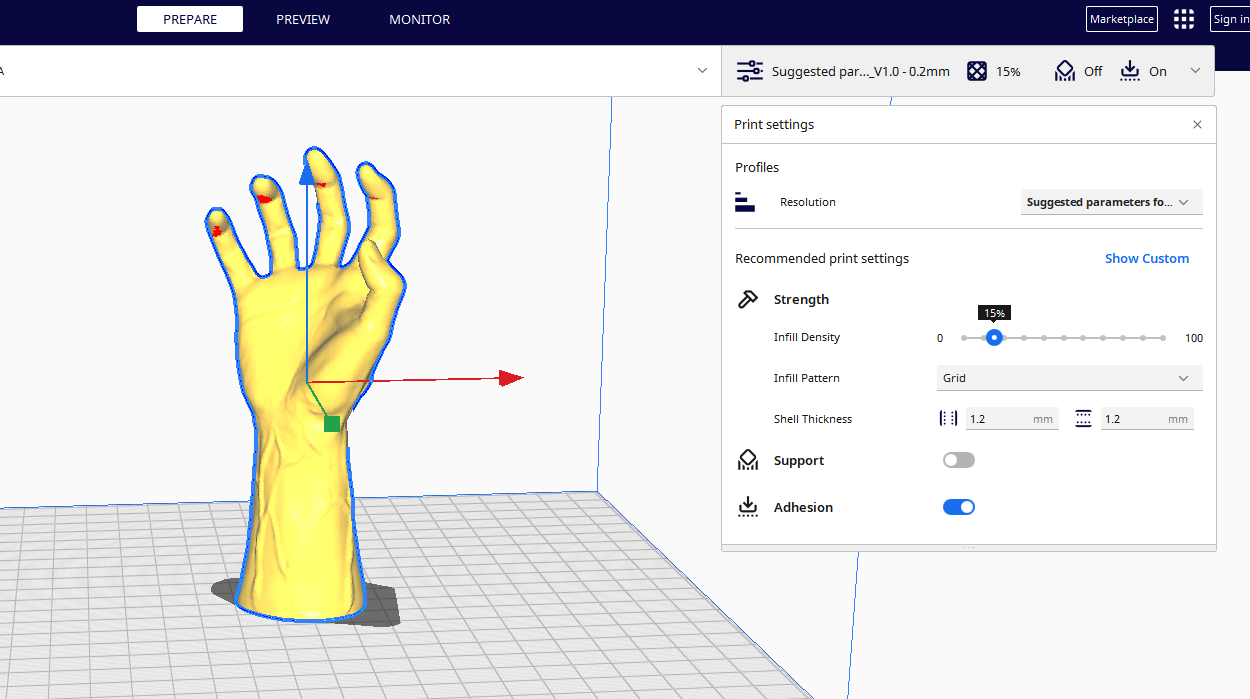
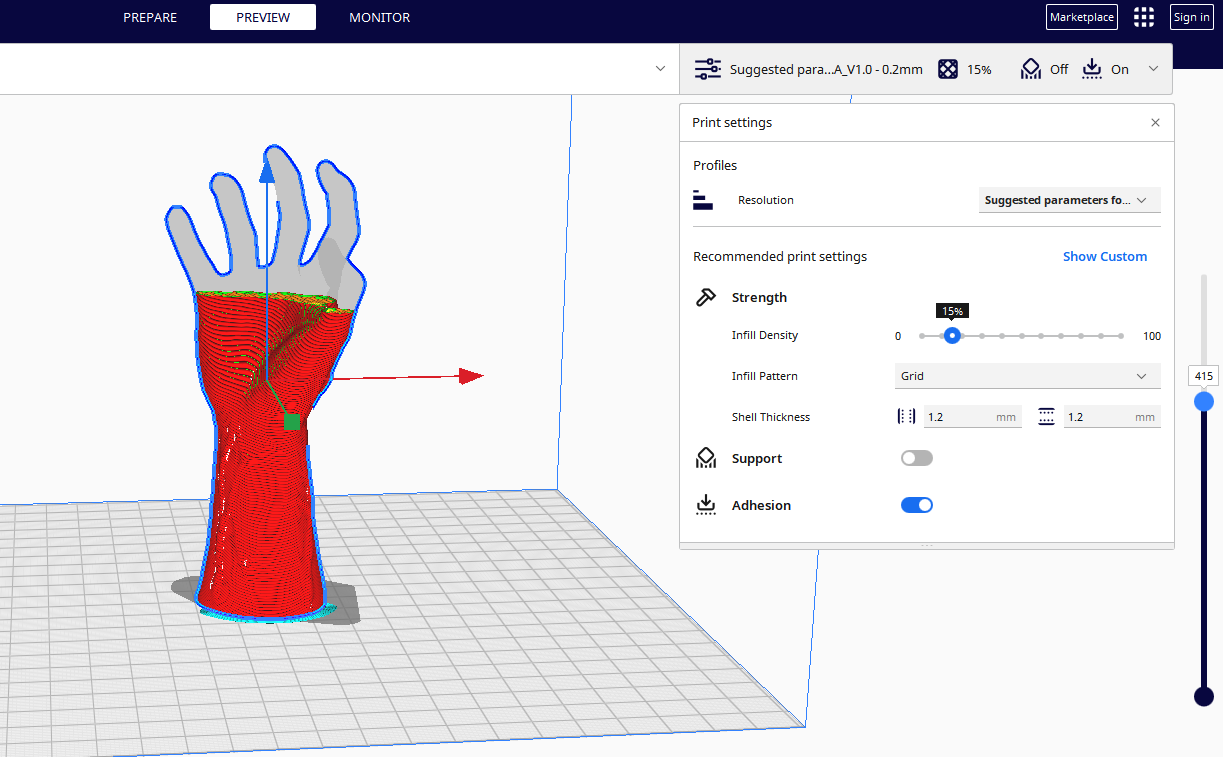
6. Expand the settings panel on the top-right section to apply the necessary settings on your 3D model before 3D slicing.
7. Click Slice found on the bottom-right corner of the workspace to slice your design. After slicing, you can click the Preview option and move the slider on the side to see how your design will be 3D printed.
8. Click Save to Disk to export your G-code file.
4. KISSlicer
KISSlicer is a cross-platform 3D slicer that you can use not only on Windows, Mac, and Linux but also on FreeBSD and Raspberry Pi OS. There is a free version that contains basic functionalities. You must upgrade to the premium version to unlock other advanced features like multi-material 3D printing. Follow the steps below to set up the software and slice your 3D models.
1. Download or buy KISSlicer from the KISSlicer webpage, then install and launch it.
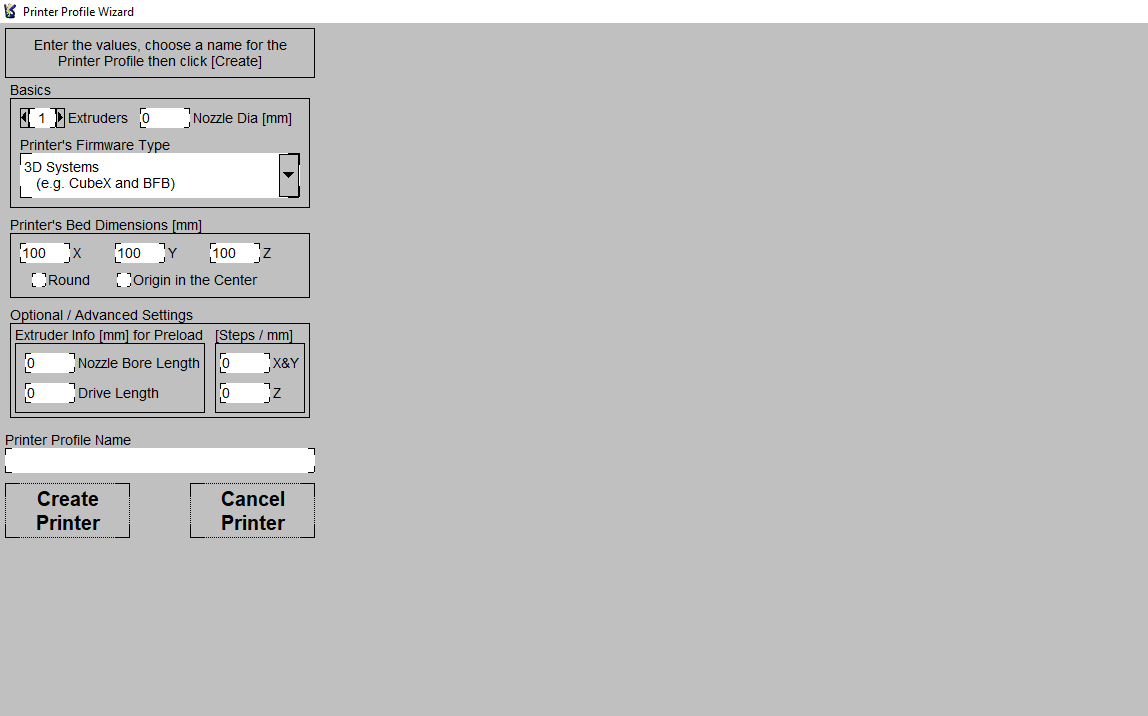
2. Set up your 3D printer profile by specifying the number of extruders it has, the diameter, and the 3D printer bed dimensions. You can also proceed without creating the profile by clicking Cancel Printer.
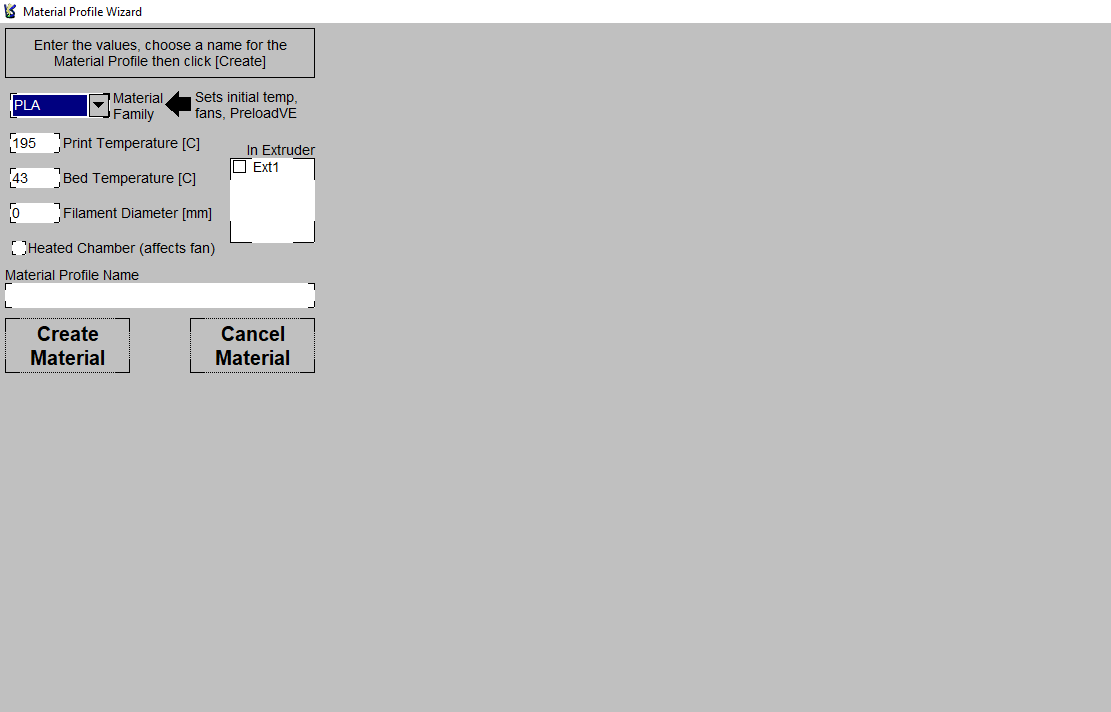
3. Create a material profile for your 3D printer if it’s not there. You can also set up other settings like supports before proceeding to the main interface, or you can choose to skip and proceed without.
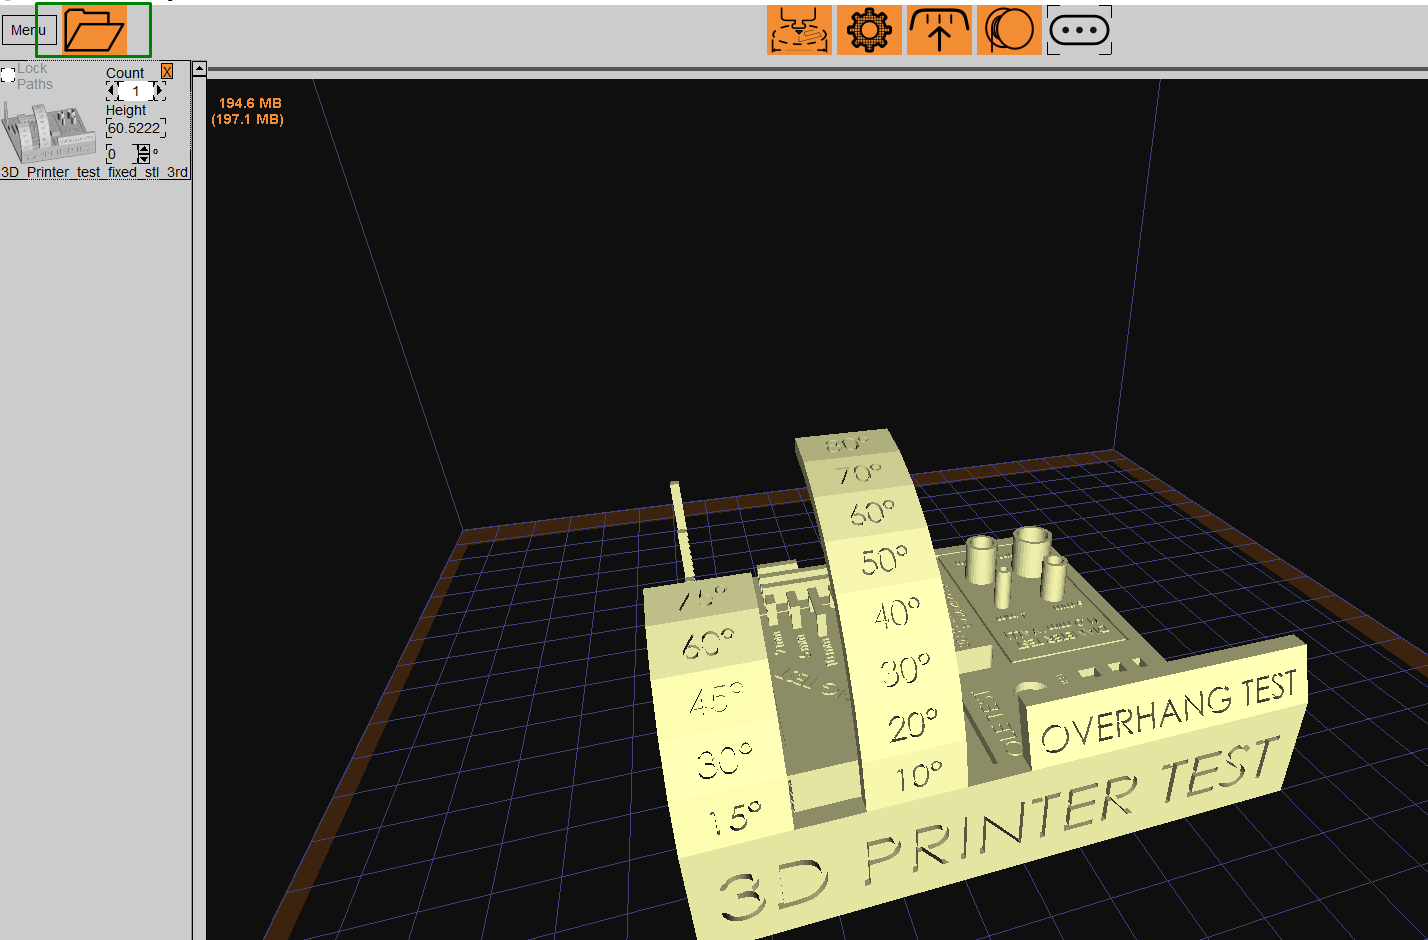
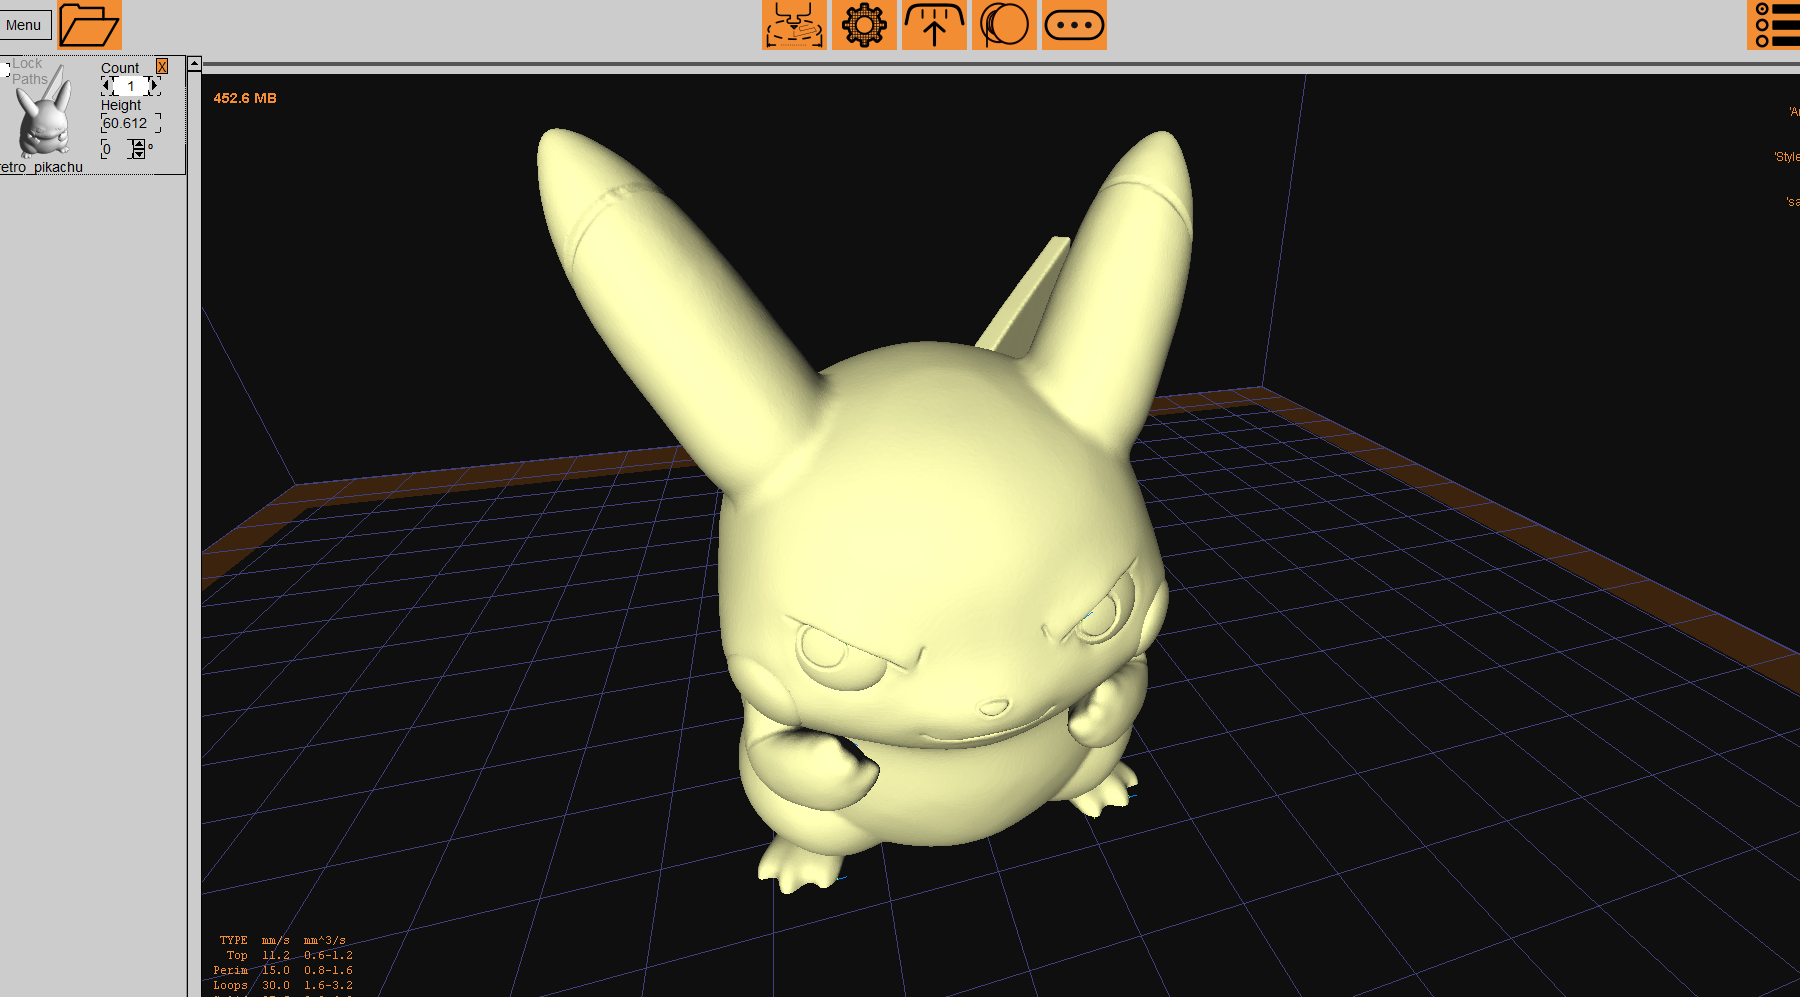
4. Click on the folder icon in the top-right section to import your designs. Alternatively, you can also drag and drop them to the platform.
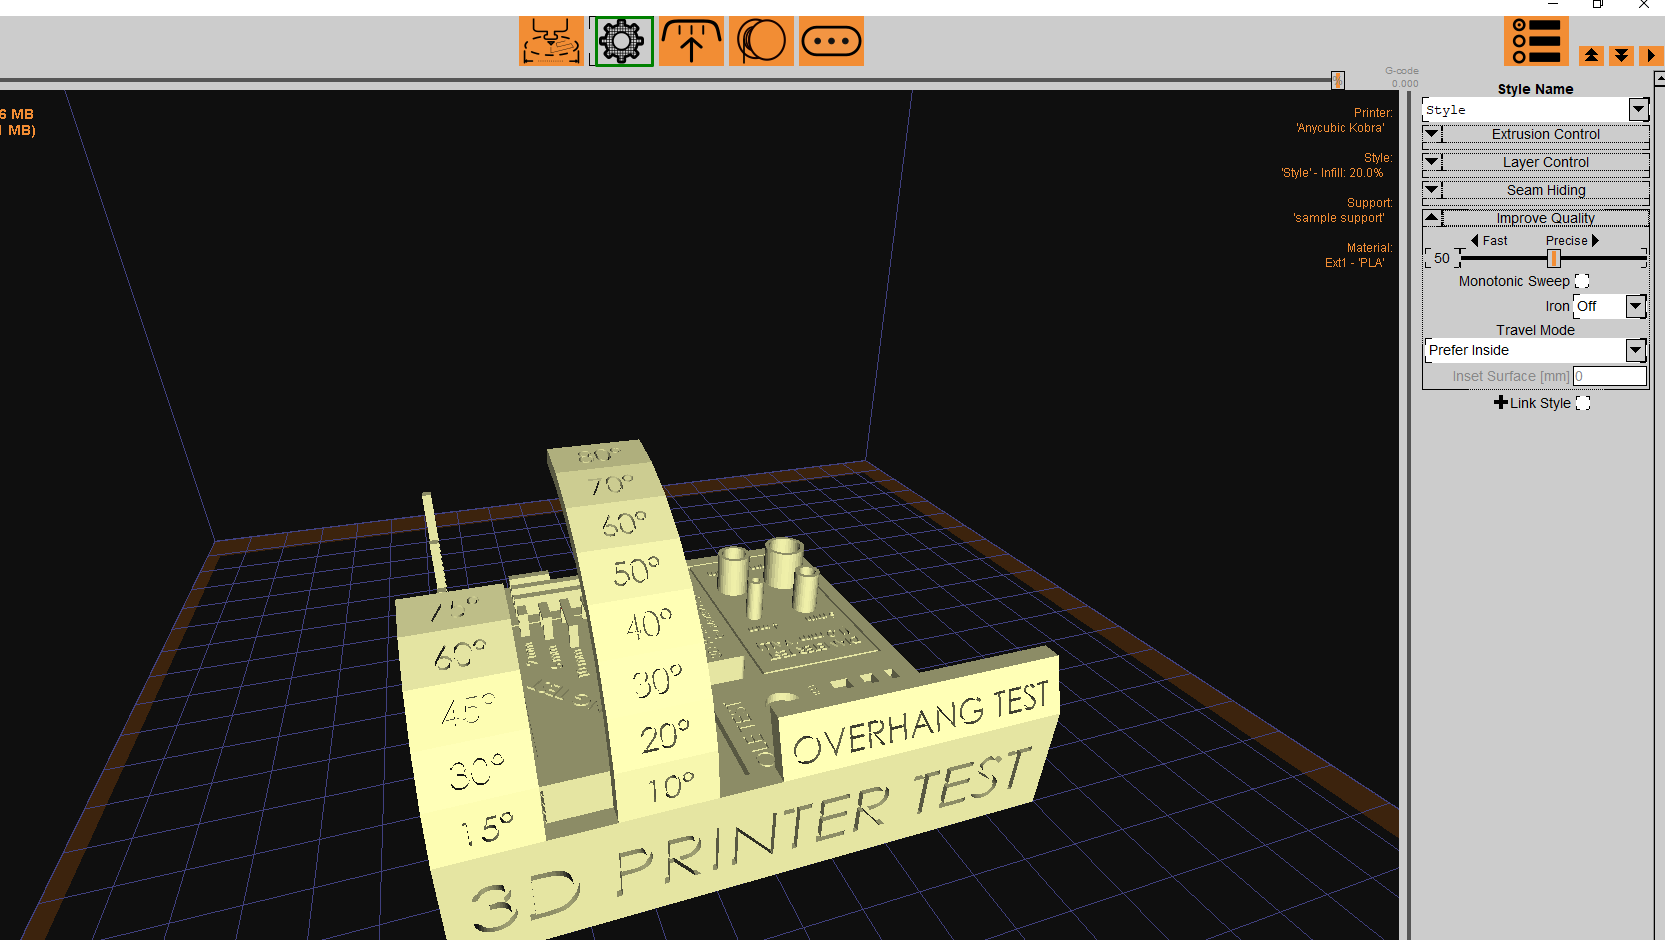
5. Click the settings icon to access the settings like extrusion control, layer control, and other settings to improve the print quality.
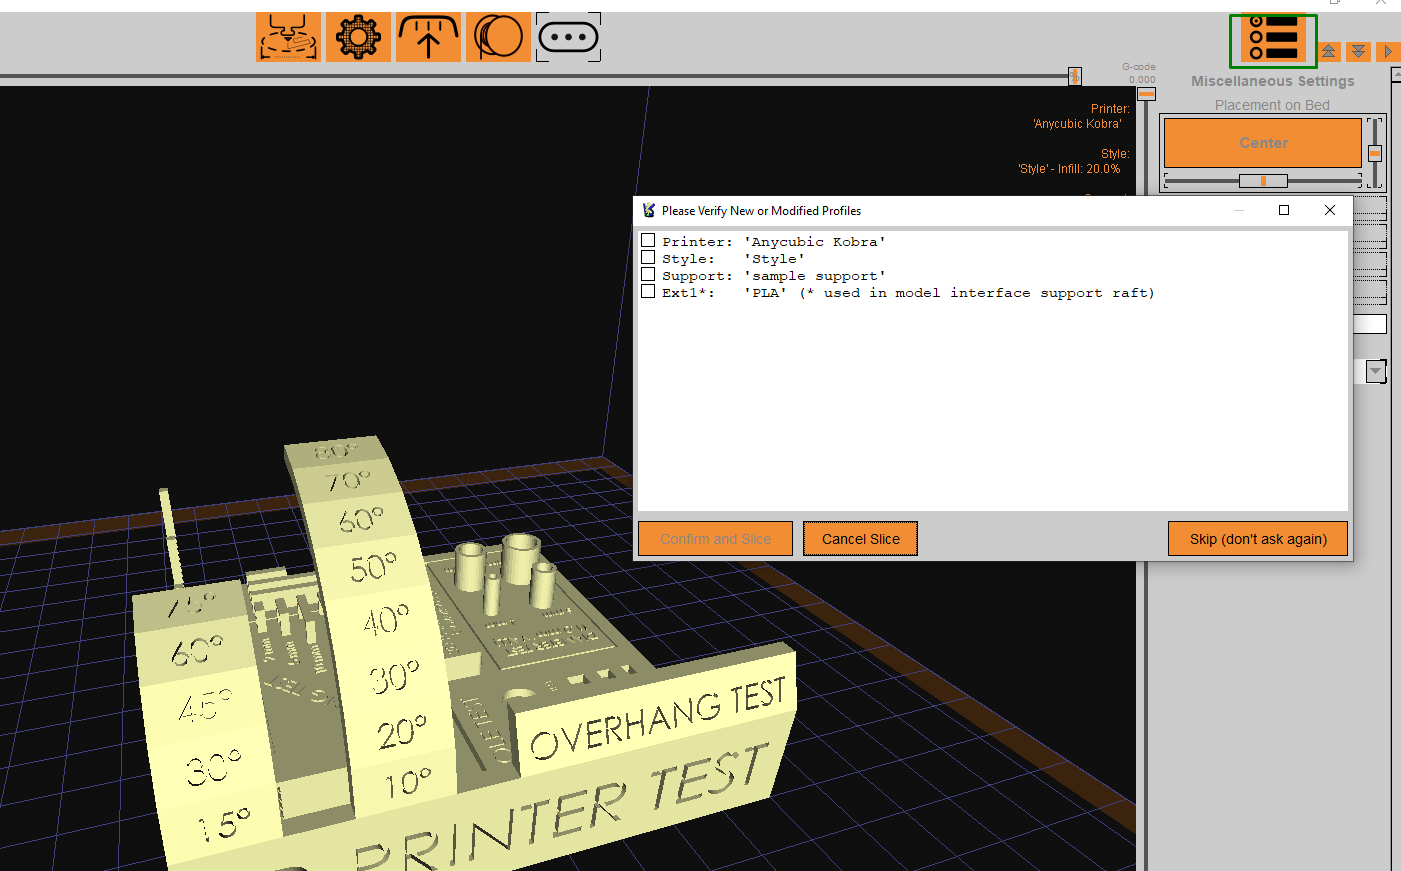
6. Click on the three dots and rectangular shapes in the top-right corner of the interface to slice your 3D model. A window launching will prompt you to verify your settings, like the 3D printer used, style, supports, and material. Confirm by clicking the checkboxes.
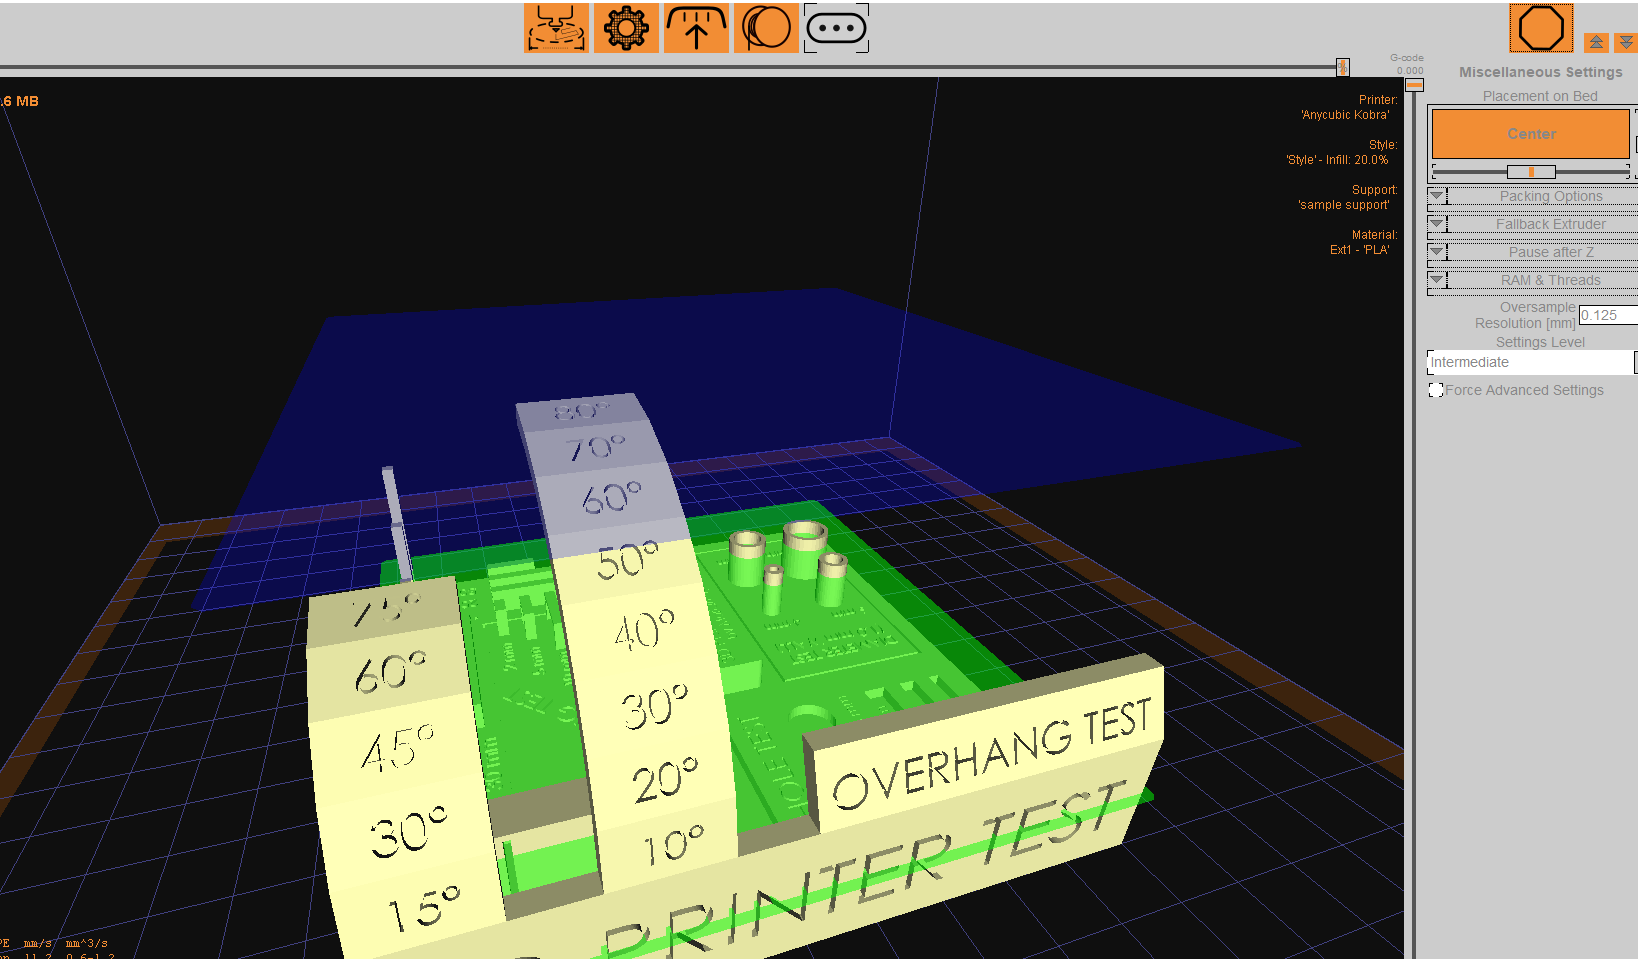
7. Click confirm and Slice if everything is well set, and you will see your design being sliced. You will see the design changing color as the slicing process continues.
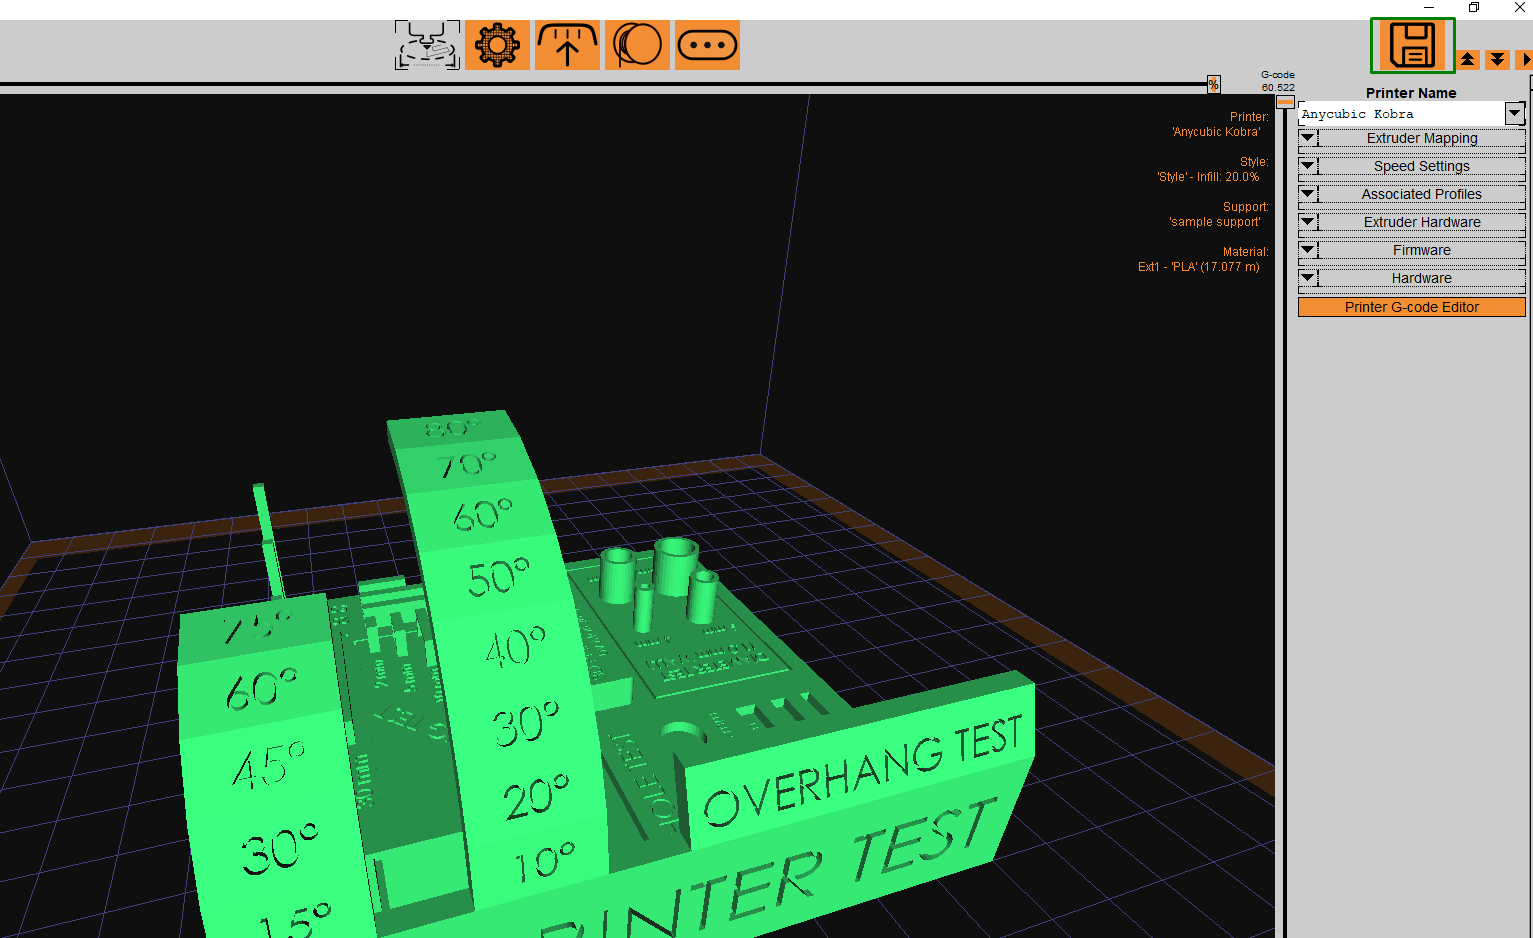
8. Click the save icon in the top-right corner to save the file.
5. Slic3r
Slic3r is a free and open-source 3D slicing software that supports FDM and resin 3D printers (see our list of the best resin 3D printers). It has advanced features like a print spool queue option, allowing you to 3D print on multiple 3D printers simultaneously. There is also the ability to preview toolpaths visually, generate G-code files in batch form, and repair 3D models. Follow the steps below to slice your 3D models.
1. Download Slic3r for your operating system.
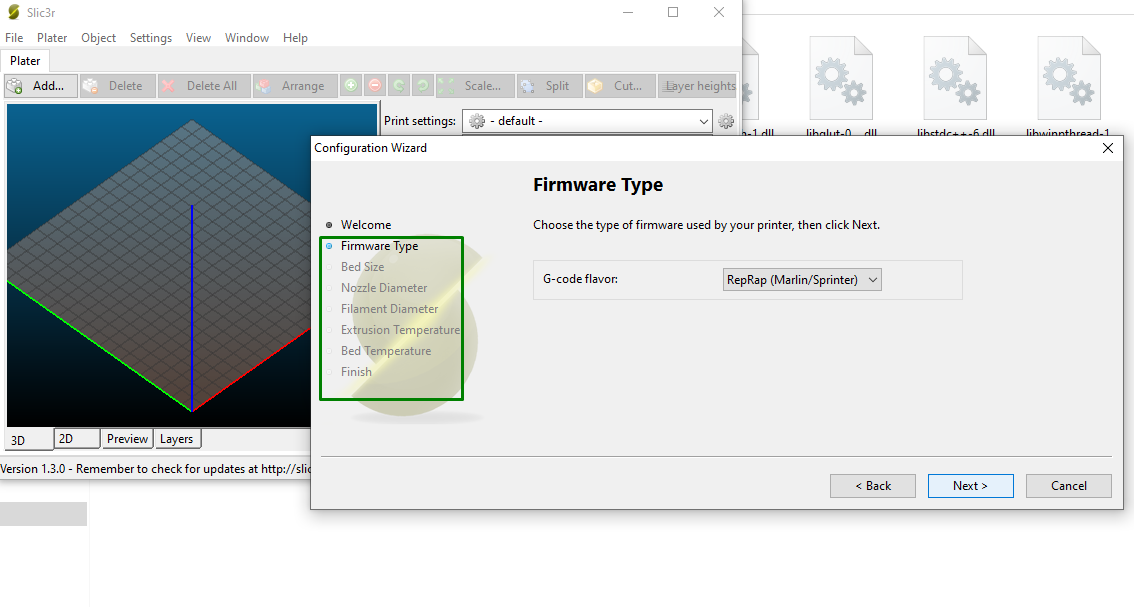
2. Configure Slic3r for your 3D printer by selecting the correct firmware, bed size, nozzle and filament diameter, extrusion, and bed temperature.
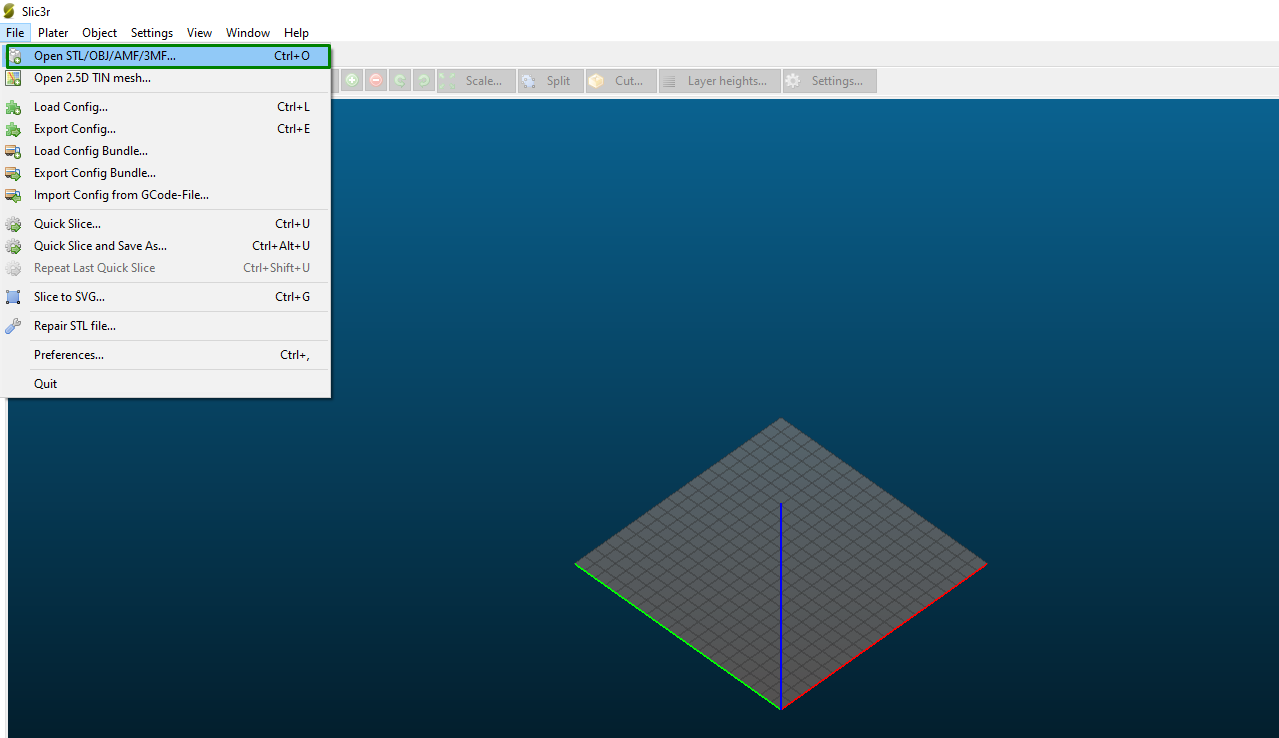
3. Go to File > Open STL/OBJ/AMF/3MF to import your 3D model to the software.
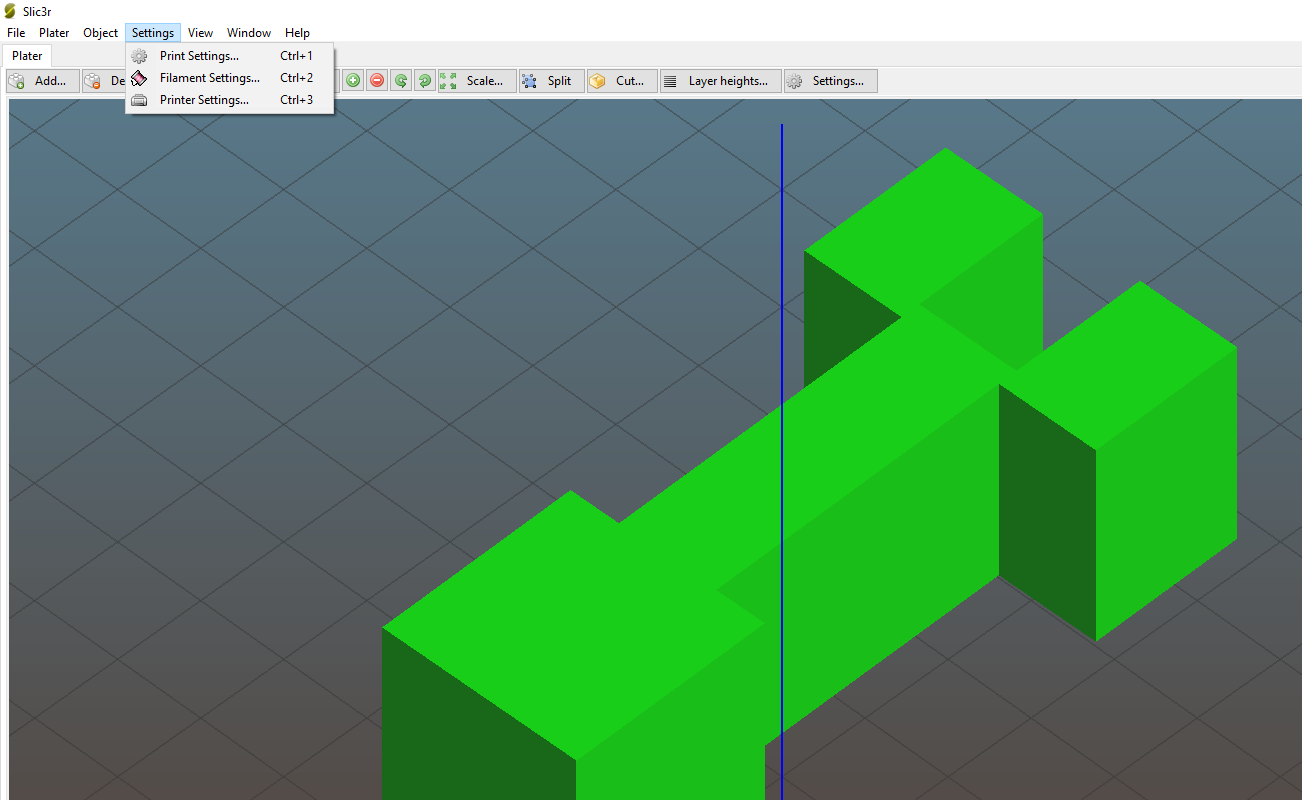
4. Click Settings to access the various settings to apply to your 3D model.
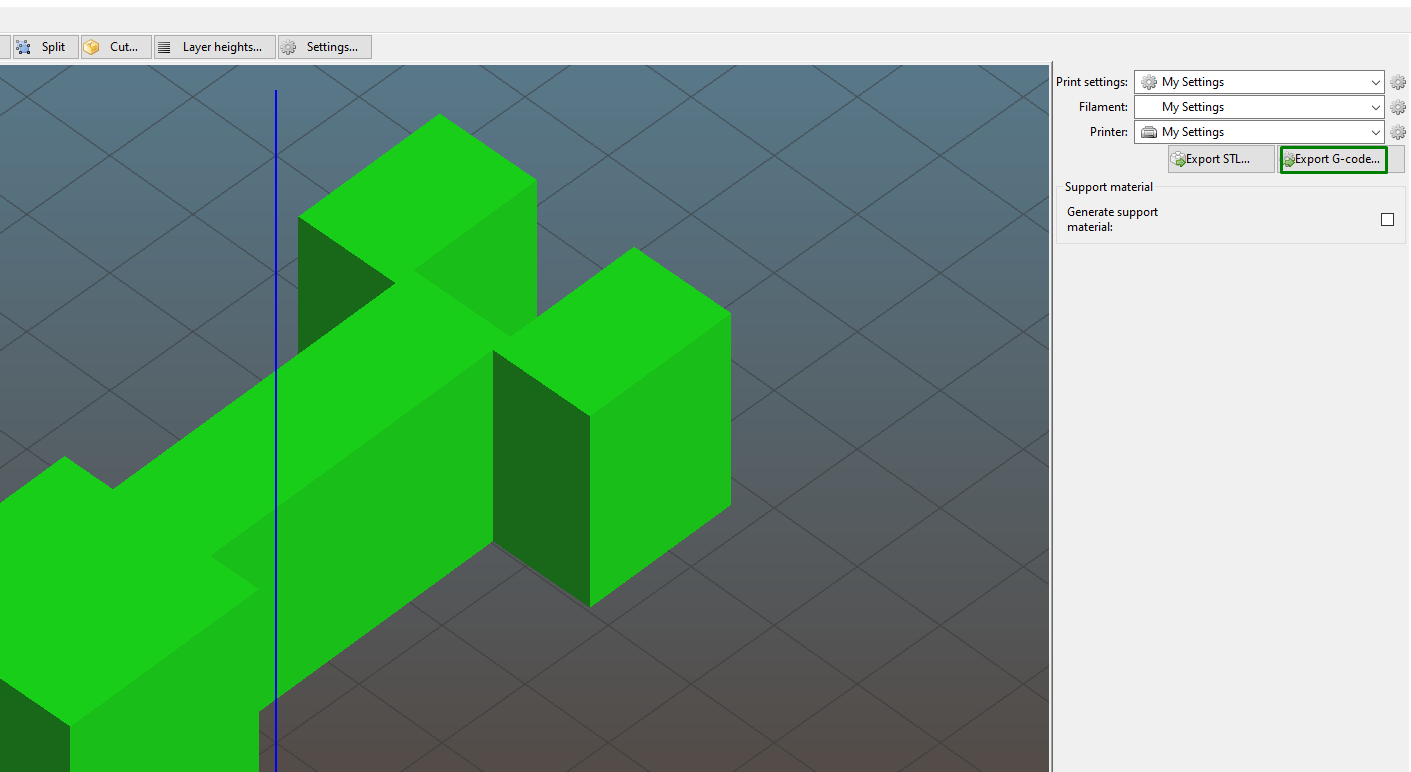
5. Click Export G-code to convert the model into the instructions that the 3D printer understands.
6. Chitubox
Chitubox is designed explicitly for slicing models to be 3D printed using various resin-based technologies like Stereolithography and Digital Light Processing. There is a basic free version and a premium version that costs $169 a year.
The difference between Chitubox free and premium versions is the number of 3D file formats supported. Tools for splitting the mode, boolean operation, cut, multi-selection tool, and object repair tools are only available in the premium version. Follow the steps below to slice your designs in Chitubox.
1. Download or buy the Chitubox, then install and launch it. Unlike the other 3D slicers described in this article, installing and launching Chitubox is straightforward. You don’t need to set up a 3D printer profile.
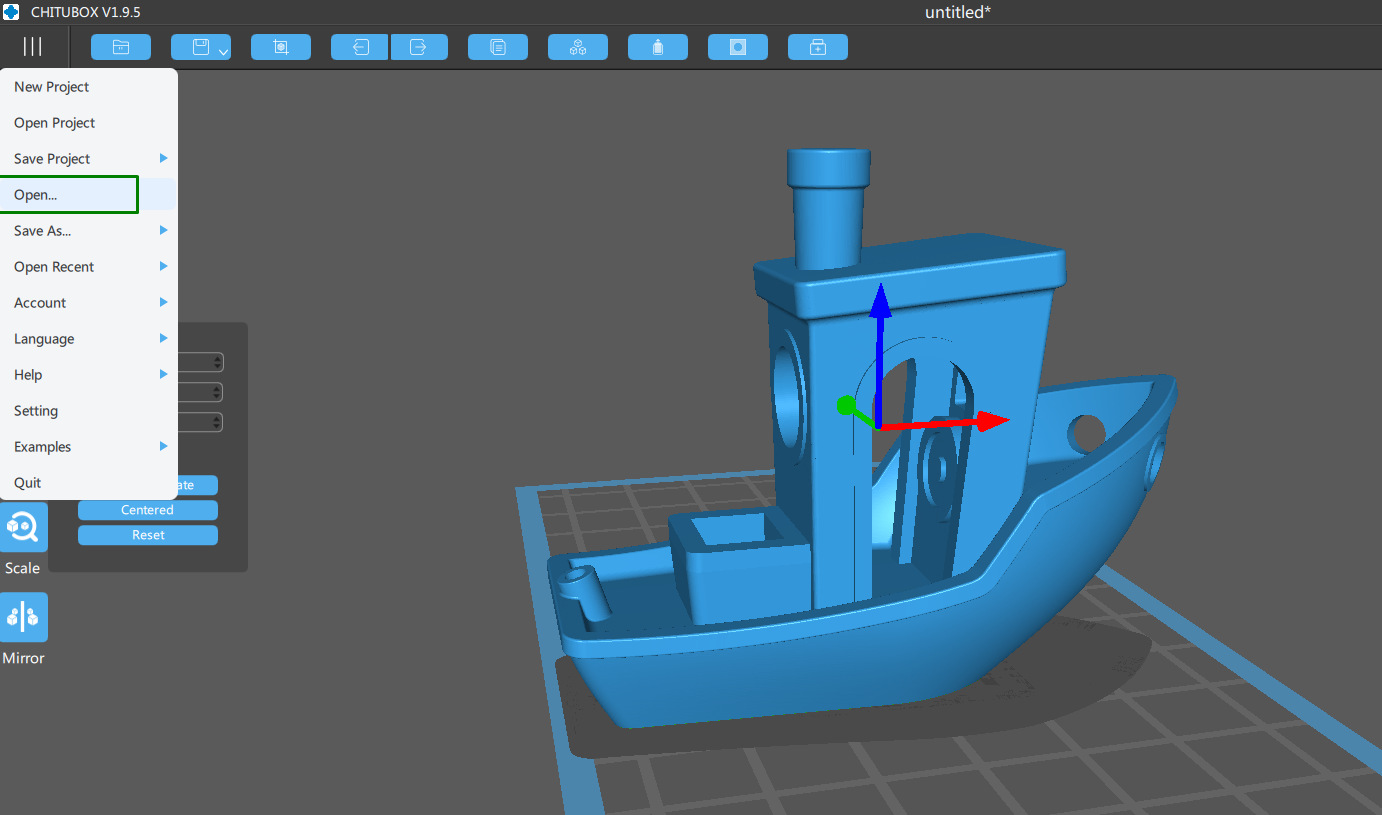
2. Go to File > Open to import your 3D model.
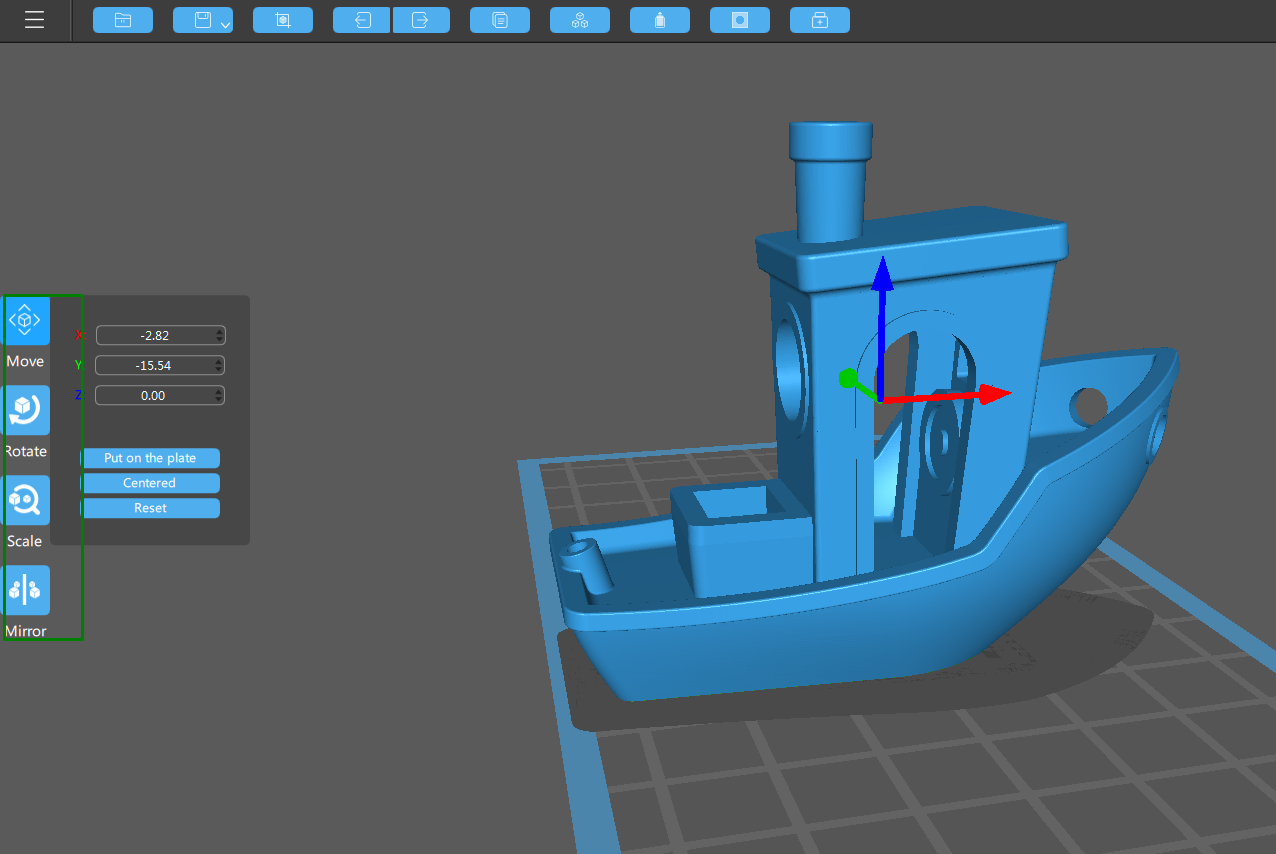
3. Move, scale, rotate, and mirror the 3D model using the tools on the left-hand side of the workspace.
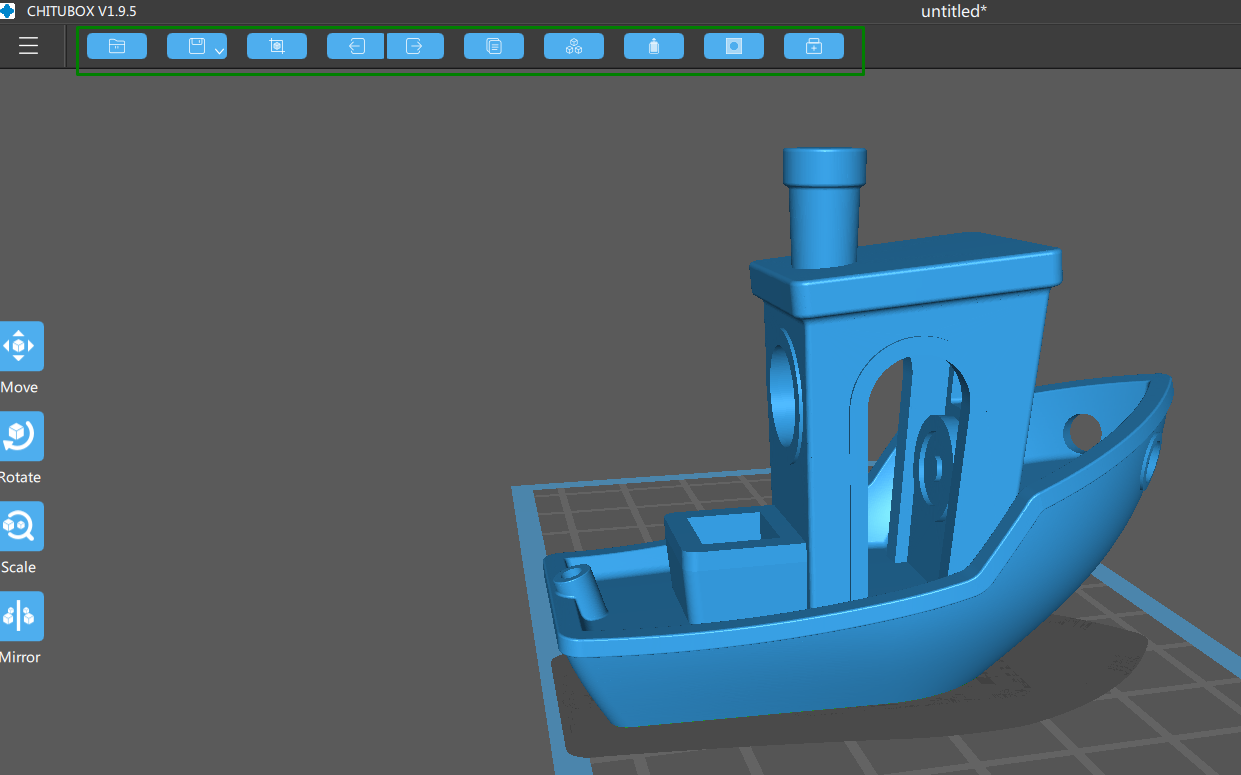
4. Modify your 3D model further using the tools on the menu bar. For example, you can hollow the object, dig holes, and even repair the model.
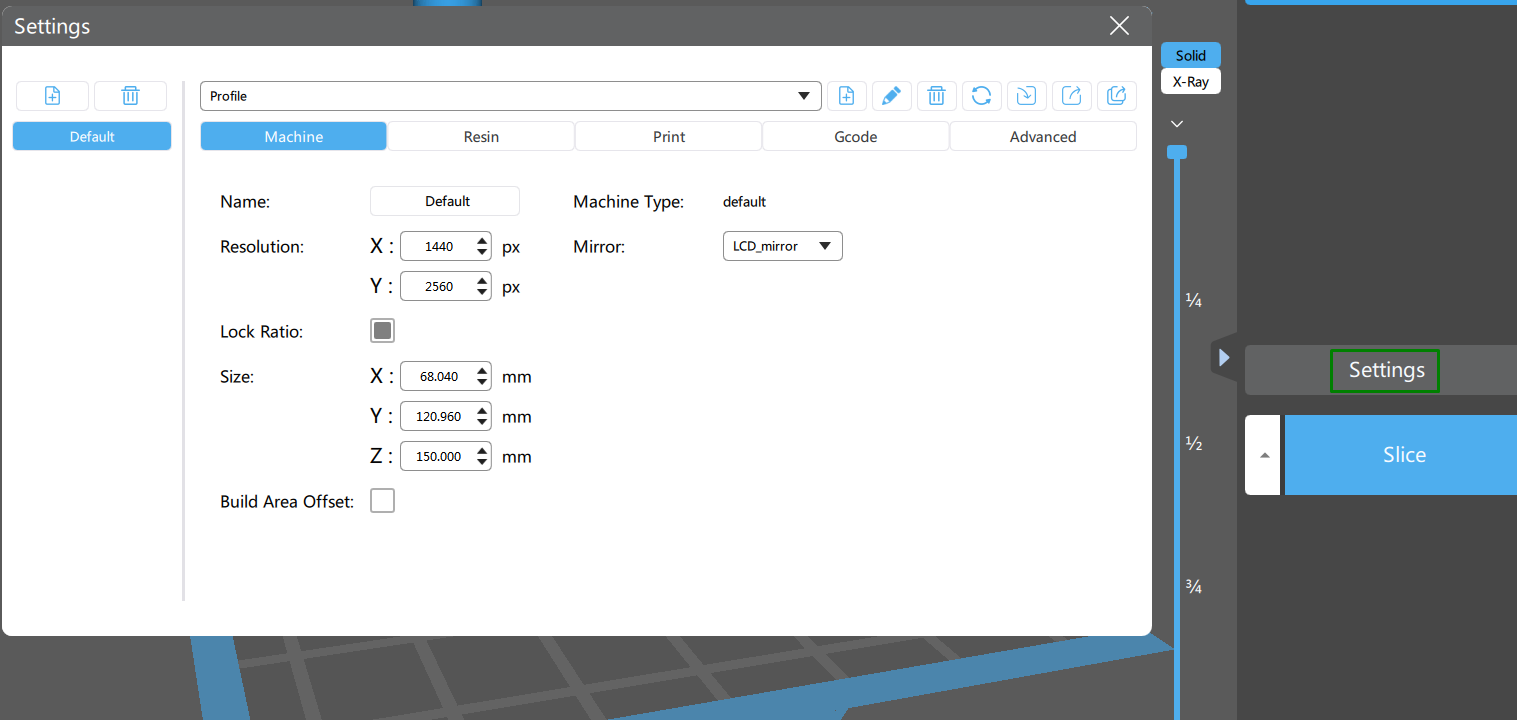
5. Click Settings to access the various settings to apply to your 3D model.
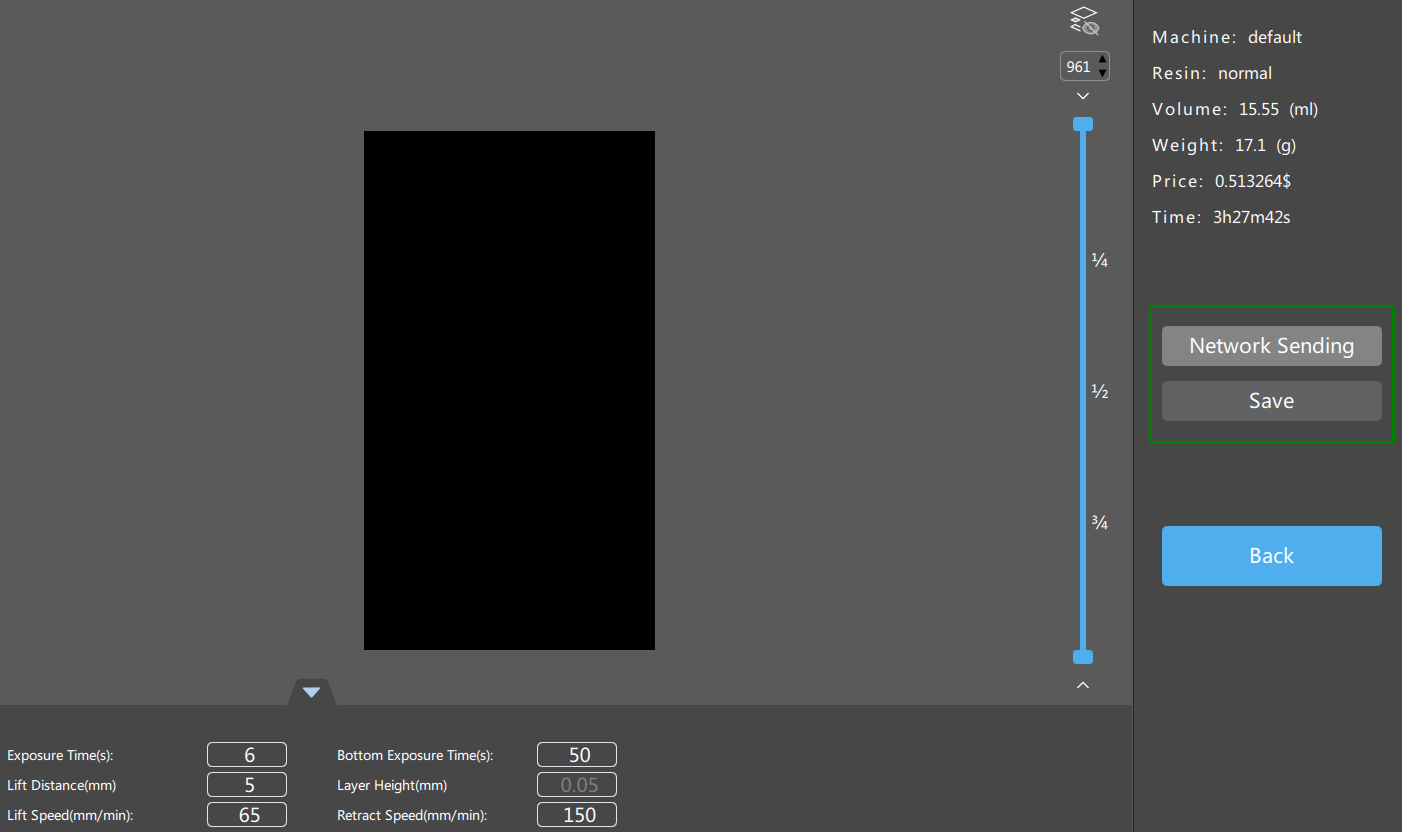
6. Click Slice when you have applied all the necessary settings. A window will appear that you can use to preview your file and either choose to send it to your 3D printer through the network or save it to your computer.
Different 3D slicers offer various features, user interfaces, and functionalities. The one you will choose depends on the 3D printing technology you use, your skill level, and your budget.
MORE: Best 3D Printers
MORE: Best Budget 3D Printers
MORE: Best Resin 3D Printers
Sammy Ekaran is a freelancer writer for Tom's Hardware. He specializes in writing about 3D printing tutorials and guides. You can find more of his work on various publications, including Makeuseof, All3dp, and 3Dsourced.
