Lian Li's O11D EVO Is a Morphing Case Monster
A big component box that can evolve along with your build
If you're the type of PC builder who's never quite happy with the features of any case, or you want a chassis for your rig that can grow and change along with your evolving rig, Lian Li's O11D EVO might be perfect for you–so long as you have lots of space.
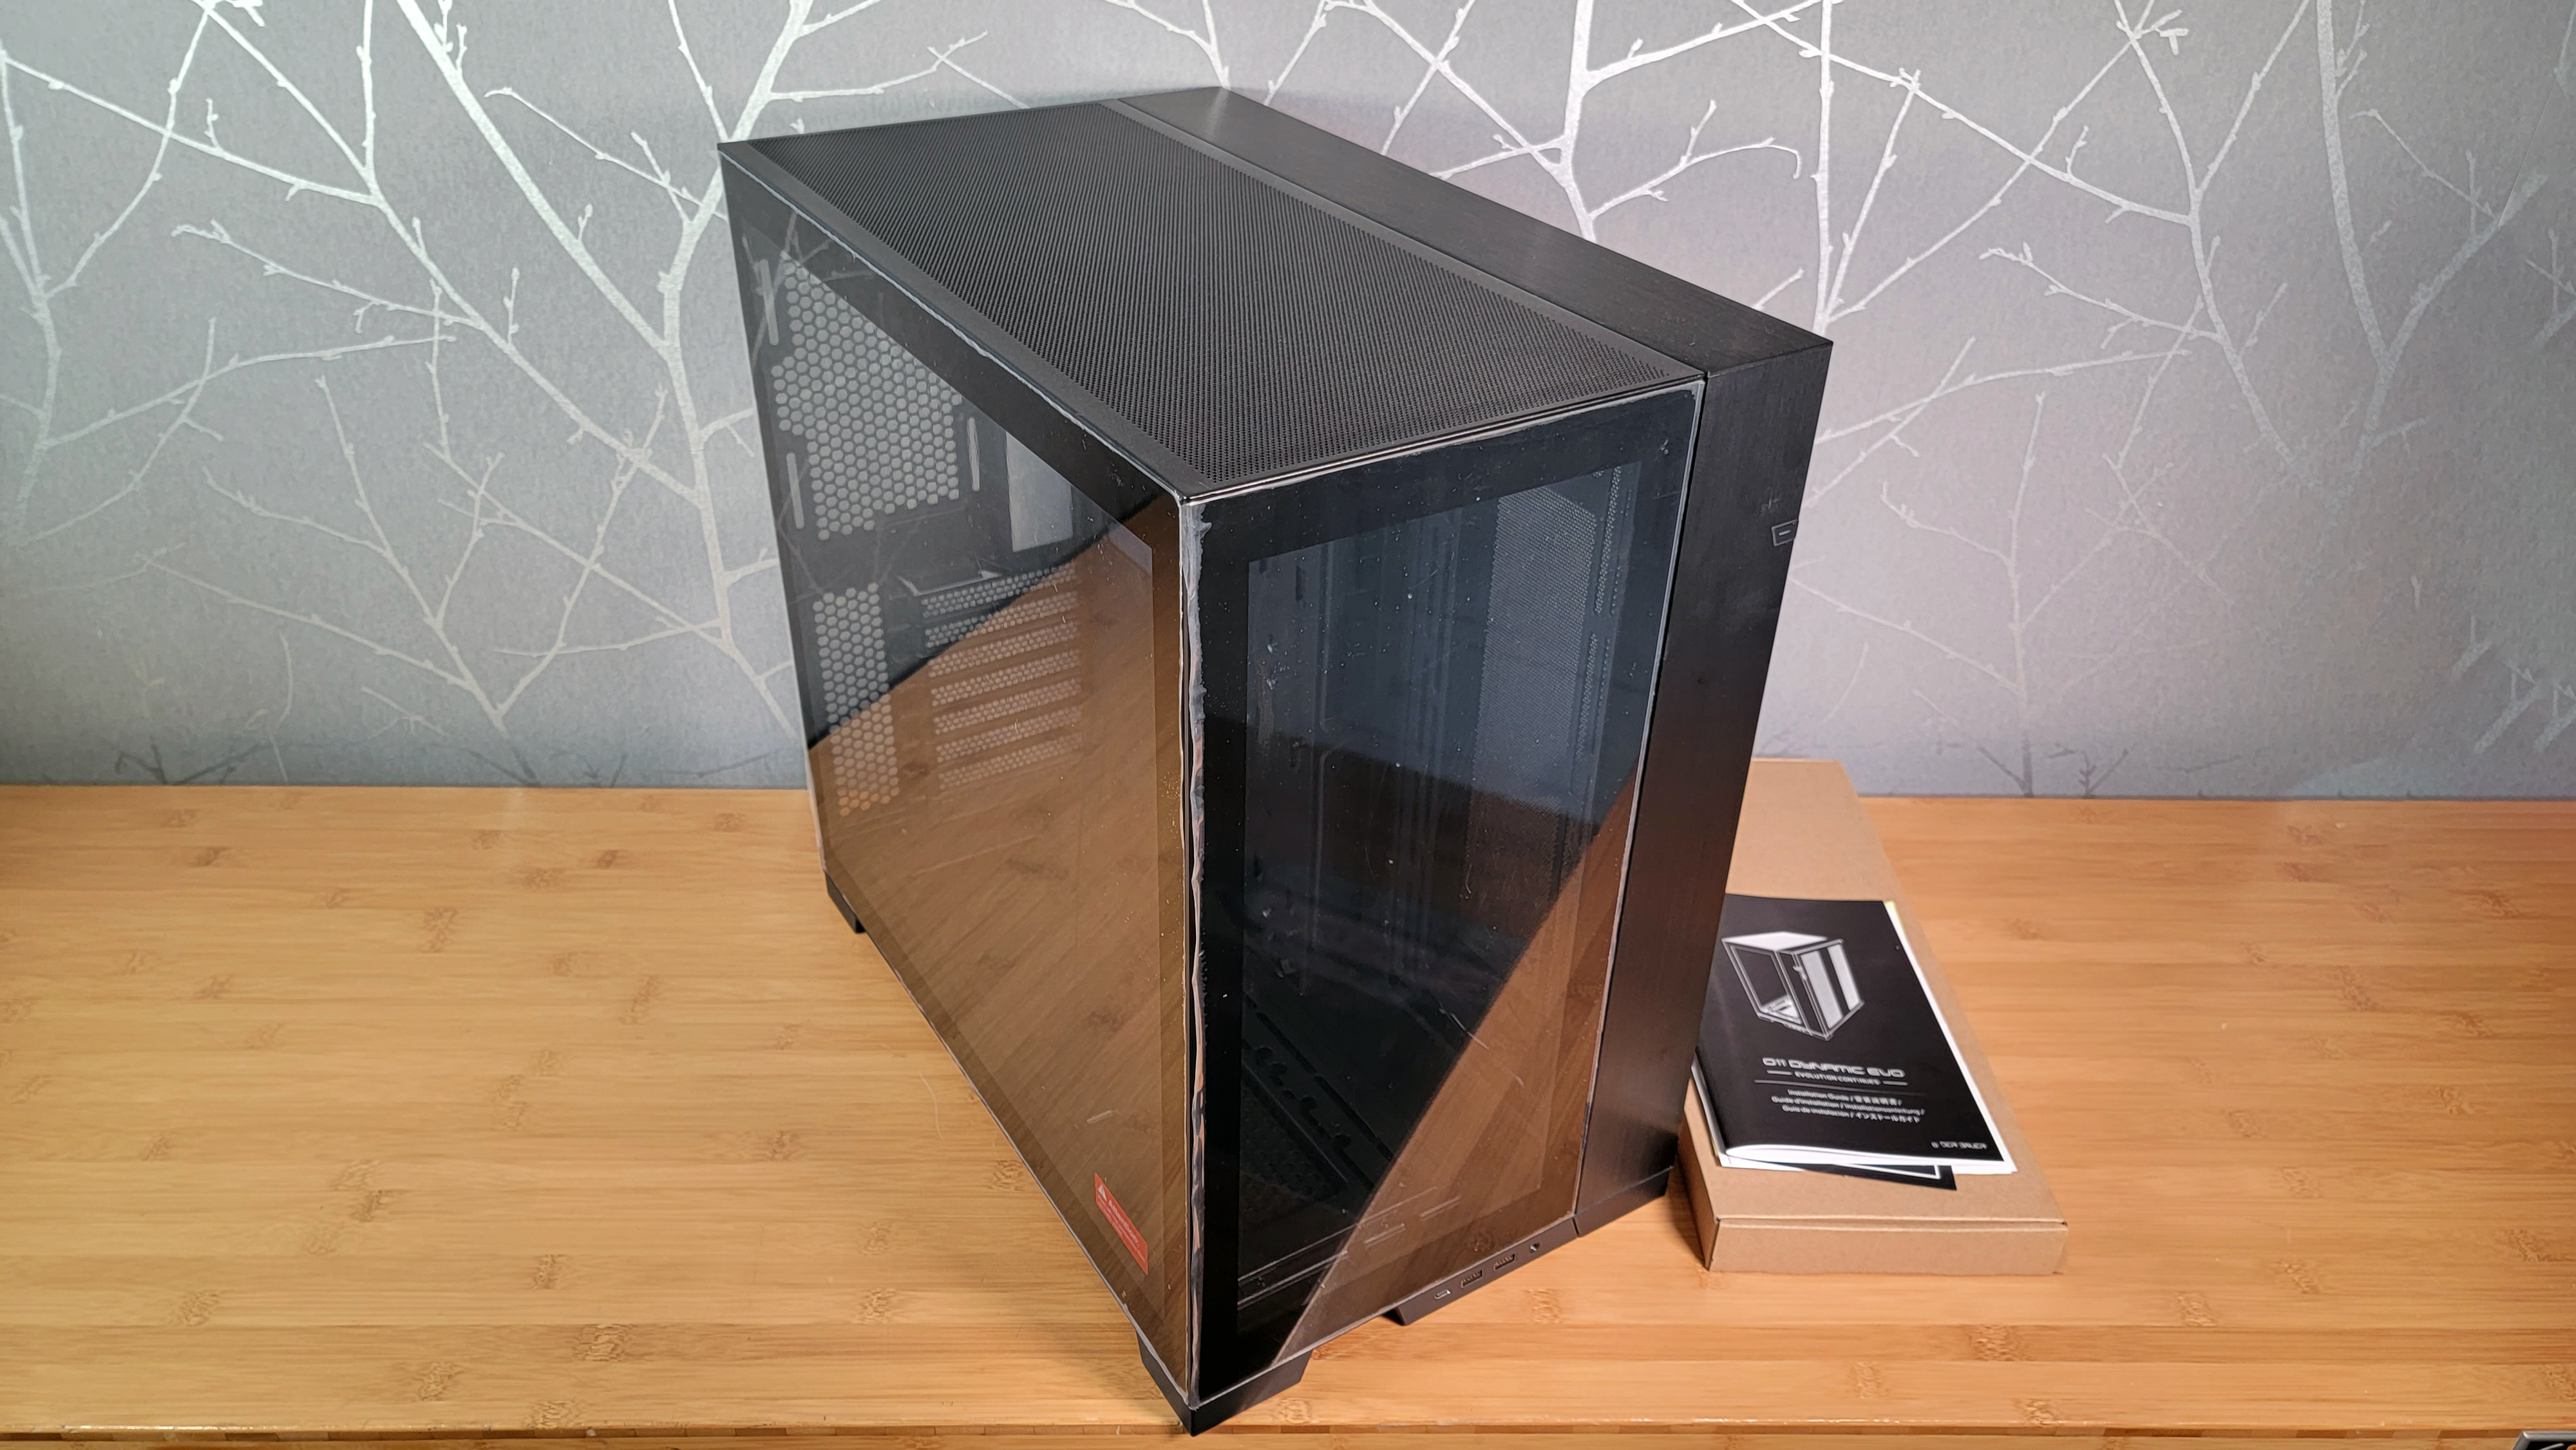
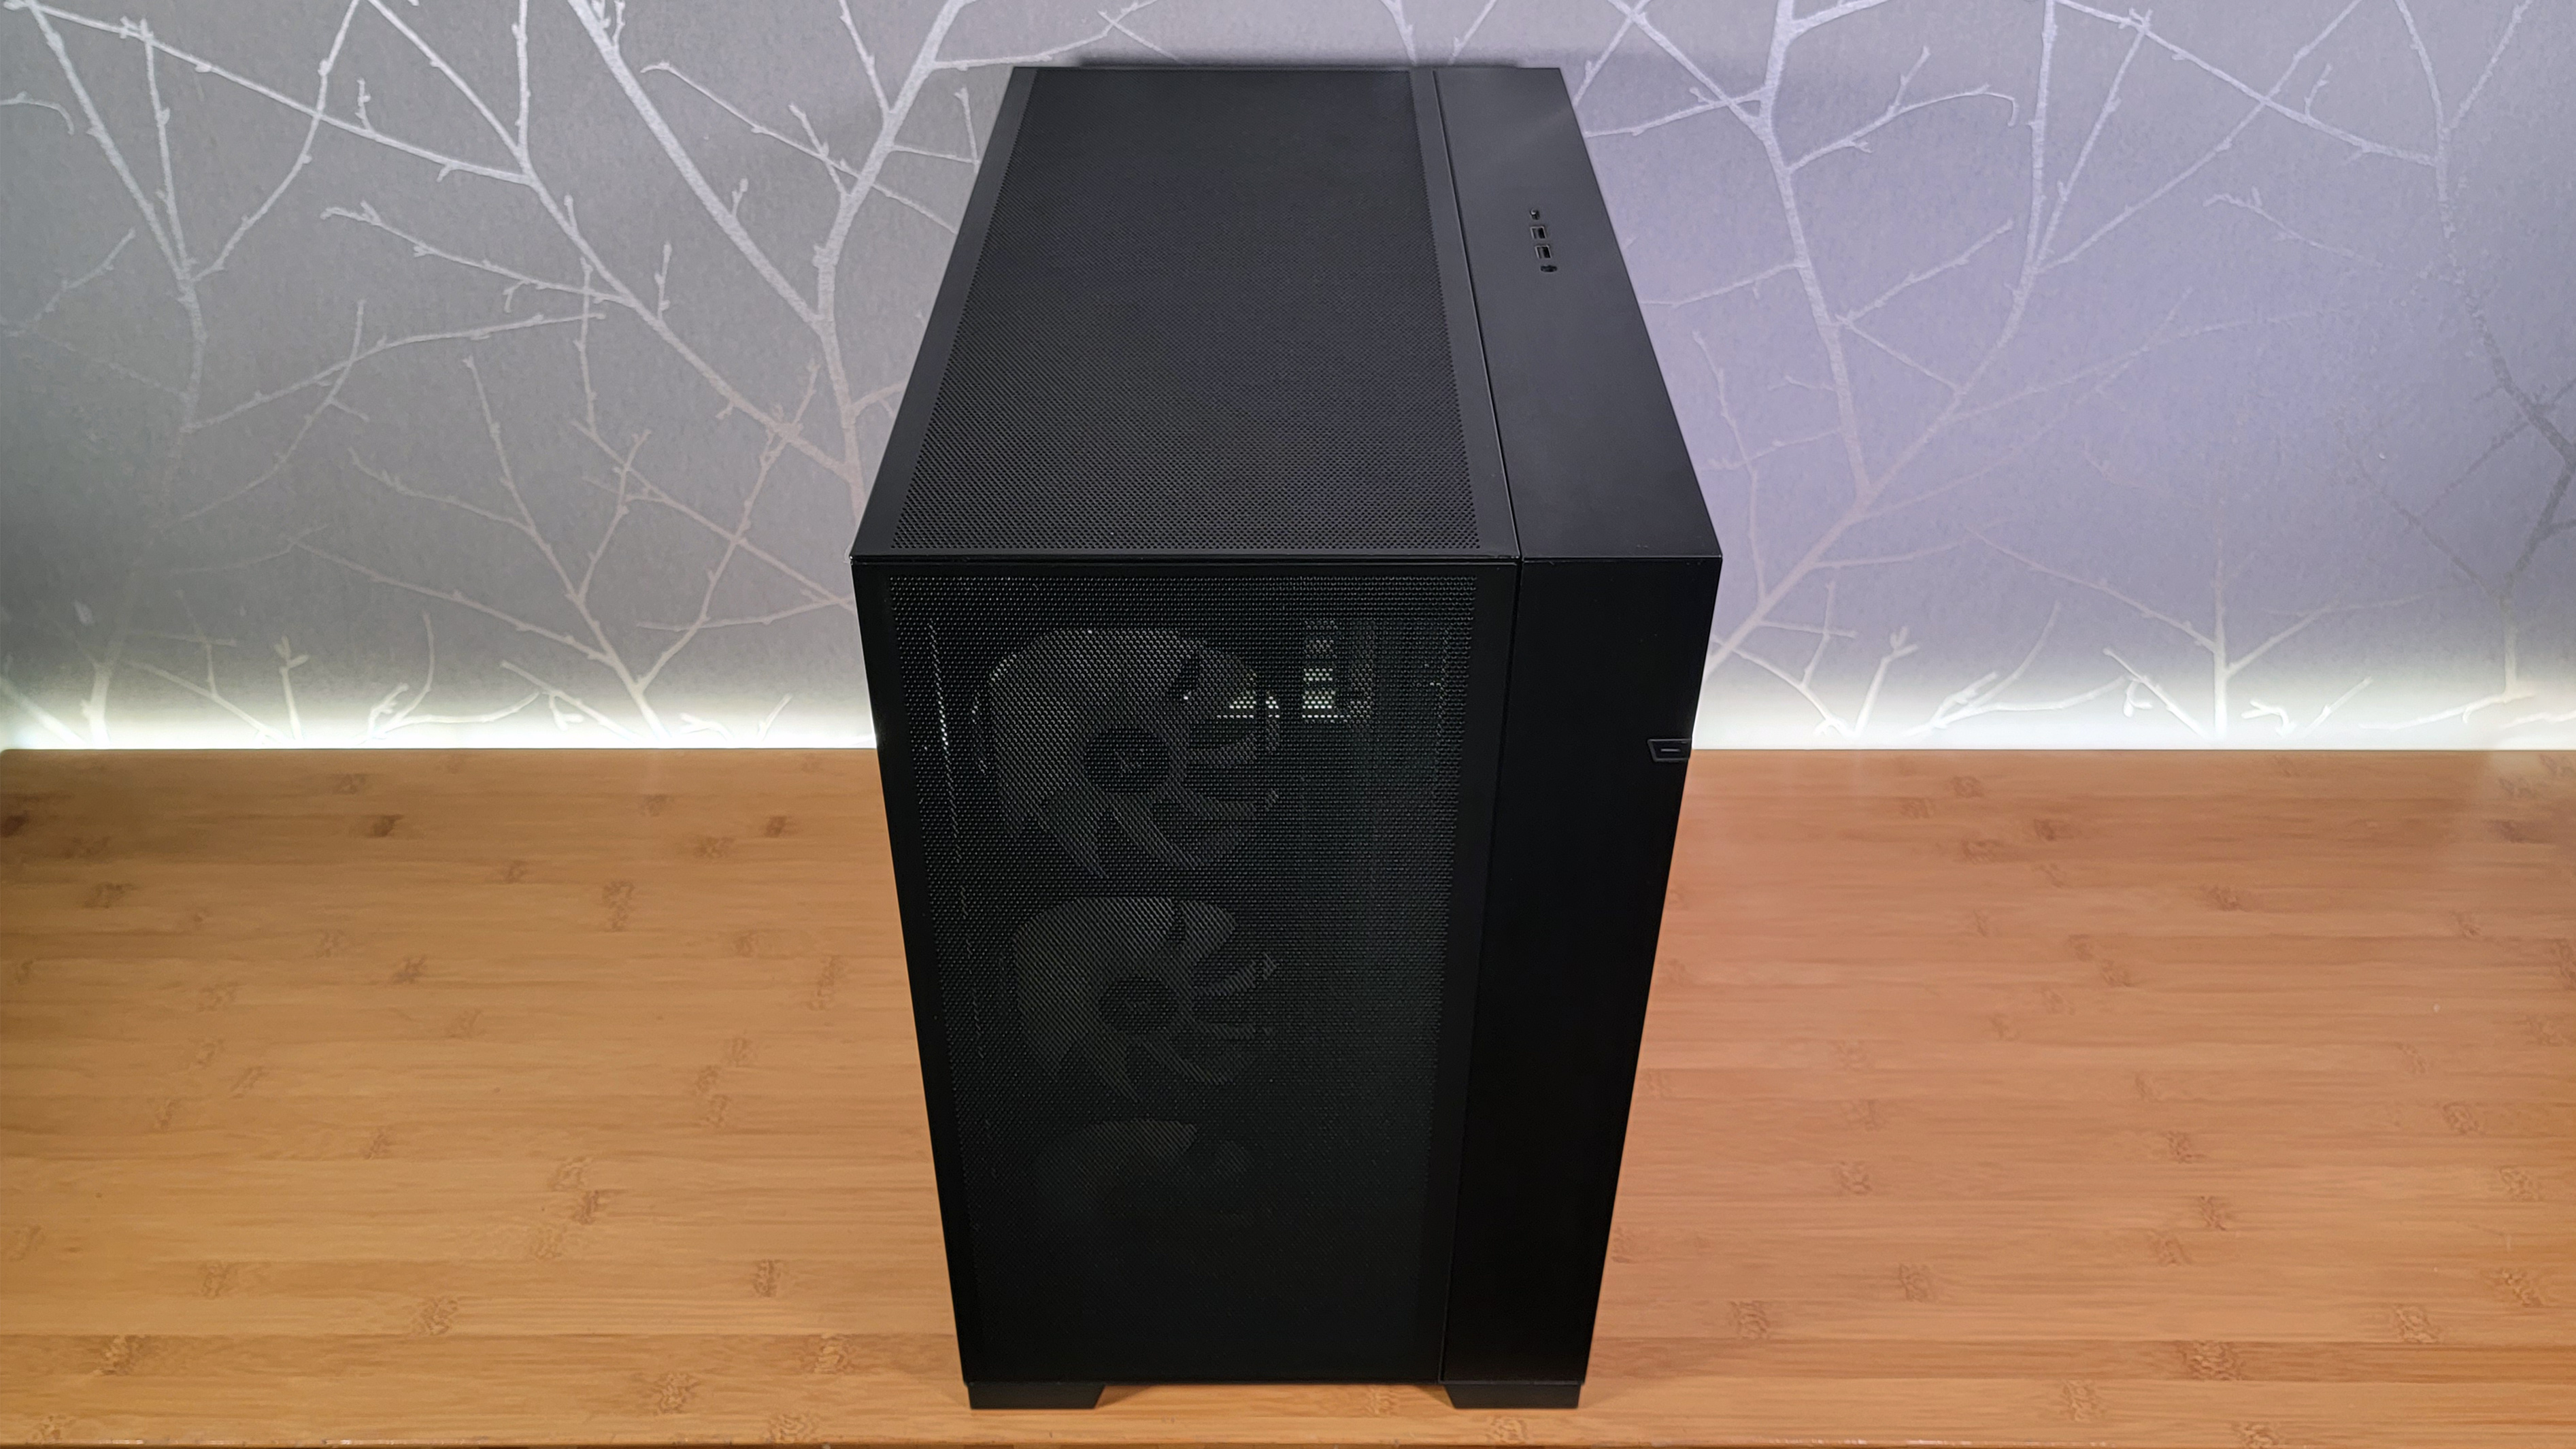
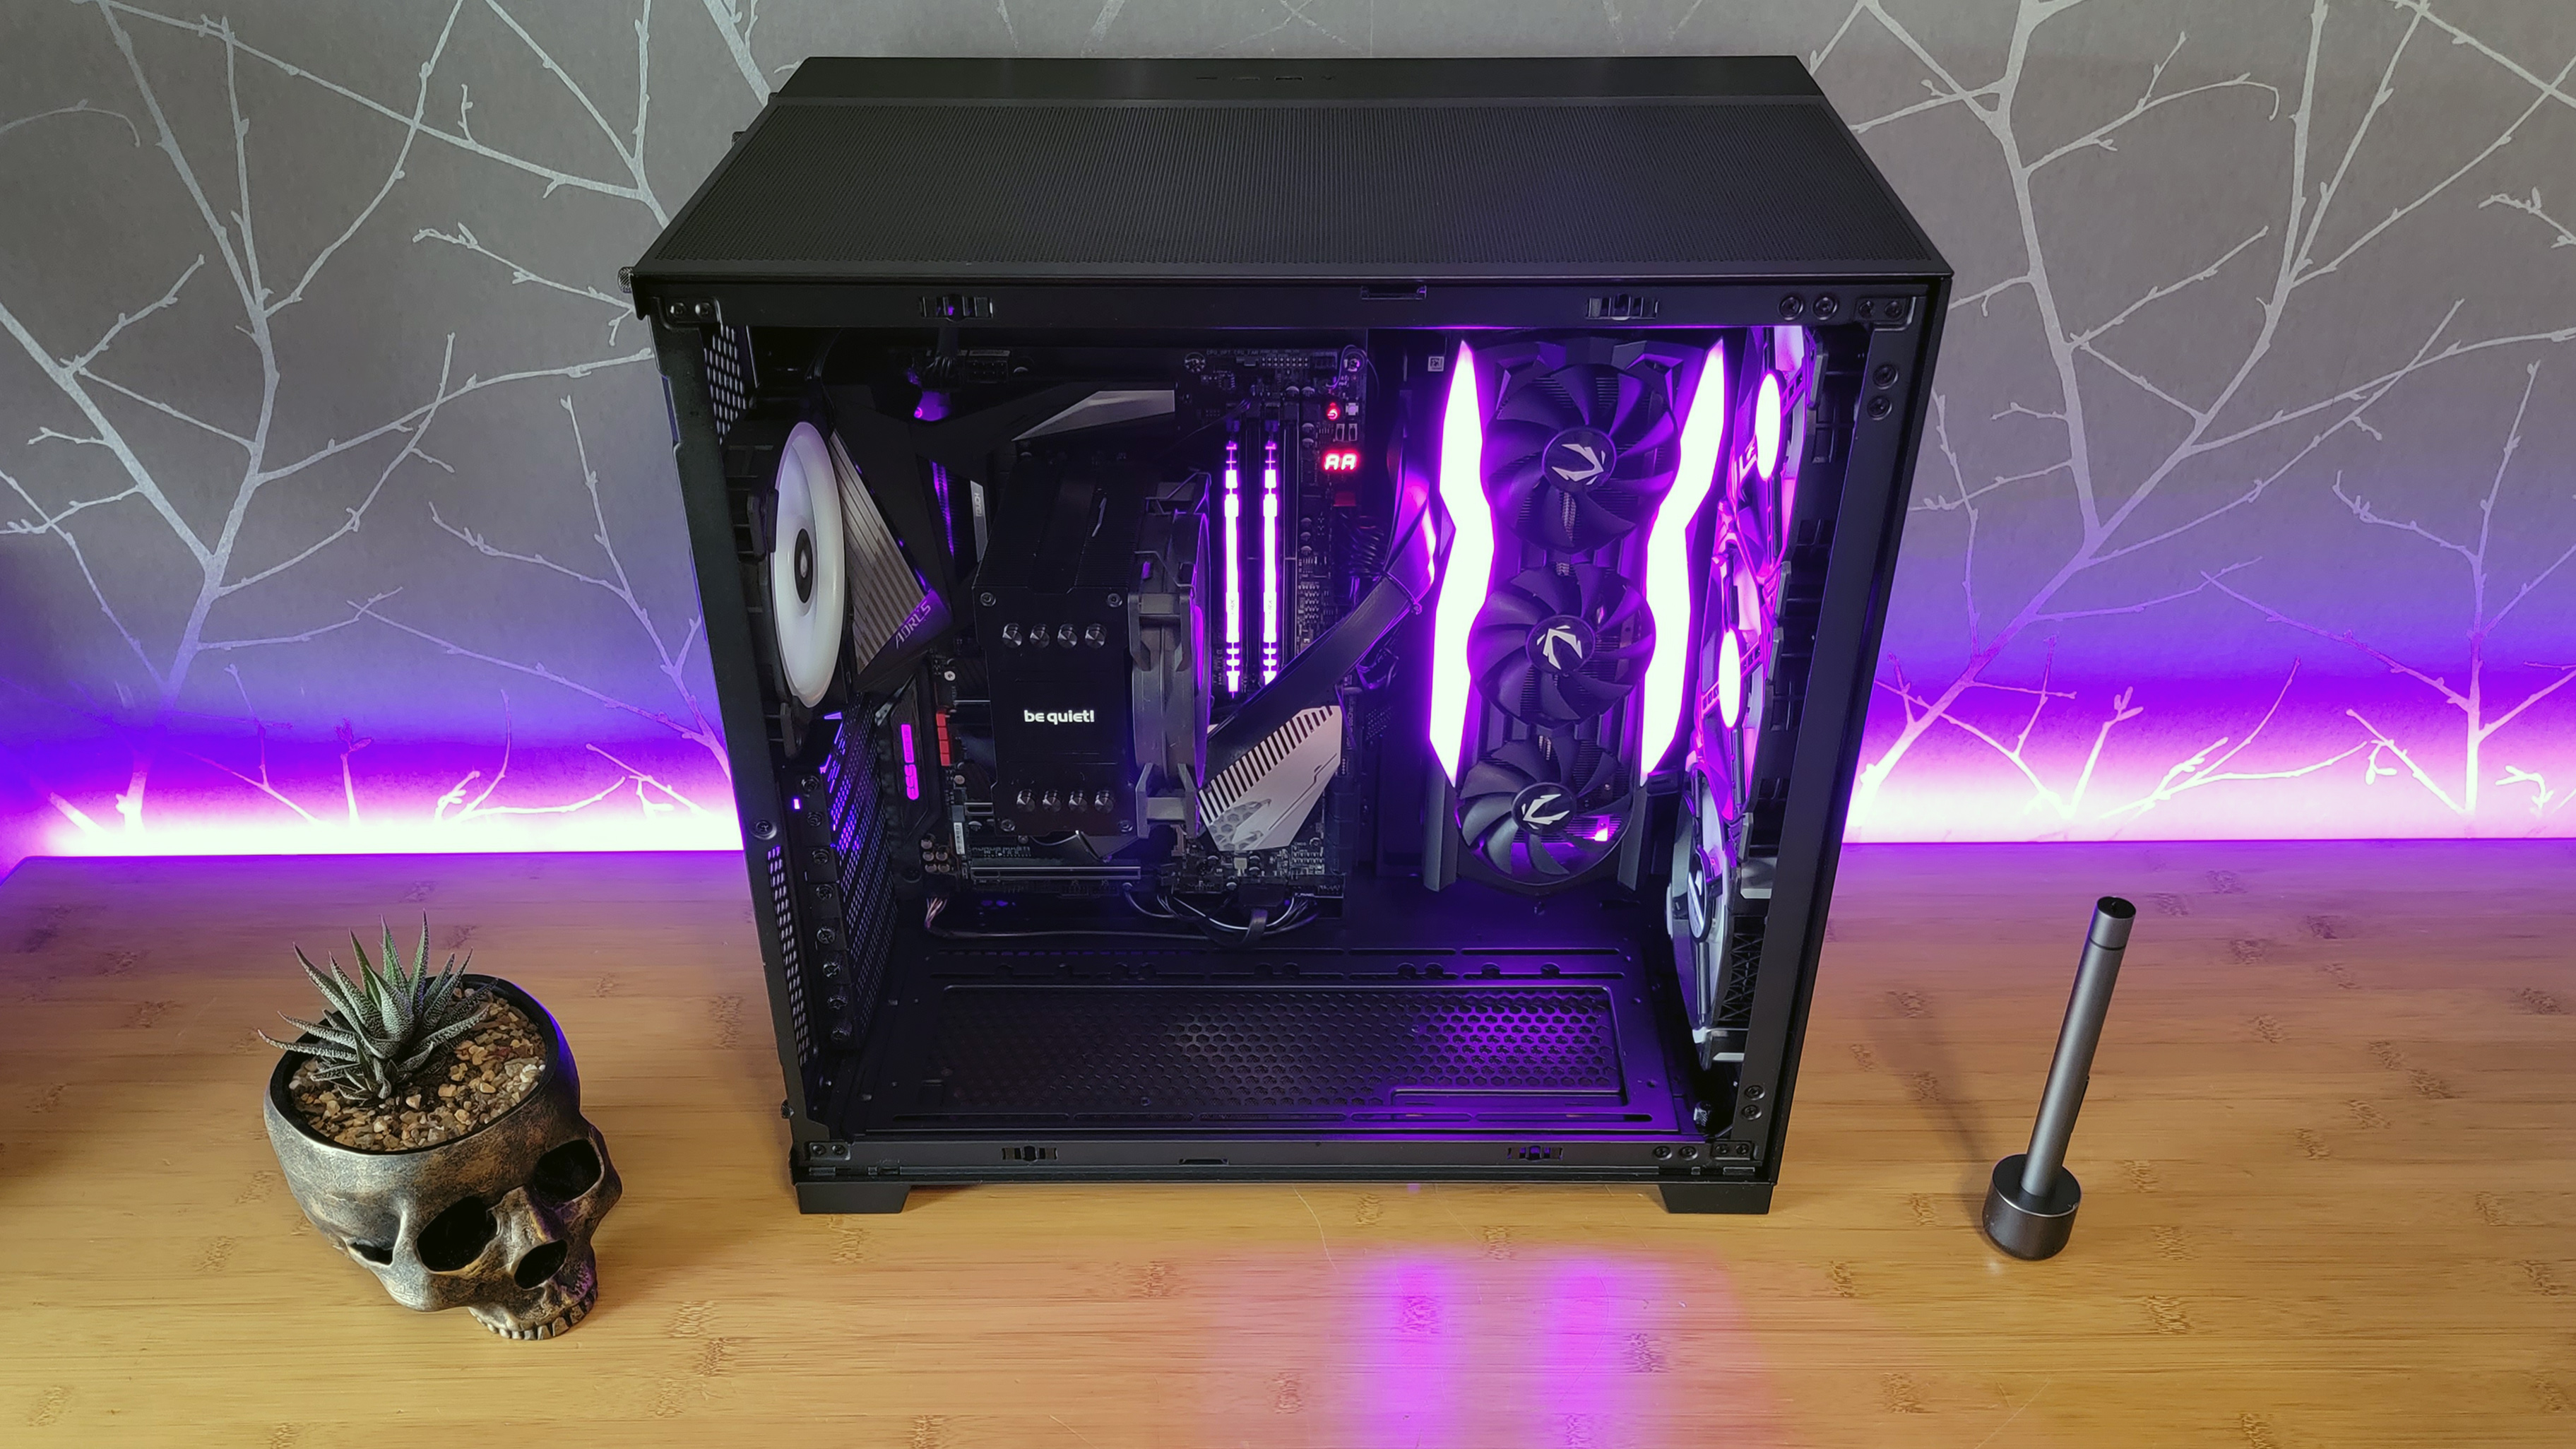
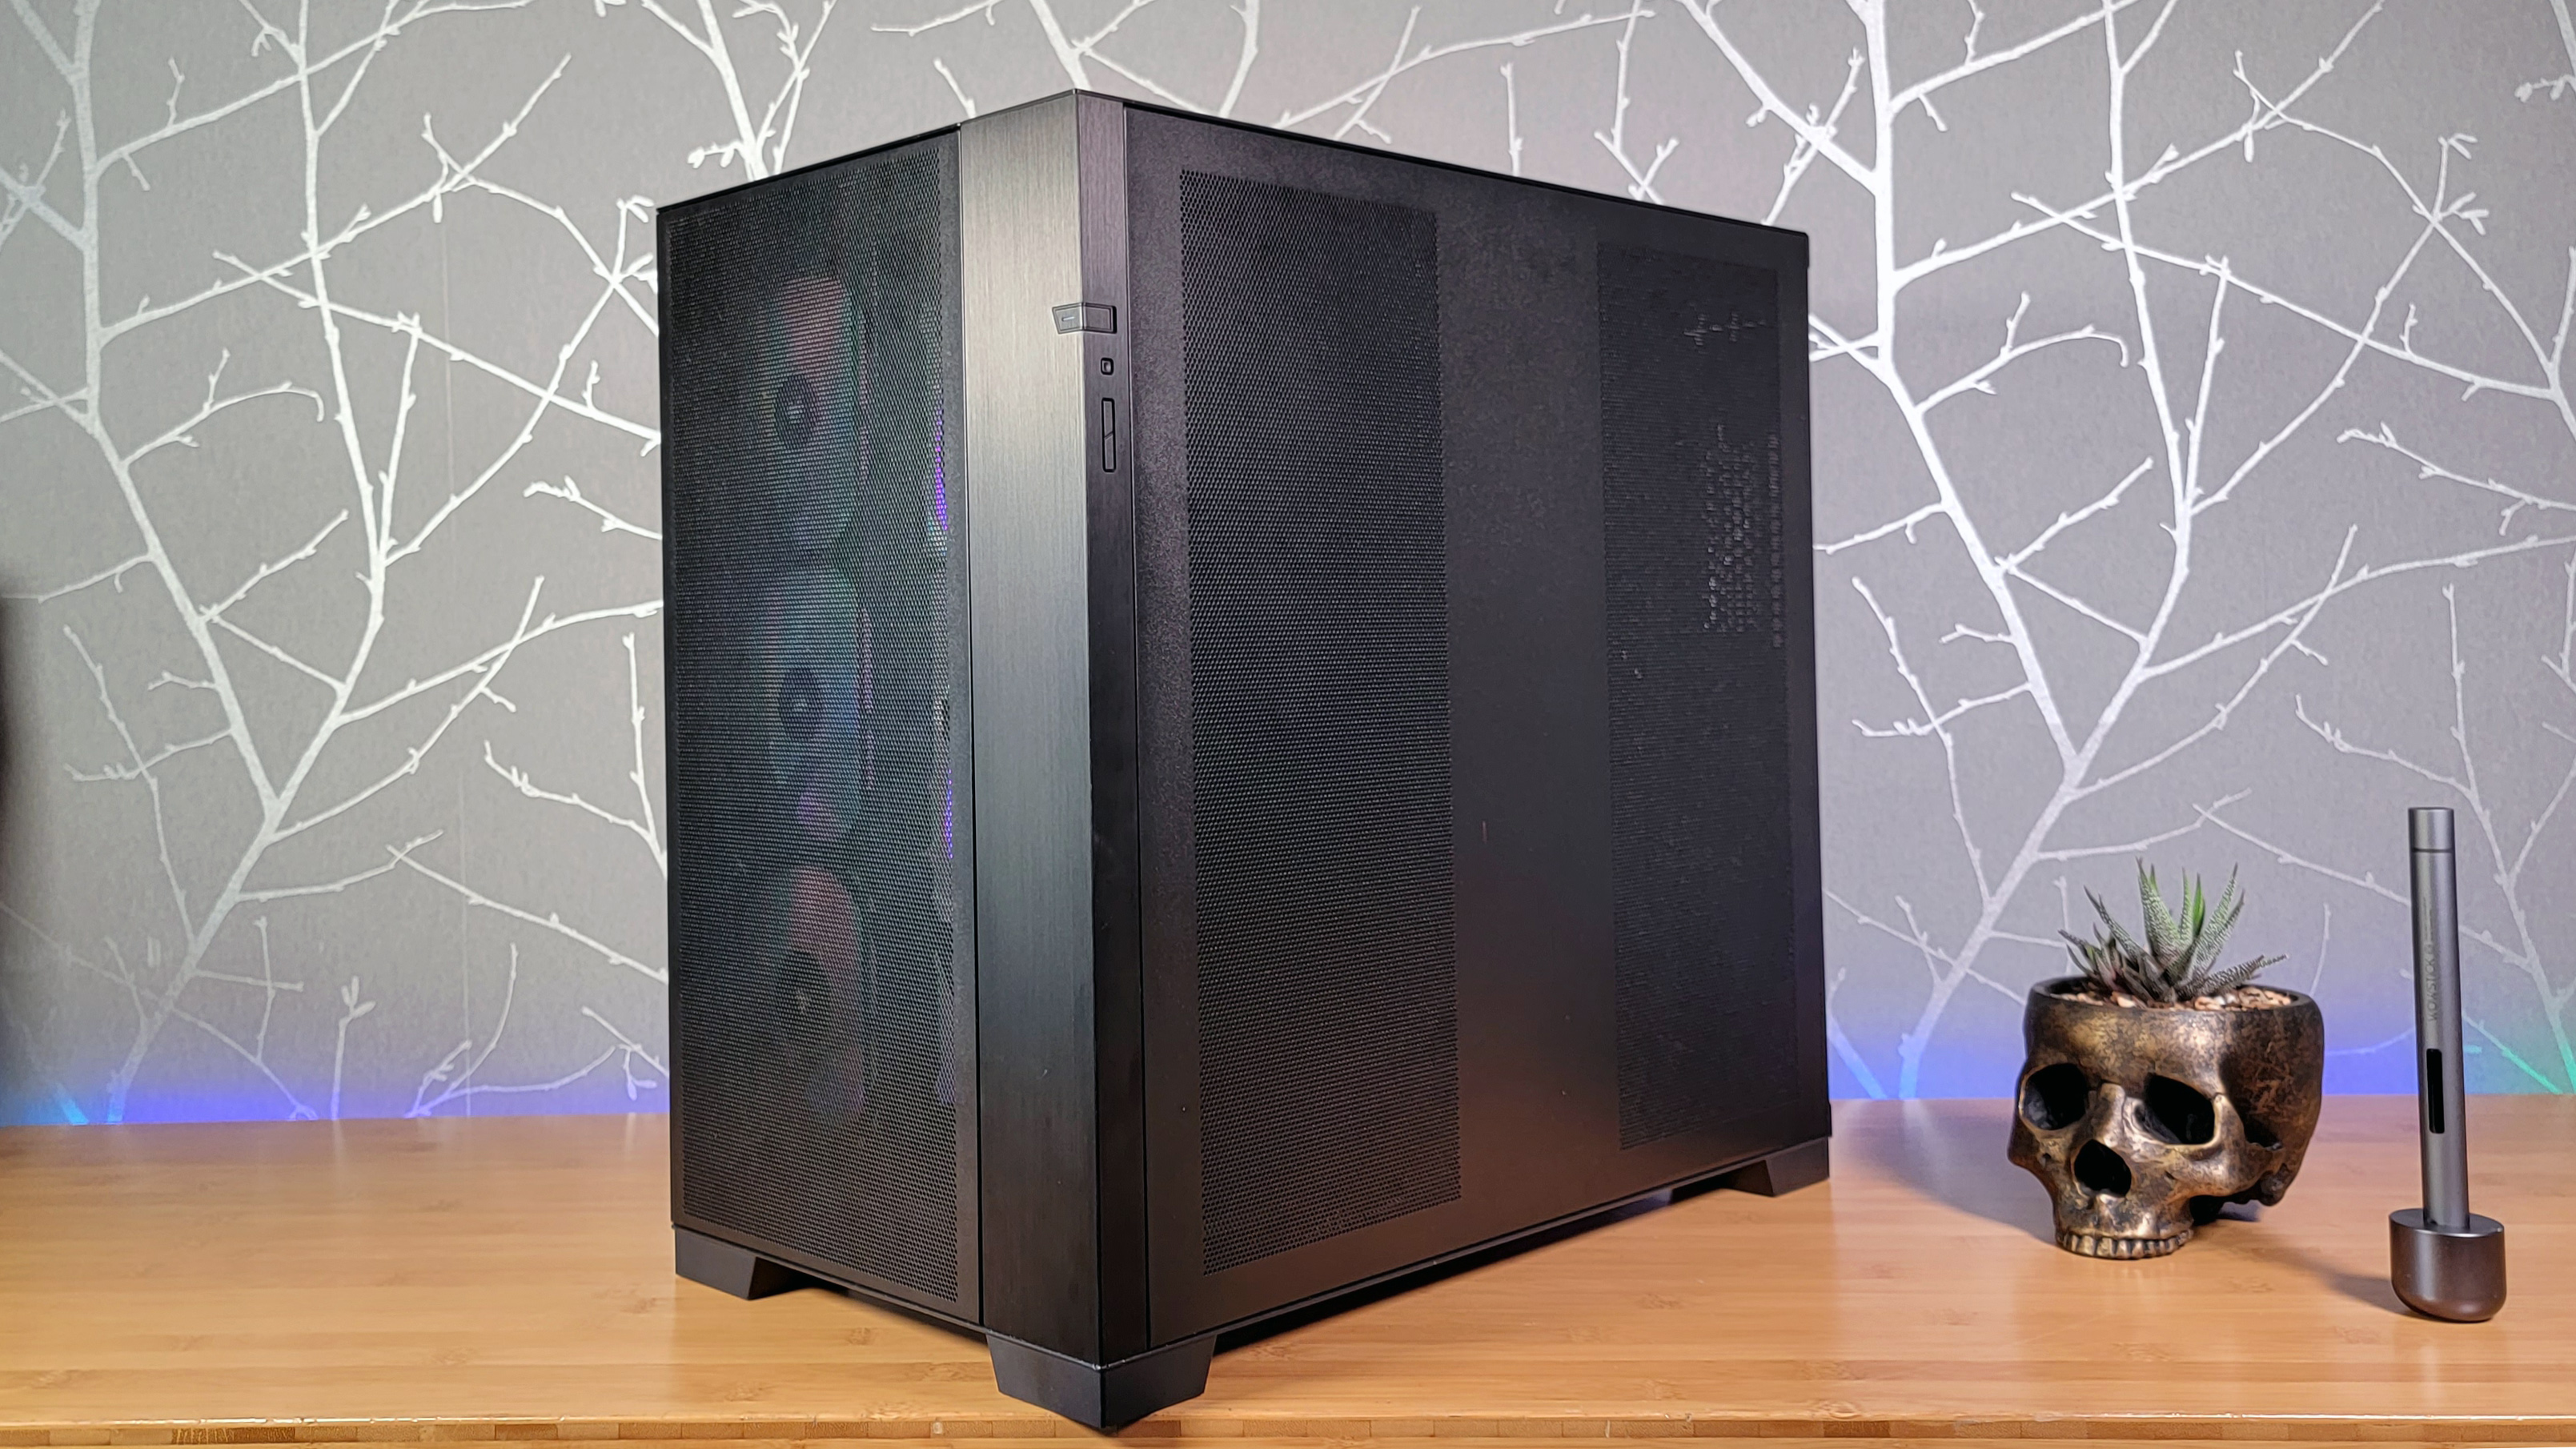
The Lian Li O11D EVO is, as you might guess, an evolution of the company's 2018-era O11 Dynamic while incorporating lessons the company learned from subsequent chassis like the O11 Air Mini and the O11D XL. It definitely leans toward the latter in terms of sheer size, at 18.07 x 11.22 x 18.31 inches (459 x 285 x 465 mm). So you'll either need a big desk or a fair bit of floor space to accommodate this case. But otherwise, the O11D EVO is all about morphing to fit your needs. It will also ship in both black and white options.
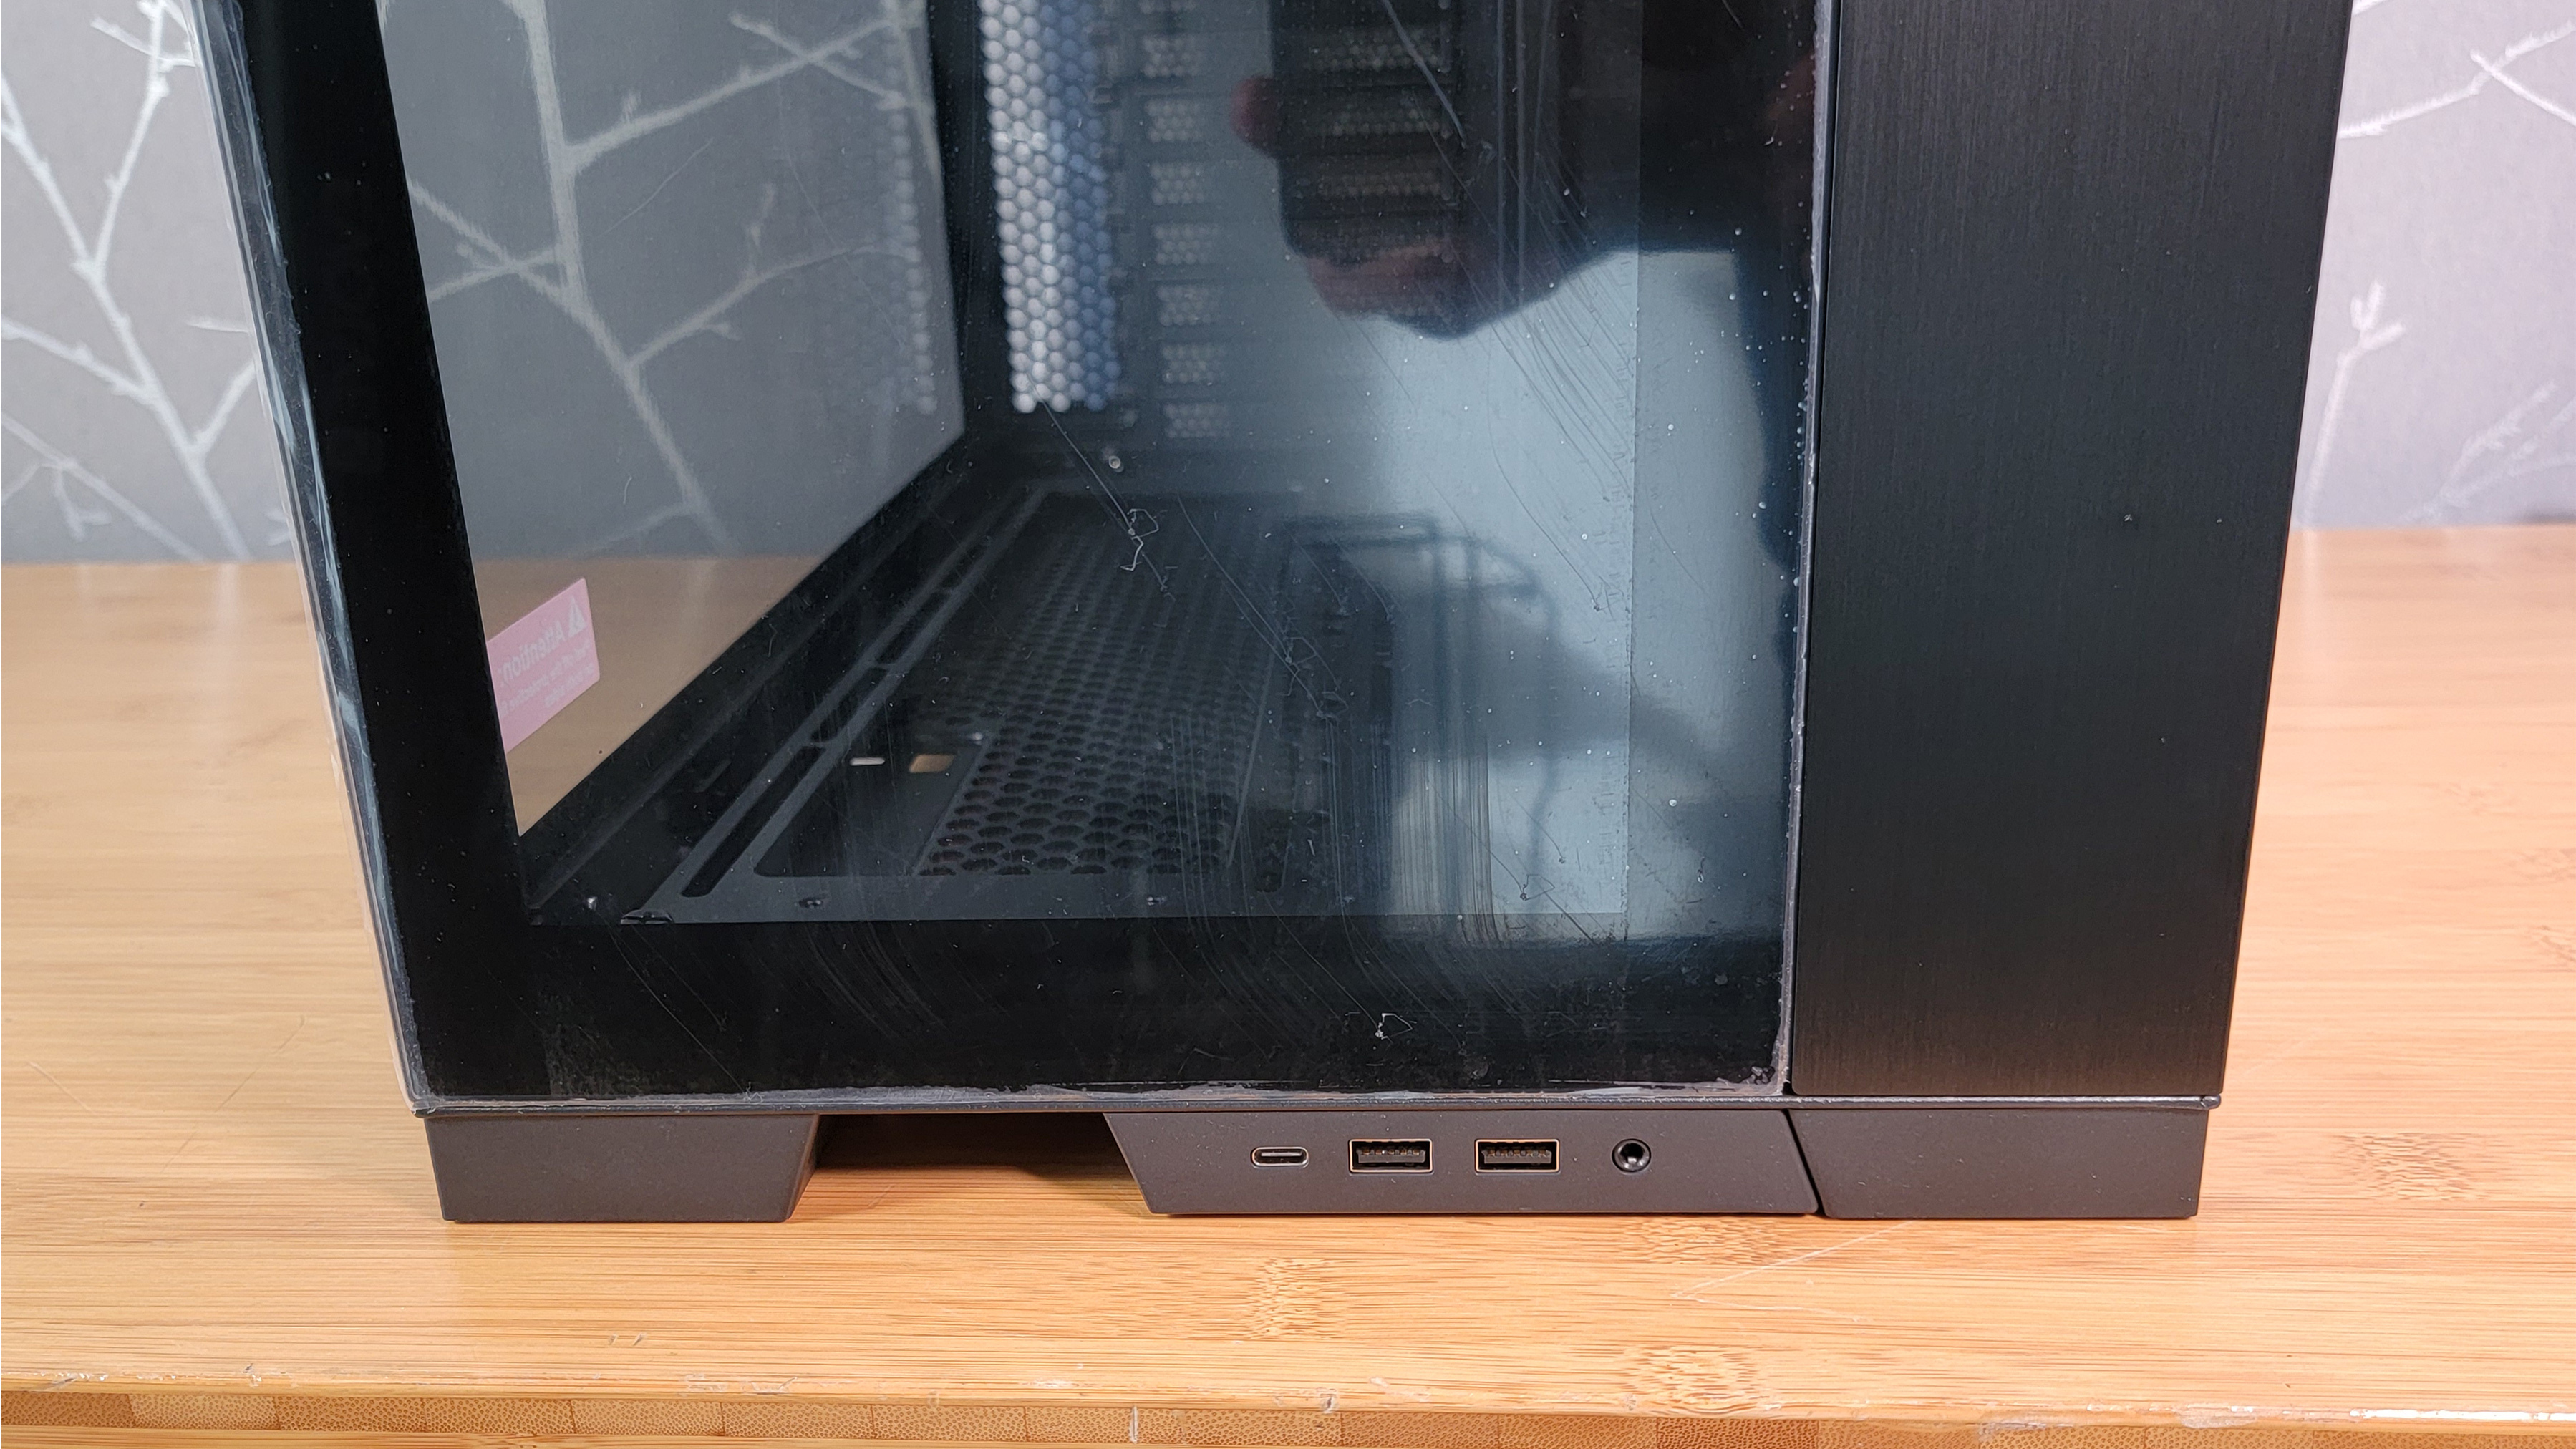
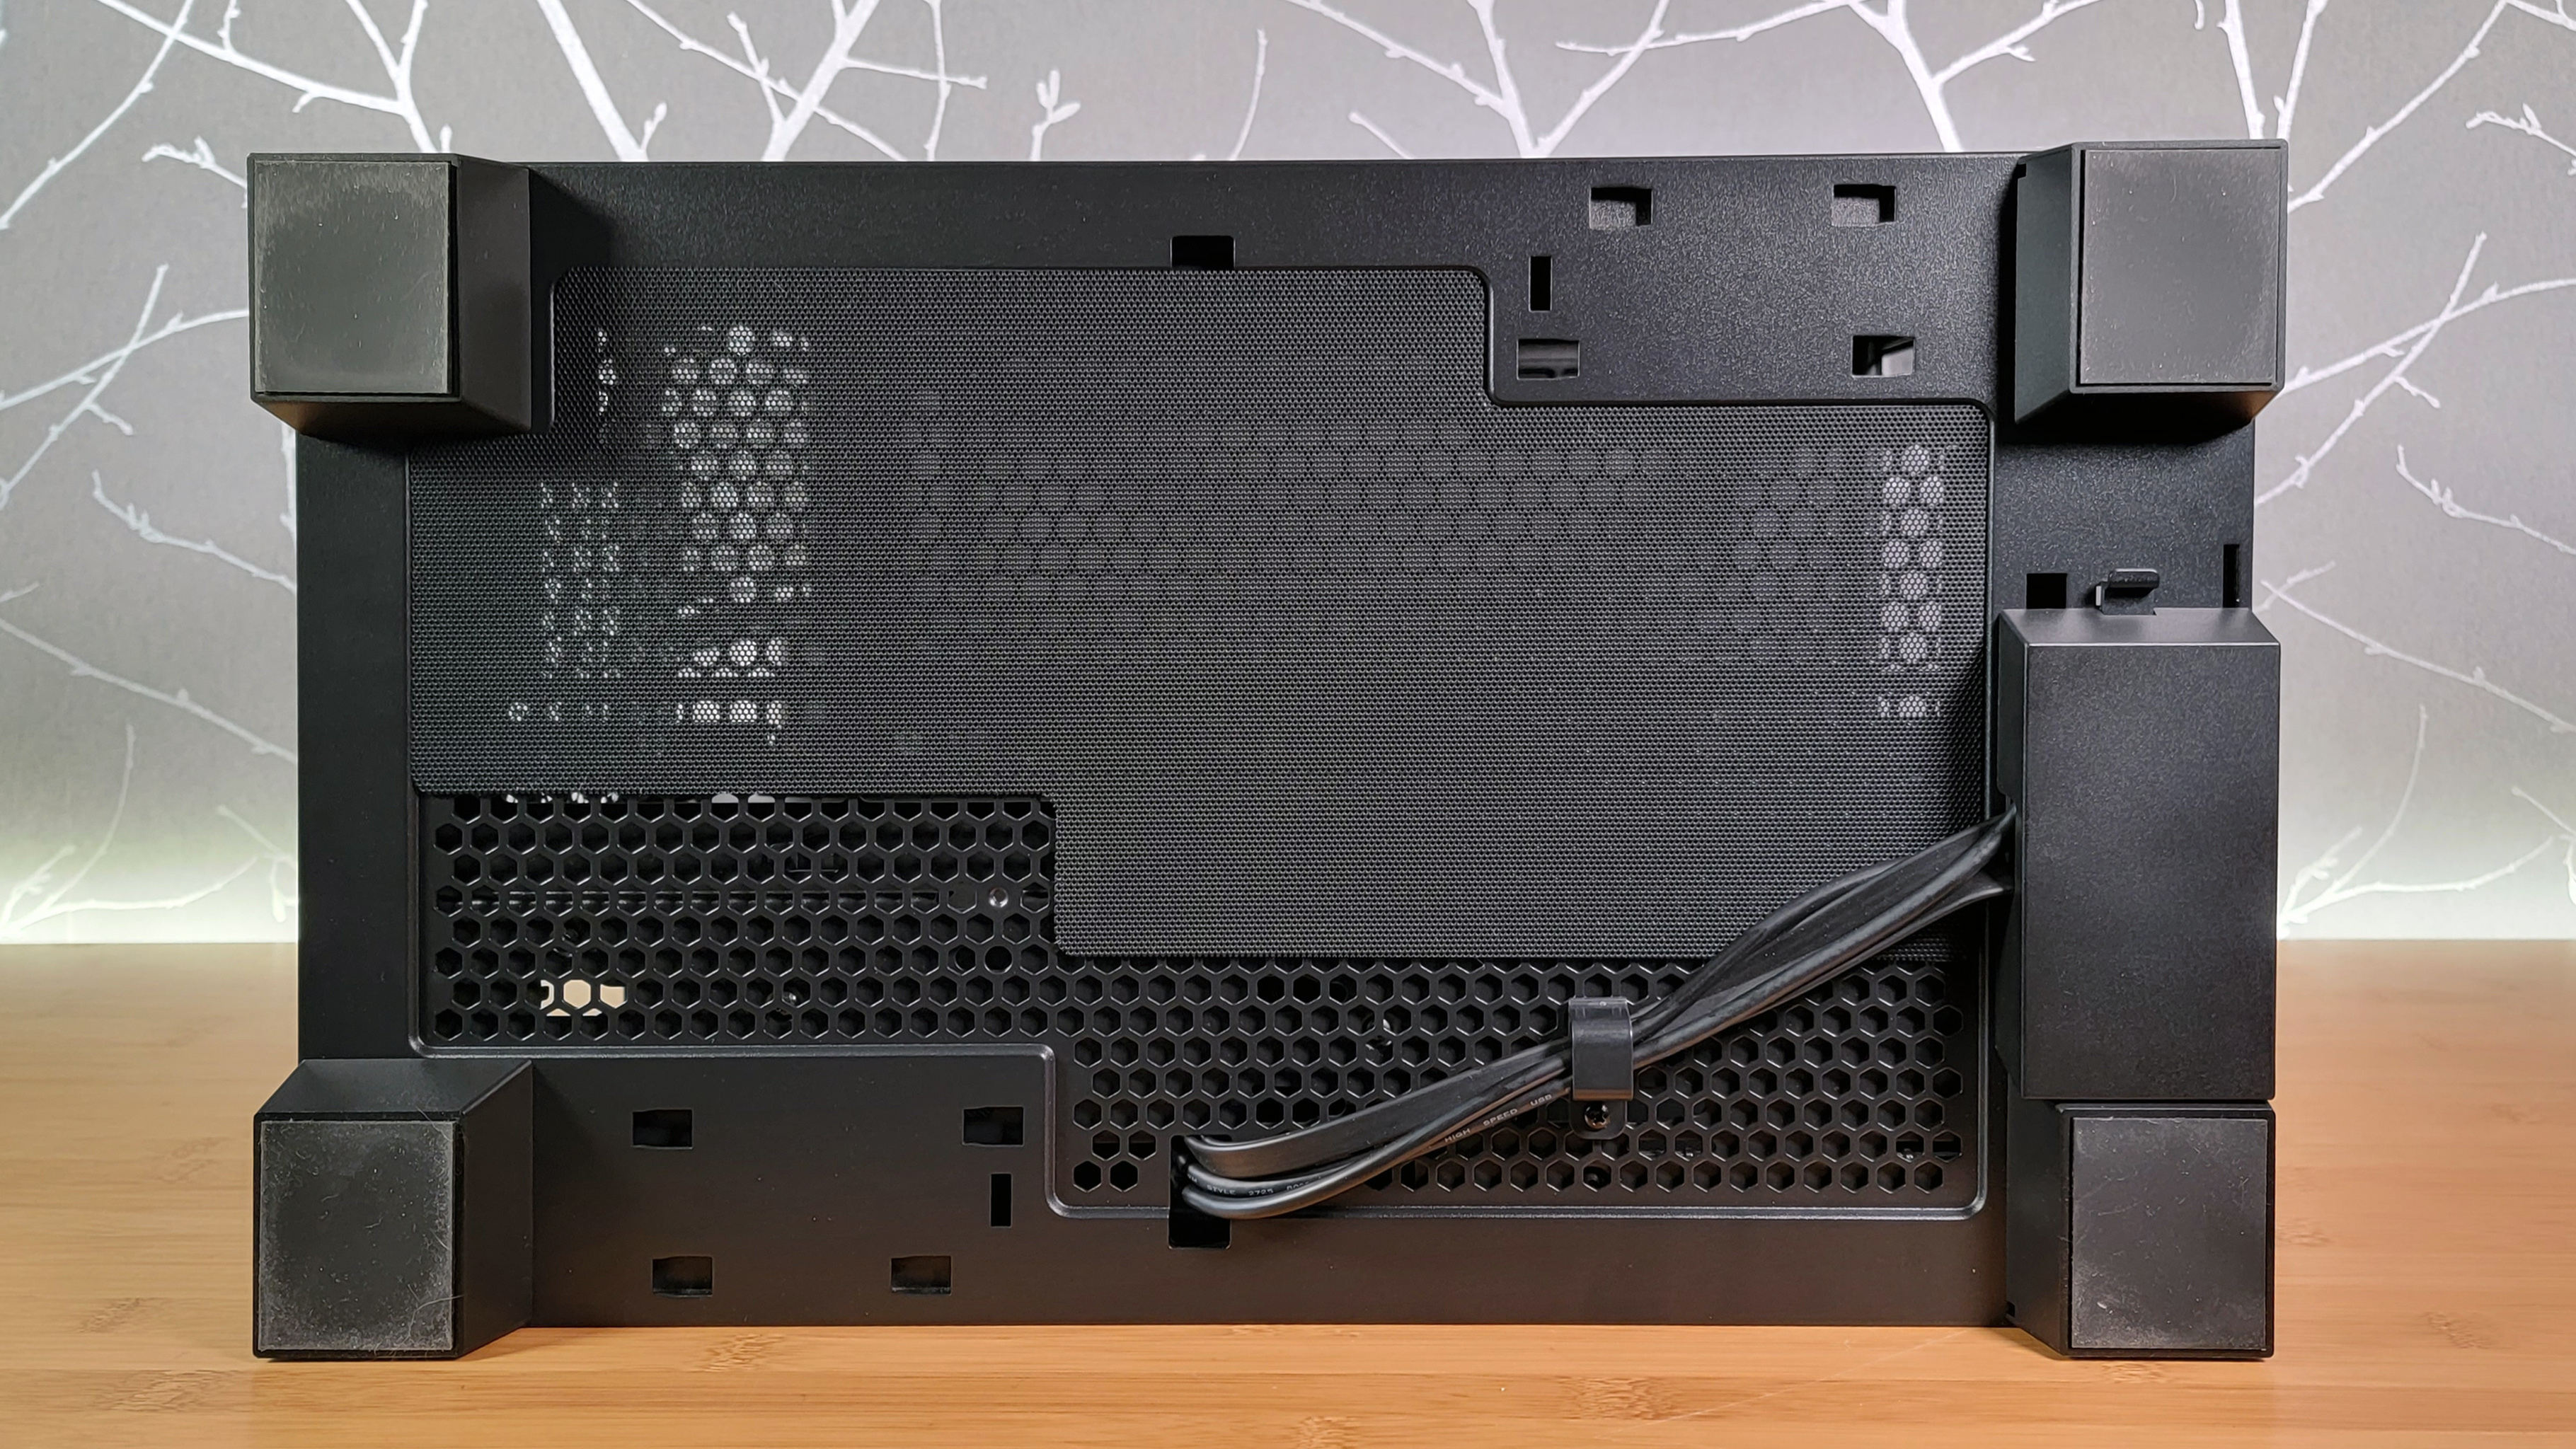
Out of the box, the case can be configured to accommodate up to E-ATX motherboards (with a width of under 280 mm) in a fairly standard orientation or reversed so that the glass side panel and motherboard live on the opposite side of the case. And the front-panel IO can be moved as well, giving you easy access to two USB-A, one USB-C, and an audio combo jack either up front or on either side of the bottom of the case.
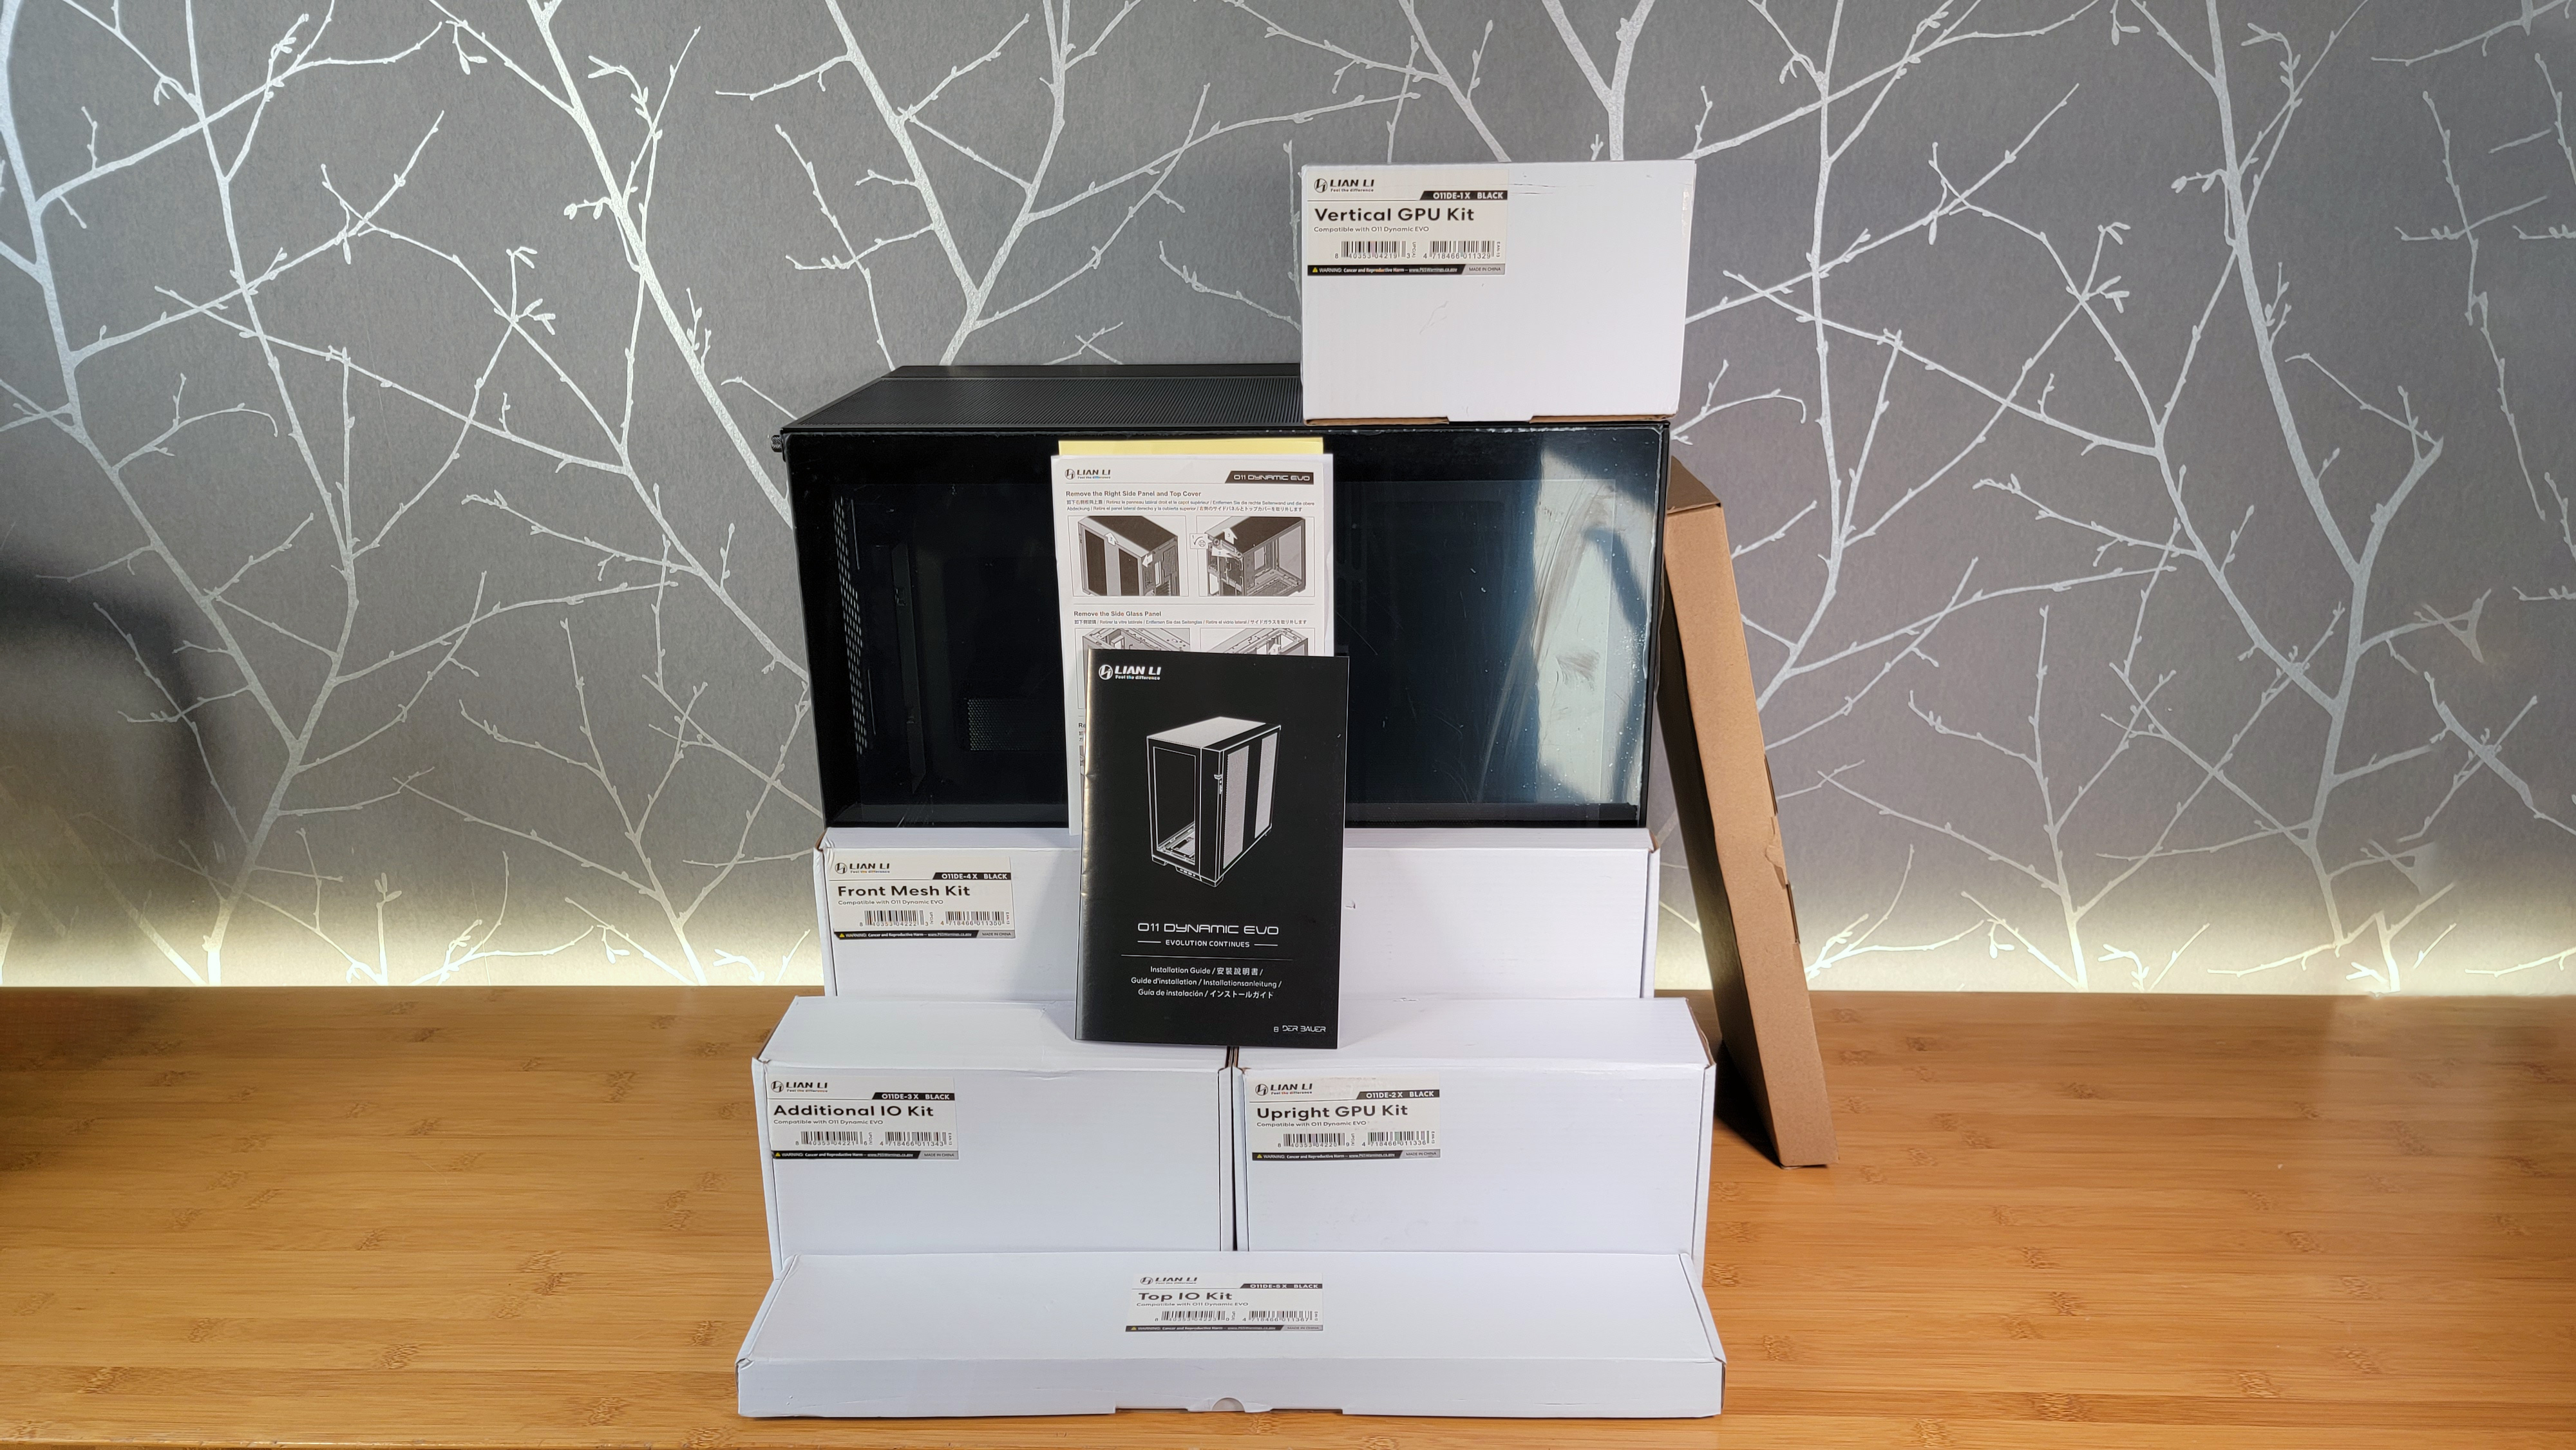
However, that's just the tip of the transforming iceberg. Lian Li will also offer up five kits for the O11D EVO, letting you move the front IO to the top (where it honestly should be by default on a case this big); replace the front glass panel with mesh for much-improved airflow; or double up on those front-/side-facing USB A/C ports (although you'll need a motherboard two front headers for that). There are also two separate kits for showing off your graphics card. The Vertical GPU Kit (somewhat confusingly) lets you mount your best graphics card standing up but running horizontally, from the back of the case to the front. The Upright GPU Kit houses your graphics card in a true vertical orientation at the front of the case.
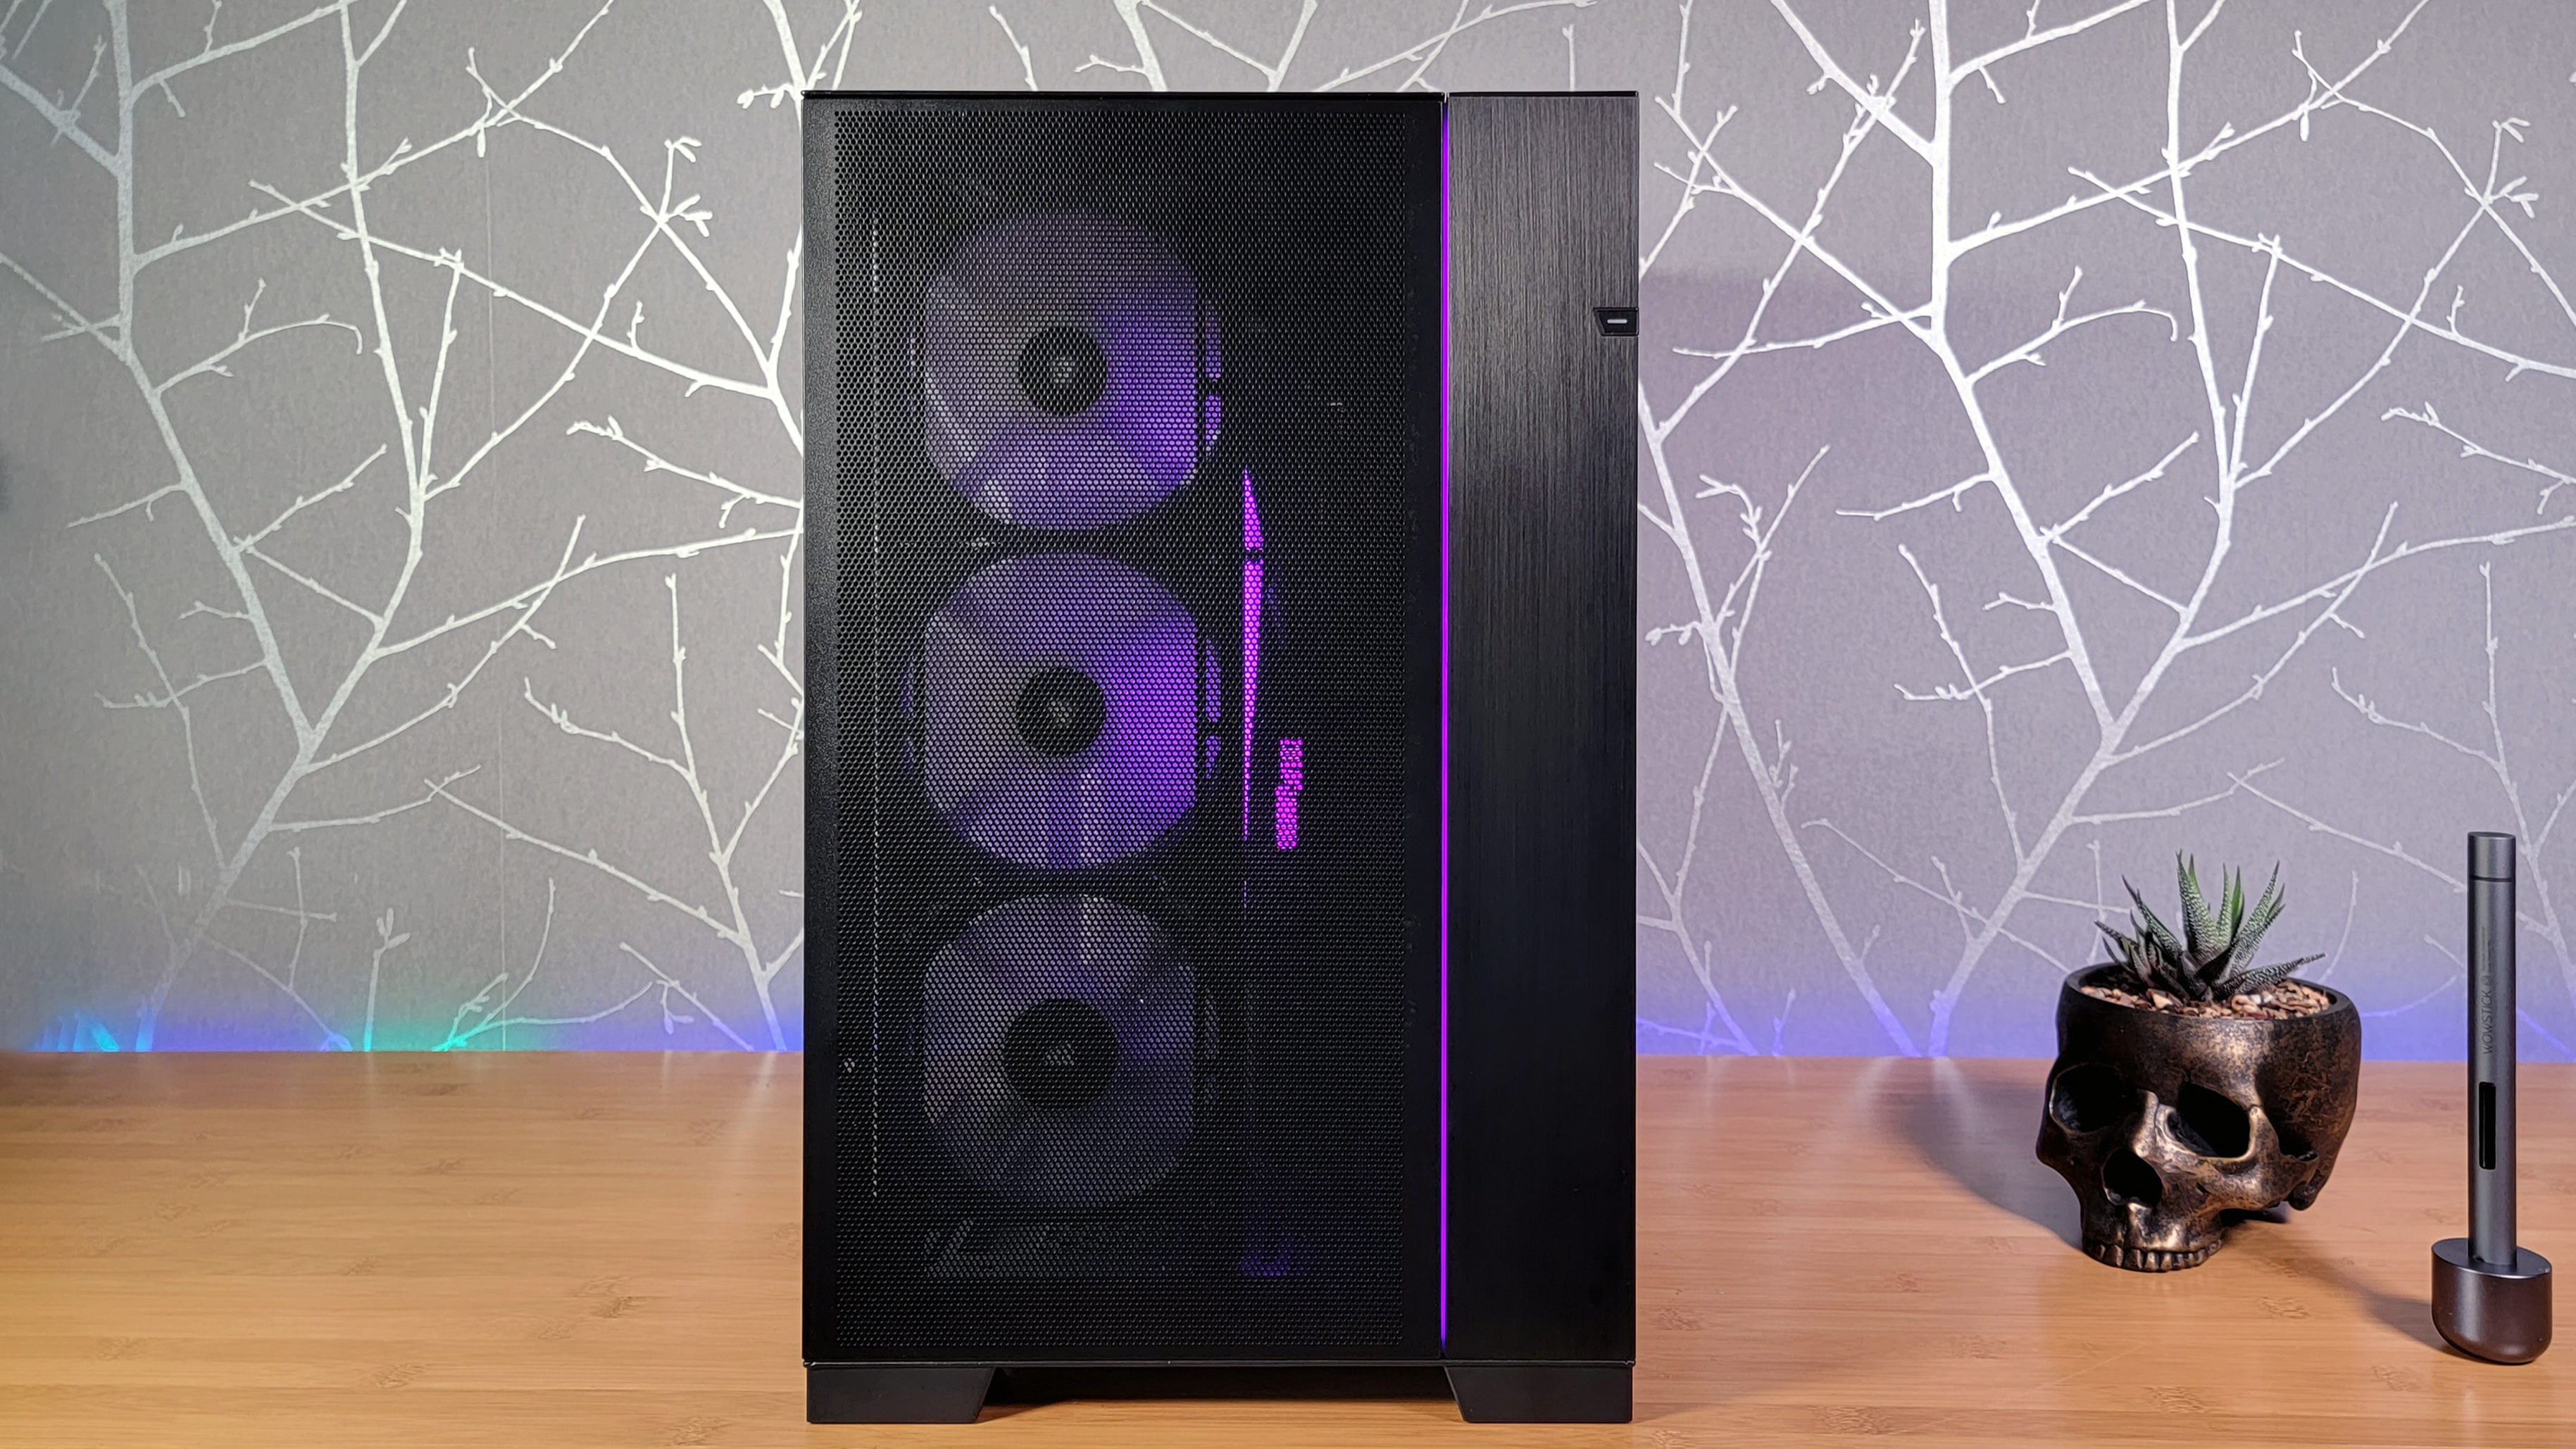
In short, the O11D EVO is more of a case platform than a traditional chassis. So it may be the best PC case for those who like to continually tweak and reconfigure their PC. And at $169 US ($159 in most other countries), it seems reasonably priced, given you also get a tasteful RGB strip that runs down the front. Note that the white model will sell for an additional $10.
Most of the upgrade kits are also fairly affordable, with all but the GPU mounting kits (which include a PCIe 4.0 riser cable) selling for under $20. But you'll have to factor in all your cooling considerations into the price because the O11D EVO doesn't ship with any fans. And though it supports up to 10 spinners, none are meant to be mounted up front unless you buy the front mesh kit.
Specifications
| Type | Mid-Tower ATX |
| Motherboard Support | Mini-ITX, Micro-ATX, ATX, E-ATX (width under 280 mm) |
| Dimensions (HxWxD) | 18.07 x 11.22 x 18.31 inches (459 x 285 x 465 mm) |
| Max GPU Length | 16.61 inches (422 mm) |
| CPU Cooler Height | 6.57 inches (167 mm) |
| External Bays | ✗ |
| Internal Bays | 7x 3.5-inch |
| 11x 2.5-inch | |
| Expansion Slots | 8x |
| Front I/O | 2x USB 3.0, 1x USB-C, 3.5 mm Audio/Mic Combo |
| Other | 2x Tempered Glass Panels |
| Front Fans | ✗ |
| Rear Fans | Up to 1x 120mm |
| Top Fans | Up to 120 mm x3 or 140 mm x2 |
| Bottom Fans | Up to 120 mm x3 or 140 mm x2 |
| Side Fans | Up to 120 mm x3 or 140 mm x2 |
| RGB | Front strip |
| Damping | No |
| Warranty | 1 Year |
Lian Li O11D EVO Design
With its mixture of glass, aluminum and steel (although mostly steel), the O11D EVO feels like most other O11 chassis, which is to say good, but not super premium. The company moved to a new pin-mounting mechanism for the pop-off panels, similar to what I've seen on both the Ssupd Meshlicious and Hyte Revolt 3 earlier this year. That means the side and front panels pop off with ease without tools or removing the top panel first. And they mostly stay in place when you want them to. The two glass panels have mounts for a screw to hold them more securely if you're traveling with or shipping the case. I'd suggest removing all the panels when starting your build, as the side panels, in particular, can come loose as you're flipping the case around. The top panel also comes off fairly easily once you loosen two captive screws at the back.
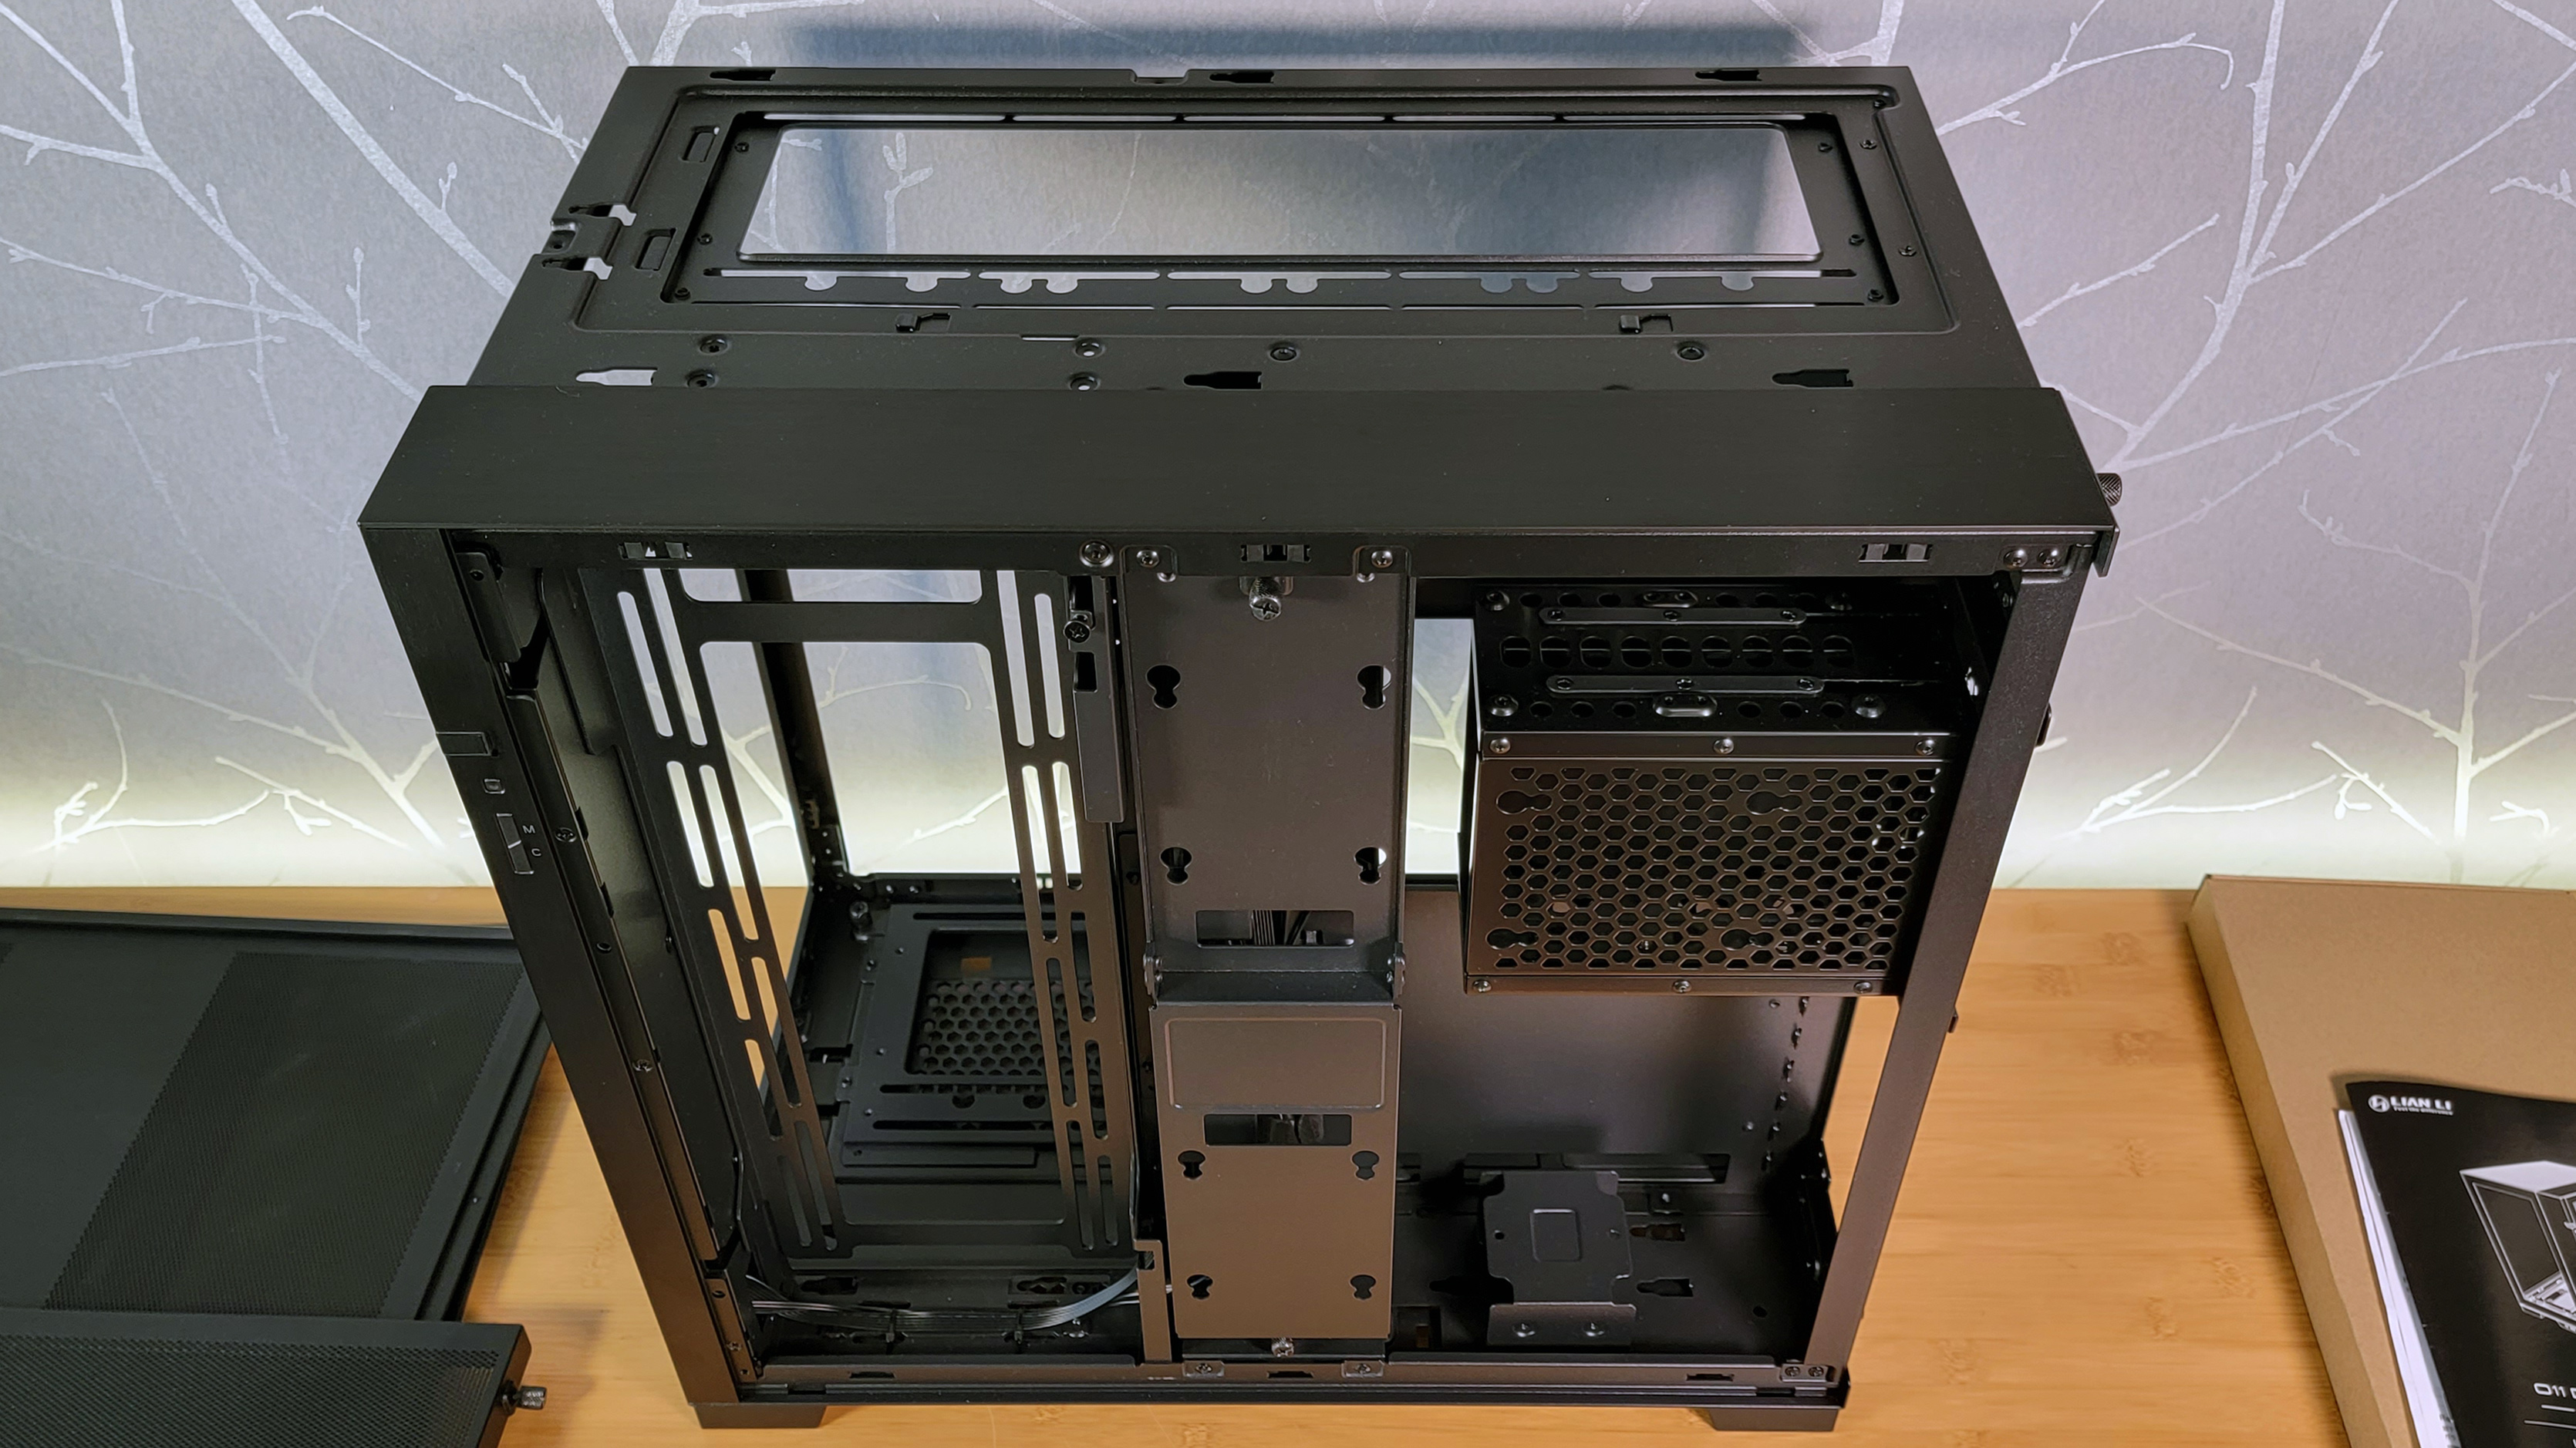
Inside, the case is nearly infinitely reconfigurable. There are over a dozen panels, pieces, and ports that can be moved or removed to fit your needs, and some don't even require a screwdriver. Most require removing a couple of screws, but you won't likely want to swap out these parts unless you're installing one of the five optional kits.
That's not to say the case isn't capable of transforming without the aid of extra parts. Out of the box, you can invert the layout of the case so that the motherboard installs on either side of the case. However, this seems to be the most burdensome reconfiguration of the O11D EVO, with over a dozen steps involving removing and reinstalling several of the case's interior bits. Due to time constraints, we didn't install a system this way, but you can see how to set up the case for this kind of install in Lian Li's video here. Also, note that some of the kits we'll cover in detail below won't work in this orientation.
Get Tom's Hardware's best news and in-depth reviews, straight to your inbox.
The other thing you can rearrange in the O11D EVO out of the box is the front IO, which is housed in the bottom front by default. If you don't like that placement for your two USB-A, one USB-C and headline/mic combo ports, the good news is you can pop the port housing out of the tabs that hold it on the bottom of the case and move it either to the left side near the back, or the right side near the front. This can all be done without reaching for a screwdriver, as the port housing just slots in and out of holes on the bottom of the chassis.
In a nice design touch that acknowledges just how large the O11D EVO is, Lian Li also designed the power button so that it wraps around the right edge of the case, which means you can press it either from the front or the side.
My primary complaint here, though, is that at over 18 inches tall and 11 inches wide, unless you have a huge desk, chances are you're going to plop this big boy on the floor. However, the floor positioning makes the bottom-mounted ports pretty inconvenient no matter where you put them.
Lian Li O11D EVO Accessory Kits
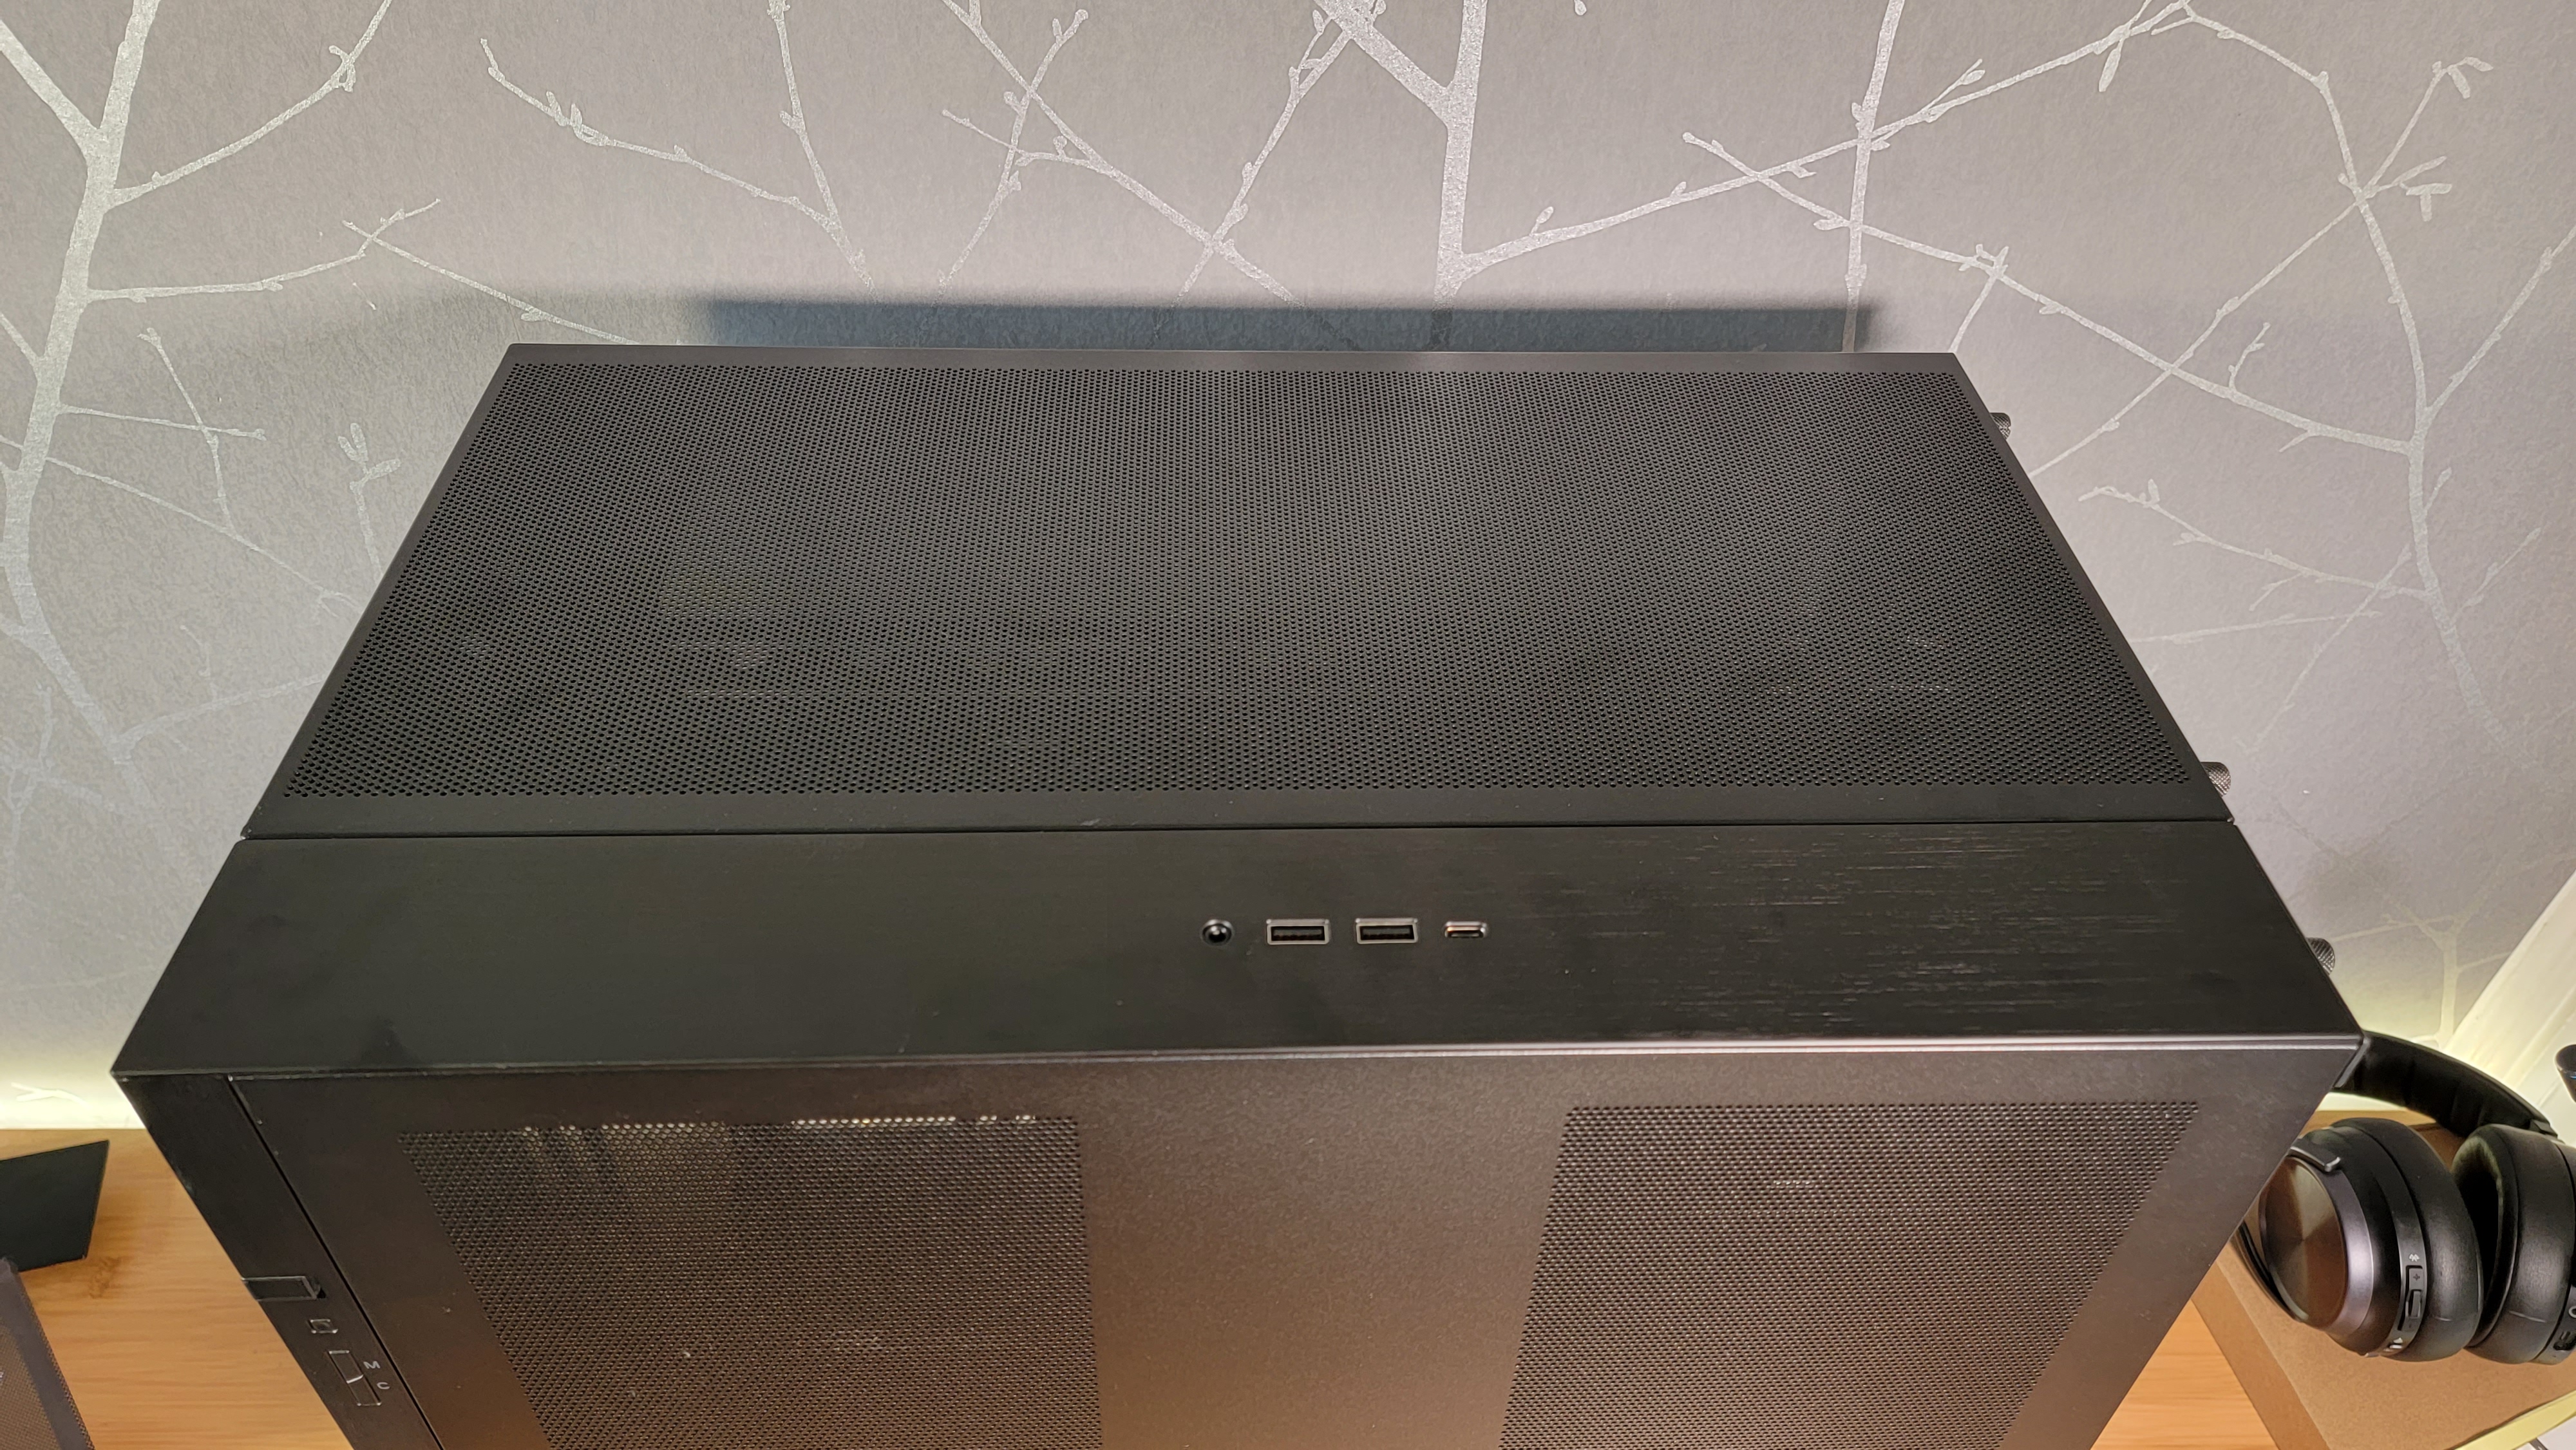
Enter the first of five kits designed for this case, the Top I/O Kit. As you might guess by the name, this lets you mount the "front" IO to the top of the case. This is also the cheapest O11D kit, priced at $12.99. It's cheap because it consists solely of an aluminum strip with holes cut out for ports and a couple of screws.
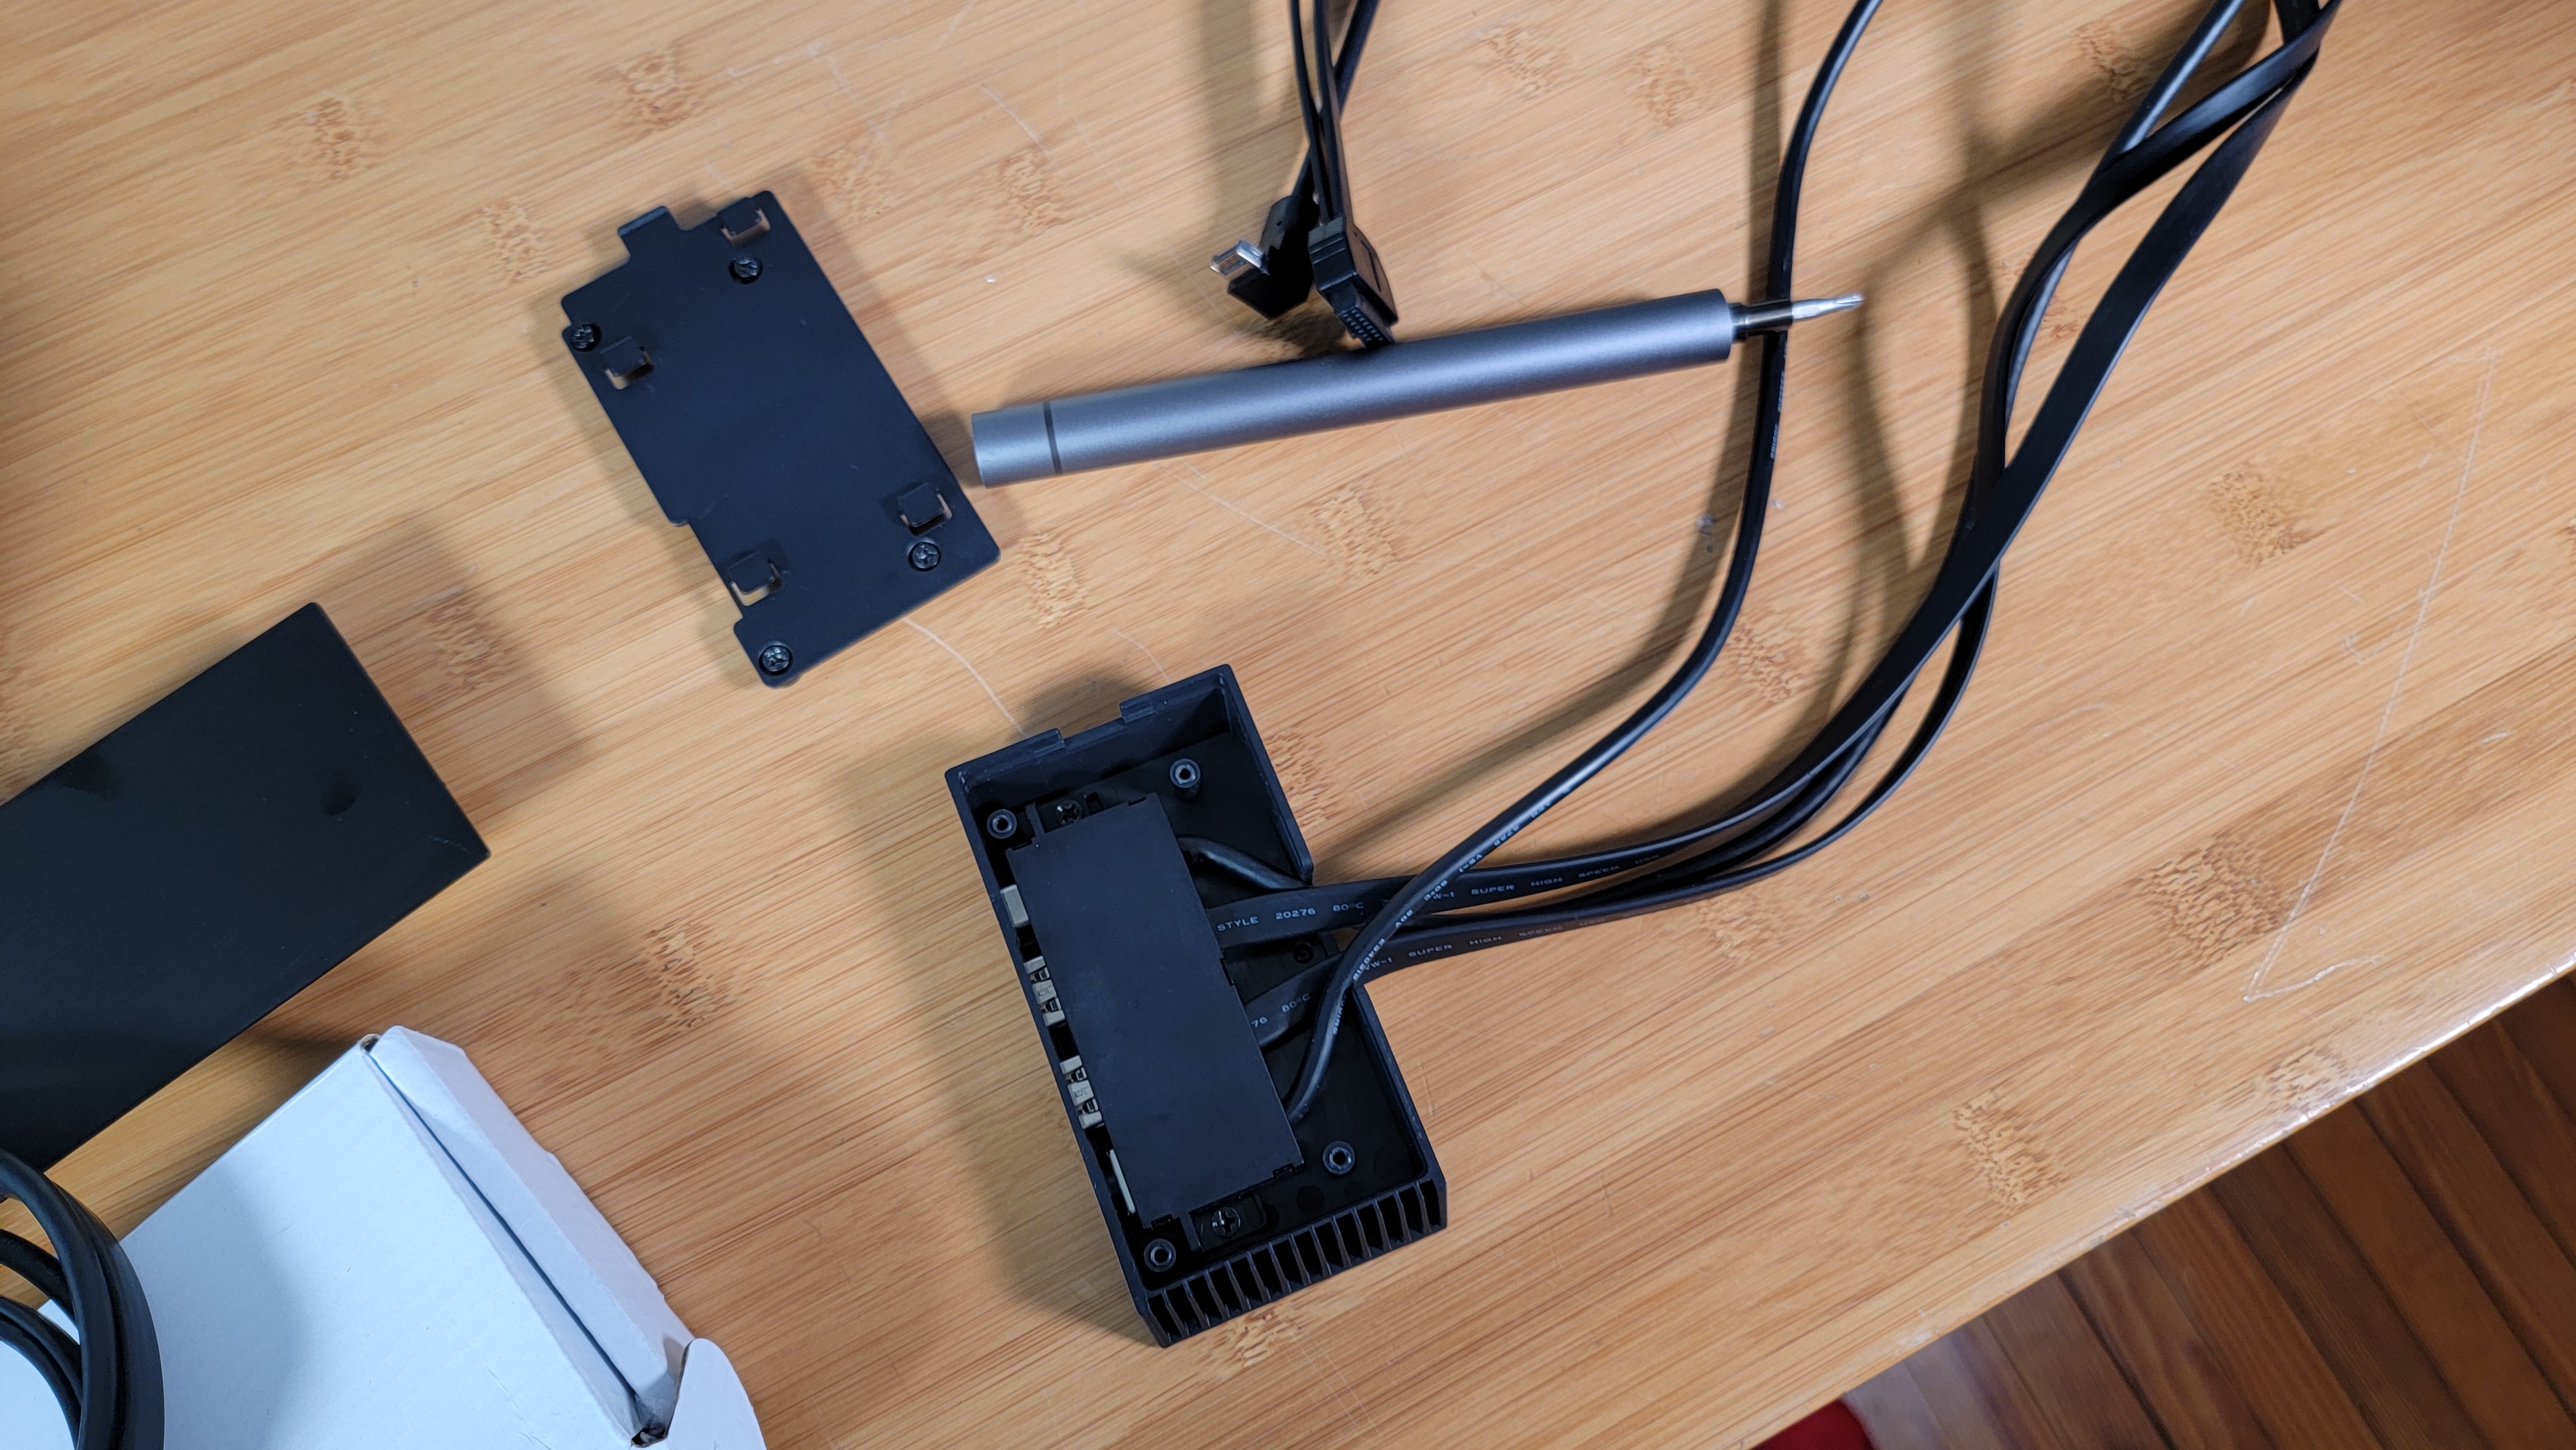
To install it, you need to pop out and remove a couple of screws from the port housing at the bottom, route the ports and cables up to the top and remove the standard top aluminum strip by loosening a thumb screw at the back. Next, screw the internal port housing into the port area from underneath the strip, then put the new top strip, with ports in place, on top of the case and screw it down with the captive thumb screw at the back.
If you want more external ports than this, there's also an Additional I/O kit, which can install in any of the three previously mentioned places at the bottom of the case. It delivers two more USB-A ports and one more USB-C port. Just note that you'll need ample front-panel connectors/headers to use both the standard and additional IO kit, as both use one USB 3.0 header and one USB 3.1 front-panel connector.
As noted up top, the O11D EVO is designed by default to pull air in from the bottom and exhaust it out the top or back–although there are no included fans. If, however, you do want to install fans up front, there's a kit for that as well. The $19.99 Front Mesh Kit replaces the front glass panel with a rigidly framed piece of metal mesh. It also includes a couple of metal rails that mount behind the mesh, letting you install three 120 mm fans or two 140 mm air movers, just like in the brackets that ship on the bottom and top of the case. If you include a 120 mm spinner at the back, that's 10 total fans that the case supports–and quite an added expense if you don't carry any over from a previous build.
With the trio of Corsair ML 120 fans installed in the front, alongside the Top I/O and Front Mesh Kit, the O11D EVO looks quite good. And it should have excellent airflow, given every panel is vented save for the glass side. But this setup is also a far cry from the base configuration of the case.
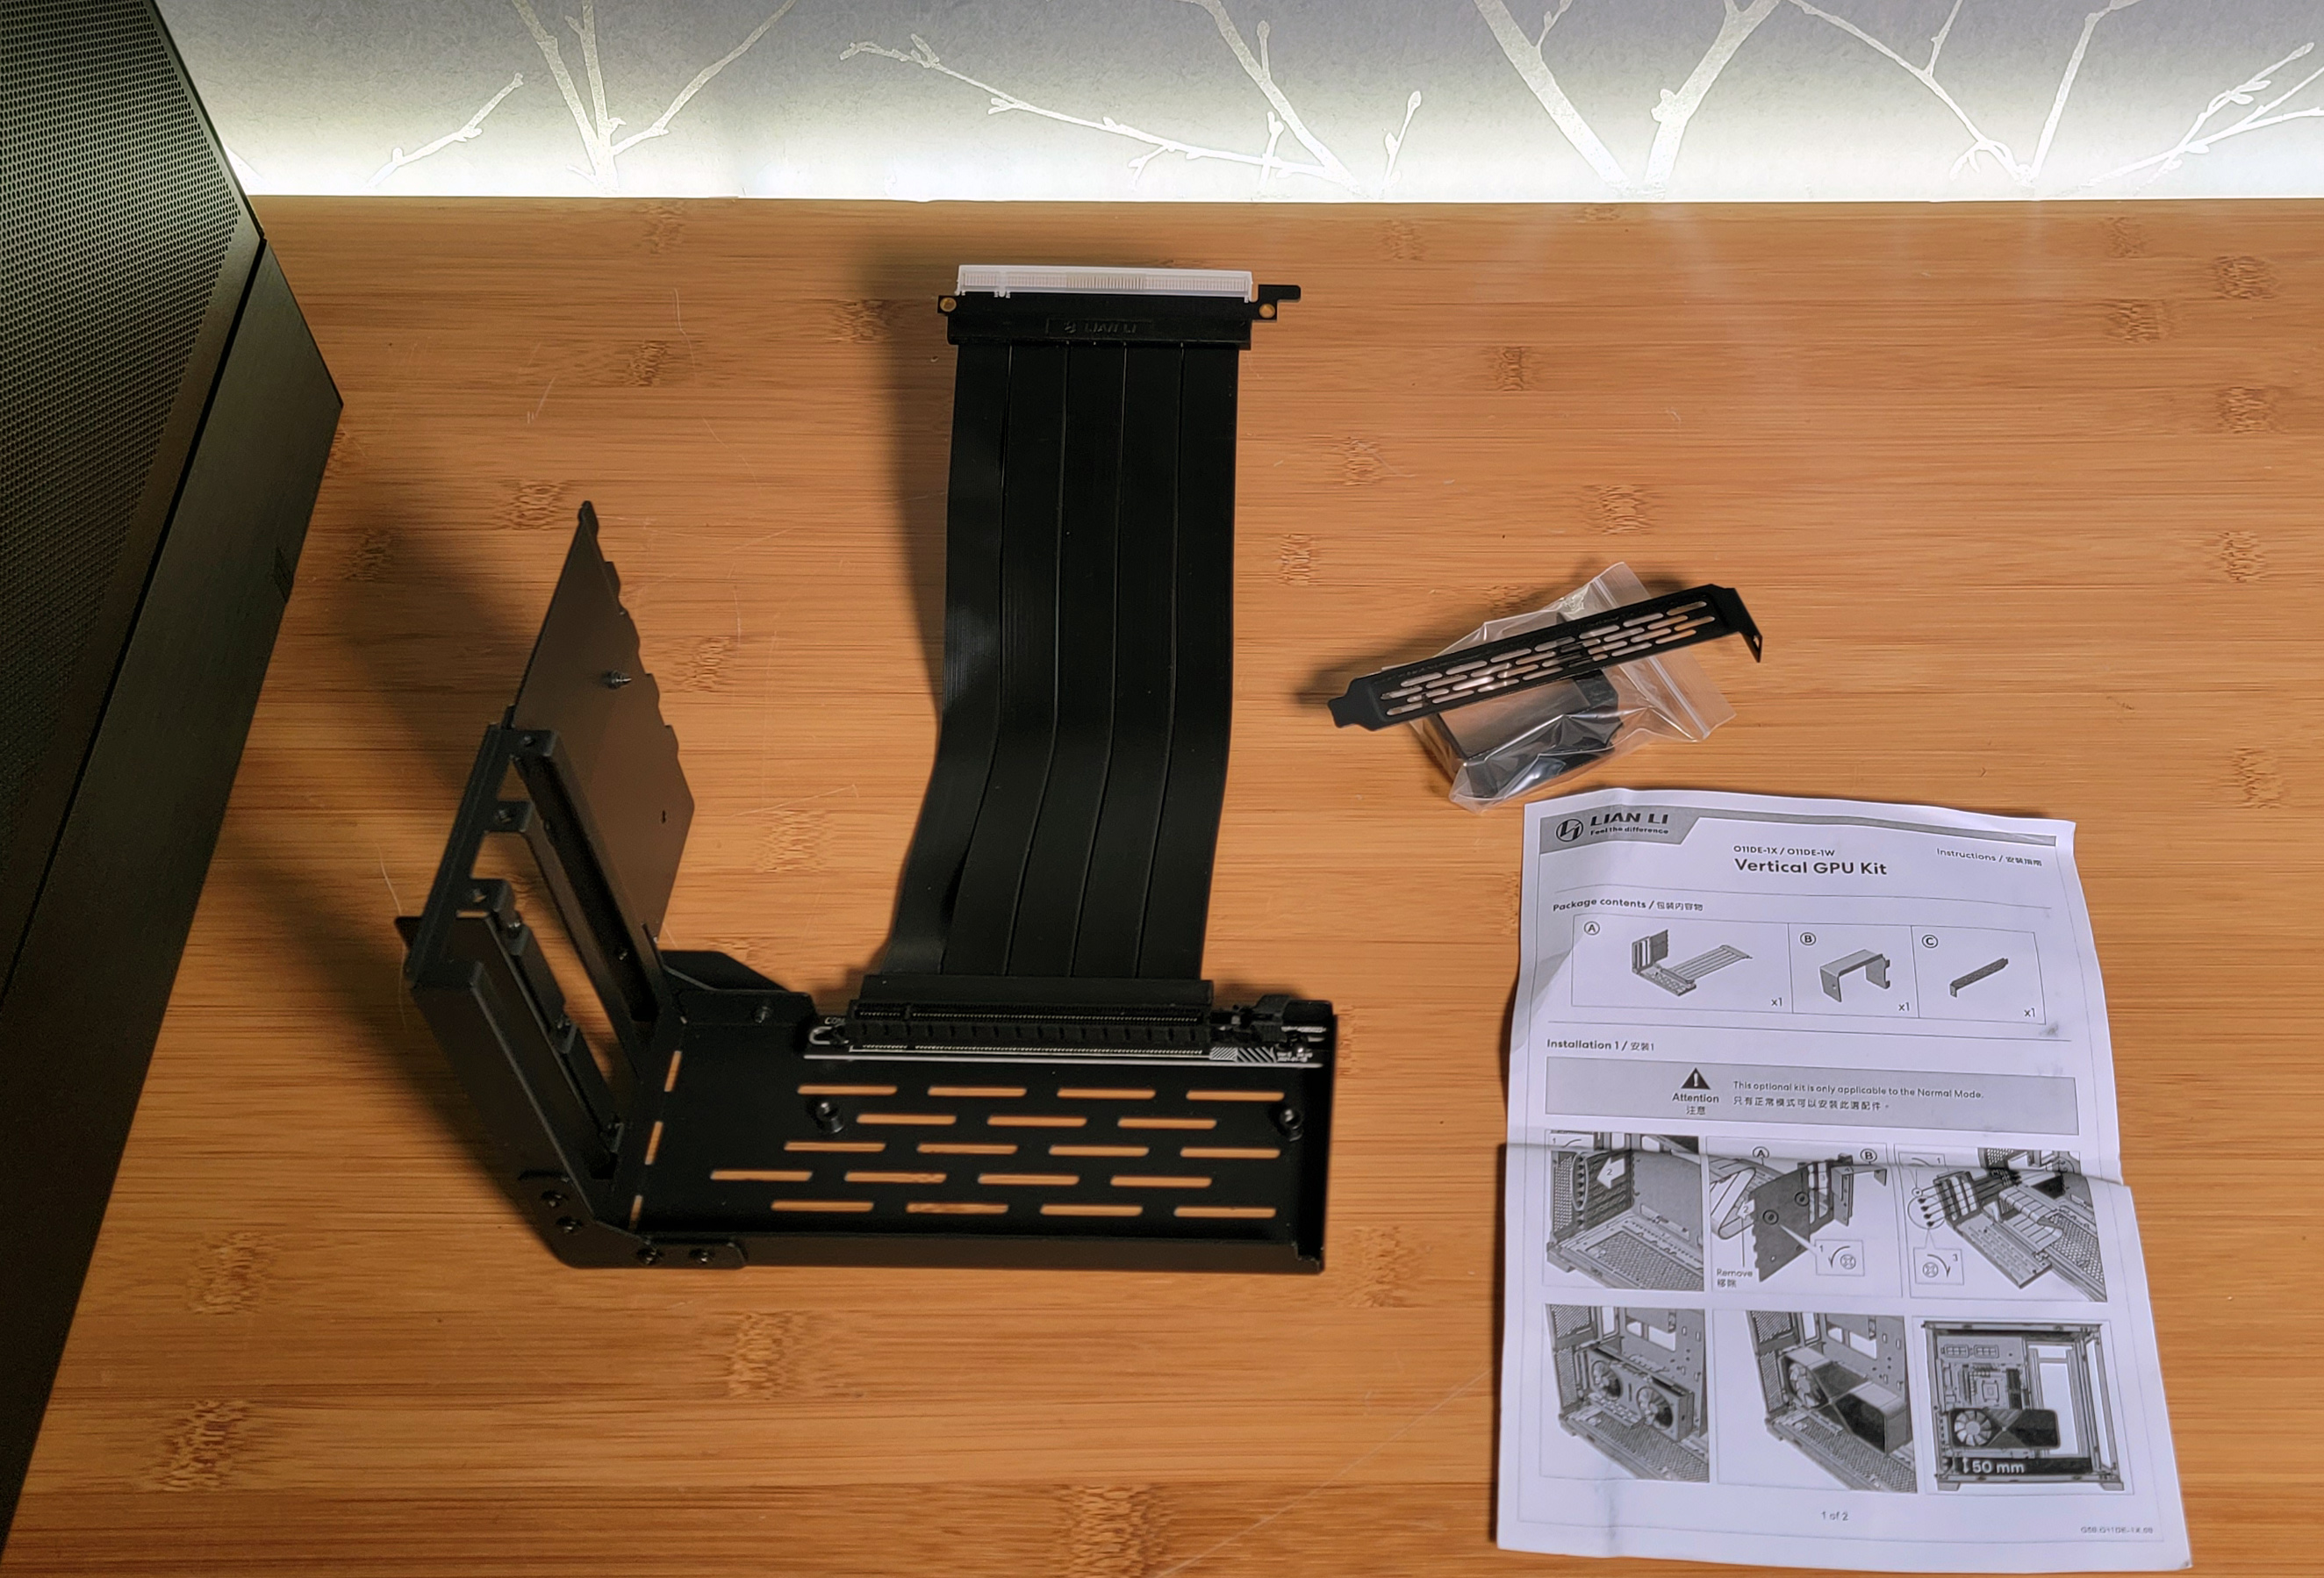
The other two kits for the O11D EVO involve alternate graphics card orientations. They're also much more expensive than the others because both come with a PCIe 4.0 riser cable.
First up is the Vertical GPU Kit, which is $69.99. Aside from the cable, you get a couple of brackets to mount your graphics card standing up, running from the back of the case toward the front. To install this kit, you'll first need to remove most of the case's eight expansion slot covers. The instructions have you removing the second through the fifth slot covers, and then the part of the bracket on the left in the image above slots into the same holes that typically hold the expansion slot covers.
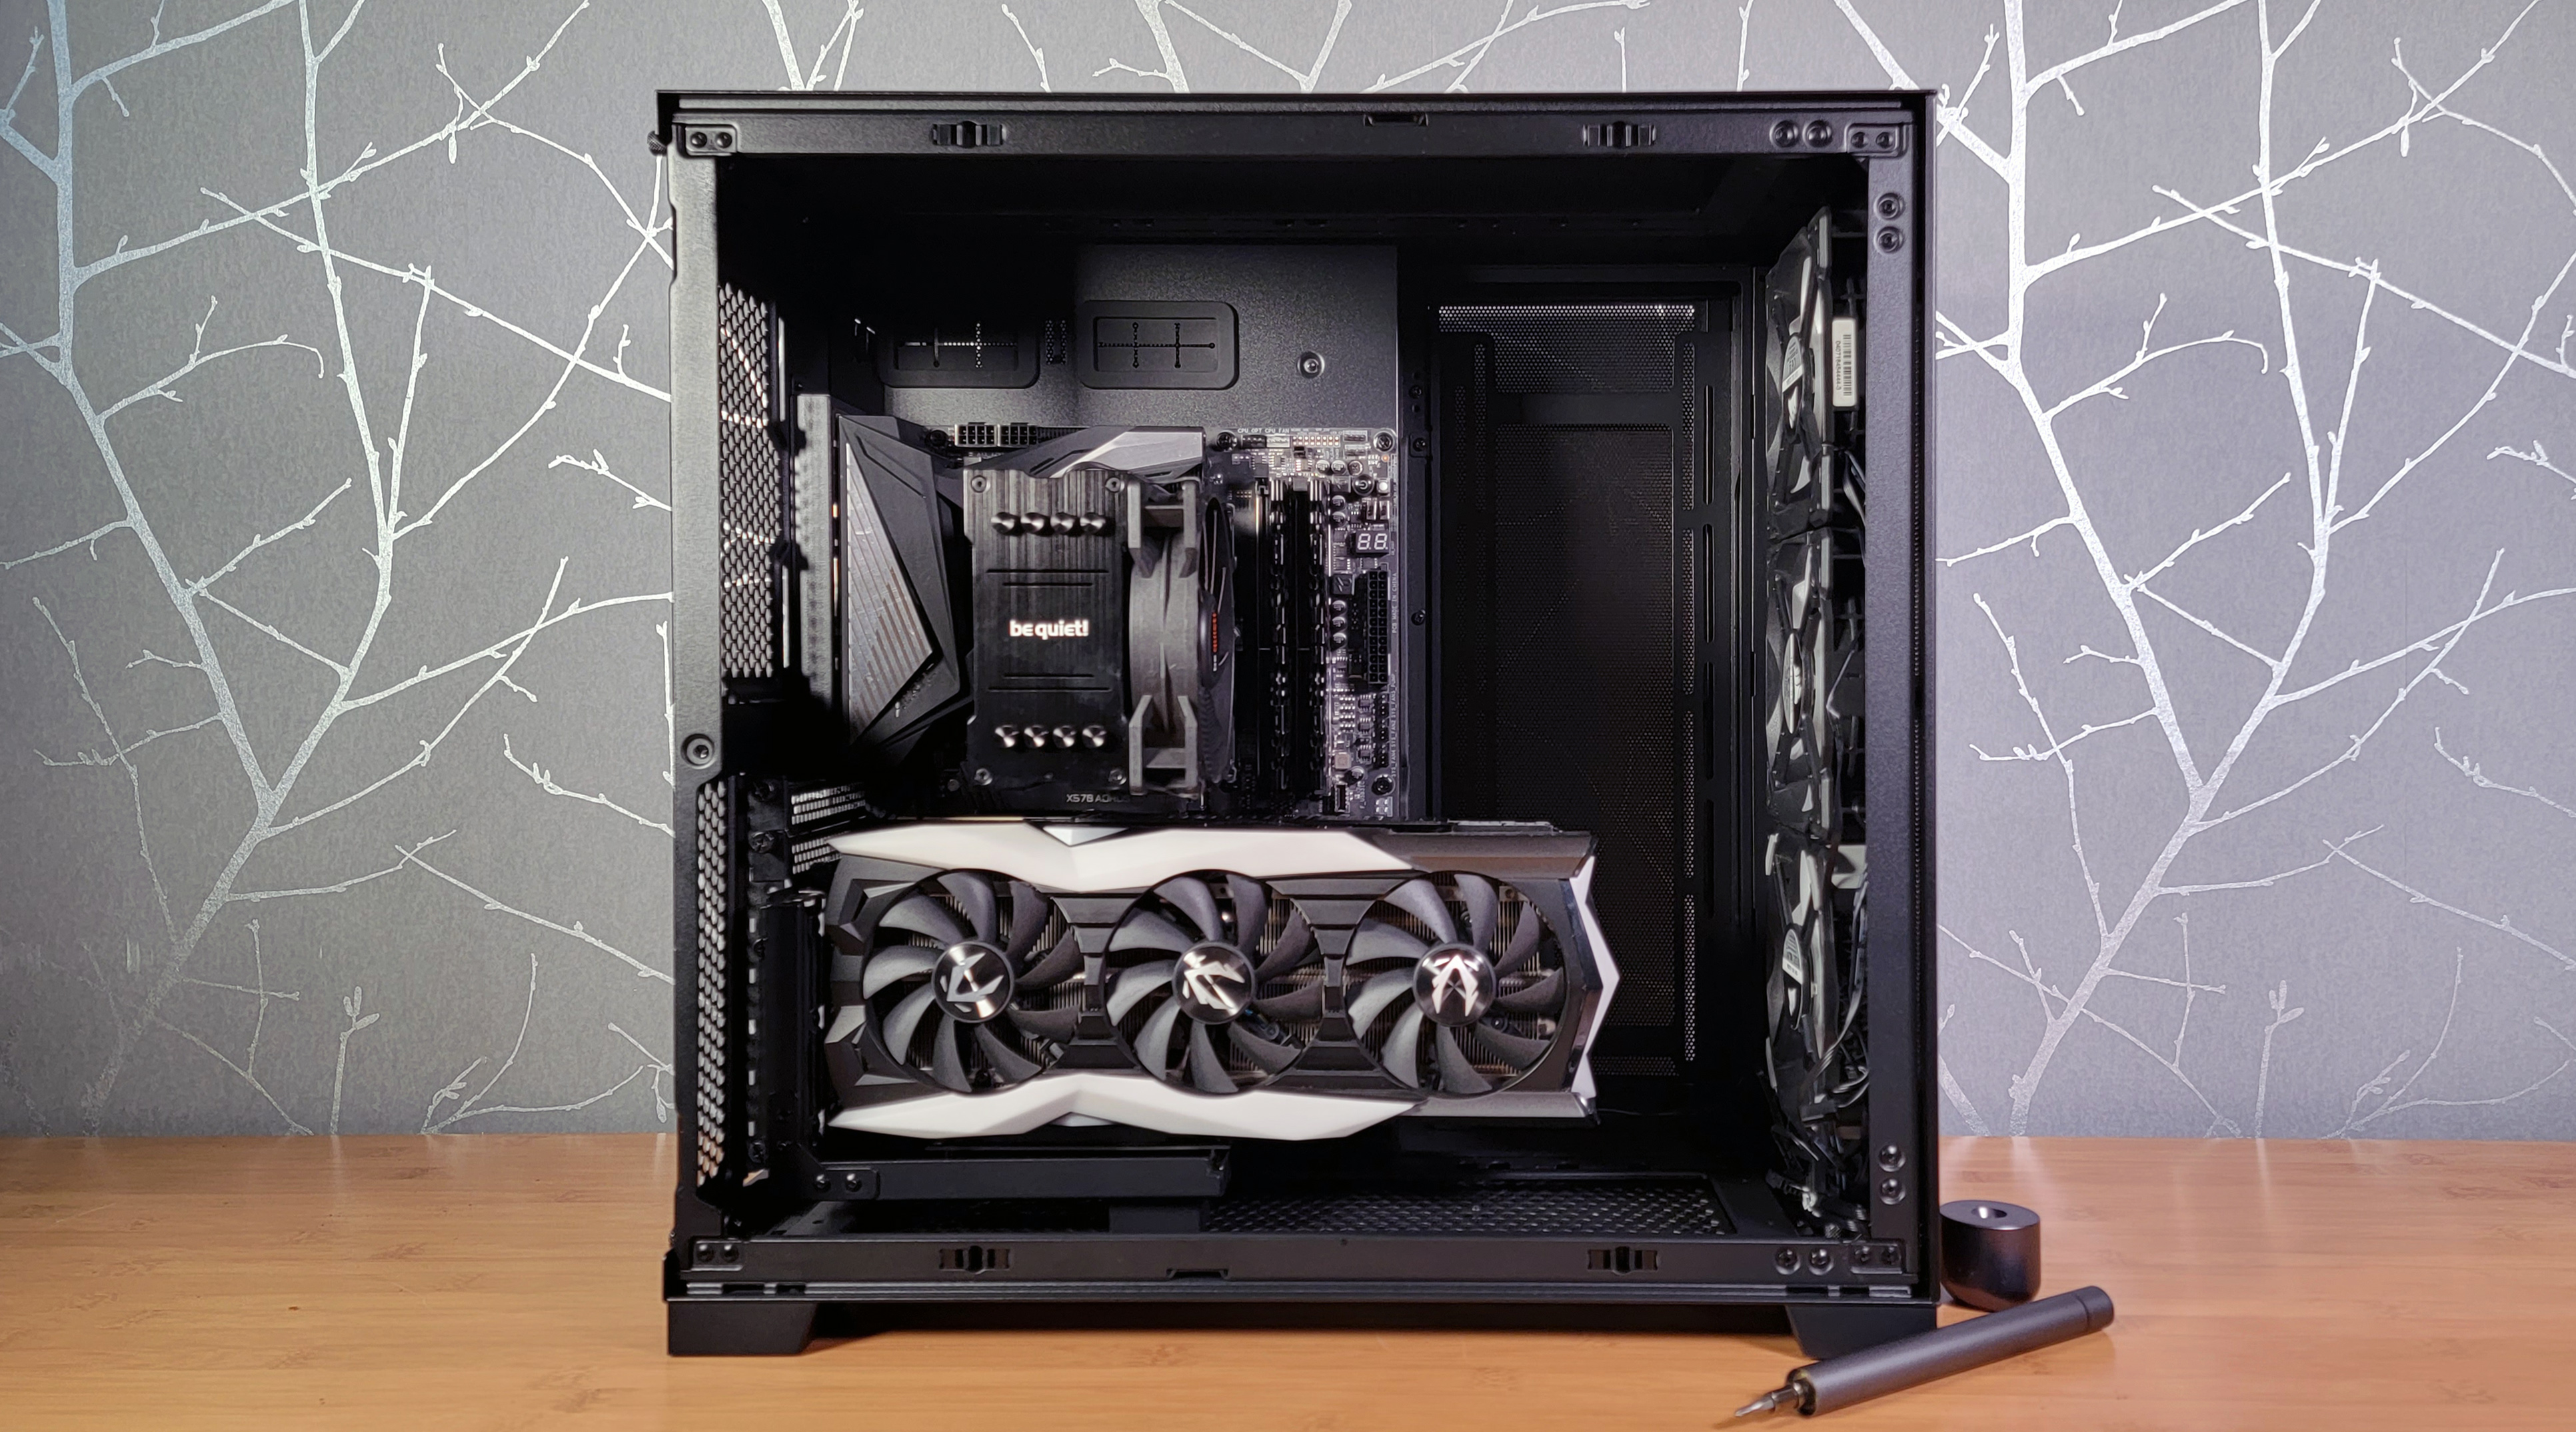
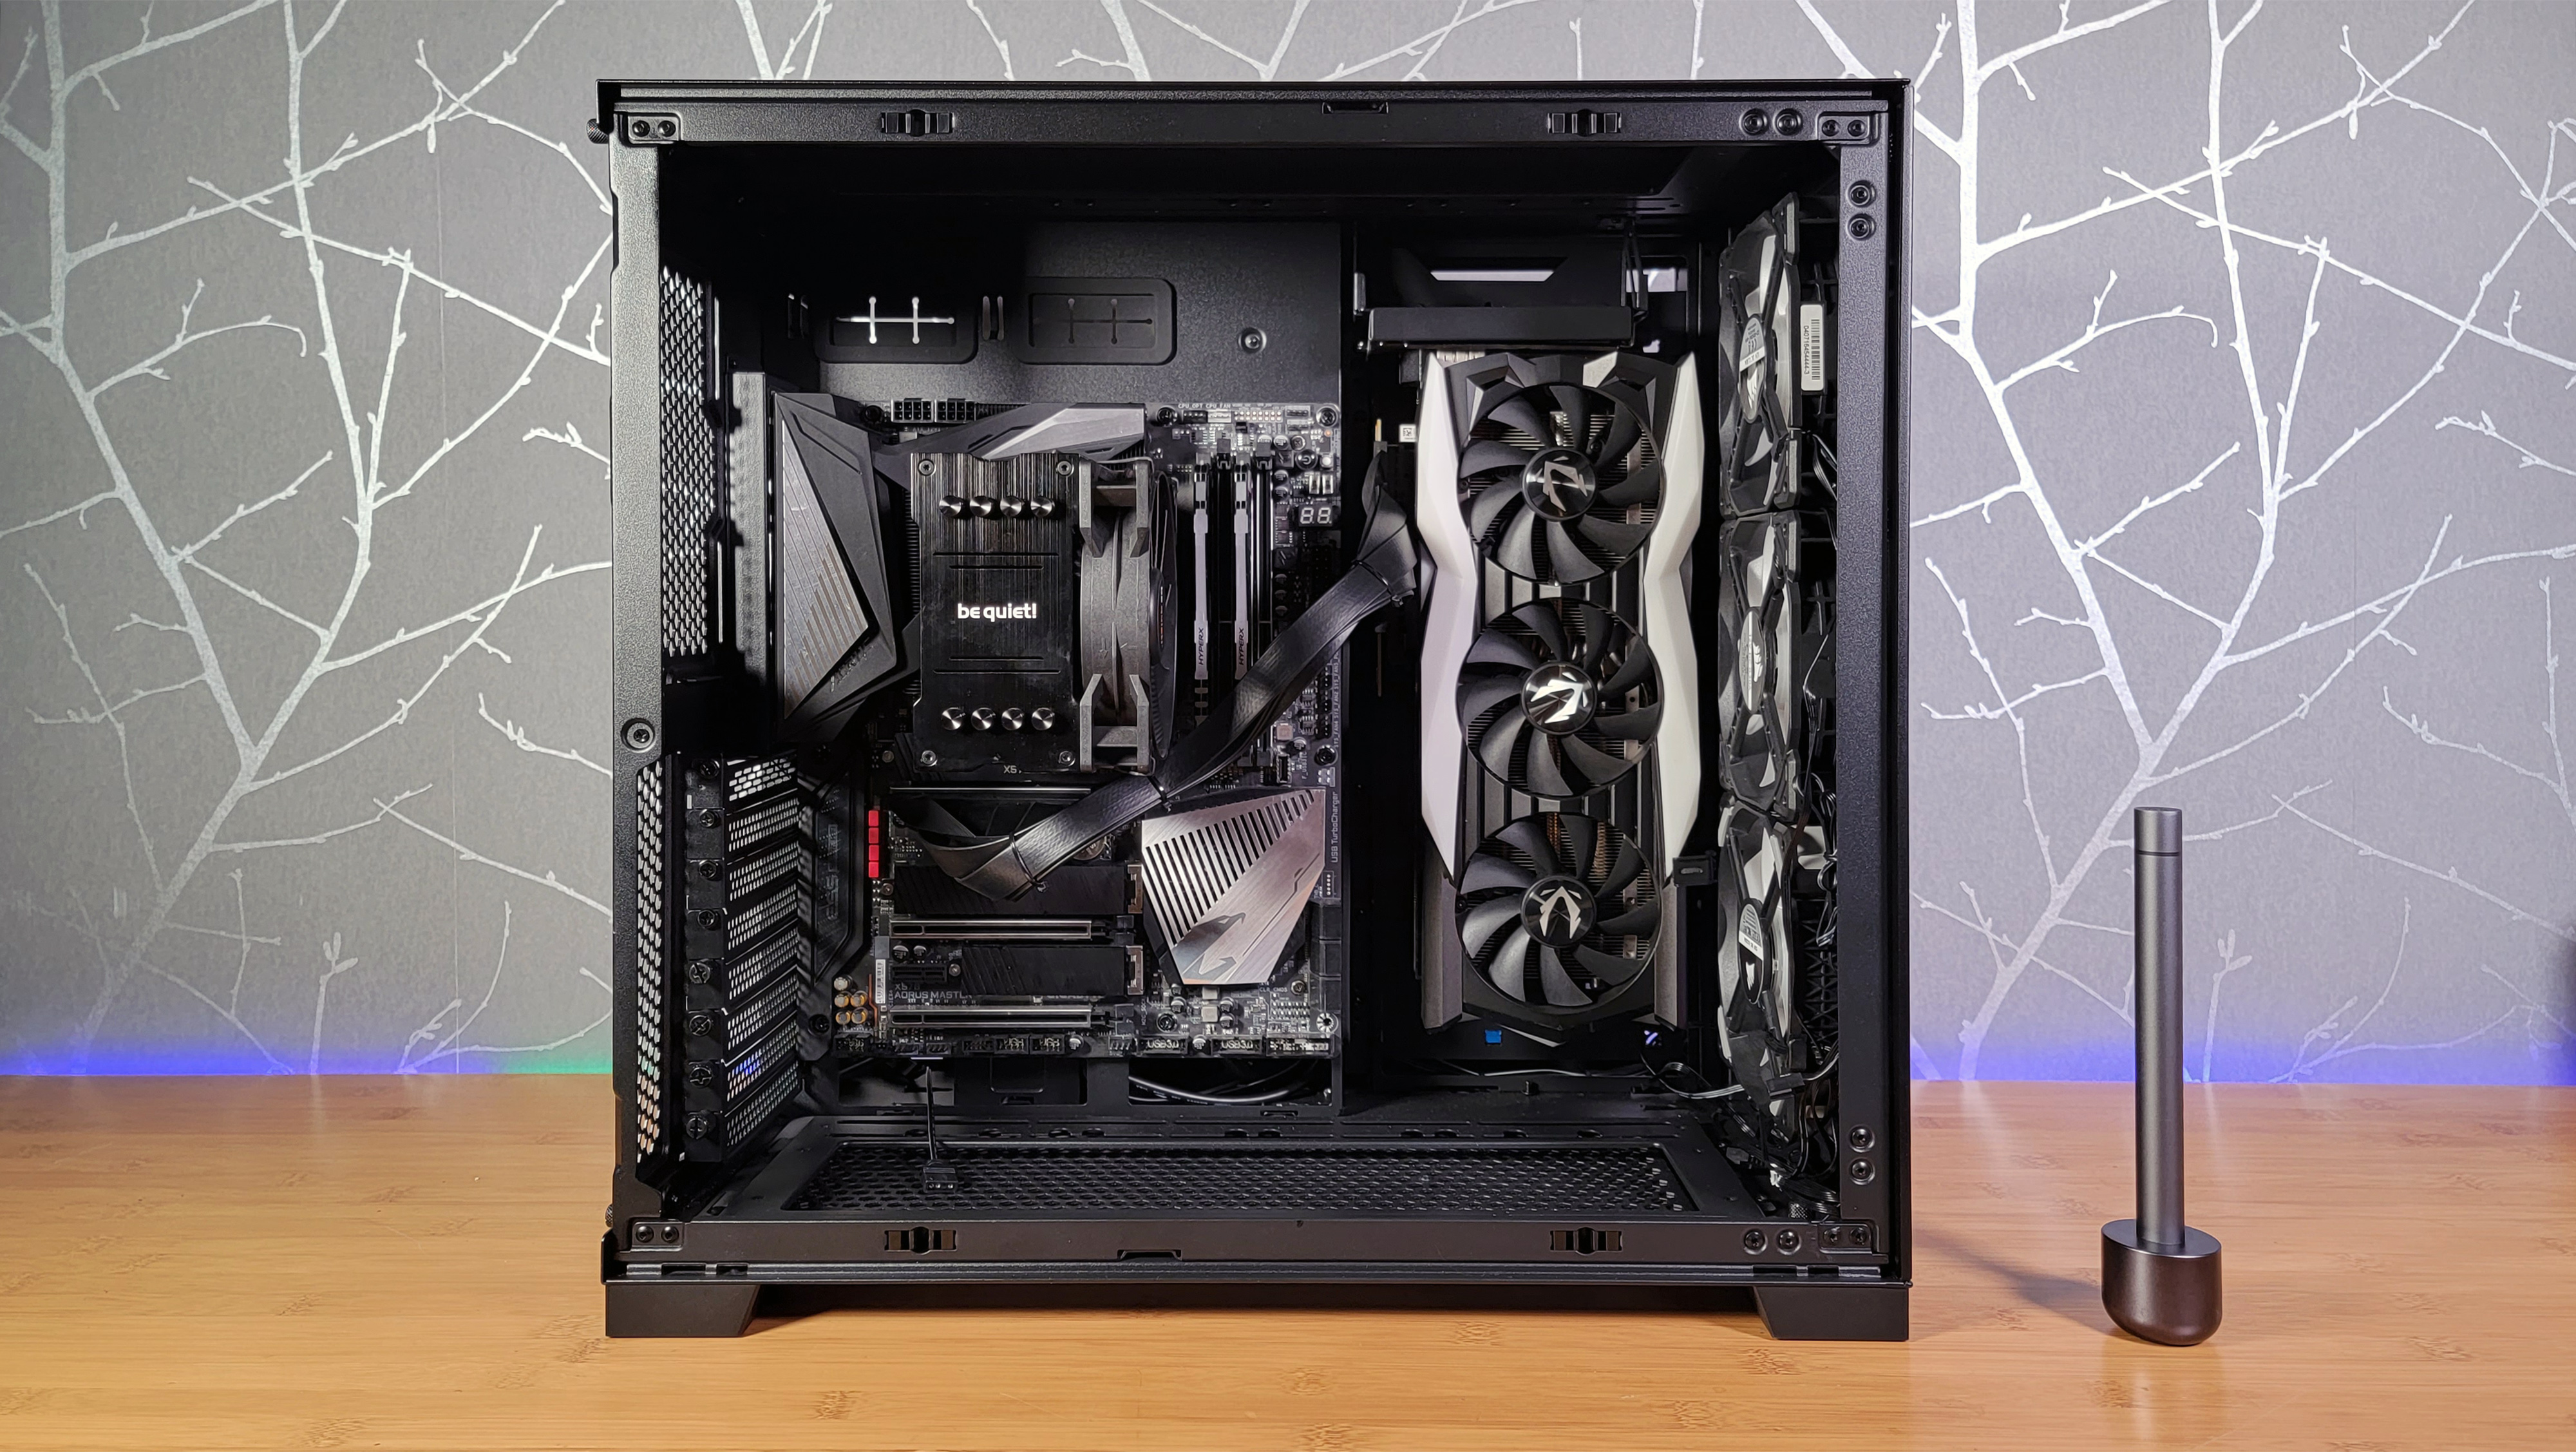
Note, though, that the combination of a large air cooler (a be quiet! Pure Rock 2 here) and bulky graphics card (Zotac's RTX 2080 Amp Extreme) made for clearance issues in the standard setup for this kit. But, the kit was flexible enough in its design that I could drop the GPU bracket down another slot, leaving some breathing room (about 2/3 of an inch) between the bottom of the air cooler and the top of the GPU. Of course, this won't really be an issue if you're using an AIO mounted at the top.
It's also worth pointing out that the bracket is built to accommodate triple-width graphics cards, and there's about 16 inches of clearance for a GPU here, even with fans installed in the front. So you shouldn't have any GPU clearance issues with this kit unless maybe you have one of the biggest graphics cards ever built.
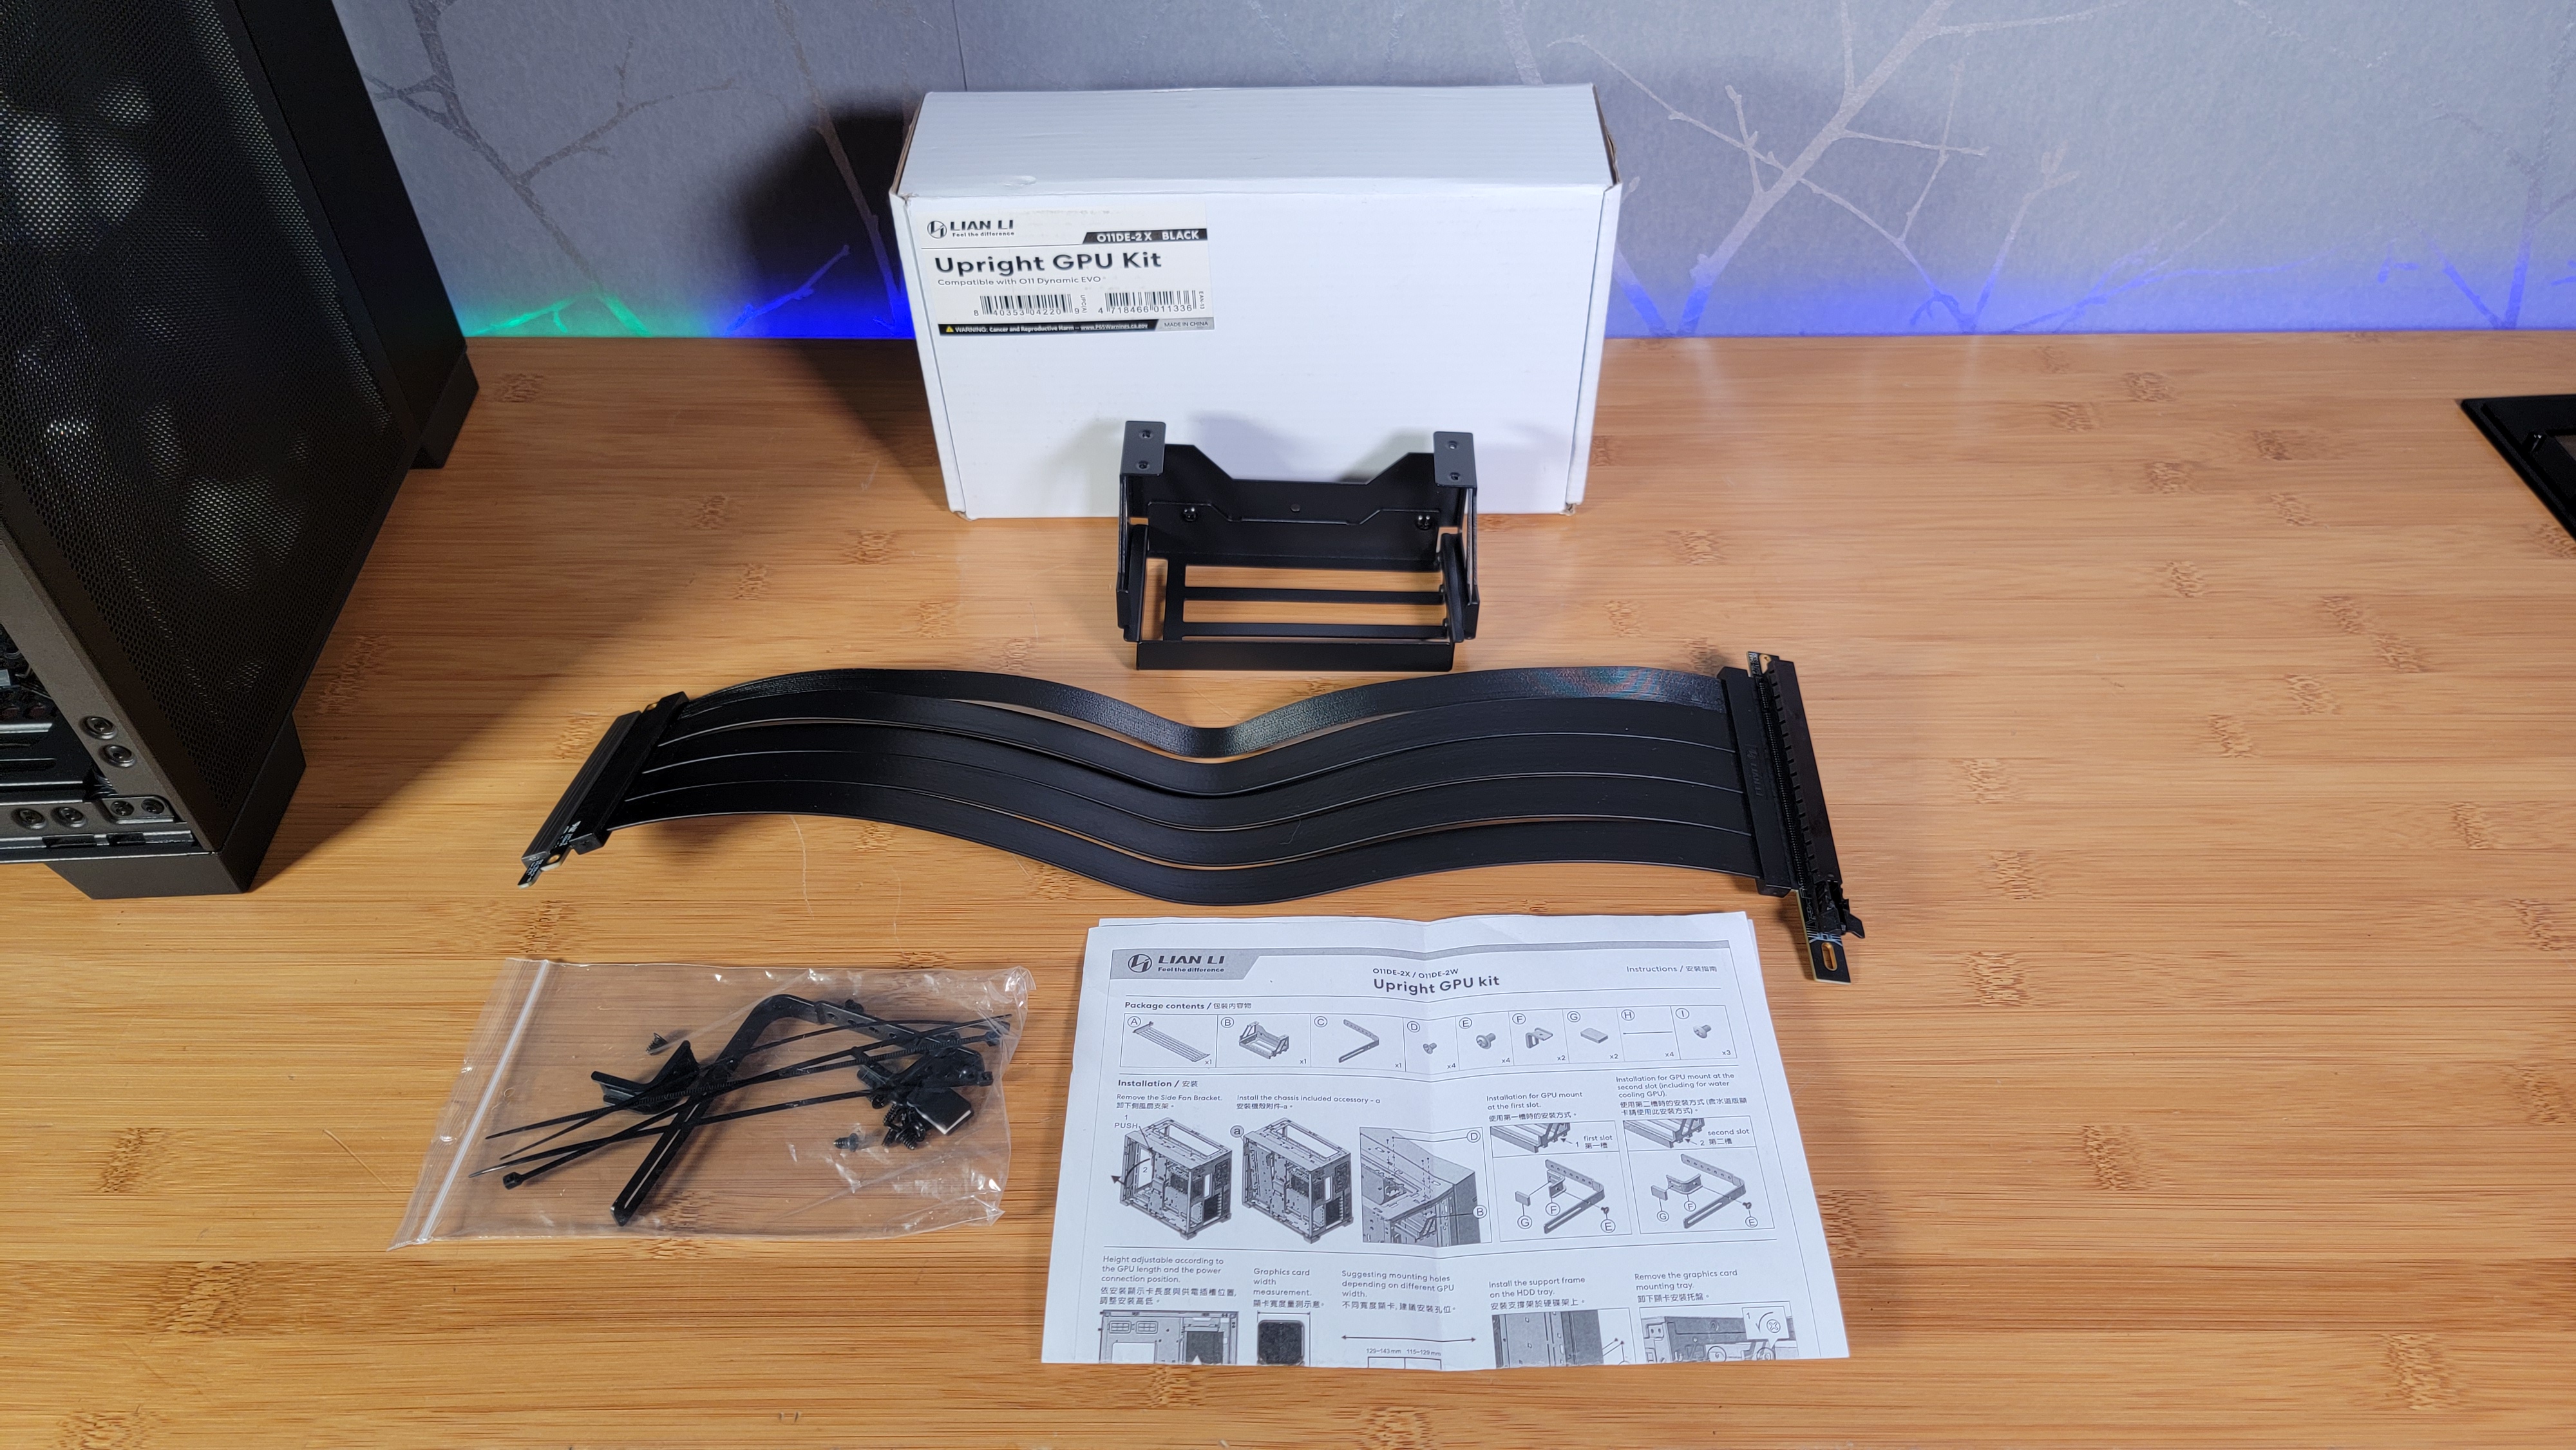
Last up is the Upright GPU Kit ($89), which is the most expensive and a bit more complicated to install. This lets you mount your graphics card at the front of the case, running top to bottom, in between the right edge of the motherboard and the front of the case. It comes with a longer PCIe 4.0 cable, a bracket to hang the GPU's PCIe slot anchors (which screws into the top of the case), and an adjustable bracket to stabilize the bottom of the card.
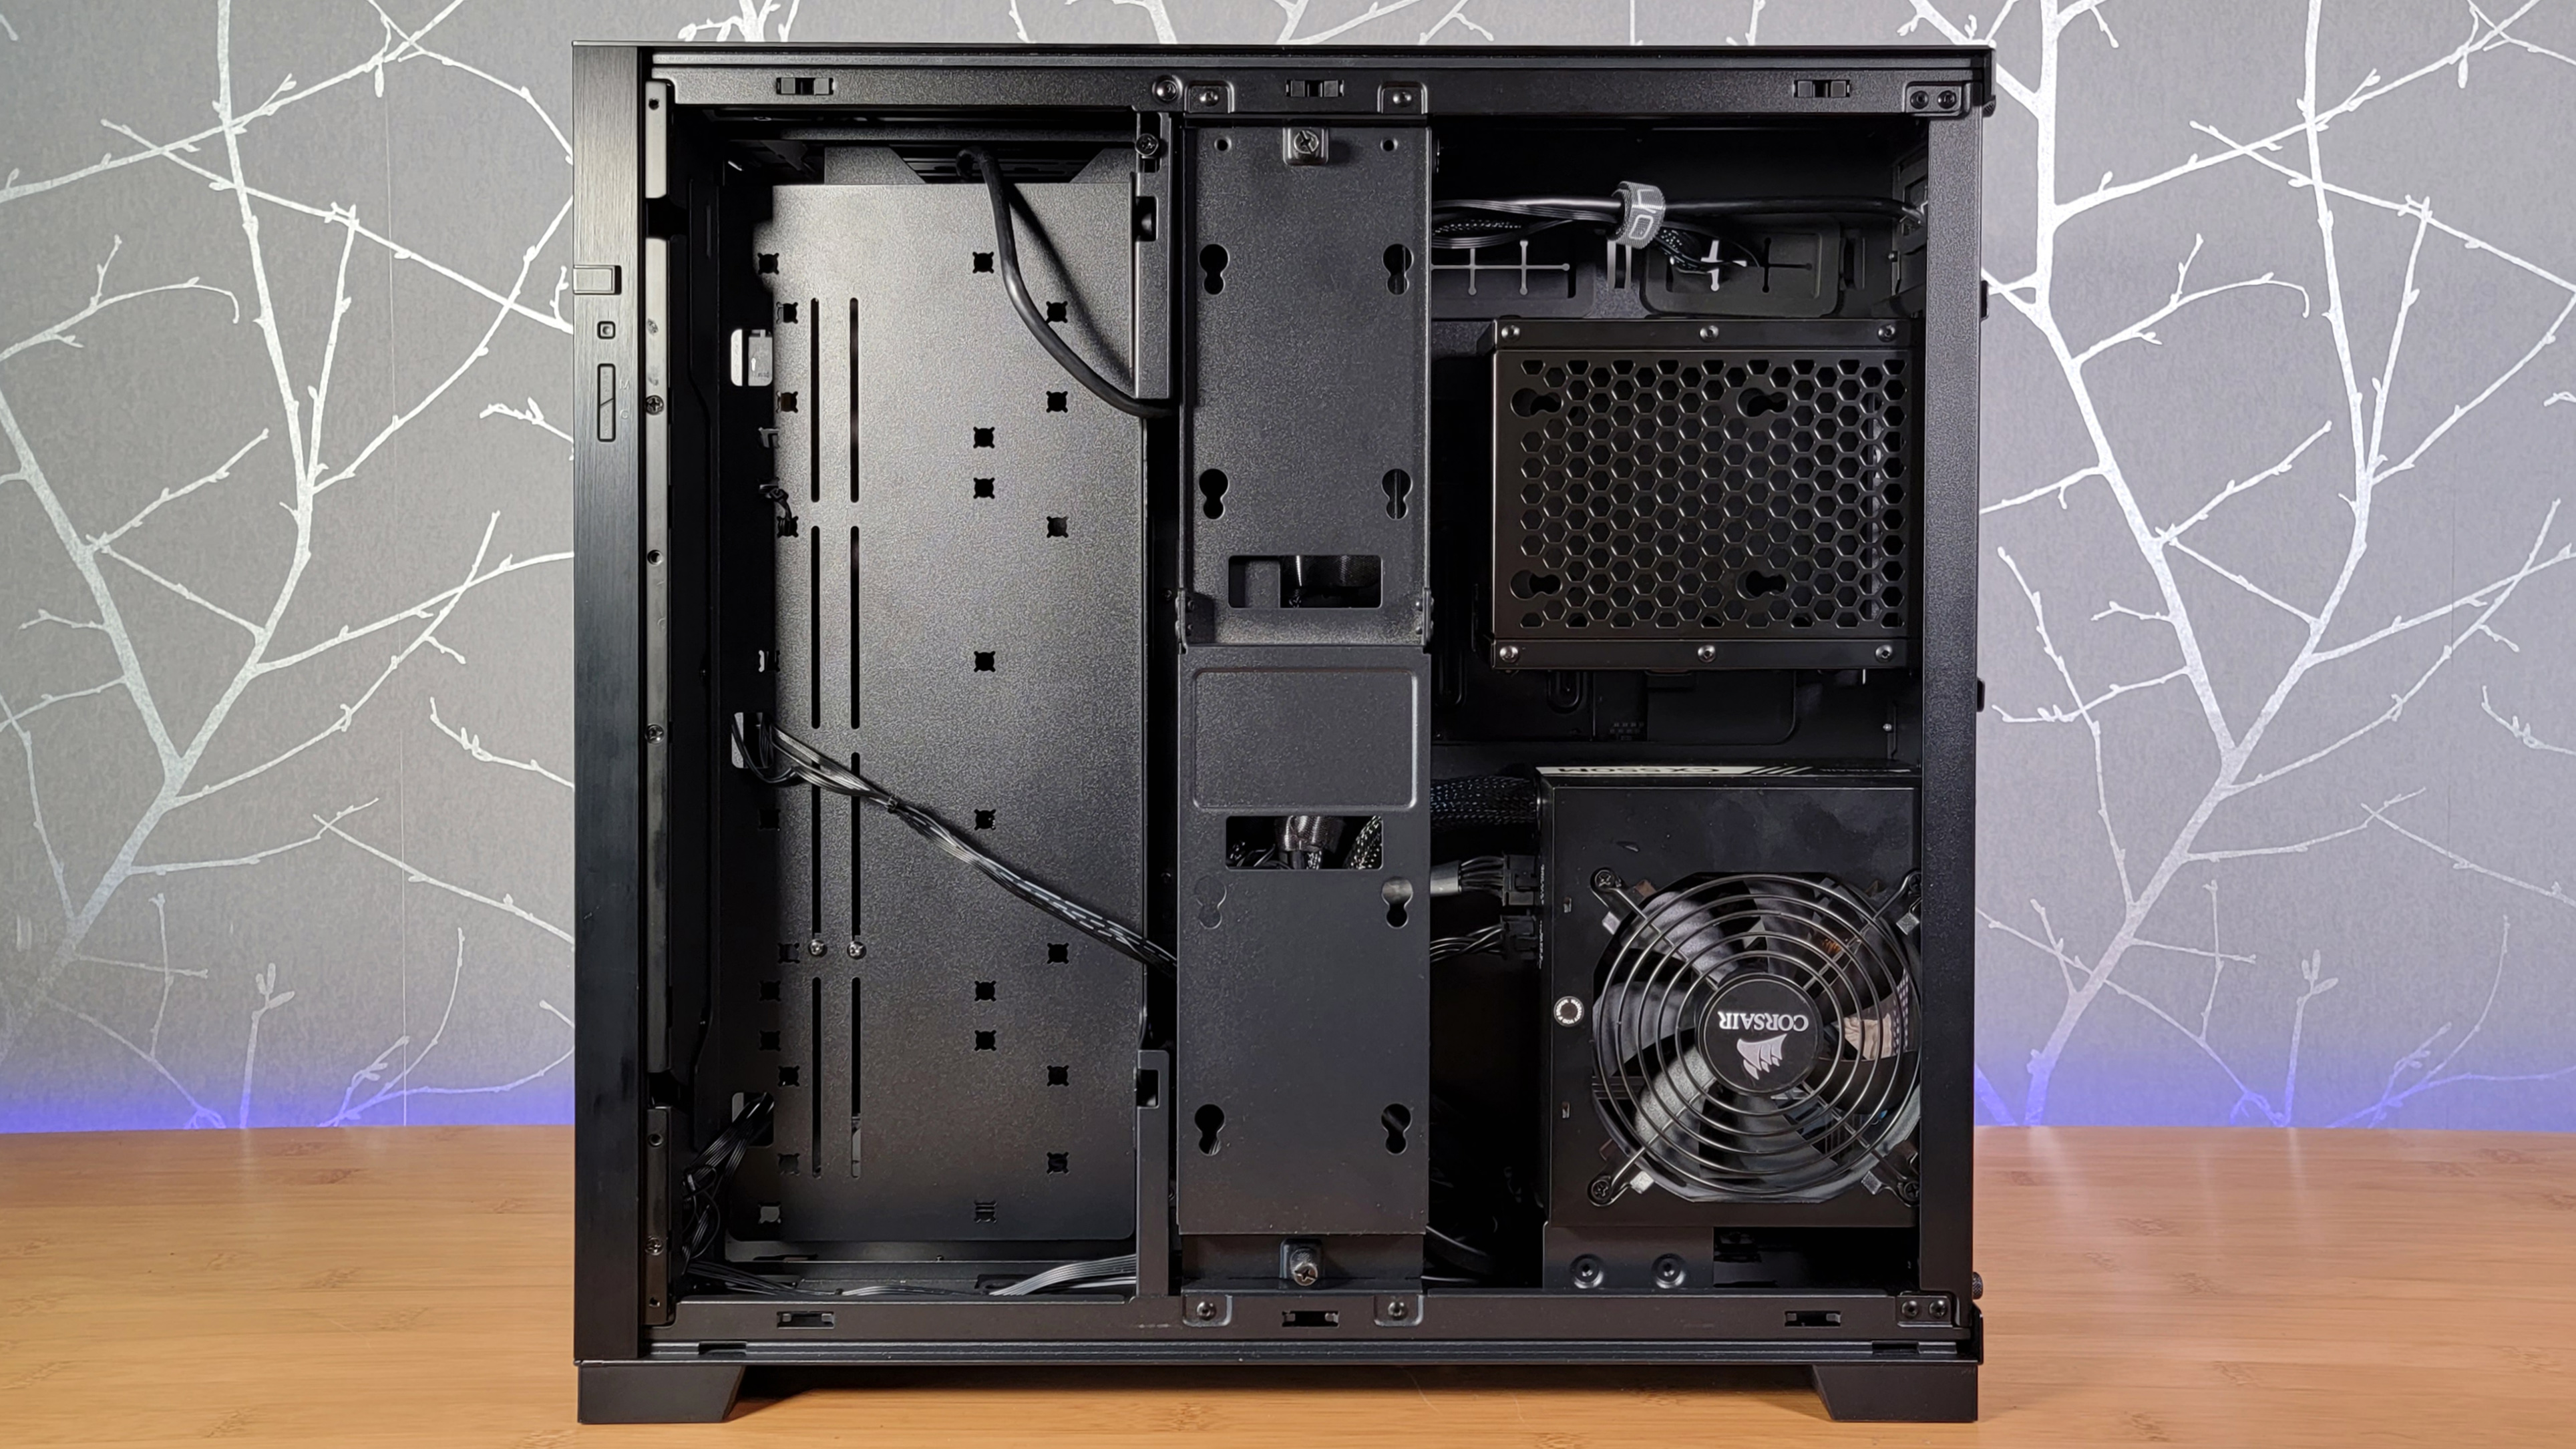
Installing the card here also has you remove the standard fan-mounting bracket that ships pre-installed in front of the motherboard area. In its place is a more solid-metal bracket that comes in the case's accessory box. This last bit is dead simple, as it's held in place by a spring-assisted lever accessed from behind the motherboard area. As with most of these kits, you'll want to remove the front, top, and both side panels before installation. This will allow the best access to every mounting hole, wiring-routing grommet, and any open spaces that you might need to move bulky components and wires through.
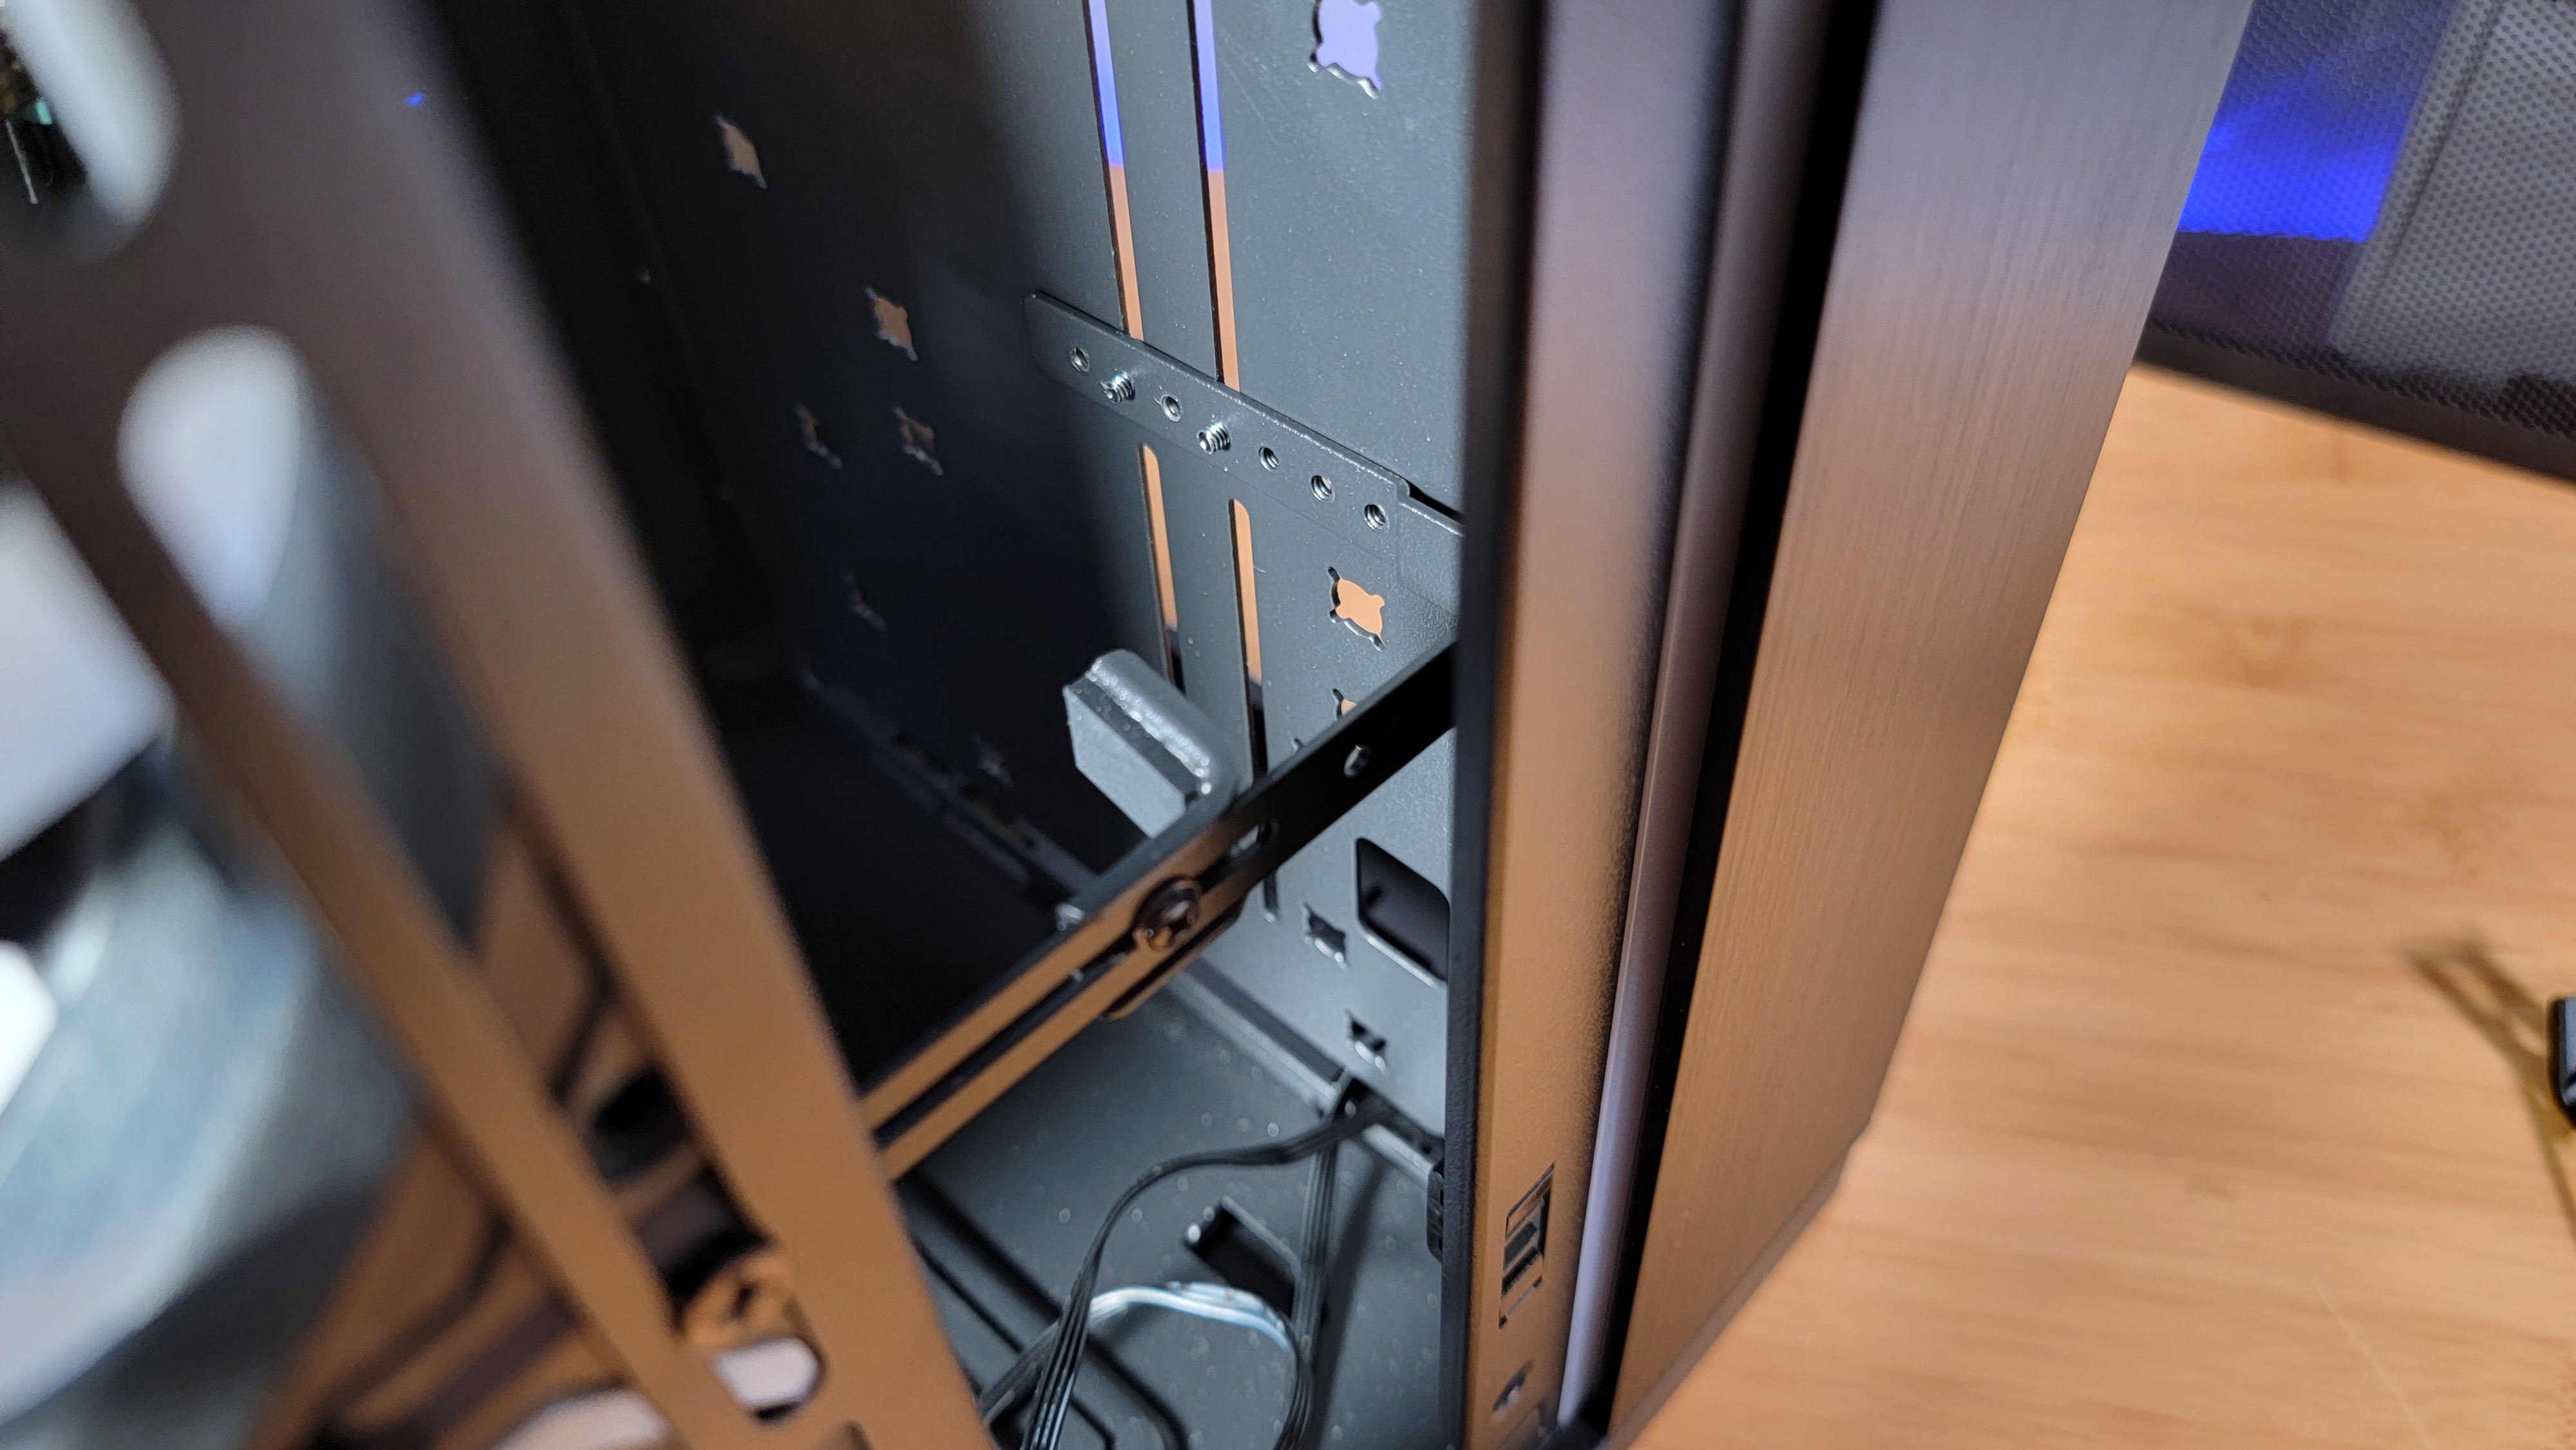
In short, once you've replaced the fan bracket with the solid metal panel, you'll need to mount the big bracket (top center in the image above) to the top of the case with four screws and install the adjustable stability bracket (bottom left in the image above) to the back metal bracket. Then you’ll slide the graphics card into the top bracket, secure it with a couple screws and adjust the bottom bracket (image below), adding a second piece to hold your particular graphics card in place at the front and the back.
Next, you'll need to install the PCIe cable in the slot on your motherboard and plug the other end on your GPU. To keep the big riser cable from covering your cooler (and messing with airflow), you can use the provided cable ties to hold the PCIe cables together.
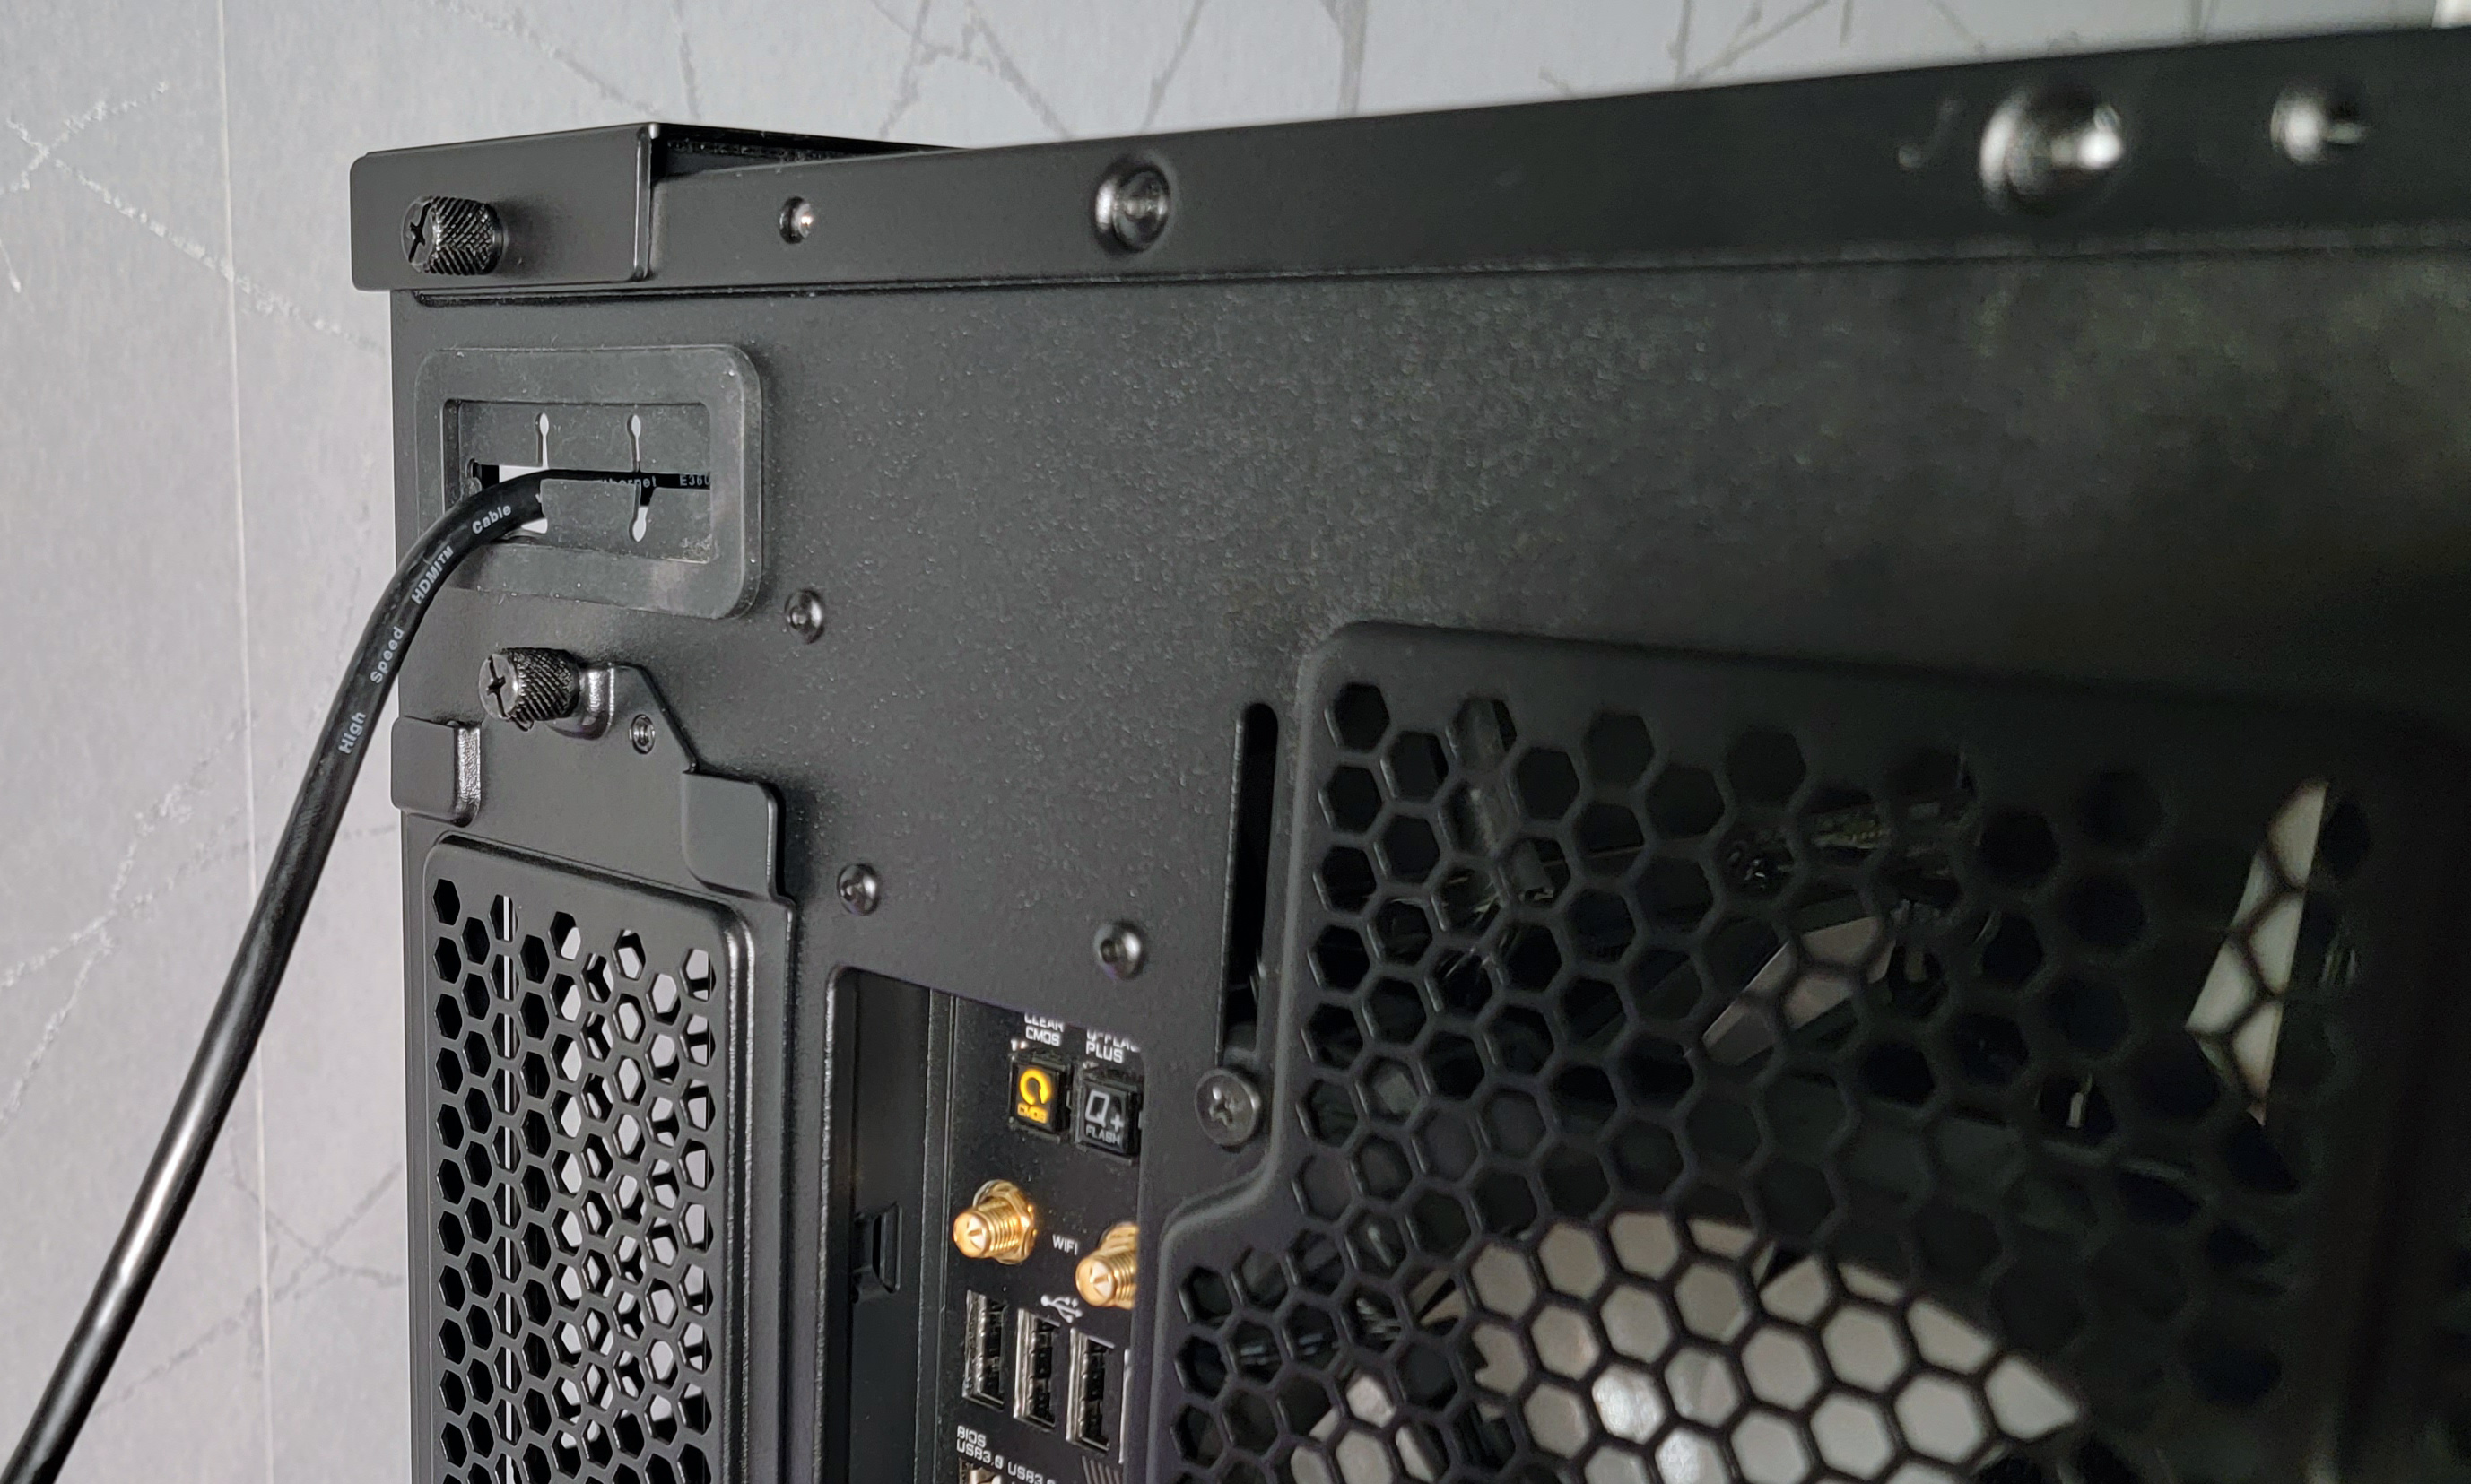
The end result looks pretty slick if you have an RGB-equipped GPU. But as you might have surmised, putting your GPU in the front of the case means you need internal access to the case to plug in your video cable(s), and then they need to be routed through the back of the case. But since the O11D EVO is so large, that's not much of an issue, and Lian Li provides a large grommeted hole at the rear, just above the default location of the drive case, specifically for this kind of setup.
This isn't the most convenient video cable option, particularly when swapping or adding monitor cables. But if you want to show off your GPU and its RGB lights, this might be the ultimate orientation to do so. Or you could save $10, go with the previous vertical kit instead of this upright option, and still have your GPU connection as part of the rear IO, just as the PC gods intended. In case you haven't noticed, the O11D EVO is all about giving you options.
The Rest of the Build Process
After plowing through those five accessory kits, most of them with the motherboard and an air cooler already installed, the rest of the build process in the O11D EVO was easy. This was largely due to the fact that the chassis is downright huge and you can remove the four side panels in about a minute. Three pop out on pins and the top slides off after loosening two thumb screws. Then you're just installing parts and routing cables around a large open frame.
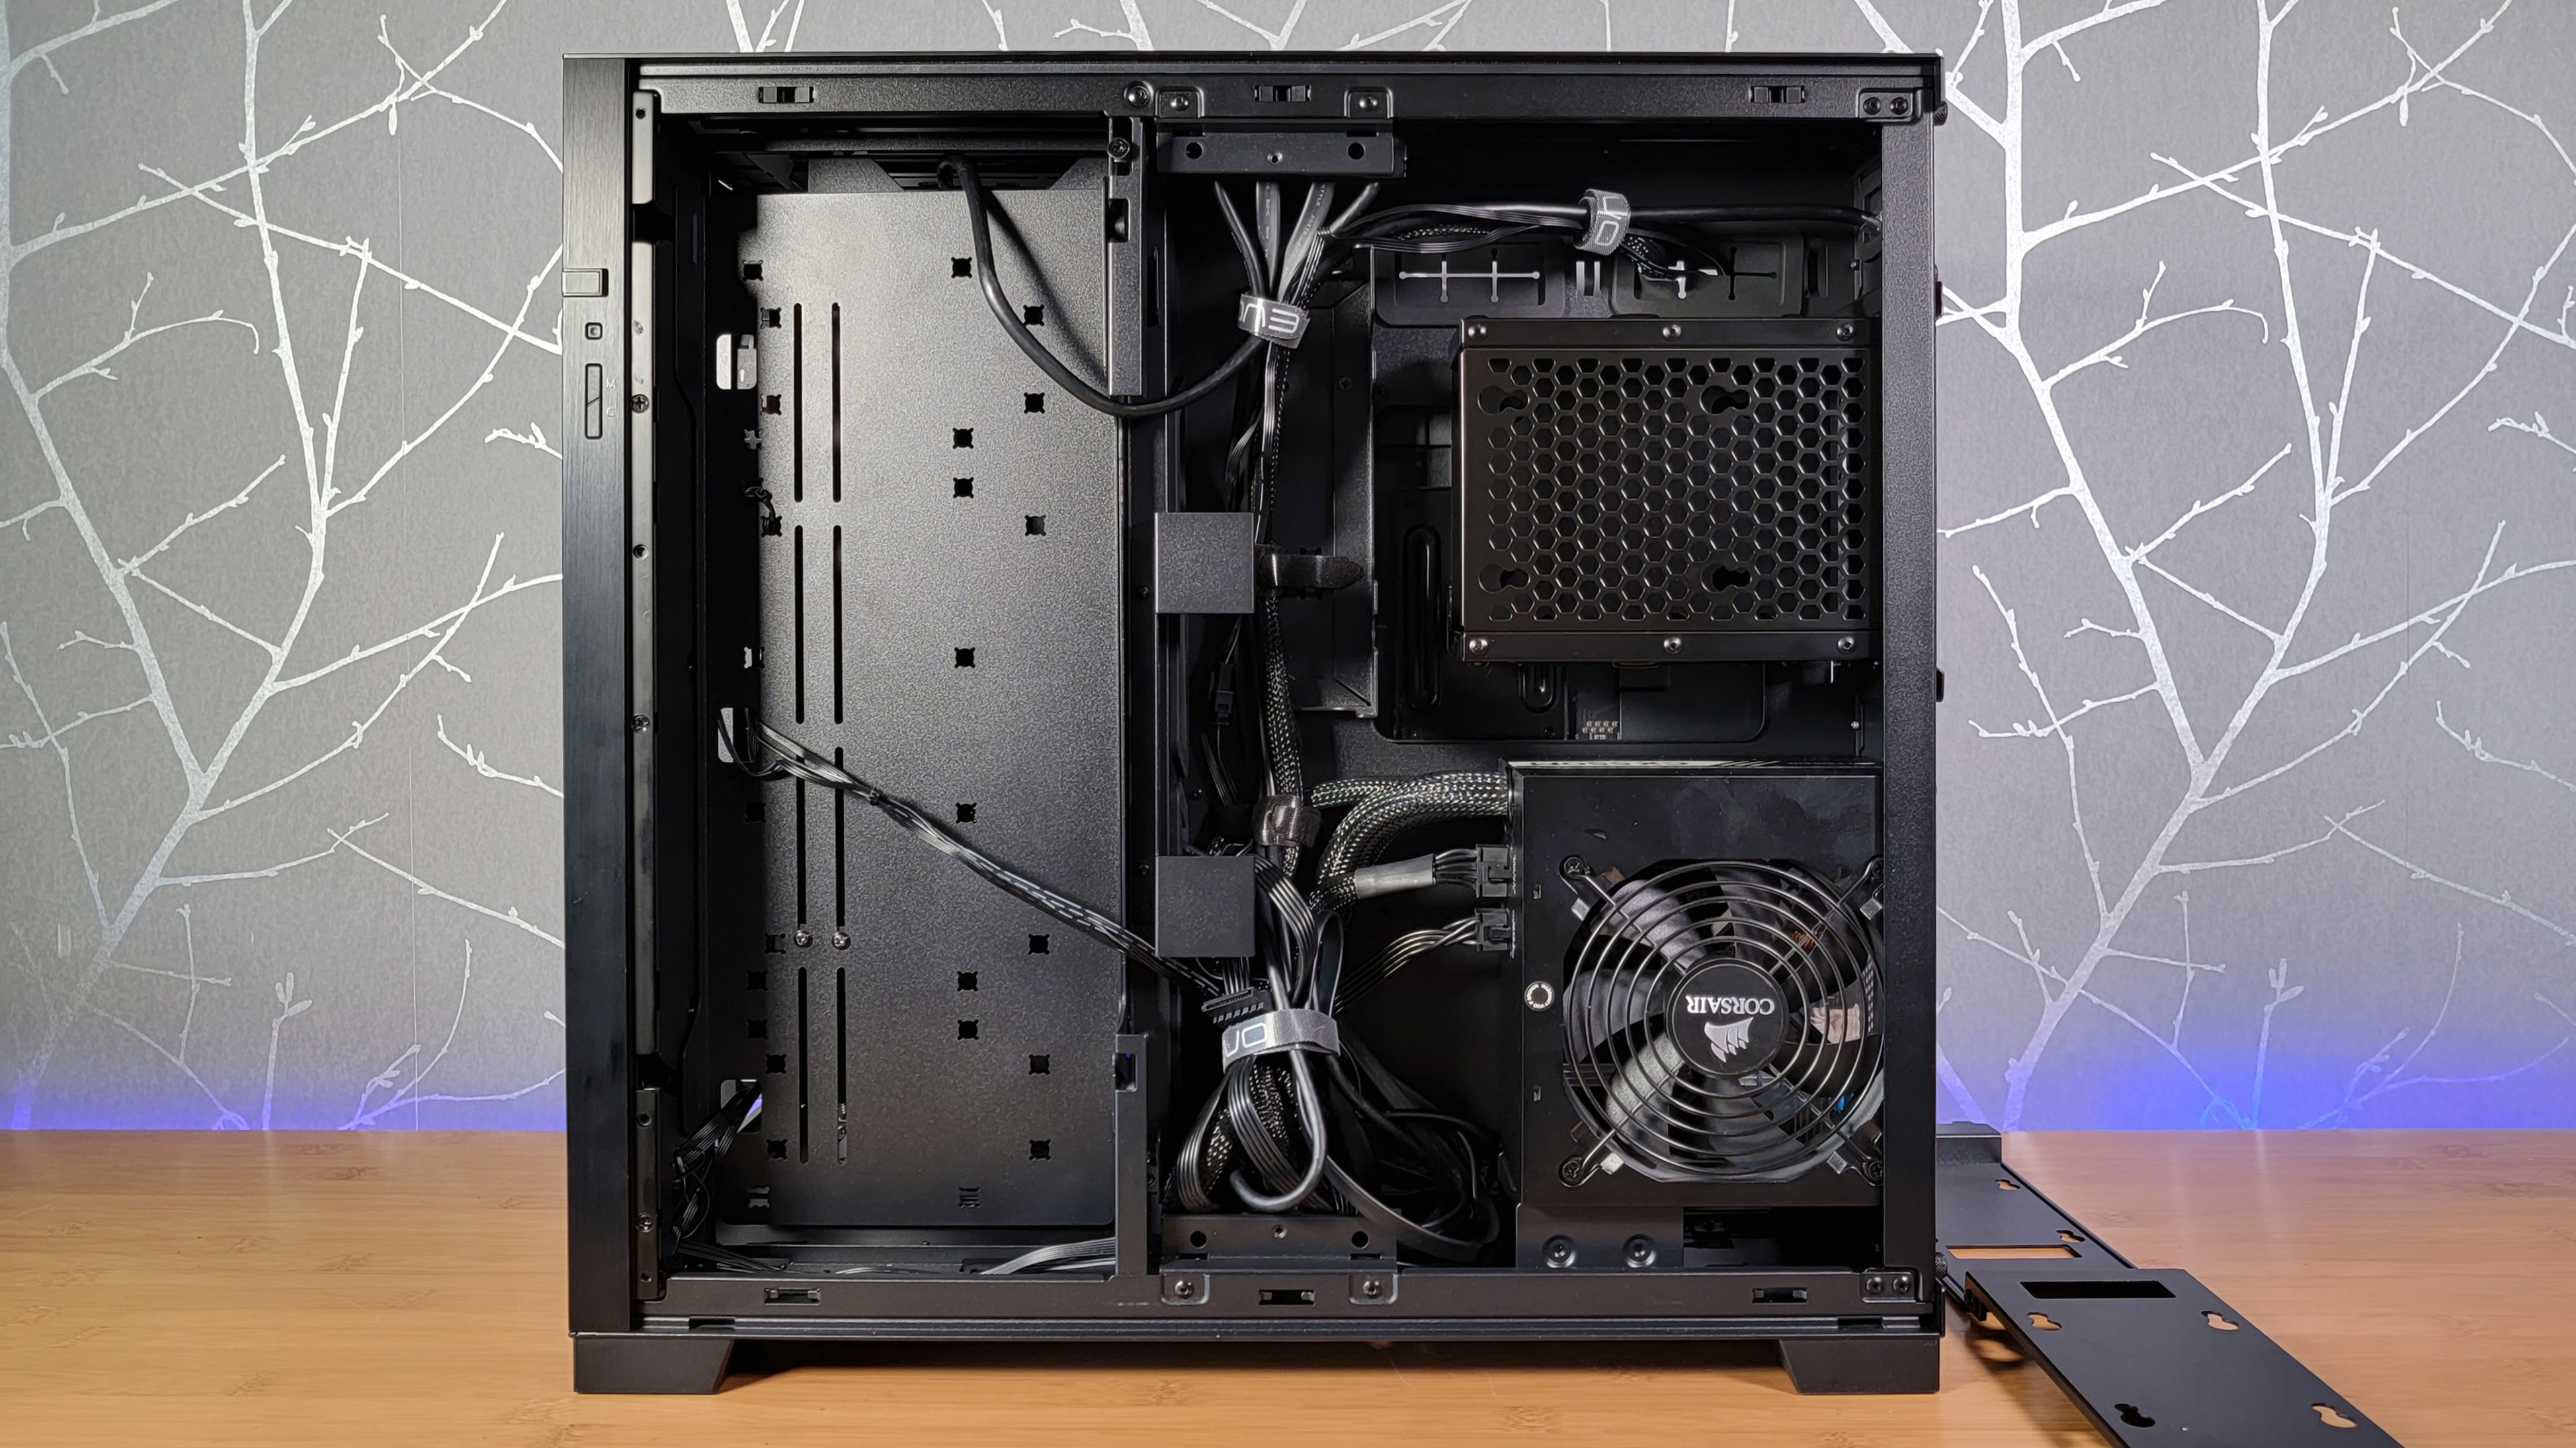
Lian Li provides a vertical chamber with three pre-installed velcro straps for keeping cable slack together. And atop that sits a handy bracket that does double duty as a mount for a couple of 2.5-inch drives and a way to hide most of your cable mess once it's installed. It too goes in and out of the case with ease, with tabs slotting into holes and the bottom and a couple of captive thumb screws holding it in place.
Some other configuration options worth pointing out: You can mount the power supply at the bottom (default), or swap its place with the two-drive hot-swap drive cage that ships at the top by default. And if the two 3.5-inch bays and two 2.5-inch mounts aren't enough for your storage needs, you have loads of other options. You can add a couple of included bars to the fan-mounting bracket on the bottom of the case to install four more 2.5-inch drives or two more 3.5-inch platter spinners. And the solid metal bracket we installed for the Upright GPU kit has mounting holes for four additional 2.5-inch drives or two more 3.5 inchers. With all that, plus whatever M.2 slots are built into your motherboard, the vast majority of users should be satisfied with the storage possibilities here.
Heck, if you ditch the main drive cage, you can install two power supplies, one atop the other–the company even includes a foam bit in the box to help keep them separated. This case really is what you make it, and with so much space inside, the options start to feel endless–especially when you factor in the five optional accessory kits. But that also means you'll need to be very good about keeping the extra parts and instructions should you want to change things up months or years down the line.
In the end, I went with the Upright GPU Kit, largely because that's what I installed last, as well as the Front Mesh kit because I wanted fans at the front and back. I also opted for the Top I/O kit, because there's no way my desk has room for both this massive case and the 55-inch LG C1 OLED TV I use as my primary monitor.
Along with the Ryzen 7 3700X, the X570 Aorus Master motherboard and two sticks of HyperX Fury RGB RAM, I installed a Corsair semi-modular power supply and four 120 mm Corsair fans (which are RGB, but I didn't want to deal with extra cables and a hub, so I just plugged in the fans themselves for airflow). I could have easily installed more drives than my still-chugging Samsung 960 Pro M.2 boot SSD, but in the interest of getting this story done in time for the case's launch, I stuck with the previously mentioned parts, tidied up the wires a bit, shoved the rest in the pre-installed velcro straps behind the cable-hiding bar that does double duty as an SSD mount, and slapped the four side panels back on.
We don't have cooling and acoustic numbers to make this a full review, but given that the case comes without any fans, and the front panel can be either glass or mesh with an optional kit, performance here really is what you make it. Still, with a large internal layout and mesh making up about 2/3 of the right side panel (or left, depending how you configure things), as well as vents on most of the top, airflow shouldn't be an issue–unless you do something dumb like stick with the front glass panel and put all your fans directly behind it, where they can't pull in any fresh air.
Bottom Line
Perhaps more than any case I've ever worked with or written about in the last decade-plus, the O11D EVO can transform itself along with your build, or be tweaked to provide just the features and layout that suits you. Just know that however you configure it, the O11D EVO is going to take up a large amount of space, either on your extremely roomy desk or on the floor.
Apart from the fact that the $169 US base price for the black model can get much more expensive once you start adding kits for better airflow and an attractively mounted GPU, my only real complaint is that the $13 Top I/O kit doesn't ship with the case by default. On smaller cases that are clearly designed for your desk, ports on the bottom can be convenient. But as this monstrous case is over 18 inches tall and deep, and approaching a foot wide, it's almost certainly destined for a spot on the floor. And no one wants to crawl around on the rug to plug in USB cables or a headset.
After a rough start with the Mattel Aquarius as a child, Matt built his first PC in the late 1990s and ventured into mild PC modding in the early 2000s. He’s spent the last 15 years covering emerging technology for Smithsonian, Popular Science, and Consumer Reports, while testing components and PCs for Computer Shopper, PCMag and Digital Trends.
-
wgulker Great article. Photos and text are both outstanding. I think this will be my next case. I think the options I want are the vertical GPU stand and top IO panel. I'm thinking white.Reply
Any idea how and when to order one? -
spongiemaster Reply
https://www.newegg.com/p/2AM-000Z-00094?Description=LIAN%20LI%20PC-O11%20Dynamic%20EVO&cm_re=LIAN_LI%20PC-O11%20Dynamic%20EVO-_-9SIAFSTGEF2338-_-Product&quicklink=truewgulker said:Great article. Photos and text are both outstanding. I think this will be my next case. I think the options I want are the vertical GPU stand and top IO panel. I'm thinking white.
Any idea how and when to order one?
