How To Clone Your SSD or Hard Drive
Migrate your system to a faster drive using Clonezilla.
Even the best SSDs are dirt cheap these days, so it’s very tempting to upgrade your gear. Migrating from one drive to another can be tiresome, however. You have the OS, your apps, all your settings and your data. Starting over from a clean install of Windows (or Linux) would take forever and you’d probably spend weeks finding things you forgot to add back. The answer: clone your SSD.
Cloning a drive is a quick and simple way to move your install from an older slower drive, to a faster and larger one. There are many ways to accomplish this, and Clonezilla ranks amongst the best. This live Linux distro boots from a USB or CD/DVD and uses a wizard based system to easily migrate between drives, create images of installations, and even deploy OSes to multiple machines over a network connection. Clonezilla just works whether you’re cloning a Windows OS or a Linux distro.
Connecting Your New Drive to the PC for Cloning
If you want to move the contents of your PC’s boot drive to a new, faster or larger alternative, you need a way to have both drives connected to the computer at the same time. If you have a desktop with room for it, you can connect the new drive to its M.2 or SATA port and mount it in your case.
However, if you are using a laptop or you don’t have room to have both drives in your computer at the same time, you’re going to need some kind of enclosure that allows you to connect the new drive to a USB port. If the new drive is a 2.5-inch SATA drive, grab a SATA to USB 3.0 enclosure. If it’s an M.2 NVMe or SATA drive, grab an M.2 to USB enclosure.
If you are using an enclosure, you’ll need to open your PC when the cloning is complete and swap out the old drive for the new one. If you’re planning to sell or give away the old drive, see our tutorial on how to securely erase an SSD or hard drive.
Cloning Windows (or Another OS)
For the purposes of our screenshots and steps below, we migrate a Windows 10 installation from a 64GB eMMC drive to a 256GB NVMe drive. However, the process that we follow can be applied to other scenarios, such as migrating installations from older drives to SSD or for cloning a drive as a backup.
Creating a Clonezilla Boot USB
Creating a Clonezilla boot USB is a great first step for your tech toolbox. With Clonezilla you have the tools to backup and migrate entire systems. For this part of the project you will need a 4GB USB flash drive.
Get Tom's Hardware's best news and in-depth reviews, straight to your inbox.
1. Go to the Clonezilla download page and select the current Stable release. At the time of writing this was a Debian based release.

2. Select the CPU architecture and set the file type to ISO, then click Download. USB drives require the ZIP file type, CD / DVD users will need to select ISO before downloading.

3. Download and install Rufus for your operating system.
4. Insert a USB drive into your machine and open Rufus.
5. Check that your USB drive is selected, and then click on SELECT and use the Clonezilla ISO image.
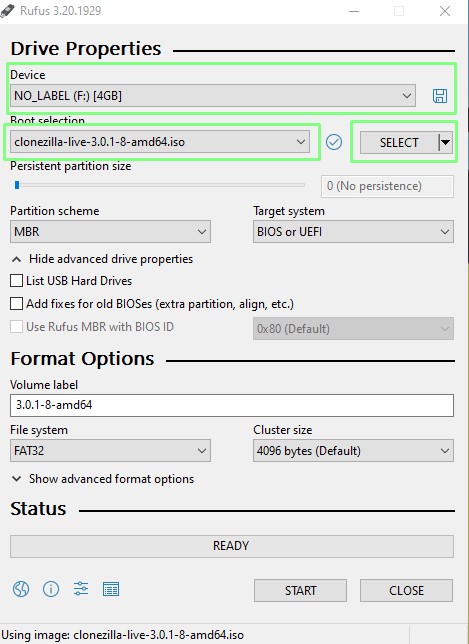
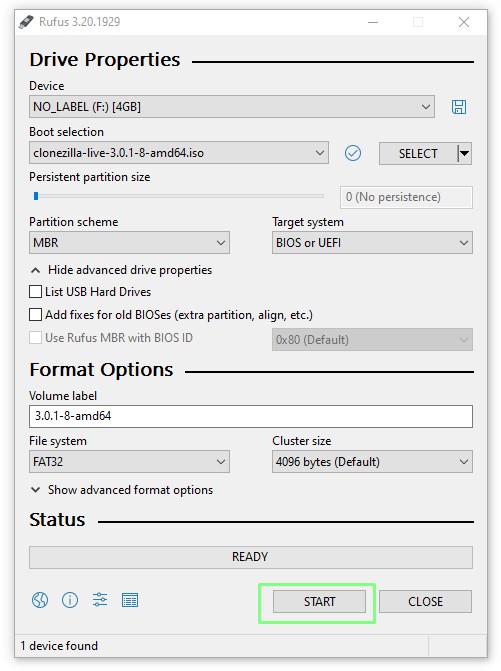
6. Click on Start to begin writing Clonezilla to the USB drive.
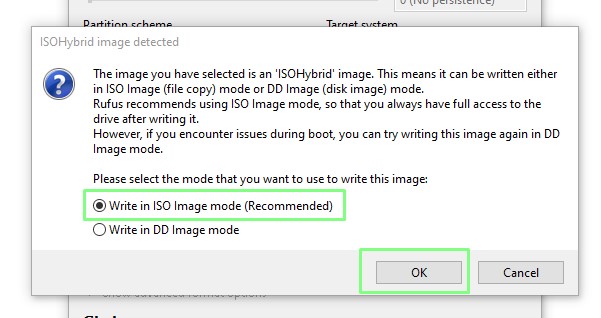
4. Write the image in ISO mode and clock Ok to start the process.
Booting Clonezilla
With our test machine running Windows 10 from an embedded 64GB eMMC drive, and a blank NVMe drive inserted into the machine we are ready to migrate the installation.
1. Boot from the Clonezilla USB drive. The key to enter the BIOS is a little different for every machine, but here we have a list that will steer you right.
2. From the menu select Clonezilla live and press Enter.
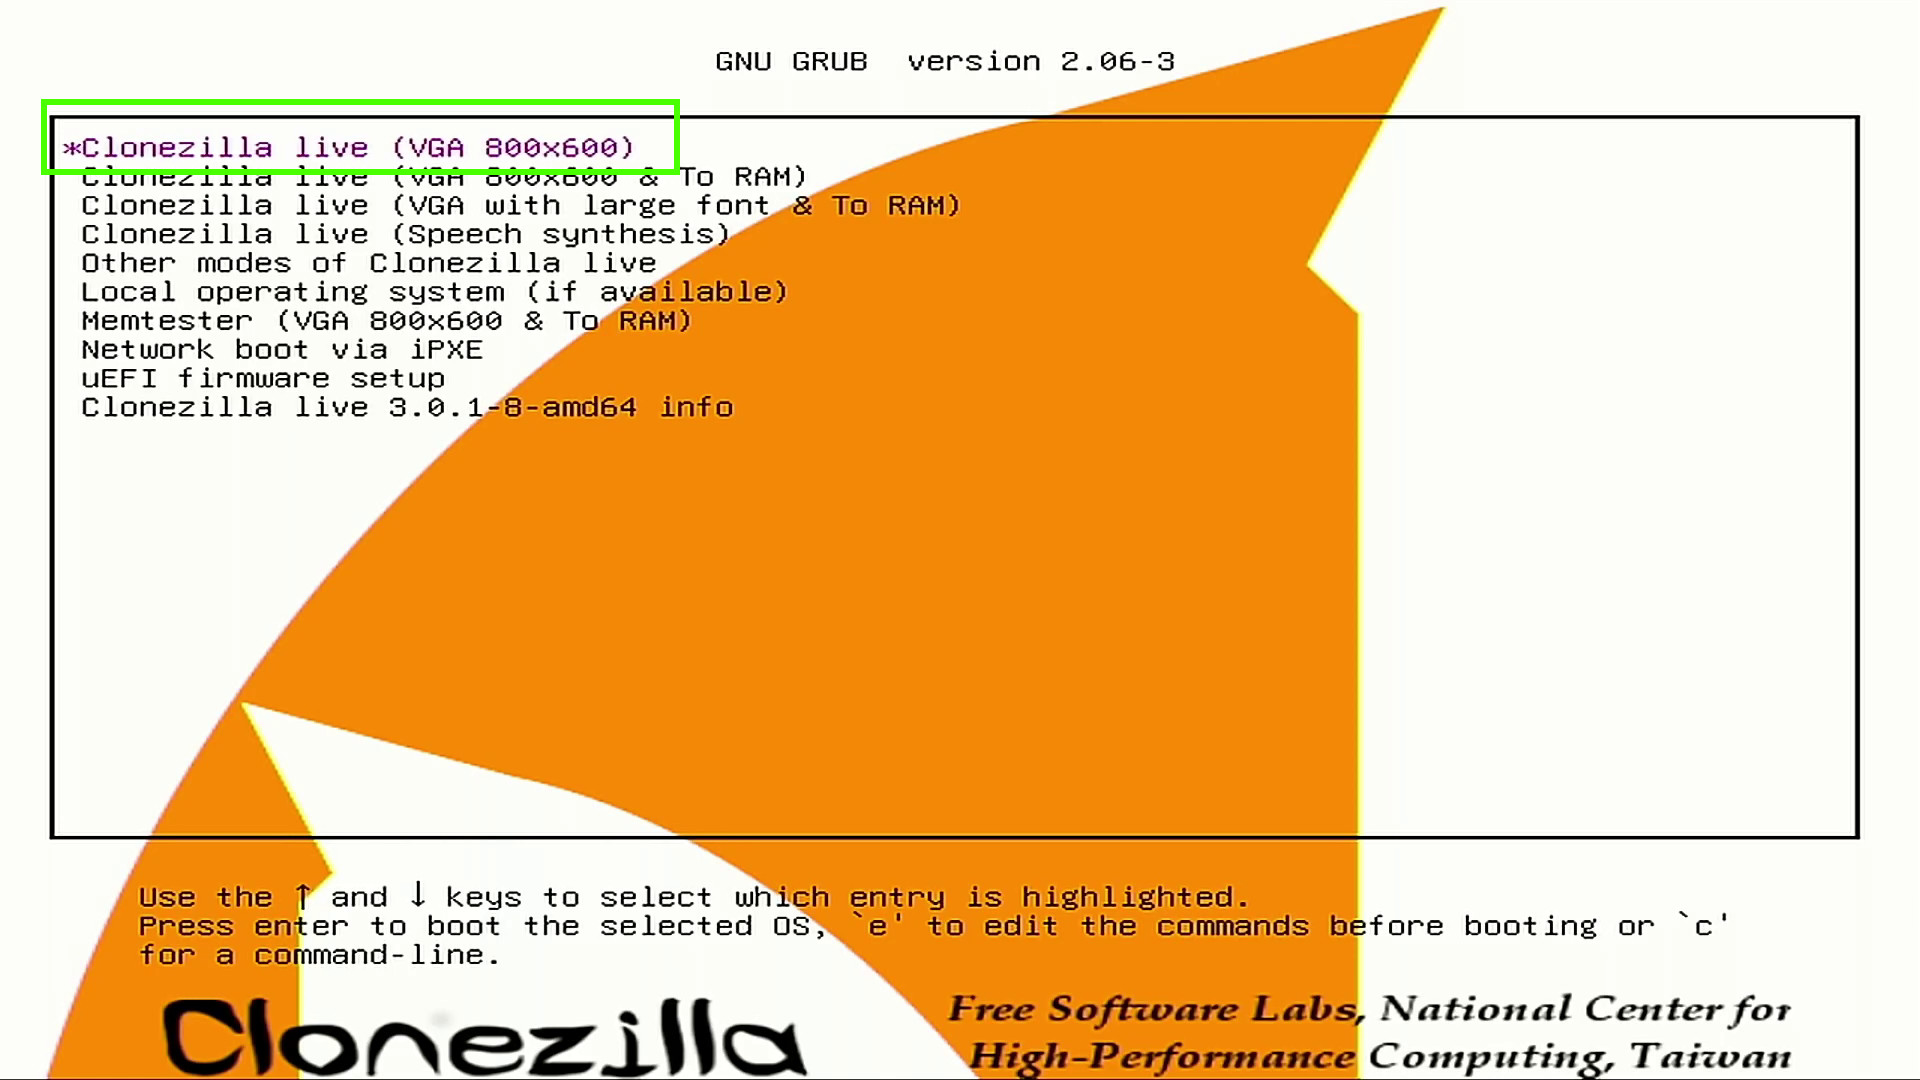
3. Select your desired language and press Enter.
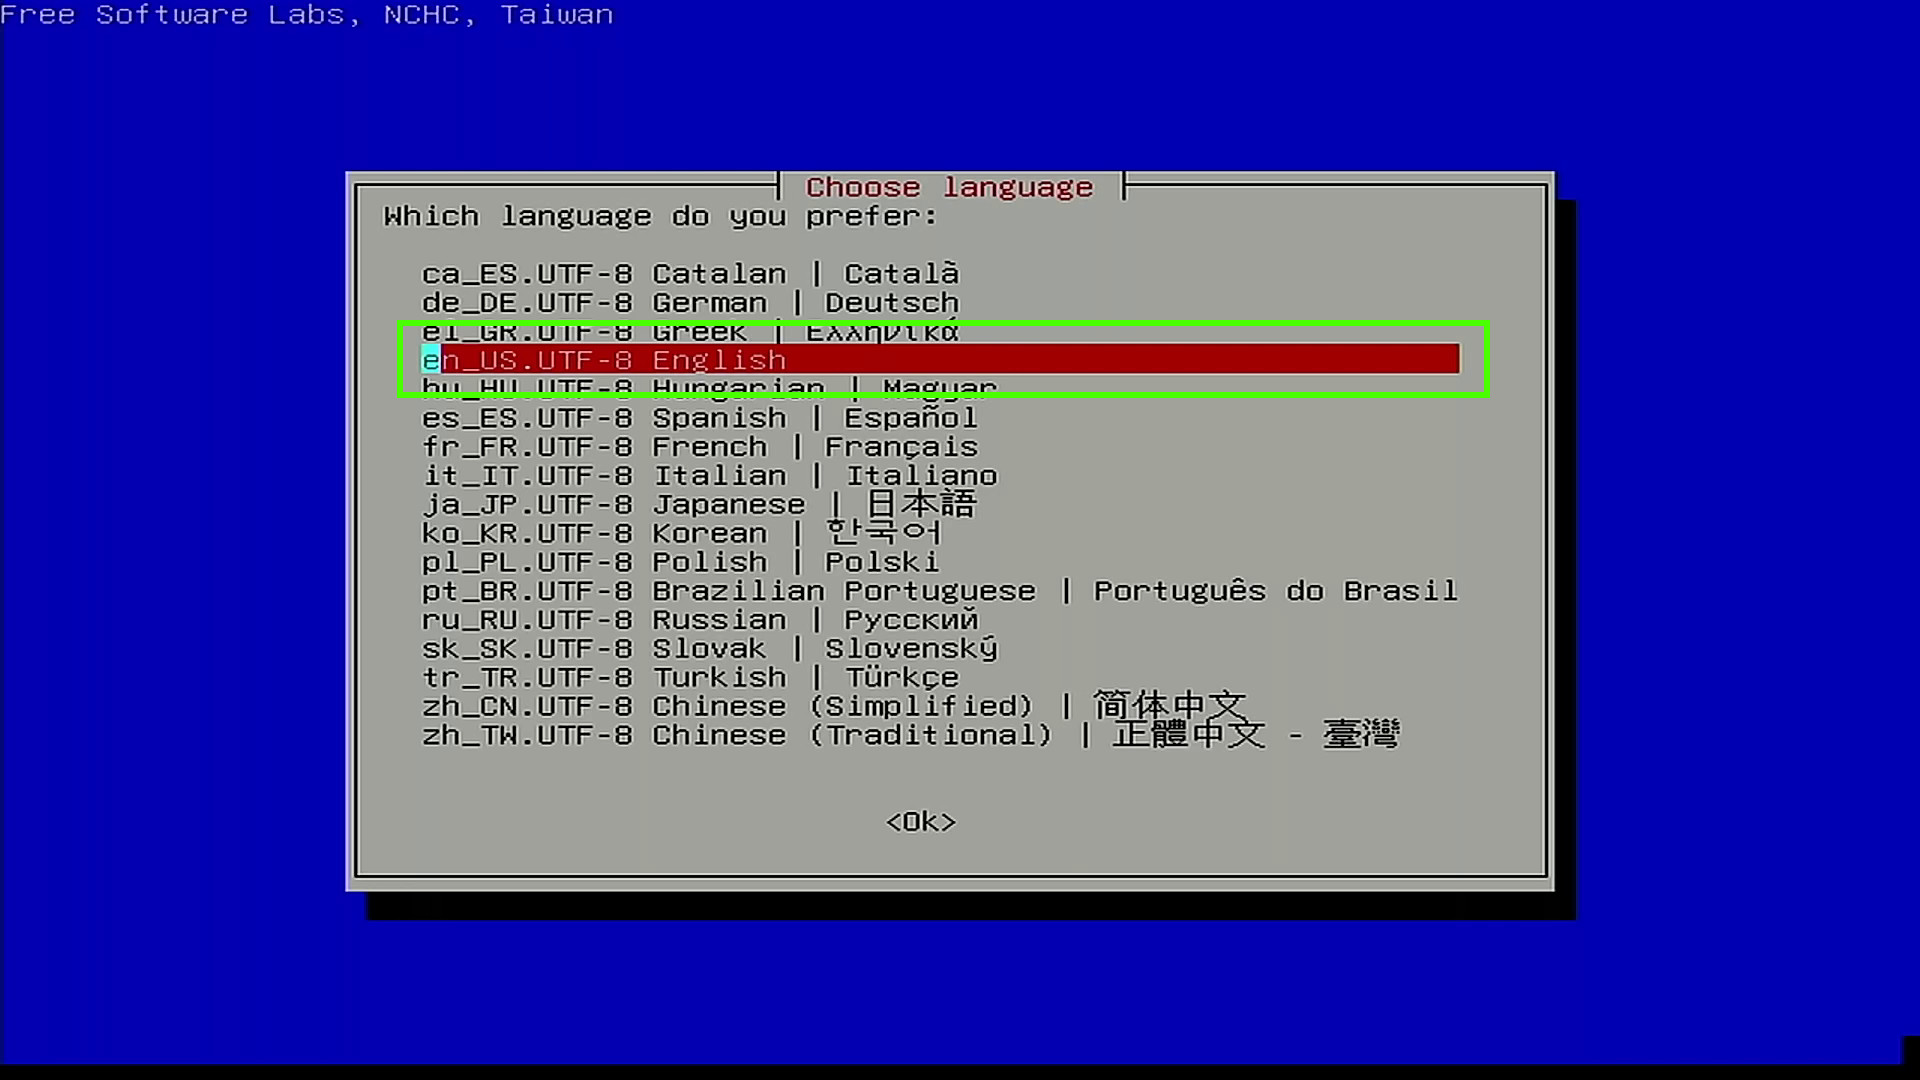
4. Confirm the selection by pressing Enter.
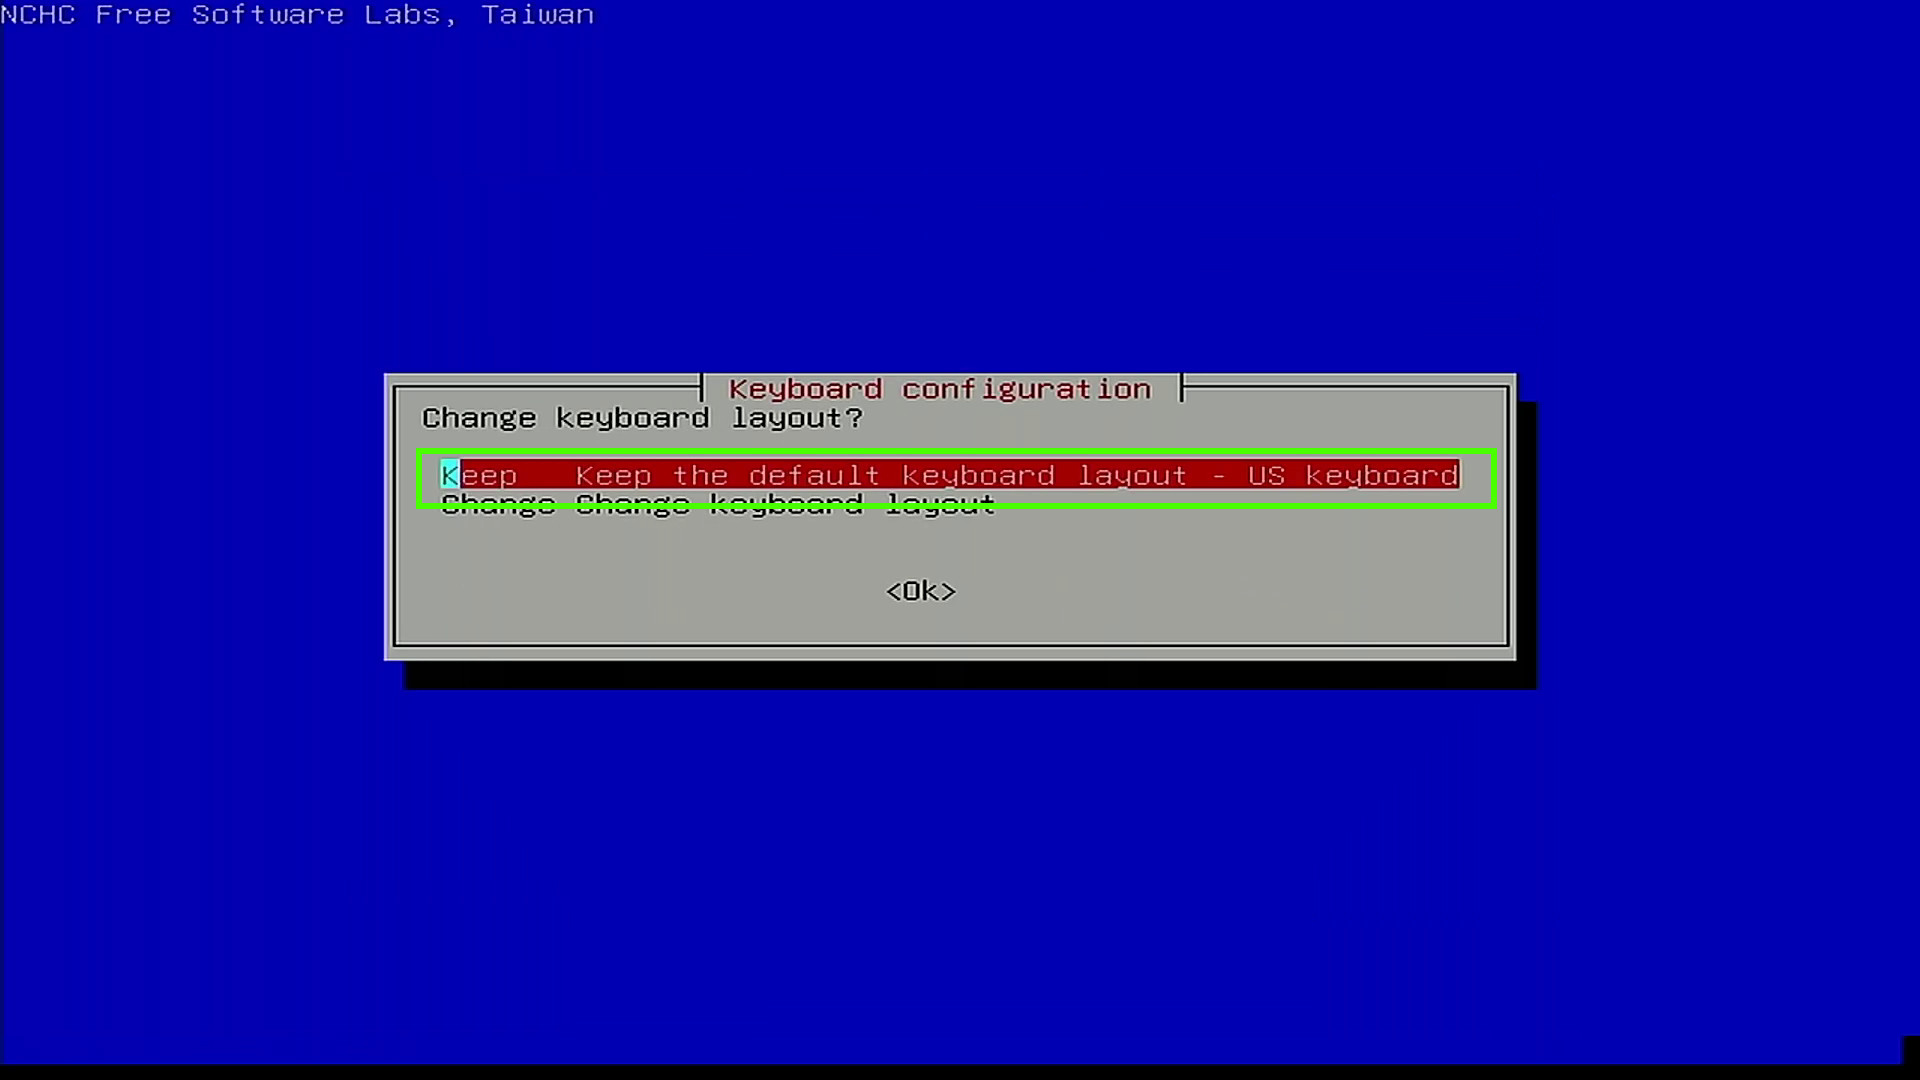
5. Press Enter to start Clonezilla’s wizard process.
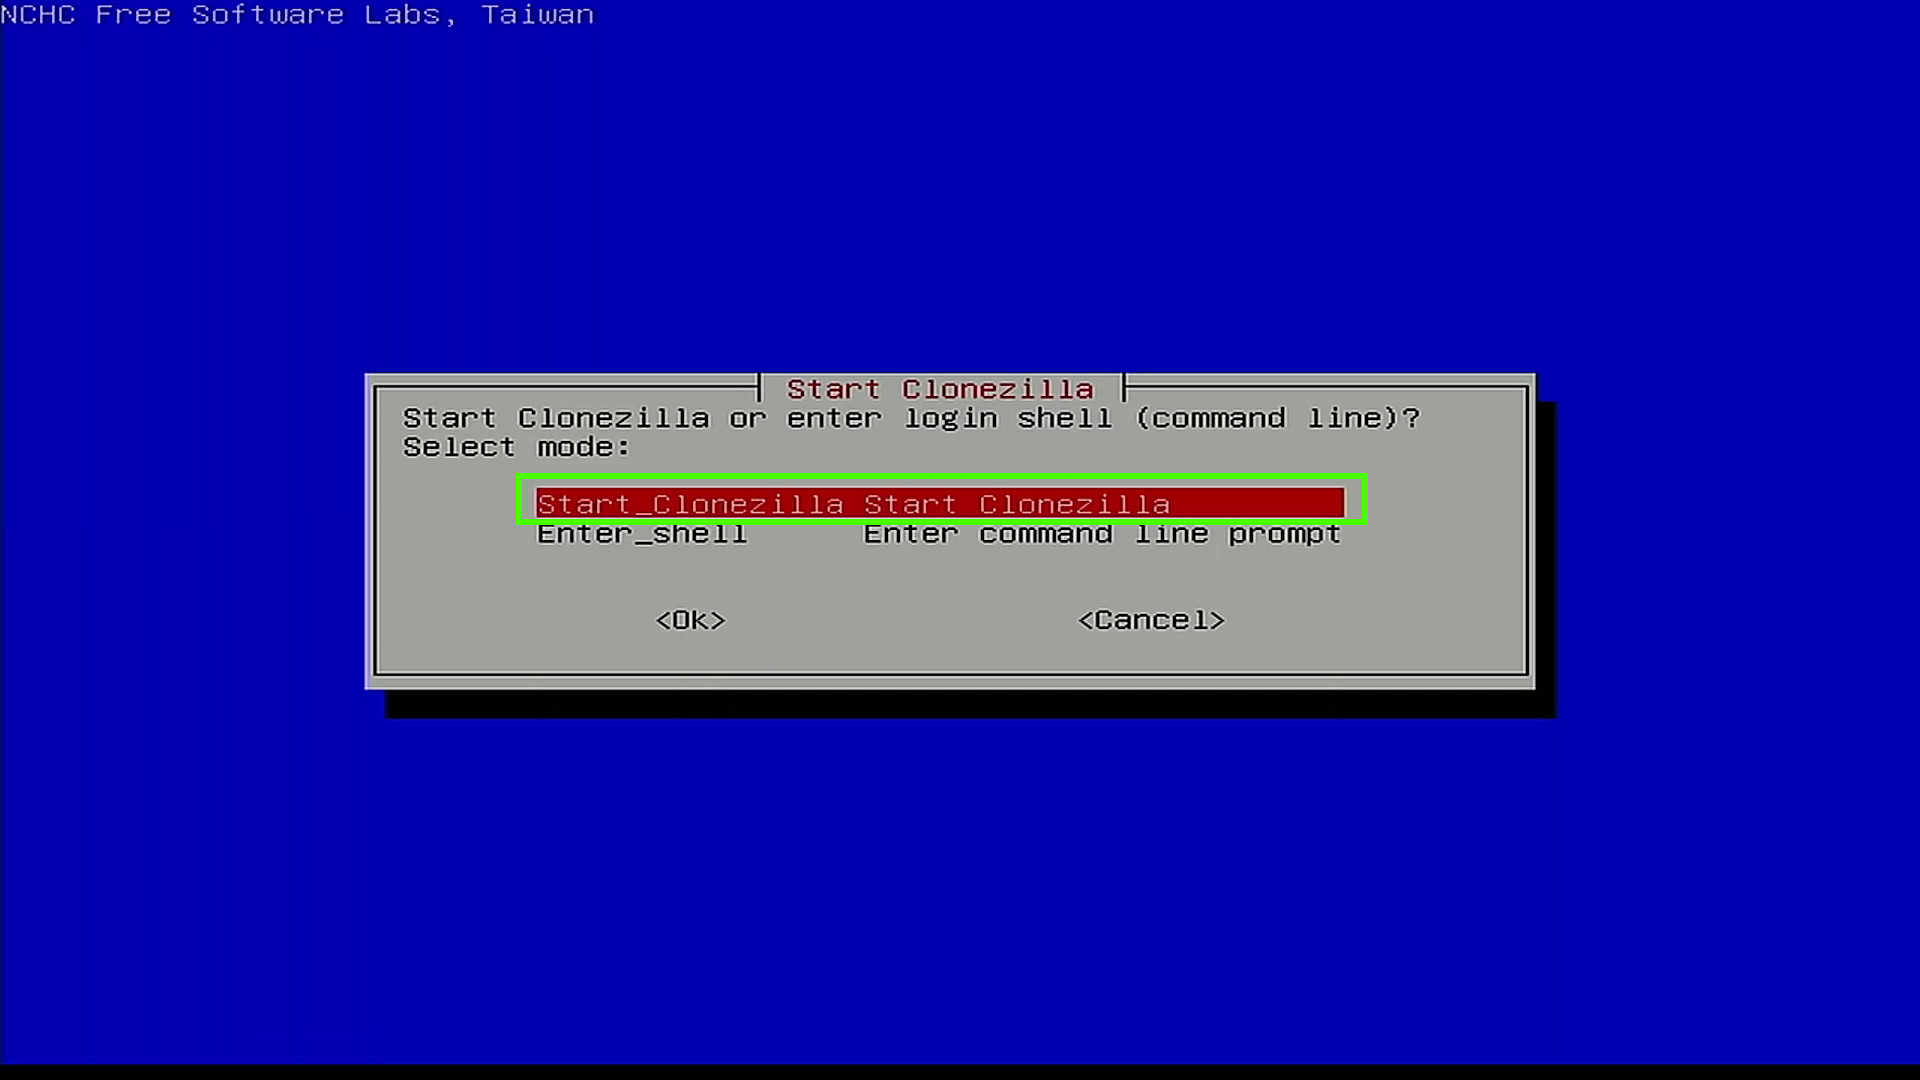
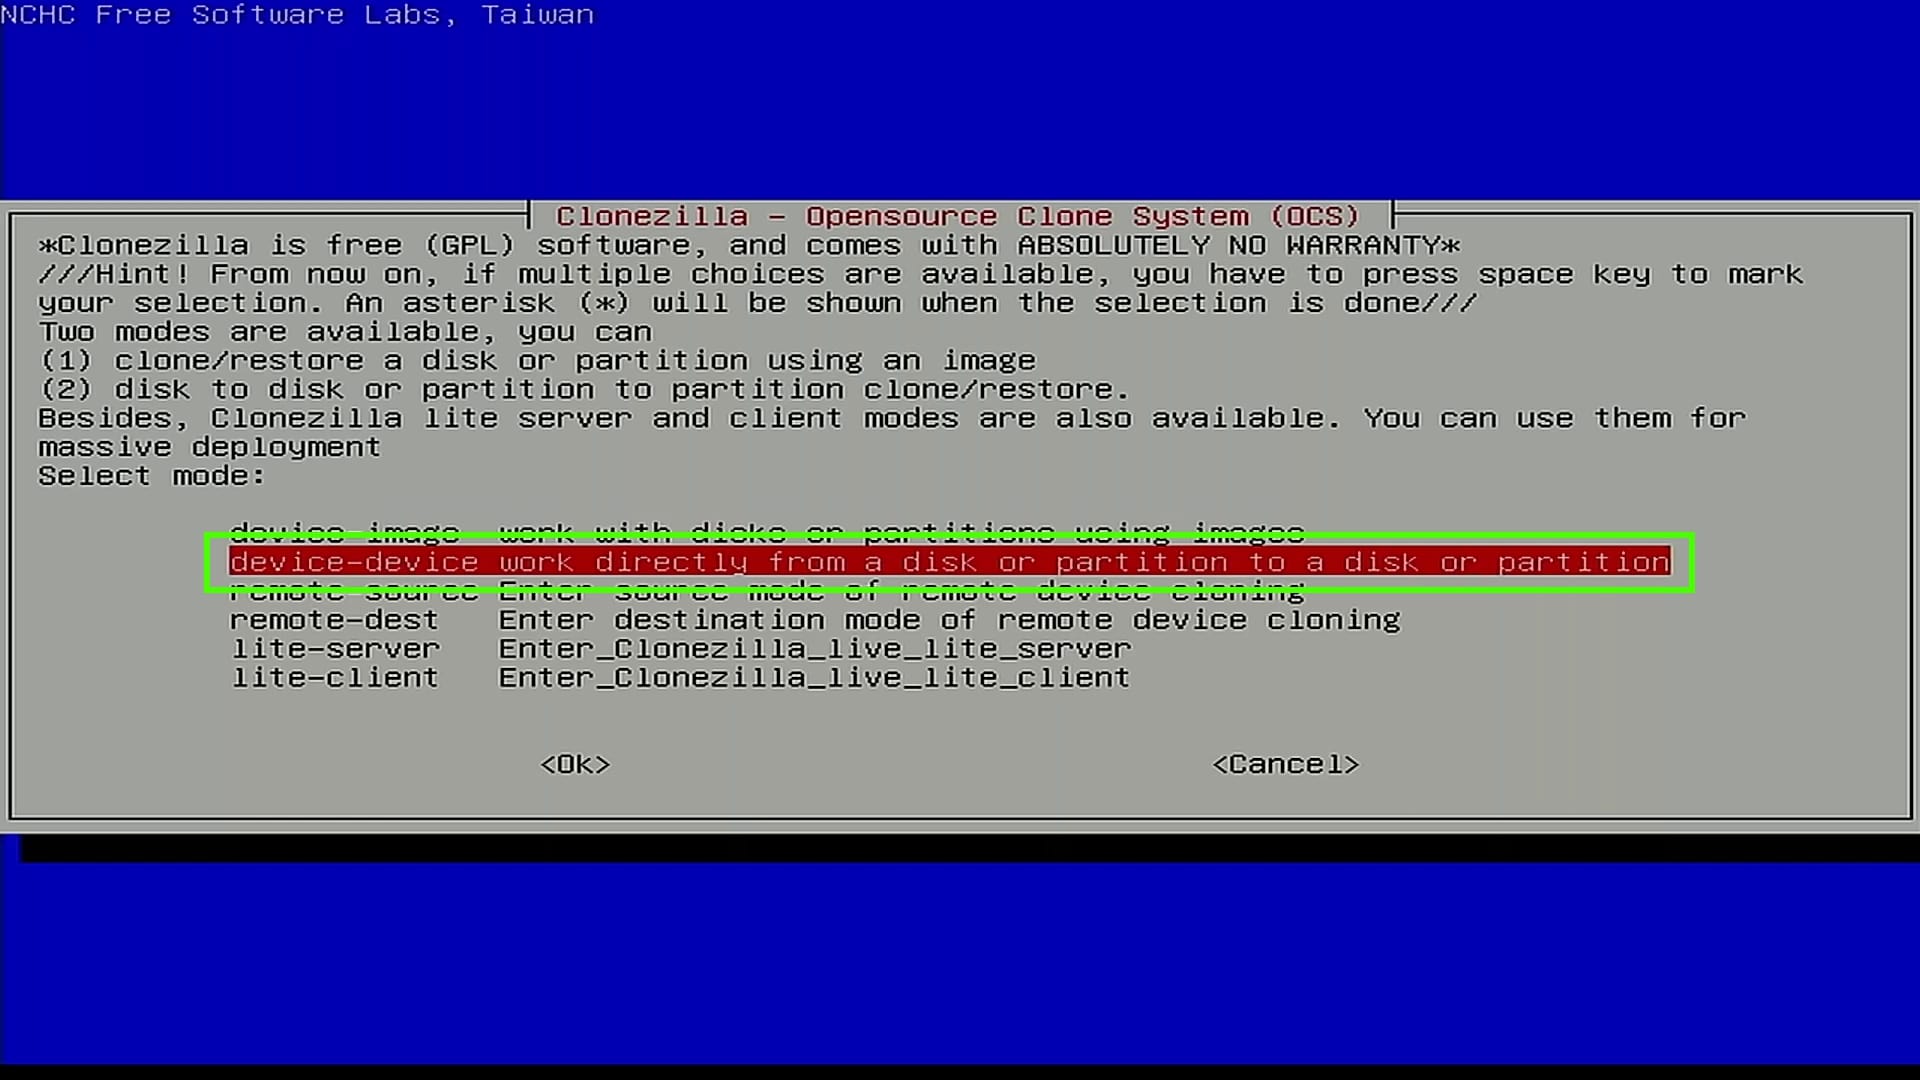
6. Select device-device to clone one drive to the other and press Enter. The other options are device-image, which clones a drive to a backup image. Remote-source and destination for remote cloning tasks. Servers can be used to clone devices to a remote server, or to distribute one clone image to multiple devices at once.
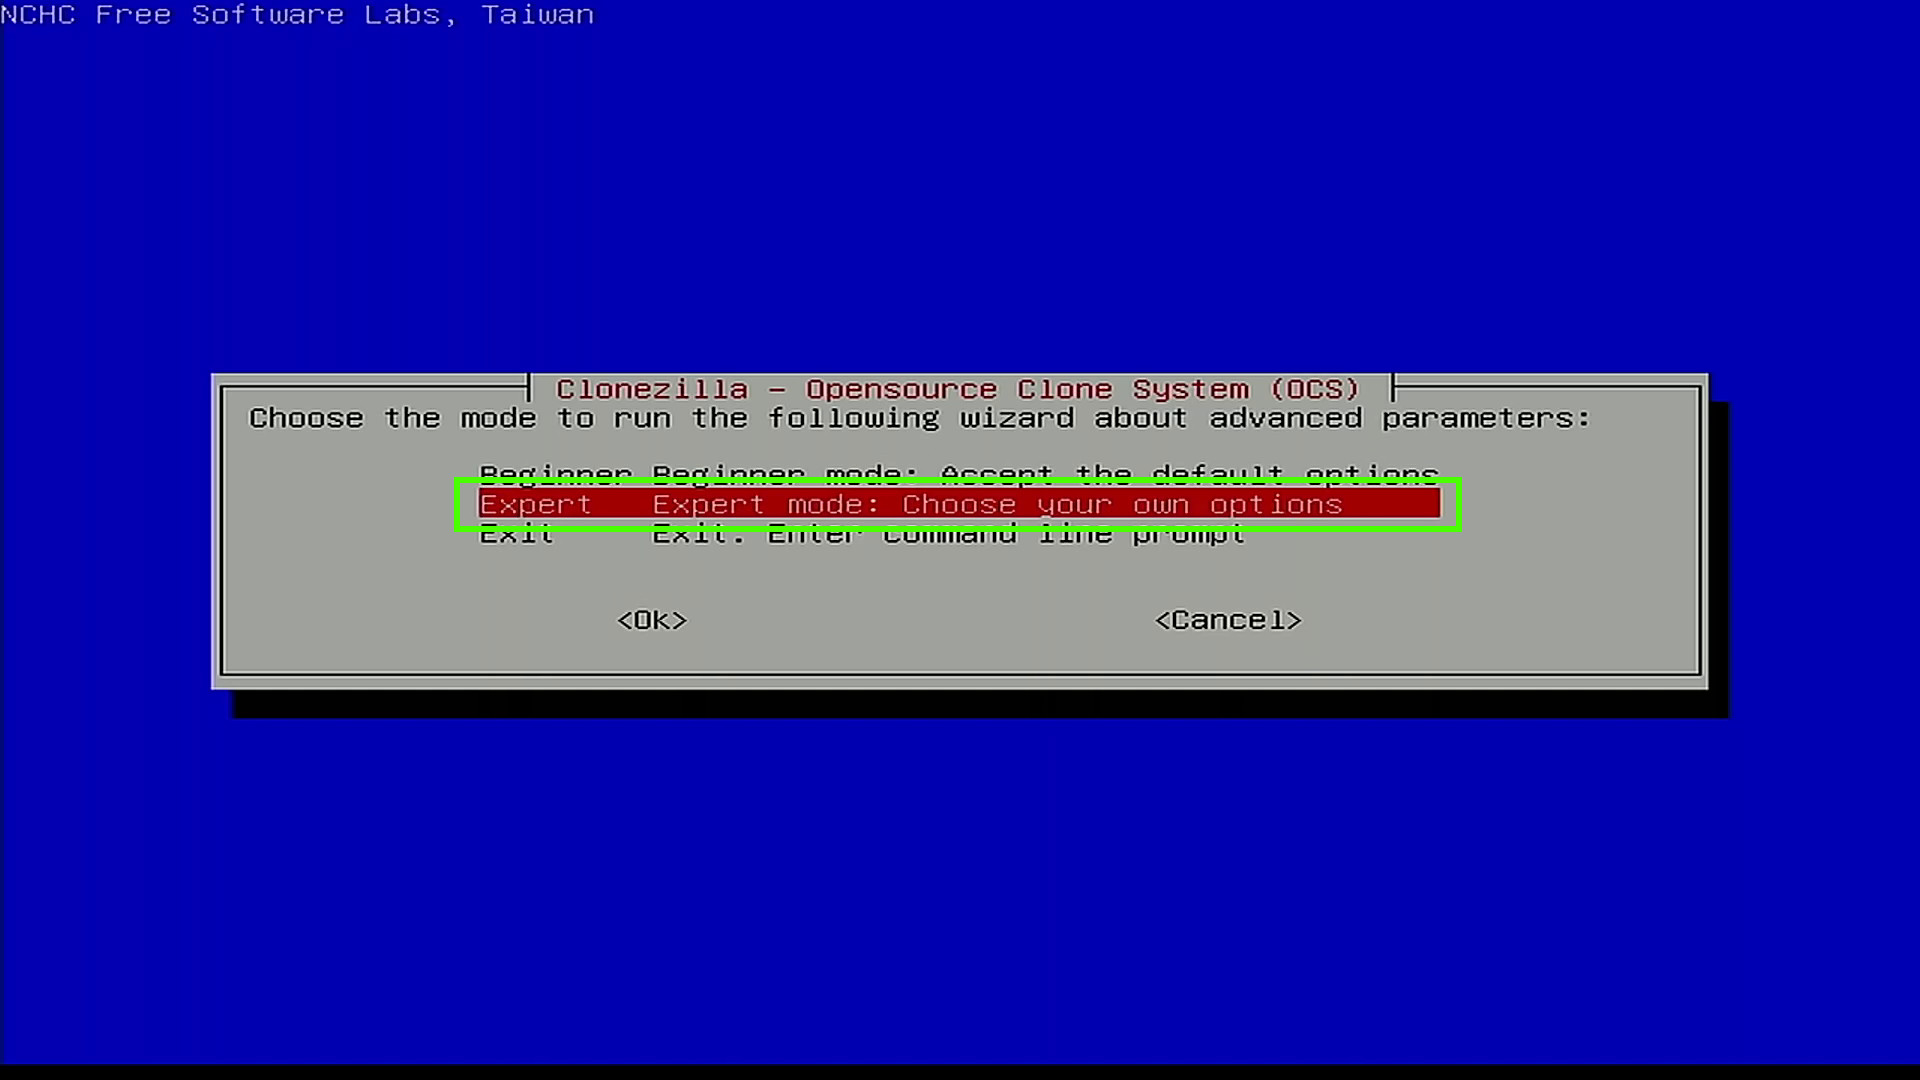
7. Select Expert and press Enter.
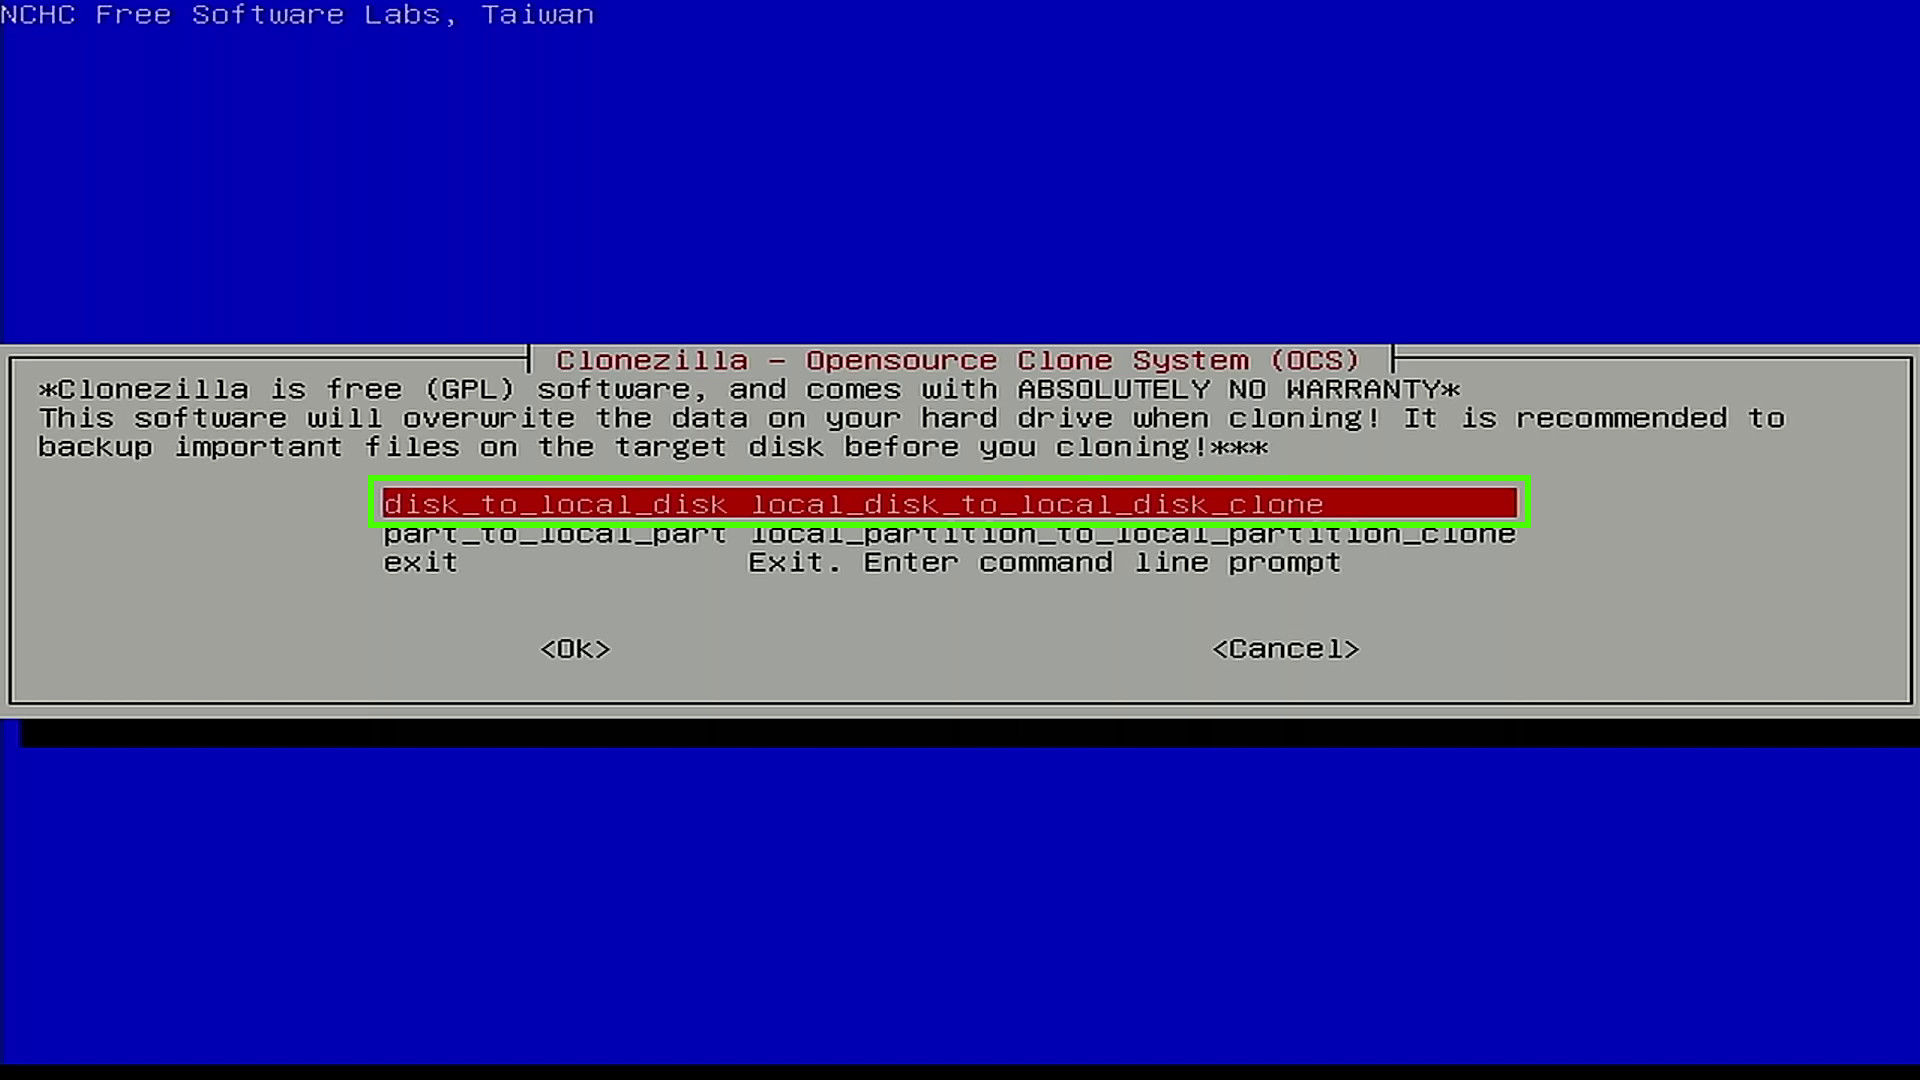
8. Select disk_to_local_disk cloning option and press Enter.
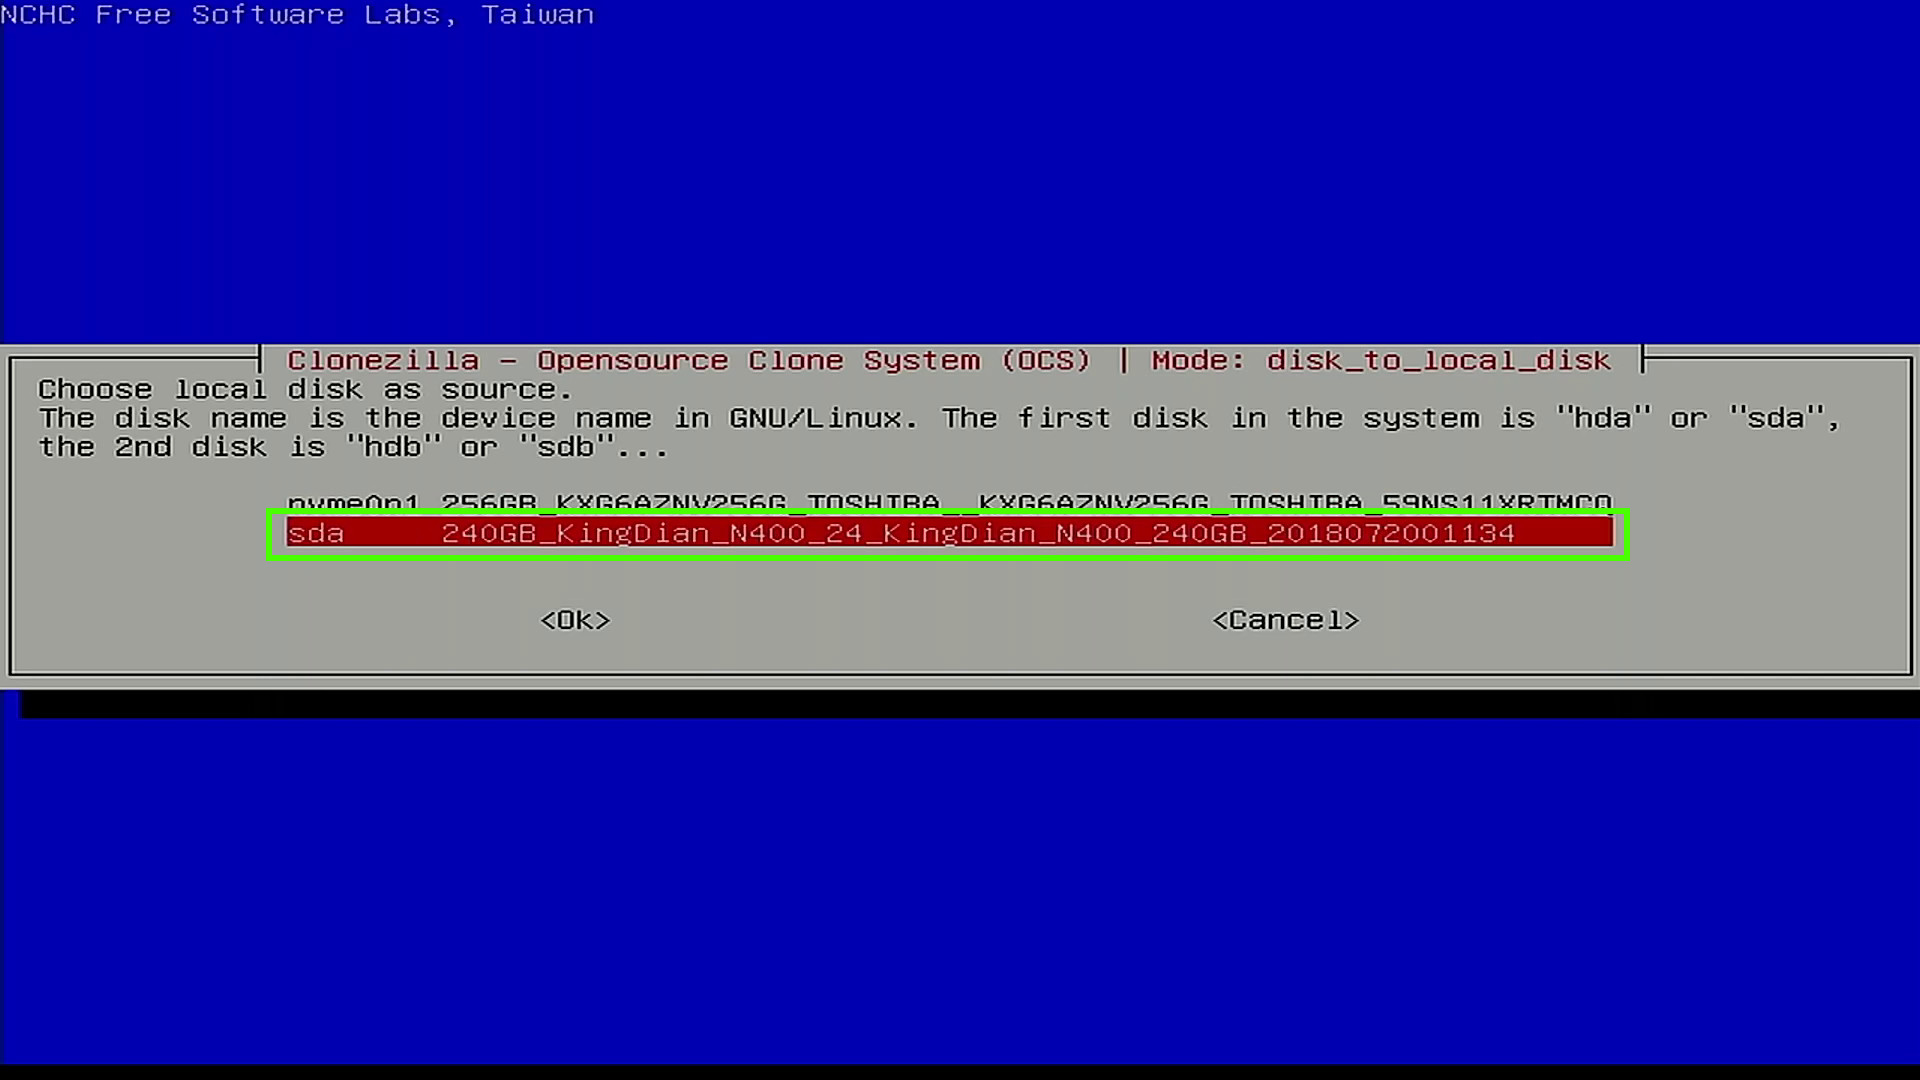
9. Select the source (the drive that you wish to clone) and press Enter.
10. Select the target on which to clone the source and press Enter. In our example it is a 256GB NVMe drive.
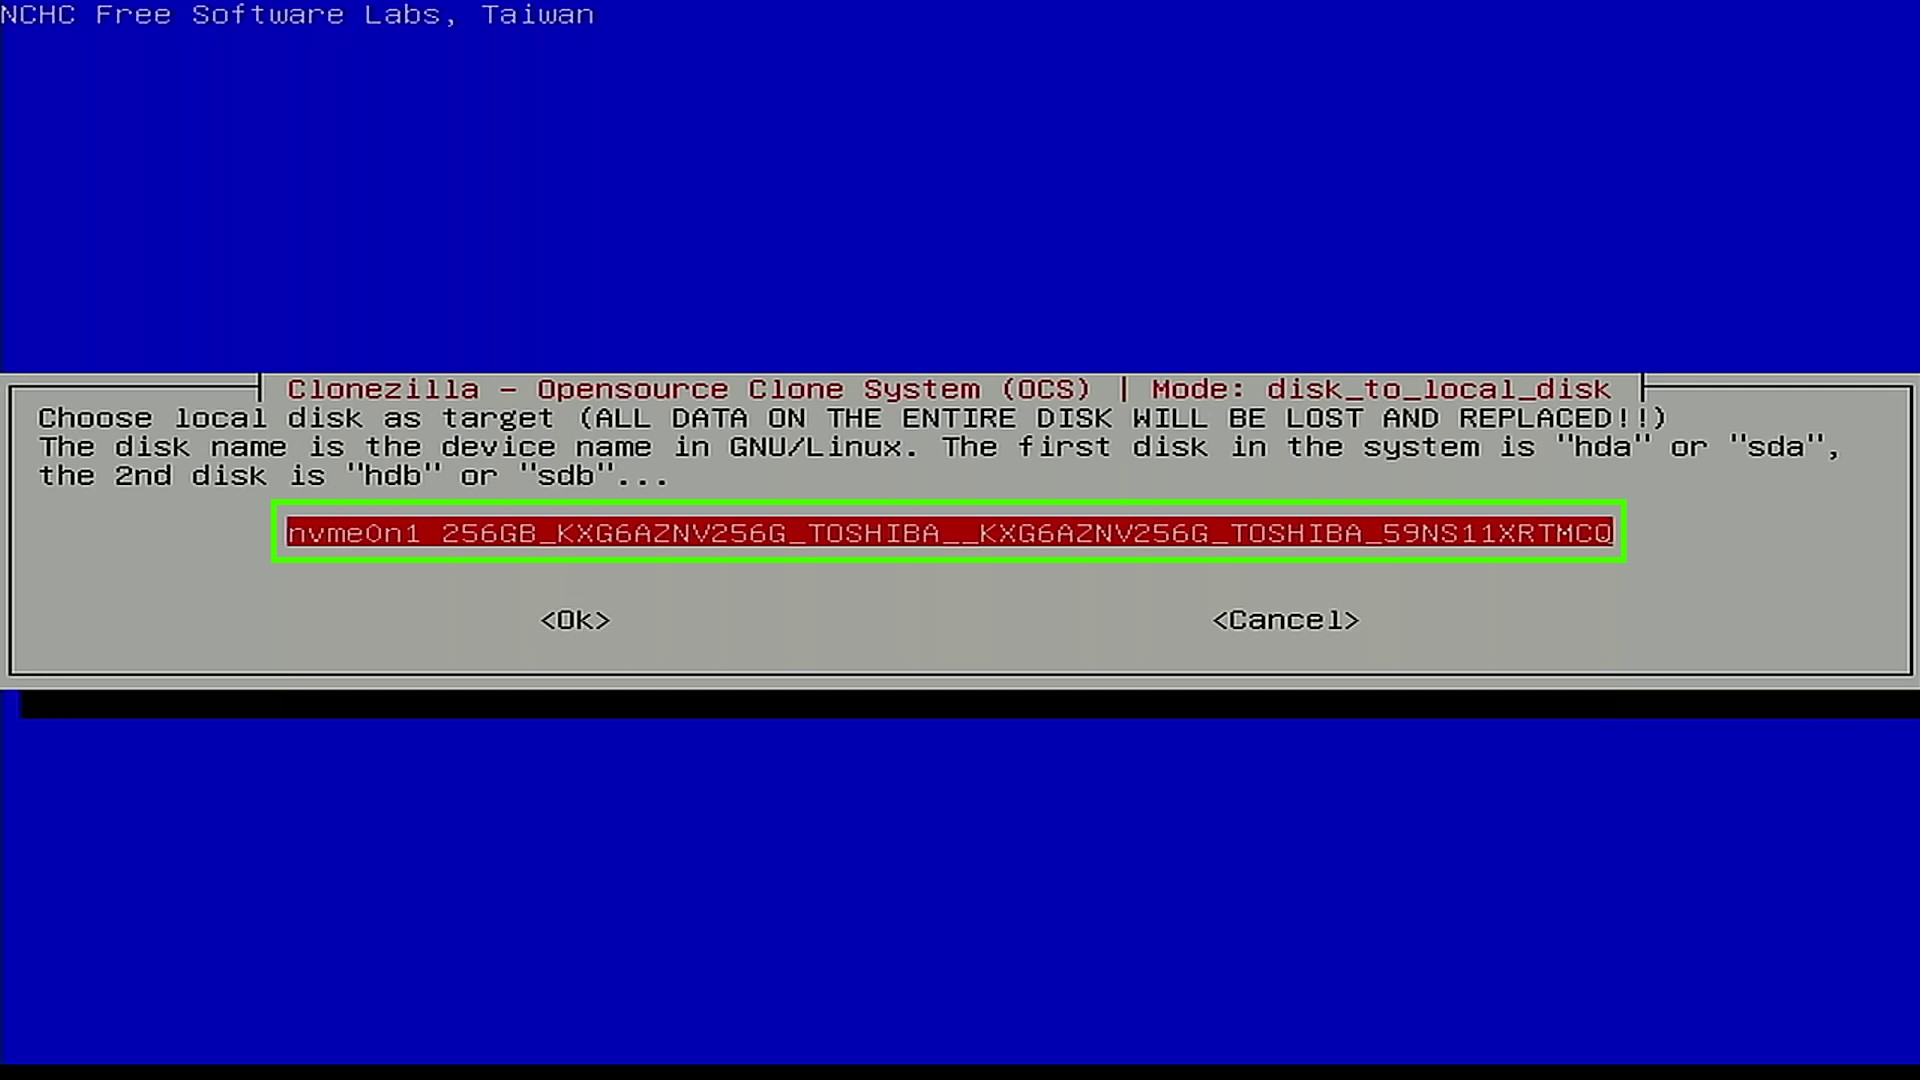
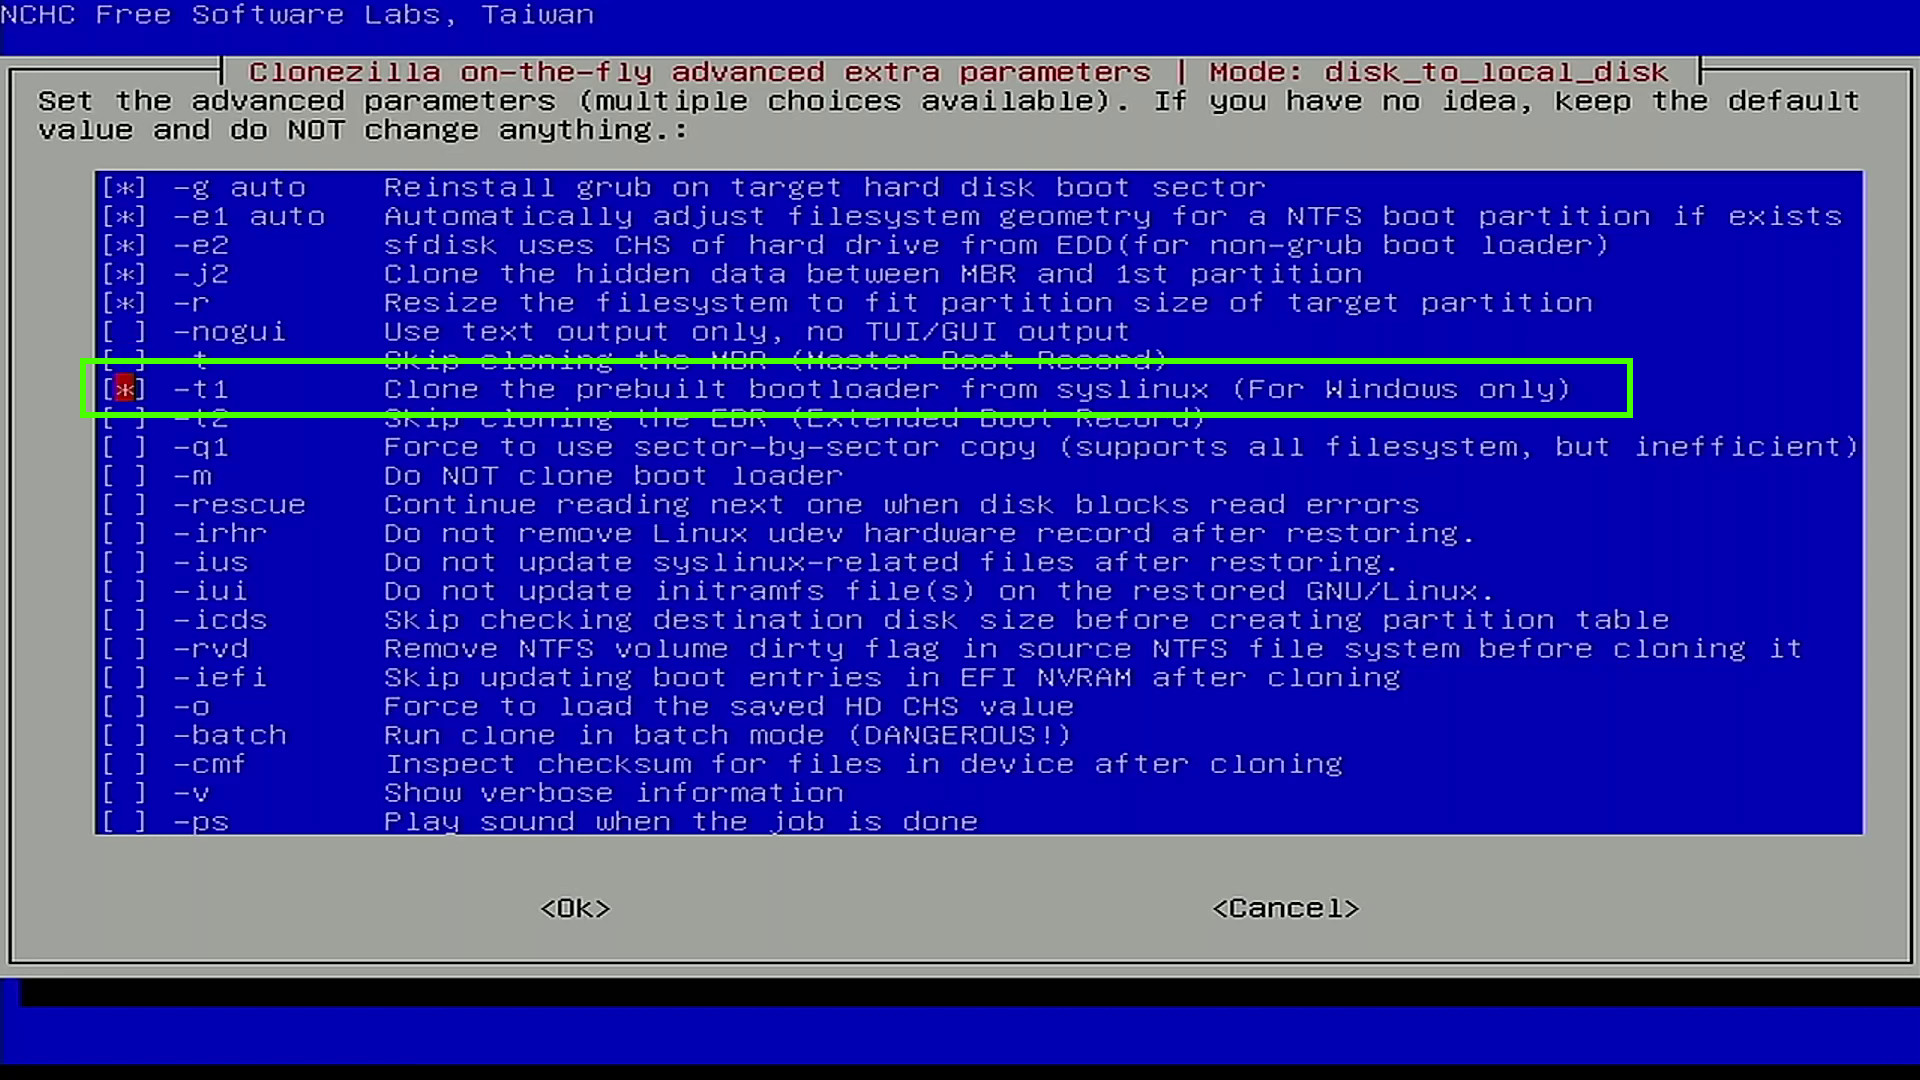
11. Scroll down to T1 and press Space to select and then Enter to move onwards. This option will ensure that our Windows bootloader is successfully copied to the target drive.
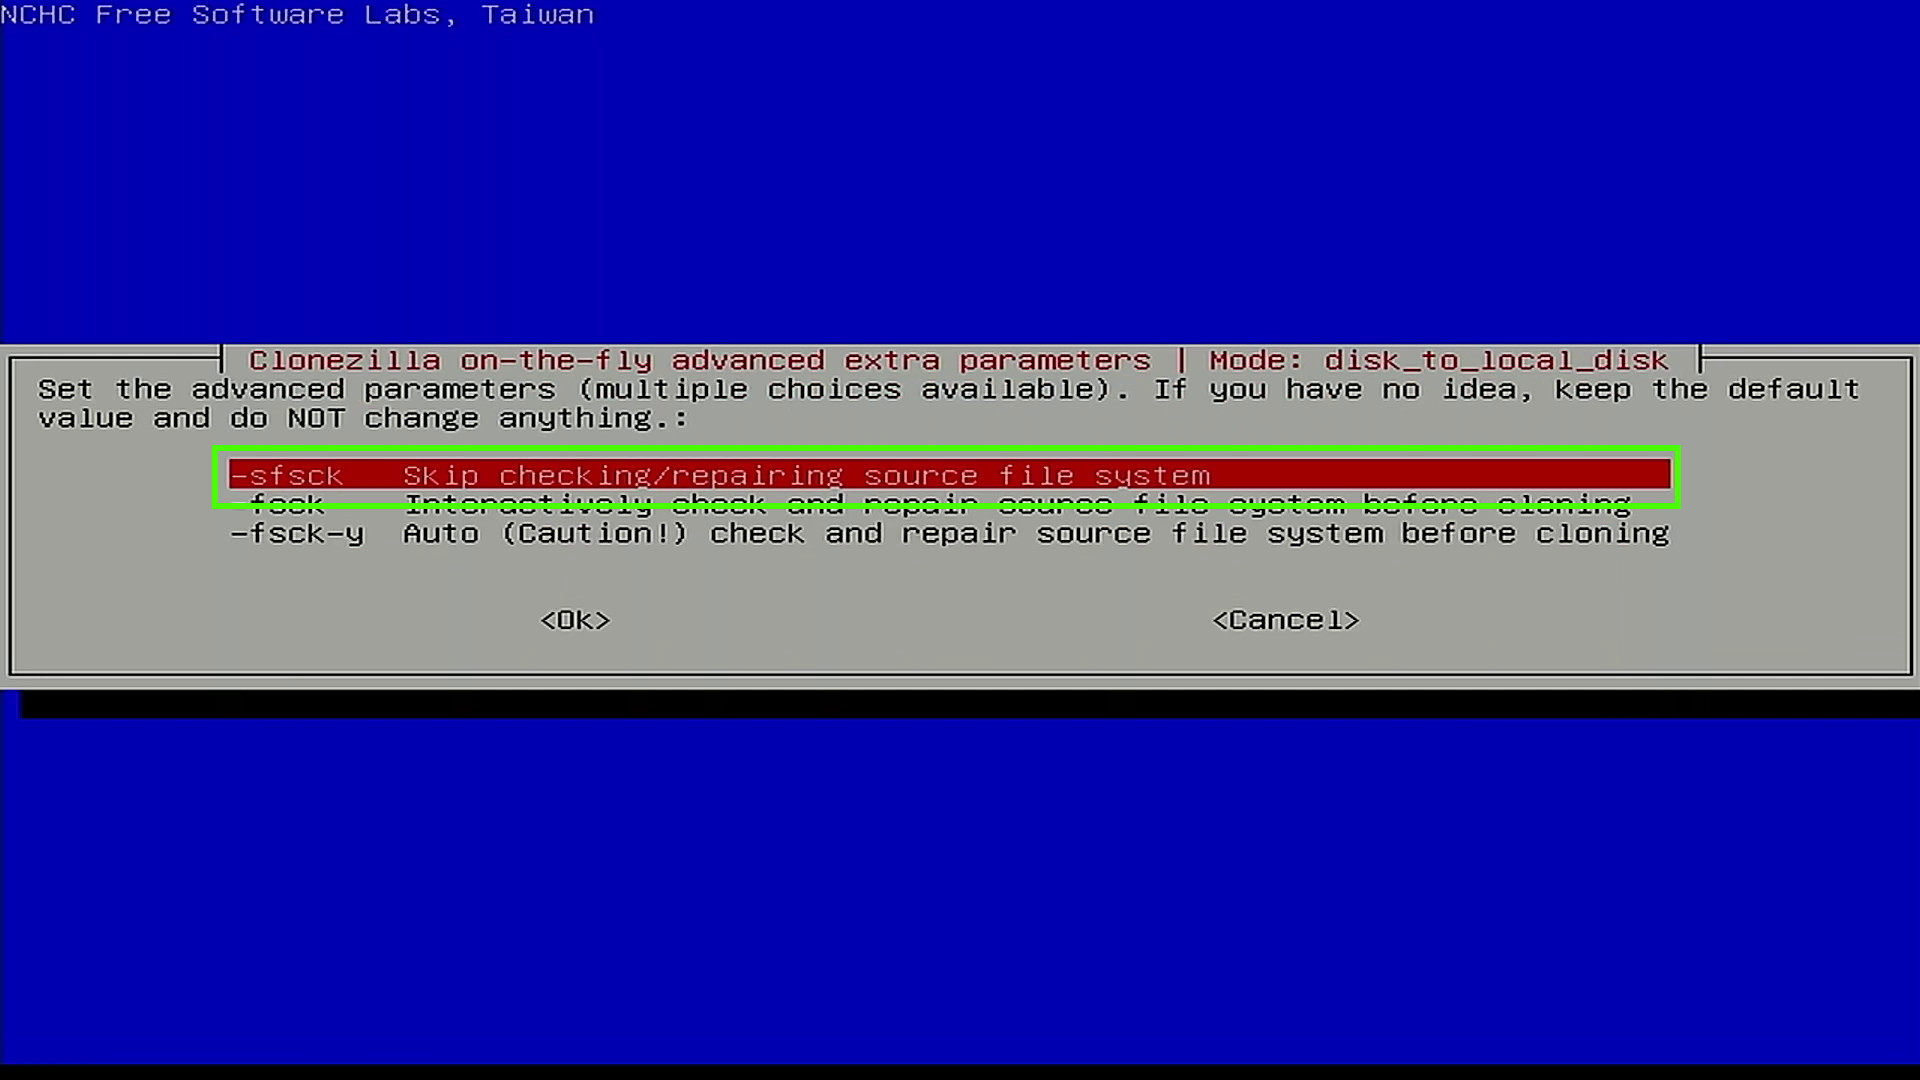
12. Accept the default option to skip checking the filesystem, and press Enter. You can opt to scan the filesystem for issues if you wish, but this will add some time to the process.
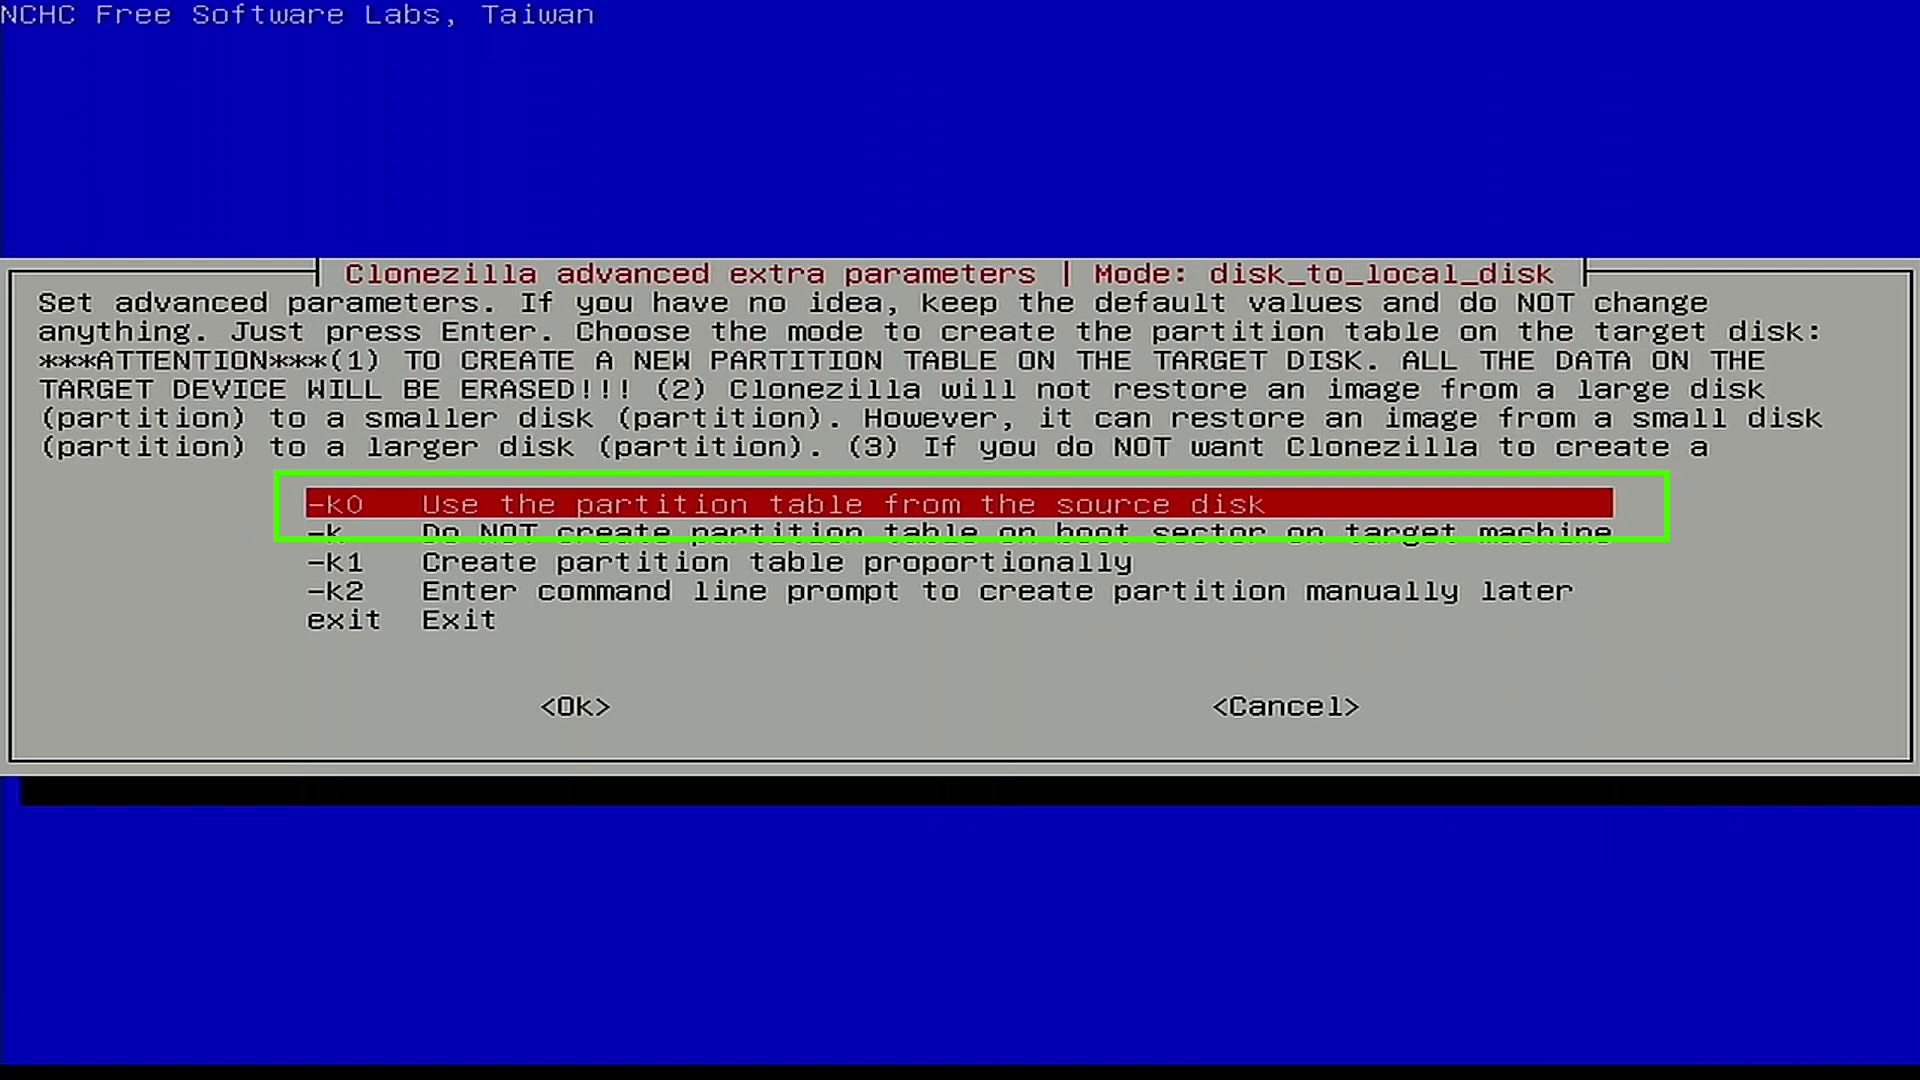
13. Accept the default option to use the existing partition table and press Enter.
14. Select Choose and press Enter. When Clonezilla is finished, it will prompt us to reboot or shutdown the machine.
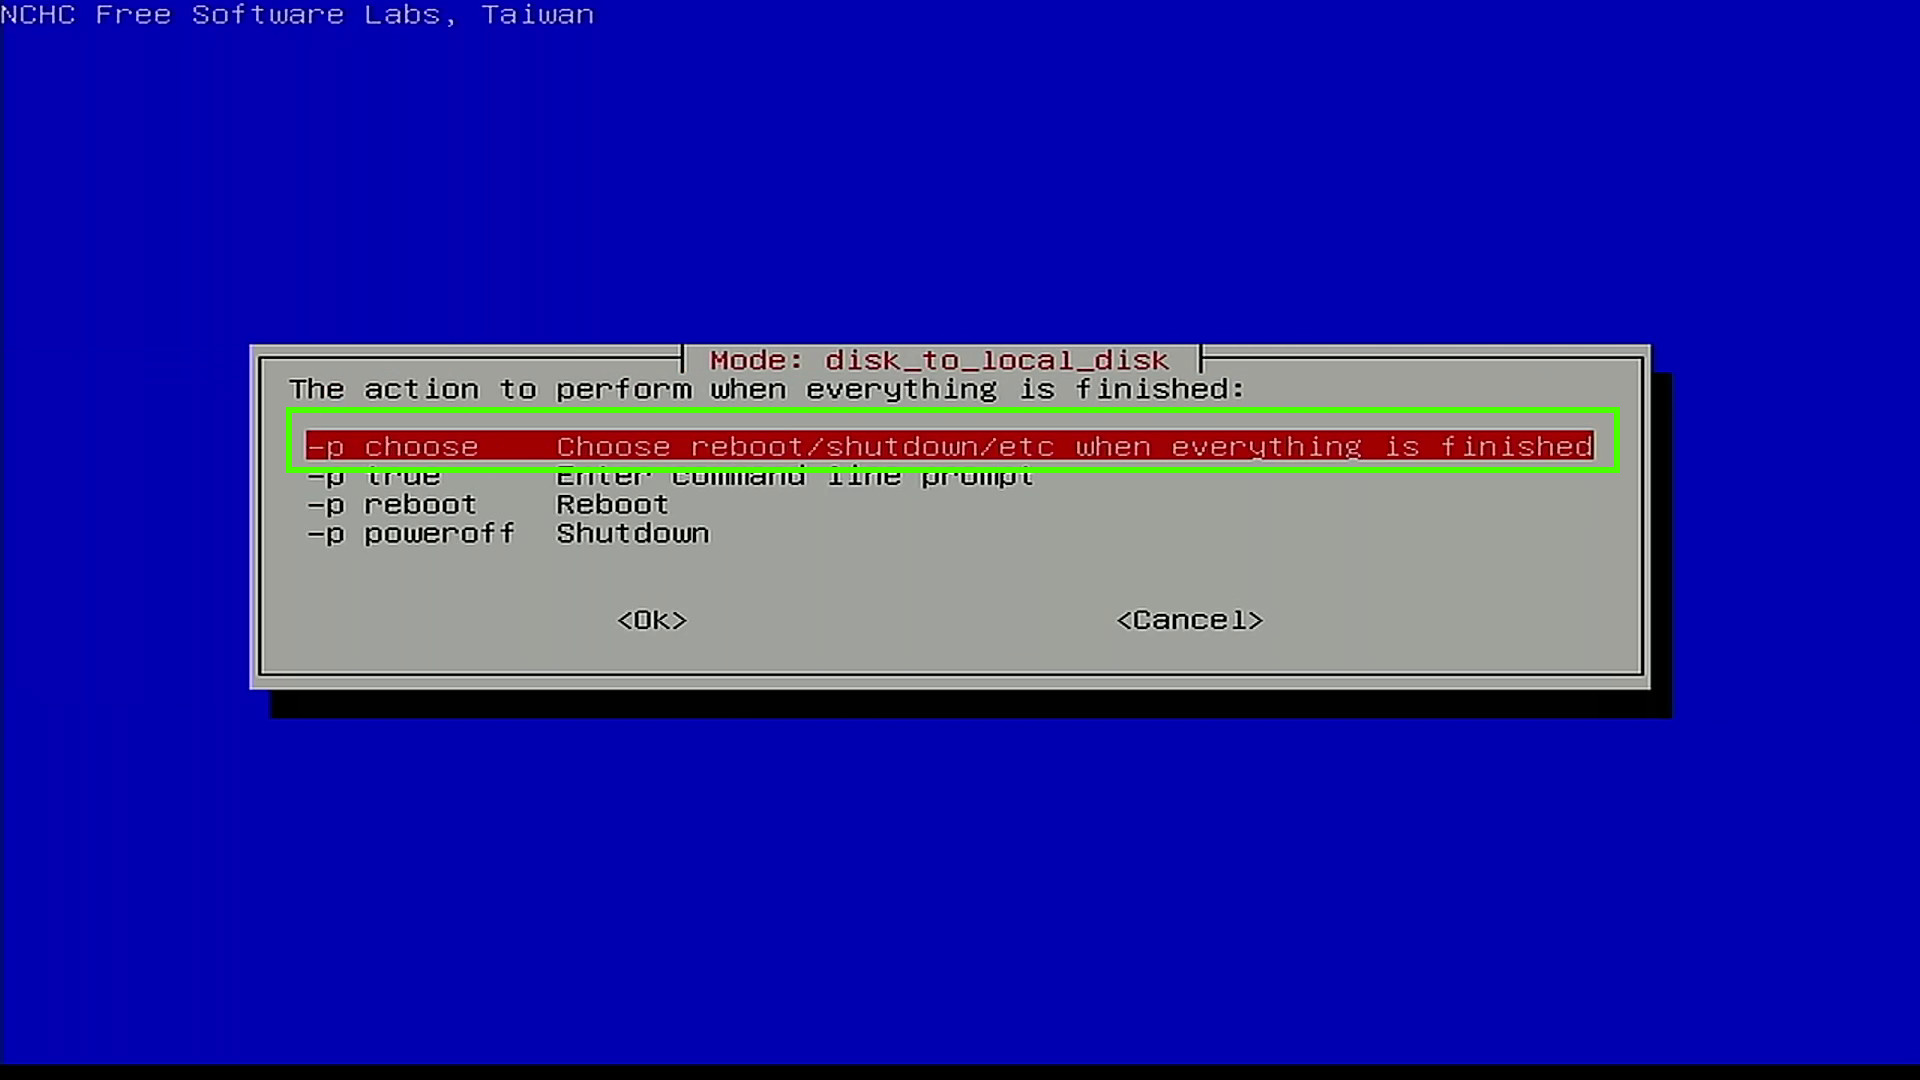
15. Press Enter to start the process. Clonezilla provides us with a terminal command which encapsulates all of the options we have just chosen. Should we wish to run the process via a terminal, this command can be used.
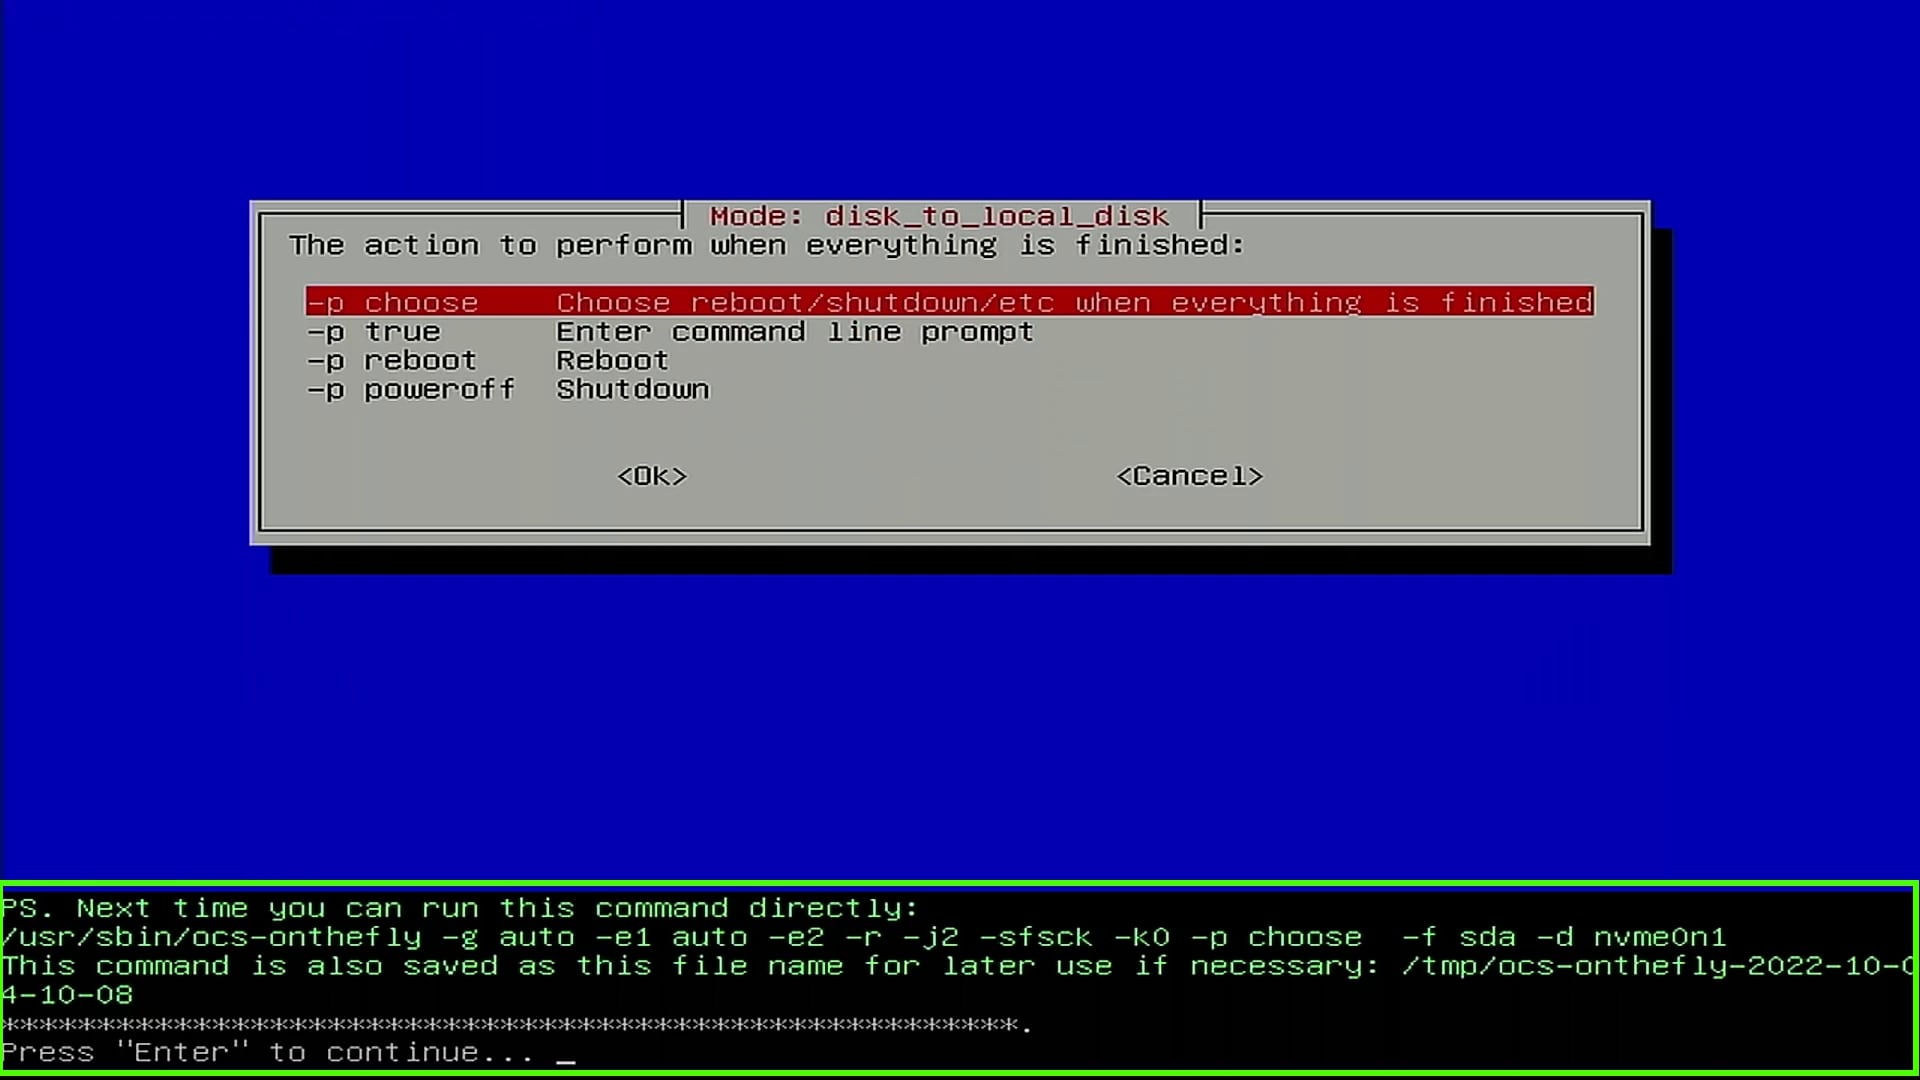
16. Press Y and Enter to begin the process. Make sure that everything is correct before moving onwards, there is no going back.

17. Wait for the cloning process to finish. Depending on the size and speed of your drives, this can take some time.
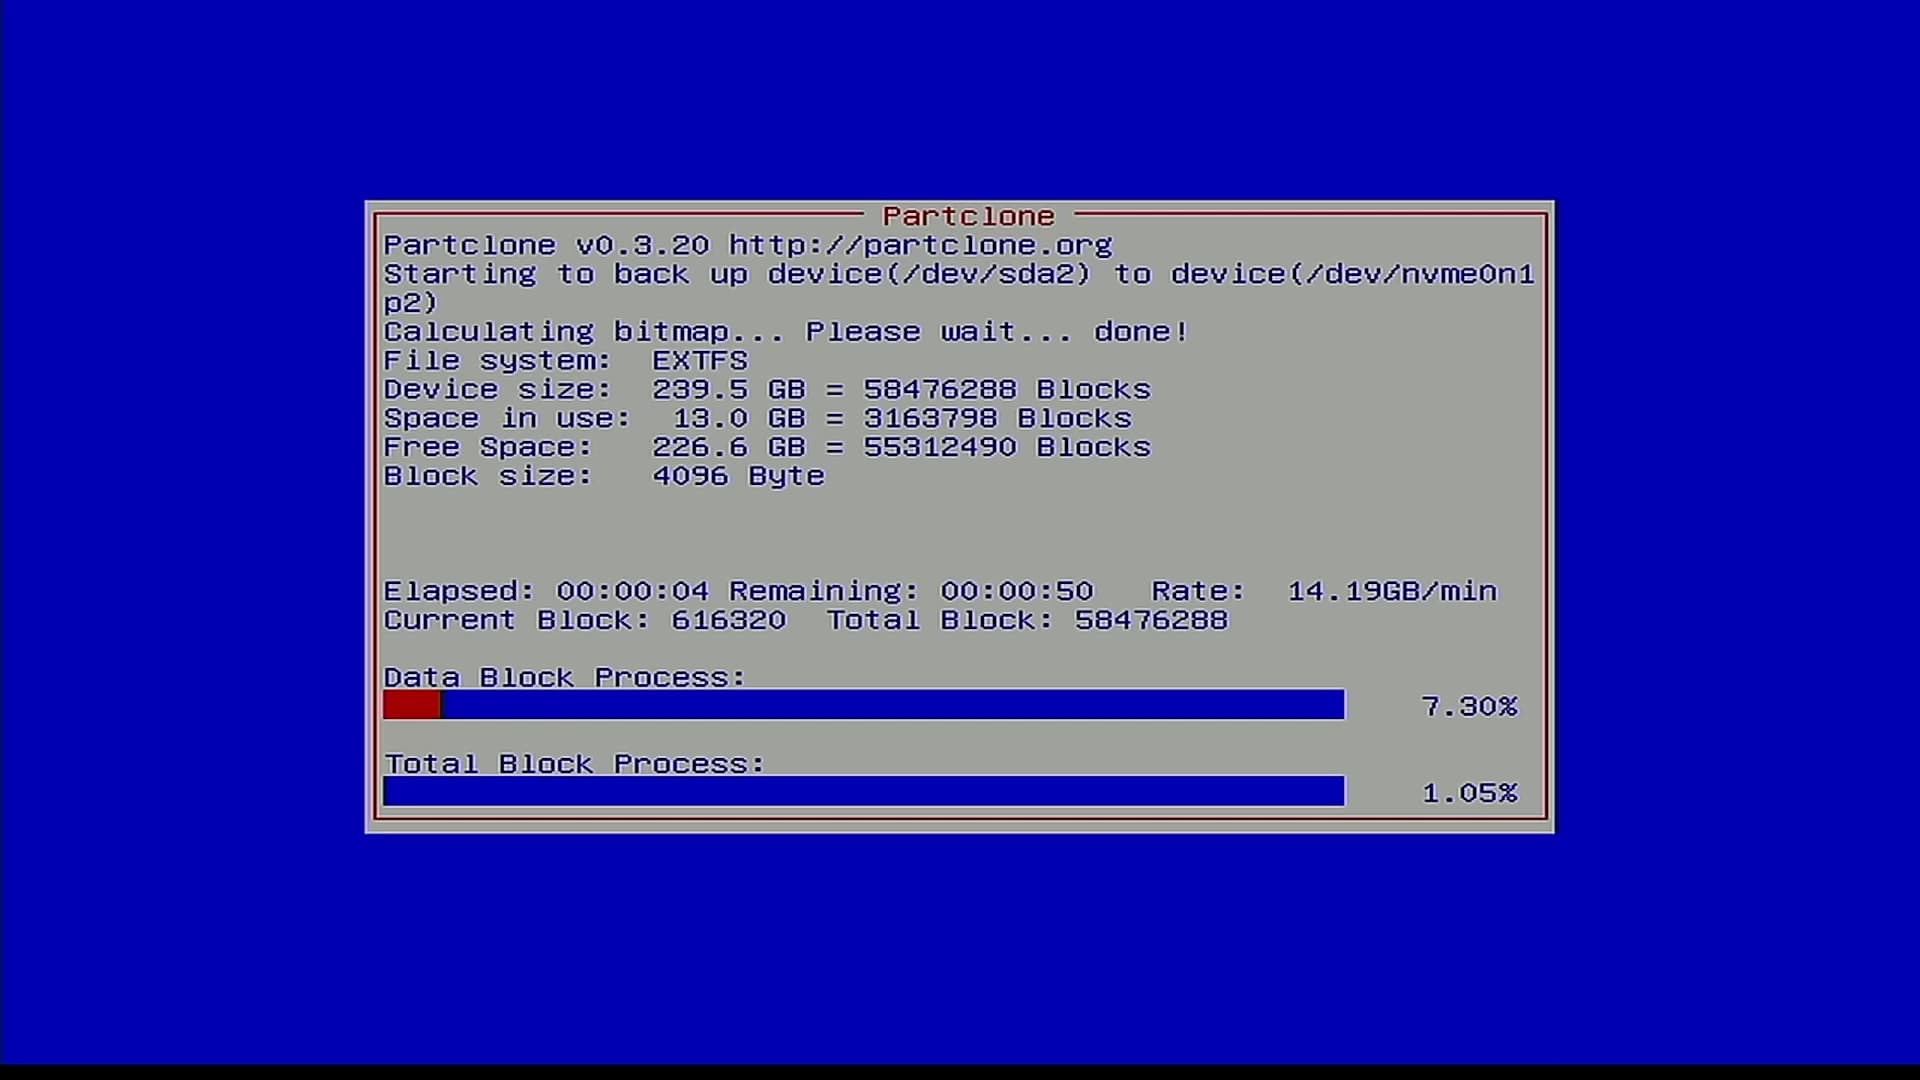
18. Press Enter to finish the process.
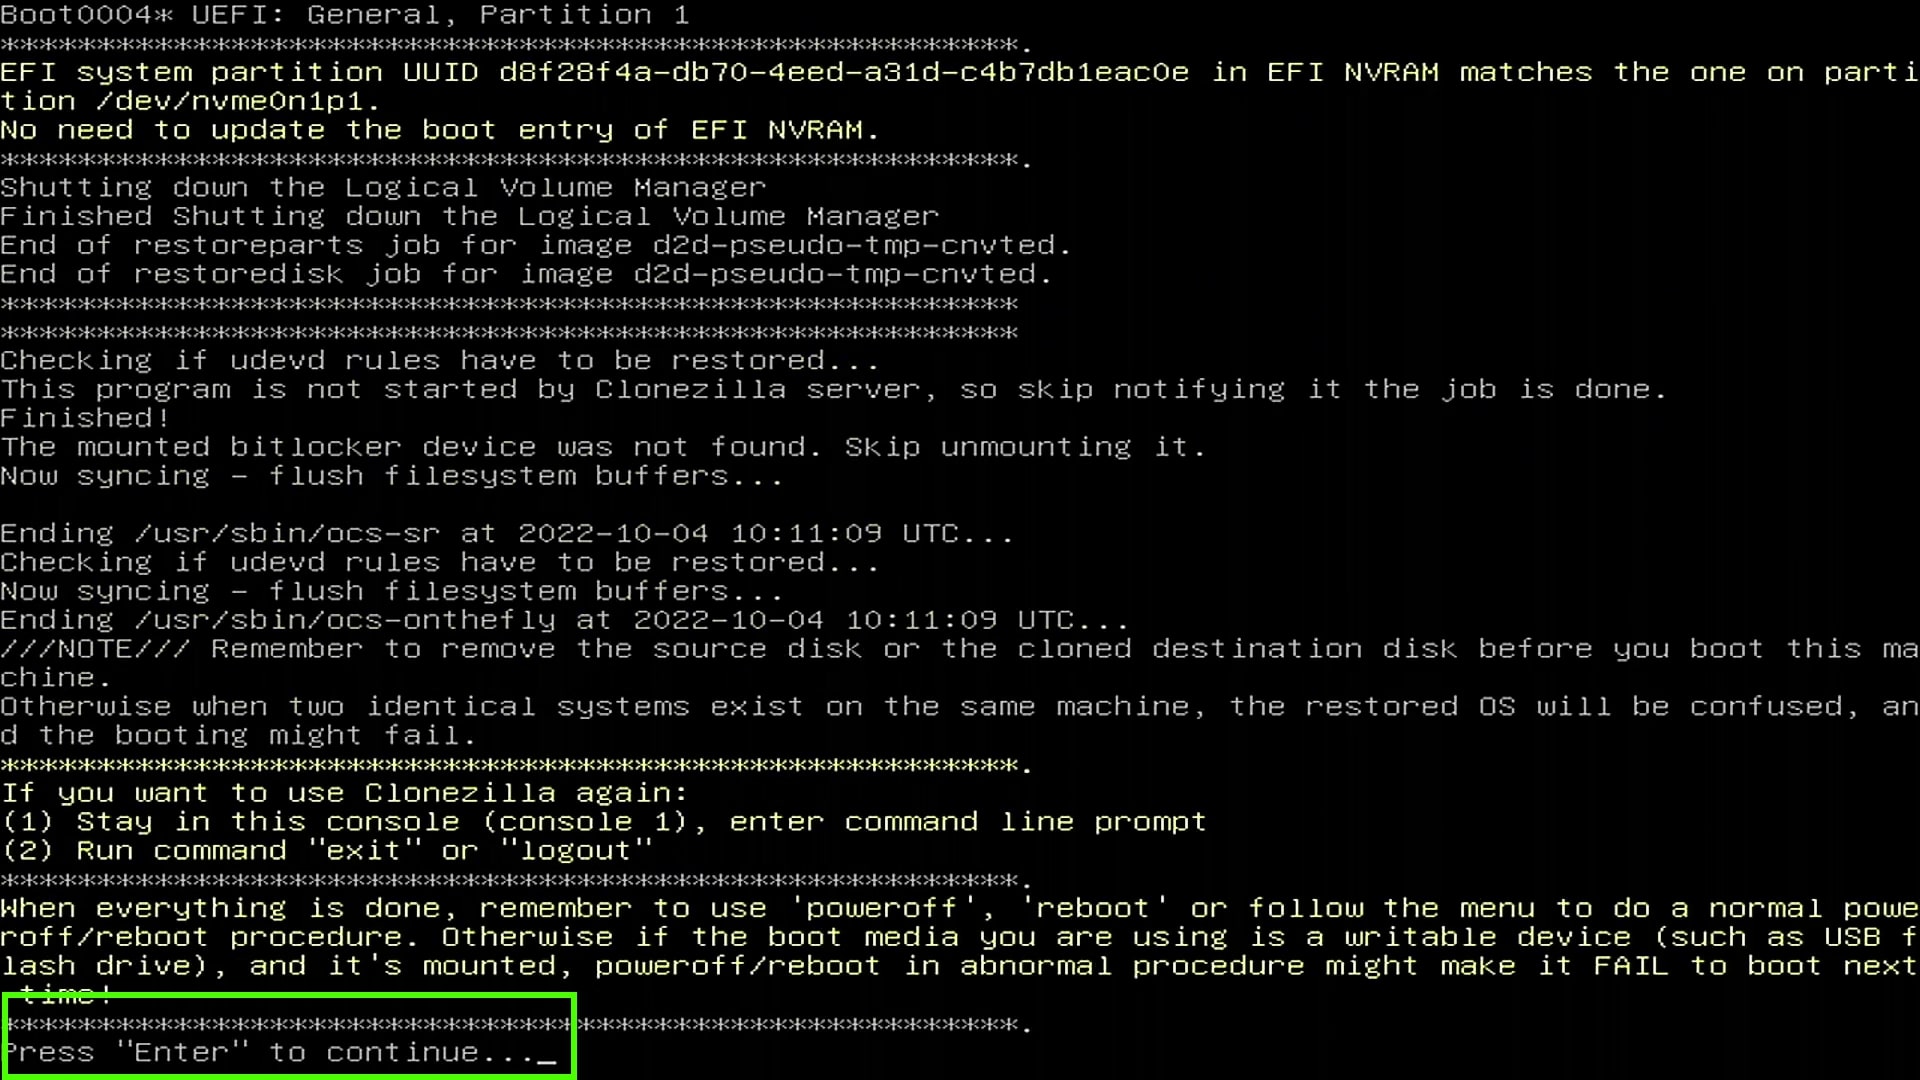
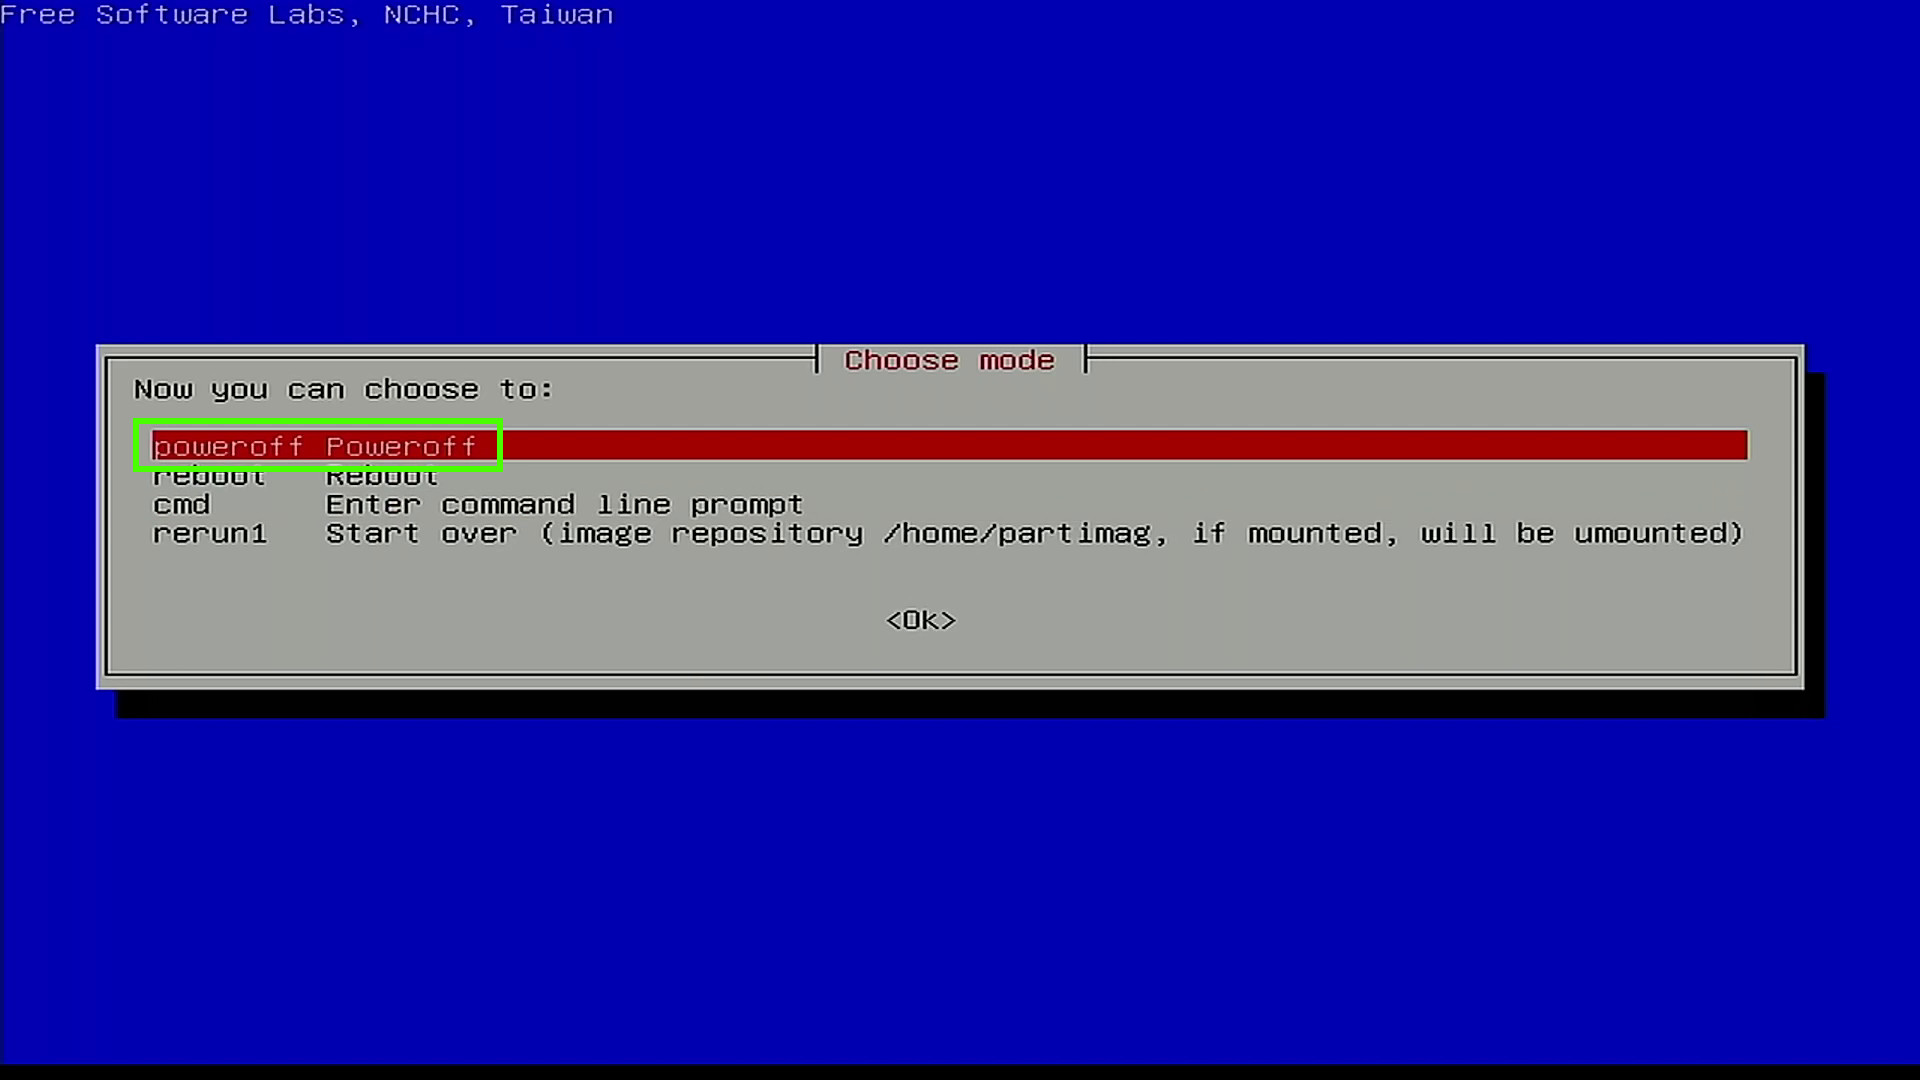
19. Select Power off and press Enter.
Extending Your Partition After Cloning
The migration is complete and now we need to check that our OS boots and extend the partition to use all of the space on the drive. We used Windows 10, but the steps should be the same in Windows 11.
1. Swap in the new drive if you are not keeping both drives in the same computer.
2. Power on the computer and via the BIOS set the new drive as the boot drive. This is different for every machine, please refer to the motherboard manual
3. Boot up, in our case to Windows.
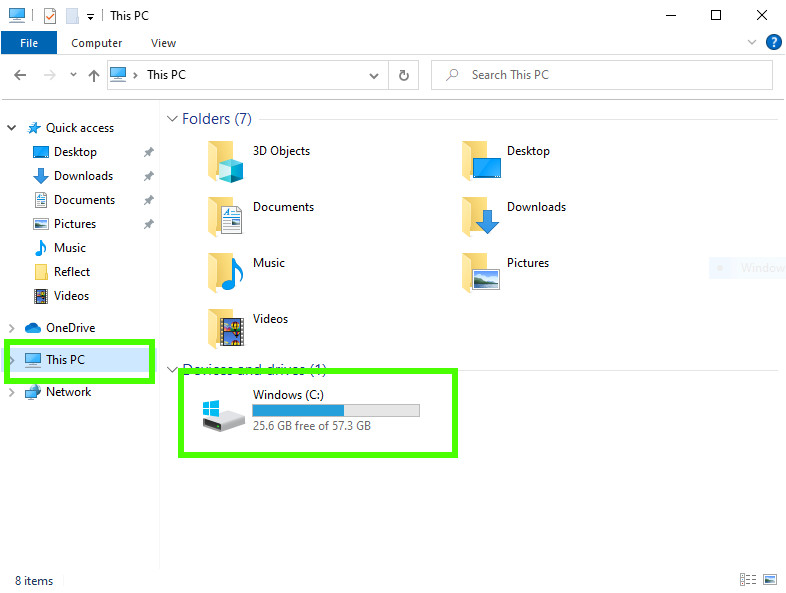
4. Open the File Manager and click on This PC. We need to extend the partition to make full use of the NVMe drive’s capacity.
5. Download and install MiniTool Partition Wizard Free
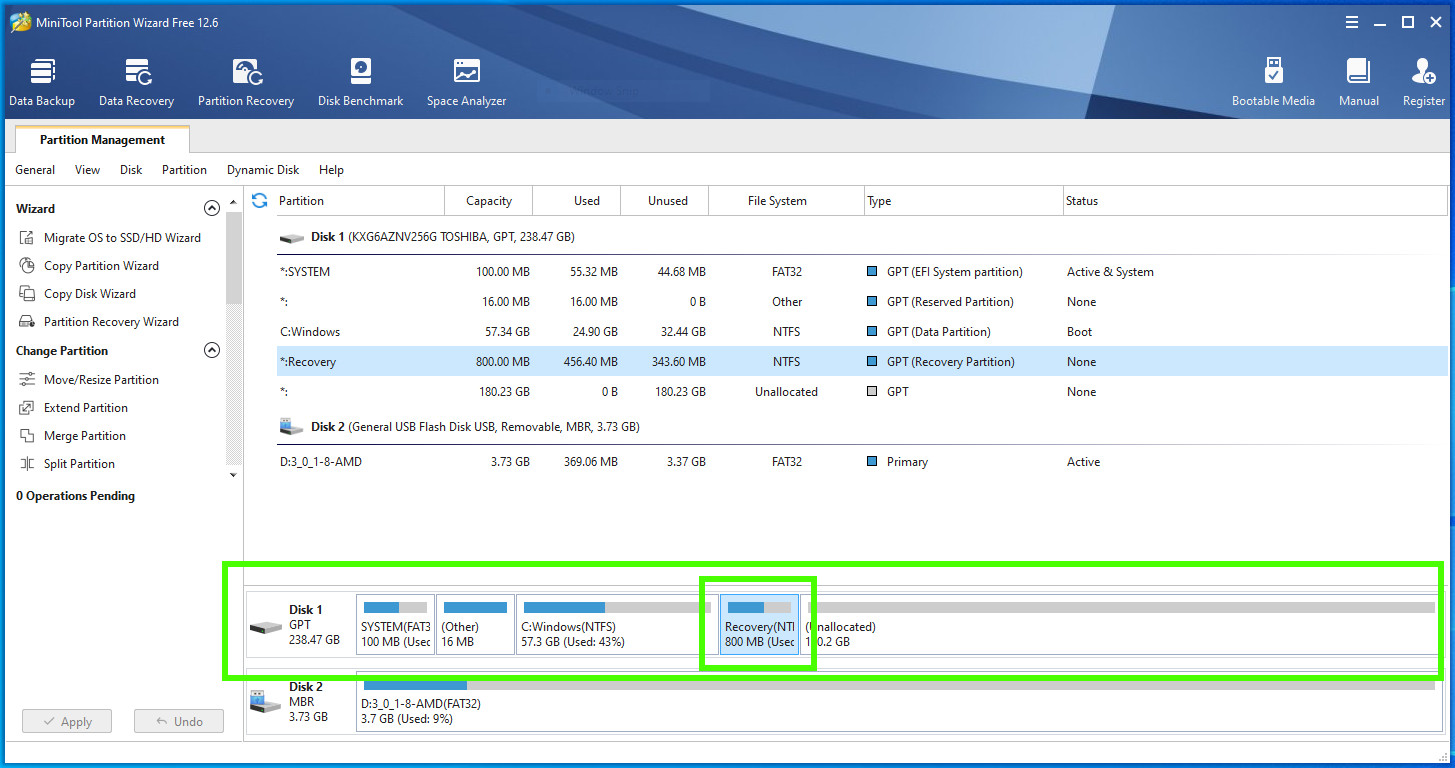
6. Open MiniTool and click on the recovery partition. We don’t need this partition and it prevents us from using the full capacity of the drive. You may not have this partition in the same location, if there is no partition between the Windows install and the unallocated space, you can skip to step
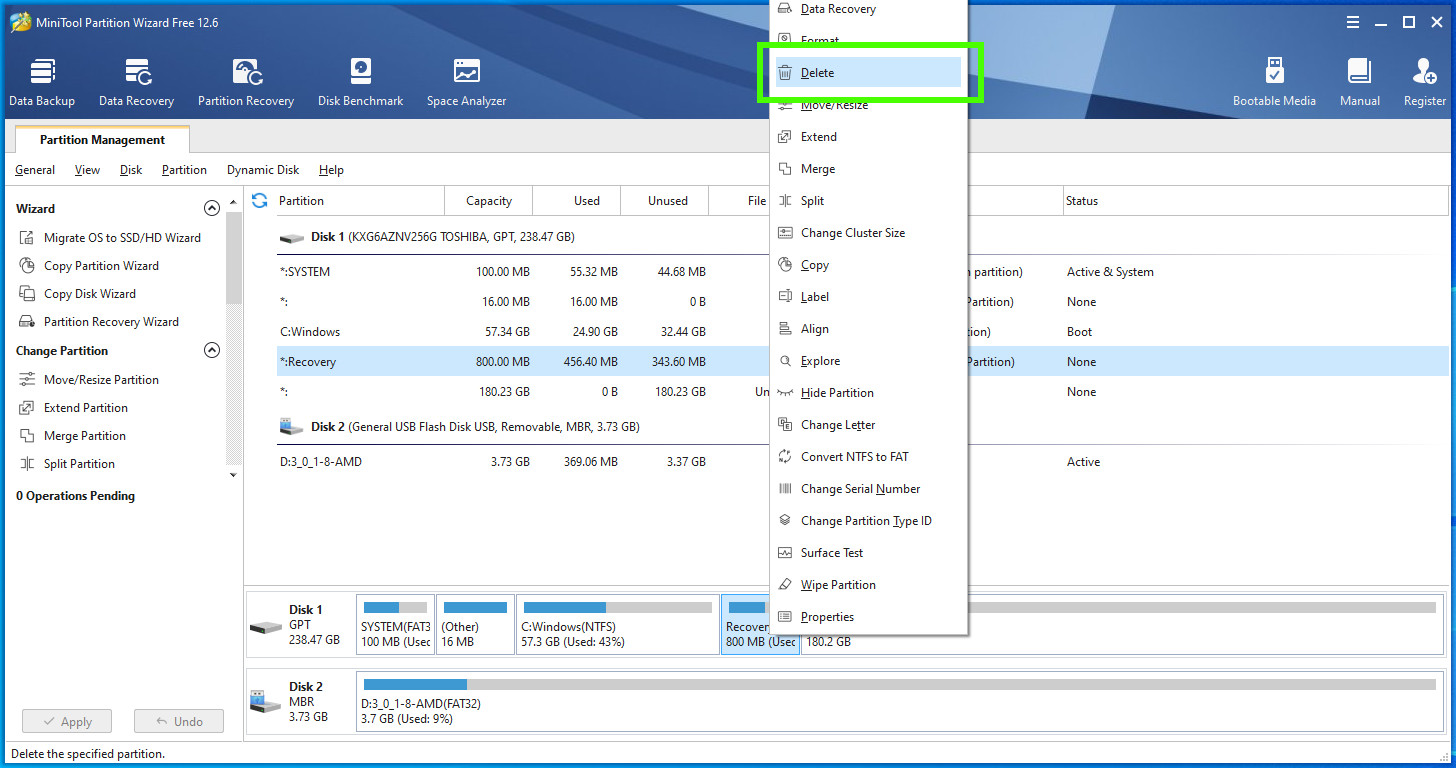
7. Right click on the partition and select Delete.
8. Click Apply to delete the recovery partition.
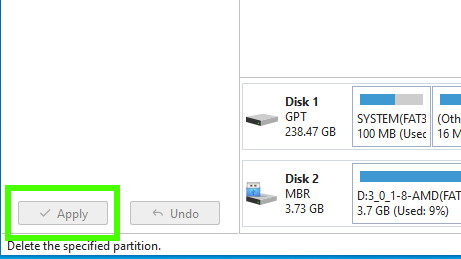
9. Click on the Windows partition.

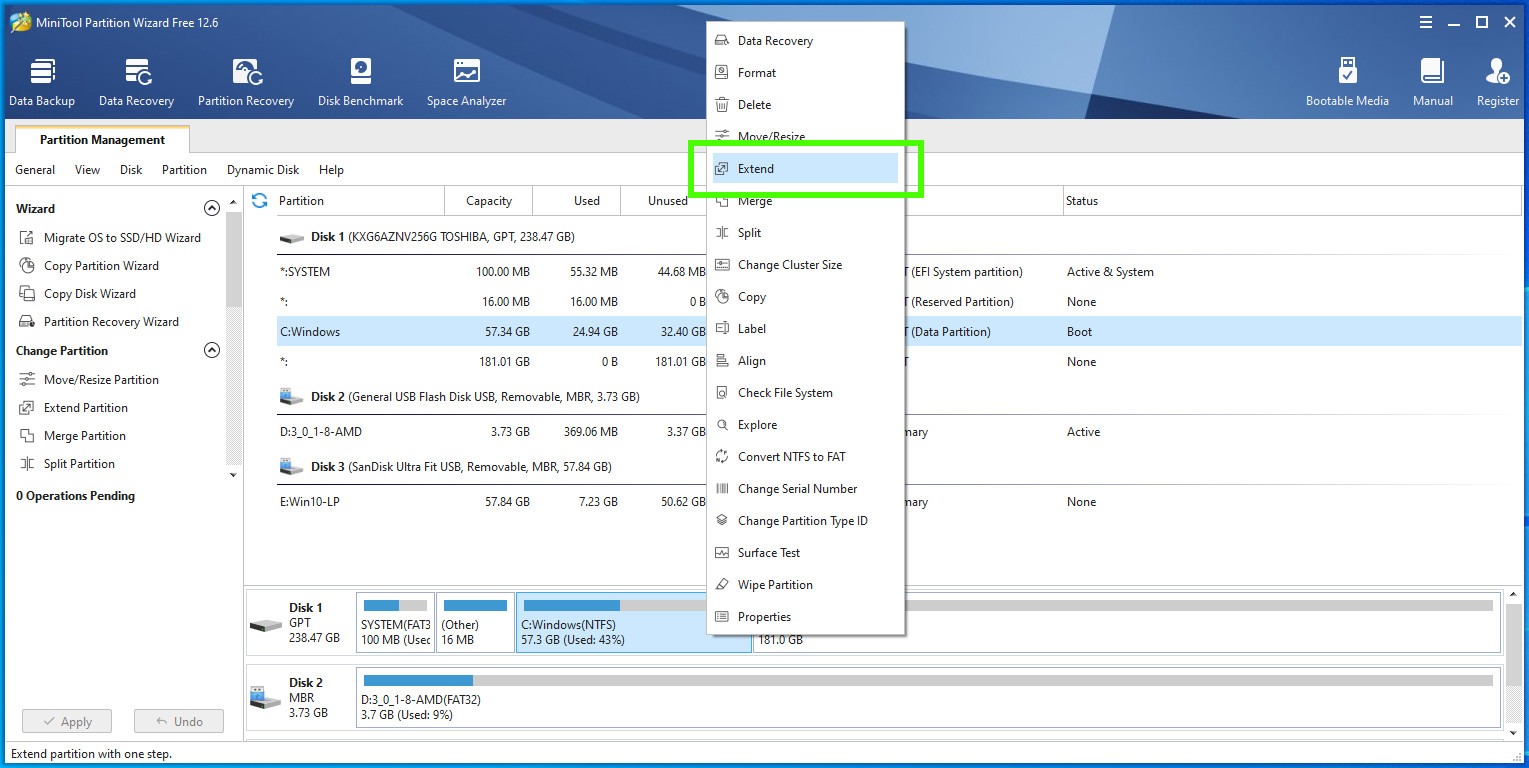
10. Right click on the partition and select Extend.
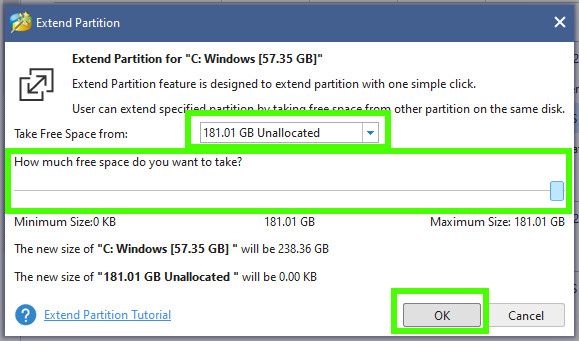
11. Select the unallocated space, and then use the slider to select how much space you need. Click OK. We chose to use the maximum capacity of the drive.
12. Click Apply to extend the partition.

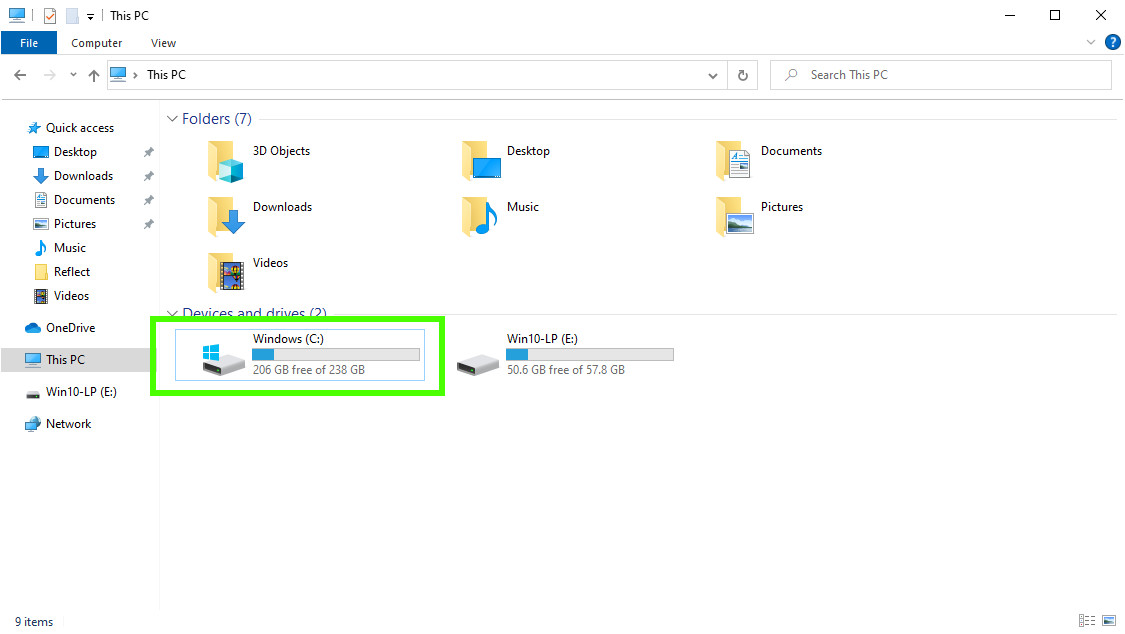
13. Go back to the File Manager, This PC to check that the drive capacity is now increased.
Frequently Asked Questions
🔍 What is the easiest way to clone a hard drive to an SSD?
The absolute easiest way to clone a hard drive to an SSD is by using a device which supports offline cloning. Using a device like this, you can effortlessly clone one drive to another without connecting to a PC. Typically these are made for 2.5 and 3.5 inch drives. Should you need to clone to an M.2 SATA or NVMe drive you can also pick up an offline cloning tool that performs the same functions, but targeted for M.2 devices. Or there is this model which covers 2.5, 3.5 inch SATA and M.2 SATA / NVMe.
Another easy method to clone a hard drive is to use USB 3 to SATA / M.2 NVMe and software such as Clonezilla on a spare laptop. You can then clone the source drive to the new target drive while continuing to work on your main PC. If you have spare M.2 or SATA ports, you could also clone the drives on your PC using these faster interfaces.
🔍 Step-by-Step guide to clone a hard drive in Windows 11
To clone a drive in Windows 11, you’ll need software that runs on Windows. AOMEI Backupper will run in the OS and you can clone a drive by selecting Clone > Disk Clone and then select the source disk (the drive that you want to clone) and then the destination drive (the new drive). If you are migrating from a mechanical drive to an SSD, make sure to select “Align partition to optimize the SSD”. All you need to do now is click on Start Clone and wait.
When the cloning is complete, power off the machine and remove the source drive, replace it with the new cloned drive. Power up and enter the UEFI / BIOS and select the new drive as the first drive in the boot order. Boot into Windows and check that everything is working as expected.
🔍 Best Free hard drive cloning software
The best free hard drive cloning software is Clonezilla. The bootable Linux OS can directly clone between drives connected via SATA, M.2 NVMe and USB. Should you wish to backup a drive, Clonezilla can image the source drive to a disk image for archive purposes.
To clone a drive in Windows, you can use AOMEI Backupper which can backup an entire disk, partitions or files via an easy to use application in the Windows operating system.AOMEI Backupper can safely clone drives, skipping bad sectors on the source drive.
🔍 What hardware do I need to connect two drives for cloning?
At the most basic level, you will need connections for the drive interfaces on your computer. All of the best motherboards come with M.2 NVMe slots, many come with multiple slots that provide a fast connection between the two drives. Most motherboards also come with legacy SATA connections. If you are migrating your system from a smaller drive to larger, then using these connections is quick and convenient.
You can also use USB 3 to connect adapters for M.2 SATA, NVMe and SATA devices. The drives appear as regular drives in your operating system and the cloning software can mount and clone the drives without the need to access the inner workings of your PC.
🔍 How can I troubleshoot a failed hard drive clone?
A failed clone will often exhibit issues during the cloning process. Slow cloning speeds, read / write errors, bad sectors. In situations like this, it is often the source drive that is at fault. Instruct the software to ignore bad sectors.
If the cloned drive exhibits issues in use, such as not booting or “Operating system not found”, check that the drive has been selected as the boot drive in your UEFI / BIOS. You should also check that the bootloader is not corrupted.

Les Pounder is an associate editor at Tom's Hardware. He is a creative technologist and for seven years has created projects to educate and inspire minds both young and old. He has worked with the Raspberry Pi Foundation to write and deliver their teacher training program "Picademy".
-
USAFRet CloneZilla used to be good.Reply
However, it does NOT work when changing from a larger drive to a small. Such as HDD to SSD.
In CZ, the target drive must be the same or larger than the source.
Current tools are much easier to work with.
They only take into account the actual data size, not the physical drive size.
-----------------------------
Specific steps for a successful clone operation:-----------------------------
Verify the actual used space on the current drive is significantly below the size of the new SSD
Both drives must be the same partitioning scheme, either MBR or GPT
Download and install Macrium Reflect (or Samsung Data Migration, if a Samsung target SSD)
If you are cloning from a SATA drive to PCIe/NVMe, you may need to install the relevant driver for this new NVMe/PCIe drive.
Power off
Disconnect ALL drives except the current C and the new SSD
Power up
Verify the system boots with ONLY the current "C drive" connected.
If not, we have to fix that first.
Run the Macrium Reflect (or Samsung Data Migration)
Select ALL the partitions on the existing C drive
If you are going from a smaller drive to a larger, by default, the target partition size will be the same as the Source. You probably don't want that
You can manipulate the size of the partitions on the target (larger)drive
Click on "Cloned Partition Properties", and you can specify the resulting partition size, to even include the whole thing
Click the 'Clone' button
Wait until it is done
When it finishes, power off
Disconnect ALL drives except for the new SSD. This is not optional.
This is to allow the system to try to boot from ONLY the SSD
(swapping cables is irrelevant with NVMe drives, but DO disconnect the old drive for this next part)
Swap the SATA cables around so that the new drive is connected to the same SATA port as the old drive
Power up, and verify the BIOS boot order
If good, continue the power up
It should boot from the new drive, just like the old drive.
Maybe reboot a time or two, just to make sure.
If it works, and it should, all is good.
Later, reconnect the old drive and wipe all partitions on it.
This will probably require the commandline diskpart function, and the clean command.
Ask questions if anything is unclear.
----------------------------- -
USAFRet Further, if you are wanting to do this with an M.2 drive, and you only have 1x M.2 port.Reply
---------------------------------------------
1x m.2 slot with an Image
Assuming you have another drive (any type of drive) with sufficient free space to hold the entirety of your current m.2 drive:
Download and install Macrium ReflectRun that, and create a Rescue CD or USB (you'll use this later). "Other Tasks". Create this on a small USB flash drive or DVD.
In the Macrium client, create an Image to some other drive. External USB HDD, maybe. Select all partitions. This results in a file of xxxx.mrimage
When done, power OFF.
Swap the 2 drives
Boot up from the Rescue USB you created earlier.
Restore (on the toolbar), and tell it where the Image is that you created in step 3, and which drive to apply it to...the new m.2
Go, and wait until it finishes.
That's all...this should work. -
Anyware Or, if you have a Samsung SSD, you can use their simple Samsung Data Migration tool. I don't know if it's specific to Samsung SSDs, but that's the only time I've used it. https://semiconductor.samsung.com/consumer-storage/support/tools/Reply -
USAFRet Reply
Yes.Anyware said:Or, if you have a Samsung SSD, you can use their simple Samsung Data Migration tool. I don't know if it's specific to Samsung SSDs, but that's the only time I've used it. https://semiconductor.samsung.com/consumer-storage/support/tools/
The Samsung Data Migration tool is only for cloning TO a Samsung target SSD.
(and the SDM is mentioned in my steps above) -
newtechldtech ReplyUSAFRet said:
Ask questions if anything is unclear.
-----------------------------
Network cloning please , USB cloning is trivial ... -
USAFRet Reply
Details of what you are wanting to do?newtechldtech said:Network cloning please , USB cloning is trivial ...
Recovering an Image over the network is also trivial. -
saunupe1911 Reply
Yeah but I'm sticking only with Samsung drives from now on!USAFRet said:Yes.
The Samsung Data Migration tool is only for cloning TO a Samsung target SSD.
(and the SDM is mentioned in my steps above)
Samsung Magician is super easy and all these other tools are charging to do a true clone.
Only hard drive to ever die on me within the past 10 years was a Sabrent Rocket...never again smh -
WrongRookie ReplySkyNetRising said:LOL.
Tutorial, how to make cloning so complicated, to scare you off completely.
I know..getting a good cloning software that's free is pretty easy. I'm sure Macrium or the software a lot of SSD drives offer do cloning pretty easily.
Not sure what they were getting at using clonezilla.. -
Persister Does Windows see this as using same serial # OS on multiple pc/s? It might not be in fact, but certainly could be.Reply