How To Use Dual Cameras on the Raspberry Pi 5
‘Focus’ on taking great shots!
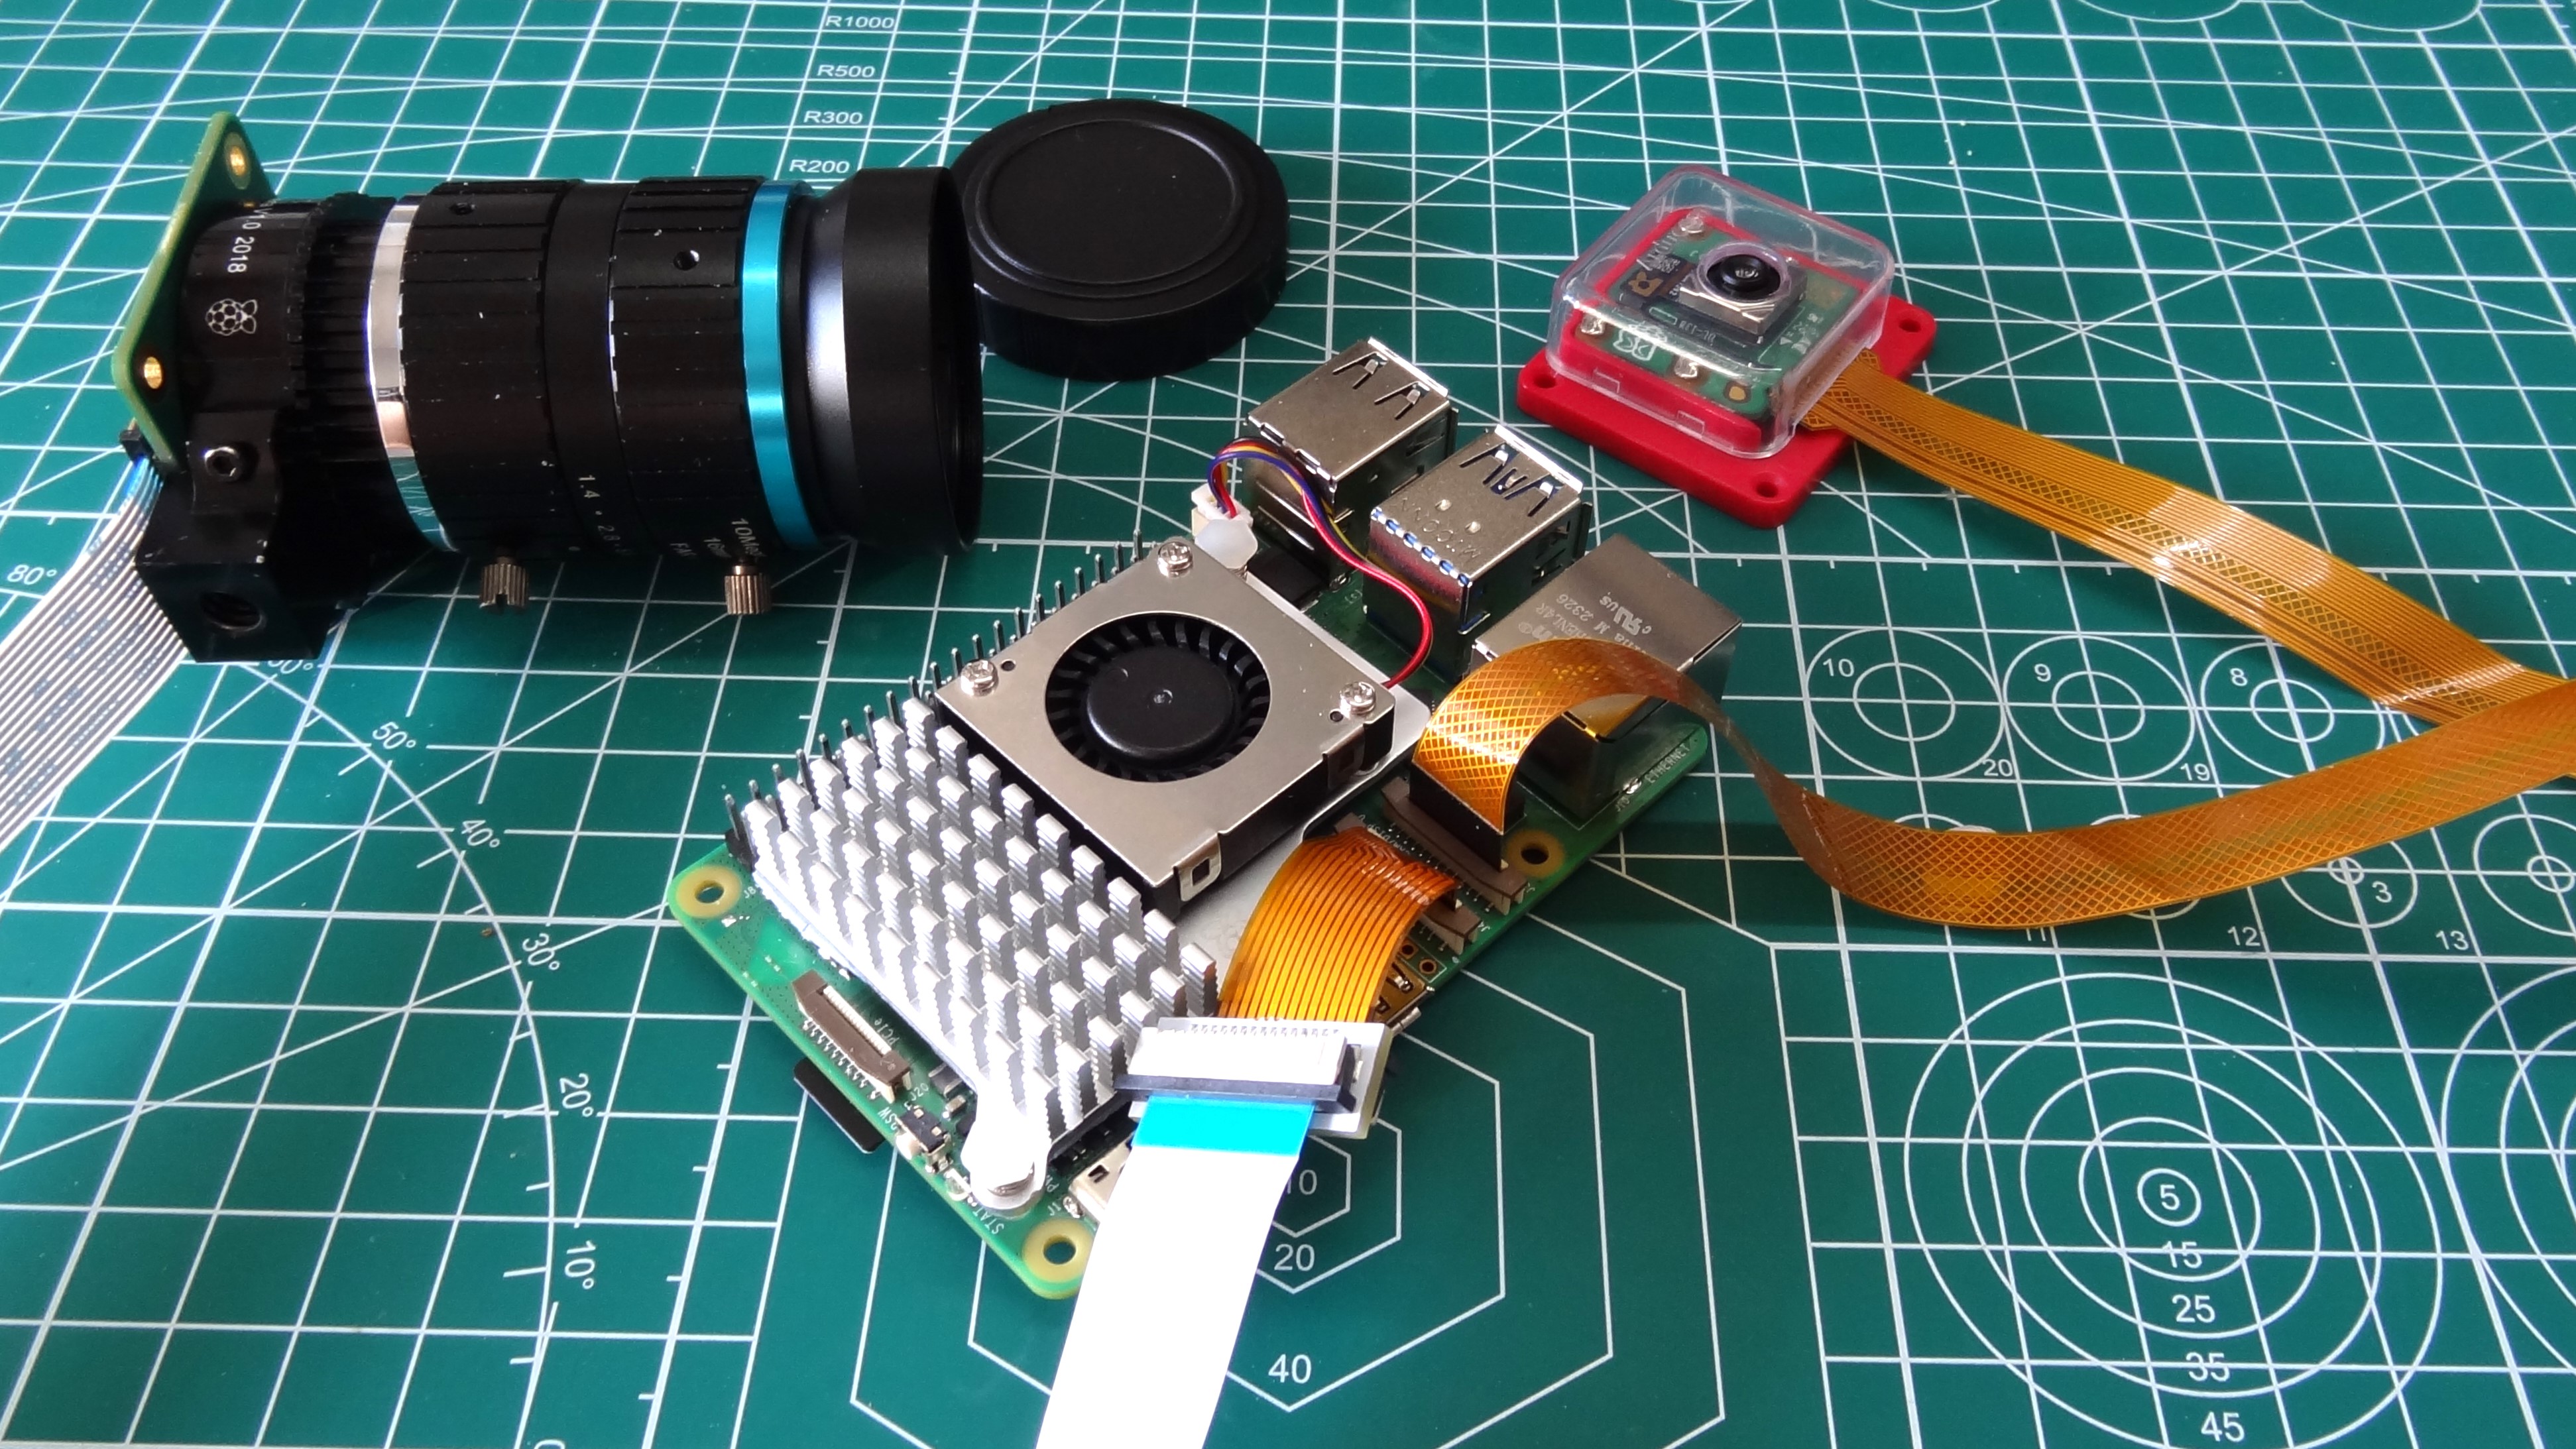
The new Raspberry Pi 5 introduces dual camera connectors for the first time on a flagship Raspberry Pi. This means we can connect two cameras (or a camera and screen, or two screens) to the Raspberry Pi 5. But how do we control the cameras?
Introduced in an earlier Raspberry Pi OS release, libcamera and Picamera2 are two different ways to control cameras. Libcamera is focused on using the camera via the terminal, whereas Picamera2 is all about Python.
In this how to we’ll learn how to use both to take pictures with dual cameras.
For This Project You Will Need
- Raspberry Pi 5
- 2 x Raspberry Pi Cameras
- Latest Raspberry Pi OS “Bookworm”
Connecting the Cameras
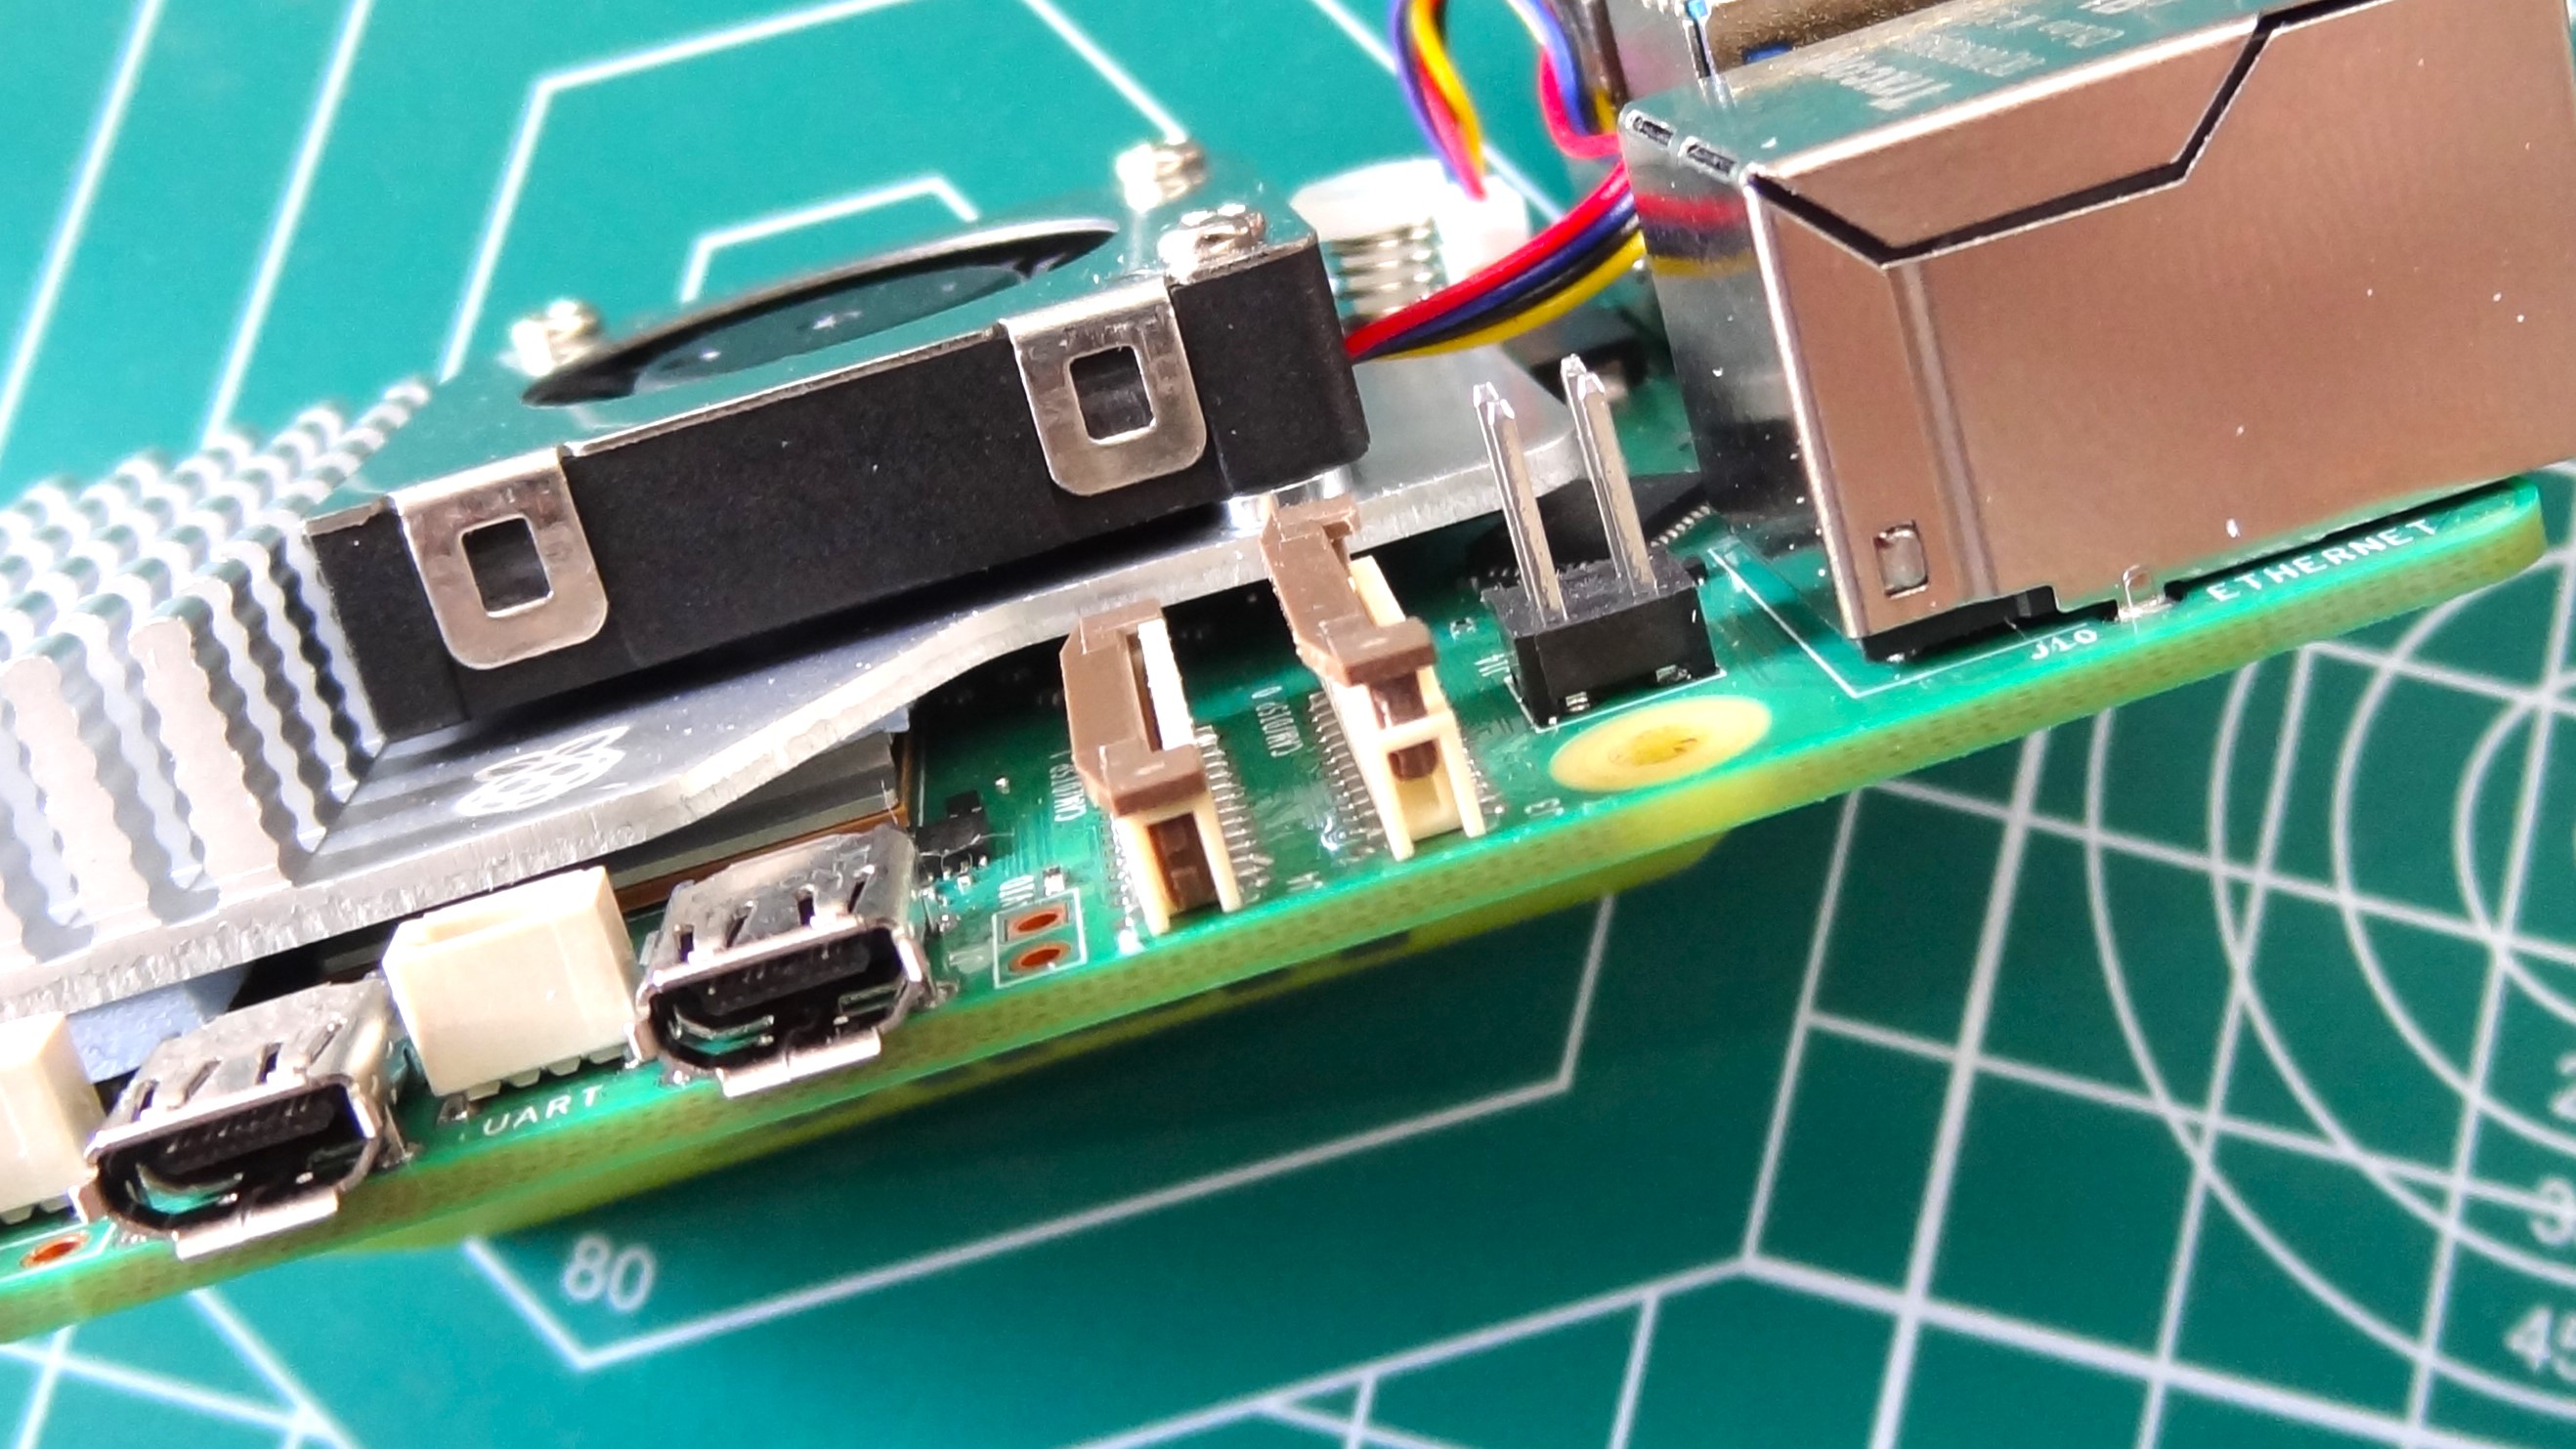
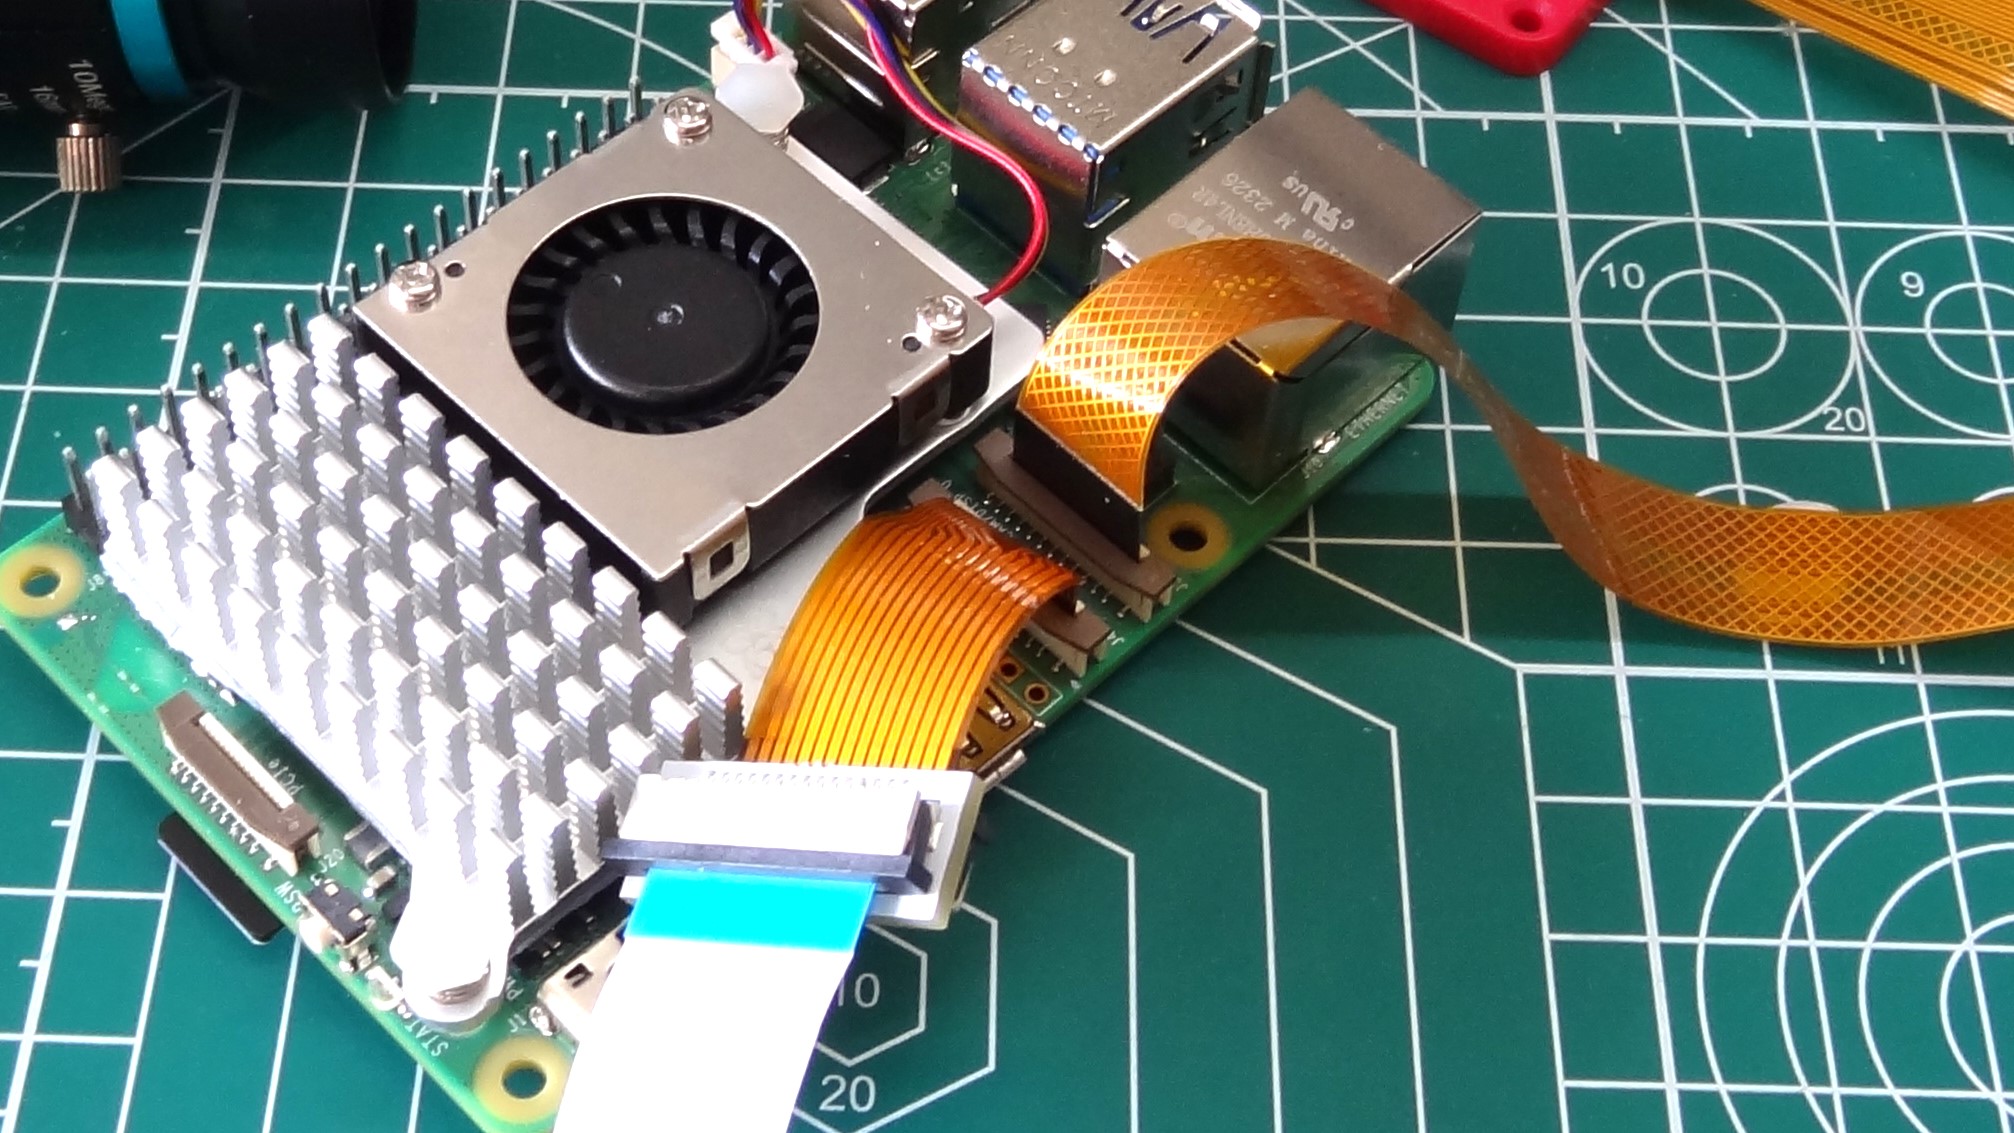
The Raspberry Pi 5 introduces multiple camera (CSI) connectors to the Raspberry Pi form factor. The Raspberry Pi Compute Module IO boards have long supported multiple cameras, but the Raspberry Pi 5 is the first “Model B” board to support them.
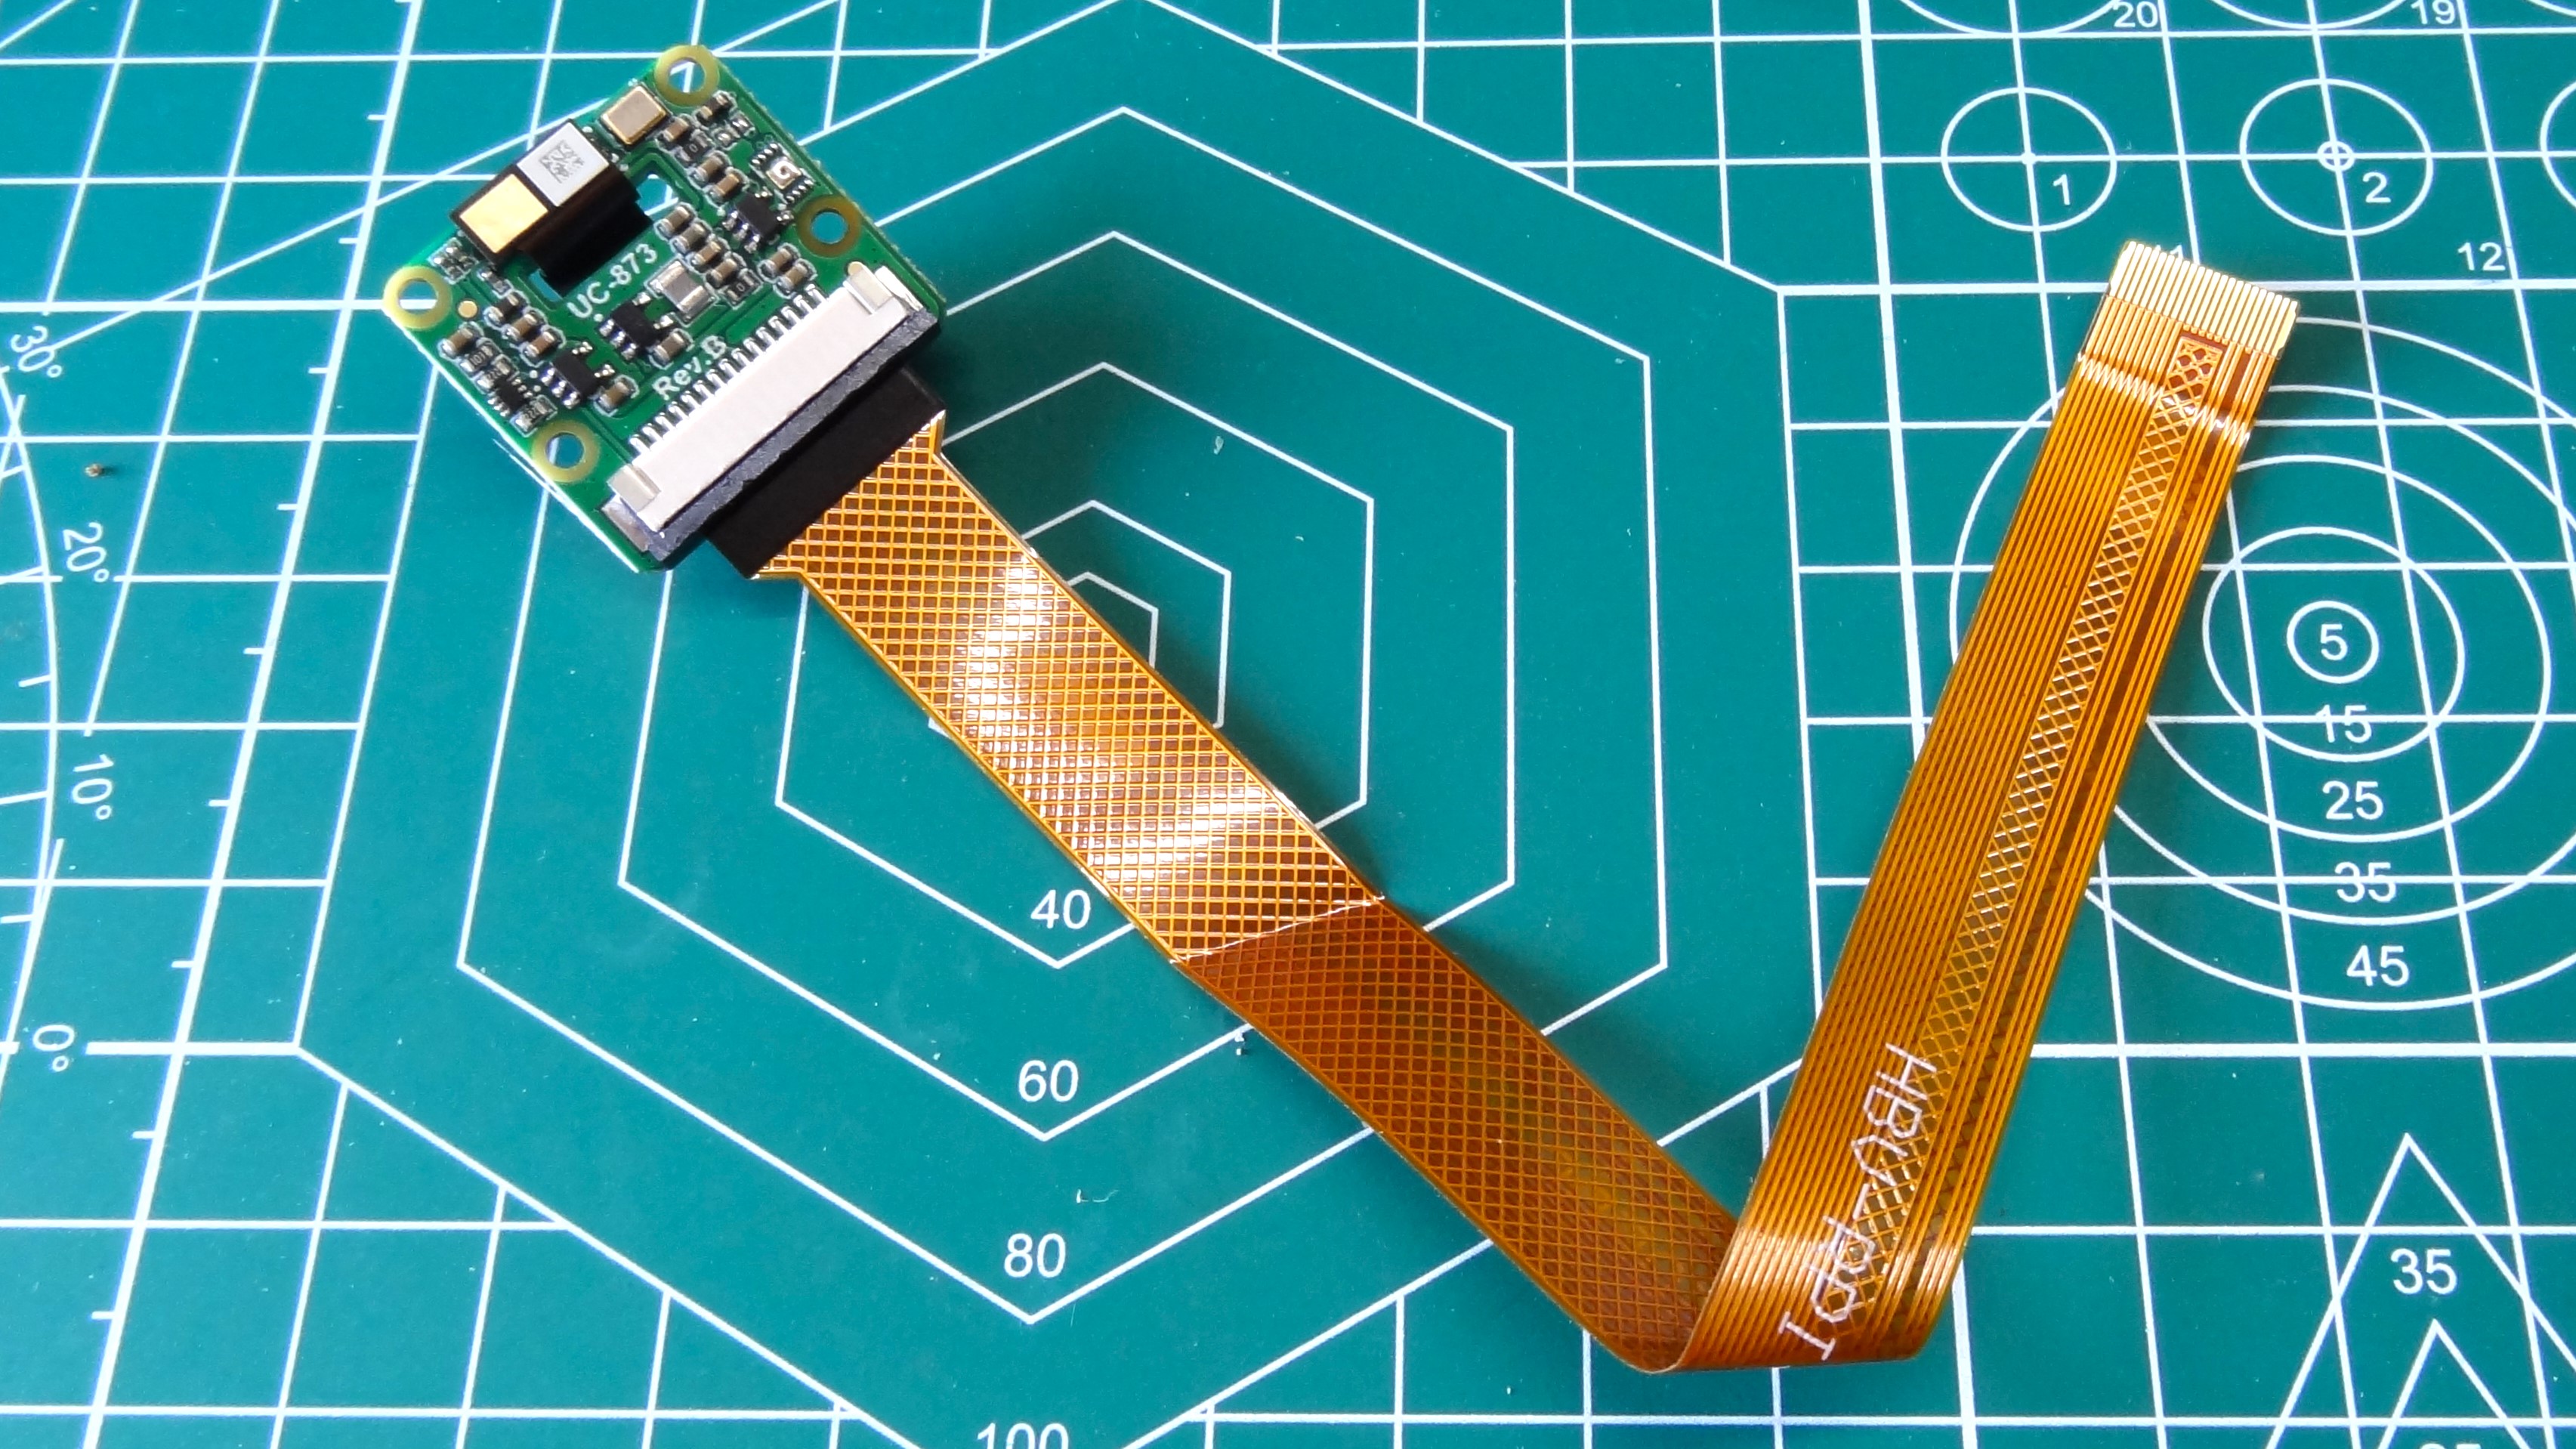
To facilitate the dual connectors, the Raspberry Pi 5 uses a high-density 22-pin flat-flex cables instead of the usual 22-pin cable. These smaller connectors were introduced with the Raspberry Pi Zero and adapters can be easily sourced to connect your cameras. All official Raspberry Pi cameras use the wider 22-pin connector so you will need to use an adapter or an adapted cable.
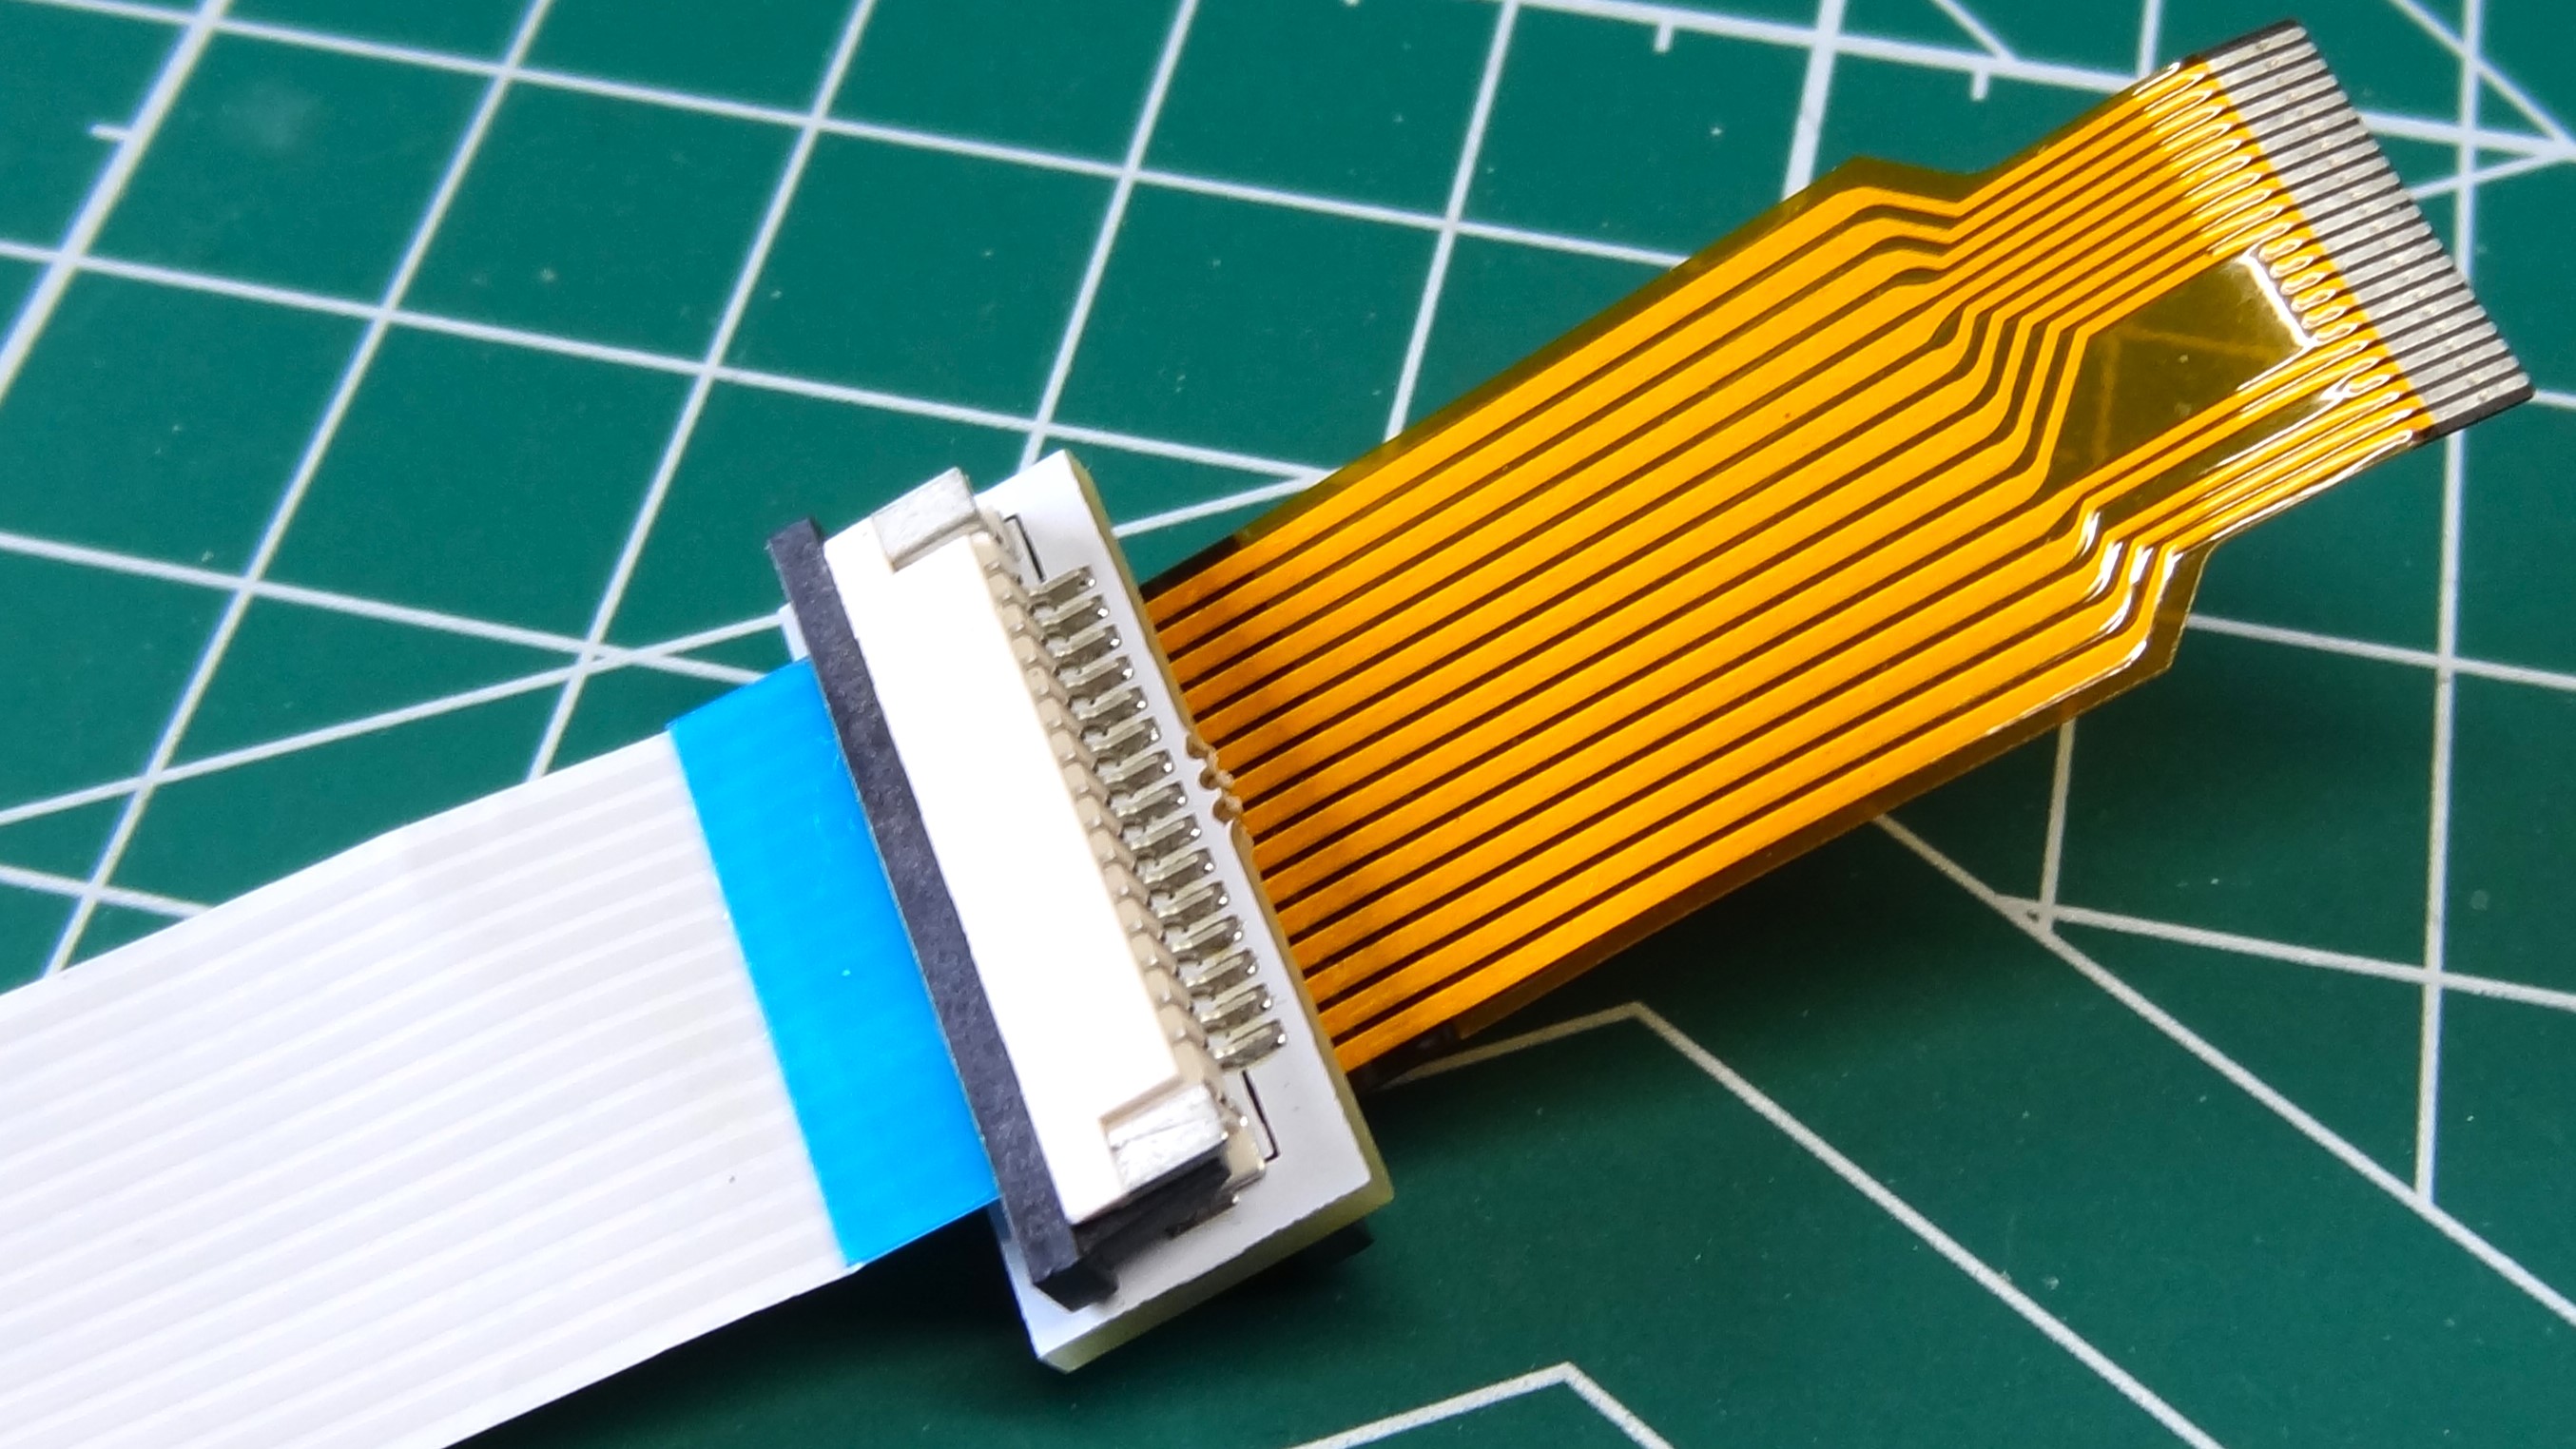
Adapted cables essentially condense the 22-pin connection down to the higher density 22-pin. They are cheap and come in multiple lengths. We picked up a handful from Amazon for less than $10.
This adapter, from Pimoroni, couples a 22-pin flat flex cable to the higher density 22-pin cable. If you have many 22-pin cables, then using this adapter with a short high density 22-pin cable will offer a flexible means to connect your camera.
Get Tom's Hardware's best news and in-depth reviews, straight to your inbox.
Connecting the Cameras to the Raspberry Pi 5
1. Power off the Raspberry Pi 5 and remove the power cable. Connecting / disconnecting cameras should be done while the Raspberry Pi 5 is powered off. Otherwise you risk damaging the Pi and the camera.
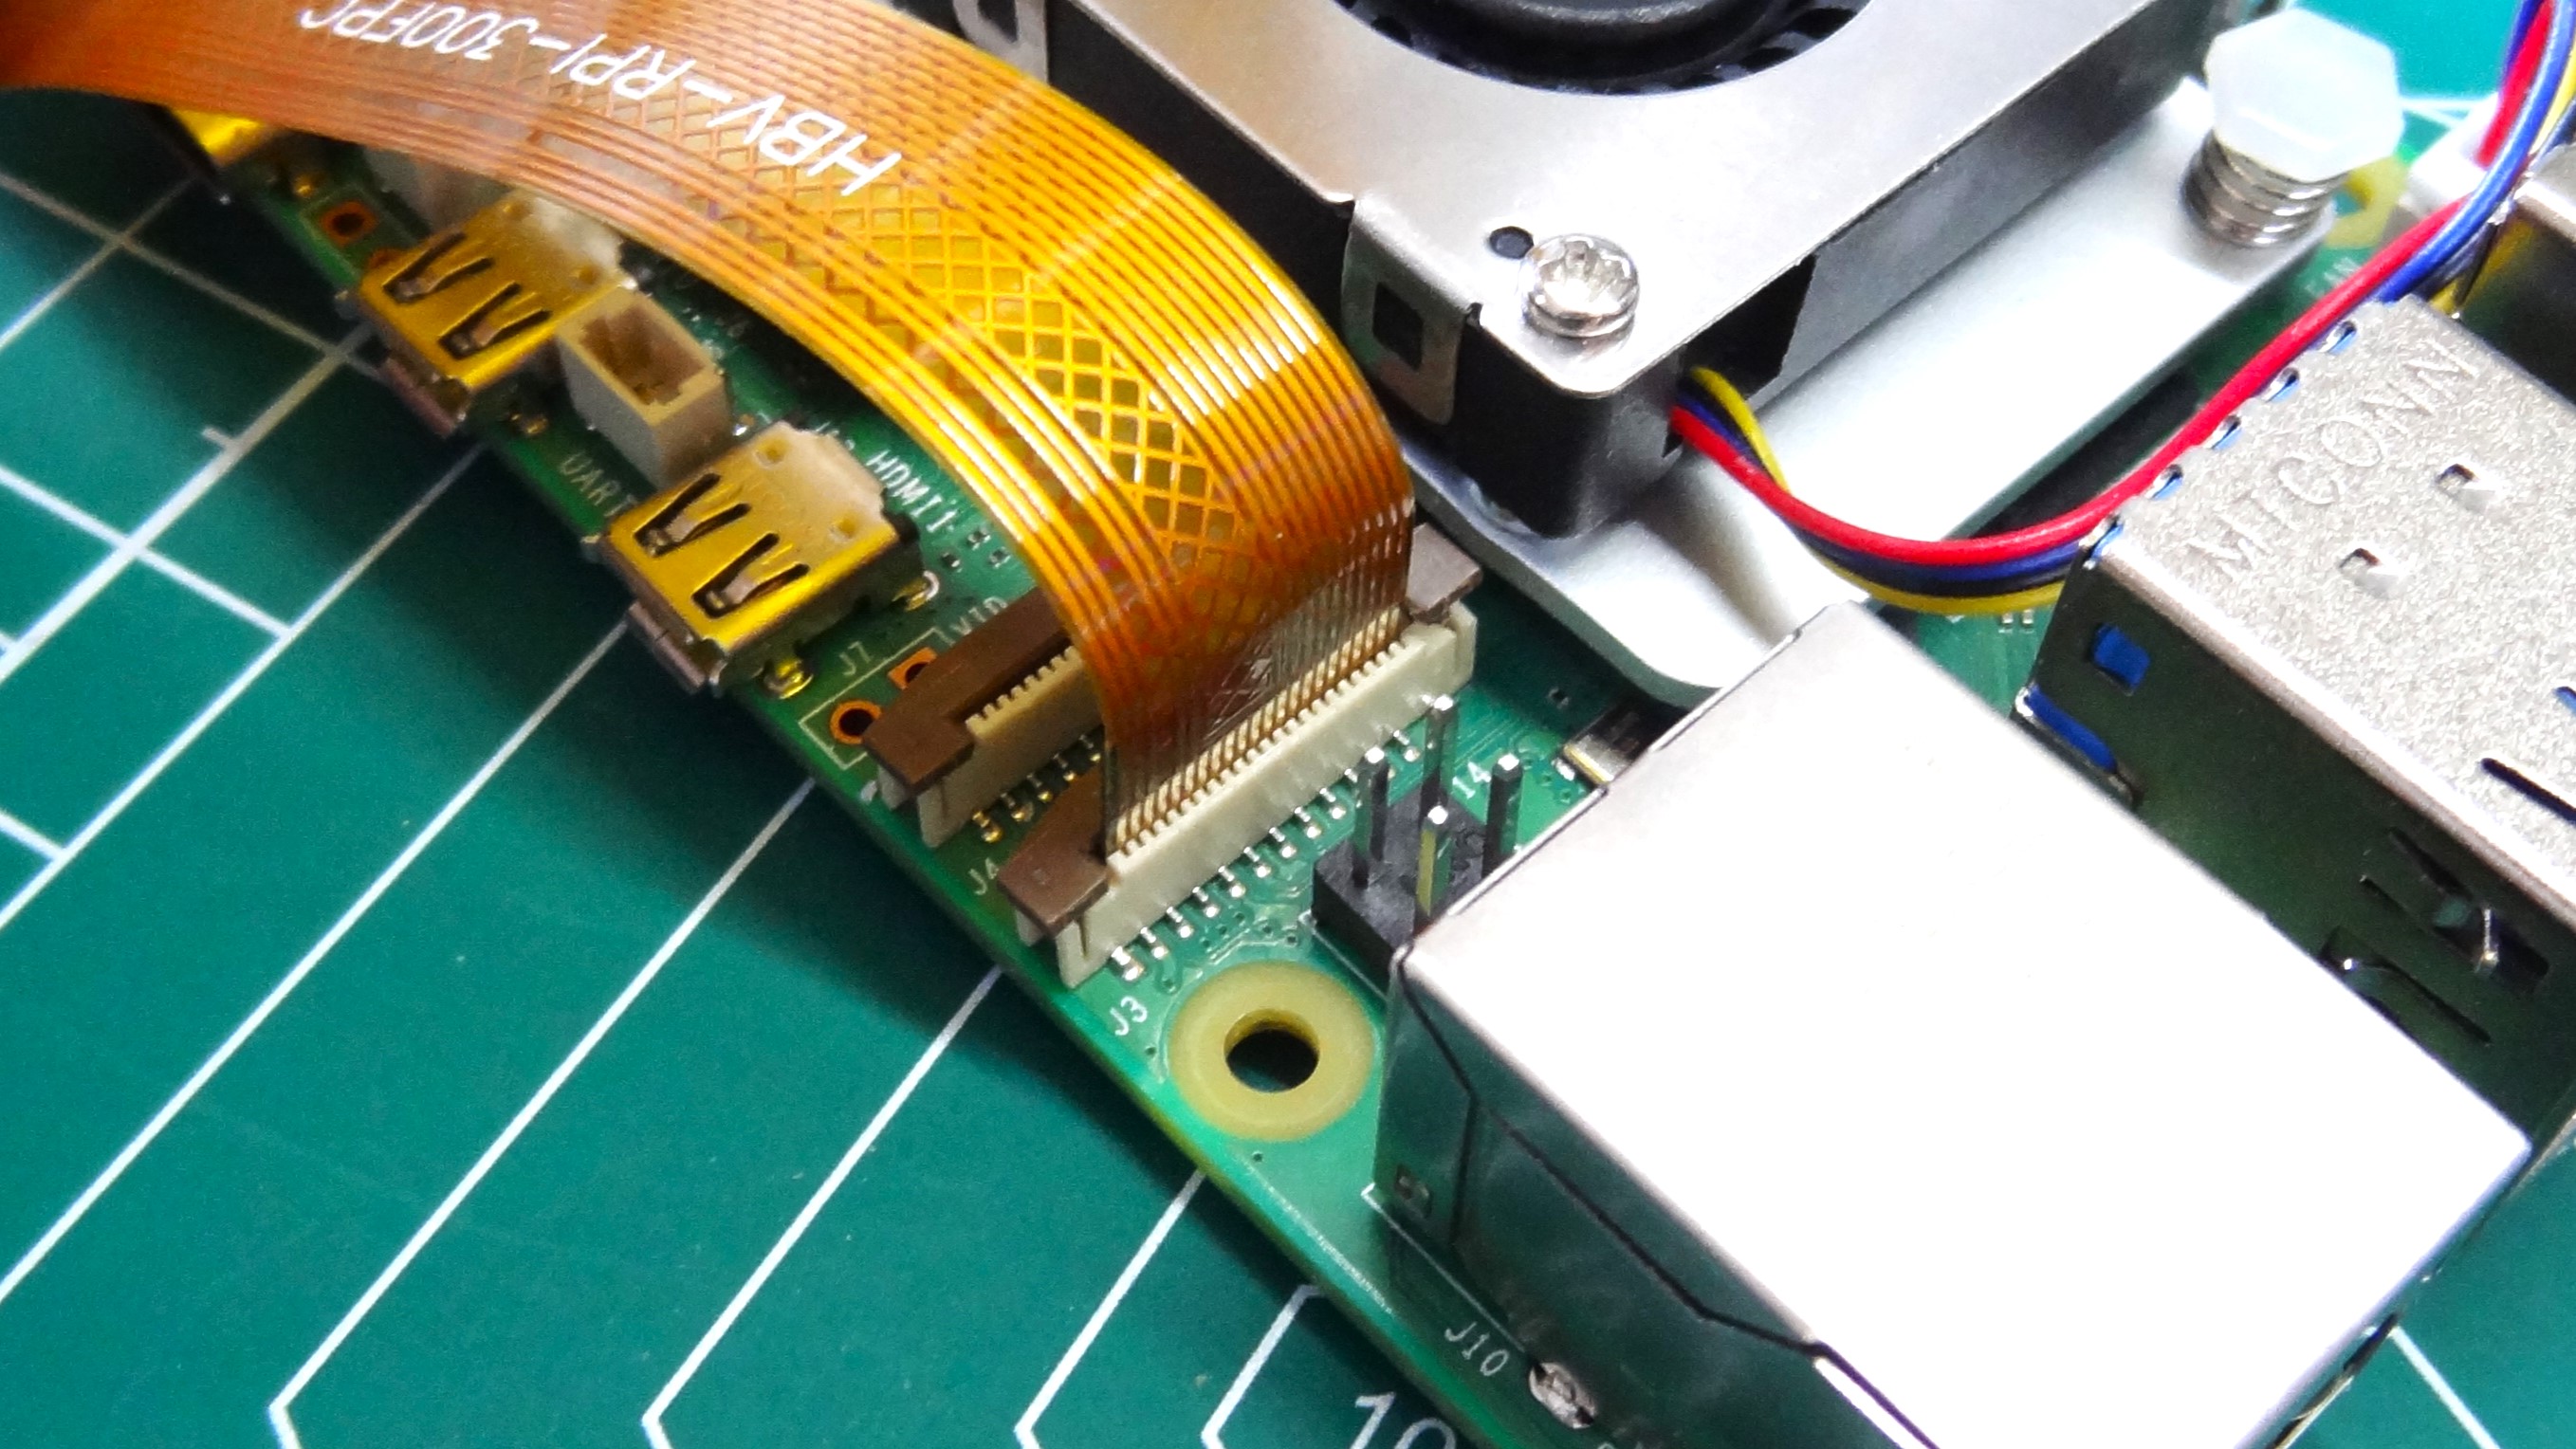
2. Using a fingernail or plastic tool, gently lift the retaining clips. The clip is fragile so take care! It will move upwards and then stop, and lean to one side.
3. Insert the 15-pin flat flex cable of the cameras into the connectors. Note that the gold pins of the cable face the Ethernet port.
4. Power up the Raspberry Pi 5 to the desktop. Ensure that the camera is not touching the Raspberry Pi 5, especially the GPIO.
Testing the Cameras With Libcamera
We now have two cameras connected to our Raspberry Pi 5. One at CAM0, and the other at CAM1. Our first goal is to check that the cameras are working properly and for that we will use the libcamera terminal command to check that we can use the cameras and that we can see the output.
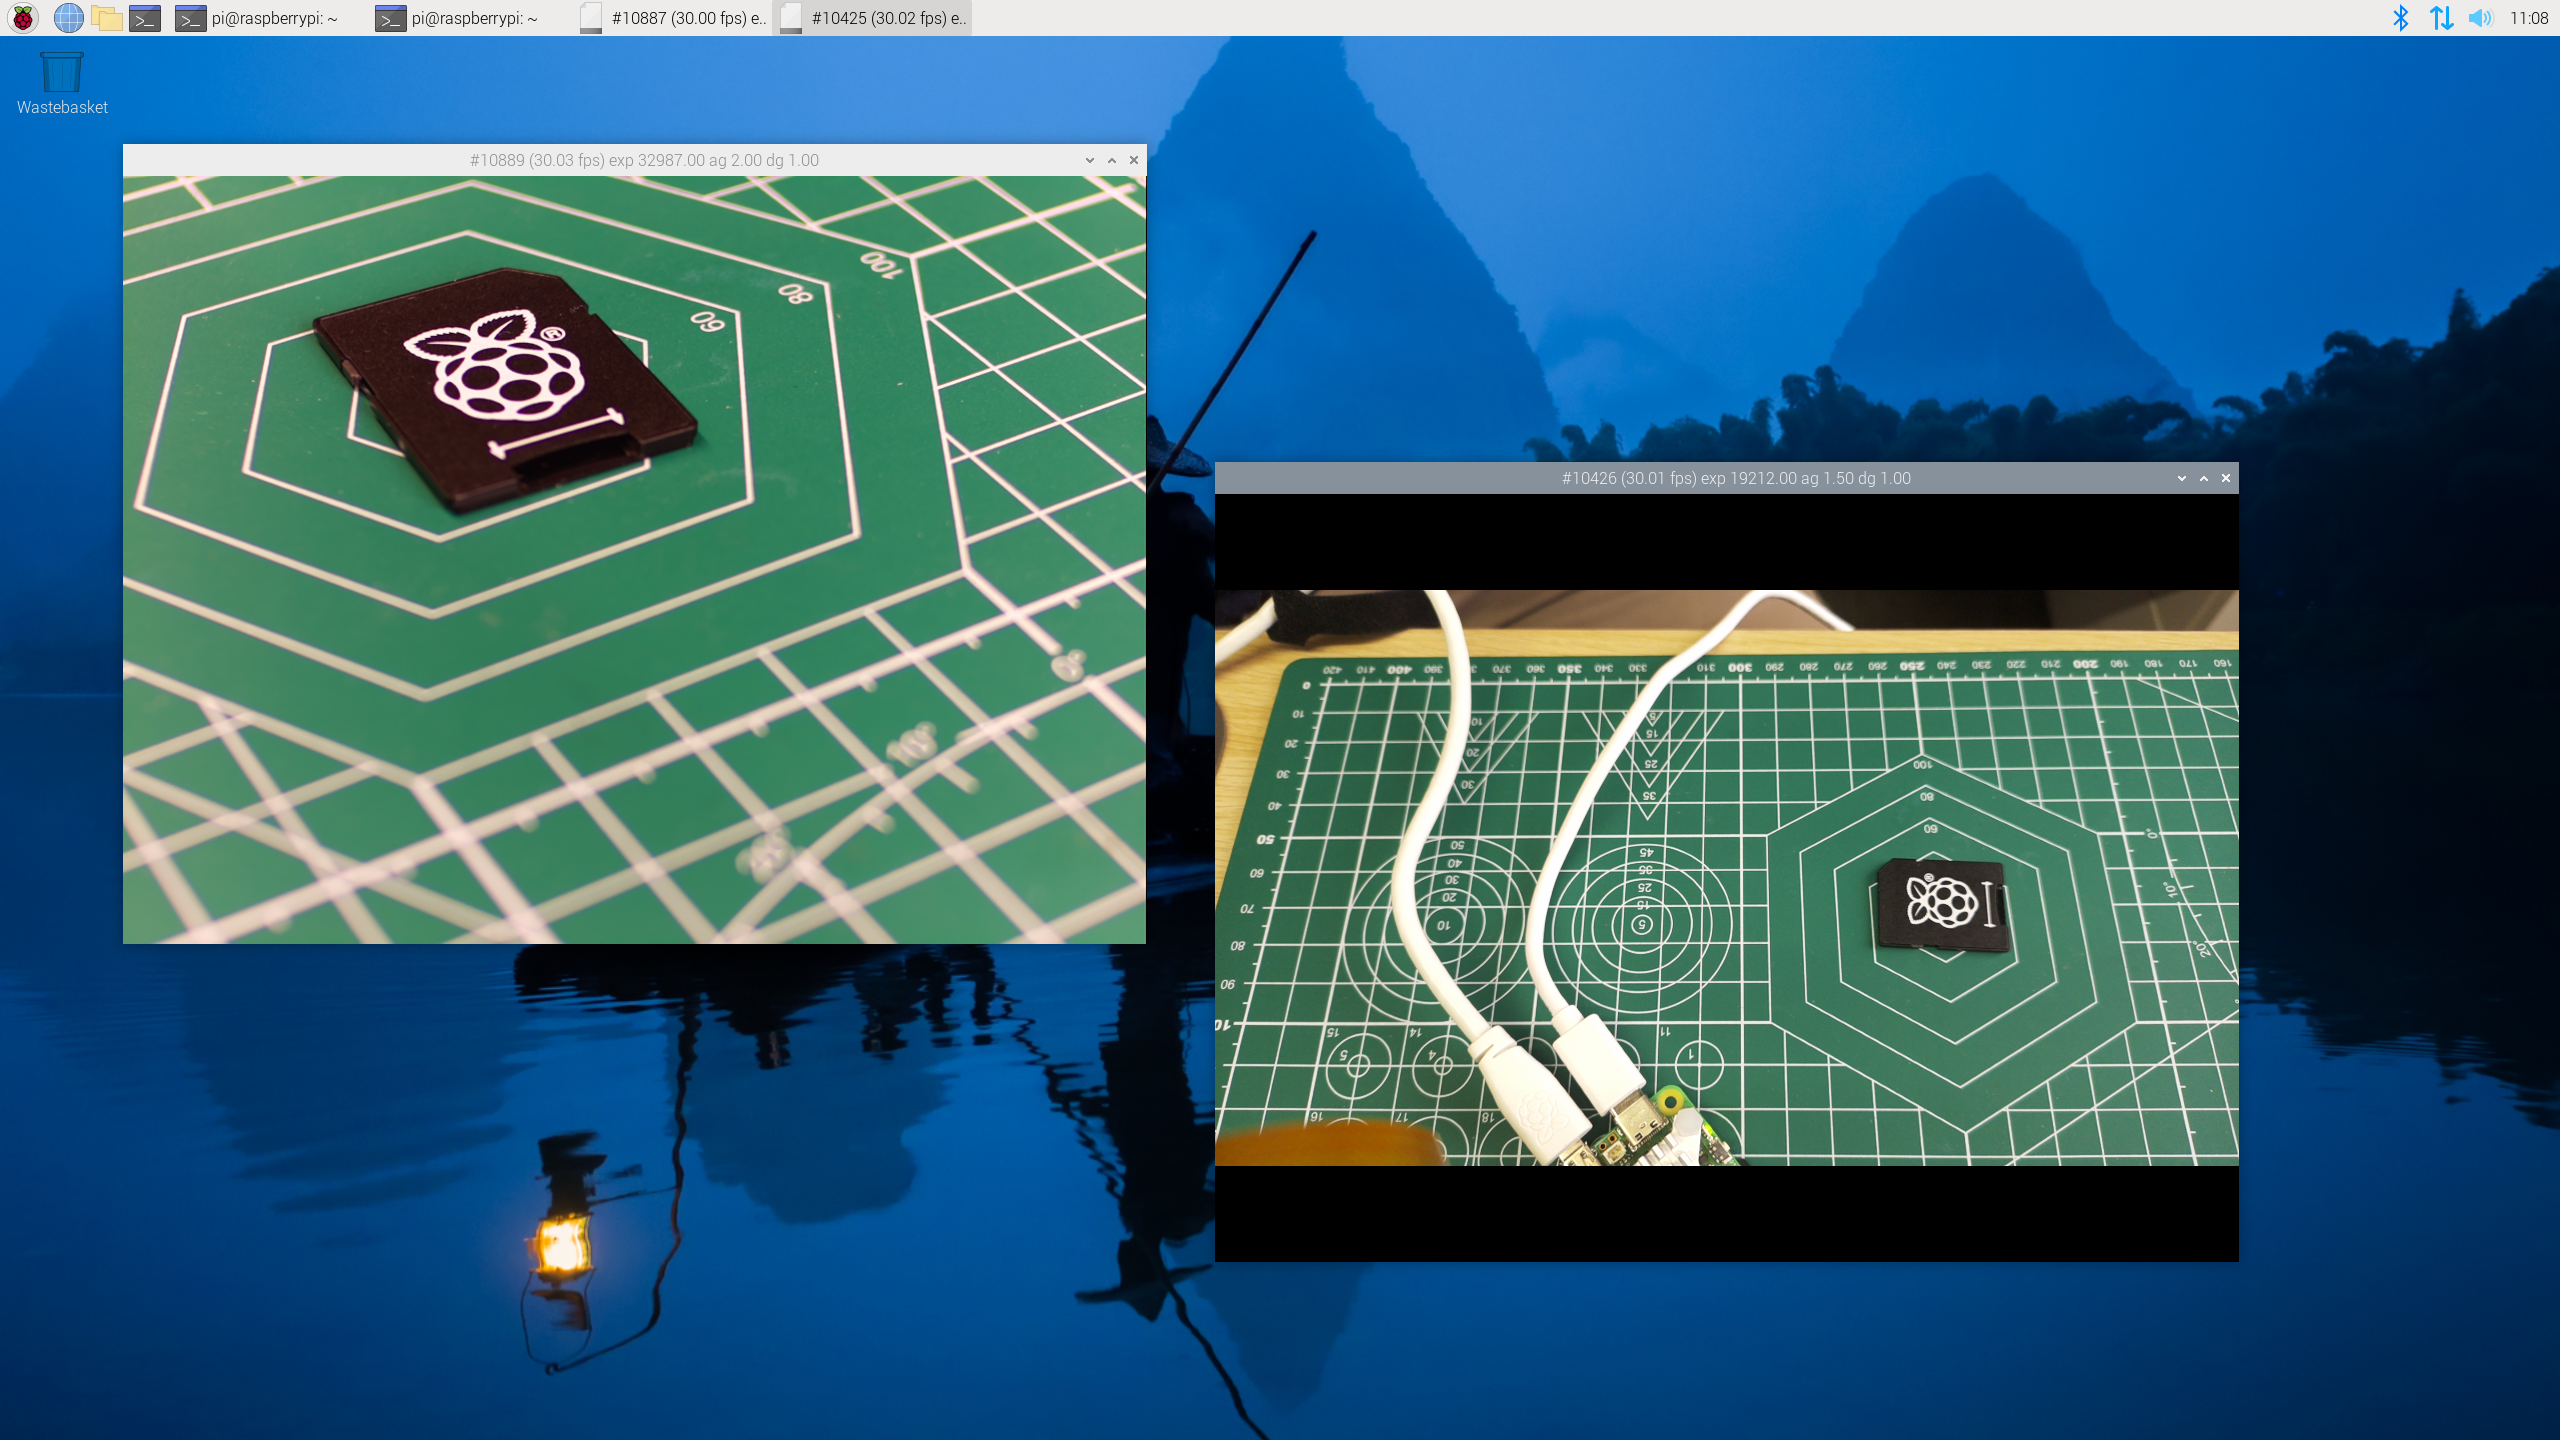
1. Open a terminal and enter this command to use the camera connected to CAM 0. The command has two arguments. The first is the camera that we wish to use, the second is a delay timer. By default the command will show a preview for five seconds. Using -t 0, the preview window will not auto-close. Instead we need to close the preview window to exit.
libcamera-hello –camera 0 -t 02. Open a second terminal and enter this command to use the camera connected to CAM 0. The command has two arguments. The first is the camera that we wish to use, the second is a delay timer. By default the command will show a preview for five seconds. Using -t 0, the preview window will not auto-close. Instead we need to close the preview window to exit.
libcamera-hello –camera 1 -t 03. Check that both cameras are working correctly. You should see two preview windows on the desktop. Move the cameras to obtain the shot that you require.
4. Close the preview windows.
Taking Pictures With Libcamera
The libcamera application has a few different means to capture images / videos.
- libcamera-hello: It starts the camera, displays a preview window of what the camera can see, then it closes. It is basically the “Hello World” for camera projects. Hence we used it to test that our cameras were working.
- libcamera-jpeg: Captures images to a jpeg file.
- libcamera-still: Similar to libcamera-jpeg but it supports more of the features found in the legacy “raspistill” command.
- libcamera-vid: Captures a video to an h264 container.
- libcamera-raw: Records raw Bayer frames directly from the camera, there is no preview window.
We’re going to use libcamera-jpeg to capture an image on each camera. These commands can also be used in a Bash script to automate the process.
1. Open a terminal and enter this command to take an image with the camera connected to CAM 0. The command has three arguments. The first is the name of the output file, second is the camera, third we set a five-second delay (5000 ms) to give us time to frame the shot.
libcamera-jpeg -o cam0.jpg –camera 0 -t 50002. Open a terminal and enter this command to take an image with the camera connected to CAM 1. The command has three arguments. The first is the name of the output file, second is the camera, third we set a five-second delay (5000 ms) to give us time to frame the shot.
libcamera-jpeg -o cam1.jpg –camera 1 -t 50003. Open the images using the file manager. The images are now saved to the directory from where the commands were run.
Take Two Pictures at Once Using Picamera2
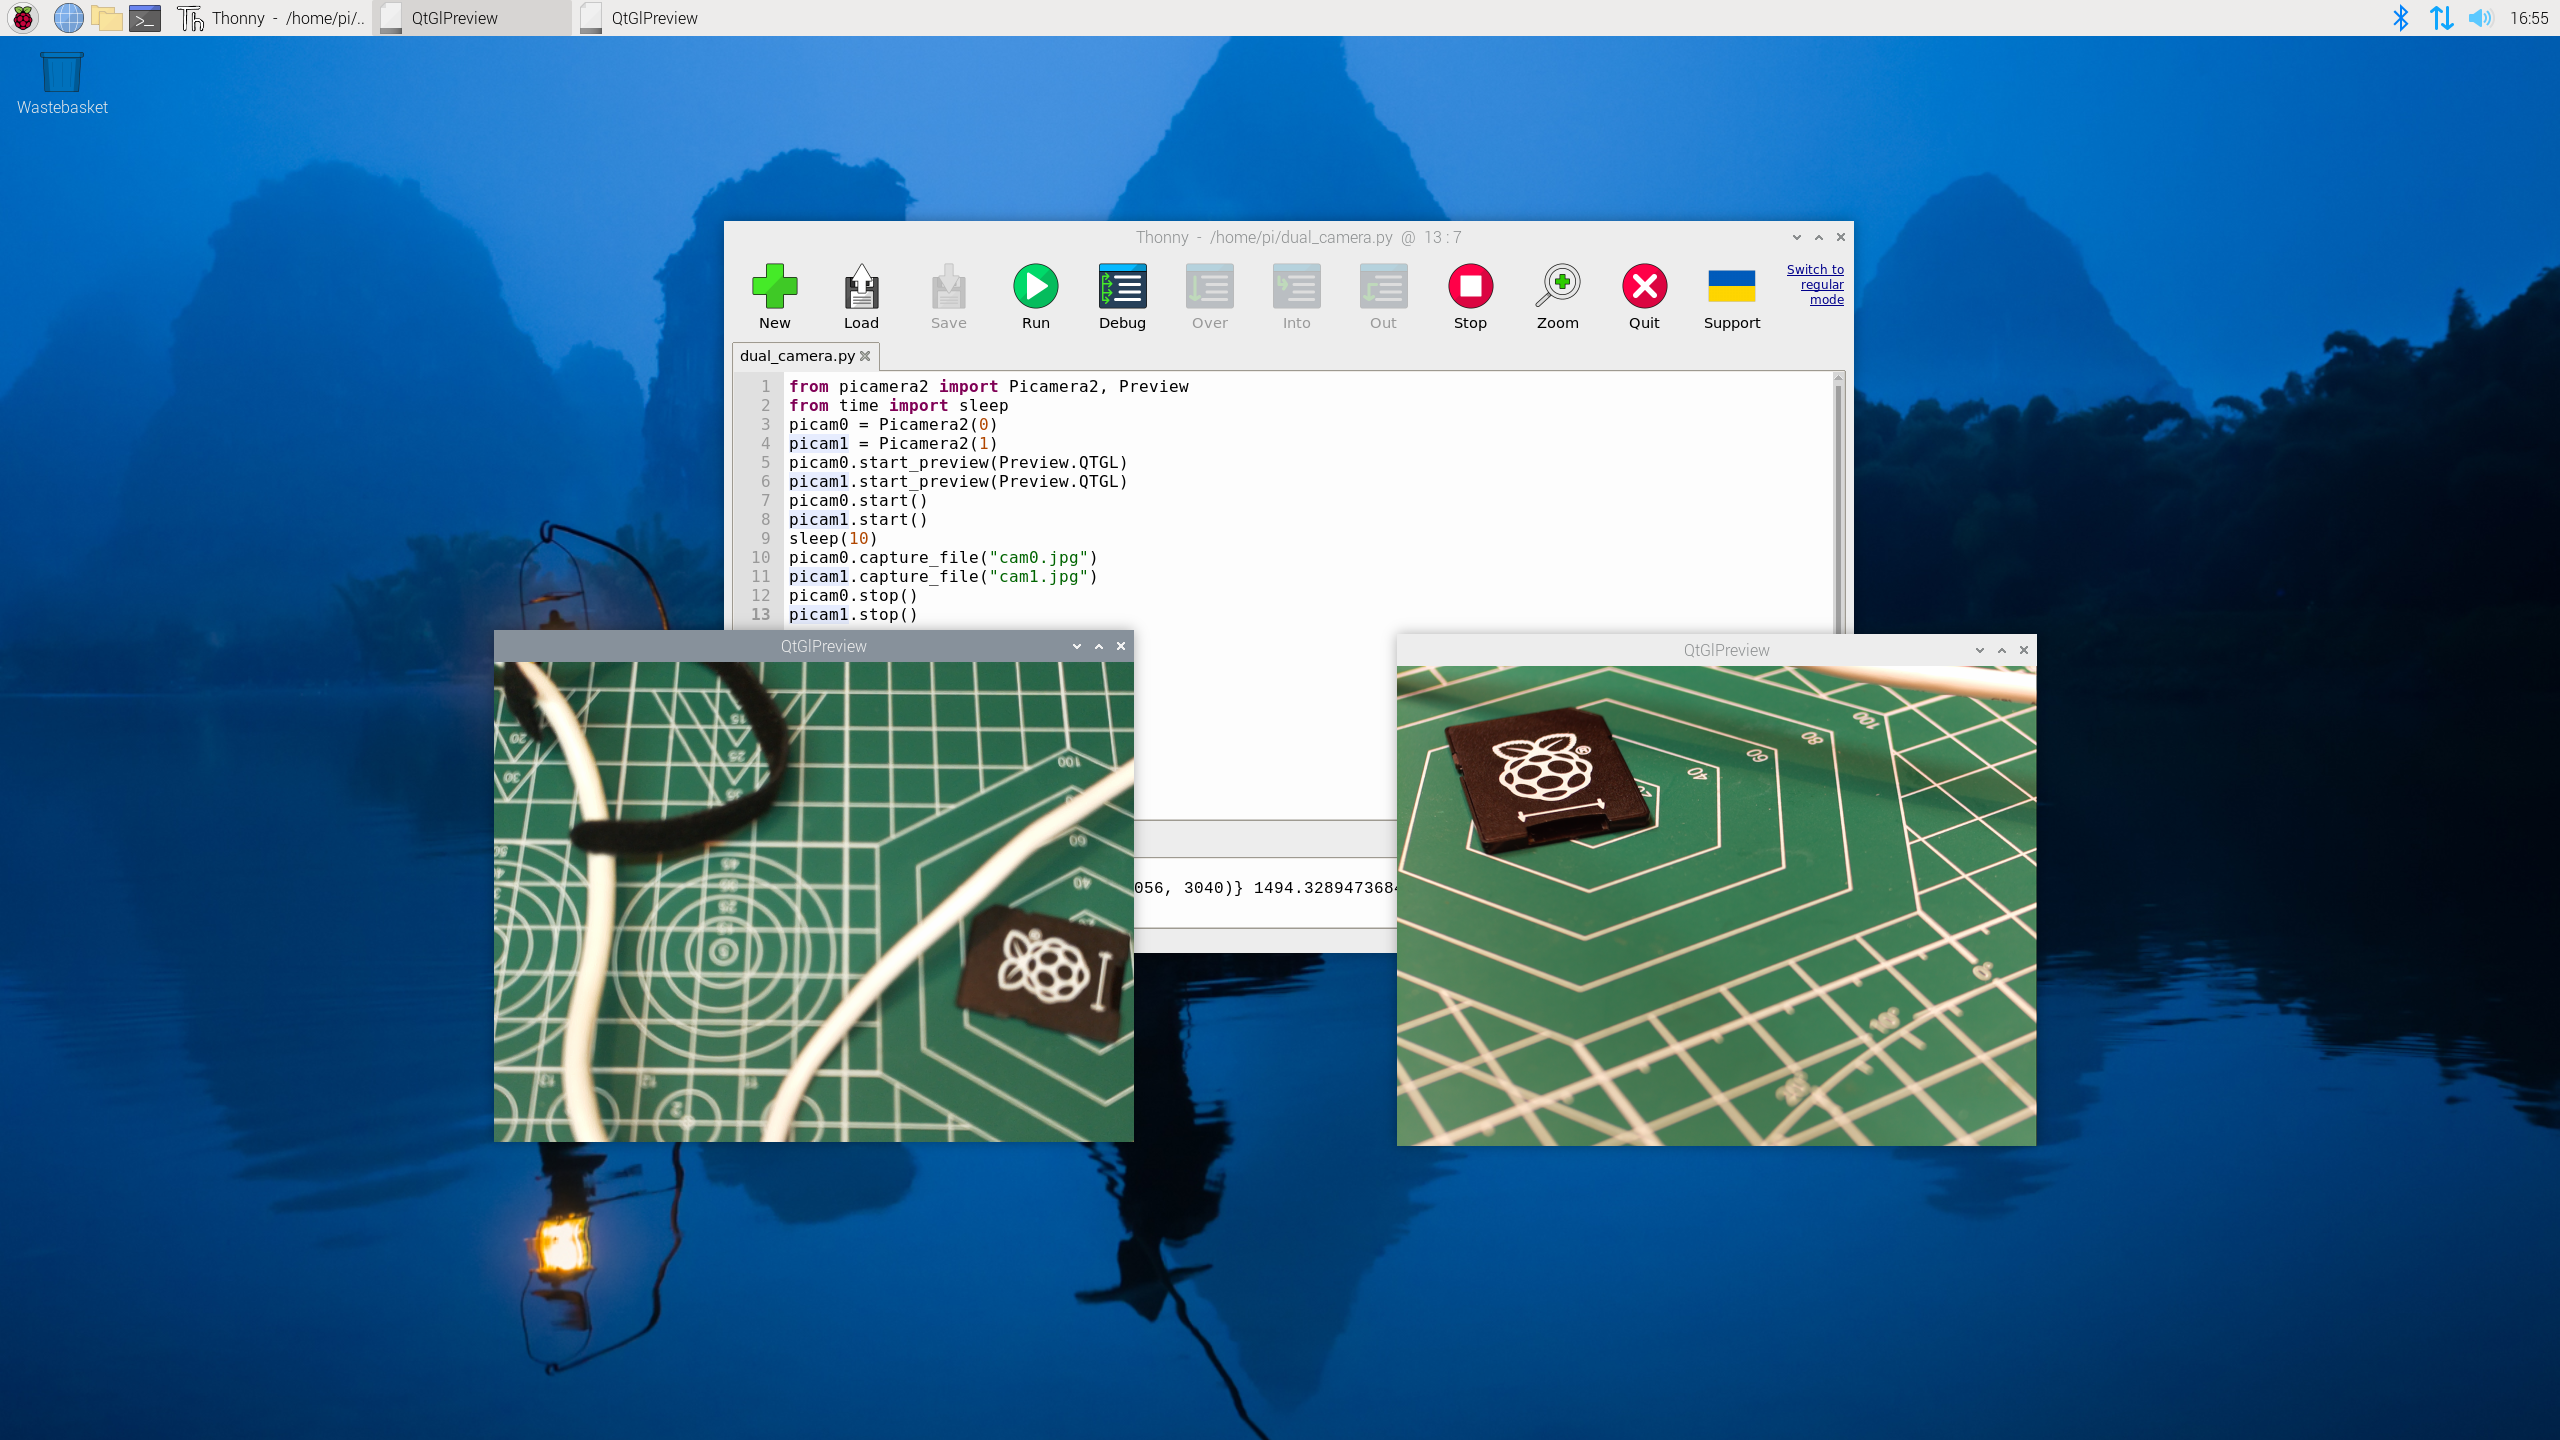
Using the Picamera2 Python module we can take two images at the same time thanks to the Raspberry Pi 5’s dual camera connectors. Essentially, we create two objects in the Python code that we use to control each camera. Then we tell each camera to start, load a preview window, give us time to frame a shot, then it captures the images to JPEGs. Then we close the connection to the cameras, and close the preview windows.
1. From the main menu select Programming >> Thonny.
2. In the blank document, import two modules of Python code. The first is Picamera2, our interface between Python and the cameras. We also import the Preview function which is used to preview the shot before the image is captured. The second module is time, specifically the sleep function which is used to pause the code.
from picamera2 import Picamera2, Preview
from time import sleep
3. Create two objects that represent the two cameras. The first is picam0. Calling the Picamera2 function with the 0 argument states that we want to use the camera connector to CAM0. The second object is picam1 and that uses the camera connected to CAM1.
picam0 = Picamera2(0)
picam1 = Picamera2(1)
4. Using the objects, start a preview window for each camera.
picam0.start_preview(Preview.QTGL)
picam1.start_preview(Preview.QTGL)
5. Start the cameras. This will trigger the preview windows to show a live feed from the camera.
picam0.start()
picam1.start()
6. Pause the code for ten seconds. This gives us time to frame the camera shots. Change this to a higher value if you need a little more time.
sleep(10)7. Capture the images from each camera to a JPEG image.
picam0.capture_file("cam0.jpg")
picam1.capture_file("cam1.jpg")
8. Stop the cameras.
picam0.stop()
picam1.stop()
9. Close the preview windows.
picam0.stop_preview()
picam1.stop_preview()
Complete Code Listing: Dual Cameras with Python
from picamera2 import Picamera2, Preview
from time import sleep
picam0 = Picamera2(0)
picam1 = Picamera2(1)
picam0.start_preview(Preview.QTGL)
picam1.start_preview(Preview.QTGL)
picam0.start()
picam1.start()
sleep(10)
picam0.capture_file("cam0.jpg")
picam1.capture_file("cam1.jpg")
picam0.stop()
picam1.stop()
picam0.stop_preview()
picam1.stop_preview()
Les Pounder is an associate editor at Tom's Hardware. He is a creative technologist and for seven years has created projects to educate and inspire minds both young and old. He has worked with the Raspberry Pi Foundation to write and deliver their teacher training program "Picademy".
-
demon000 The begining of the article contains some mistakes. The new Raspberry PI actually uses a 22-pin connector. But the pin pitch is smaller, so the connector and the ribbon cable are smaller, even if they contain more pins.Reply -
Kerry Jenkins I found the camera argument needs to be preceded with two dashes instead of one:Reply
libcamera-hello --camera 0 -t 0 -
esolliday Reply
I noticed that camera 1 would not display on my Pi 5. Thanks for the tip, it worked.Kerry Jenkins said:I found the camera argument needs to be preceded with two dashes instead of one:
libcamera-hello --camera 0 -t 0
