Tom's Hardware Verdict
3DMakerPro demonstrates that software has finally caught up with hardware in the entry-level 3D scanning market with the handheld Lynx 3D scanner. This scanner is ideal for anyone interested in creating 3D models for under $1,000.
Pros
- +
Intuitive and powerful JMStudio software app
- +
Automatic point cloud alignment
- +
Turntable mode provides semi-automated 3D scanning
- +
Captured small details with ease
Cons
- -
Poor performance when scanning faces
- -
Marketing sets potentially unrealistic expectations
- -
Highly sensitive to black or dark surfaces
Why you can trust Tom's Hardware
The 3DMakerPro Lynx 3D scanner starts at $369 and brings high-resolution 3D scanning to a low price point. The Lynx is capable of being used in both handheld as well as turntable mode, both of which worked well during testing. 3D scanning can sometimes be difficult for beginners due to the complexity of the process involved, but 3DMakerPro has created a linear workflow using the JMStudio software app that will help first-time users successfully create 3D models.
During testing, the Lynx had issues scanning facial hair and hair, which may be a problem for users interested in using the scanner for scanning people. The JMStudio software app worked well for capturing point cloud data, aligning and cleaning, and making watertight mesh models that can be used for 3D printing. While many 3D scanners in this price range suffer from difficult-to-use software that is poorly documented and performs inconsistently, 3DMakerPro has put time and effort into the documentation of the JMStudio app which will help to reduce the learning curve of the Lynx for first time users.
Specifications of 3DMakerPro Lynx
Accuracy | 0.1mm |
Single Capture Range | 400 x 250mm |
Working Distance | 400 - 900mm |
Scan Speed | 10 fps |
Light Type | NIR |
Alignment | Visual Tracking |
Color | Optional with Luxury Package |
Output Format | OBJ, STL, PLY |
Required PC | Windows or Mac |
Included in the Box: 3DMakerPro Lynx
The 3DMakerPro Lynx premium package ships in a box that includes everything you need to start scanning immediately, with no additional accessories required. Since the Lynx uses visual tracking instead of markers like other scanners, there are no sticker sheets, textured mats, or any other temporary alignment aids included in the package.
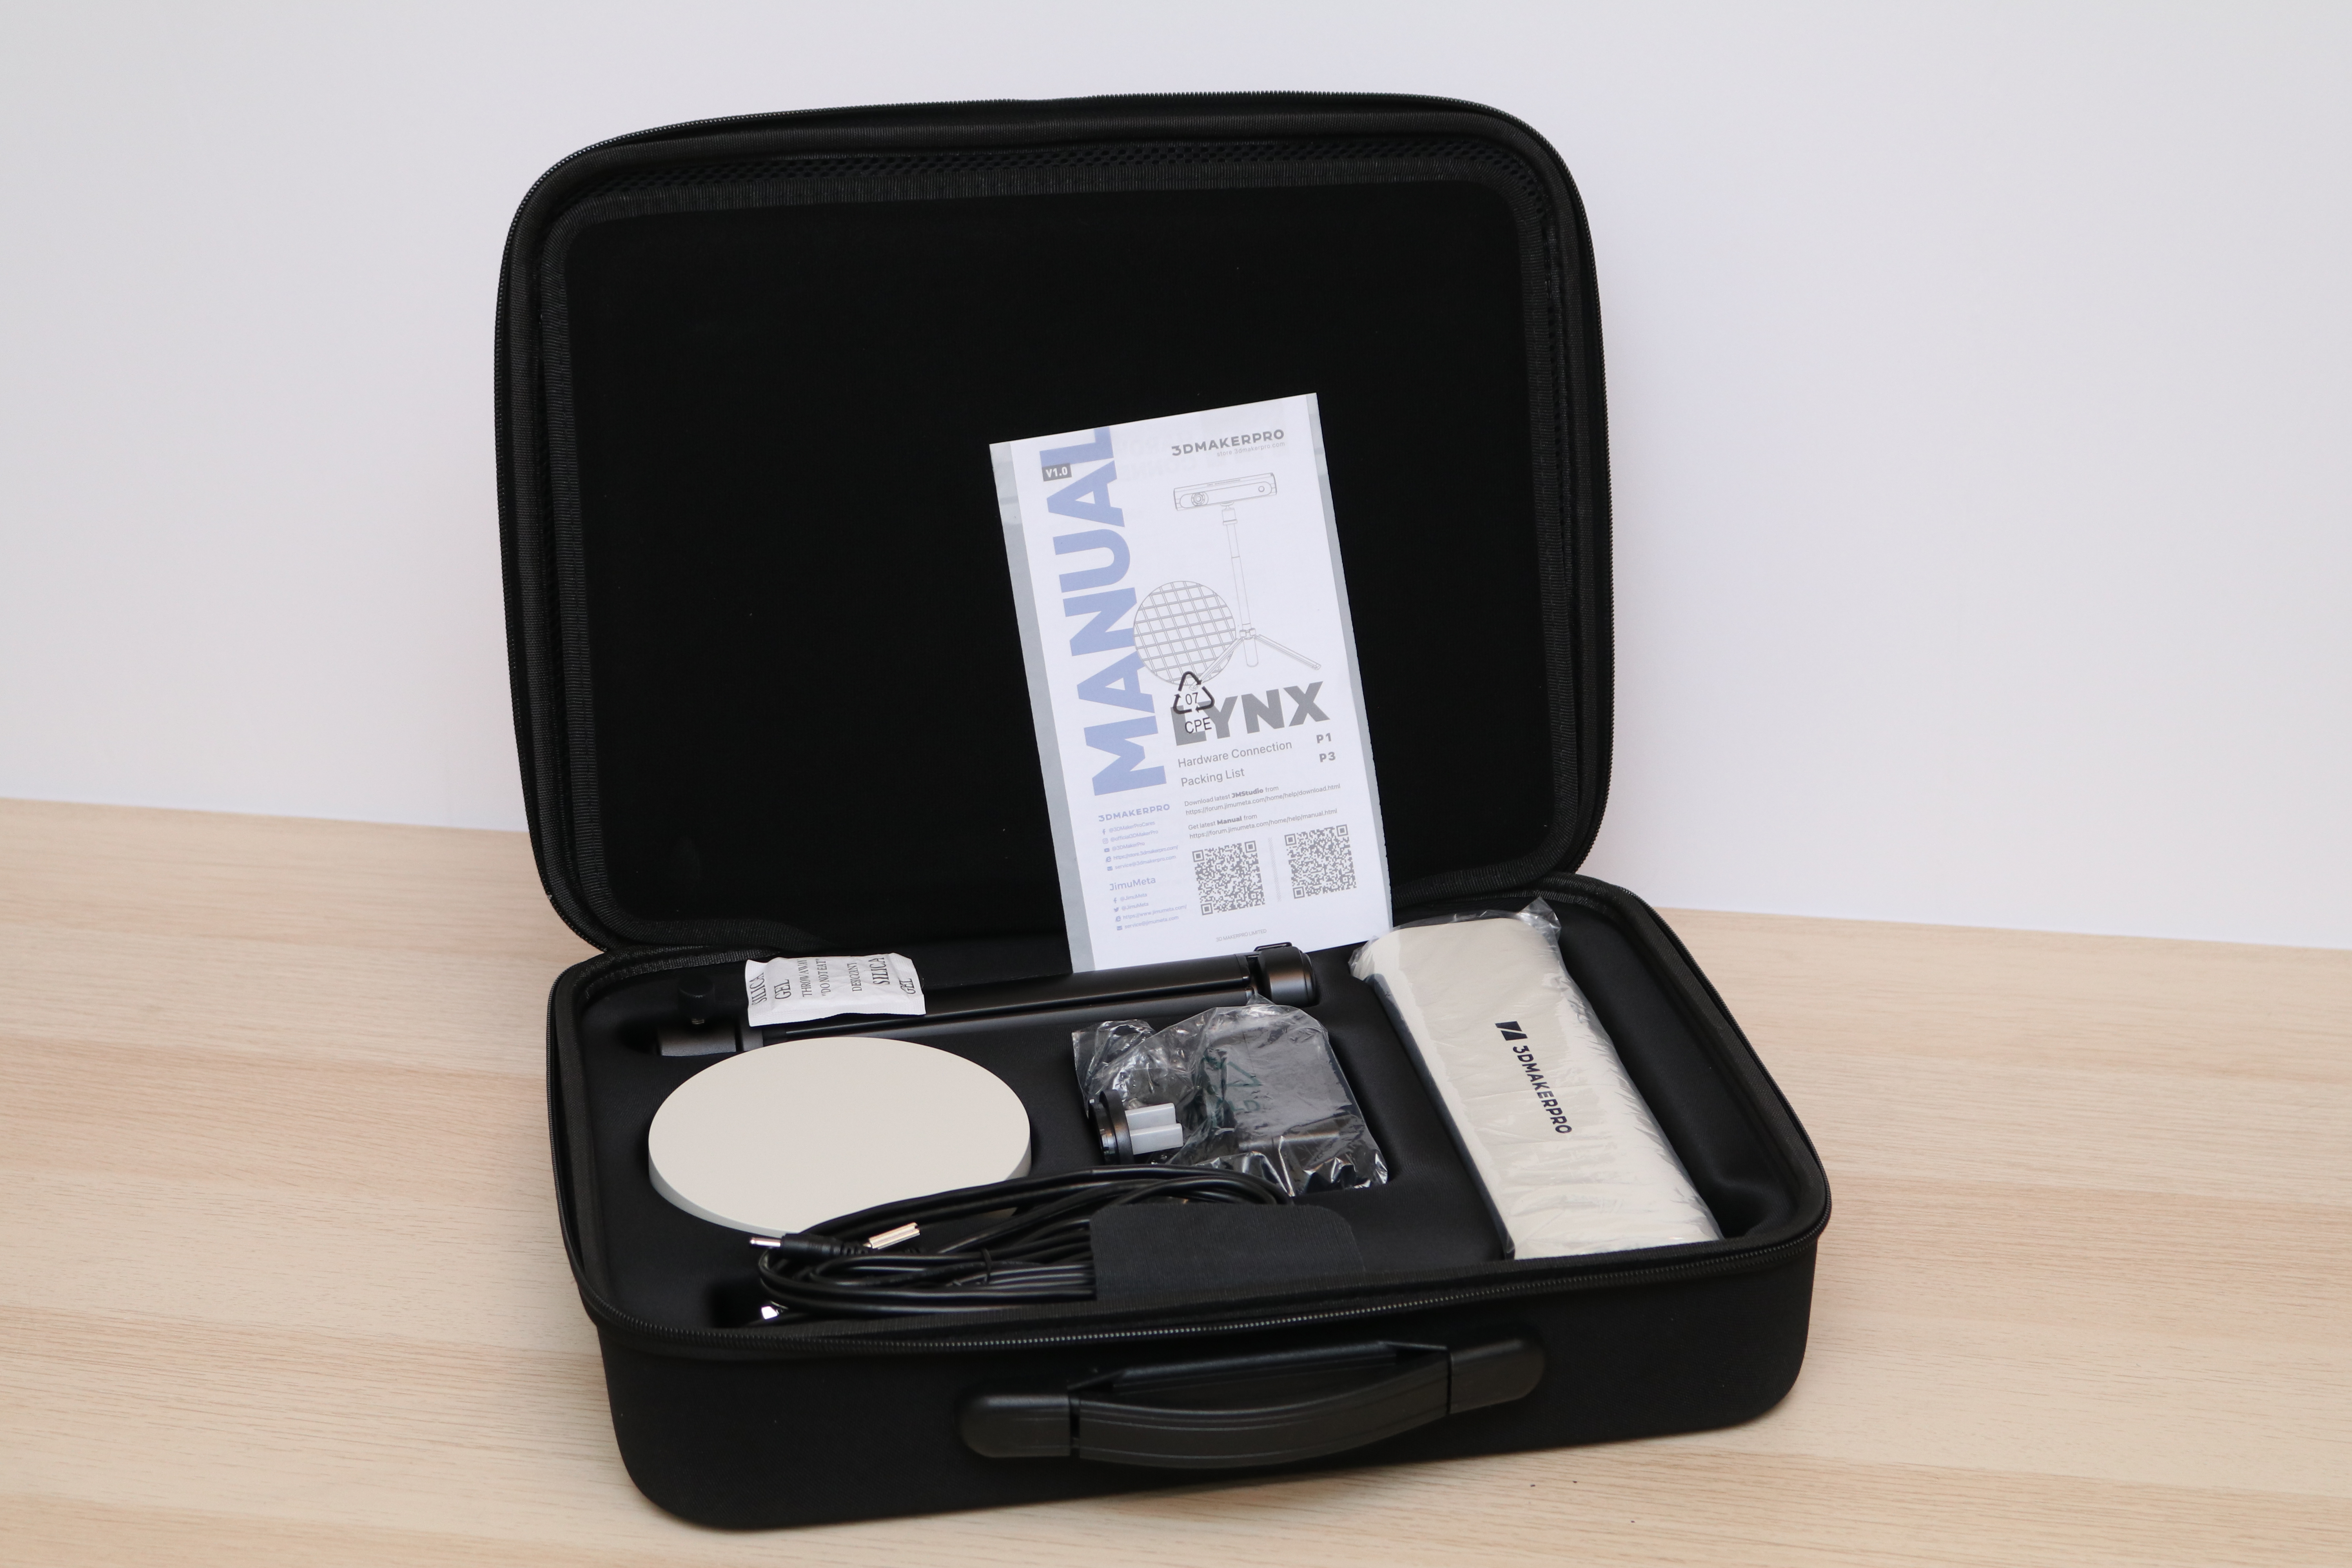
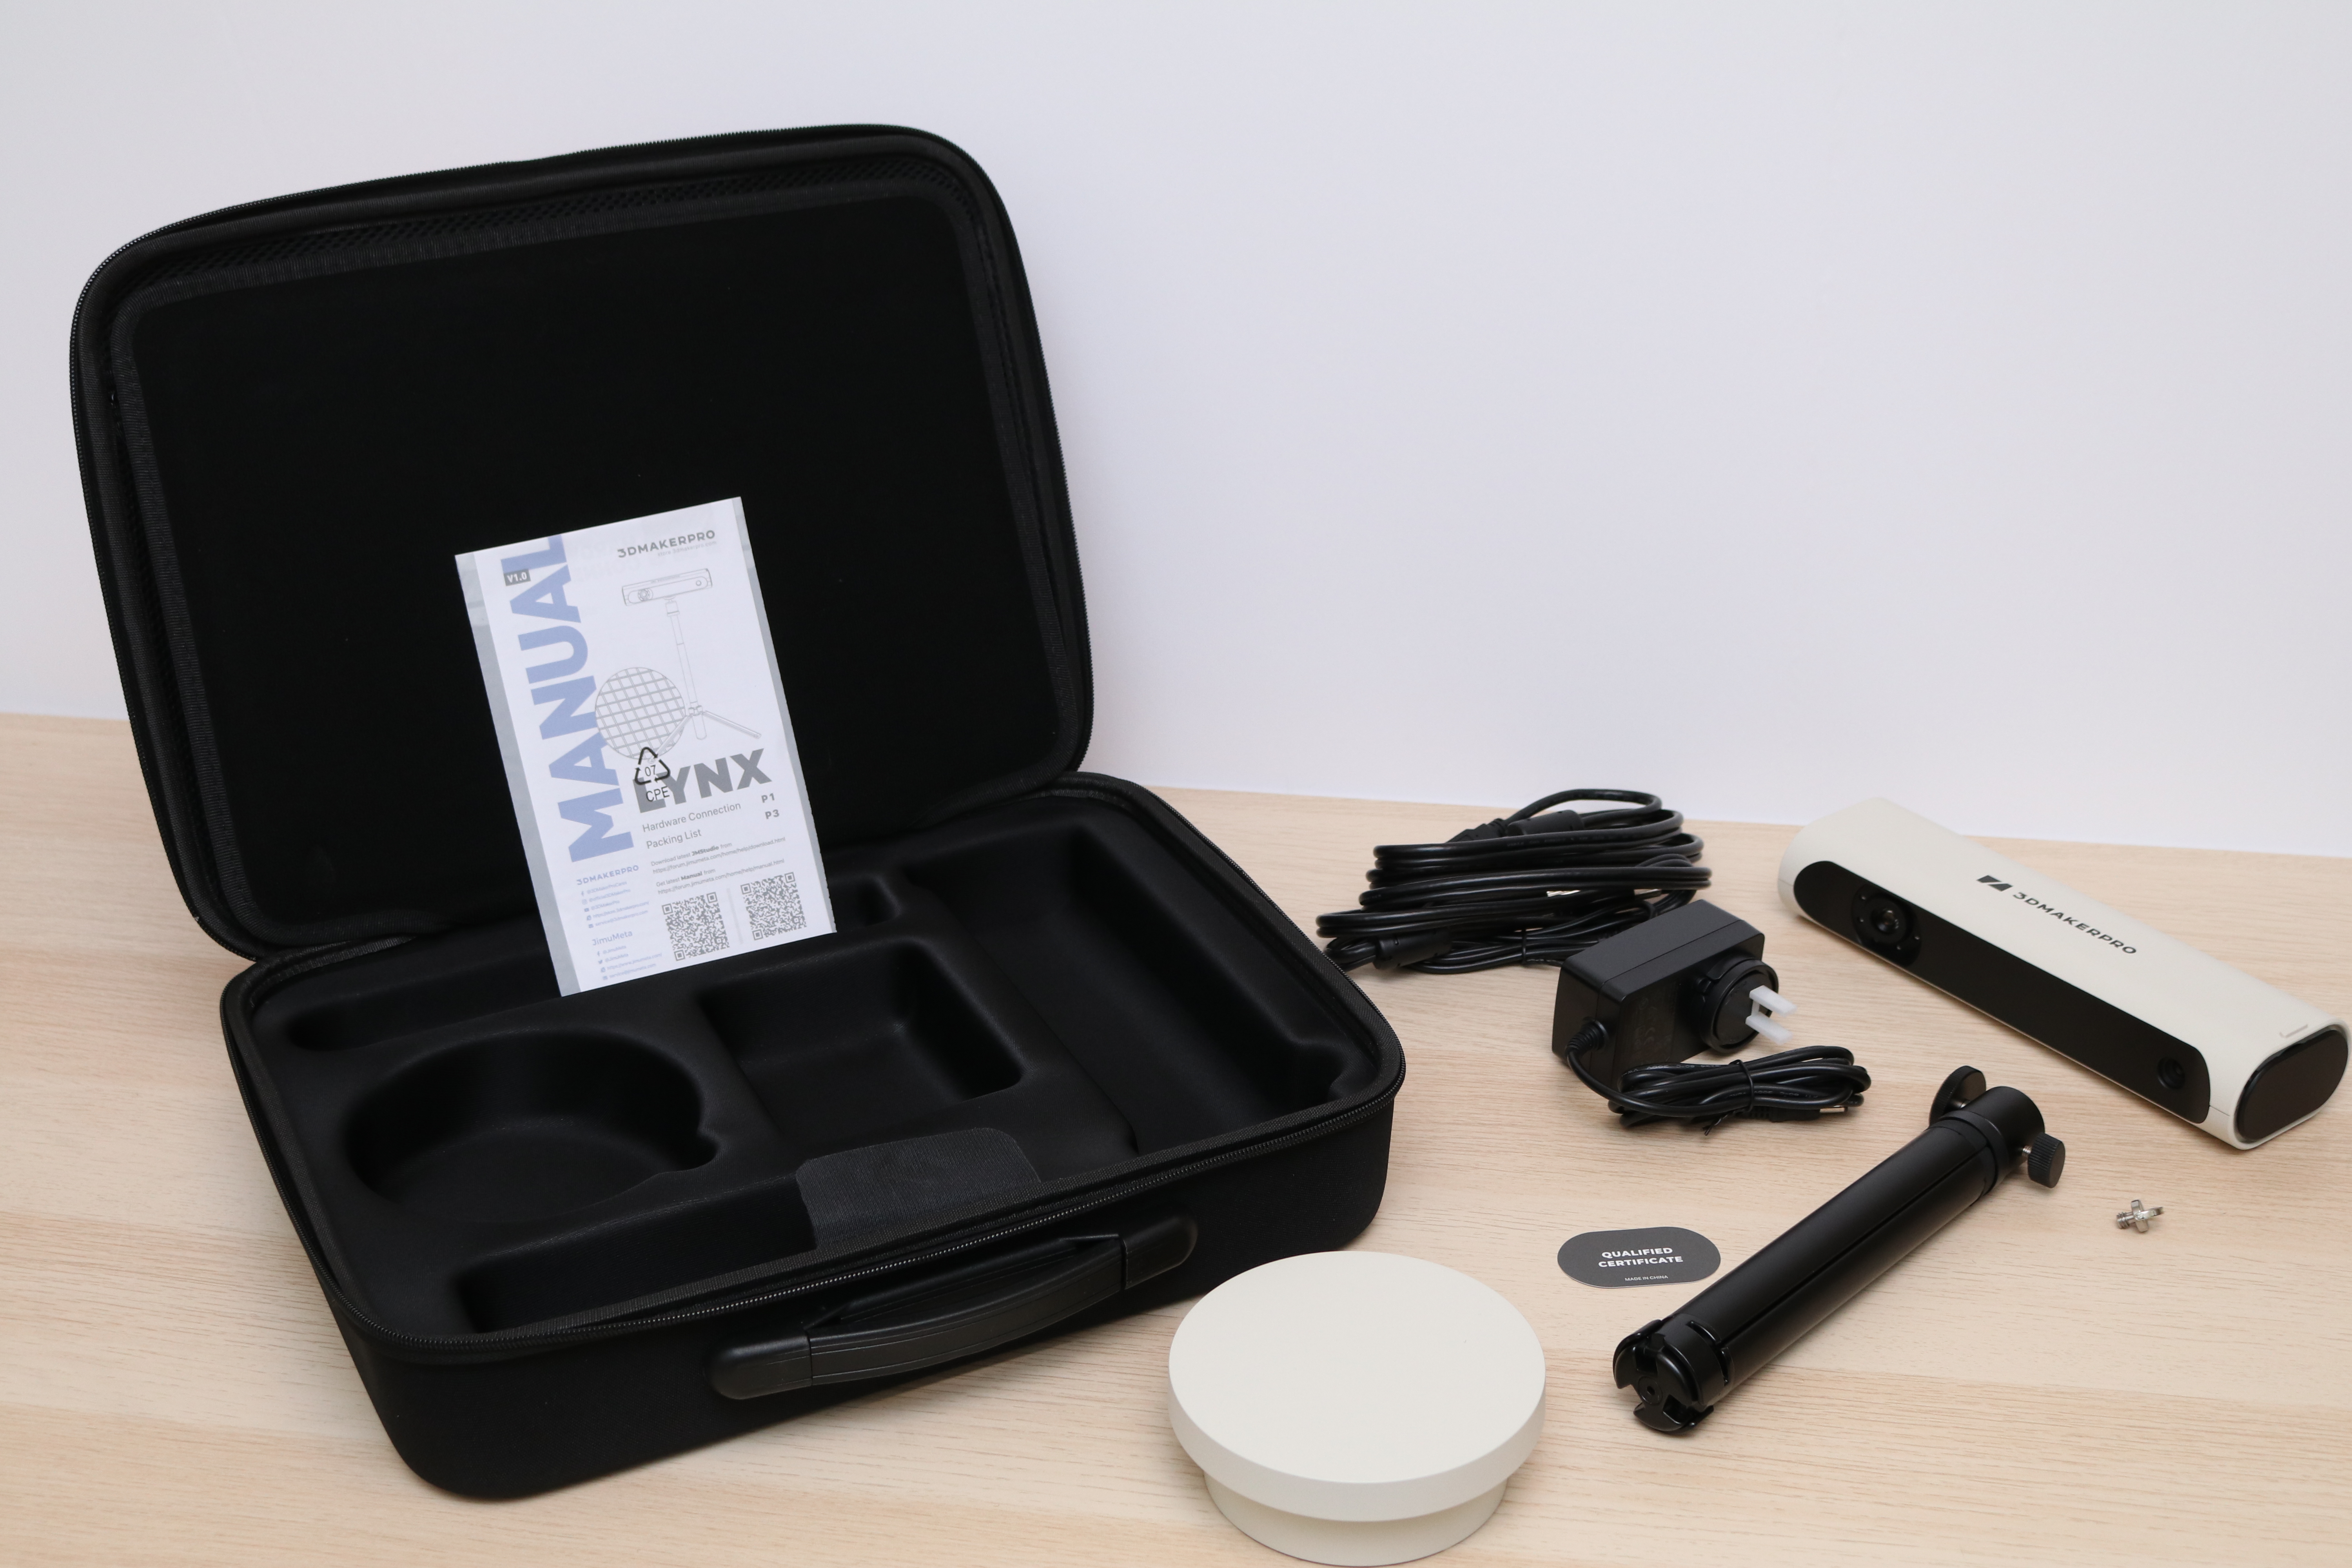
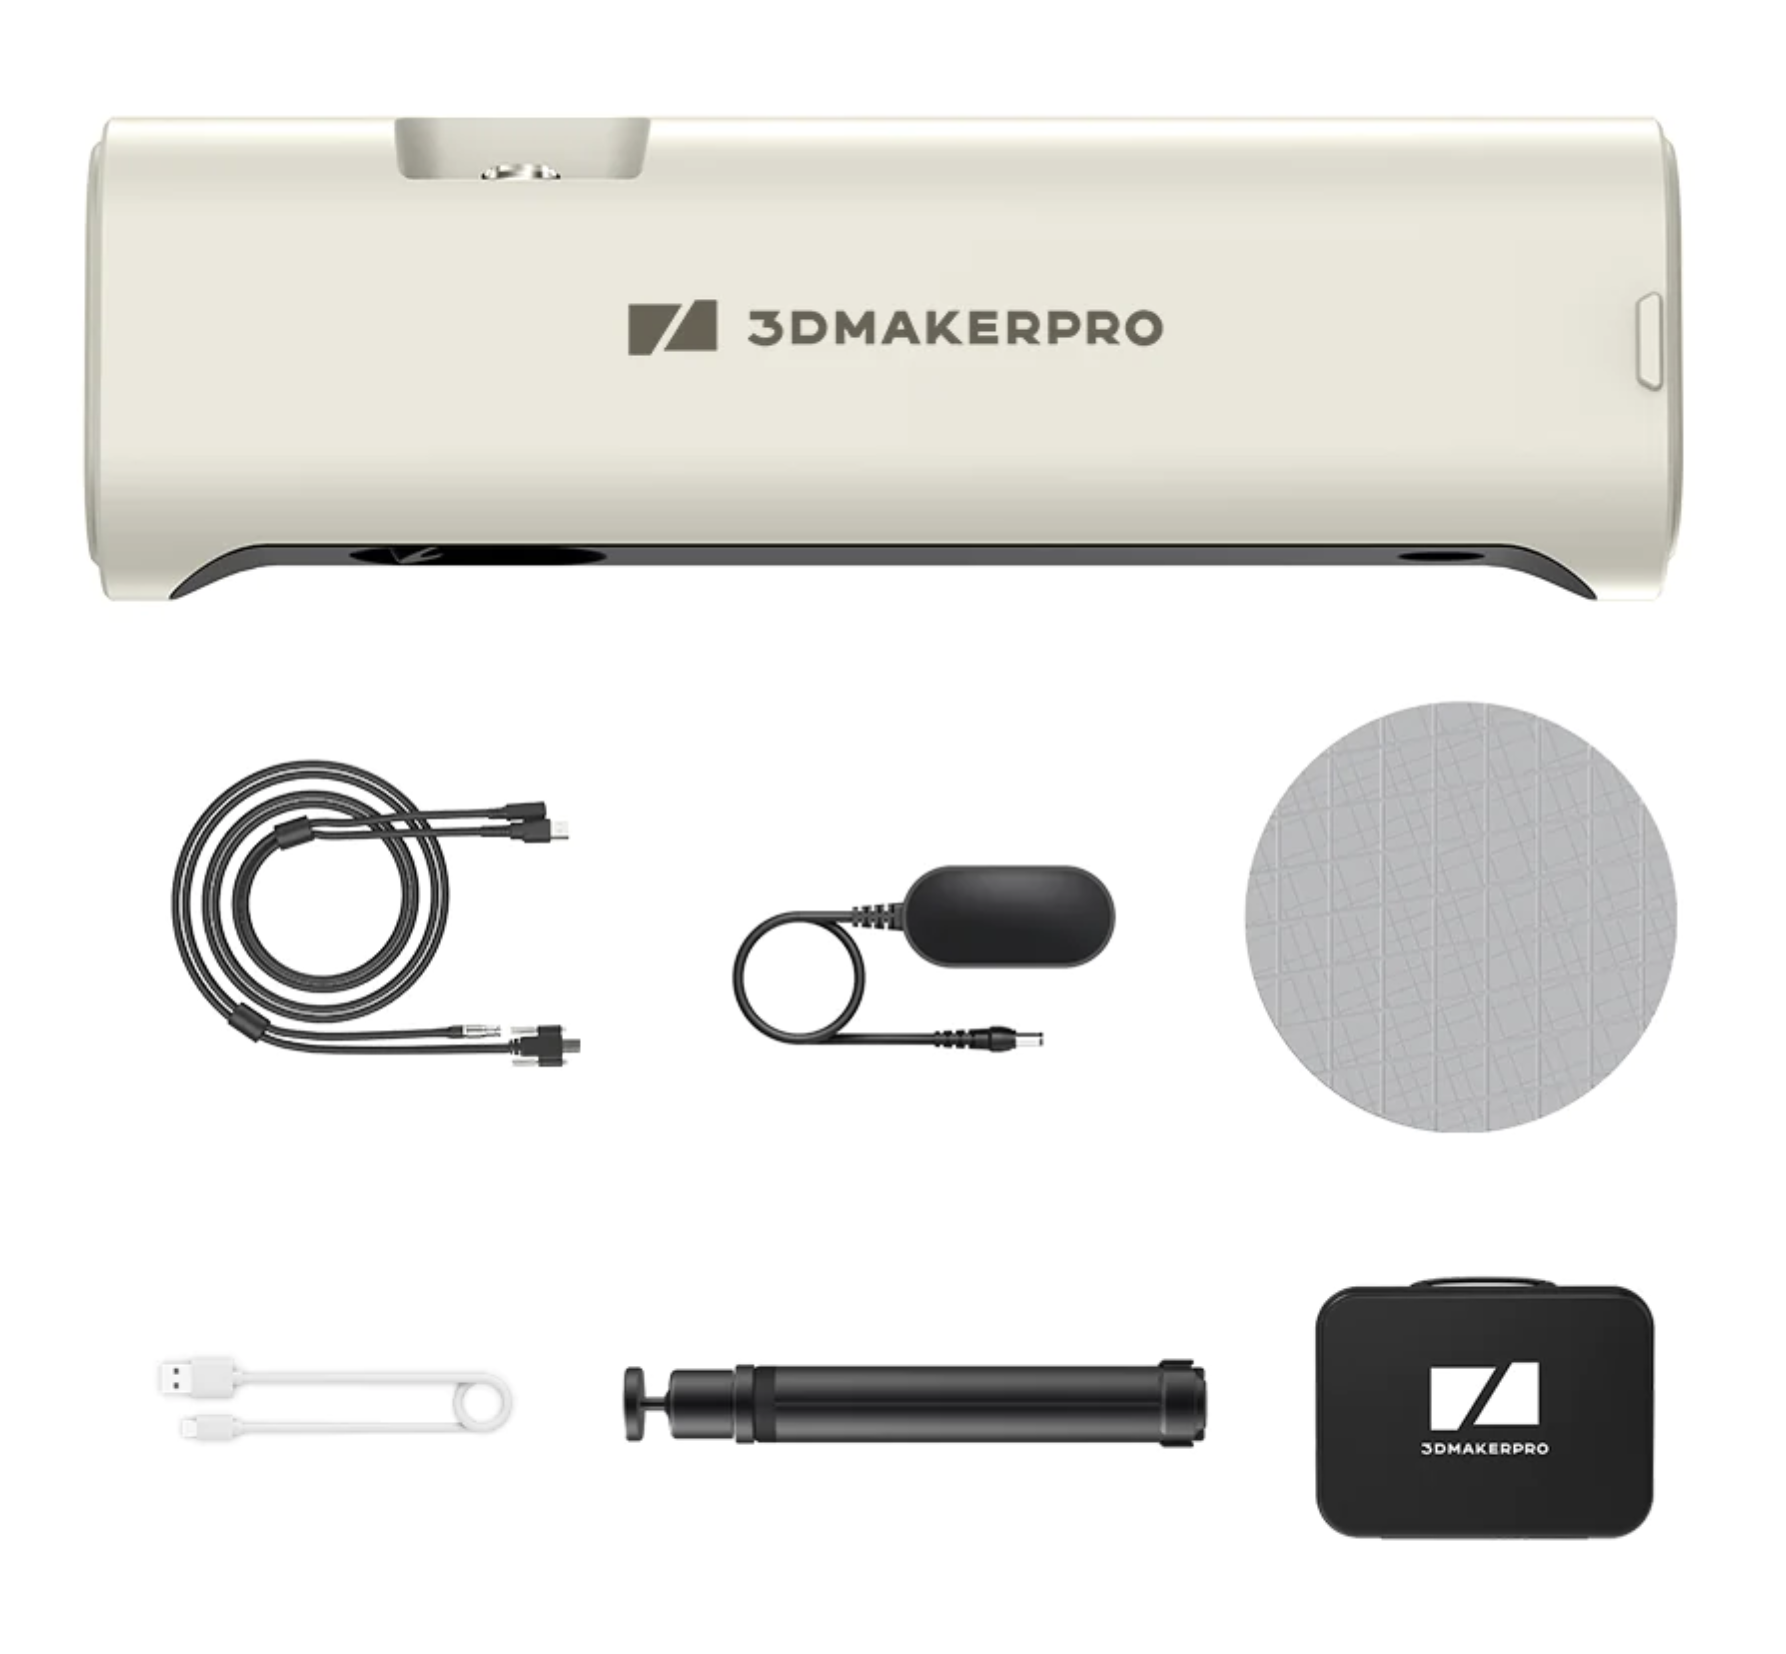
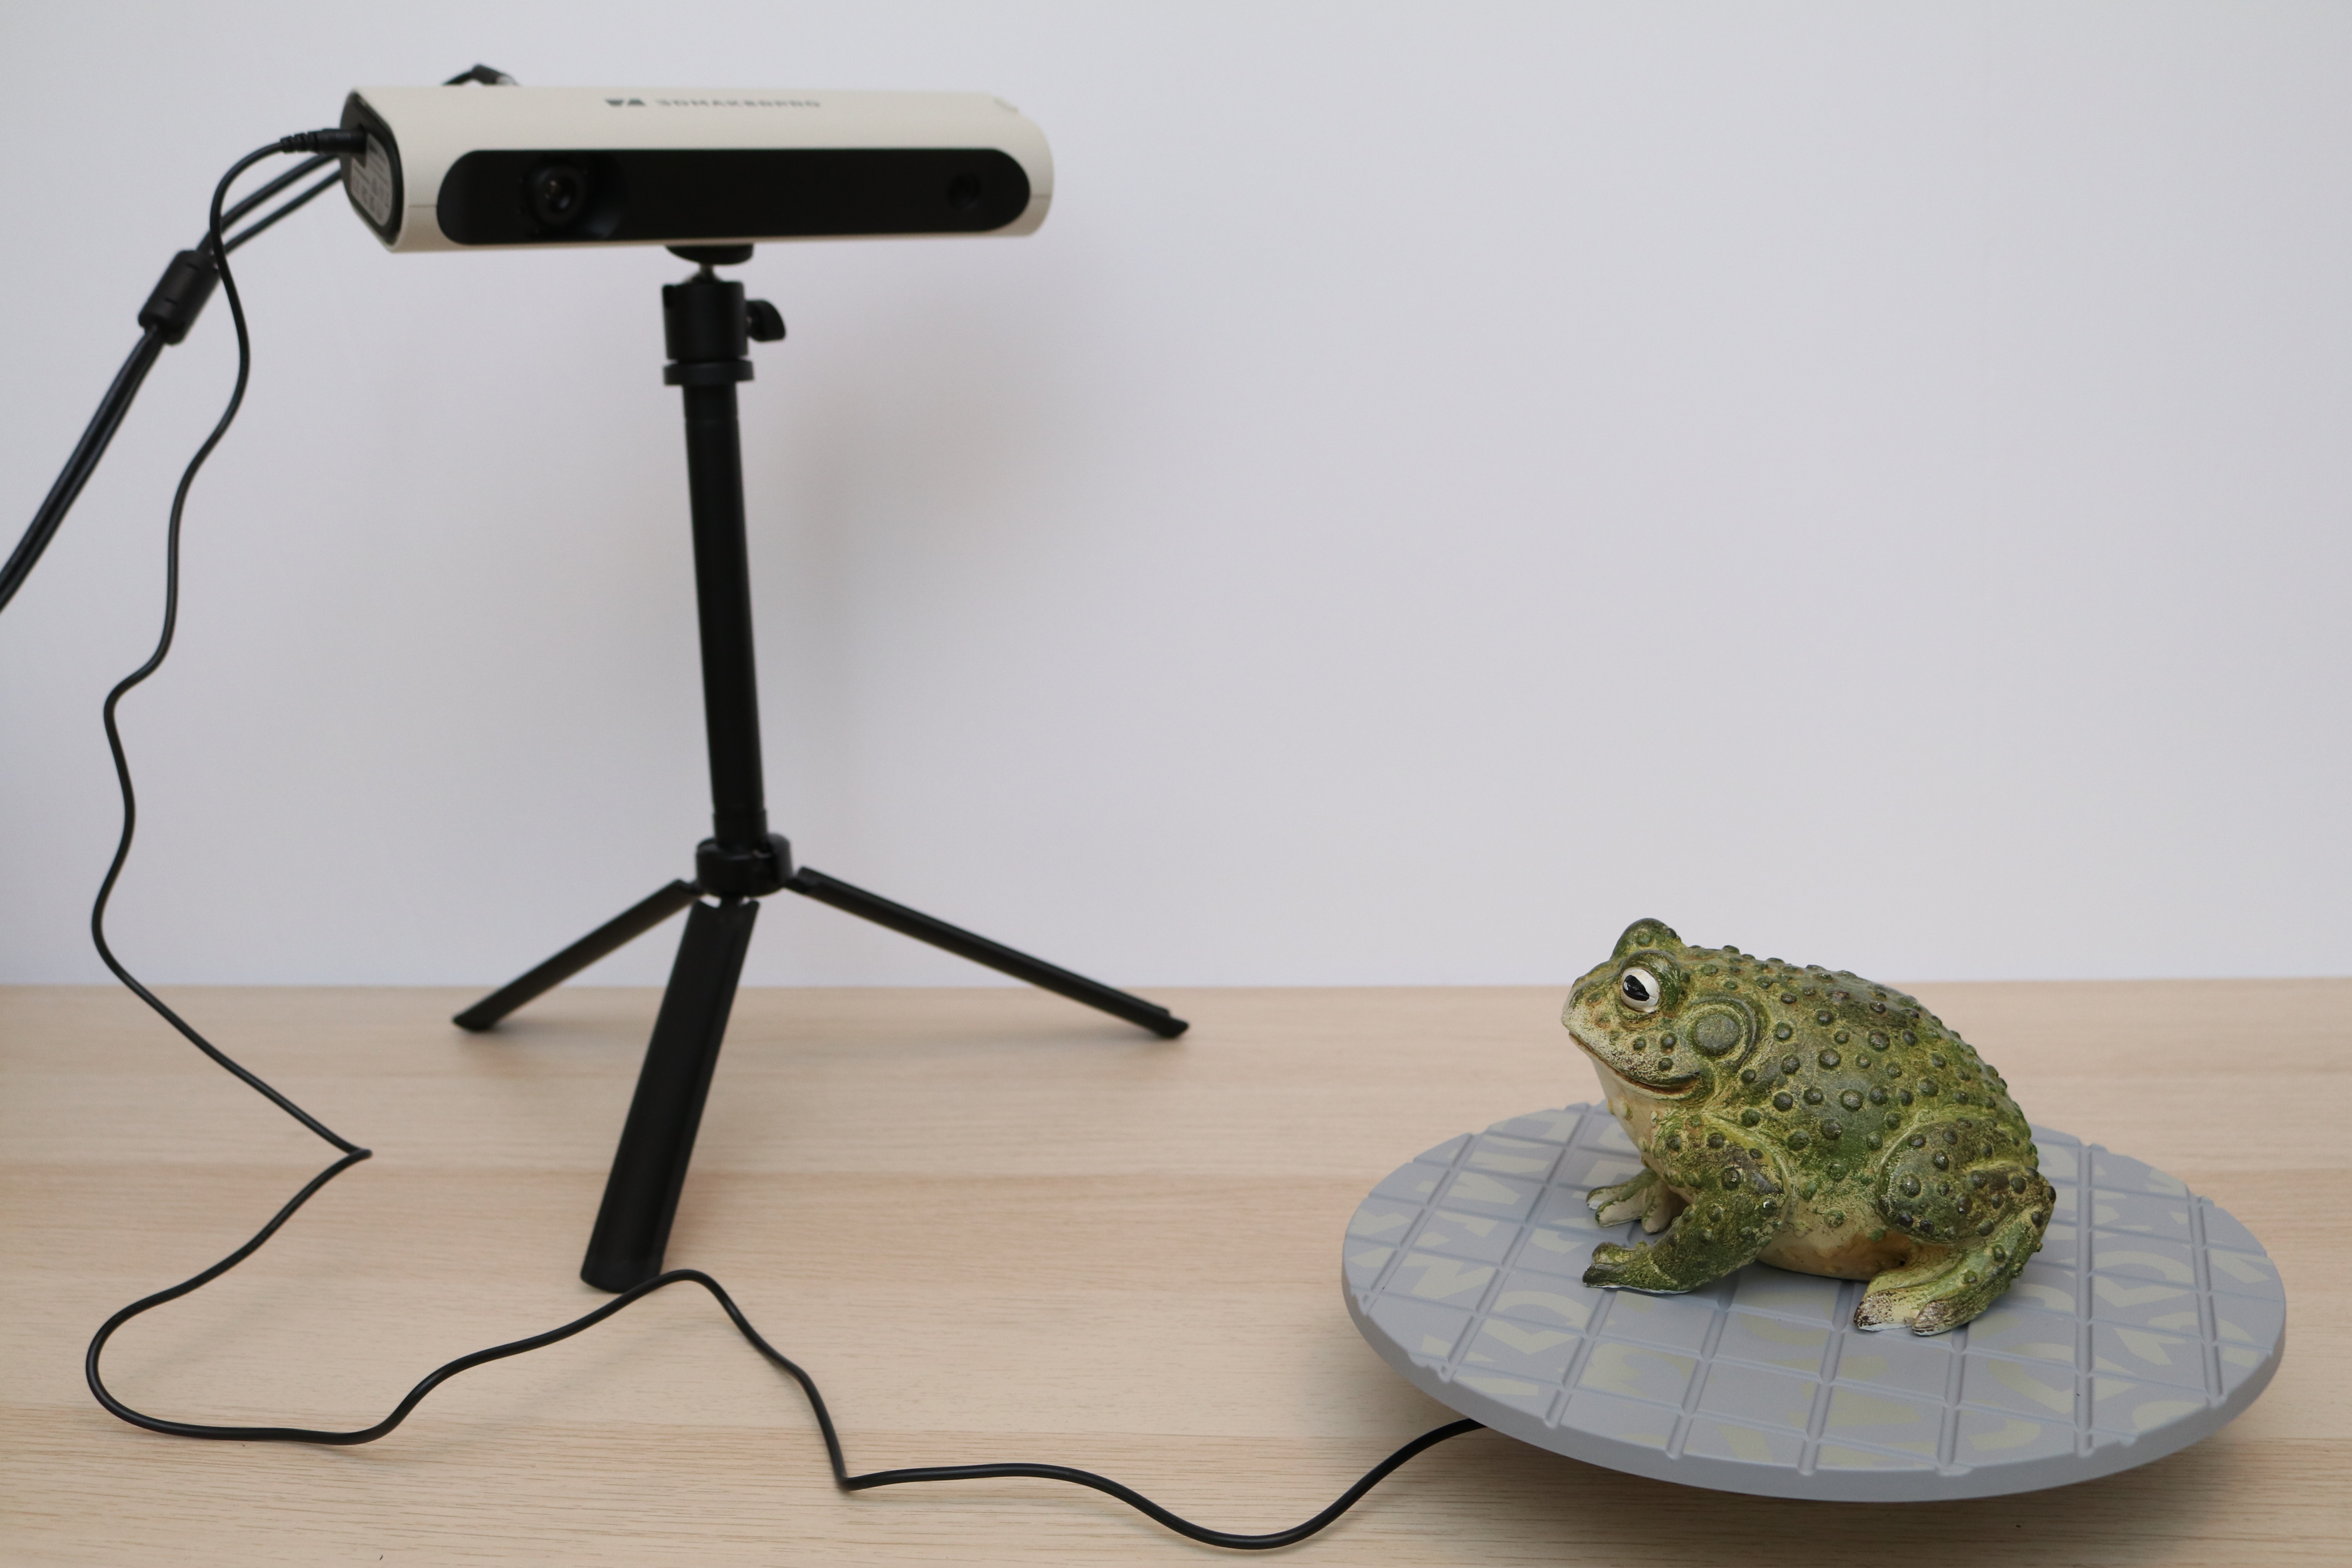
The premium package includes the Lynx 3D scanner, a tripod that doubles as a handle, a data cable, a power adapter, a turntable, an extended surface for the turntable which increases the diameter, a cable to connect the turntable to the scanner, a quick start guide, and a carrying case for everything. I was impressed with the case and the overall presentation, something that shows thought was put into the customer experience with the scanner.
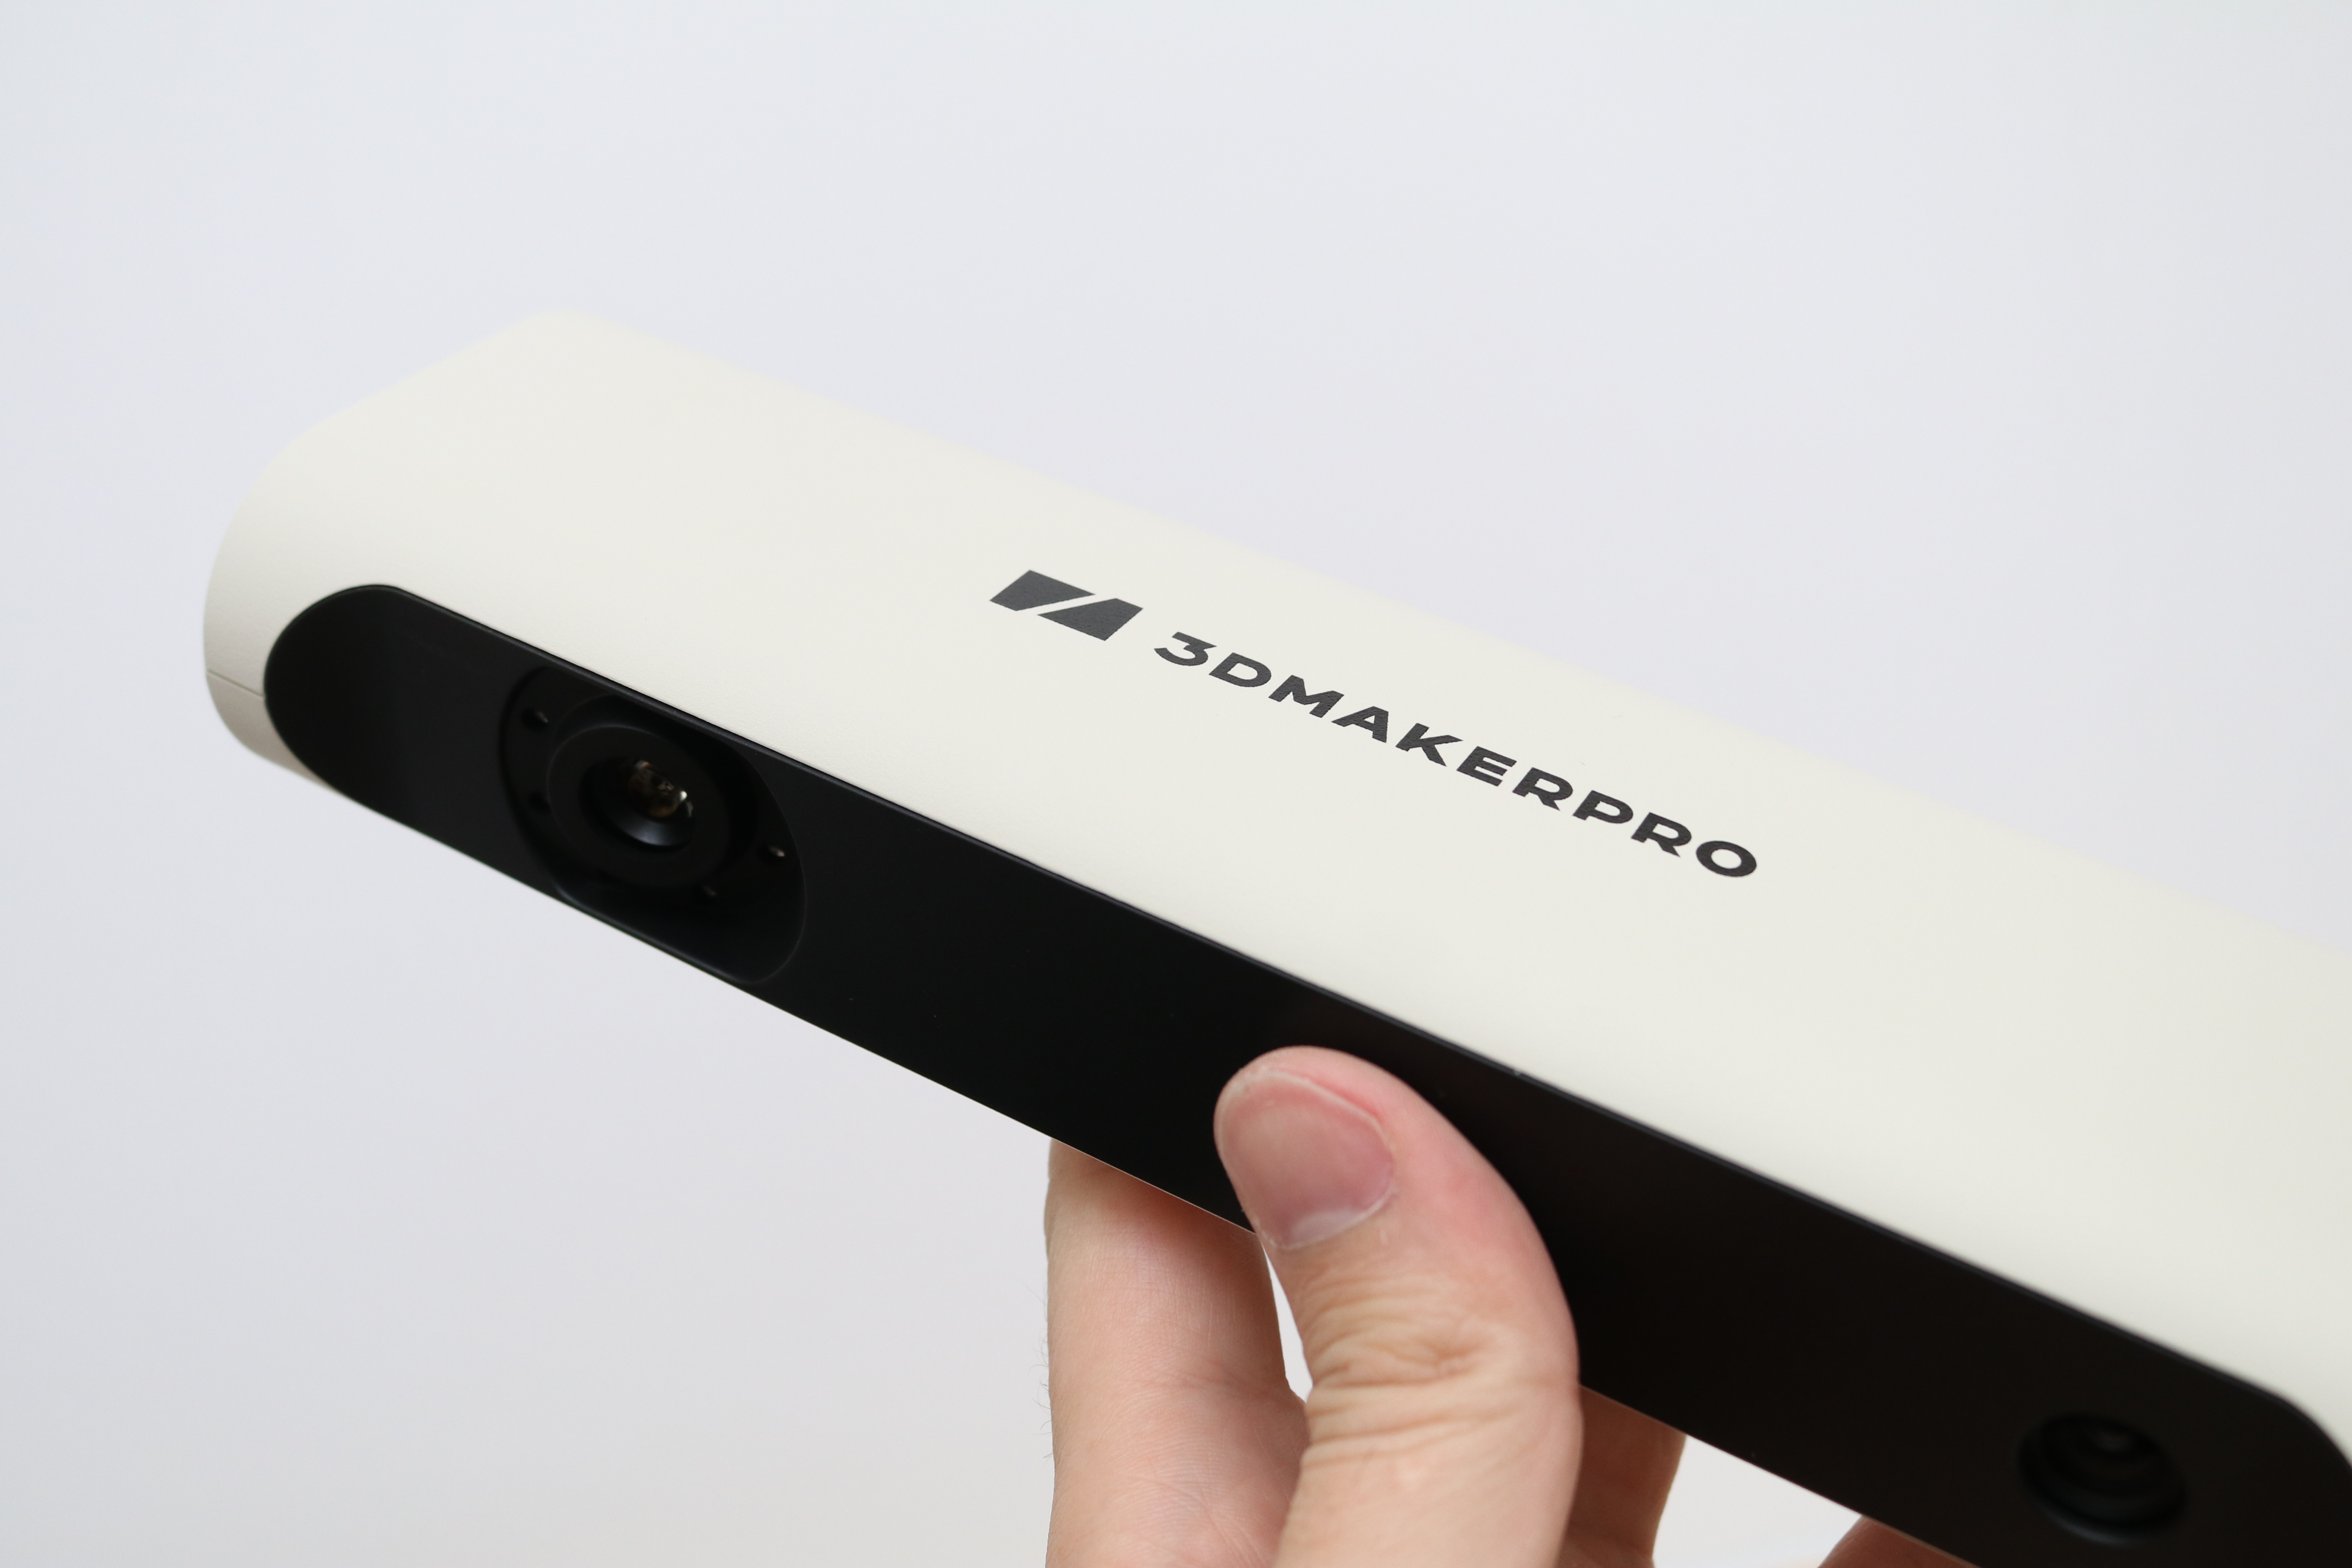
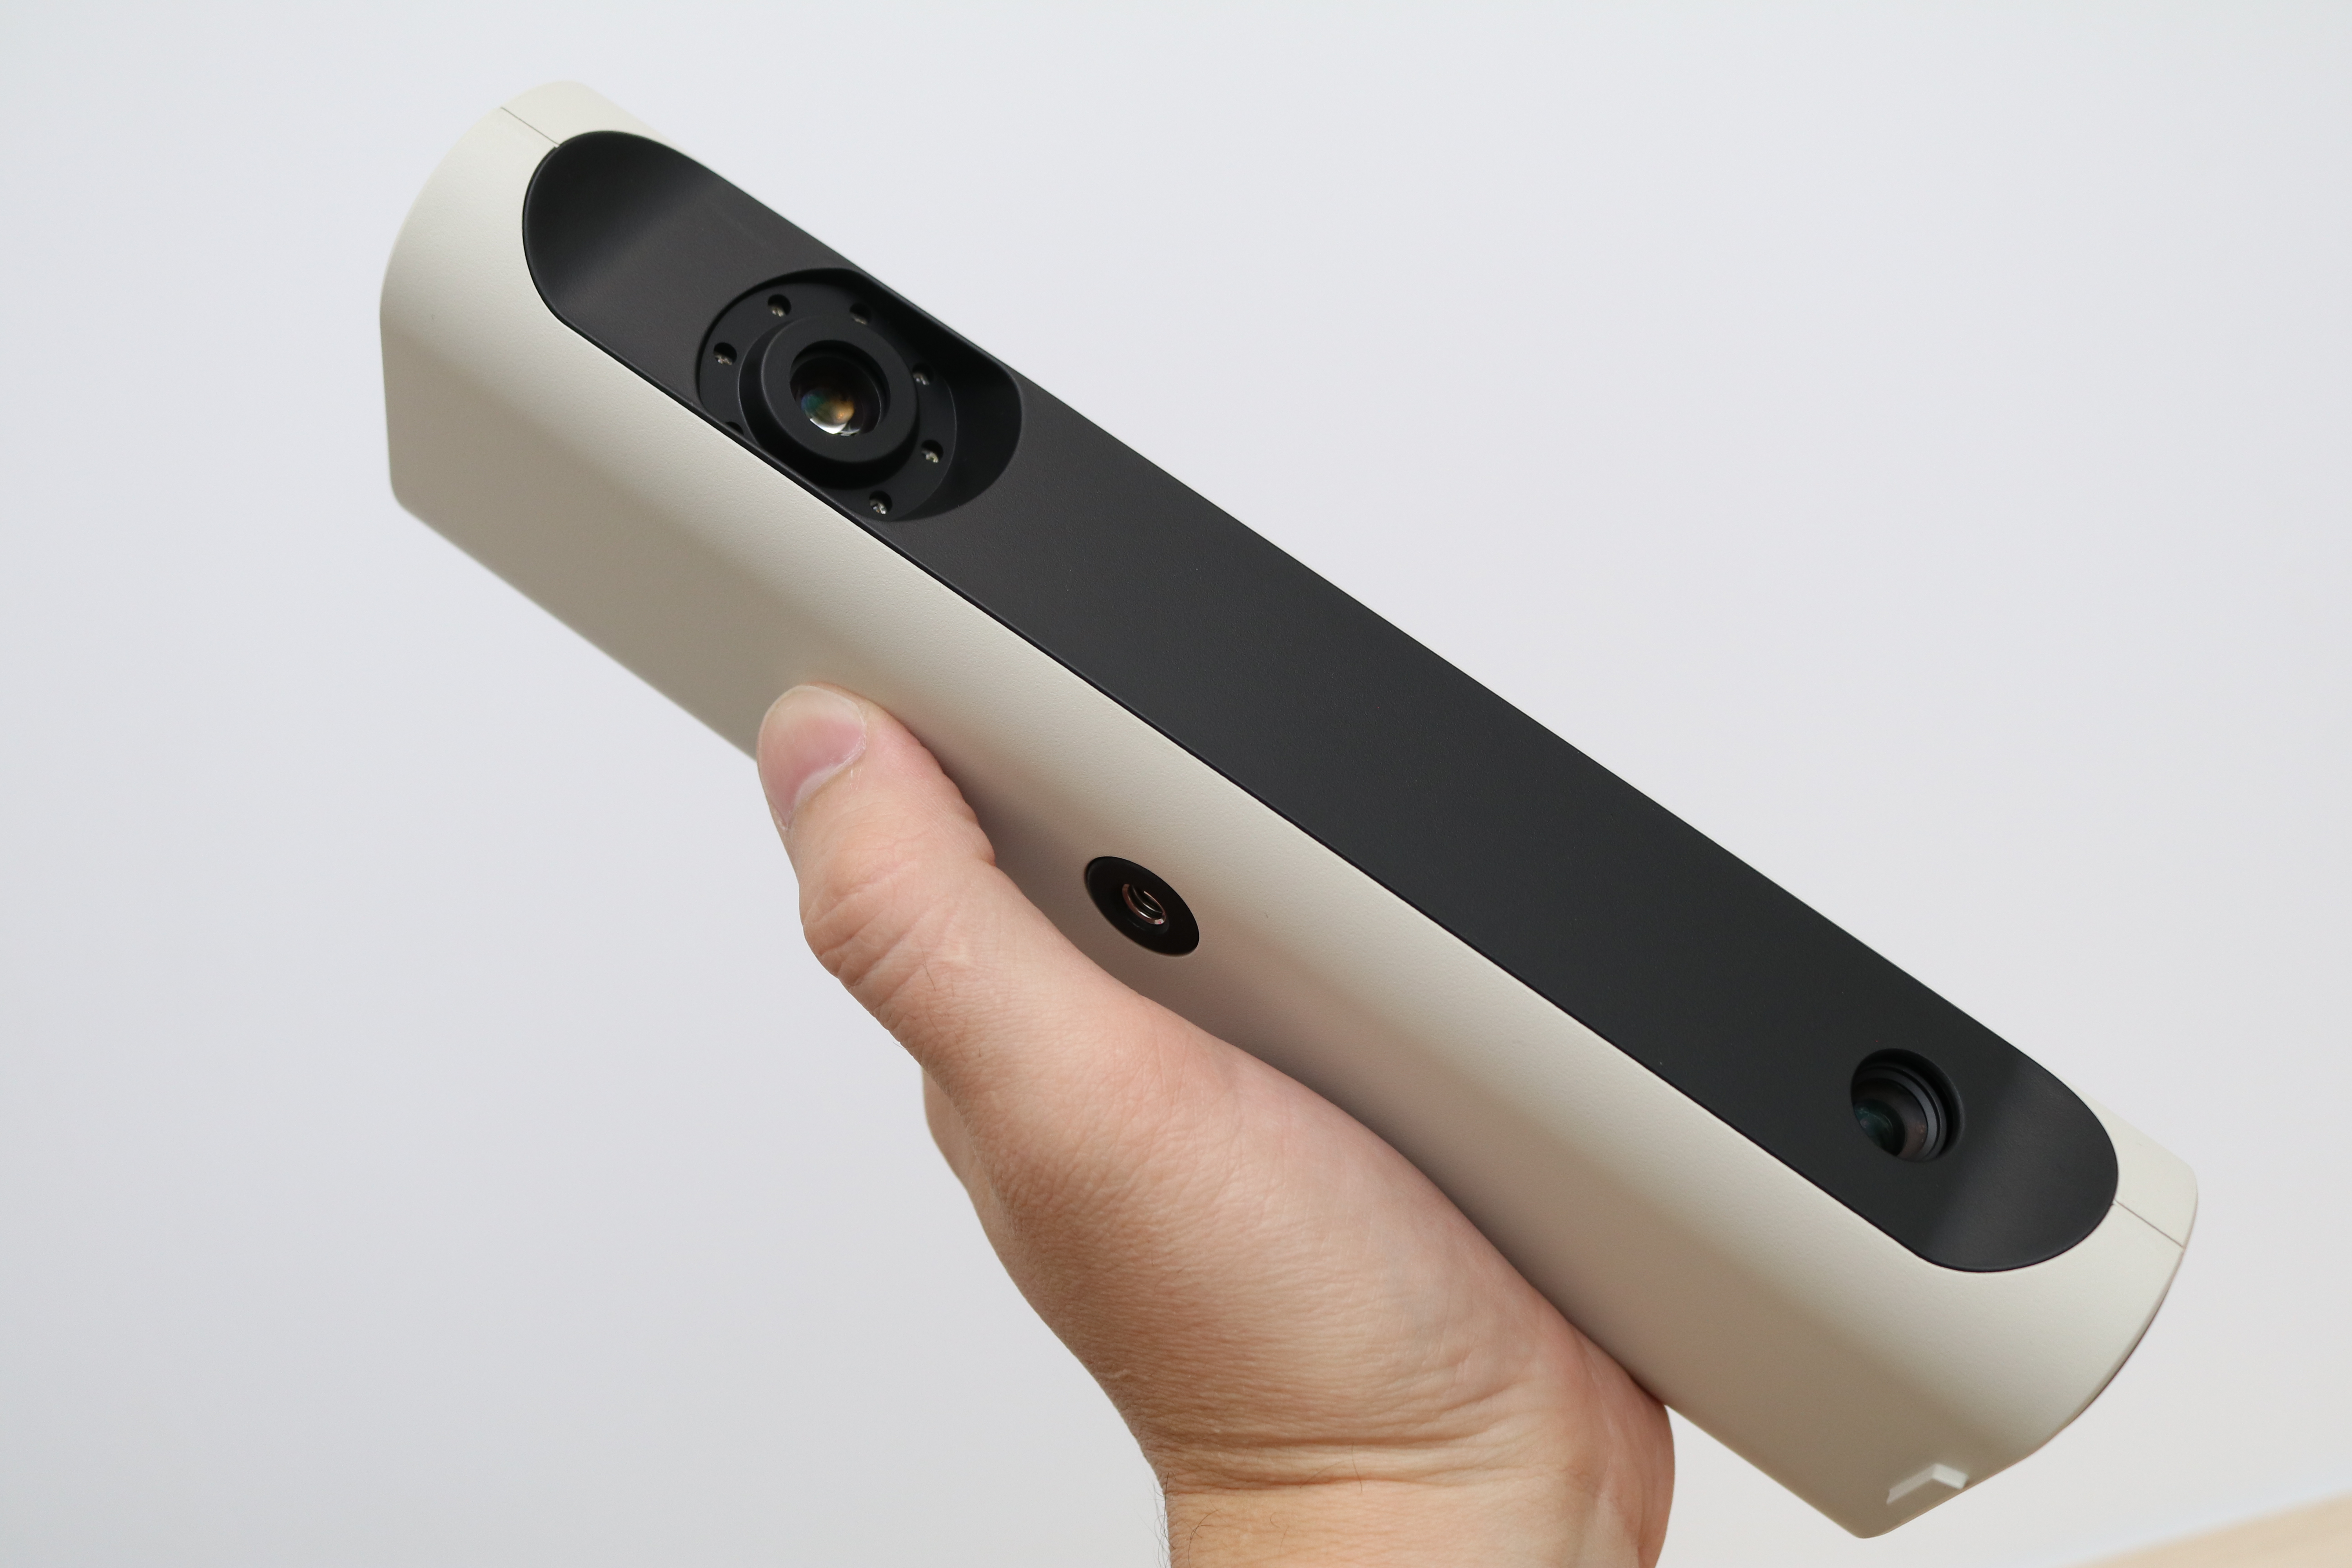
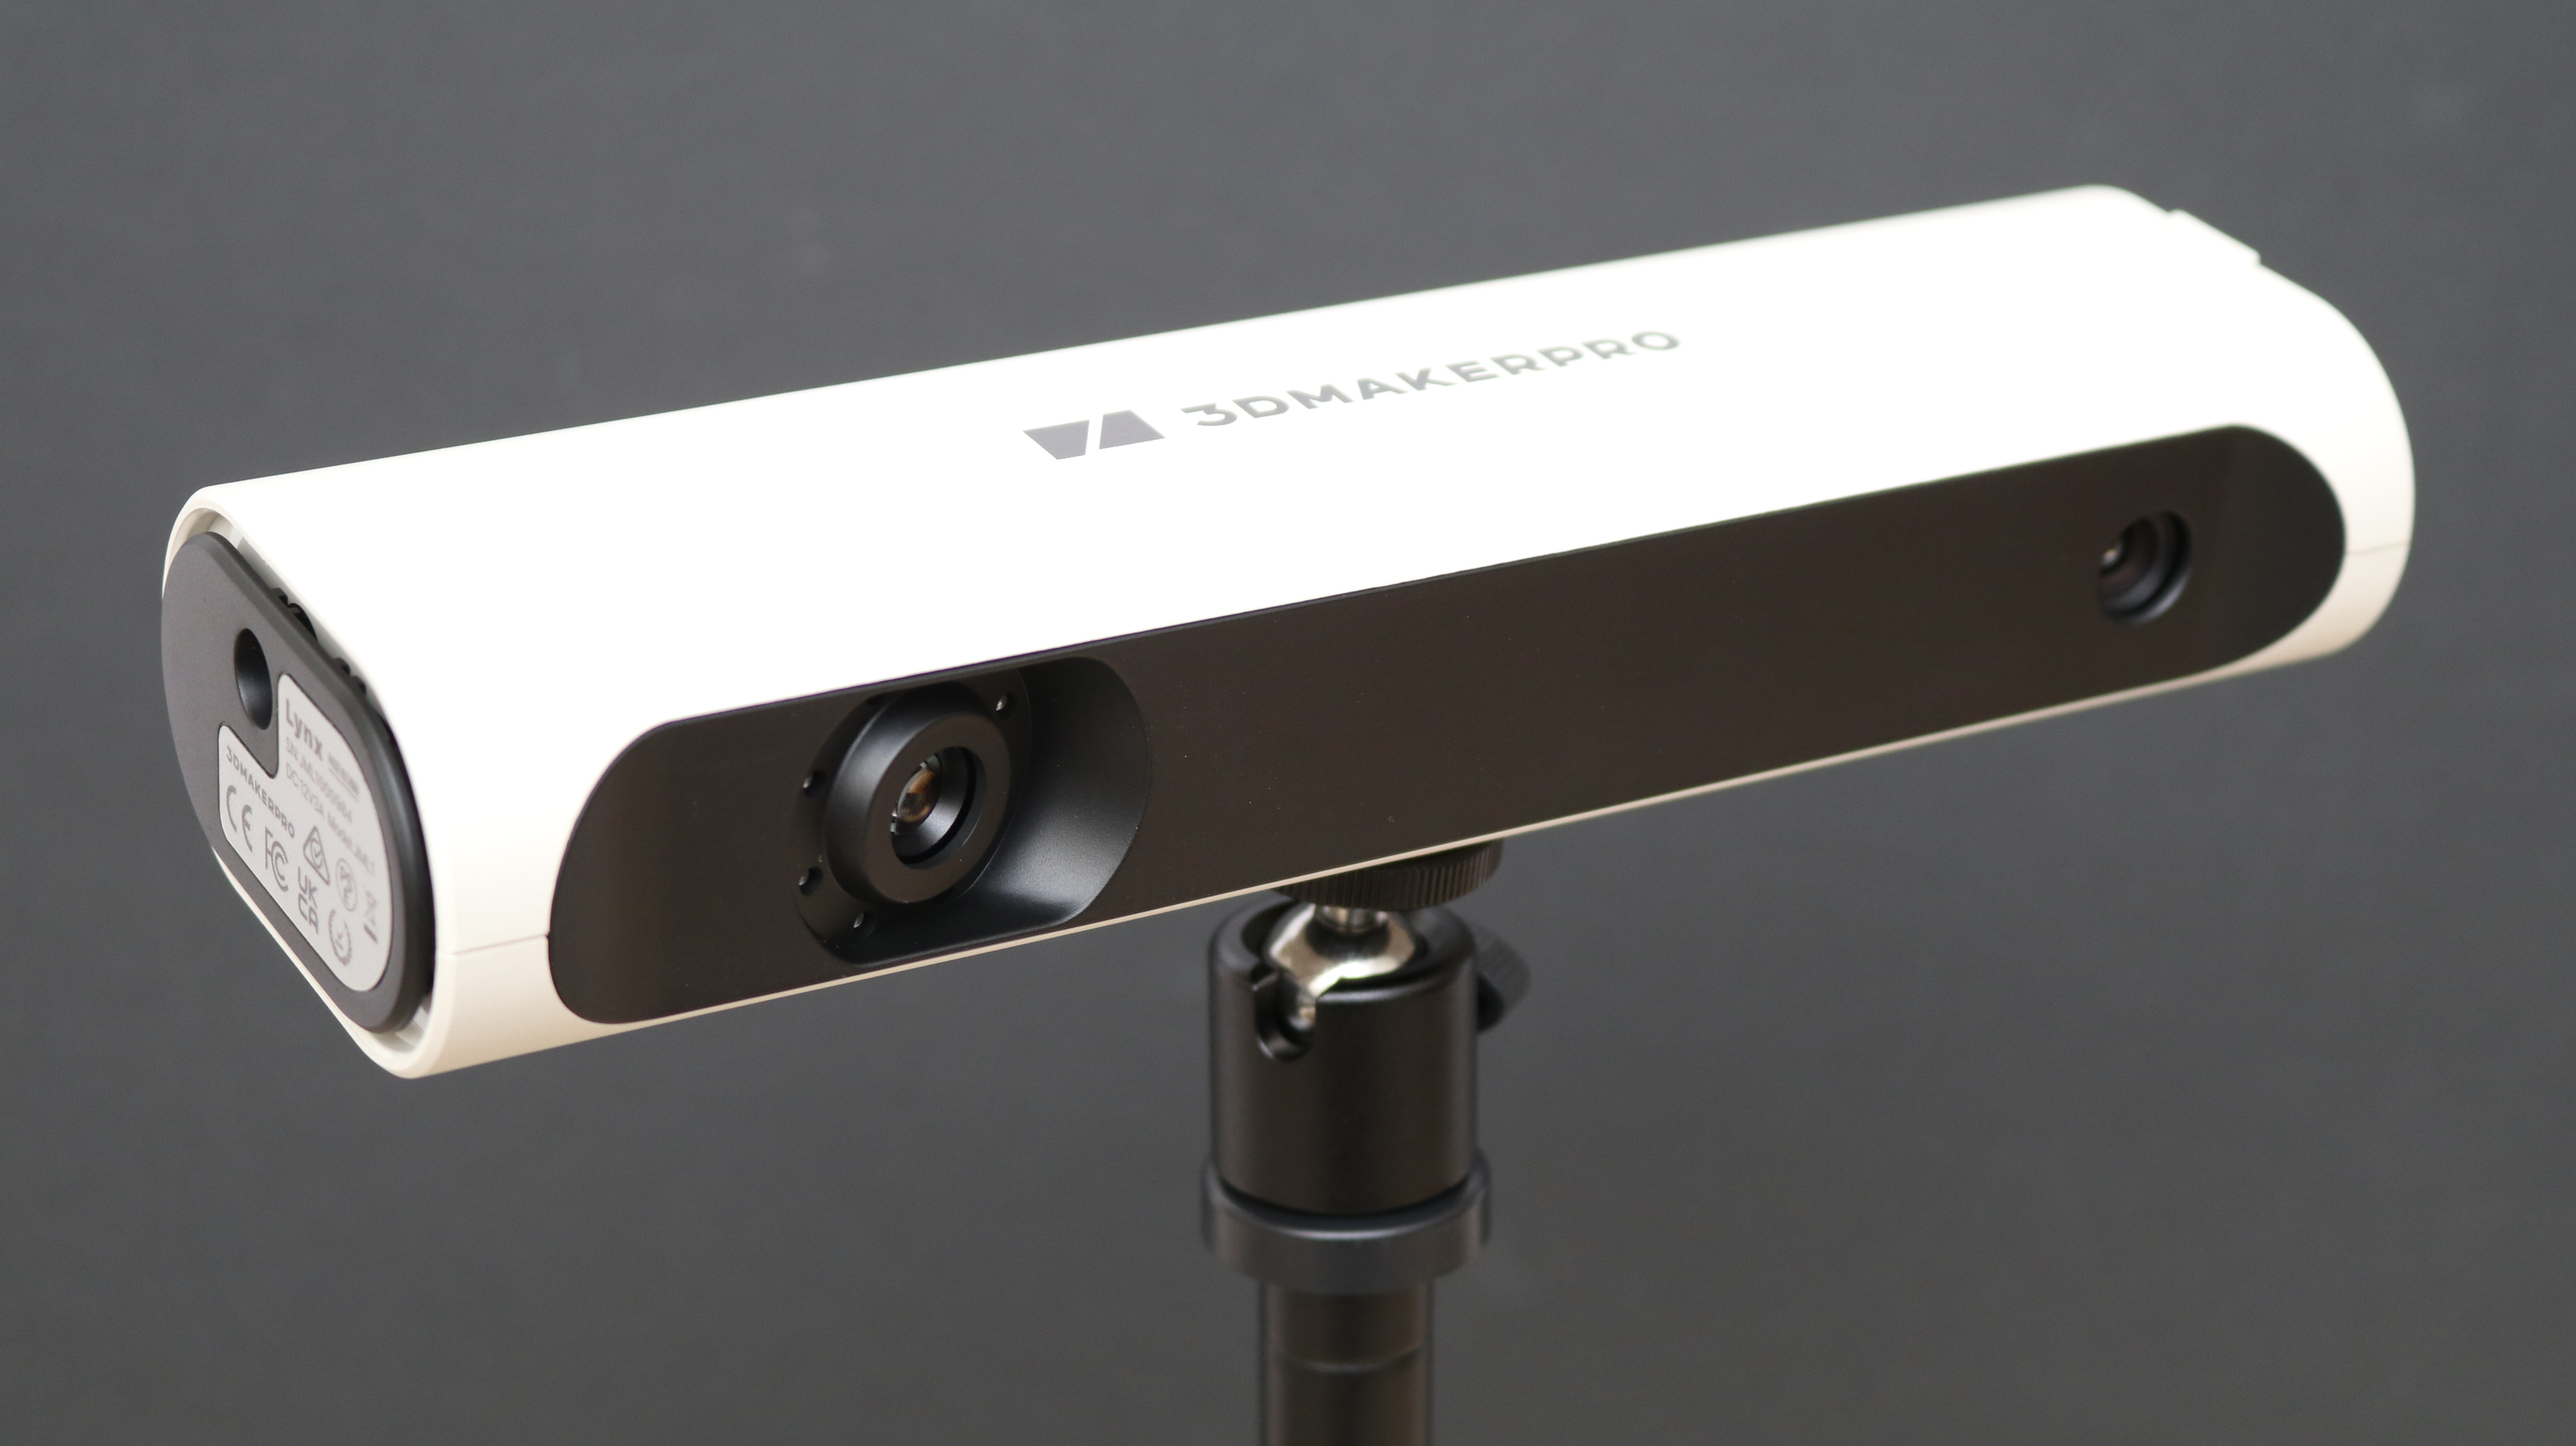
The scanner itself weighs about 500 grams, and fits easily in a hand. The cables plug into the rear of the scanner, and it can be held without using the handle/tripod. The enclosure of the scanner is lightly textured, and it feels like a high-quality product. There is a port on the side of the scanner where the power cord for the turntable plugs in.
Package Variations of 3DMakerPro Lynx

The Lynx is available in three packages: standard, premium, and luxury. The standard package includes only the scanner, power adapter, and data transfer cable, which is technically all you need to create a scan. The premium bundle also includes a turntable, tripod, and a carrying case. The luxury bundle includes a “color kit”, which will allow you to create color textures for your model with the addition of a DSLR camera that takes pictures during the scan.
3DMakerPro shipped me the premium version of the Lynx, which is the package that will provide the most value for the majority of users. The rotating turntable is perfect for scanning small objects, and the tripod doubles as a handle which is useful for scanning larger objects and people. These are both additions that most users will likely need at some point, while the color texture kit included with the luxury version will likely not be as useful for users focused on reverse engineering or mesh generation.
Get Tom's Hardware's best news and in-depth reviews, straight to your inbox.
Setup of 3DMakerPro Lynx
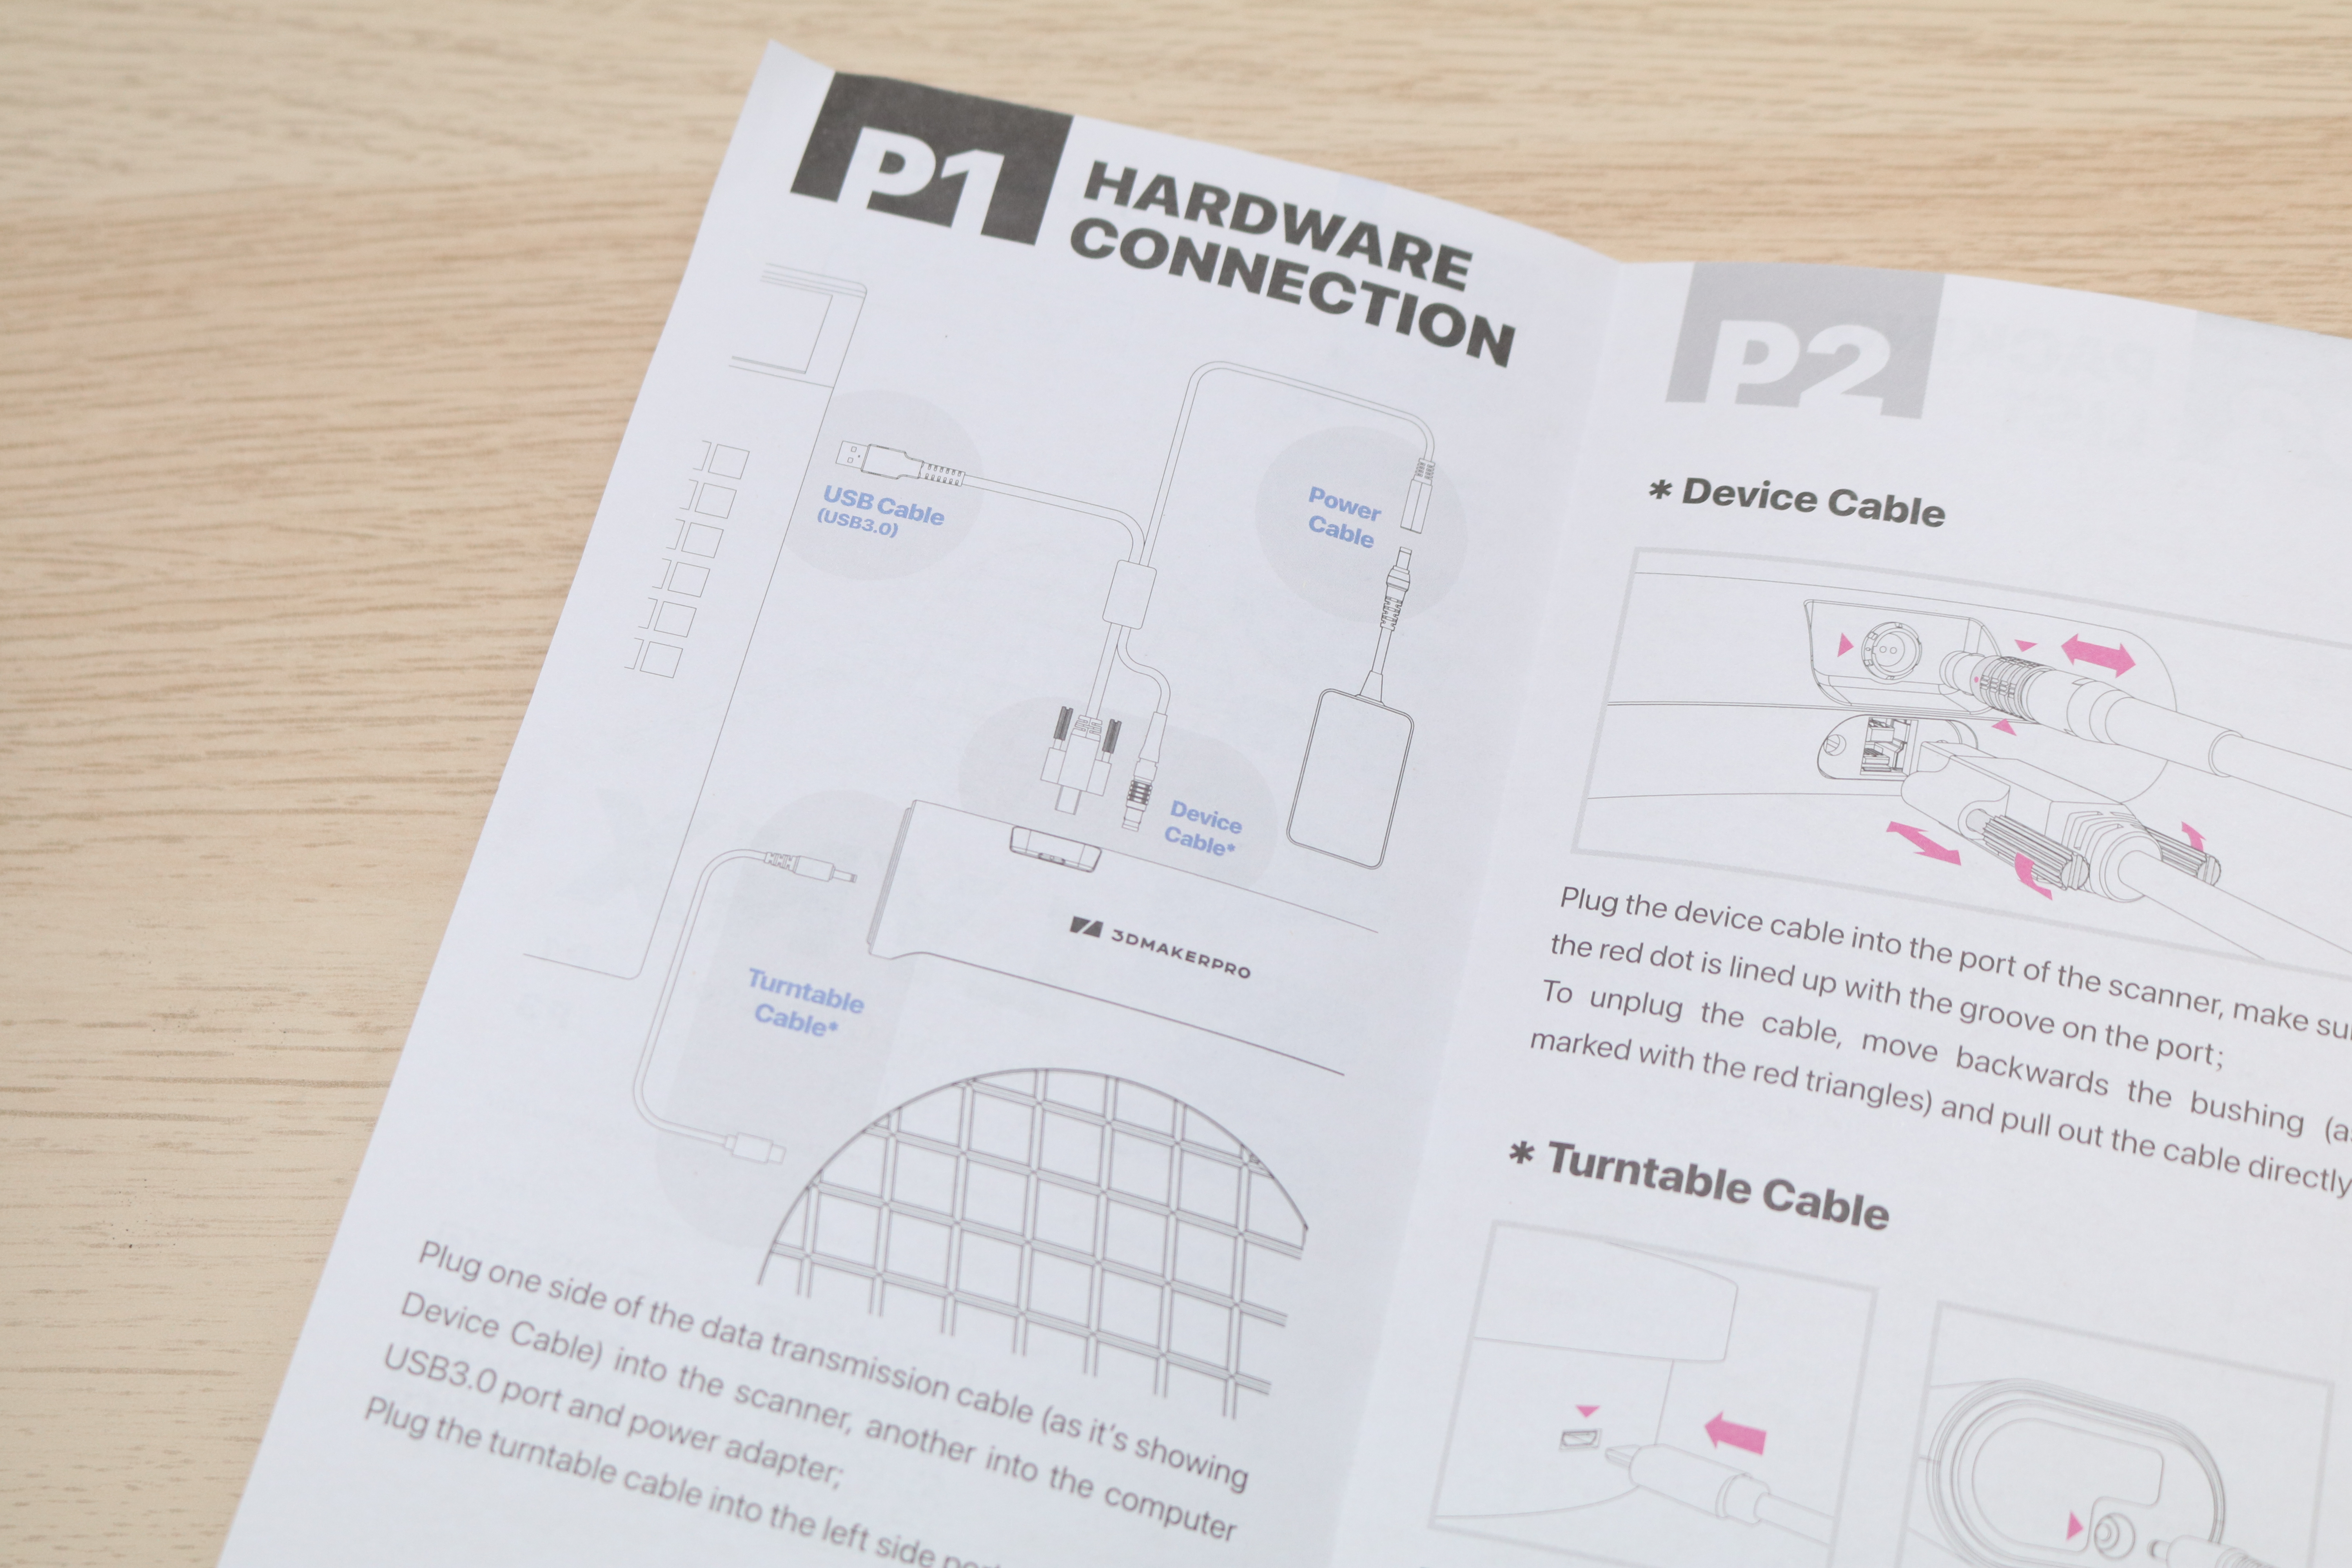
The 3DMakerPro Lynx requires multiple connections for power, data, and turntable control and includes a wiring diagram that shows the proper connections for all the components. It’s a surprisingly complex setup for a consumer scanner, and the non-standard proprietary cables are something you’ll want to keep in mind if using this scanner in an environment where they could potentially be cut or damaged.
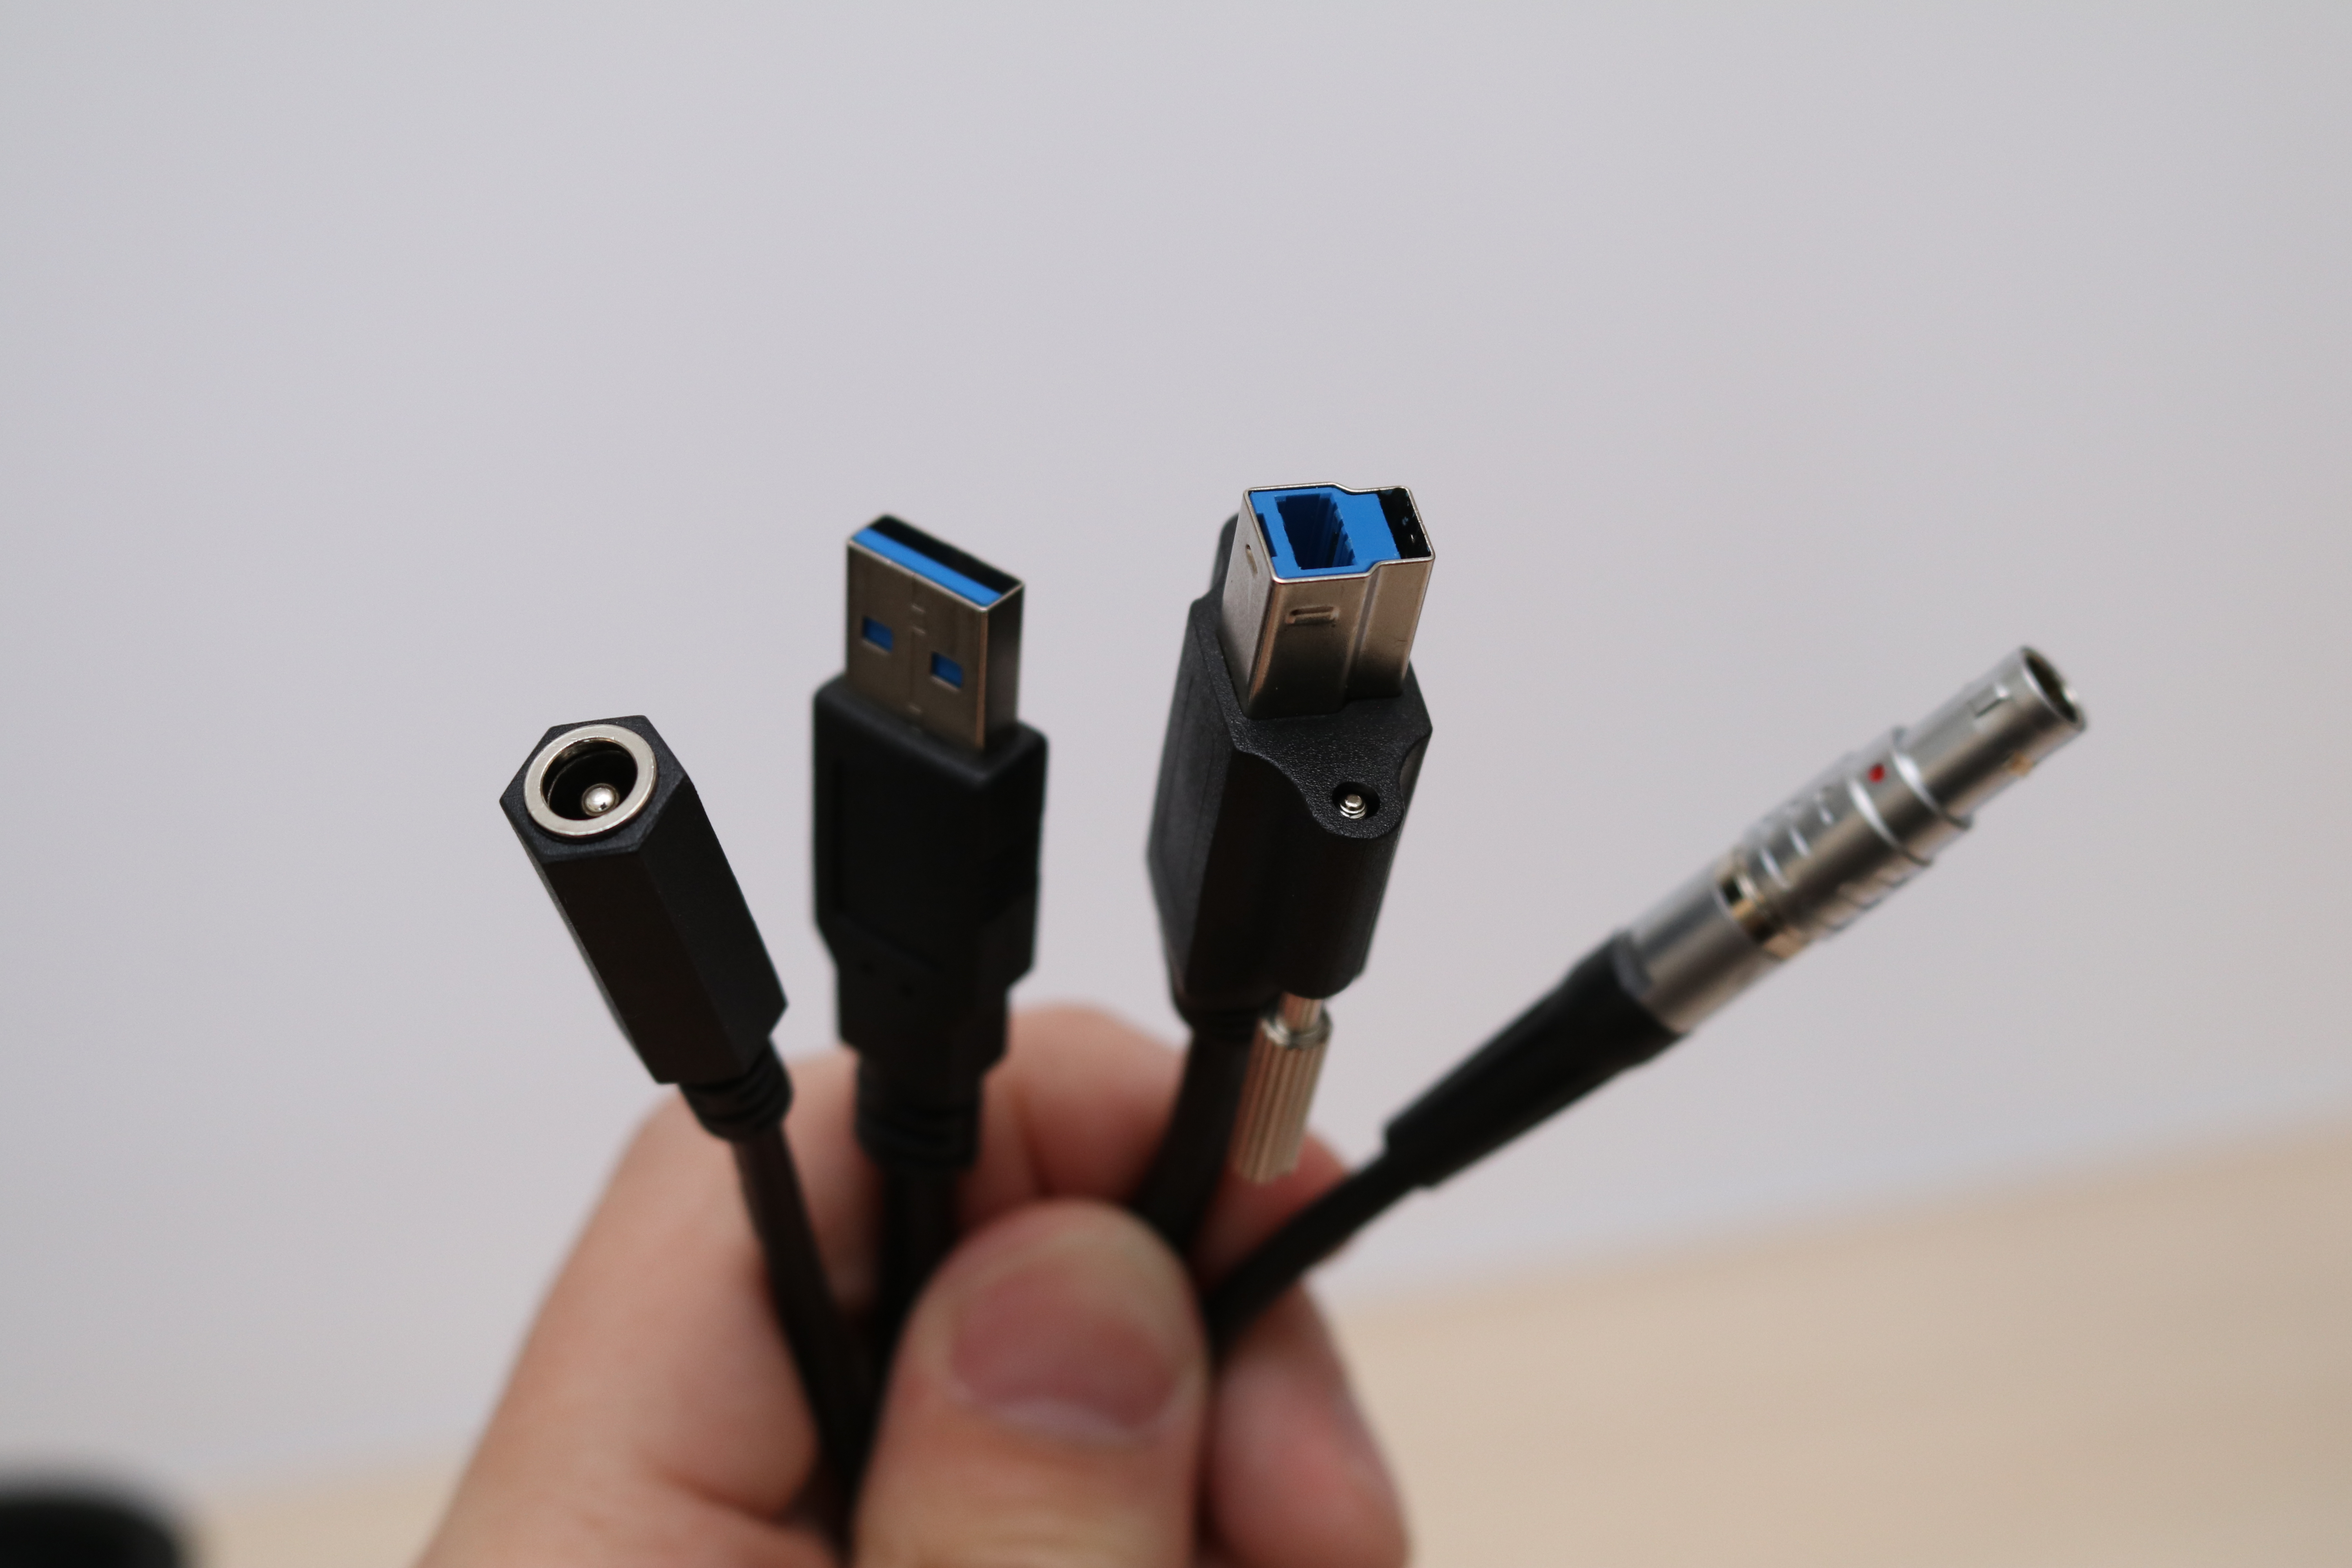
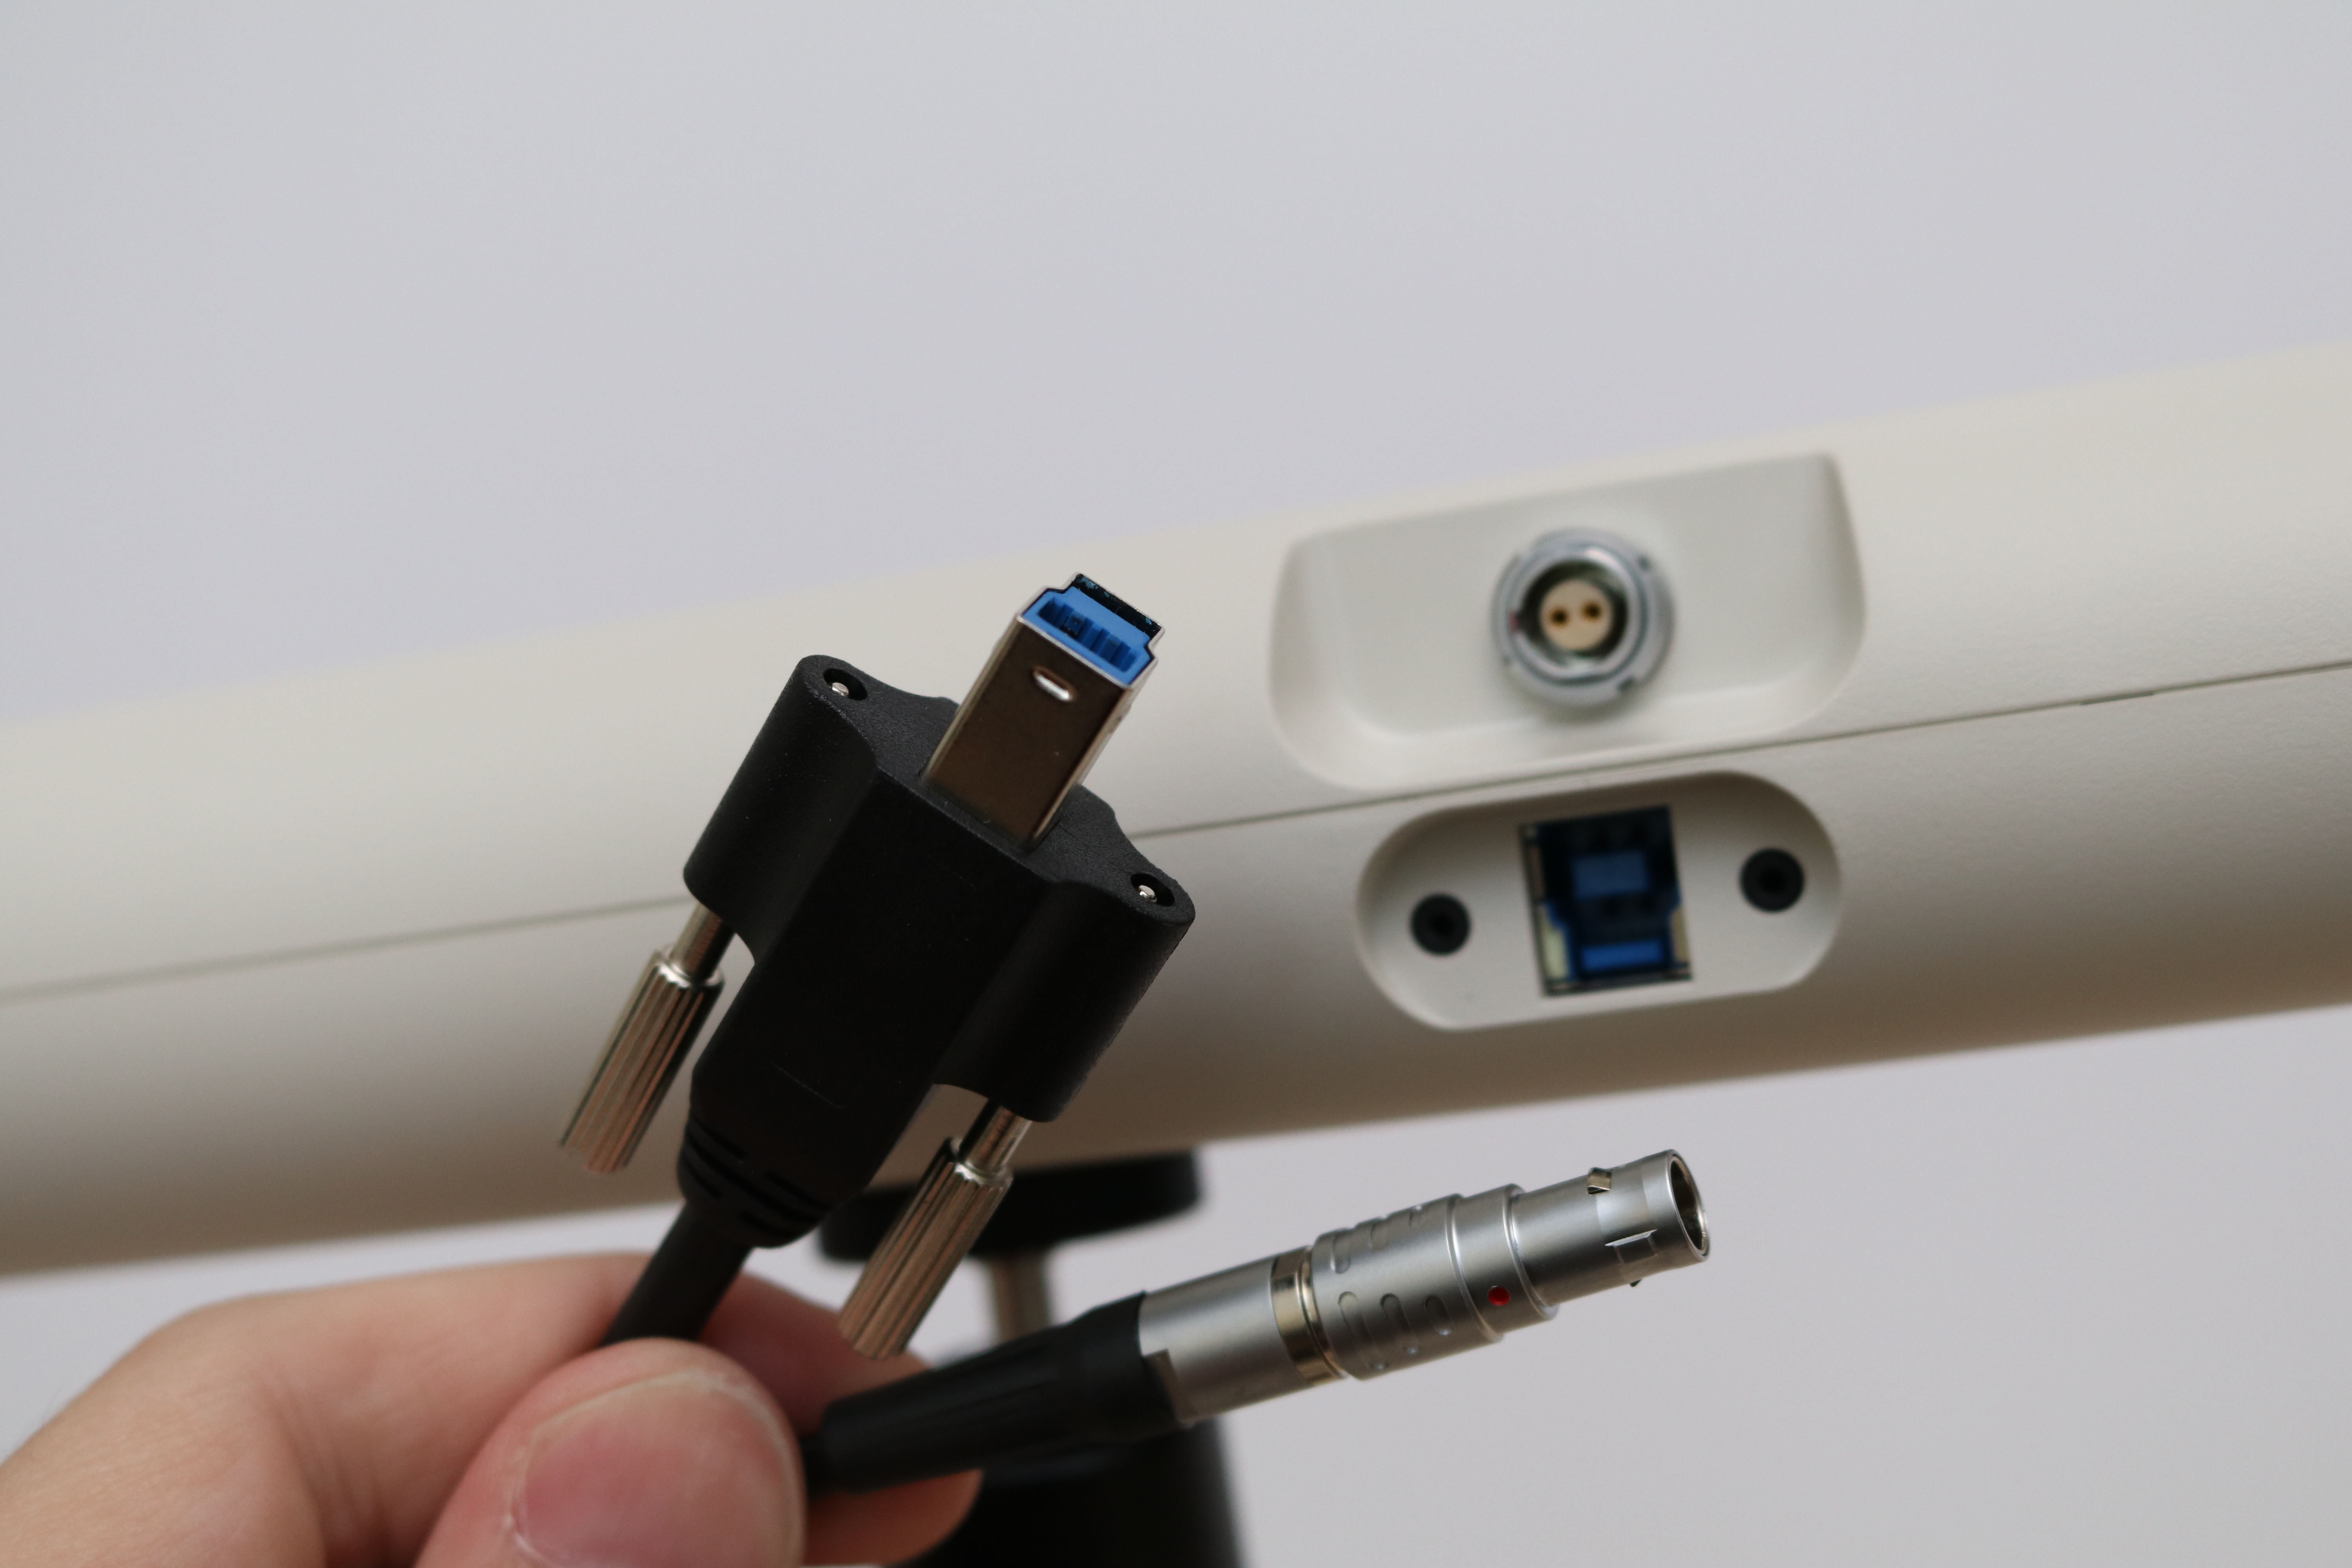
The primary device cable is composed of two joined cables; one provides power to the Lynx scanner provided by the external power supply, and the other transfers data to a USB 3.0 connection. In addition to these cables, there is a separate microUSB cable that connects the scanner to the turntable. The turntable itself has no physical controls, and there’s no way to increase/decrease speed or turn it on and off without unplugging it.
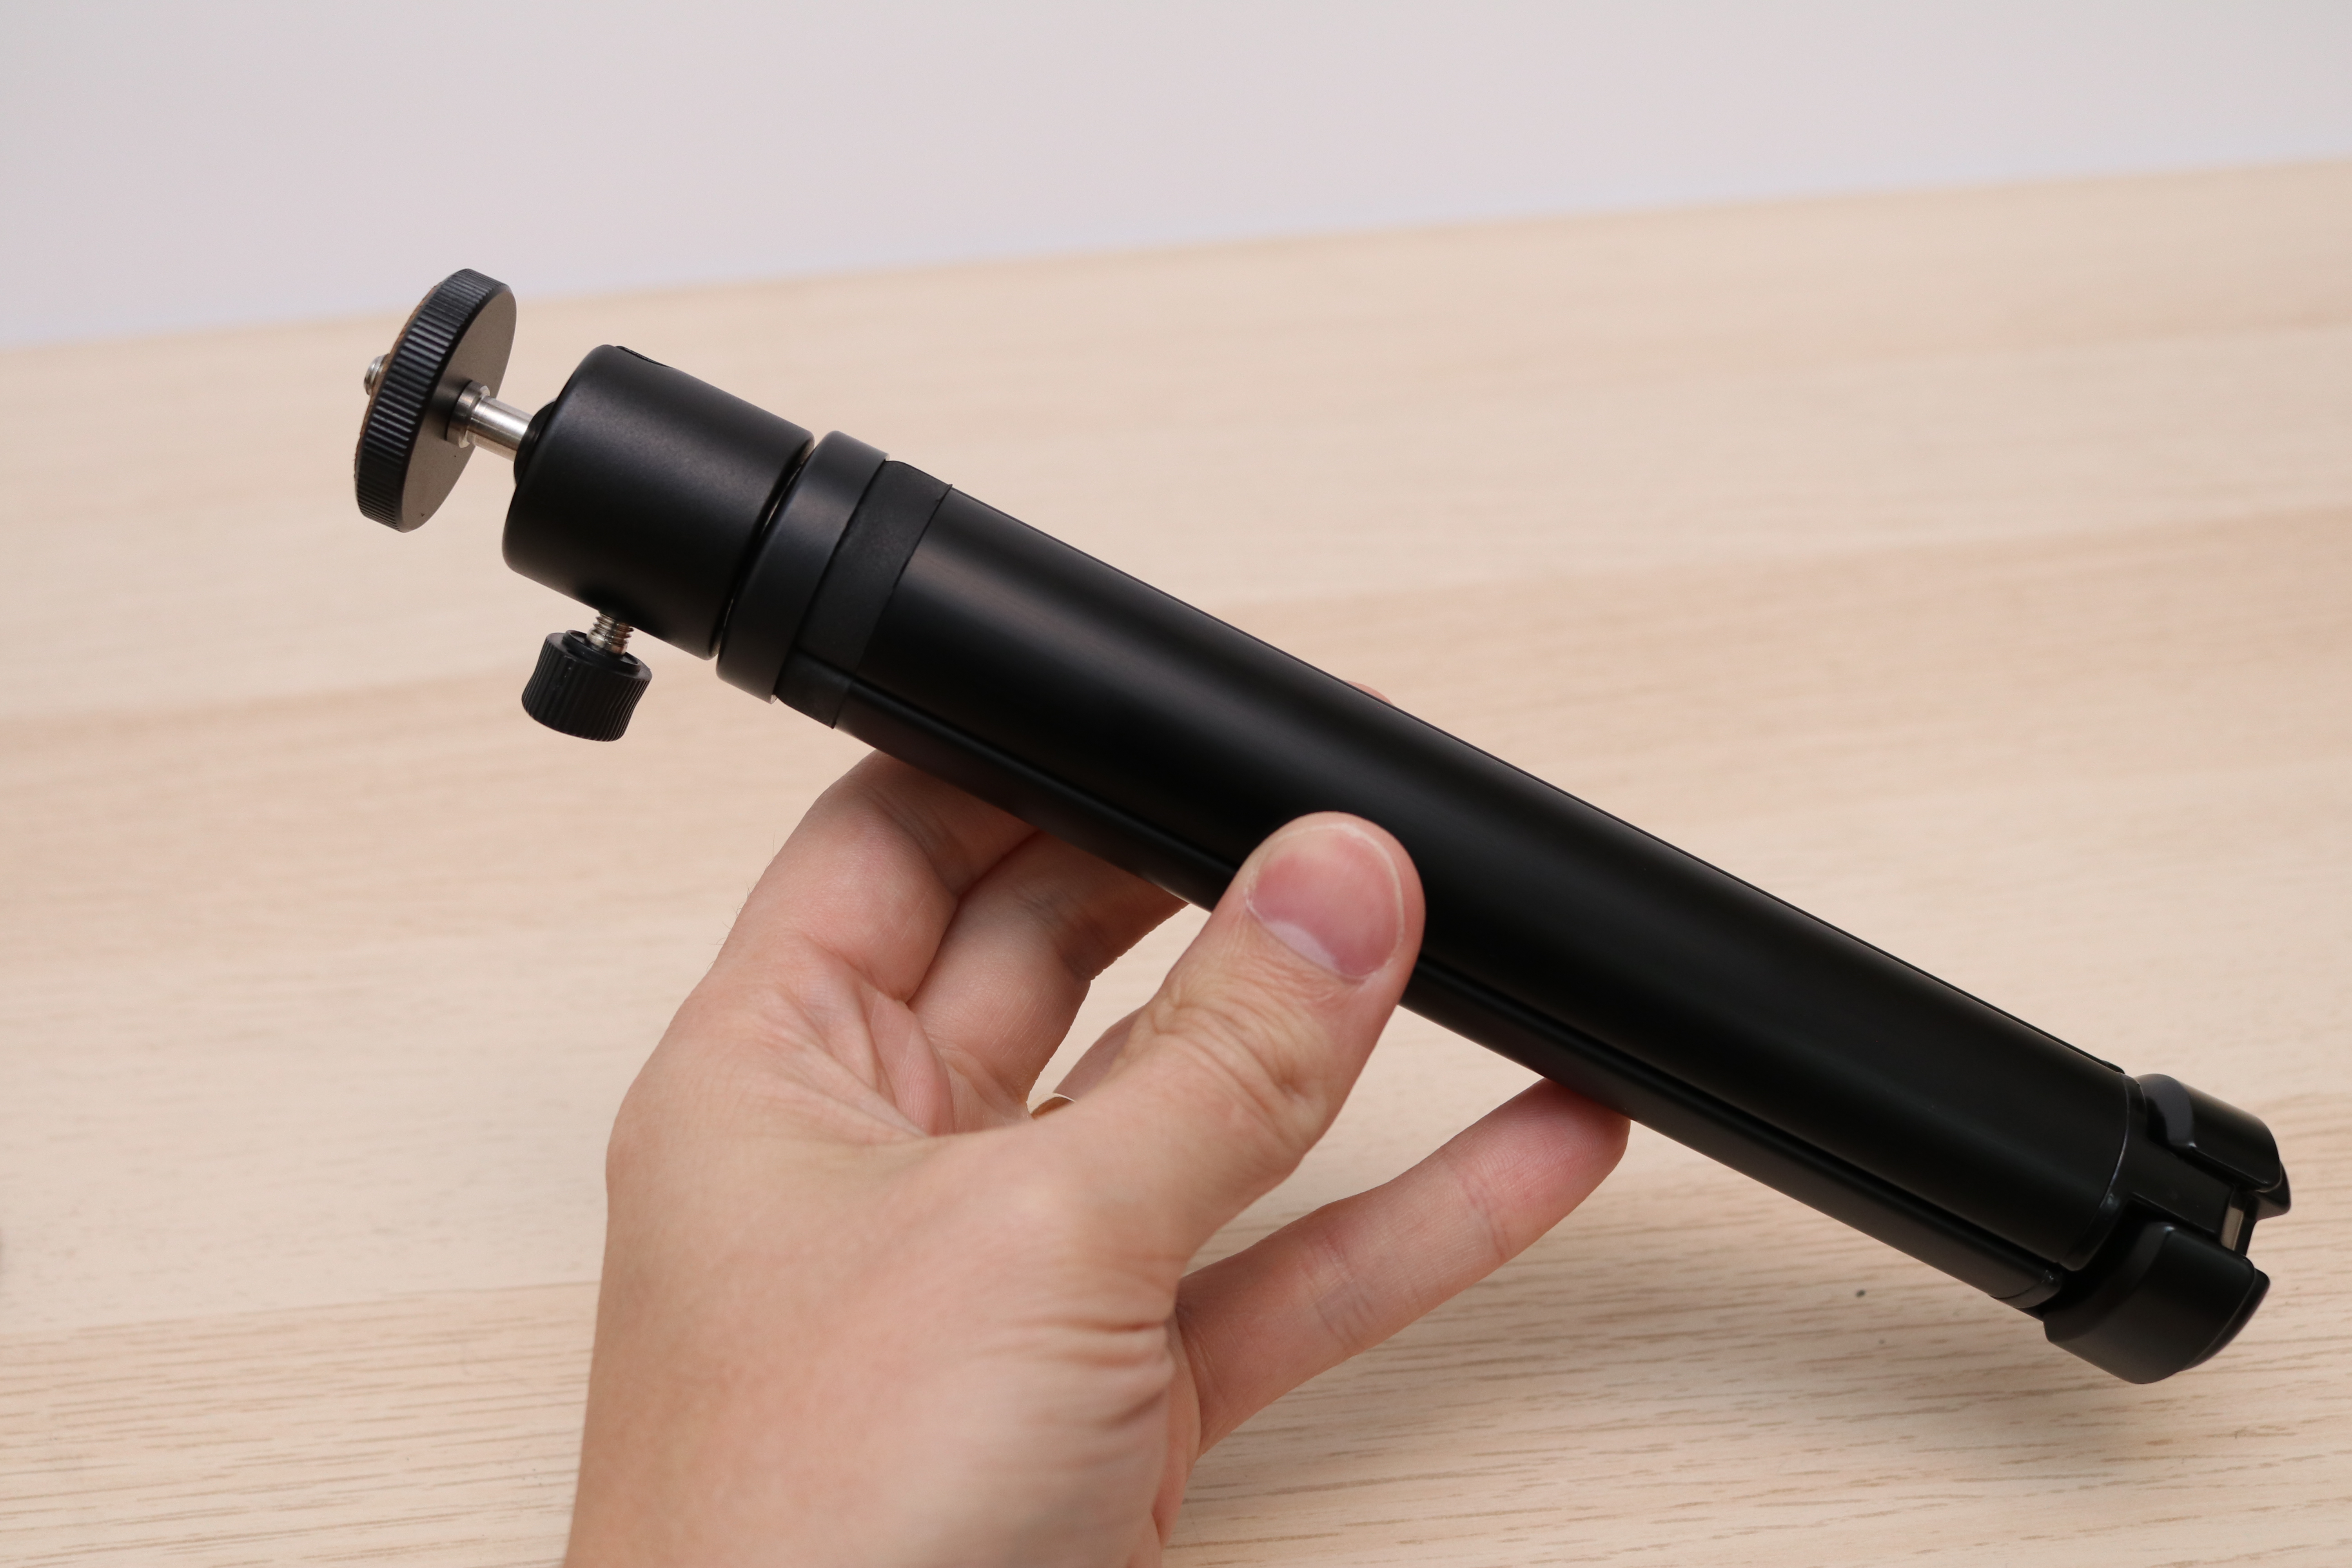
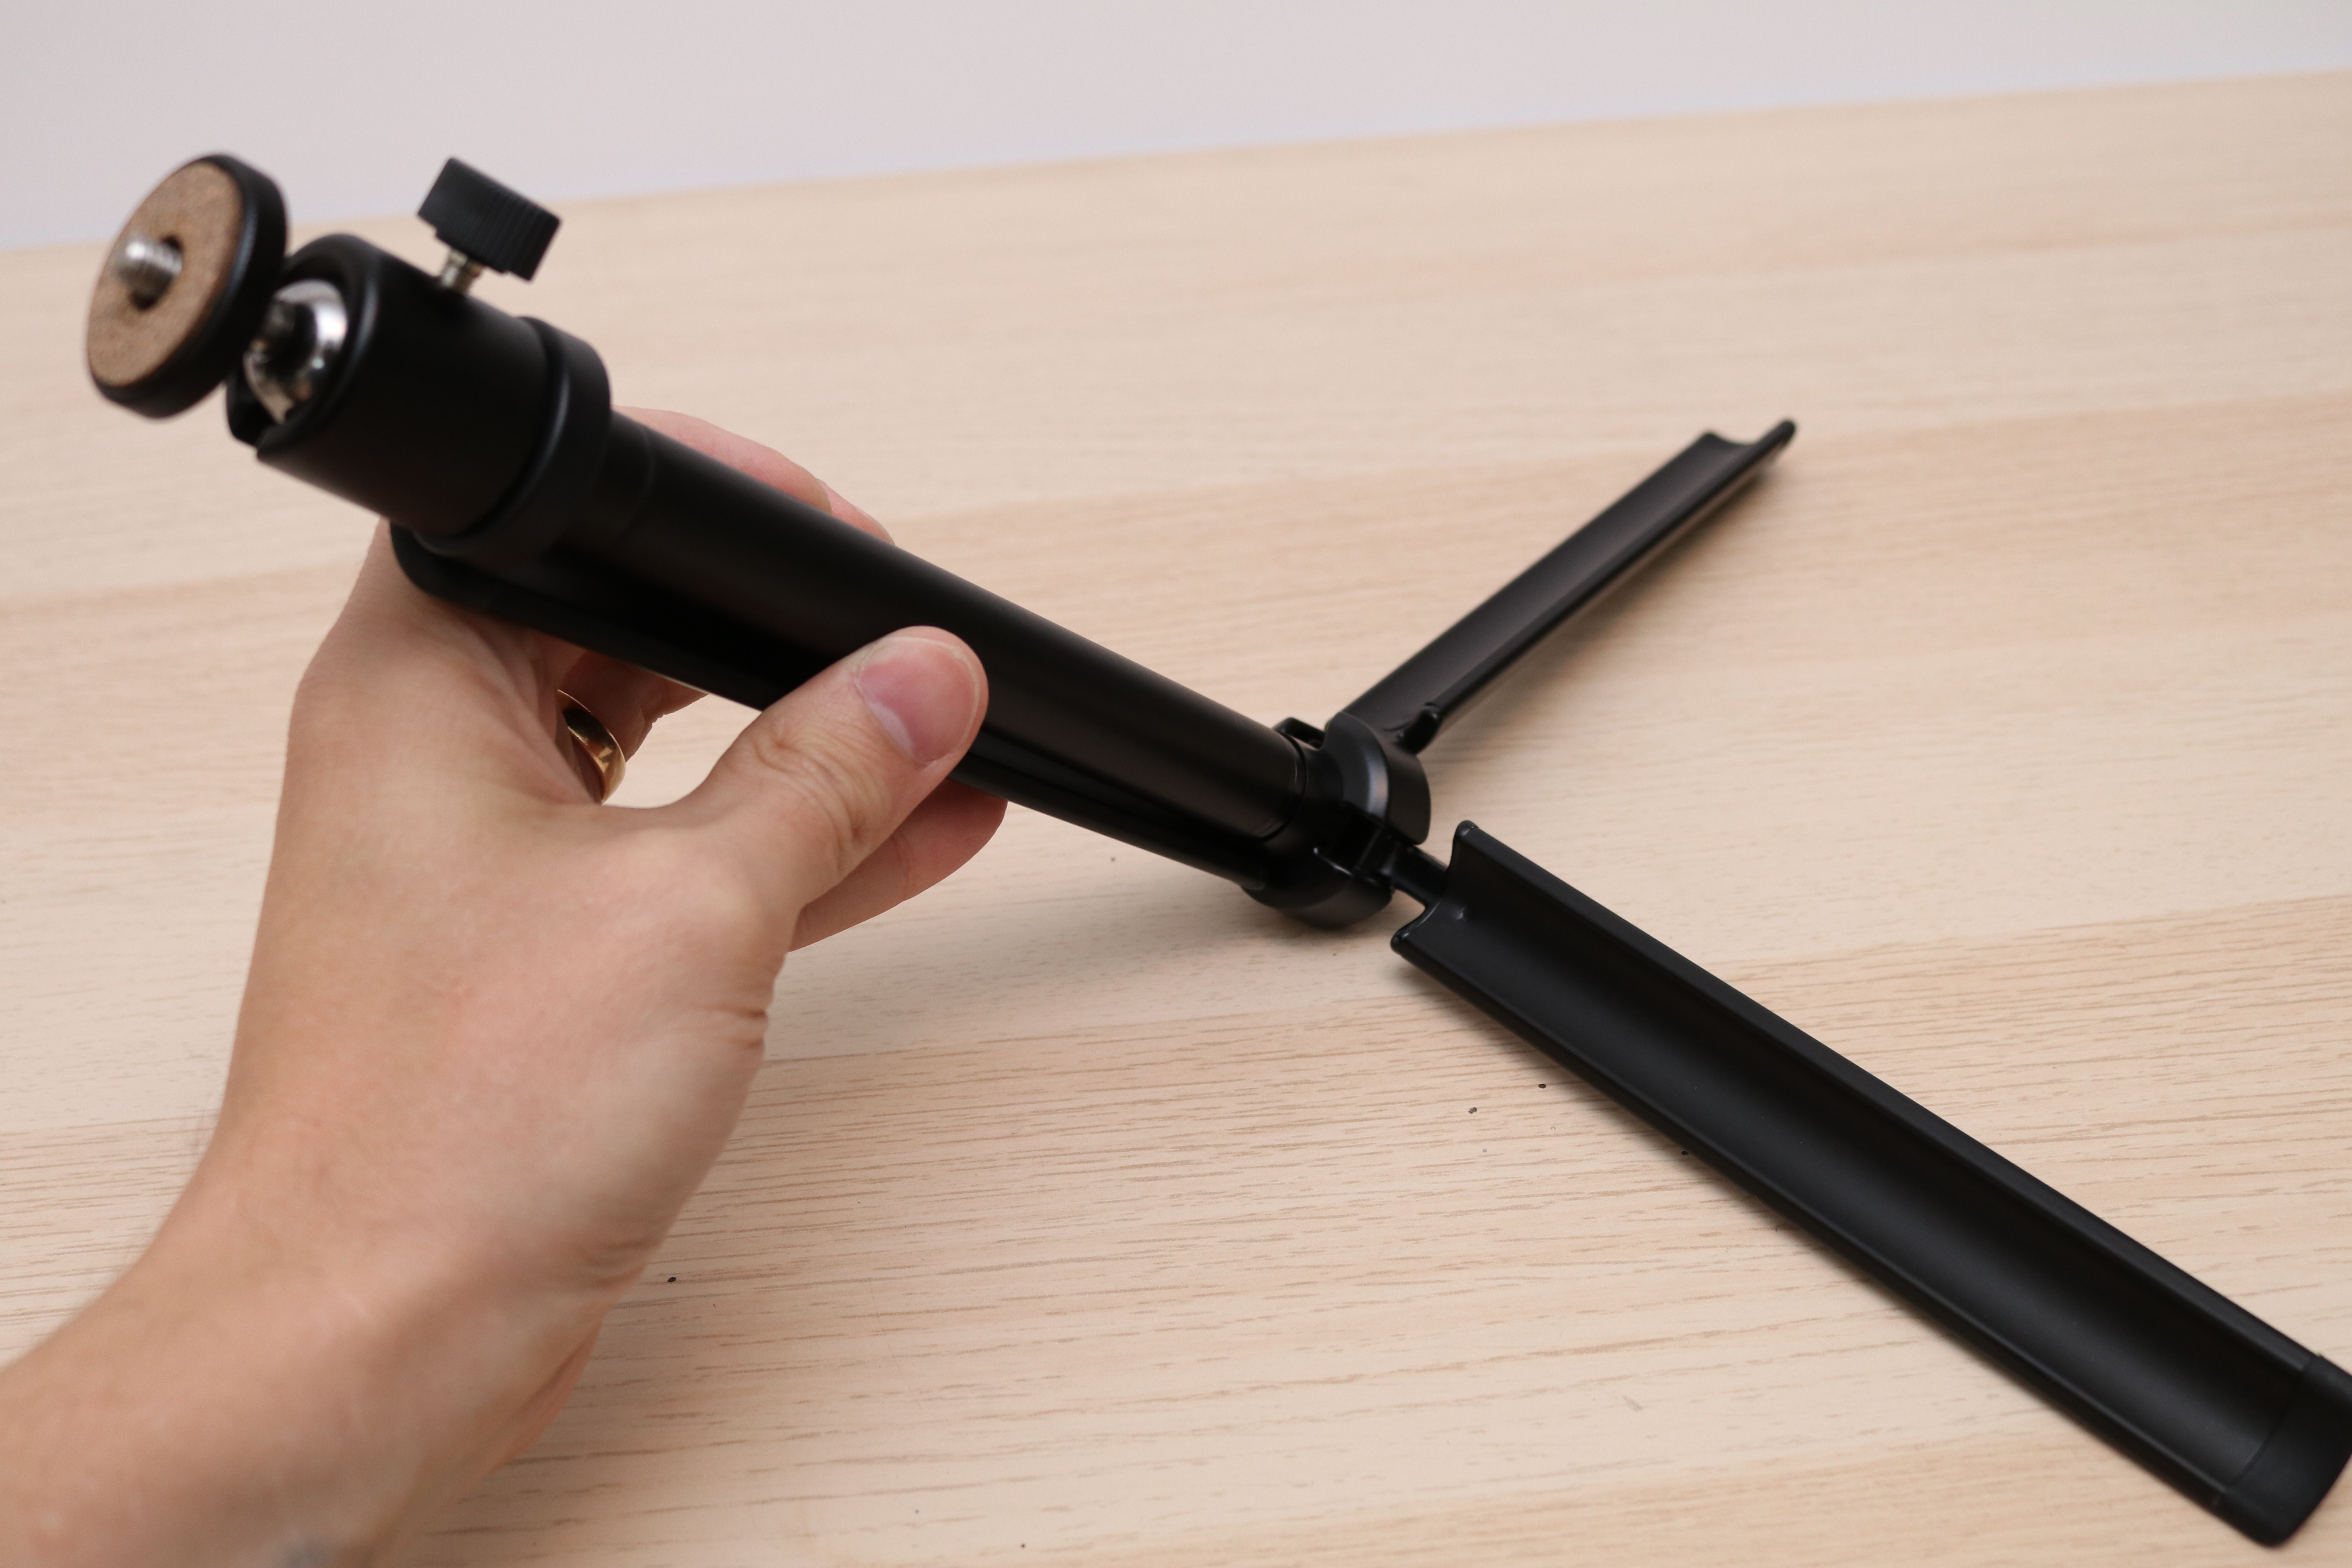
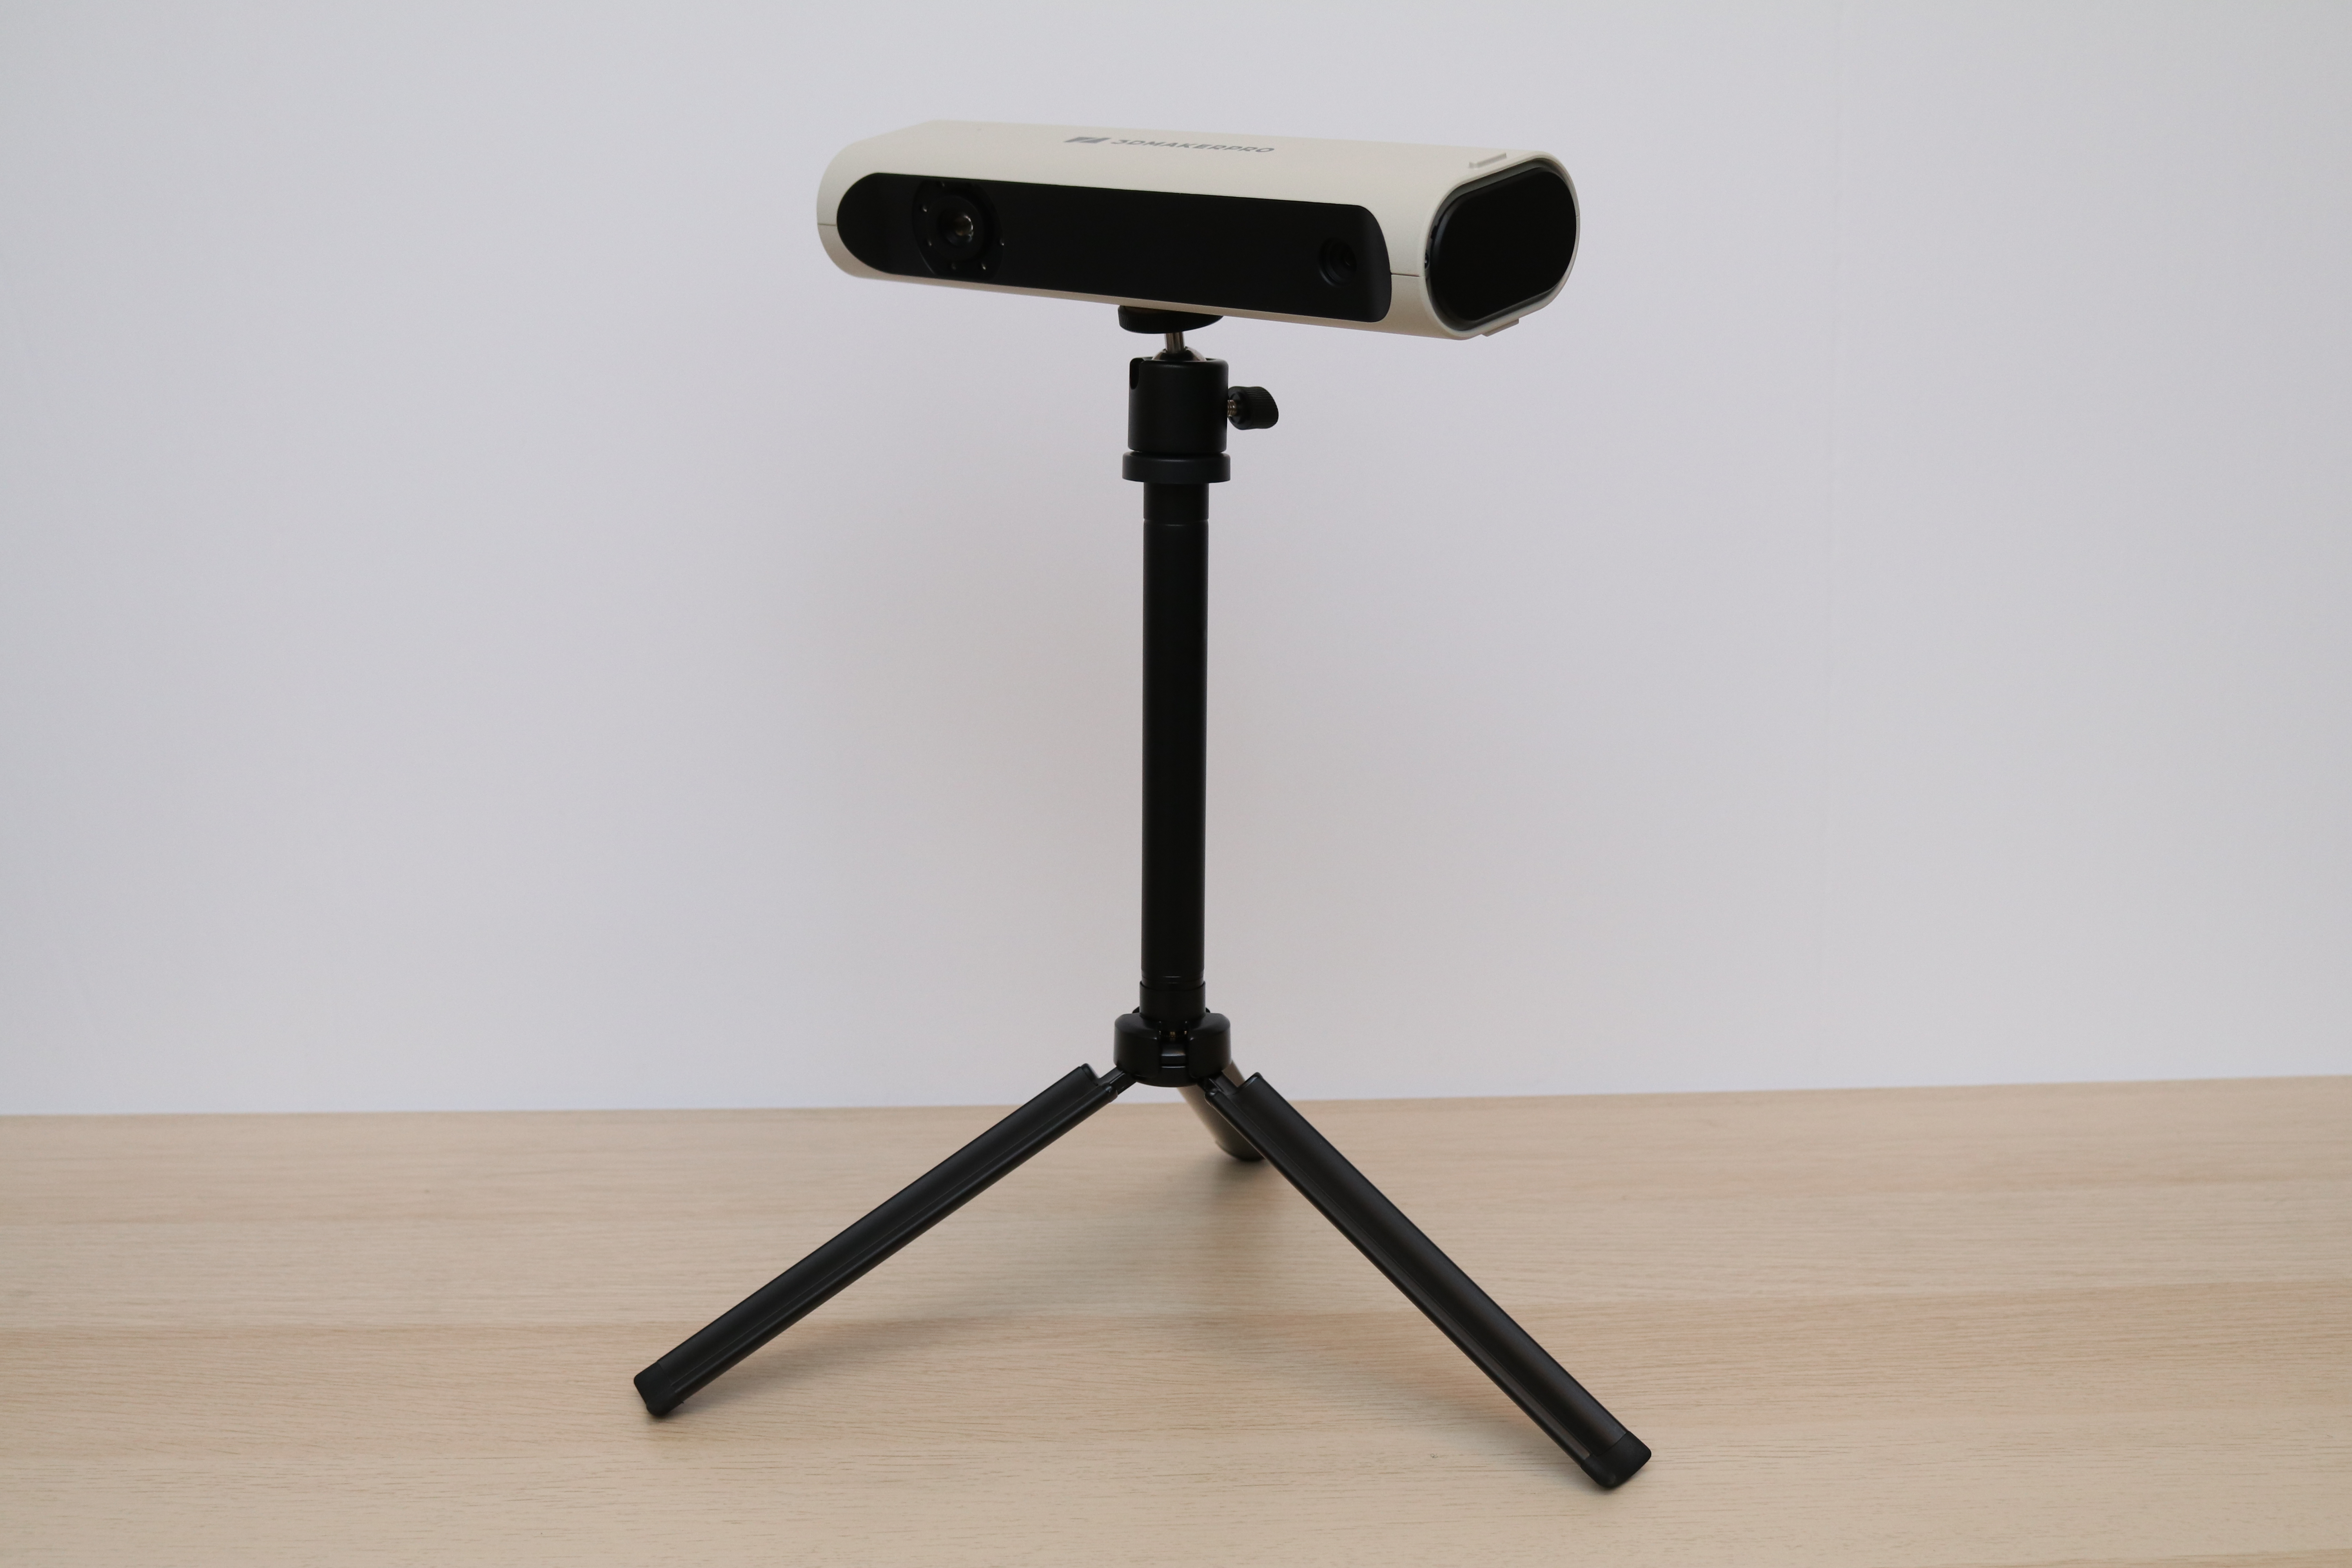
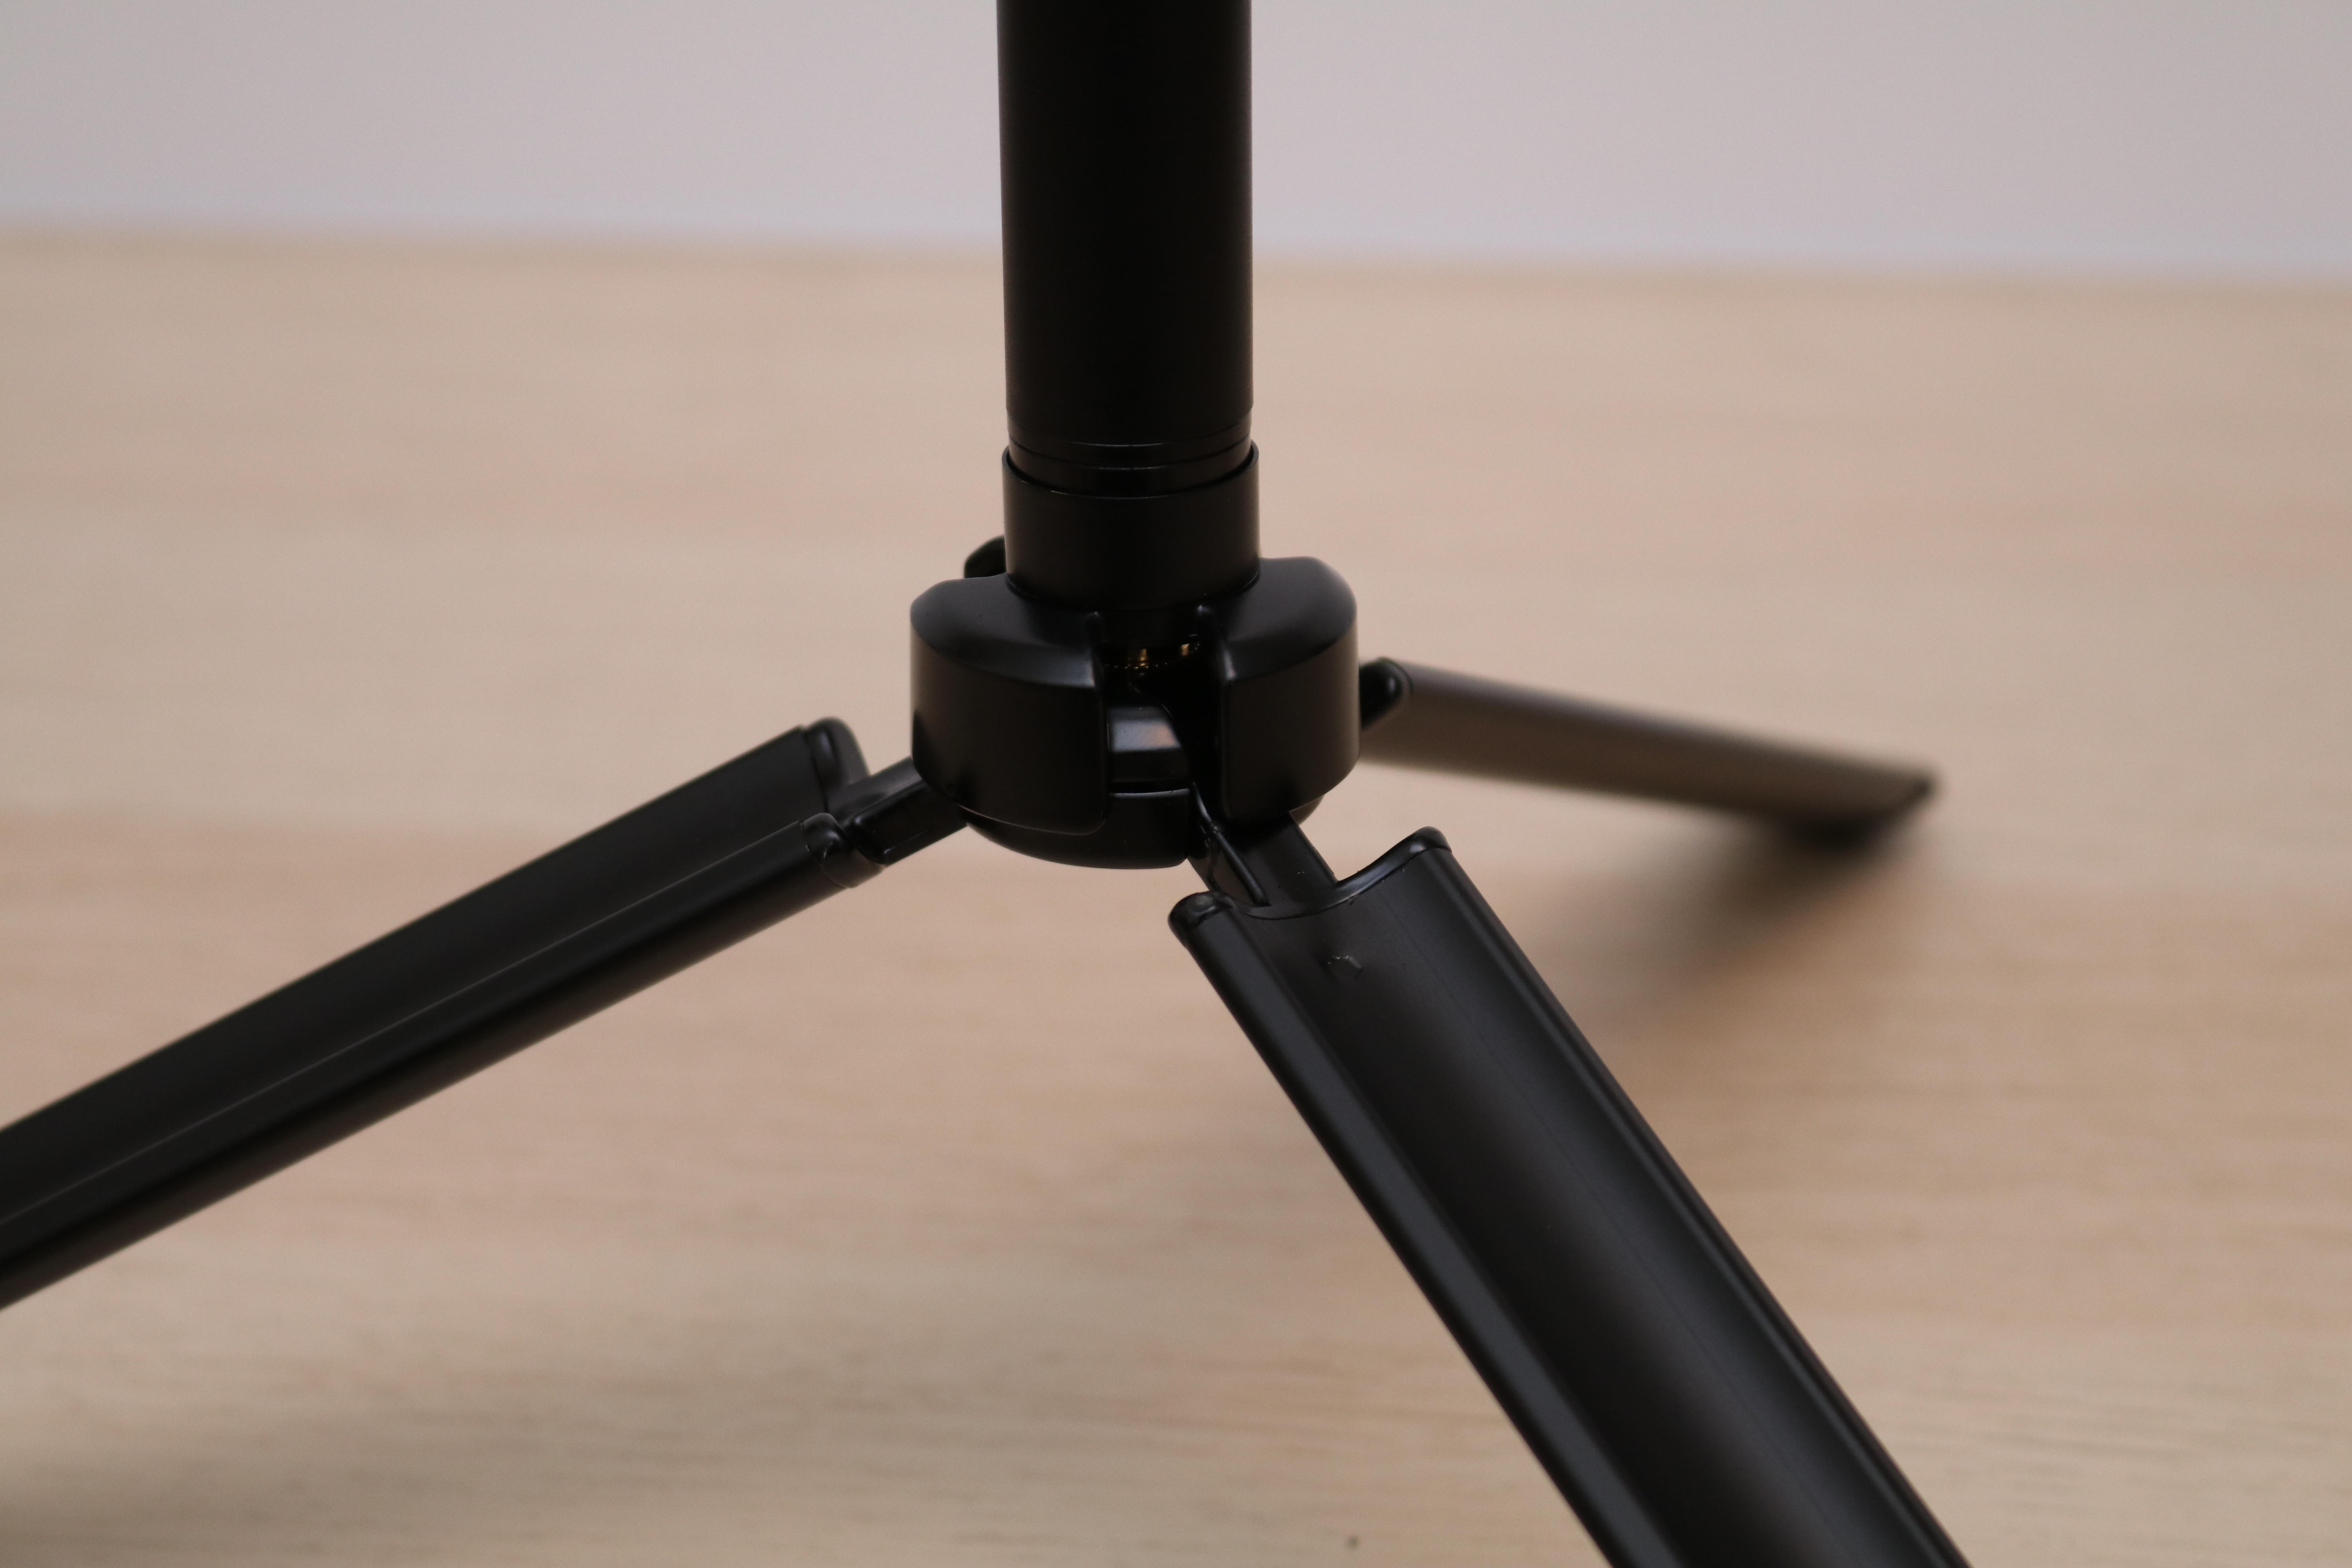
The included handle doubles as a tripod and it feels sturdy and robust. The design is clever, and the handle can be twisted to allow the tripod legs to fold out. The legs all have a rubber tip on the end, so the tripod grips the surface it sits on when fully extended. There is a collar on the base of the tripod that twists and locks the legs into place after extending them.
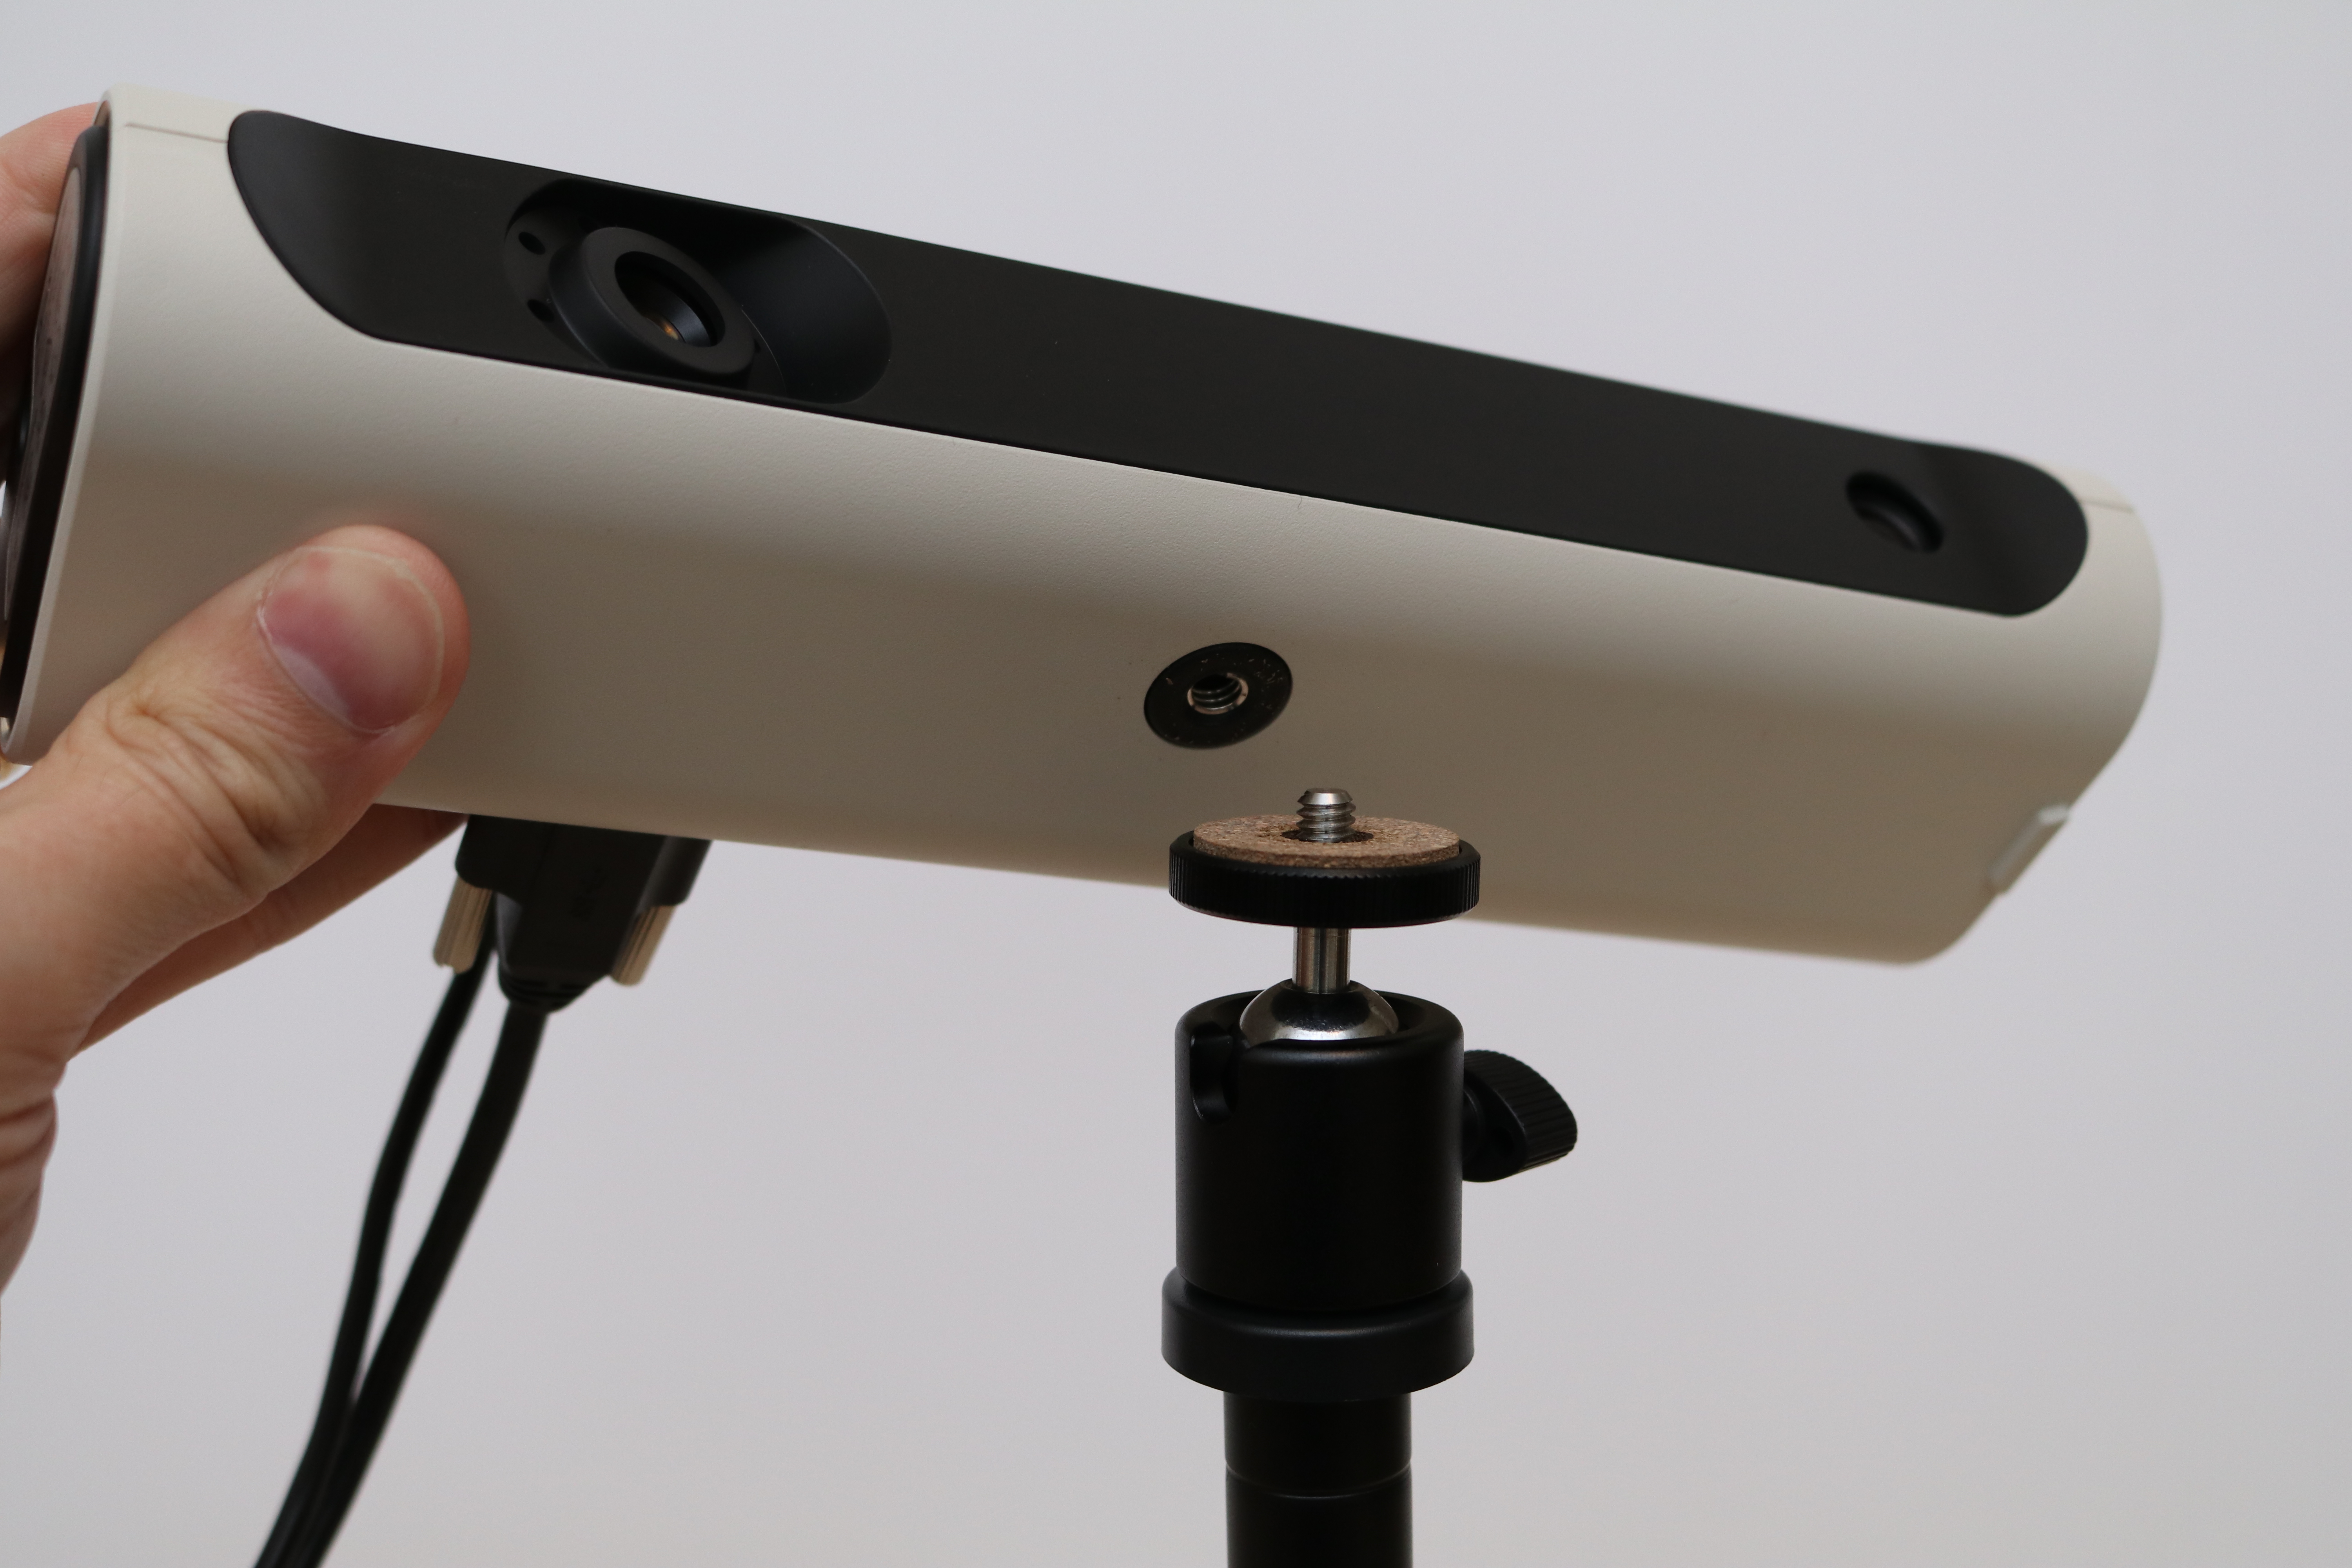
After extending the tripod, it can be connected to the scanner using a standard threaded camera tripod mount. There is a thin layer of cork on the top of the tripod which provides grip and creates an interference fit when fully screwed in to prevent the scanner from wiggling or being jiggled if bumped. When plugged in, a fan inside the scanner turns on and stays on while the scanner is in operation. It’s not particularly loud, but it’s not something you’ll want to leave on unless you’re using it.
Installing the Software for 3DMakerPro Lynx
3DMakerPro offers a software app called JMStudio for capturing scan geometry, editing point clouds, and exporting a 3D mesh. This app is available for PC and Mac, and offers advanced functionality that should satisfy the needs of the majority of users. In addition to simply capturing scanned surfaces as point clouds, JMStudio can also automatically merge surfaces, delete isolated points, and simplify an .STL mesh before exporting. I’m using the Mac version of JMStudio for this review (v2.2.6) on an 64GB M1 Max MacBook Pro.
Turntable Scanning on 3DMakerPro Lynx
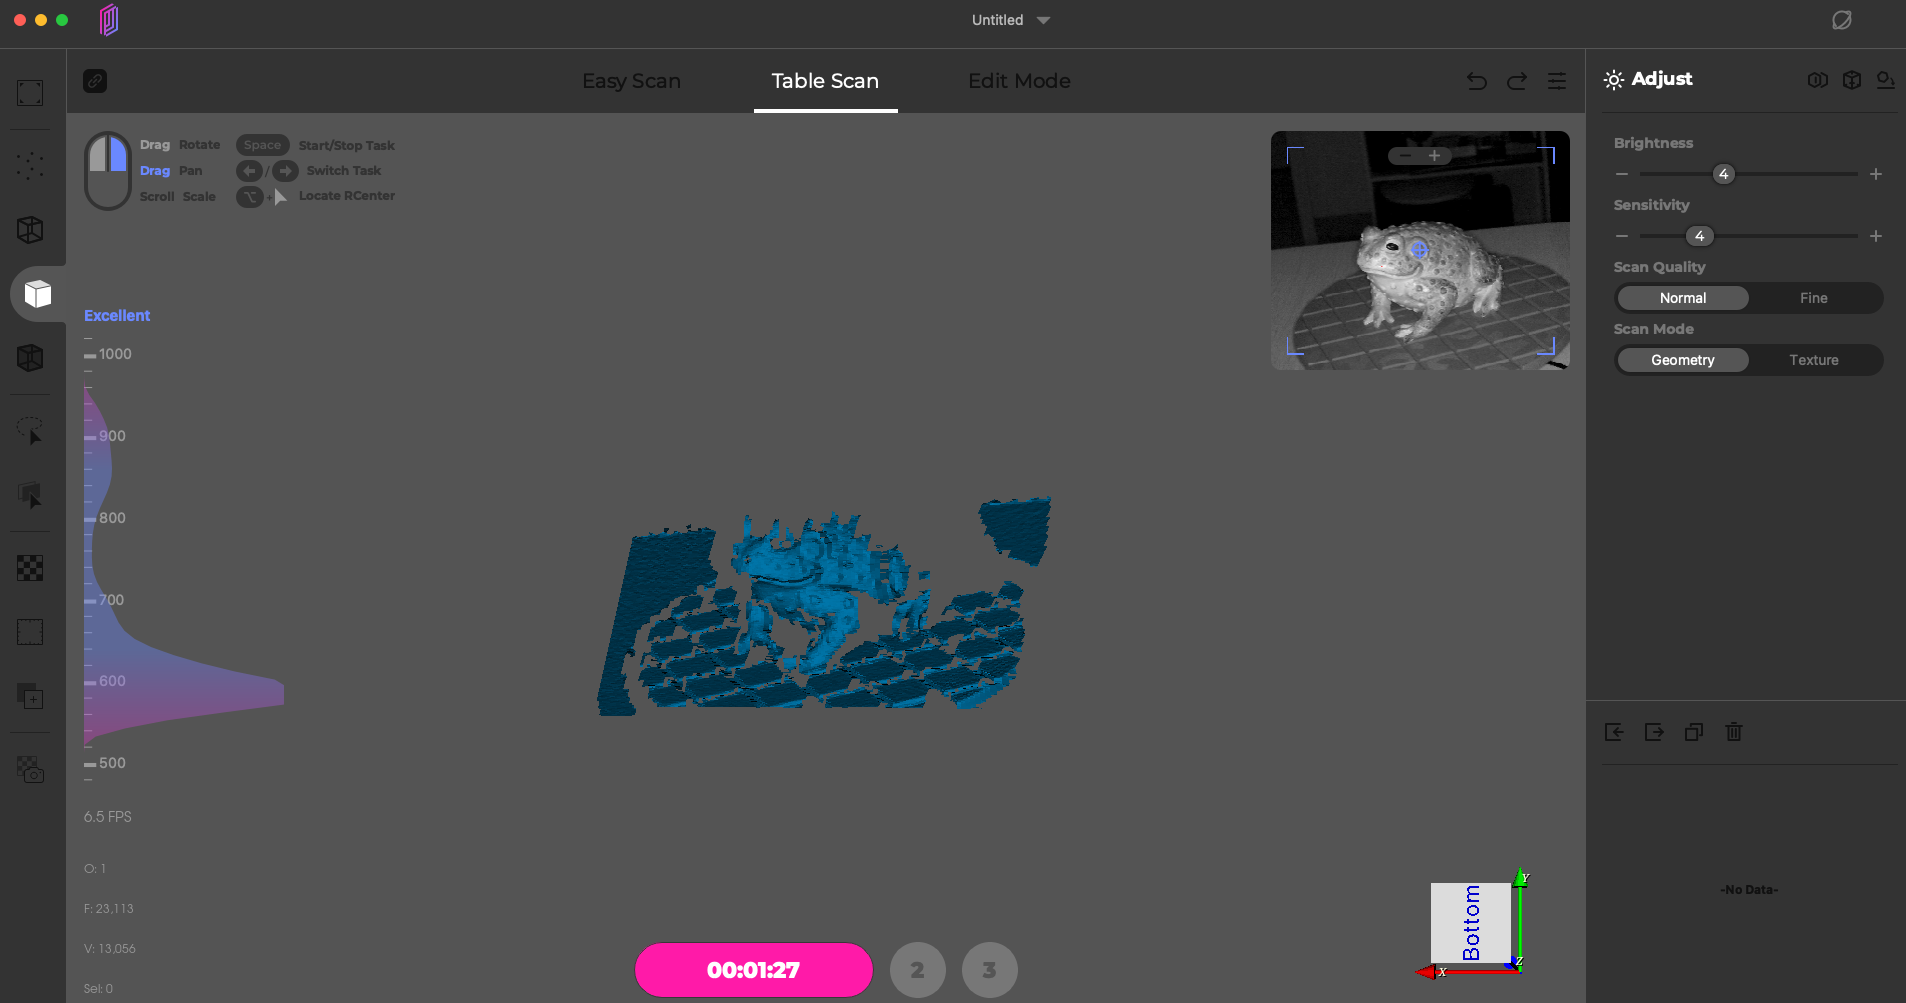
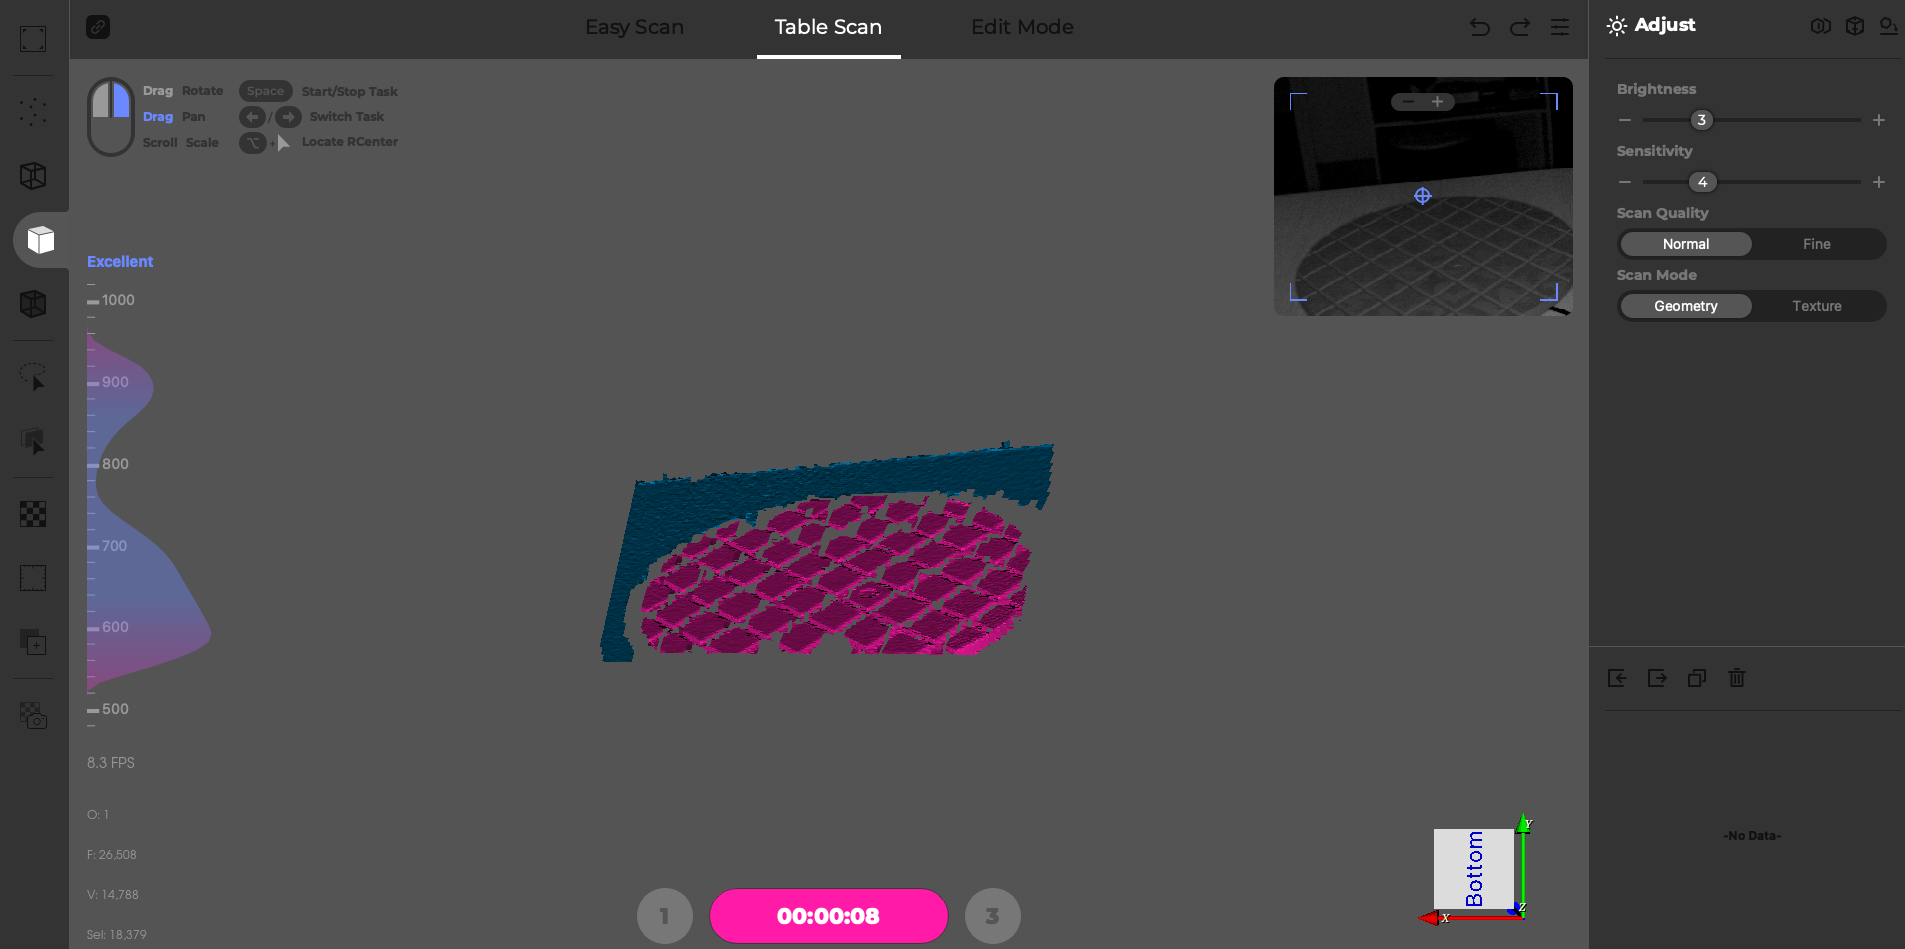
The JMStudio app has a dedicated turntable mode which can be used to make scans with an automated turntable-based process. This setup is ideal for scanning models that are between 6 and 8 inches cubed, and allows for multiple scans on a turntable that are merged together to create a full mesh. This mode has three steps you must complete before creating a mesh: preview, initialization, and scanning.
The first part of the scanning process is the initial preview, which you can use to make sure the model to scan is fully in frame while rotating. If you plan on flipping the object or moving it between scans, this is your chance to make sure that all of these orientations will fully fit within the scan volume. Once you’ve confirmed that the model will fit in the scan volume, this step is complete.
Next comes the initialization step. Remove the object from the turntable and the JMStudio software will automatically detect the top of the turntable and highlight it in red. This step allows the software to remove the turntable from the scan geometry automatically without tedious point cloud selection. Once the turntable is highlighted in red, this step is complete.
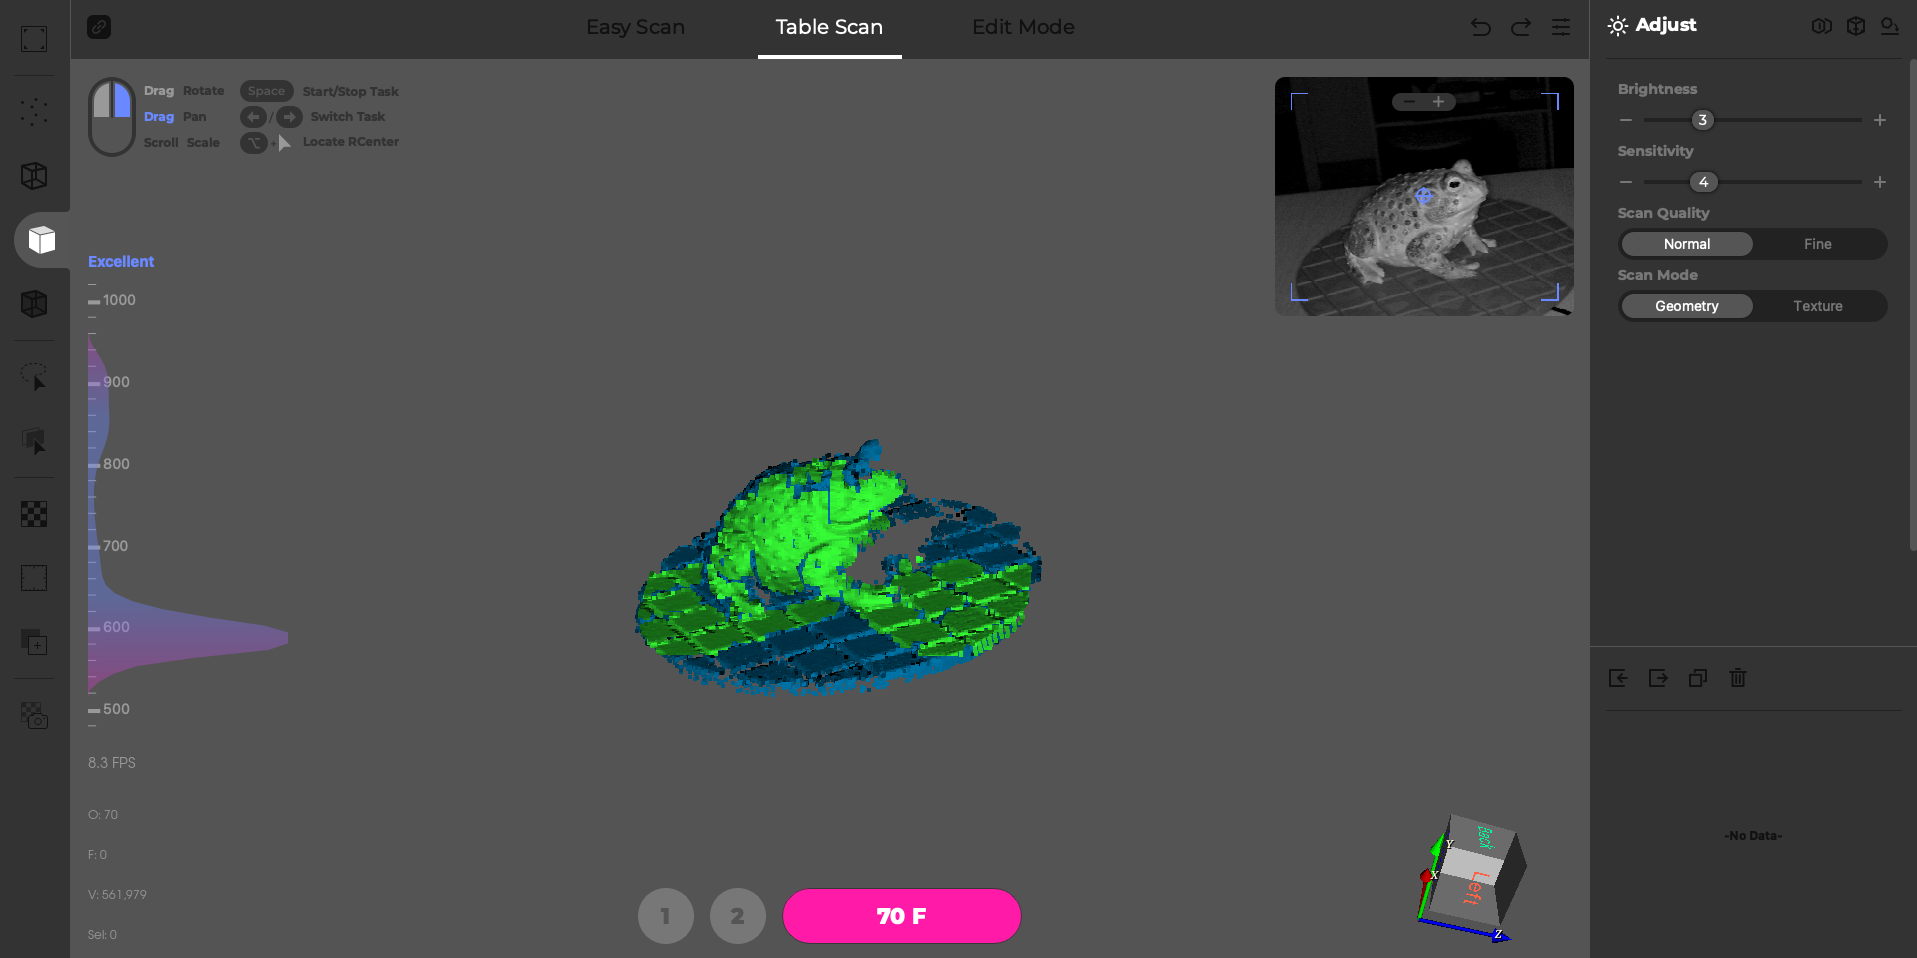
Finally, the scanning step begins the geometry acquisition process. The software will capture exactly 320 frames before automatically stopping, which represents a full revolution of the turntable. The turntable is still visible in this step during the scan, but it will be automatically edited out later. This step should be repeated until all surfaces of the model to capture have been captured and are visible in the scan preview.
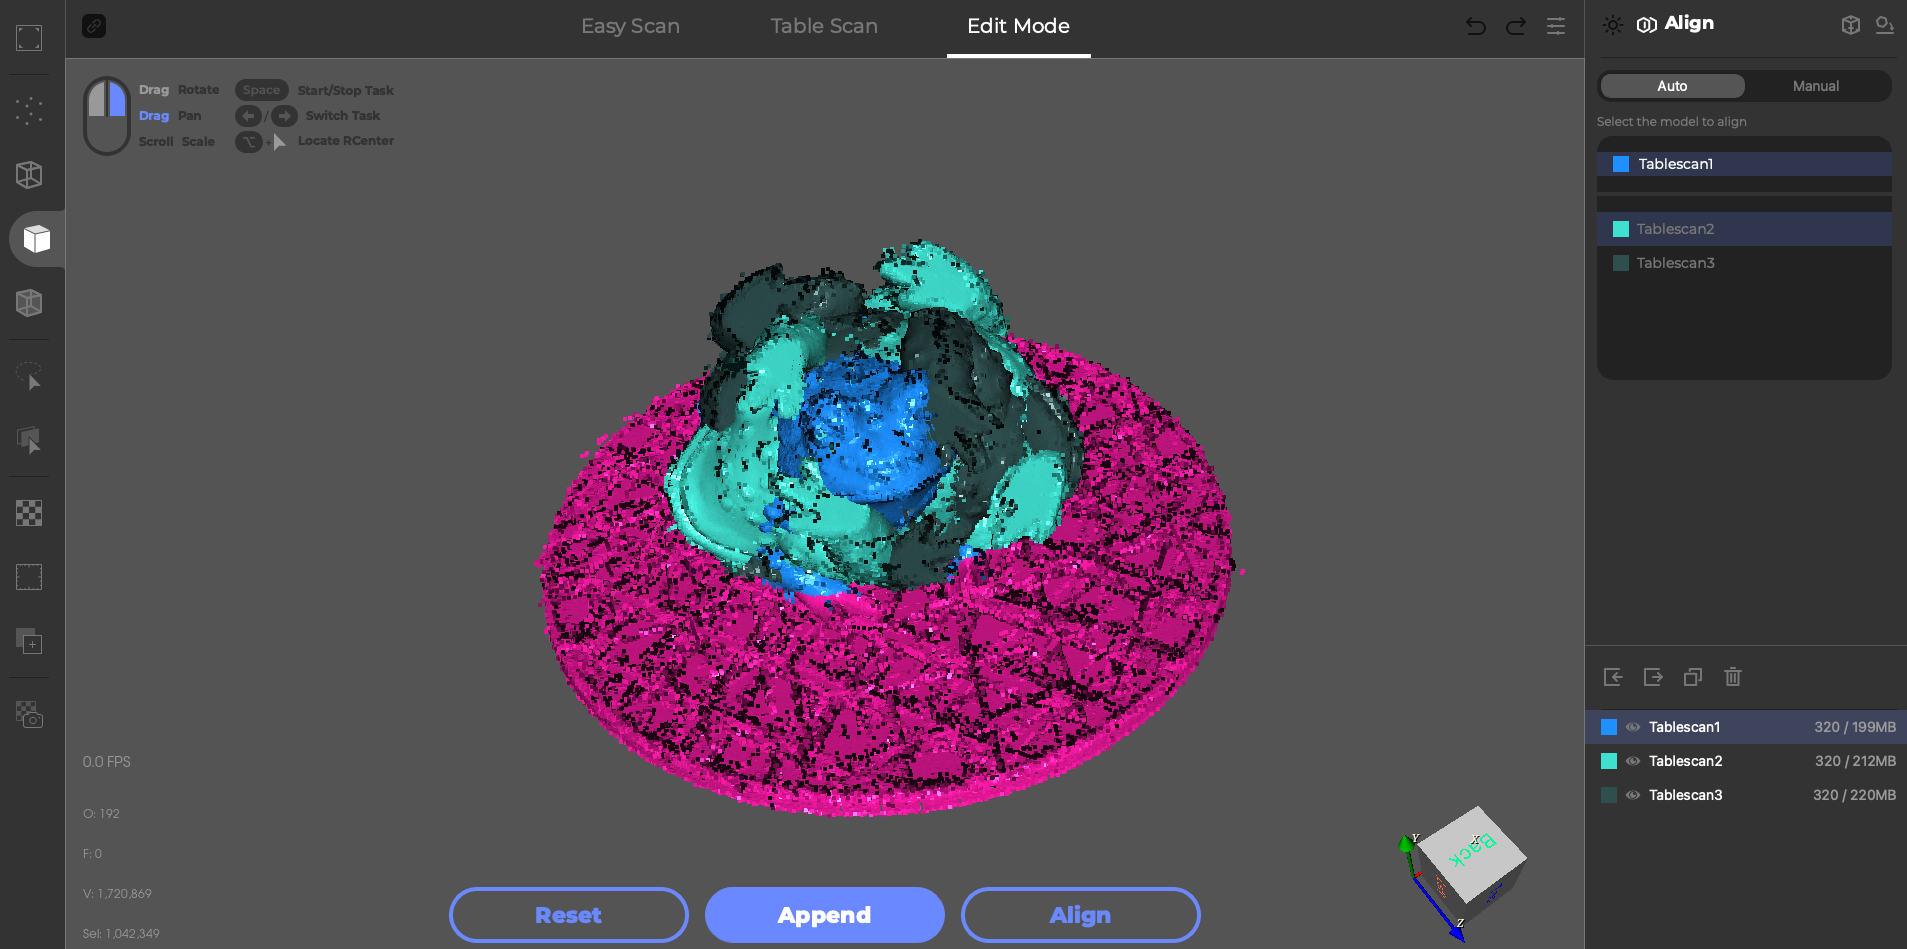
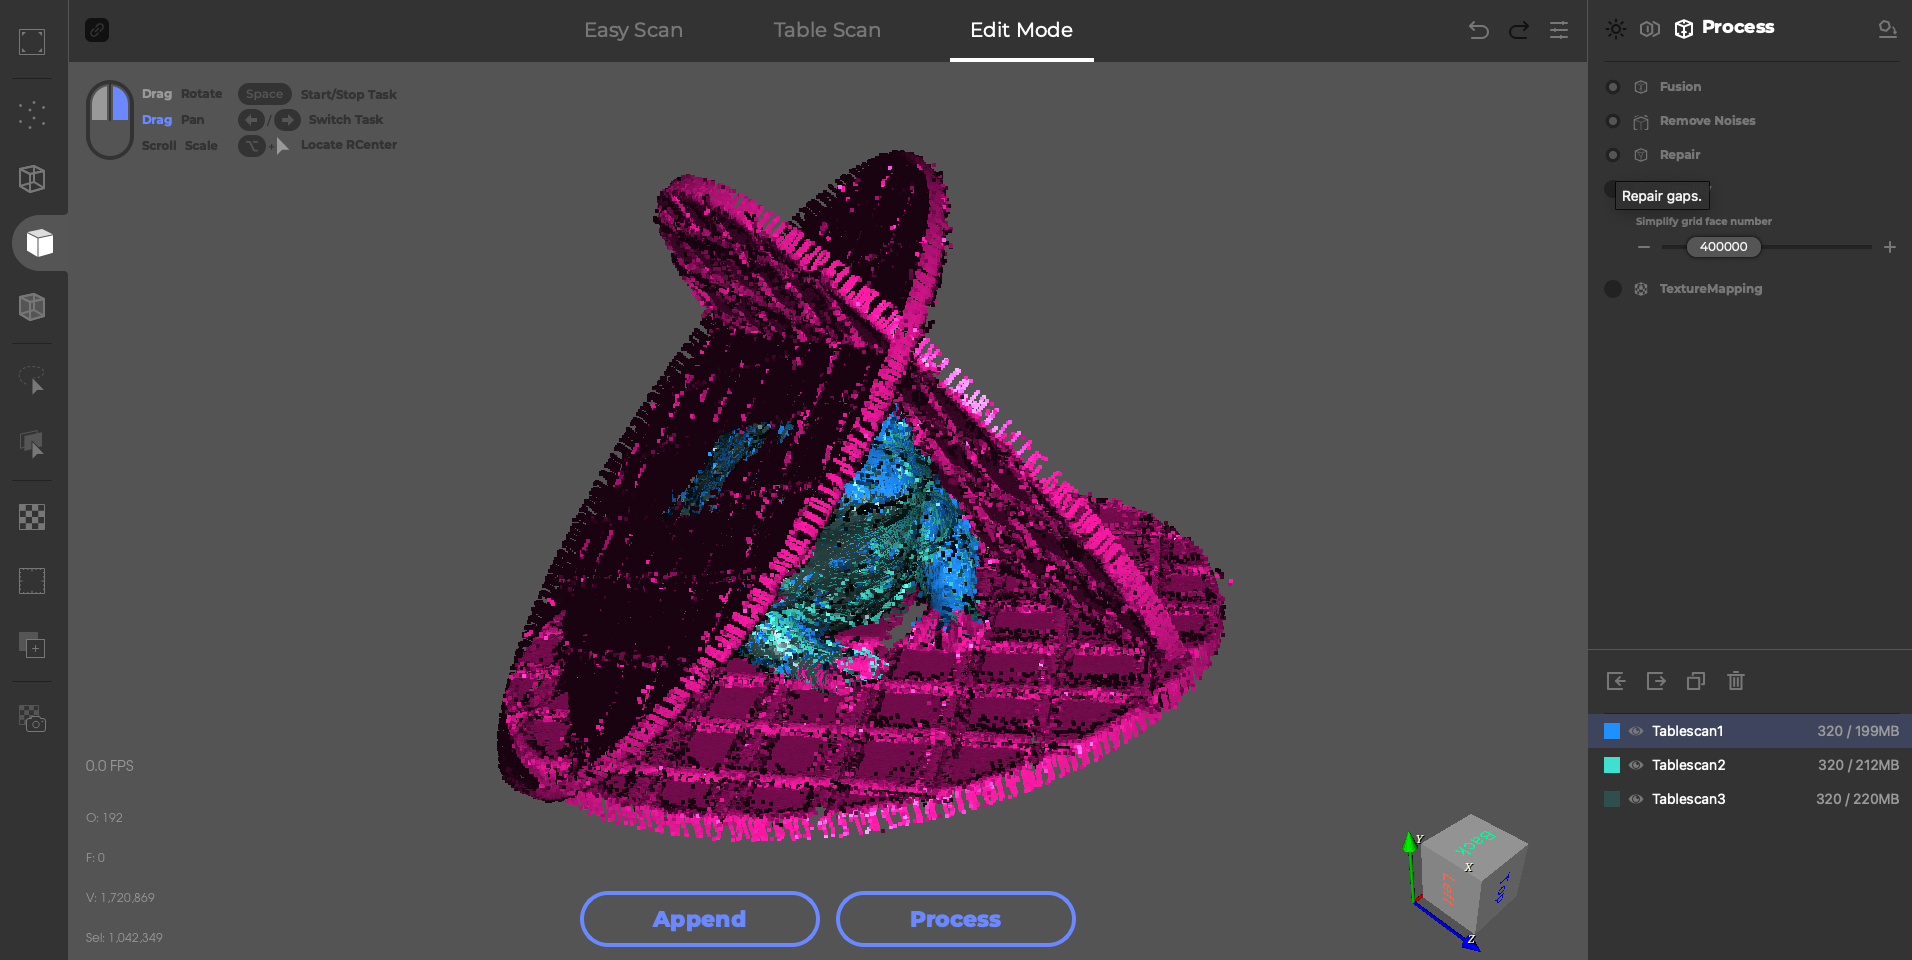
JMStudio can automatically align scans, a feature that I found to work well without any manual intervention required. In the first photo, you can see that the turntables are all aligned, while the scanned surfaces all overlap. After automatic alignment, the scans are combined and the turntable geometry shifts to show how the models were positioned.
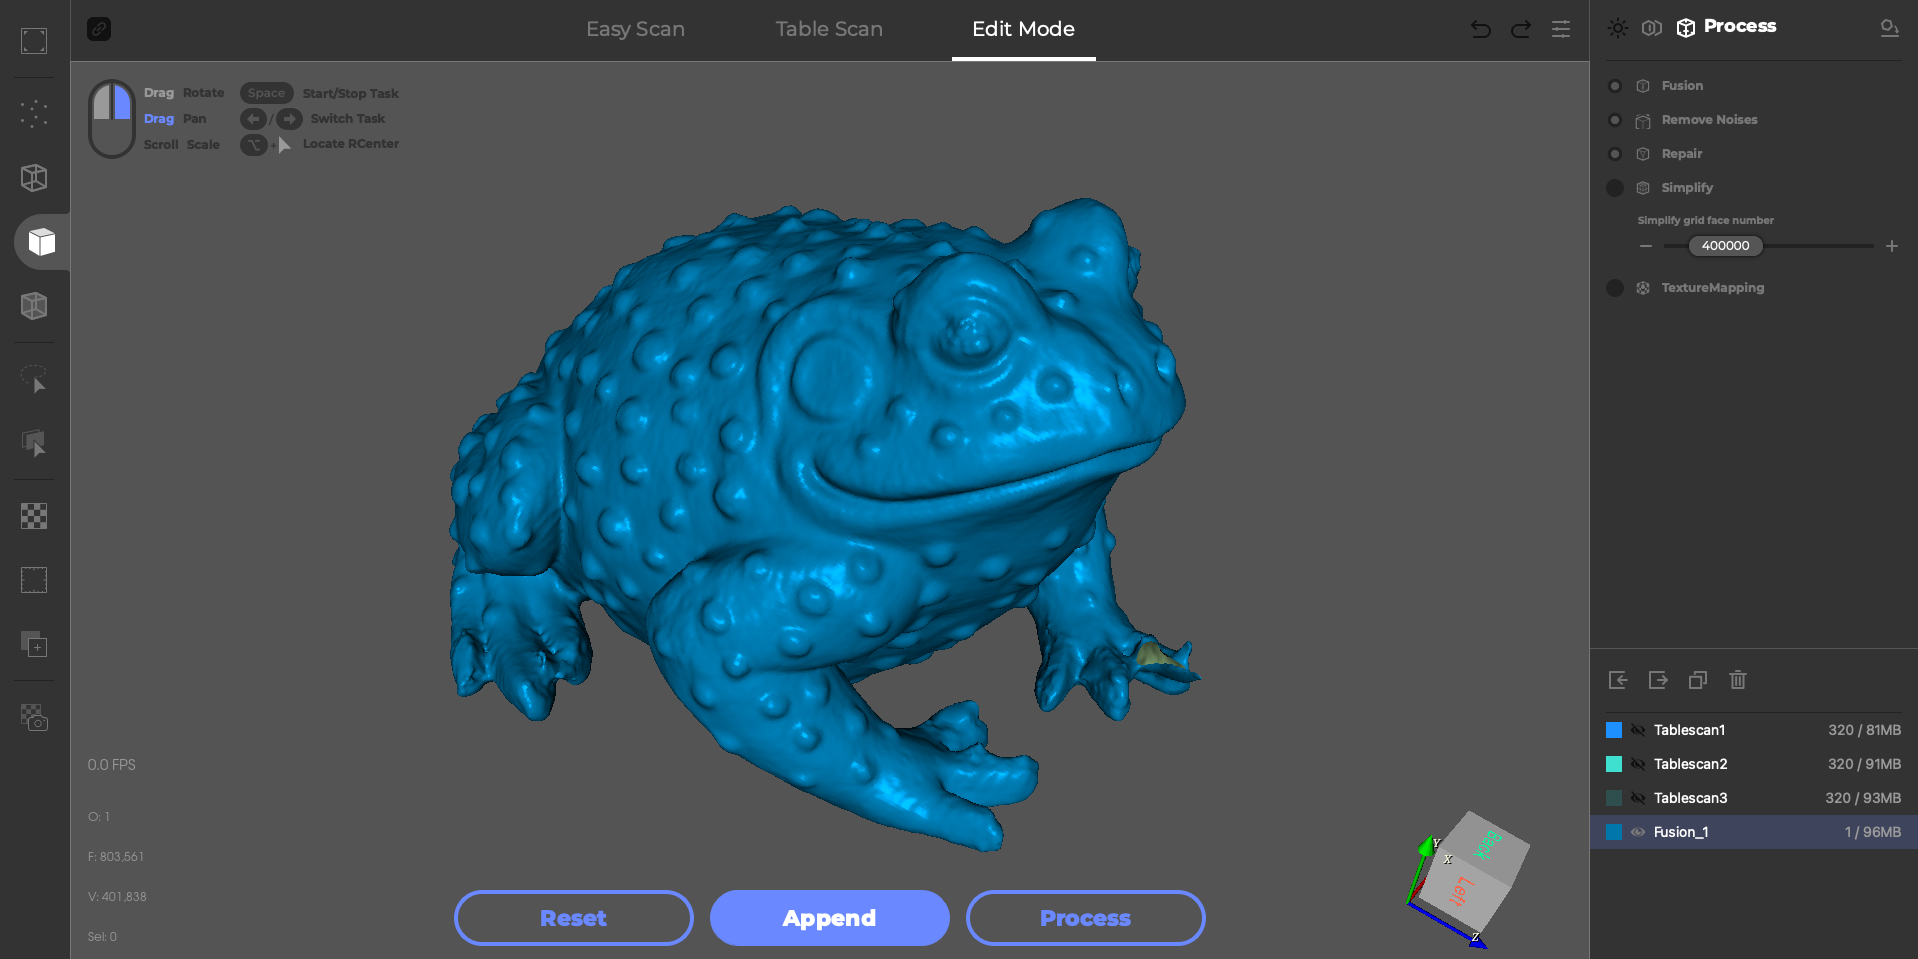
Finally, the processing step brings everything together to make a 3D model. This step fuses the point clouds, removes any disconnected points (or noise), repairs any small holes, and can also reduce the polygon count or apply a color texture. Since I don’t have the color kit, I wasn’t able to apply a color texture but I tested all the other features. From here, the model can be exported as an .STL to share, continue processing, or 3D print.
Scanning Shiny Objects with 3DMakerPro Lynx
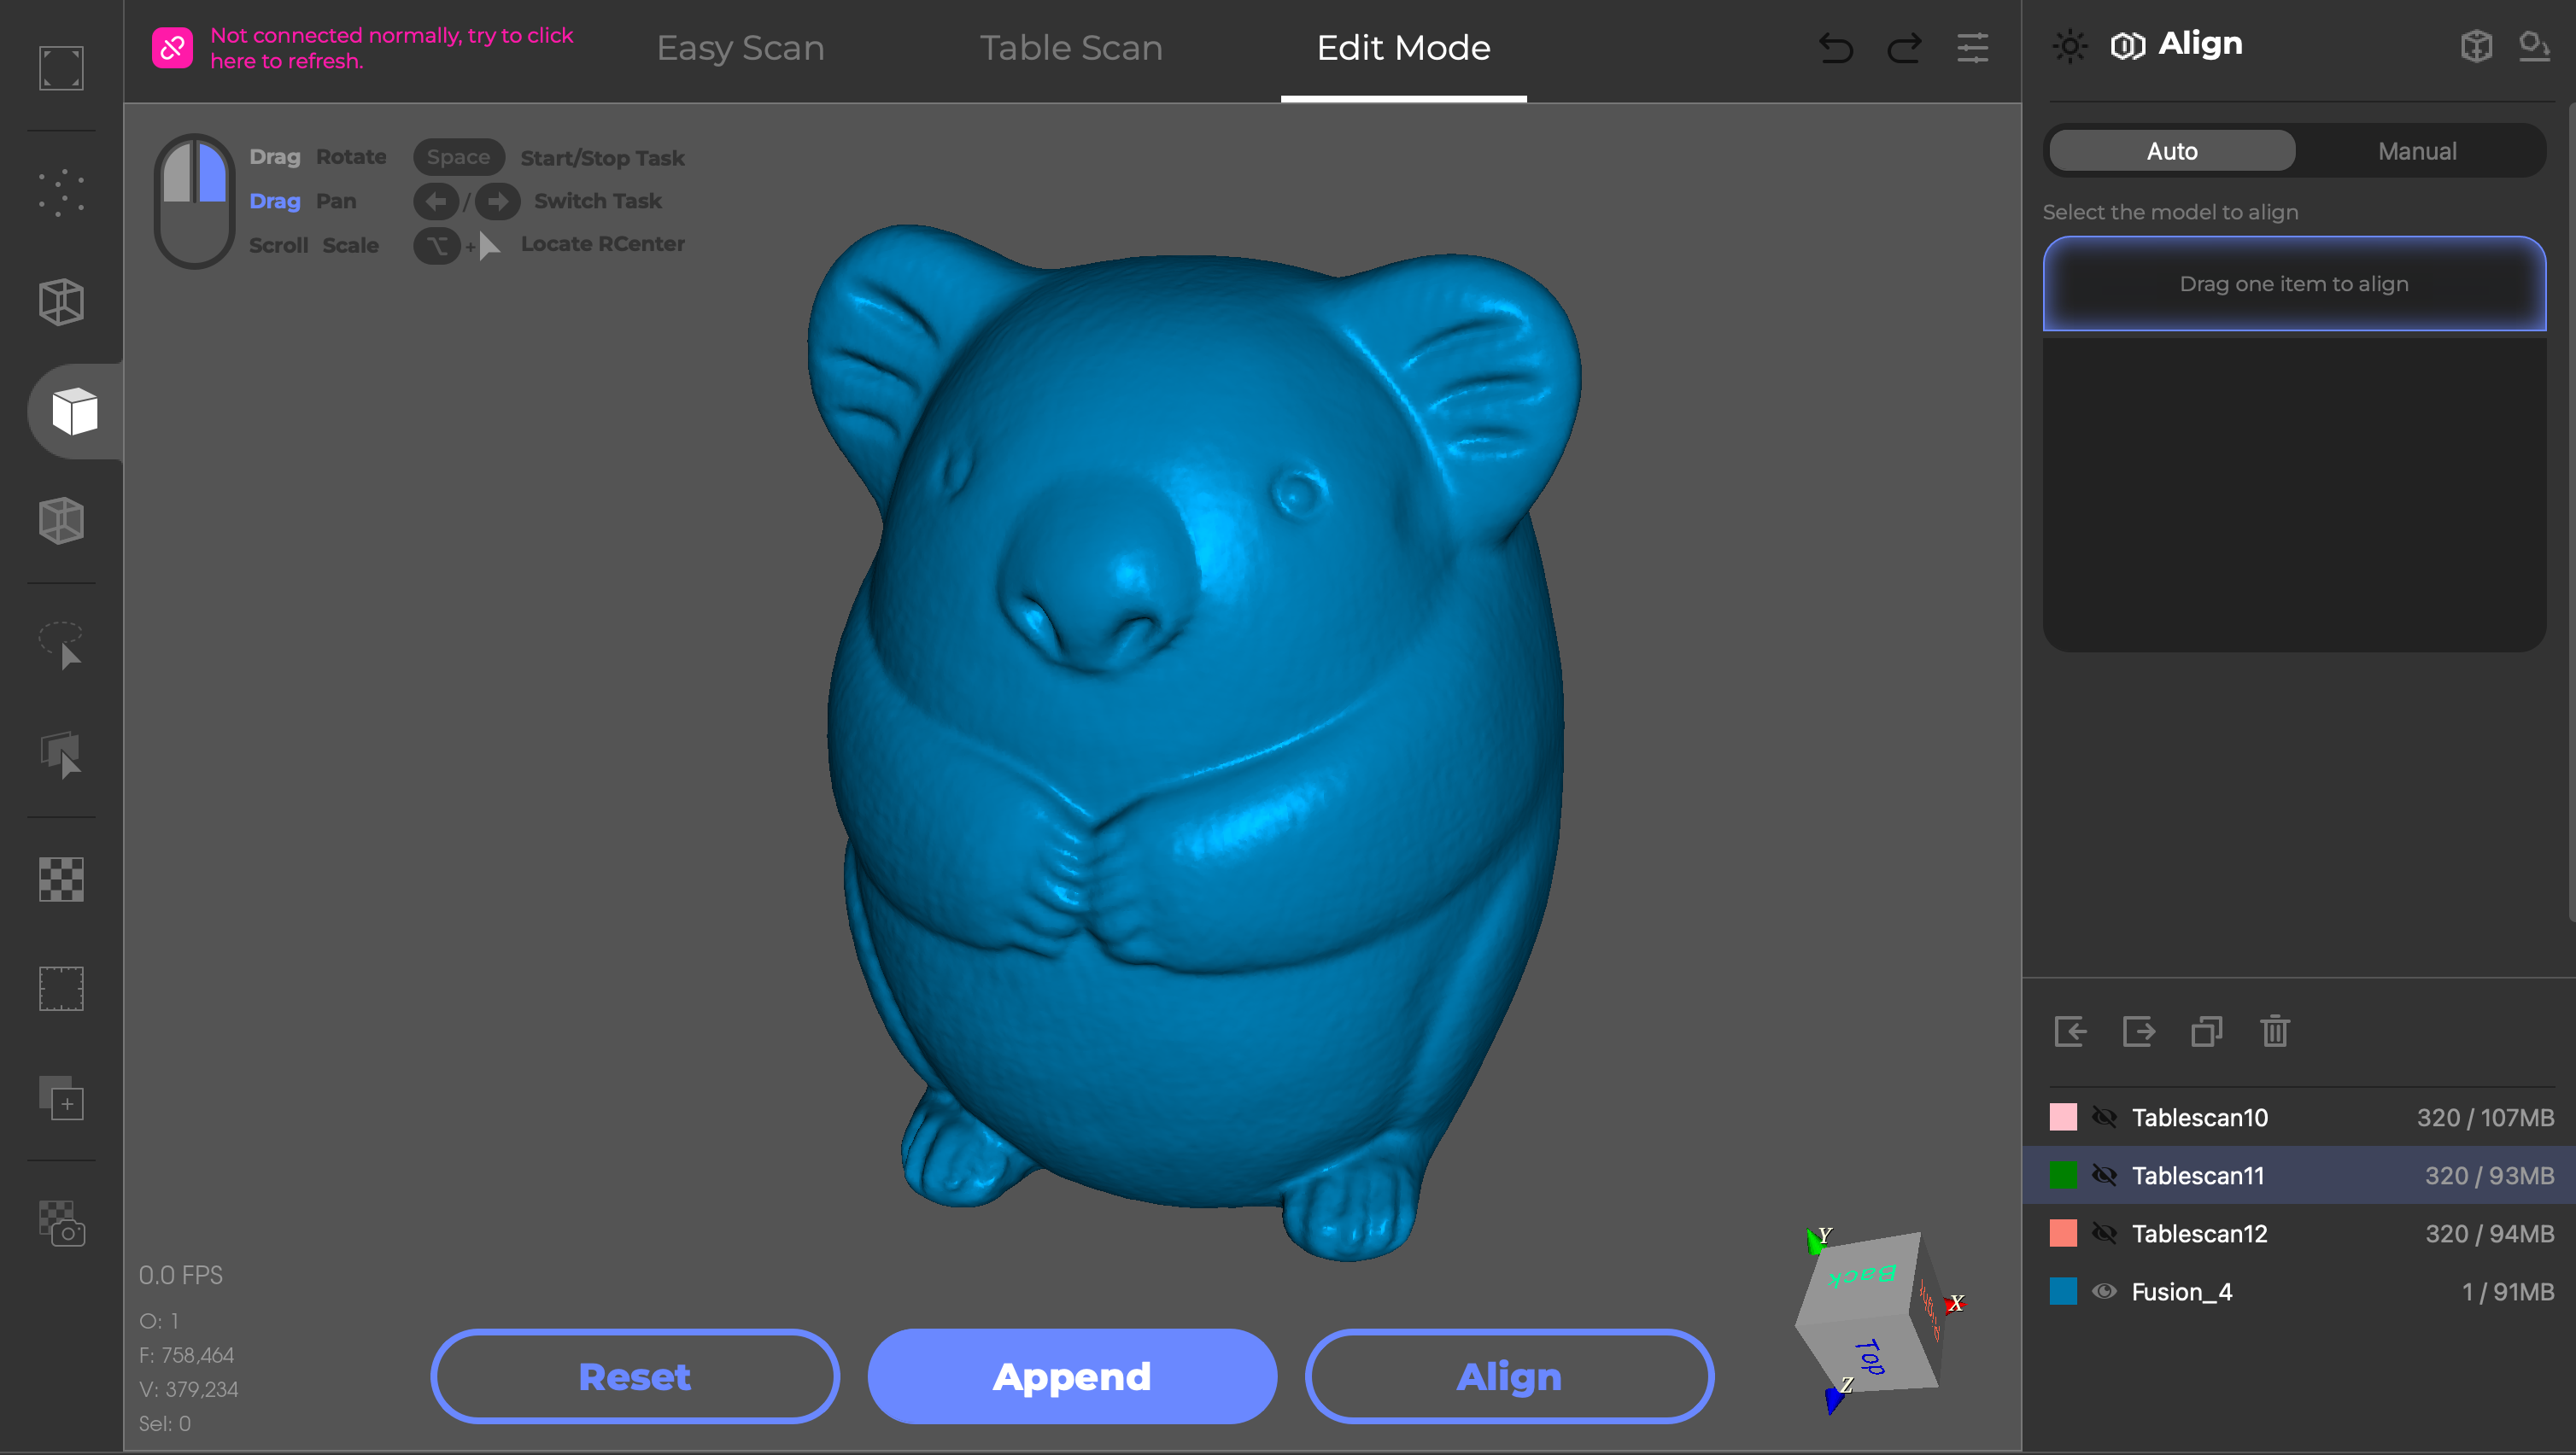
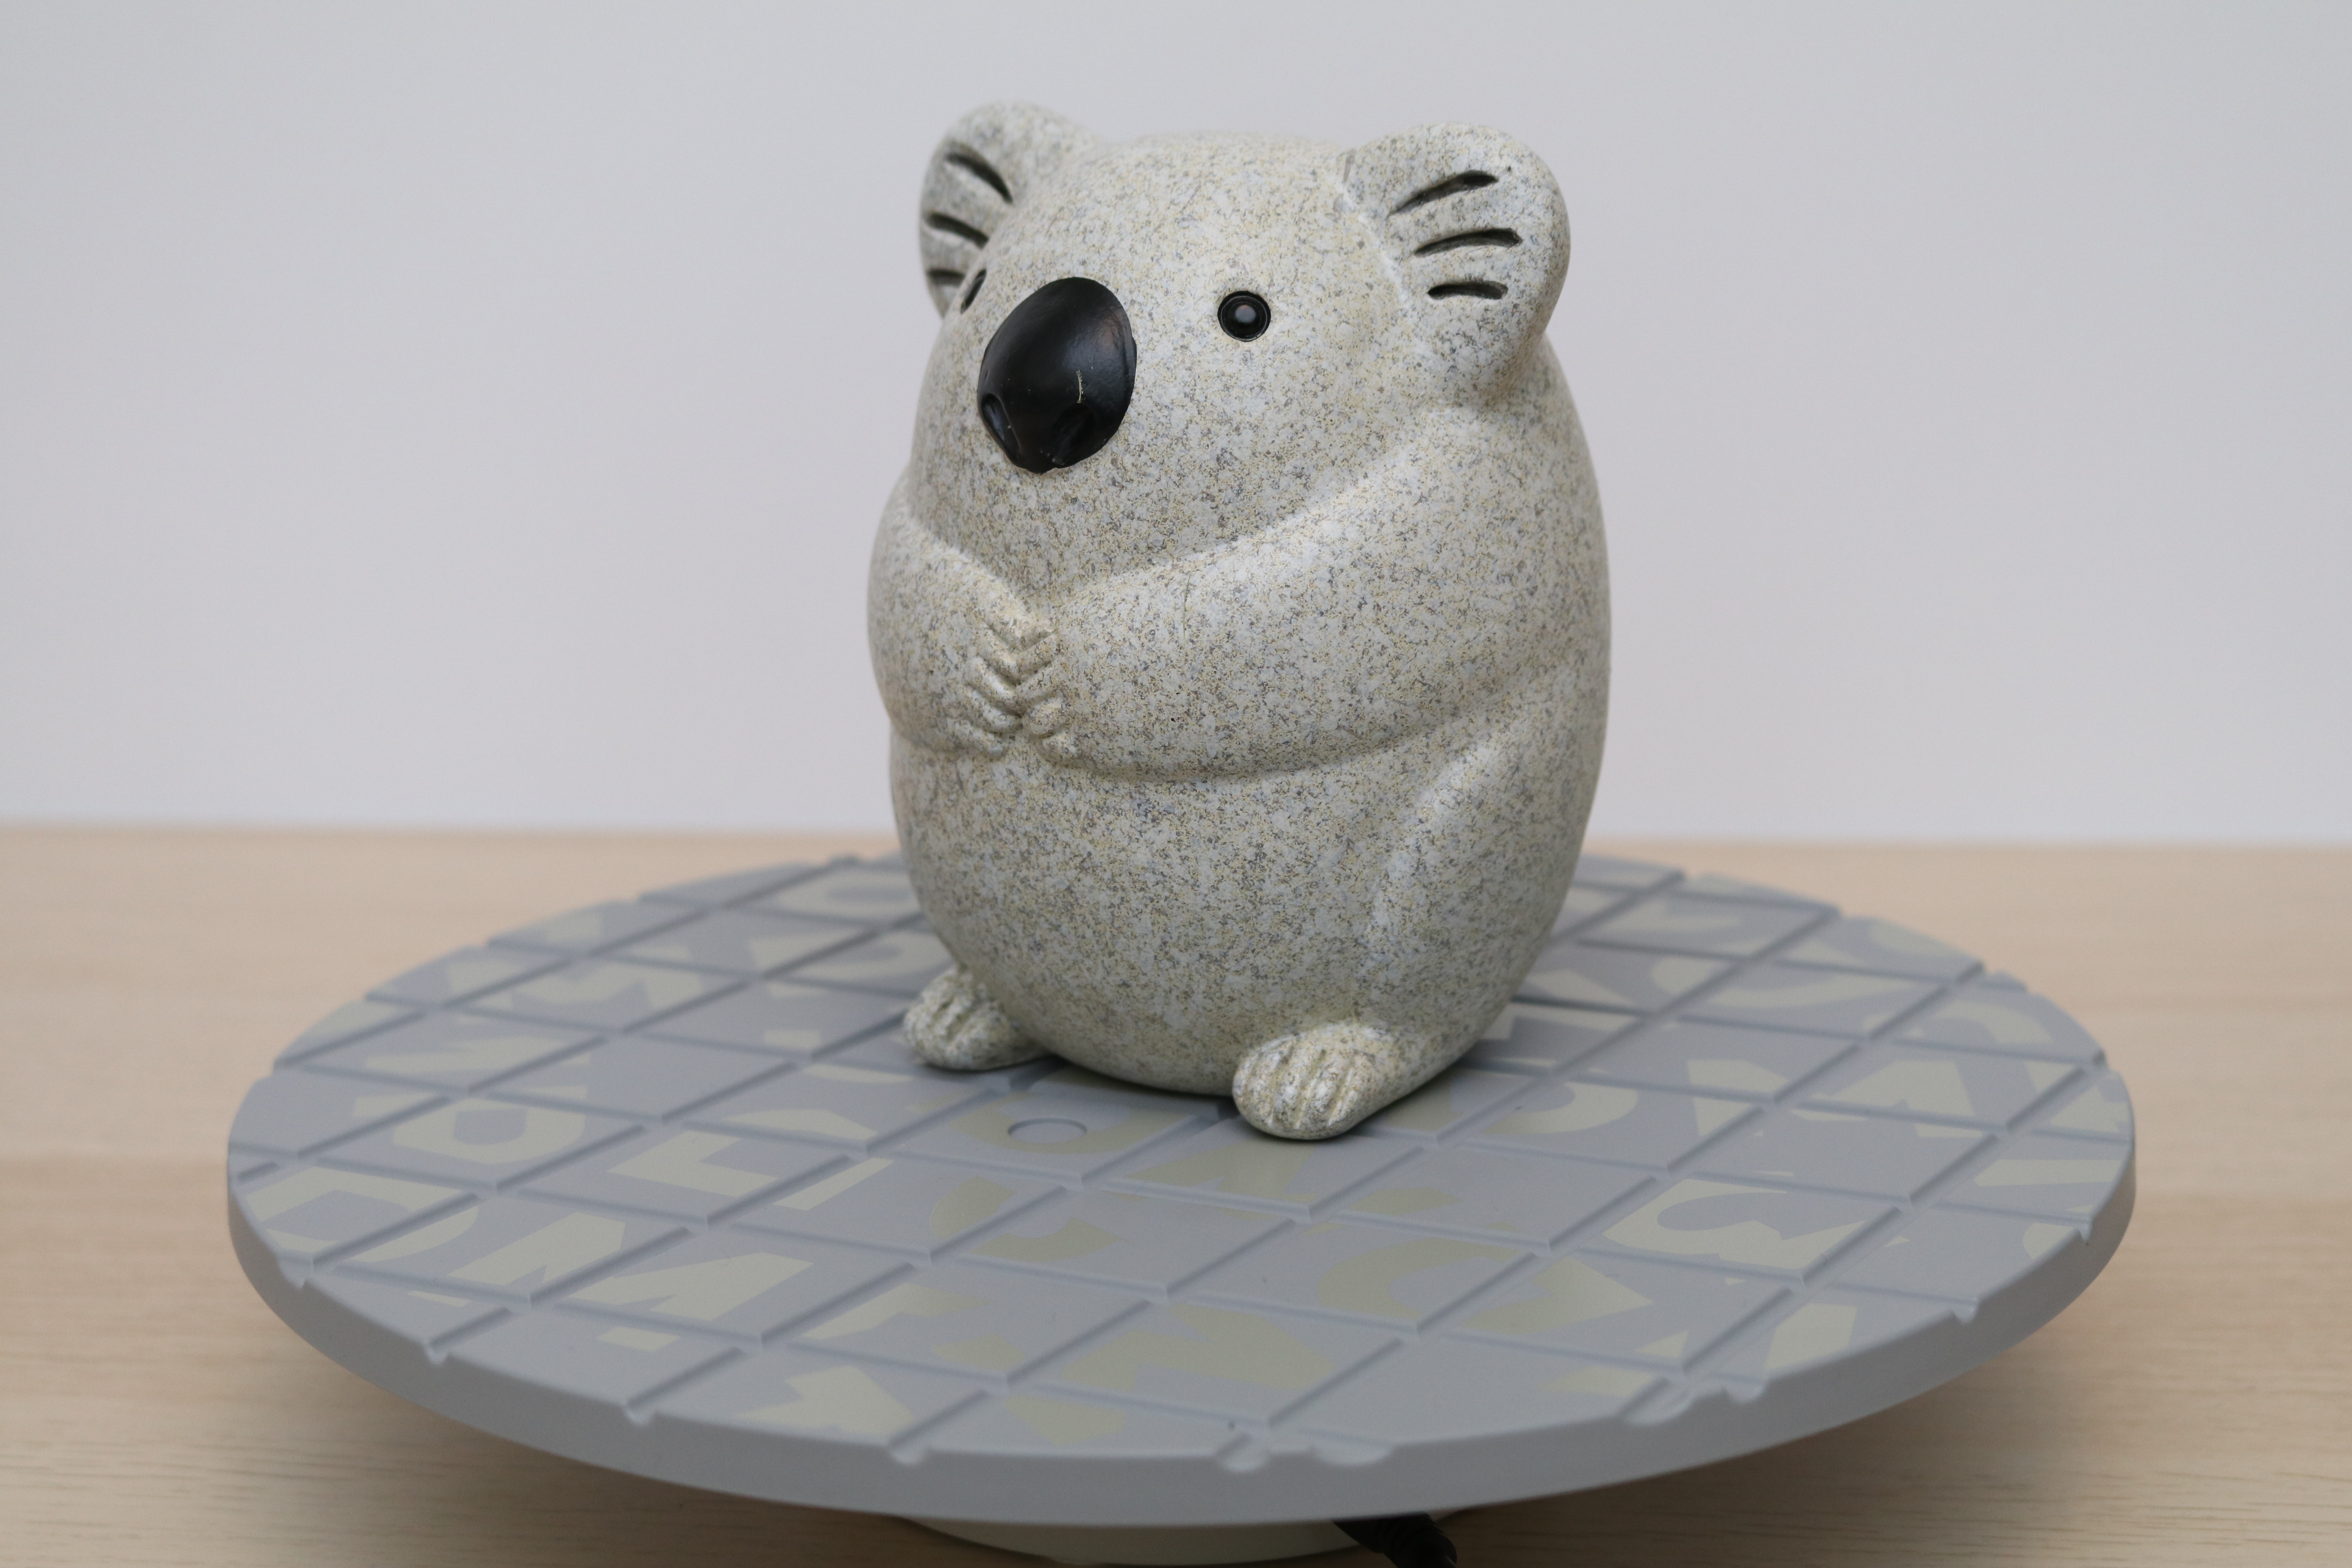
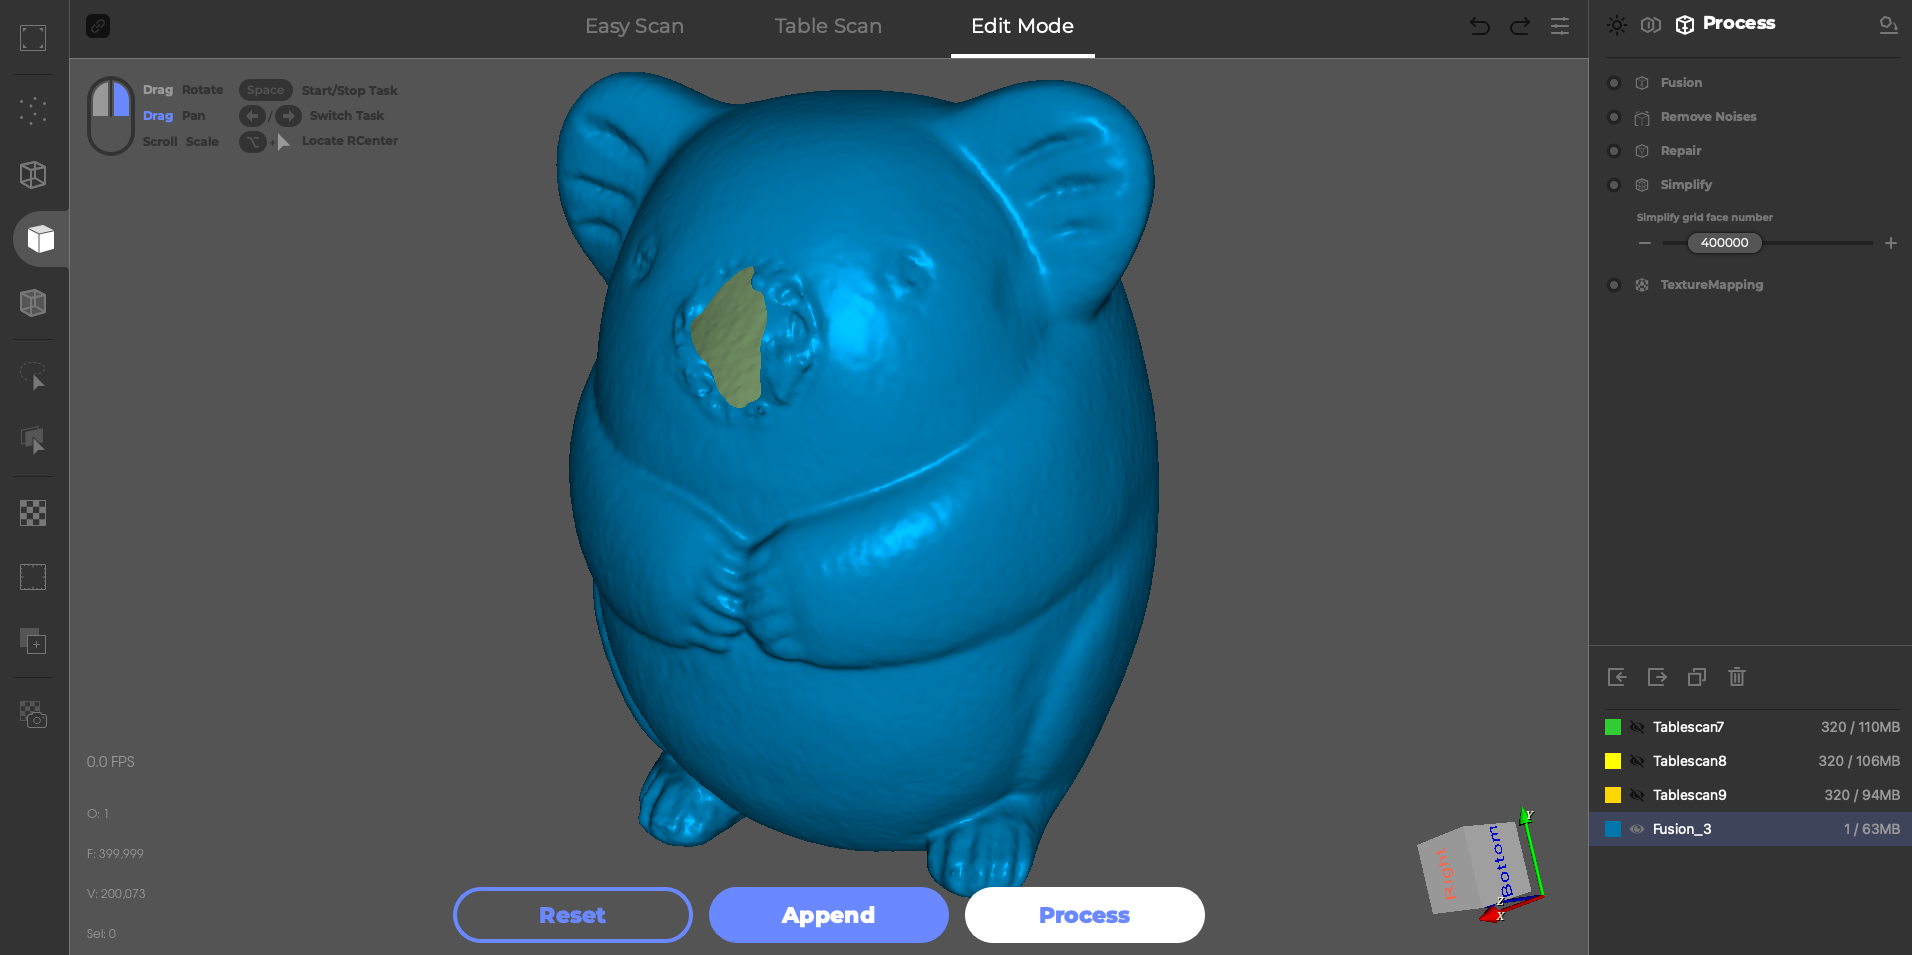
Like most 3D scanners, the 3DMakerPro Lynx can sometimes struggle when scanning shiny, glossy, or reflective objects. This is compounded when scanning glossy black objects, which sharply transition from very dark to very bright and can be difficult to accurately capture. For example: this model of a koala has a matte granite-like texture, but the nose, eyes, and ears all have glossy black paint applied. Using turntable mode, I scanned the model three times, aligned the scans, and merged them into a mesh.
The shiny nose of the koala is almost completely missing, and the eyes and ears appear misshapen and lack detail.The surface of the model is a speckled granite-like finish, and the scanner had no difficulty capturing the geometry in areas like the arms and stomach of the model. While this model could likely be repaired or fixed in post-processing, the best way to get a quality scan is to use a matting spray like AESUB Blue or a dry shampoo to reduce the reflectivity of the model and make it easier to process.


To prep the model, I used Batiste Dry Shampoo, which creates a very thin layer of white powder on the model that can easily be washed off after spraying. The difference is immediately apparent, and the geometry of the nose is easier to see, even in a photograph. This thin layer of dry shampoo is all that is needed to prepare the model for 3D scanning, and it leaves no permanent mark or deformation.
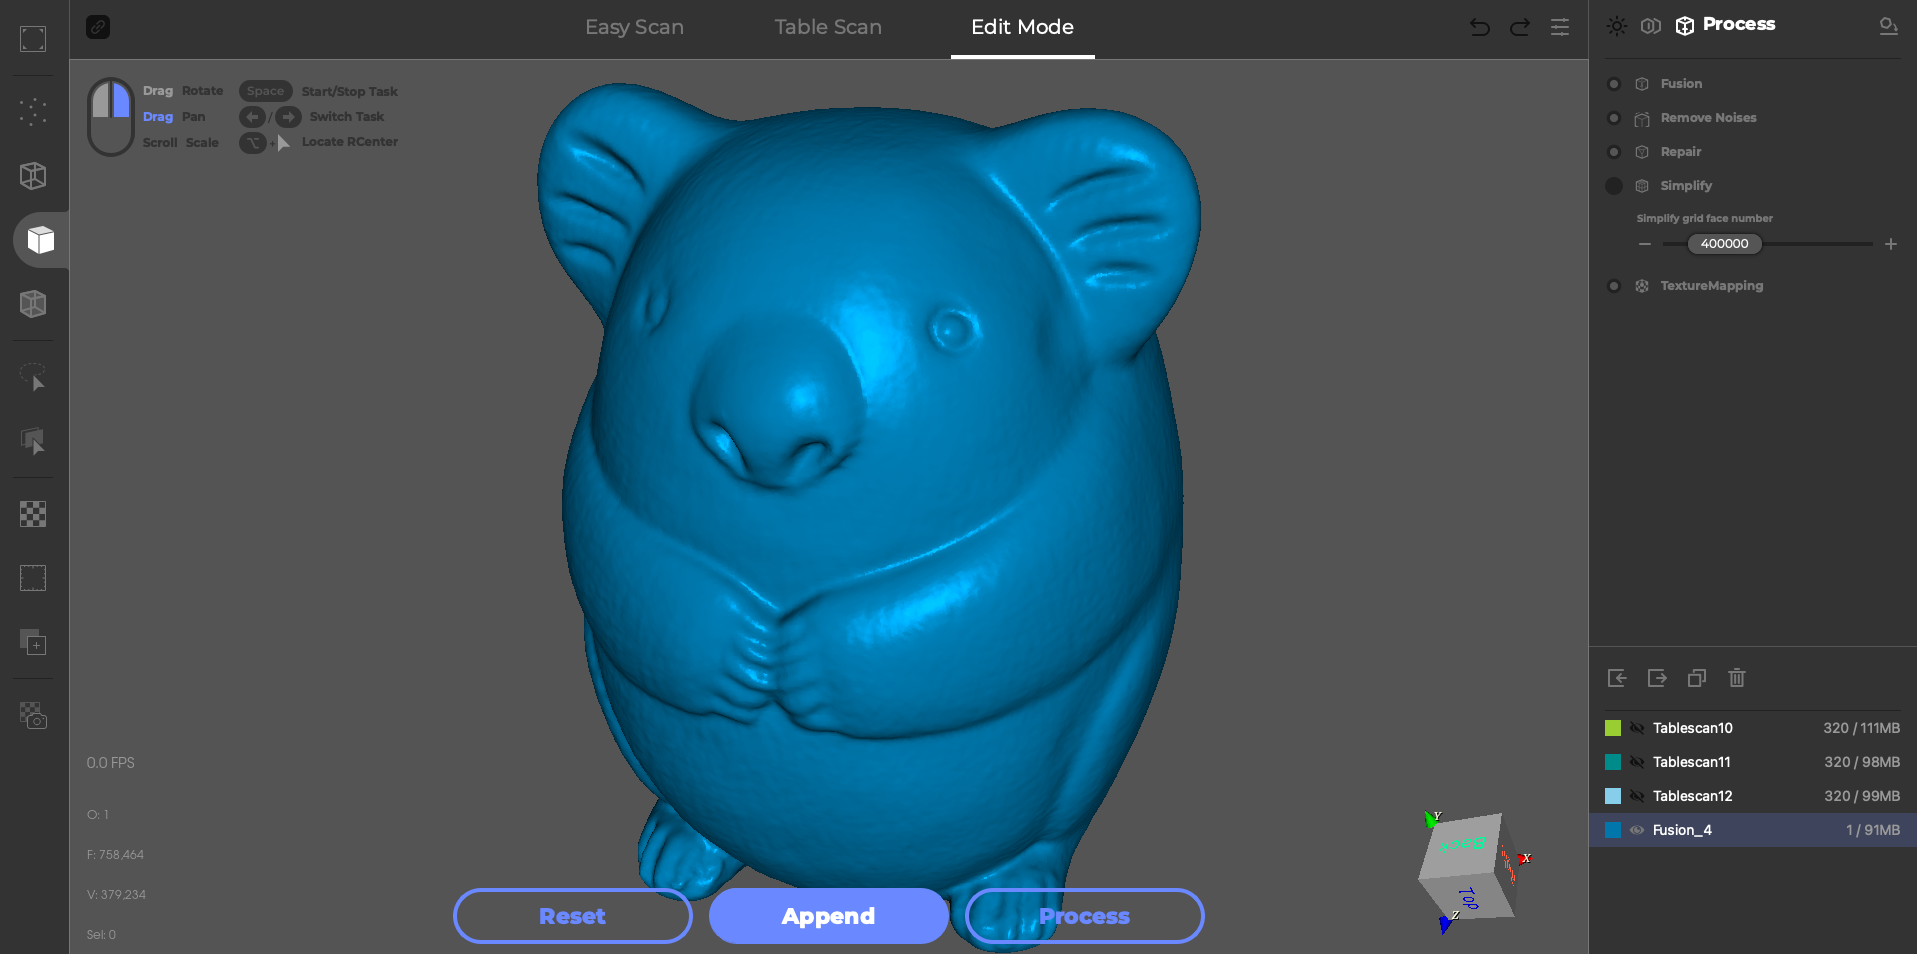
I scanned the model again using the same orientations and processing as the first, and the difference is dramatic. The nose was captured perfectly, and the mesh is manifold and even. If you pay close attention to the subtle reliefs in the ear, you can see that they are consistent with the original statue. The first scan shows the reliefs as wobbly and rough, while the second scan looks much closer to the actual model. The matting spray made a large impact, and it’s a powerful tool to use when scanning shiny black models.
Mobile Scanning on 3DMakerPro Lynx
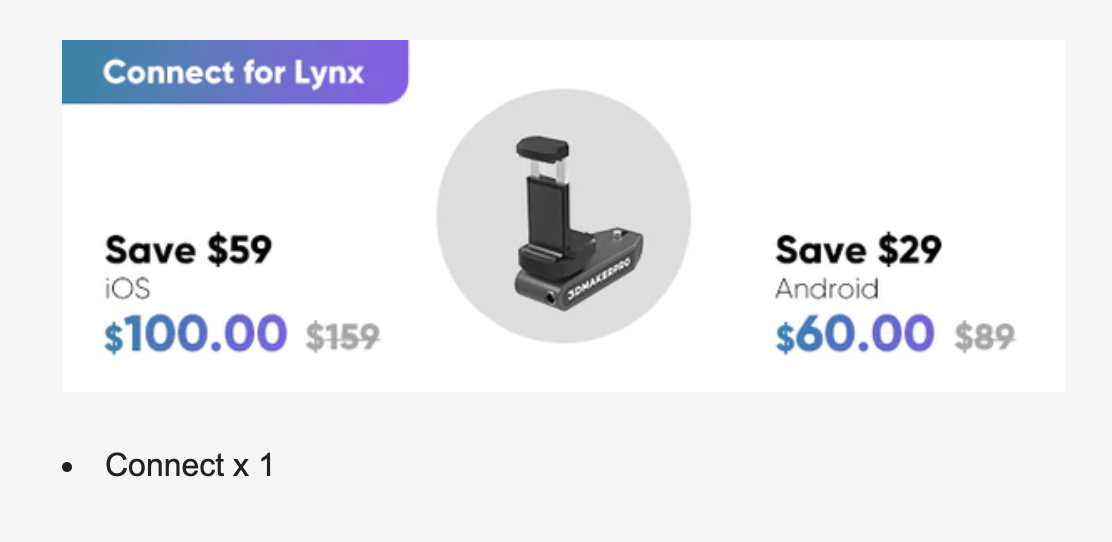
3DMakerPro also offers an optional accessory called the Connect for Lynx which allows users to plug the Lynx scanner directly into a mobile phone to use with the JM Studio for Mobile app. The app currently has 2 ratings on the iOS App Store; 1 is 5 stars and includes an enthusiastic blurb while the other is 1 star and claims the app does not work their scanner. Given the computational power typically required by scanning apps, I would imagine most users would be better off using a computer for creating a mesh instead of using a mobile app.
Reverse Engineering on 3DMakerPro Lynx
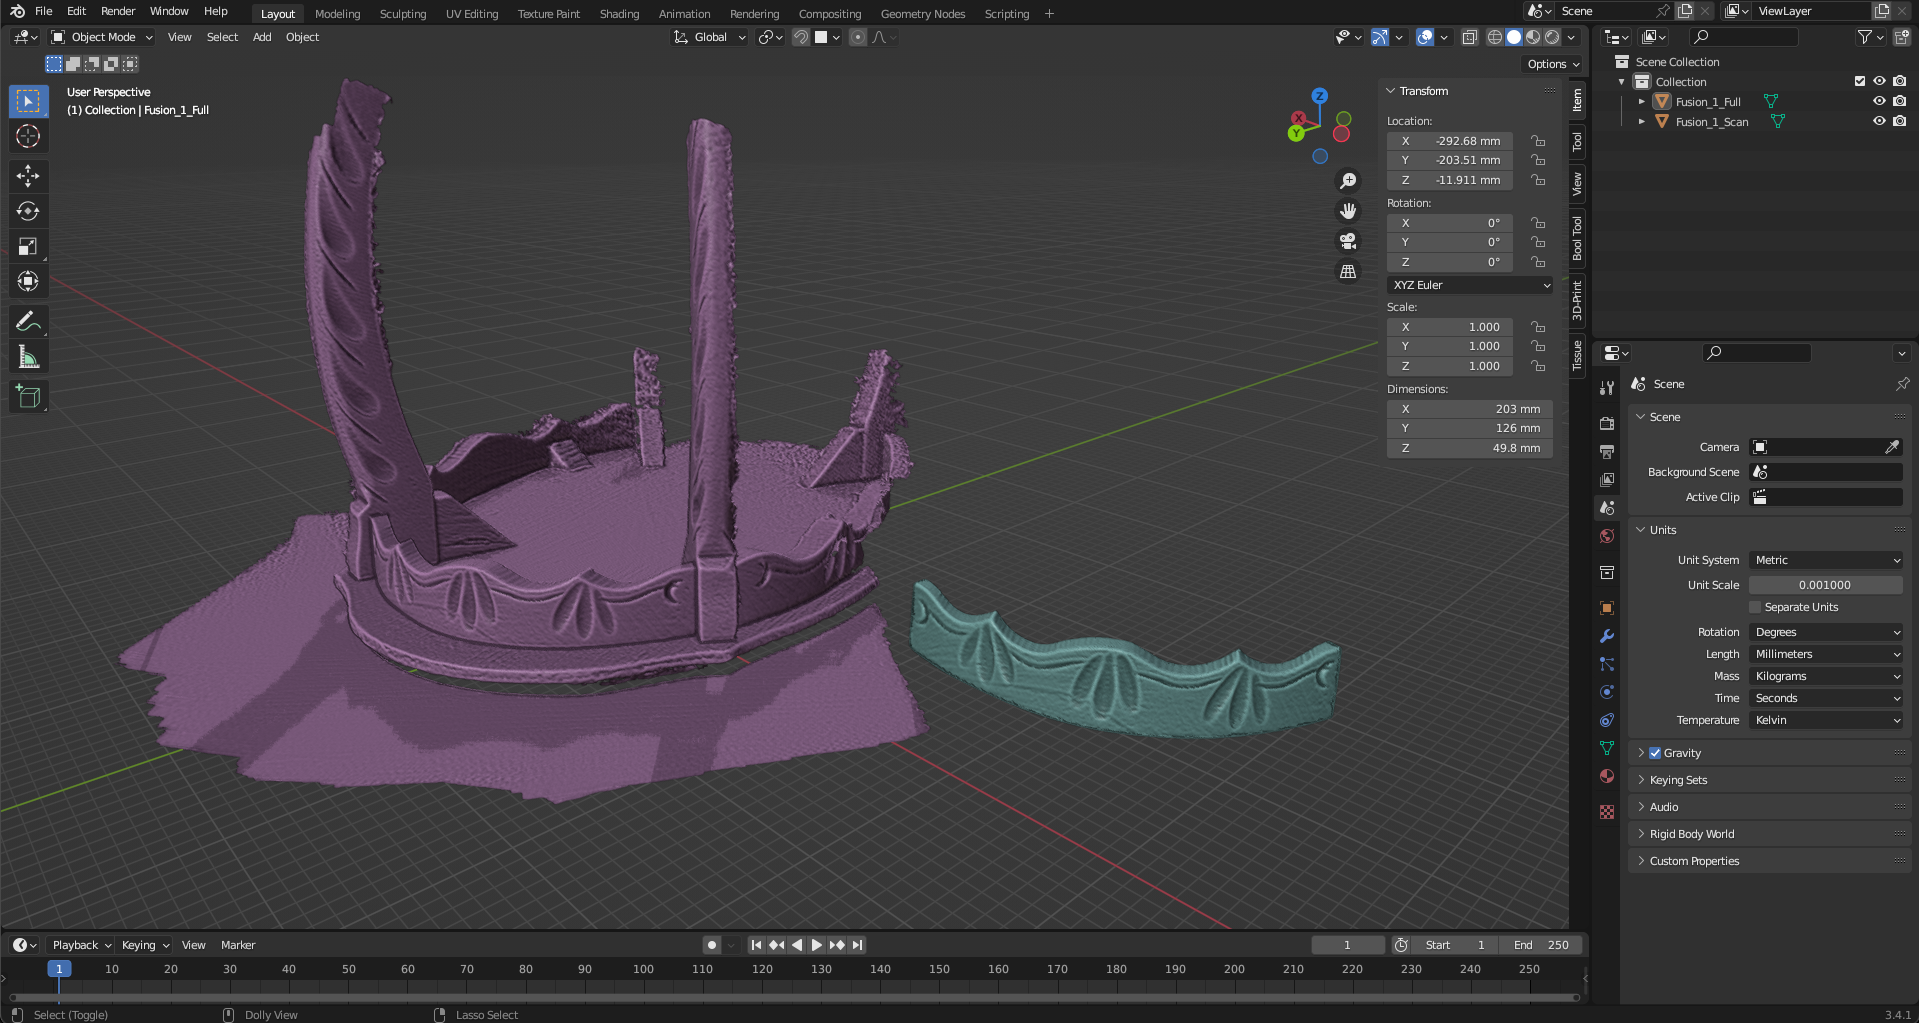
A common application for 3D scanning is reverse engineering, or capturing geometry so it can be reproduced or improved upon. To test out this particular application, I scanned a vintage side table that is missing a piece of wood on one side. The piece is present on the other side of the table, so my plan was to scan this area, isolate the missing piece and create a printable file, and print it out to replace the missing piece.
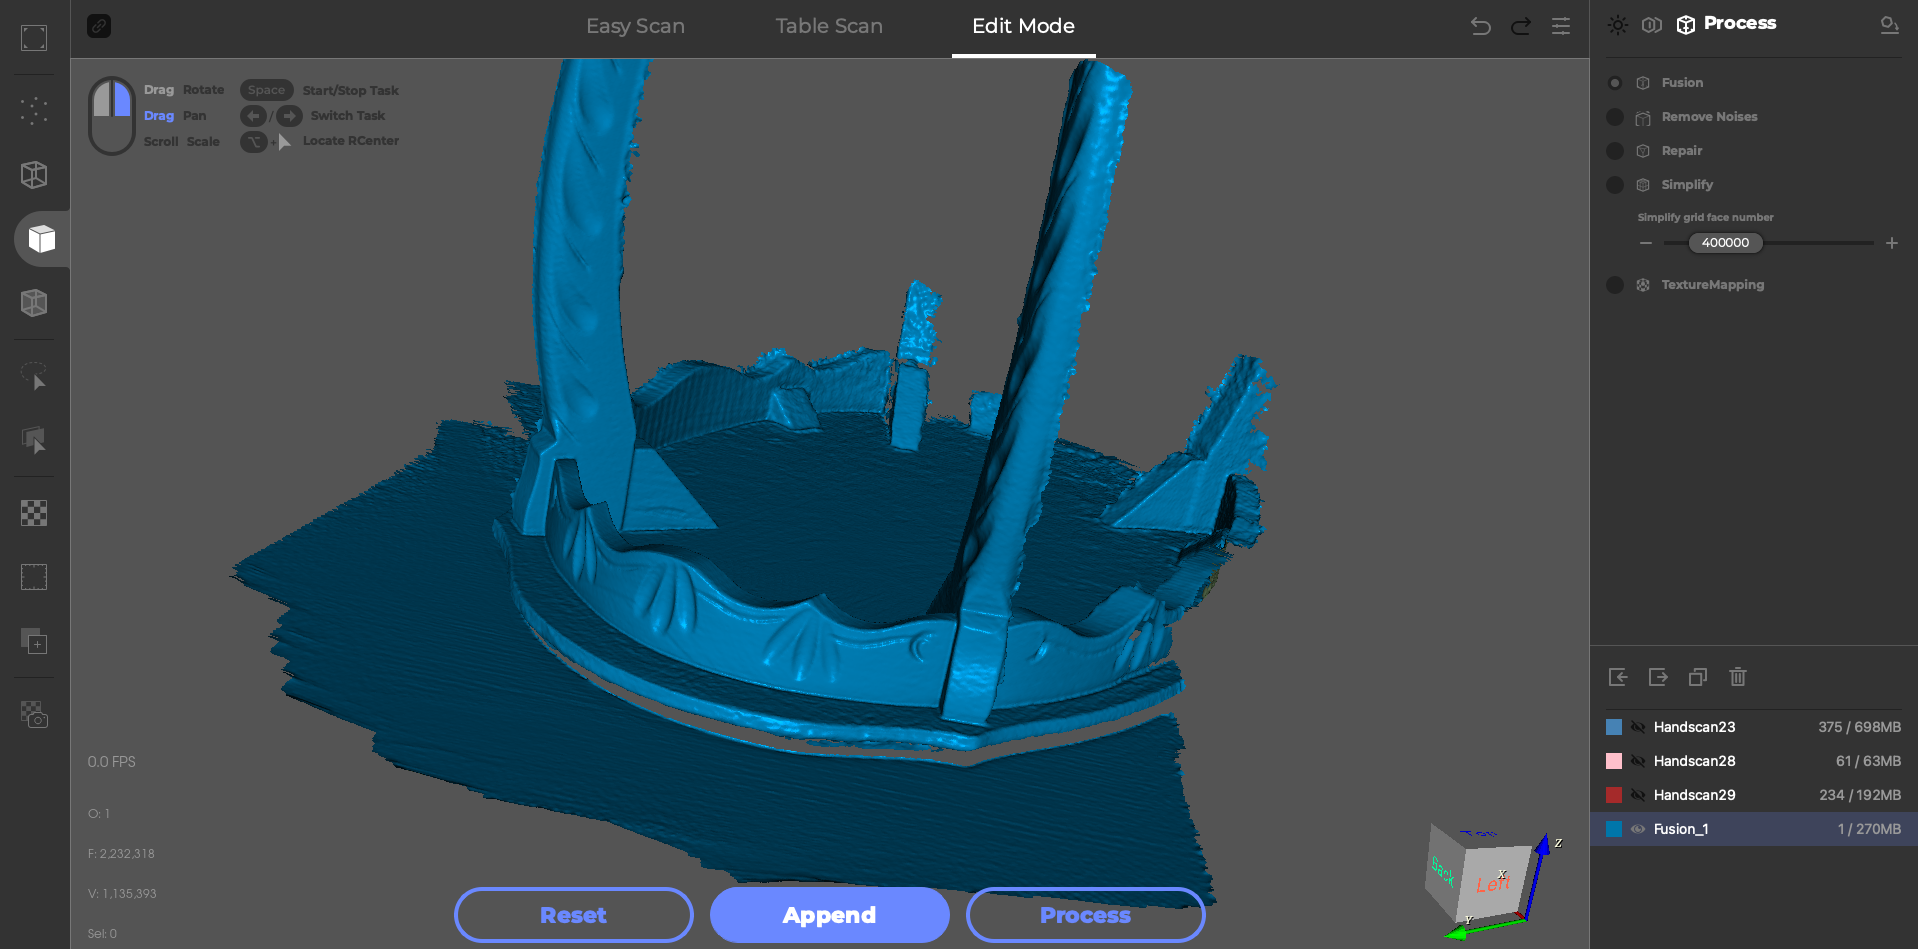
The side table has a satin finish, so there was no processing or prep required before scanning aside from brushing off dust and generally cleaning it up. I took three scans total; approximately capturing the piece to replicate from the front, top, and rear. The pieces didn’t align perfectly using the automatic merge, so I used the manual alignment and picked points to snap them together. Once the three scans had been aligned, I processed them with the point cloud fusion but skipped the repair step as I didn’t need a watertight mesh at this point. The fused point cloud was then converted to a mesh and exported as an .STL file.
Once the .STL file had been generated, I imported it into Blender to isolate and mesh the missing piece. This process involves selecting the pieces of the mesh I don’t need (legs, table surface, etc.) and deleting them. Once the piece had been isolated, I repaired the holes and made sure the file was a single watertight mesh with a flat surface that could be printed on an FDM 3D printer.
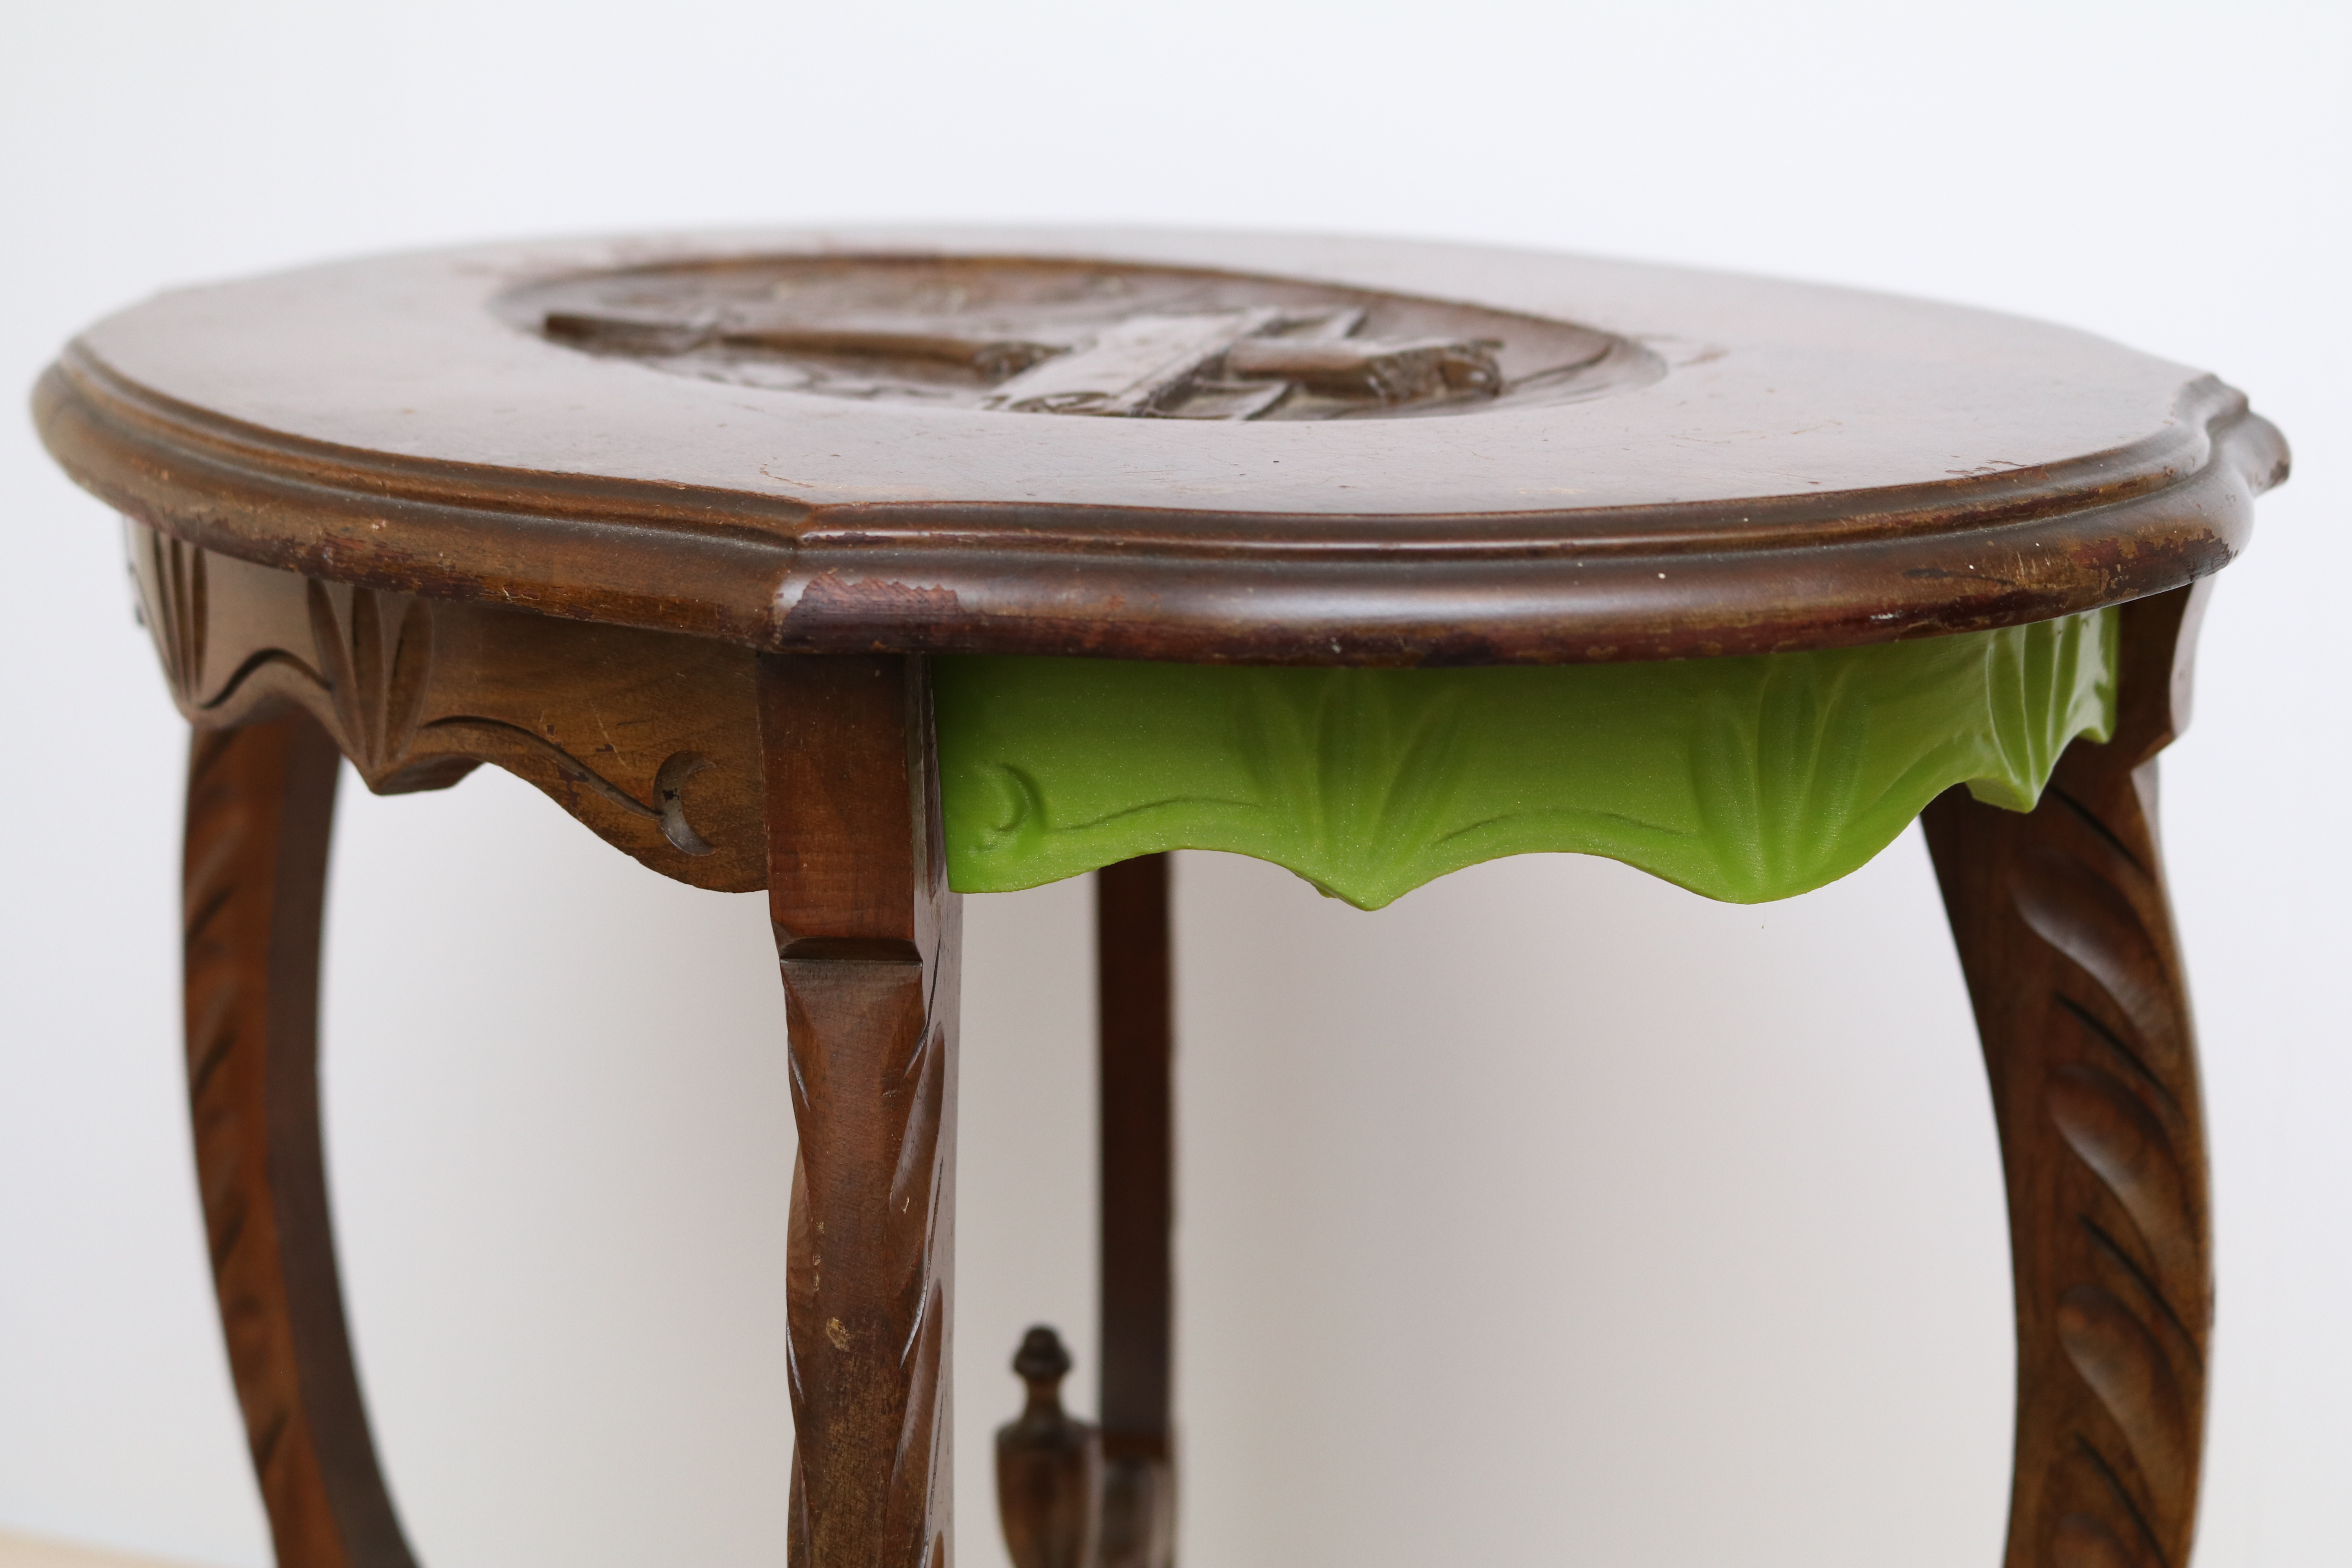
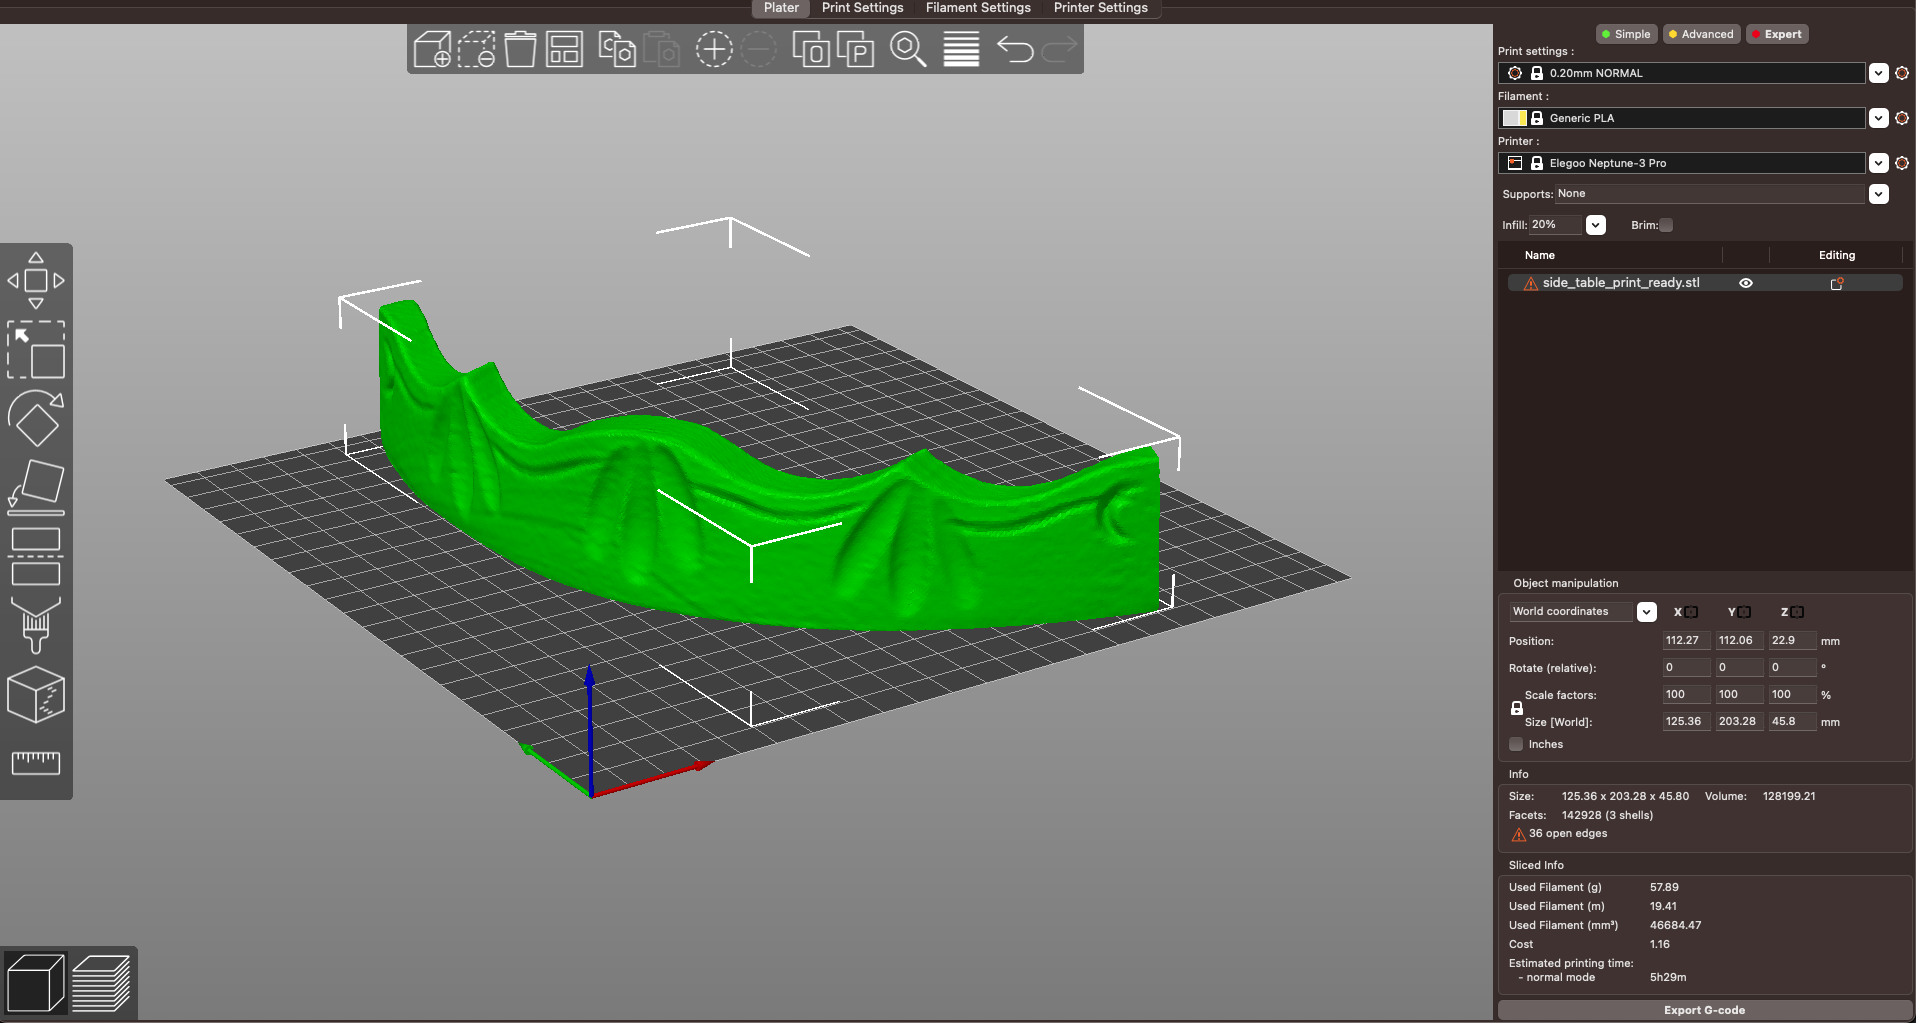
I printed the model on an Elegoo Neptune 3 Pro, one of the best FDM 3D printers available for desktop 3D printing. The piece fit perfectly on the build platform, and I printed the model at a .2mm layer height using Printed Solid Green Slime Glitter PLA filament.
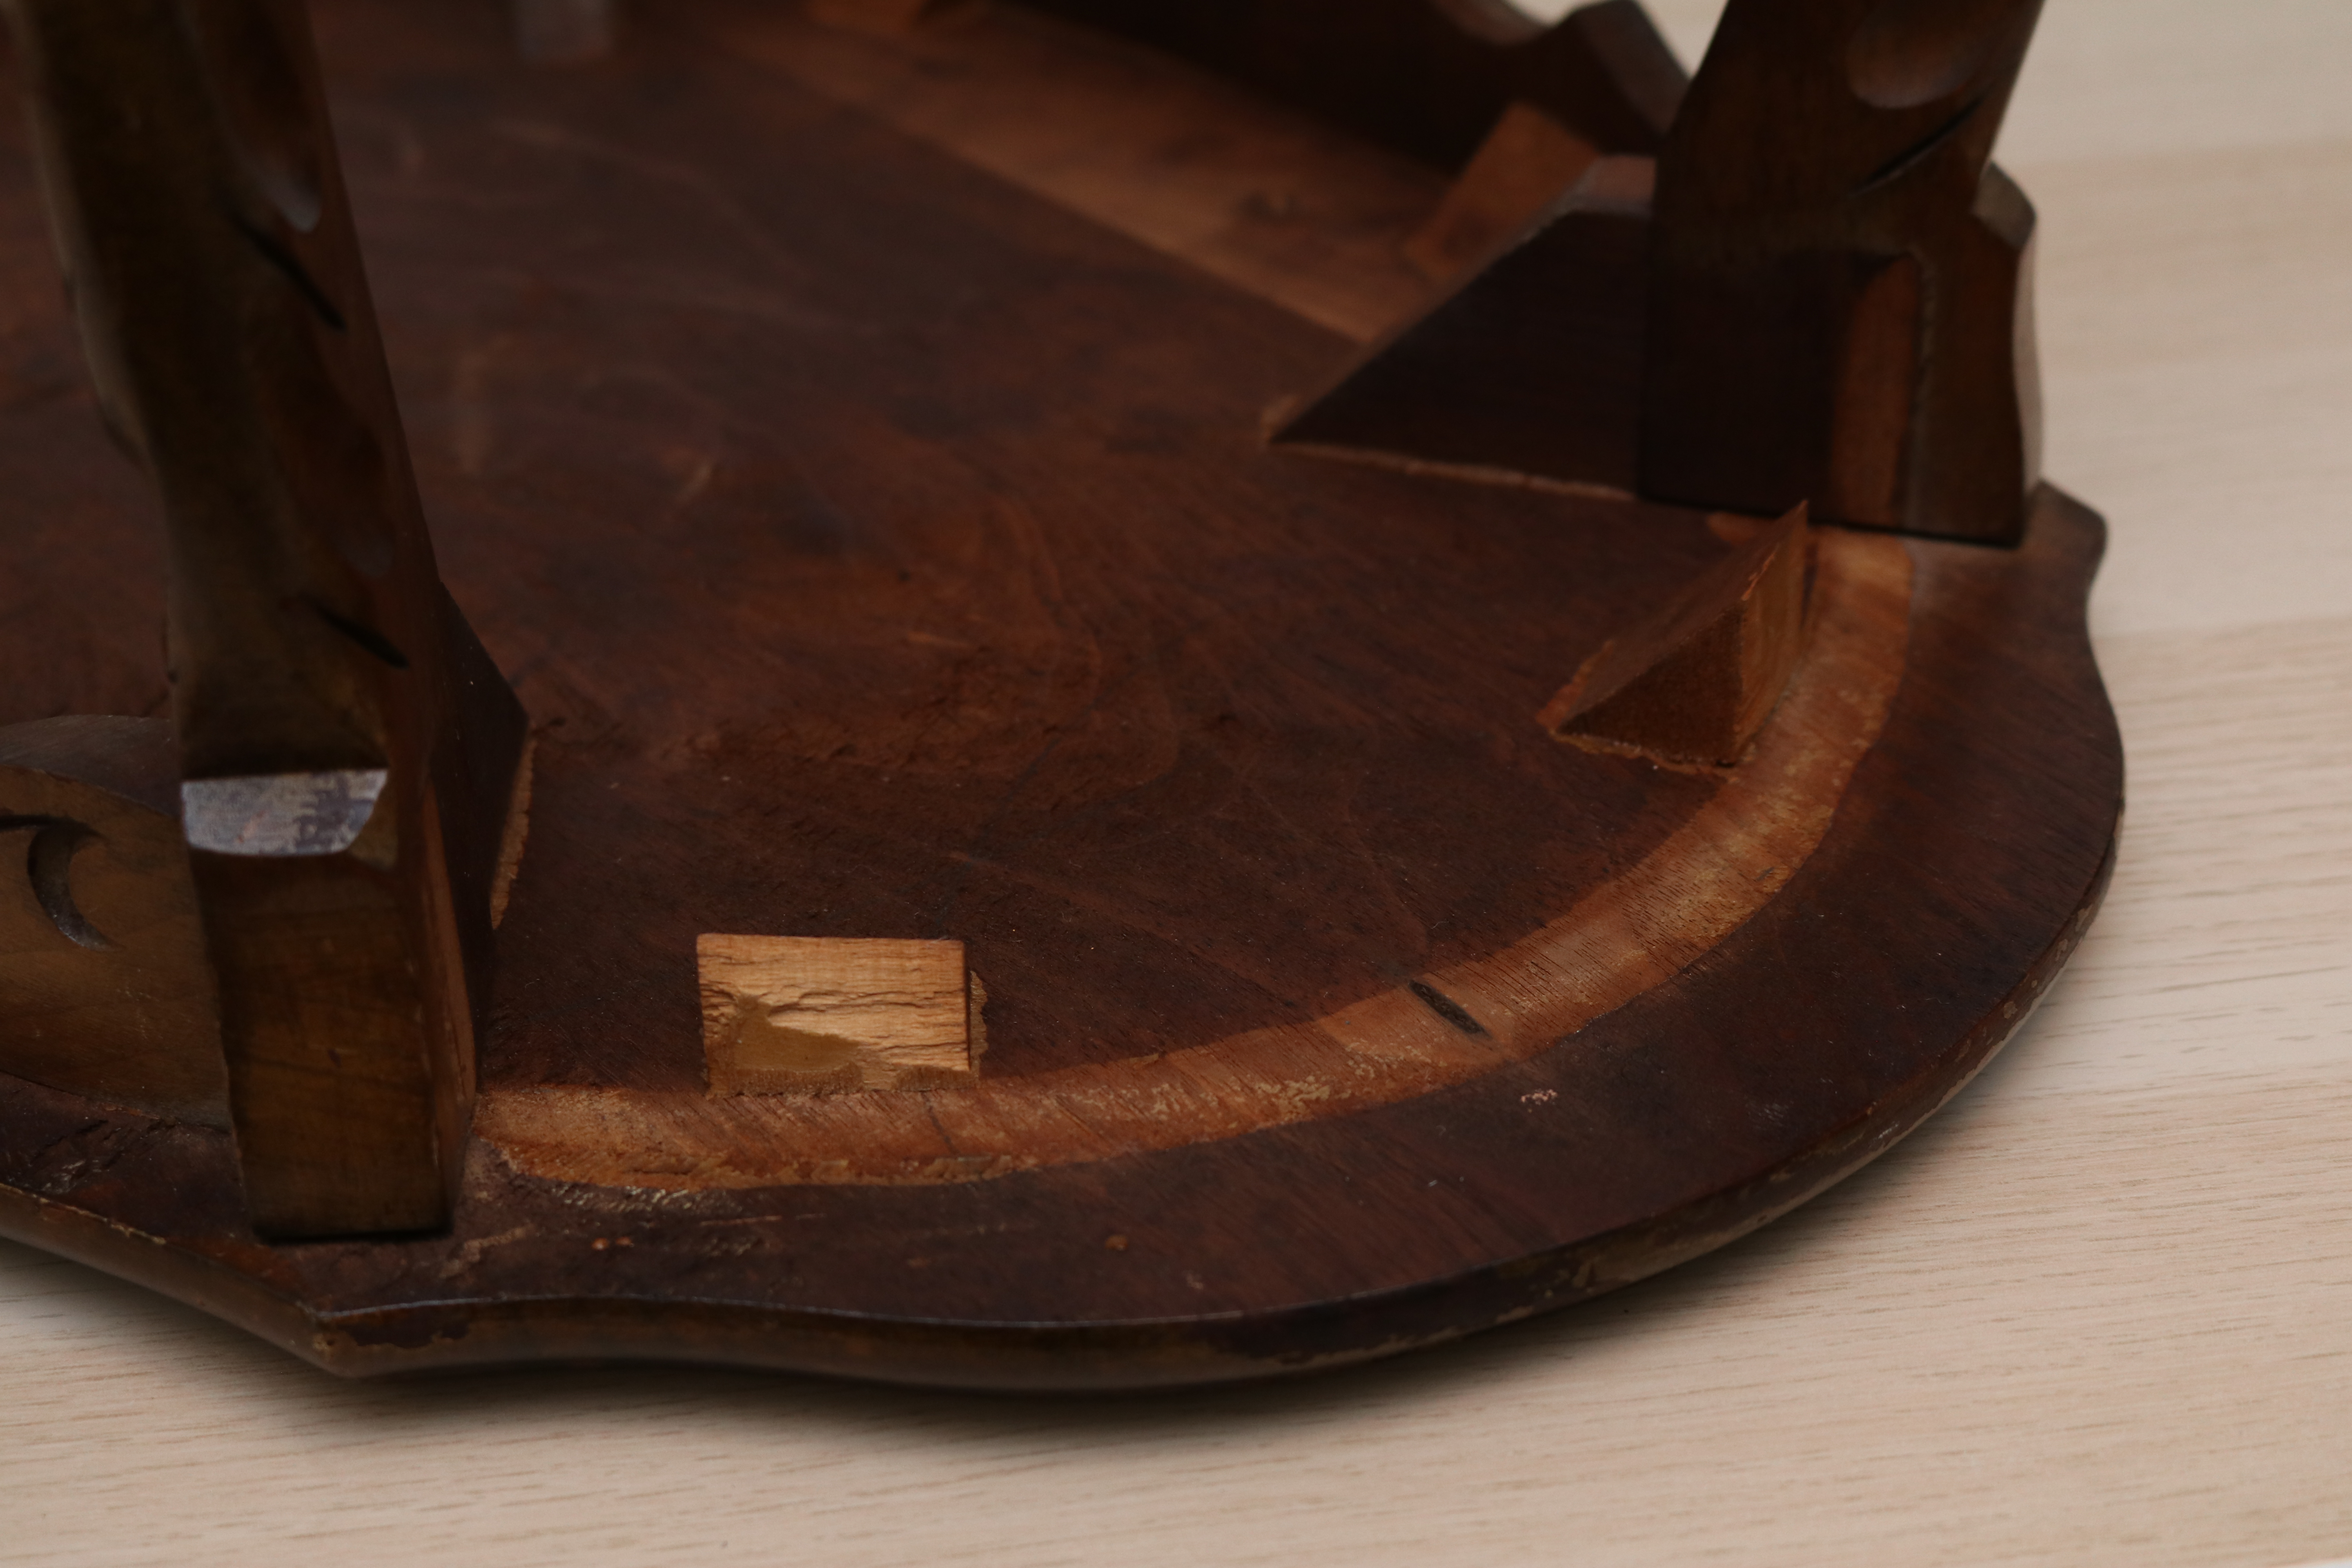
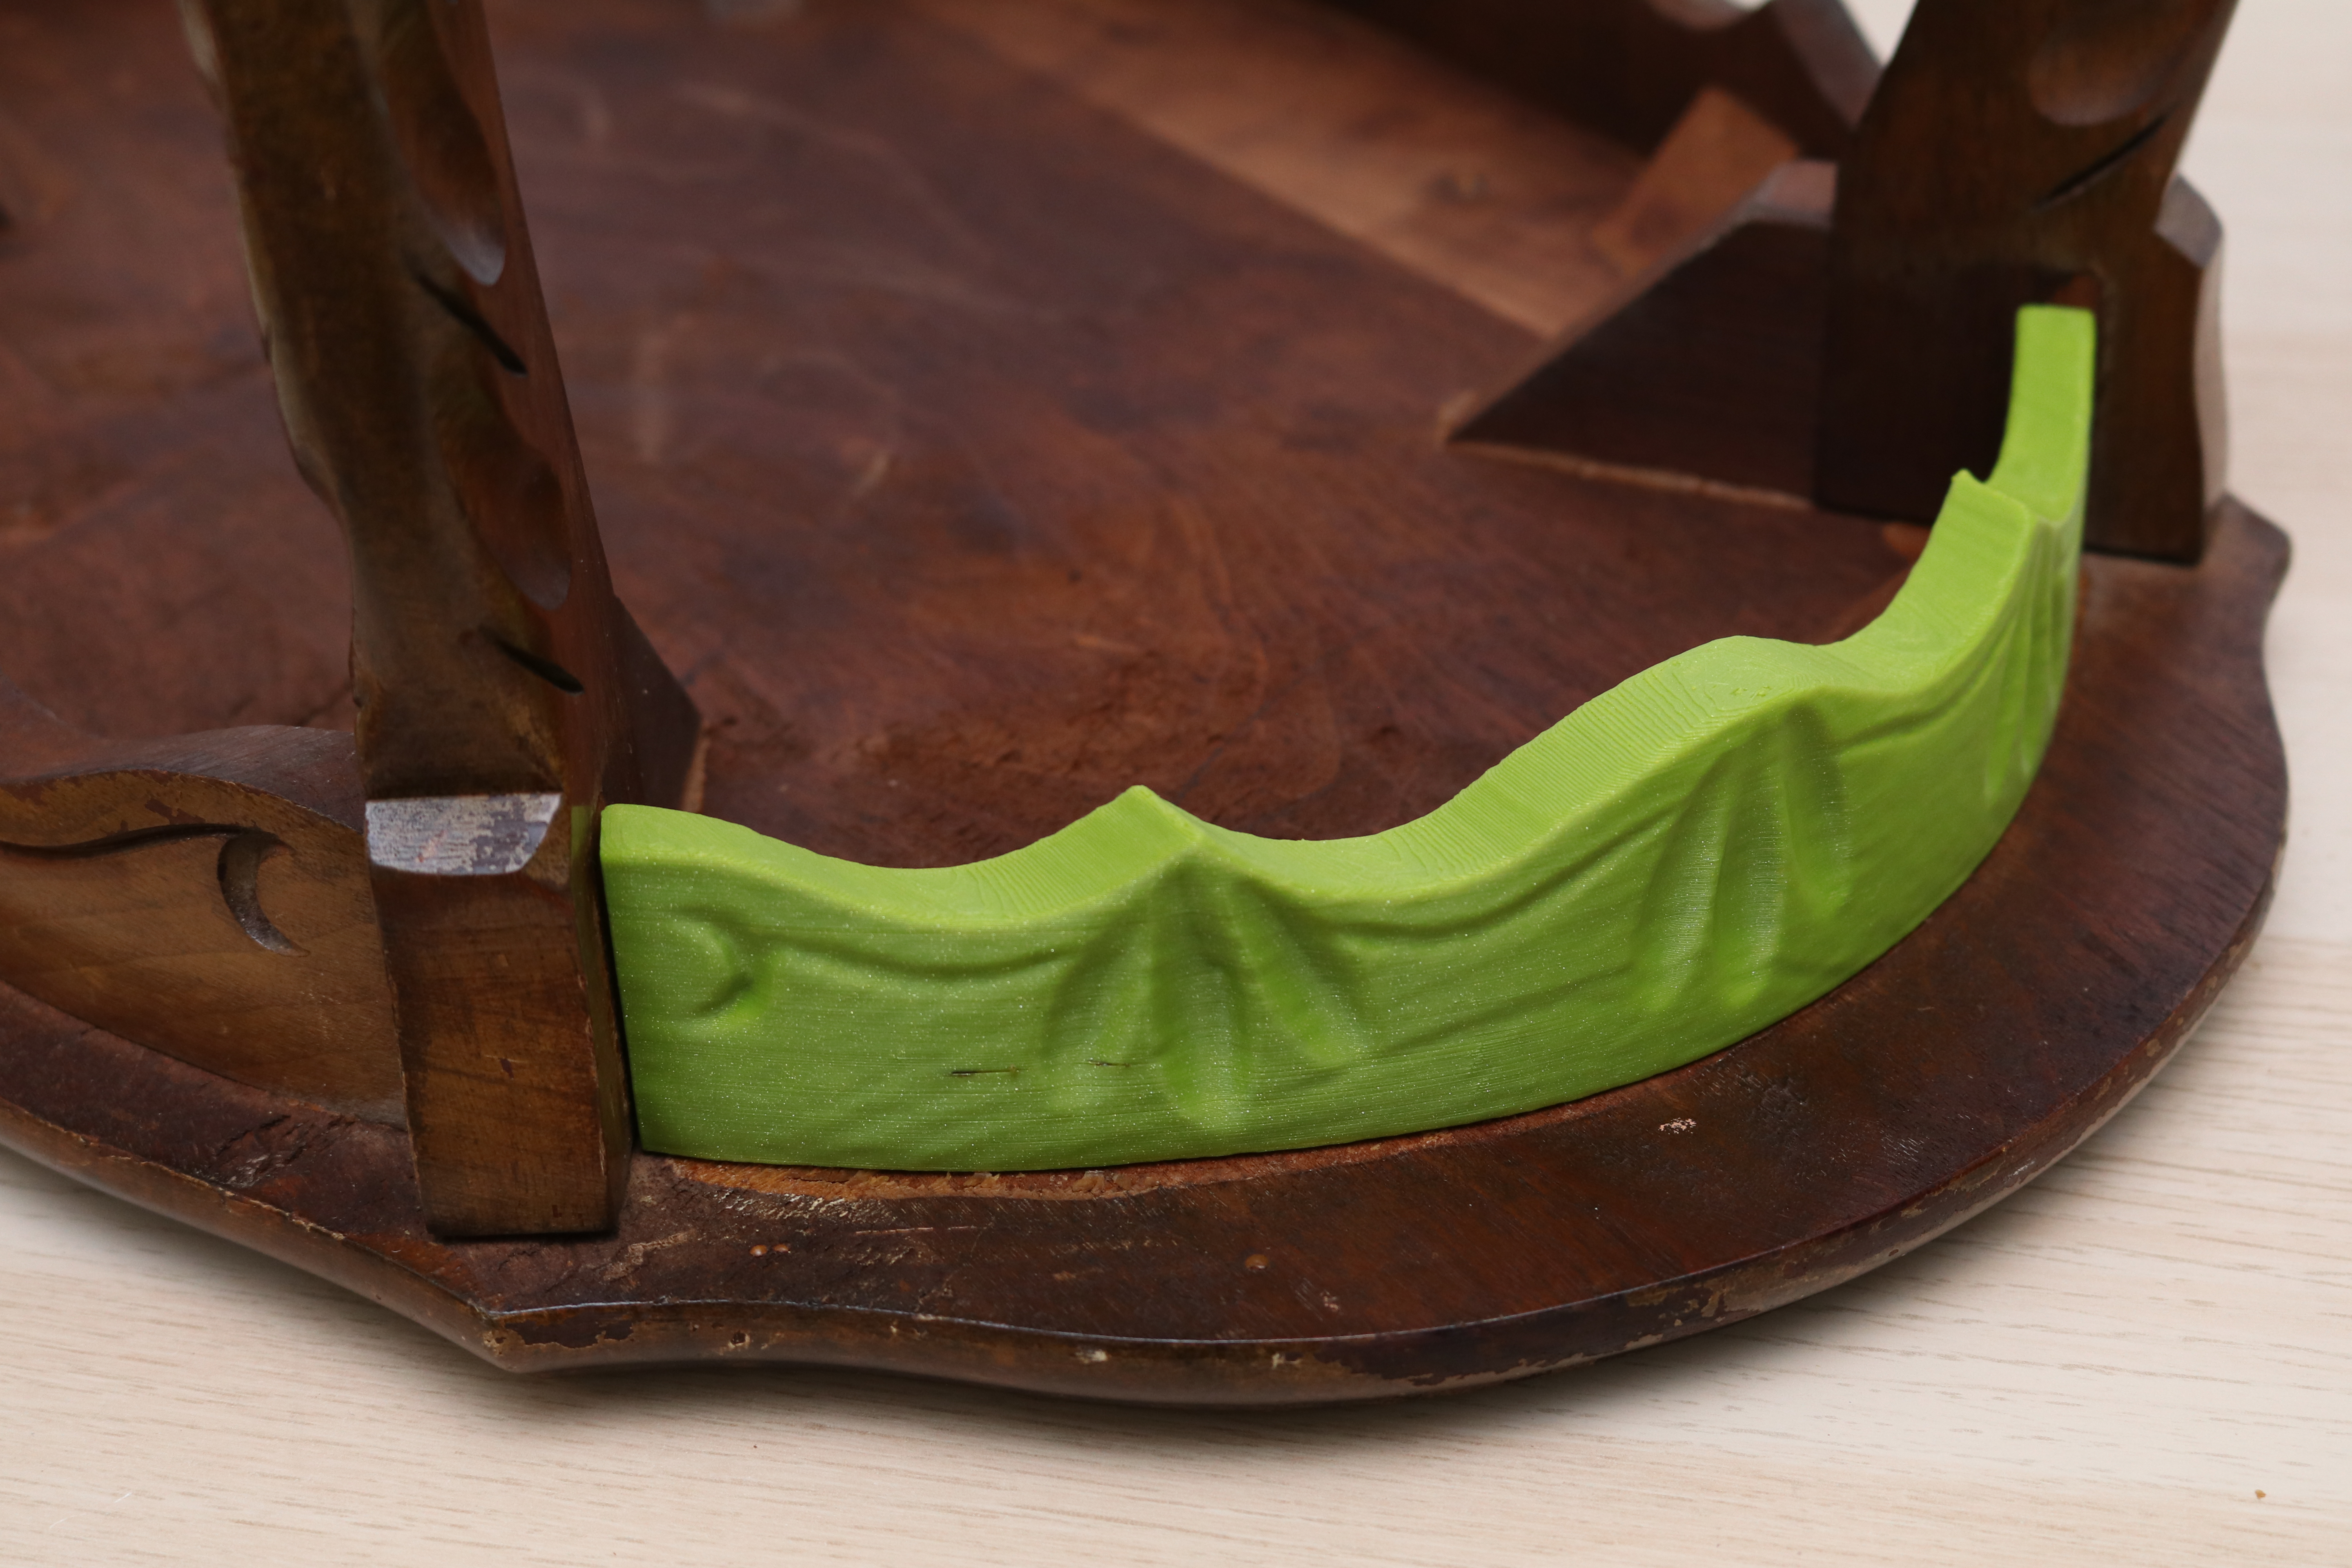
The printed model fit perfectly in the gap left by the original part, and the flat bottom was perfect for adhering to the side table. The engravings on the wood match the look of the original, and the general texture of the part has an uneven, organic look to it. I thought about painting the part, but I like the contrast between the digitally created duplicate and the carved organic original.
The Lynx made scanning the part a fast and easy process, and the resulting mesh file was perfectly to scale and could be processed without much work. It’s easy to see the value of 3D scanning in reverse engineering, and the Lynx performed well in this particular test.
Scanning People with the 3DMakerPro Lynx
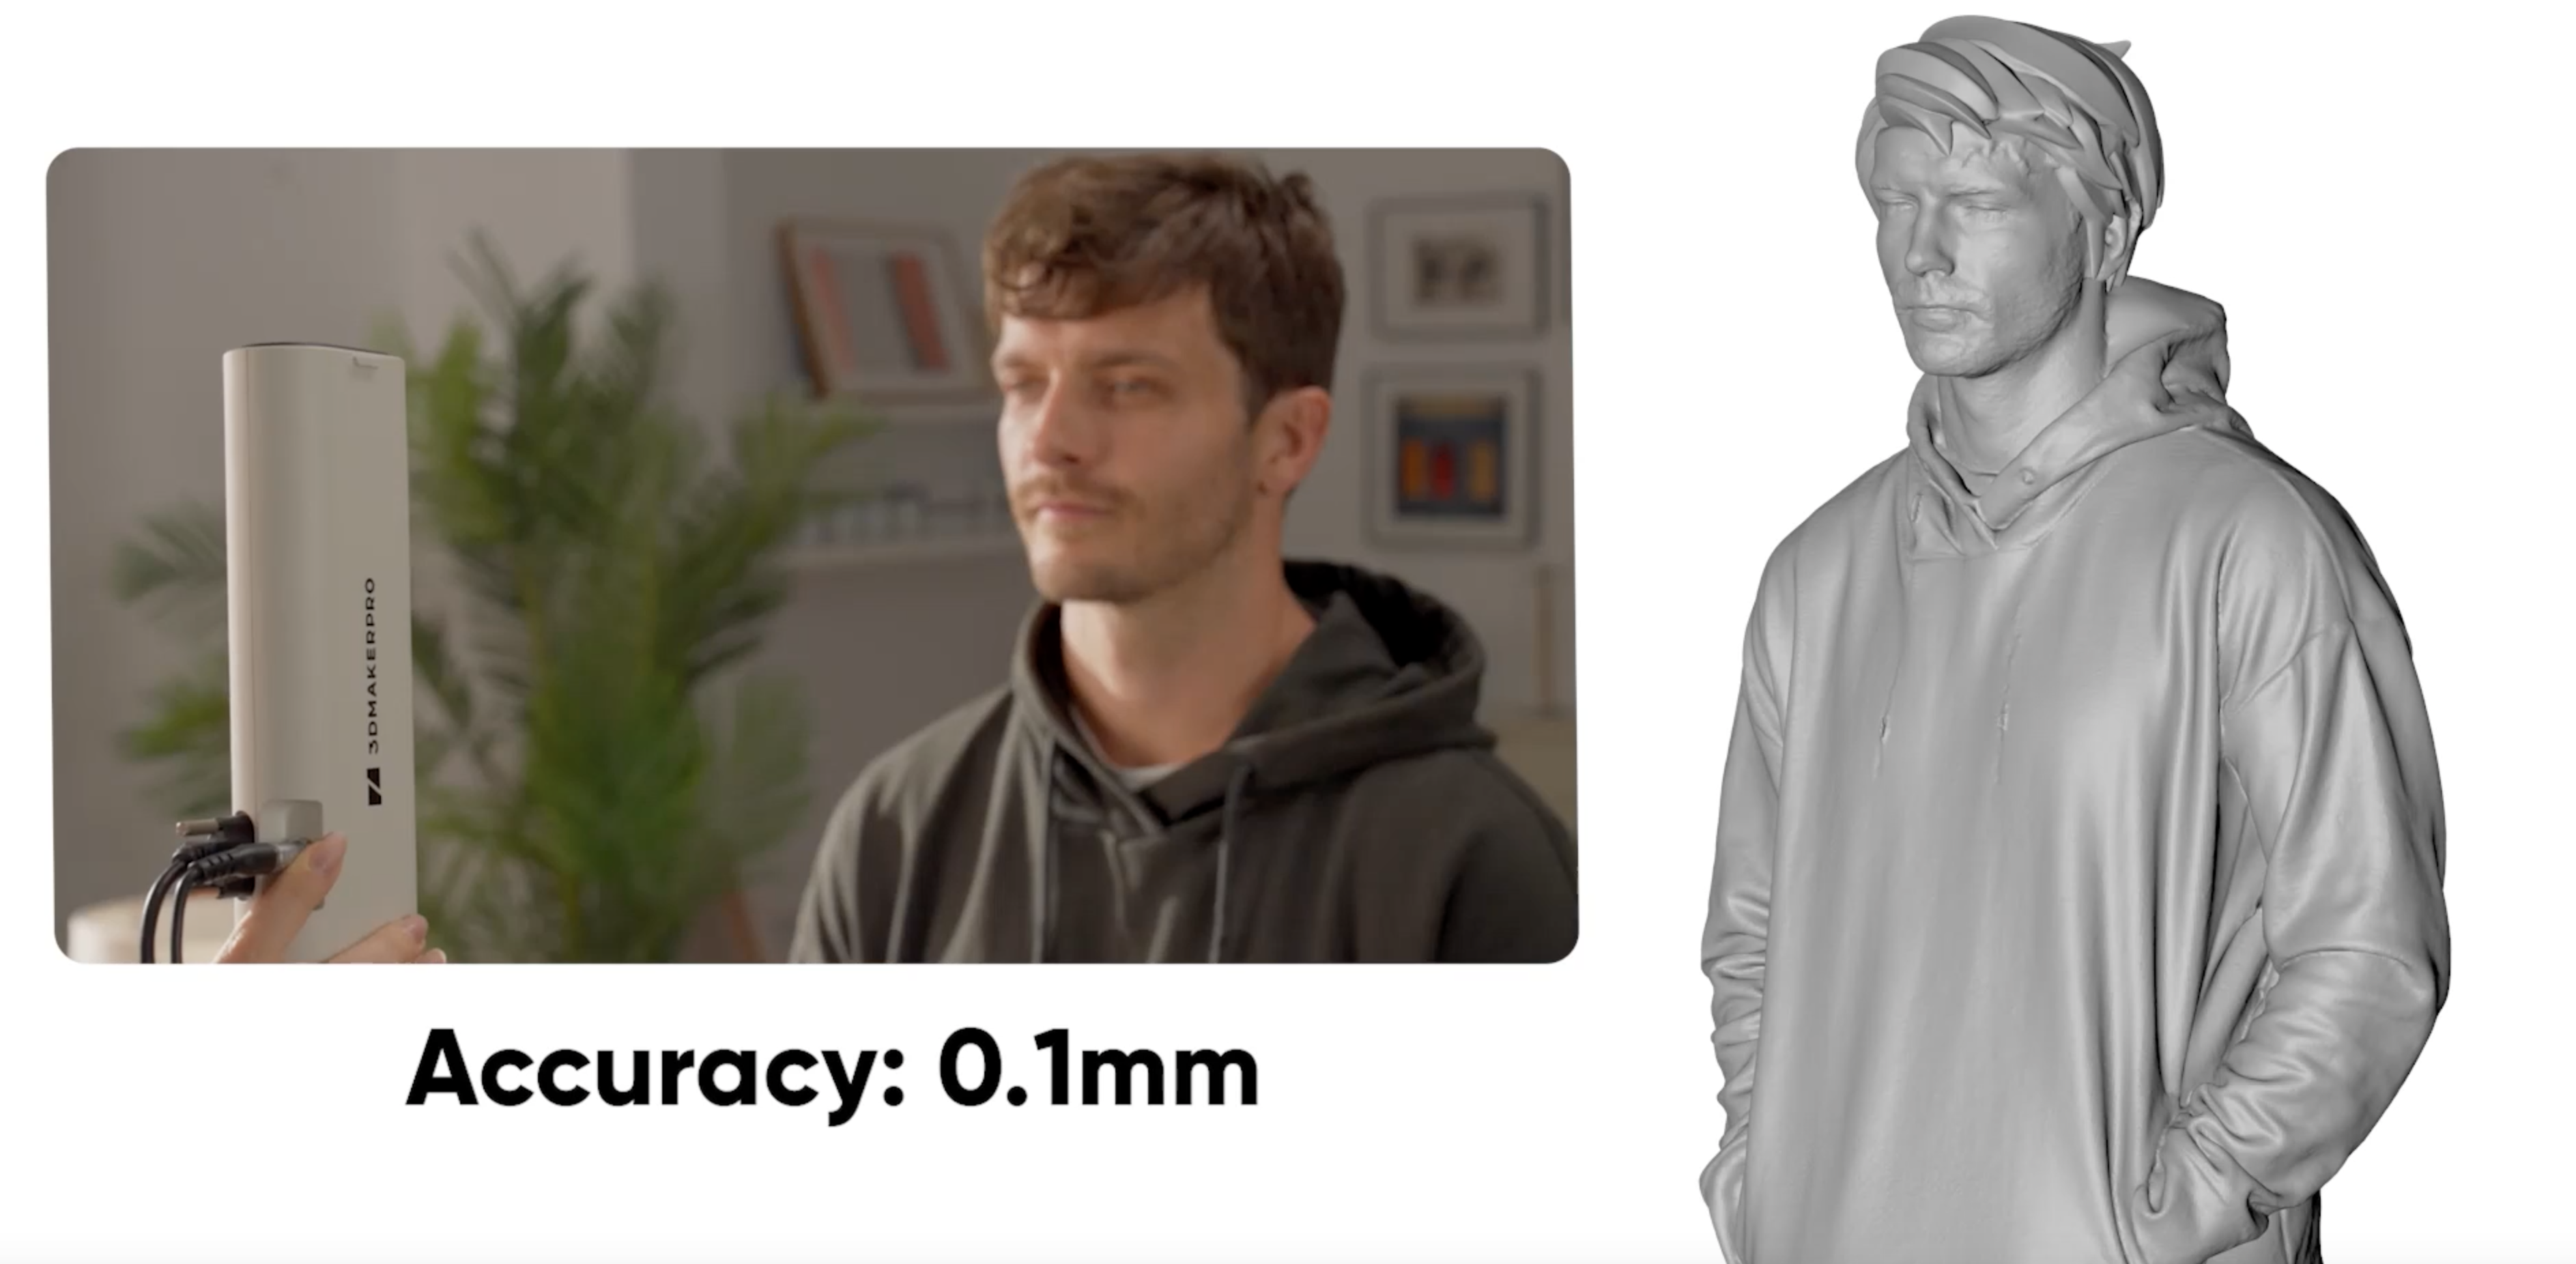
A common application for 3D scanning is taking 3D scans of people, which is a surprisingly difficult process. People tend to move slightly during a scan, which leads to minor distortions in scanned meshes. Hair is difficult to capture accurately, and things like facial hair, glasses, and earrings can also be hard to faithfully reproduce. 3DMakerPro includes a video on the Lynx page captioned “Faithful Object Reproduction”, which features a person being scanned and a very blocky sculpt of hair added to the final mesh. When the company that makes the scanner can’t show a quality scan of a person, that’s typically a sign that you won’t be able to either.
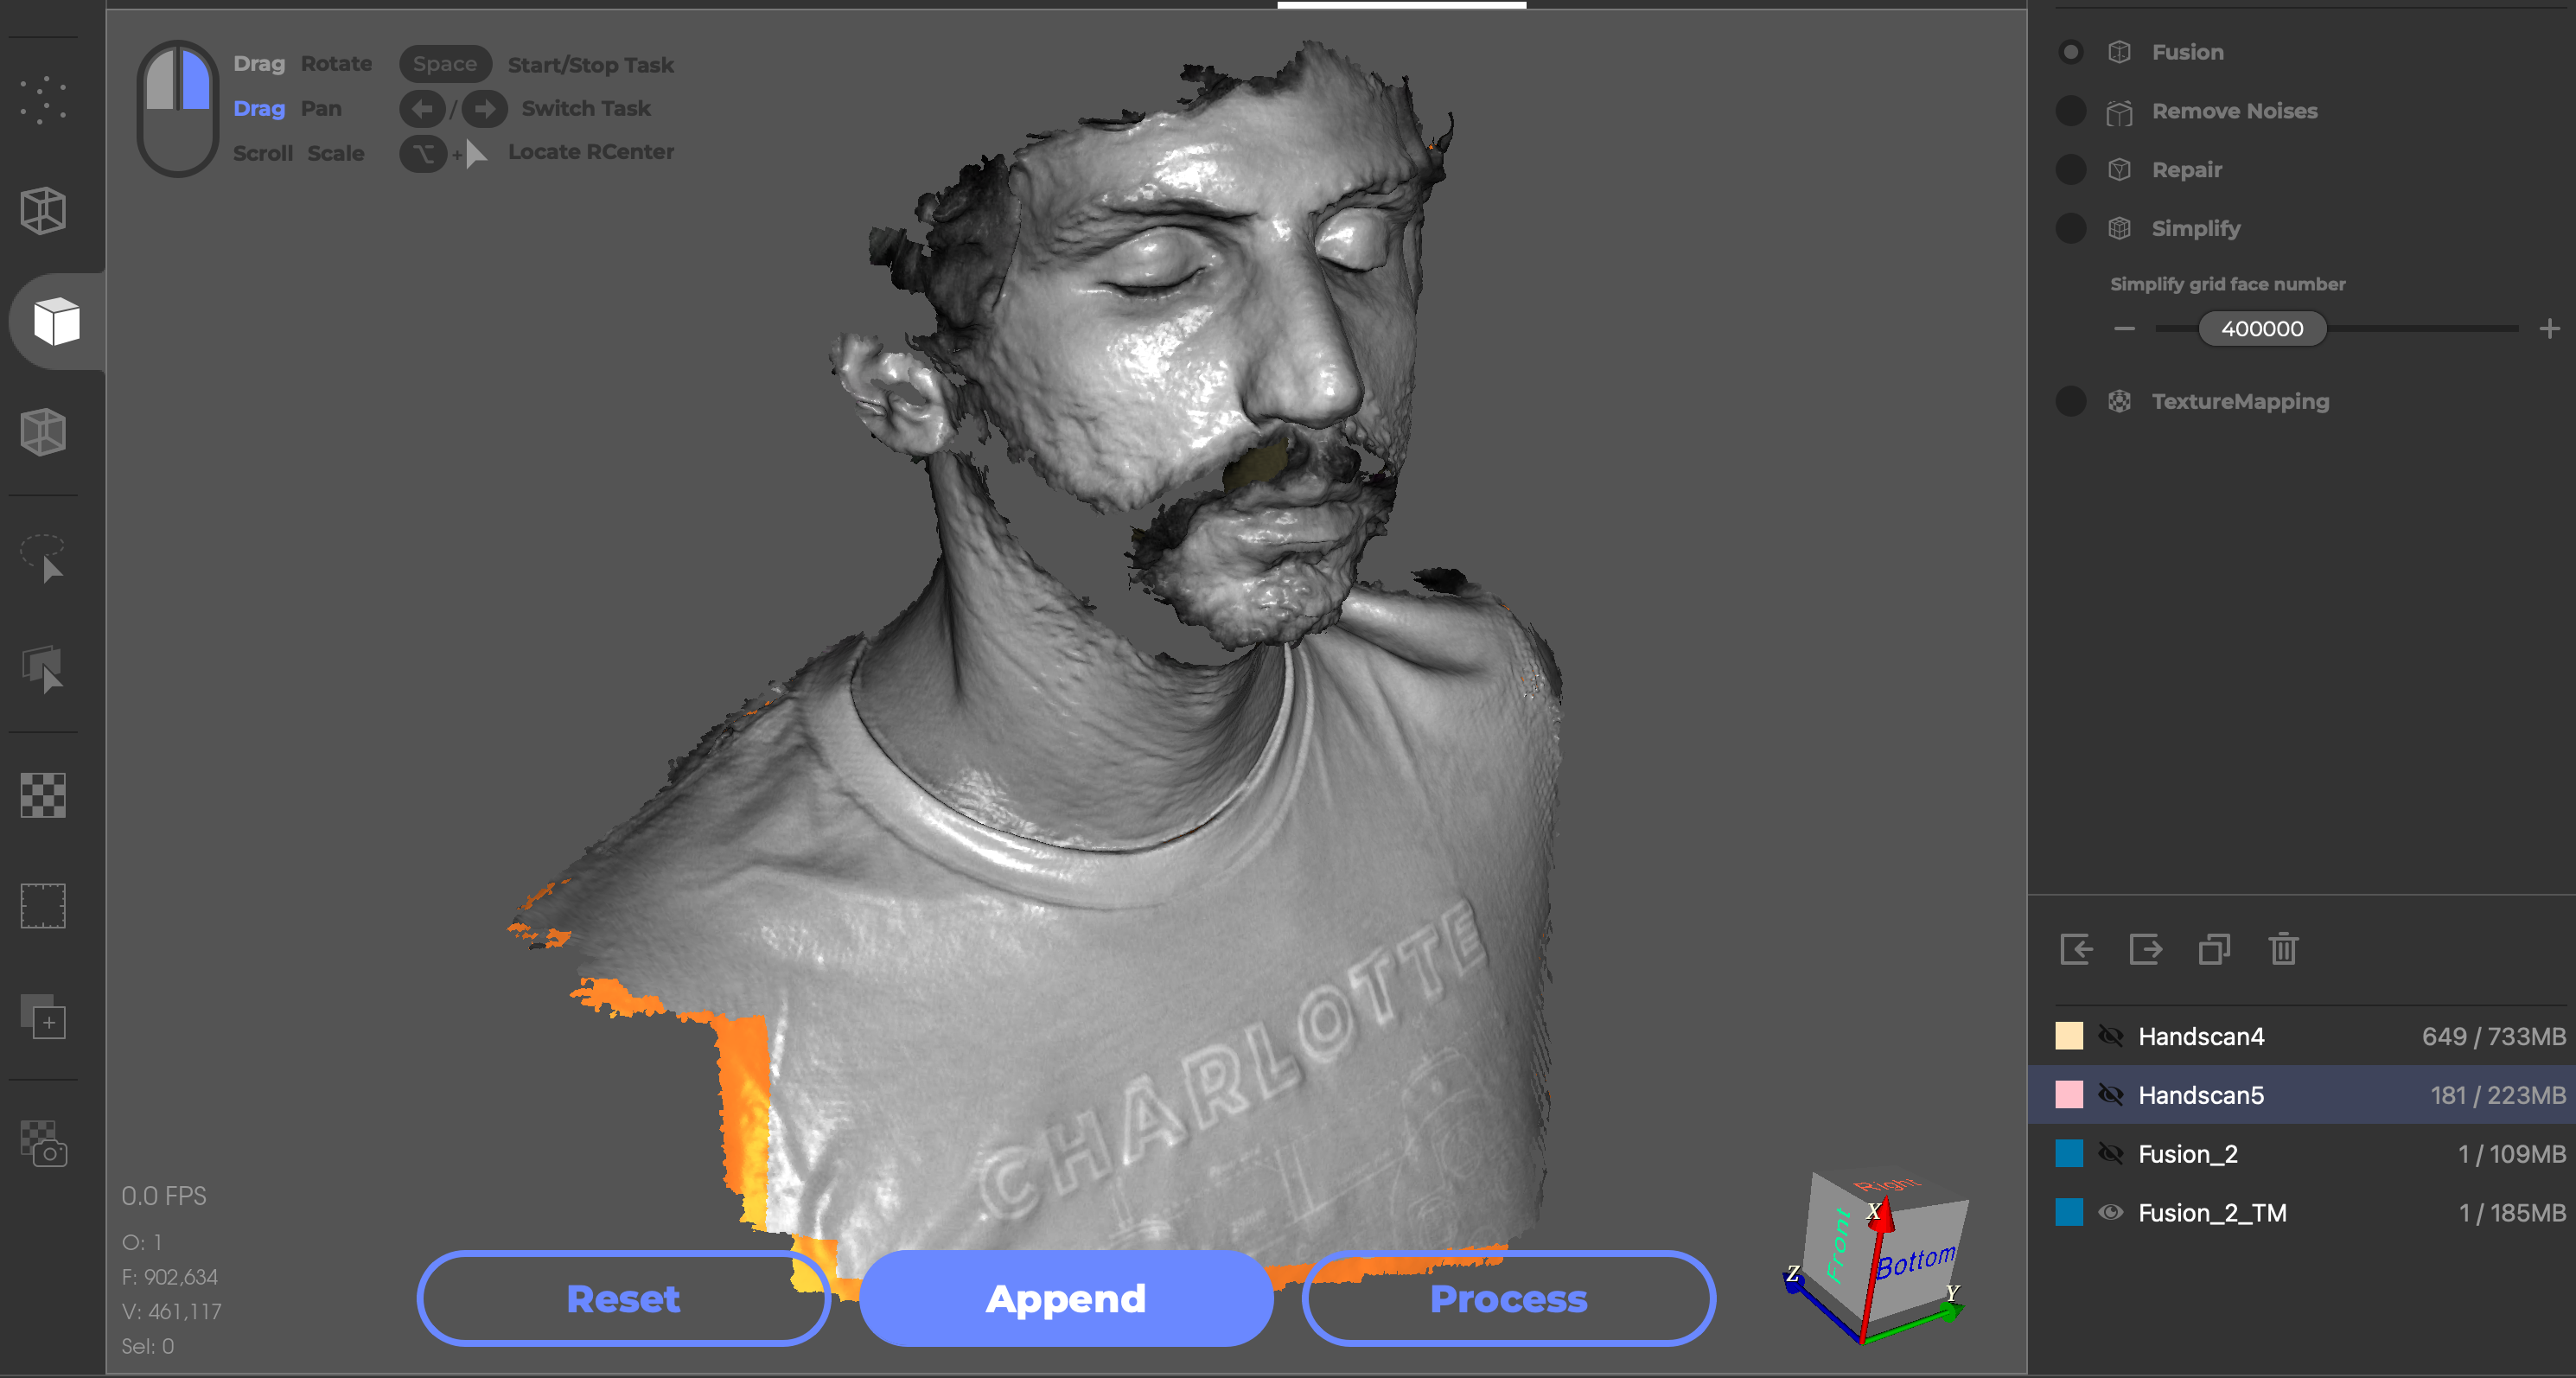
I tried multiple times to get a scan of my face, but was not able to get a full scan regardless of what adjustments to the brightness and sensitivity I made. My facial hair was too dark to capture, and as a result the scanner simply skipped my facial hair and hair which left me with a model that looked a little spooky. While there are several potential solutions that could be attempted (shaving my face, shaving my head, wearing a hat, spraying my entire face with dry shampoo, etc.), none of them are fast or easy to implement.
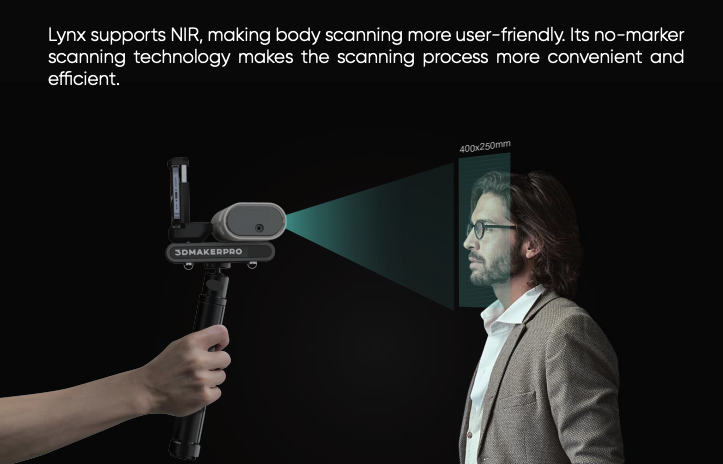
In their advertising material, 3DMakerPro shows a person with a beard, long hair, and glasses being scanned, something that would be difficult under the best of circumstances. Between this image and the mesh showing the sculpt of hair added, it seems that scanning faces is something that will require significant trial and error on the part of the user. Given that this feature is being advertised as “more user-friendly”, I think that it would be reasonable to expect a “Face Mode” with some presets that would make it easier to capture a scan of a person.
Bottom Line
Like many 3D scanners in this price range, the 3DMakerPro Lynx is advertised with images showing the scanner capturing people wearing glasses, shiny machined aluminum, and other objects that will set unrealistic goals for most first-time users. In practice, the Lynx works well when scanning objects on a turntable as well as larger models like the side table to create 3D geometry. The clean-up process in JMStudio is simple enough for beginners or users who are inexperienced with editing point cloud data, but the software is powerful enough to handle alignment and mesh clean-up.
With an intro price of $369 for the standard package, the 3DMaker Pro Lynx will likely attract a large number of users interested in learning more about 3D scanning and what the technology can accomplish. However, the jump in price to the premium package (which includes a turntable as well as the handle/tripod) is easy to justify as these accessories are tremendously useful when making 3D scans. It’s unclear what is required to take advantage of the full color texture mapping feature included in the luxury package, but the rendering on the site shows a separate digital camera which may be an additional cost for some users.
Overally, the Lynx feels like a step in the right direction in the entry-level scanning market. Inexpensive desktop scanners typically have confusing, buggy, and difficult to use software, like the Creality CR-Scan Lizard when it was reviewed. The turntable mode in JMStudio was intuitive and simple, which should result in beginners experiencing early success instead of frustration trying to align scans and merging point clouds.

Andrew Sink first used a 3D printer in 2012, and has been enthusiastically involved in the 3D printing industry ever since. Having printed everything from a scan of his own brain to a peanut butter and jelly sandwich, he continues to dive ever more deeply into the endless applications of additive technology. He is always working on new experiments, designs, and reviews and sharing his results on Tom's Hardware, YouTube, and more.
-
JTClose Reply
The documentation states that the system will "theoretically" scan an object up to 5000 mm.Admin said:The 3DMakerPro Lynx is an inexpensive 3D scanner that brings 3D scanning to the entry-level market with the powerful JMStudio software app. During testing, the Lynx was able to capture geometry and create 3D models of small objects as well as perform reverse engineering on furniture components.
3DMakerPro Lynx 3D Scanner Review: Start 3D Scanning Today : Read more
Did you attempt any object between 2000 mm and 5000 mm ?
Thank you -
_zanthrax_ The review mentions the Creality CR-Scan Lizard and it's hard to use software.Reply
But that software has been updated. In fact, it's the same software shown in this review.
Creality now also sell a scanner with the exact same formfactor at double the price as the Lynx.
The proprietary power connector on both scanners is also the same btw.
I'm guessing some other company is manufacturing these scanners and both 3DMakerPro and Creality are just reselling them.
