Tom's Hardware Verdict
The $429.99 Asus ProArt X570-Creator WIFI includes three M.2 sockets, dual Thunderbolt 4 ports, fast 10 GbE port and Wi-Fi 6E, plus an understated appearance that will fit with most builds. If you need Thunderbolt 4 for ultra-fast transfers and the extra bandwidth of X570, this board is your best bet.
Pros
- +
+ Two Thunderbolt 4 Type-C ports
- +
+ 10 GbE and 2.5 GbE ports
- +
+ Three M.2 slots
- +
+ Unique M.2 Q-Latch means no tiny screws
Cons
- -
Expensive
- -
Basic appearance
Why you can trust Tom's Hardware
Not long ago, we took a look at Asus’ ProArt B550 Creator. It’s a solid board overall, but was held back by chipset limitations (the lower PCIe lane count) compared to X570. With that B550 option you get just two M.2 sockets and four SATA ports which could be light for content creators who want to run more storage than the board allows. Moving to the ProArt X570-Creator WIFI we’re looking at here resolves those issues thanks to X570’s increased bandwidth. Plus you get top-end Wi-Fi 6E in case you aren’t near an Ethernet connection.
Powering the CPU on the Asus ProArt X570-Creator WIFI is a 14+2 VRM, capable of driving AMD’s flagship Ryzen 9 5950X at stock speeds and while overclocked. The X570 version we’re testing today includes three M.2 sockets and six SATA ports, which should be enough for most content creators, without throwing in an add-in-card. Along with the increased storage options and fast Wi-Fi, the board includes a 10 GbE port, flagship-class audio (albeit last-generation) and two Thunderbolt 4 USB Type-C ports to round out primary connectivity. Overall, it’s a well-appointed motherboard for content creators looking for an X570 workhorse.
The X570-Creator WIFI did OK overall during our performance testing, mixing in well with the other results. No result was exceptionally fast or slow and, in the end, the board was an average performer. If there’s a place we can point at where the board excelled, it would be in the PCMark 10 benchmark(s). Outside of that, Handbrake, 7Zip, LAME and Corona were spot on average, while Cinebench and POV-Ray were slightly below average.
Overclocking went without a hitch as well, taking our Ryzen 9 5950X to 4.4 GHz without worry. The VRMs and their heatsinks handled the load without complaint, running cool during our benchmarking and stress testing. I wouldn’t use this board with sub-ambient cooling methods, but then the target audience for this board is professionals who prefer stability over pushing the limits of overclocking. Still, if you’d like to get your work done faster, the X570-Creator WIFI can handle any ambient overclocking, even on the flagship AMD processor we use for testing. If you’re after a well-equipped board for serious content creation and you don’t want to step up to a Threadripper workstation, the Asus ProArt X570-Creator WIFI might be one of the best X570 motherboards for you. But read on as we explore this board’s features and performance in detail, because at $430, it’s no small investment.
Specifications - Asus ProArt X570 Creator
| Socket | AM4 |
| Chipset | X570 |
| Form Factor | ATX |
| Voltage Regulator | 16 Phase (14+2, 70A MOSFETs for Vcore) |
| Video Ports | (1) HDMI (v2.1) |
| Row 5 - Cell 0 | (2) Thunderbolt 4 USB Type-C |
| Row 6 - Cell 0 | (1) DisplayPort (v1.2, input for TB4 ports) |
| USB Ports | (2) Thunderbolt 4, Type-C (40 Gbps, 5V/3A 15W Charging support) |
| Row 8 - Cell 0 | (4) USB 3.2 Gen 2, Type-A (10 Gbps) |
| Row 9 - Cell 0 | (4) USB 3.2 Gen 1 (5 Gbps) |
| Network Jacks | (1) 10 GbE |
| Row 11 - Cell 0 | (1) 2.5 GbE |
| Audio Jacks | (5) Analog + SPDIF |
| Legacy Ports/Jacks | ✗ |
| Other Ports/Jack | ✗ |
| PCIe x16 | (2) v4.0 (x16, x8/x8) |
| Row 16 - Cell 0 | (1) v4.0 (x4) |
| PCIe x8 | ✗ |
| PCIe x4 | ✗ |
| PCIe x1 | ✗ |
| CrossFire/SLI | ✗ |
| DIMM slots | (4) DDR4 4800+(OC), 128GB Capacity |
| M.2 slots | (1) PCIe 4.0 x4 (64 Gbps) / PCIe + SATA (up to 80mm) |
| Row 23 - Cell 0 | (1) PCIe 4.0 x4 (64 Gbps) / PCIe (up to 80mm) |
| Row 24 - Cell 0 | (1) PCIe 4.0 x4 (64 Gbps) / PCIe + SATA (up to 110mm) |
| U.2 Ports | ✗ |
| SATA Ports | (4) SATA3 6 Gbps (RAID 0, 1 and 10) |
| USB Headers | (1) USB v3.2 Gen 2, Type-C (10 Gbps) |
| Row 28 - Cell 0 | (1) USB v3.2 Gen 1 (5 Gbps) |
| Row 29 - Cell 0 | (3) USB v2.0 (480 Mbps) |
| Fan/Pump Headers | (8) 4-Pin |
| RGB Headers | (3) aRGB (3-pin) |
| Row 32 - Cell 0 | (1) RGB (4-pin) |
| Other Interfaces | FP-Audio |
| Diagnostics Panel | Post Status Checker (4 LEDs) |
| Internal Button/Switch | ✗ |
| SATA Controllers | ✗ |
| Ethernet Controller(s) | Intel I225-V (2.5 Gbps) |
| Wi-Fi / Bluetooth | Intel AX200 Wi-Fi 6E (ax, 2.4/5 GHz, 160 MHz) |
| USB Controllers | ✗ |
| HD Audio Codec | Realtek ALC1220A |
| DDL/DTS Connect | ✗ / ✗ |
| Warranty | 3 Years |
Inside the Asus ProArt X570-Creator’s box, the accessory stack is thin but should have what you need to get going without a trip to the store for more parts. Here you’ll find the typical set of SATA cables, Wi-Fi antenna, and even a passthrough cable for Thunderbolt 4 video.
- (4) SATA cables
- DP to DP cable (for TB4)
- Asus Wi-Fi antenna
- (2) M.2 rubber package
- M.2 screw package
- Q-connector
- User manual
- Support/Driver CD
- ACC Express Activation key card
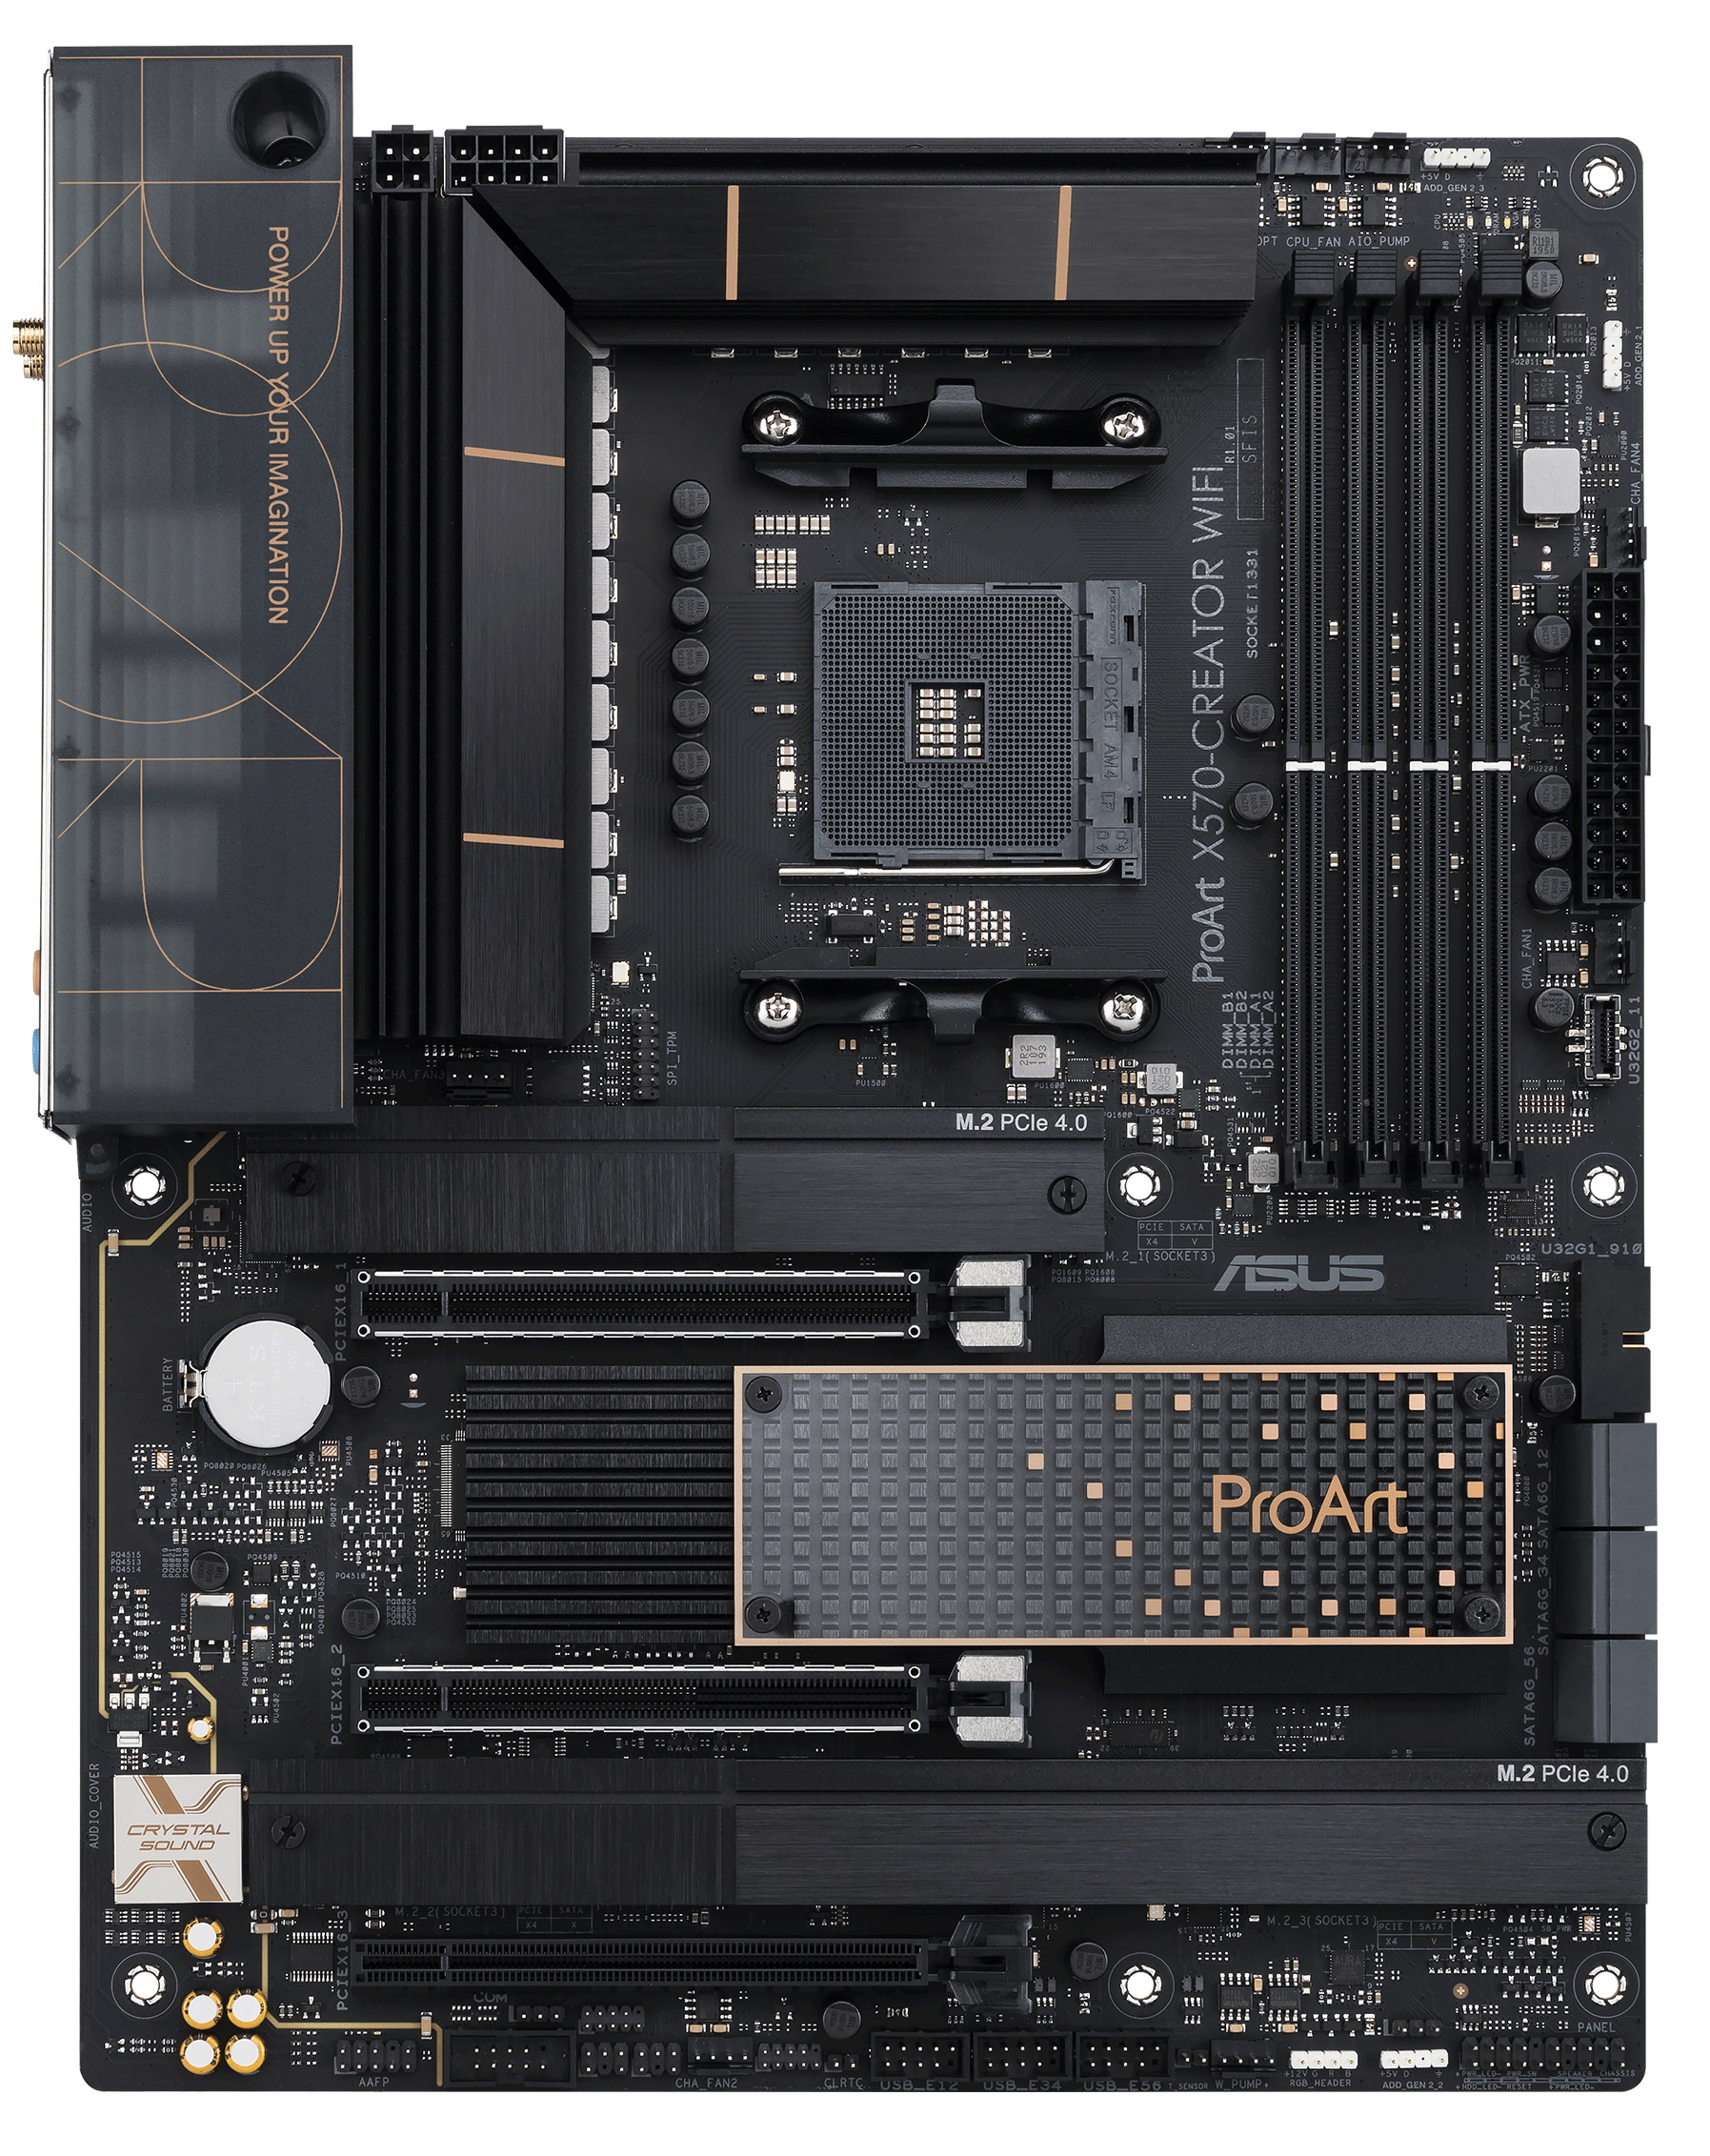
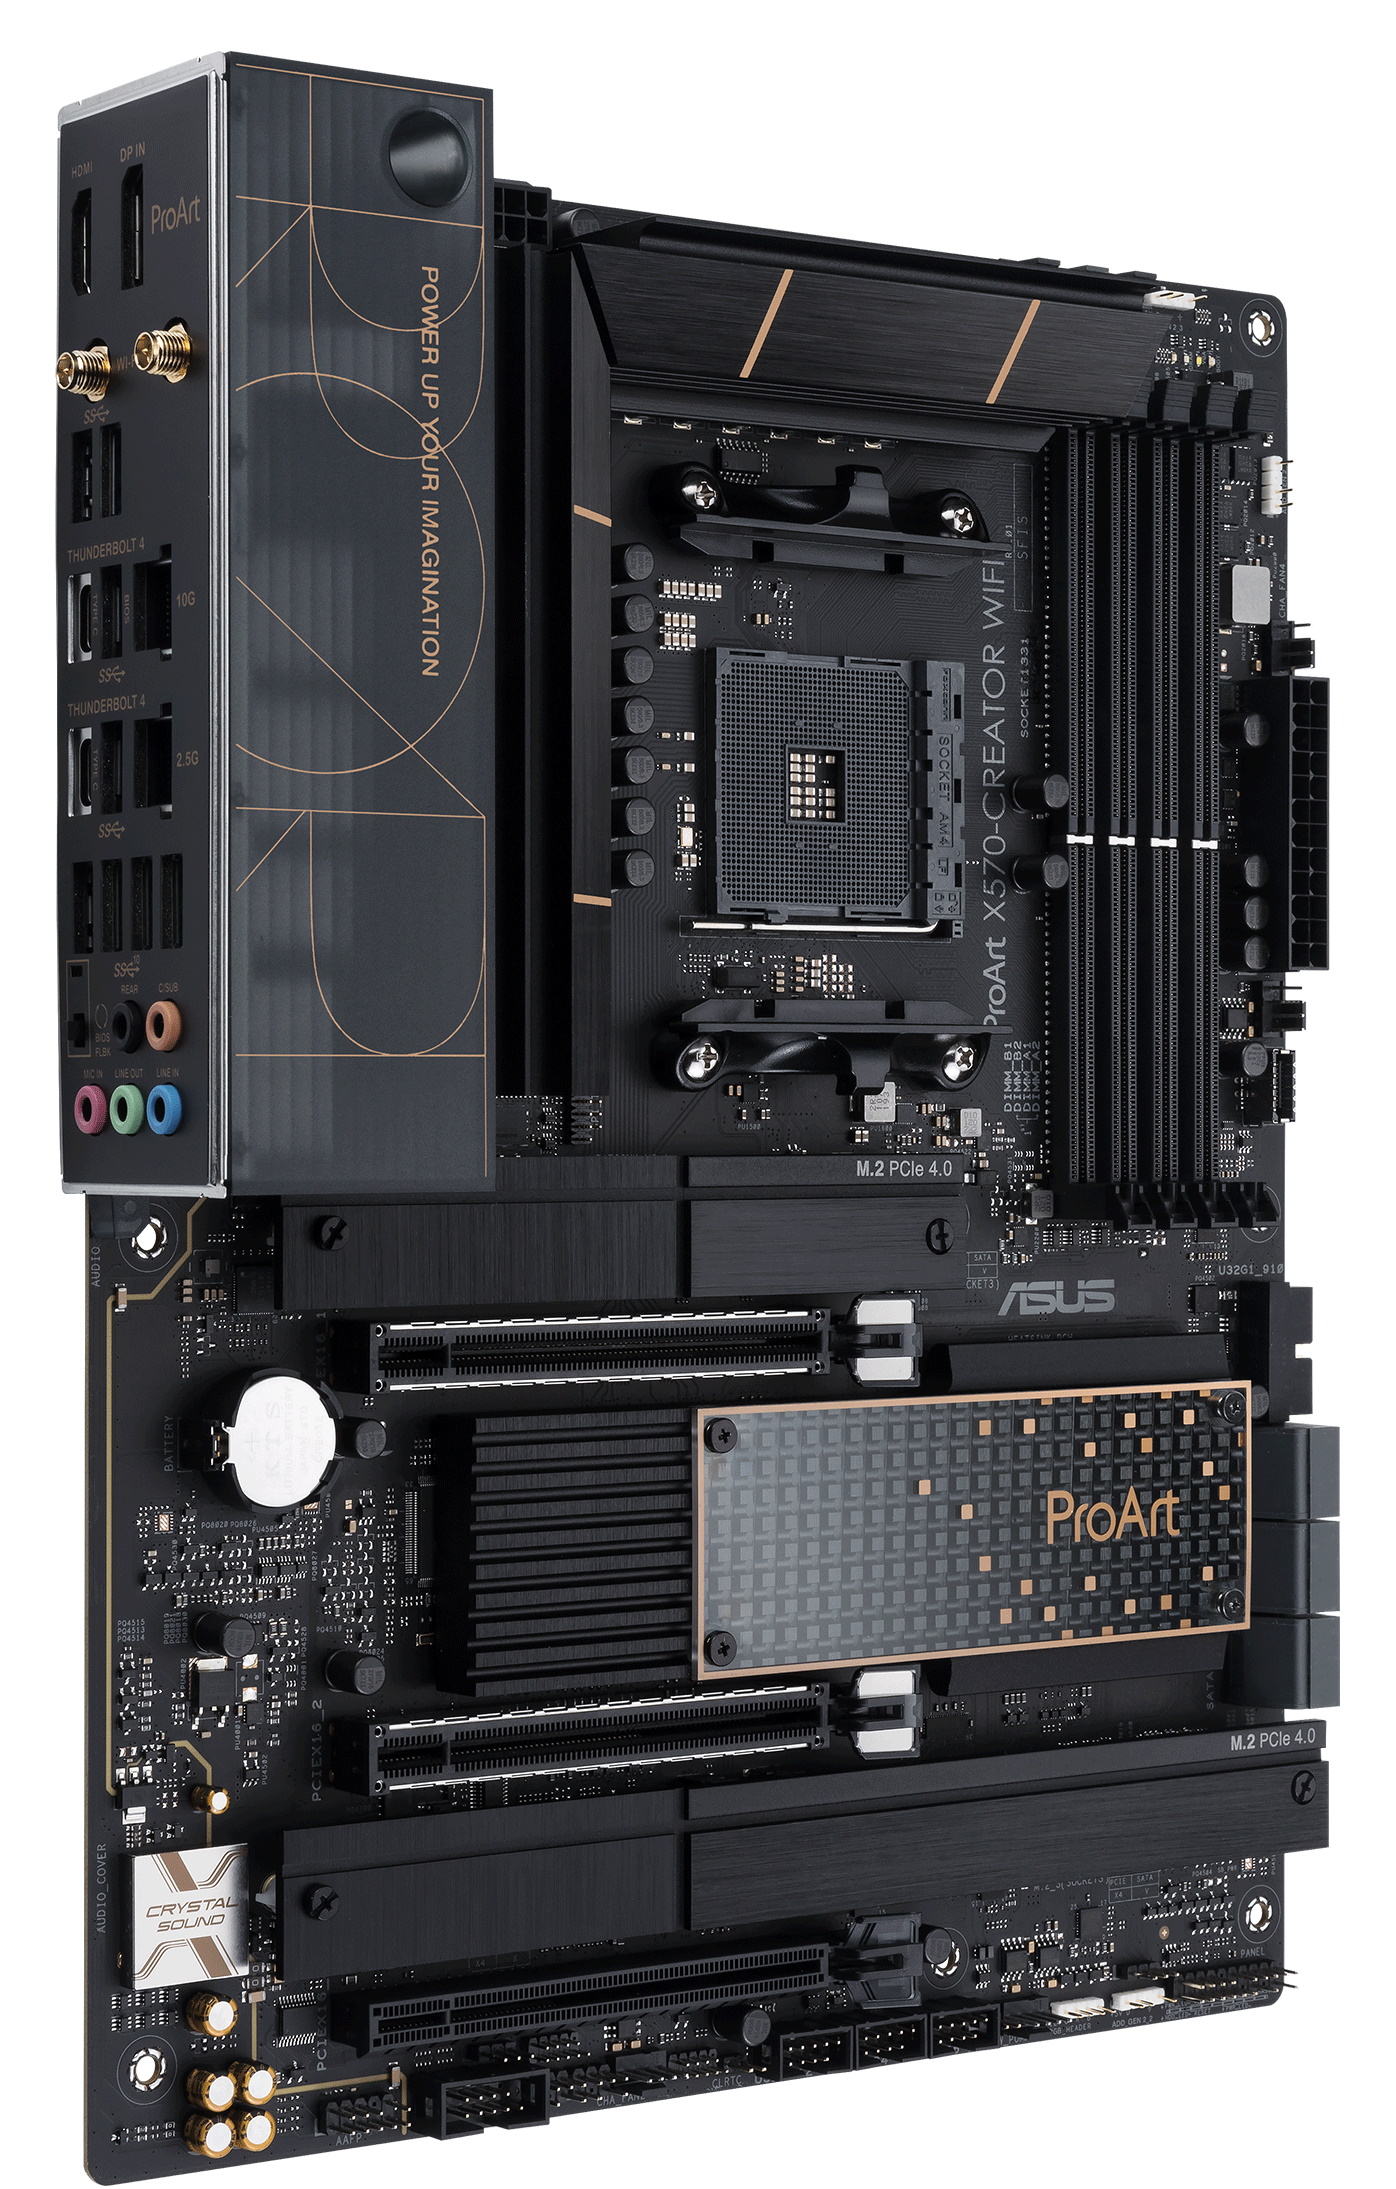
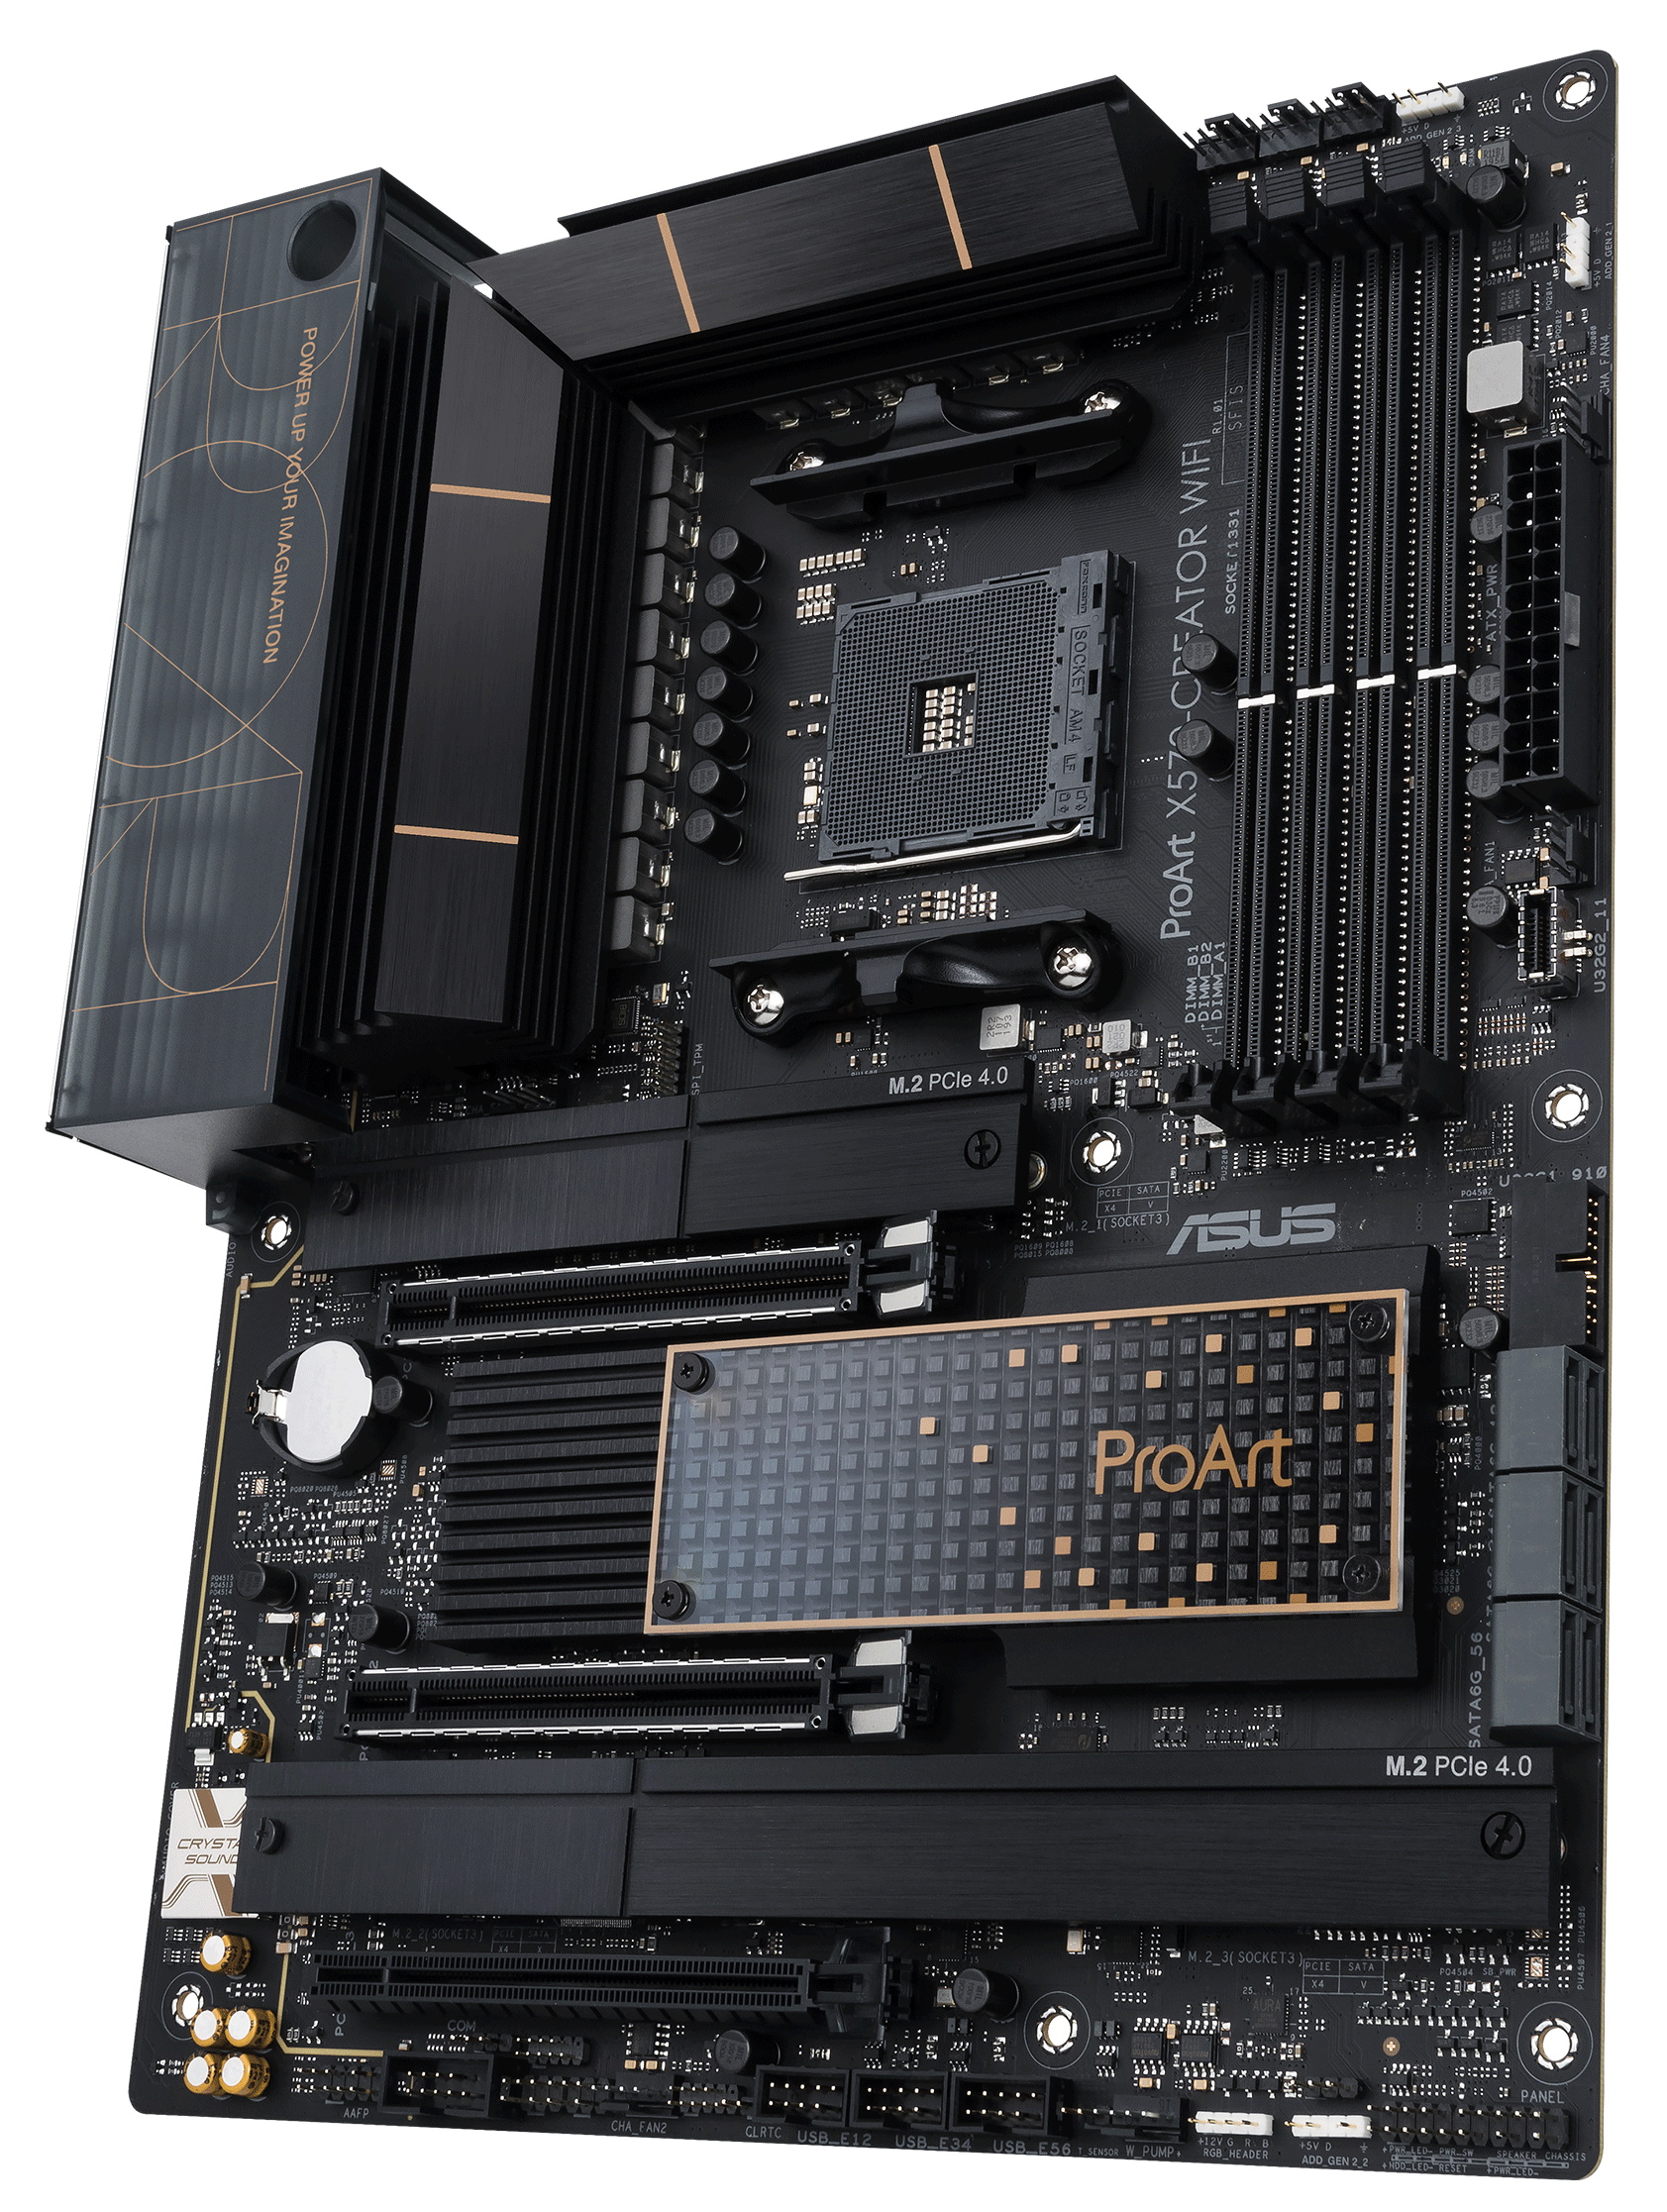
Looking at the board up close for the first time, we see a matte-black PCB, along with black heatsinks and gold highlights. There’s also some ProArt branding on the clear plexi top of the chipset. Above the rear IO is a translucent smoke-tinted cover hiding the PCB and integrated circuits (ICs) below. There are two reinforced PCIe slots, but the RAM slots do without that extra (and largely unnecessary) feature. Asus chose not to add RGB lighting on this board, so if that’s on your list, you’ll have to buy it separately connect it to the onboard headers. Like its B550-based sibling, the X570 Creator WIFI looks the part of a ‘creator’ type board, putting function over form approach. This board won’t take away from the look of your build, but it likely won’t be the centerpiece either.
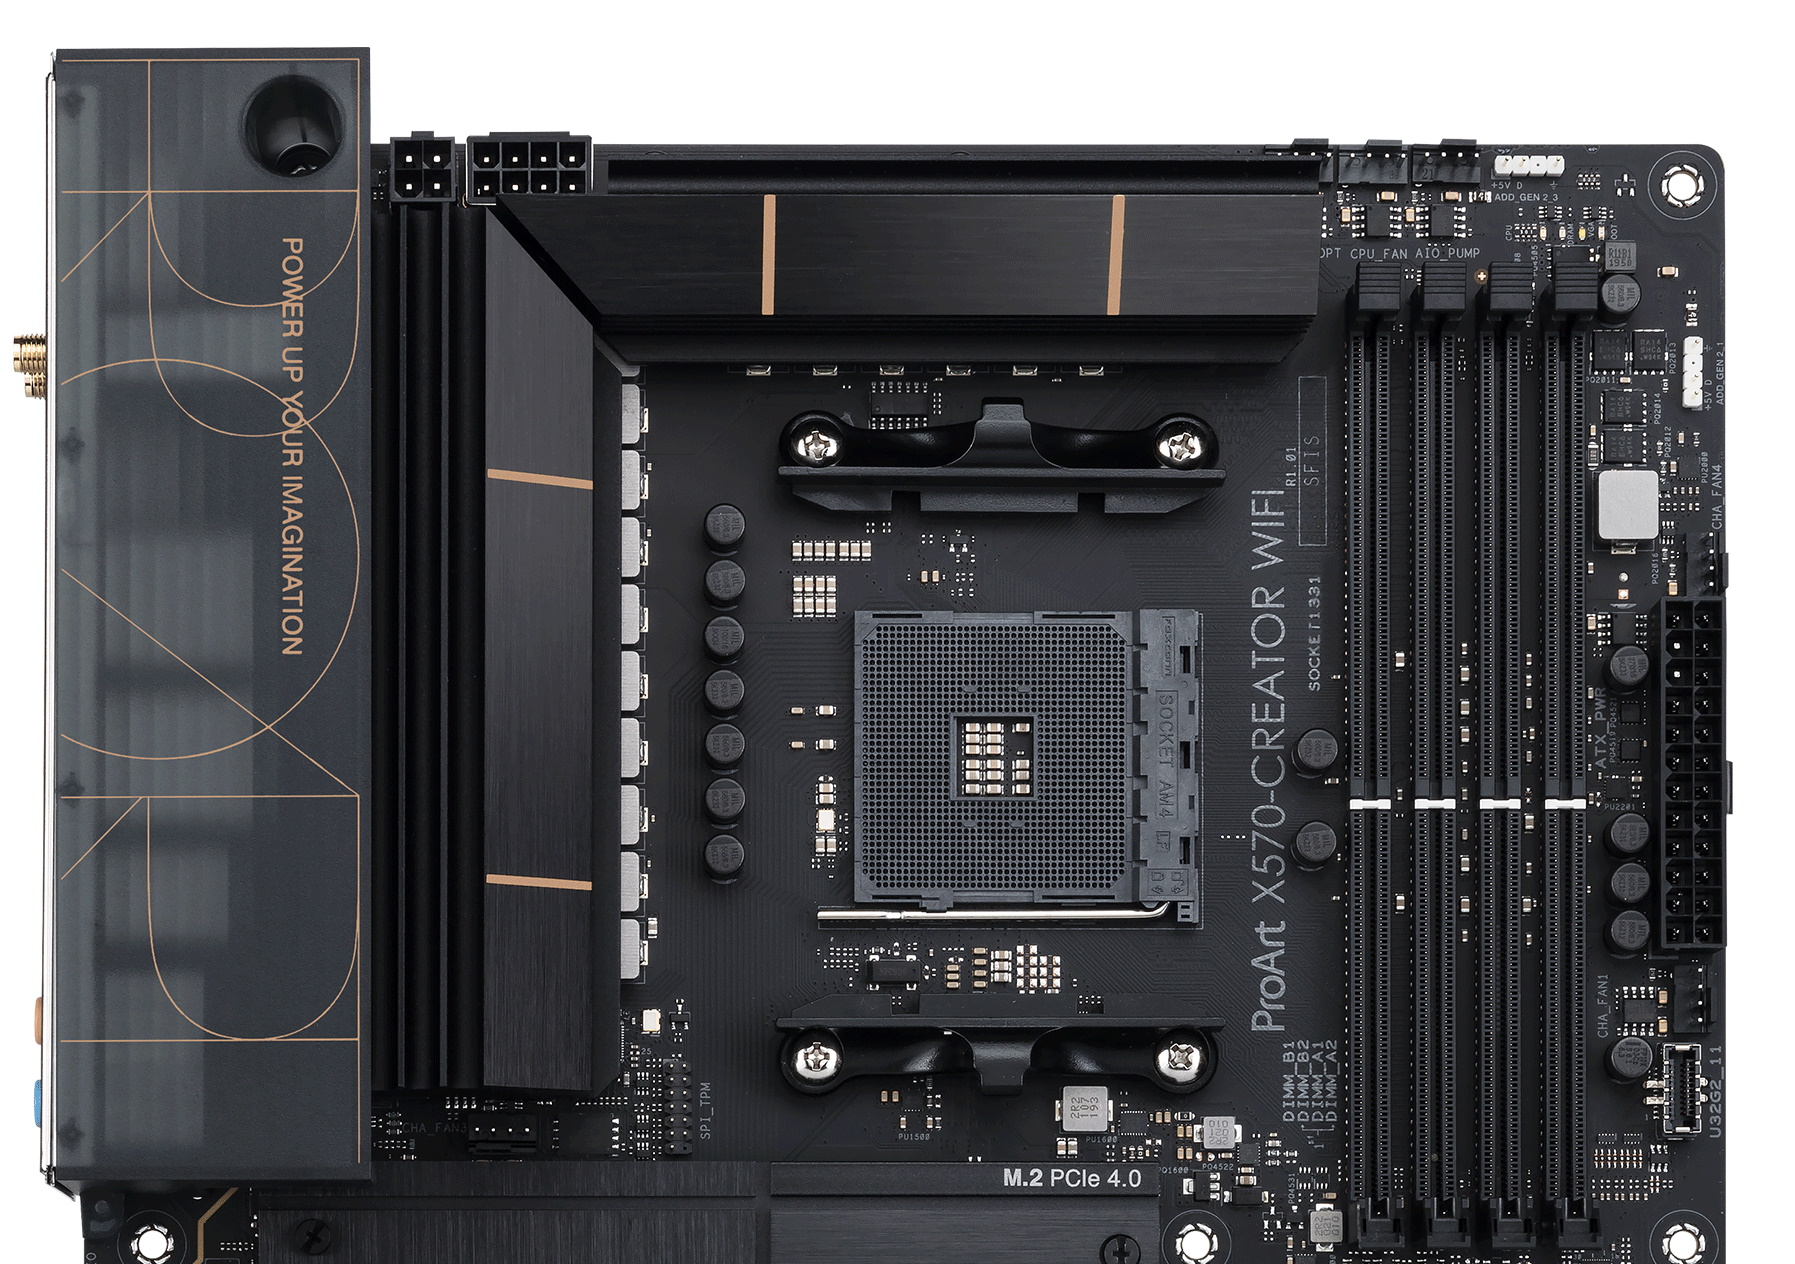
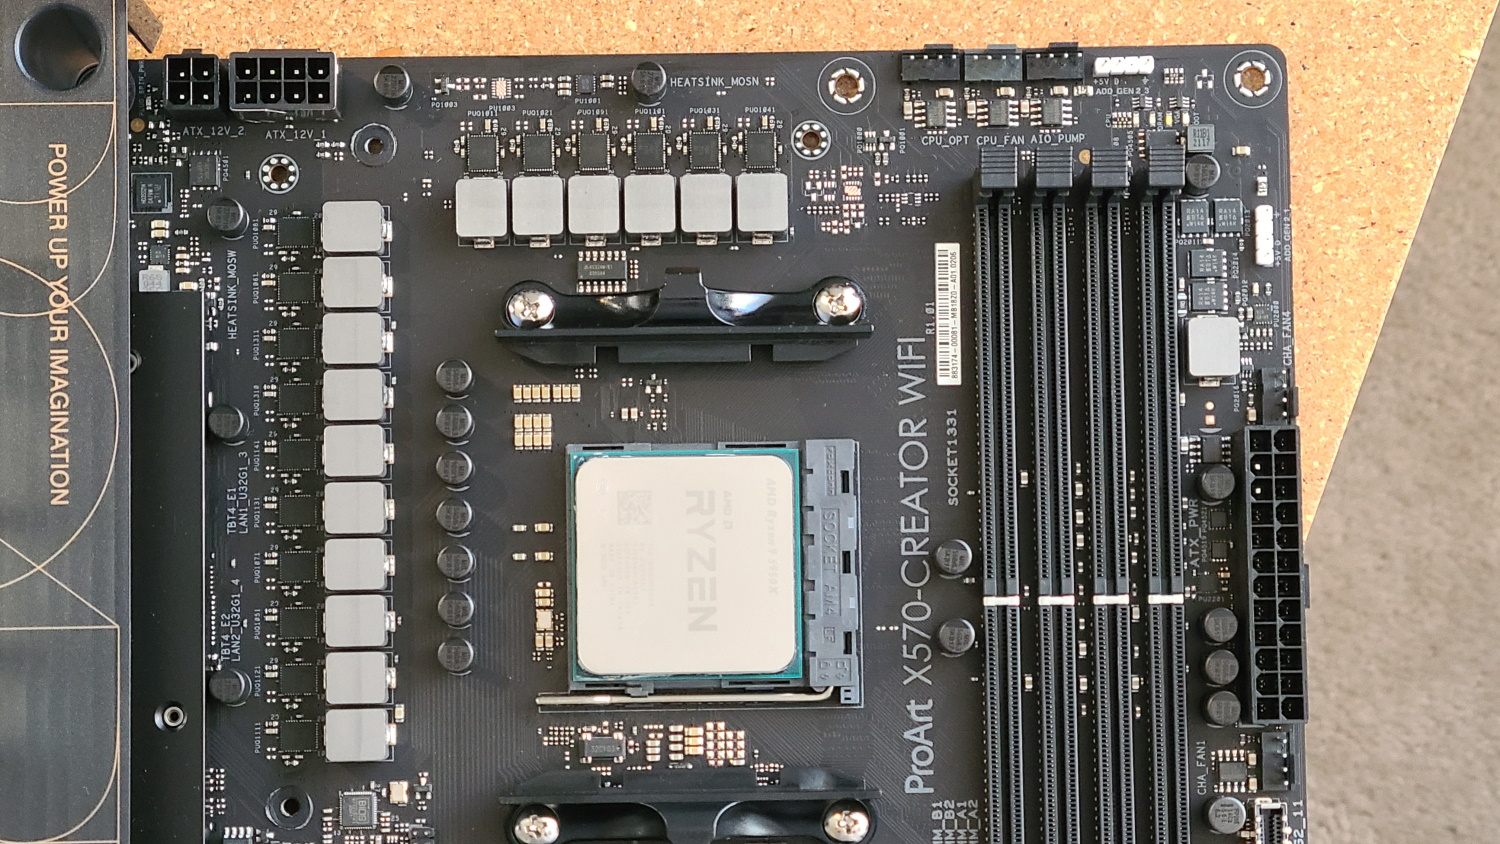
Focusing on the top half of the board, we get a closer look at the tinted IO cover and “Power Up Your Imagination” tag line, written in gold. Along the top edge of the board is a reinforced 8-pin EPS (required) and a 4-pin EPS (optional) connector to feed power to the CPU. The VRM heatsinks are large, heavy, and do a good job keeping the power bits cool during stock and overclocked operations.
Get Tom's Hardware's best news and in-depth reviews, straight to your inbox.
Continuing right, past the socket area, we run into the four single-side locking DRAM slots, supporting up to 128GB of RAM. Asus lists speeds up to DDR4 4800 with 3000/5000 series desktop processors, and DDR4 5100 for 4000/5000 G-Series processors (APUs). As always, your mileage will vary, because reaching those high speeds depends on the CPU and the quality of its integrated memory controller (IMC), as well as the memory kit.
Just above the DRAM slots are three (of eight total) 4-pin fan/pump headers. All headers output up to 1A/12W, except for the W_PUMP+ header that supports up to 3A/36W. The CPU and Chassis fan headers are Q-Fan controlled, while the AIO_PUMP and W_PUMP+ headers run full speed by default. Both CPU headers automatically detect the type of fan and control it automatically, while the rest of the headers are set manually for control. There are plenty of headers and enough power to run your cooling system from this board.
In the upper-right corner sits the first two (of four) RGB headers. Up top is the 3-pin ARGB, while right around the corner is a second one. You’ll find the third ARGB header at the bottom of the board, along with the only 4-pin RGB header here. Typically, motherboards have an even split between the two types of headers, so seeing a 3:1 is a bit unusual, but this is good if you want to add lots of ARGBs lighting.
The Q-LED lights, also located in this area, tell you where the board is in the POST process. If there is a problem in any of the four steps (CPU, RAM, VGA, and Boot), whichever LED corresponds to the problem remains lit up, notifying you where the problem is. Without a 2-character POST code LED, this is the only tool to troubleshoot POST/boot issues.
Continuing down the right edge, we spot two more fan headers, the 24-pin ATX connector for board power and a front-panel USB 3.2 Gen2 Type-C header.
Asus touts a 14-phase (12+2) configuration on the X570 Creator. This is the same as the B550 version by count, but the underlying parts are different and improved. On the X570 board, power is sent from the EPS connector(s) to the Asus Digi EPU (ASP1405I) 8-channel (X+Y=8) controller. Power is also sent to the 70A OnSemi FDMF3170 Smart Power Stages (MOSFETs). Asus uses a ‘teamed’ configuration on the VRMs, which sends power to two MOSFETs, improving transient response compared to using phase doublers. The 840A available to the CPU isn’t the most we’ve seen in terms of raw numbers, but is enough to easily handle our Ryzen 9 5950X, even when overclocked.
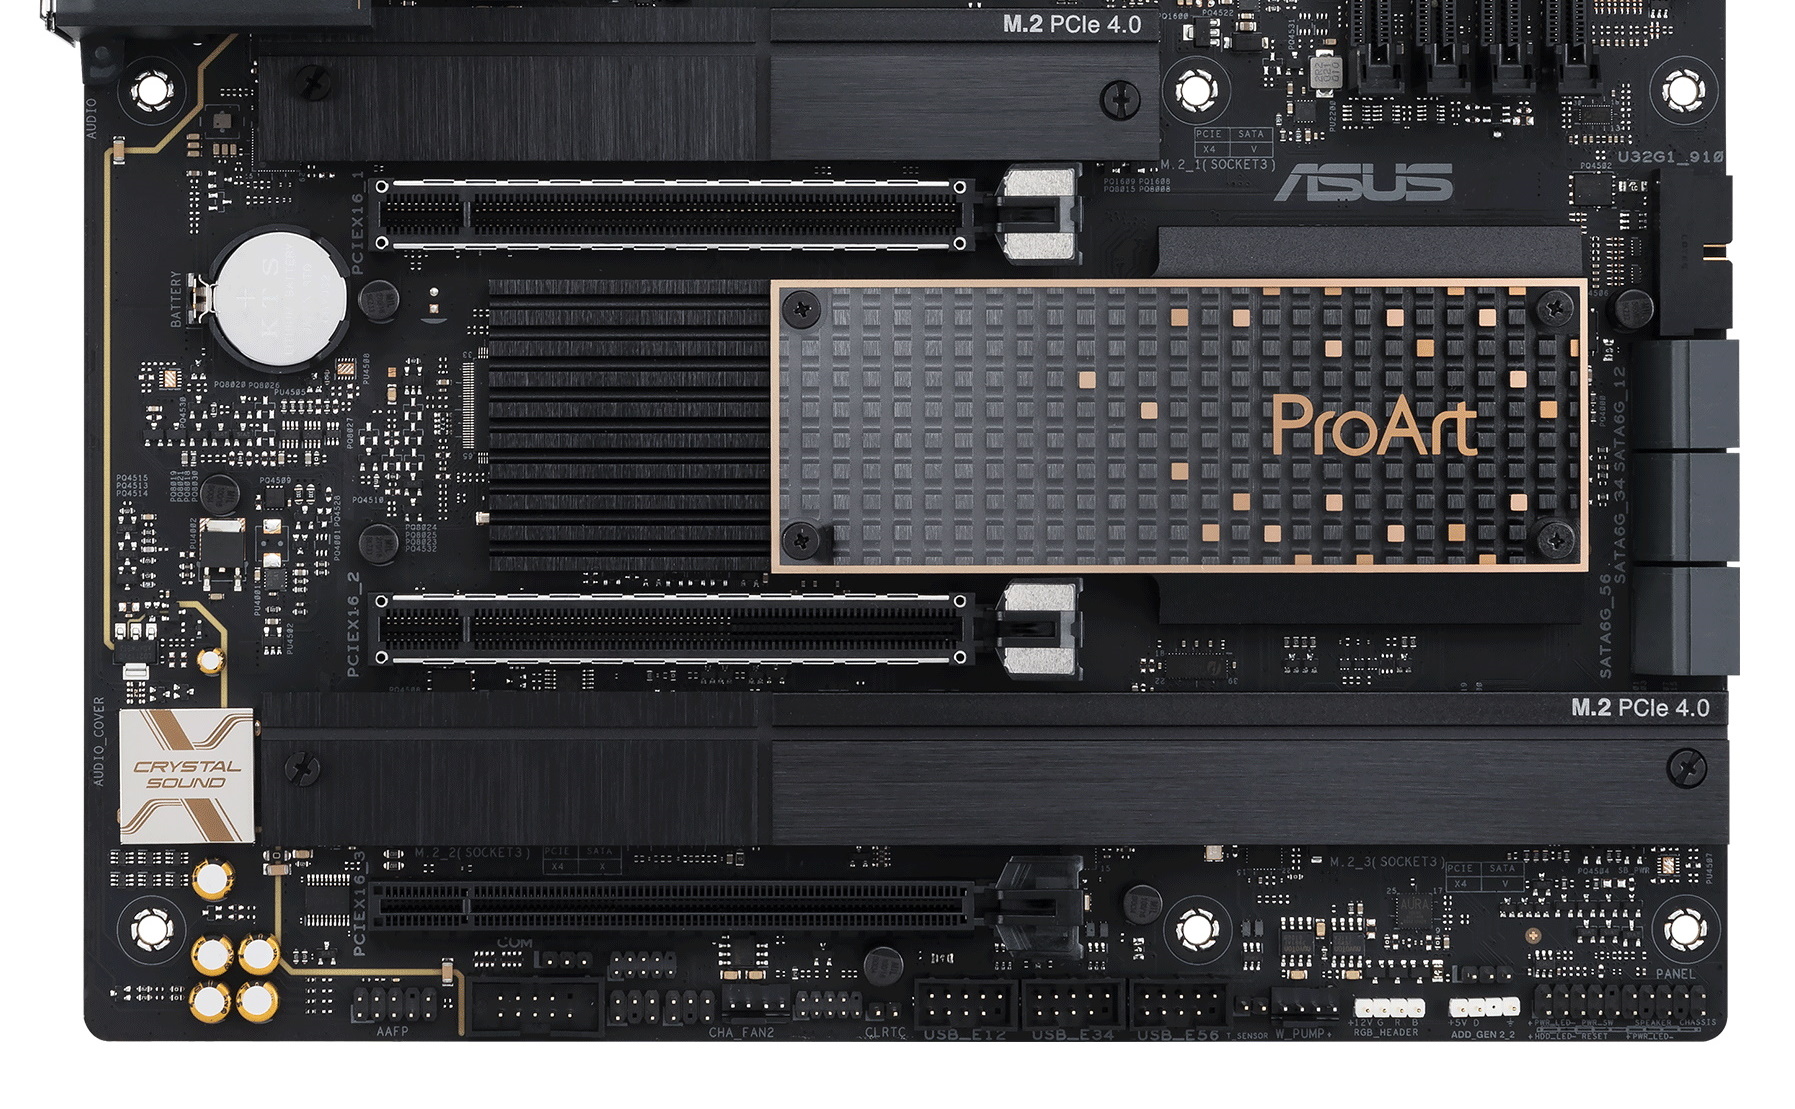
On the bottom half of the board, we find the PCIe slots, M.2 storage, and the audio bits. Starting on the left, we see the Crystal Sound-labeled faraday cage sitting over the Realtek ALC1220A audio codec. The audio separation line weaves its way from the bottom of the board by the front panel header up to the IO area. We also spy several yellow capacitors dedicated to audio. While the 1220A codec isn’t the best currently available, most users should find this solution more than adequate.
Sliding right, the ProArt X570-Creator WIFI has a total of three PCIe slots, two of which use the Asus Safeslot reinforcement to prevent shearing from heavy video cards. The top slot runs at full PCIe 4.0 x16, while the second slot runs at a maximum of PCIe 4.0 x8. This slot shares bandwidth with M.2_2. When a drive is installed in that M.2 slot, the PCIEX16_2 slot runs at PCIe 4.0 x4. With the number of lanes available to the slots, the board should support 2-Way AMD Crossfire, but the manual lists nothing to that effect. Last, the bottom full-length slot sources its bandwidth through the chipset and runs PCIe 4.0 x4. There are many possibilities here due to bifurcation. Please check the manual for all of the details.
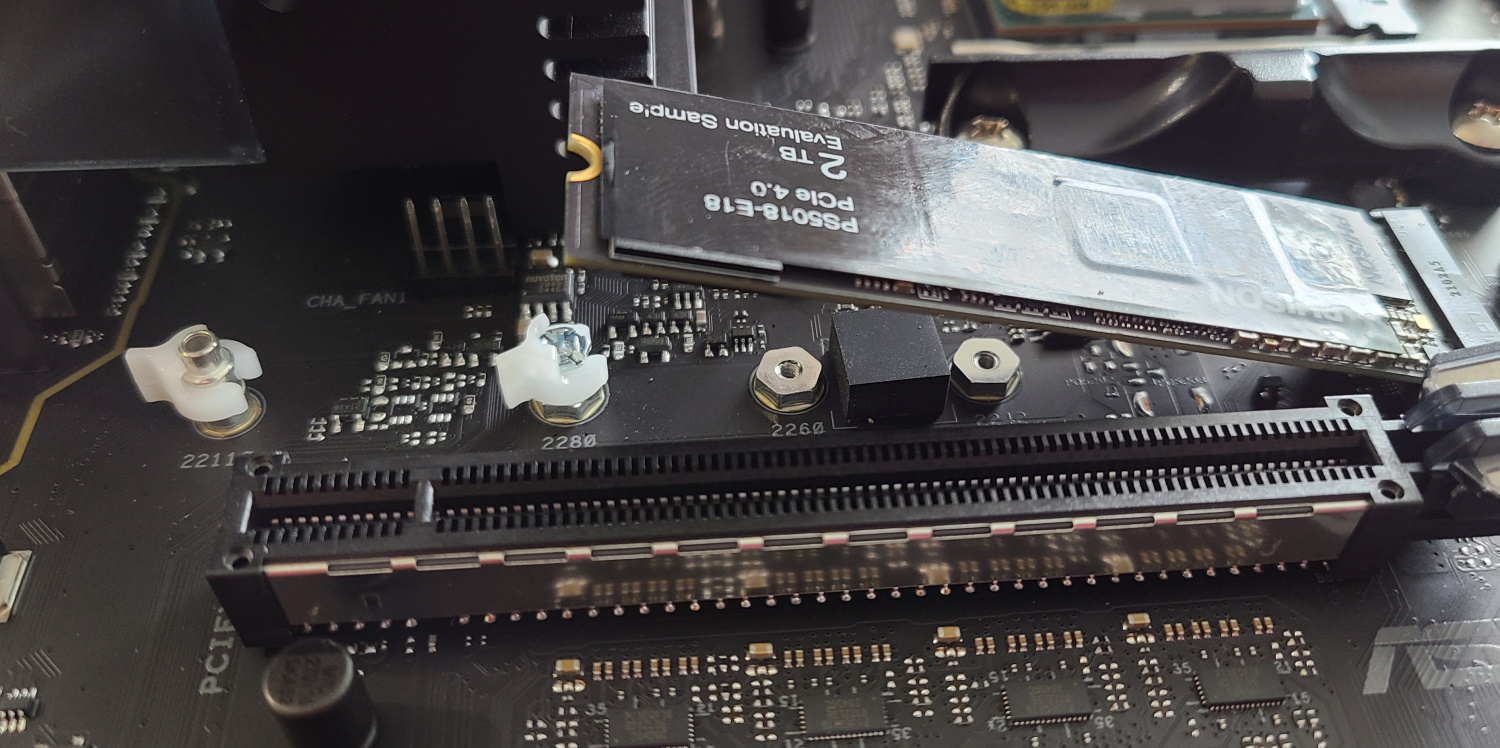
Located above the top PCIe slot sits the first M.2 connector, while the other two are weaved between the second and third PCIe slots. The top socket is CPU-connected and runs at PCIe 4.0 x4 (64 Gbps) speeds. It supports both PCIe- and SATA-based modules up to 110mm. The second socket runs at PCIe 4.0 x4 speeds, only supporting PCIe-based modules up to 80mm. The third M.2 slot is attached to the chipset and supports up to 110mm PCIe 4.0 x4 and SATA modules. Each M.2 socket also uses the Asus ‘M.2 Q-Latch,’ which makes it easier to install or remove and M.2 SSD without tools. A simple integrated locking mechanism secures the drive, eliminating the use of those tiny screws that always get lost in your build or in the forest of your rug.
Moving right across the fanless chipset heatsink to the edge of the board, we find a front-panel USB 3.2 Gen 1 port. Below that are the six SATA ports that support RAID0, 1 and 10. Between the SATA ports and M.2 sockets, you can run up to 9 storage devices concurrently. You’ll have plenty of storage options and capability if you opt for the X570-Creator.
Across the bottom are several headers, including USB ports and RGB. Here’s the complete list, from left to right:
- Front panel audio
- COM header
- Chassis fan header
- (3) USB 2.0 headers
- 2-pin temperature sensor
- Water pump header
- 4-pin RGB and 3-in ARGB headers
- Front panel
On the back IO, we’re presented with a preinstalled IO plate with a black background and the ProArt branding in gold, just above the DisplayPort port (which is an input, note). Below that is the HDMI output and to the right is the Wi-Fi 6E antenna. There are a total of four USB 3.2 Gen2 ports (blue) with the two Thunderbolt 4 Type-C ports below. Just above that are the two ethernet ports -- one 10 Gb and the other 5 Gb.
To the right are four additional USB ports (USB 3.2 Gen 1, in teal). To the right is the 5-plug audio stack. Missing here is the optical SPDIF output. In its place is a BIOS flashback button for updating without a CPU (good for upgrading older BIOS with new unsupported CPUs). The flashback port sits below the 10 GbE port.
MORE: Best Motherboards
MORE: How To Choose A Motherboard
MORE: All Motherboard Content

Joe Shields is a staff writer at Tom’s Hardware. He reviews motherboards and PC components.
-
_dawn_chorus_ How is "basic appearance" in the negatives?? Obviously that is entirely subjective but imo this is a beautiful, simplistic looking motherboard. We need more motherboards on the market that look a little grown up vs the current trend of Gundam scrap parts being slapped all over everything at random angles.Reply -
escksu Reply_dawn_chorus_ said:How is "basic appearance" in the negatives?? Obviously that is entirely subjective but imo this is a beautiful, simplistic looking motherboard. We need more motherboards on the market that look a little grown up vs the current trend of Gundam scrap parts being slapped all over everything at random angles.
ITs the price tag....It cost 429 so pple will expect it to be beter looking that 200 board. -
helper800 Reply
Do you see a chipset fan anywhere on the chipset? No? Didn't thinks so. And I quote from the article, "Moving right across the fanless chipset heatsink to the edge of the board..."Marvin Martian said:Not 570S means chipset fan. Not interested. -
misterfresh Thanks @tomshardware and @joeshields for the review however unfortunately this review is incomplete because it does not address the main reason why someone would want to buy this board : the allegedly 40 GBps thunderbolt 4 ports. I mean come on you list the ports in the title and in the supposed pros but you never actually test them even though these ports are the prime reason someone would want to spend 450$ on a board !Reply
Based on your testing the board is no better or worse than say the B550 Tuf Gaming Wifi that cost 300$ less.
I want to see one or two Razer Core X in each thunderbolt 4 port + one graphics card in each PCIe x16 slot and see the result of some rendering or mining, with a couple nvme drives installed.
It is a question mark as to how bandwidth is allocated when you saturate the PCI lanes with external GPUs and nvme drives and thunderbolt devices and 10Gbps networking simultaneously, I assume some or all of the i/o would see some degradation in such scenarios.
I am especially interested in the compatibility of thunderbolt devices because I have seen reports on Reddit of people not being able to use the thunderbolt ports correctly (especially for eGPU) with the B550 Asus Creator board, and using the x570 chipset could solve that. Not to mention AMD boards with any thunderbolt support are rare so compatibility and support is a question mark for potential buyers that is much more important to address than a couple points difference in the usual Futuremark testing.
If I have learned anything in the past year, it's that just because a port looks like thunderbolt doesnt mean that thunderbolt functionality will actually work. For example usb 3.1 gen 2 type C in previous ryzen boards was quite misleading because it does not actually support an eGPU.
It would be interesting also to check performance when running the PC from an external thunderbolt nvme ssd such as the one from plugable (with the OS installed on said external SSD) .
It would be interesting to see the transfer time for a large 4k video file from such an external ssd towards an internal one to test the real world speed of the thunderbolt 4 ports.
So many critical testing is missing from this review to give potential buyers an idea of what this board is really worth. All in all the review is a missed opportunity to address these concerns relating to Thunderbolt 4 support and compatibility.
By the way does anyone know why we need two PCIe x16 slots anymore since SLI is not supported anymore ? Give me a small form factor mATX or ITX board with thunderbolt 4 ports so that I can extend it if needed. -
amerifax Reply
I'm looking to buy this board. What are you getting at in regards to chipset fan? And are there two different models of the Asus ProArt X570?helper800 said:Do you see a chipset fan anywhere on the chipset? No? Didn't thinks so. And I quote from the article, "Moving right across the fanless chipset heatsink to the edge of the board..."
