BenQ SW2700PT 27-inch QHD Pro Monitor Review
If you need the ultimate in color accuracy, BenQ can deliver with its 27-inch SW2700PT. Professionals seeking a precise QHD resolution screen may rejoice when they see its low price. Today we check it out in our labs.
Why you can trust Tom's Hardware
OSD Setup & Calibration
The SW2700PT has a large and flexible OSD as any pro-monitor should. The funny thing is you’ll barely need to use it other than to set brightness and select the picture preset. Accuracy is so good we didn’t even attempt a calibration. We’ll walk you through anyway.
OSD Tour
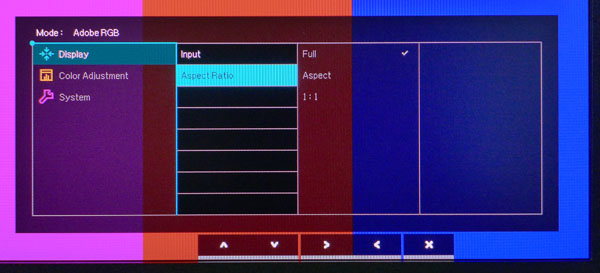
The Display sub-menu has only an input selector and aspect ratio options. If you only have a single active signal the monitor will lock onto it automatically. Aspect presets are Full (fills the screen regardless of input resolution), Aspect (fills the screen while maintaining proper image shape, best used for 4:3 content) and 1:1 which maps each pixel exactly. Lower-res images are therefore shown in a window.
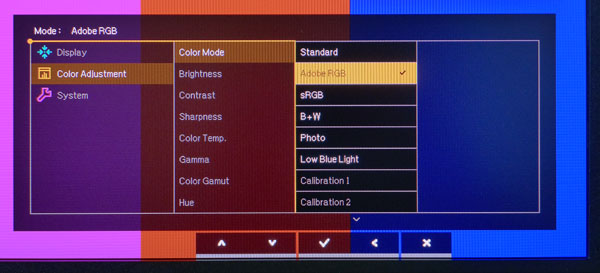
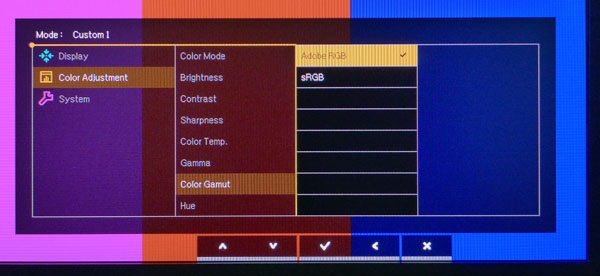
All the calibration options are in the Color Adjustment menu. Picture modes include six presets plus two User memories and two slots for Palette Master settings; more on that below. Brightness changes the backlight level in approximately three cd/m2 increments and has a large operating range from just over 350 to as little as 11cd/m2.
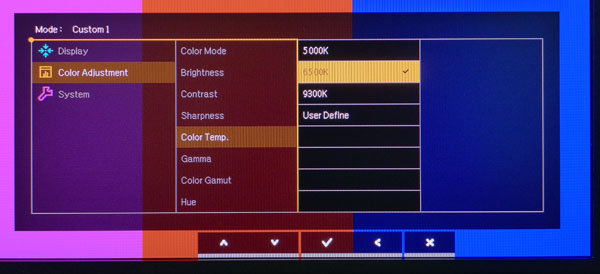
In the color temp menu you can choose from three presets or create your own white point in the User modes.
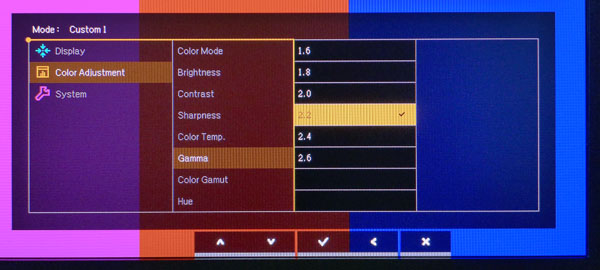
There are six gamma presets available in all modes. They track their indicated values perfectly.
Even though there are sRGB and Adobe RGB picture modes, you can change the color gamut if you wish.
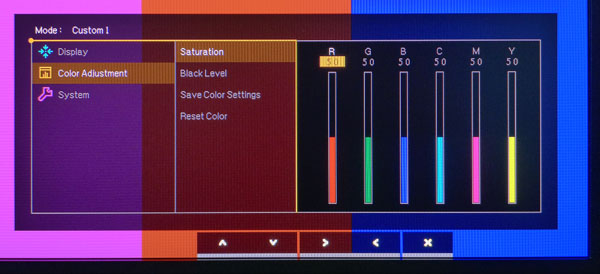
The User modes unlock a six-axis option for color saturation and hue. There is no adjustment for luminance. Our tests revealed a monitor so accurate that these controls are likely to never be used.
Get Tom's Hardware's best news and in-depth reviews, straight to your inbox.
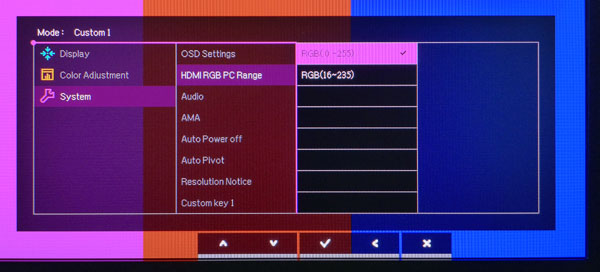
With HDMI signals it’s important to change the luminance threshold from 16-235 (the default) to the correct (for PCs) 0-255. Then you’ll be able to utilize the SW2700PT’s full dynamic range.
The System sub-menu contains OSD settings for timeout, audio volume, Auto PowerOff and other convenience features.
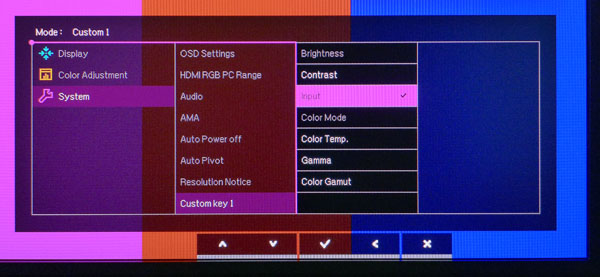
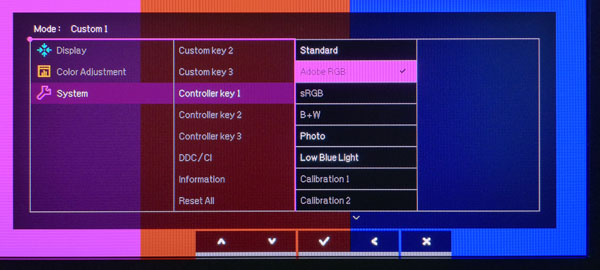
The Custom Key options let you assign functions to the first three bezel buttons. By default they’re set for quick access to inputs, image modes and brightness.
You can also program three of the OSD controller buttons to switch picture modes with one press. That saves time when you need to work in multiple color gamuts or white points.
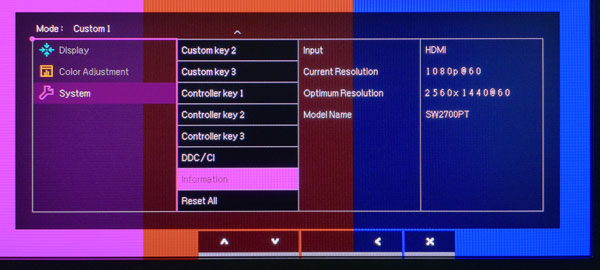
The signal information is minimal and only includes the active input and the input resolution with refresh rate. In case you’re in doubt of the monitor’s model number, BenQ has included it here.
Calibration With Palette Master
After taking our initial measurements of the Standard, Adobe RGB and sRGB modes, we could see no reason to create a custom calibration. The SW2700PT is that accurate. All errors are below one Delta E and gamma tracks 2.2 perfectly. You can create custom calibrations in the OSD or use Pallette Master to do it via software.
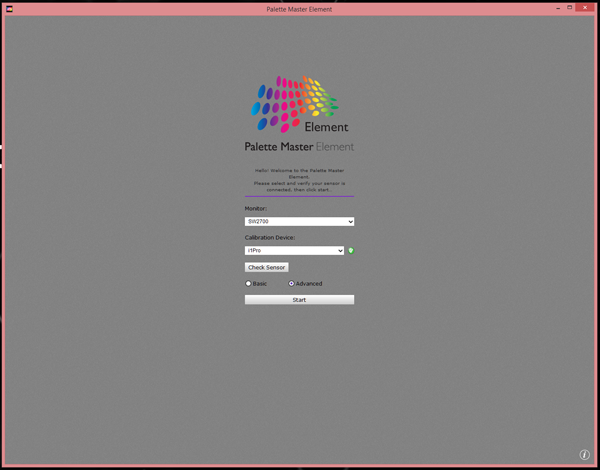
Before downloading and installing, connect the monitor’s upstream USB port to a free downstream jack on your computer. Then hook up a calibration instrument to one of the SW2700PT’s side USB ports. You can use any member of the i1 Pro or i1 DisplayPro series from X-Rite or a DataColor Spyder 4. We used the i1 Pro spectrophotometer for our tests.
The opening screen verifies that you have the correct monitor and calibrator connected. You can also choose between basic or advanced modes. Advanced gives you a few more options regarding the number of measurements but the end results are the same.
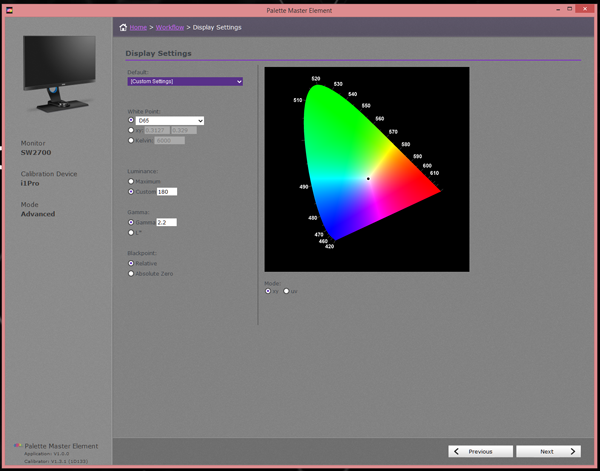
The first drop-down lets you choose preset options for white point and gamma. One thing missing here is a gamut option. You can only work in Adobe RGB. No sRGB choices are provided. There is also no provision for a BT.1886 gamma standard. You can have any power function you desire but that is all. You can also specify the maximum luminance value for automatic backlight adjustment.
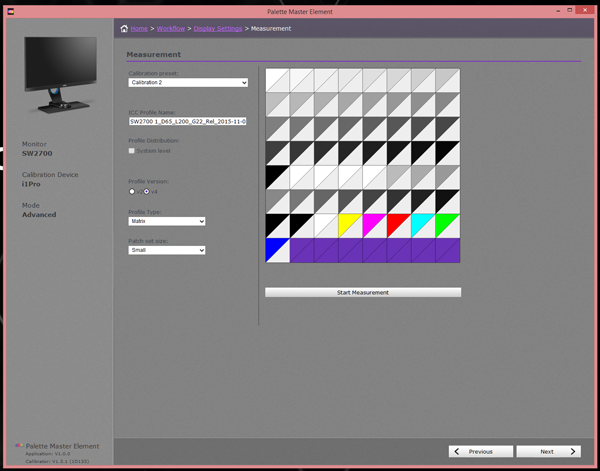
These are the color patches that will be measured. You can increase the number in the Patch Set Size drop-down if you want greater precision.
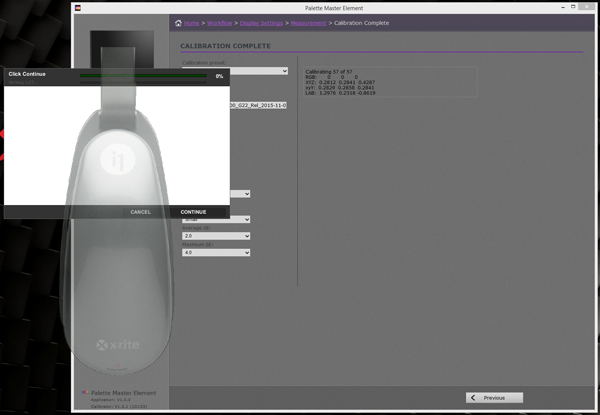
When the app is ready it projects a picture of the selected meter on the screen. Simply place your instrument over top and click continue. Palette Master works hands-off and requires around 10 minutes to measure 57 color patches.
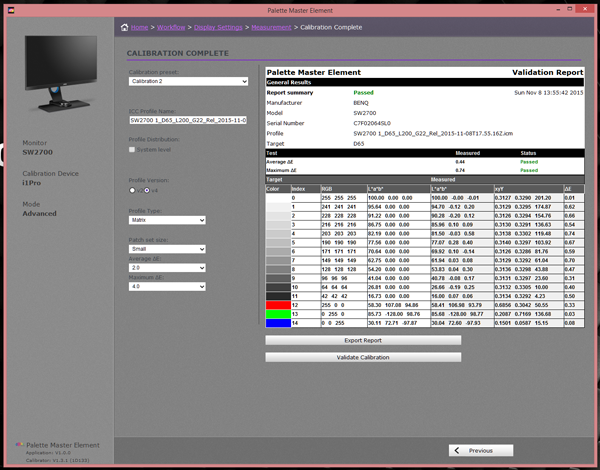
At the end, click validate and the app will recheck the measurements before presenting you with the results. In our test all errors were well below one Delta E so we were able to equal the out-of-box measurements we’d already recorded.
This is a very convenient and inexpensive way to maintain the calibration of your SW2700PT and the app works without issue. It’s only flaw is the absence of additional gamut options or custom gamma curves. You can set any white point you like either by entering x & y coordinates or a Kelvin value. Perhaps a future version of Palette Master will include greater flexibility.
Brightness Level Settings
If you want to hit specific brightness targets using the OSD here are the numbers we recorded.
| BenQ SW2700PT Brightness Settings | |
|---|---|
| 200cd/m2 | 52 |
| 120cd/m2 | 29 |
| 100cd/m2 | 24 |
| 80cd/m2 | 18 |
| 50cd/m2 | 10 |
Current page: OSD Setup & Calibration
Prev Page Packaging, Physical Layout & Accessories Next Page Brightness & Contrast
Christian Eberle is a Contributing Editor for Tom's Hardware US. He's a veteran reviewer of A/V equipment, specializing in monitors. Christian began his obsession with tech when he built his first PC in 1991, a 286 running DOS 3.0 at a blazing 12MHz. In 2006, he undertook training from the Imaging Science Foundation in video calibration and testing and thus started a passion for precise imaging that persists to this day. He is also a professional musician with a degree from the New England Conservatory as a classical bassoonist which he used to good effect as a performer with the West Point Army Band from 1987 to 2013. He enjoys watching movies and listening to high-end audio in his custom-built home theater and can be seen riding trails near his home on a race-ready ICE VTX recumbent trike. Christian enjoys the endless summer in Florida where he lives with his wife and Chihuahua and plays with orchestras around the state.
-
muhammad_88 Pretty Neat for 630$Reply
I Work in Offset Printing, and i'm considering this as a proofing monitor.
The acceptable brightness range for this scenario is 80 cd/m2 to 120 cd/m2
For the white point 5000K/D50 and 5500K/D55 are commonly used in CMYK reproduction. For a reference class monitor i hope you start adding these to your reviews for people like myself considering monitors for print proofing -
zodiacfml Wow. AHVA screens are awesome. I'm quite surprised with the lower than expected contrast ratio compared to the Philips 40inch screen with AHVA panel.Reply
This one ticks all my boxes though I wish it could come with 120hz refresh rate. -
ceberle The Philips BDM4065UC is an AMVA panel. This is not the same as AHVA. It's confusing but AHVA is an IPS variant. It has better viewing angles but no difference in contrast. AMVA is a completely different pixel structure which blocks the backlight better and renders lower black levels resulting in superior contrast.Reply
-Christian- -
drewafx Bought it after reading this review.Reply
Definitely better than Dell ultrasharp 27"
Anti-glare is different than typical LG matte ips panel (Better view when looking straight, noise pattern from angle)
Love the color even at sRGB mode. Factory calibration brightness at 93 (too bright at night...need to buy calibrator)
Hence Max brightness at 100 is not that bright (more brightness would be good for HDR)
Backlight Flicker-free is noticeable when changing brightness (smooth transition)
Slight backlight bleed (yellowish around corners)
Doesn't matter when editing photos at center, just bothersome when watching movies with dark scenes
No ghosting, 75Hz tested fine (custom resolution from gpu)
miniDP to DisplayPort cable included, but monitor doesn't have miniDP port
DisplayPort to DisplayPort cable is necessary to work with 10-bit desktop GPU (in my case)
Low blue light mode is subtle and works well
if OLED is not an option, this monitor is good enough for anything
maybe next year...I'm waiting for AMD to release 10bit HDR GPU
so the AdobeRGB space would be more useful...
4K 144hz freesync is overrated...if you care more about vibrant accurate color
I'm wondering how good it could be if BenQ released glossy display like Apple's iMac and Cinema Display
Come on, we got light hood to cover reflections...no need for anti-glare coating
Do Smartphones come with antiglare coating? Not needed even outdoors....just ruins the experience
