BenQ XL2420G G-Sync Monitor Review
Even though FreeSync is starting to appear, G-Sync is still the go-to tech for gamers seeking an image free of frame-tearing. Today we’re checking out BenQ’s latest feature-laden display – the 24-inch XL2420G.
Why you can trust Tom's Hardware
OSD Setup And Calibration
It’s important to understand that the XL2420G is basically two monitors in a single chassis. There is a Classic mode that utilizes the HDMI and DVI inputs, and G-Sync mode, which uses DisplayPort exclusively. Each mode has its own menu system with independent settings. We’ll walk you through everything along with recommended settings for both modes since they exhibit slight differences in performance.
OSD Tour
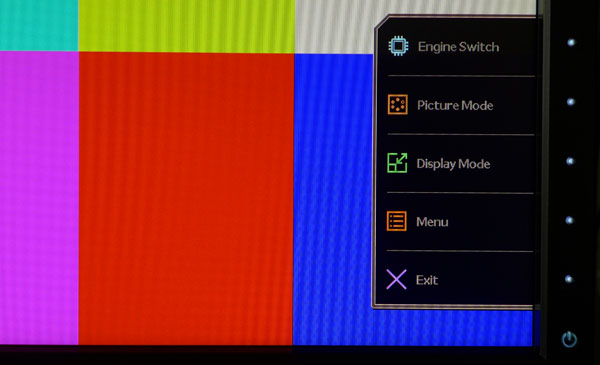
Pressing any bezel or S-Switch button brings up this quick menu.
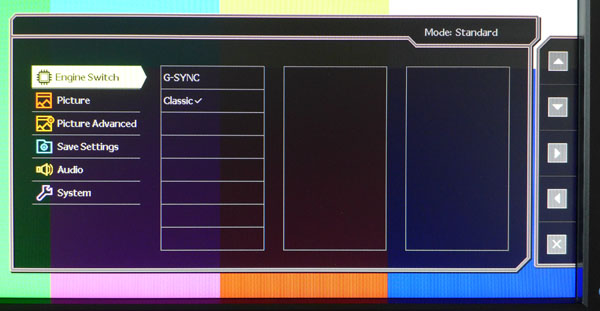
The top option, Engine Switch, selects the Classic or G-Sync mode. By default, the XL2420G is set to Classic mode and therefore must be fed either an HDMI or DVI signal. G-Sync mode switches over to DisplayPort automatically when chosen. It also disables the S-Switch.
All of the remaining photos are taken in Classic mode. The G-Sync mode menus look pretty much the same. When different settings are called for, we’ll explain which ones and why.
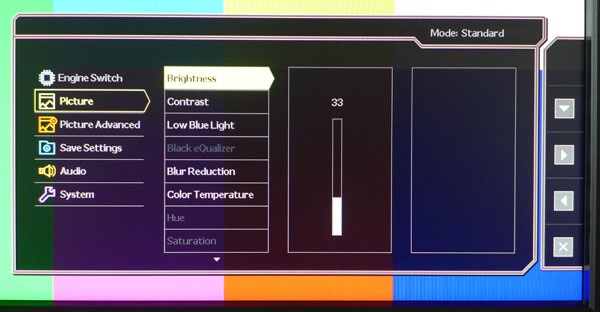
The Picture menu looks just like it did on one of the other BenQ monitors we reviewed recently. Brightness and Contrast work as expected. LowBlueLight warms the color temp to help reduce fatigue. It’s not really necessary because the Standard picture mode is good right out of the box.
Blur Reduction operates at refresh rates up to 120Hz, and in the Classic mode it can only be on or off. Enabling this feature results in a 65-percent reduction in light output. To get adjustable pulse width, you have to switch to G-Sync mode. We don’t recommend changing it though. At its brightest setting (100), the same 65-percent brightness drop is imposed. We’ll talk more about its effects on page four.
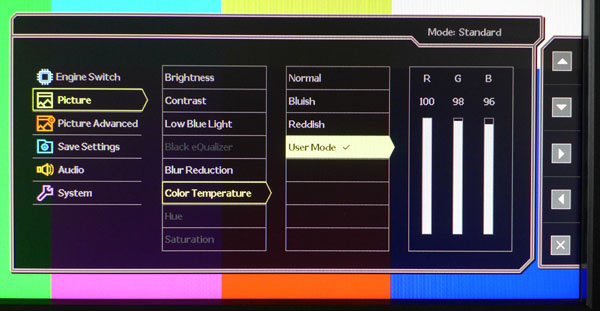
There are three color temp presets plus a user mode. As you can see, it doesn’t take much adjustment to achieve excellent grayscale tracking. One nice touch is that the RGB sliders are available in the gaming modes if you want to tweak them. In G-Sync mode, Normal provides the best grayscale tracking.
Get Tom's Hardware's best news and in-depth reviews, straight to your inbox.
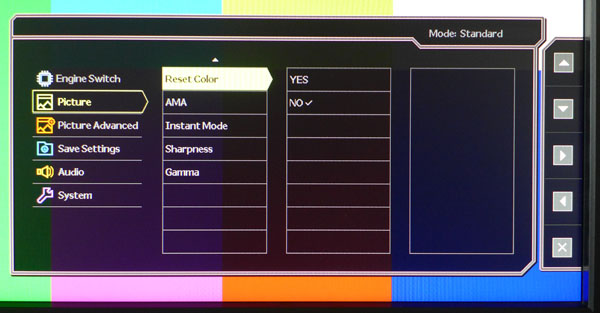
If you get lost while adjusting color settings on the XL2420G, you can reset that one menu here. AMA is BenQ’s term for overdrive. The options are Off, High and Premium. Instant mode improves input lag, and should be left on unless you’re using an interlaced signal (highly unlikely). Sharpness has 10 levels and works best at setting five. Any higher and edge enhancement results. Finally, there are five gamma presets available in Classic and four in G-Sync.
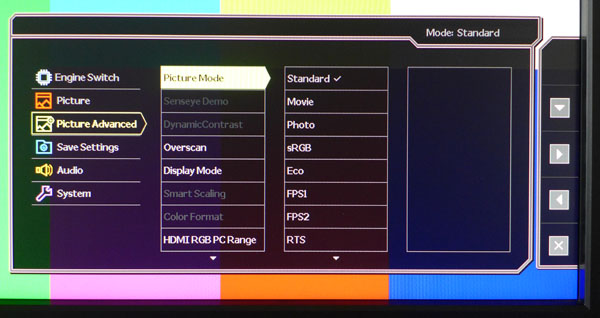
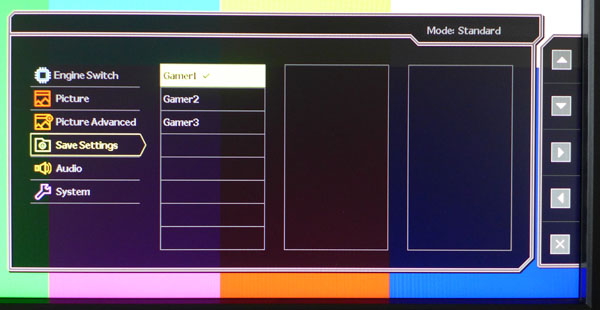
The Picture Advanced menu is where you’ll find the eight picture modes, plus three user-programmable presets (Gamer1-3). Any settings you specify in another mode can be saved to one of the Gamer slots in the Save Settings sub-menu. Then you can call them up by pressing one of the three buttons on the S-Switch.
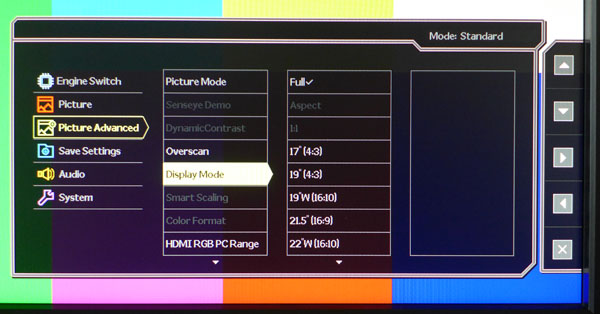
DisplayMode is BenQ’s term for aspect ratio, and there are 10 options designed to mimic screens of other sizes so the image is not distorted when rendered on the XL2420G. For native 16:9 signals, Full is the best choice.
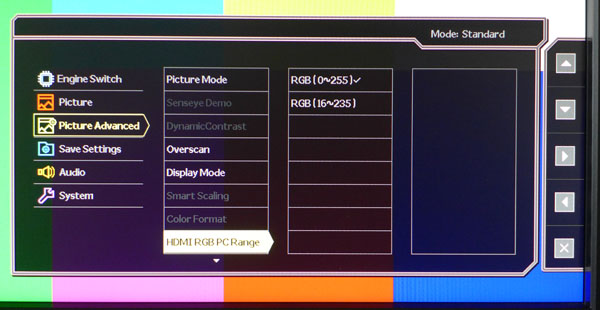
When using PC signals over HDMI, you must set this option to 0-255 to see the full dynamic range. Otherwise levels below 16 and above 235 will be clipped and overall brightness will be reduced.
Here’s where you can save your settings to one of three memory slots. This is a feature we’d like to see on all displays, regardless of category.
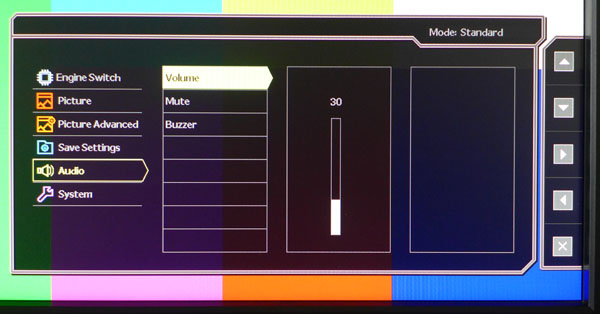
There are no speakers built in to the XL2420G, so volume and mute only affect the headphone output. Buzzer refers to the little beep that occurs when you press an S-Switch or bezel button. You can turn it off if you wish.
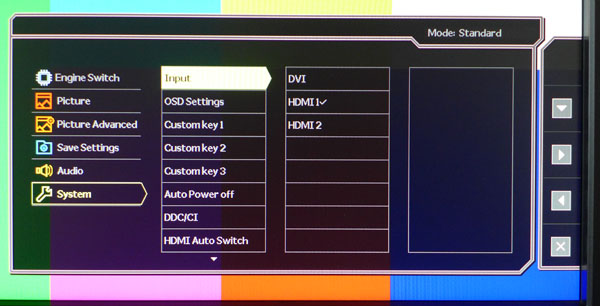
You can see that in Classic mode, DisplayPort is missing from the input list. You have to visit the Engine Switch menu and select G-Sync to engage it. That’s why we recommend a dual connection to your computer. For tasks that don’t require G-Sync or 144Hz, we like the contrast and color accuracy of the HDMI connection a little better. For gaming, however, you want to take advantage of the aforementioned performance enhancers.
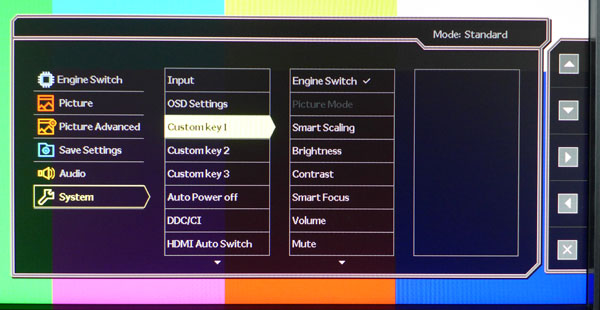
Customkey refers to the first three buttons on the bezel’s control panel. They can be reassigned to one of 12 functions like brightness or input. They’ll save you a trip to the OSD for often-used items.
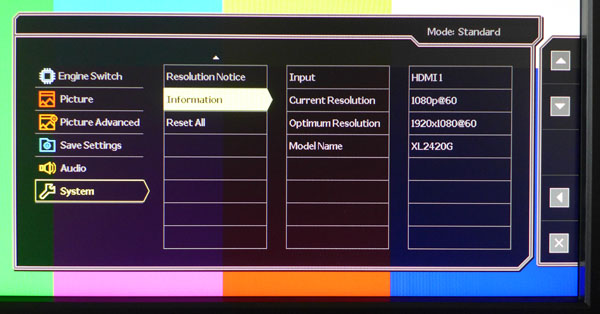
Here is the signal information, resolution and refresh rate, along with the active input and model number.
One last note about the OSD before we move on to the calibration. Once you select G-Sync mode, the S-Switch no longer functions, forcing you to use the bezel buttons. Otherwise, the menus are pretty much the same with minor differences. The main issue is that you’ll want to use independent settings for each mode to ensure optimal image quality.
Calibration
Calibration of white balance and gamma is possible in both Classic and G-Sync modes. However, the settings will be different. For both modes, you’ll want to select the Standard picture preset. It’s the best starting point and if you don’t wish to calibrate, it’s very accurate right out of the box. In fact, we were unable to improve the grayscale tracking in G-Sync mode. Just select the Normal color temp, Gamma 1 preset and you’re done. Here are our recommended settings for both modes. Remember that Classic mode omits the DisplayPort input; you only get HDMI and DVI connections.
| BenQ XL2420G Calibration Settings - Classic Mode | |
|---|---|
| Picture Mode | Standard |
| Brightness | 33 |
| Contrast | 50 |
| Color Temp User | Red 100, Green 98, Blue 96 |
| Gamma | 3 |
| BenQ XL2420G Calibration Settings - G-Sync Mode | |
| Picture Mode | Standard |
| Brightness | 45 |
| Contrast | 50 |
| Color Temp | Normal |
| Gamma | 1 |
Current page: OSD Setup And Calibration
Prev Page Packaging, Physical Layout And Accessories Next Page Brightness And Contrast
Christian Eberle is a Contributing Editor for Tom's Hardware US. He's a veteran reviewer of A/V equipment, specializing in monitors. Christian began his obsession with tech when he built his first PC in 1991, a 286 running DOS 3.0 at a blazing 12MHz. In 2006, he undertook training from the Imaging Science Foundation in video calibration and testing and thus started a passion for precise imaging that persists to this day. He is also a professional musician with a degree from the New England Conservatory as a classical bassoonist which he used to good effect as a performer with the West Point Army Band from 1987 to 2013. He enjoys watching movies and listening to high-end audio in his custom-built home theater and can be seen riding trails near his home on a race-ready ICE VTX recumbent trike. Christian enjoys the endless summer in Florida where he lives with his wife and Chihuahua and plays with orchestras around the state.
-
Wisecracker I can understand why the display folks thread lightly, here. This price point is a minefield and miss-mash of tech. This monitor might be a bargain at $300.Reply
Otherwise, $500-$600 is Eyefinity/Surround, HD Projector, 60-inch Plasma TV territory. It's a tough sell for a display port-capable monitor these days in Adaptive/G -Sync, being that we are only moments before the flood.
And, the market is not in the high-end, at least, not for long. It's back where us poor slubs with 'pitiful' $200 gaming cards :lol: need the help.
-
bogda Finally a G-Sync monitor with more inputs than one DP. Now give me 1440p resolution and price below 500 and I will consider it.Reply -
DarkSable Just throwing out there - saying that the brighter the monitor the better is absolutely far from the truth. If you're in an office environment under florescent lighting, then sure, but if you're interested in a gaming computer, it's probably in your room or a den, and, well... brighter is only better if you only game at night, or have every possible light on while you do.Reply
From all the gripes about how the monitor gets so dim, that's actually a HUGE benefit for me - nobody every bothers to test what the minimum brightness a monitor can achieve, and many monitors, especially gaming monitors, fail miserably. I'd much rather have less eye strain than picture-perfect colors when I'm gaming at night. -
PaulBags DP has better bandwidth, so why does the HDMI here have better contrast and colour accuraccy?Reply -
Shankovich Here's that $200 nVidia premium kicking in. Could have made it IPS or 1440p guys come on...Reply -
blakphoenix I'm sorry but there is no way this monitor could be classed as having "professional-level color accuracy". For starters it doesn't even get 100% sRGB, let alone the terrible sub 70% AdobeRGB performance. Is it good enough for games? It may well be. Is it professional level colour? Not even close!Reply -
bystander ReplyJust throwing out there - saying that the brighter the monitor the better is absolutely far from the truth. If you're in an office environment under florescent lighting, then sure, but if you're interested in a gaming computer, it's probably in your room or a den, and, well... brighter is only better if you only game at night, or have every possible light on while you do.
Brightness does have one important use; ULMB. In ULMB, because the backlighting pulses, it causes these monitors to be very dim. Extra brightness helps to counteract this issue, but I do agree, testing the minimum might be useful, as there are some people out there that have to play at nearly the lowest levels due to headaches.
From all the gripes about how the monitor gets so dim, that's actually a HUGE benefit for me - nobody every bothers to test what the minimum brightness a monitor can achieve, and many monitors, especially gaming monitors, fail miserably. I'd much rather have less eye strain than picture-perfect colors when I'm gaming at night. -
TechyInAZ Wow very sweet for a monitor. I would highly consider this monitor if I can afford it. Since I use my computer for both work and play.Reply
However, for that price I'm disappointed it's only 1080P. I hope they come out with a free sync 1440P version that's cheaper than this monitor.
