BenQ XL2730Z 27-inch FreeSync Monitor Review
For our first chance to examine AMD’s FreeSync, BenQ sent us its brand-new XL2730Z, and we’re running it through our demanding suite.
Why you can trust Tom's Hardware
FreeSync & OSD Setup And Calibration
FreeSync Setup
All you need to complete your FreeSync-capable rig, besides the XL2730Z, is an appropriate Radeon graphics board. Only certain models, starting with the Radeon R7 260, but not including the R9 270-series or R9 280, will work. We used an R9 285 in our test system. You’ll also need the latest beta drivers from AMD. As of this writing, that’s version 15.4 dated April 14, 2015.
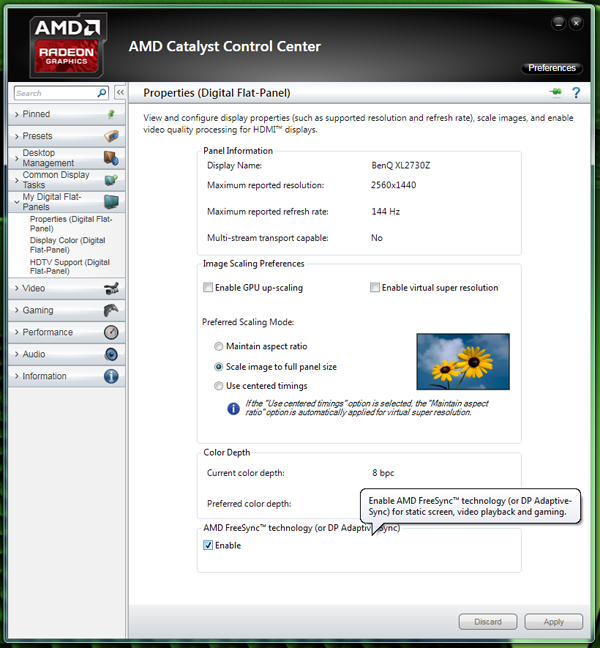
Once AMD Catalyst is installed, navigate to the My Digital Flat Panels/Properties window.
At the bottom, you’ll see a checkbox that enables FreeSync. You know what to do. Just like G-Sync, you can now enjoy tear-free motion in your games. And you can set your monitor to its highest refresh rate if you wish. In the case of the XL2730Z, there is nothing to set in the OSD. Other displays may require a visit to the menu to turn on FreeSync support.
OSD Tour
You can operate the XL2730Z’s OSD with traditional buttons on the right side of the bezel, though it’s much easier to use the controller with its wheel and smartly-designed keys. BenQ really has the lead in this area, and it is by far our favorite way to interact with a computer monitor. The only other company to come close is LG with its joystick method.
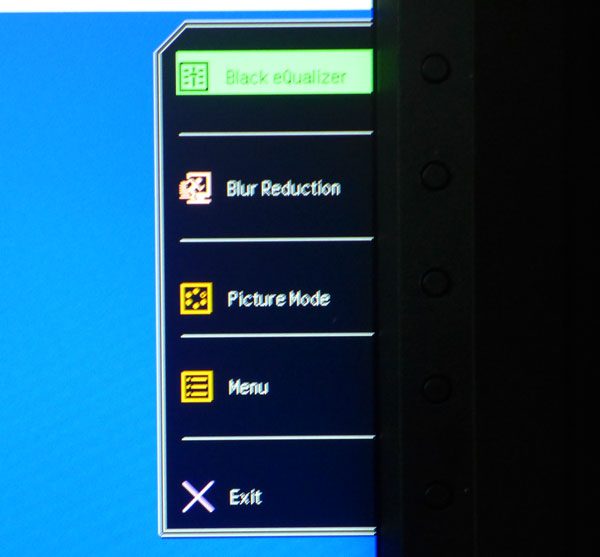
Pressing any button on the bezel or the controller brings up a quick menu. You can program the top three slots to different functions than the ones shown. For instance, we’d probably change the top one to Brightness.
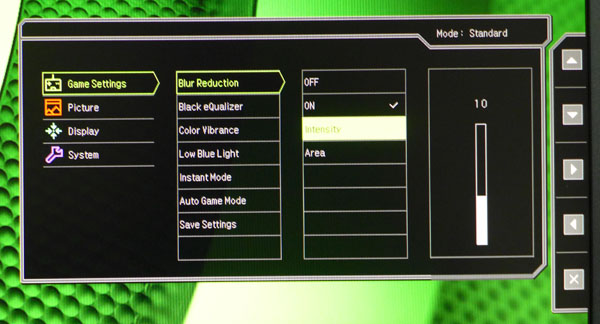
You can use blur-reduction on any input, but to access the Intensity and Area settings, you have to use DisplayPort. One advantage the XL2730Z has over most competitors is that you can use the blur-reduction at 144Hz. Other monitors limit you to 120Hz. We found the best setting for Intensity was 1, the lowest. You get a noticeable improvement in motion resolution with only a 35 percent reduction in light output.
The Area control is an interesting one. The manual gives very little explanation of this function. In our testing, it appeared to widen the area of blur-reduction in the vertical direction. On its default setting of 10, blur was reduced most dramatically in the center-third of the screen. Increasing it to 45 seemed to cover the largest area. Higher settings moved the band of improvement below center, leaving upper zones less affected.
Get Tom's Hardware's best news and in-depth reviews, straight to your inbox.
The only other feature in the Game Settings menu you might consider changing is the Color Vibrance control. It’s a slider with 20 clicks, and it starts in the middle at number 10. We found an improvement in color accuracy and saturation by changing it to 11 combined with the Gamma 2 preset. Check out our results on pages five and six for more information.
The final option, Save Settings, lets you program the three Game Modes. Then you can call them up with one of the dedicated buttons on the OSD controller. Very cool.
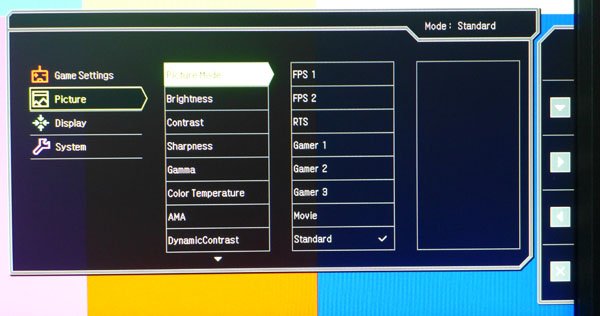
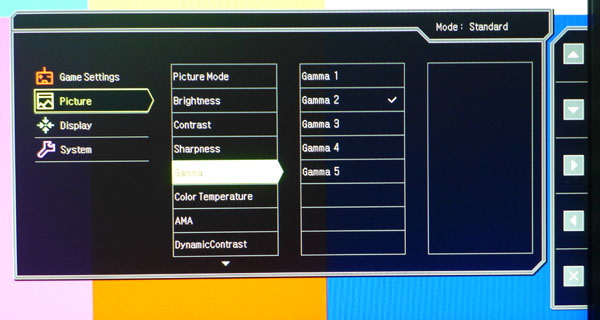
The Picture menu is topped by a selection of eight picture modes; FPS 1 is the default. We found the best results in Standard, whether you calibrate or not. The Gamer modes are memory slots that can be used to save your custom settings and then called up with dedicated buttons on the OSD controller. This is a feature we’d like to see in all monitors.
The Brightness and Contrast sliders work as they should. Contrast comes set to 50 and can be left there. Higher numbers introduce clipping and a color shift. Brightness ranges from just over 350cd/m2 down to a low point of 59cd/m2.
There are five gamma presets; numbers two and three run pretty close to a 2.2 average value. You’ll see later in our tests how we used them to improve color saturation and accuracy.
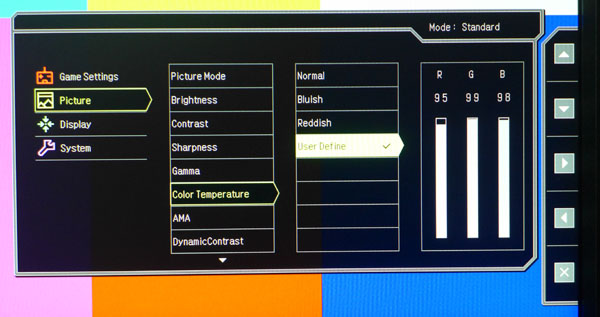
There are three color temperature presets plus a user-adjustable mode. Excellent grayscale tracking is just a few clicks away.
AMA is BenQ’s version of overdrive. It works fine on the High or Premium setting and does a good job of mitigating ghosting artifacts.
Dynamic Contrast generates great on/off contrast numbers but also clips detail at both ends of the brightness scale. To see everything in your image, it’s best to leave it off.
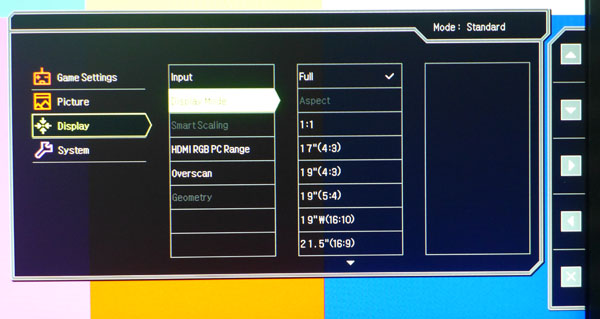
BenQ is unique in offering multiple aspect ratios on its monitors. Rather than just the usual 16:9 and 4:3 options, it adds modes for nine additional monitor sizes. This makes it easy to fit different image shapes on the screen without distortion.
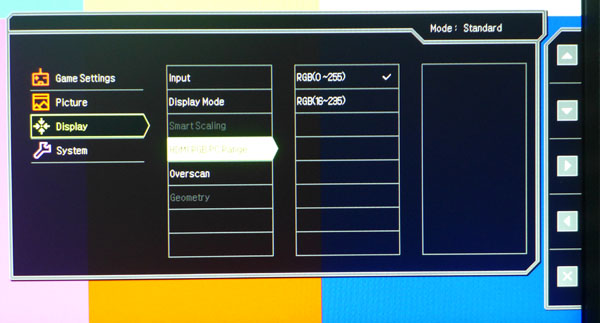
If you use an HDMI input with the XL2730Z, make sure to visit this menu and change the setting to 0-255 for PC signals. Leaving in on the 16-235 default will shrink dynamic range and clip detail.
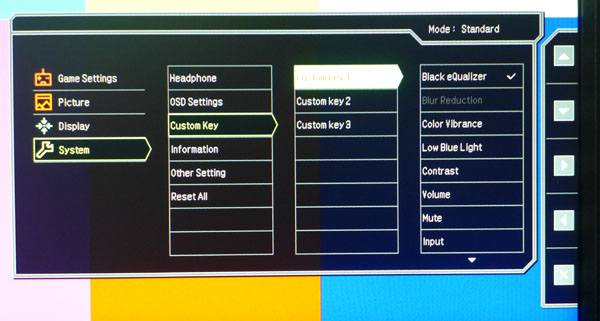
Here is where you can program the three custom key slots for the OSD’s quick menu. They can be set to any of 12 different functions. Coupled with the three game mode presets, it’s very easy to change settings quickly on the XL2730Z.
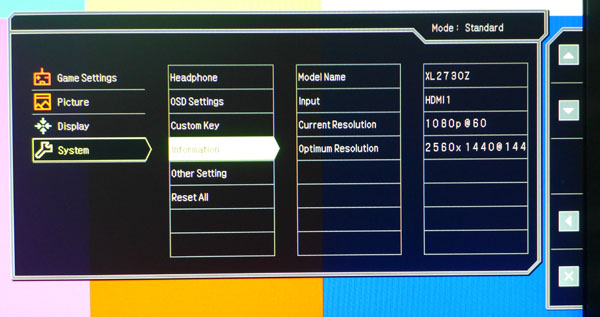
Here is the signal information. In addition to the input resolution and refresh rate, you get a suggestion for the optimal values (in this case, 2560x1440 at 144Hz). Also included is the active input. At the top-right of all OSD screens is the currently selected picture mode.
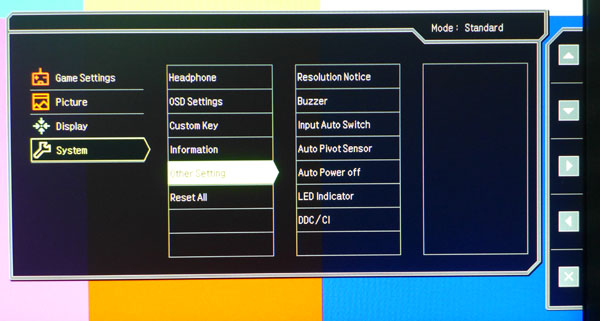
Finally, you get options for things like input auto-sense and front LED intensity. We didn’t find a need to change any of these settings. If you want to return the XL2730Z to its factory defaults, choose Reset All at the bottom.
Calibration
You can calibrate any picture mode on the XL2730Z, but it’s easiest to start with the Standard preset. It’s pretty good out of the box and even better when the proper adjustments are made. Once we got the grayscale tracking in line, we experimented with both Gamma 2 and Gamma 3, along with the Color Vibrance control to achieve a nice balance of accuracy and saturation. If you use blur-reduction, we recommend setting the Intensity to 1, the Area slider to 45 and Brightness to 100. This provides the best compromise between motion resolution improvement and light output. Please feel free to try our settings below.
| BenQ XL2730Z Calibration Settings | |
|---|---|
| Picture Mode | Standard |
| Brightness | 47 |
| Contrast | 50 |
| Sharpness | 5 |
| Gamma | 2 |
| Color Temp User | Red 95, Green 99, Blue 98 |
| Color Vibrance | 11 |
Current page: FreeSync & OSD Setup And Calibration
Prev Page Packaging, Physical Layout And Accessories Next Page Brightness And Contrast
Christian Eberle is a Contributing Editor for Tom's Hardware US. He's a veteran reviewer of A/V equipment, specializing in monitors. Christian began his obsession with tech when he built his first PC in 1991, a 286 running DOS 3.0 at a blazing 12MHz. In 2006, he undertook training from the Imaging Science Foundation in video calibration and testing and thus started a passion for precise imaging that persists to this day. He is also a professional musician with a degree from the New England Conservatory as a classical bassoonist which he used to good effect as a performer with the West Point Army Band from 1987 to 2013. He enjoys watching movies and listening to high-end audio in his custom-built home theater and can be seen riding trails near his home on a race-ready ICE VTX recumbent trike. Christian enjoys the endless summer in Florida where he lives with his wife and Chihuahua and plays with orchestras around the state.
-
norseman4 I don't understand why the price is so high. The only things I see that are different (in any meaningful way) from the Acer XG270HU (which I have, and am a fan of) is hight adjustment and an external puck to load configurable screen settings. (that is pretty cool though)Reply
The Acer also doesn't have the raised bezel that is actually about 8mm (Top, Left and Right)
The Benq looks like a good monitor, I just don't see what justifies the premium price. -
Xajel I'll wait for 29" 21:9 1440p instead, the only option available is curved, which is pricey, I don't see the curvation worth the extra cost... FreeSync is a plus but this will drive the cost up again ( to have a 144Hz panel at that resolution )... and please add a USB 3.1 hub with 2x Type-A & 2x Type-C portsReply -
eklipz330 i may have missed it in the article, but what is the range of frames freesync covers on this monitor?Reply -
I Hate Nvidia Replyi may have missed it in the article, but what is the range of frames freesync covers on this monitor?
First thing I was thinking of is FreeSync Range , and I double checked the article and there is no mention of it at all! I think the writer is not well informed regarding FreeSync - GSync Range.
-
JTWrenn This was a good article for a monitor review....it was a very bad article for one of the first Freesync monitors to be released. Many of us wanted more info on that and you acted like all monitors are the same as long as the tech works...that is just not true. Please add more about the Freesync tech, how it worked and what it's limitations were.Reply -
singemagique Why does the author not add a comparison to the Acer XB270HU? Instead they make reference to the ROG Swift? At ~$740, the XB270HU offers 1440p, 144hz, and Gsync on an IPS panel and is definitely at the top of my list at this price point. Could Toms please add info on the Acer panel to this review?Reply -
Falkentyne Christian, I sent you an email about Version 4 firmware for the previous monitor you reviewed--the XL2720Z.Reply
And "Area" is the same thing as "strobe phase" is on the older Z series.
http://forums.blurbusters.com/viewtopic.php?f=13&t=560 -
Bondfc11 He says it's 40-144, but has that been tested? Or is that just the normal statement? Recall plenty of FS monitors state a range and then the panel won't oblige once it was properly tested.Reply -
Falkentyne That's the refresh rate capability, NOT the blur reduction rate capability. The older Z series can't even single strobe at 50hz without a Vertical Total tweak which tricks the scaler into using 60hz backlight pulse widths (if you try single strobe at 50hz without it, the backlight becomes overdriven with voltage and the current makes the monitor reset from overcurrent protection.Reply
It can "double strobe" at 50hz and 60hz but that's only because the single strobe option is missing from the service menu (it was there in all of the previous benq blur reduction monitors including the 2430T).
