System Builder Marathon Q1 2015: Budget Gaming PC
Assembly And Overclocking
Assembly
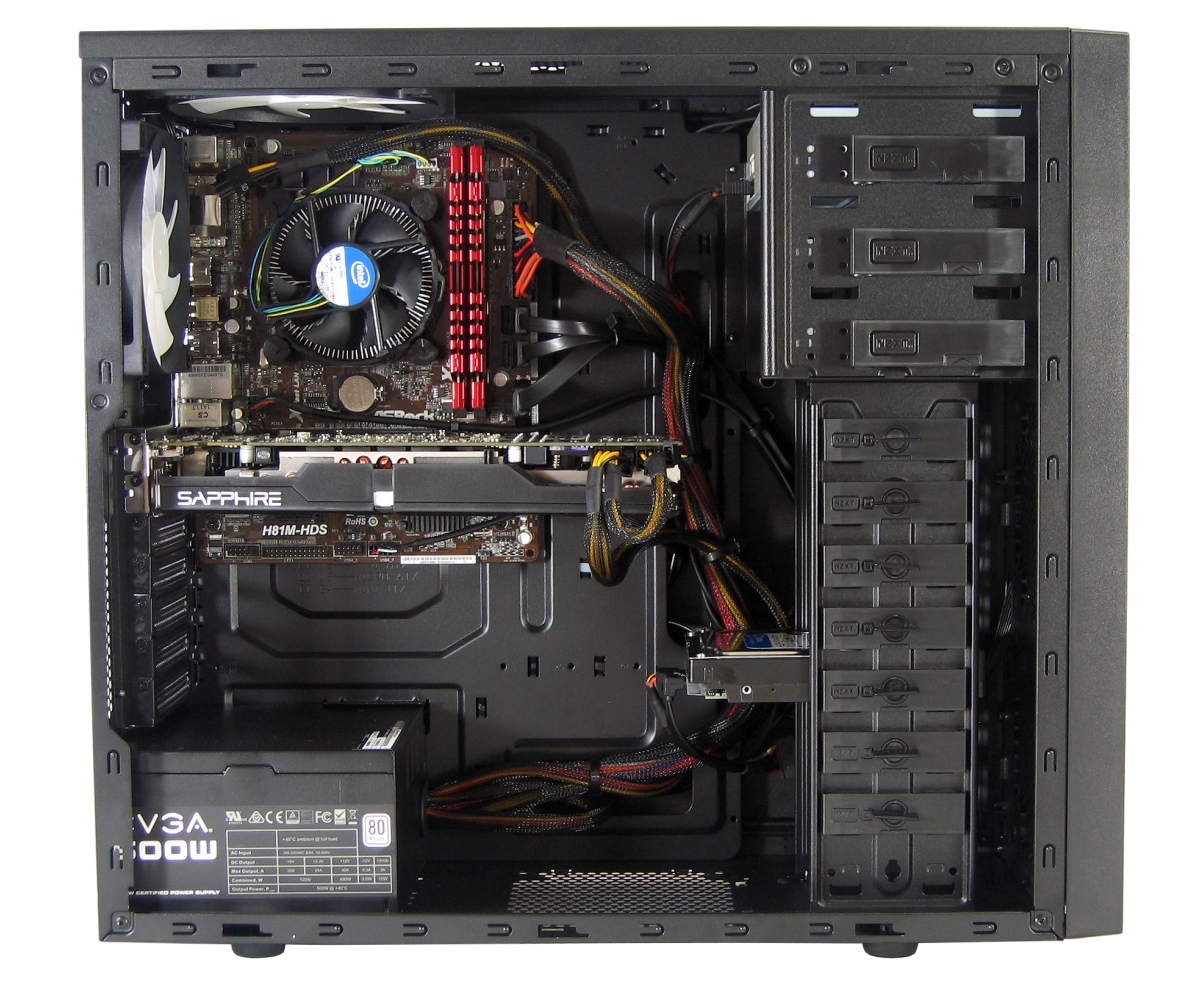
Gaining access to the Source 210 Elite's internals requires removing two thumb screws from each side panel. Inside you'll find an all-black interior, an adequate hardware bundle and a folded paper manual. The front-panel connections and exhaust fans are wired through the provided cable management holes, making them easy to tuck out of the way. With a moderate tug, the front bezel snaps off, simplifying removal of a 5.25” bay cover for optical drive installation.
After mounting the Core i3 processor, its push-pin heat sink and both memory modules, it was time to install the motherboard. This step went smoothly, since I did my homework to make sure my case had the standoffs it needed to accommodate our mATX motherboard. NZXT even supplies a 5mm socket to help tighten the screws. Unfortunately, my pre-purchase investigative work wasn't thorough enough; the assembly process soon ground to a halt.
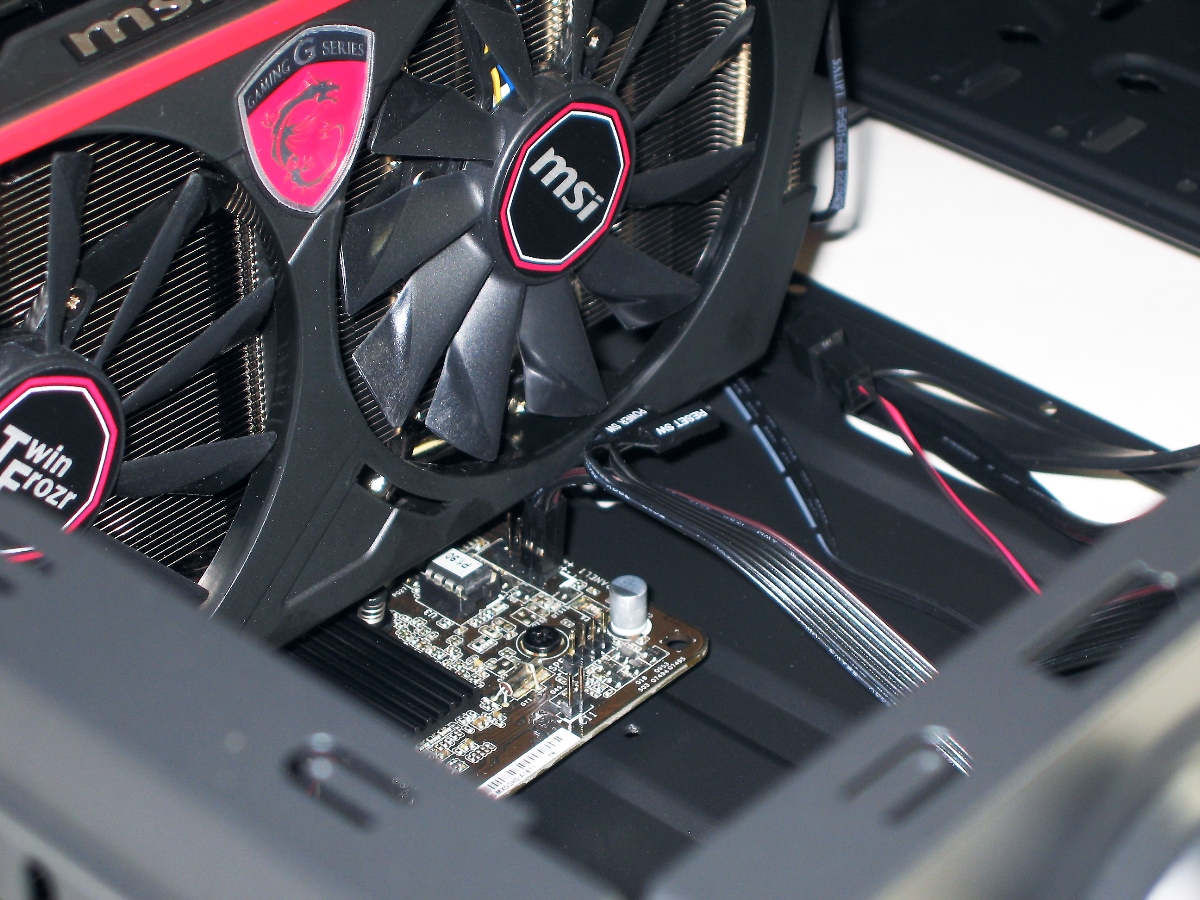
Early in the build process I noticed the motherboard’s easily accessible CLR CMOS jumper, located between the processor and graphics card slot. But any points I’d award for that inclusion were erased as soon as I tried to connect front-panel headers. A Newegg review warned of tight spacing, but I underestimated the extent of the incompatibility. ASRock didn't consider the H81M-HDS' true gaming potential, it seems, when the company placed part of the front-panel header where a dual-slot graphics card would overhang.
When Sapphire's Dual-X shot up $20, I pulled it from my cart and substituted the most affordable R9 280 alternative. Our orders were due, and I was thrilled to have a $190 option. However, upon assembly, there was simply no way to seat the MSI card with our power and reset switch connections in place (at least not without modifying the case wiring or massive cooling shroud).
After confirming that the machine would boot from Intel's HD Graphics 4400 engine, I sent my discrete card in for a smaller alternative. Thankfully, the Sapphire Dual-X was again available at an even lower price, knocking my total down another $10. It’s not exactly fair to my colleagues that I'll benefit from this sequence of events, but I really can't complain.
Once my replacement arrived, the machine was good to go. The most difficult challenge to overcome was managing the PCI Express power connectors, which EVGA exposes on the same lead. The extremely stiff loop created by using both connectors had to be bent downward to fit inside the case. It's also worth mentioning that NZXT provides four-pin adapters for the two exhaust fans, which came in especially handy considering the placement of our motherboard’s system fan headers in relation to the case’s cable management holes.
Get Tom's Hardware's best news and in-depth reviews, straight to your inbox.
Graphics-Only Overclocking
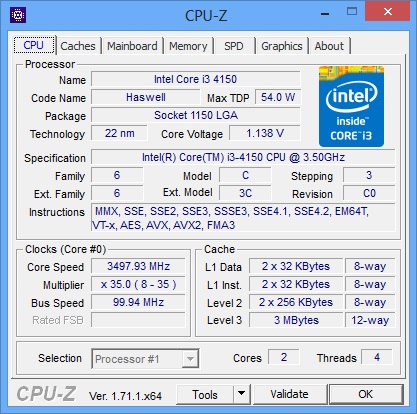
I chose the Core i3-4150 partly because ASRock's H81M-HDS would support it with UEFI version 1.6. As it turned out, our board shipped with version 1.9 already installed, meaning it'd recognize the quicker Core i3-4160 right out of the box.
This quarter, it seems I took a page from Don’s book, meaning I'll likely ensure some ribbing from Thomas. But I was curious to test stock settings at default CL11 timings, which could have saved me a couple bucks by going with cheaper modules. My overclocking run would leverage the XMP profile's CL9 settings.
Since the Core i3 can't really be overclocked, my manual tweaking efforts would revolve around optimizing the graphics card's frequencies.
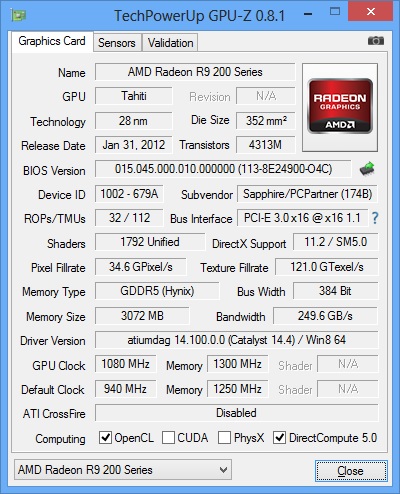
The Radeon R9 280's GPU operates at an 850MHz base clock rate. But in-game, our Sapphire Dual-X maintained its 940MHz peak Boost frequency. Using MSI Overdrive, I hit 1100MHz before noticing signs of instability. The card went 45 minutes in Far Cry 3 without an issue, but then locked up within a minute under Battlefield 4. Practicing a conservative approach, I didn’t push the graphics memory as hard as I could have. Instead, I settled for a 1080MHz GPU setting and 1300MHz (5200MT/s) memory.
Before testing, I did however mess with Sapphire’s fans, discovering that they start to get noisy above 50% duty cycle. I created a custom fan profile that peaked a little higher than the 42% default. This provided a bit more airflow to the memory, while also keeping the overclocked GPU running just as cool as it did out of the box.
Current page: Assembly And Overclocking
Prev Page Memory, Drives, Case and Power Next Page Test System Configuration And Benchmarks-
cmi86 Over all I like it. I am glad to see that you went with the superior R9 280 over the thoroughly underwhelming GTX 960, which I thought you may have felt obligated to include in the budget build. Only minor gripe I have is that I am sure you could have saved five dollars somewhere to get that SSD in there, case maybe ?Reply -
damric Should have used Windows 10 Preview instead of paying $100 for OS. It's an obvious choice for a cheap build.Reply -
TechyInAZ Reply15365194 said:Should have used Windows 10 Preview instead of paying $100 for OS. It's an obvious choice for a cheap build.
I disagree, eventually windows 10 preview will stop working when windows 10 is officially out. And for people viewing and building a duplicate rig off this post half to a year later, they would be out of luck.
Nice computer! I personally would have chosen a gigabyte mobo instead. -
Onus I didn't like it. I can't help but think I'll get lots of downvotes, but it looks like a hodgepodge of throwaway parts. By that I mean every choice was an example of "settling" for less than what was probably wanted. On a tight budget, with limited or no future upgrade possibilities, maybe it is the best that can be done. Throw in some possible future upgrades though, and I would have made some sacrifices for the benefit of future growth. For example, I'd rather see a more competent mobo (e.g. to allow a data RAID1), PSU, and storage (i.e. including a SSD), and would have lowered the CPU and/or graphics card (depending on benchmarks) in order to get there. As good as most modern games look even on a mix of "high" and "medium" settings, this would create a system with much longer-lasting core components, and snappier "home-user" performance (because of the SSD). Future GPU and/or CPU upgrades in a year or so would keep the whole system humming right along.Reply -
envy14tpe This is the best Budget Gaming PC I've seen on this site. Love the choices. Did not skimp and no overkill on one component while weak other components. For a build under $600 you could not have done better. This will max out 1080p gaming!Reply -
MerryLane Why not buy an AIO cooler with these 100 dollars and overclock the hell out of the pentium?Reply
After all the i3 has only two cores too ... and no overclocking possible.
I'm pretty sure that 50% overclocking is greater than 2 extra threads that give at best 30%.
There are also great bundles everywhere, G3258 + motherboard for cheaper.
The GTX 960 also seem more future proof than a 280 and barely more expansive. -
TNT27 Reply15366289 said:Why not buy an AIO cooler with these 100 dollars and overclock the hell out of the pentium?
After all the i3 has only two cores too ... and no overclocking possible.
I'm pretty sure that 50% overclocking is greater than 2 extra threads that give at best 30%.
There are also great bundles everywhere, G3258 + motherboard for cheaper.
The GTX 960 also seem more future proof than a 280 and barely more expansive.
Are you serious in saying that you belive a gtx 960 is more future proof? The r9 280 is on par or better than the 960, and its cheaper. When overclocked the 280 can reach into gtx 770 territory. Its also go a wider bus, and a extra gig of vram= much better performance in higher resolutions, and newer games that are starting to use that gig of vram. -
dstarr3 I've built with that case before, and it is really surprisingly good for it's cost. But I got it for $35 at my local computer parts store. Regular price. If you're paying $50 for it, you're mad.Reply -
turkey3_scratch I don't see why SSDs are being considered a necessity. With Windows 8 and the fast startup you don't even need to worry about waiting a minute, and on a budget I don't see why it's worth the extra money just to calm one's impatience for 10 seconds of loading.Reply


