Here’s How We Booted Windows 10 in 4.9 Seconds (Now, Beat Us)
Software
We used Windows 10 Pro 64-bit in our testing, but Windows 10 Home should offer similar boot times.
Boot Drive Connectivity
If you are using a SATA drive, plug your OS drive into the native SATA chipset port 0. Third-party SATA chipsets can delay boot. If you are just using a PCIe NVMe SSD, you can go ahead and plug that into any of the available M.2 ports on your system.
Note, however, if you have an M.2 port that is only PCIe 3.0 x2 and your device is PCIe 3.0 x4, you will be missing out on performance. It is then suggested to use an adapter card and plug it into the next available PCIe slot that allocates full bandwidth directly to the CPU. We used a 960GB Intel Optane SSD 905P to achieve our epic boot time, which was plugged into the very first PCIe slot it could fit into.
Unplug Things Not in Use
Sometimes external drives will delay boot time, so it could help you to remove that backup drive or two you have sitting connected. Plus, it’s a bit safer to store your backups disconnected anyways.
Just as well, some keyboards (very few and rare to find) have extended some people’s boot times based on my forum troubleshooting experiences. I cannot note specific models, but if your boot time is exceptionally long, this could be one tip to consider looking into. We used a Logitech 2.4-GHz wireless keyboard and mouse and neither slowed the boot. Chances are that you won’t have a problem with any normal input device.
UEFI/BIOS Settings
Besides upgrading to an SSD, optimizing your system’s UEFI settings is the most important step in speeding up your boot time. With motherboards having many additional controllers, it is best to see what actually matters for you in the end. Otherwise, you will have features you don’t necessarily need enabled and they will extend your POST time for no good reason.
Get into Your BIOS or UEFI
To start off, you need to actually get into your BIOS or UEFI. If you don’t know how to access your motherboard’s settings, check out our guide to getting into your BIOS / UEFI where we have instructions for every major manufacturer (most PC motherboards use the DEL key).
Get Tom's Hardware's best news and in-depth reviews, straight to your inbox.
Once booted into your BIOS or UEFI, there are a few tab menus to look through. If you have a newer UEFI motherboard, you might not see these tabs at first. On most desktop motherboards, you will need to navigate to an advanced UEFI setup mode or options to view the tab menus first. Laptop UEFI menus may not have all the options you need to lower your POST time.
The following settings may make large or small differences depending on the setting, but keep in mind, no matter how small the change in speed, these changes add up to a significant amount of reduced boot time.
As well, the settings we are changing here today could be beneficial for your daily use. Disabling things you are unsure of is not a good idea. Since hardware varies from manufacturer to manufacturer, we can only give you examples from this ASRock Z370M Pro4 motherboard’s settings menu. If your menu structure differs, be sure to read up on the settings you are changing before doing so. For boot time, we need our system running at full speed. So, any power savings features were disabled to ensure the absolute fastest time possible. For your own system, you can and probably should enable them to save on power.
Our ASRock motherboard, like many other motherboards, allows us to save our settings to multiple profiles and easily revert back to if we ever needed to ever clear the CMOS (which resets everything to default) due to a bad overclock or setting. We suggest you use this profile saving feature as you go through and enable and disable things.
In the UEFI
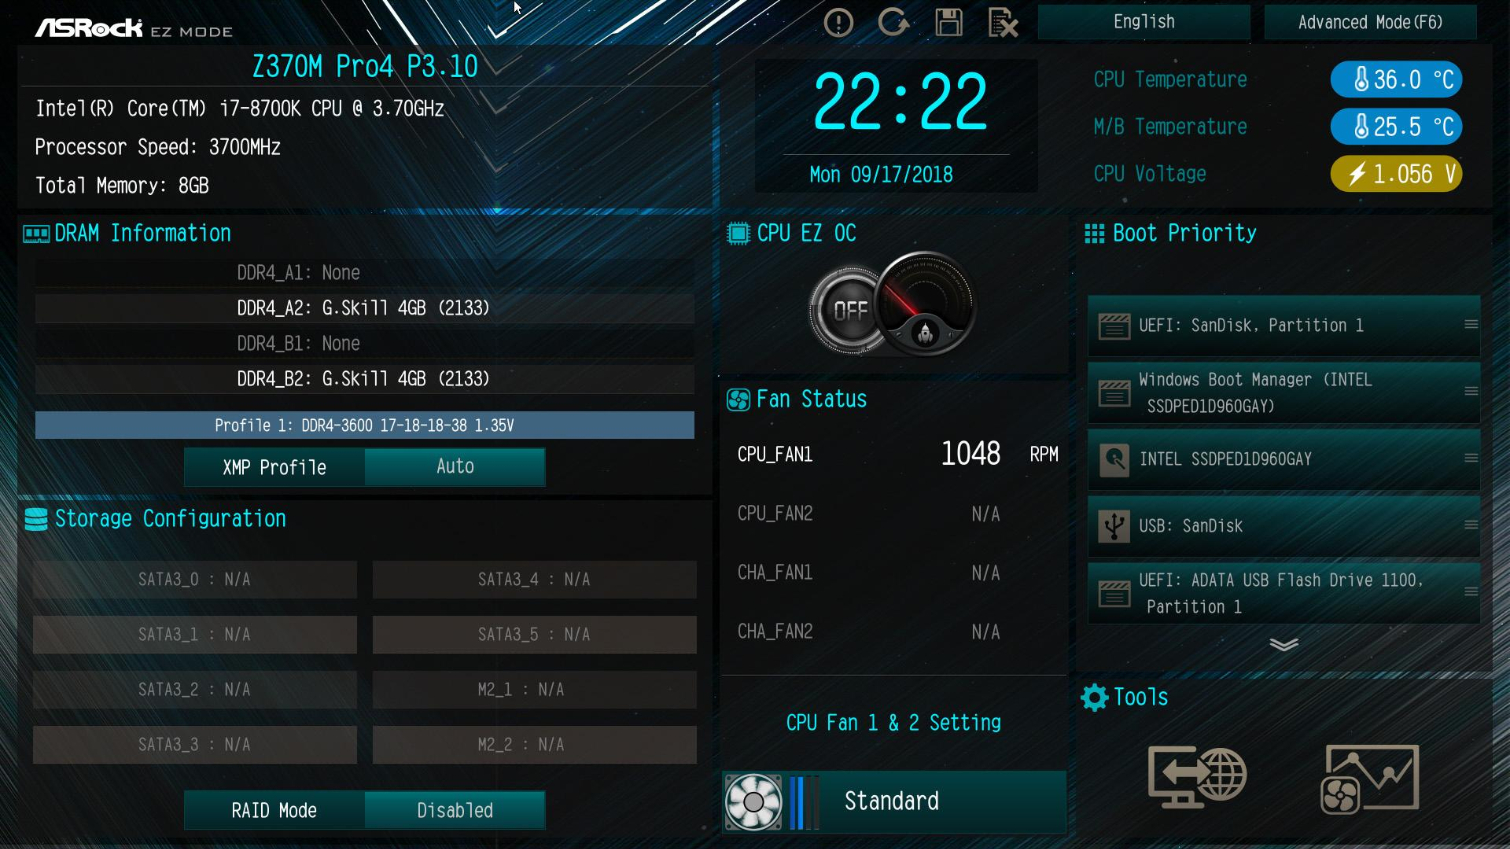
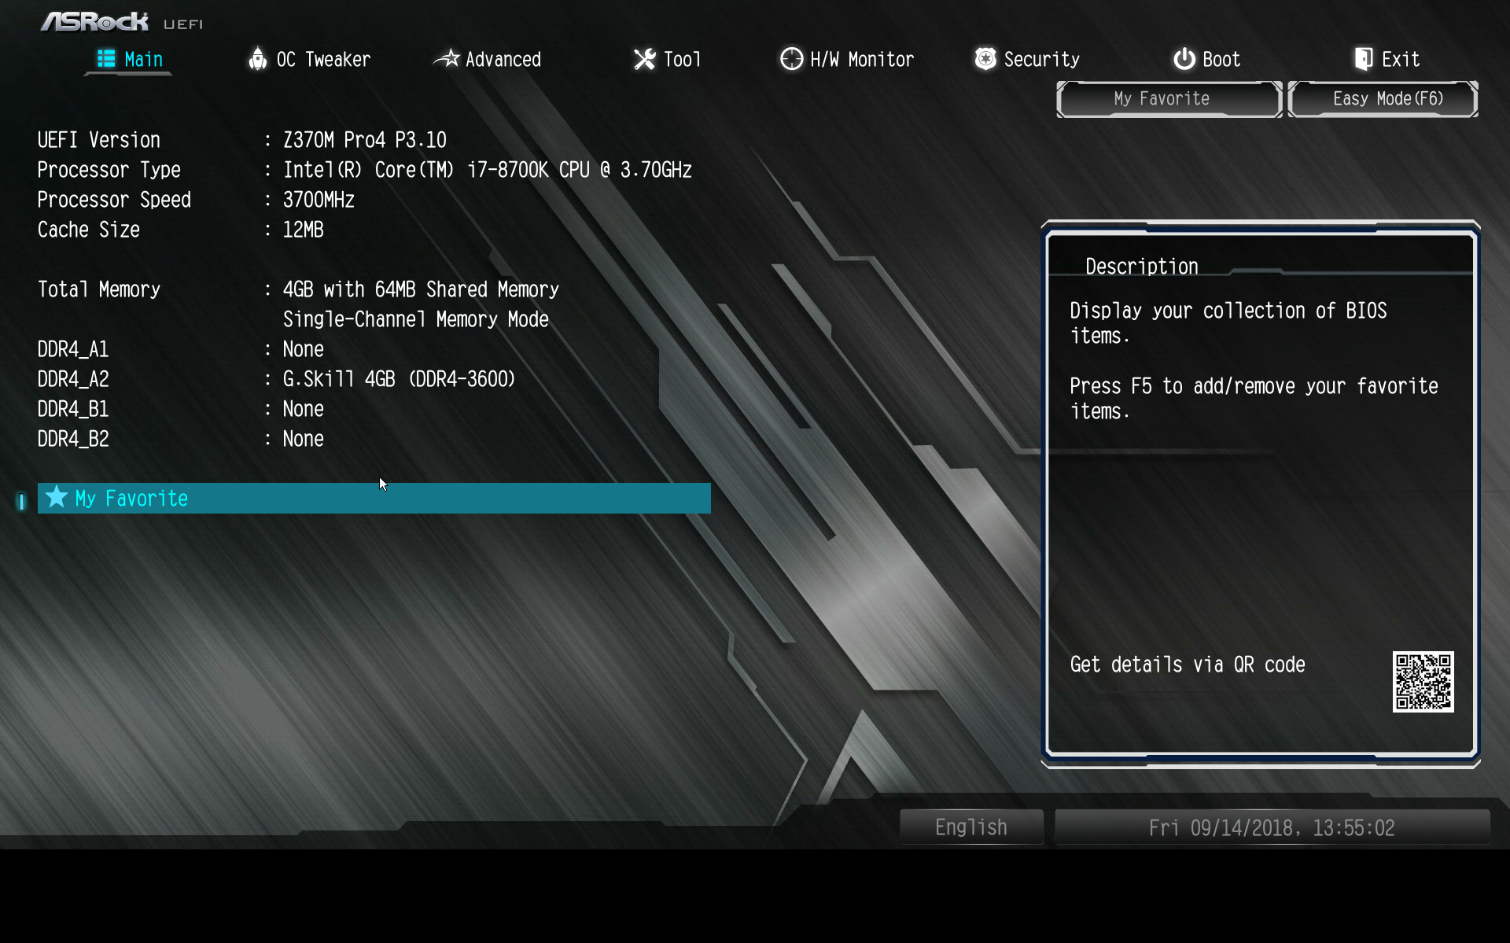
In your UEFI settings menu, the different tabs are usually a main screen that shows your installed components, including: RAM, CPU, firmware, etc. This is fine for verifying your hardware, but what really matters are the Advanced, Boot, and OC Tweaker tabs.
Advanced Tab
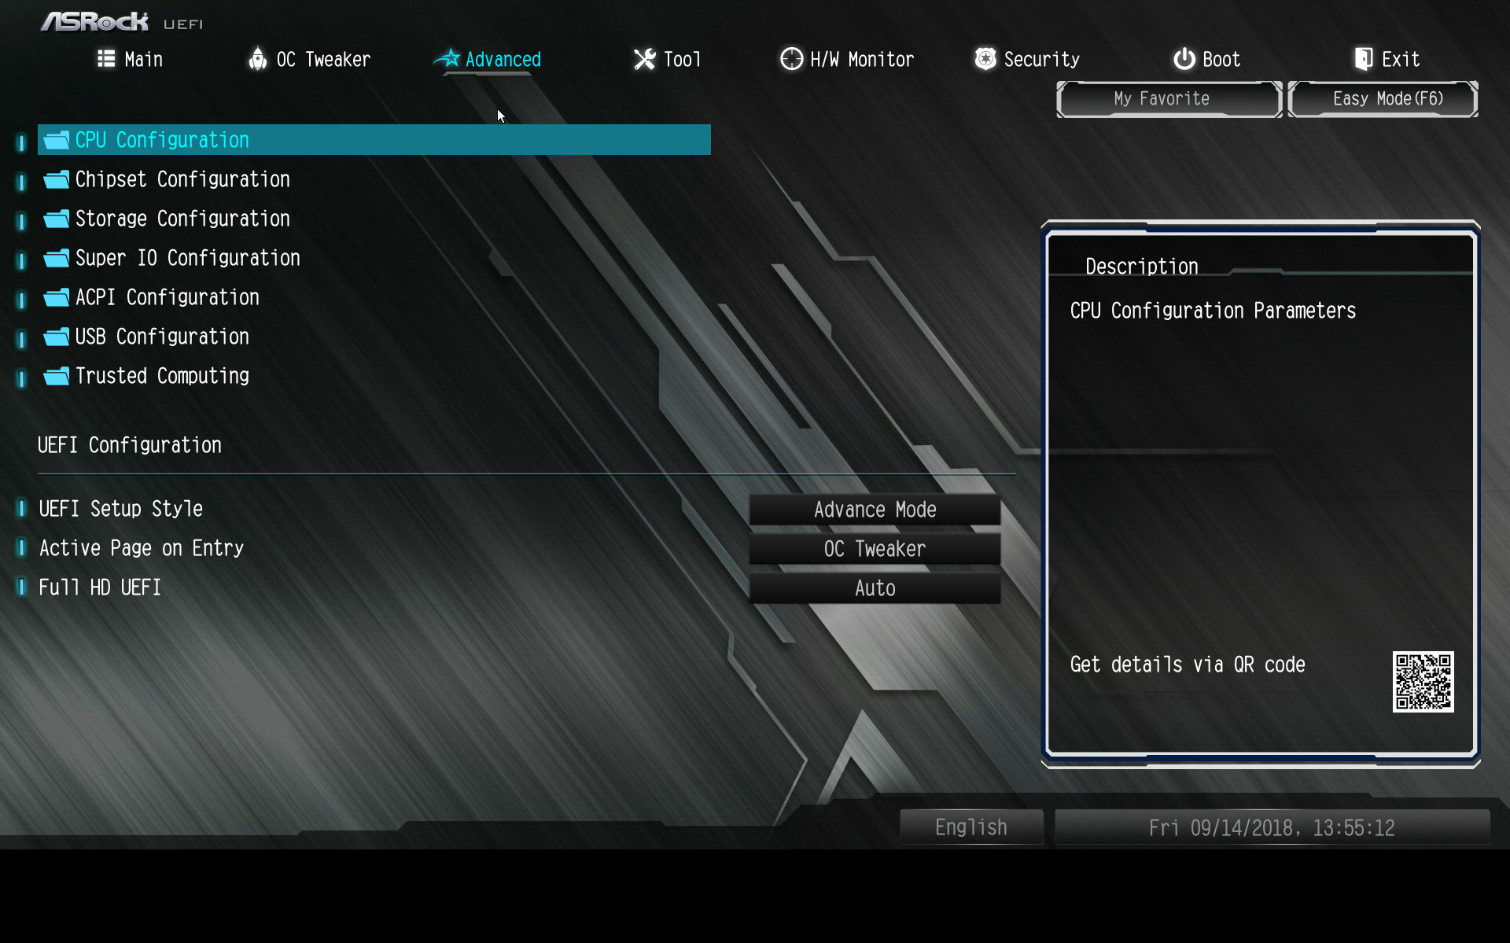
In the advanced tab, you can configure your motherboard’s chipset, controllers, and power settings. Once there, make the following changes (if available).
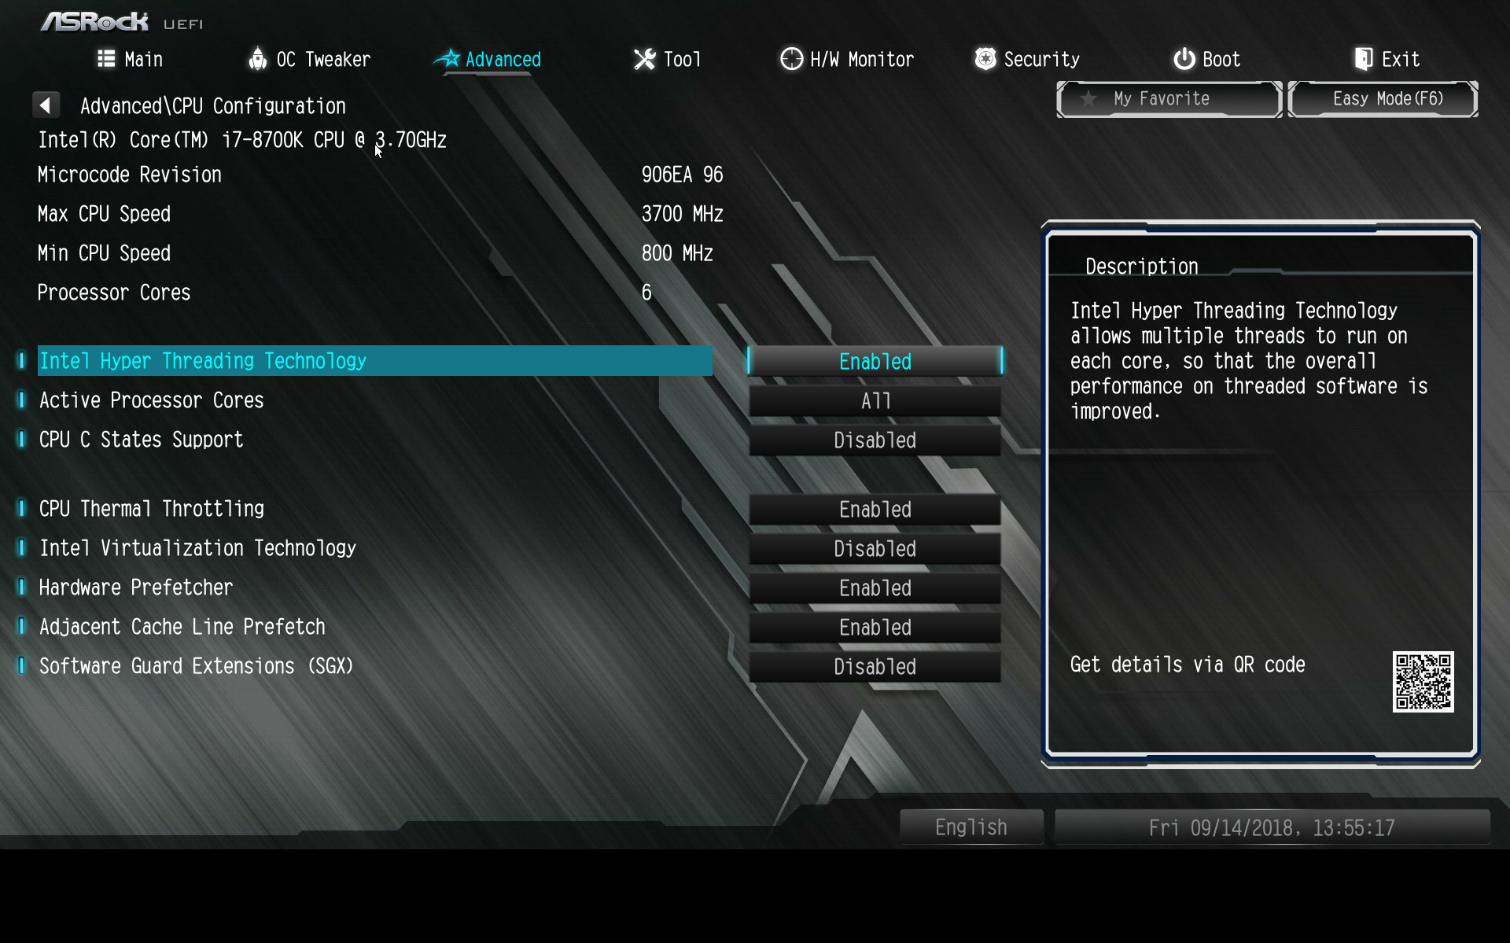
CPU Configuration
- Intel Hyper Threading - Disable. Hyper threading is a wonderful feature on Intel CPUs. It enables faster performance by enabling a single core to look like and operate as two. While more threads help with speeding up application performance, during boot it is simply another feature to initialize and actually can delay your boot time. We don’t recommend disabling it in normal use, but in our quest for the fastest possible boot time, disabling it saved 0.07-0.15 seconds.
- Active processor Cores - Enable them all. Unlike Hyper Threading, active processor cores should all be enabled. It doesn’t take longer to initialize all the CPU cores like it does with HT. Using less (4 instead of 6) resulted in a slightly slower boot time.
- CPU C States Support - Disable. As an enthusiast looking for the absolute best performance, you will want to disable any power savings features, this is one of them. Enabling it can impact storage performance negatively, but it is at the expense of drawing more power at idle.
- Intel Virtualization Technology - Enable. When enabled, Intel Virtualization Technology provides hardware support for virtual machines. Typically, we think more features enabled means more to initialize at POST, but when we disabled it in testing, it had no effect on boot speed.
Chipset Configuration
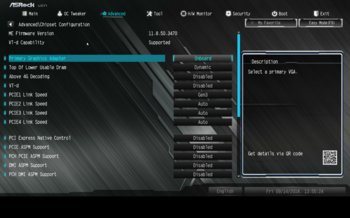
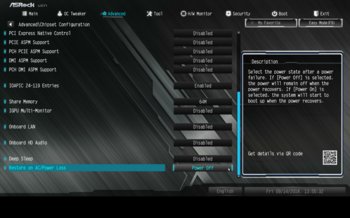
- Primary Graphics Adapter - If you are using the integrated graphics on your CPU and motherboard, set this setting to “Onboard,” it can net you 0.13 seconds faster boot time. If using a dedicated GPU, however, resulted in the same time whether or not this setting was set to Onboard or to PCIe instead.
- PCIe Link Speed - Set your link speed to Gen3 if you are using a PCIe SSD in one of your PCIe slots. Manual setting this cuts down on initialization during POST and speeded up boot by about 0.1 seconds with our Intel Optane SSD 905P.
- PCI Express Native Control and ASPM Support - Disable Like CPU C States Support, we disabled ASPM and Native Control. These are power savings features and can add latency during boot and within your normal use.
- We disabled other features including: VT-d, Above 4G Decoding, IGPU Multi-monitor, Onboard LAN, and Onboard HD Audio. We also manually set Share Memory manually rather than leave it on auto. Some motherboards may also have Bluetooth/Wi-Fi/Secondary ethernet port controllers. These didn’t impact boot when enabled one by one in testing, but the sum of all may have. For normal users, however, you are most likely going to want your audio and LAN unless you have separate add-in cards for those.
Storage Configuration
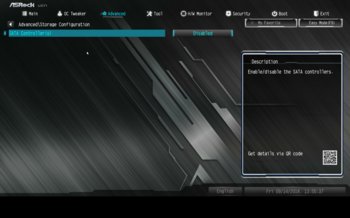
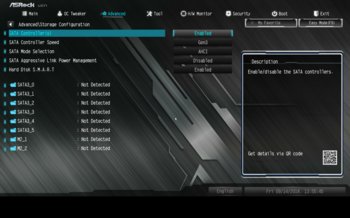
- SATA Controller: Disable, if applicable. If you are not using a SATA device at all and are booting from a fancy NVMe SSD like us, disable your SATA controller. It will net you 0.10 seconds faster boot time. Also, plugging in an HDD as a secondary drive, rather than an SSD, can cause a slightly longer delay during boot.
- SATA Mode: Set to AHCI. If using a SATA drive, set your SATA mode to Advanced Host Controller Interface (AHCI) or (Redundant Array of Independent Disks) RAID mode under storage configuration, usually in the advanced tab of the UEFI. This enables better performance over Integrated Drive Electronics (IDE) mode, if that option is still in your specific UEFI. Newer models won’t even include IDE mode anymore.
Super IO
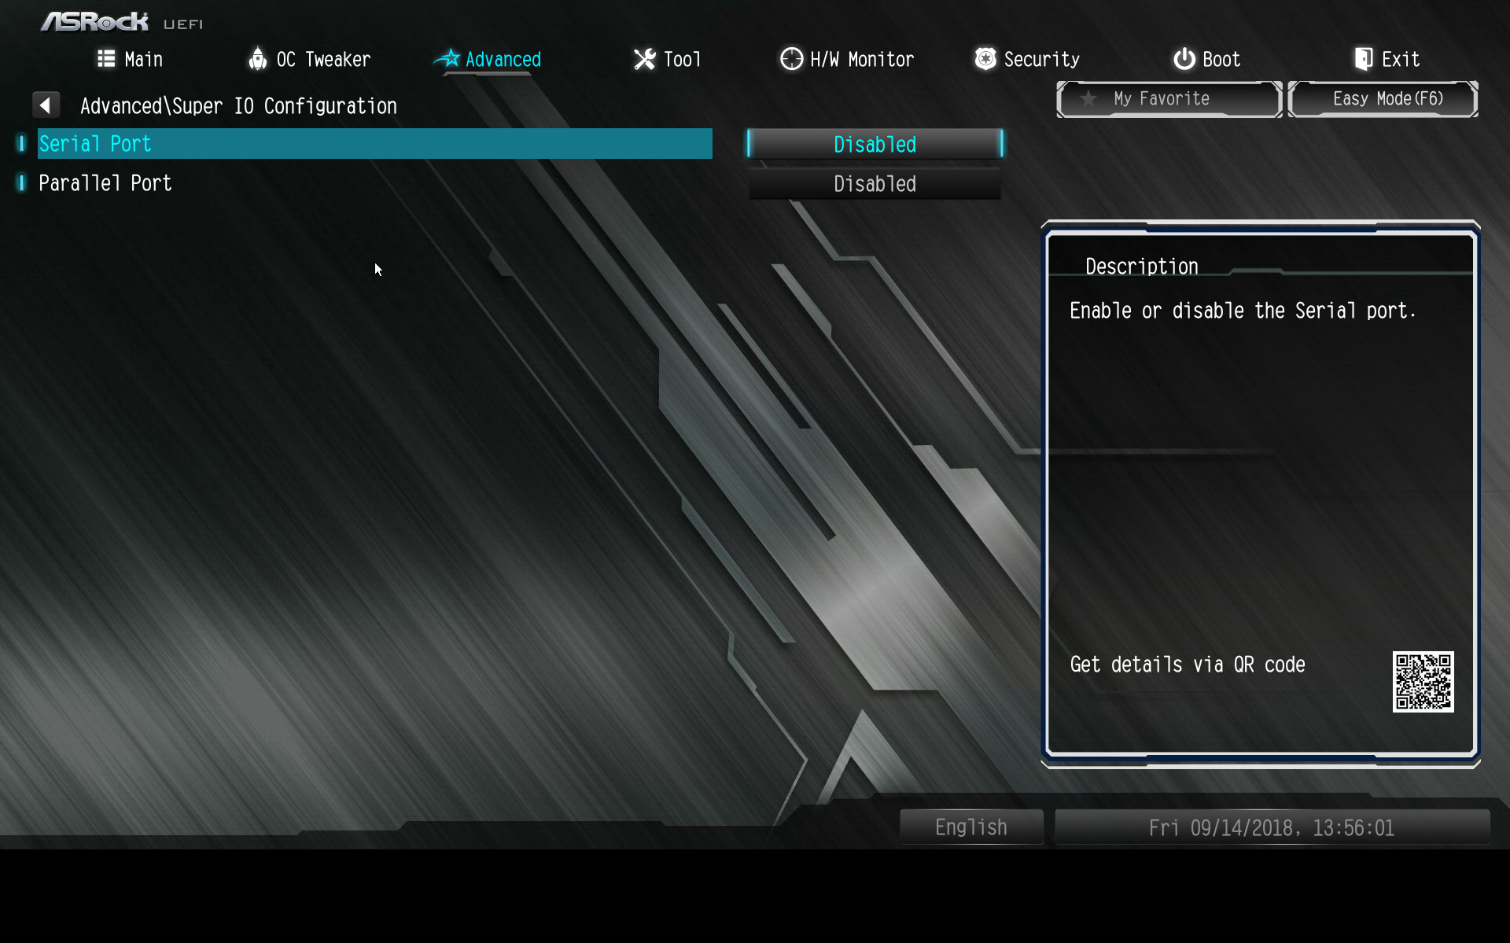
Serial Port and Parallel Port - We disabled both on our motherboard since we do not use them. Disabling this extra feature saved us 0.1 seconds on boot.
Boot Tab
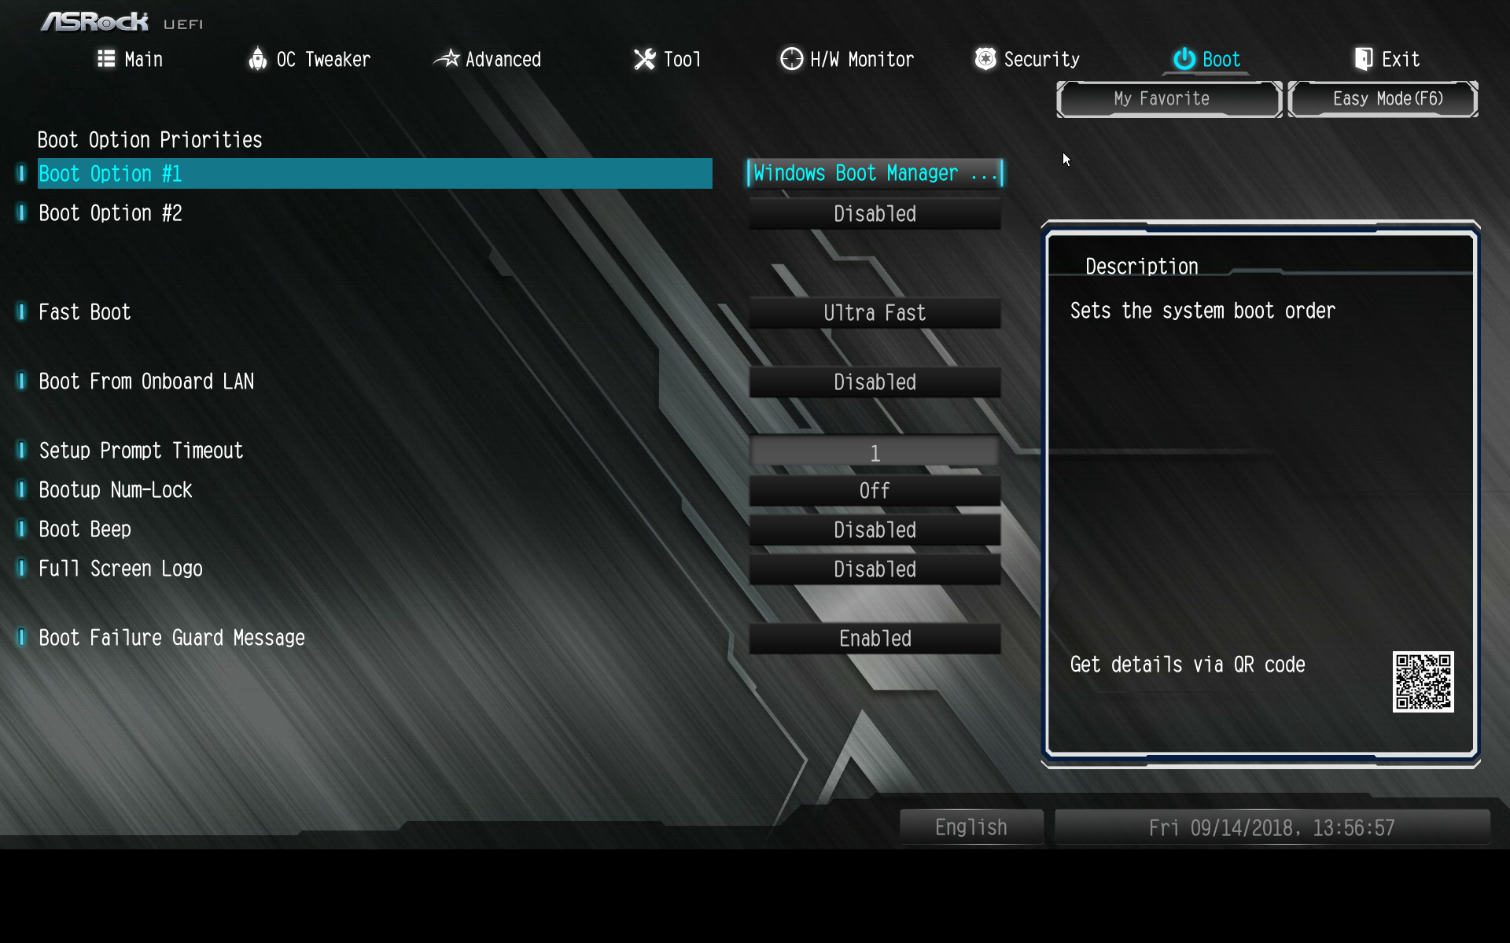
- Fast Boot (Ultra-Fast Boot): Enable if your hardware is UEFI and GOP compliant. If your graphics card is not compliant, you will have to reset your CMOS to get back any display output if your system black screens after configuring the setting. Again, it is important to save your system settings profiles before and after making changes.
- Compatibility Support Module (CSM) - Disable. Enabling Fast Boot should disable it for you, but if not, do it manually. Note: If you need to boot from a support USB or cloning software that isn’t yet UEFI boot compatible, you will need to disable fast boot and enable CSM to boot from it.
- Boot Options - Disable all boot options but OS drive, including Boot from LAN. Auto selecting the boot device can add time to your boot or the motherboard would cycle through the boot options until it matches with the proper boot device.
- Boot Beep and Bootup Num-Lock - Disabling these actually makes a difference. It can decrease boot time by as much as 0.05 seconds from boot, even though both these features are quite useful.
- Disable Full Screen Logo and OpROMs - The Full Screen Logo and loading OpROMs can increase your boot time. Disable them if you do not need to access any OpROMs, you can always go back and enable these settings if you need to configure a device like a RAID card.
- Setup Prompt Timeout – Set to 0. This is the delay time the UEFI will sit and wait for you to enter the UEFI before it tries to boot from the first boot device. The shorter the time, the faster it will boot. Of course, if you want the chance to hit a key to get into your UEFI setup, set this to 1.
OC Tweaker Tab
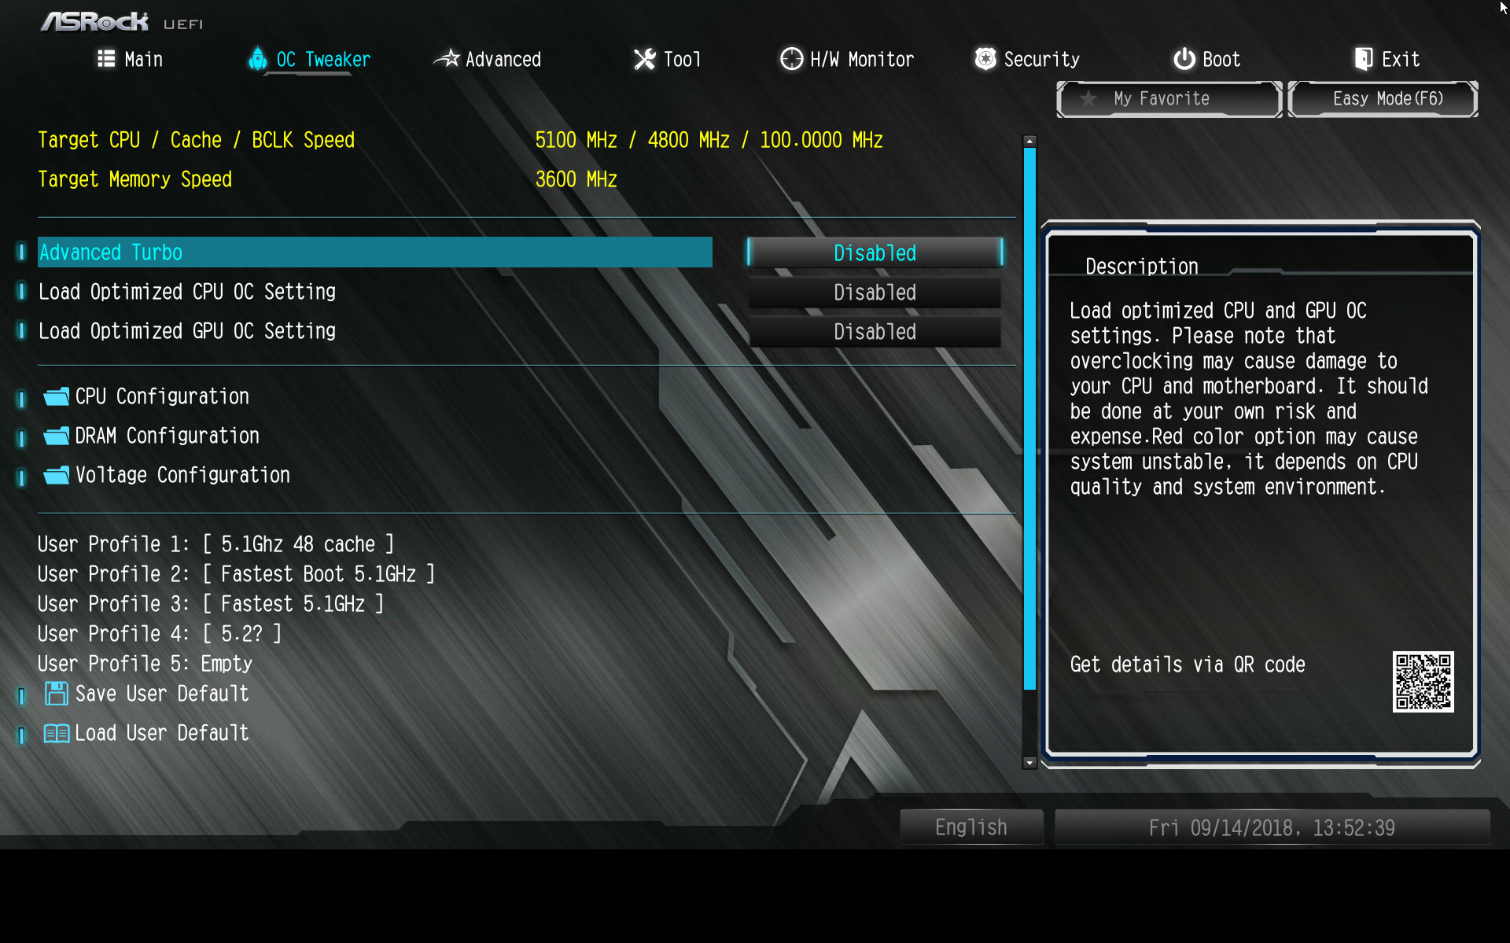
If your system supports overclocking, you should have this sort of tab for it. Here you can set up your CPU and RAM speeds, voltages, and other advanced settings.
CPU Configuration
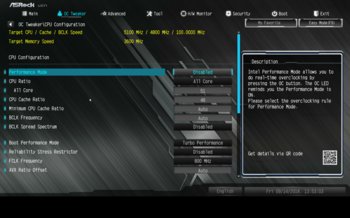
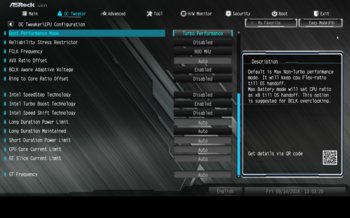
- Boot Performance Mode - Set to “Turbo Performance” if you have it and are not overclocking or if you are overlocking by using turbo boost technology - just as with overclocking (which we will cover shortly), this will help to cut down on boot time by having the CPU run at turbo mode and not the base frequency during boot. But, you need the next setting enabled to take advantage of it.
- Intel Turbo Boost Technology - This setting makes the processor run above the base operating frequency when the OS requests more performance. Enable it. Obviously, this setting only applies to Intel processors.
- Enhanced Intel SpeedStep Technology (EIST) - This is power and thermal management feature that downclocks the CPU at idle/low load to save on power and lower thermal load. We disabled it to ensure maximum performance.
- Intel Speed Shift Technology - An updated version of EIST, it provides faster latencies during the frequency transitions since it is controlled by the CPU rather than OS like EIST mostly is. Again, we disable it for maximum performance.
DRAM and Voltage Configuration
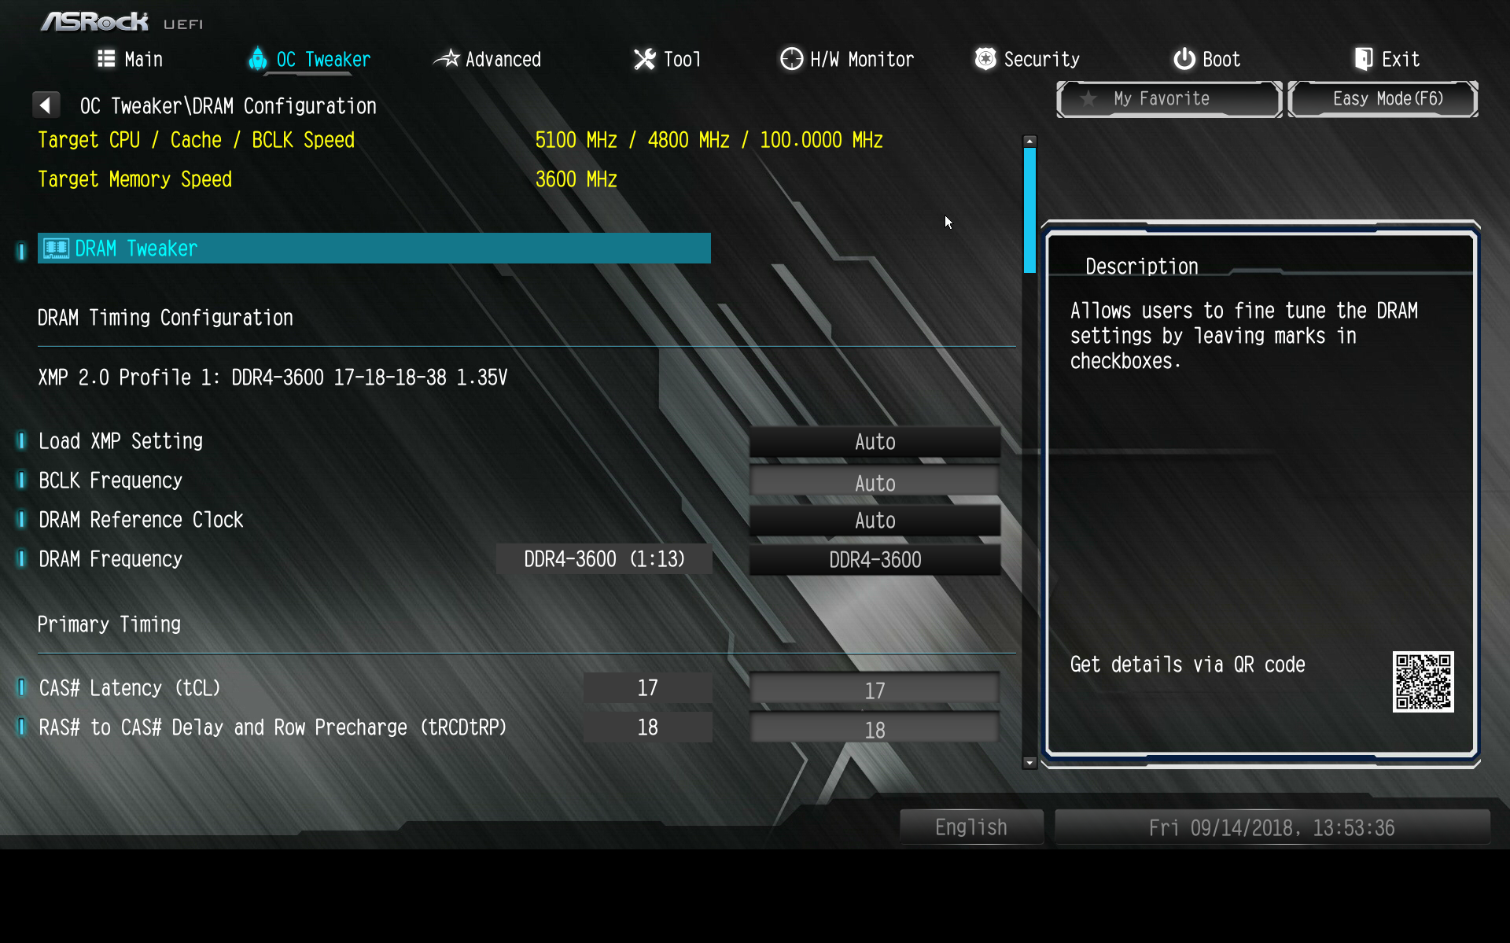
On a rather interesting note, do not just select the XMP profile for your DRAM. Instead, set your DRAM frequency, timing, and voltage manually. Manually setting these for our G.Skill Ripjaws X 3600MHz kit sped up boot time by 0.80 seconds vs just relying on XMP to input the settings automatically.
Current page: Software
Prev Page Introduction and Hardware Setup Next Page Overclocking Your CPU and RAM
Sean is a Contributing Editor at Tom’s Hardware US, covering storage hardware.
-
David_693 Link and info for the Intel 660p SSD are for the 512GB model NOT 1TB, $99 was too good to be true!Reply -
Peter Martin you know, I put an 850 evo in my kids asus laptop at it boots as fast or faster with fast-boot. we hit the button and it's almost instant. he loves that stupid laptop. when he got it, it had a 5400 rpm in it... lol, he hated it. i could not believe it once I installed the ssd and windows 10 fresh. I was stunned. i did a bunch of timings with my stopwatch, not that accurate but still, 3-5 seconds boot to usable is amazing.Reply -
Colif Software tab only talks about bios, mentioning you set up netplwiz in win 10 to auto login would have helped or PC wouldn't be getting to desktop in that speed :)Reply -
davidgirgis Here's How I rebooted Windows 10 in 4.5 Minutes:Reply
(Now, Beat Me)
2012 13" Macbook Pro 9,2
Windows 10 Pro via Boot Camp
Restart from Desktop to Desktop in 2:29
Not usable until the 5400 rpm hard drive goes down from 100% utilization at 4:27 -
davidgirgis Reply21349926 said:Does booting from a Win10 VM stored on a RAM Disk qualify? :)
Yes. You qualify because you used a combination of Hardware and Software. Albeit, non-traditionally. -
maestro0428 Great article. Somethings I can try to speed up my boot times, although I typically leave my PC on 24/7.Reply
