System Builder Marathon Q4 2014: $1600 Performance PC
Component Installation And Overclocking
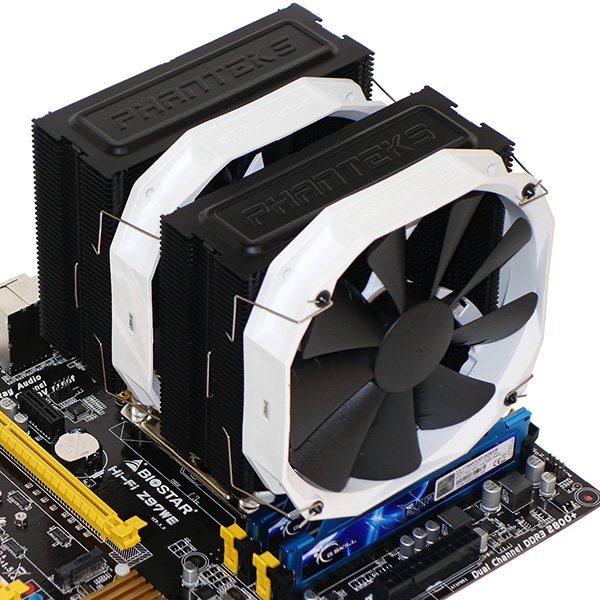
The installation guide of our Phanteks CPU cooler review provides all of the information needed to attach it to an LGA-1150 motherboard. Since I’d already forgone my selected G.Skill Ares memory modules in favor of the slightly cheaper (and better-rated) Ripjaws X, the forward fan was initially installed with its top protruding above the sink.
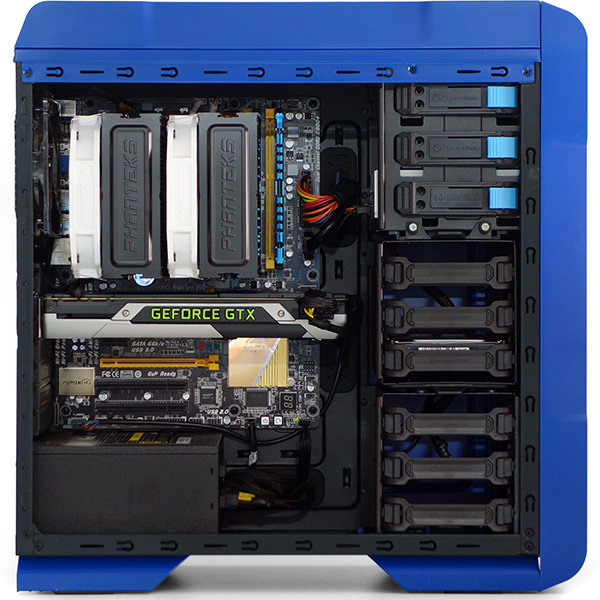
One wouldn’t expect that to cause any installation problems in an $80 gaming case, but I only paid $56 for this one. And it should cost $56, because that extra space didn’t leave room to close the side panel. Rather than take a hacksaw to the RAM, I reversed the fans.
I learned a long time ago that fans push air towards the center, but draw air from around the sides of the frame in a funnel-shape. That means they don’t draw air through a sink well, unless that sink is properly shrouded. Since this would reduce performance, I reversed the direction of both CPU fans and flipped the case’s exhaust fan around to act as a secondary intake. Two intake fans (one front, one rear) is still a viable (if imperfect) option since this case is also well-ventilated on top.
I also found that two of the Chaser A31’s exhaust fan holes were stripped during factory assembly, which is an expected defect in $56 (but not $80) cases. Reversing the fan gave me access to pristine plastic.
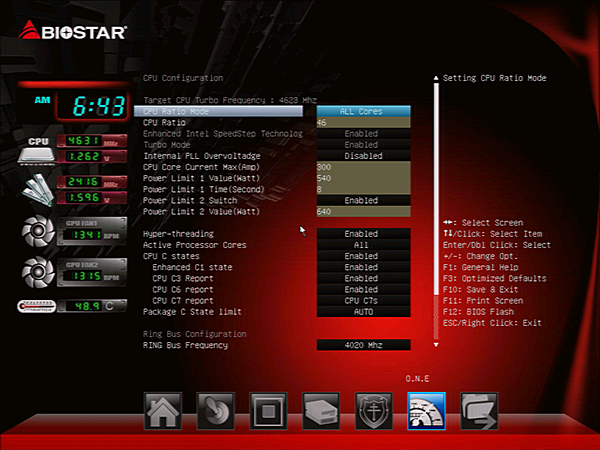
Initial delight that this CPU would easily clock to 4.70 GHz at 1.28V without crashing turned to frustration as the CPU got hot and began to throttle. A cool-to-the-touch heatsink and barely-warm motherboard was number 1 indicator that this CPU core wasn’t transferring heat properly between the core and its so-called “heat spreader”. Frustrated over thermal transfer promises broken by Intel’s “Devil’s Canyon”, I settled for 4.60 GHz at 1.26V.
That also helps answer the “Why so big?” question frequently asked by readers of our cooling articles. A relatively large decrease in surface temperature results in a fairly small decrease in die temperature. As for the idea that the stock cooler must have been good enough for the CPU’s rated 4.40 GHz, Intel Turbo Boost steps down as multiple cores are loaded, and motherboard-provided turbo boost enhancements (full speed with all cores loaded) often run up against thermal throttling in otherwise-stock systems.
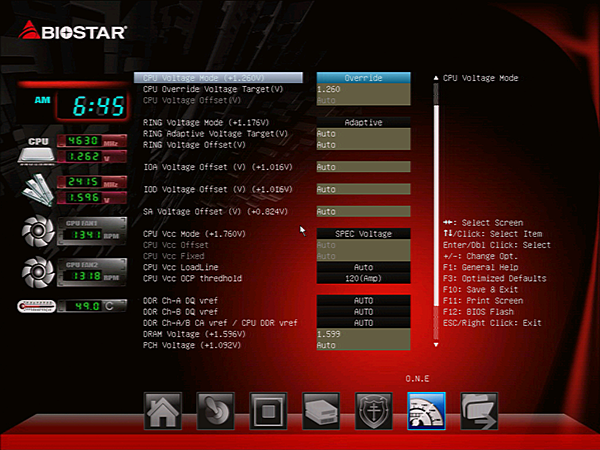
My fixed 1.26V core is barely higher than the 1.25V maximum the processor would have produced without intervention. That tells me I should have stuck to “adaptive” mode and “offset” voltage to reach my 4.8 GHz with two cores loaded and 4.6 GHz with four. Lacking the time to sort out a variable overclock, I’ll try to keep this in mind for my next build.
Get Tom's Hardware's best news and in-depth reviews, straight to your inbox.
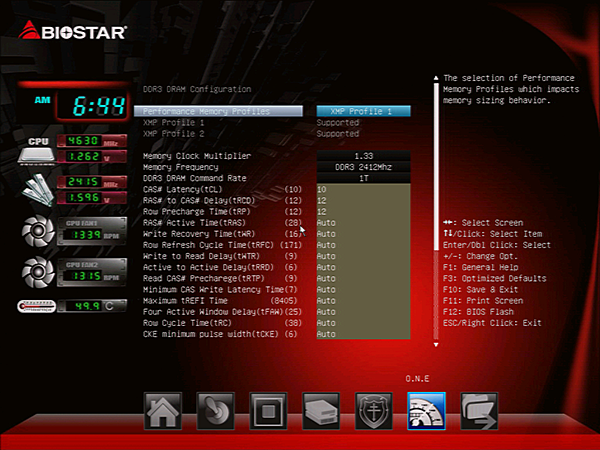
G.Skill’s DDR3-2133 CAS 8 modules overclocked to the same settings as its DDR3-1866 CAS 8 from my previous build. Unable to go any higher at the rated 1.65V, I tried lowering the voltage to reduce heat without altering my best-found frequency and timings, eventually discovering the same 1.60V optimum as used with the previous set. Though I was hoping the new modules would overclock better, this consistency saves configuration time.
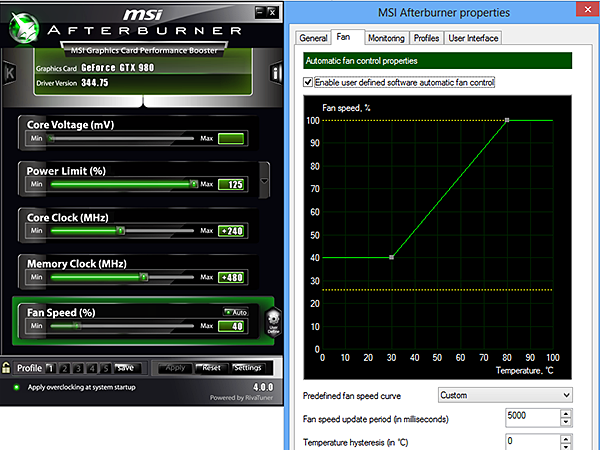
Graphics stability tests showed that this GTX 980 spent most of its time power-throttling, and increasing the power threshold provided a huge advantage in performance consistency. The GPU’s eagerness to run 250 MHz over-stock eventually gave way to a crash two hours into Grid 2, so I dropped it to 240 MHz. Similarly, graphics memory ran at the +500 MHz setting for a couple hours before producing artifacts in Battlefield 4, so I dropped it back to +480 MHz. Just as with those artifacts, these frequency settings are showing me patterns where none should exist!
Current page: Component Installation And Overclocking
Prev Page Memory, Drives, Case And Power Next Page How We Tested Our $1600 Performance PC-
cmi86 With $60 for a case you could have done so much better than that atrocious smurf turd. If you want me to spend $1,600 on a PC it better look the part as much as it plays the part. NZXT source 210, Antec GX-500, Bitfenix Neo-100, Rosewill Redbone, Thermaltake CA1B2/Commander/Versa and the list goes on and on and on... and on.Reply
BTW, These were only $50 cases netting you $10 on your budget. -
Onus Never mind the atrocious color, how was the case otherwise? Sturdy? Any sharp edges? Front panel cable lengths? Cable management space?Reply
You addressed my thoughts on the oversized PSU; if 650W of similar quality were not cheaper, I might have done the same thing.
I can't help but wonder how SLI of two lesser cards would have performed. Won't two GTX760s beat a GTX980? -
elbert I would have tried to wiggle around 2x 970's for about $660ish. Saved money on the heatsink with a CM 212 evo and a bit cheaper ssd.Reply -
Onus It might have been hard to squeeze out that $60 without raising eyebrows, but perhaps that might have been done. Use the same cooler Don used though;'no reason to waste money on the Hyper EVO. It is almost certainly a better cooler, but not worth the price difference compared to Don's or one of the other 120mm competitors (including the older Hyper212+).Reply -
UltimateDeep Disappointing, your could cut cost a bit more on the cooler or the case and go for a 128GB SSD and go for GTX 970s in SLI. You could get a LOT more with 970s in SLI.Reply -
jasonelmore Honestly, the whole reason to get a 4790K is because it runs 4.4Ghz Stock. With no overclock. 99% of motherboards will automatically overclock all 4 cores to 4.4ghz using Multi-core enhancement setting.Reply
Why void your warranty for 200mhz OC? not needed for such small gains. 4.4 is fast enough even for 4k gaming -
Vorador2 Spending almost 1000$ on the graphics card and CPU and pairing them up with just freaking 8 Gb of RAM is an insult. I know is the price to fit both on a 1600$ budget, but still...it feels completely unbalanced.Reply -
Crashman Reply
It's a fairly mid-grade case with rolled edges and so forth, and reasonable room for cables. Thermaltake's window is a little hard and thin, which is mostly a shipping issue, and I was a little disappointed that it was too narrow to hold this RAM/Cooler combo in its intended orientation. It would make a very NICE $60 to $70 case, but there are many better options at $80+ (its original price).14919563 said:Never mind the atrocious color, how was the case otherwise? Sturdy? Any sharp edges? Front panel cable lengths? Cable management space?
But it wouldn't have been $60. Remember, I ordered a $560 card and ended up with a $600 card. So going back to the planning stage, 2x 970's would have been $100 more.14920018 said:
It might have been hard to squeeze out that $60 without raising eyebrows14919897 said:I would have tried to wiggle around 2x 970's for about $660ish. Saved money on the heatsink with a CM 212 evo and a bit cheaper ssd.
Intel isn't tracking whether-or-not you overclock...but the reason to pick a 4790k over a 4770k is that, in my experience, Intel is tossing a lot of heat-problem cores into the 4770K parts bin.14920879 said:Honestly, the whole reason to get a 4790K is because it runs 4.4Ghz Stock. With no overclock. 99% of motherboards will automatically overclock all 4 cores to 4.4ghz using Multi-core enhancement setting. Why void your warranty for 200mhz OC? not needed for such small gains. 4.4 is fast enough even for 4k gaming

