How To Build A $750 Gaming PC
Our $750 Best PC Build provides excellent 1080p gaming and entry-level VR performance for an impressively low price. The Intel Core i5-7600K easily reaches 4.6 GHz with Gigabyte’s built-in CPU overclocking profile on the Z270P-D3 motherboard, and the Gammaxx 200T cooler has no issues dissipating the extra heat. Although the memory capacity is quite standard at 8GB, the speed (2800 MHz) is above average, and the RAM meets the minimum requirements for most VR and AAA games. The MSI RX 480 Armor 8G OC graphics card performs admirably with its 1291 MHz boost clock rate and 8GB of 256-bit GDDR5 clocked at 8000 MHz, according to MSI. It pushes over 60 FPS in some hard-hitting game titles at 1080p. It can even reach respectable framerates at 2560 x 1440, and you can turn down some of the more extreme detail settings or pair it with an AMD FreeSync display to smooth out the gameplay even further. The 520W SeaSonic PSU has no issues feeding the components the power they'll need. Storage is the only part of the build that seems to cut corners, and the choice of the Western Digital RE4 1TB drive (which is an enterprise HDD) was to keep the price under the $750 limit.
(Editors Note: Pricing listed below reflects current pricing, which may have fluctuated since the time the parts were chosen to fit within the $750 budget.)
Specifications
| "Lava Stream" by SR-71 Blackbird | |
|---|---|
| Case | Zalman Z3 ATX Case |
| Cooling | Deepcool Gammaxx 200T CPU Cooler |
| CPU | Core i5-7600K |
| Graphics | RX 480 8GB |
| Memory | G.Skill Ripjaws V Series 8GB (2x4GB) F4-2800C15D-8GVRB |
| Motherboard | Gigabyte GA-Z270P-D3 |
| PSU | S12II Bronze 520W |
| Storage | Western Digital RE4 1TB WD1003FBYX |
Now, we’ll show you how to assemble the $750 budget build Lava Stream.
The Case & Power Supply
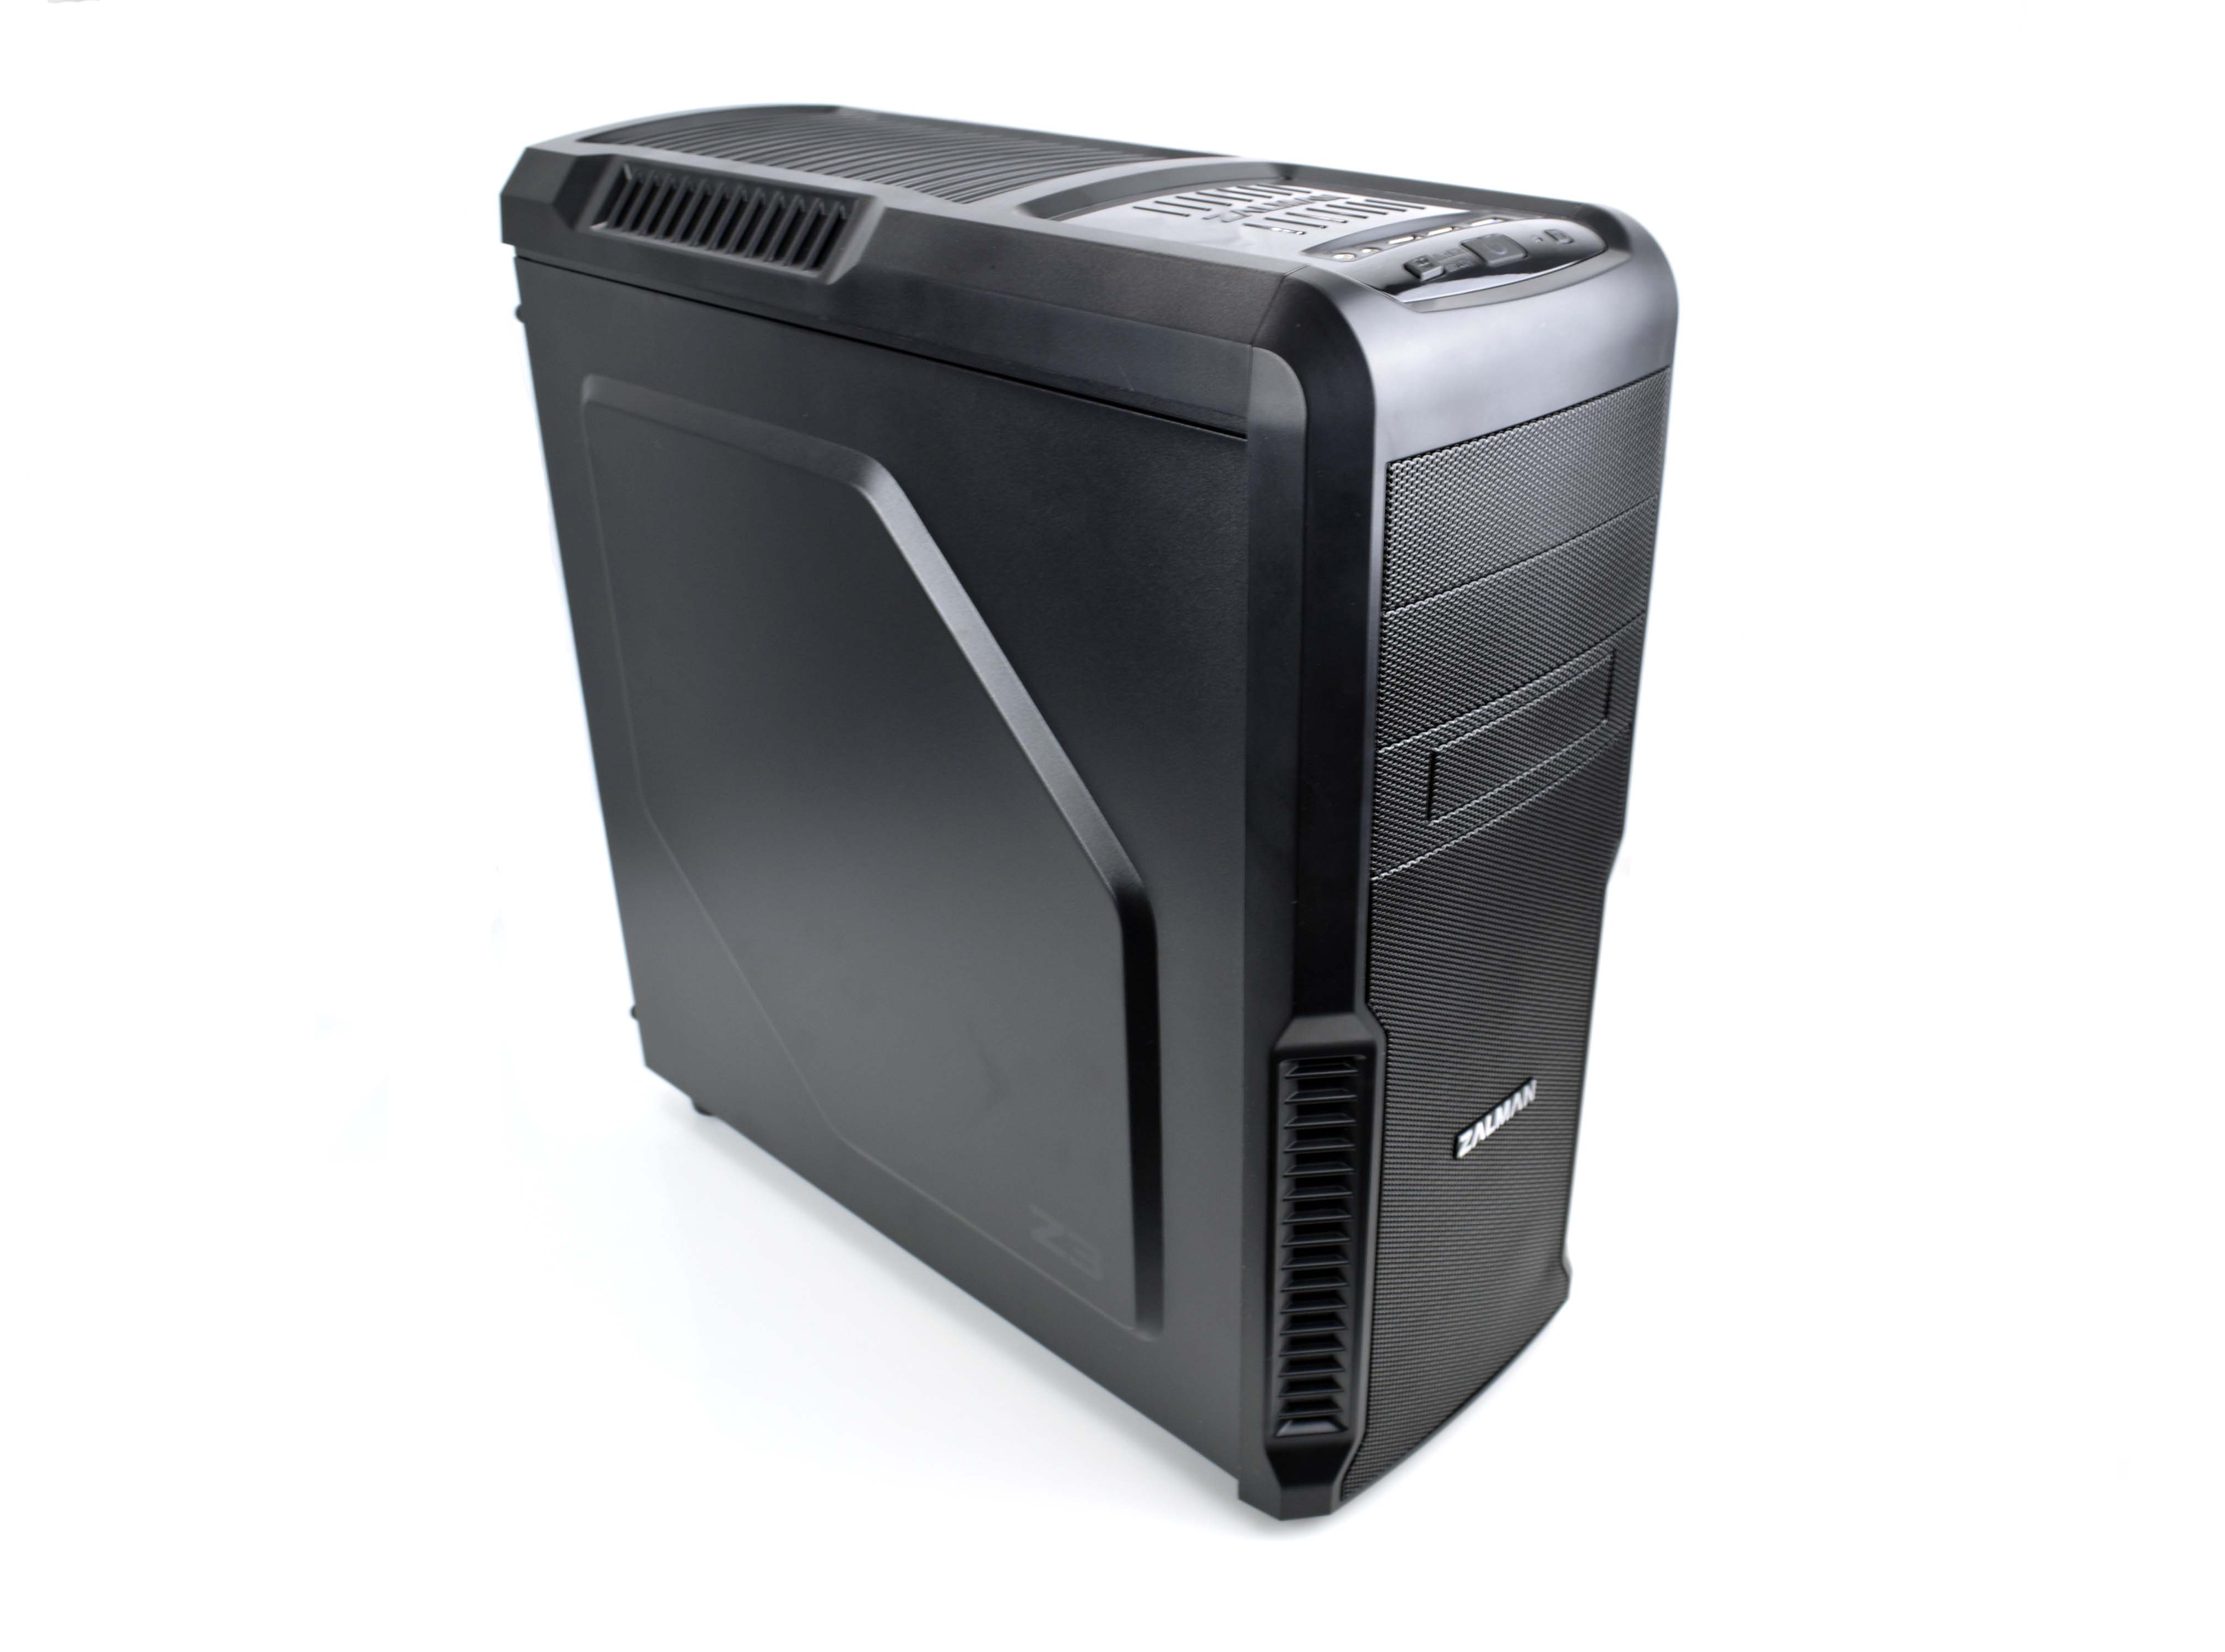
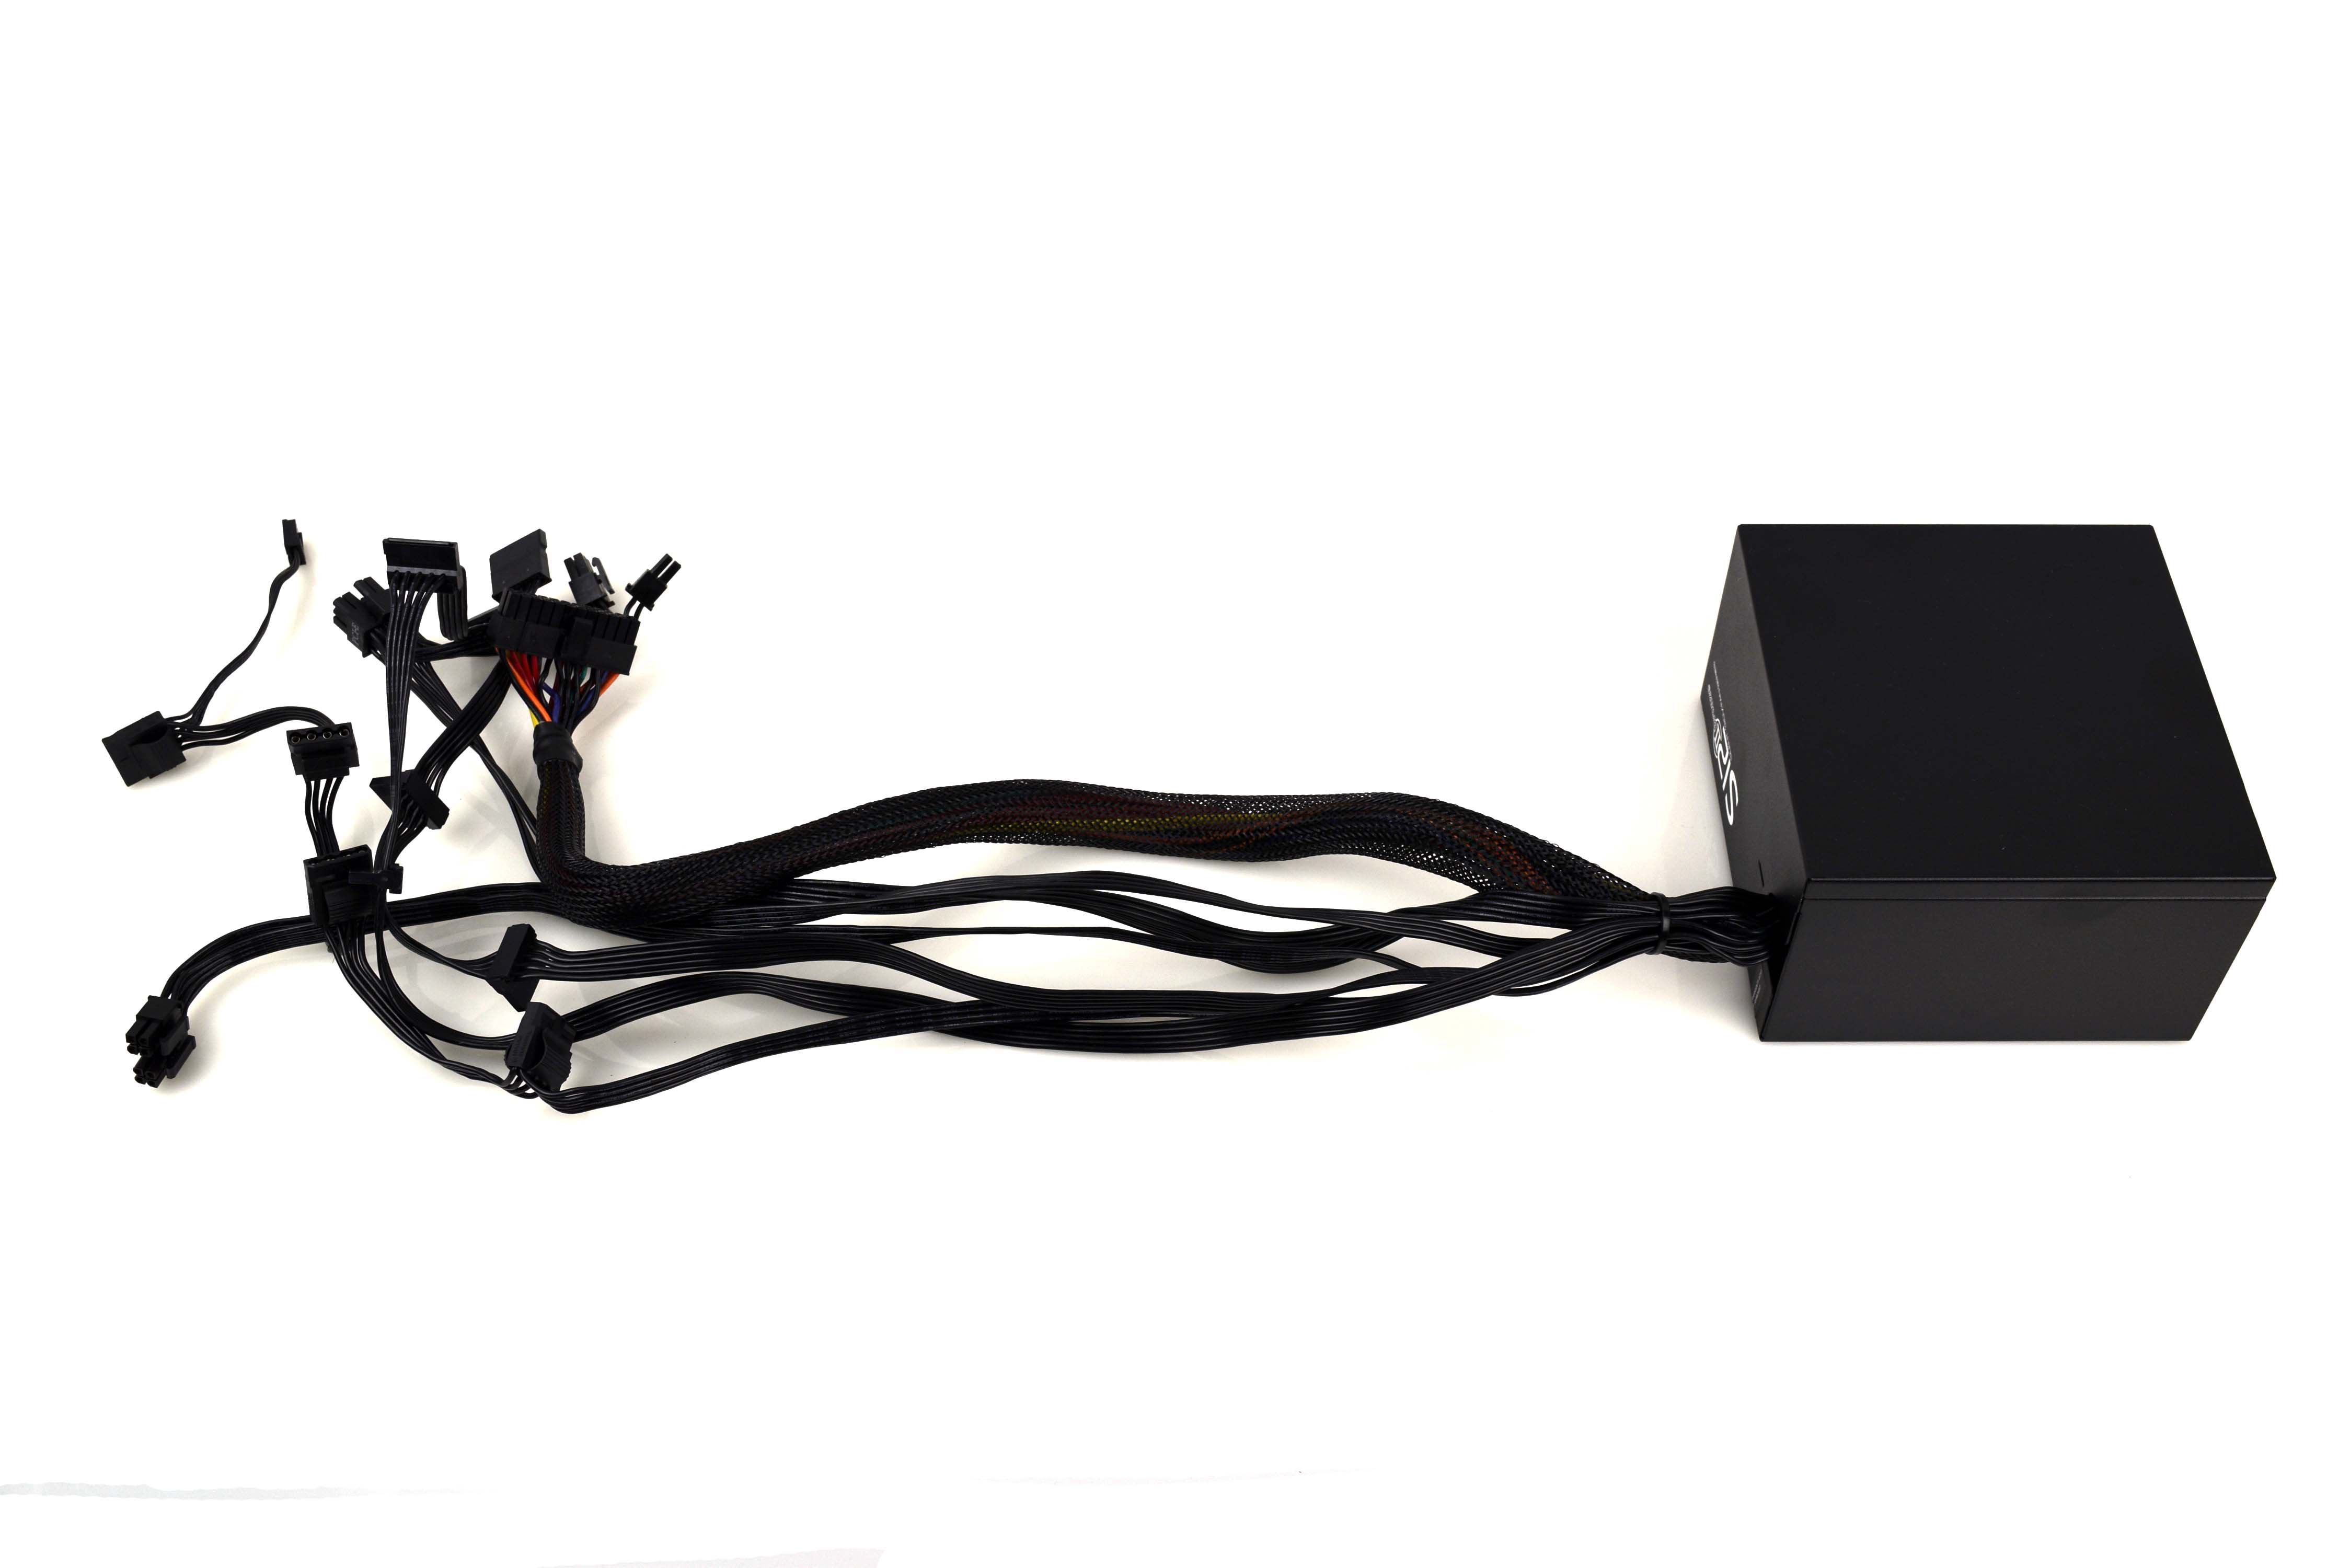
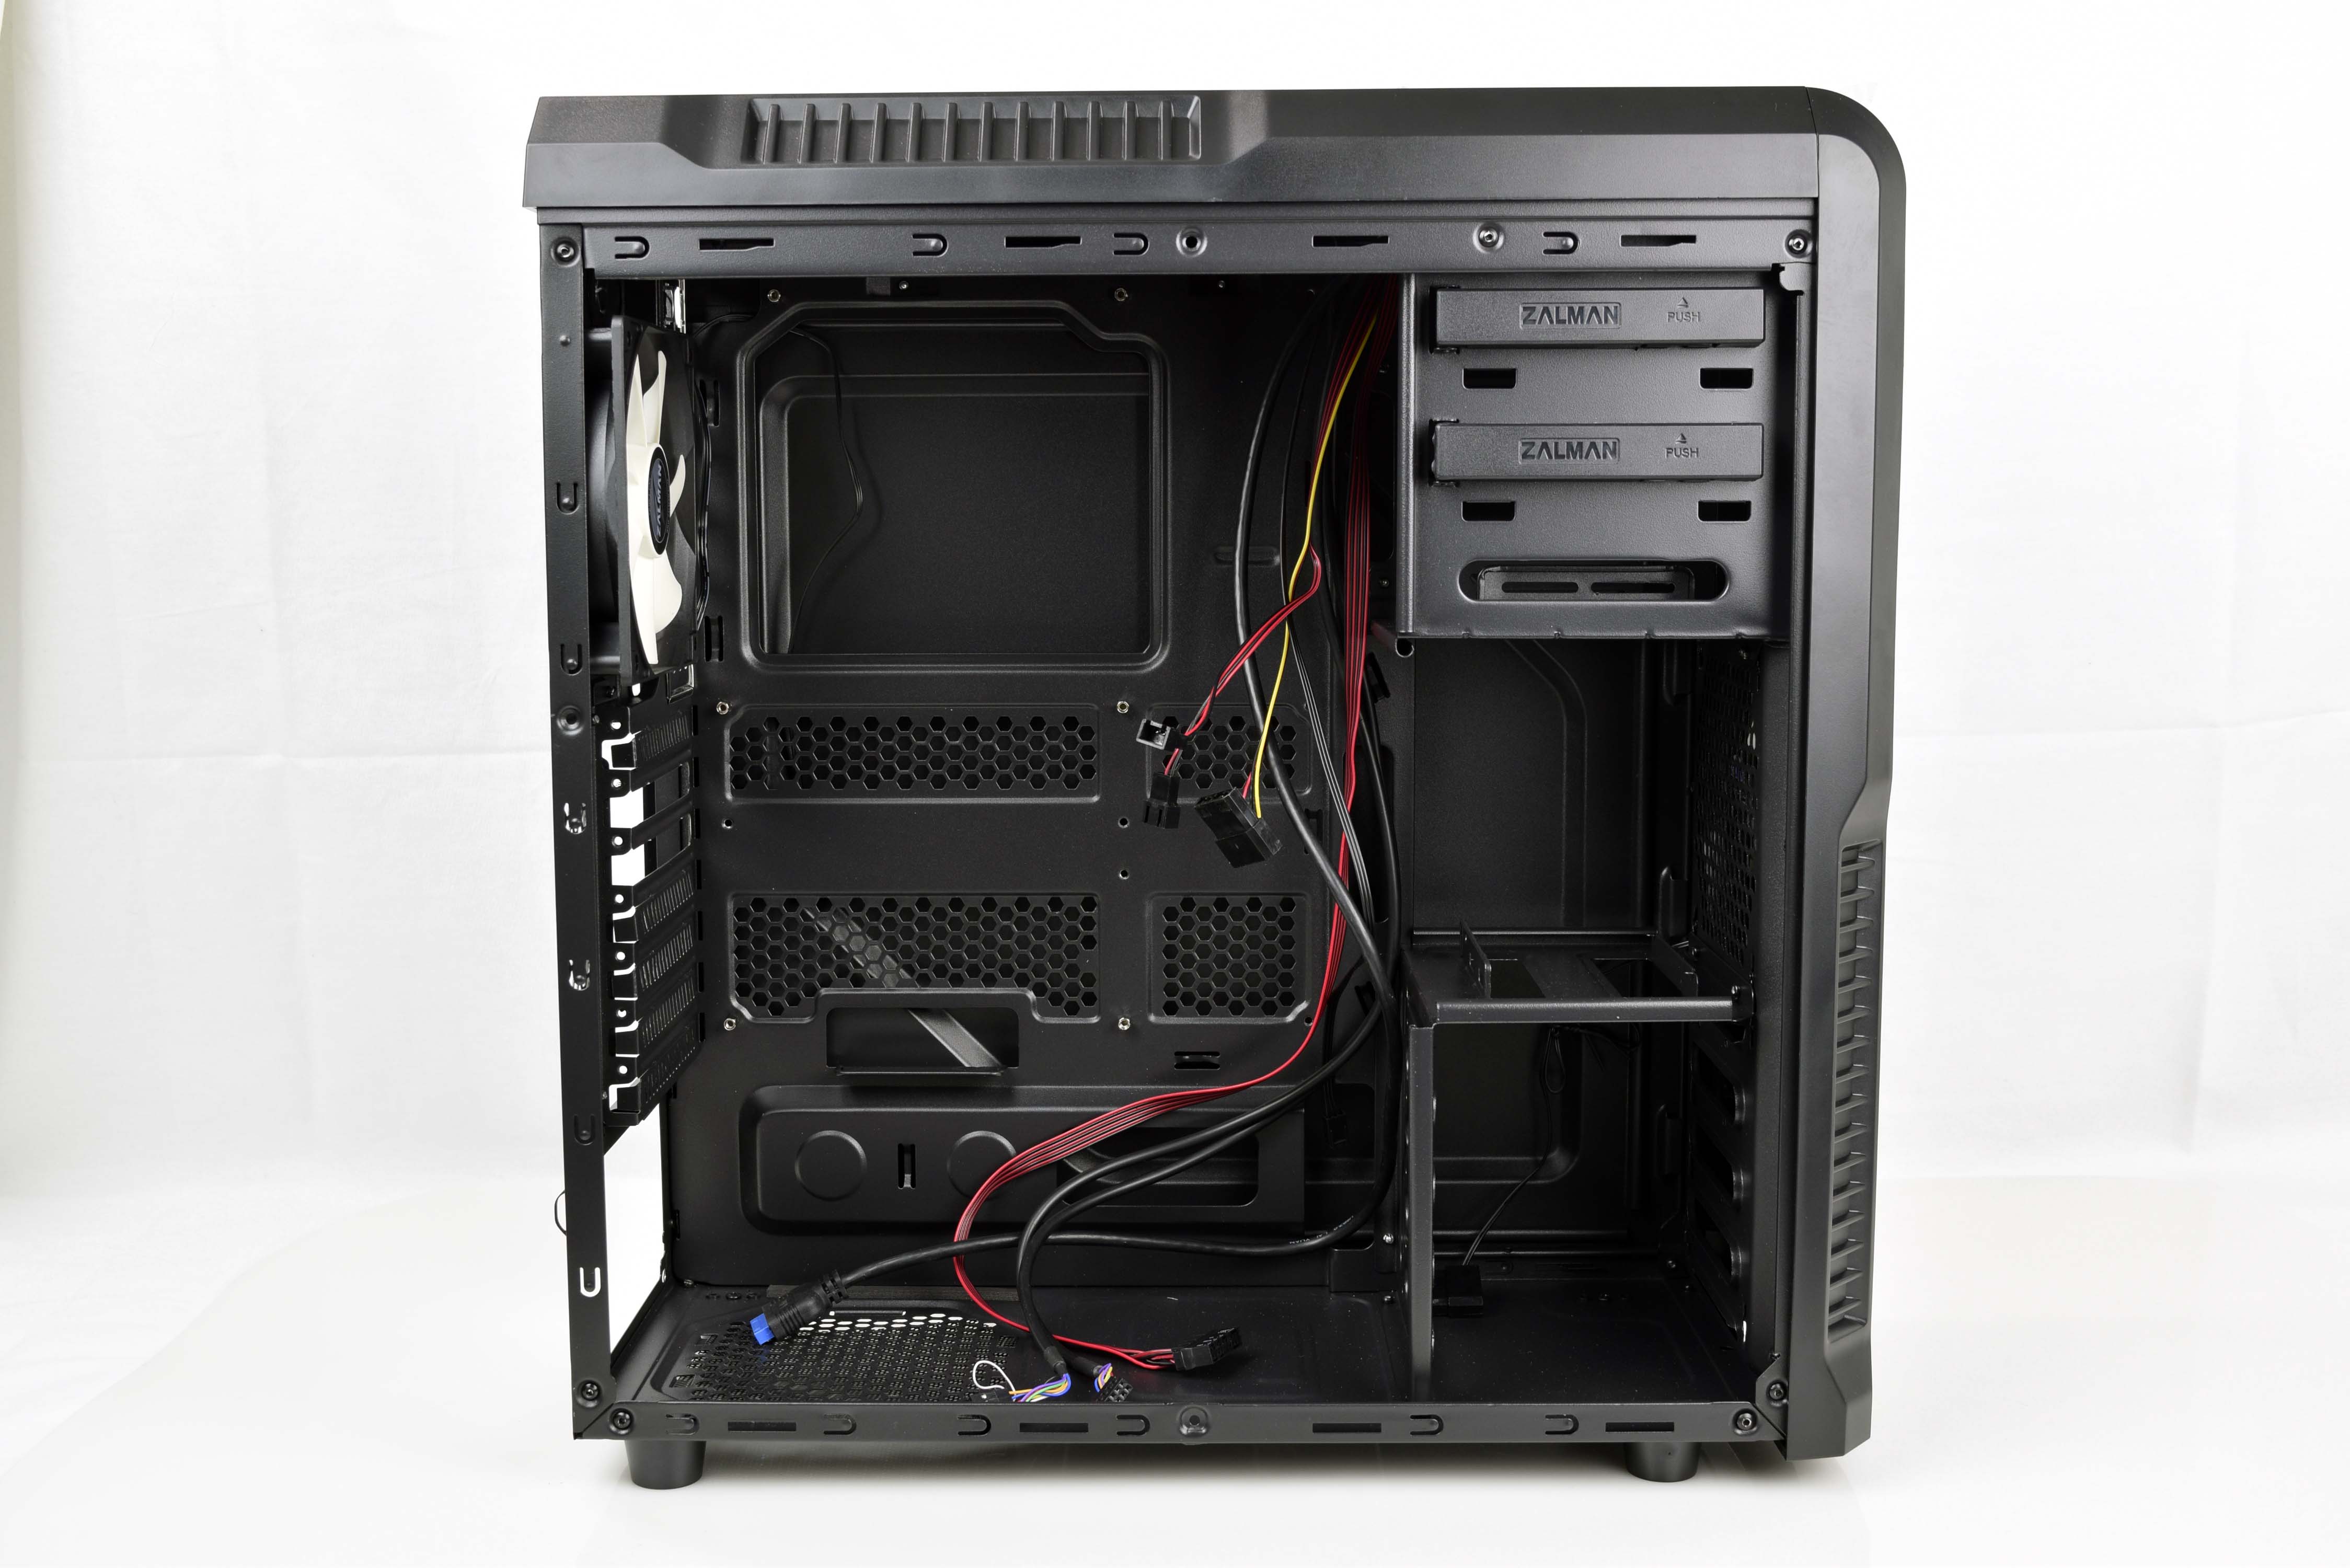
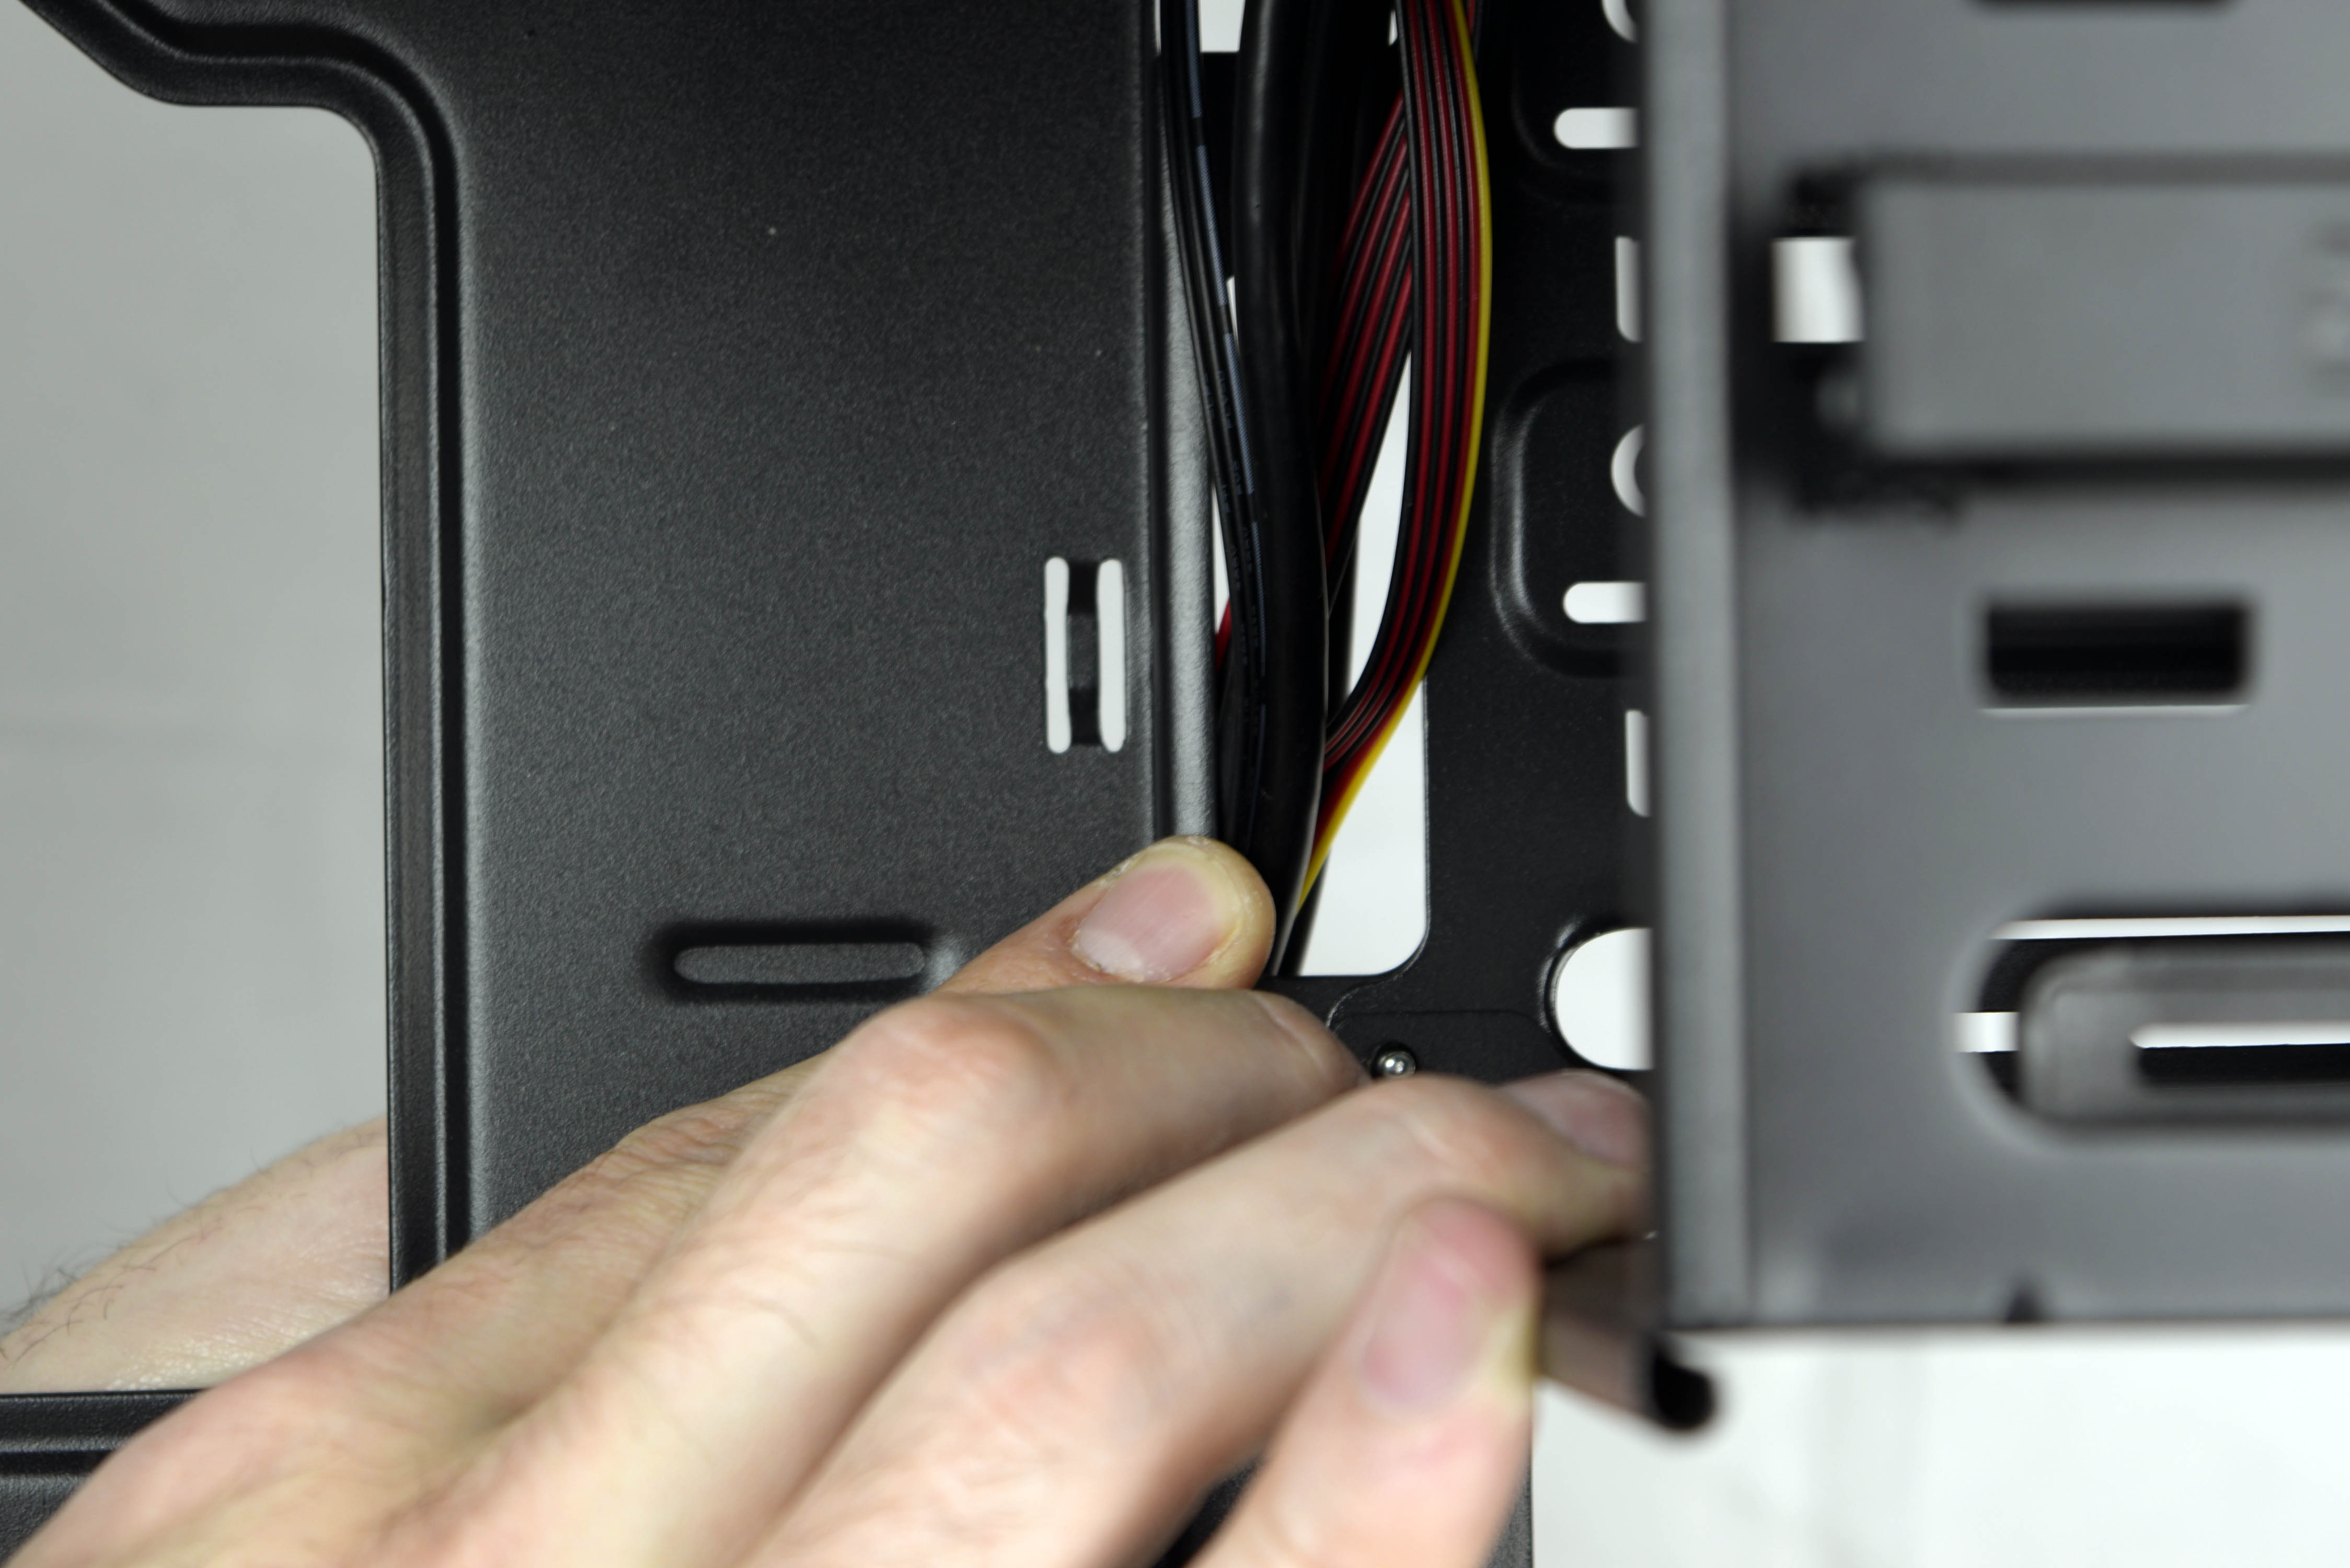
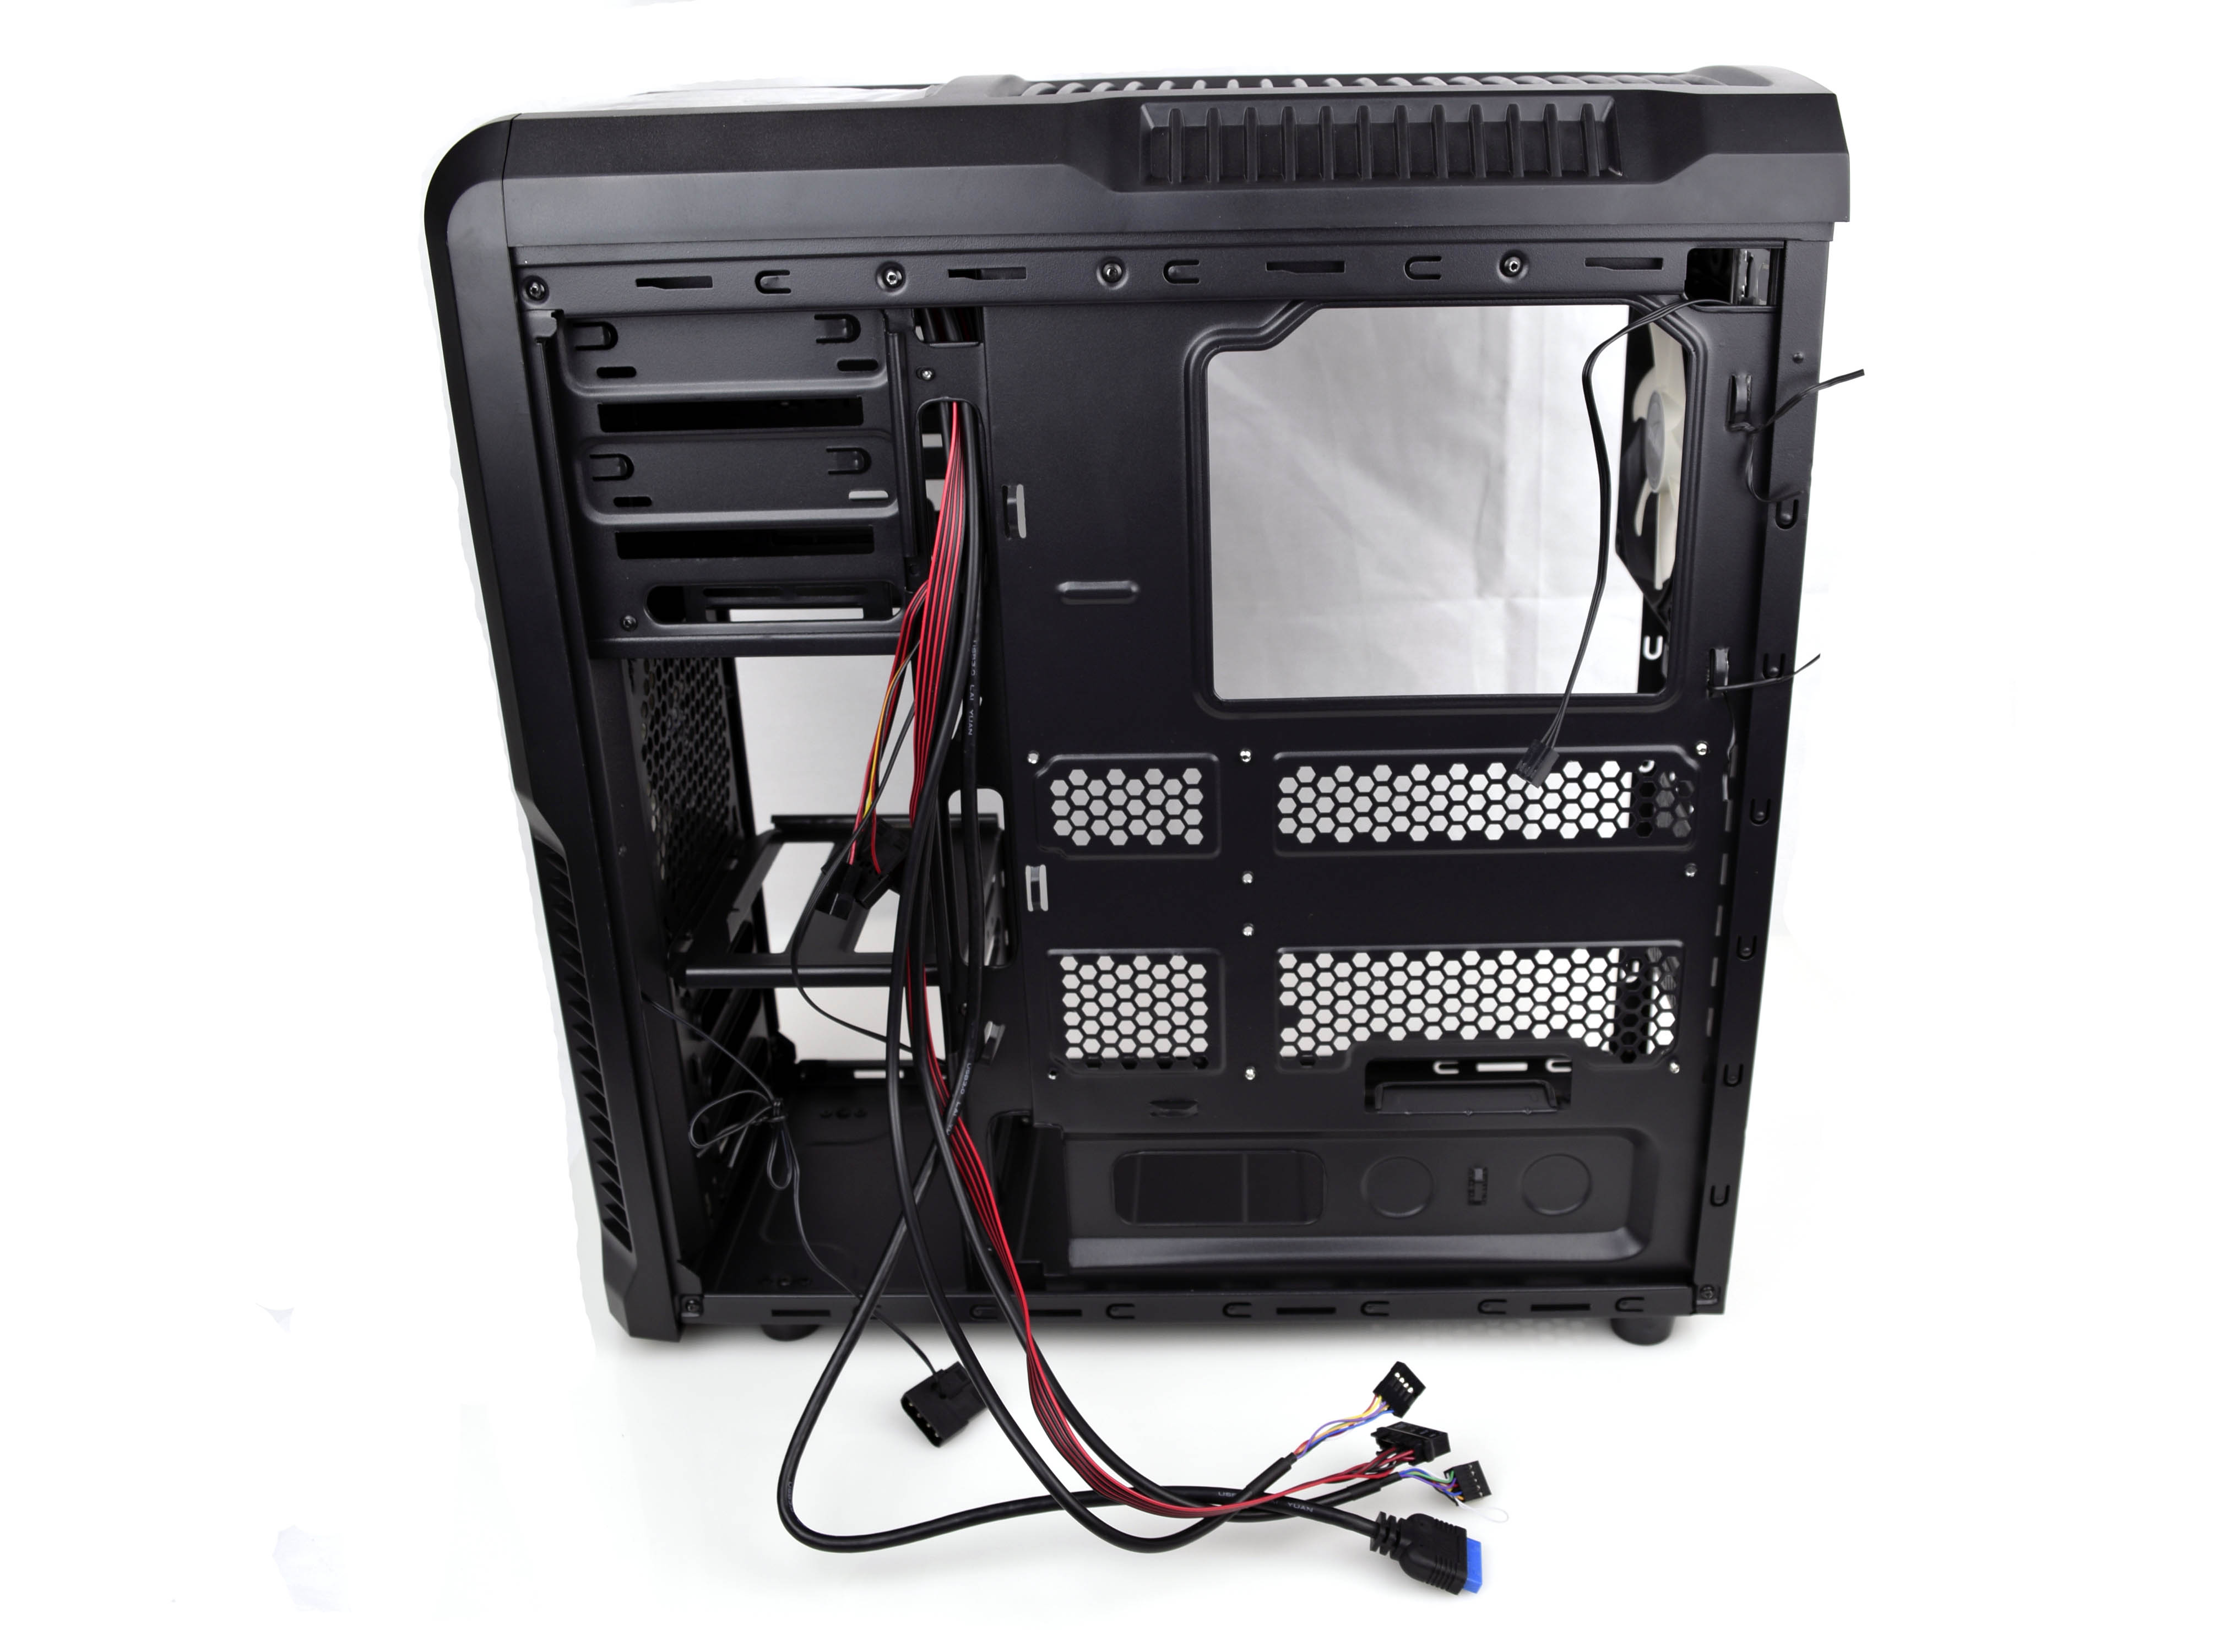
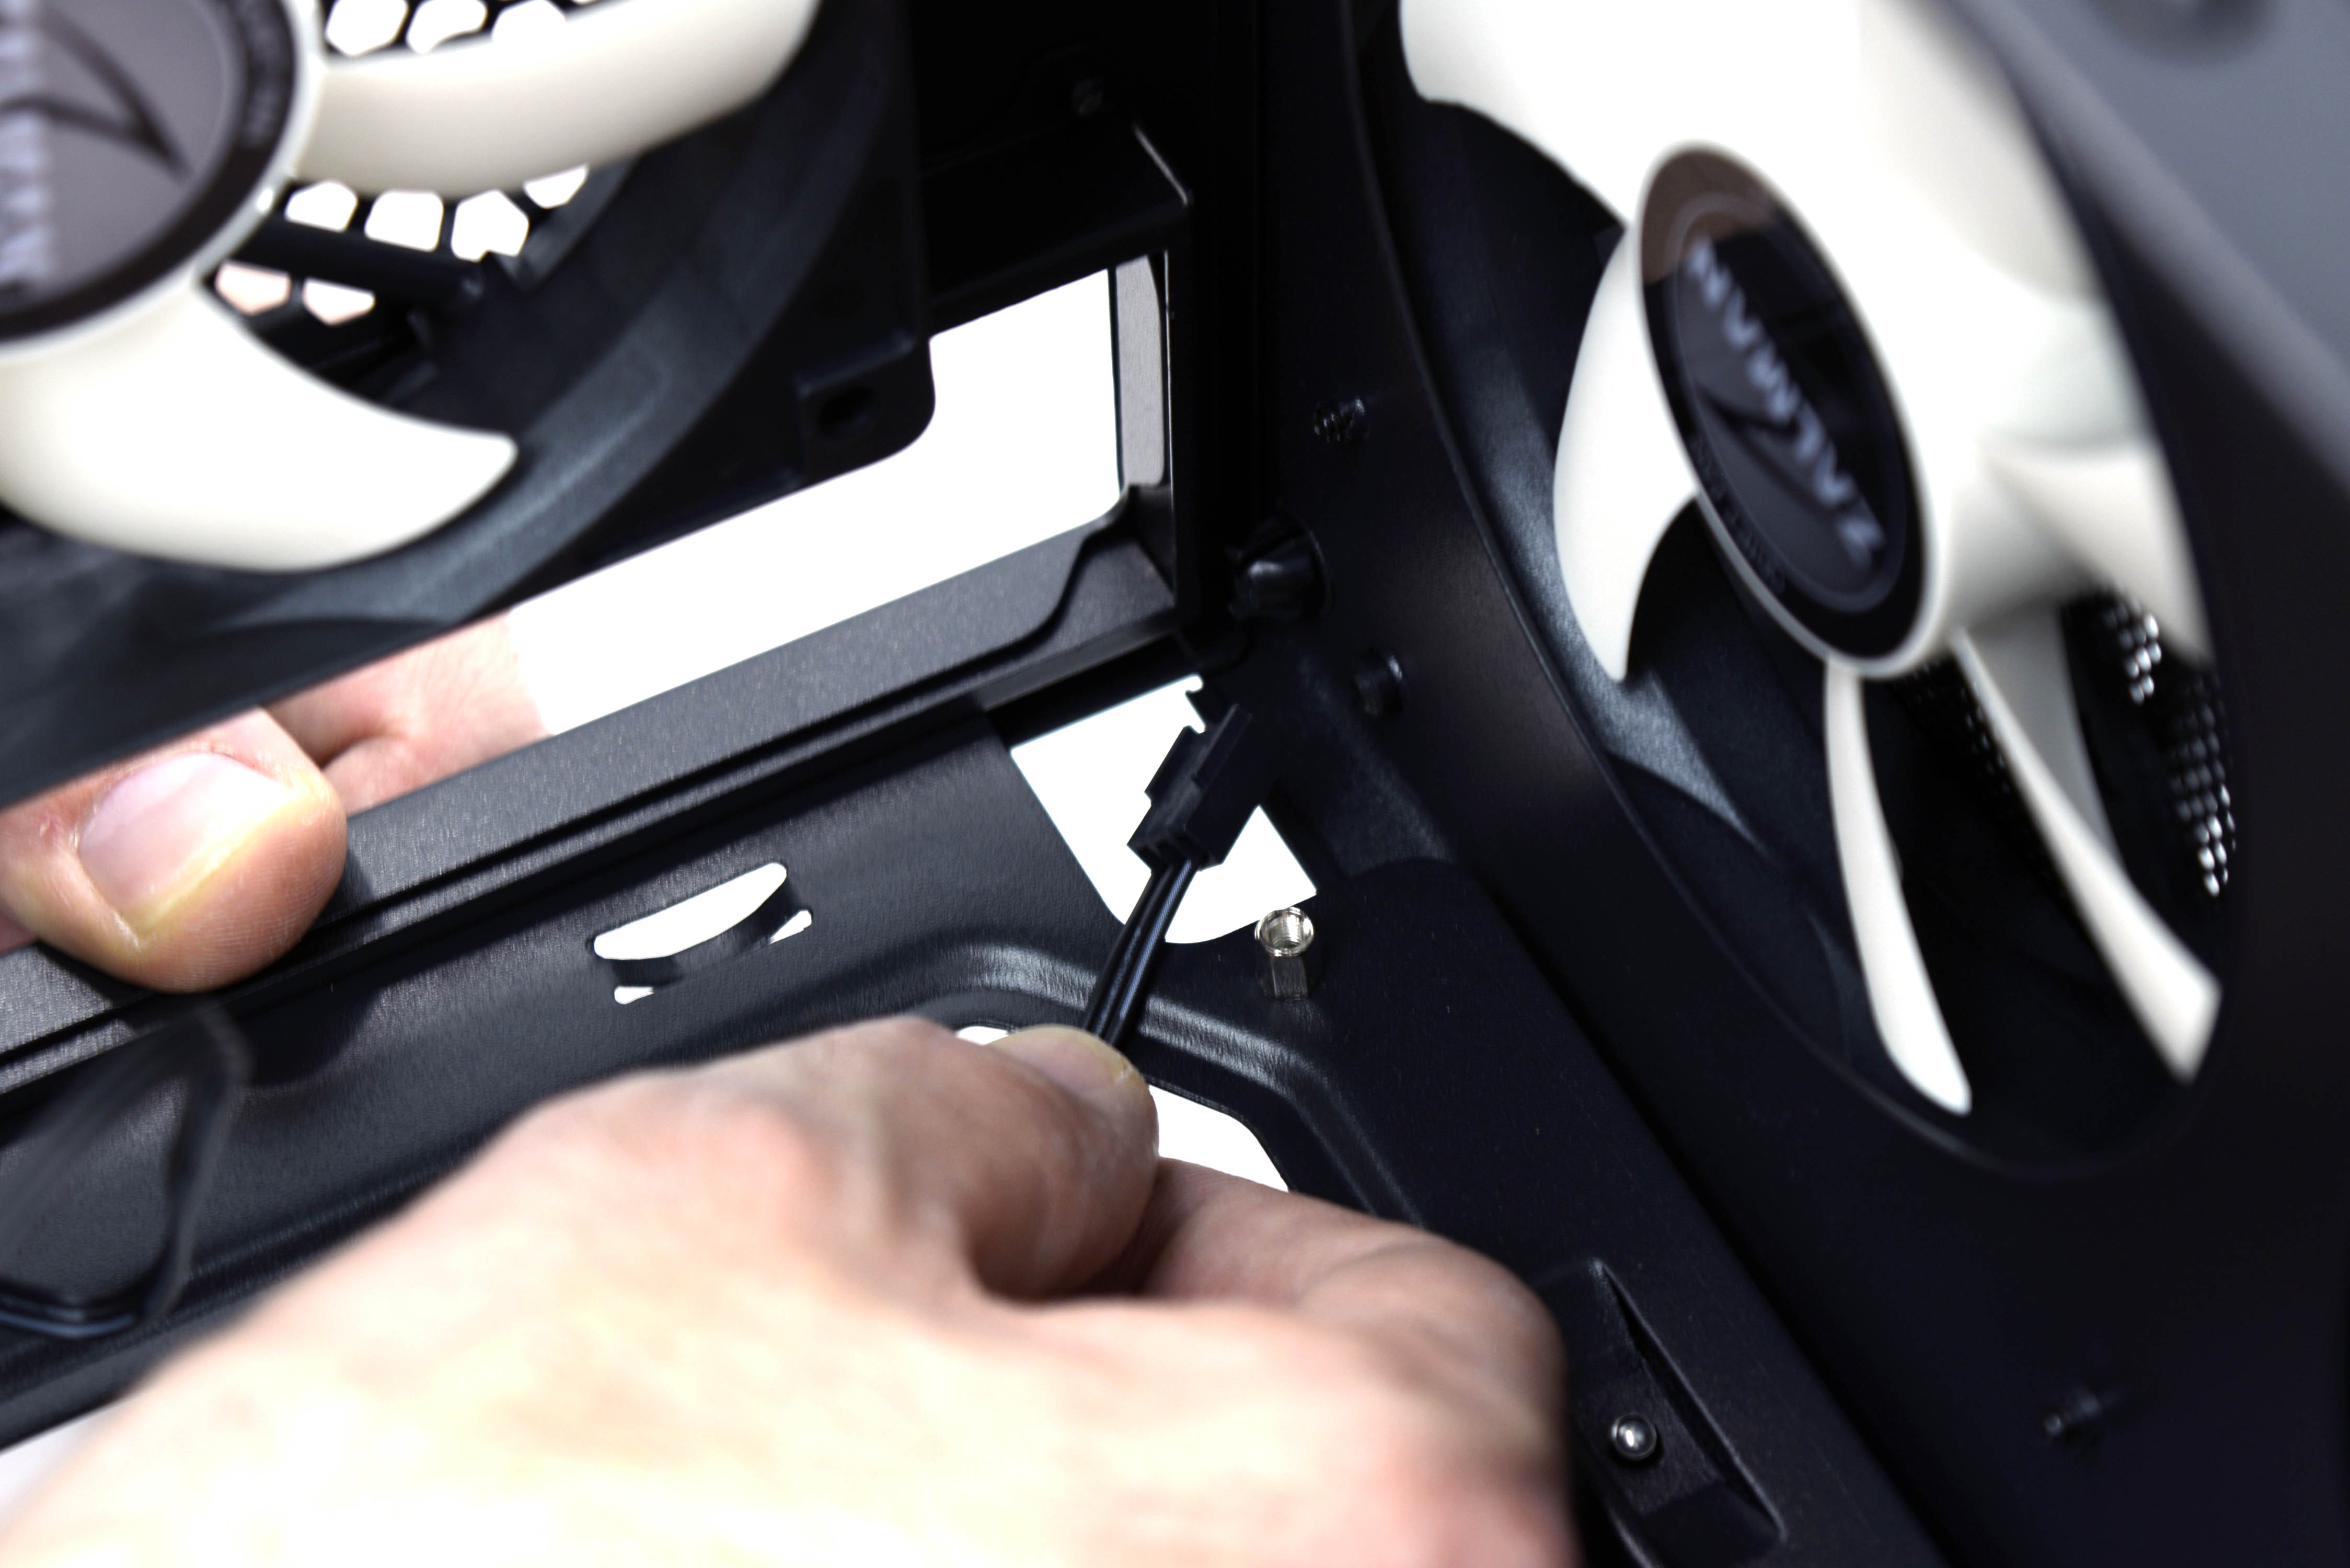
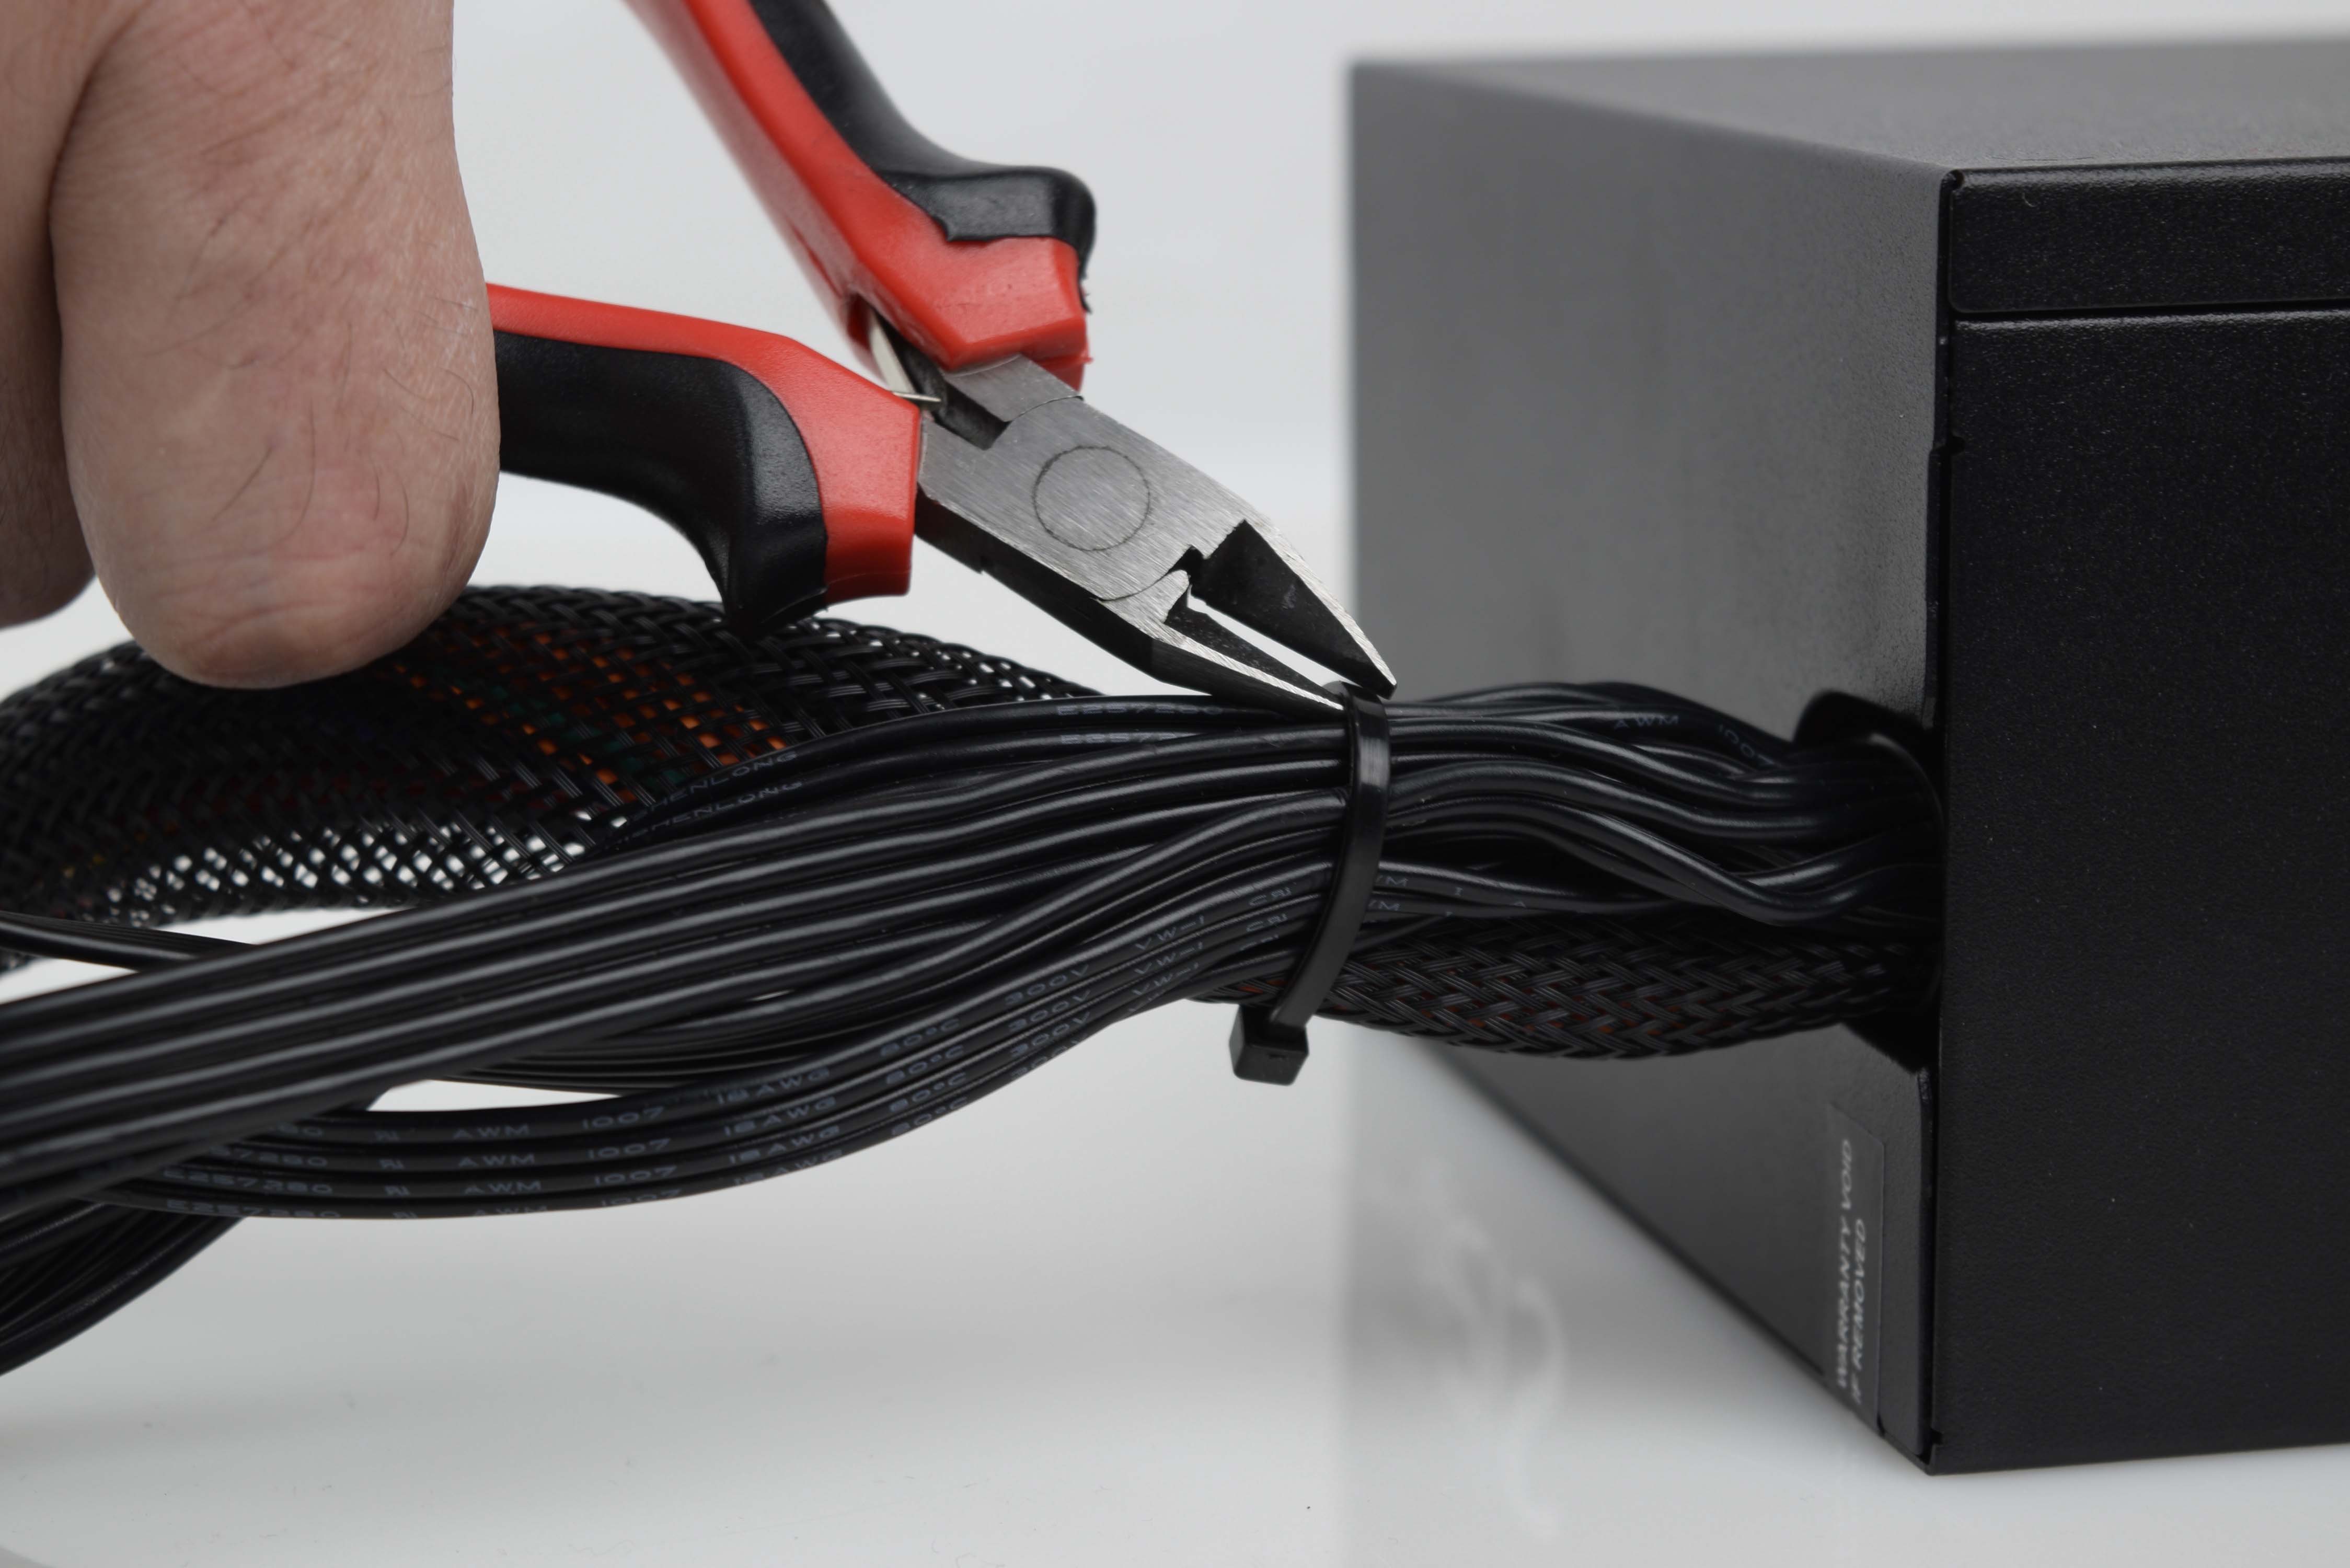
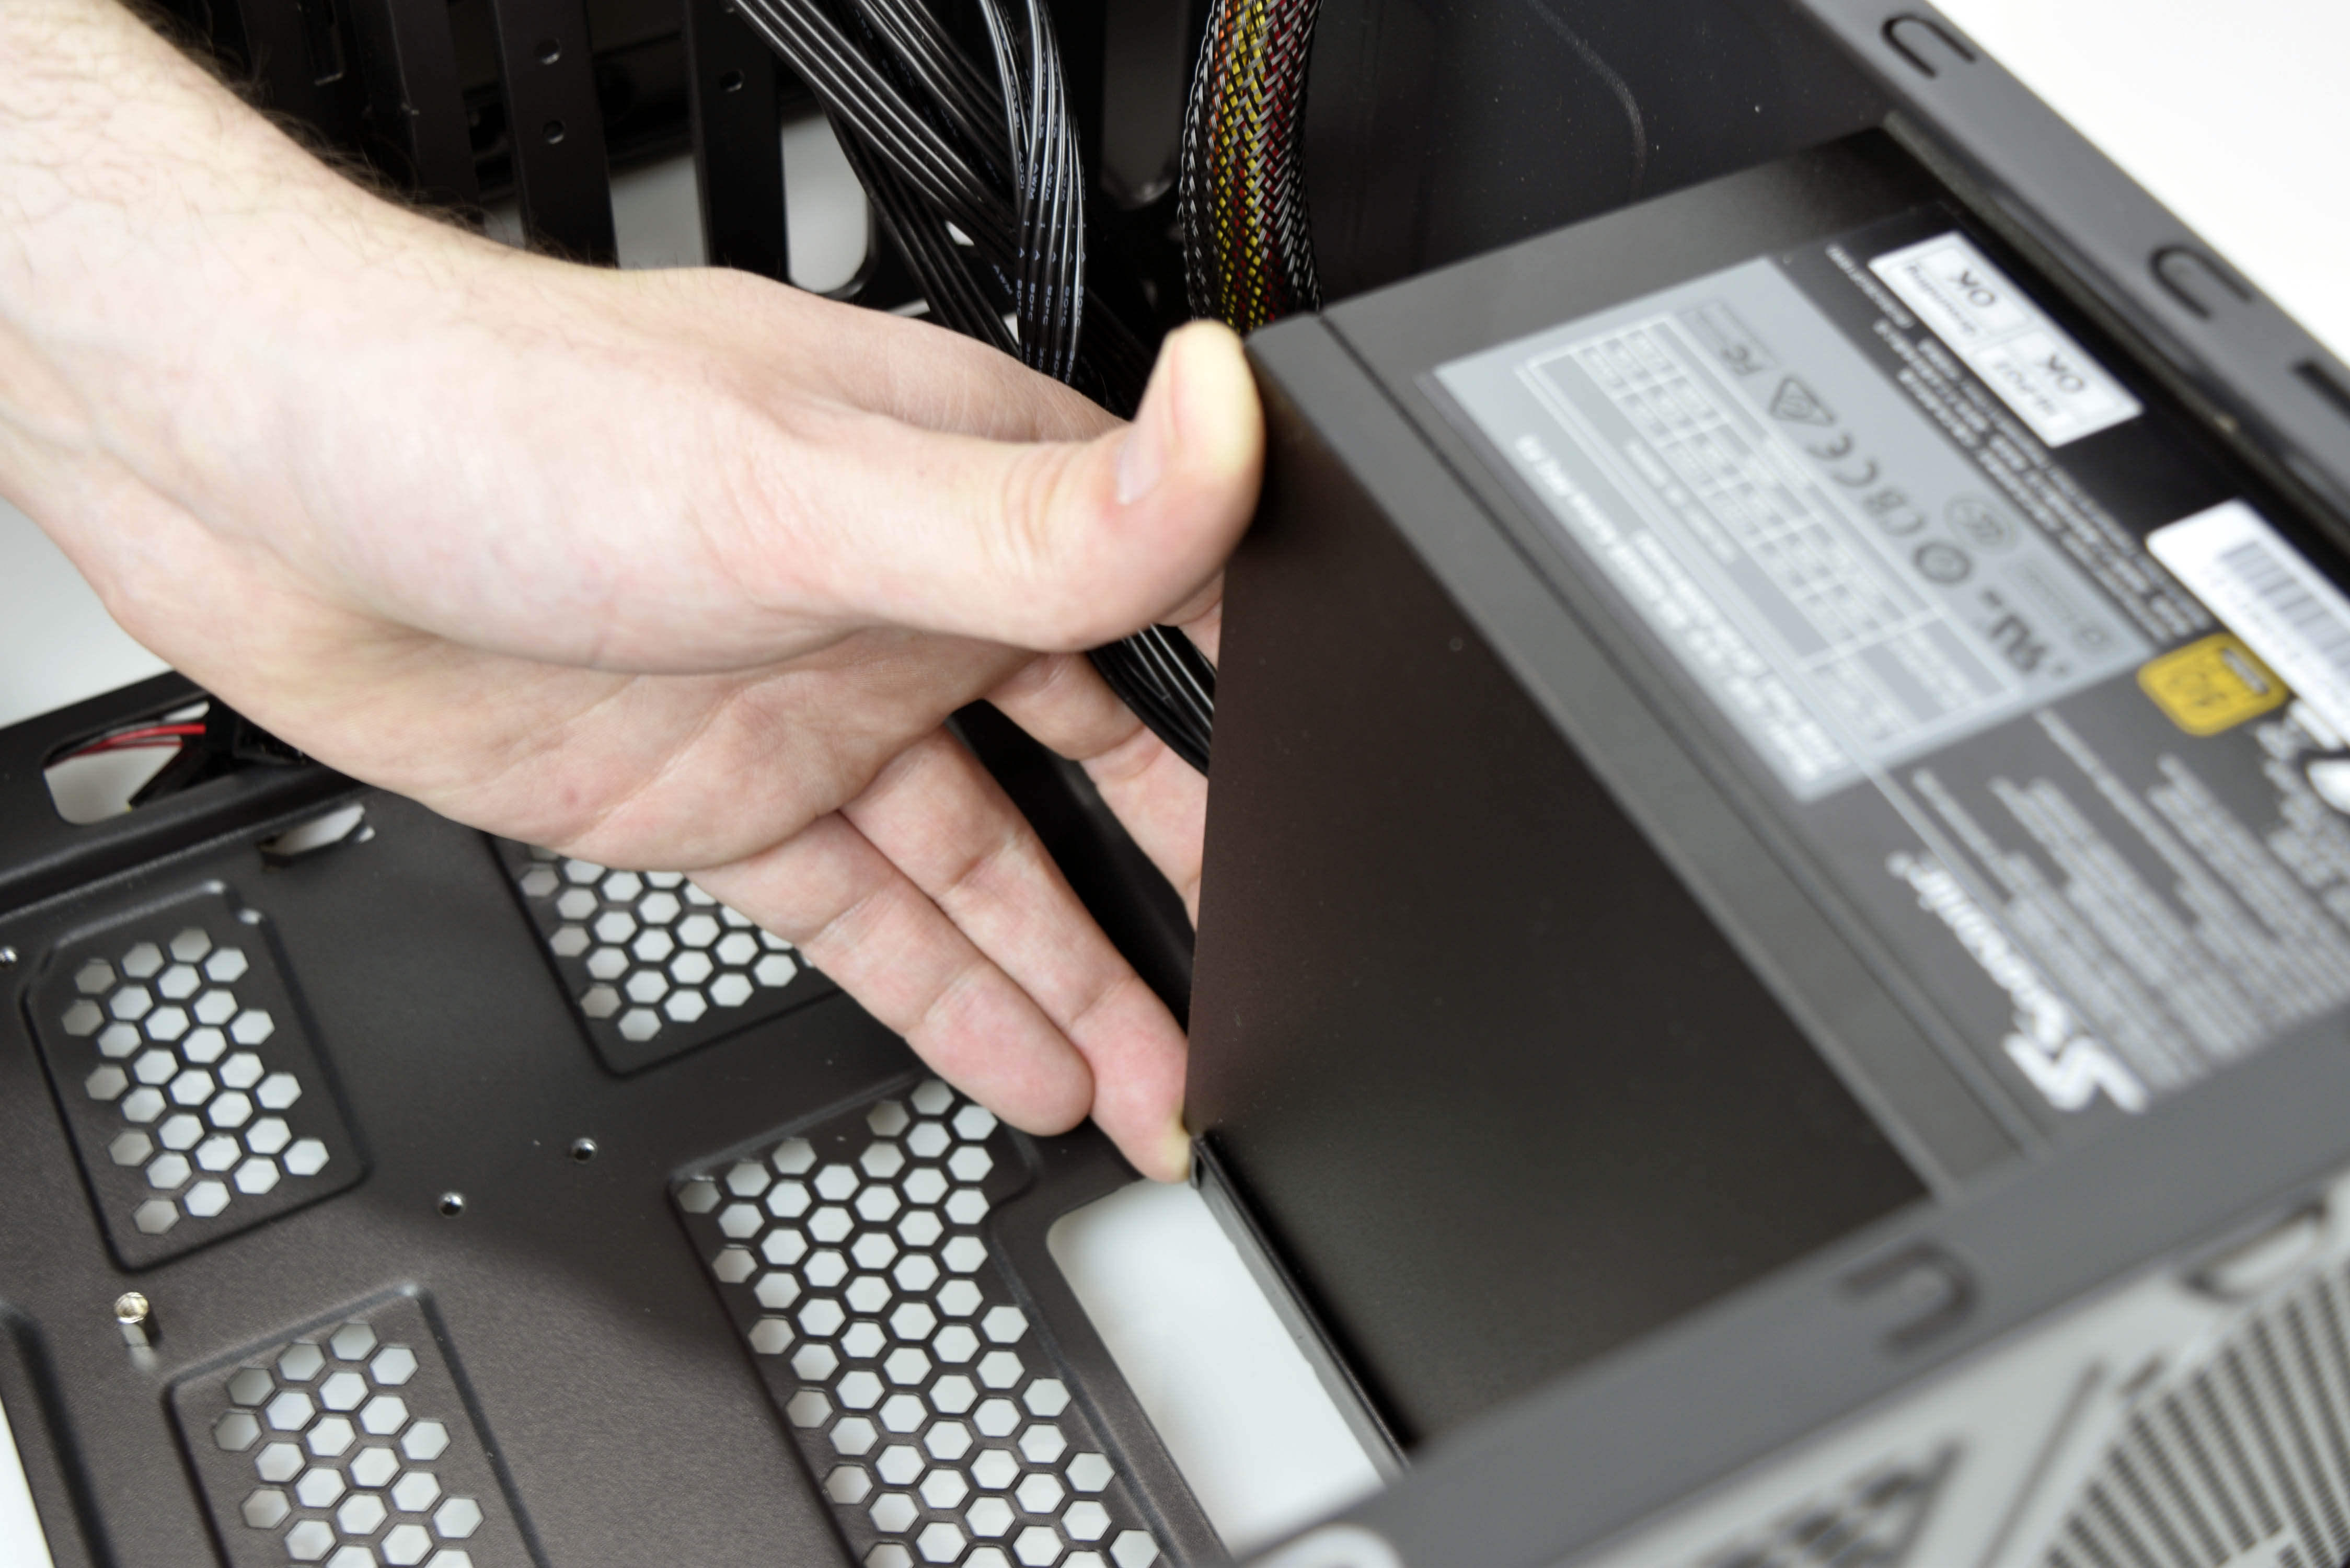
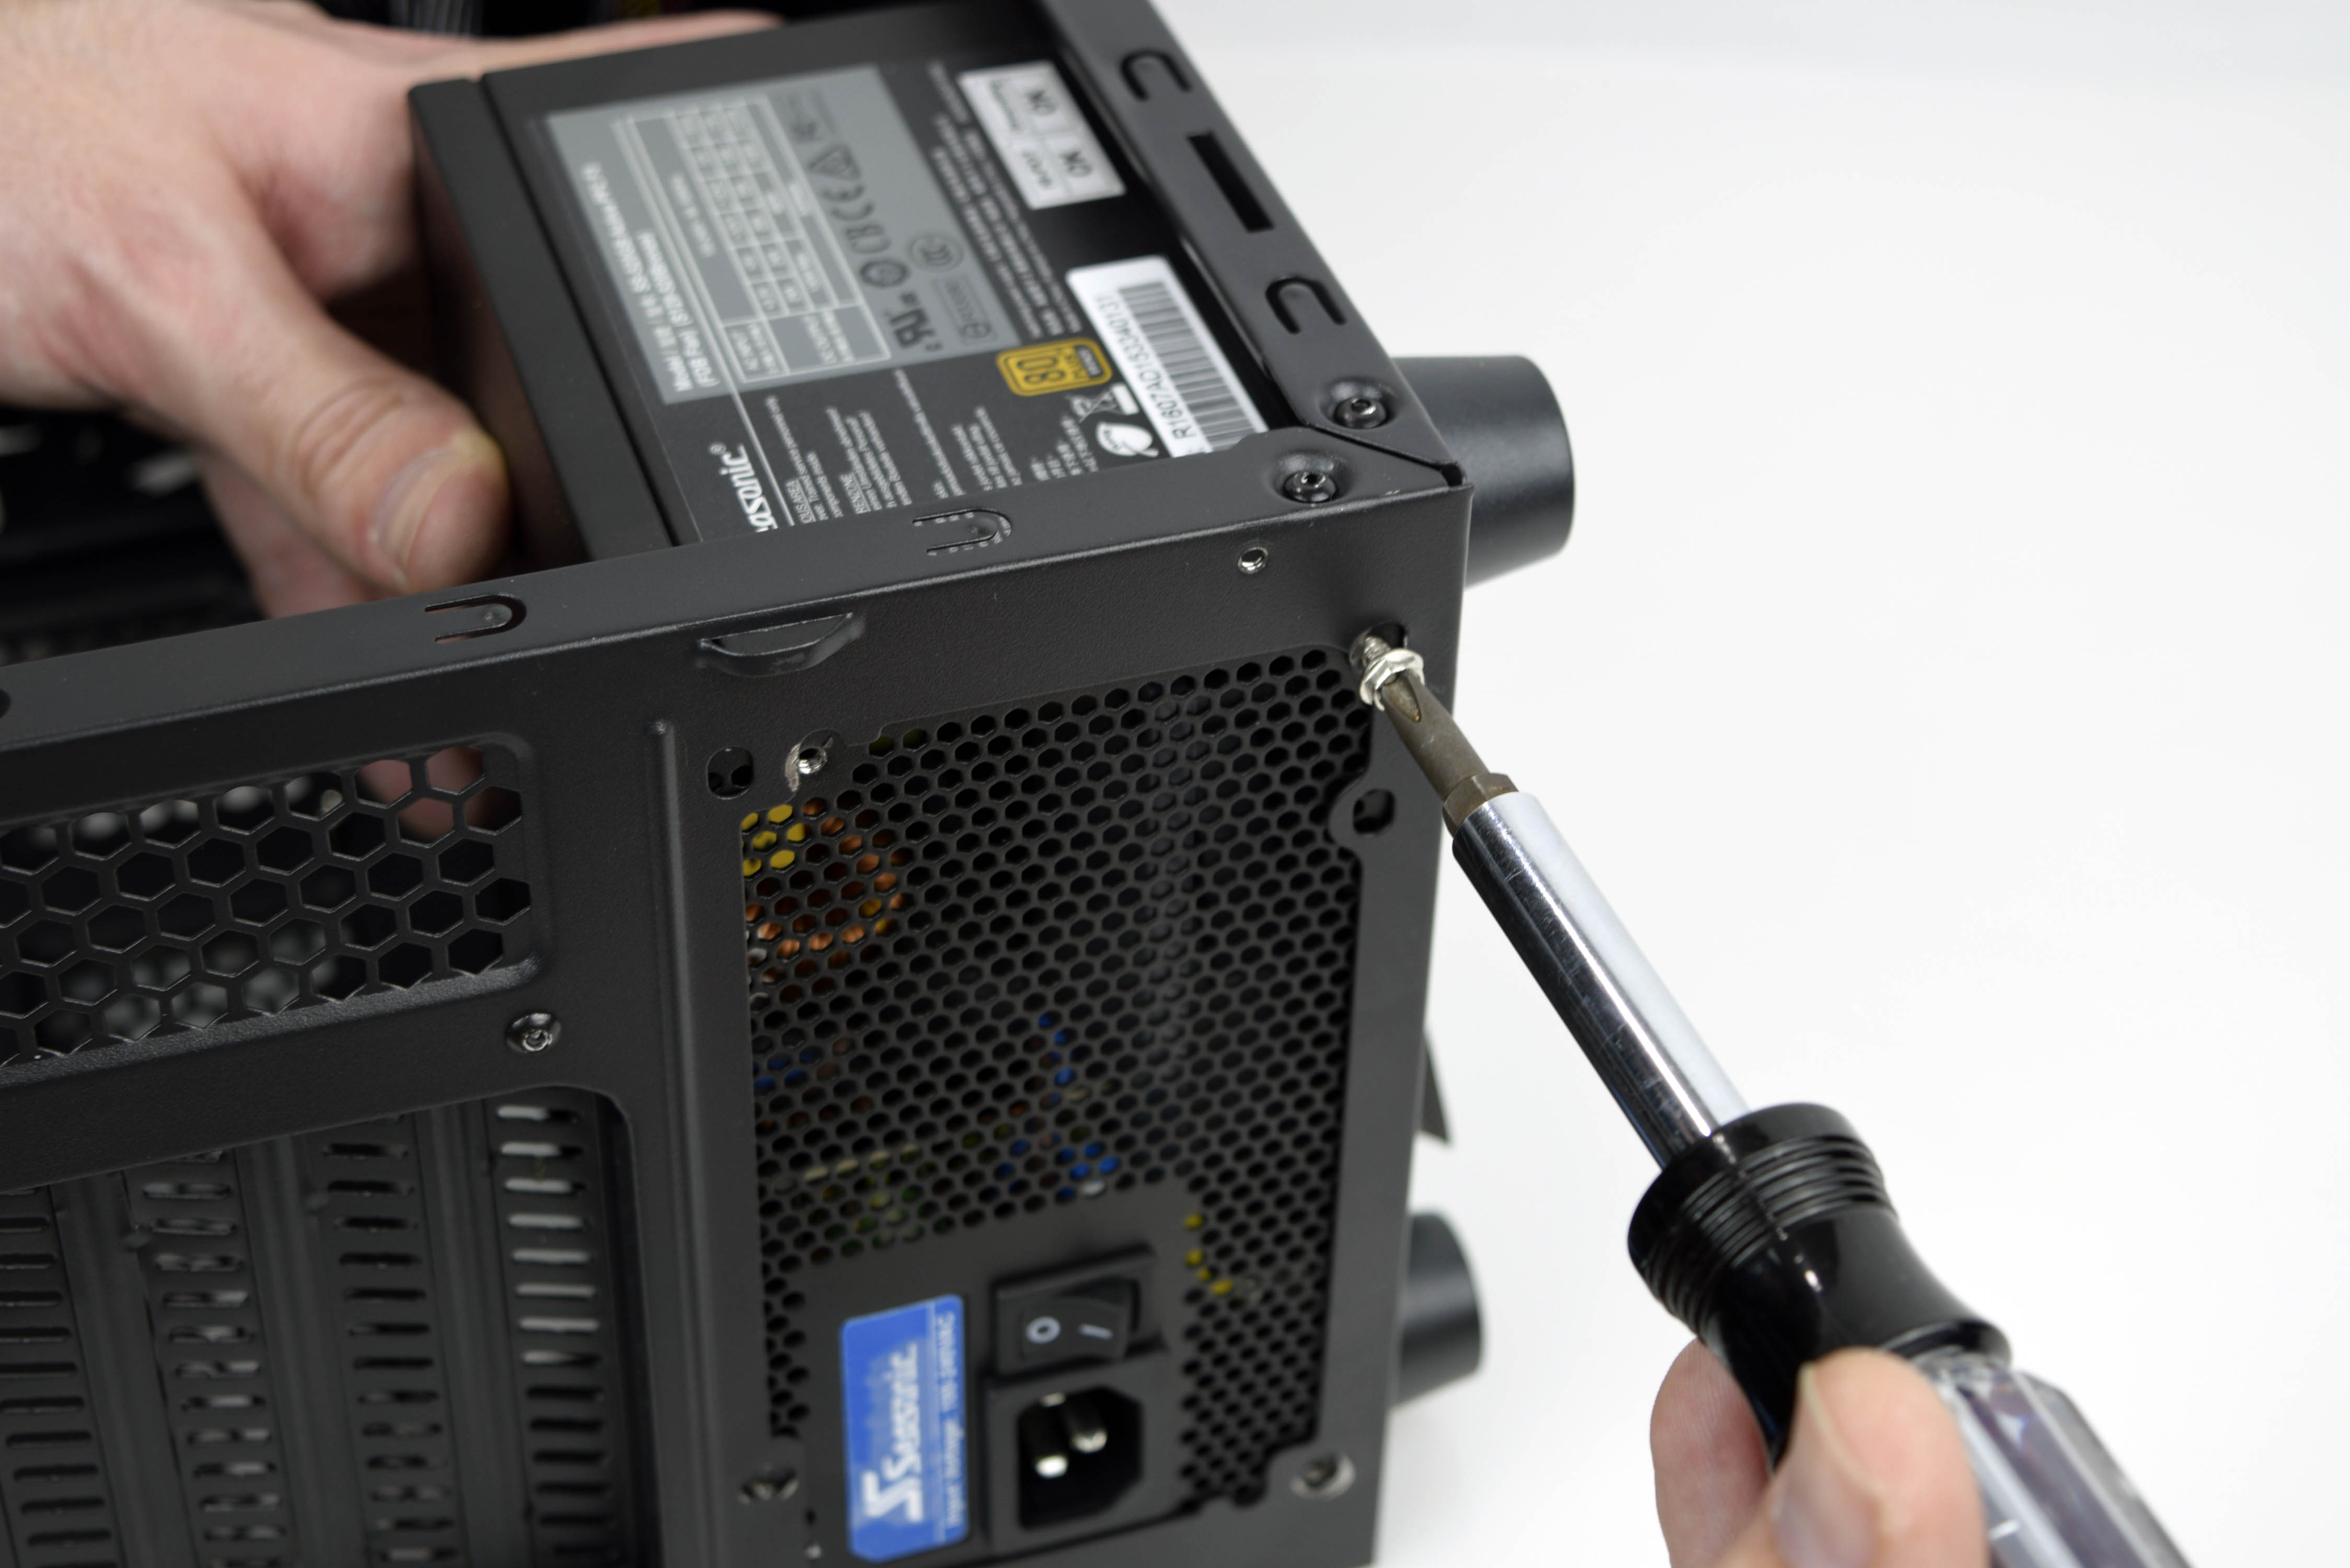
The Zalman Z3 mid tower doesn’t have a windowed side panel, so novice builders are afforded some shortcuts when it comes to cable management. However, we’re going to show you an ideal method of hiding the cables in the tight constraints of the Z3, as though you could see inside. This will ensure that the cables aren’t obstructing air flow (which is particularly important on this build, considering the overclockable CPU and low-cost air cooler) and so that you can easily add onto your system down the road.
For this step, you’ll need to remove the case and power supply from their packaging. You’ll also need a few of the motherboard’s accessories, so keep the box handy.
Begin by removing the case’s side panels (both of them) and setting them aside. Untie the boxed hardware kit from the frame, as well as any other attached tie wraps holding back the internal wiring. Save these tie wraps; you’ll need them later. Pull the internal wiring (front panel, USB 2.0, USB 3.0, audio, fan power leads) through the hole that feeds them into the main chamber (it's towards the top of the chassis). They should hang freely behind the sidewall for the time being. Feed the rear fan’s cable through the hole at the very top of the case (see fourth picture in the album above), so that it also hangs loosely behind the main chamber of the case.
Free the PSU cables from its wrap, and use a pair of cutters to slice the zip tie towards the base of the cables where they feed into the PSU chassis. You’ll need every last inch of slack to be able to comfortably reach the 8-pin CPU power connector on your motherboard, and this should be the first PSU cable you run. Install the power supply by laying it into the bottom of the case, fan down, and with the cables towards the sidewall (see the eighth picture in the album above). Secure it to the case using the provided screws (you may have to adjust the supply to get the holes to line up).
Get Tom's Hardware's best news and in-depth reviews, straight to your inbox.
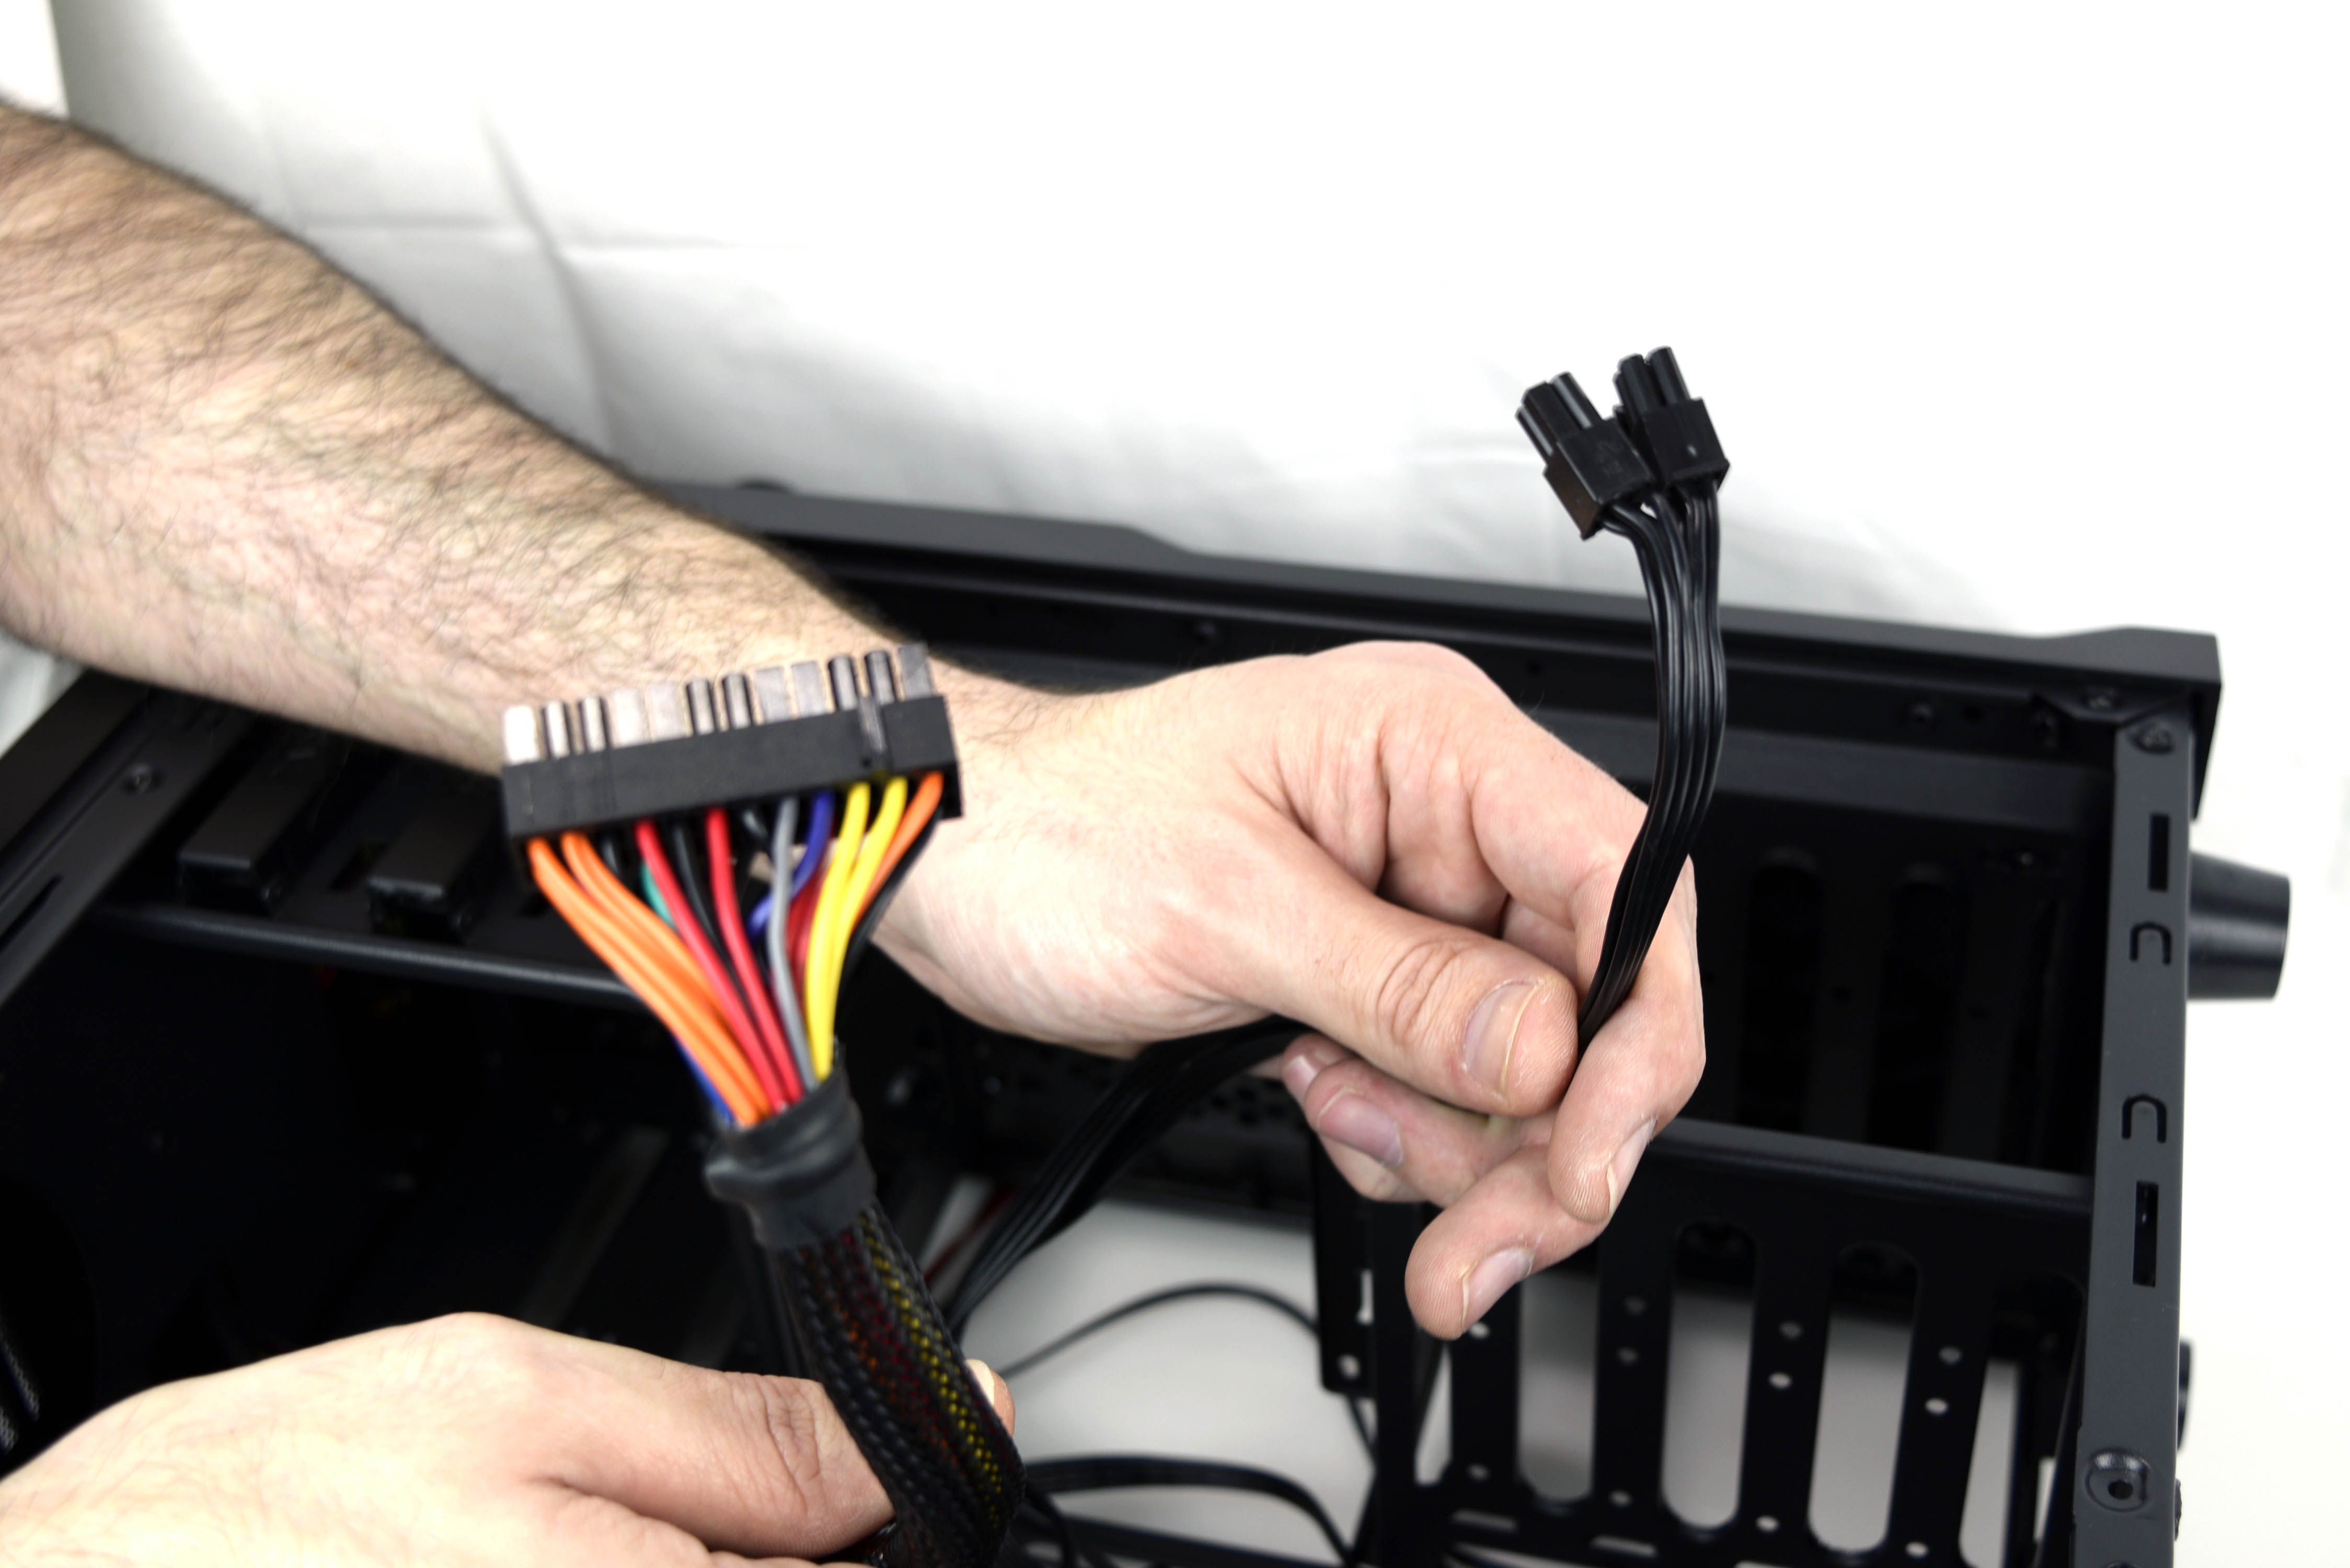
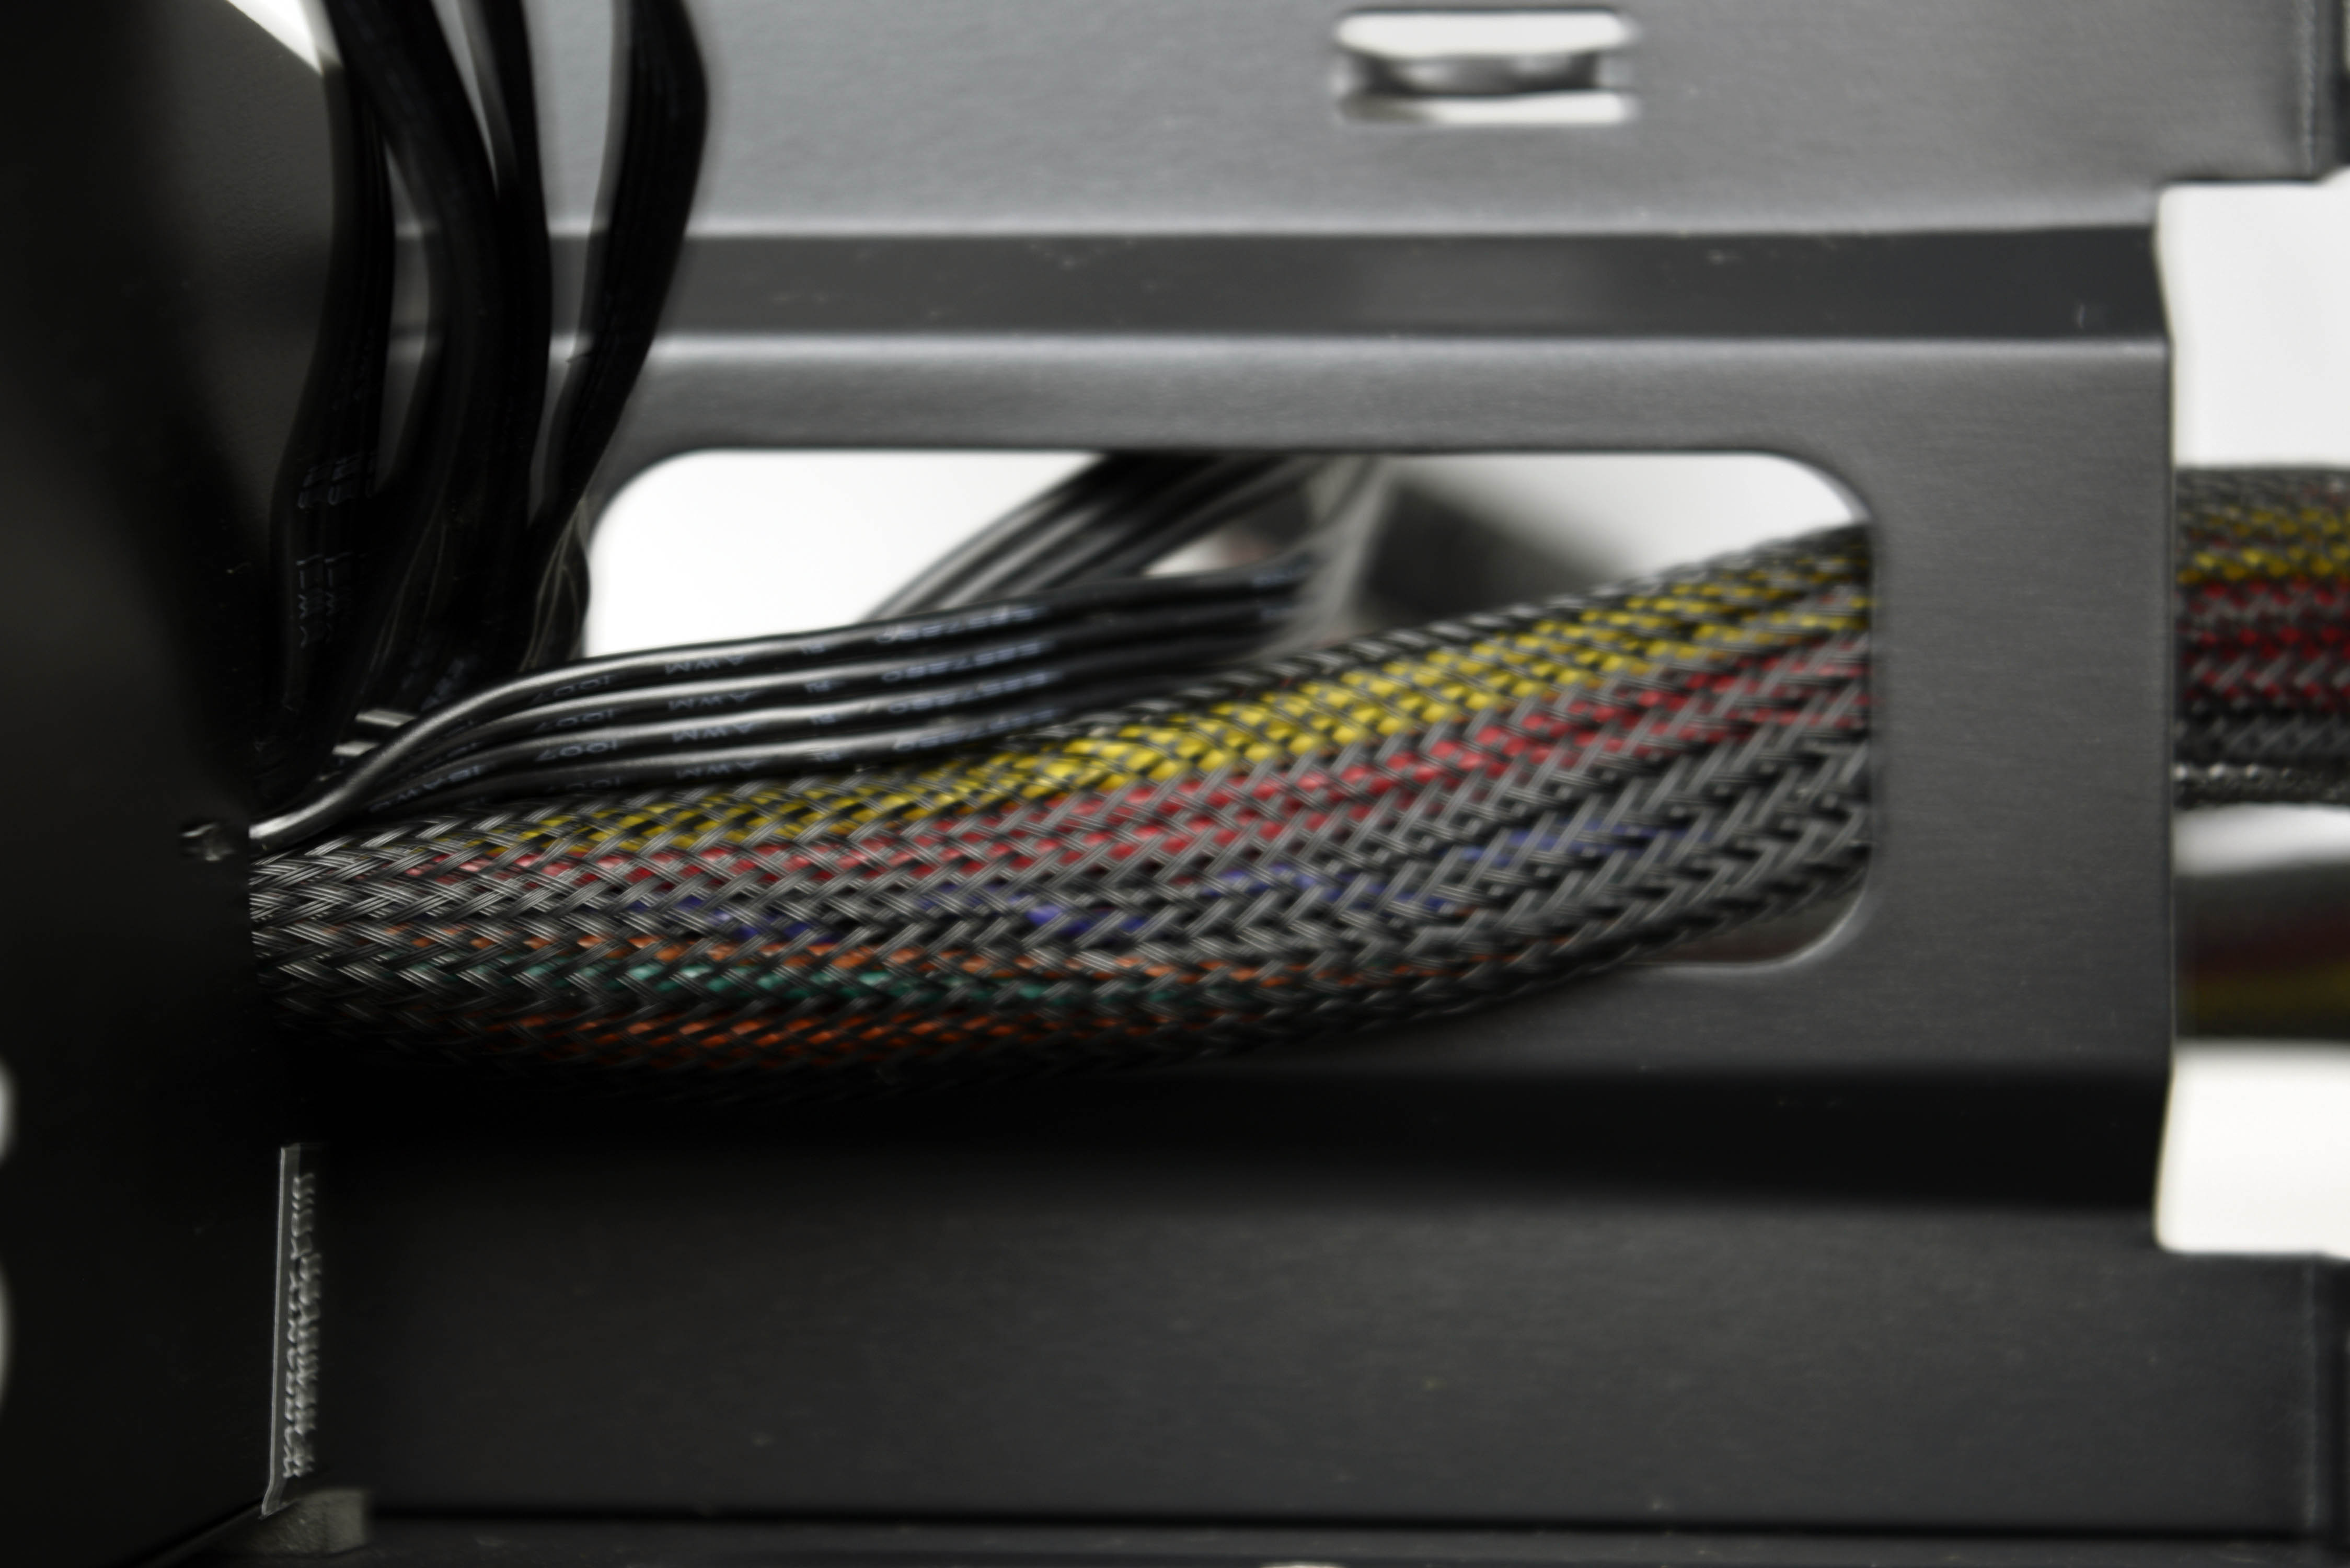
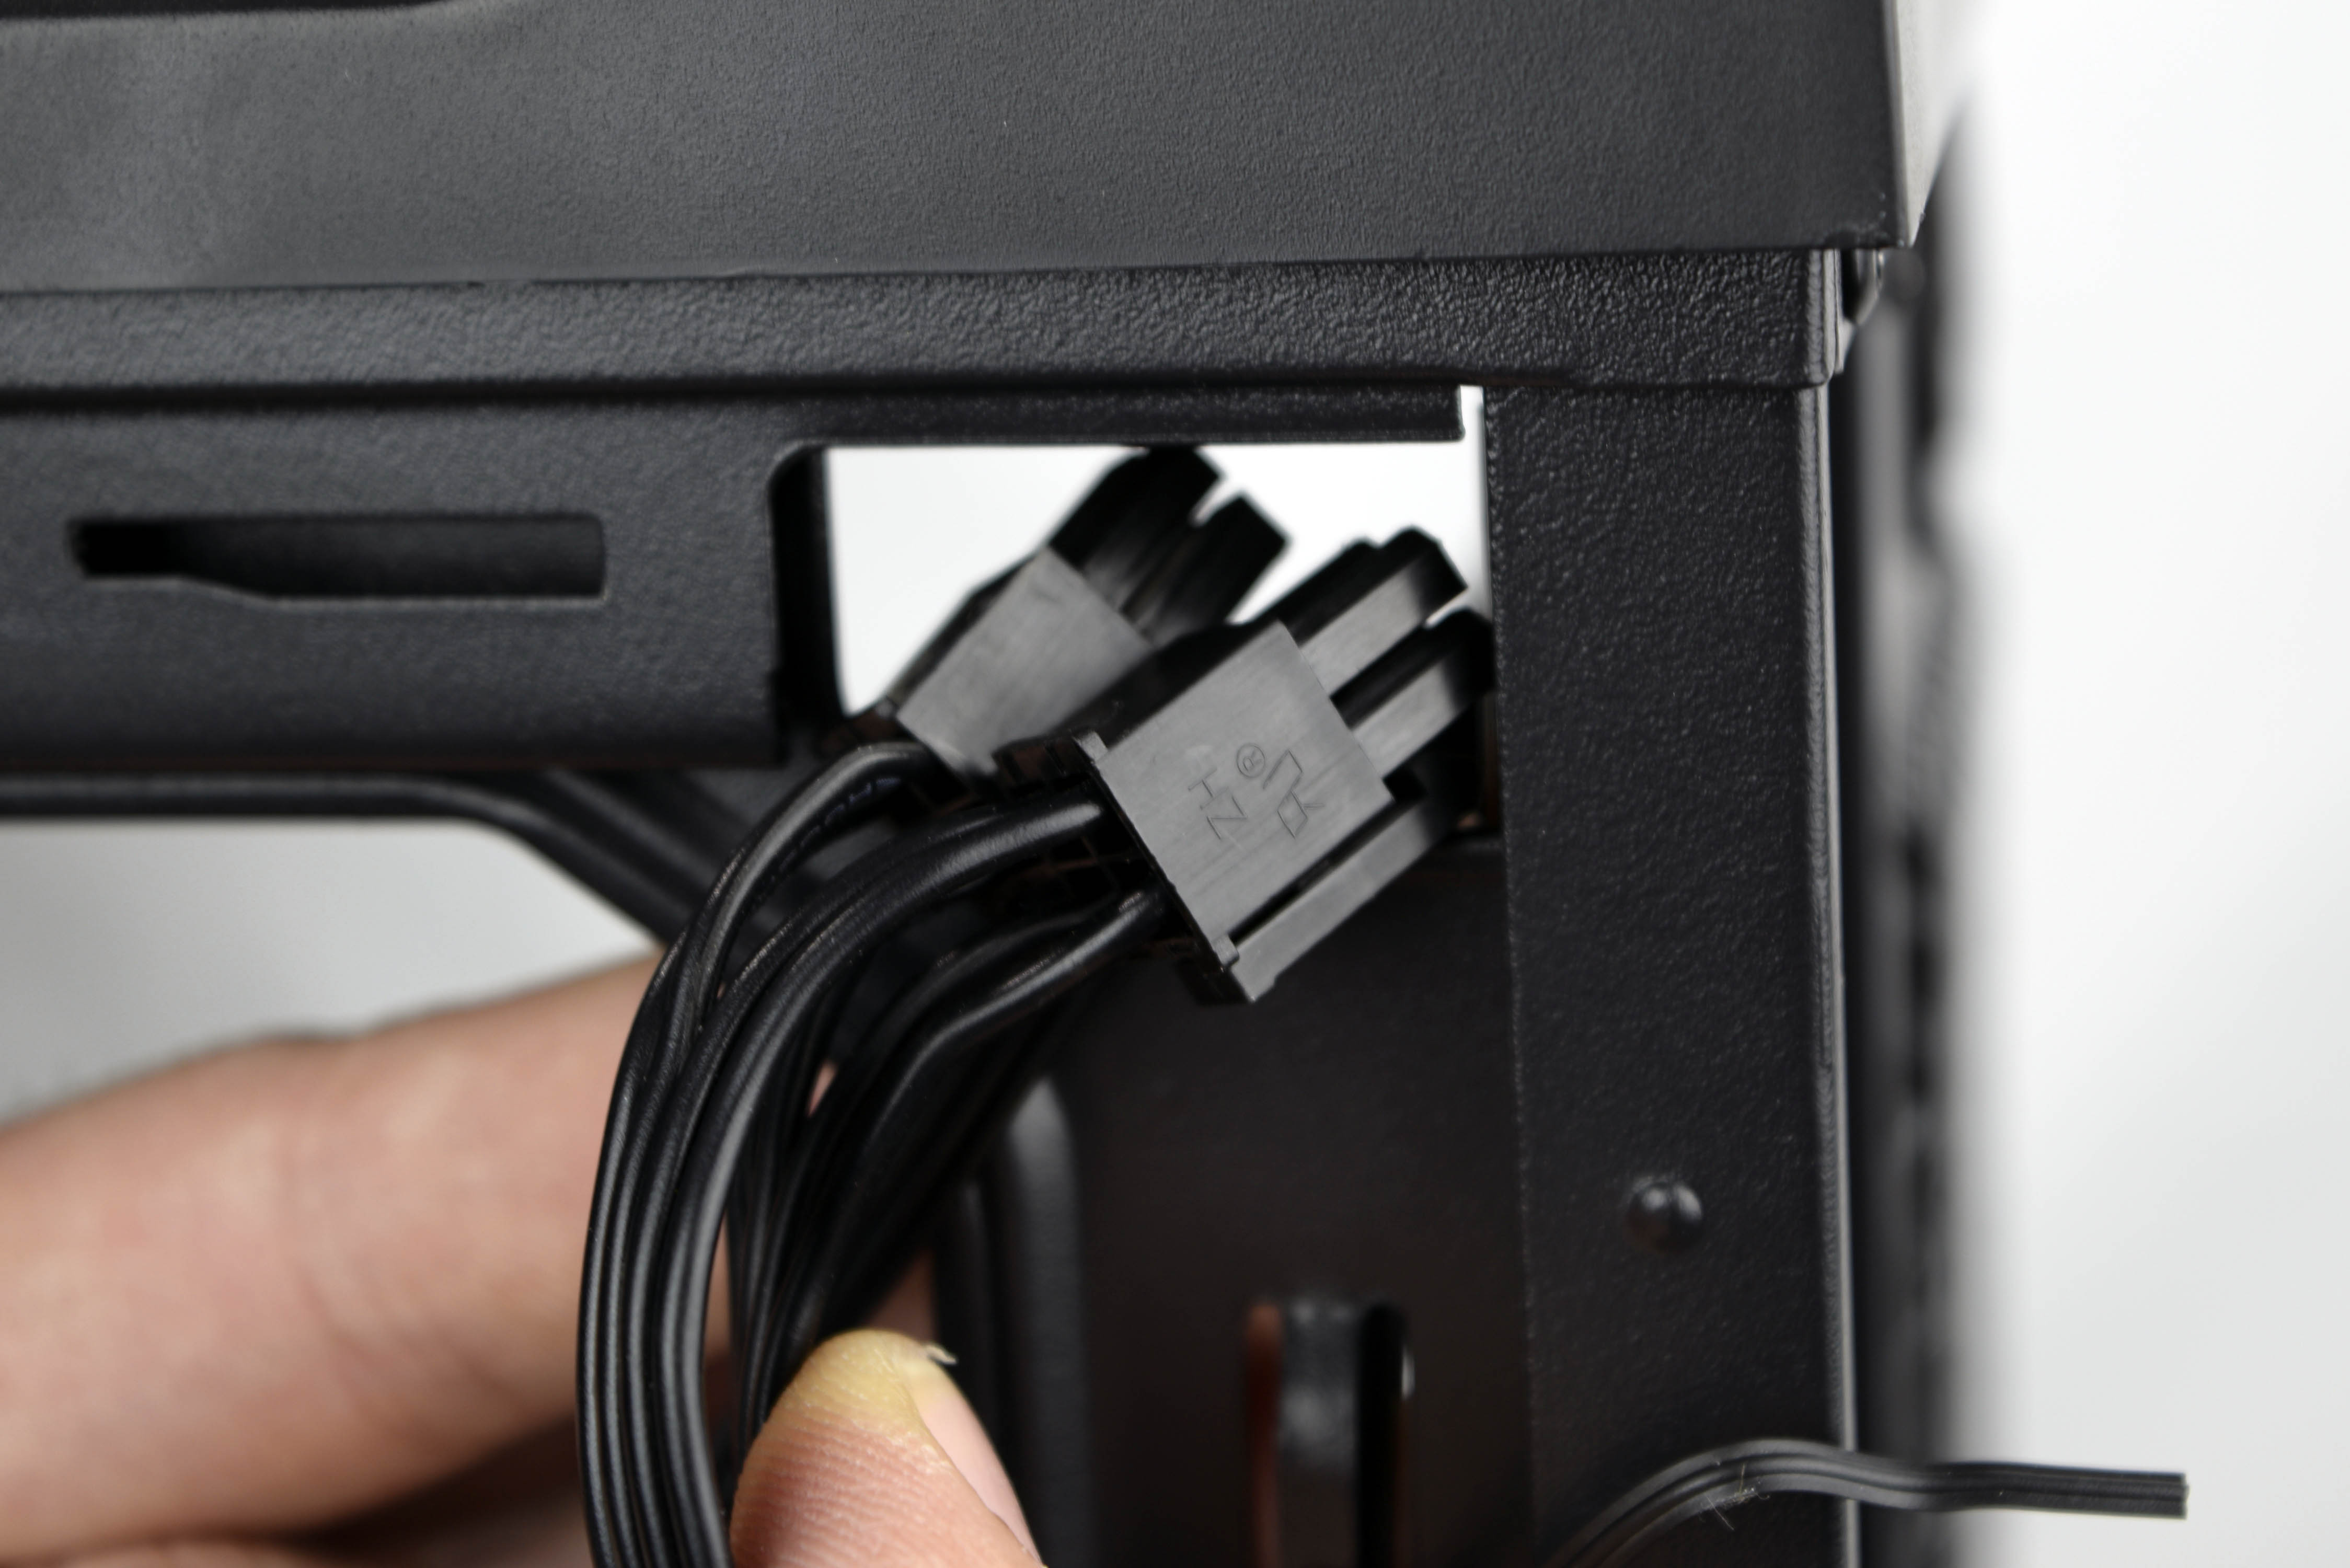
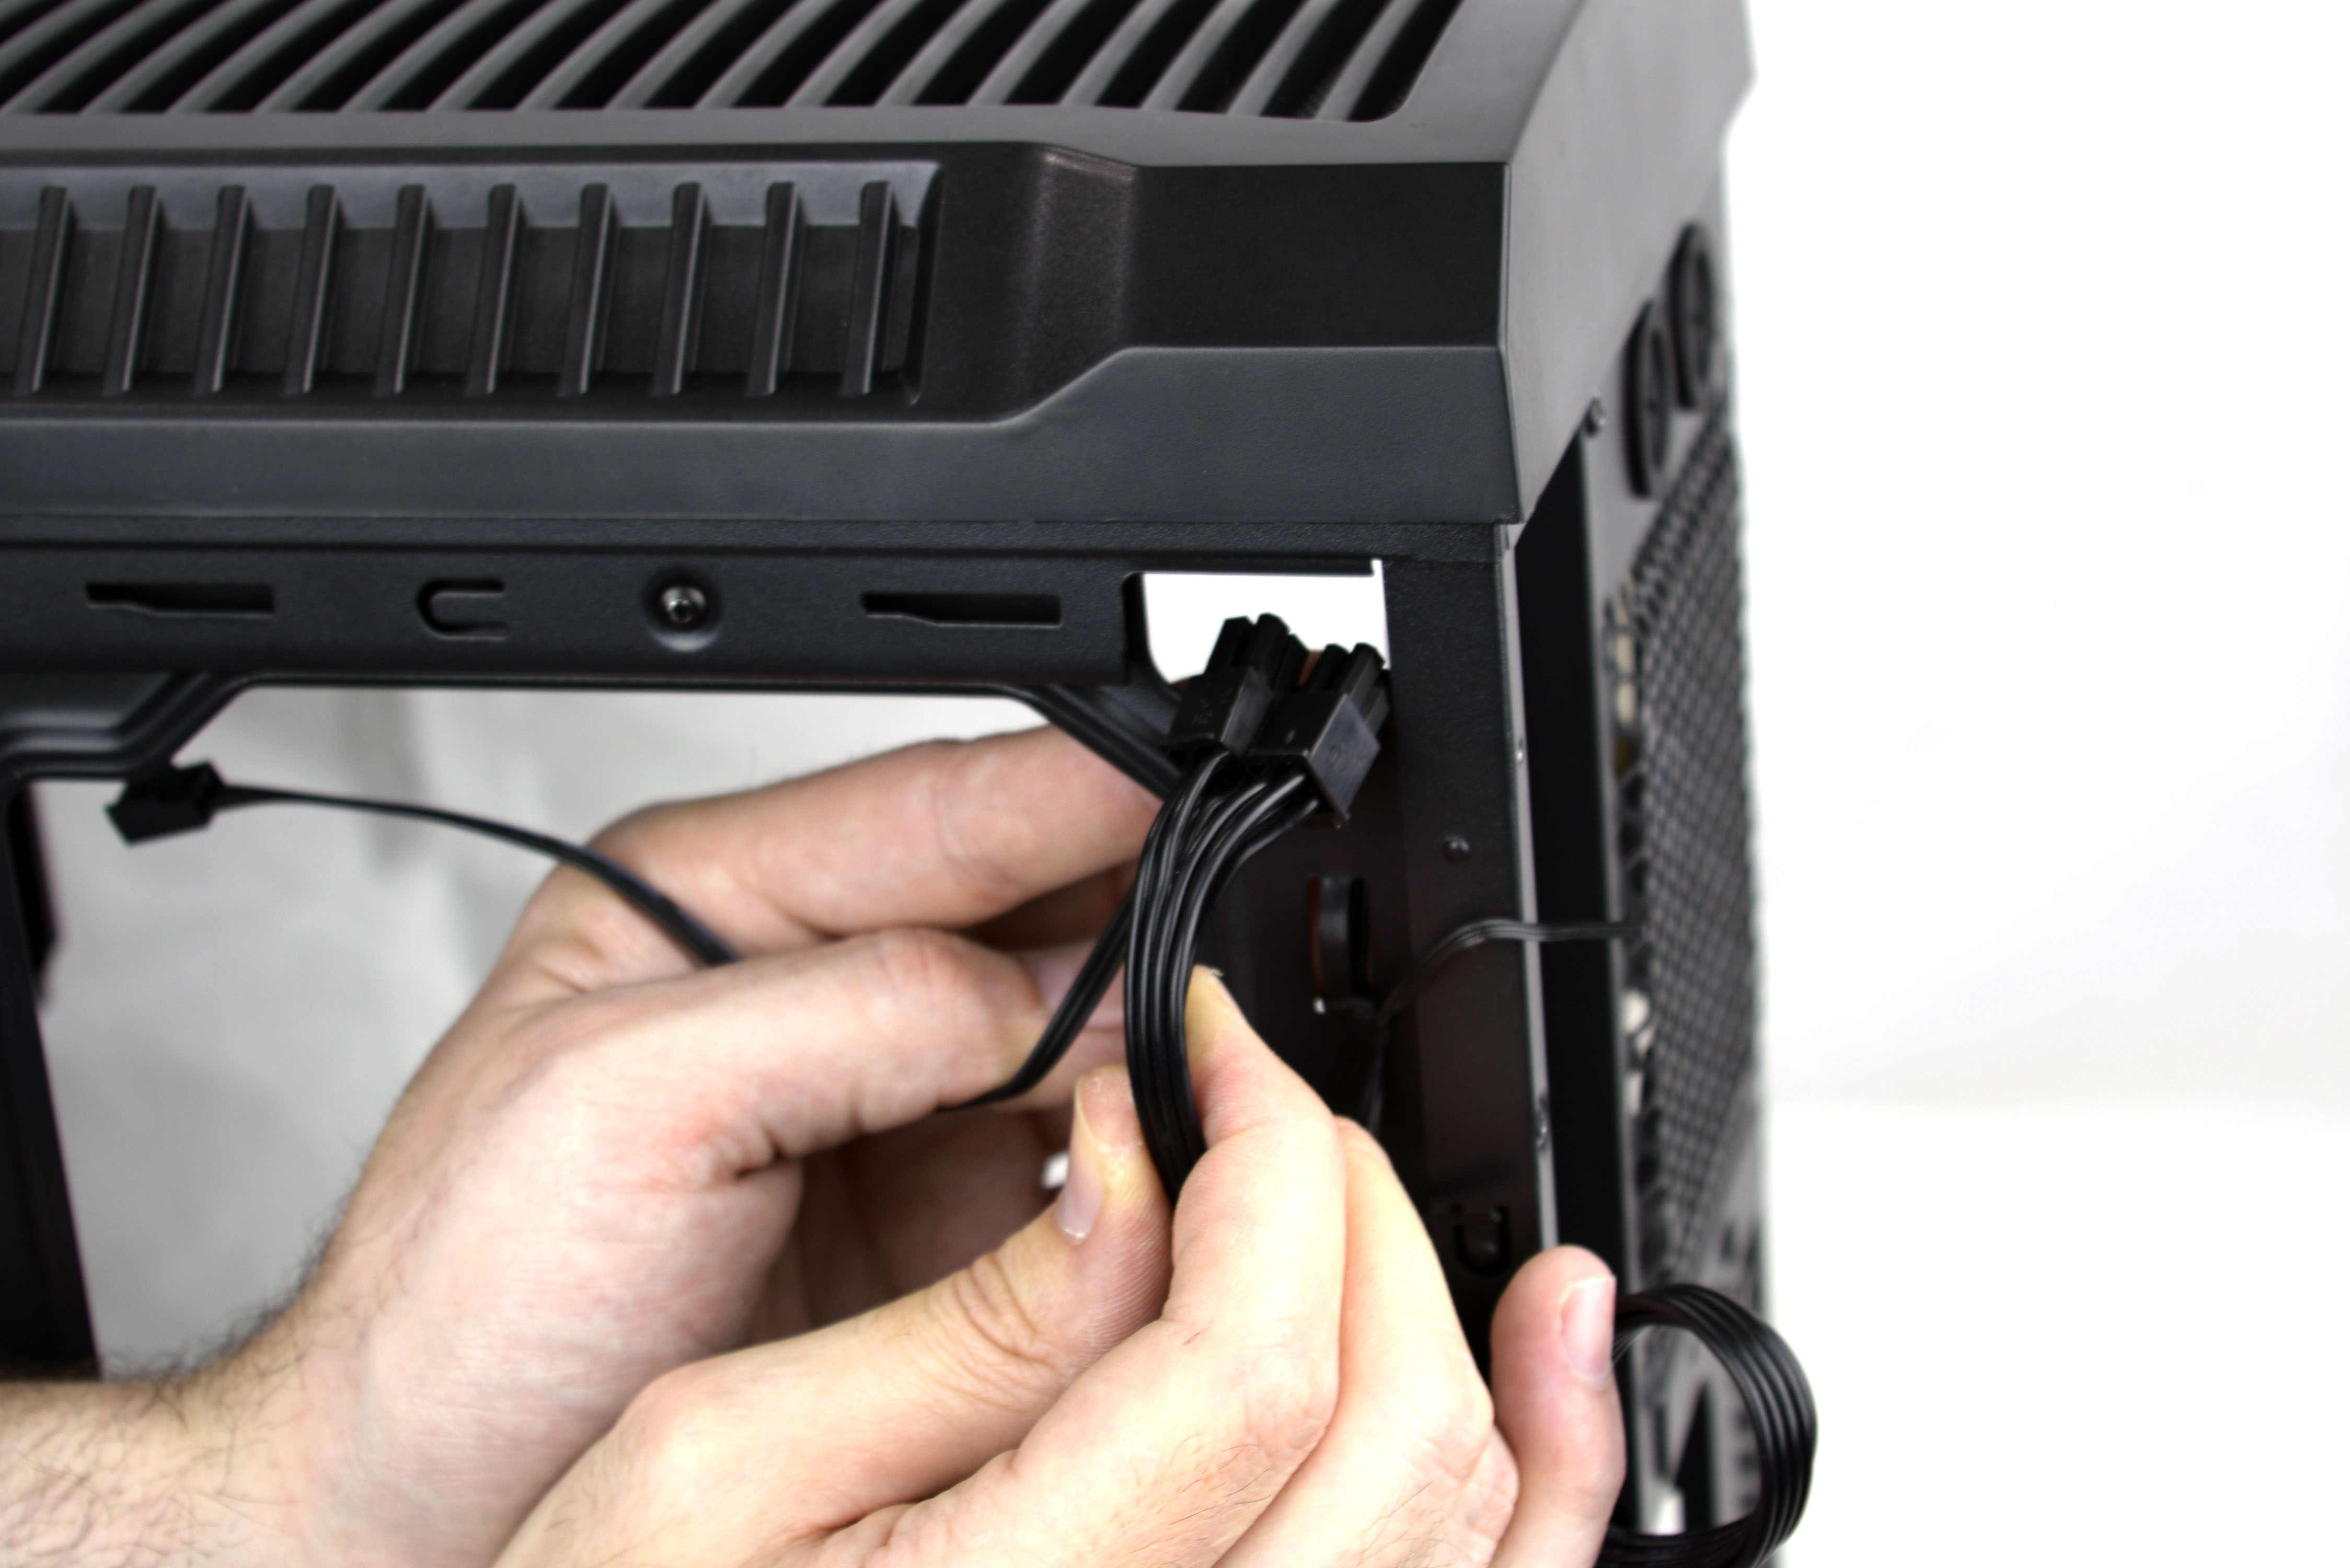
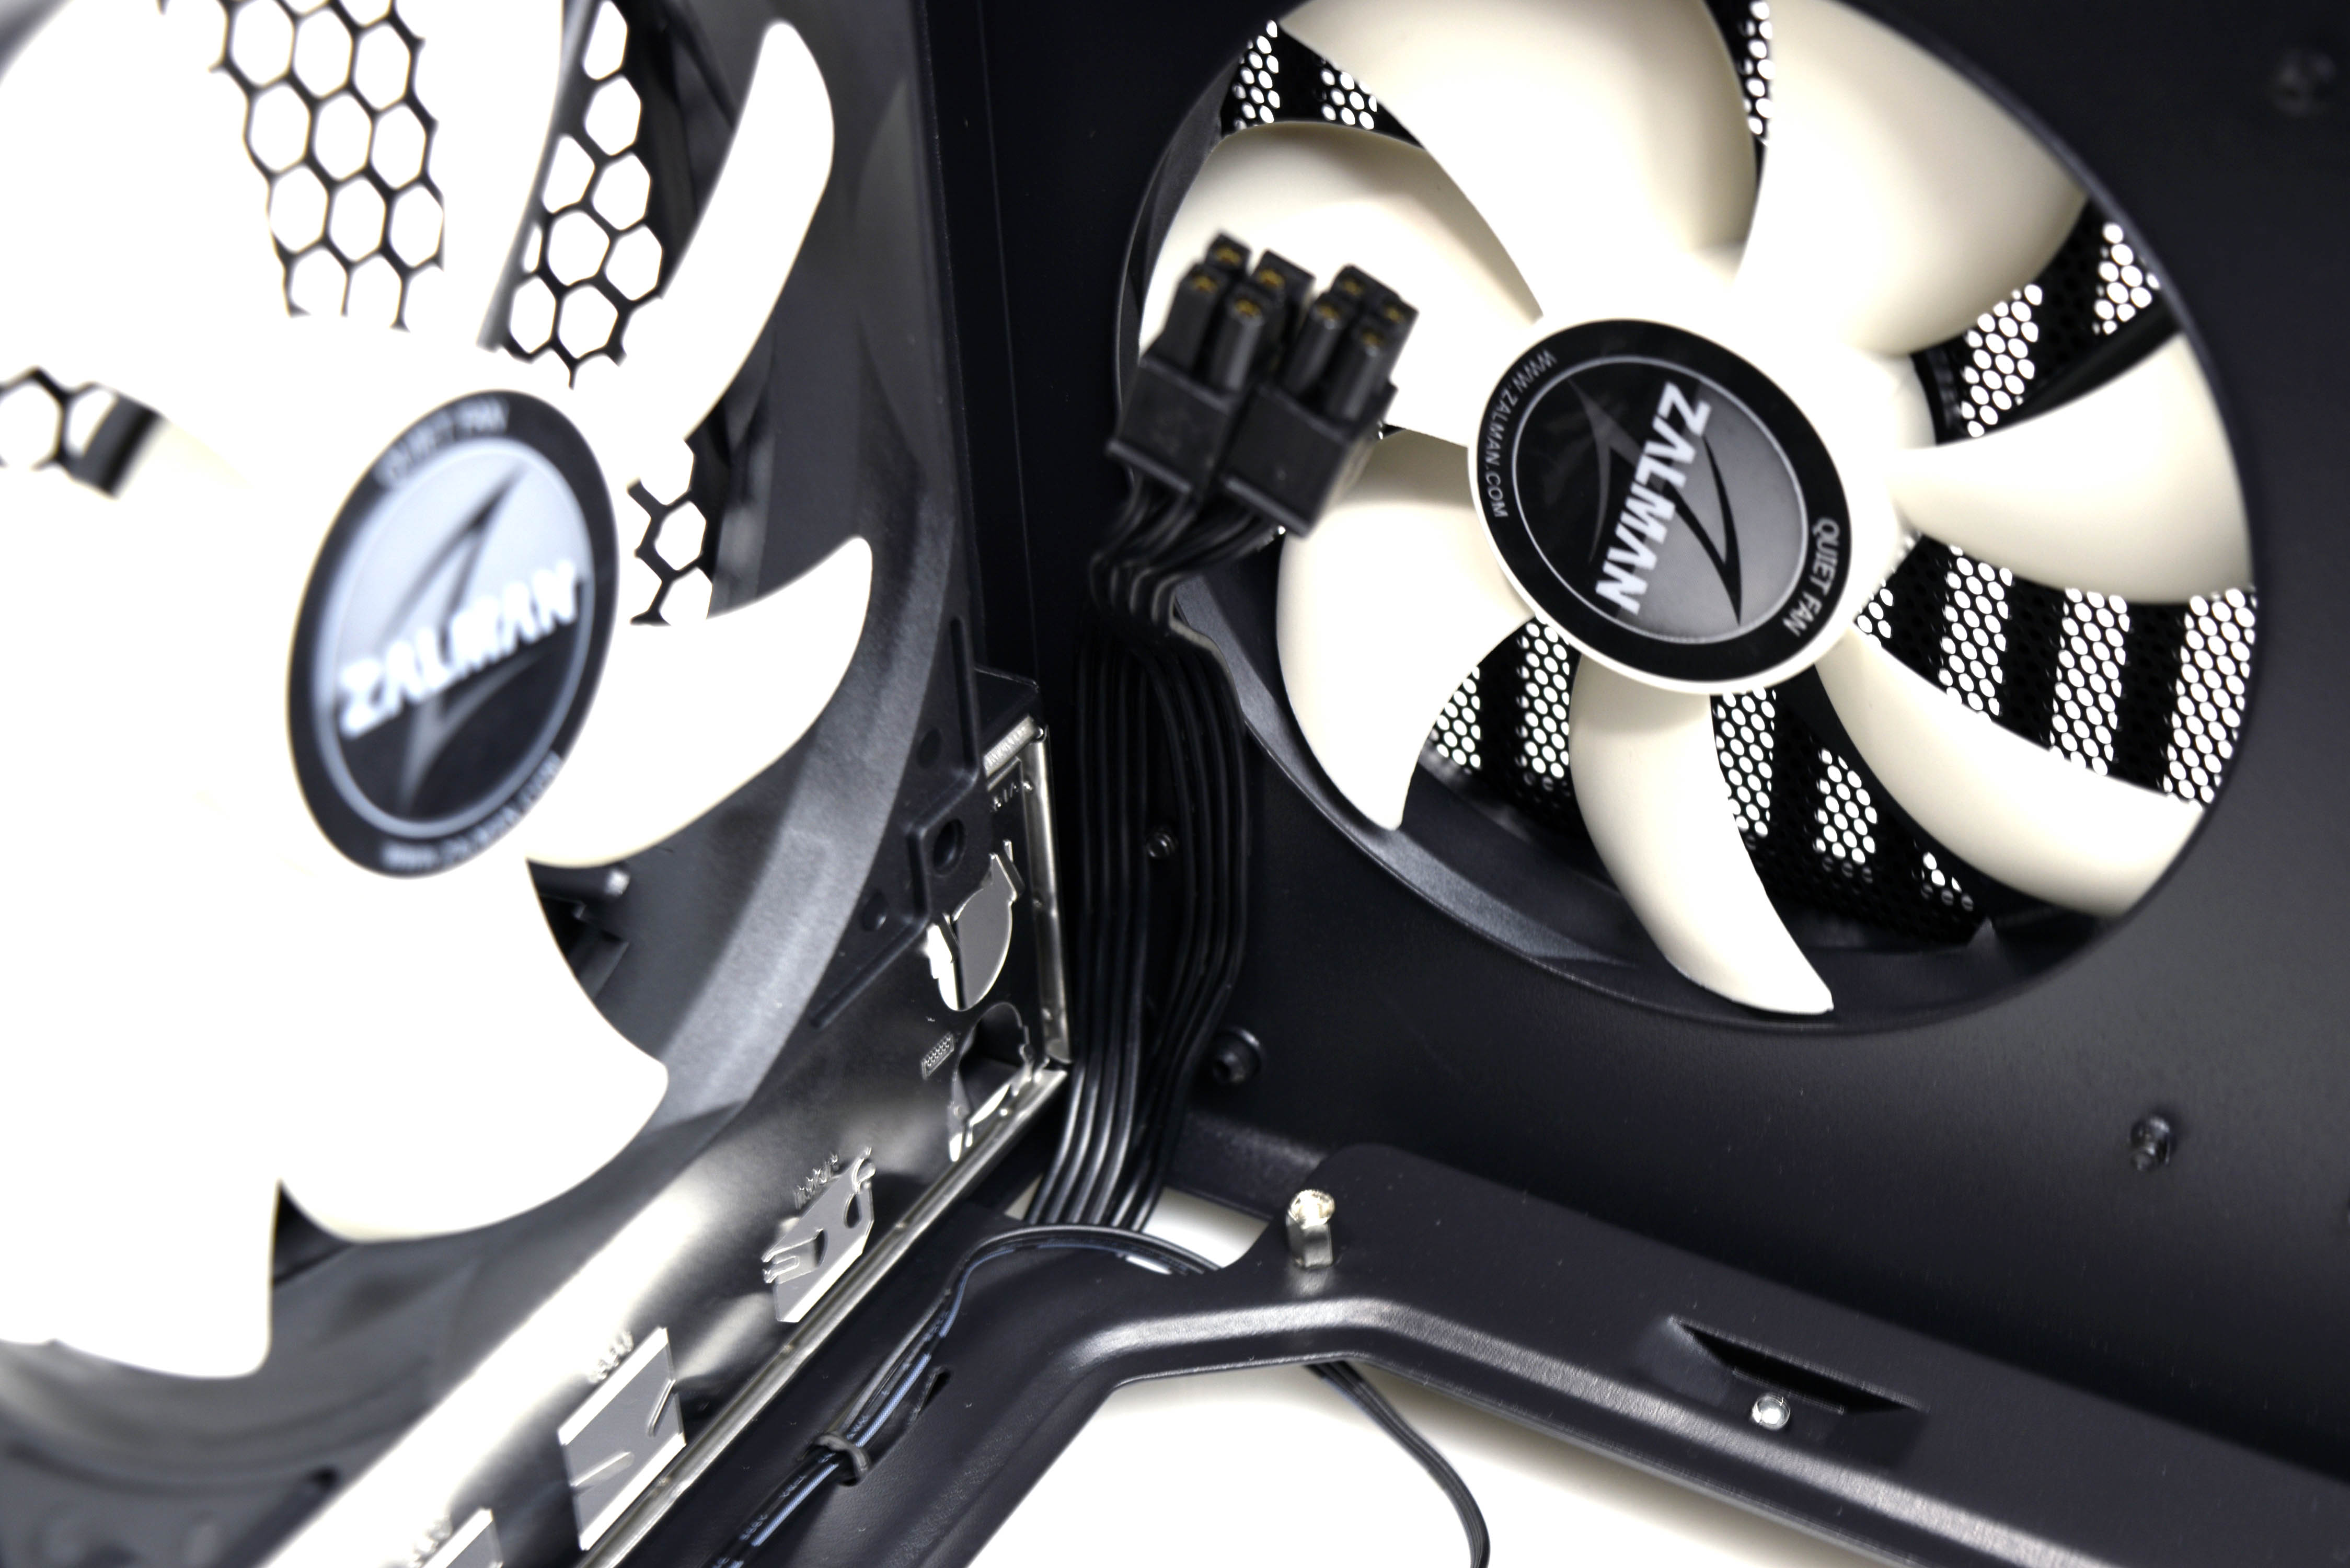
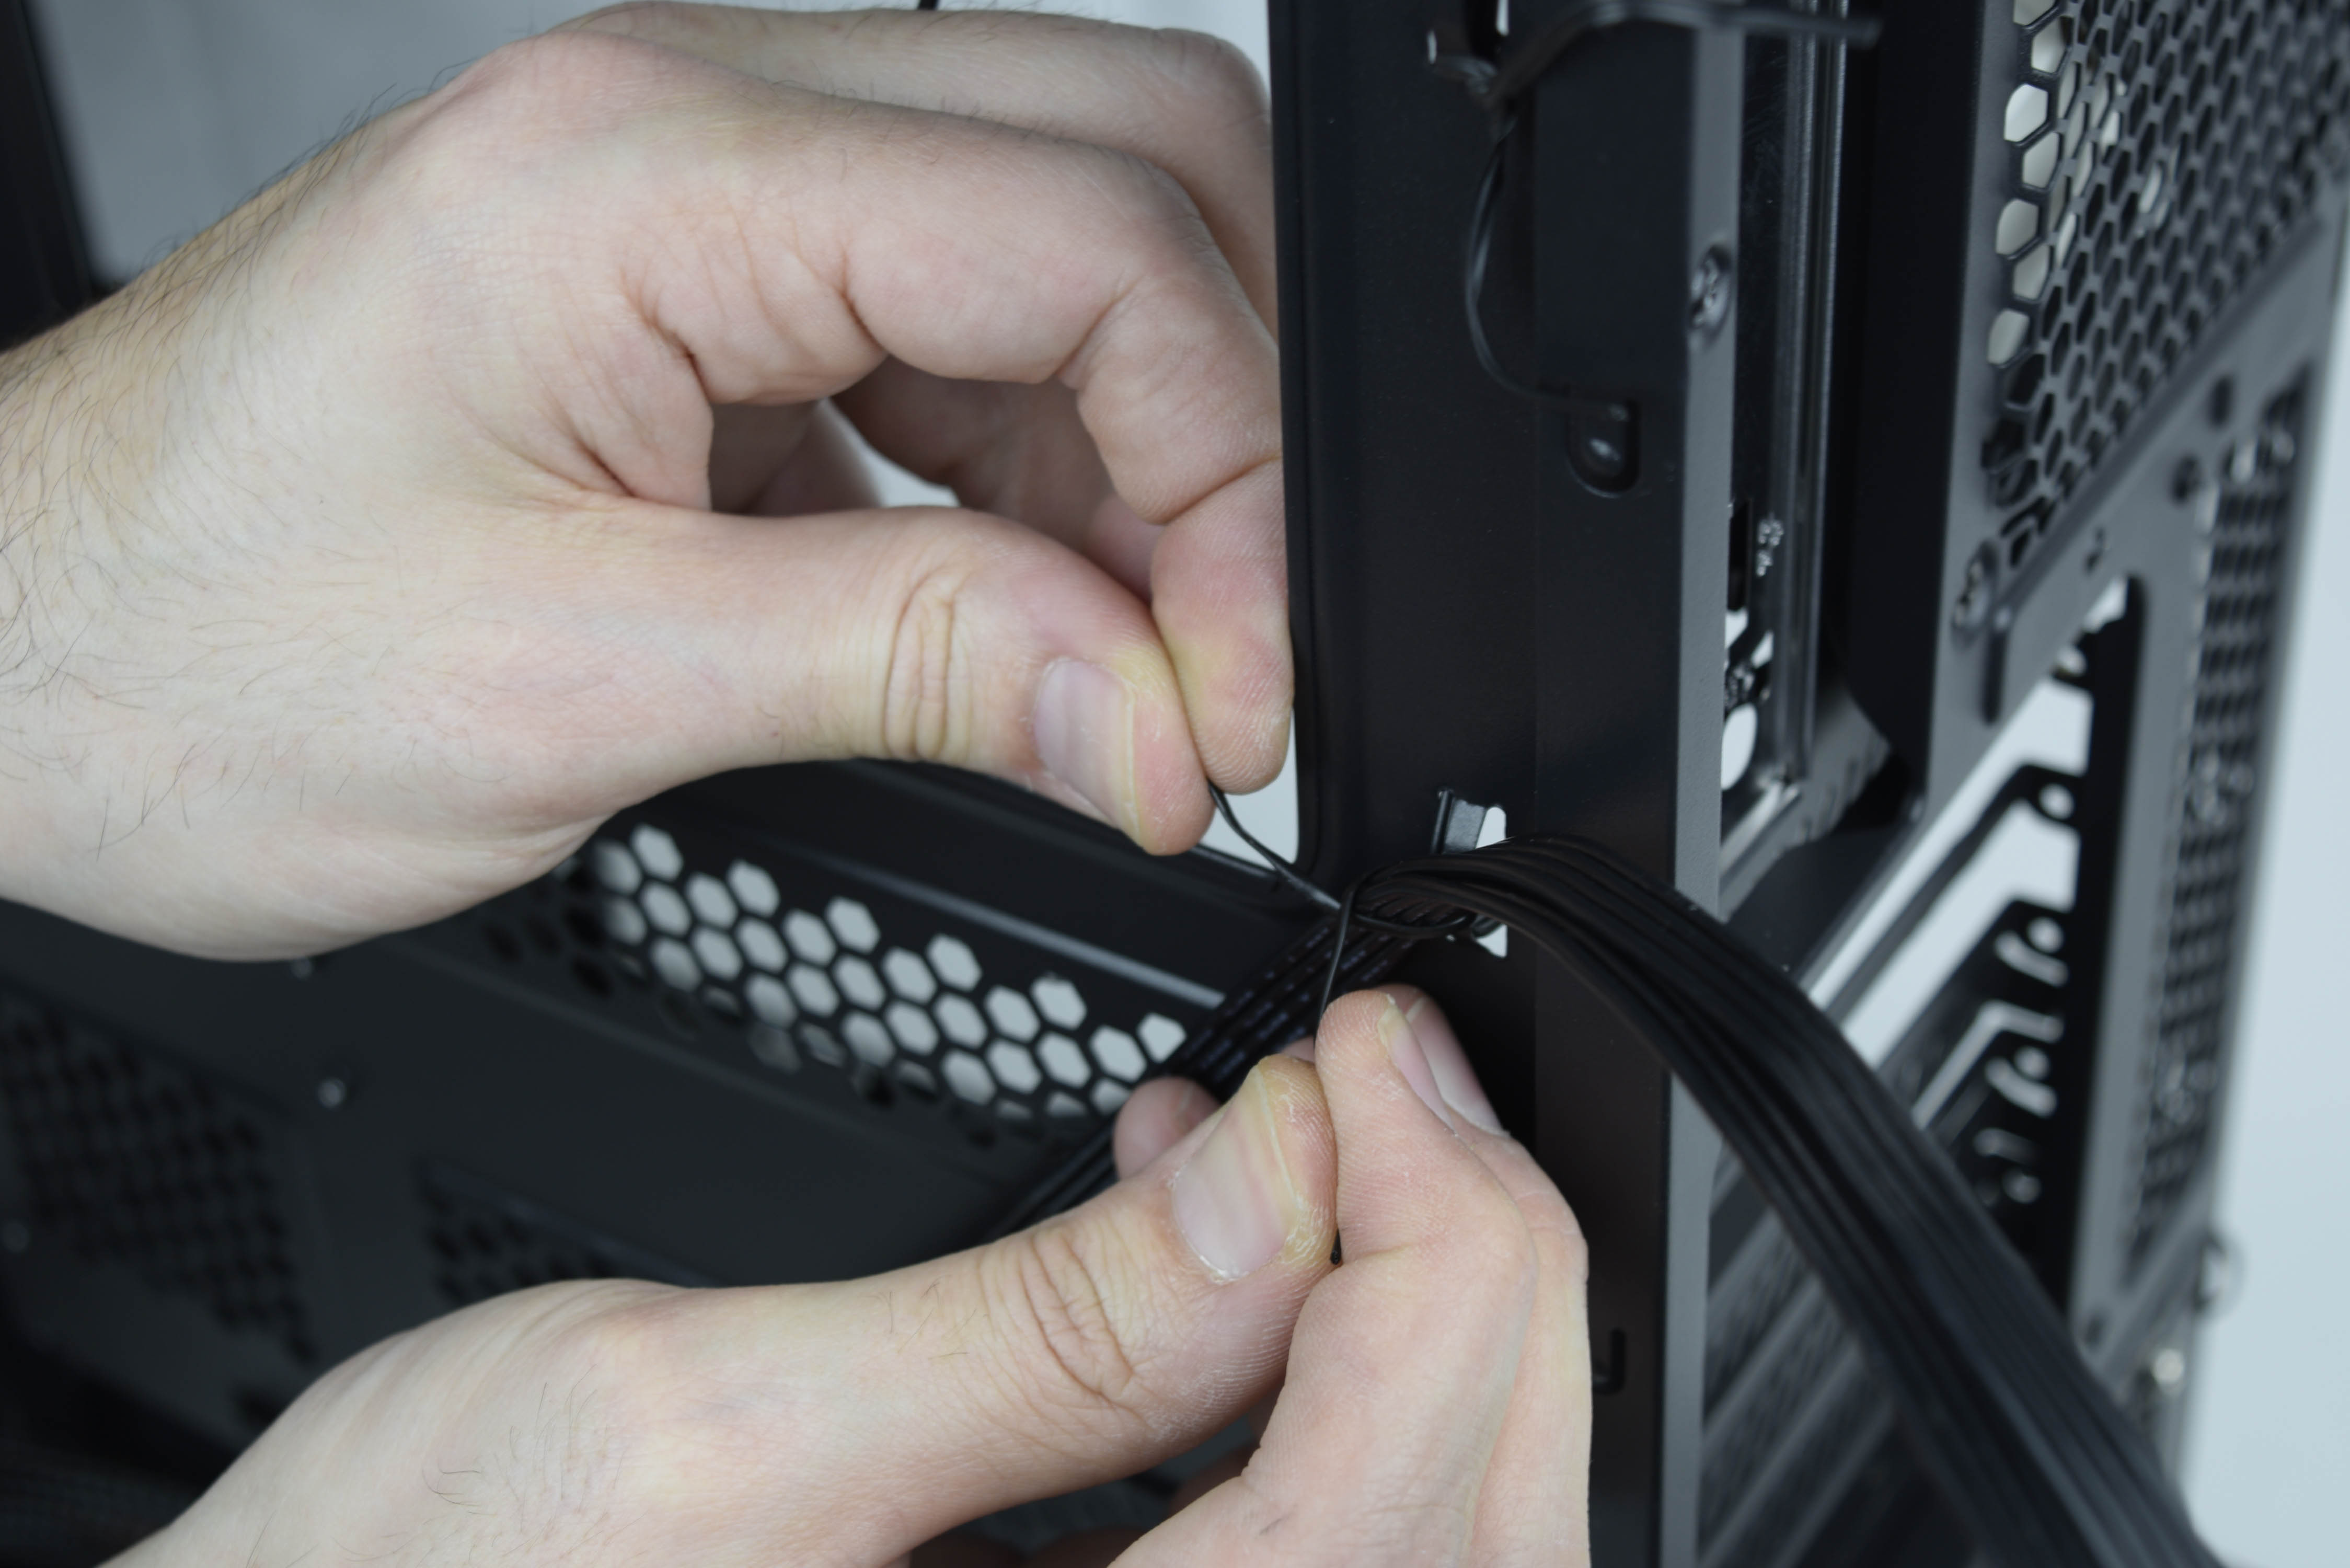
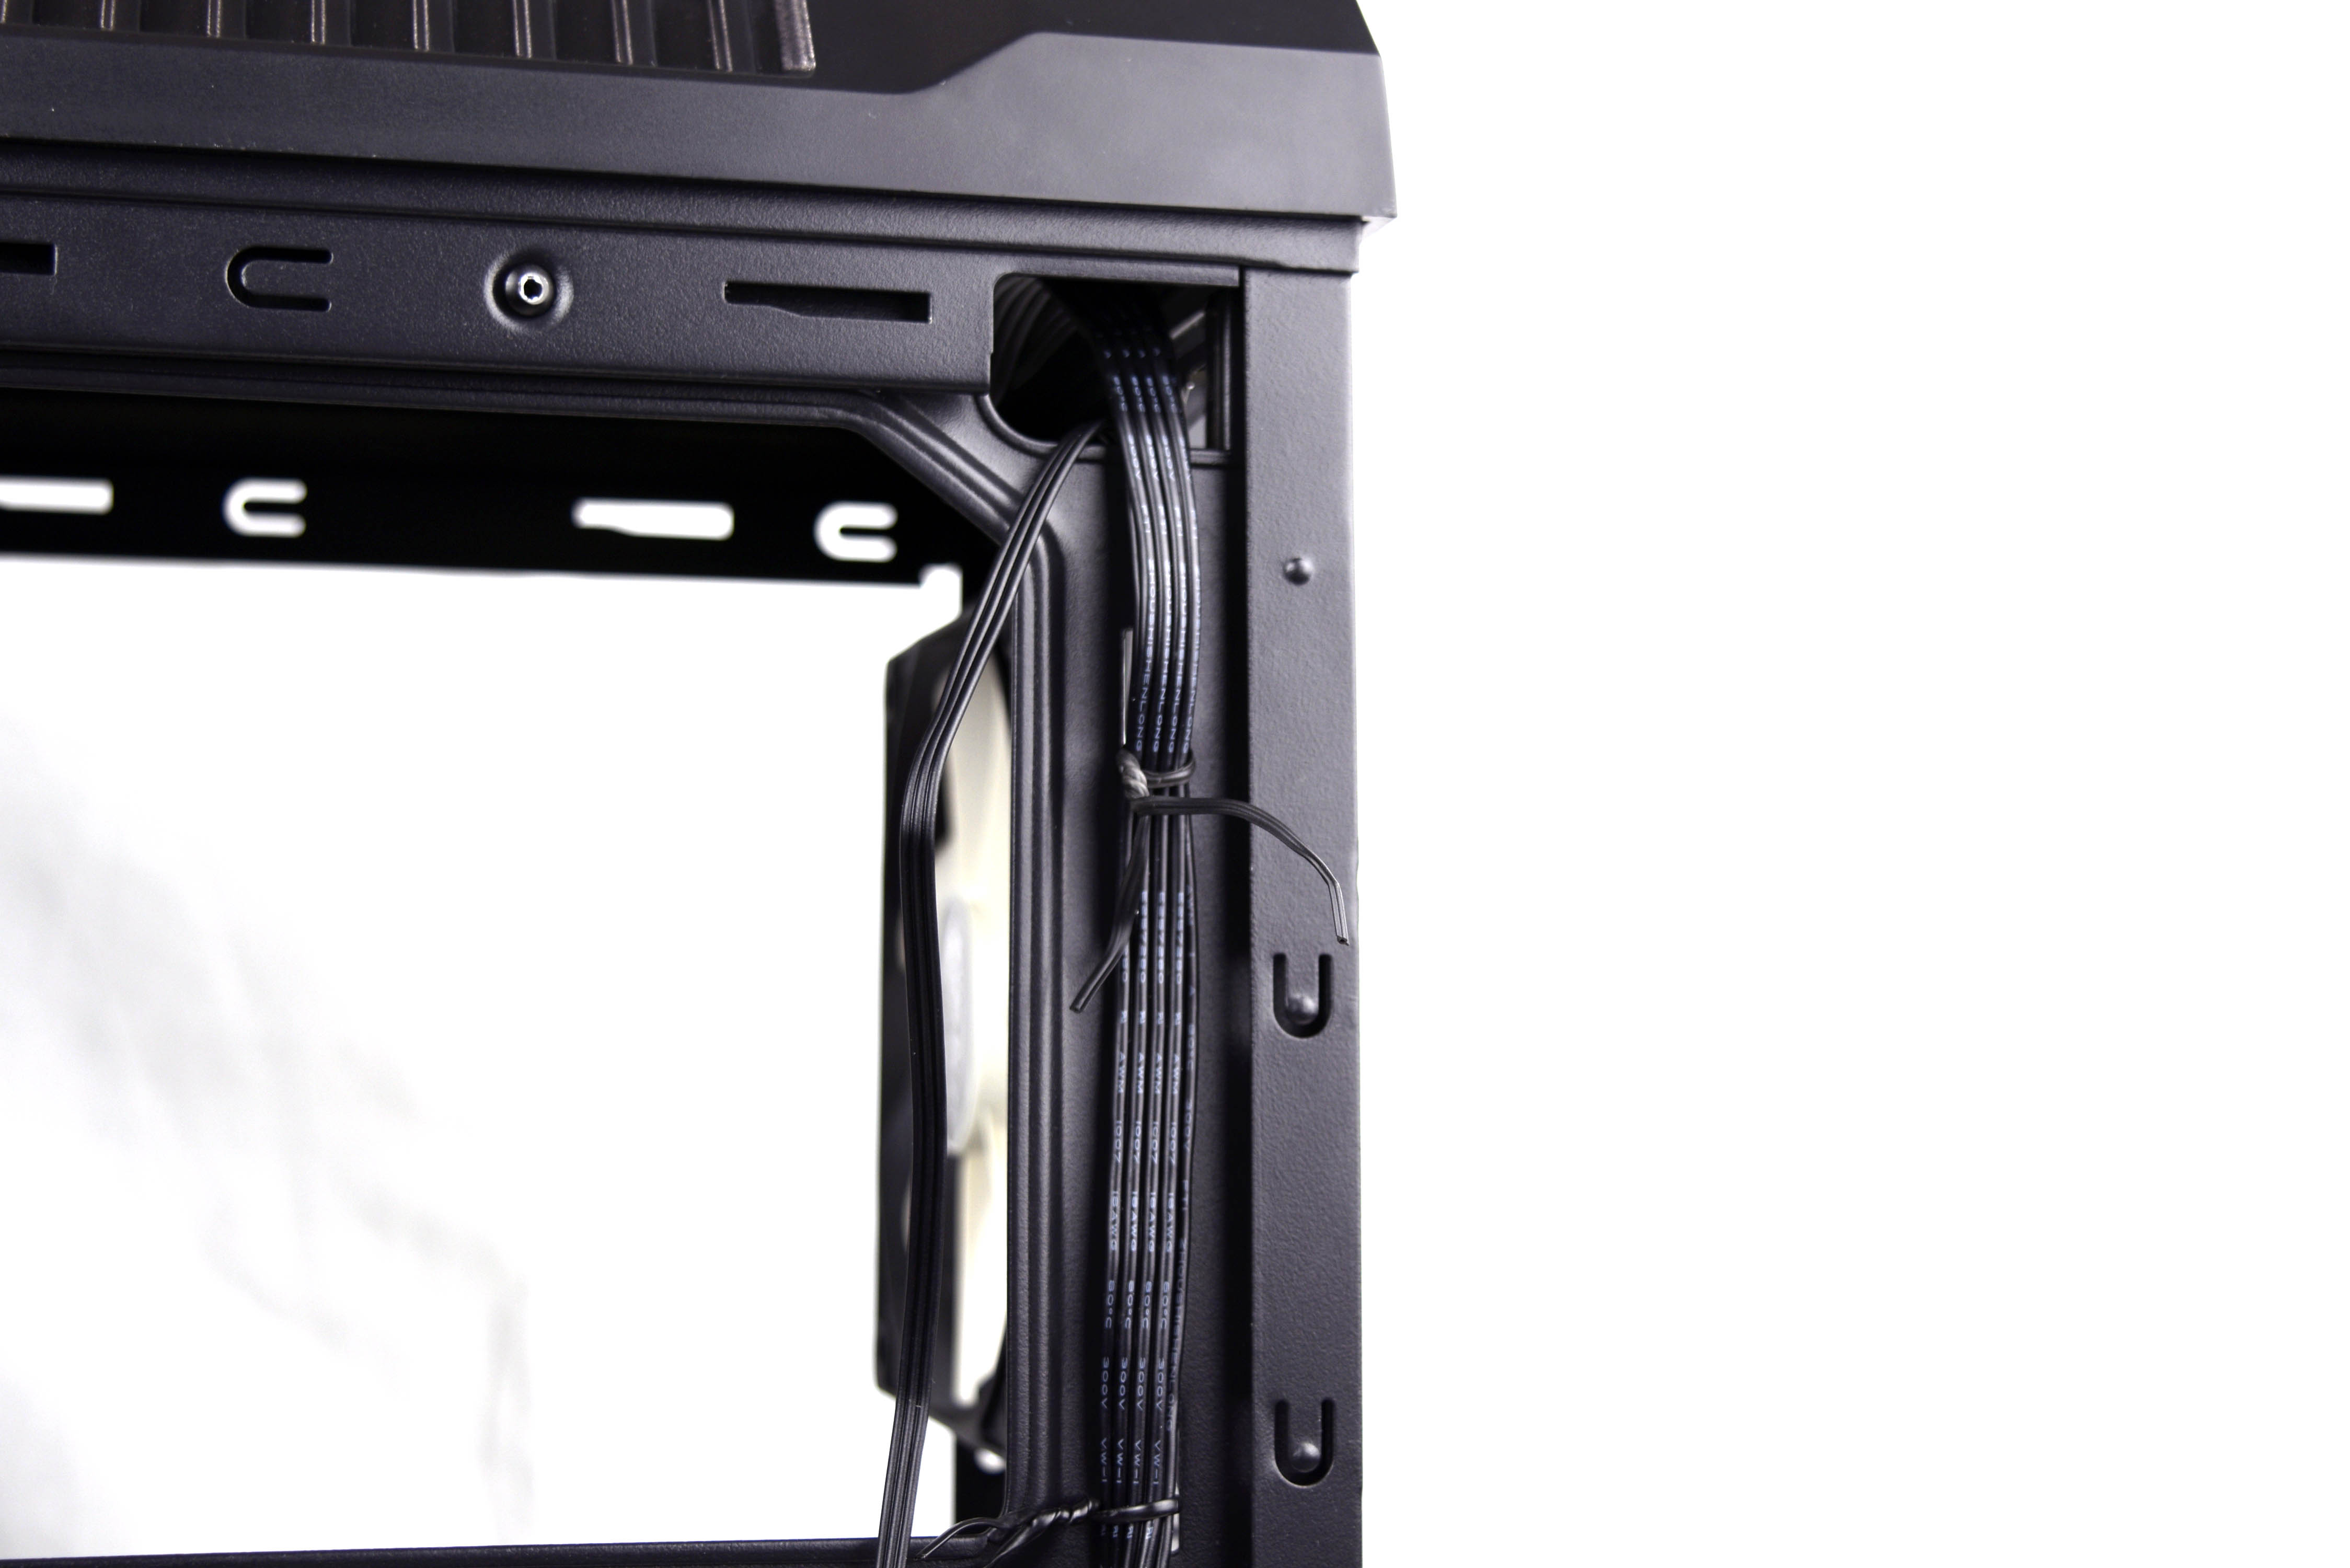
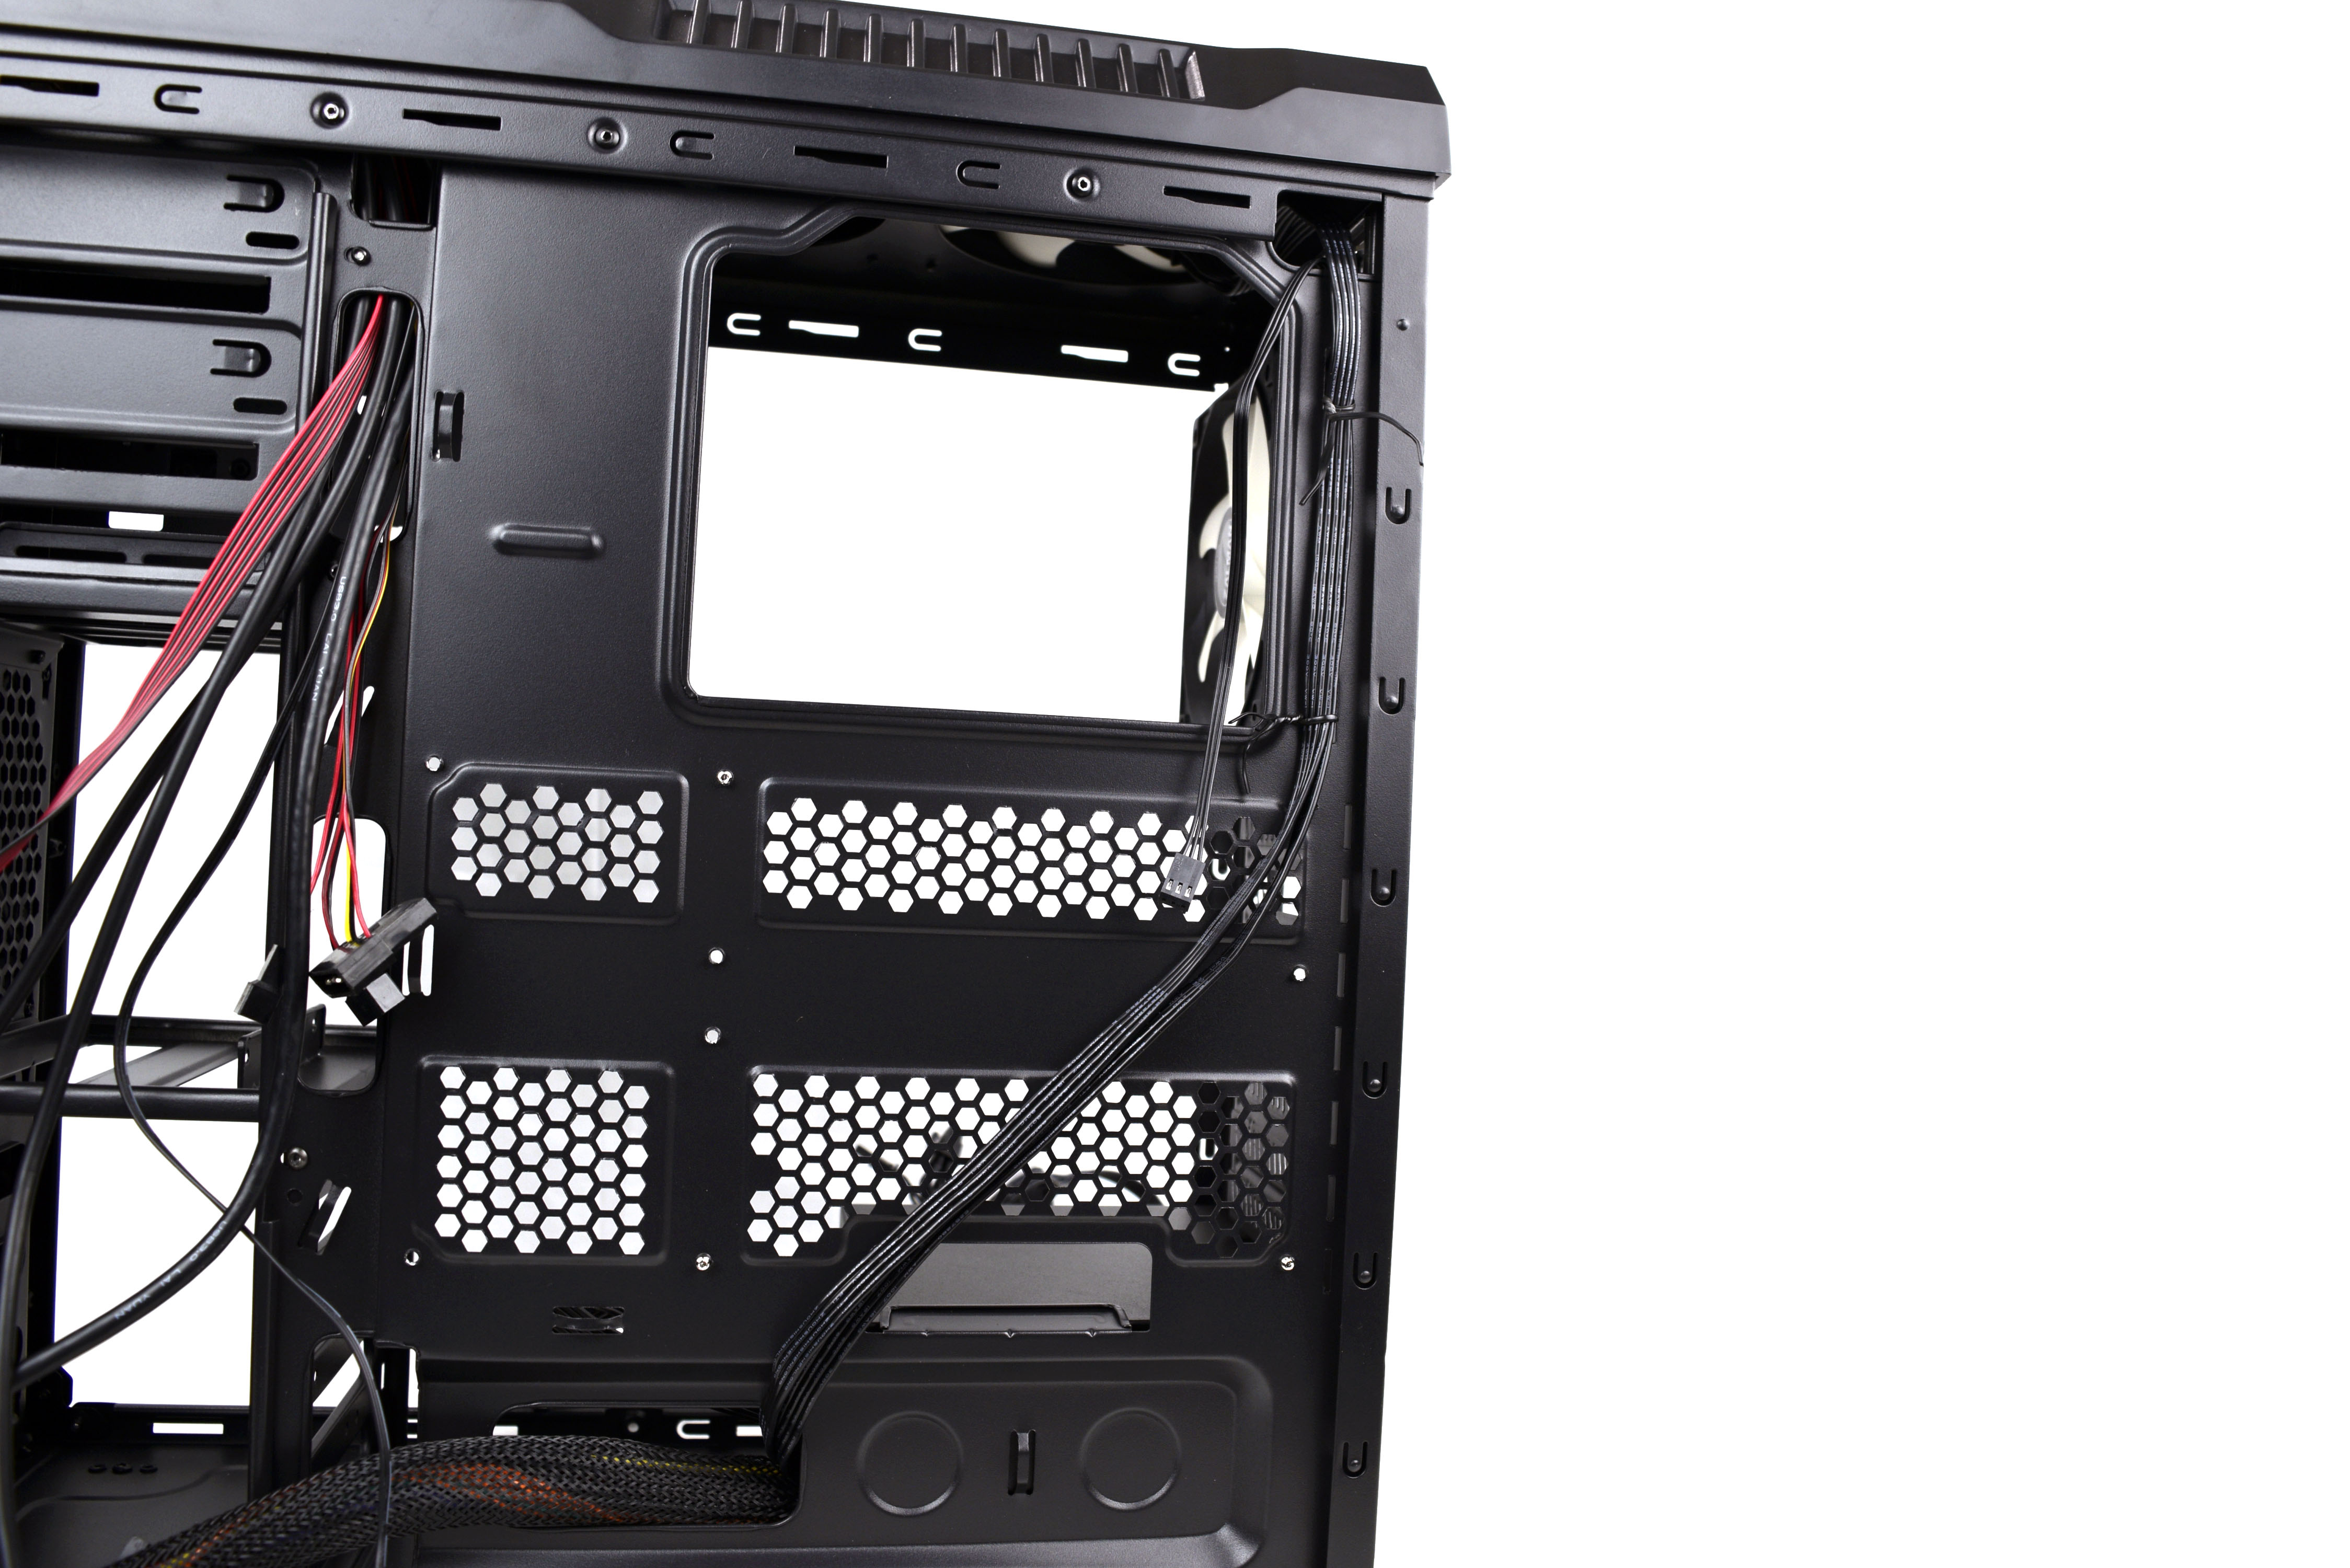
Feed the CPU and ATX power plugs through the first hole, directly in front of the PSU, and run the CPU cable up the right side of the rear of the case (leave the 24-pin ATX cable alone for now), towards the hole in the upper right hand corner (third picture above). Feed the plug through it, and fashion the flat part of the cable against the top of the case in the main chamber of the chassis to make room for the motherboard. Use two tie wraps to secure the cable to the two loops in the case that reside just below the hole where the cable is fed (see pictures 5 - 7). You can also use the cutters on the longer tie wraps that come with the case to make more (we recommend one cut, in half, for a decent sized tie wrap). We prefer tie wraps over zip ties because you can always go back and add wires to the existing cable management, or remove components and their cables easier. You can choose a more permanent solution by using the provided zip ties, but if this is your first time building a PC, you’ll likely end up appreciating the proverbial safety net offered by the tie wraps.
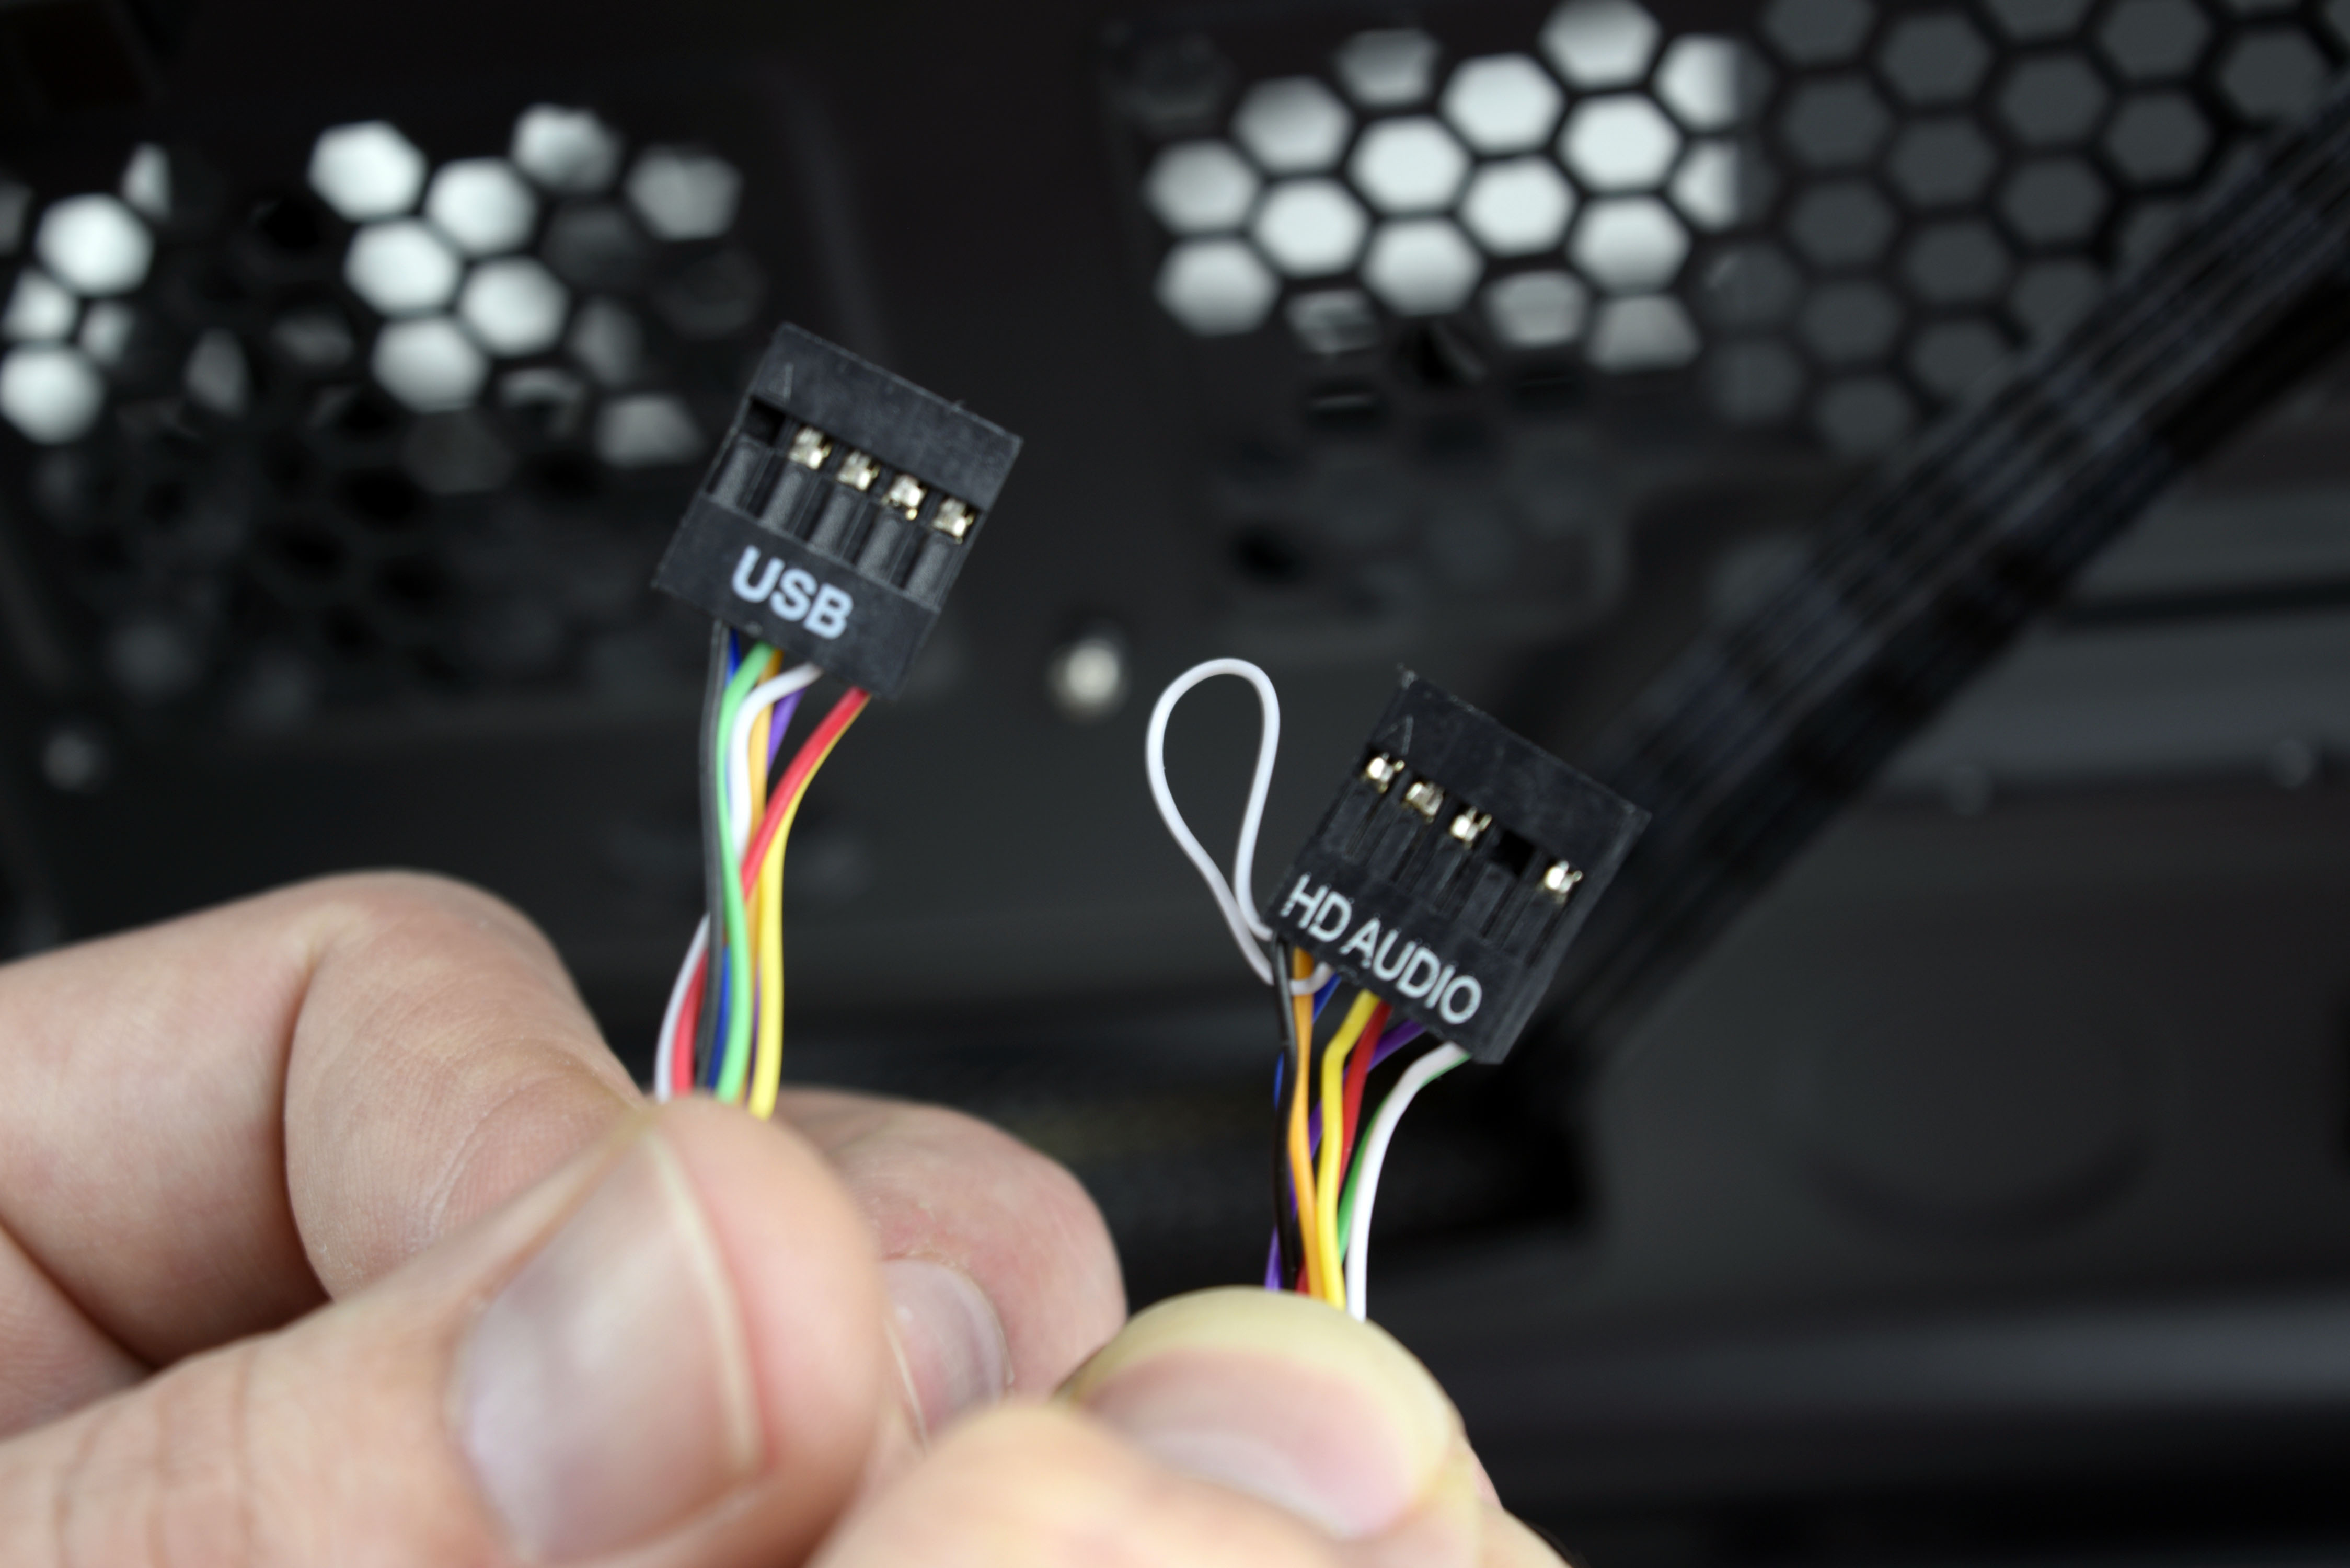
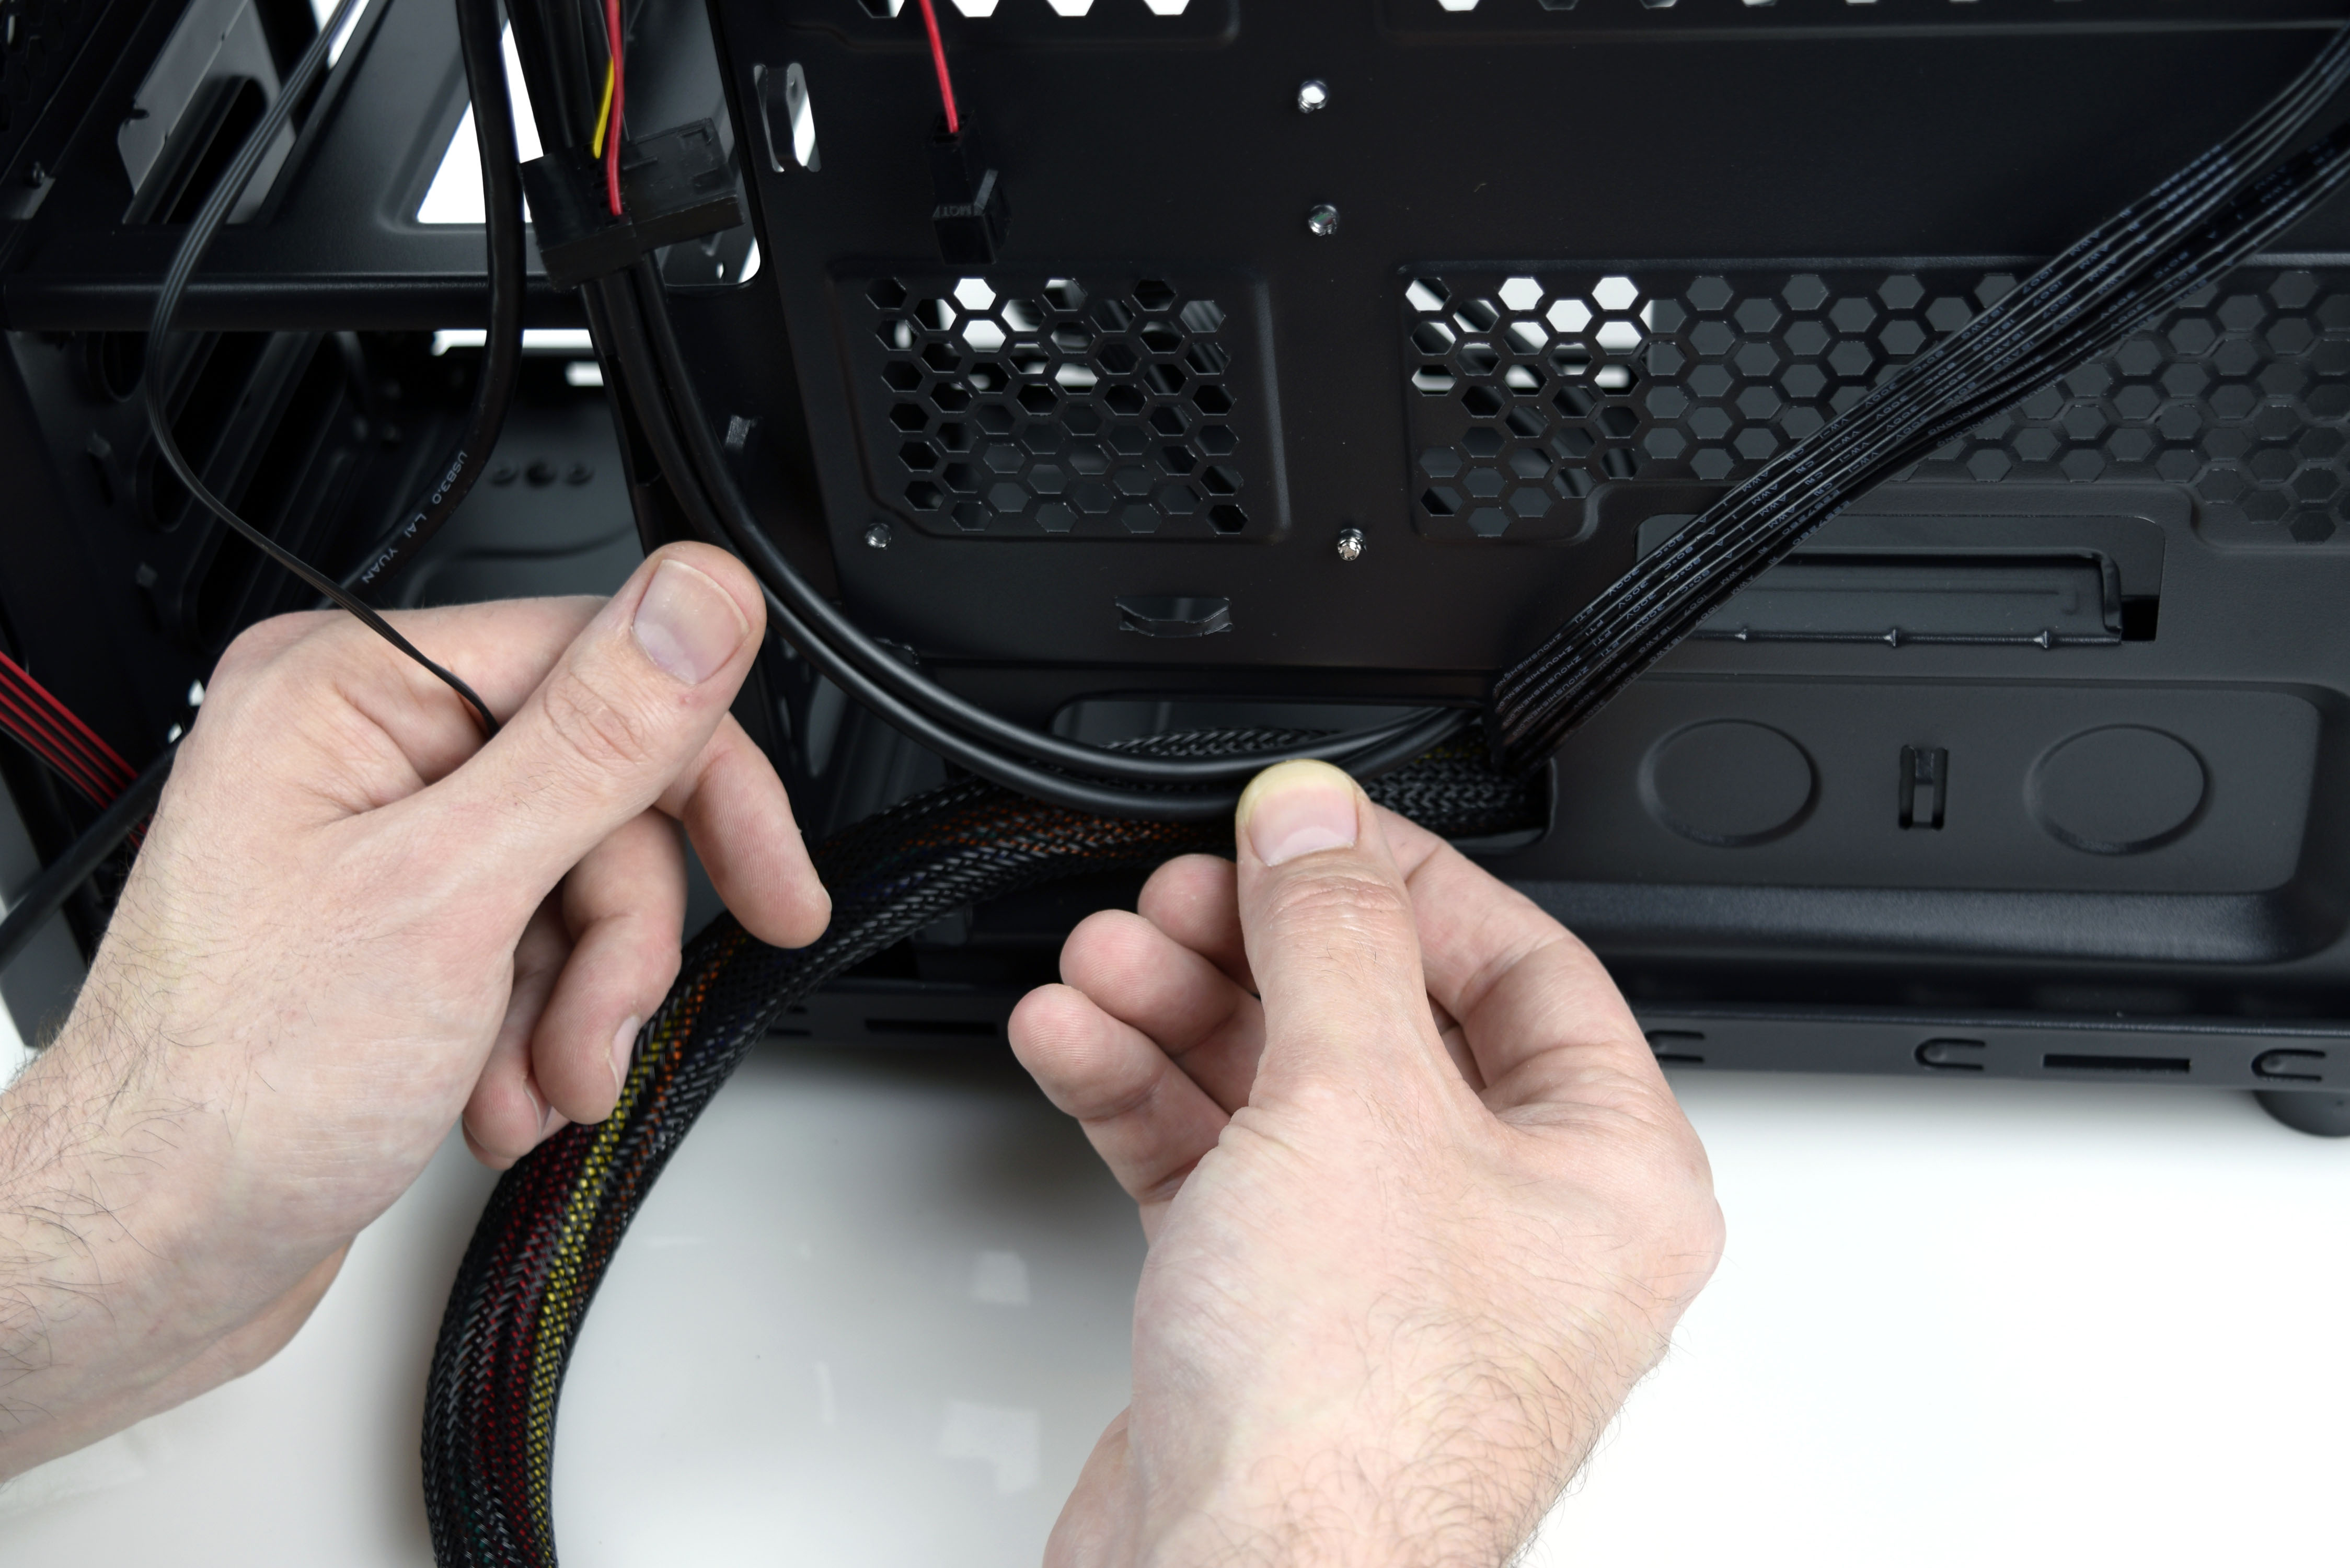
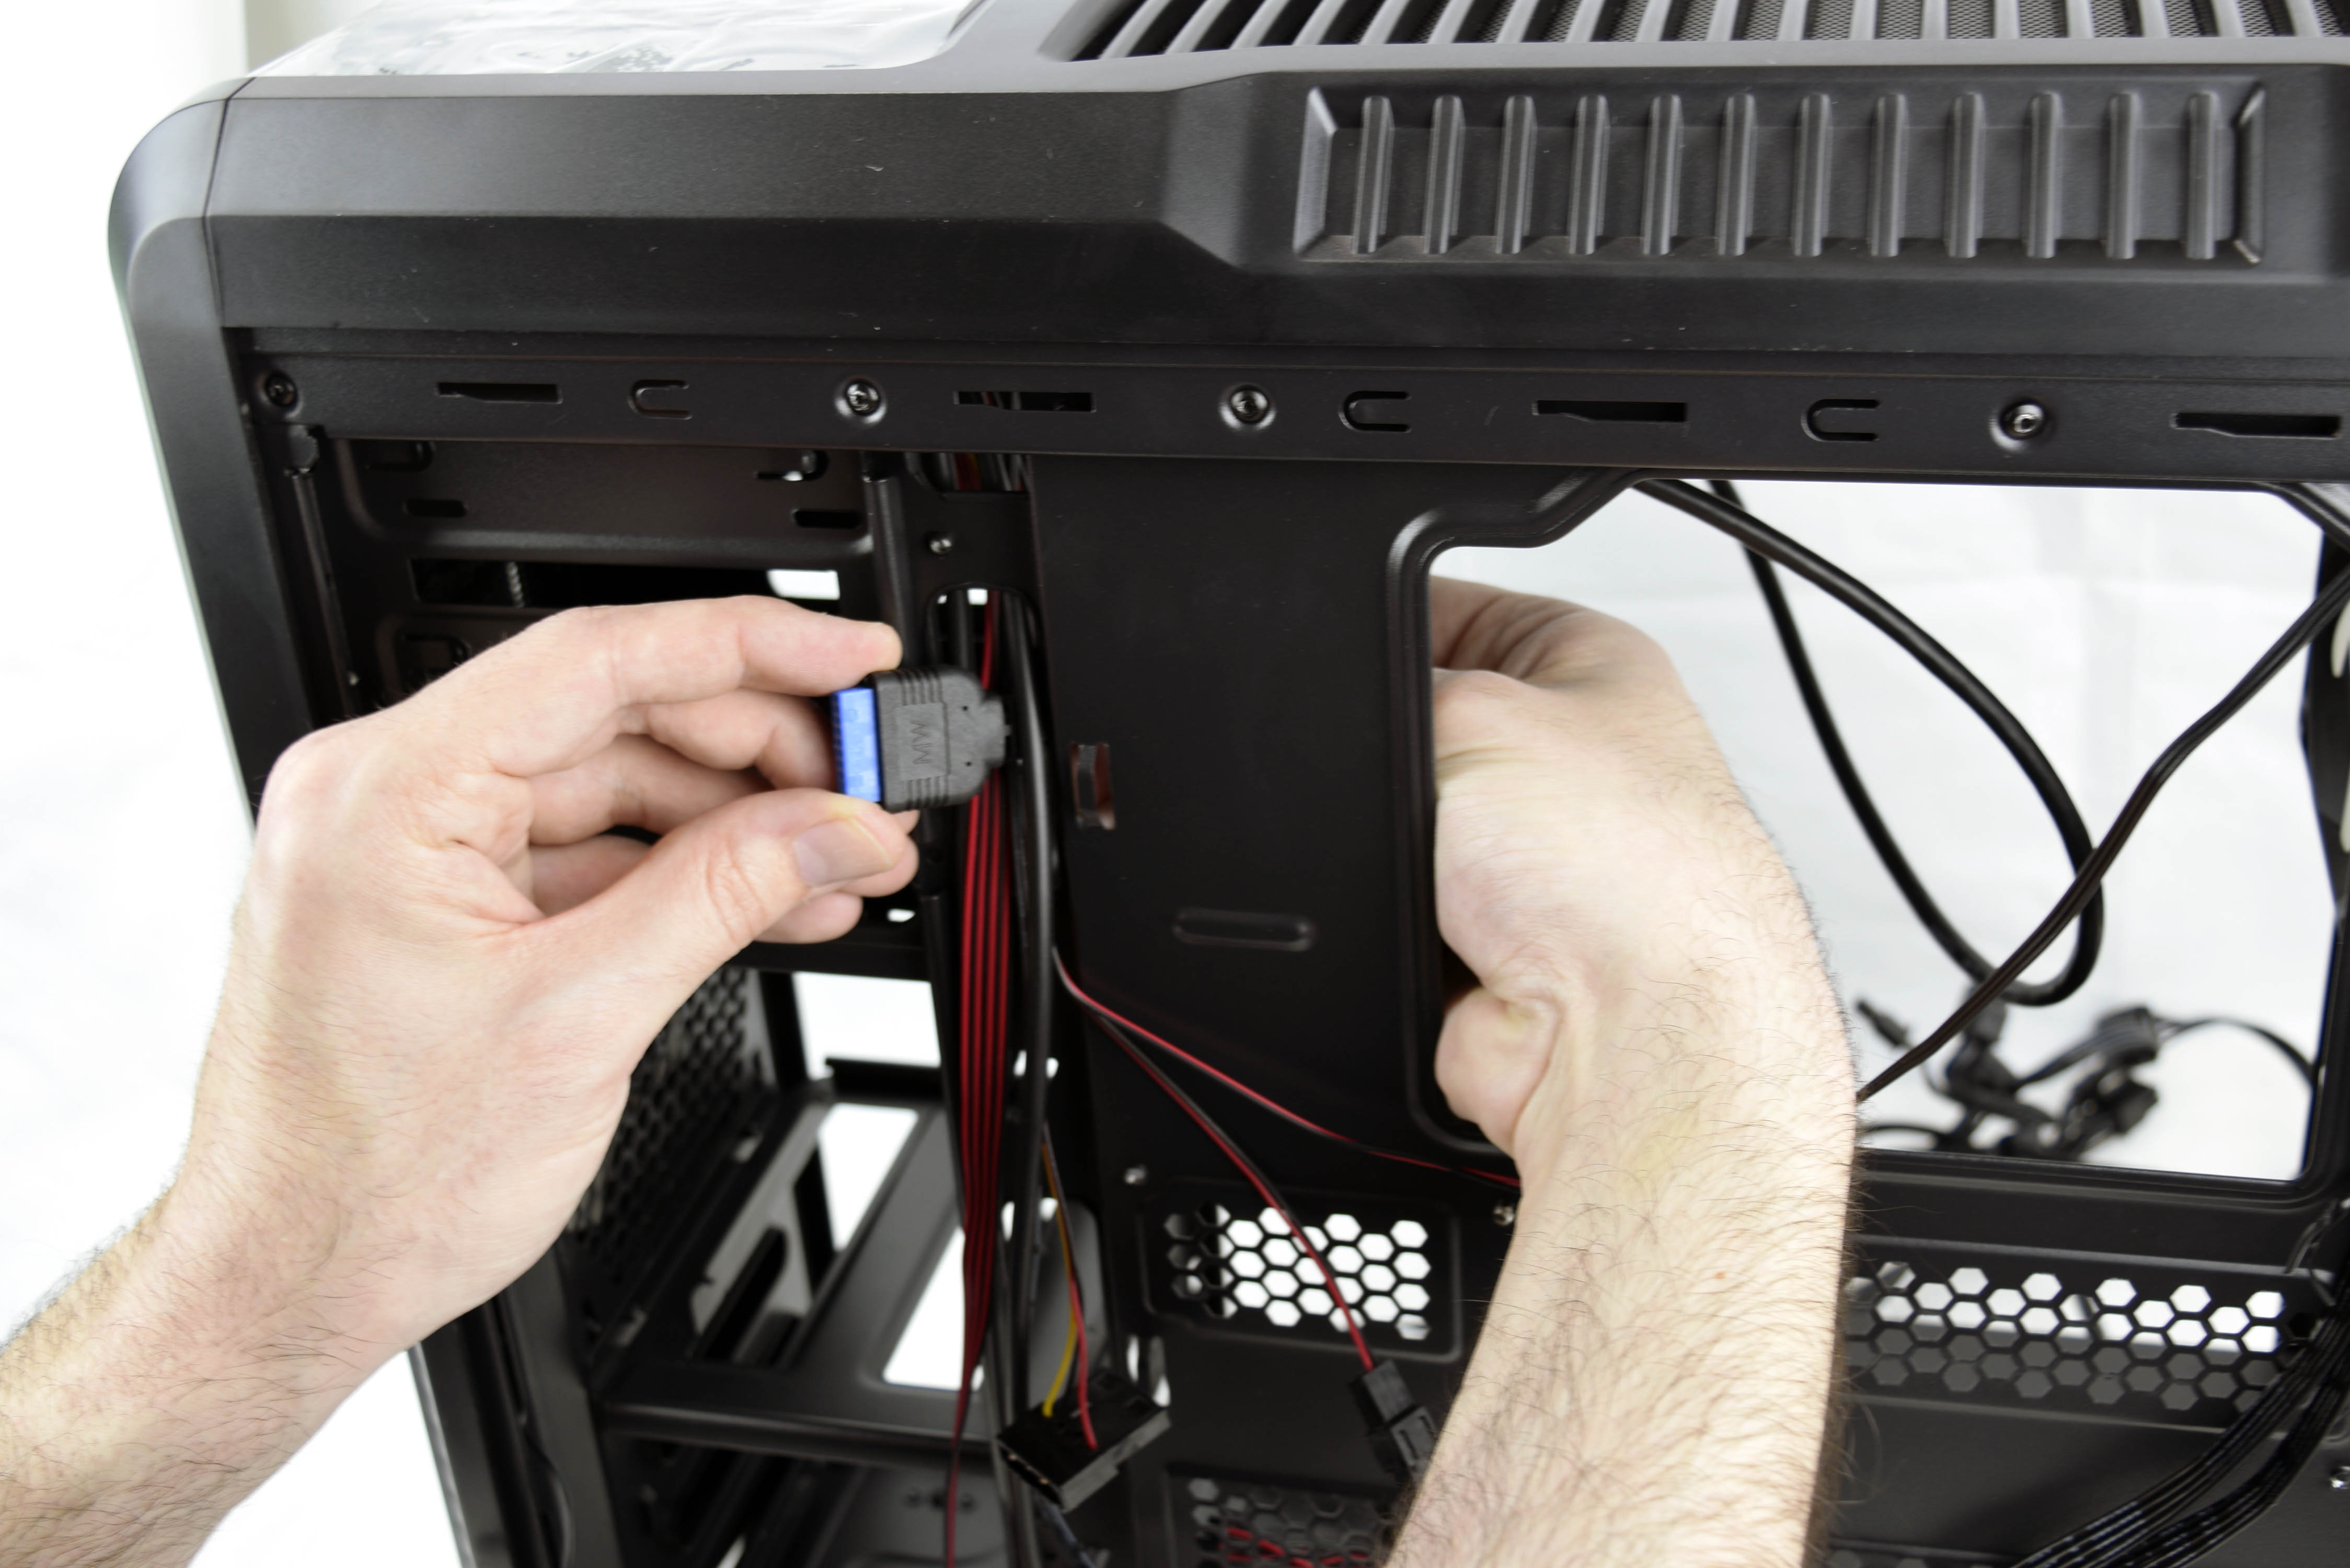
At this point, separate the case’s internal cabling, and run the USB 2.0 and audio wiring down the case and into the same hole you just ran the two power cables through (see pictures 2 and 3 above). The audio cable takes priority, and it will require all of the possible slack you have to reach its connector on the motherboard comfortably (once it’s mounted).
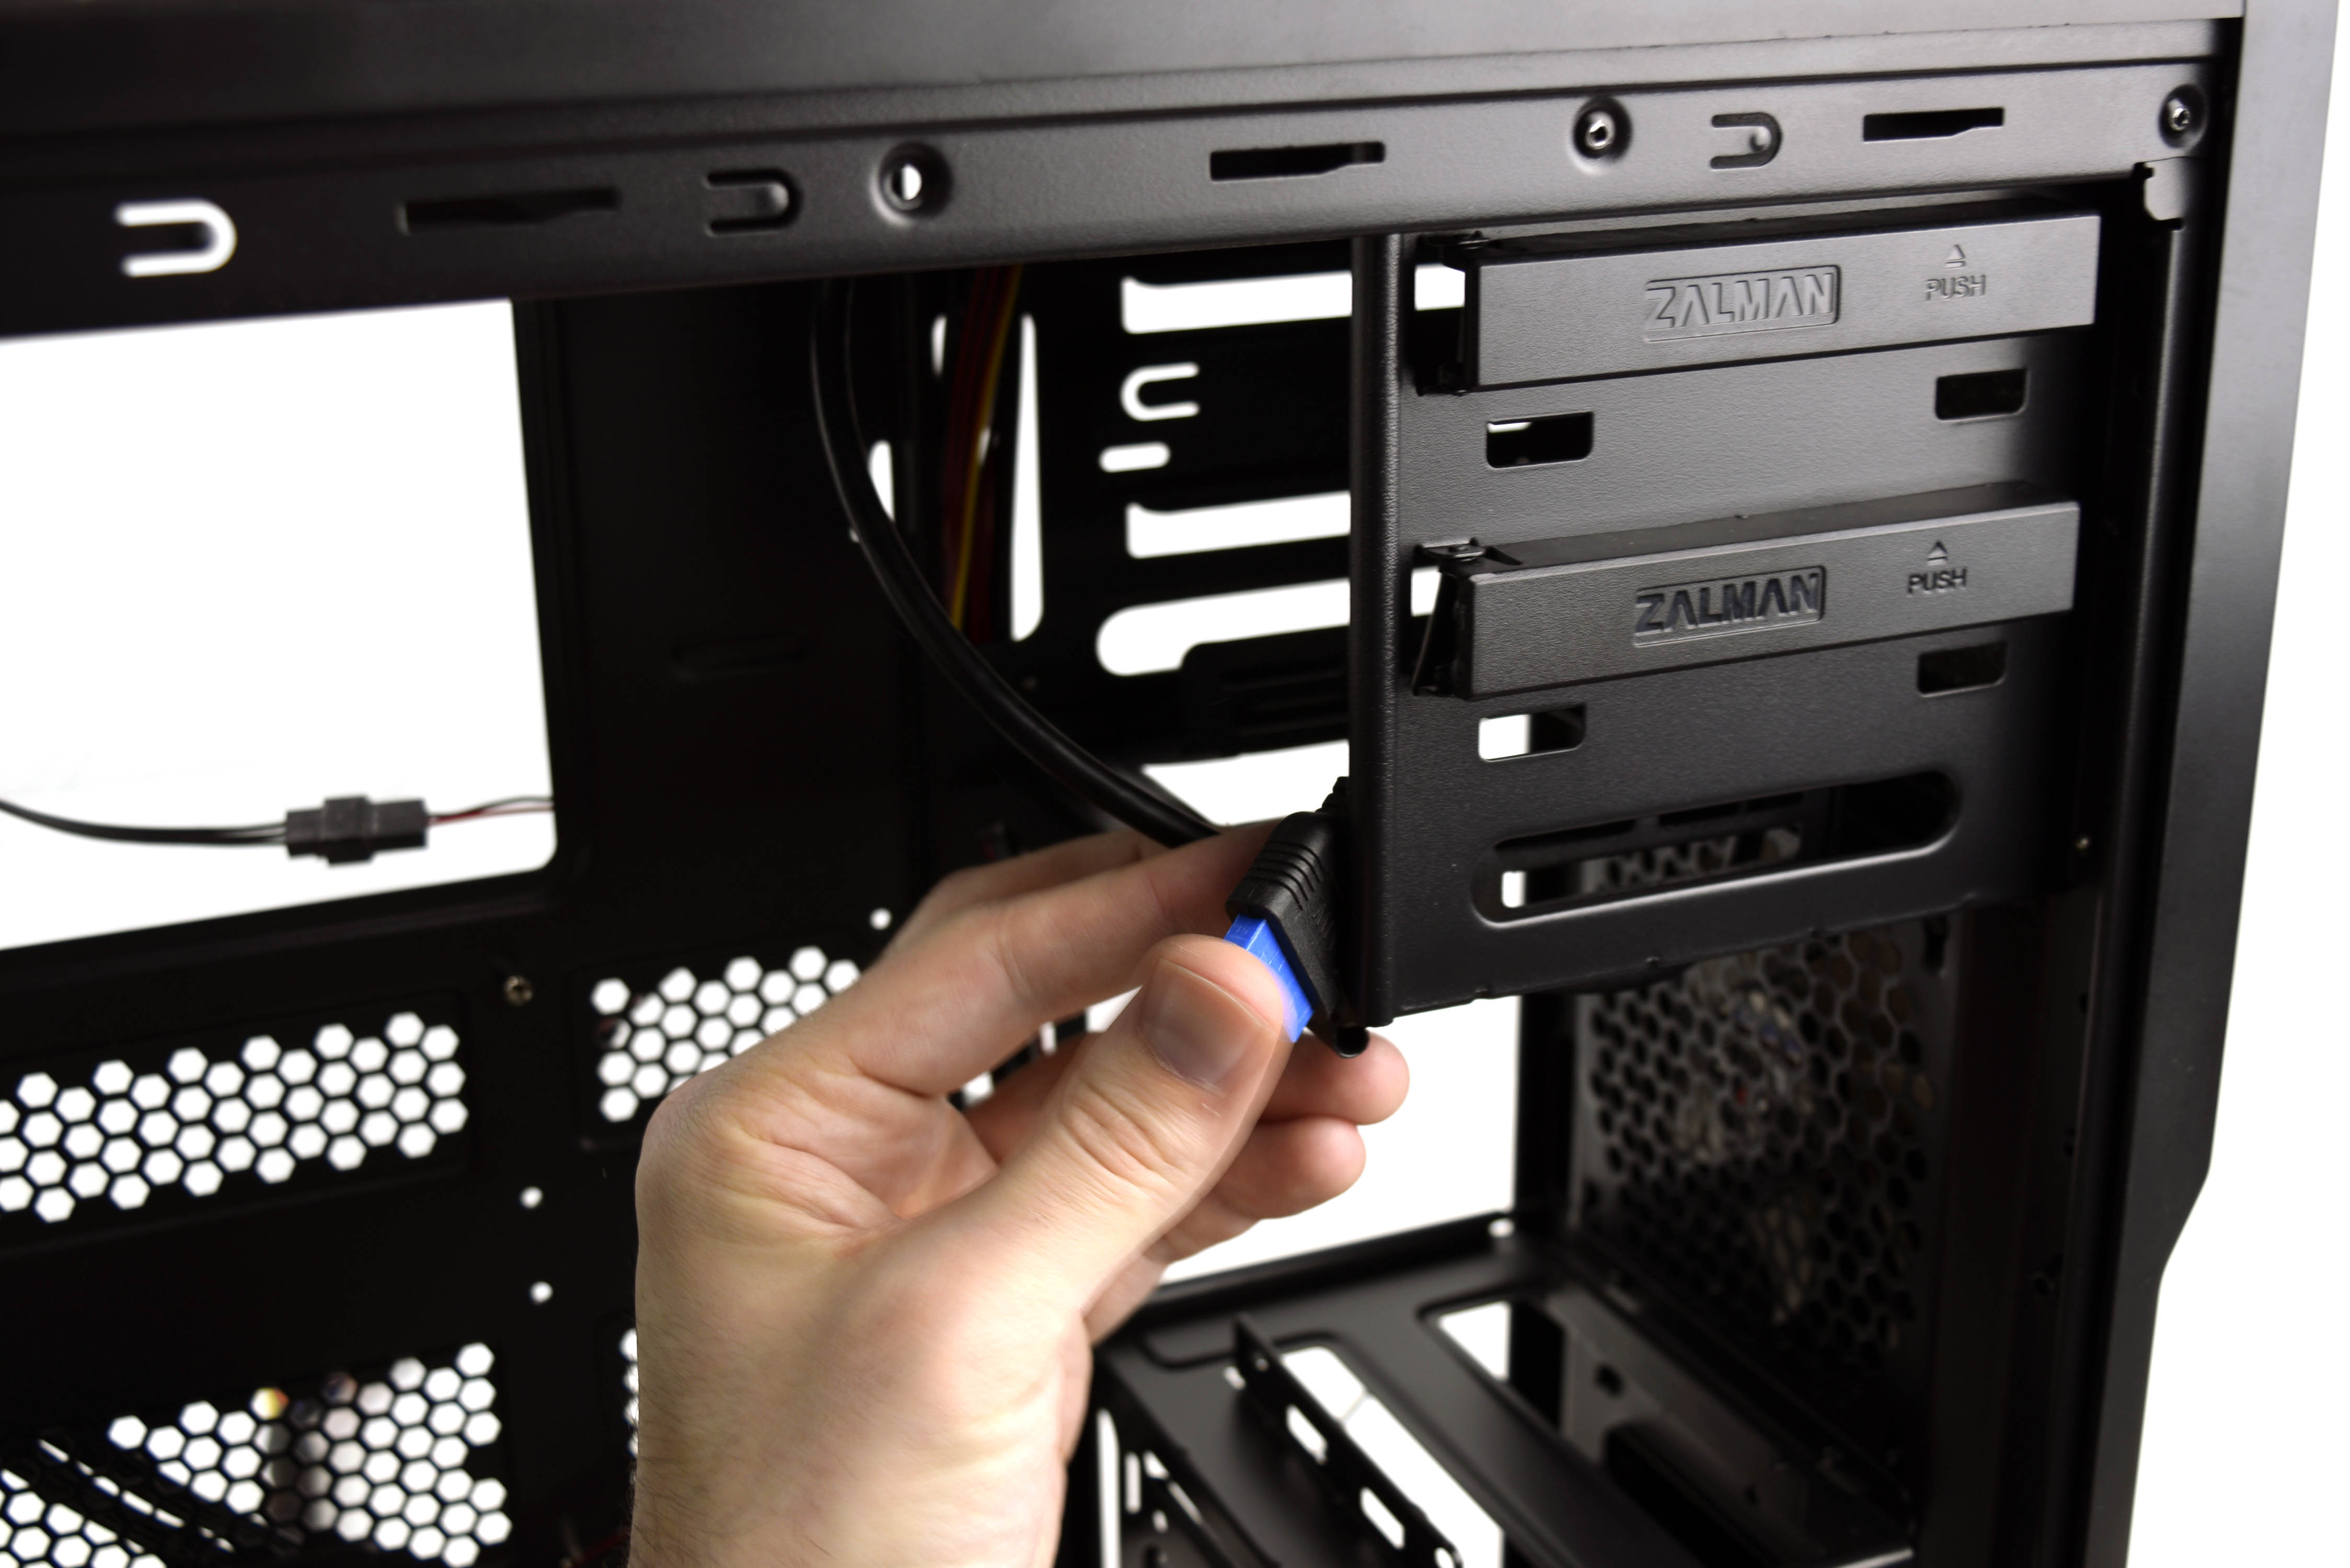
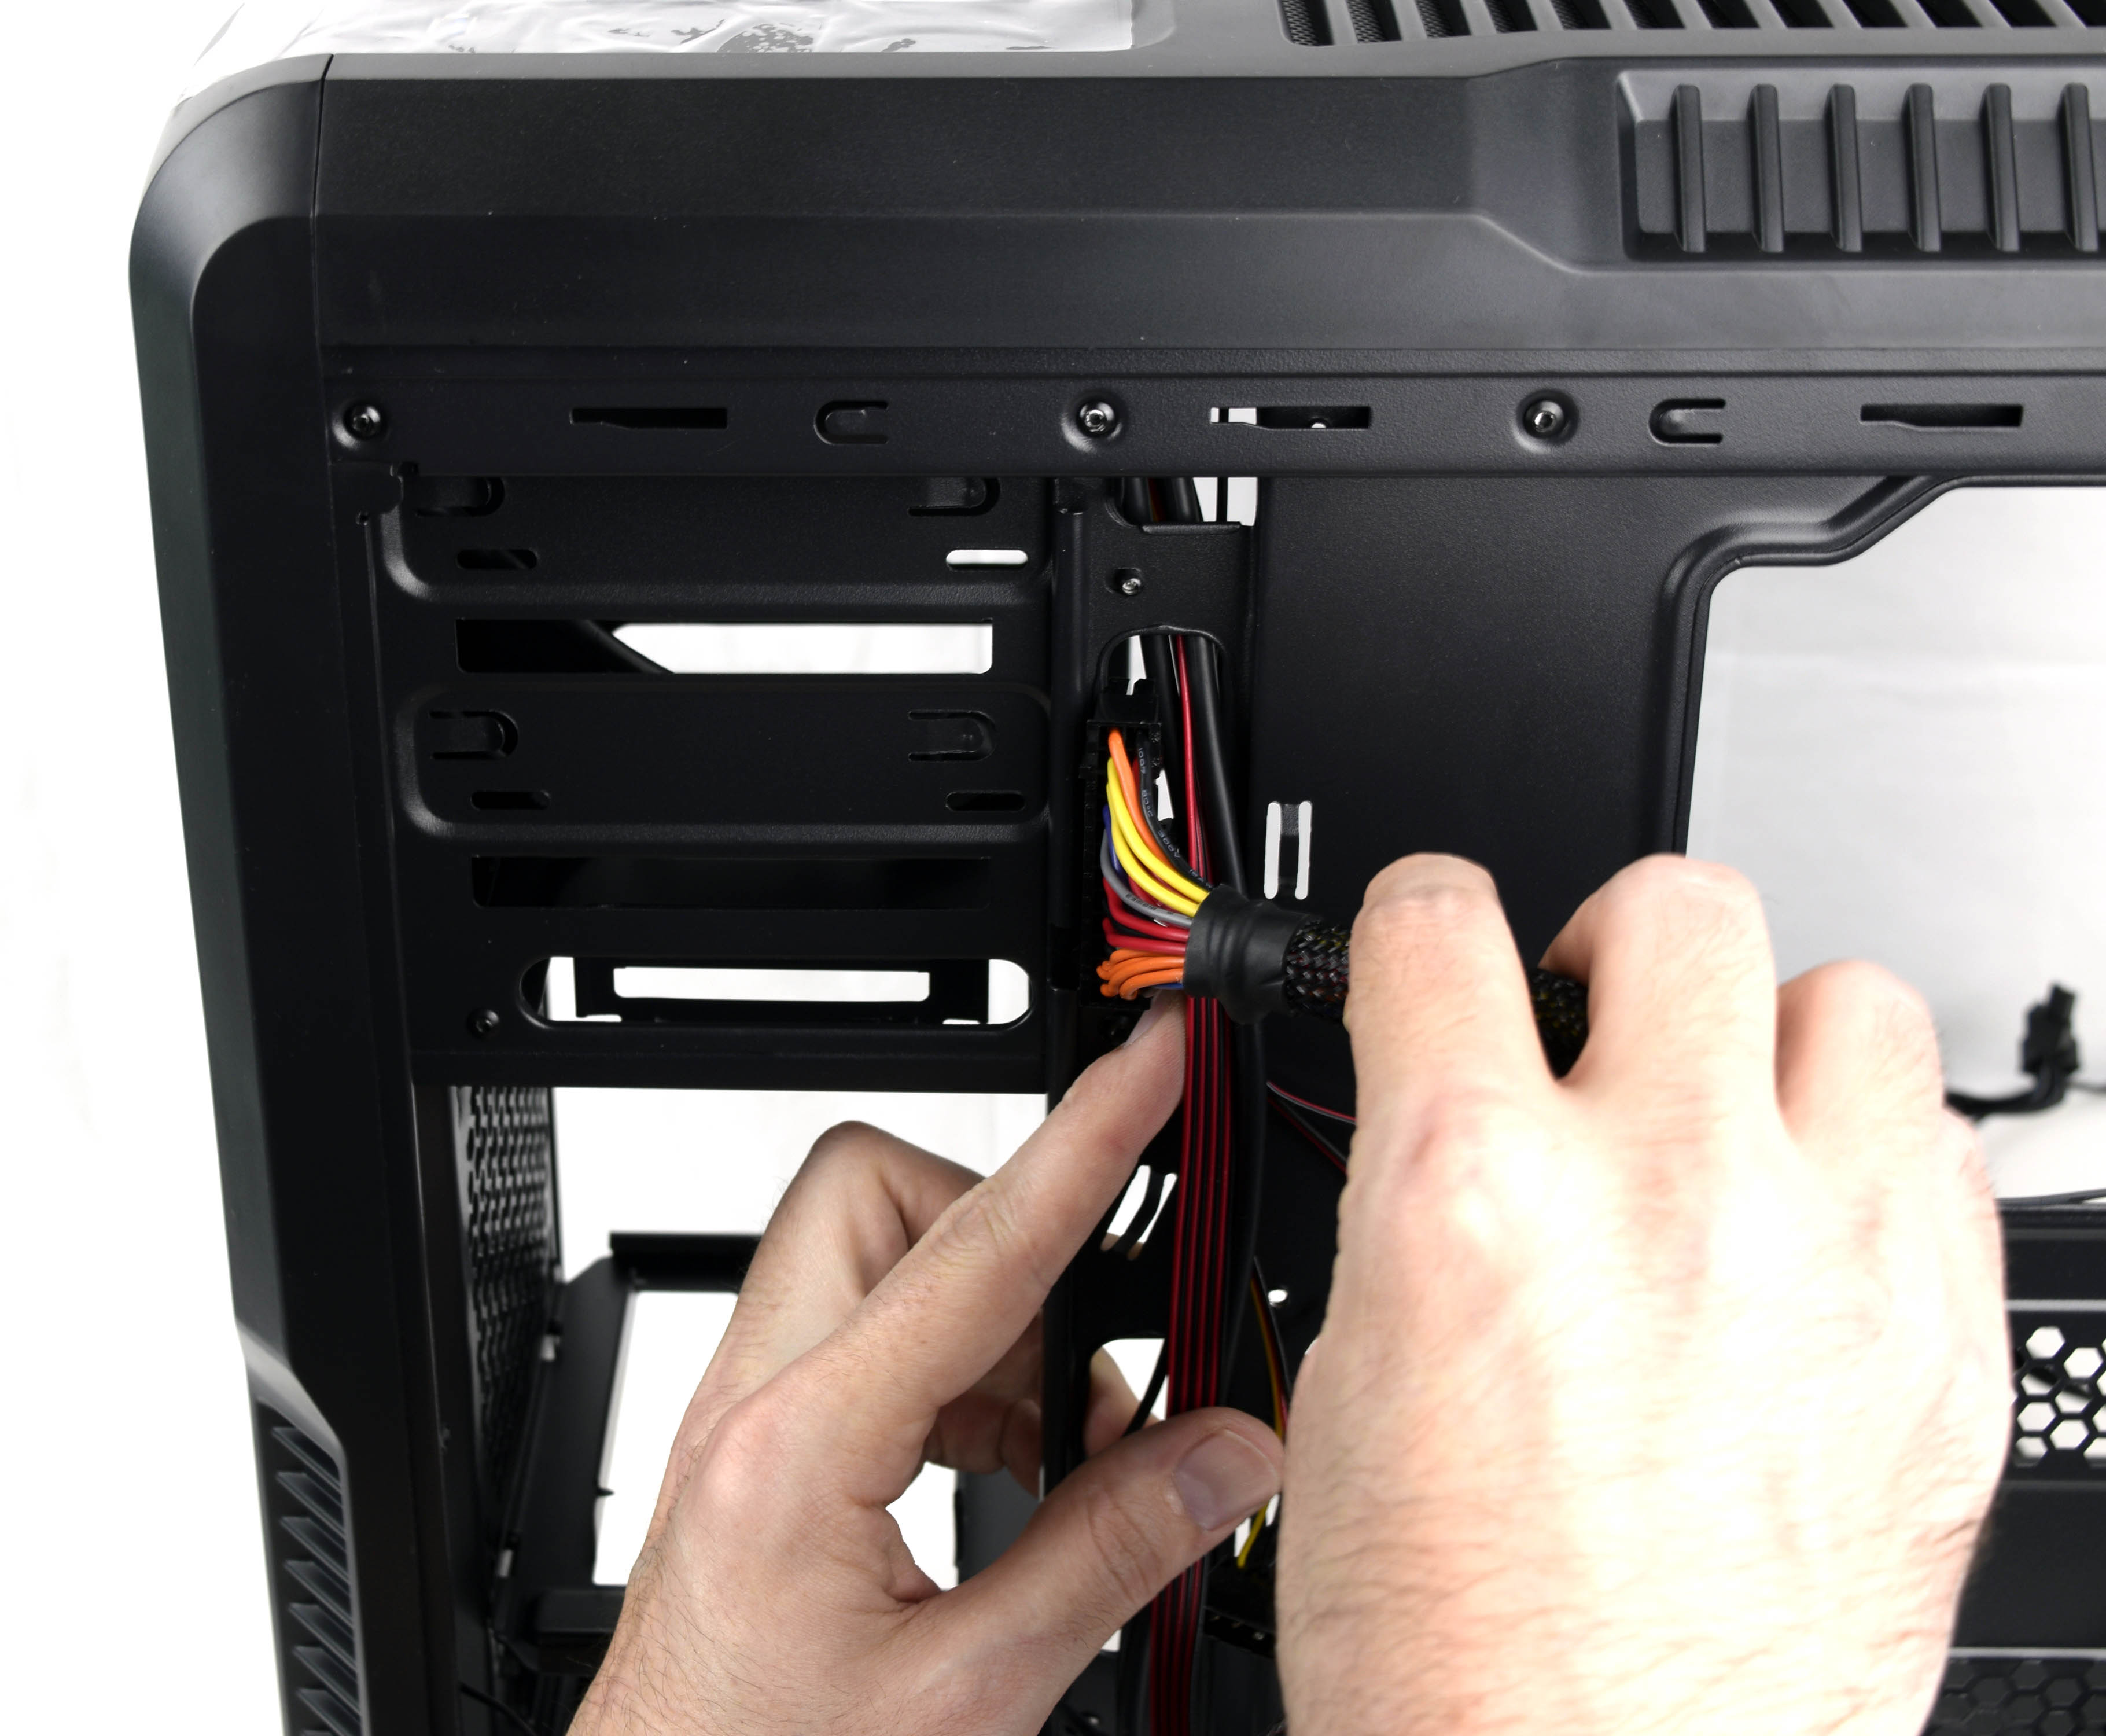
Feed the USB 3.0 cable into the 5.25” drive bay and keep it tucked away for now (fourth picture). Run the 24-pin ATX power connector alongside the USB 2.0 and Audio cables (fifth picture) and through the hole at the top of the case, next to the 5.25” drive bay (which is unused in this configuration). Tuck the ATX cable into the bay for now, making it flush and taut to the case’s underside.
Wiring
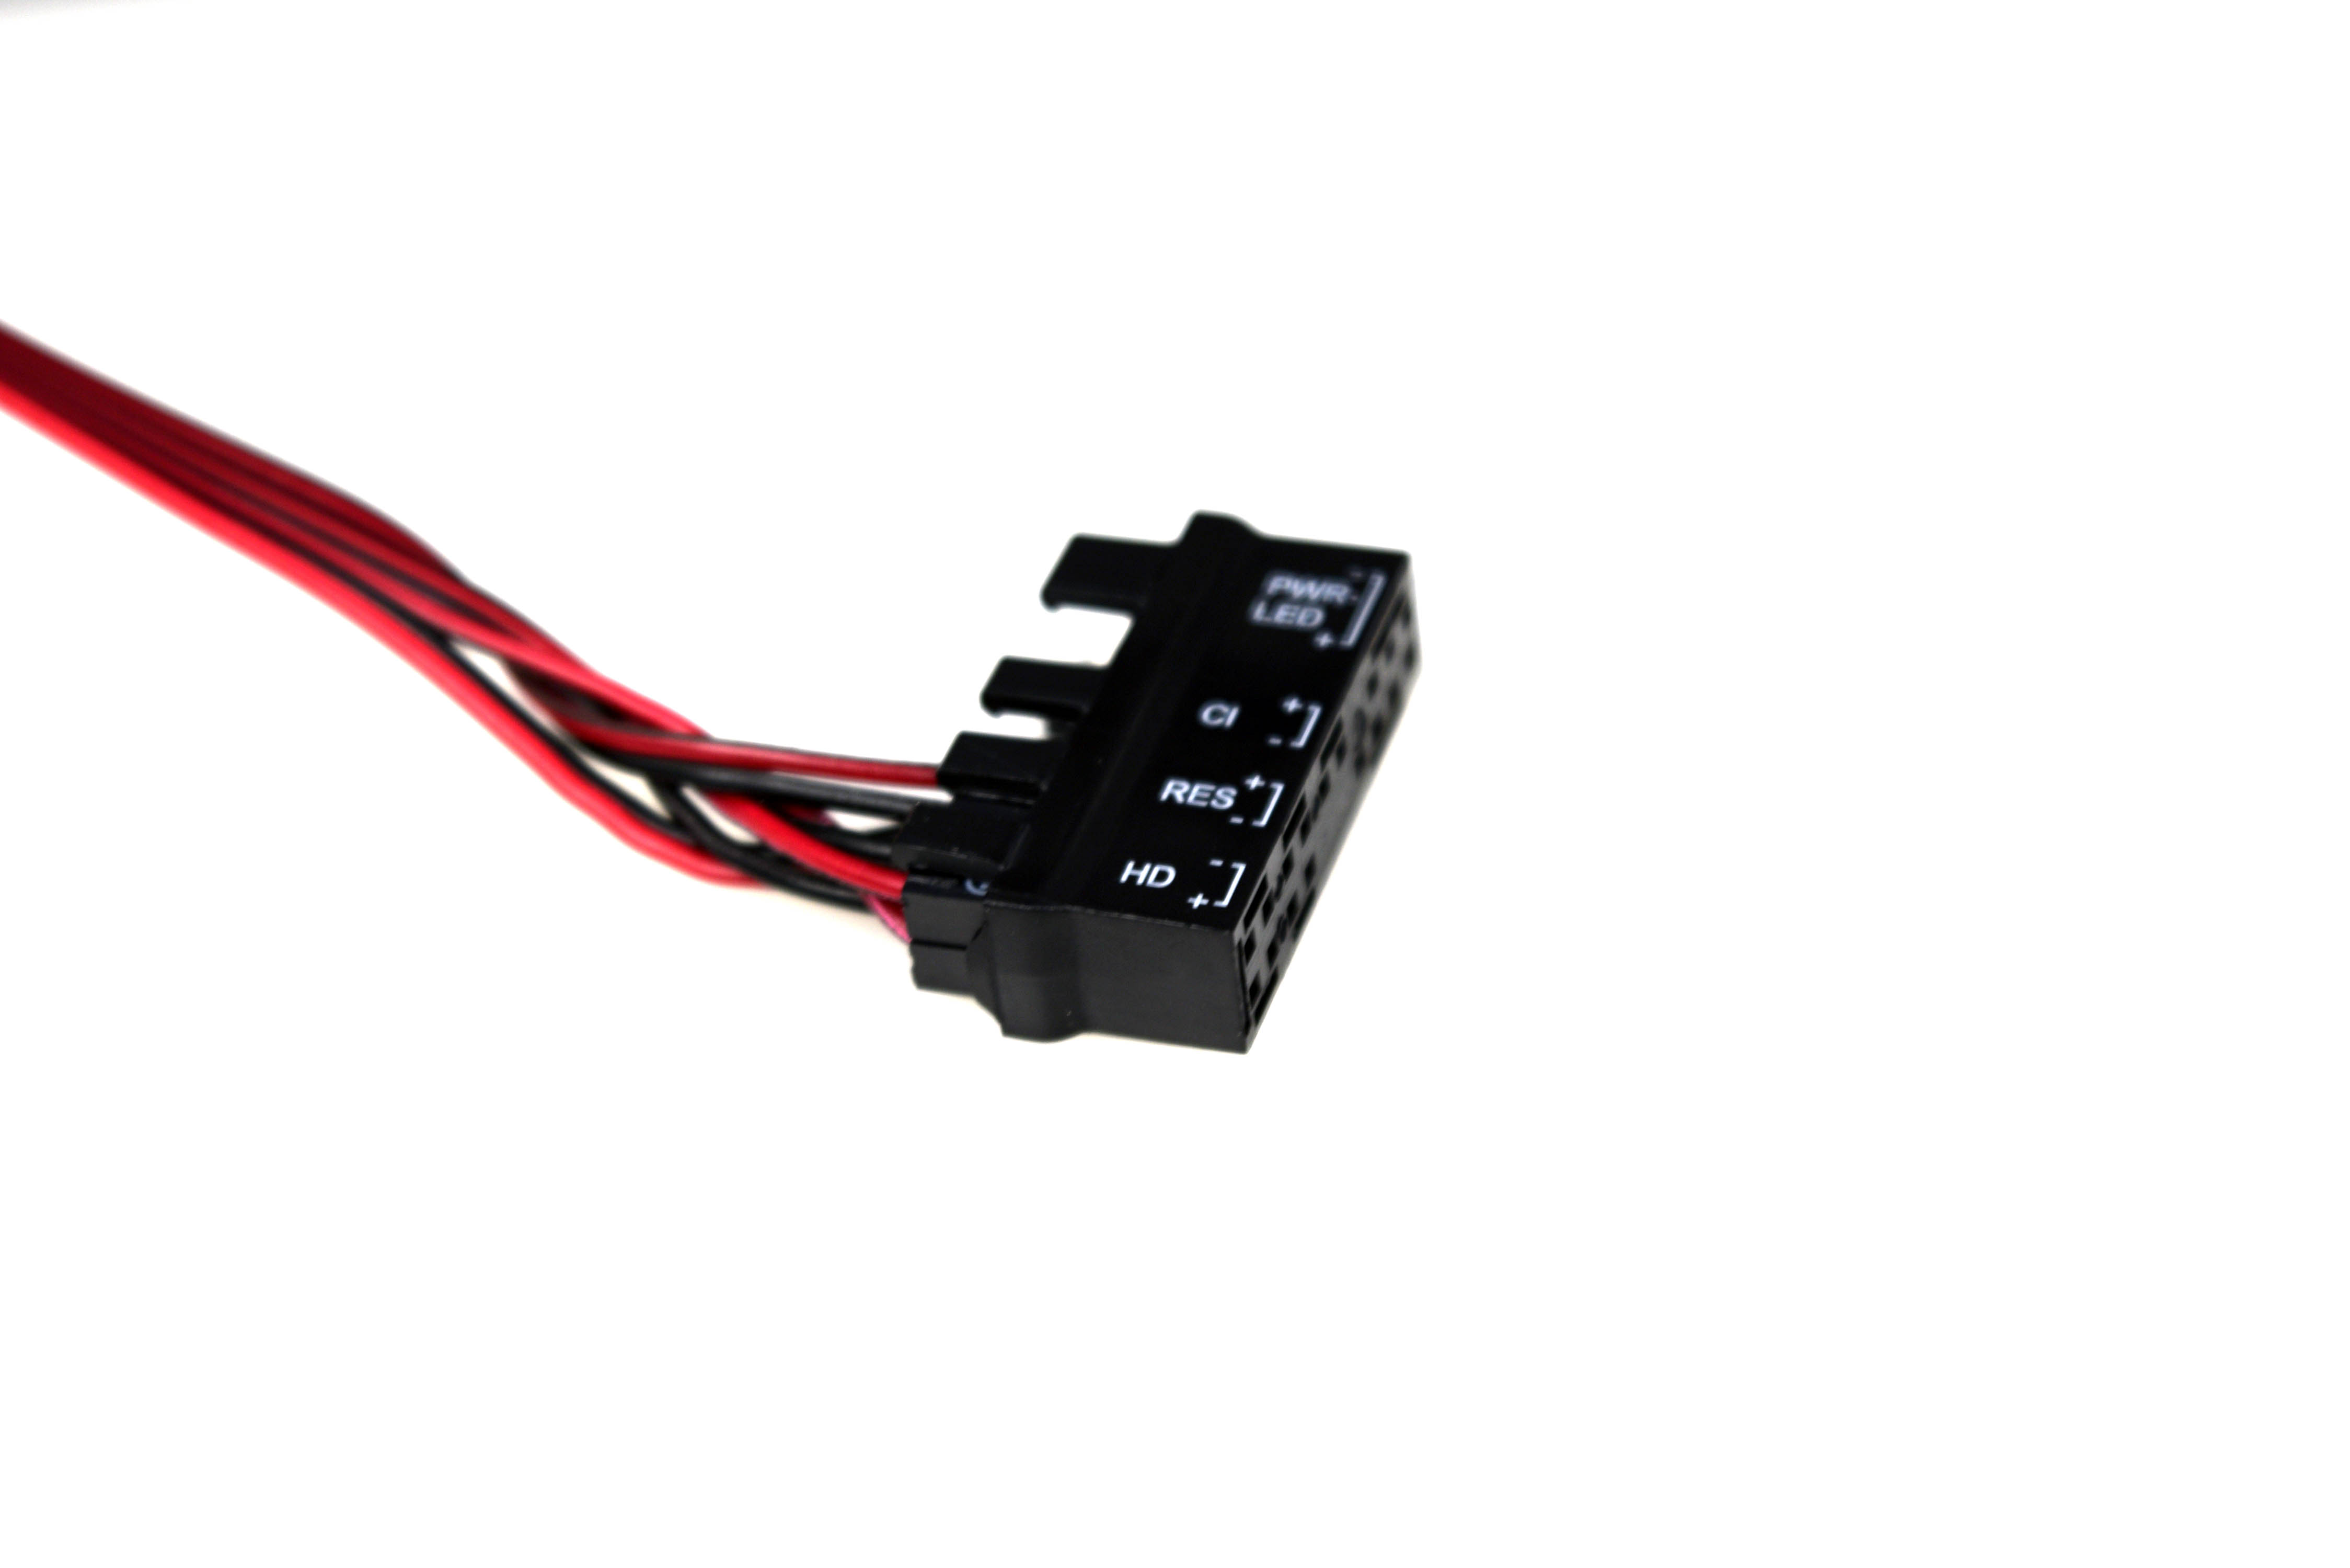
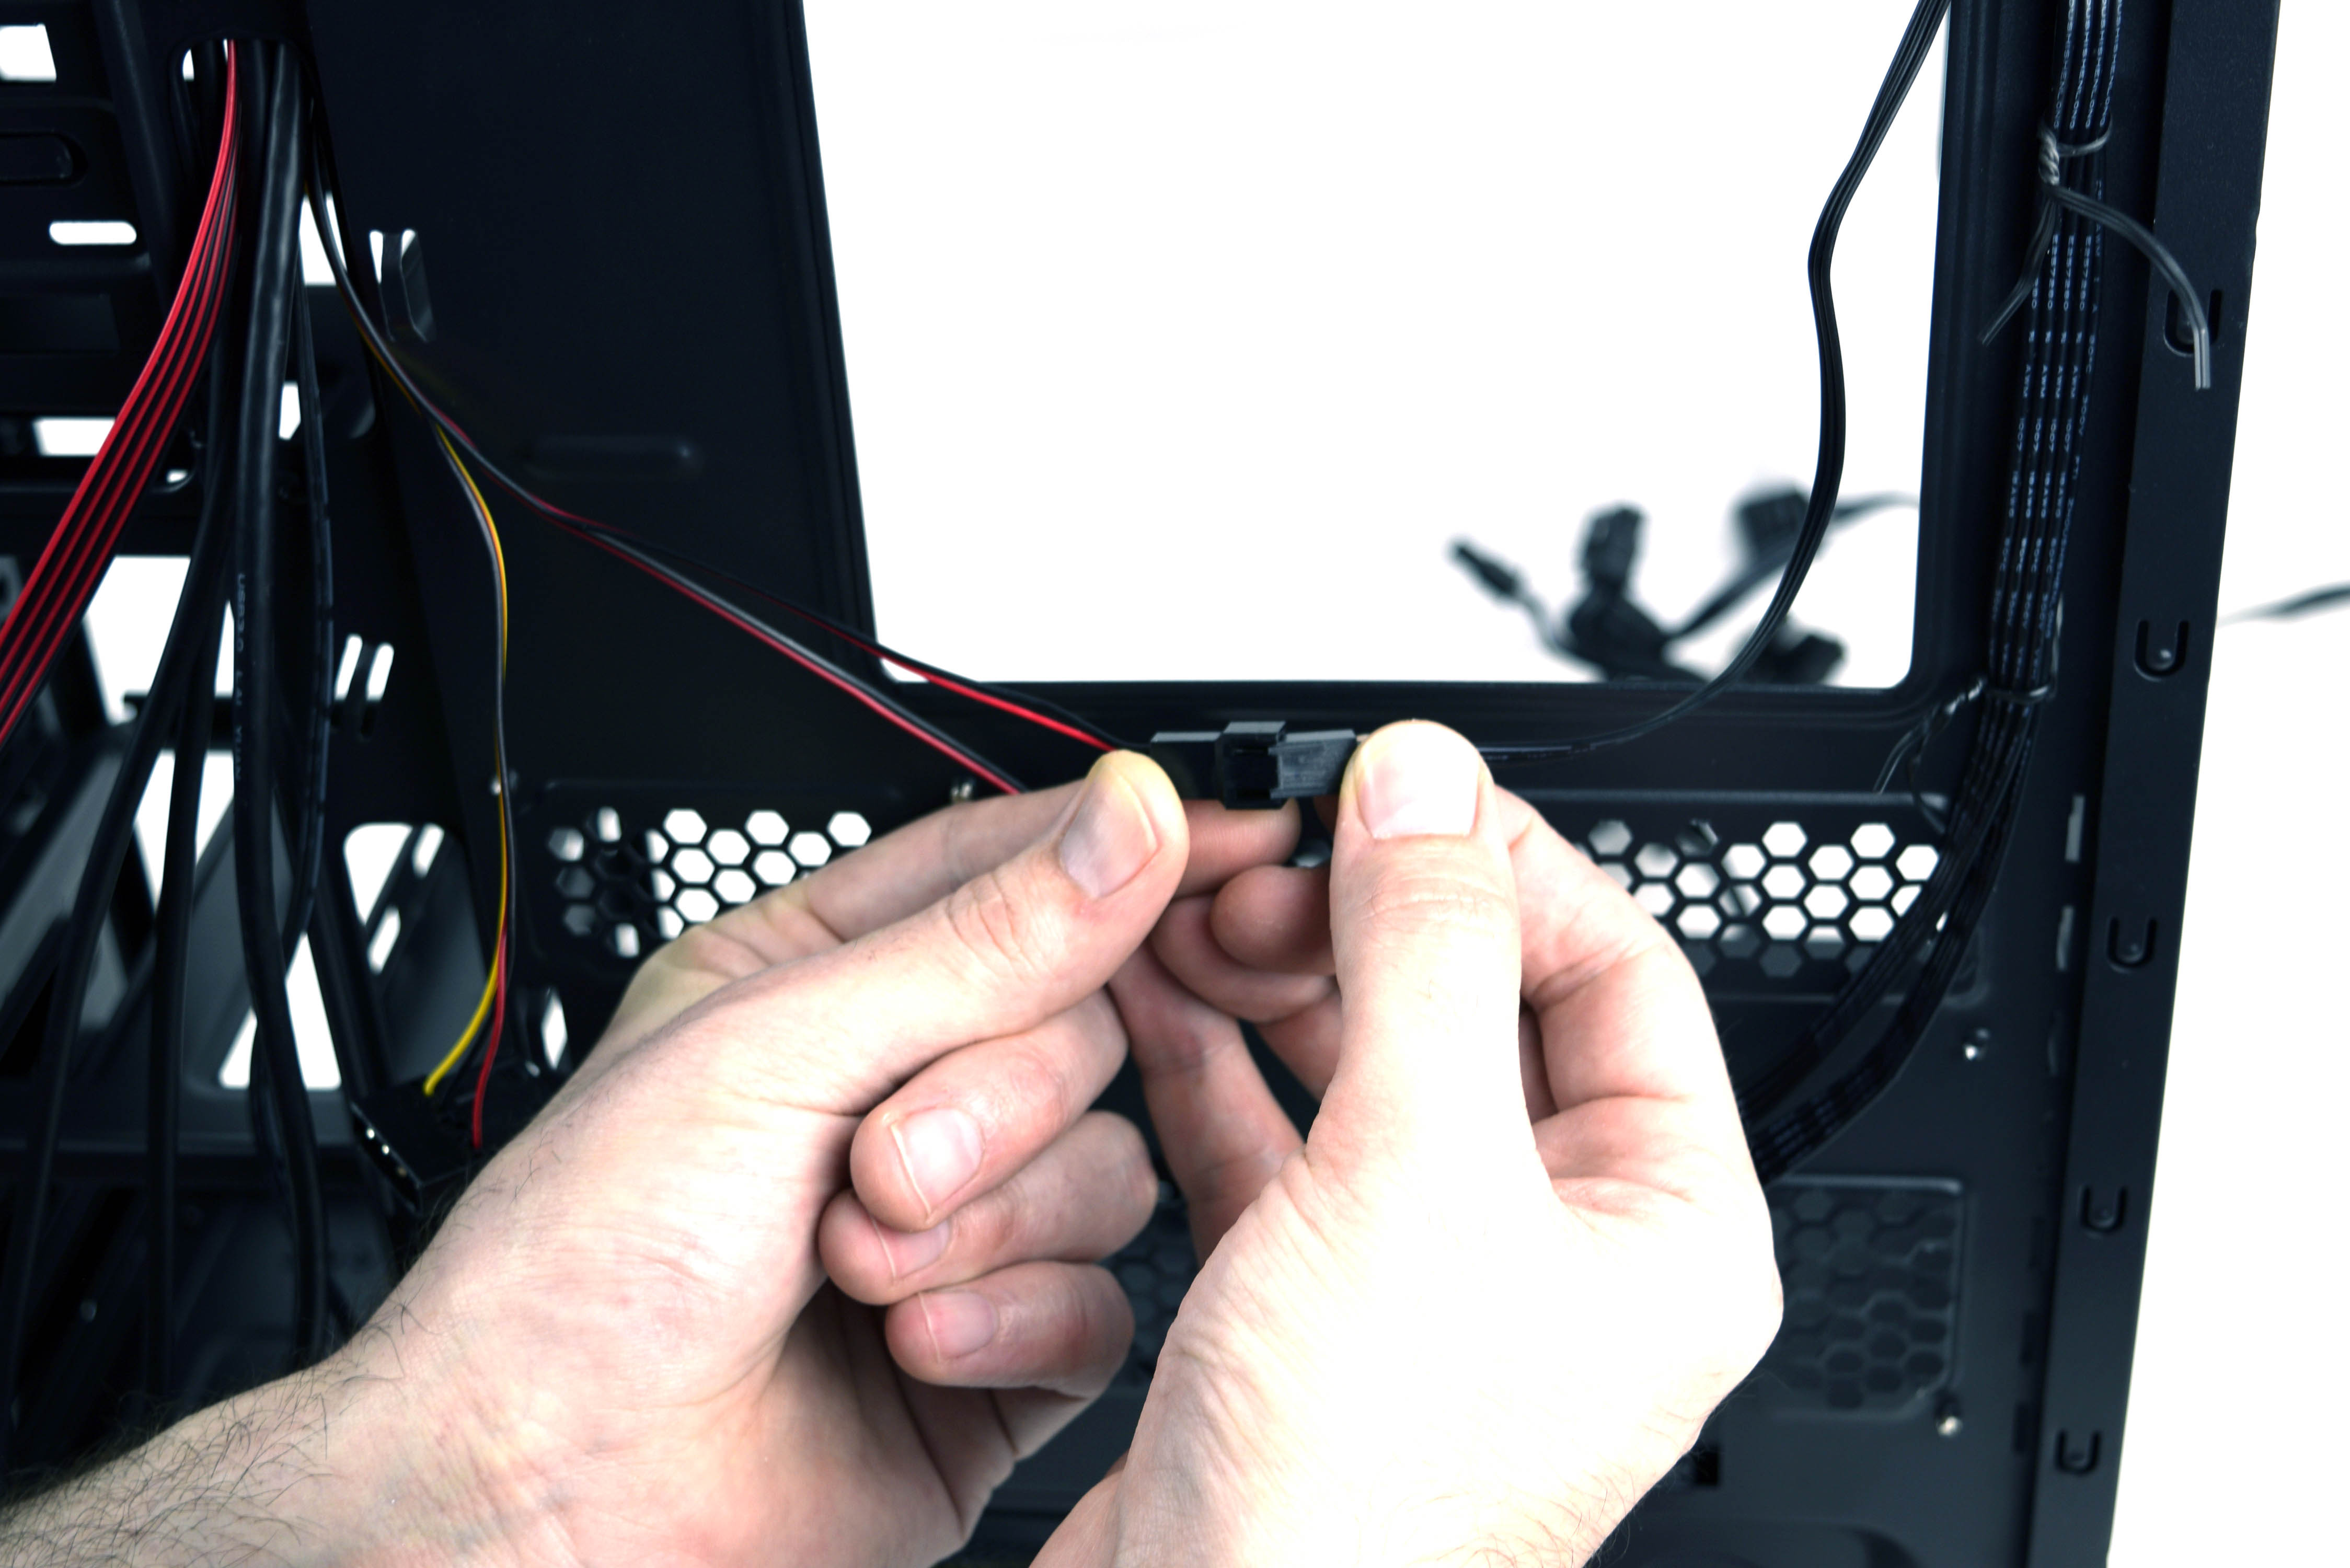
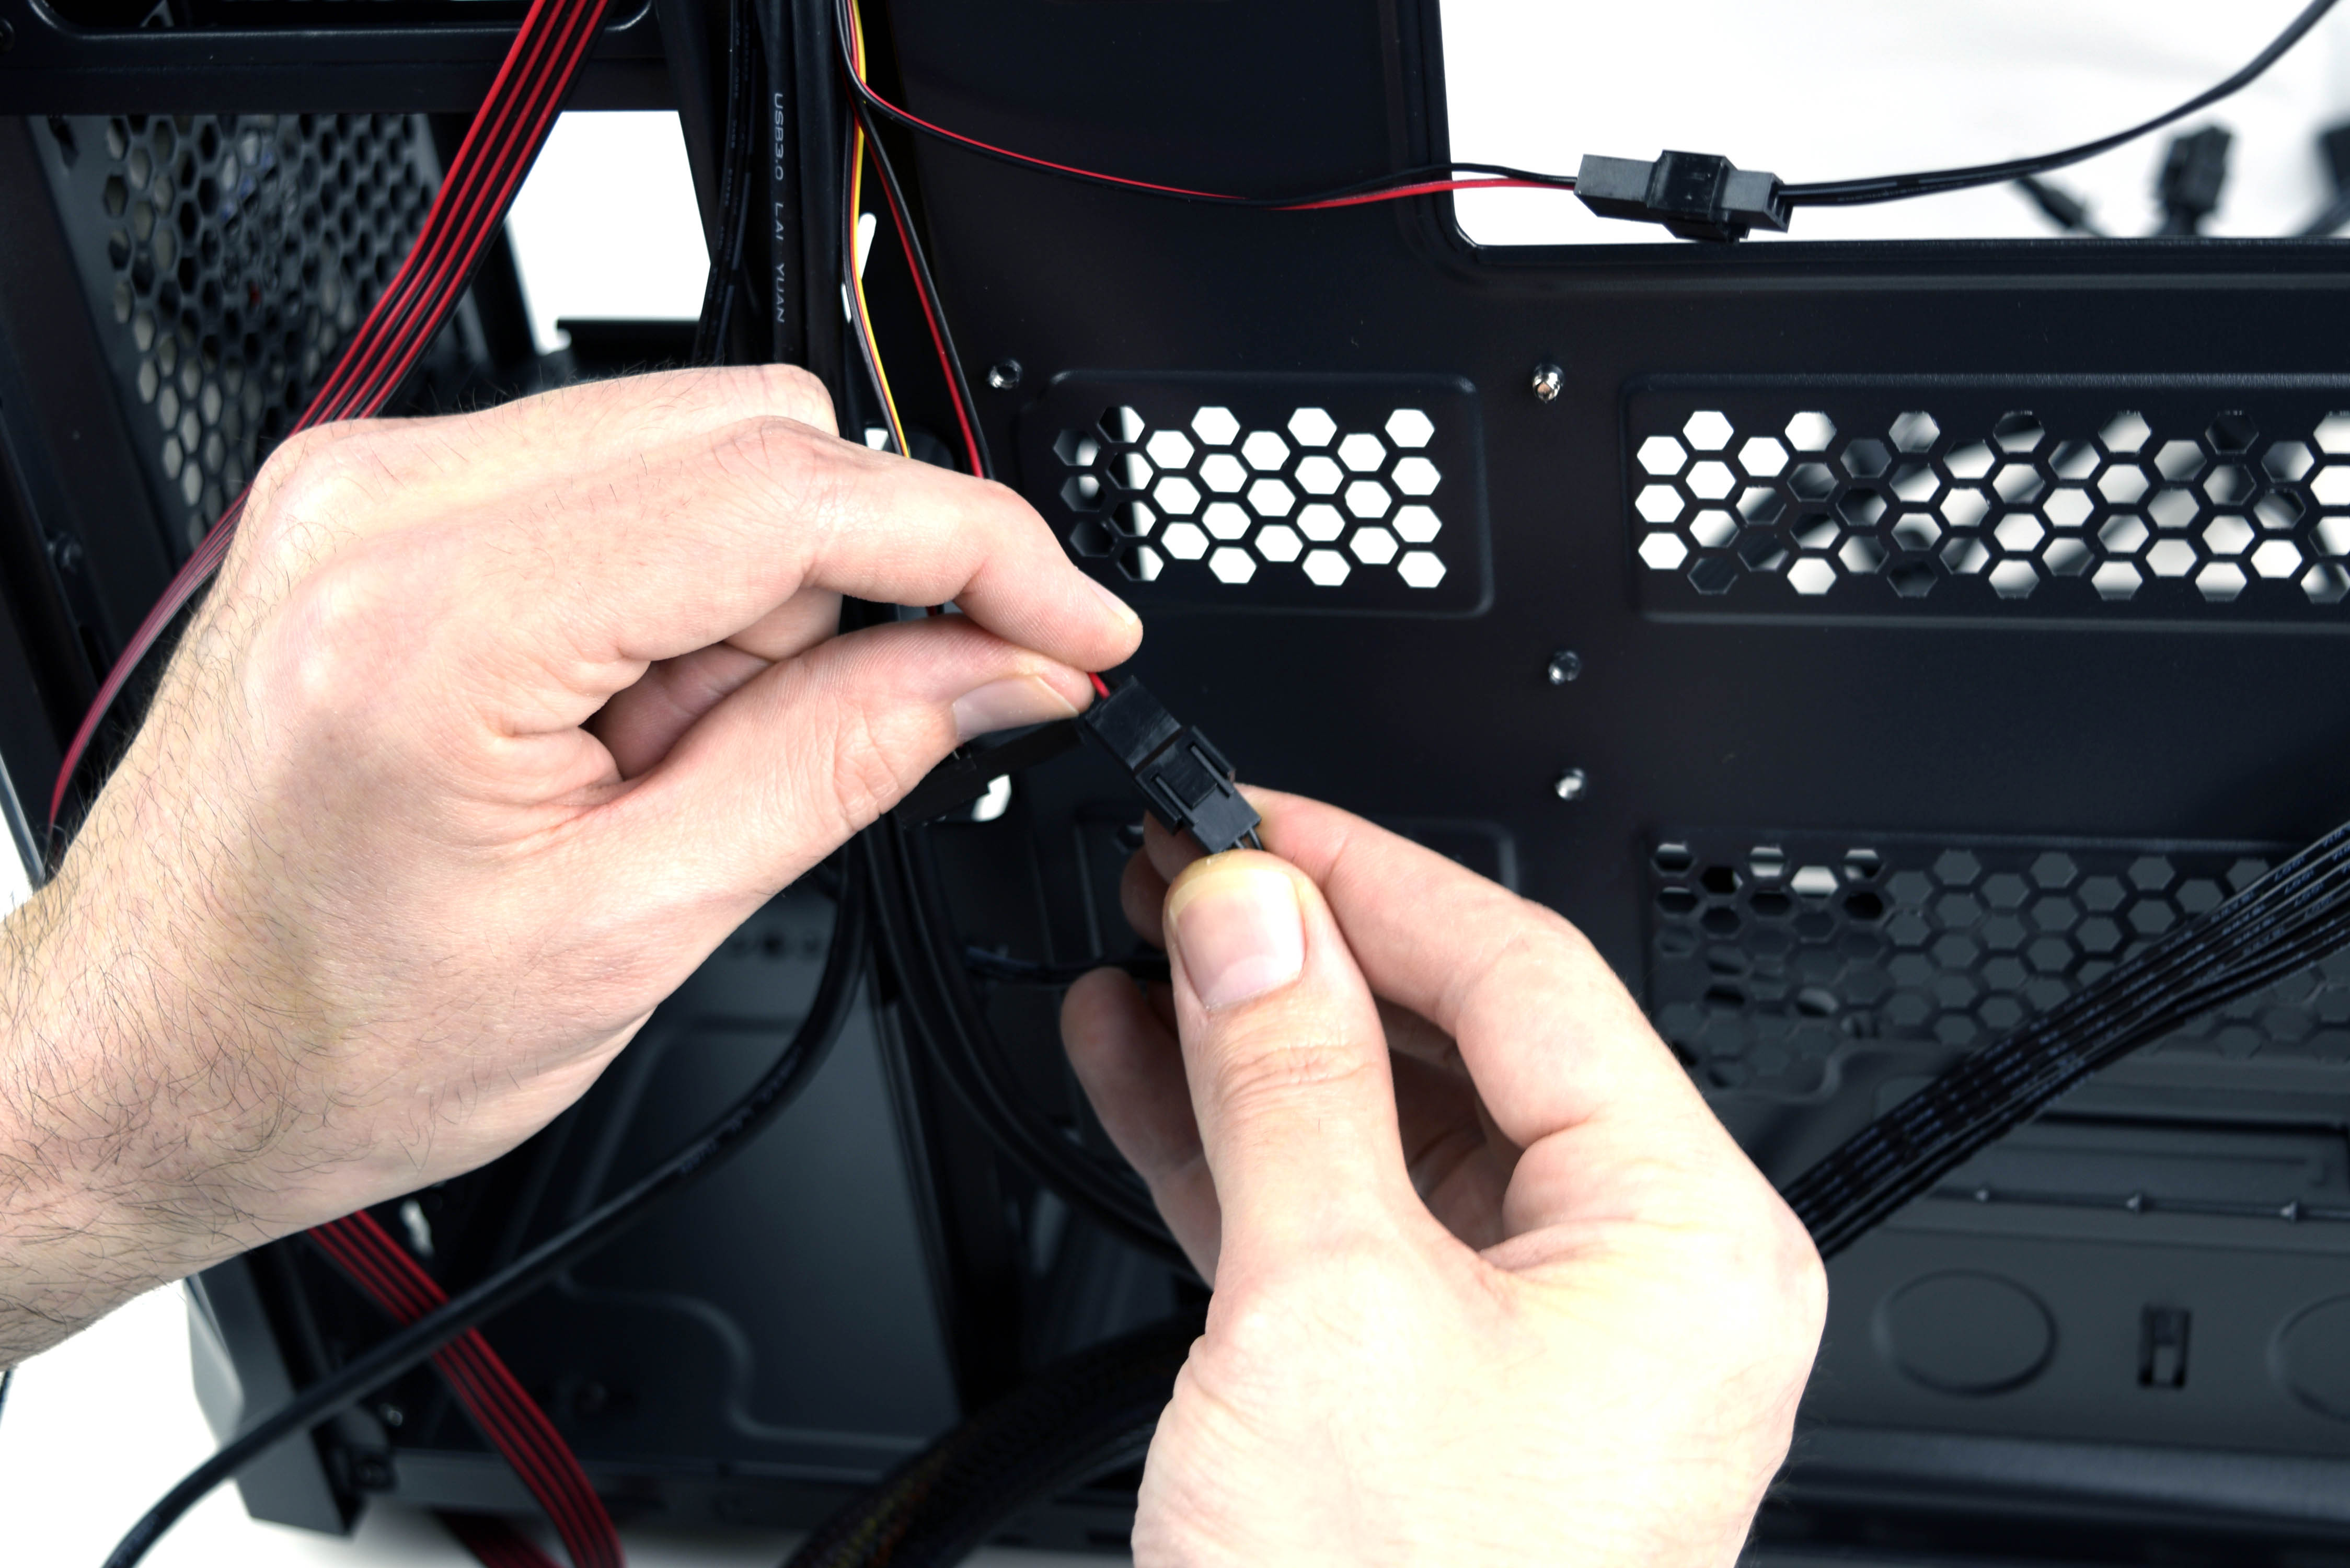
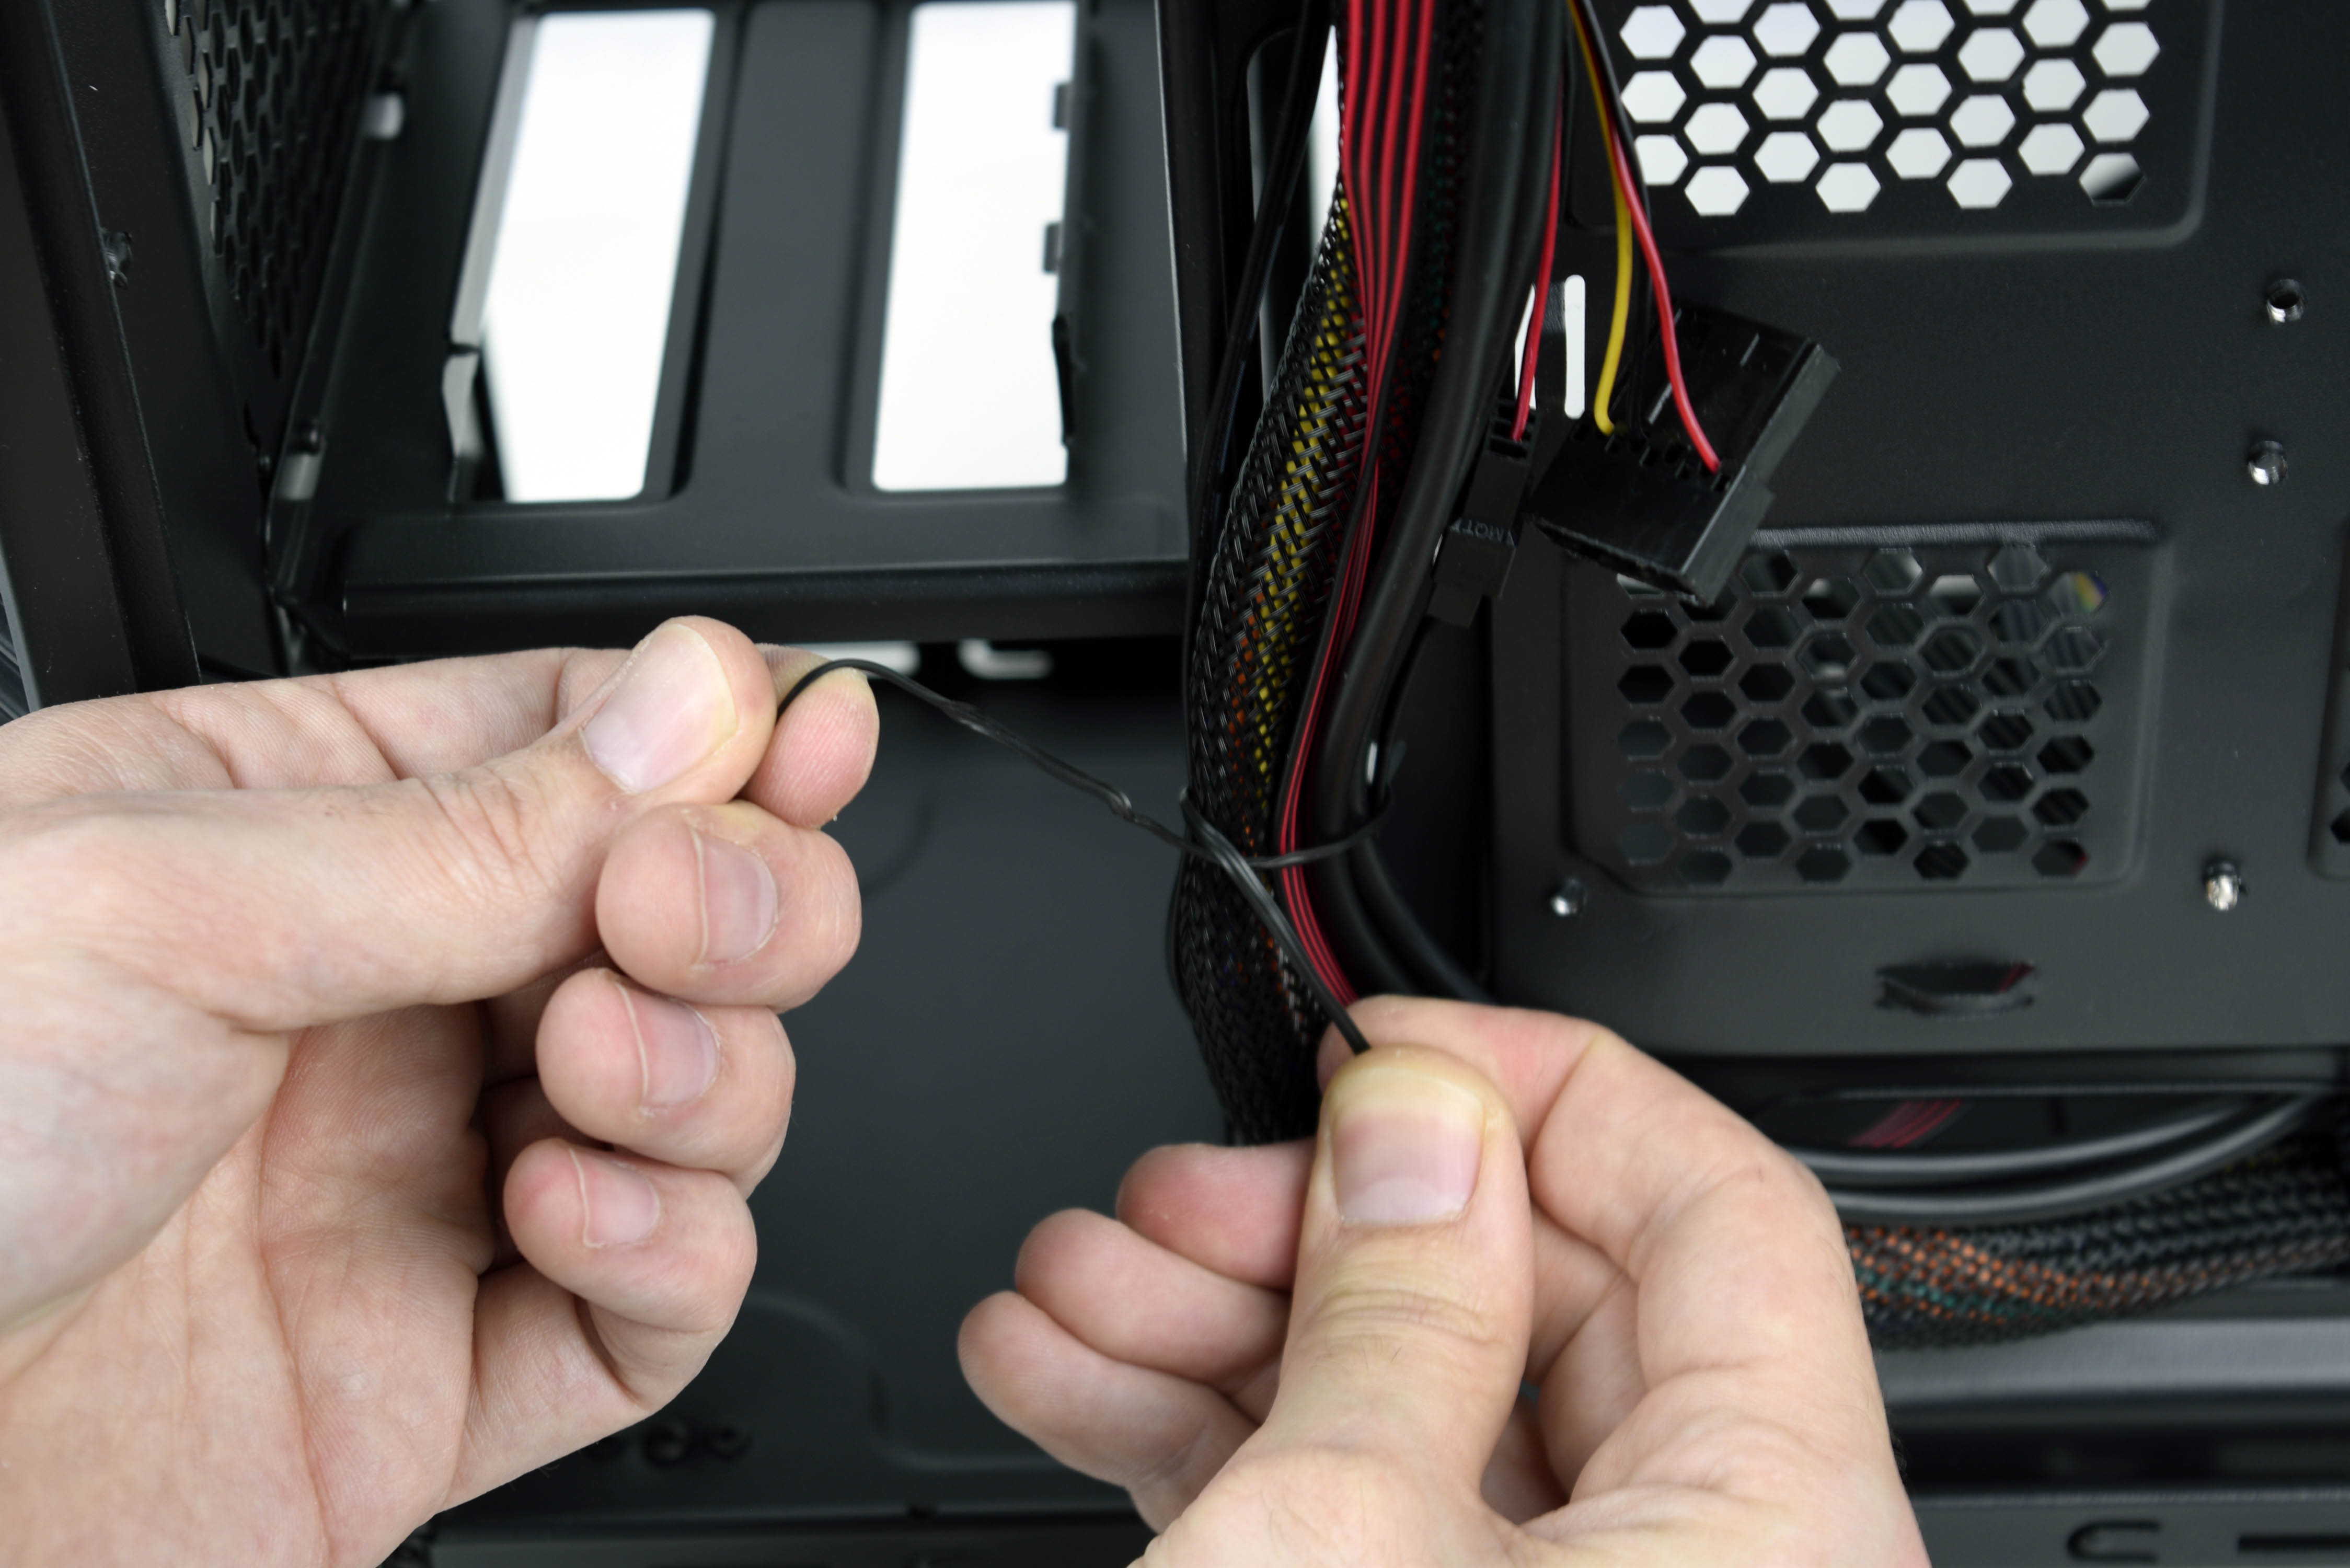
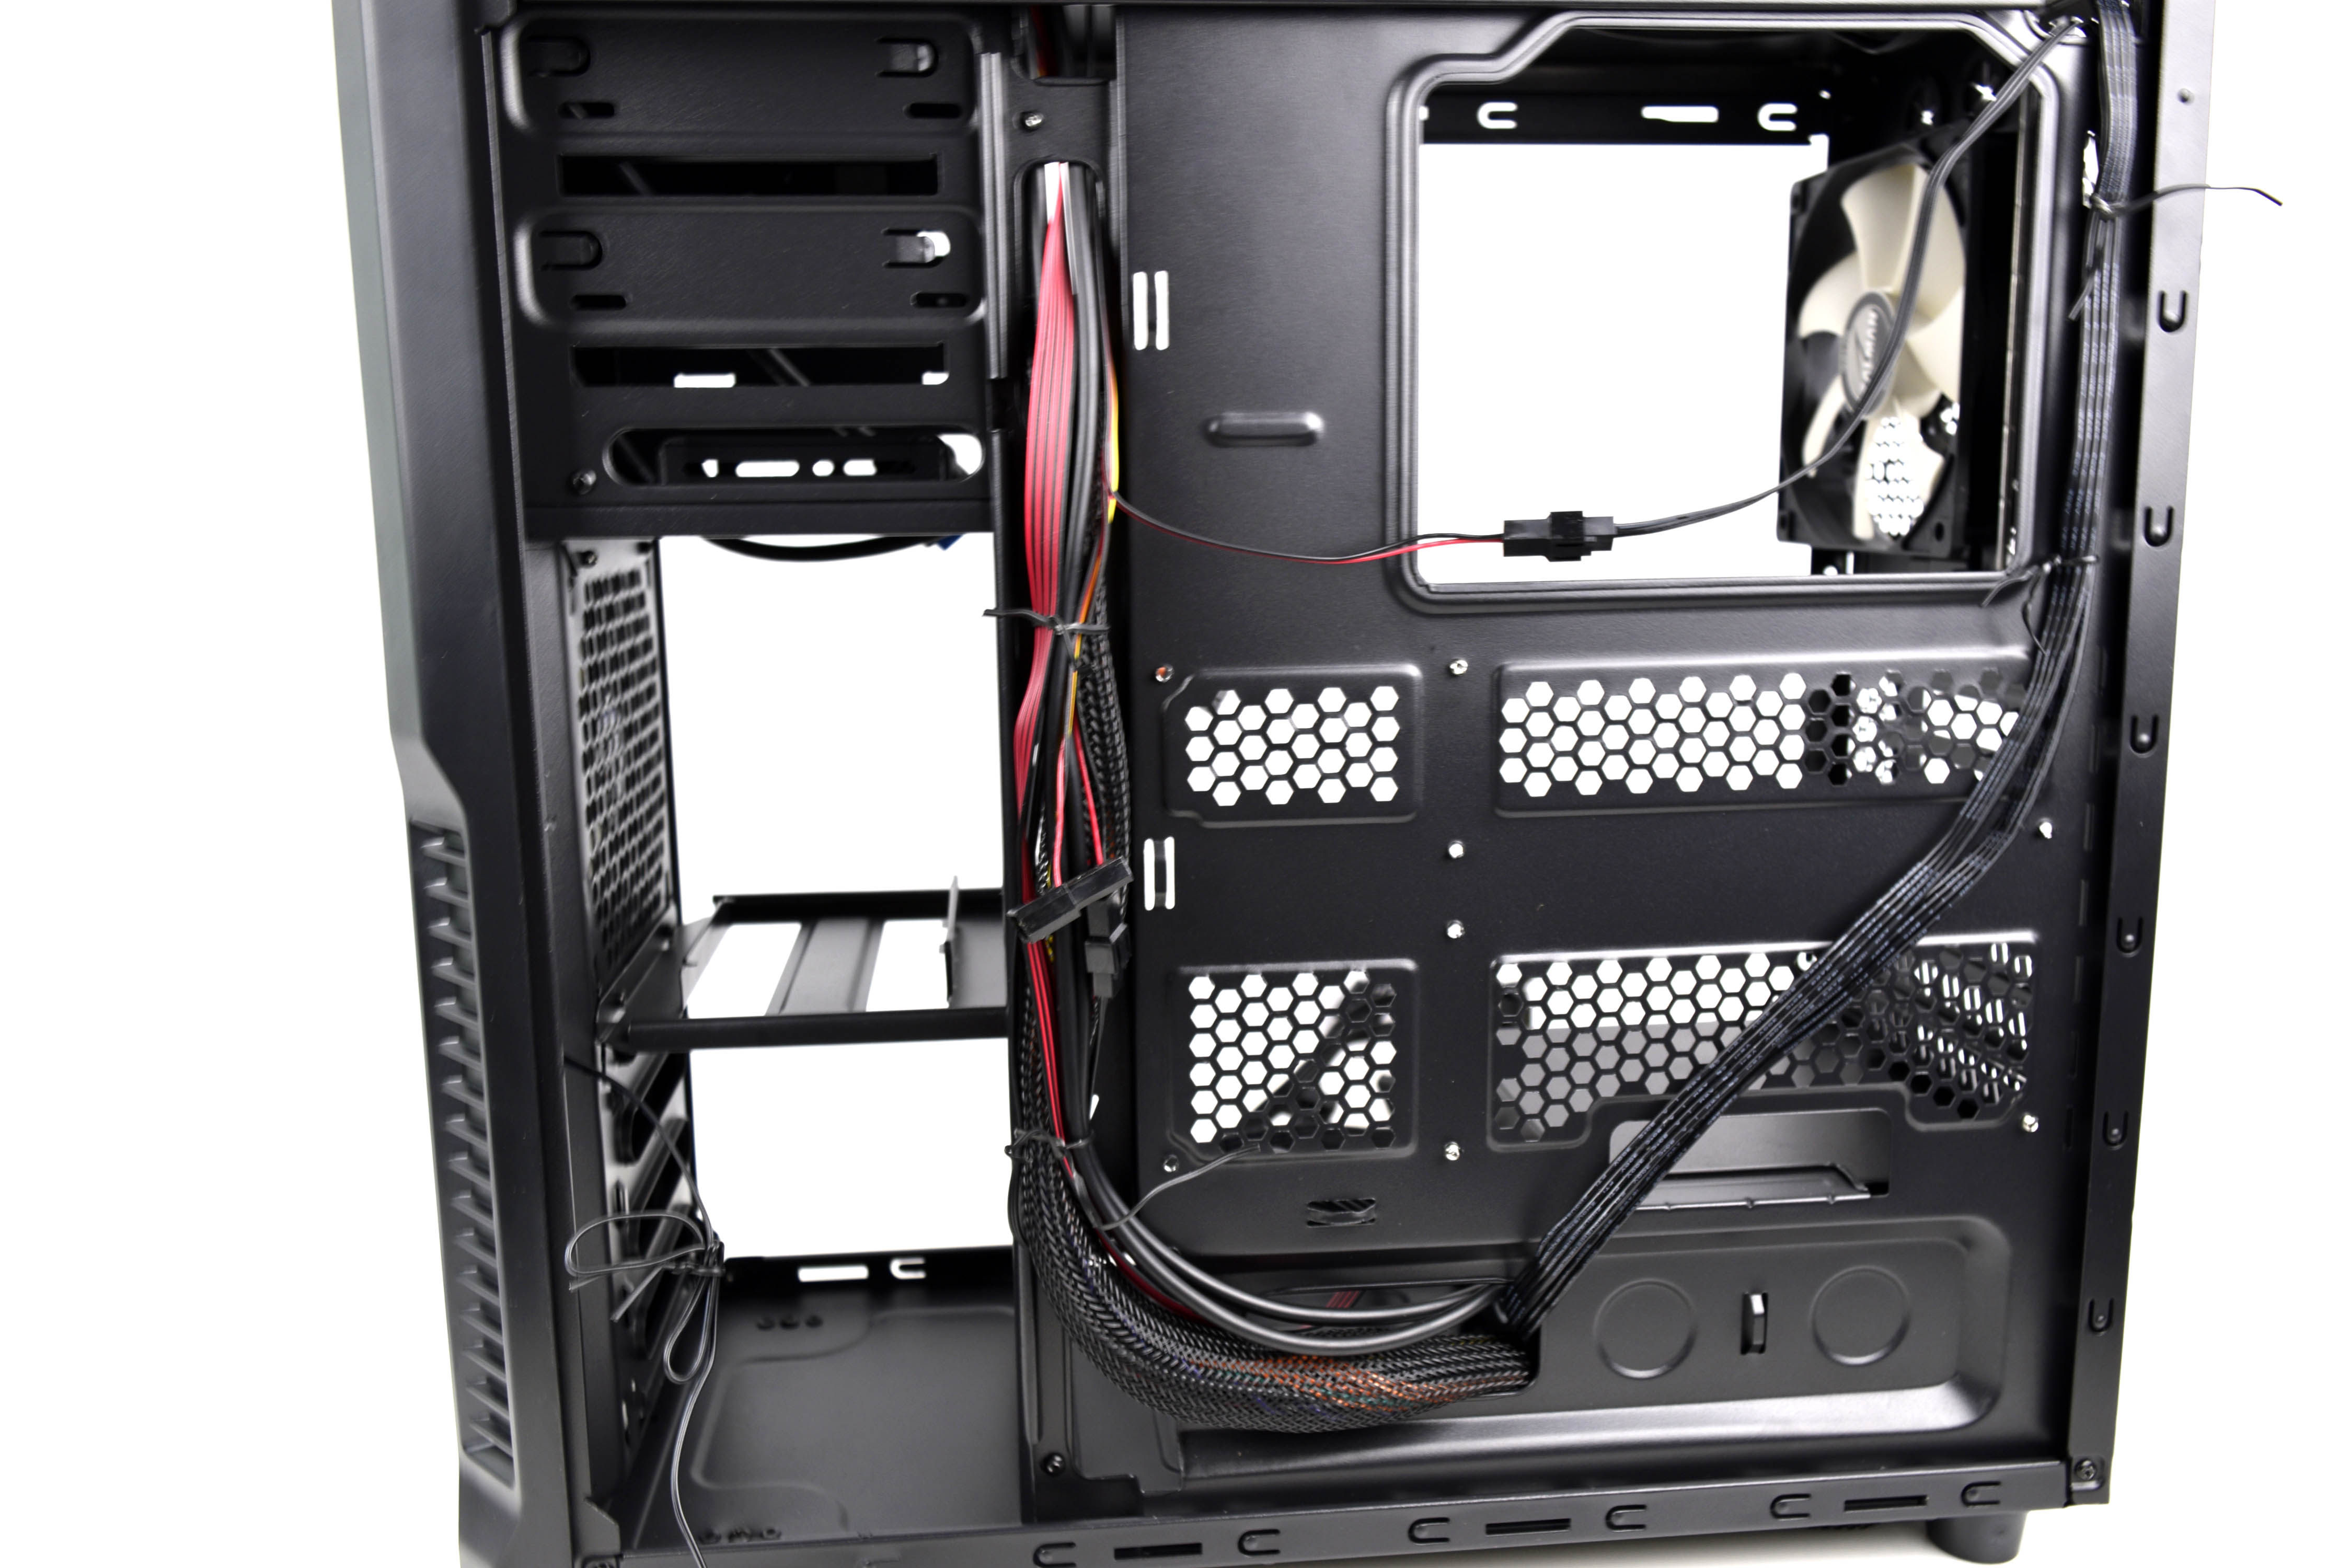
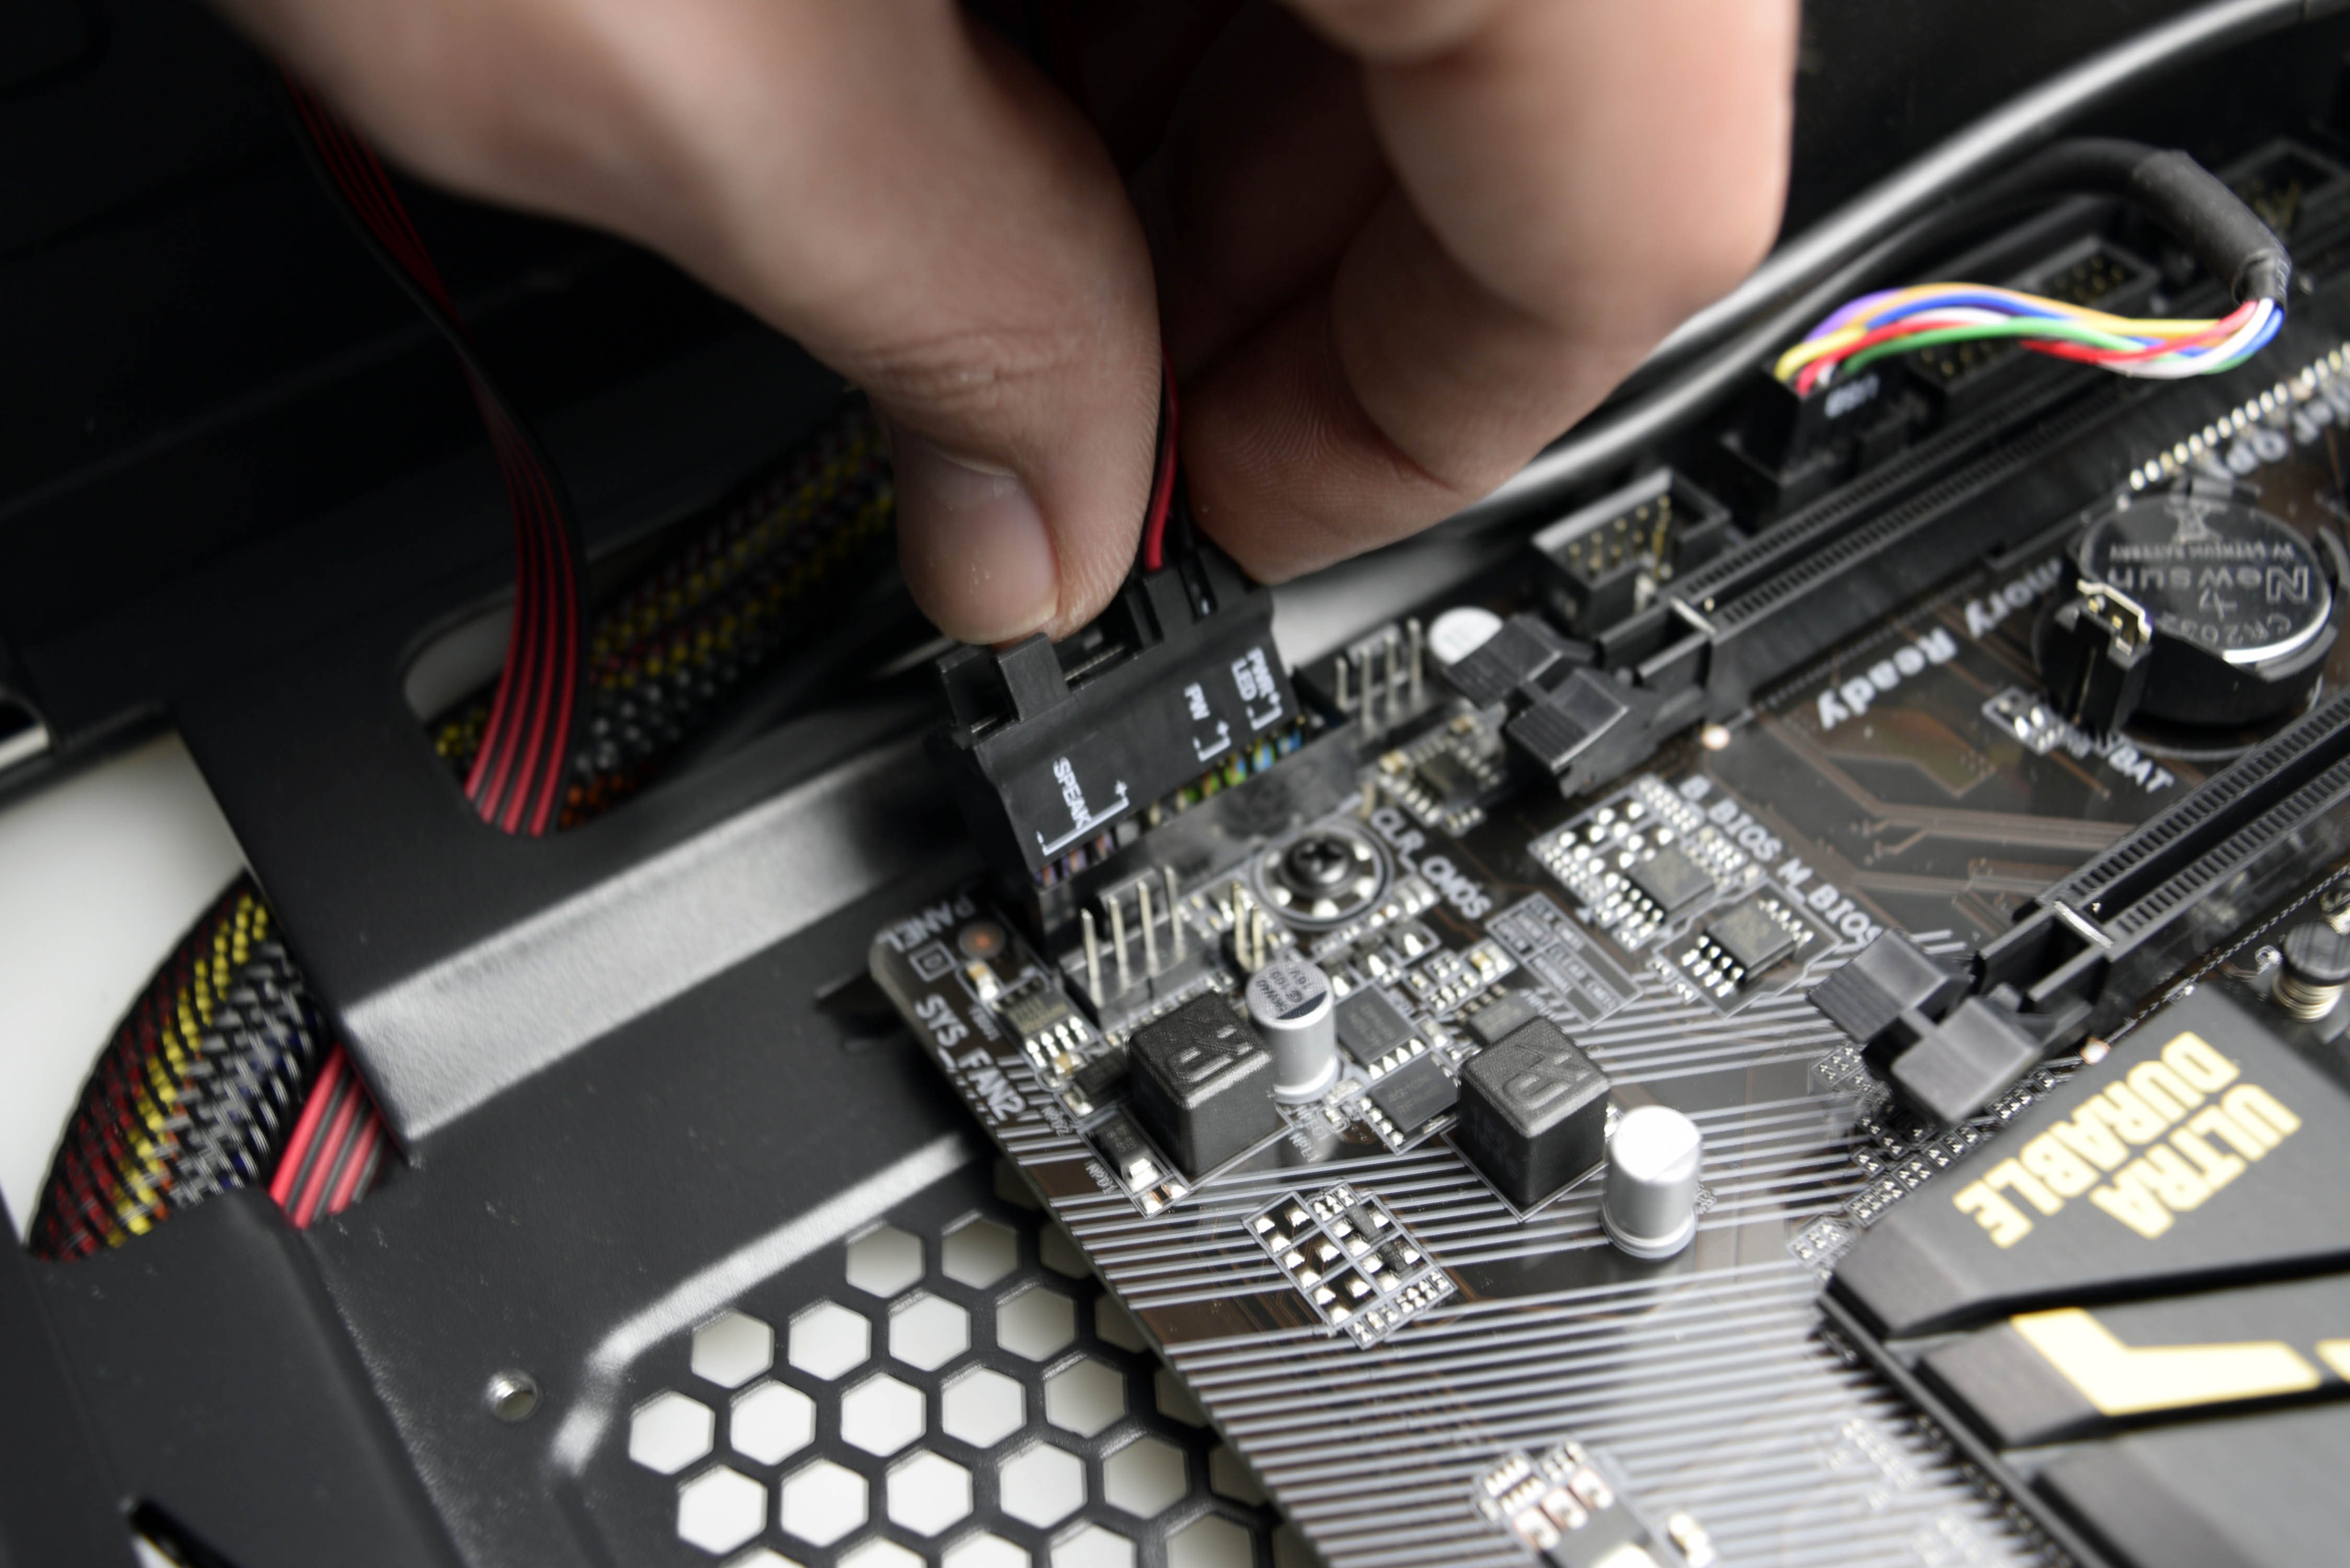
Locate the G-Connect front panel I/O connector from the motherboard box and attach the case’s wiring. Make sure that the positive and negative leads are facing the correct way. The HDD LED and Power LED cable are clearly labeled with positive and negative leads. Power and reset switches are floating (not grounded or polarized) and can be flipped either way, but since some cases use a common “negative” pin for both, it’s a good idea to learn to place these with the text facing the same direction as that of the Power and HDD LED. There are also two Power LED ports on the G-Connect module, but it’s easier to use the pins closest to the others.
Feed the front panel cable (with the attached G Connector) through the same hole near the PSU and into the main chamber of the chassis (approximately where the front I/O panel header will be with the motherboard mounted).
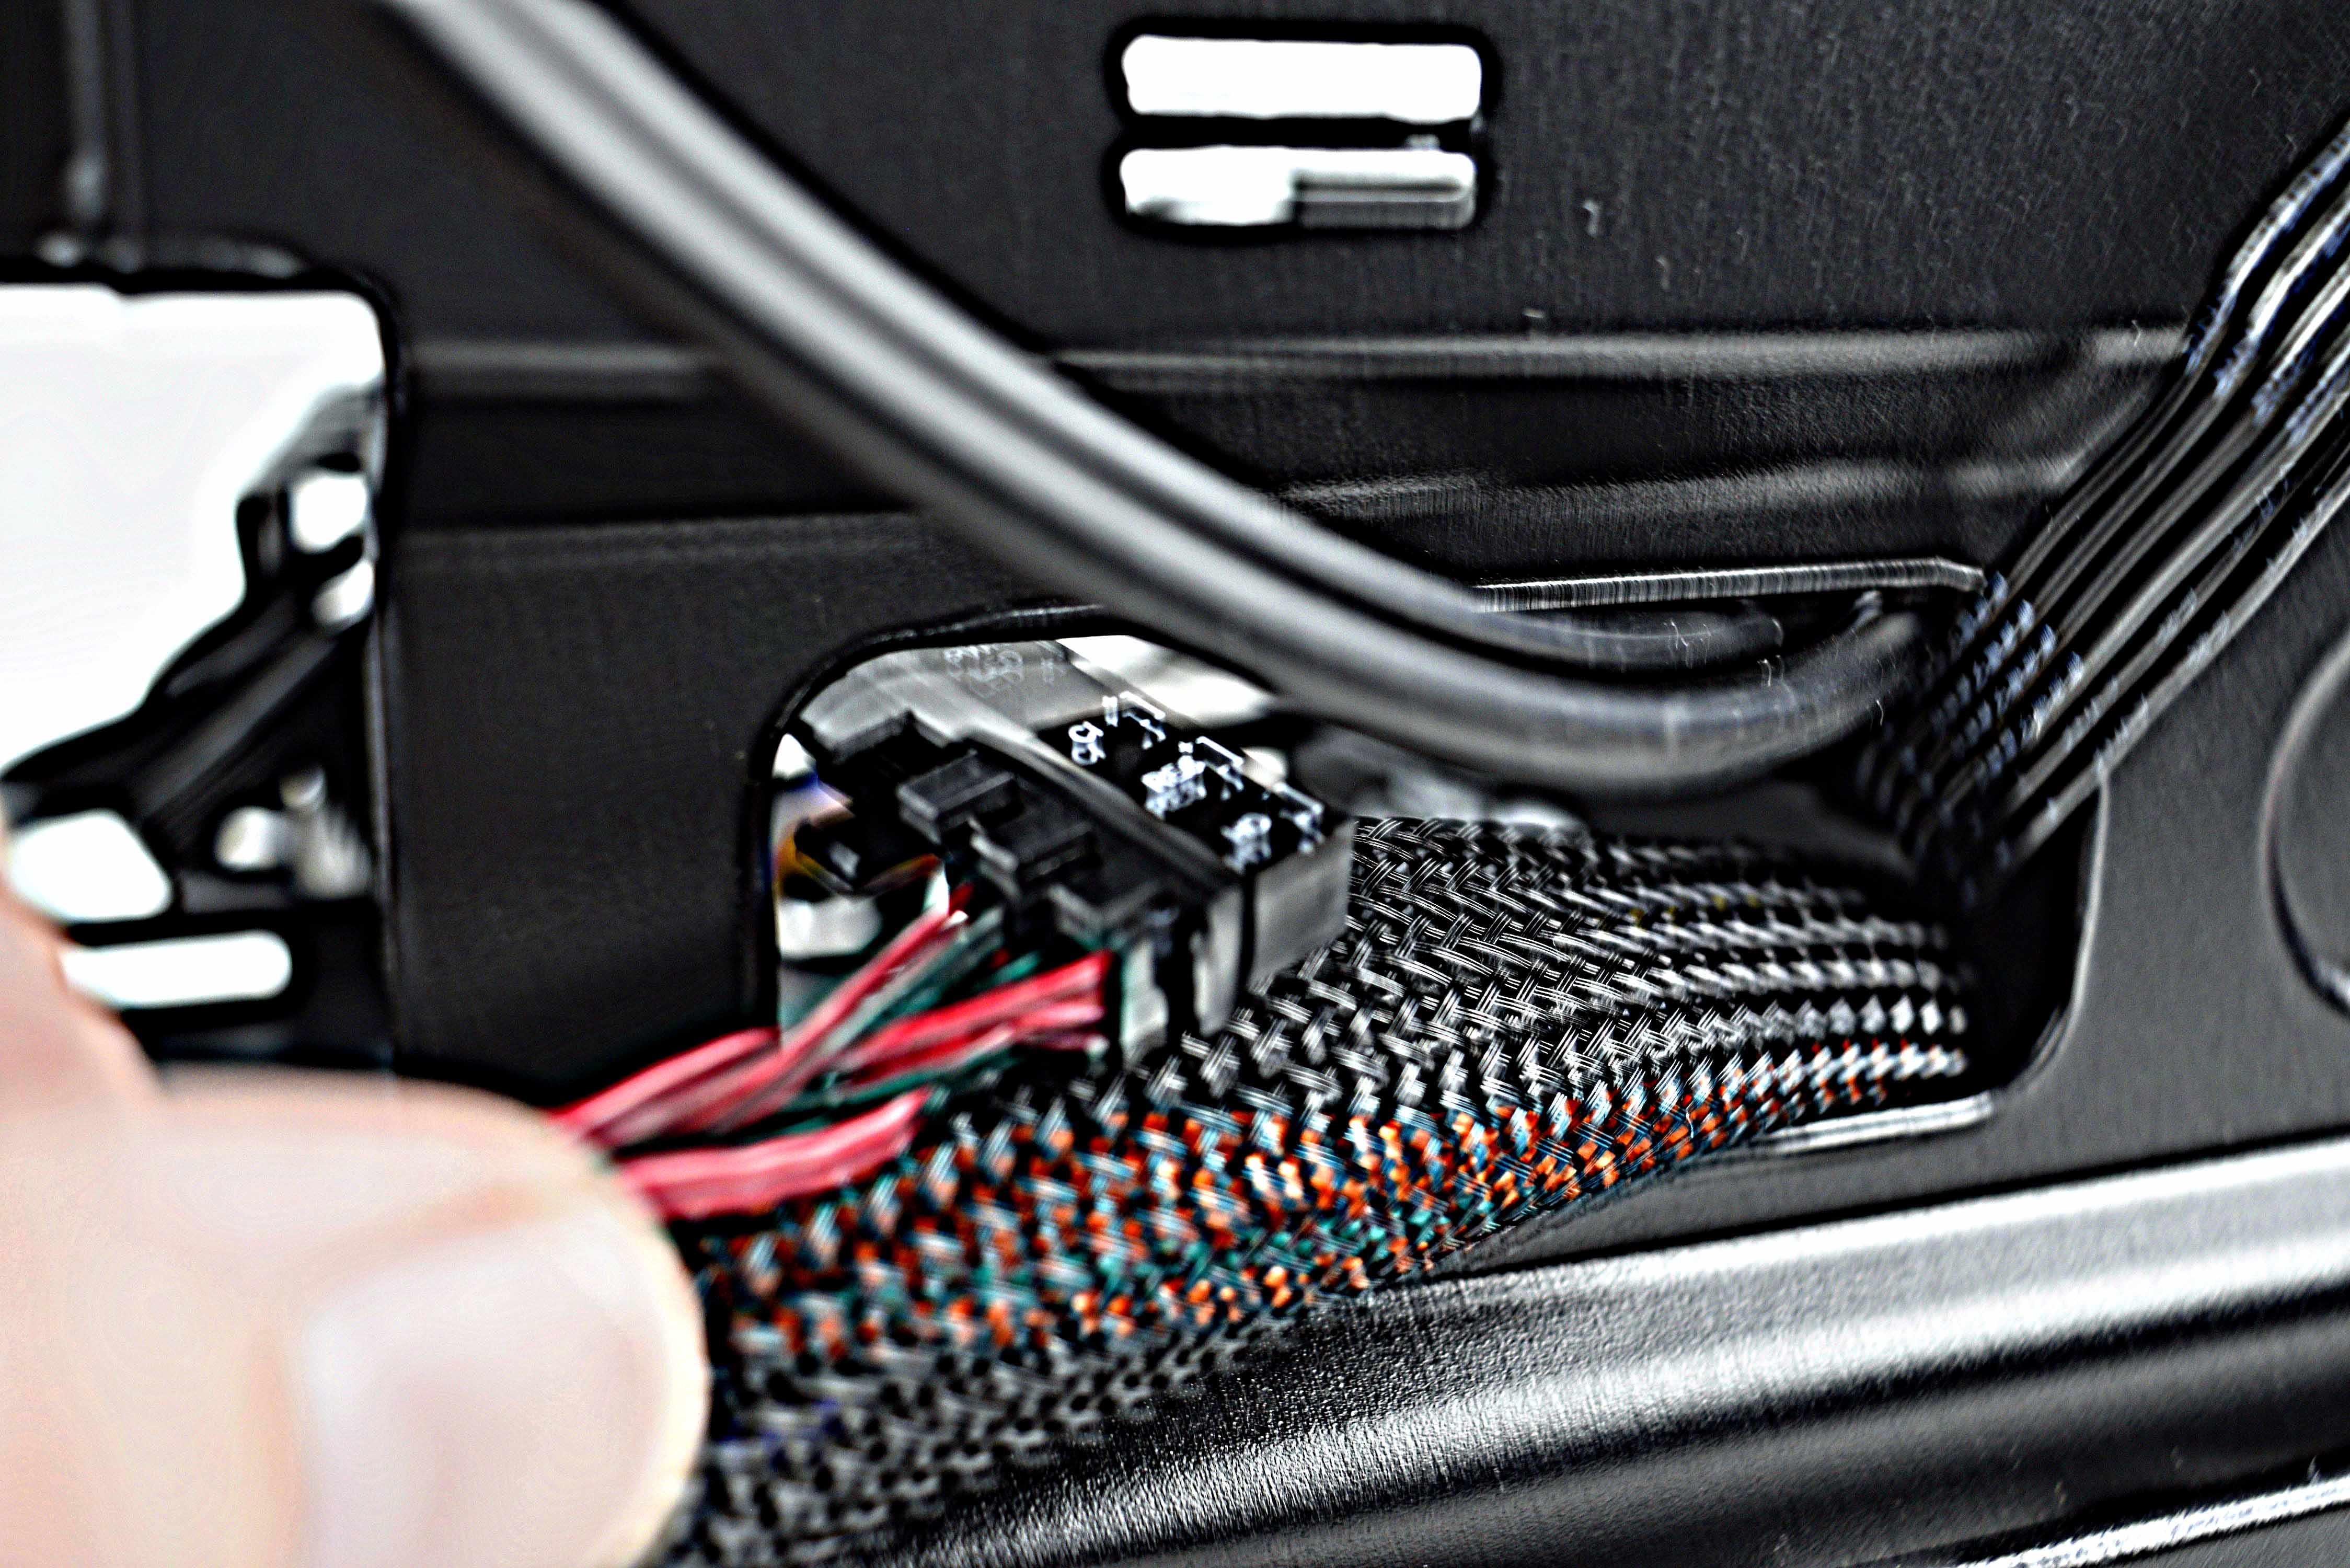
Connect the rear fan cable (which up to this point has been dangling from where the CPU power cable is fed) to the fan power link (still hanging behind the motherboard tray near the 5.25” bay), as seen in the third picture above. Also attach the top fan’s cable to the other 3-pin connector, which is fed out to where the other cables are (fourth picture).
Use tie wraps on the corner loop, mid loop, and top loop (next to the drive bay) on the backside of the motherboard tray to secure the cables to the chassis, so that everything is nice and tight.
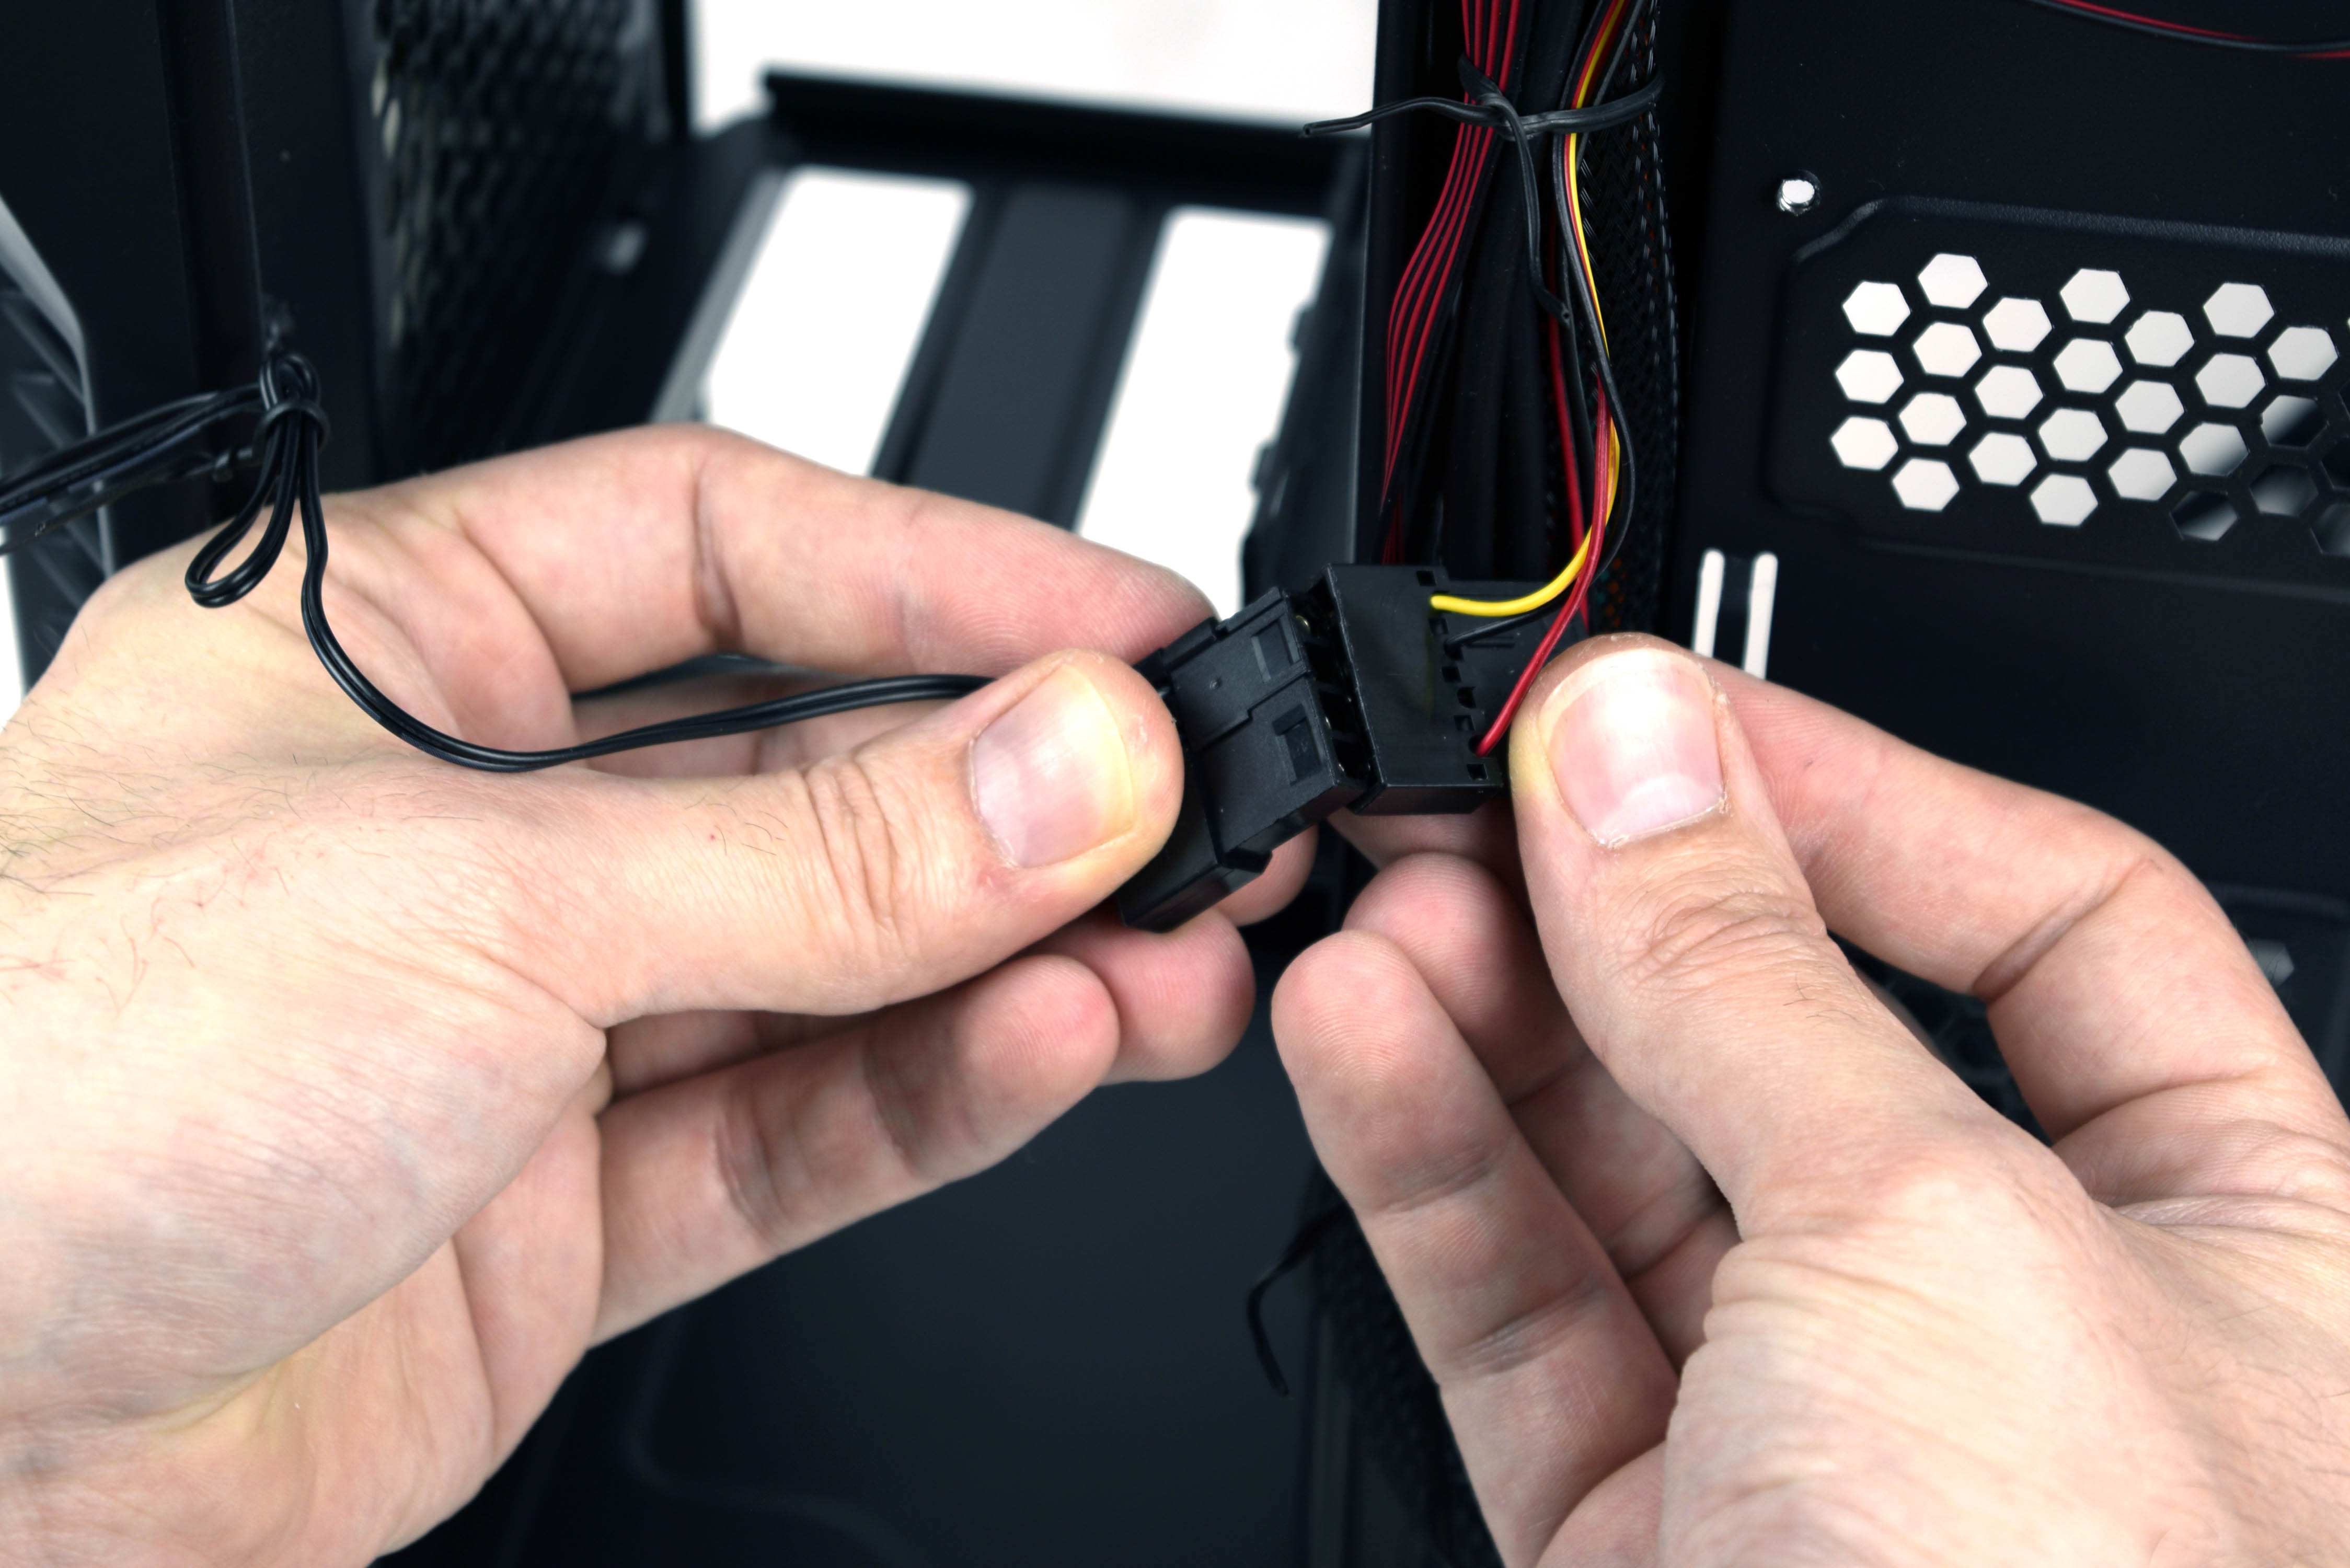
Some cases will include fans that have a 3-pin or 4-pin fan connector that can plug into the motherboard for power and speed control. However, some fans sport only a 4-pin molex connector, which is much larger. The included front fan of this case is powered by a molex connection, so coupling it with the 3-pin fan header (which is also fed power by a molex connector from the PSU) will keep all three case fans on the same power feed, with the rear and top fans connected to the speed toggle button on the front panel and the front fan running at a static speed.
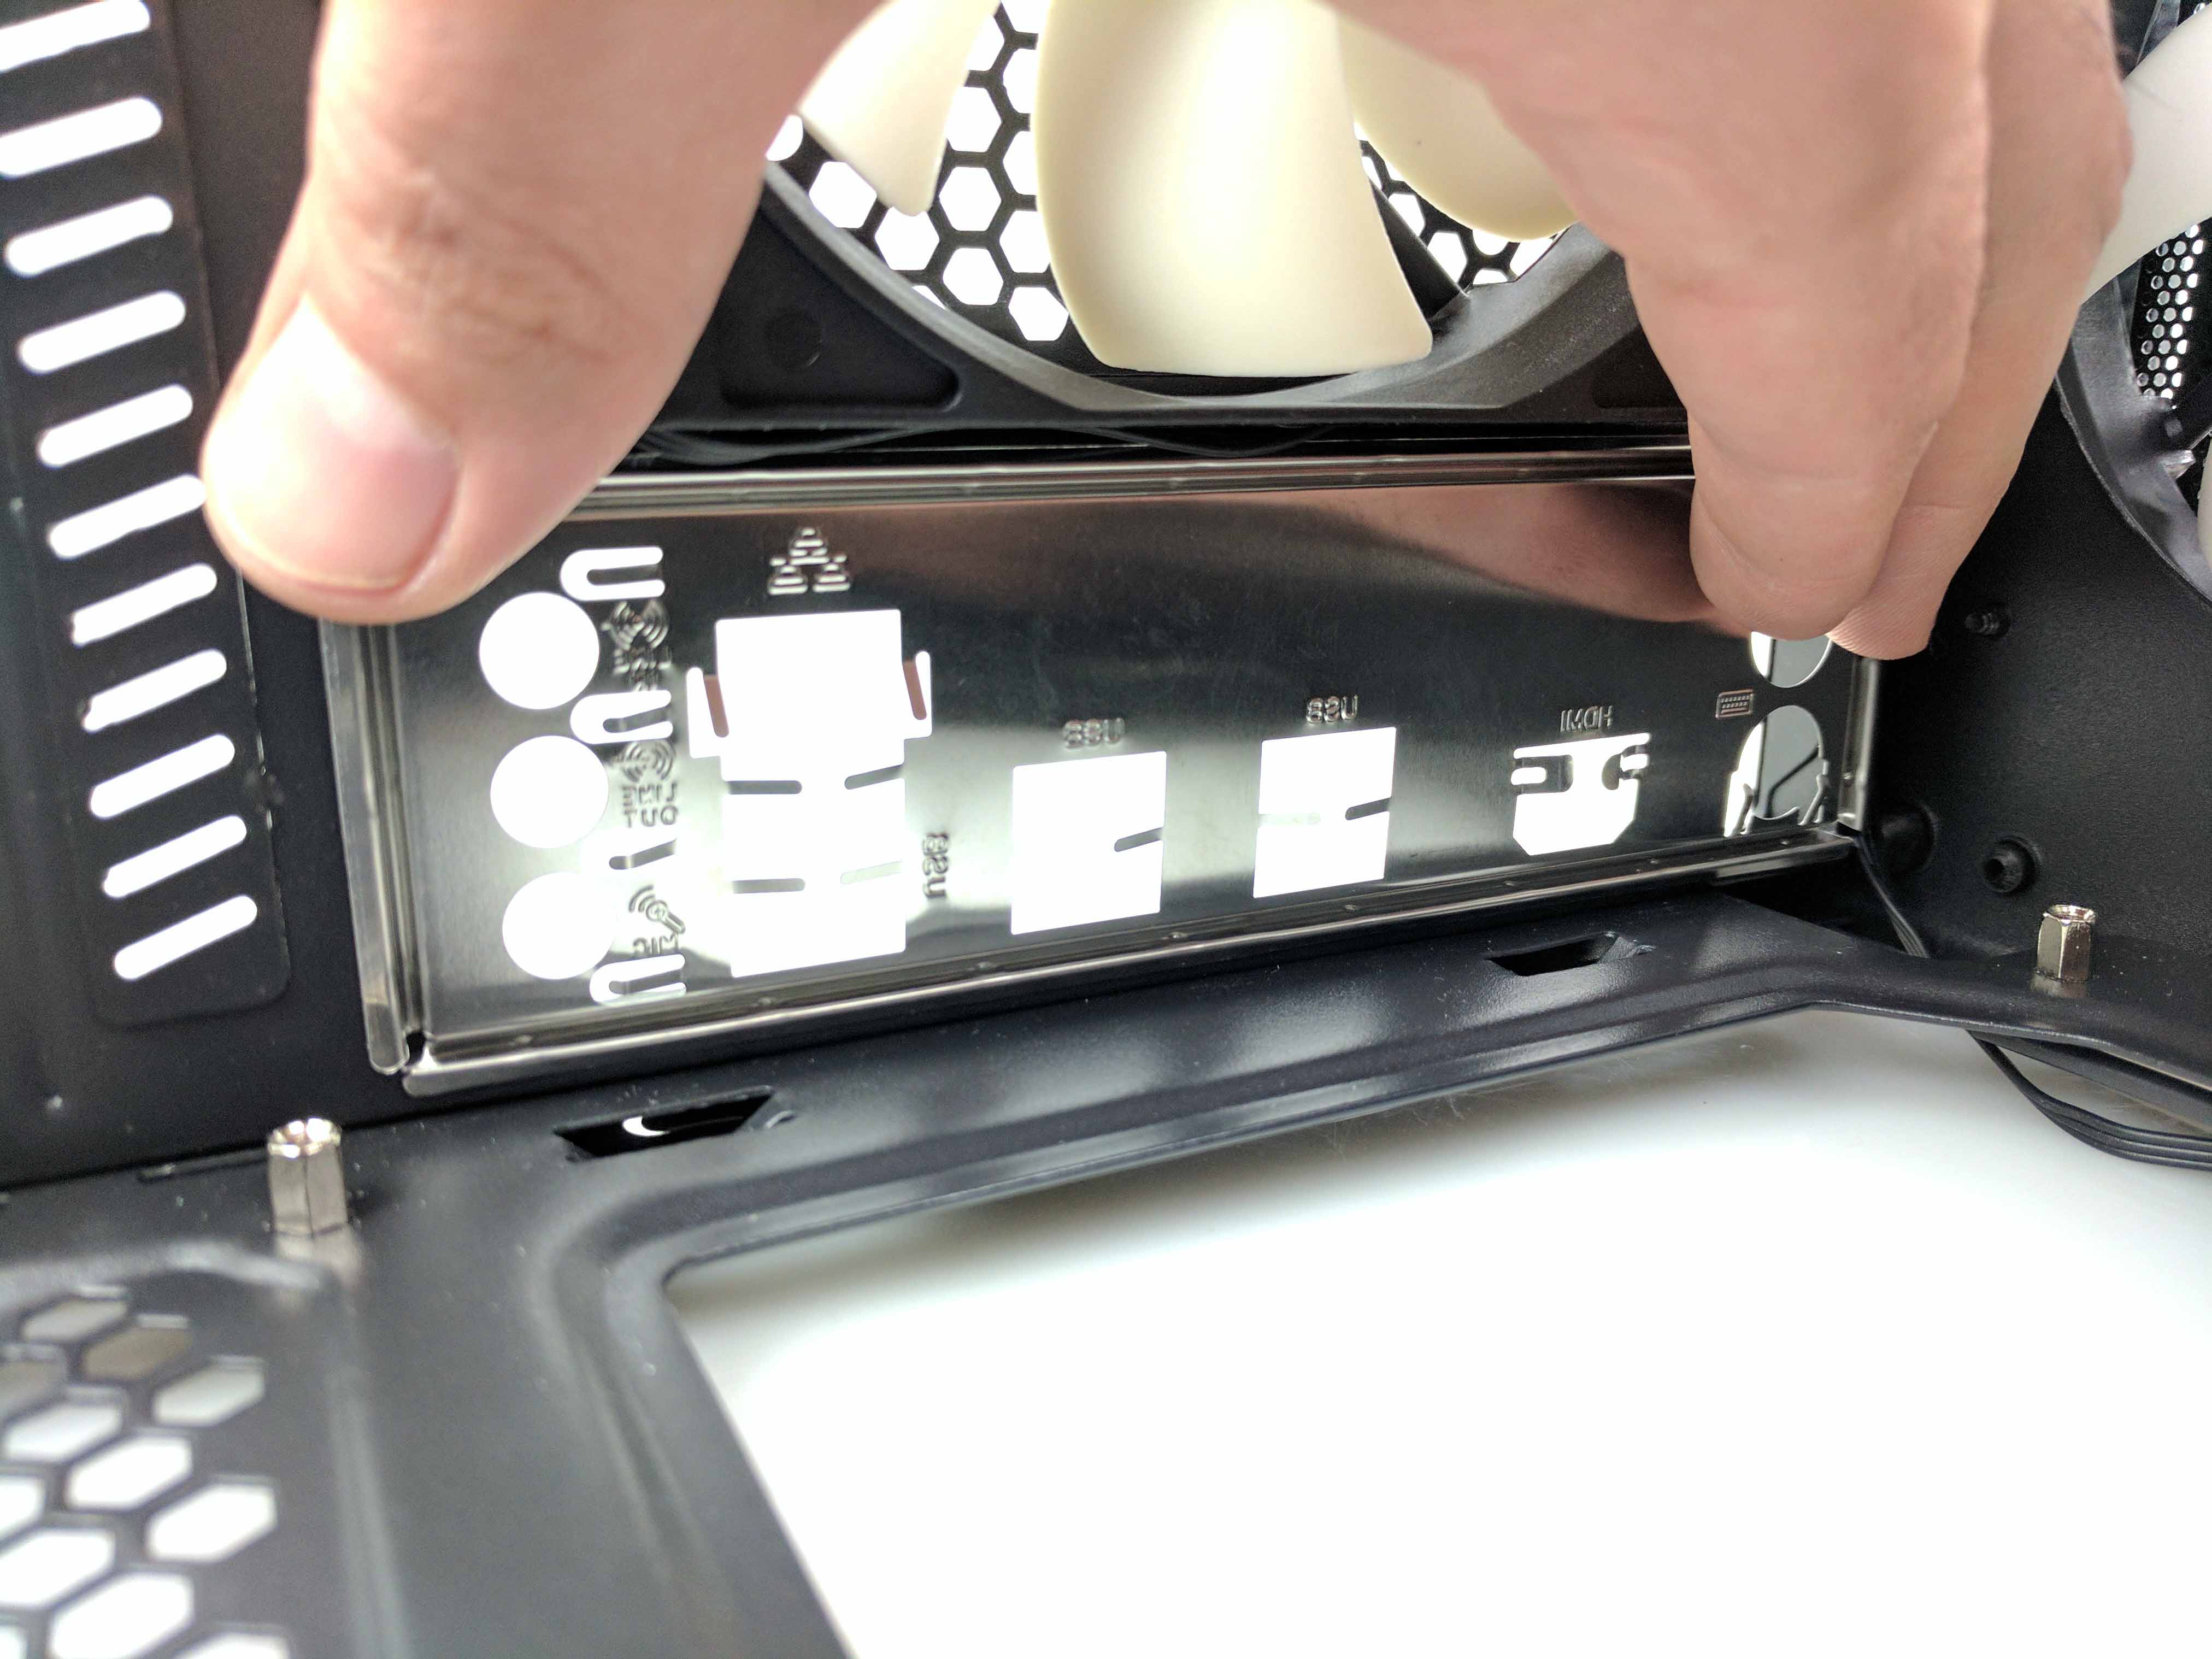
Reach back into the motherboard box and install the rear panel I/O cover, making sure all the edges are firmly in the case and avoiding the existing cables (last photo above). With the primary power, fan, I/O backplate, and front panel cables all run in advance, you can now get ready to mount the motherboard to the case.
The Motherboard & CPU
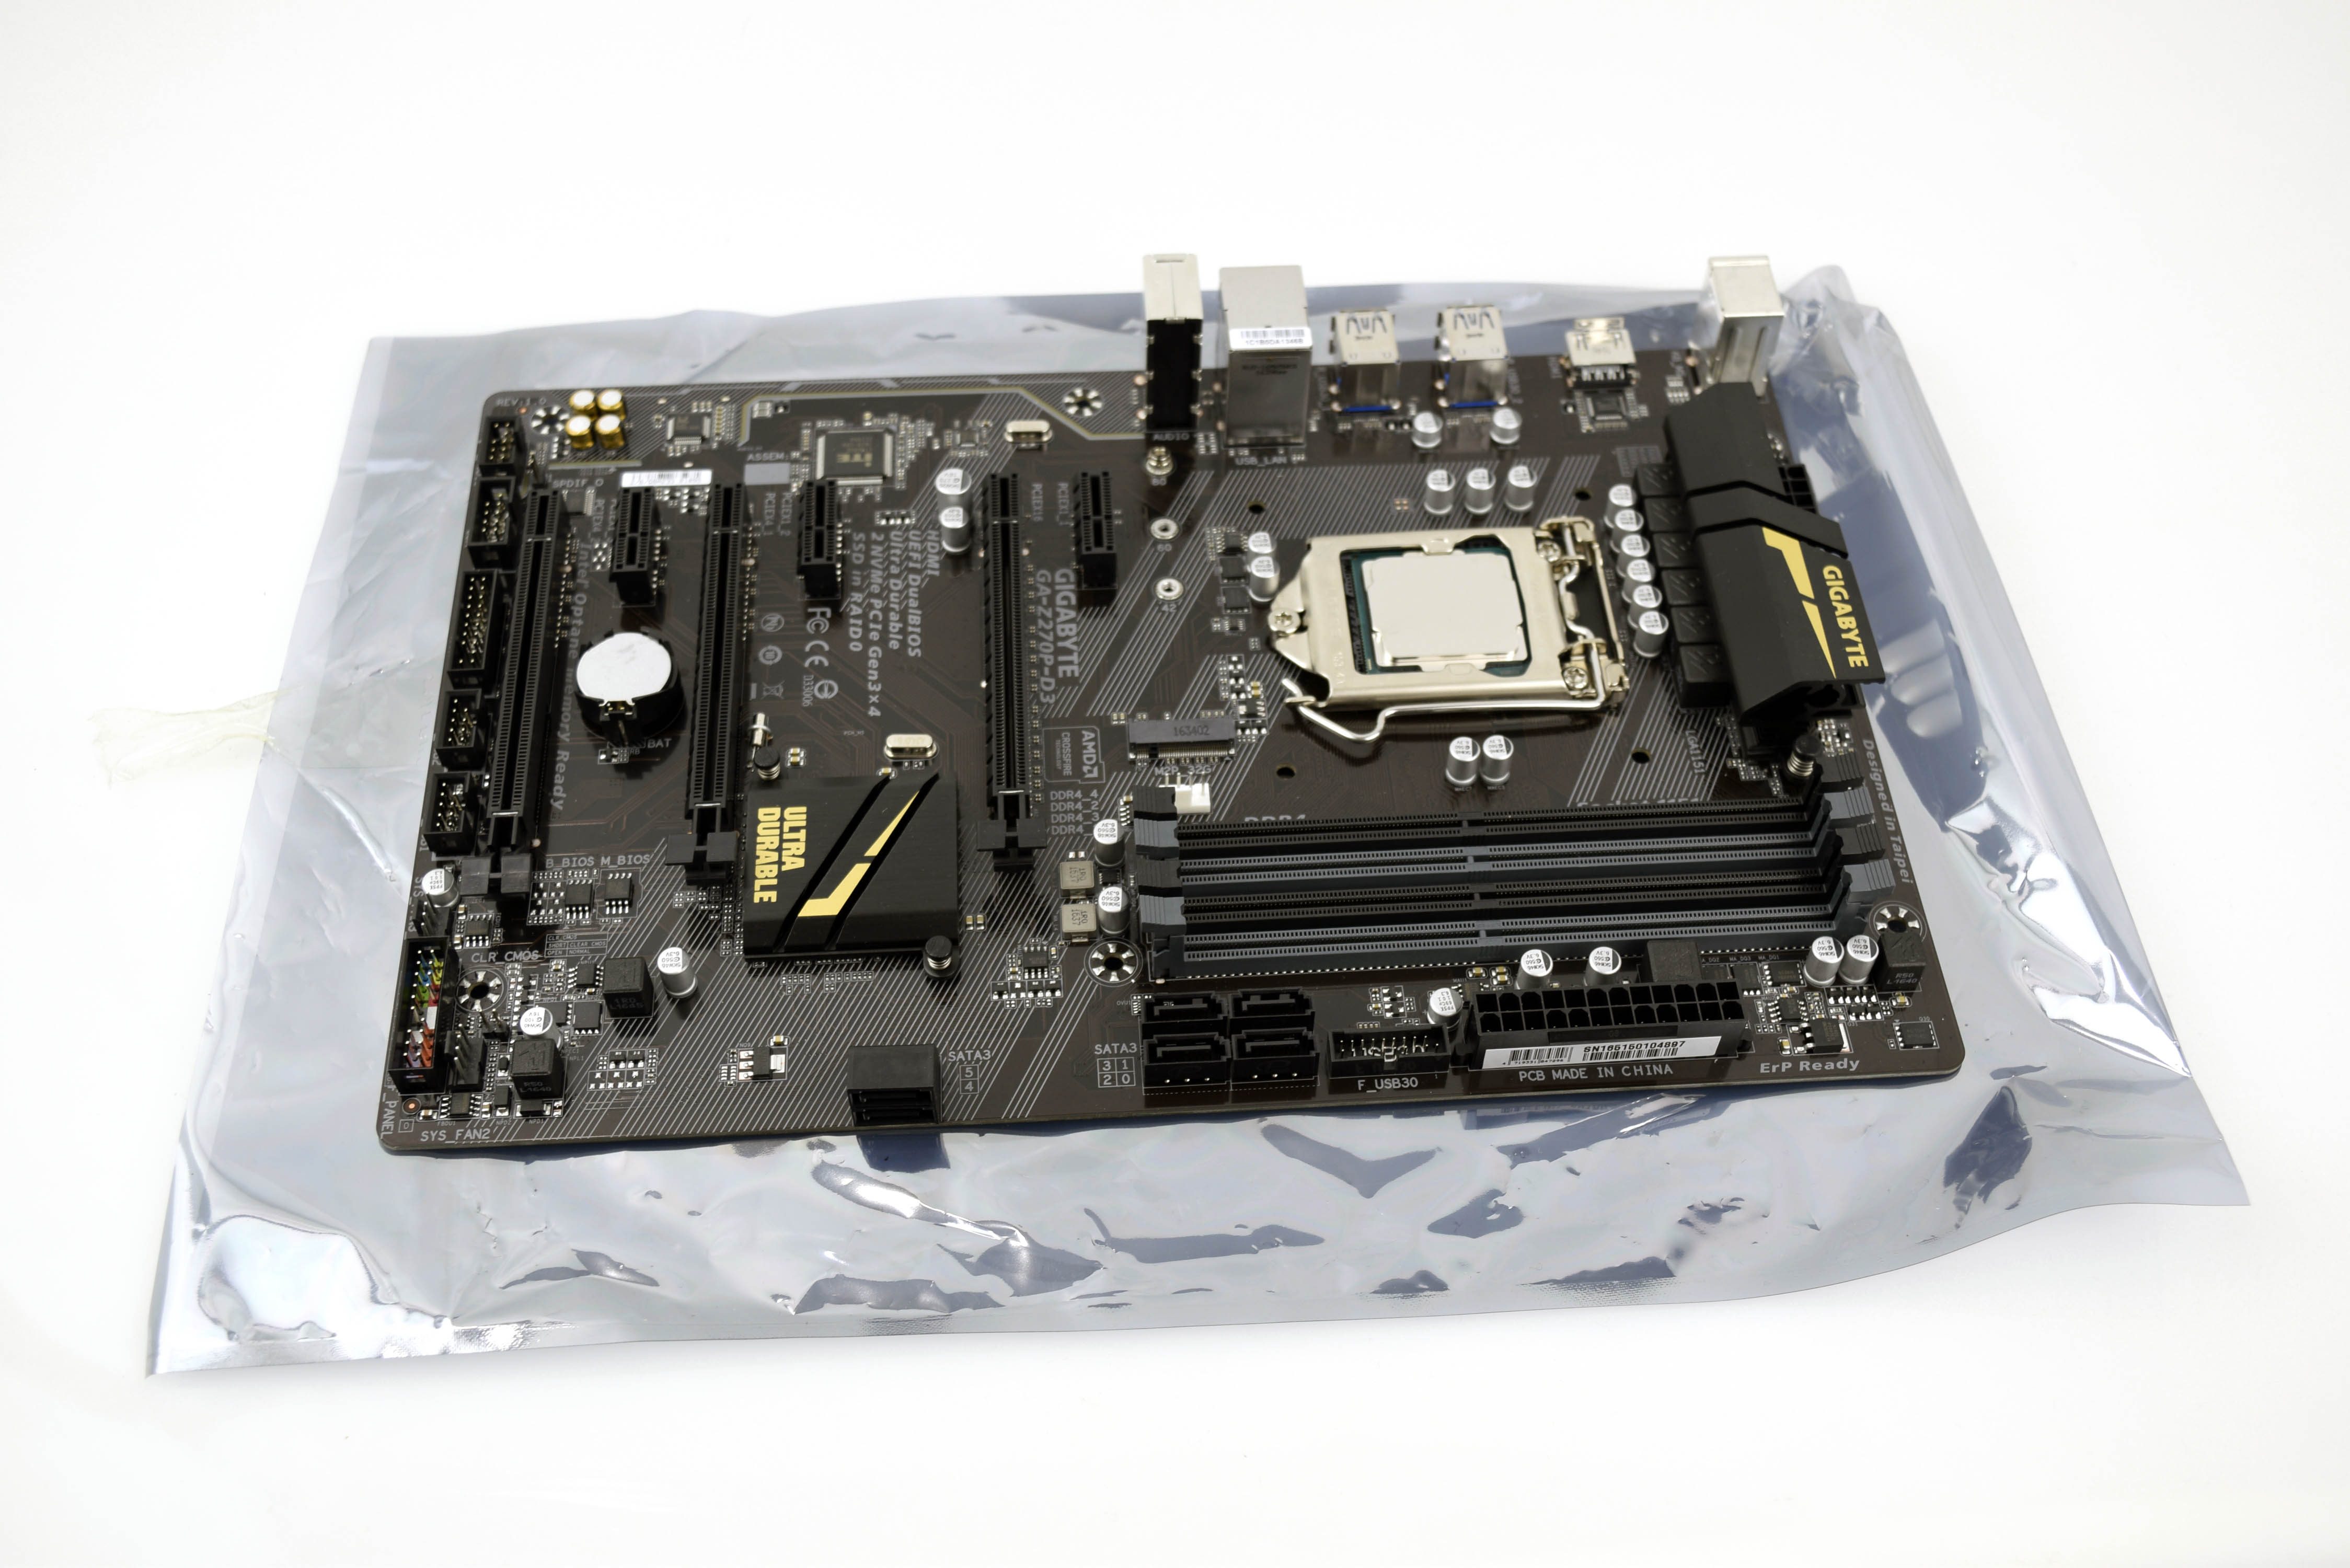
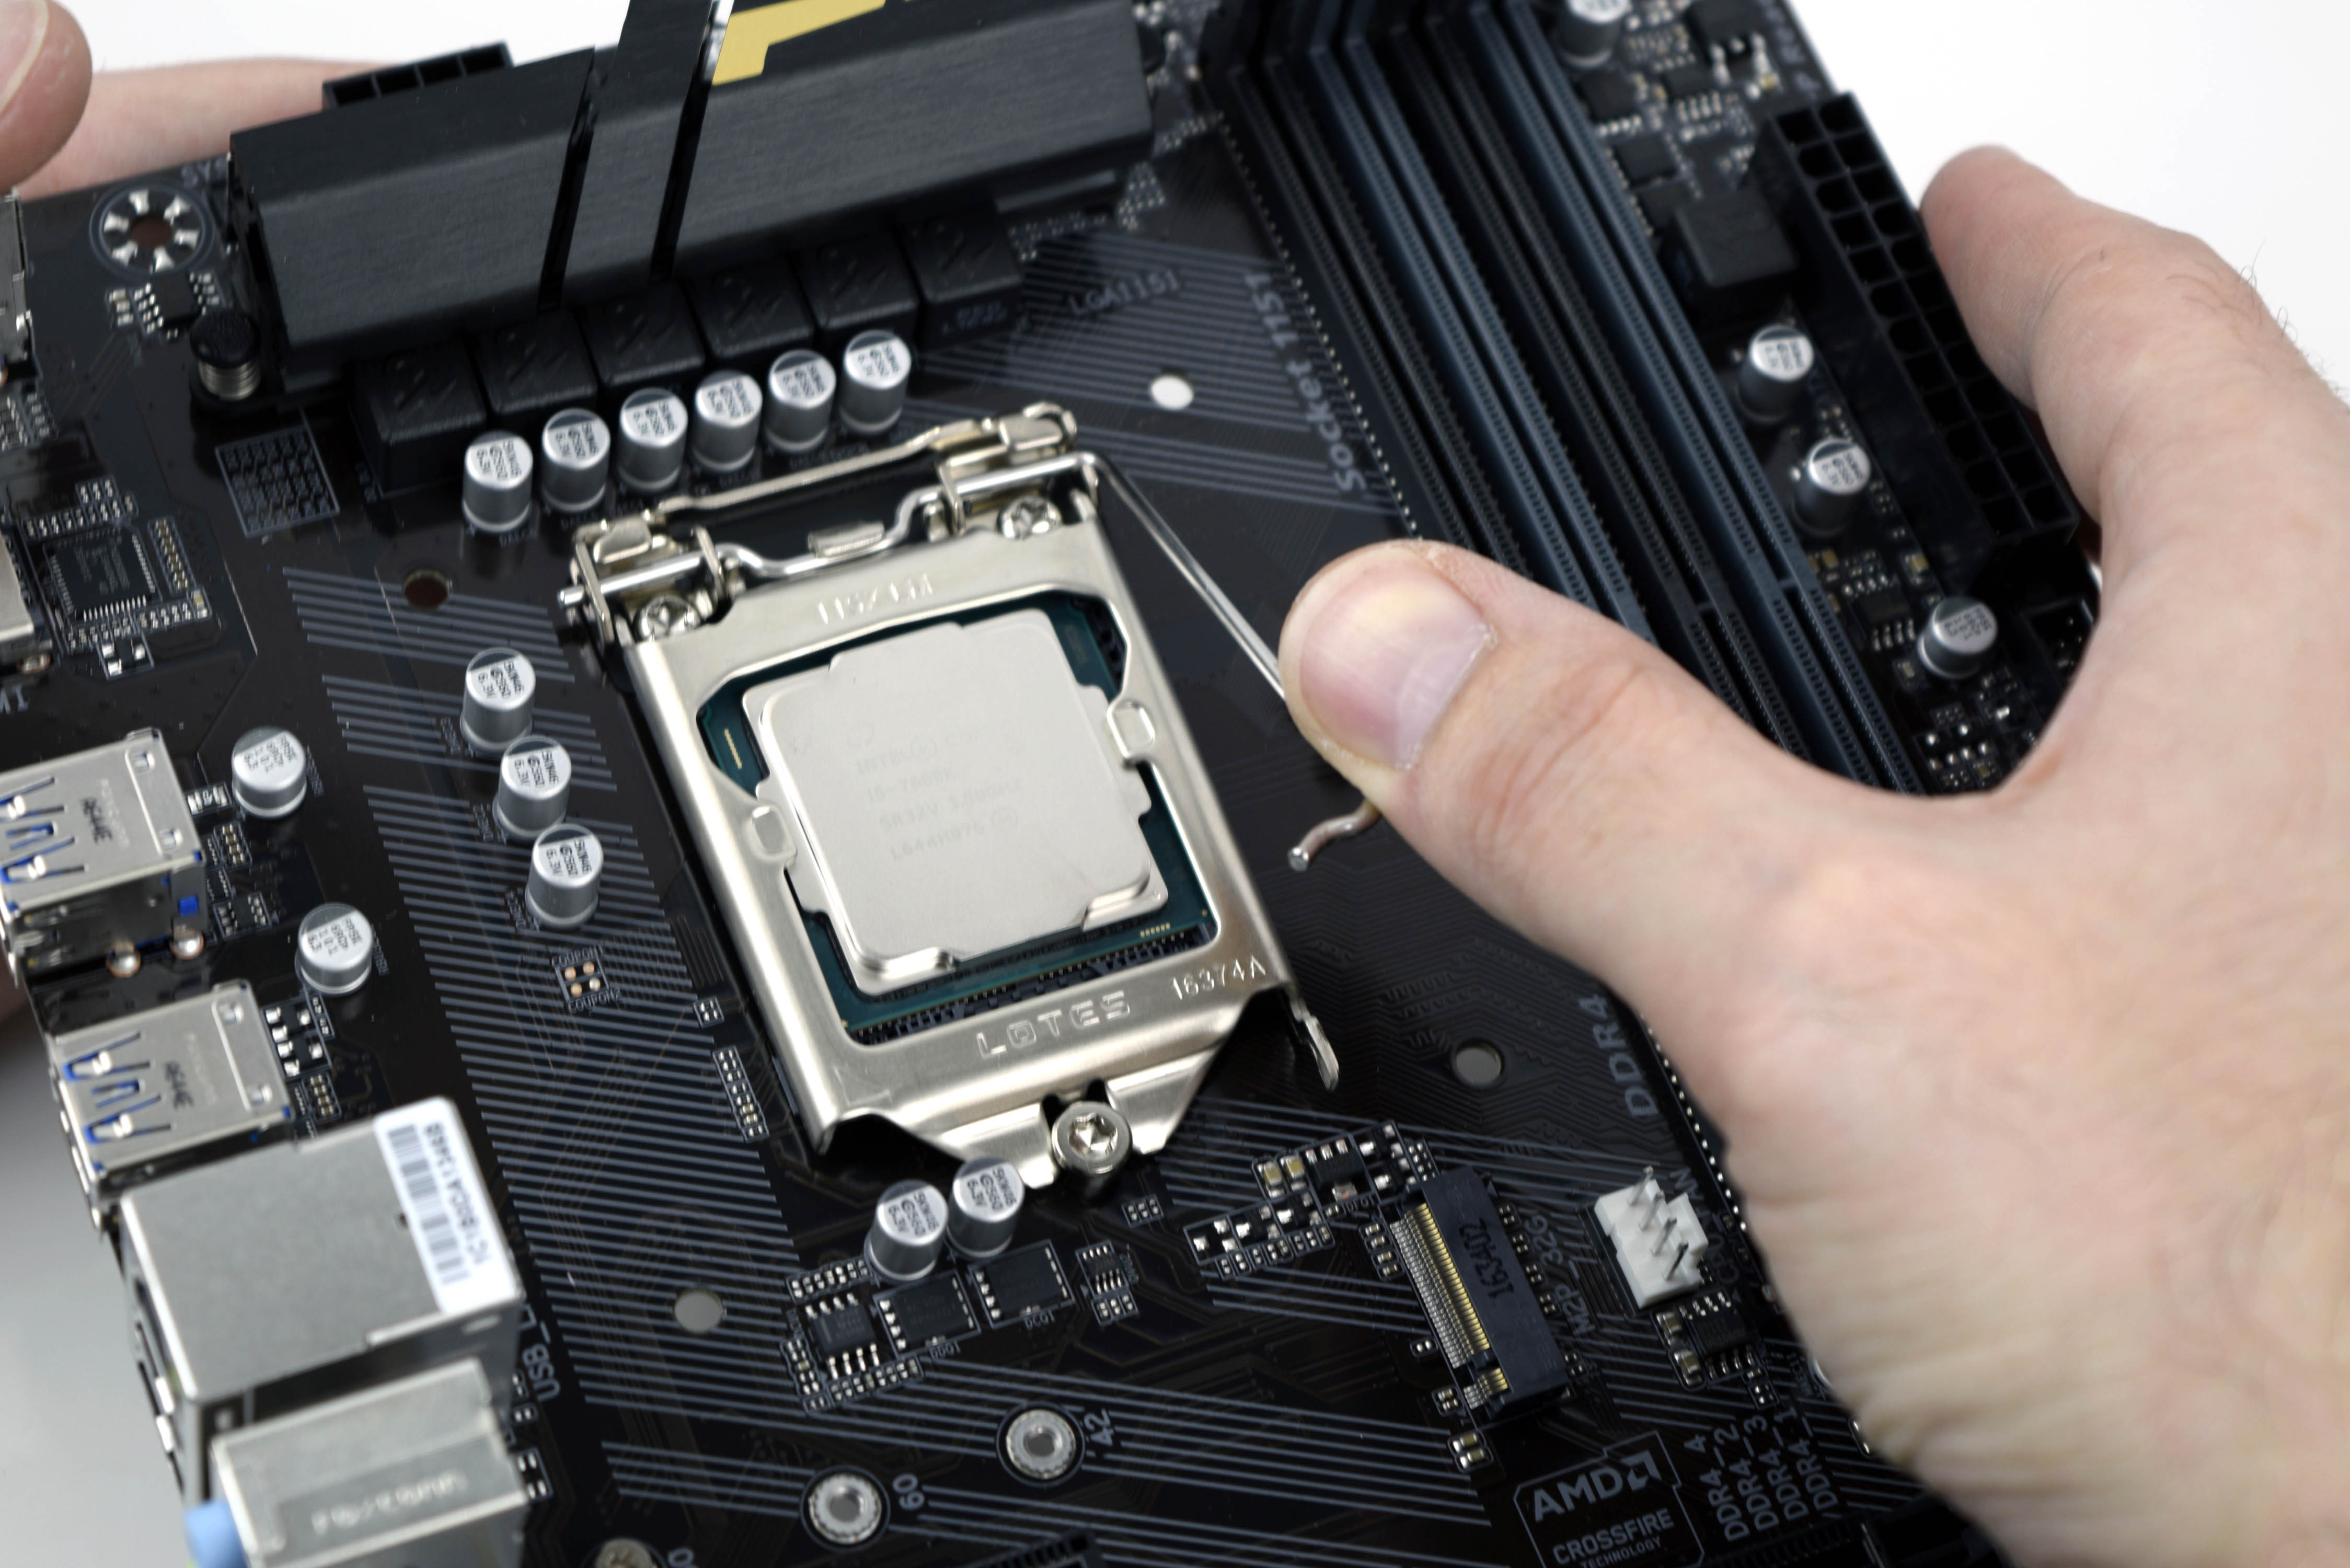
Remove the motherboard from its packaging and save the anti-static bag. It comes in handy as a coaster if you need to put the board down (and you will). Set it aside and unpack the CPU (in this case, an Intel Core i5-7600K) and Gammaxx 200T cooler.
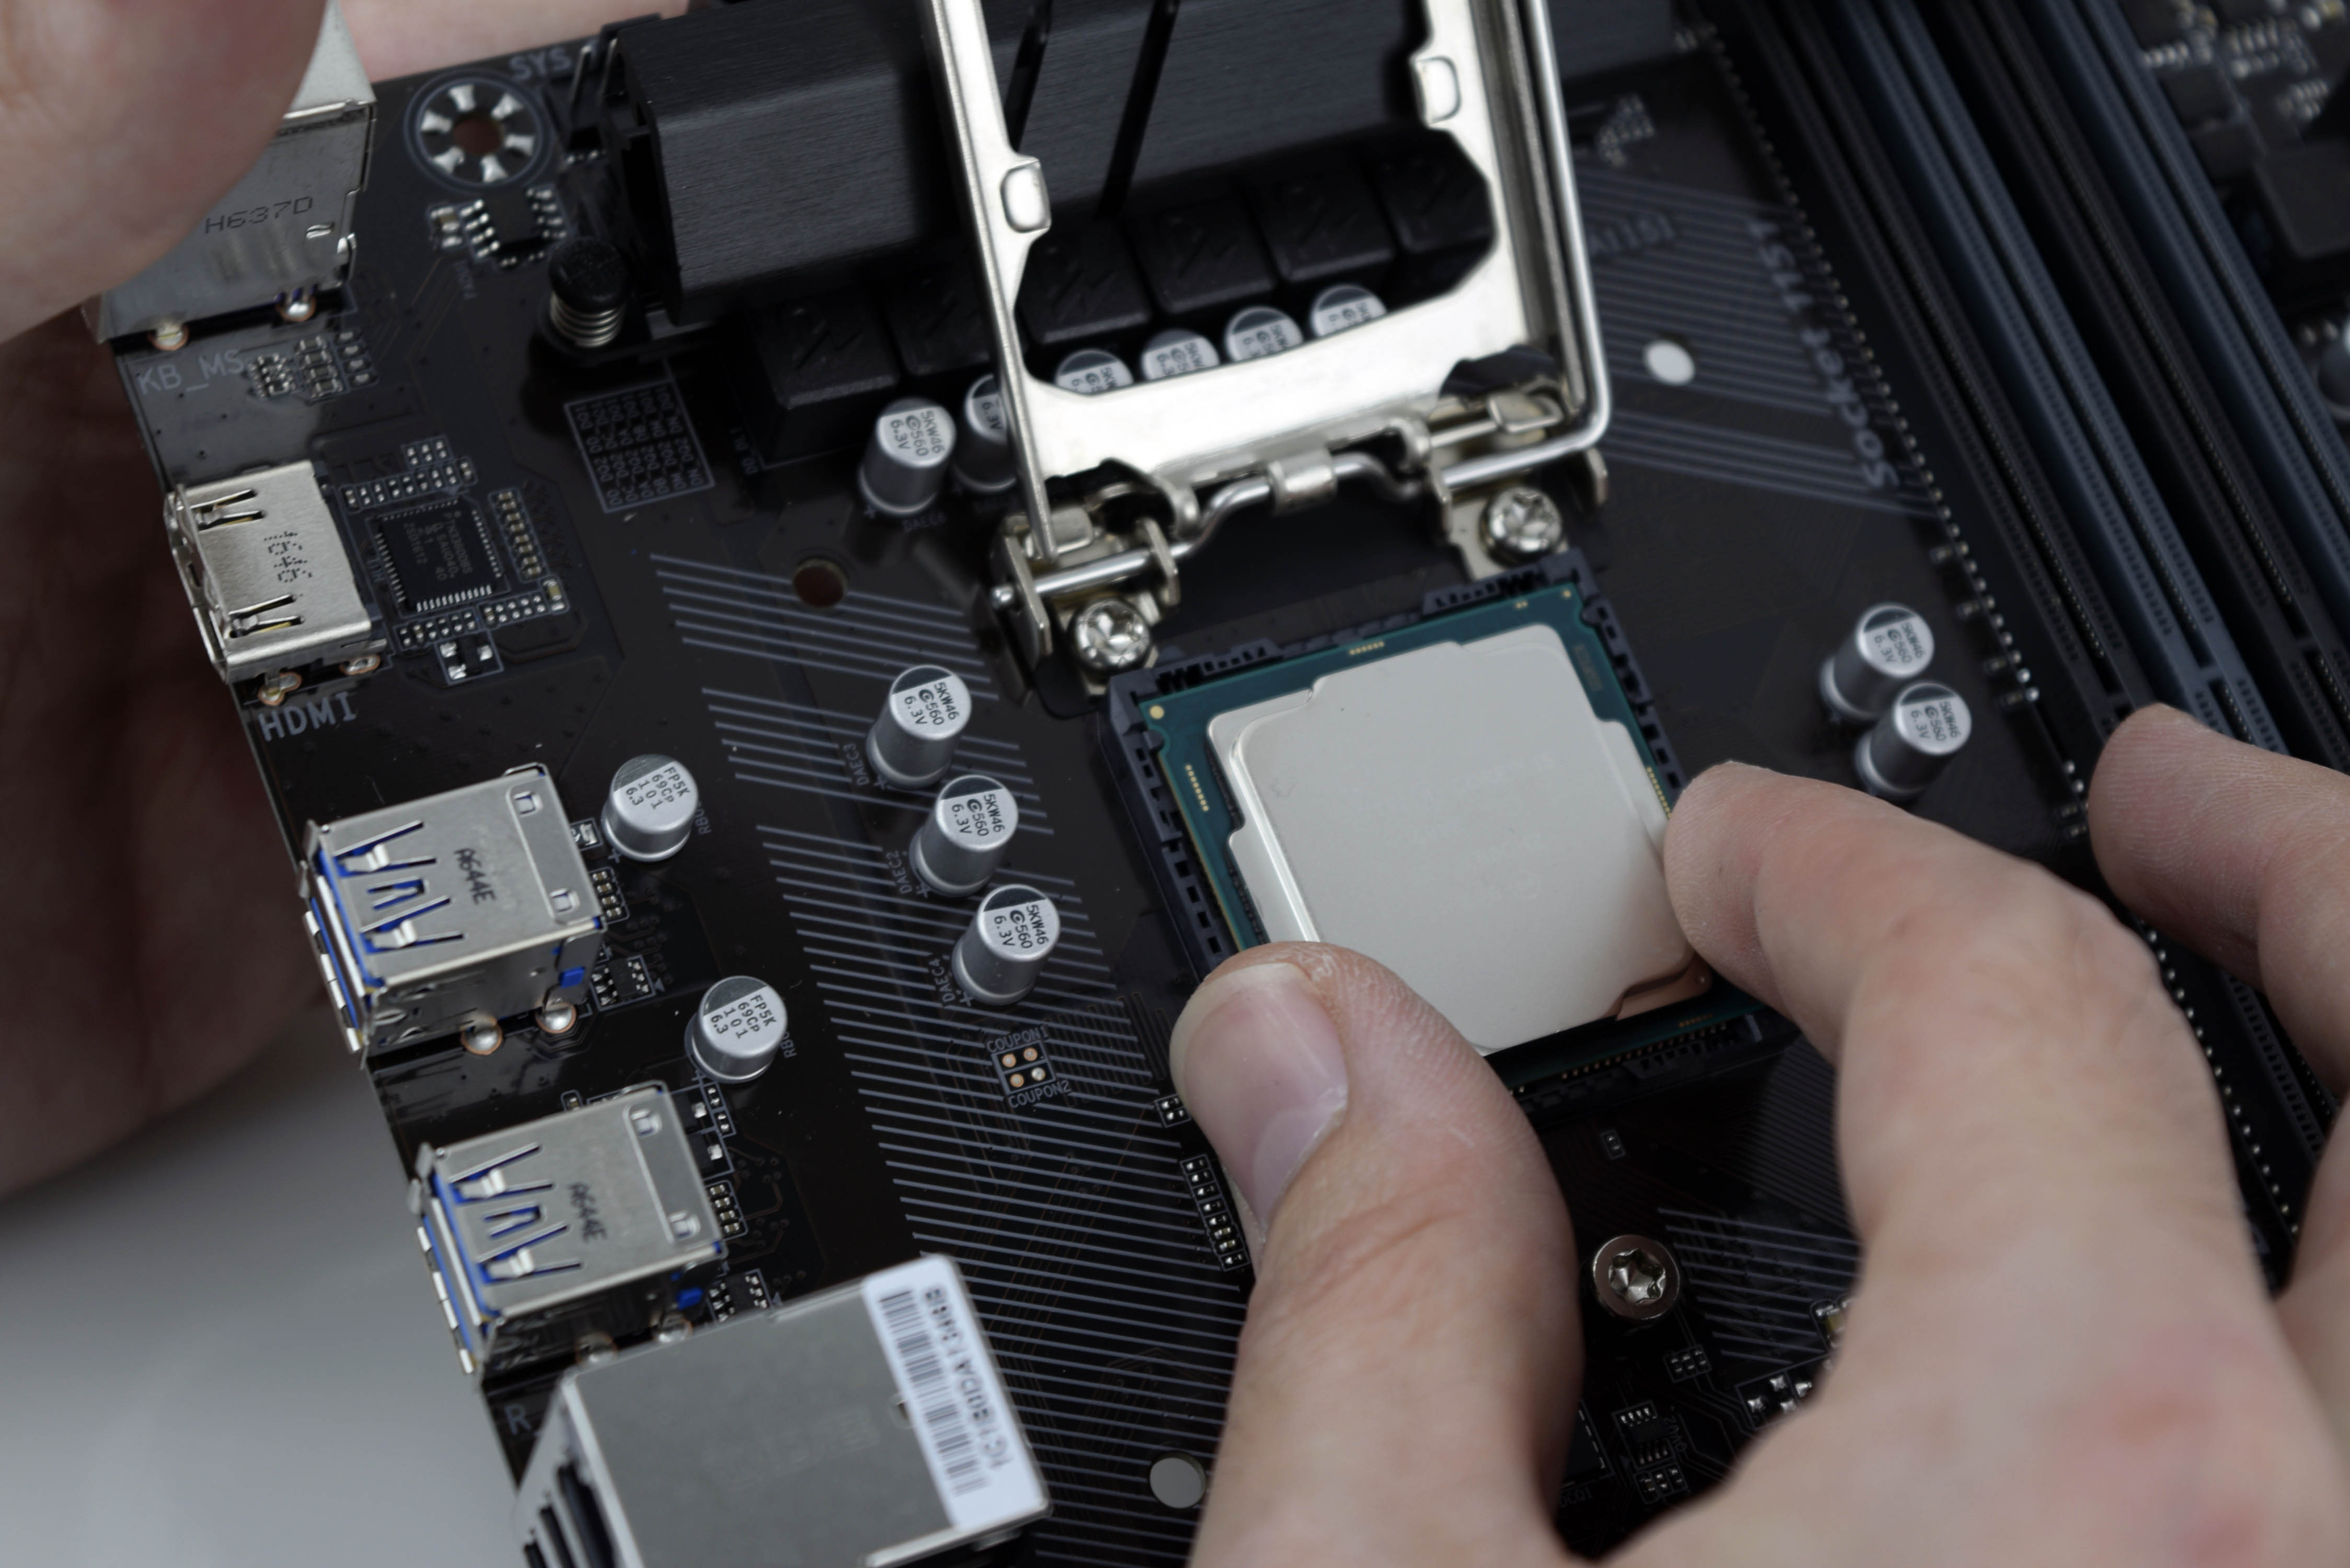
The CPU is delicate, so be careful removing it from its plastic prison. Unhook the CPU socket arm on the motherboard and raise the clamp to expose the socket. Line up the processor by locating the notches in the chip and motherboard and gently place it in the socket (see second picture above), taking care not to drop one end into it. You can also use the provided installation tool from the motherboard box.
It’s also important to discharge any static buildup before handling the processor. This can be accomplished with an anti-static wrist band, or by simply touching a grounded metal object nearby. Remove the plastic cover on the clamp, and lower it into position. Push the arm down and lock it into place. You’ll encounter some resistance, but if you hear any scraping or crunching at this point, you've likely made a dire mistake and rendered your system useless, so be careful and patient.
We debated whether to pre-install the cooler before mounting the motherboard, because once it’s in the case it’s difficult to attach the retention clips (they face the top and bottom of the case, and there’s not much clearance to reach a hand above the processor inside the chassis). For builders with nimble hands, you could hold off on installing the CPU cooler until the end, but we’d recommend doing it now for the accessibility.
The Cooler
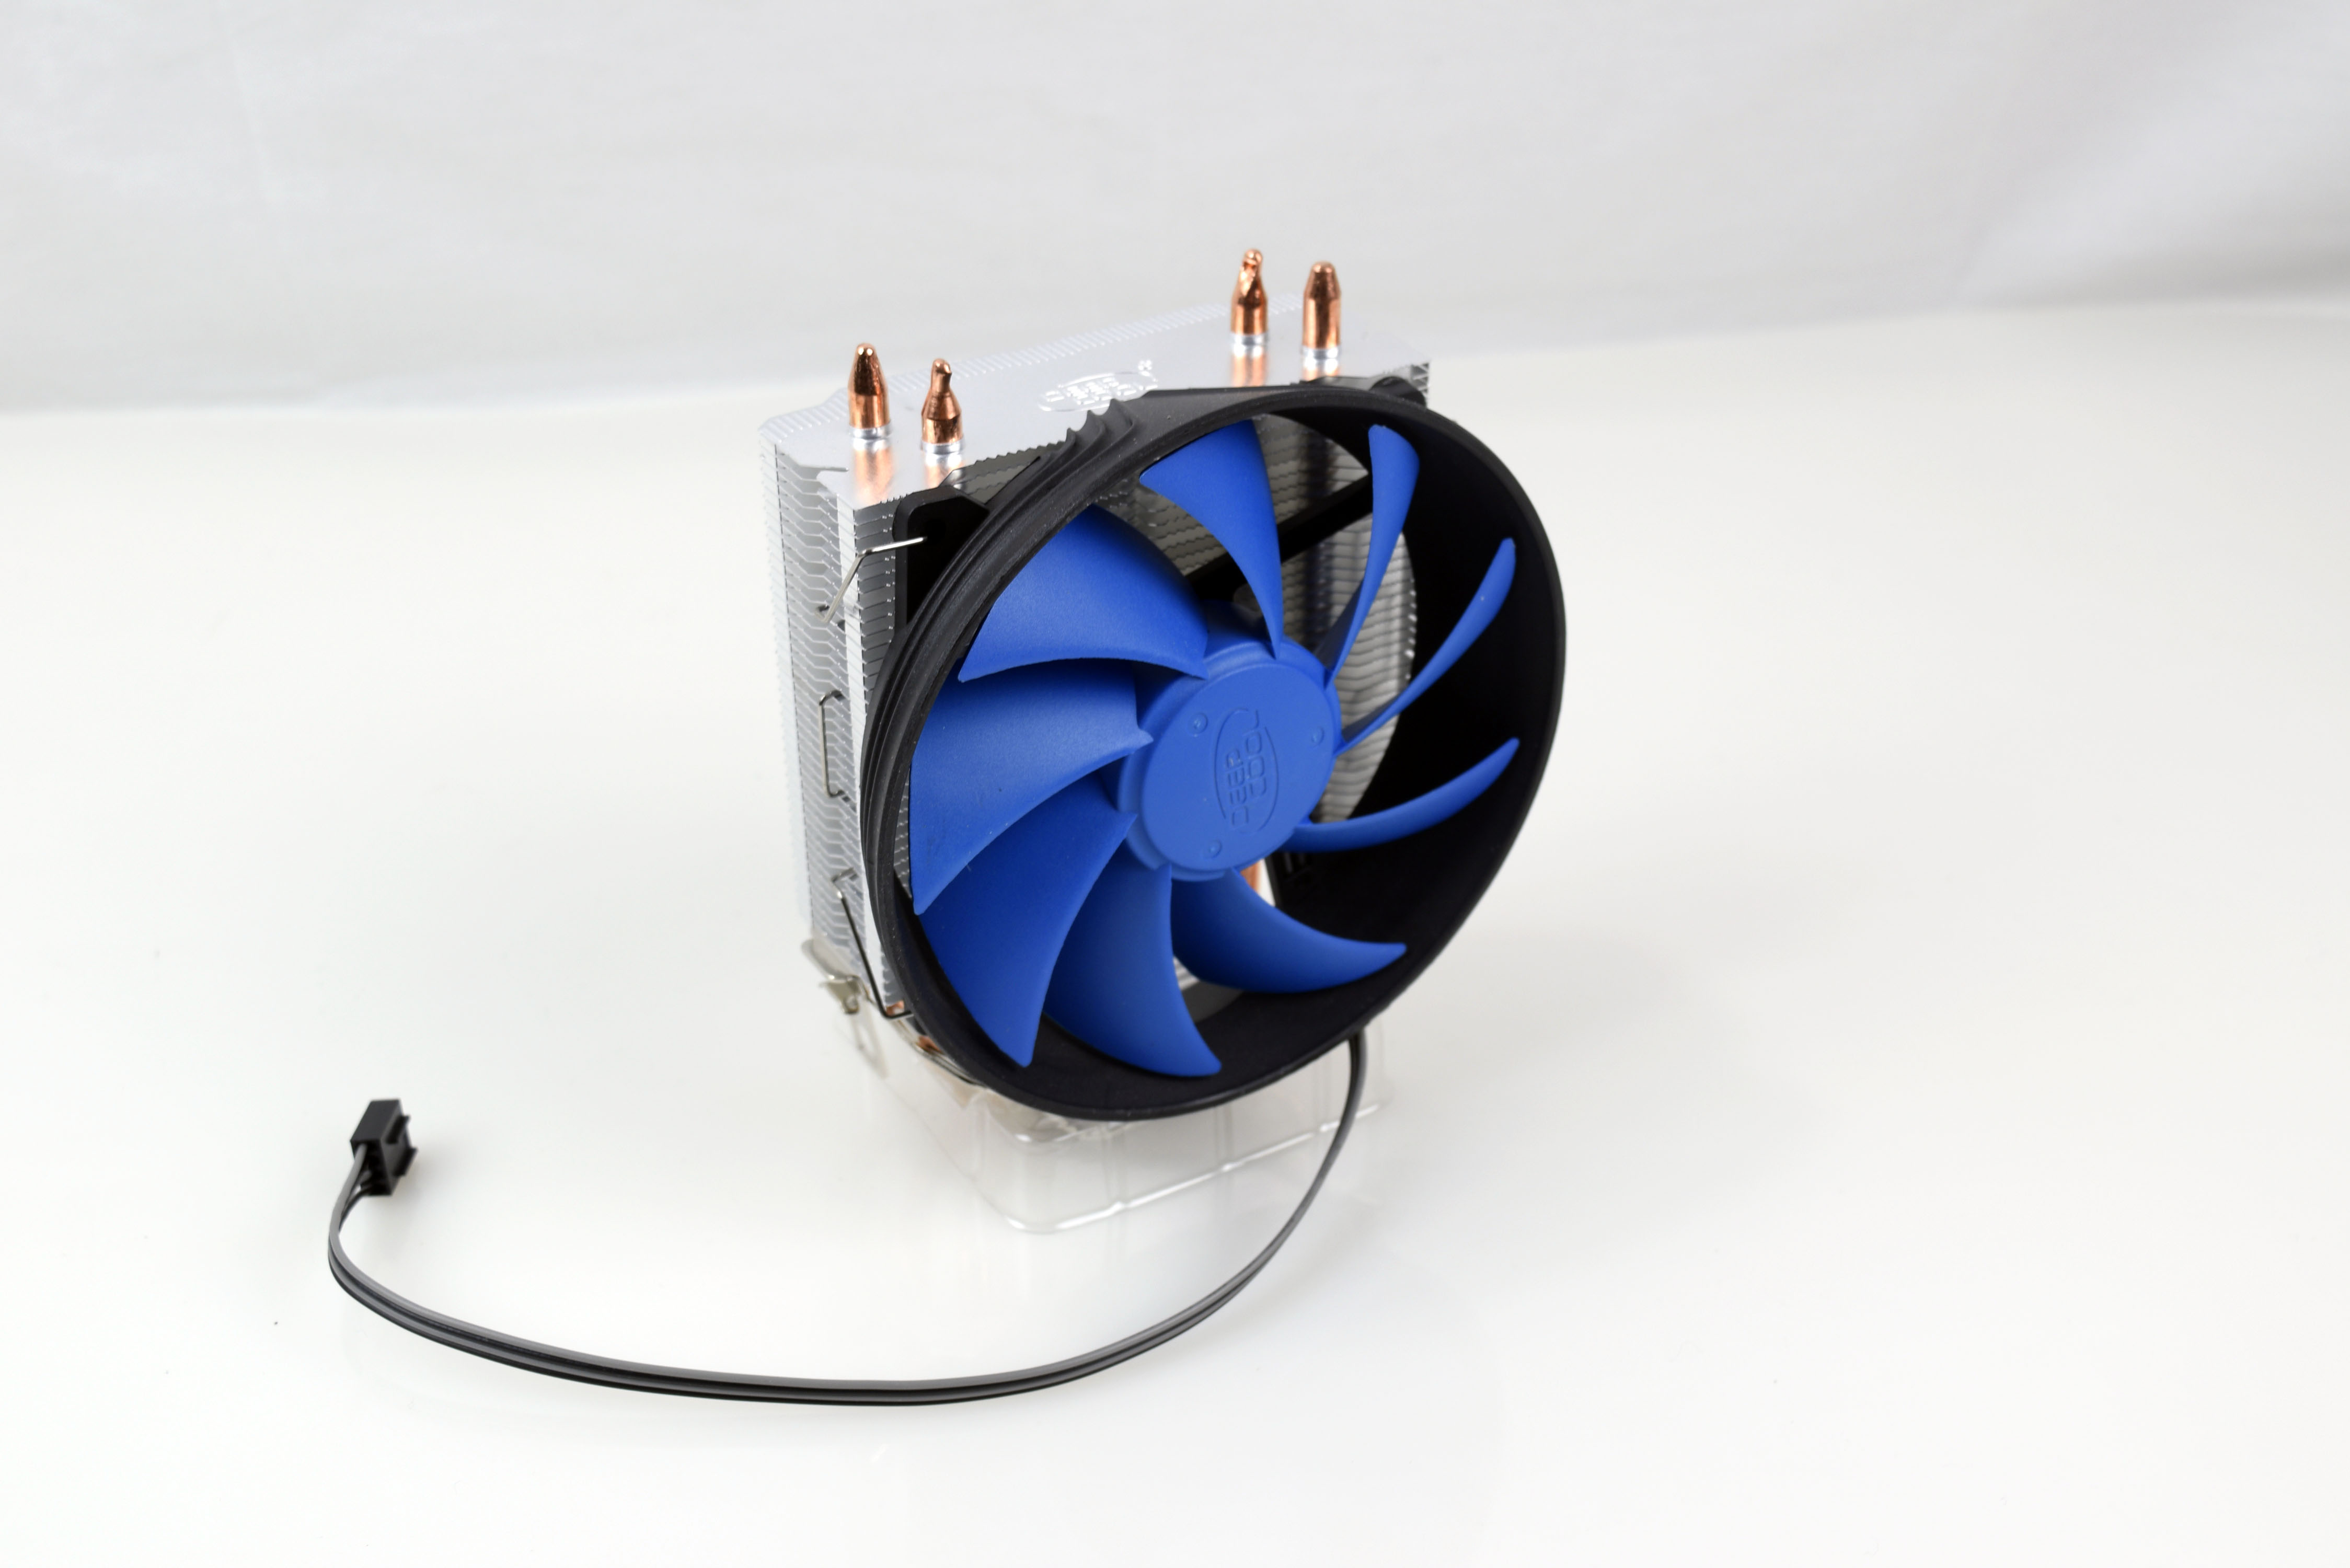
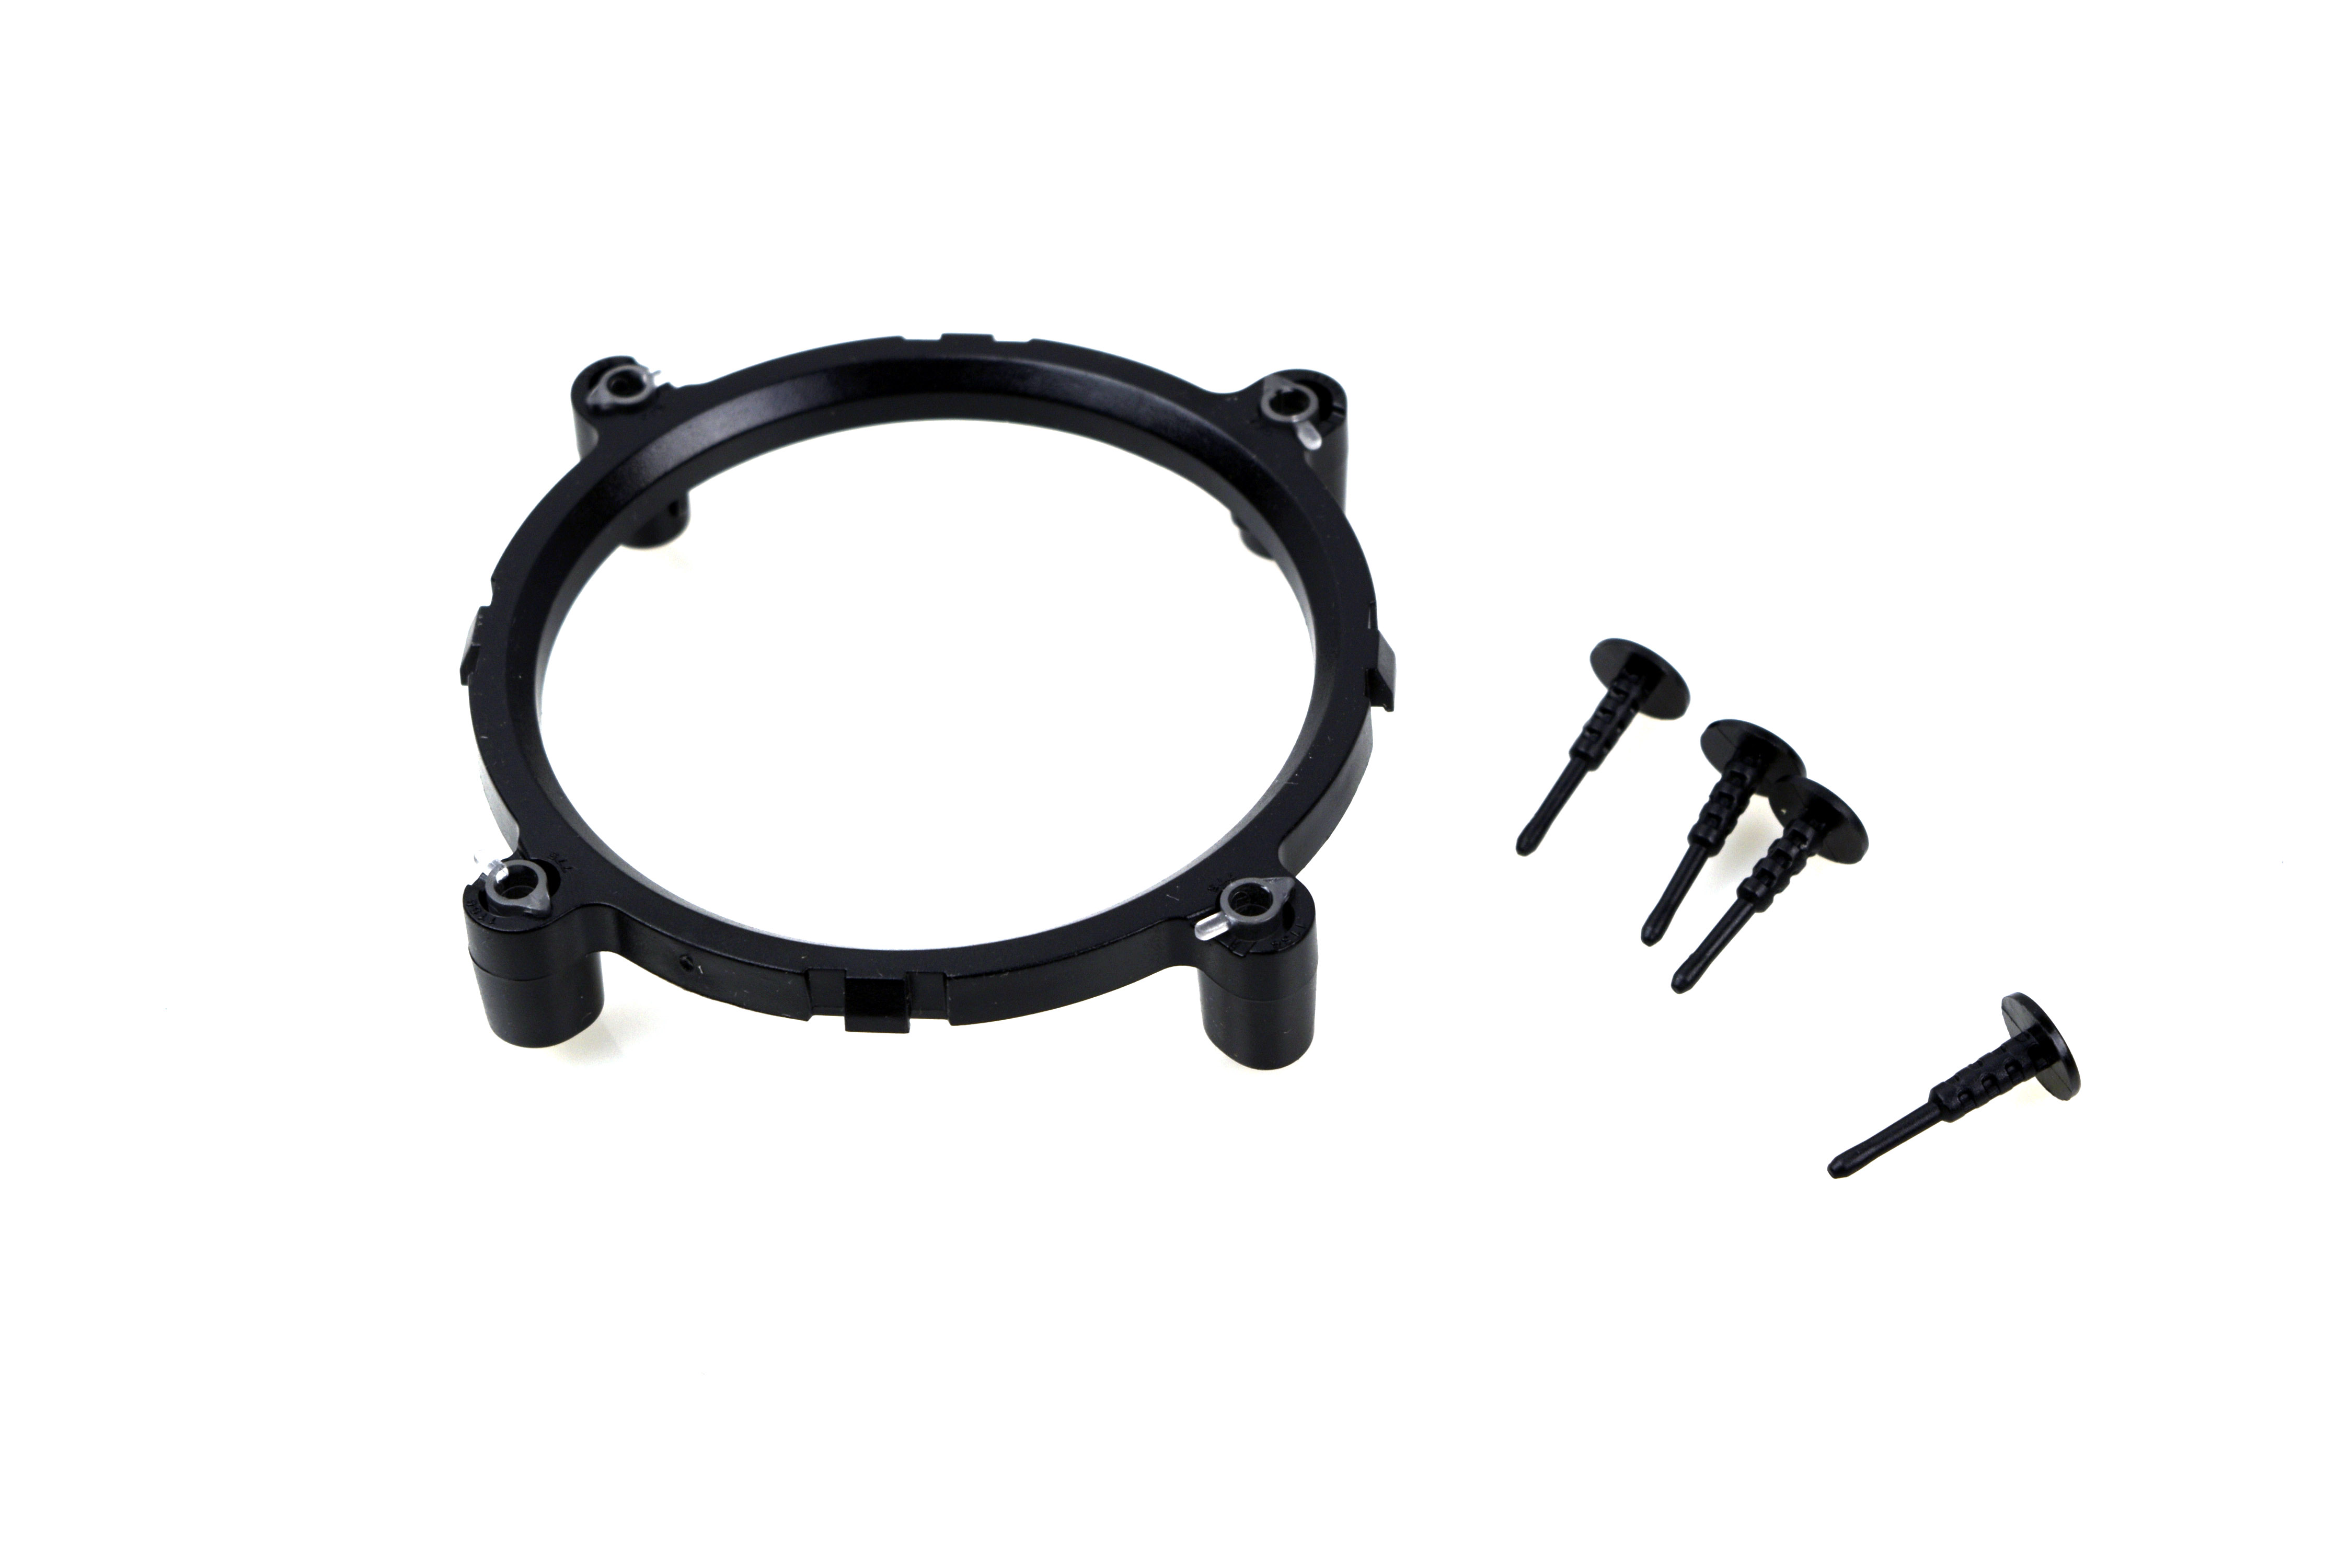
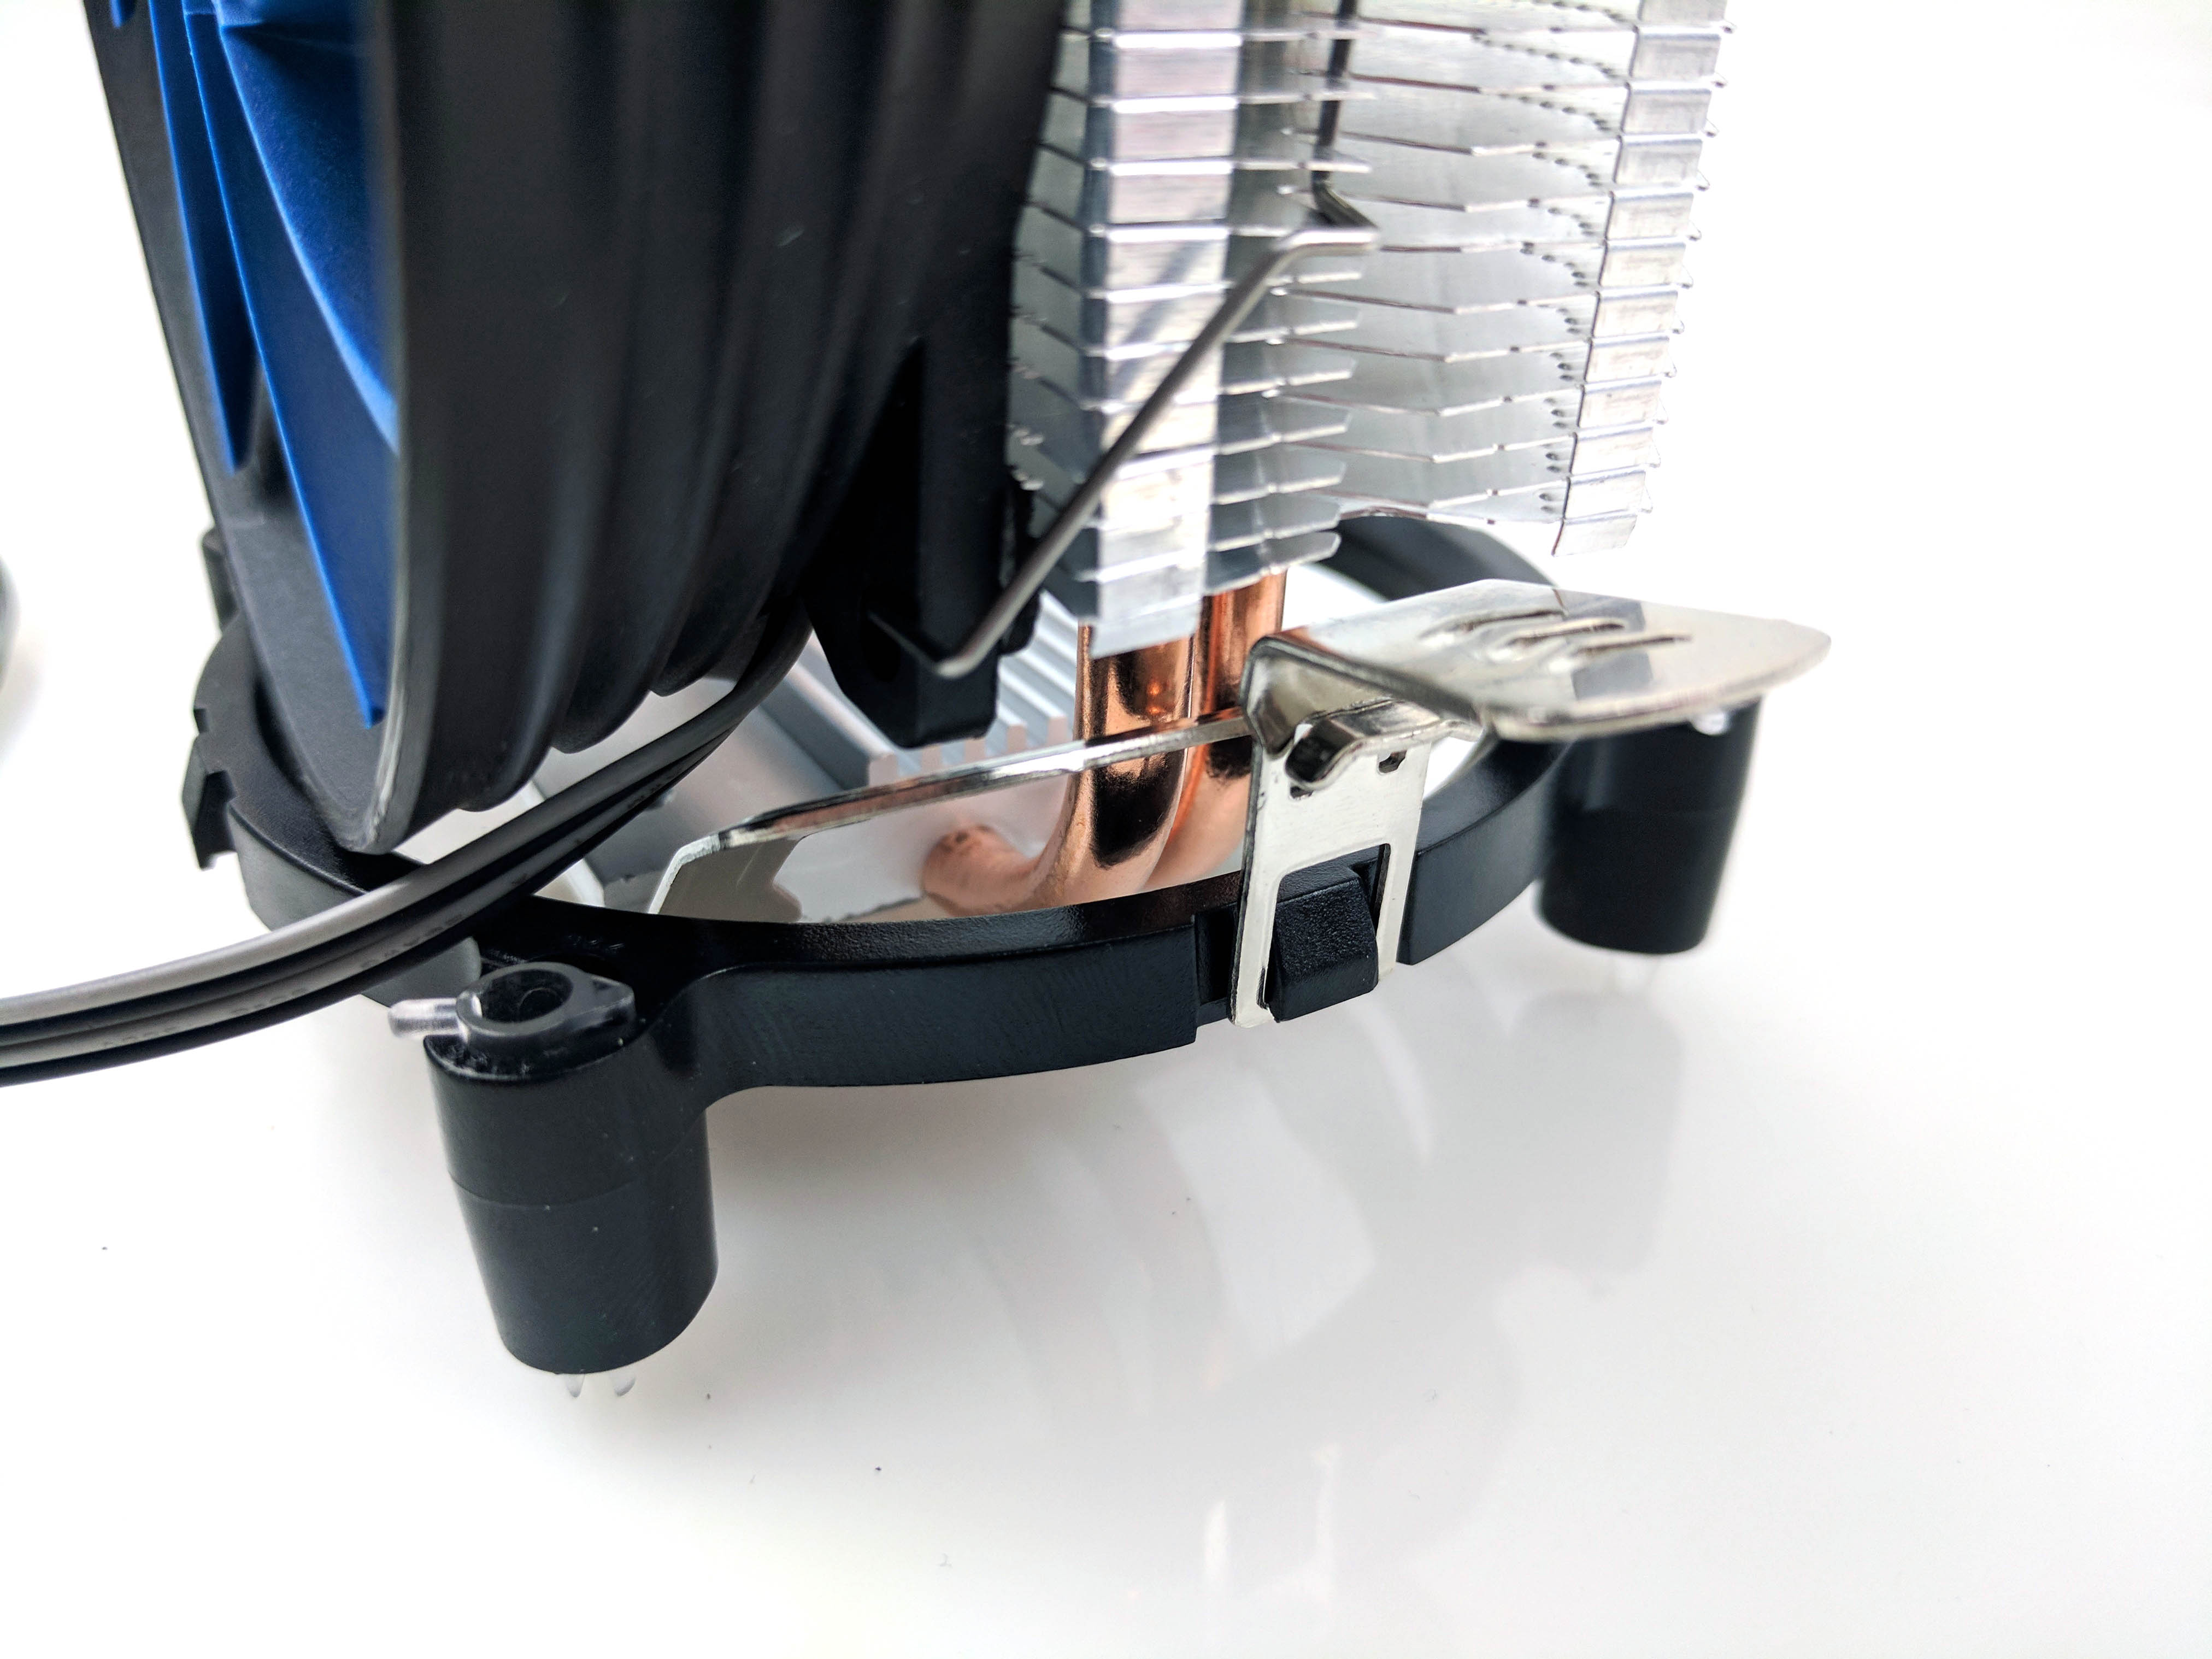
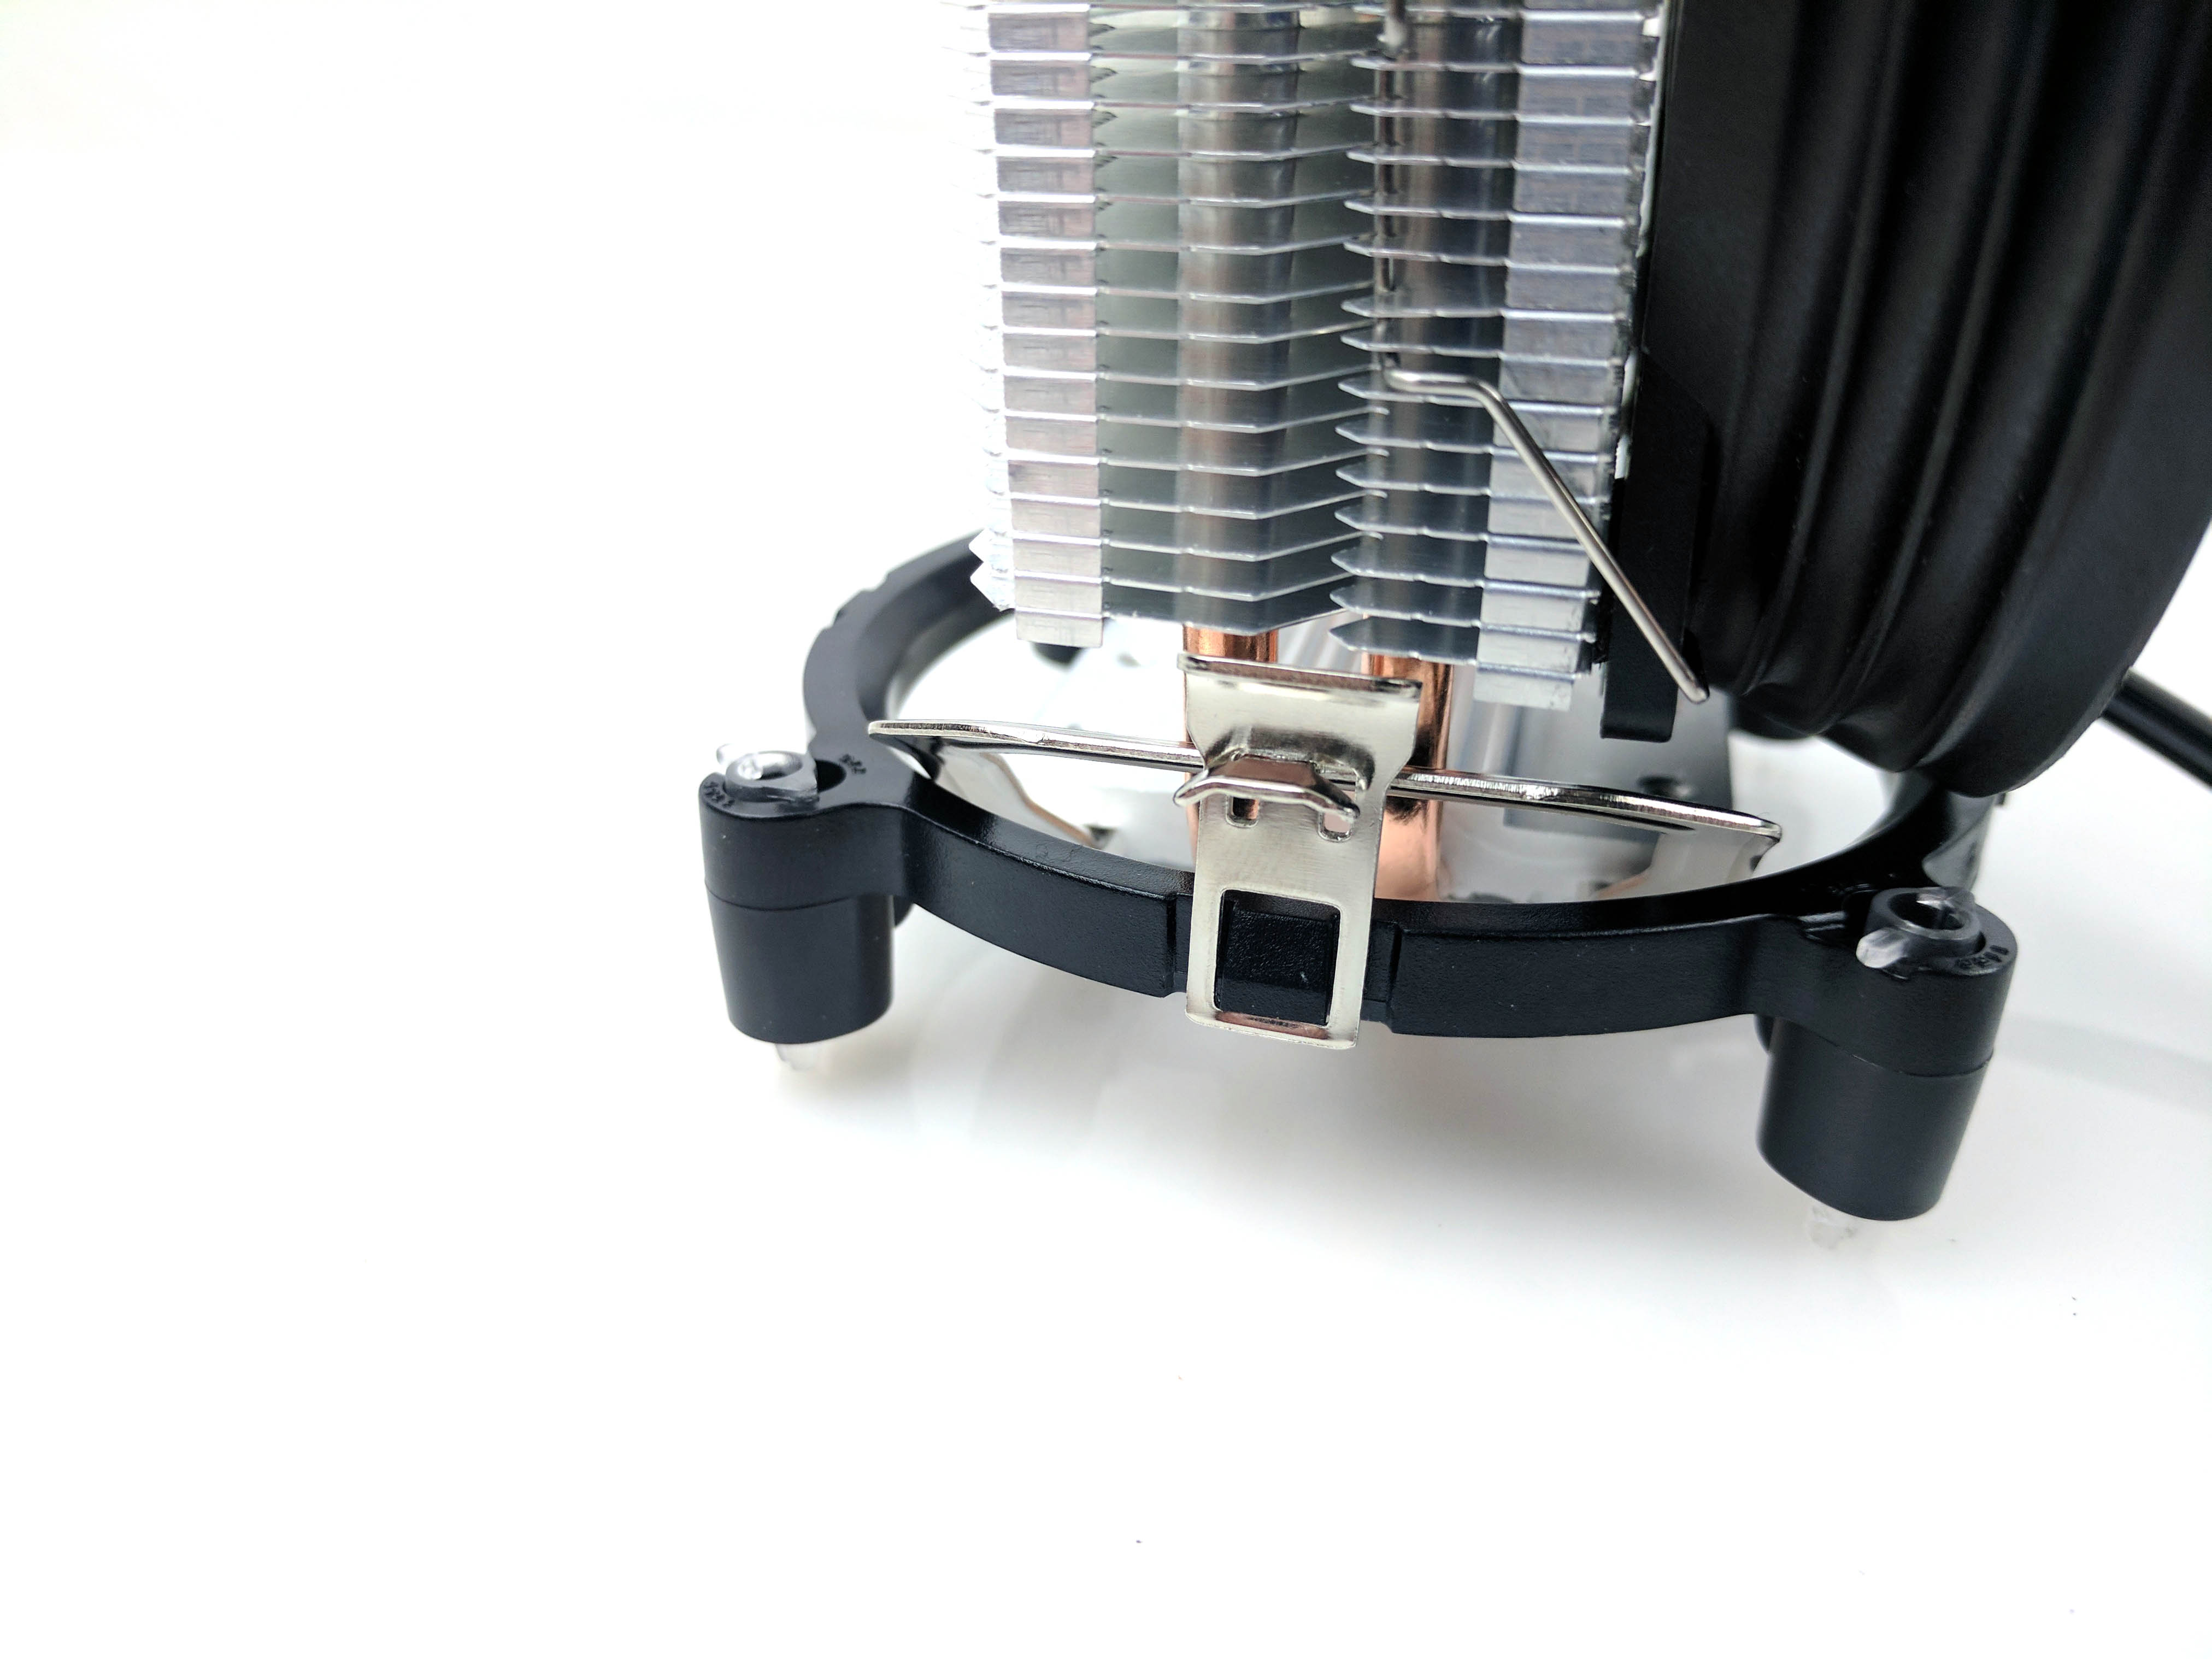
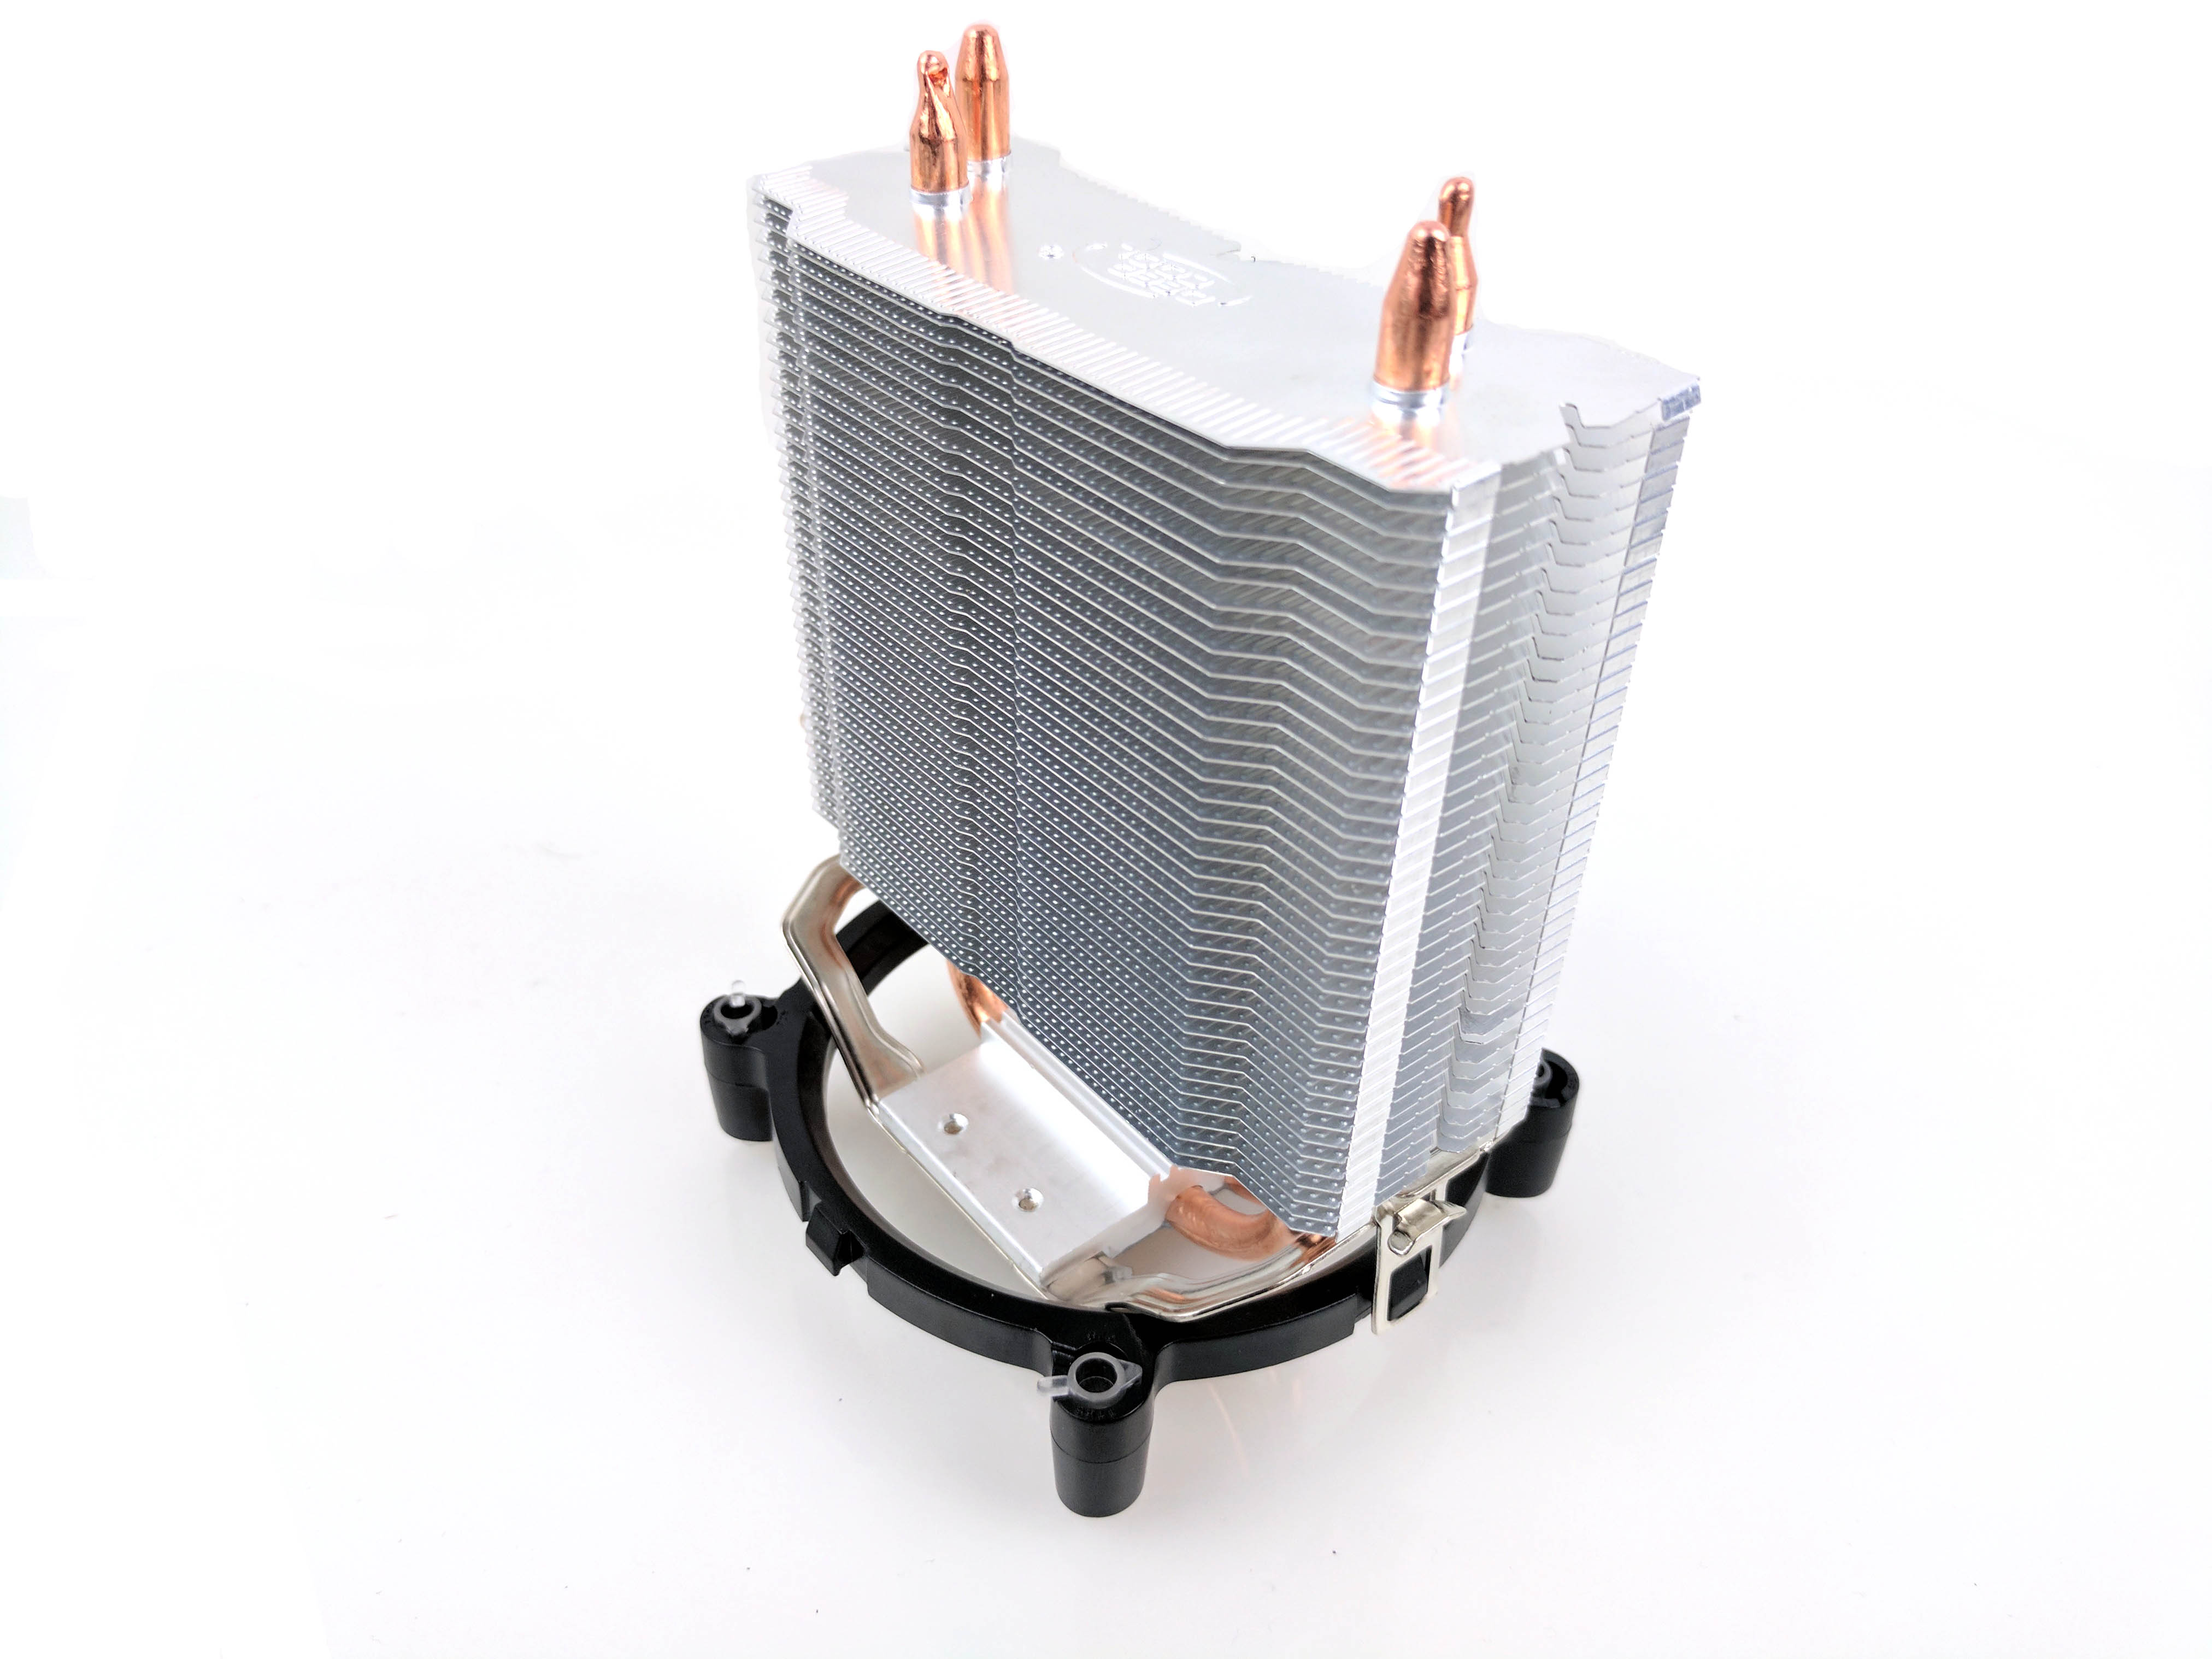
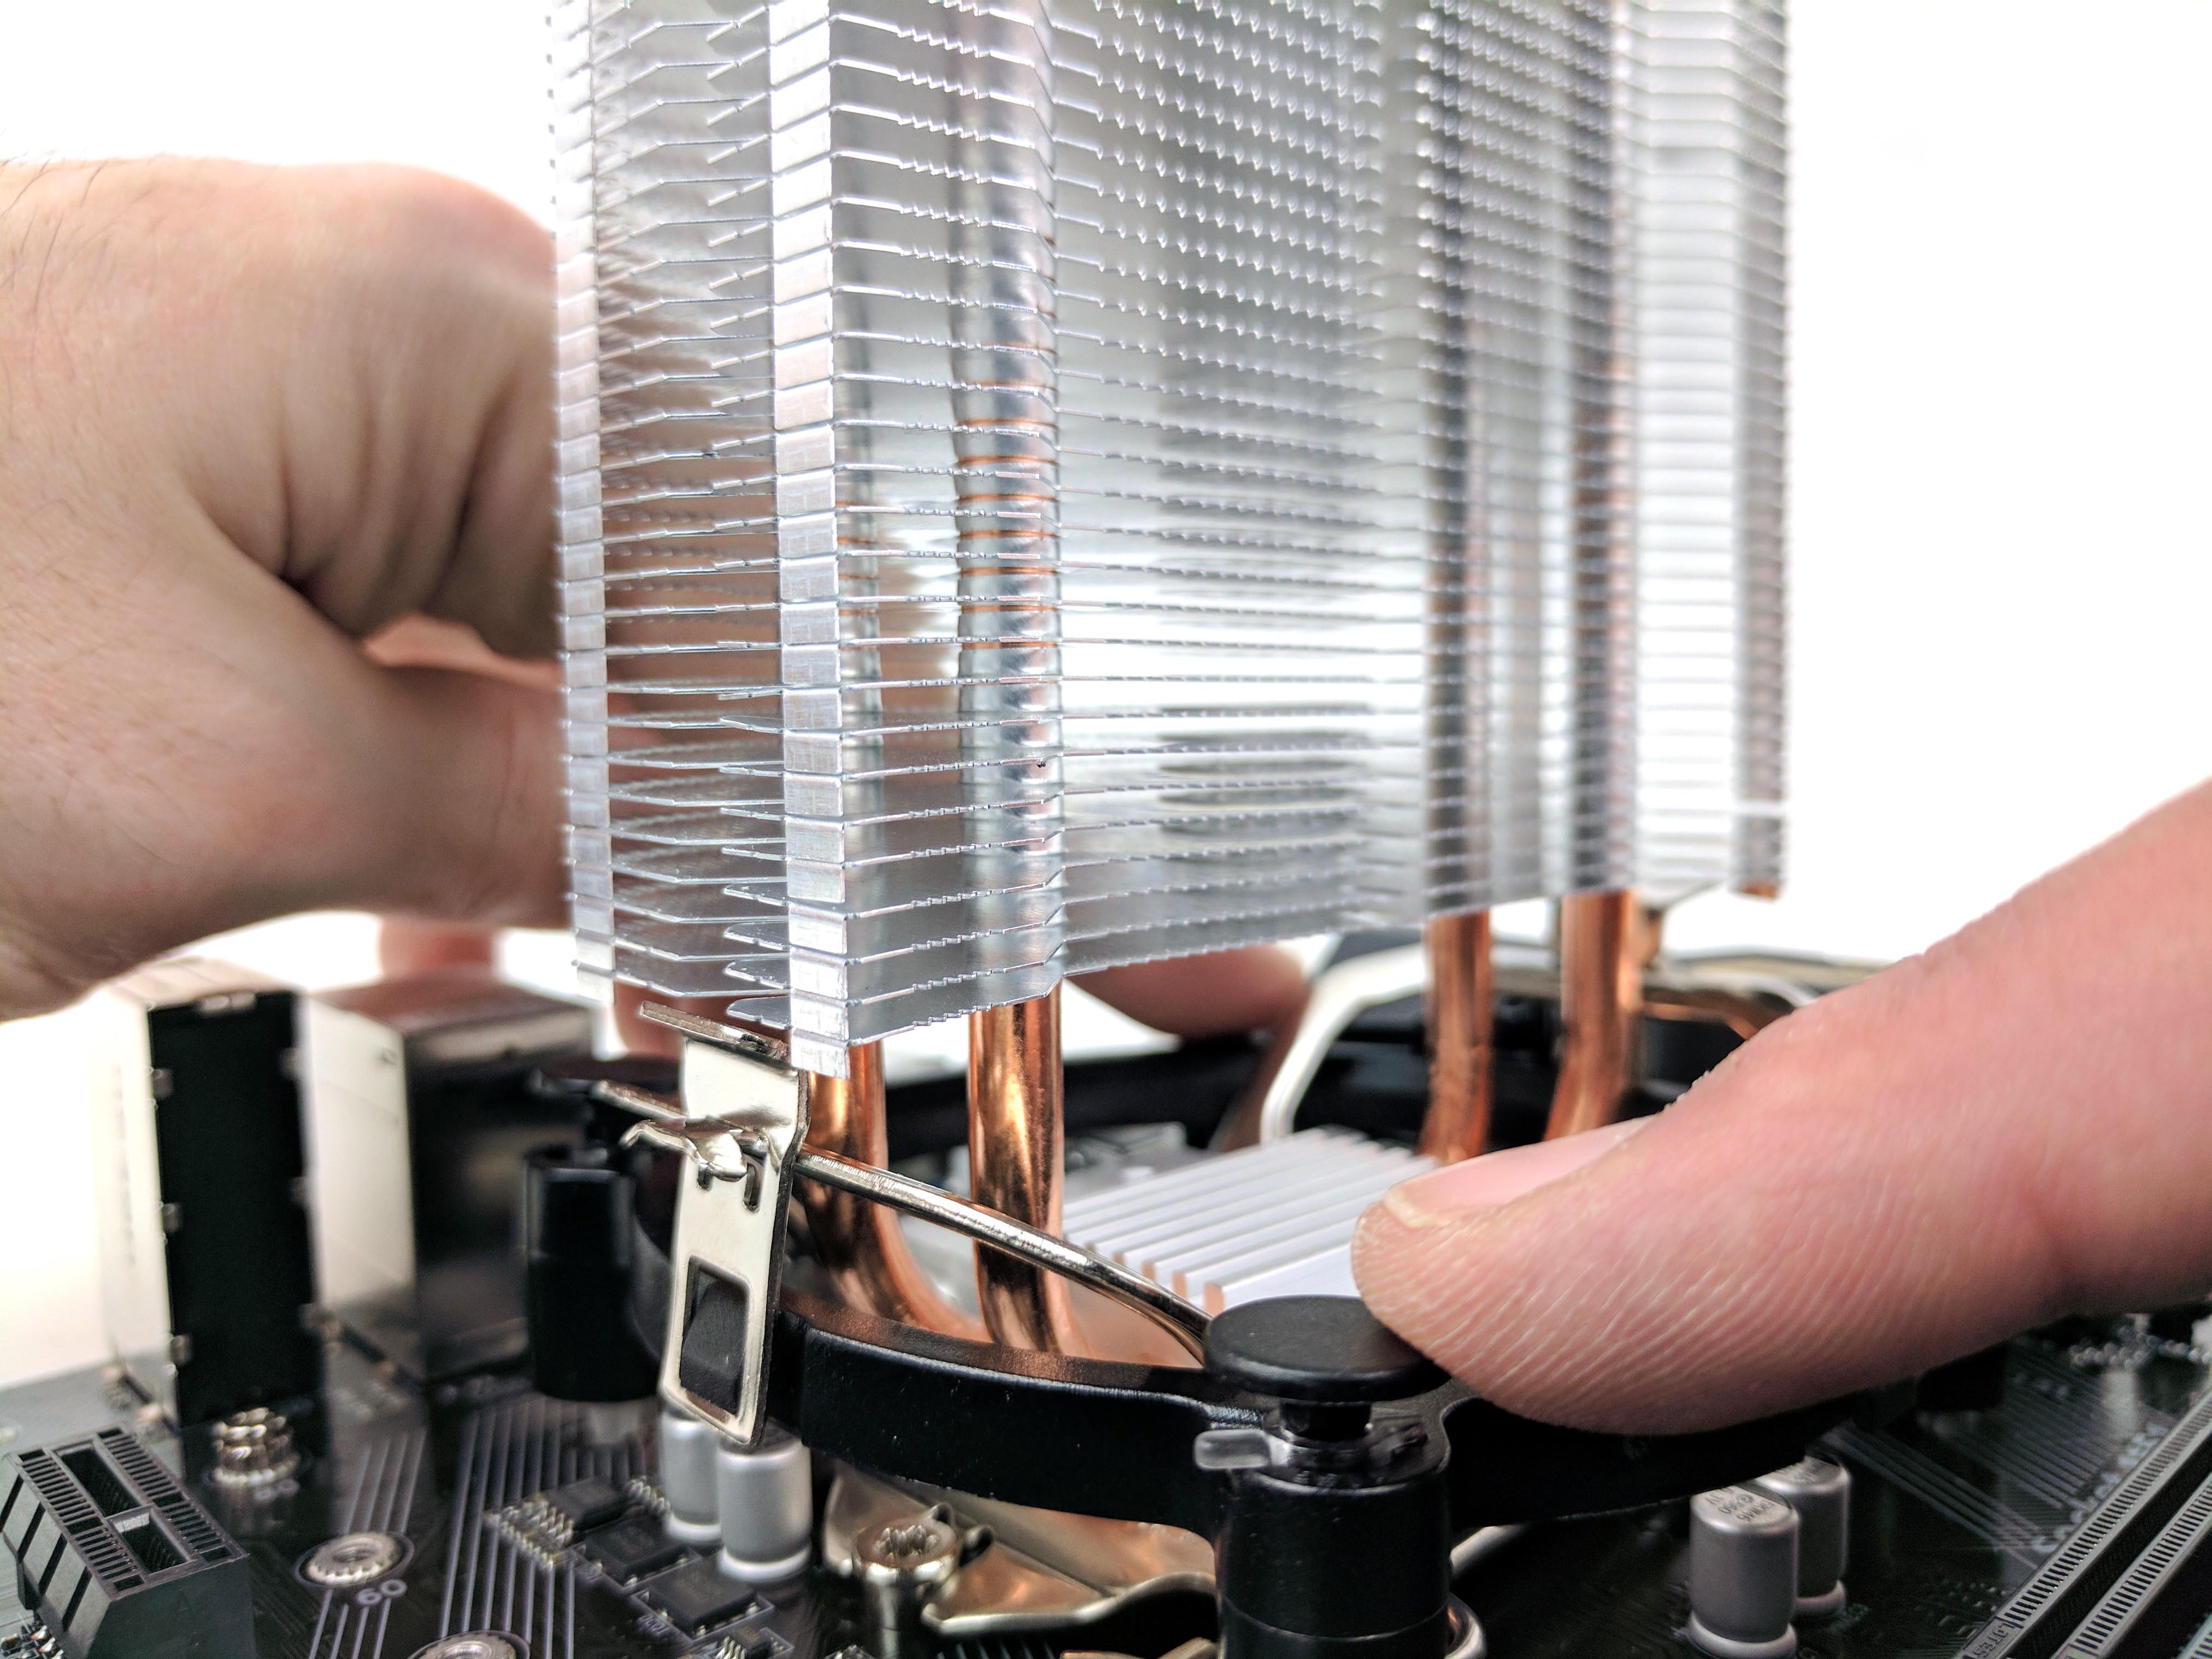
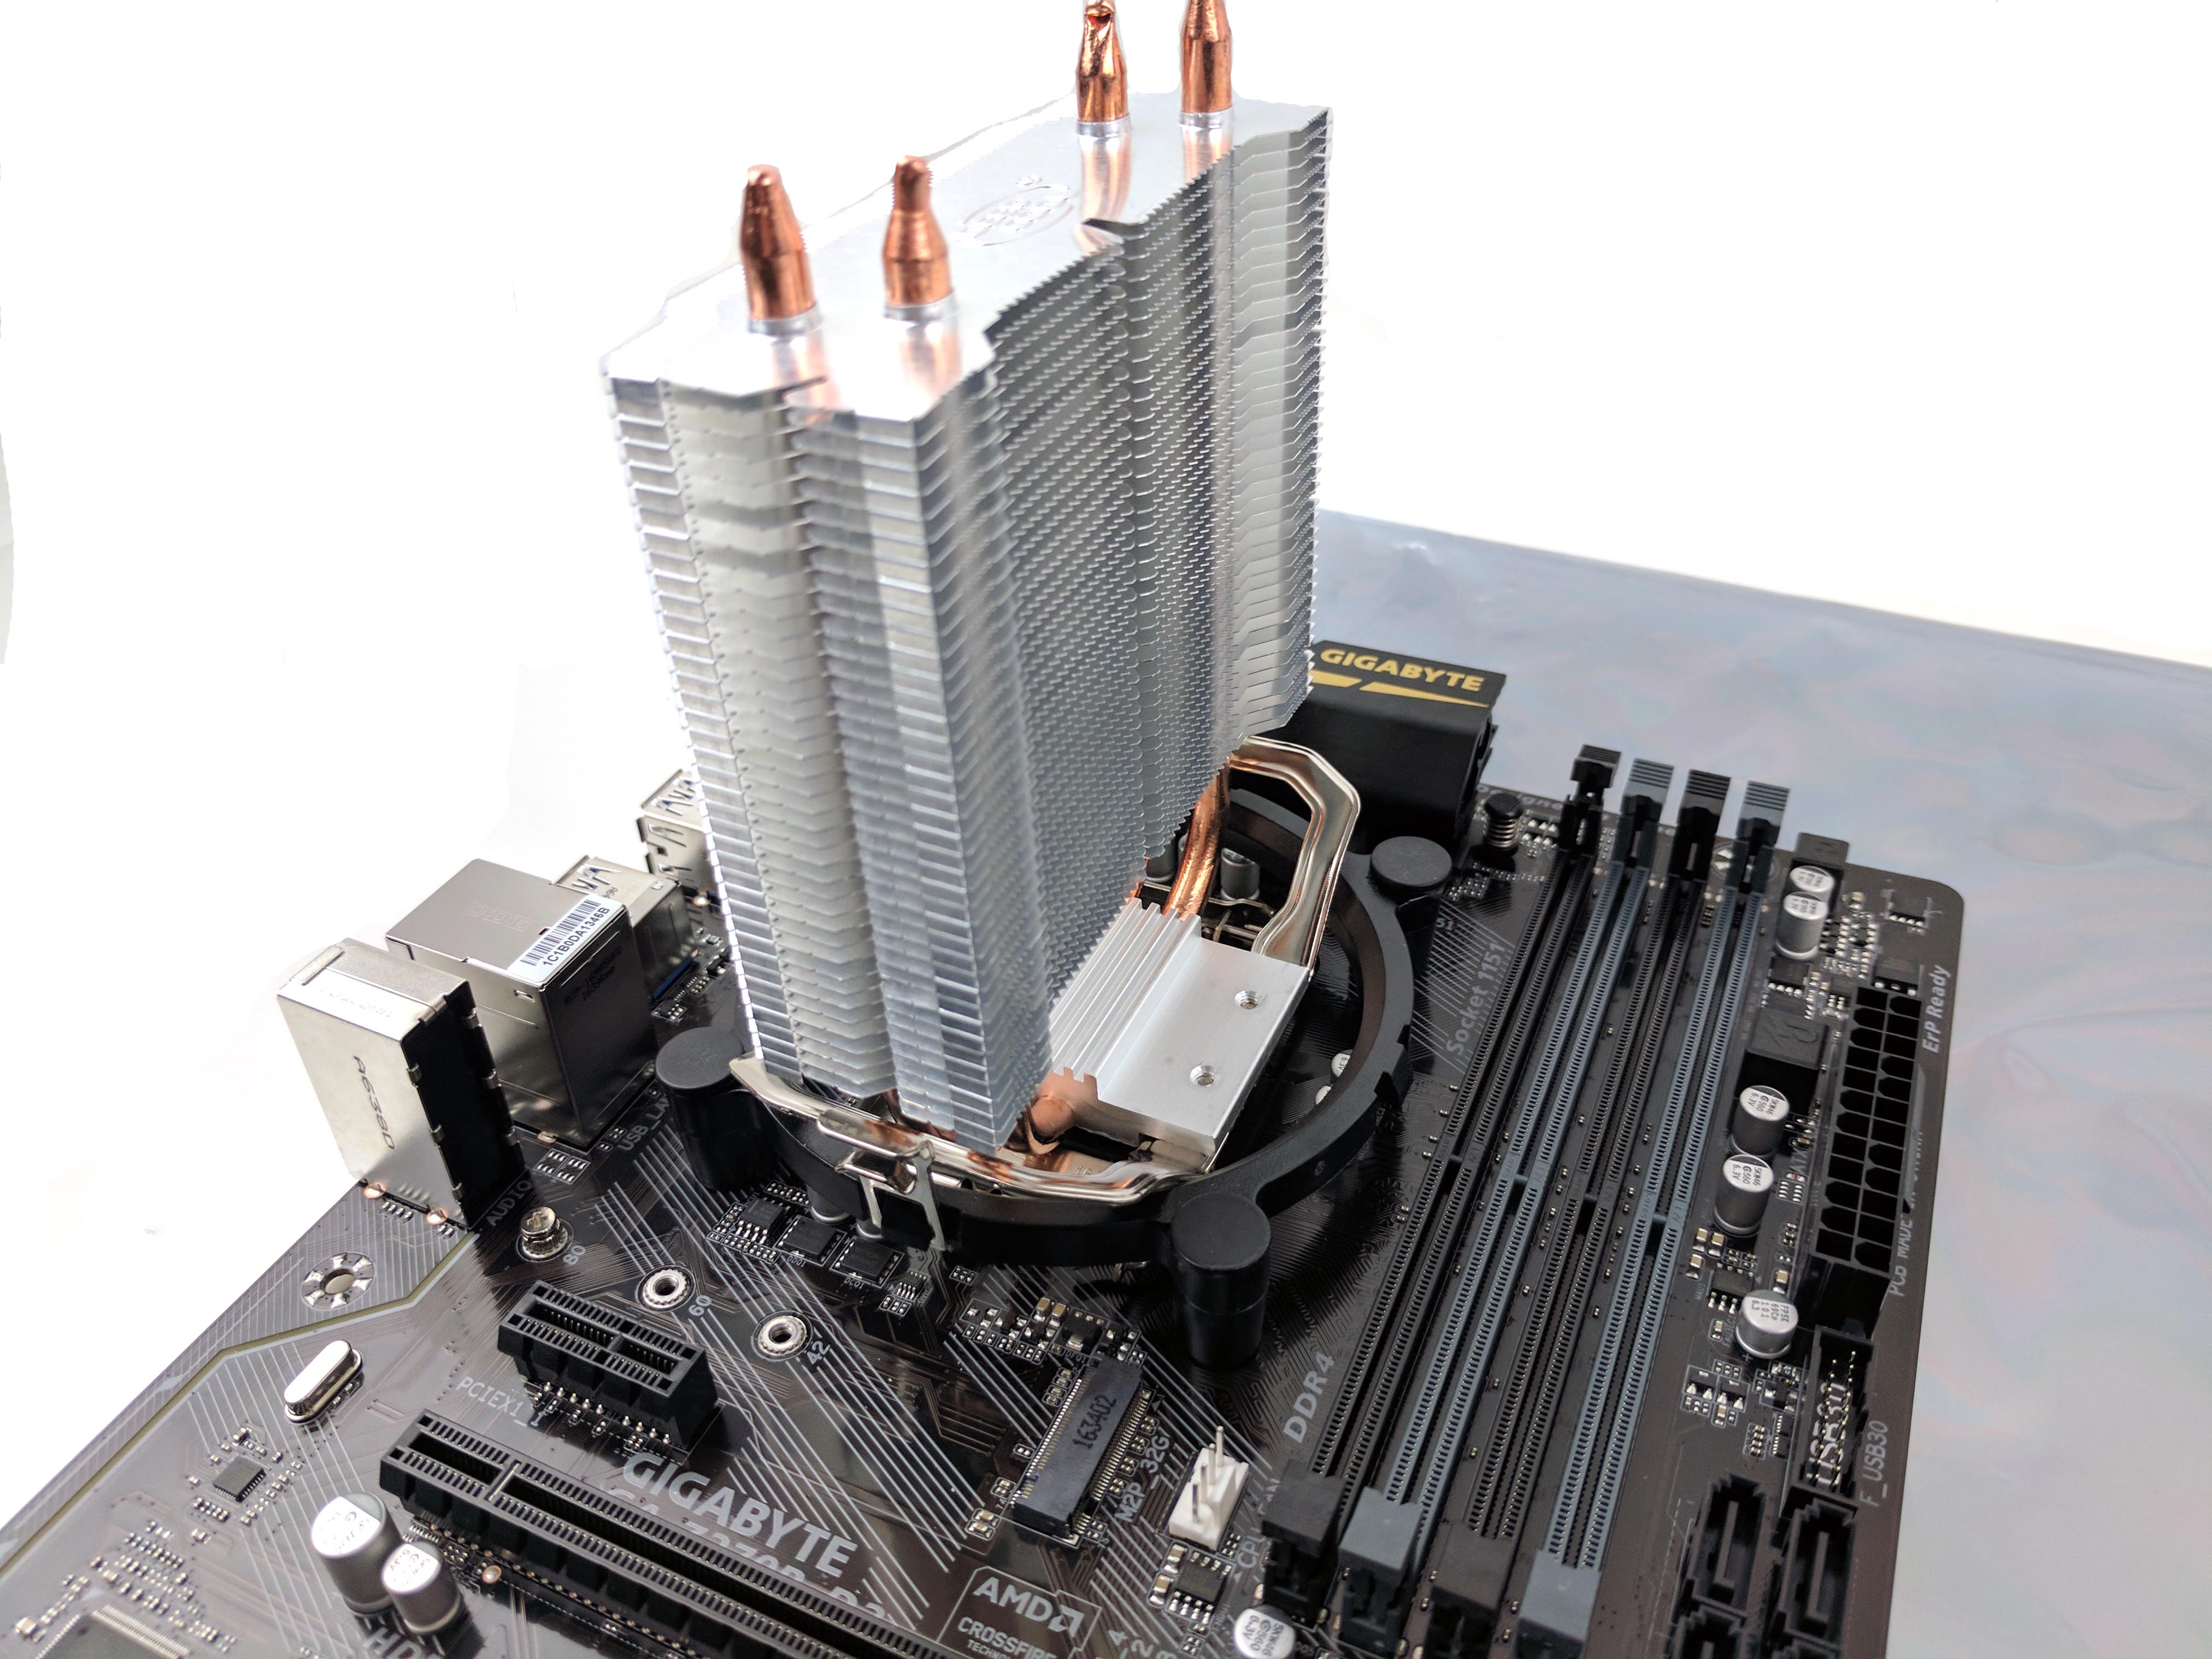
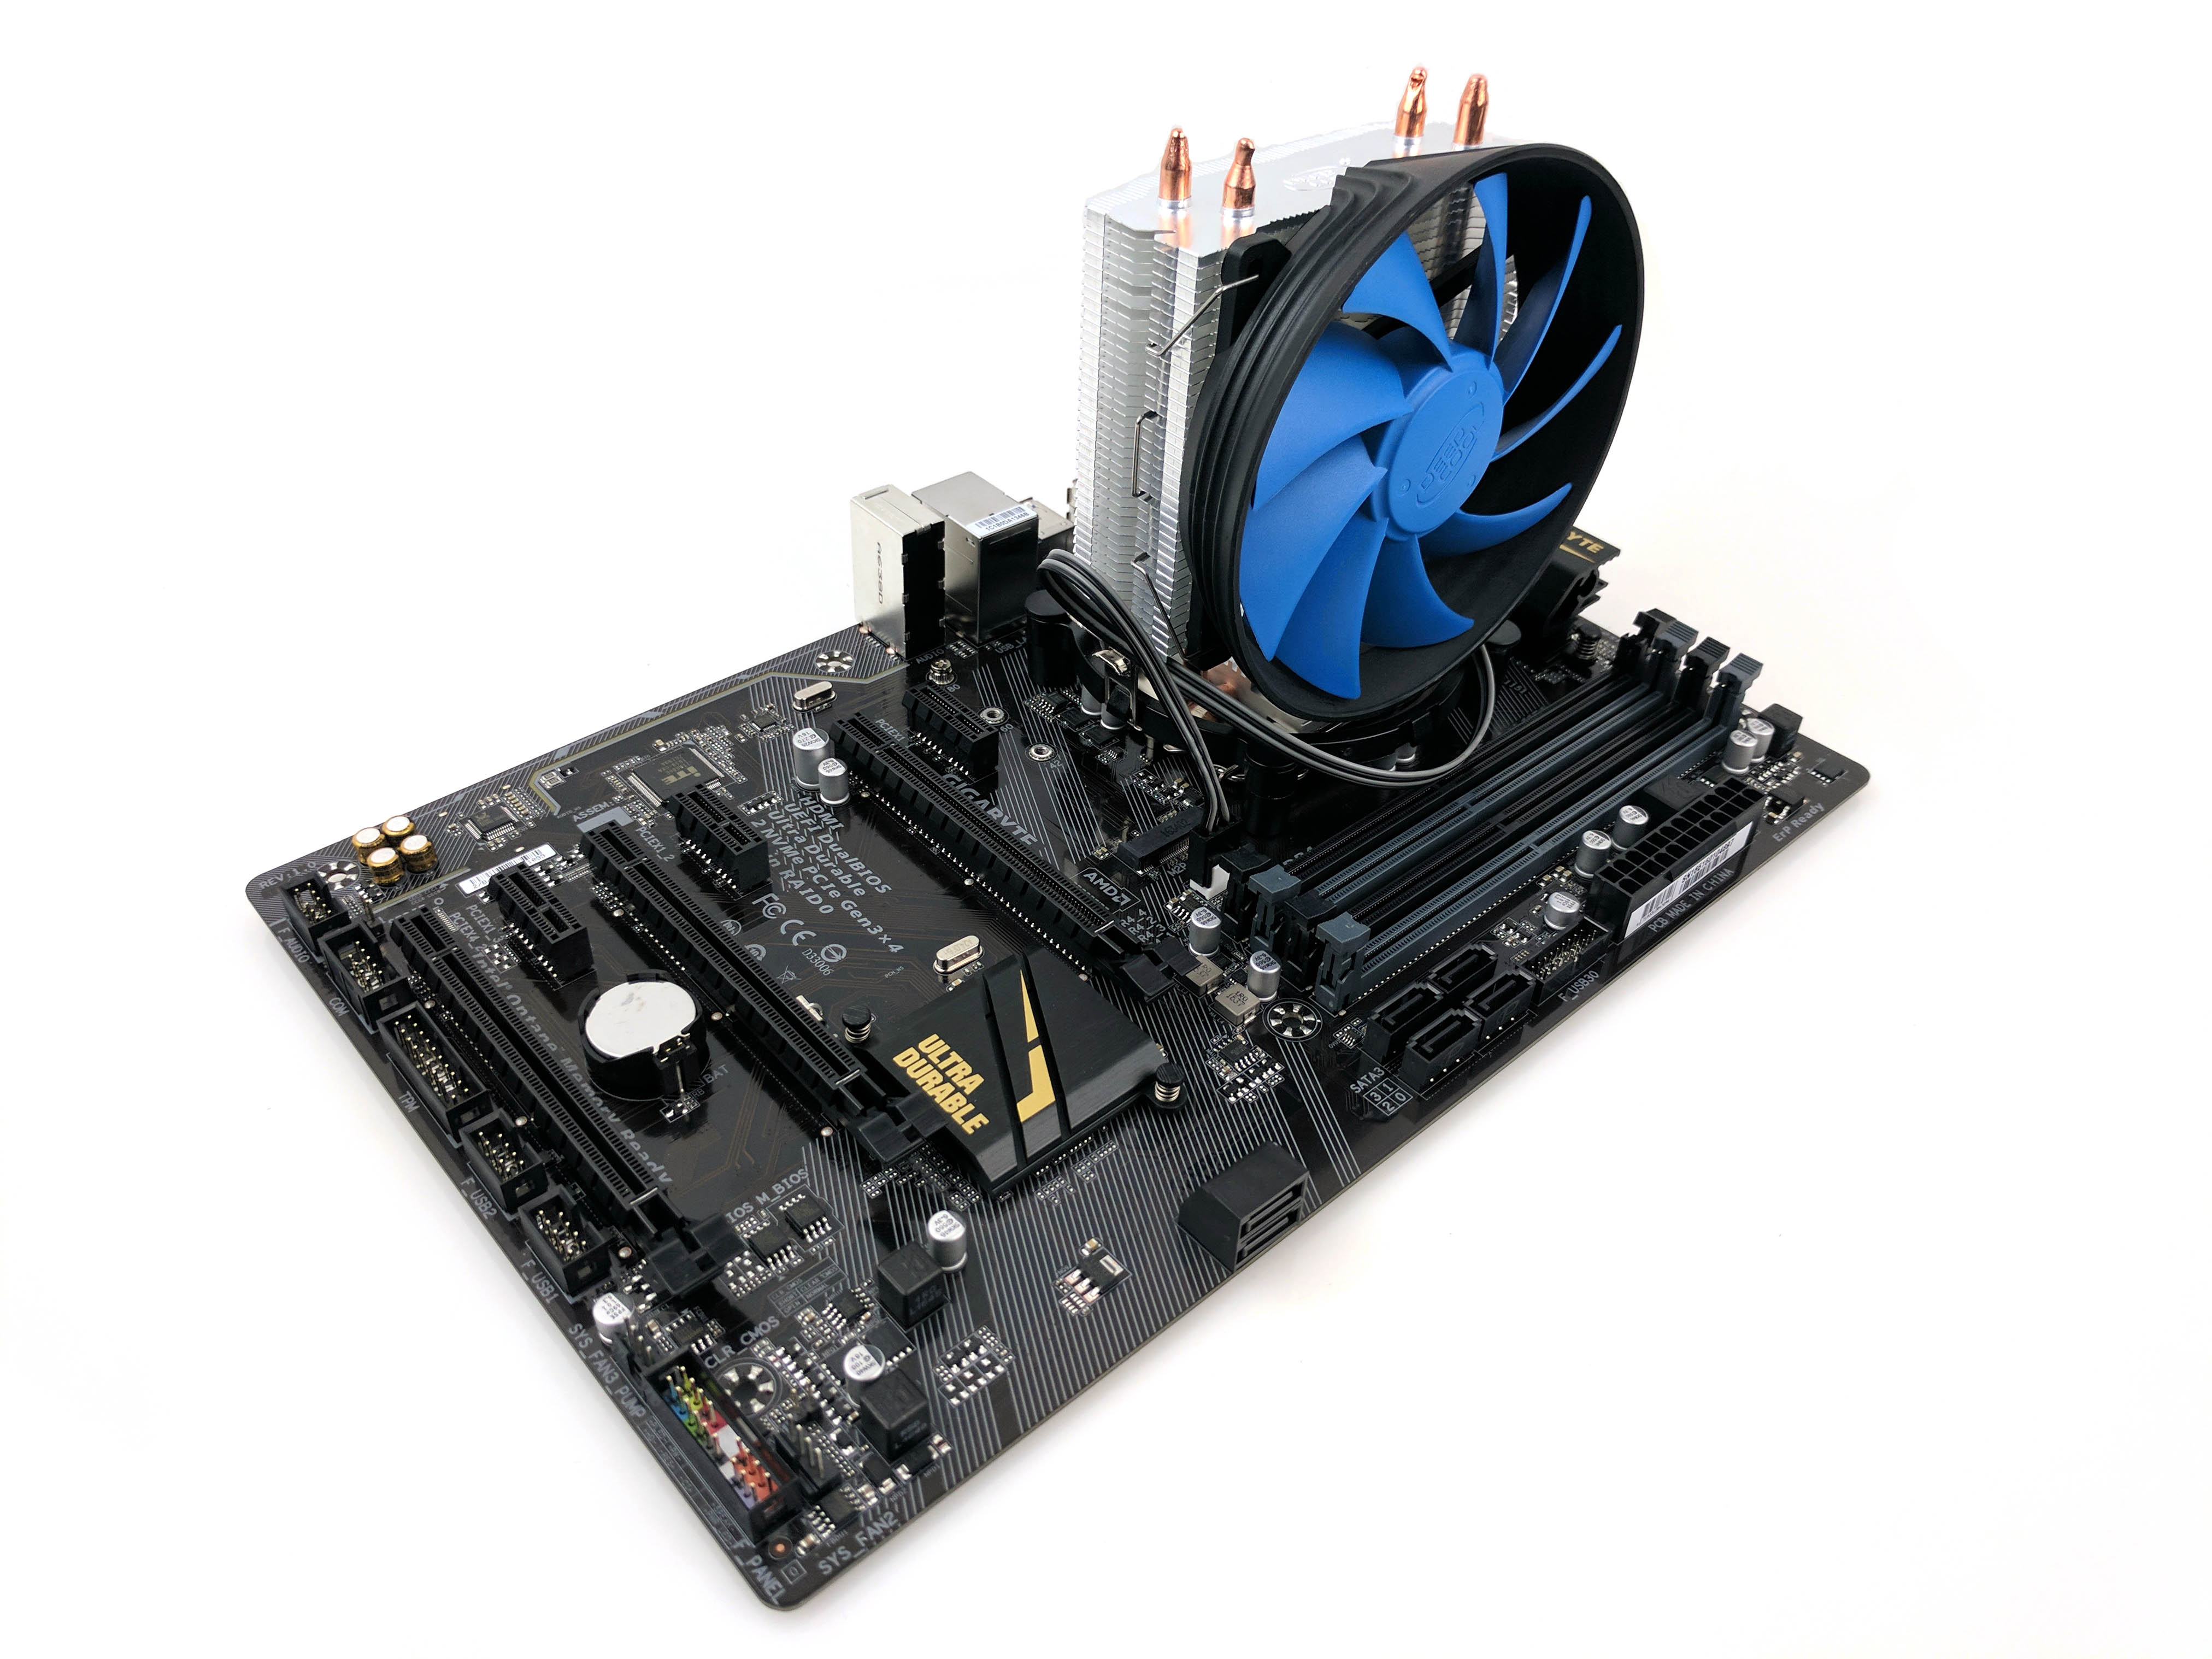
The instructions to install the cooler are on the back of the box, but it leaves out a few important details. The cooler is more convenient for AMD sockets (as evidenced by the retention clip configuration), but the heavy plastic retention ring (see second picture in the album below) has hooks for the clips. The ring features switches (third picture below) on each post that adjust the alignment for specific Intel chipsets. Setting each switch all the way to the right (from the center) is the appropriate configuration for socket 1151.
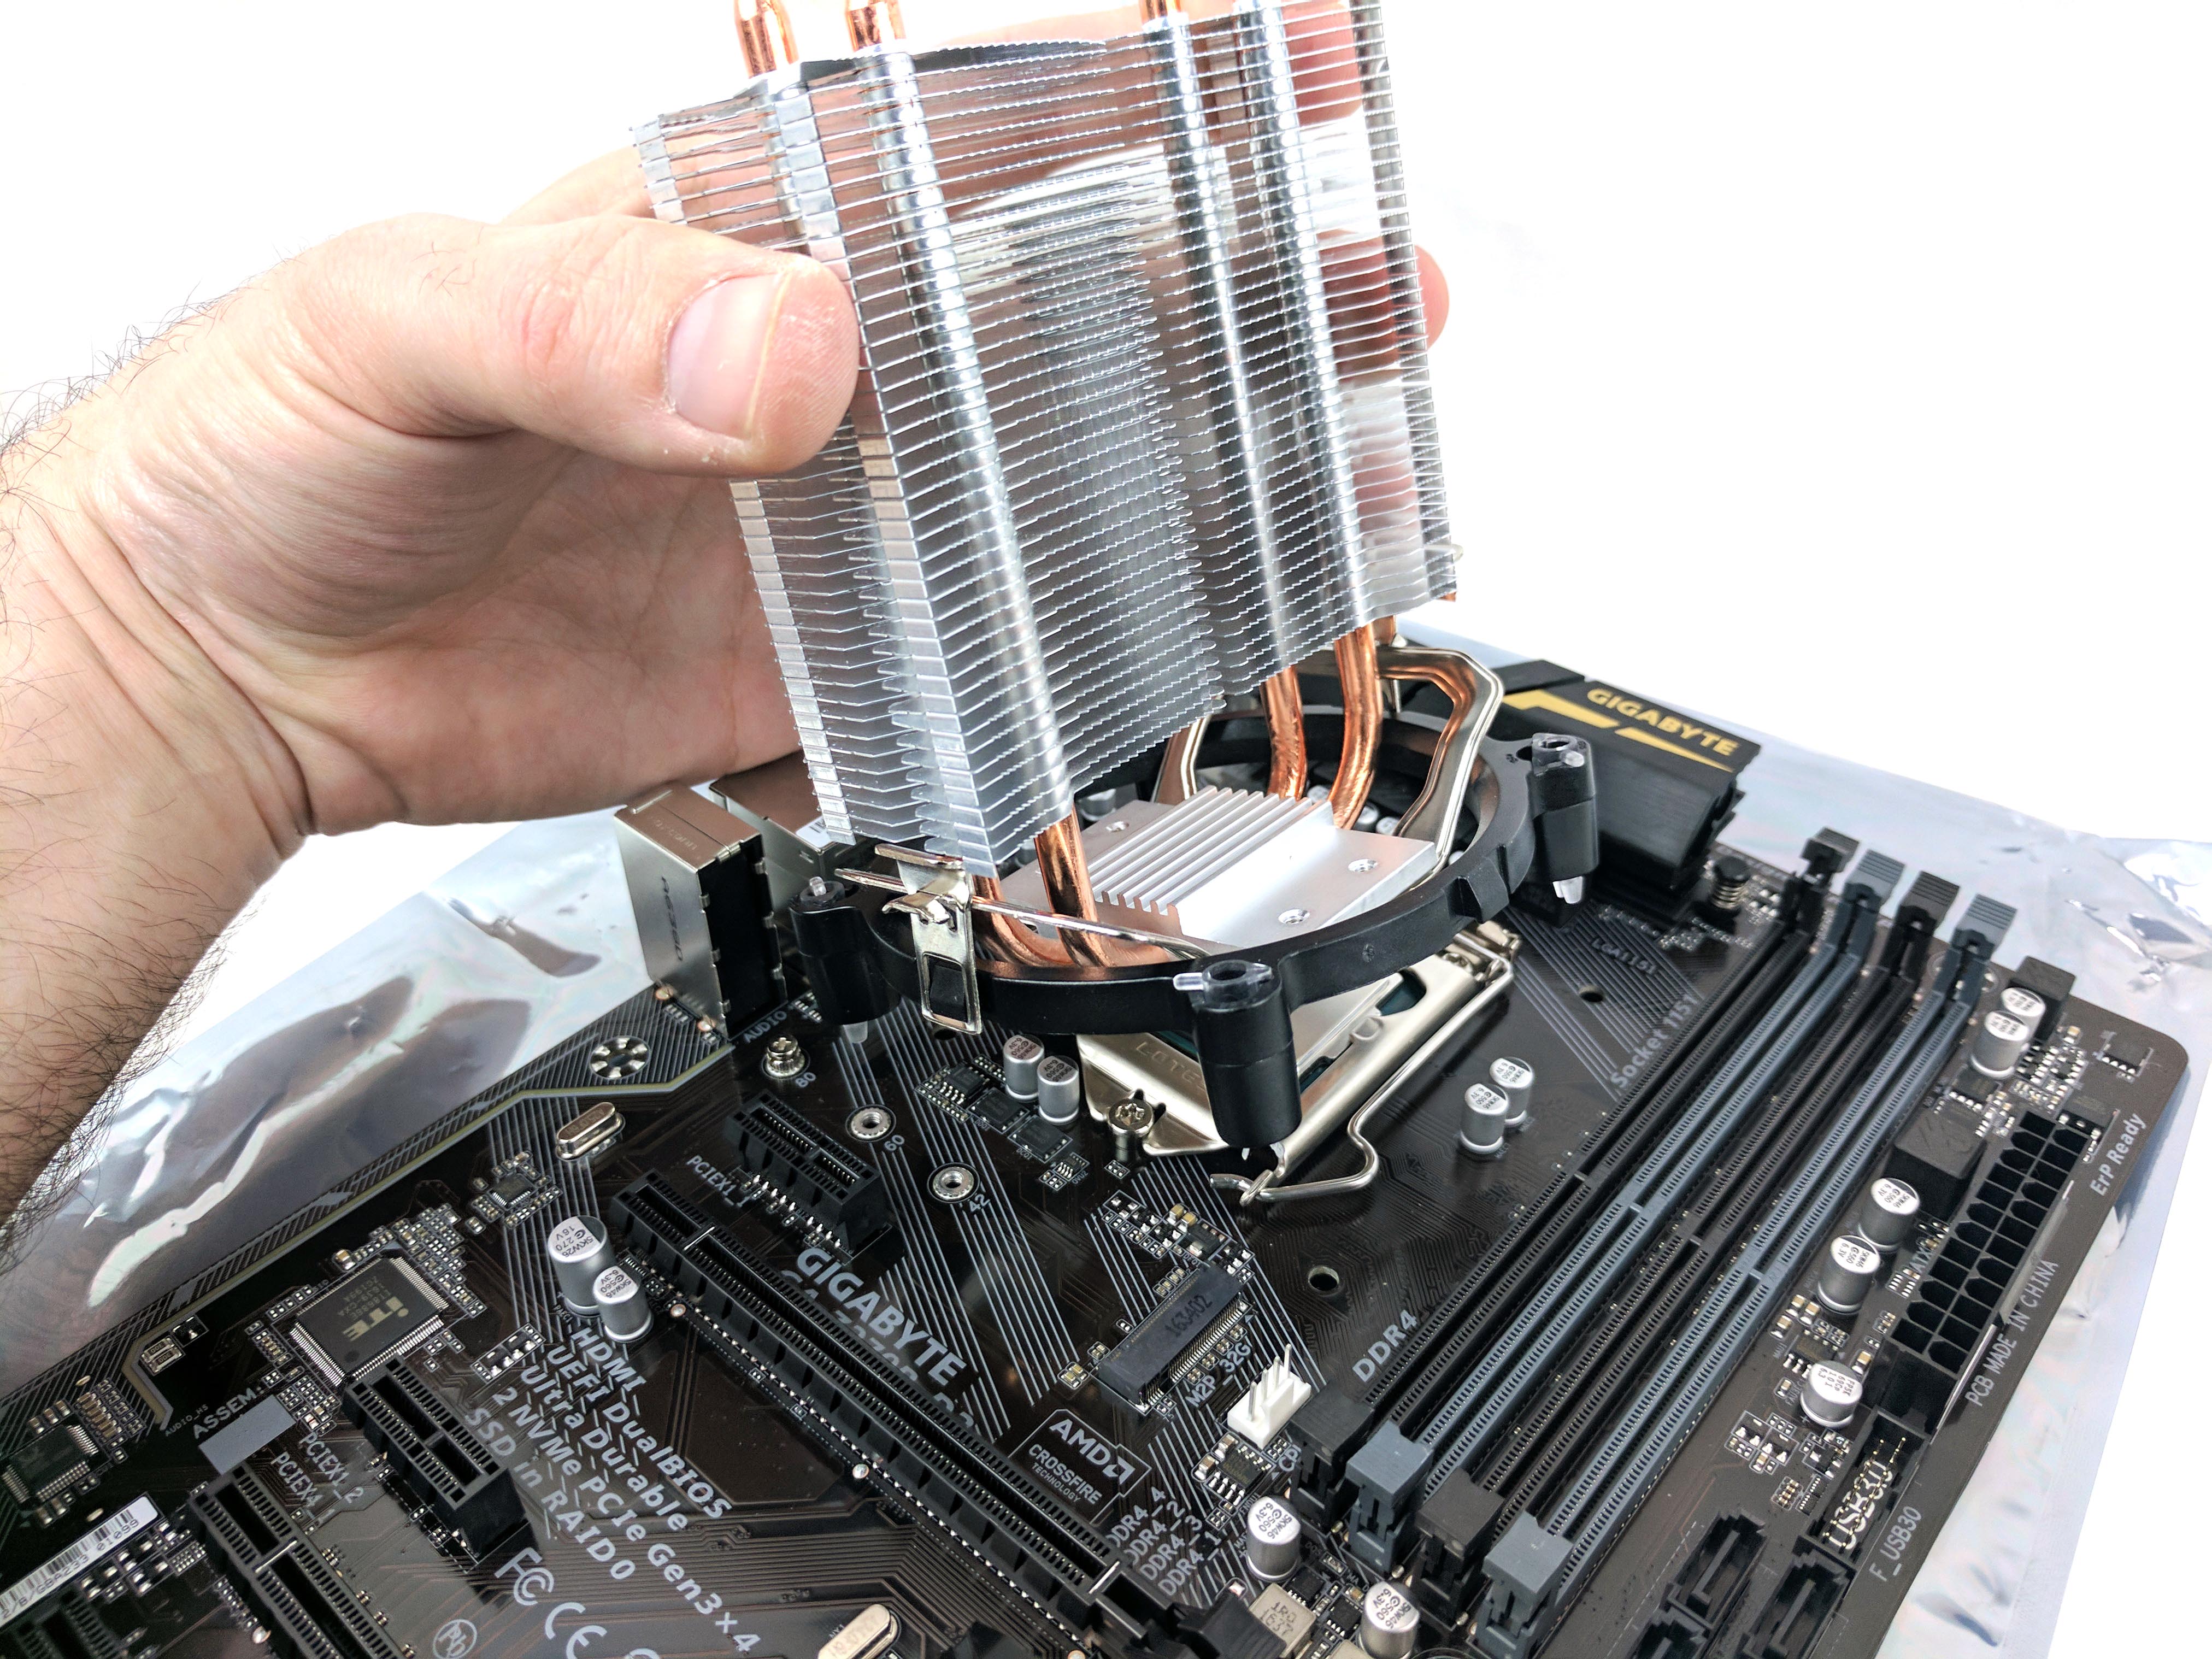
The instructions tell you to first place the ring’s posts over the motherboard holes near the processor, followed by putting the pegs in each post and pushing down. We advise you to skip those instructions. First, pressing down locks the ring to the motherboard, which could prevent you from getting the heatsink on properly (the retention clips are difficult to hook without considerable pressure using this method). We found it much easier to attach the heatsink to the plastic retention ring before going anywhere near the motherboard.
The trick to attaching the Gammaxx 200T is to have everything lined up (retention clips, posts, pegs) before you apply pressure, so once you have the heatsink attached to the ring and all of it lined up with the motherboard, you can simply push down to secure it. The only caveat to this method is that you have to remove the CPU fan in order to be able to push down on the pegs underneath that fan, which should be facing the memory and 5.25” drive bay.
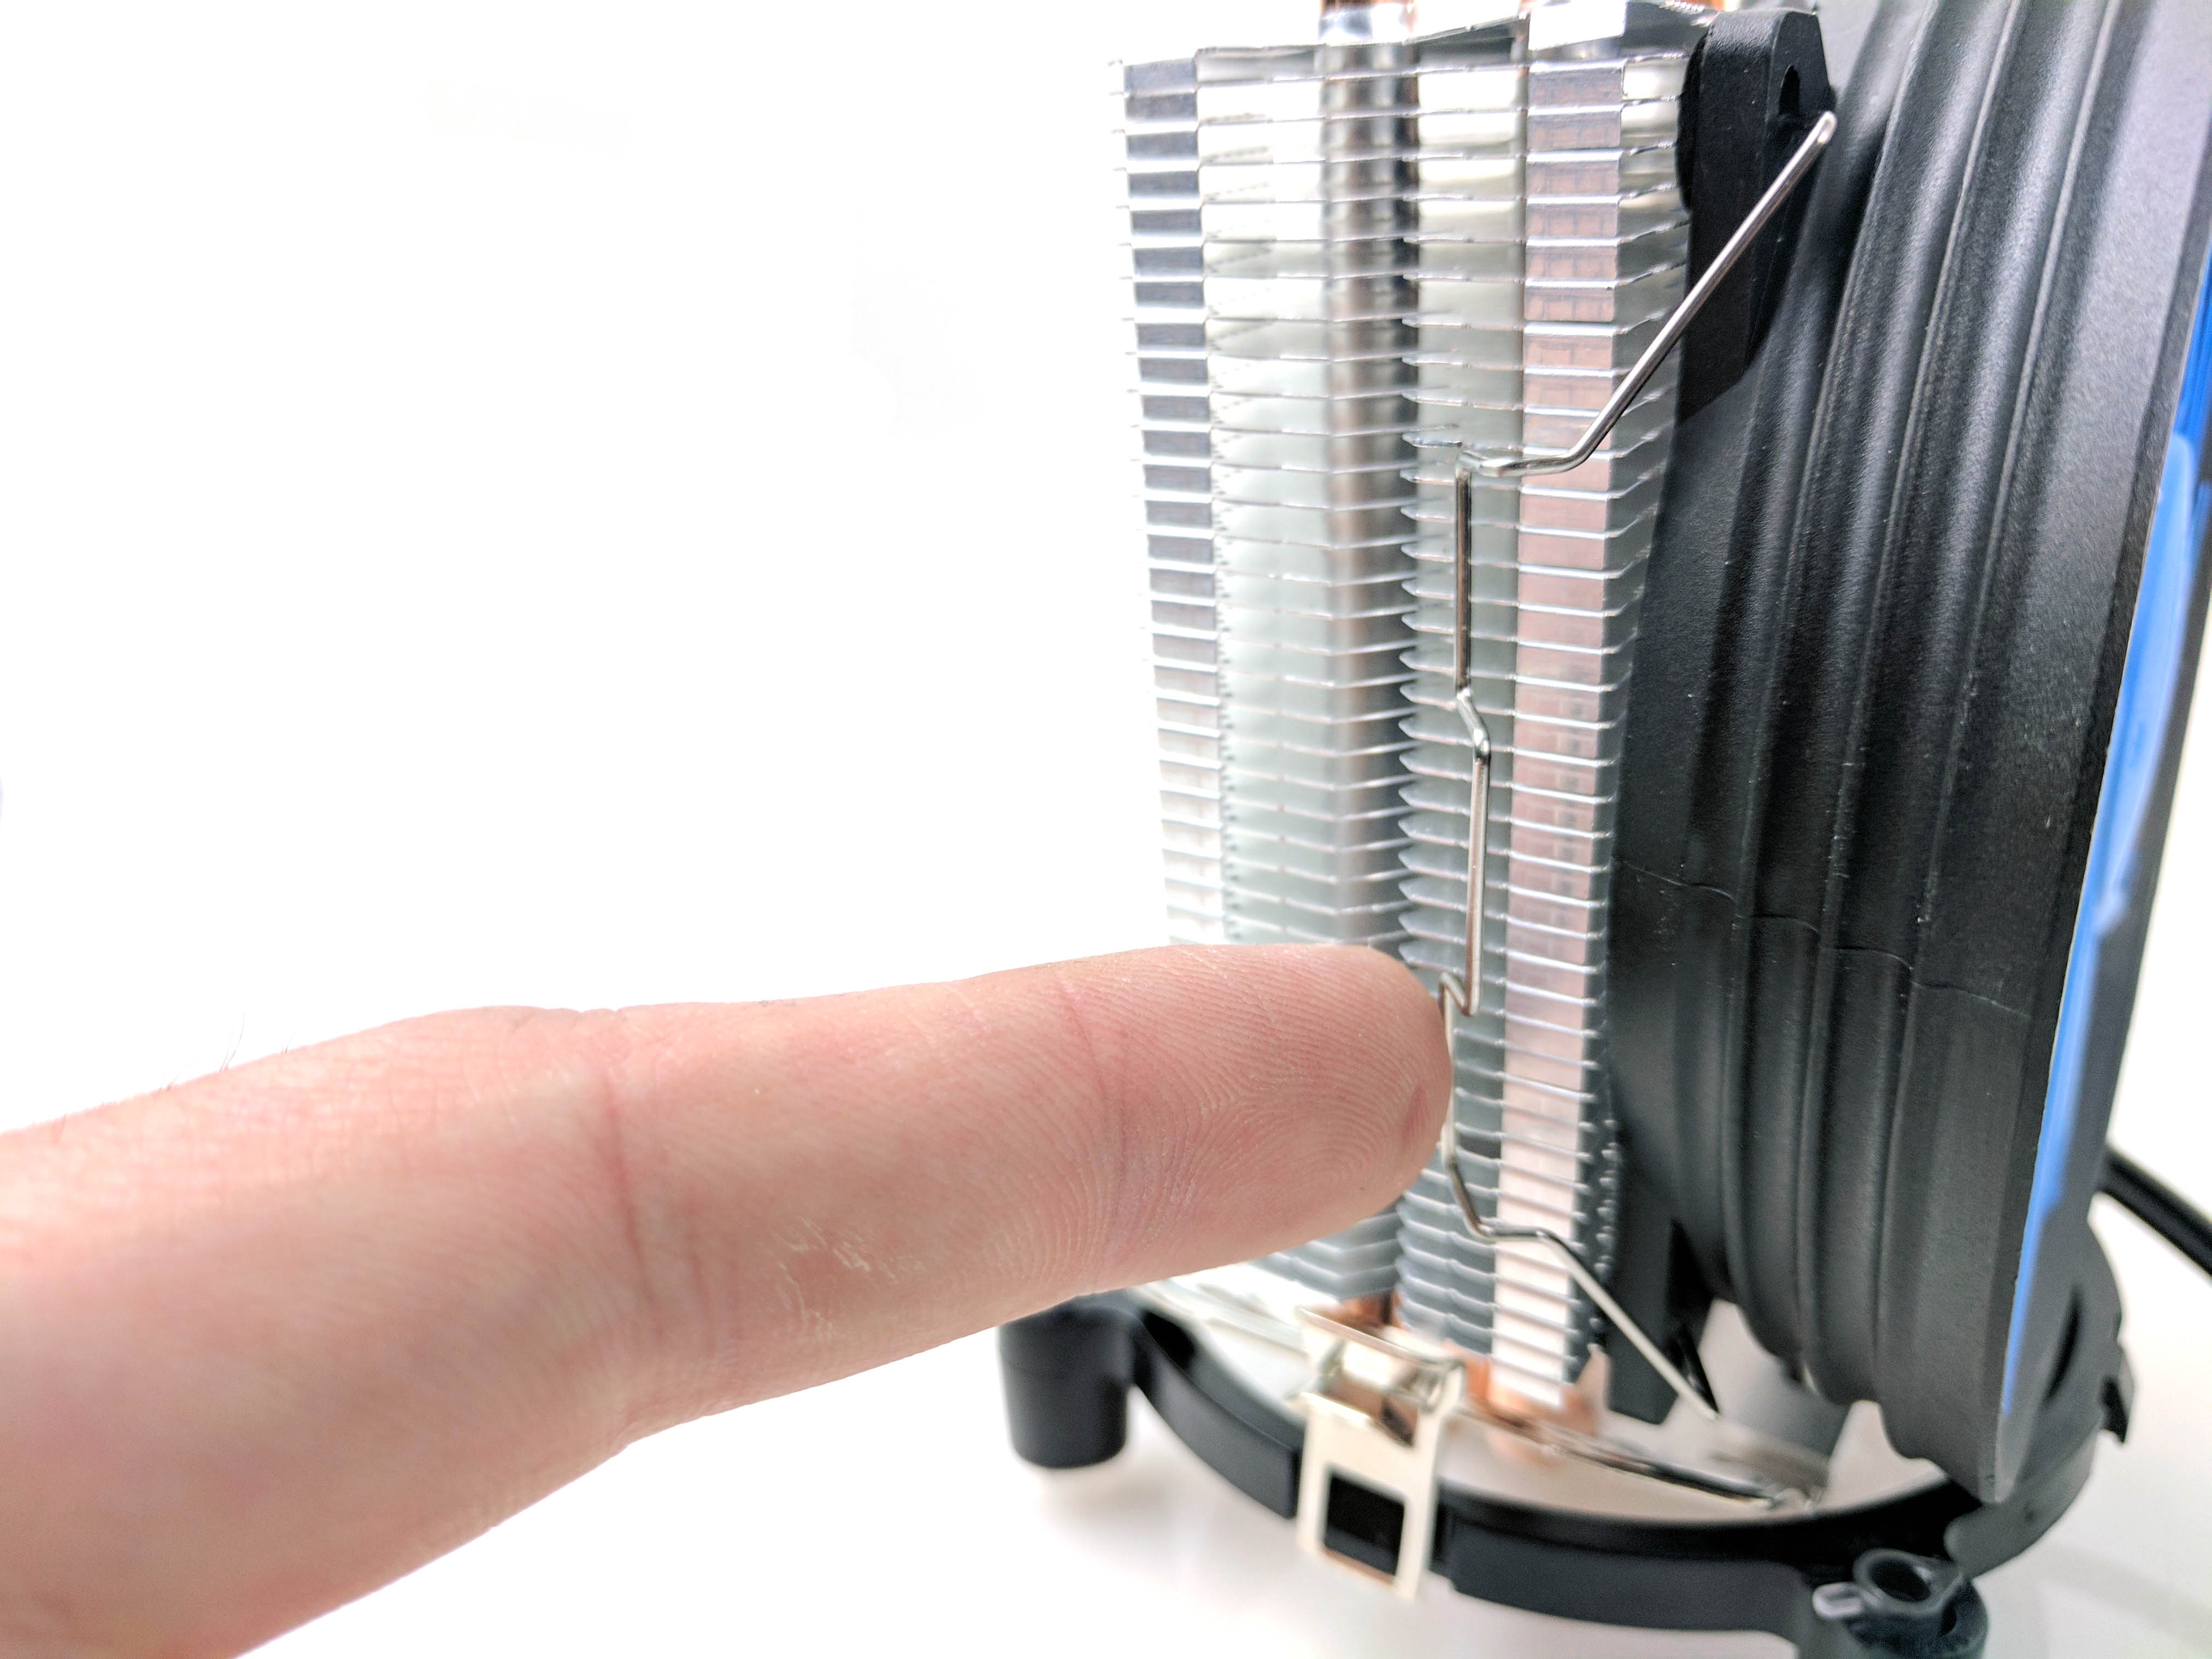
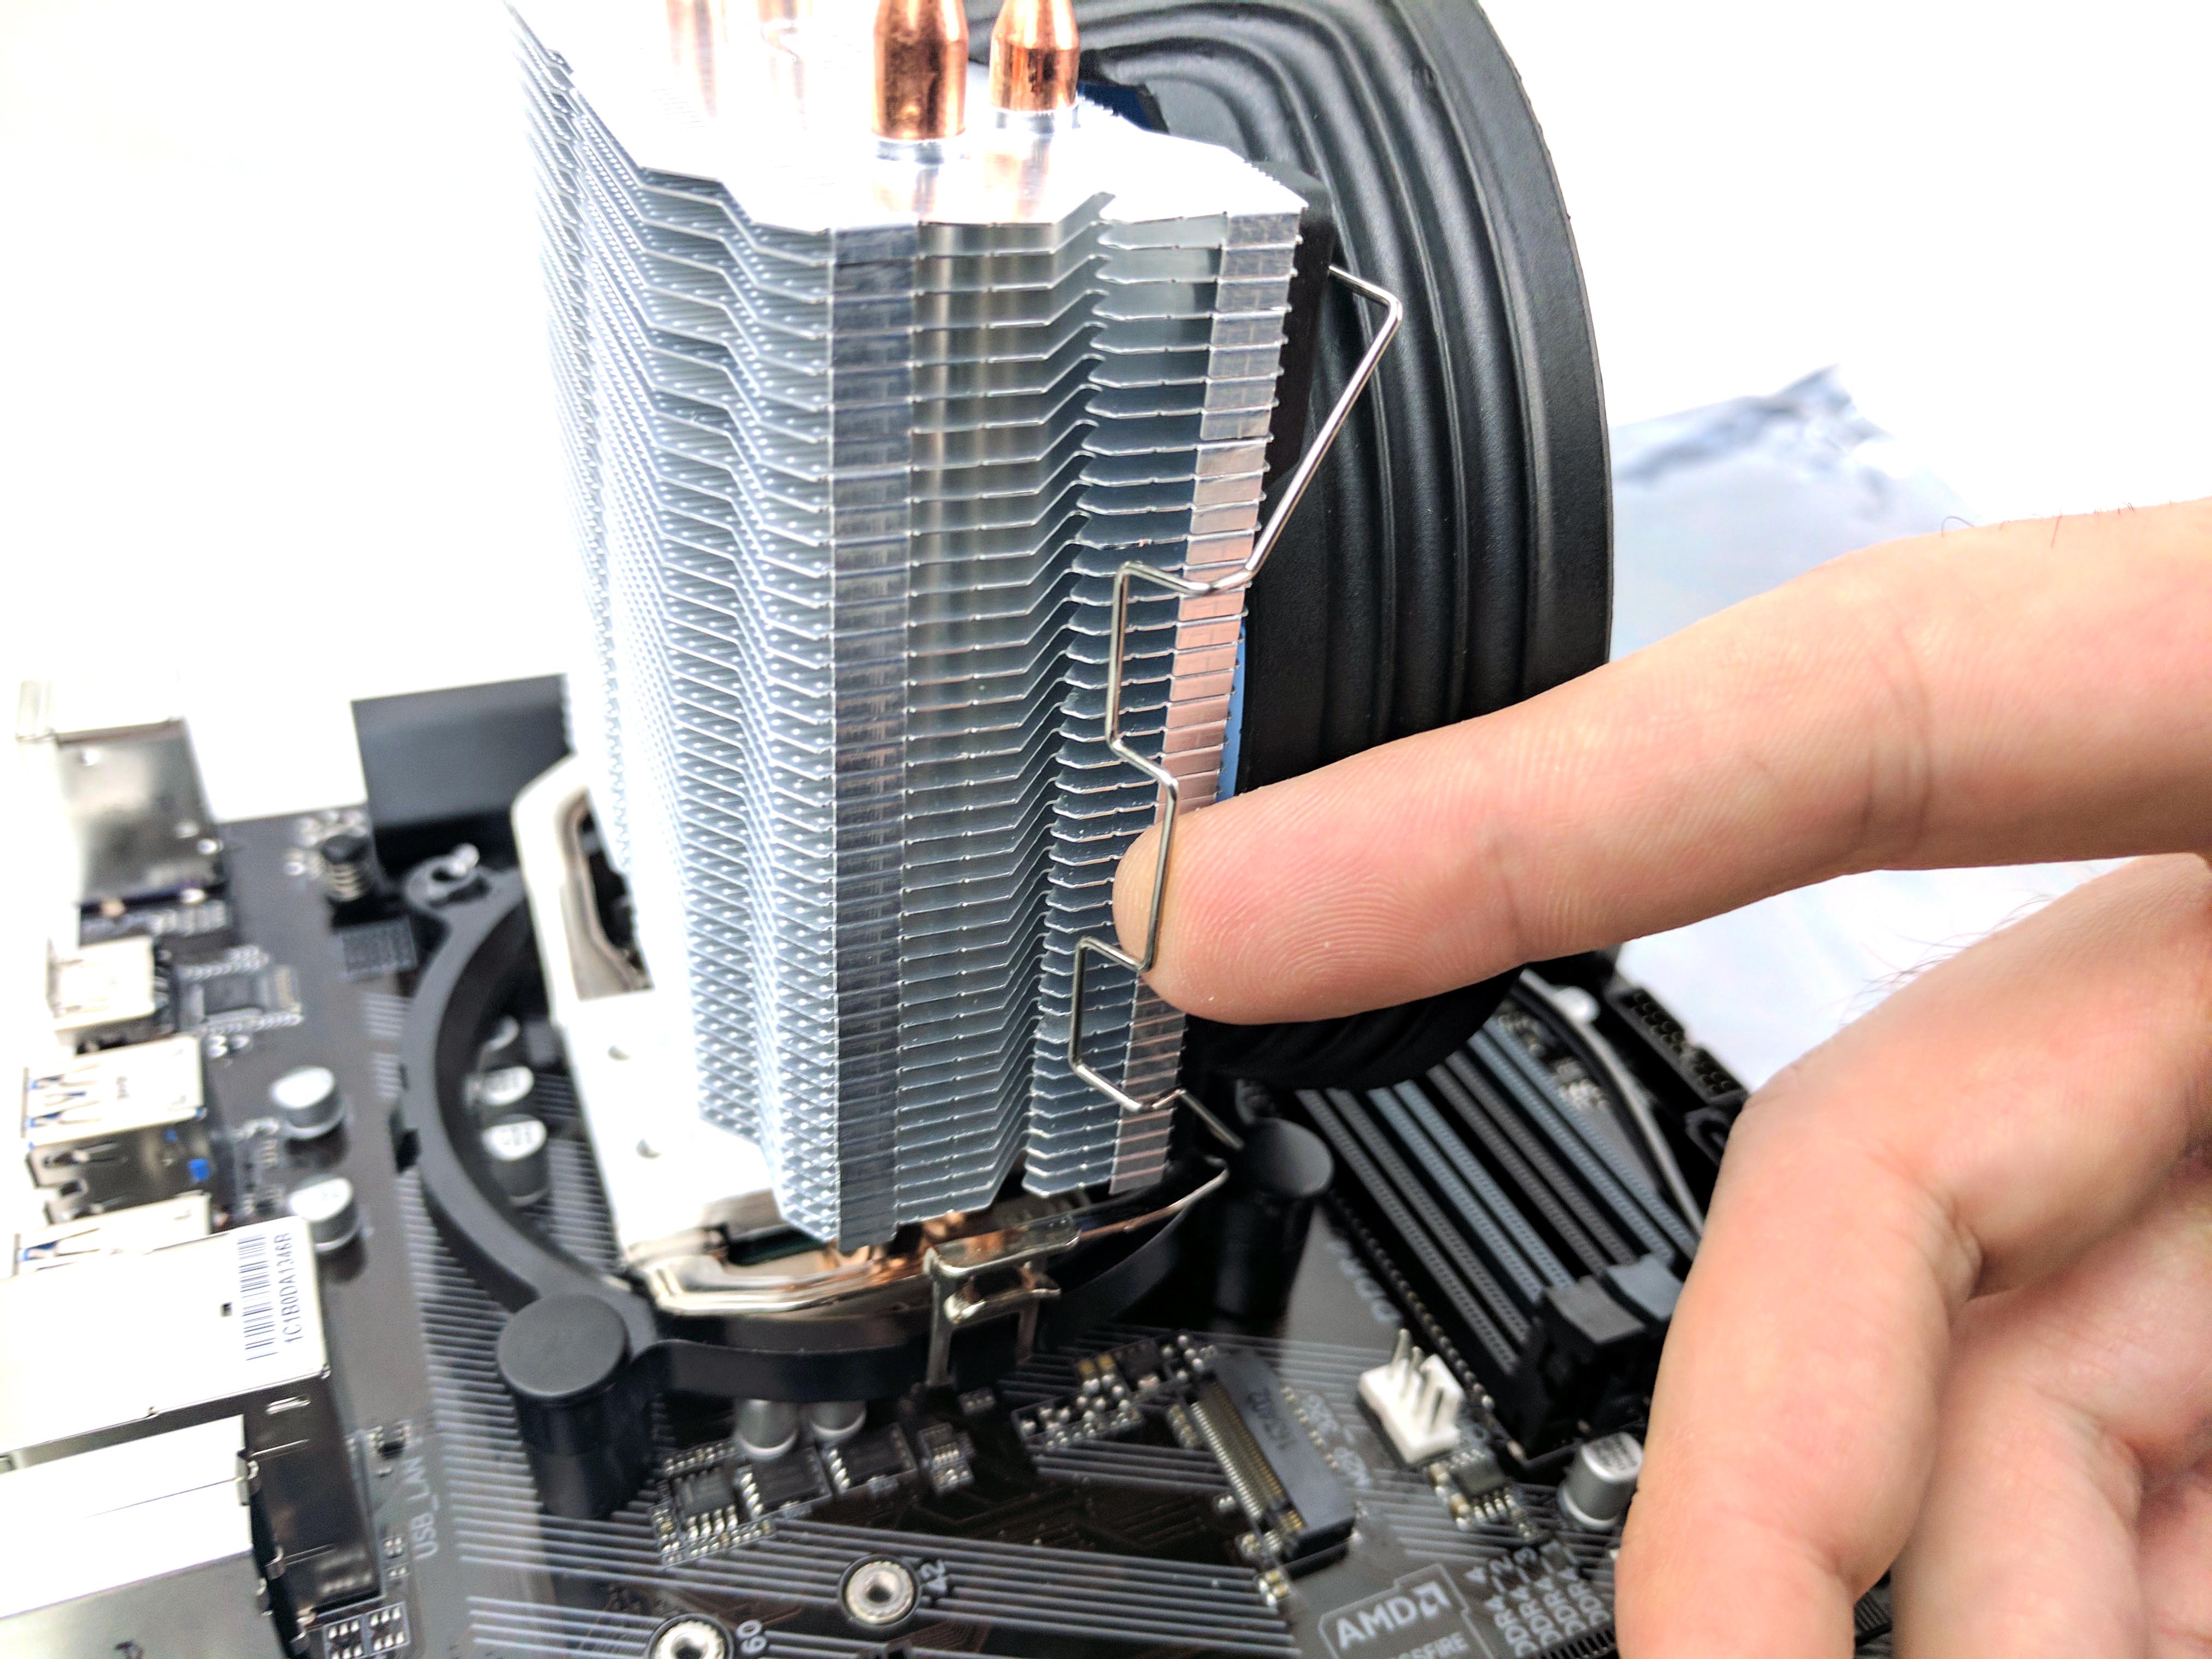
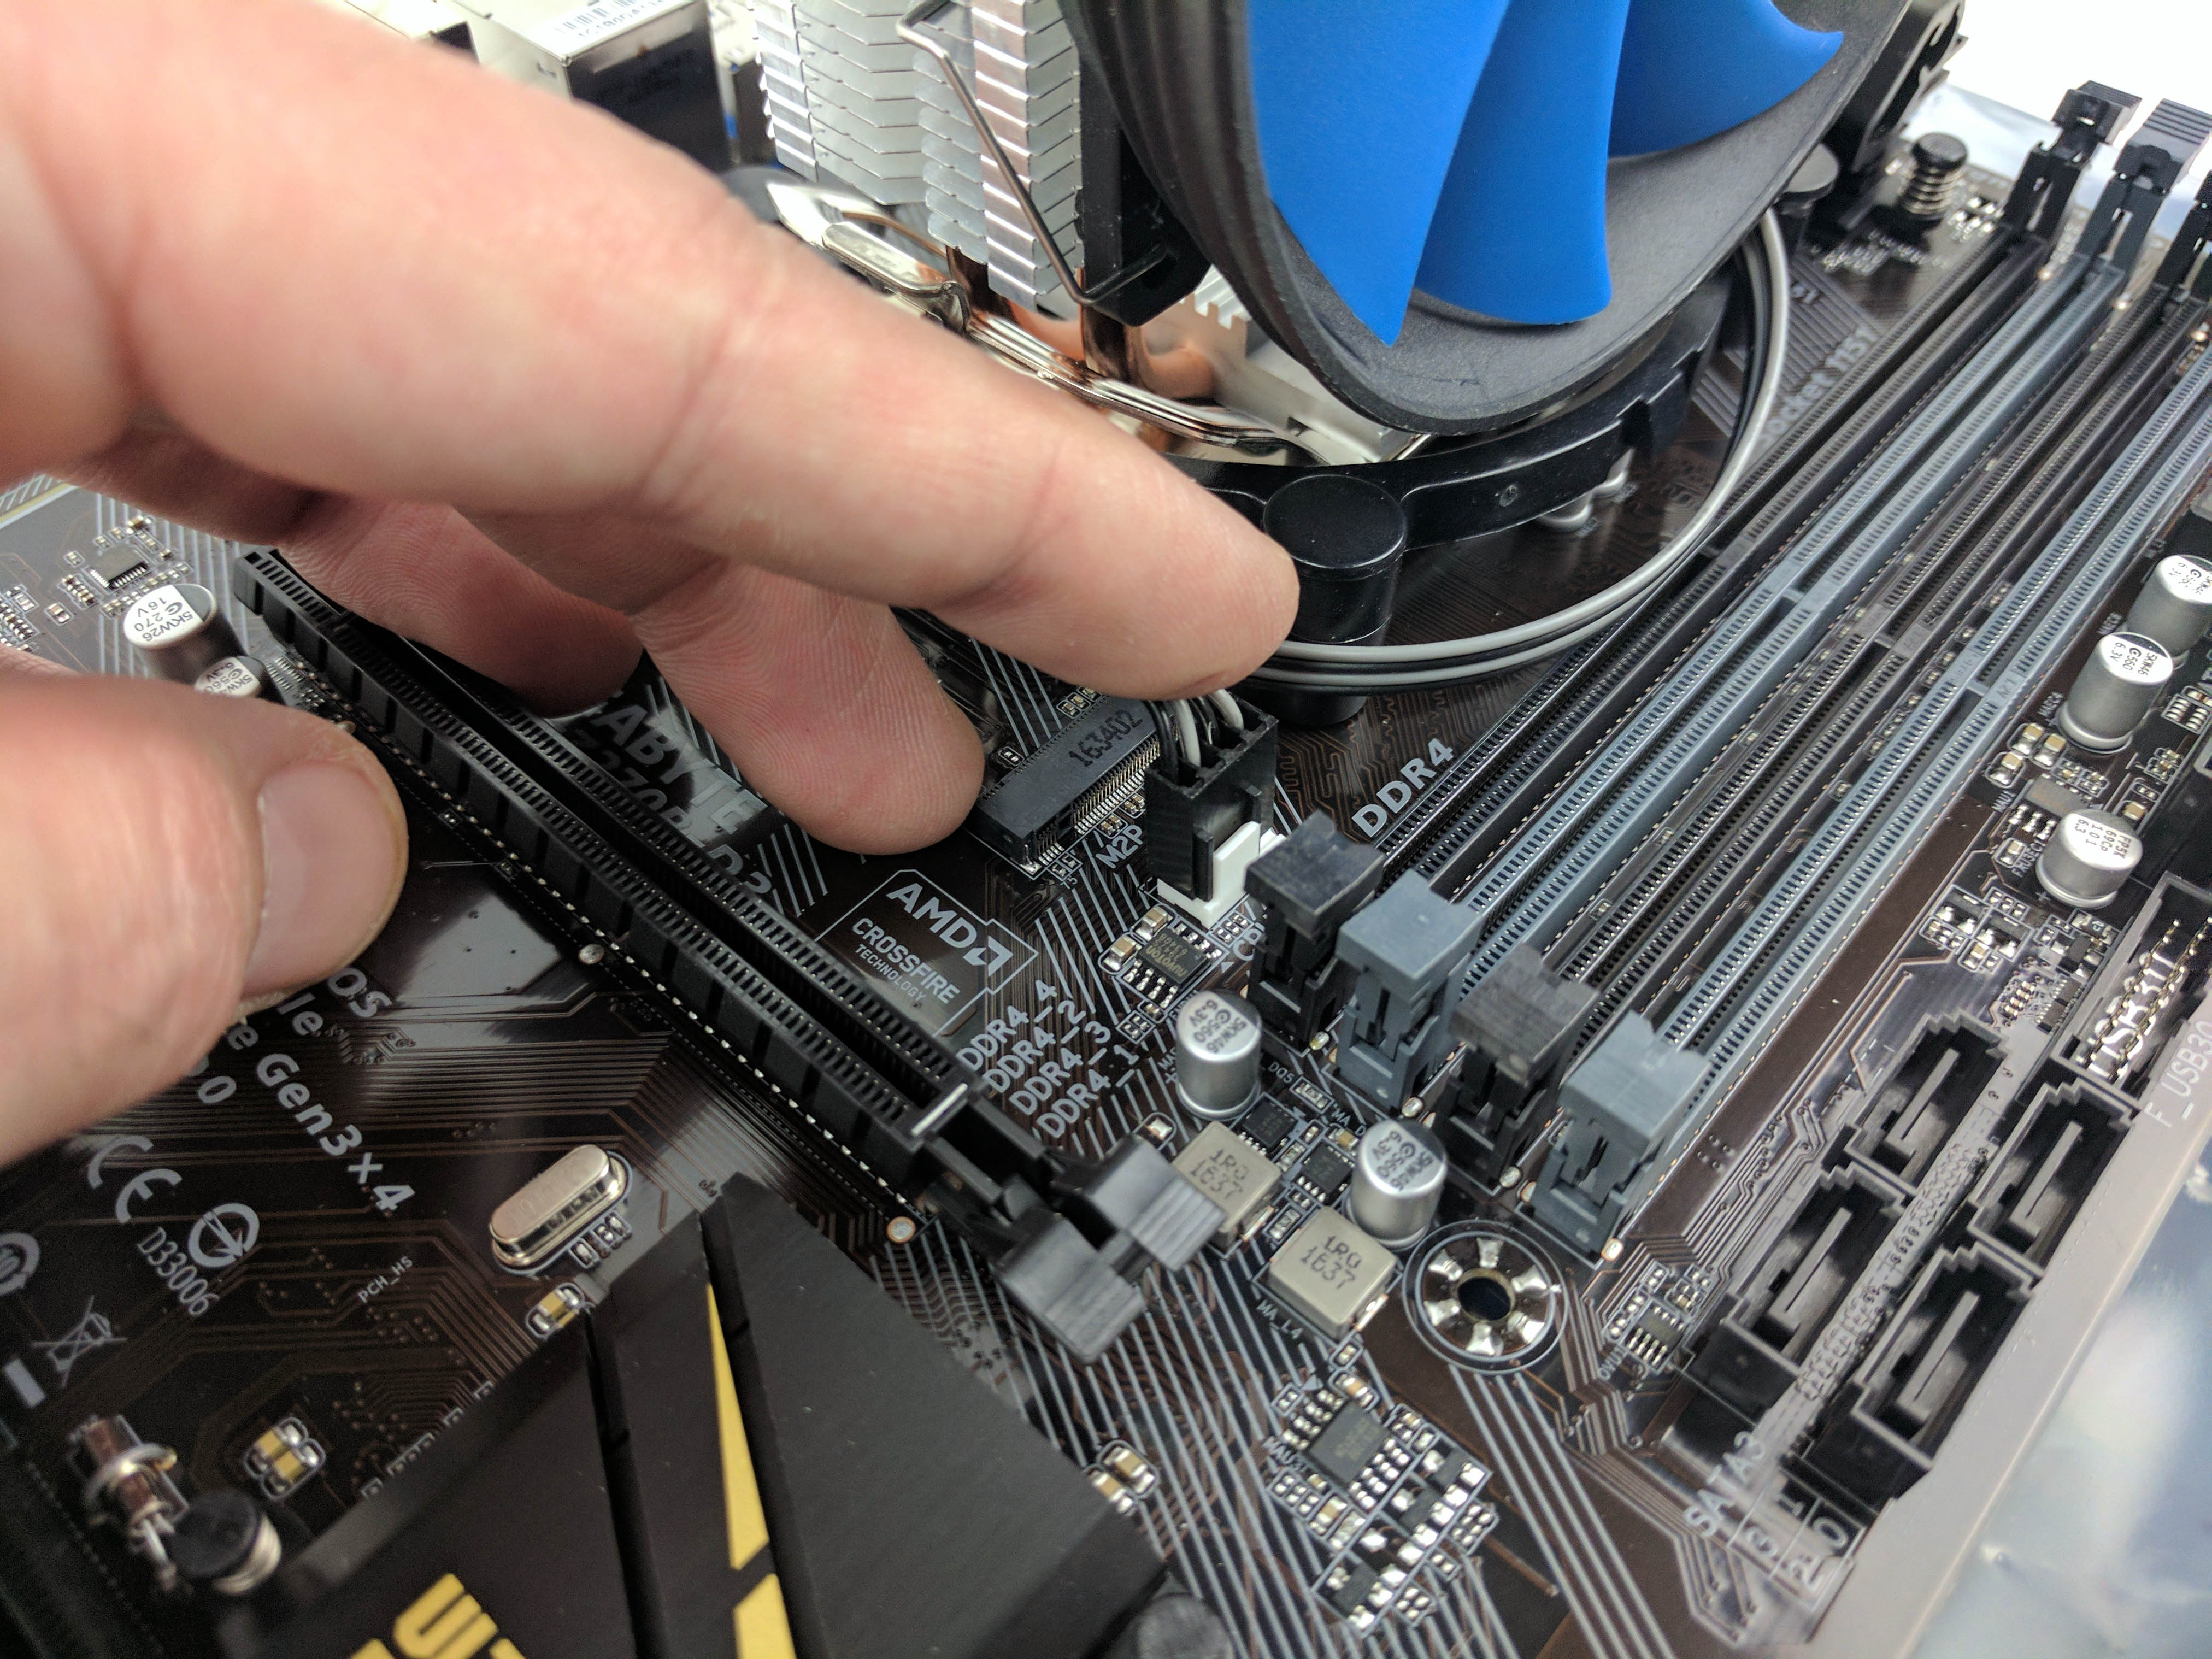
To remove the fan clips, pull back and lift them at an angle to release the fan from the heatsink (see fifth picture above). This gives you plenty of space to insert the black pegs into the white posts. The cooler’s factory-applied thermal compound allows builders to skip the manual application step. Replace the fan after the heatsink is secure to the motherboard, making sure not to bend any fins on the heatsink when you slide the clip back into place (see tenth picture above). Plug in the heatsink’s fan to the CPU fan port on the motherboard (just next to the memory DIMMs), and tuck the cable around the heatsinks for a clean look (11th picture above). Set the motherboard aside and get ready to install the components in the case.
With the power cables (mostly) run in advance, the rear I/O panel installed, and the cooler attached to the processor, we can now install the motherboard and remaining components. Locate the short Philips-head screws. Use the screws with the thinner threads. The larger ones appear as if they could fit in the motherboard post’s threads, but they are too large. You’ll also need the thicker-threaded screws later, so set them aside.
The Motherboard
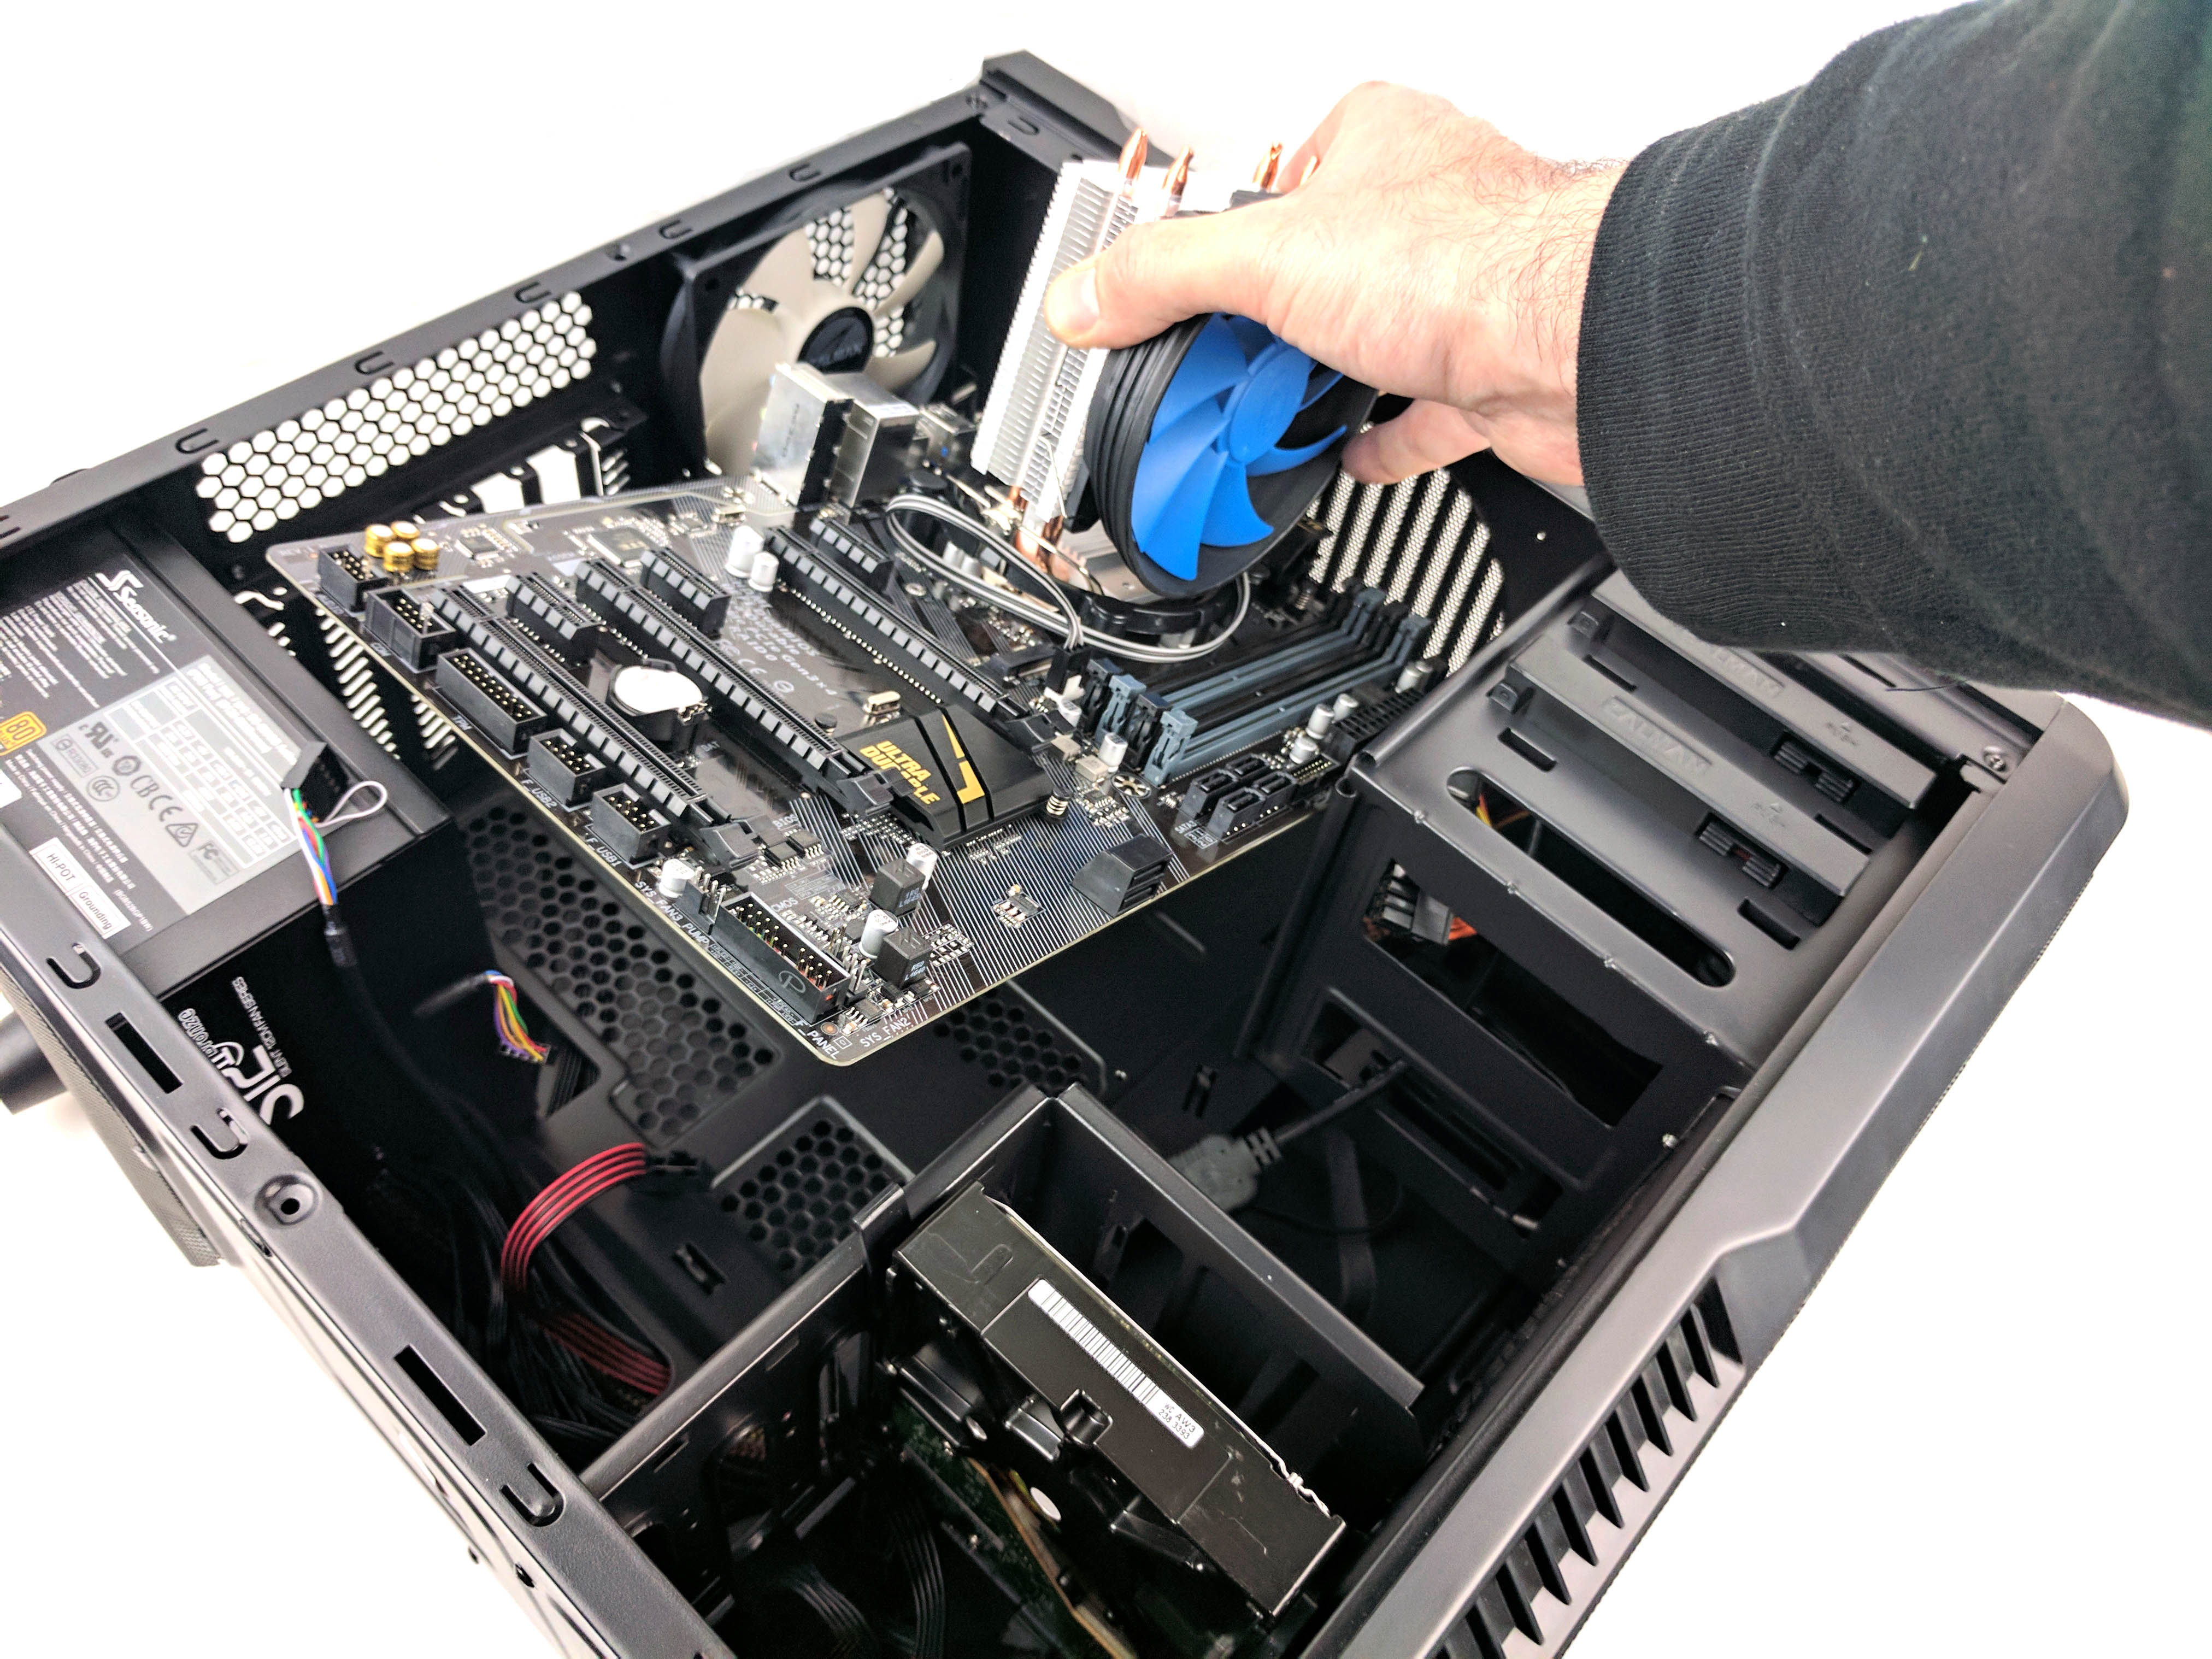
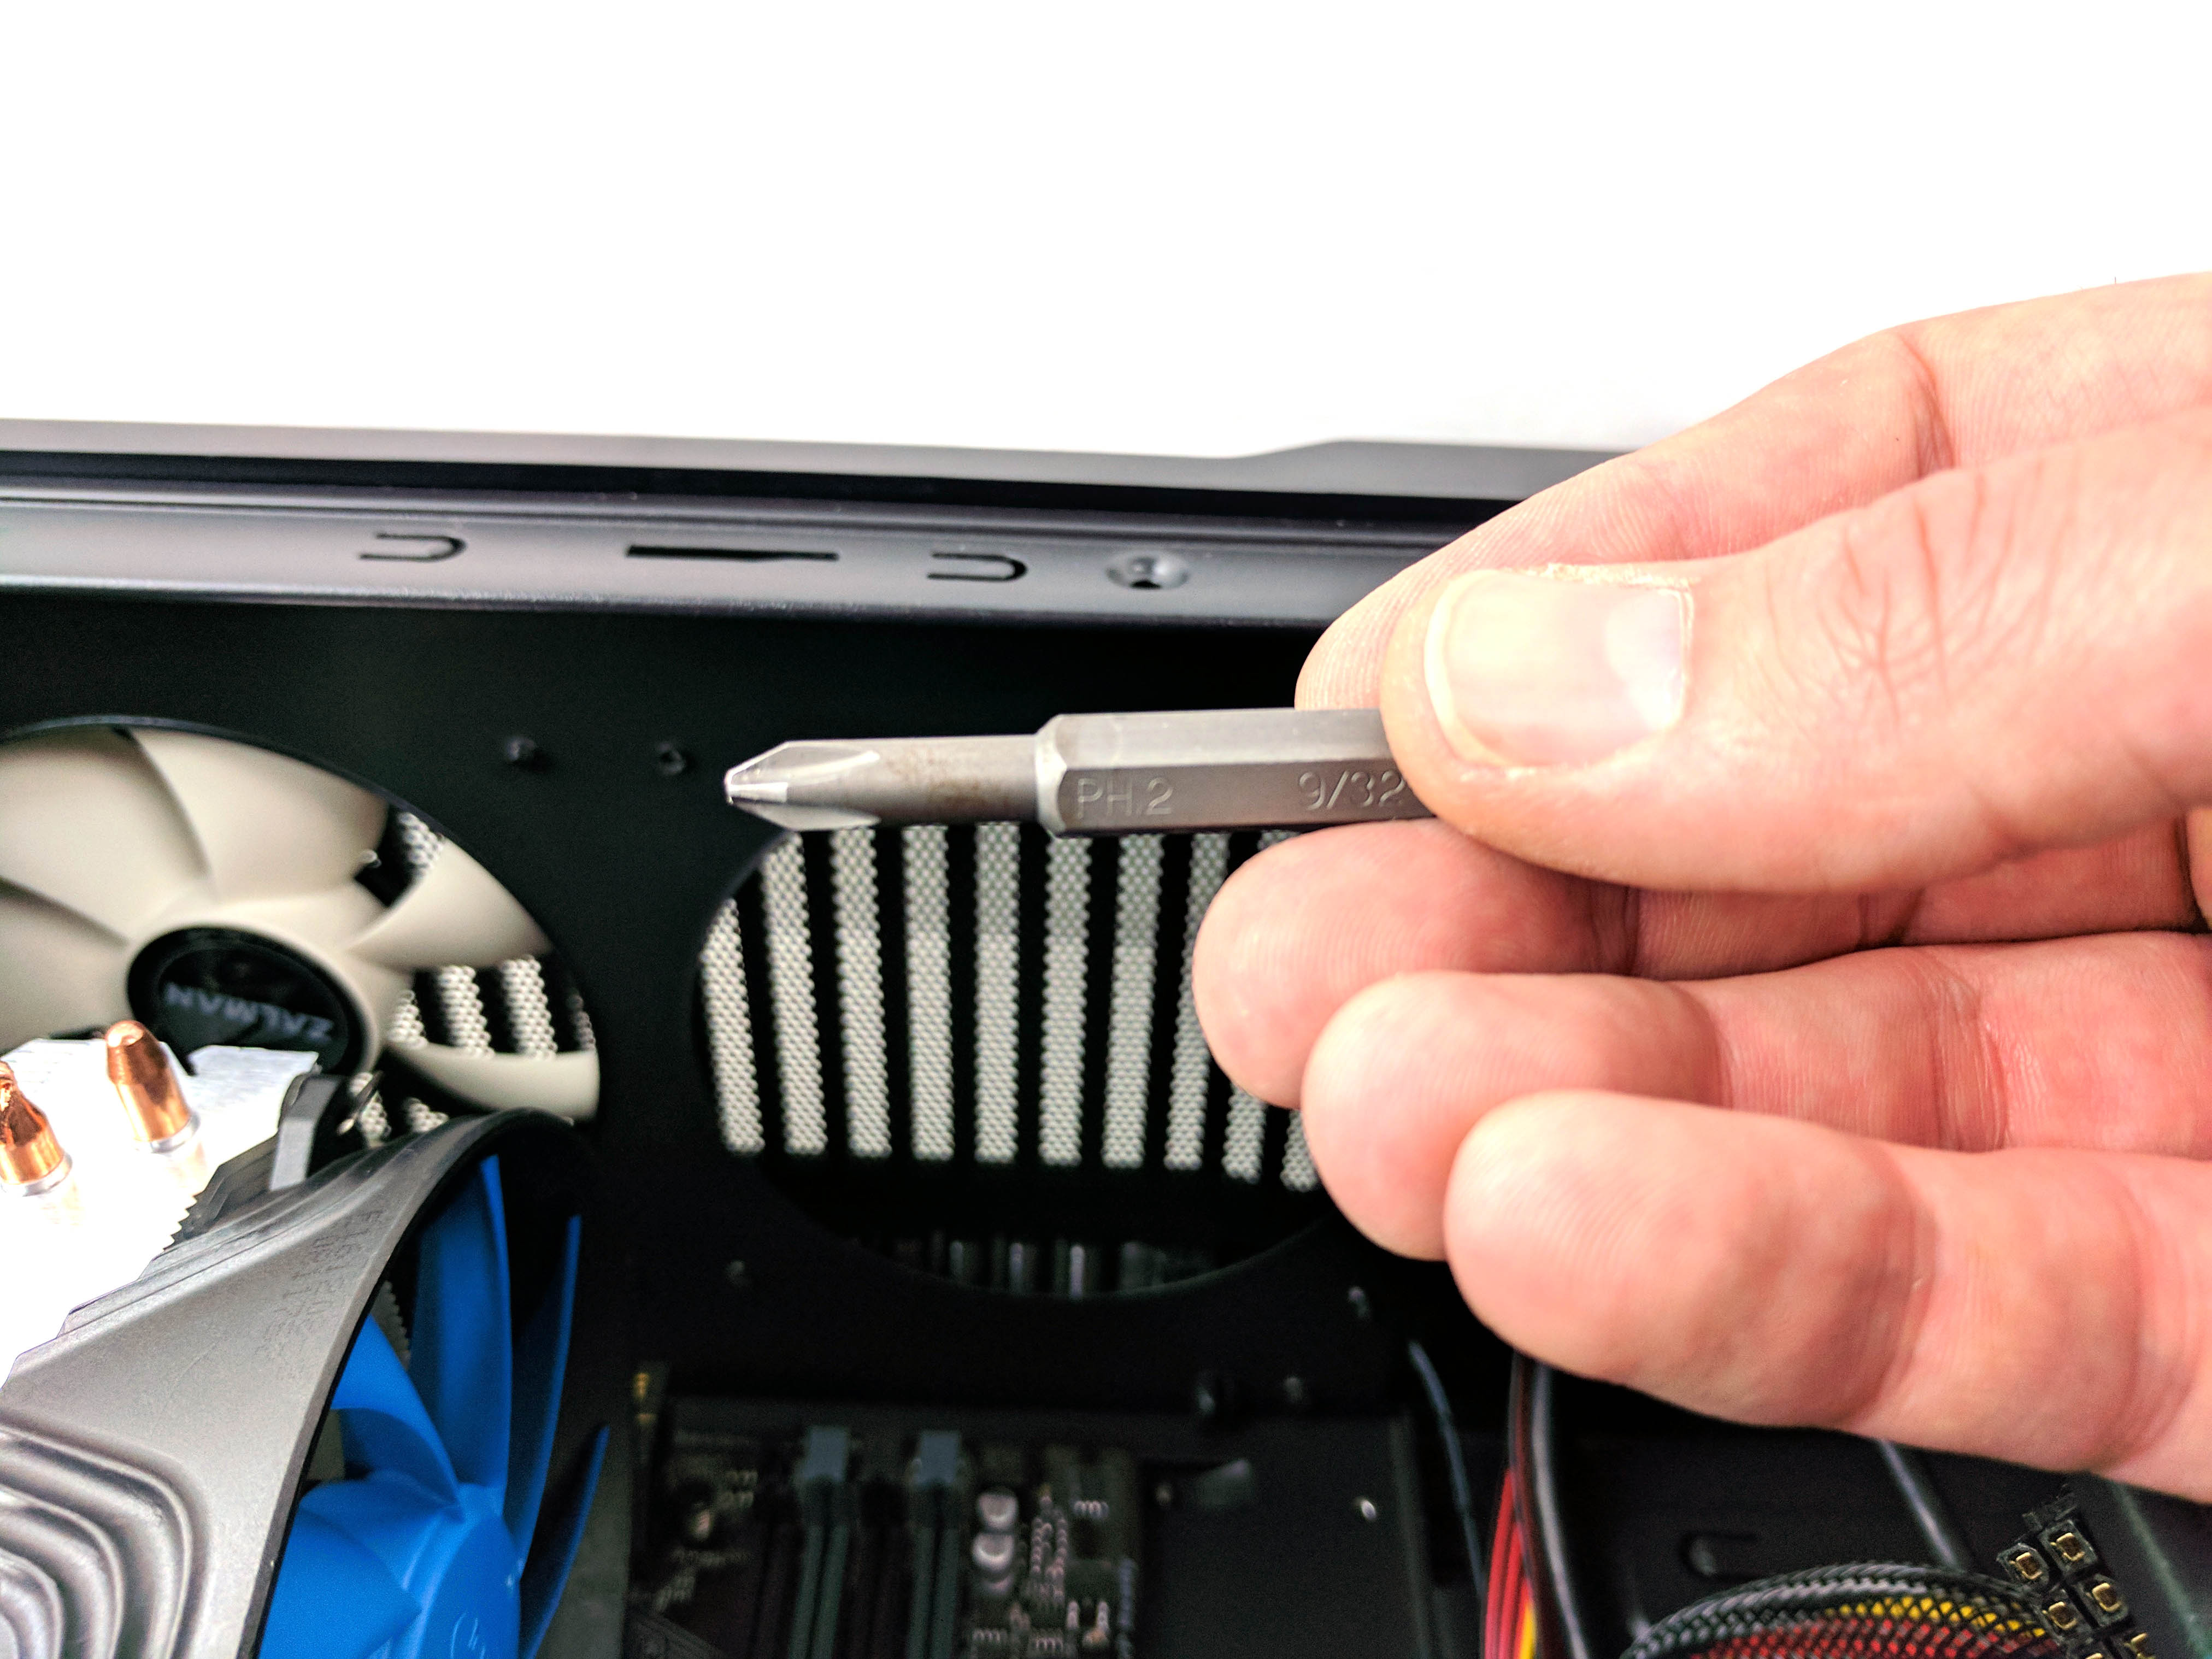
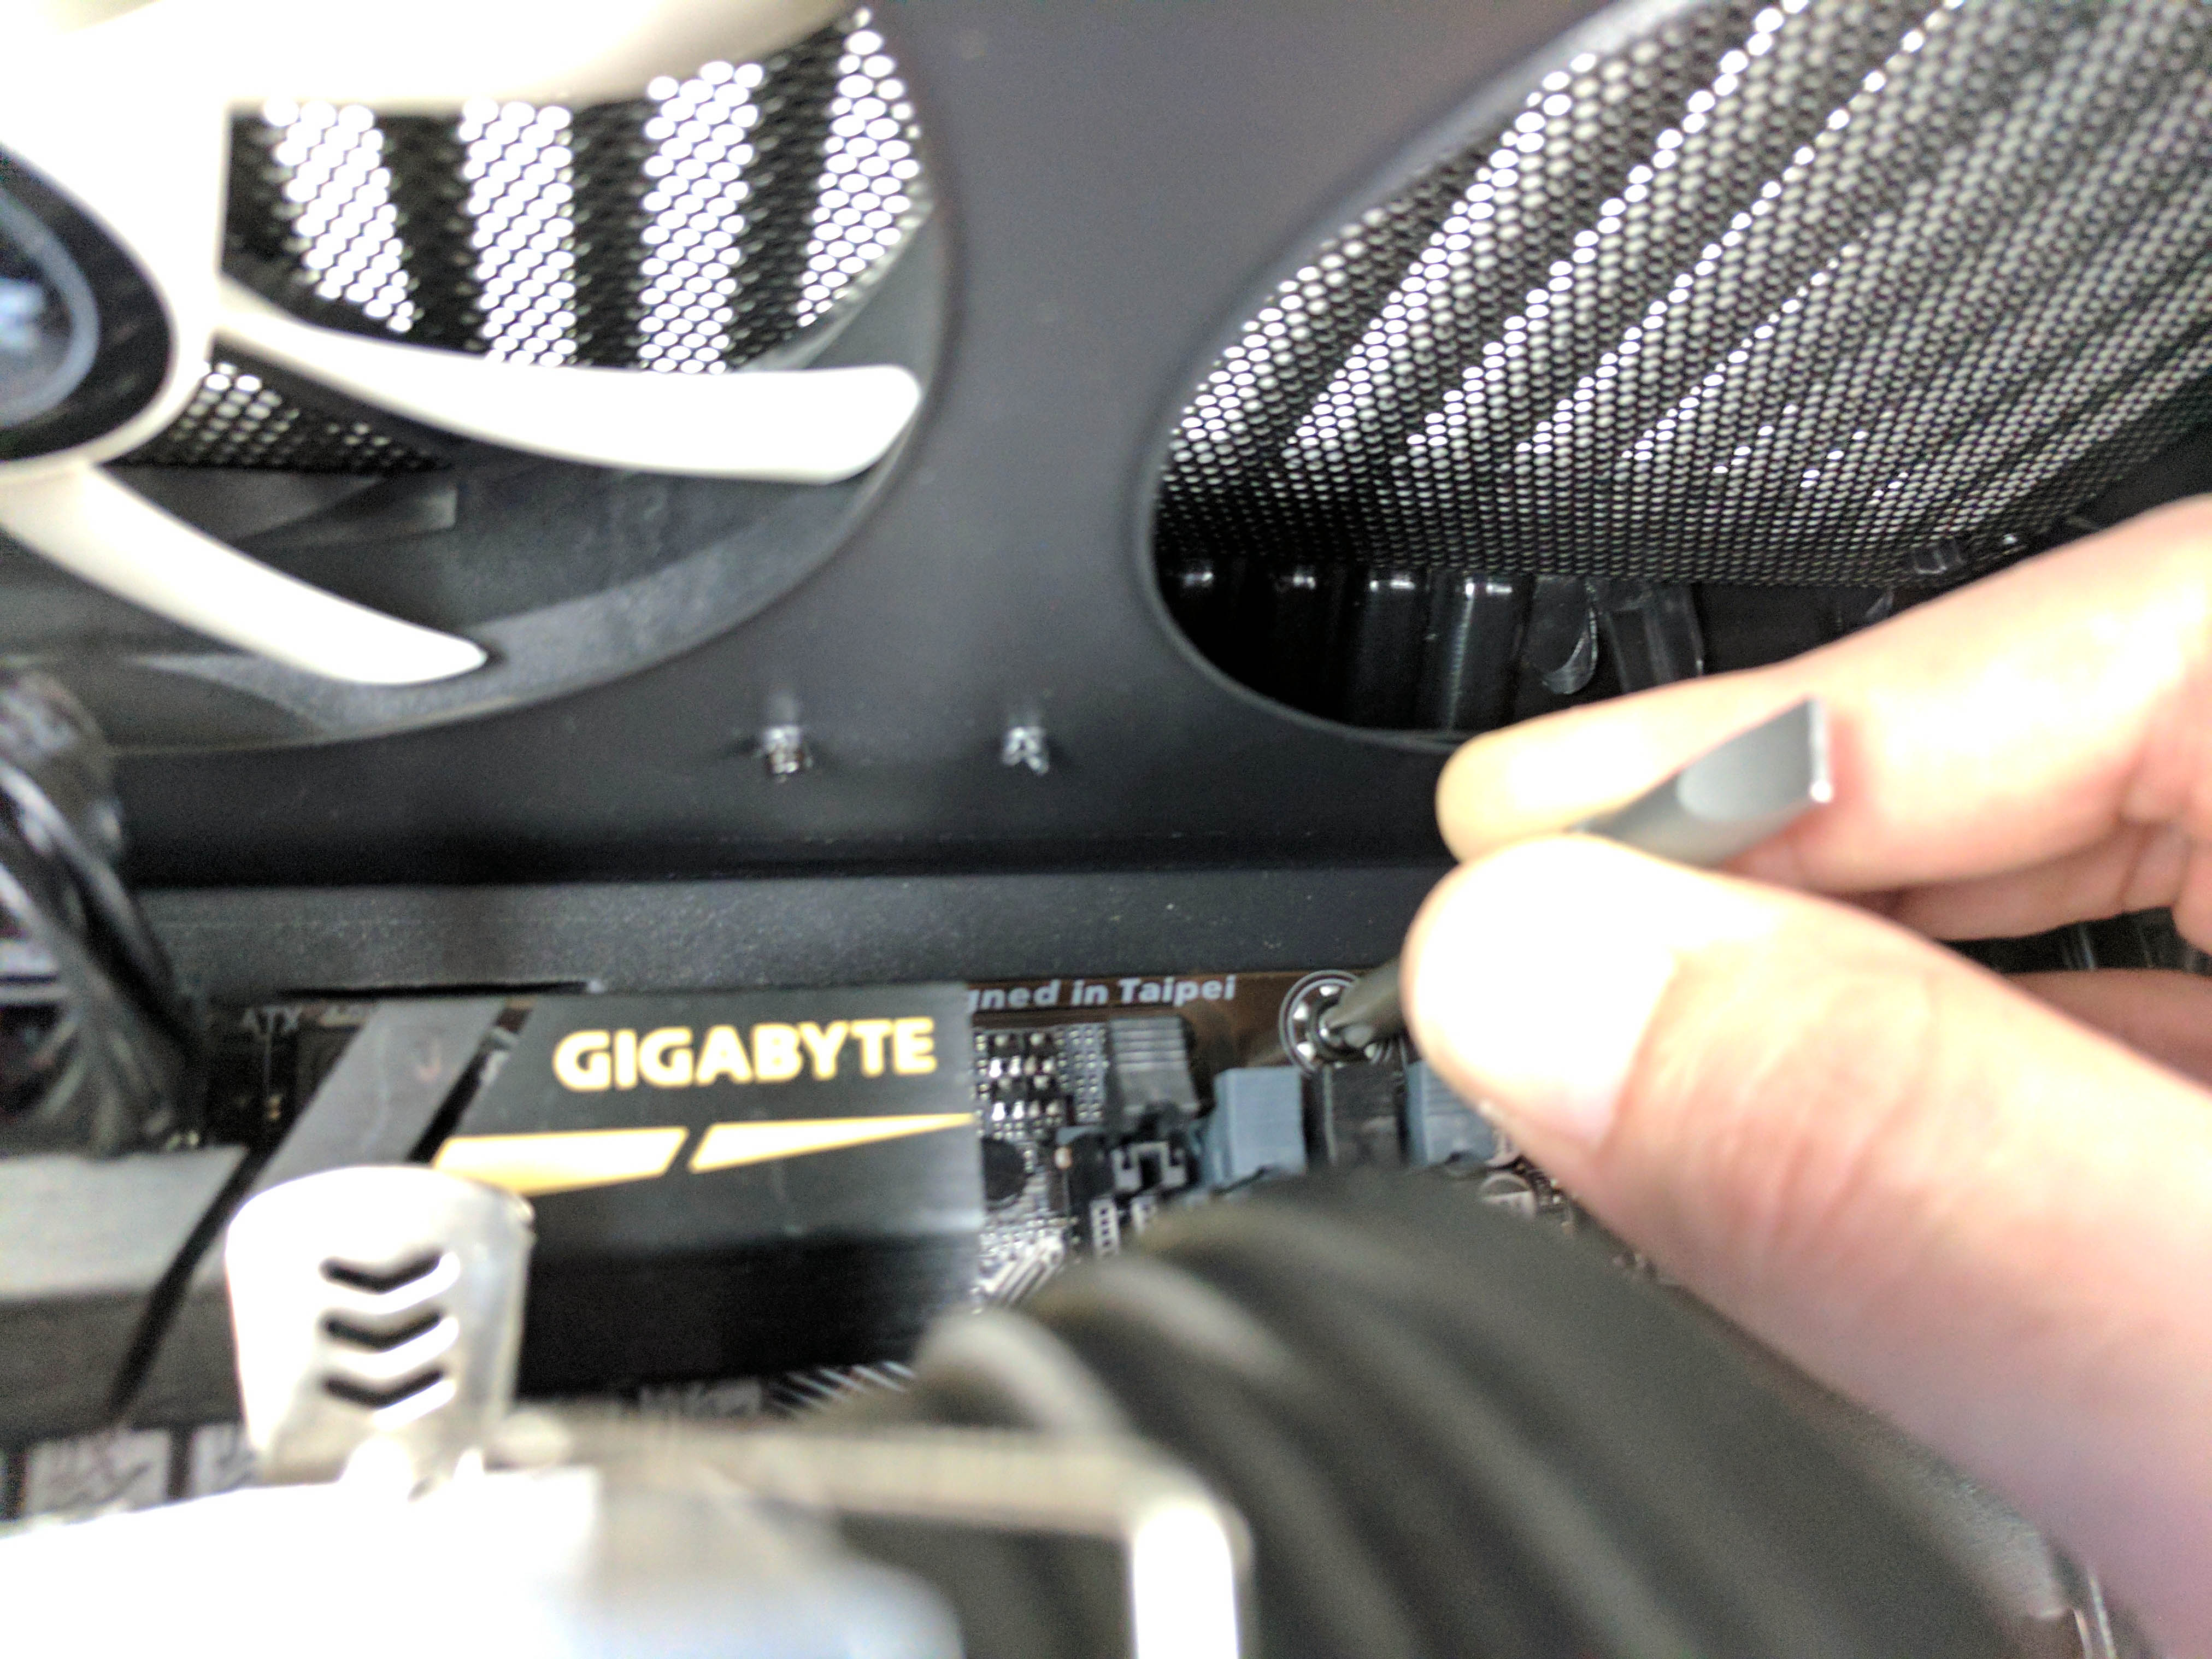
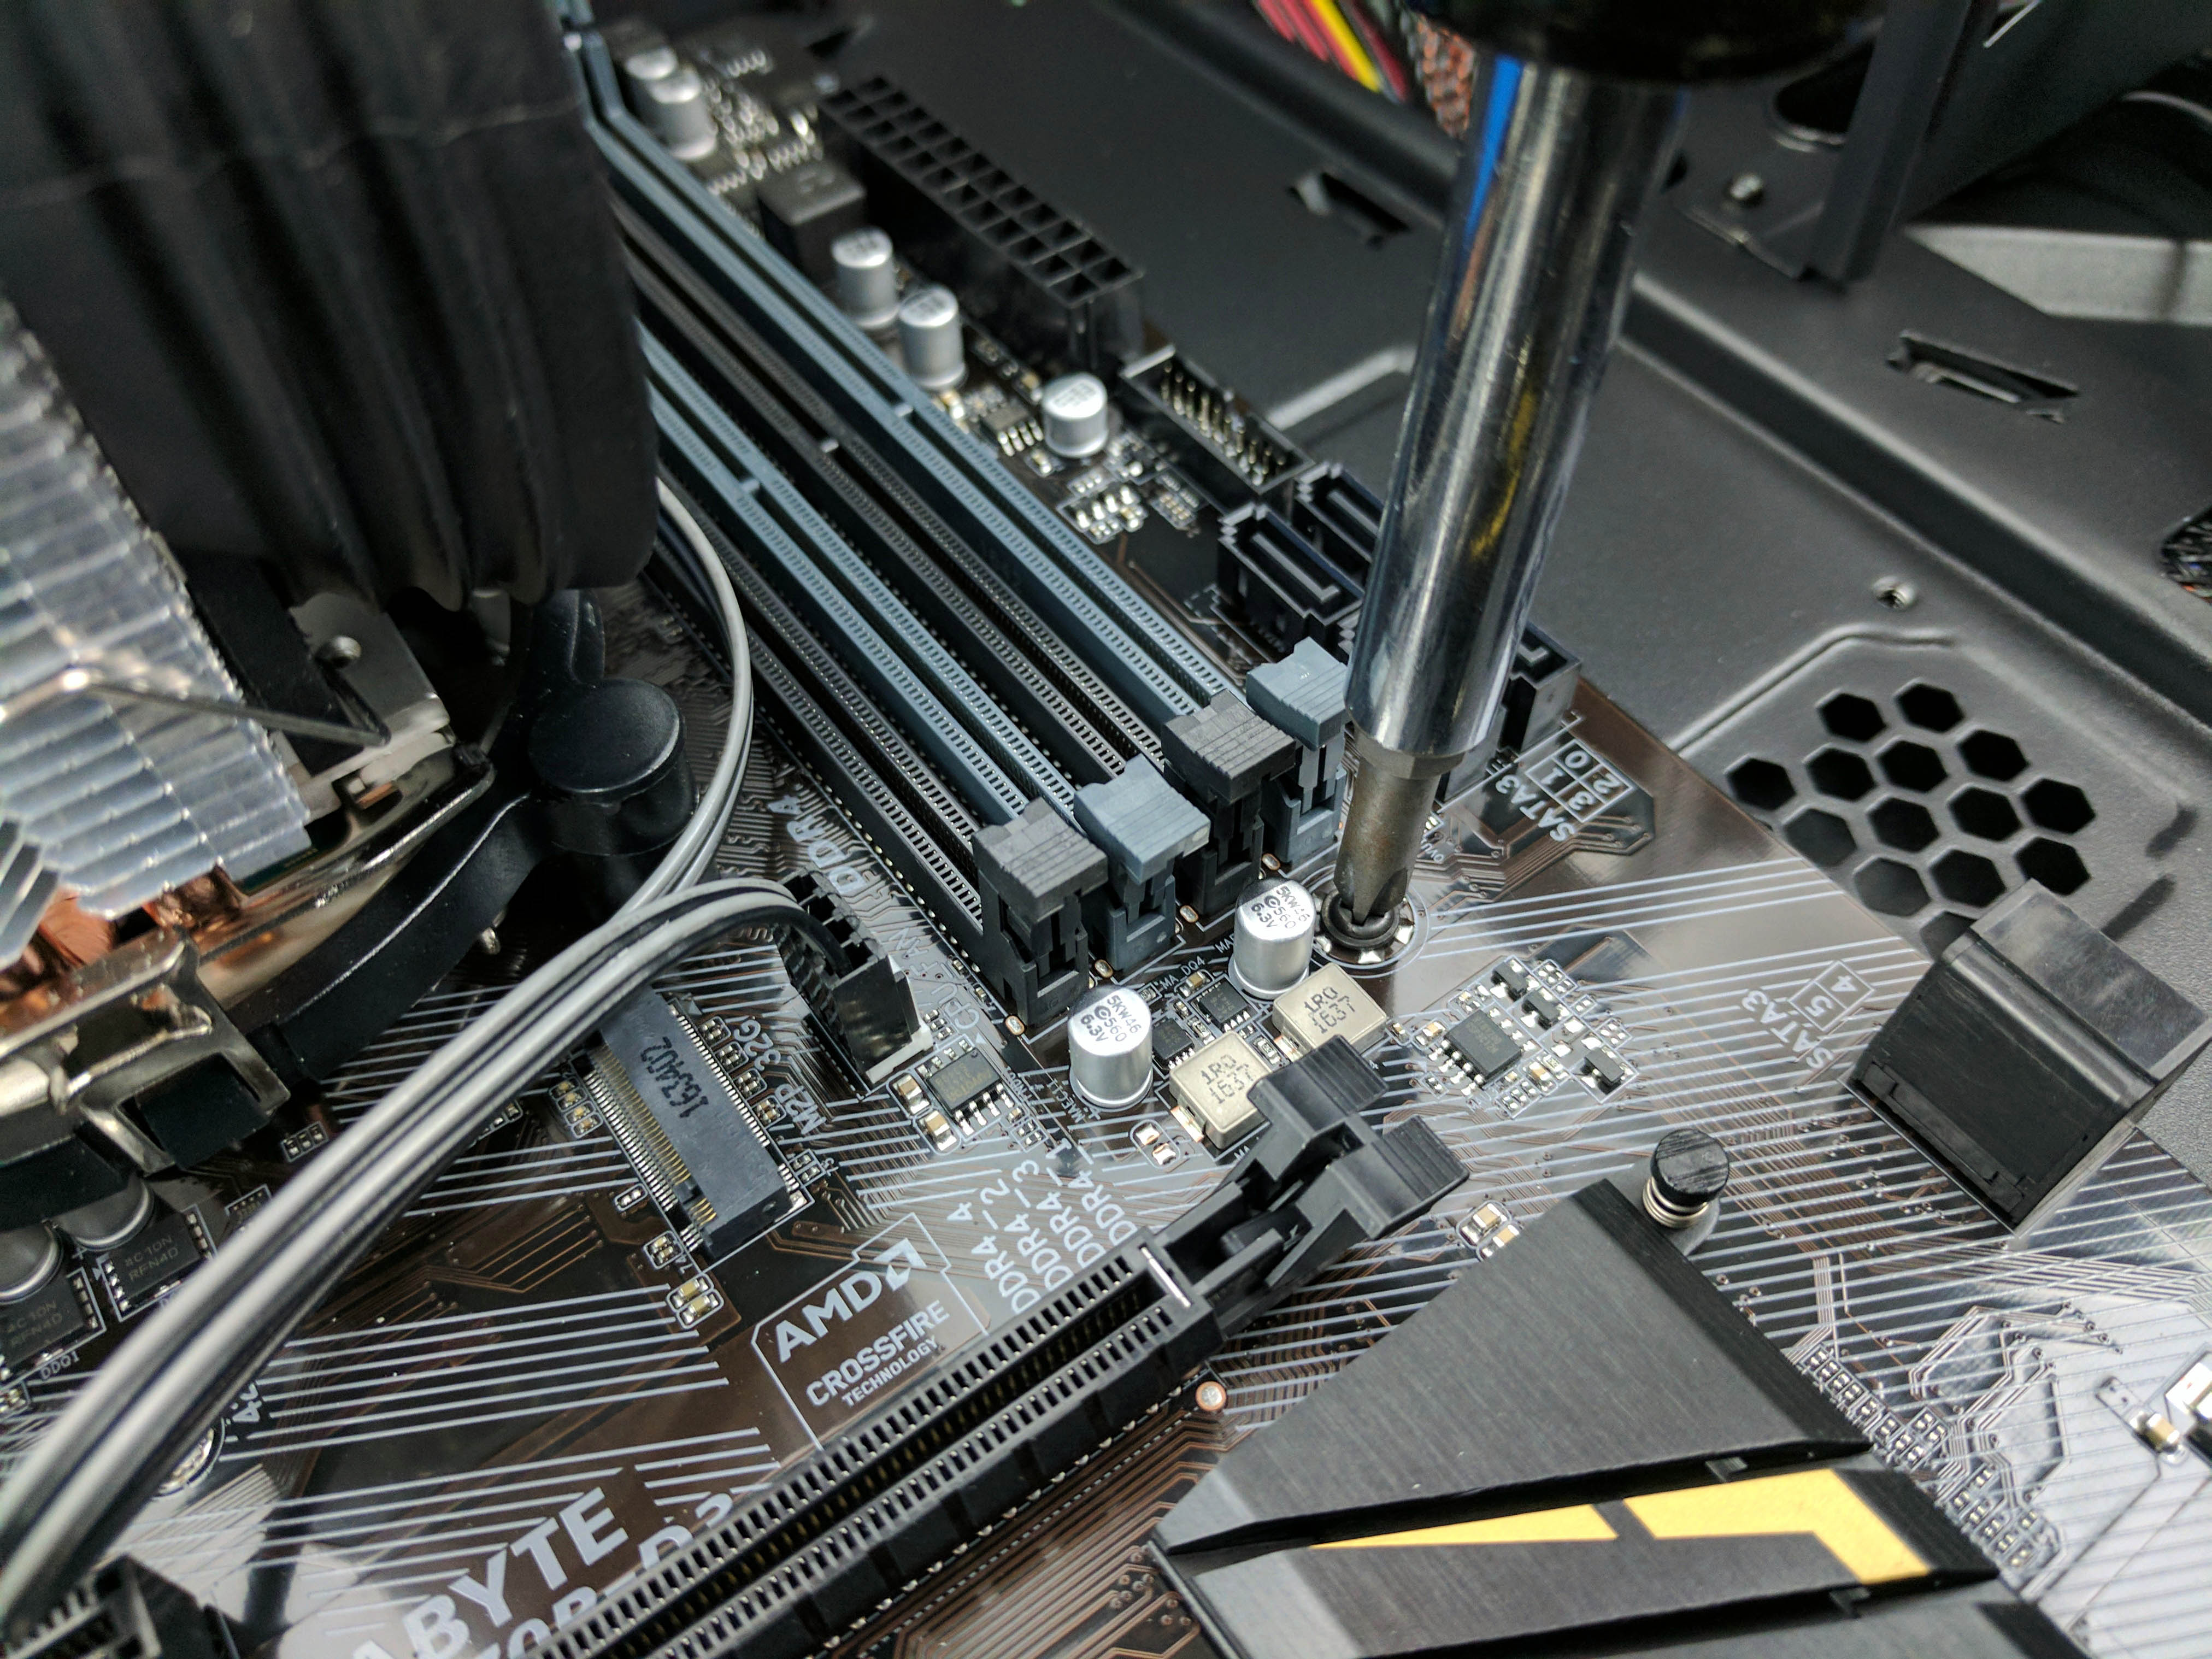
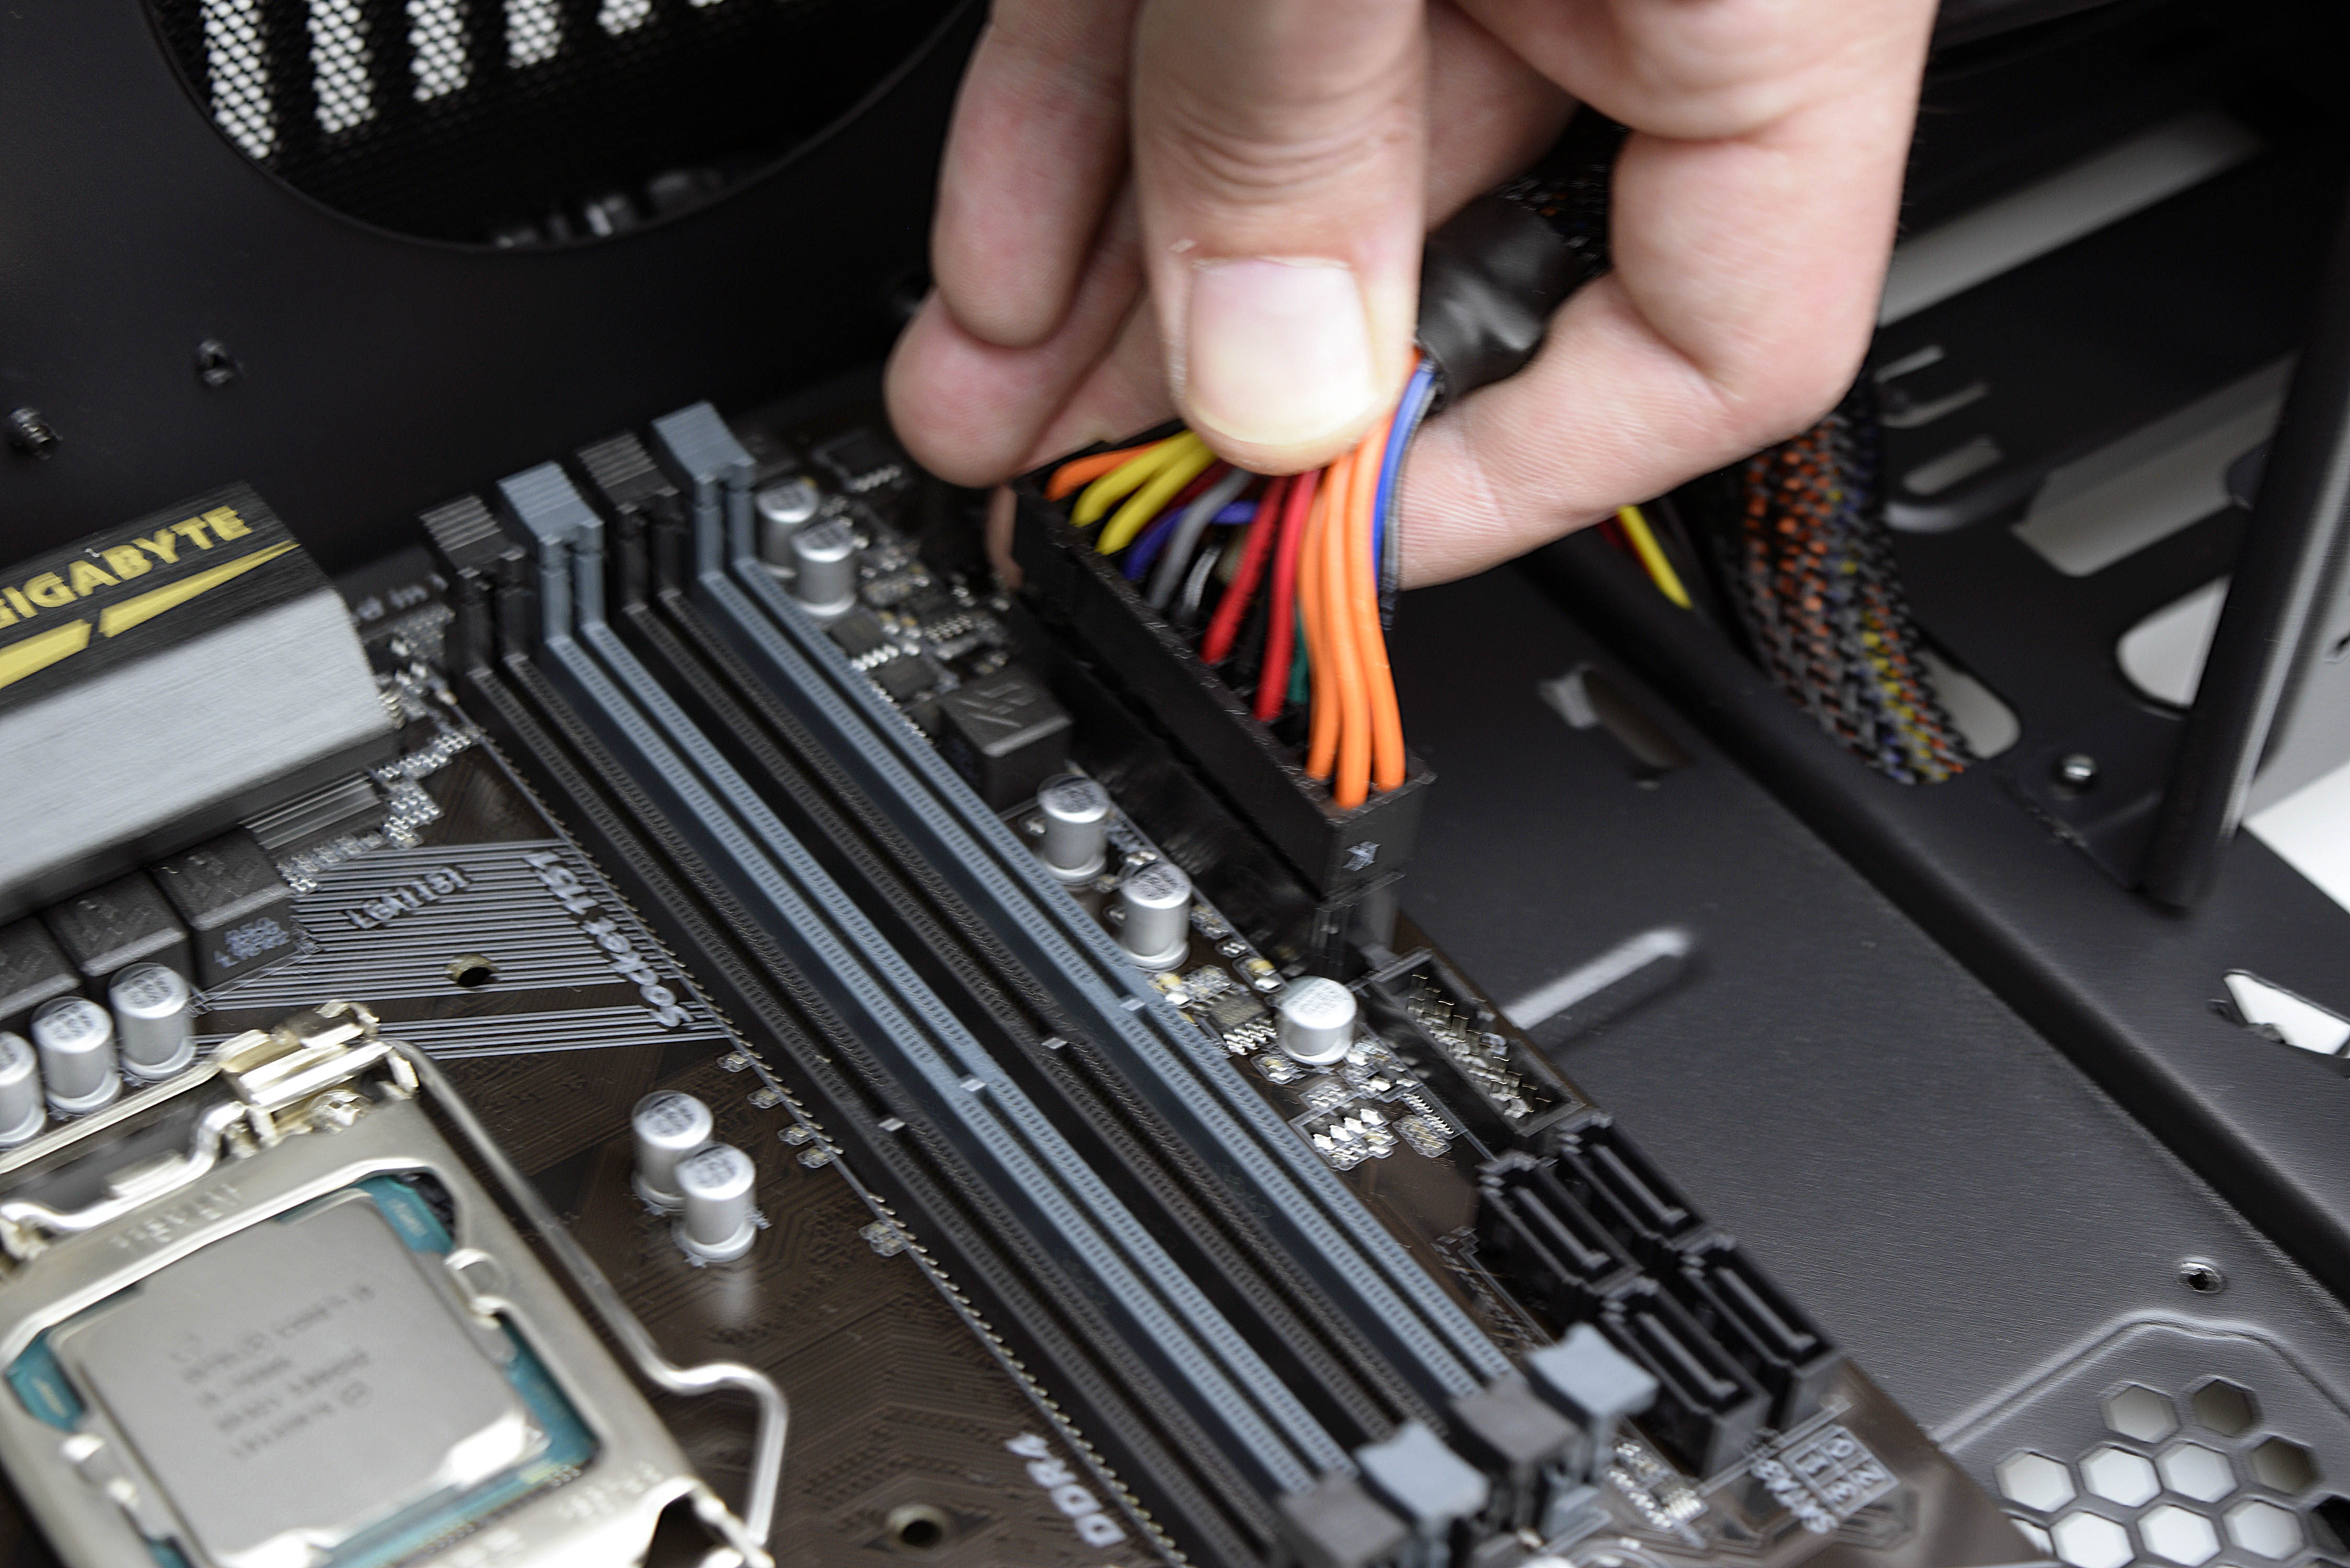
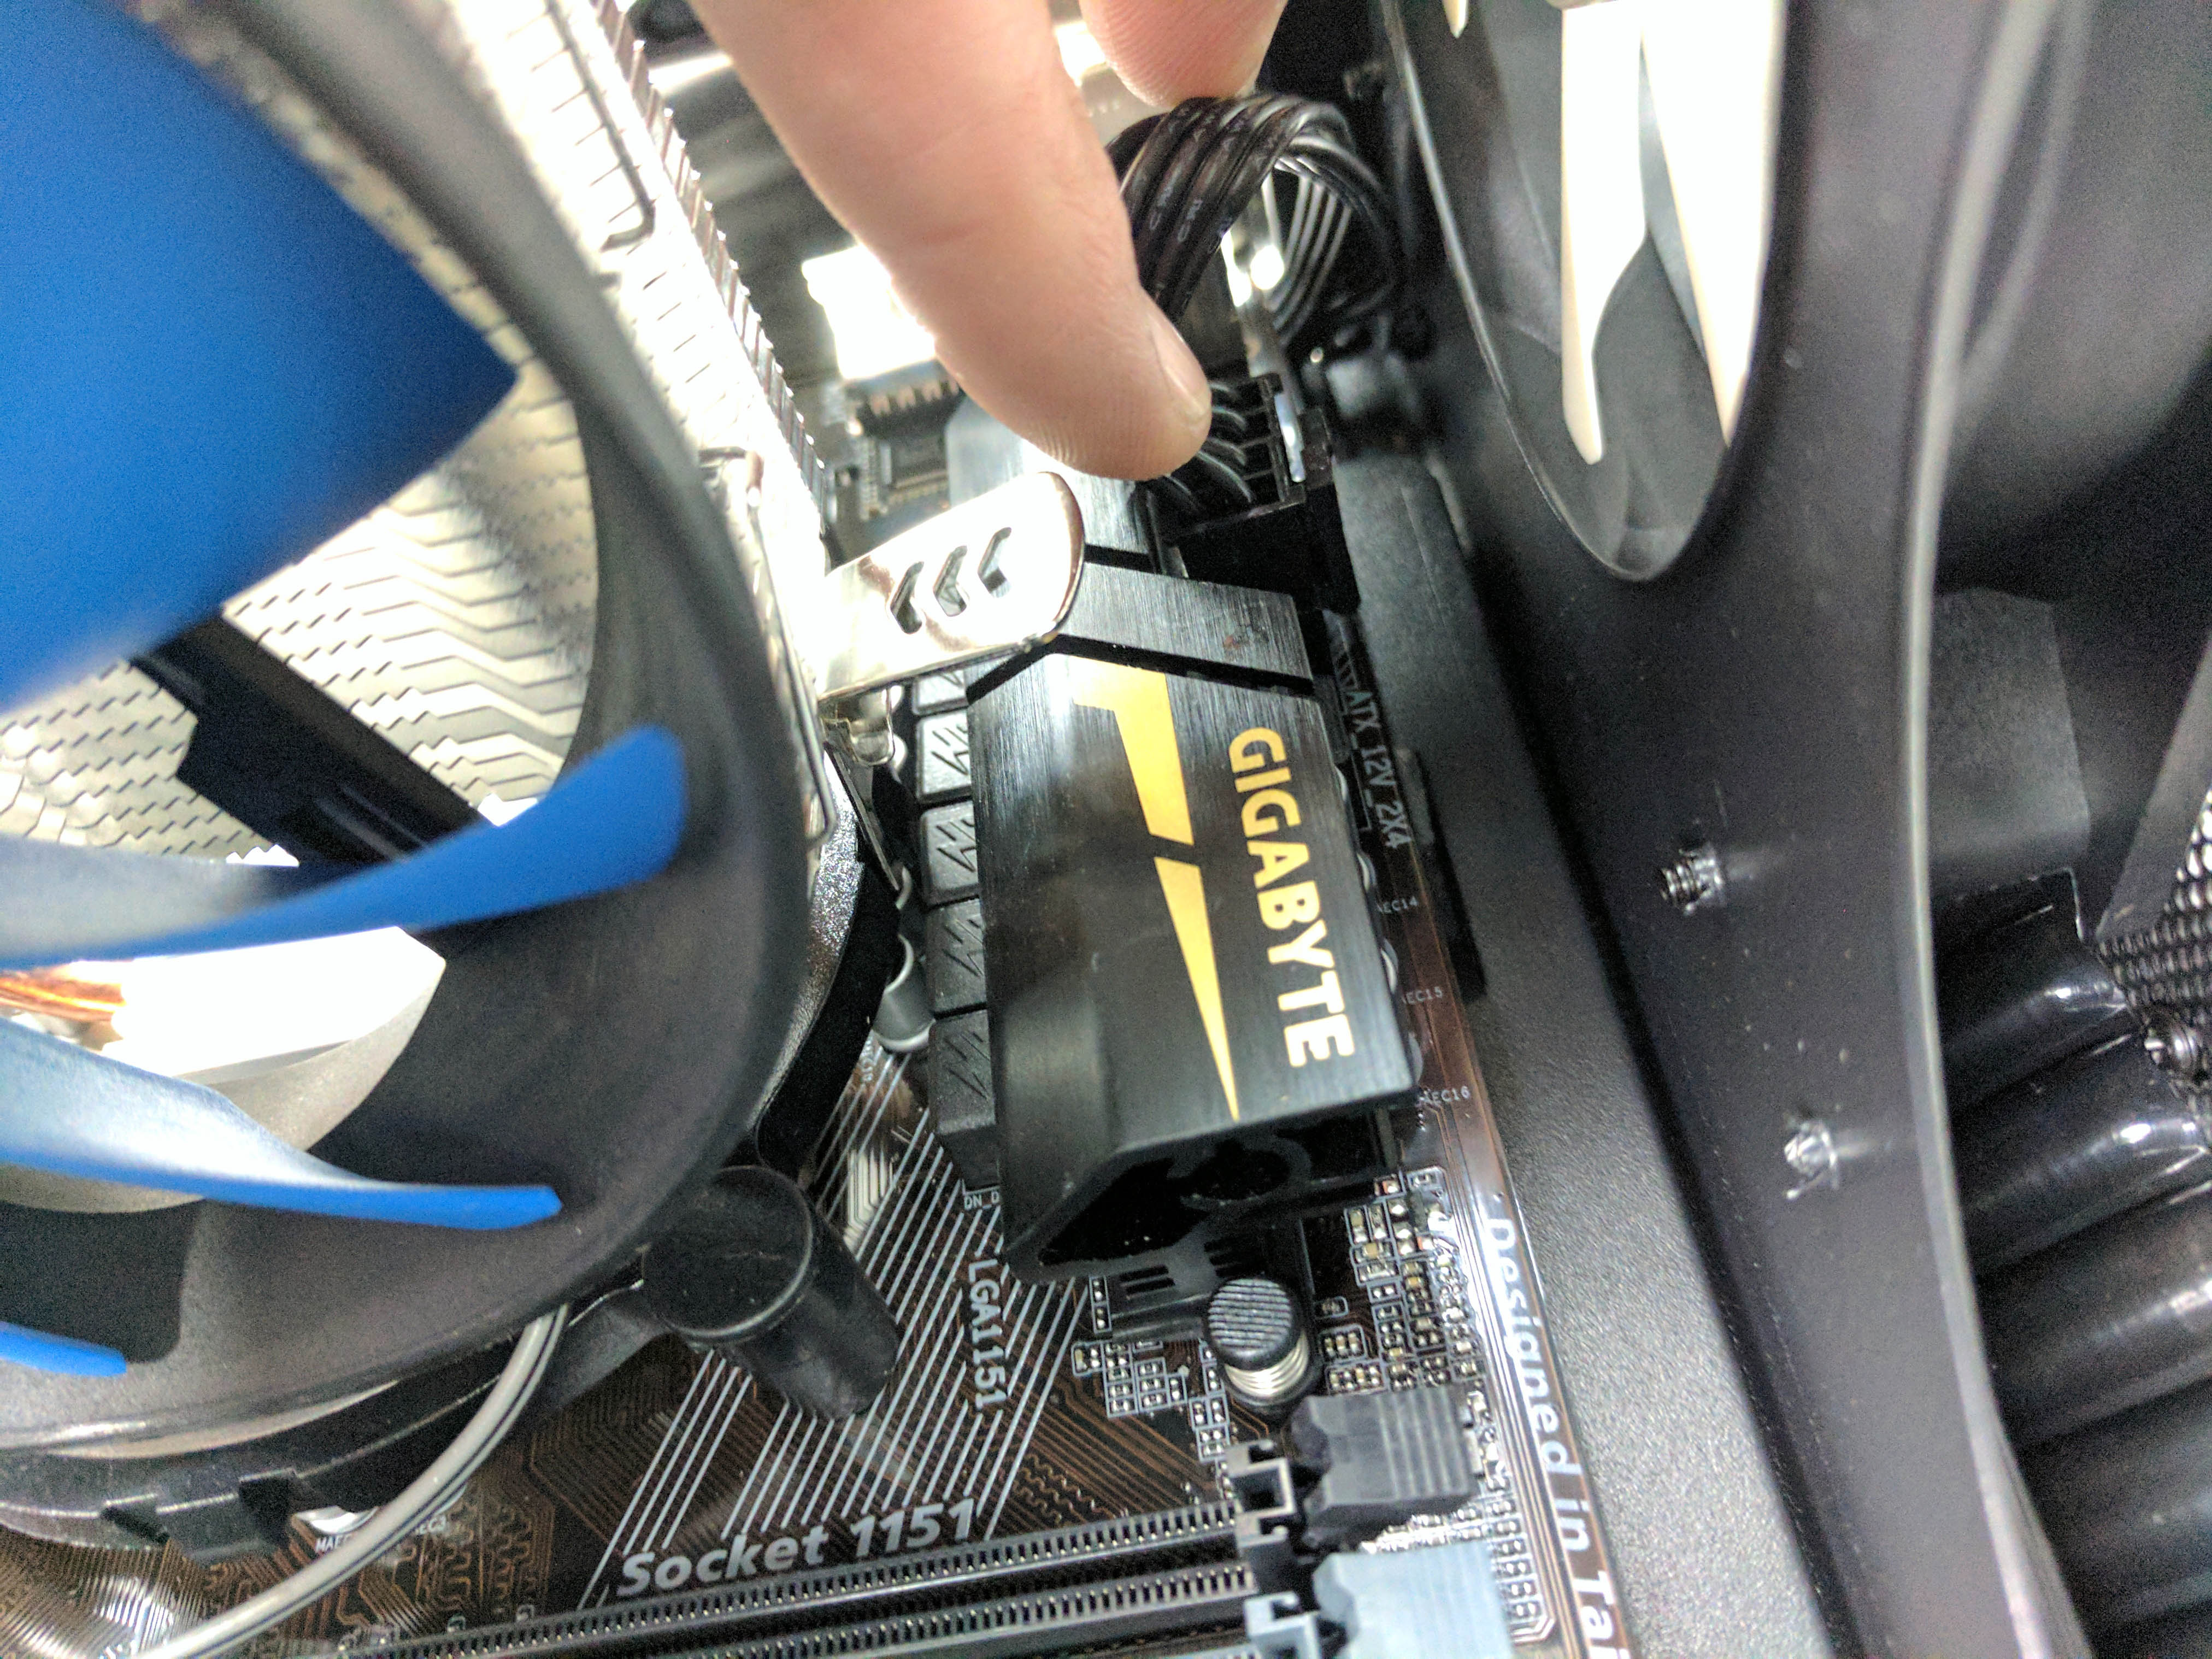
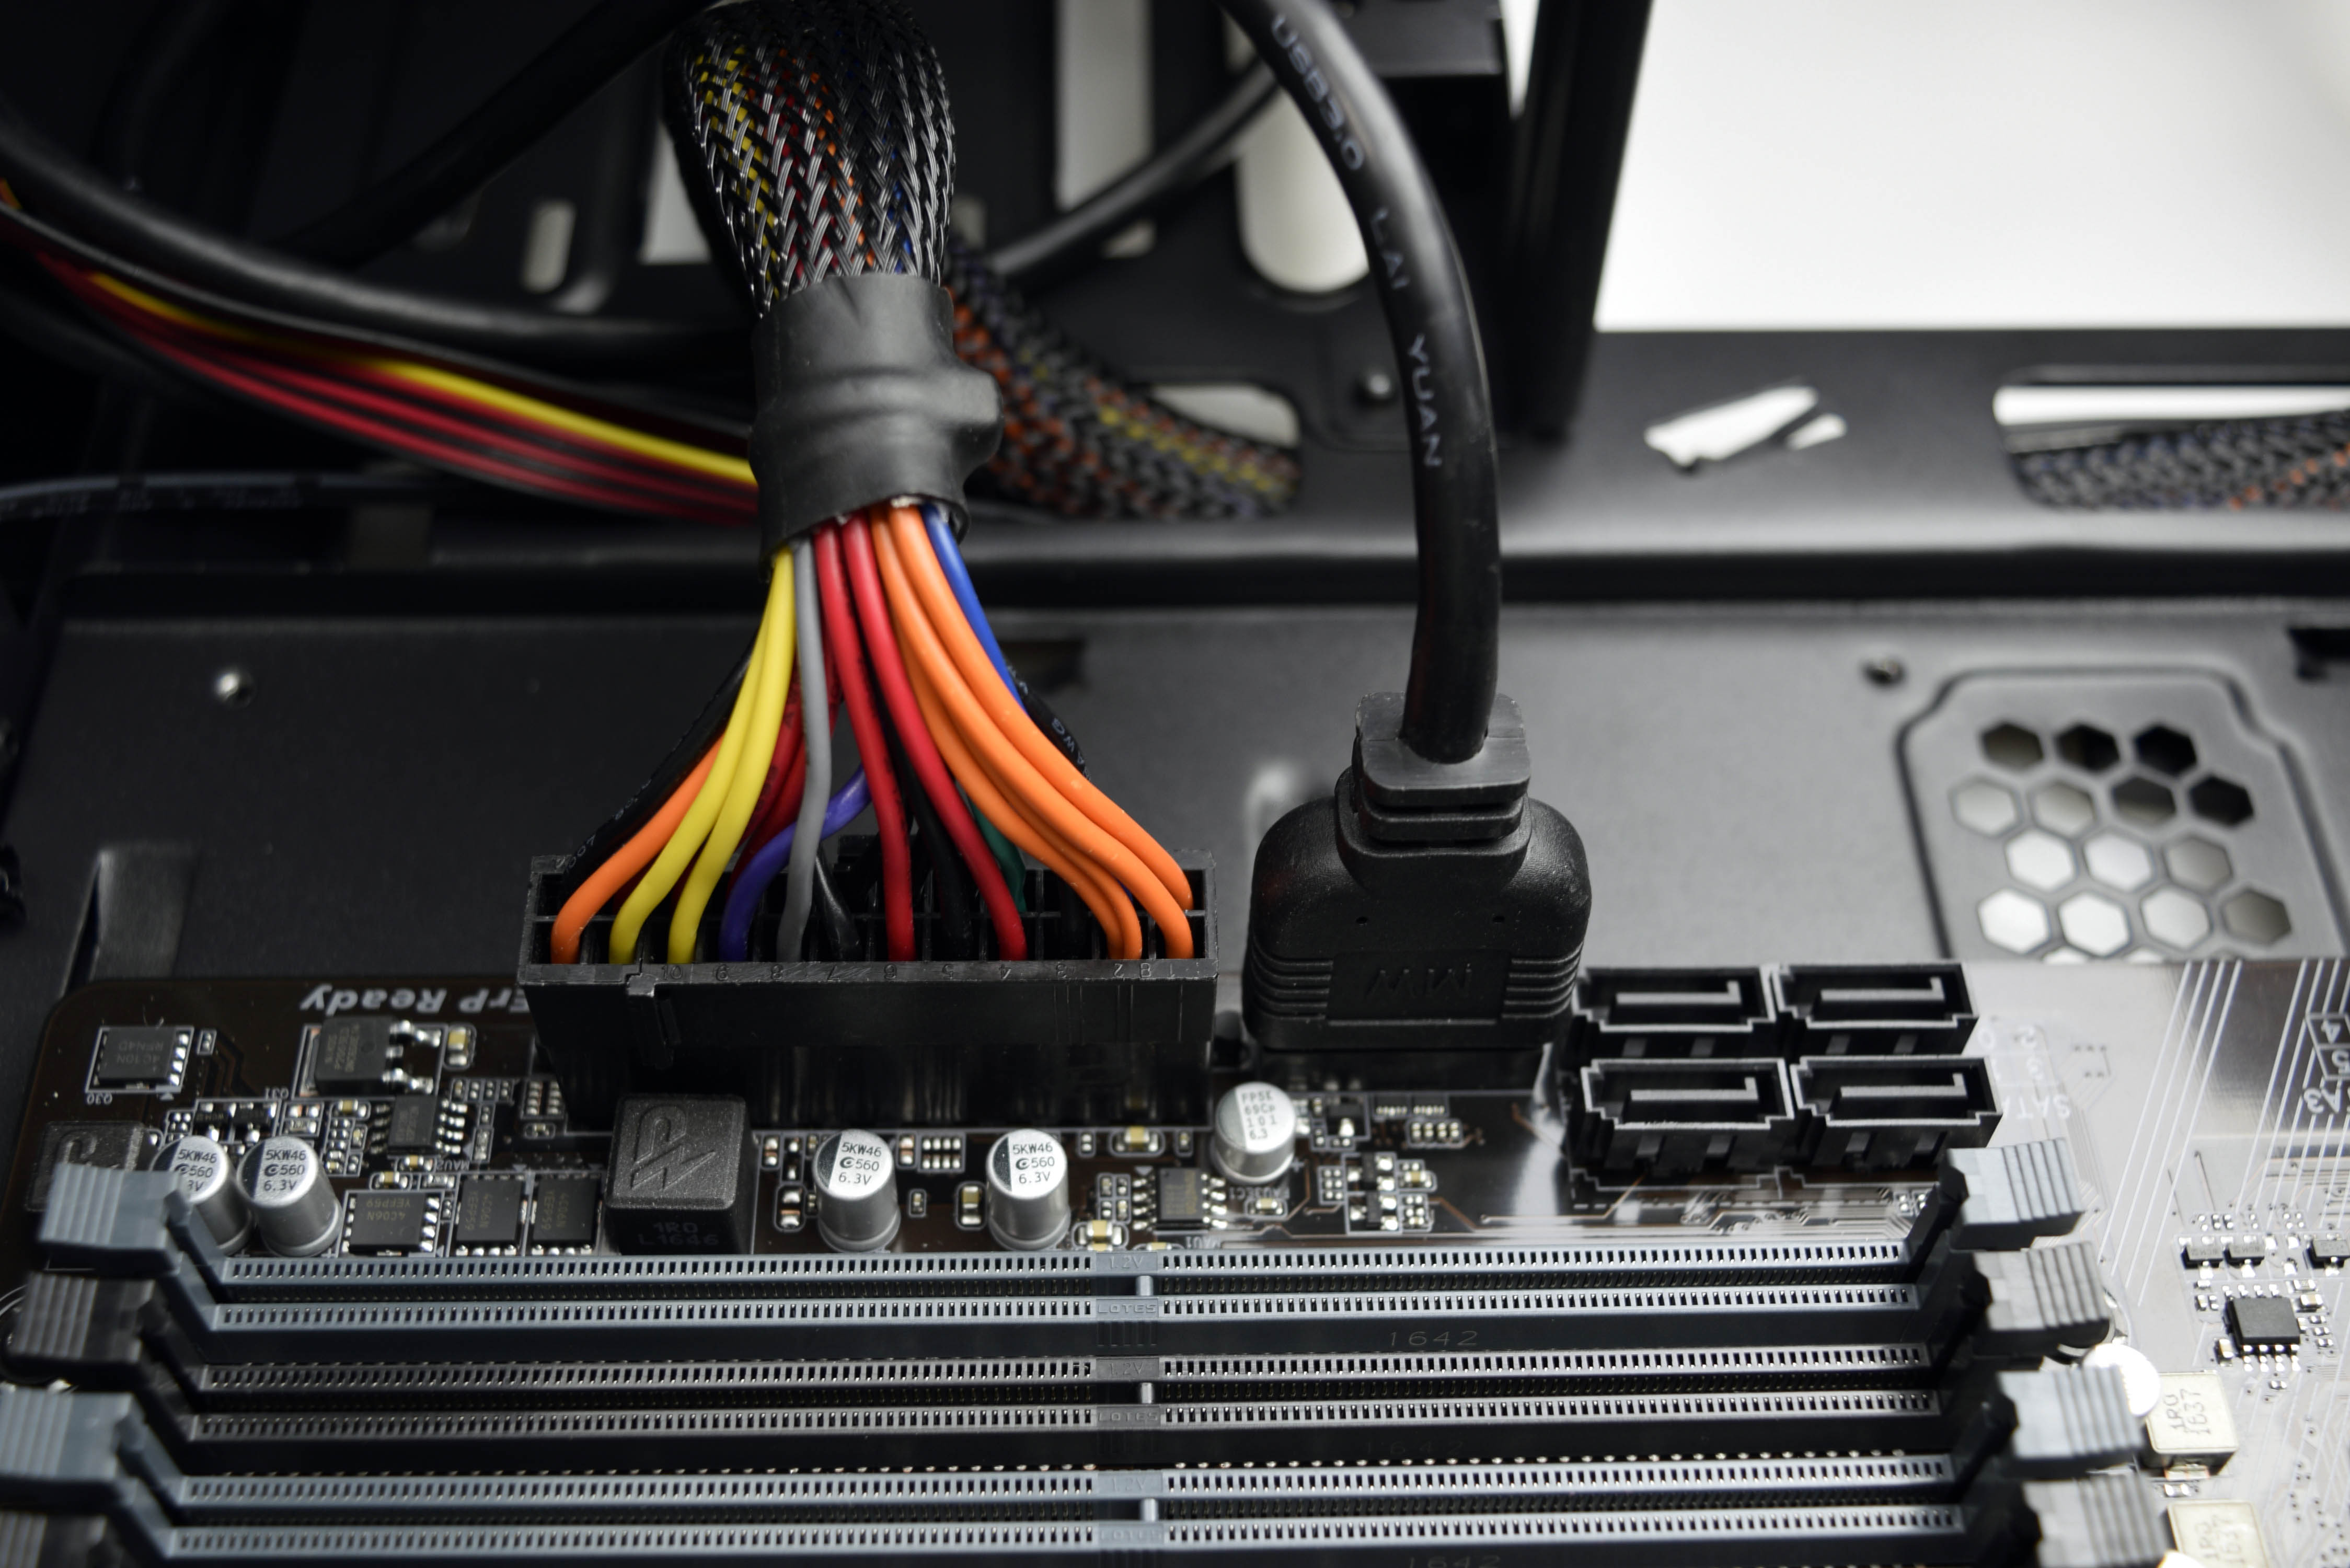
Lower the motherboard into the chassis and line up the mounting holes to the case. Be sure to align the motherboard’s rear I/O ports to the backplate so that nothing is bending or blocking a port. It’s also important to mind the rear fan wire and the CPU power cable. The case provides just enough clearance for the wiring to sneak around the motherboard, but it may need a little convincing.
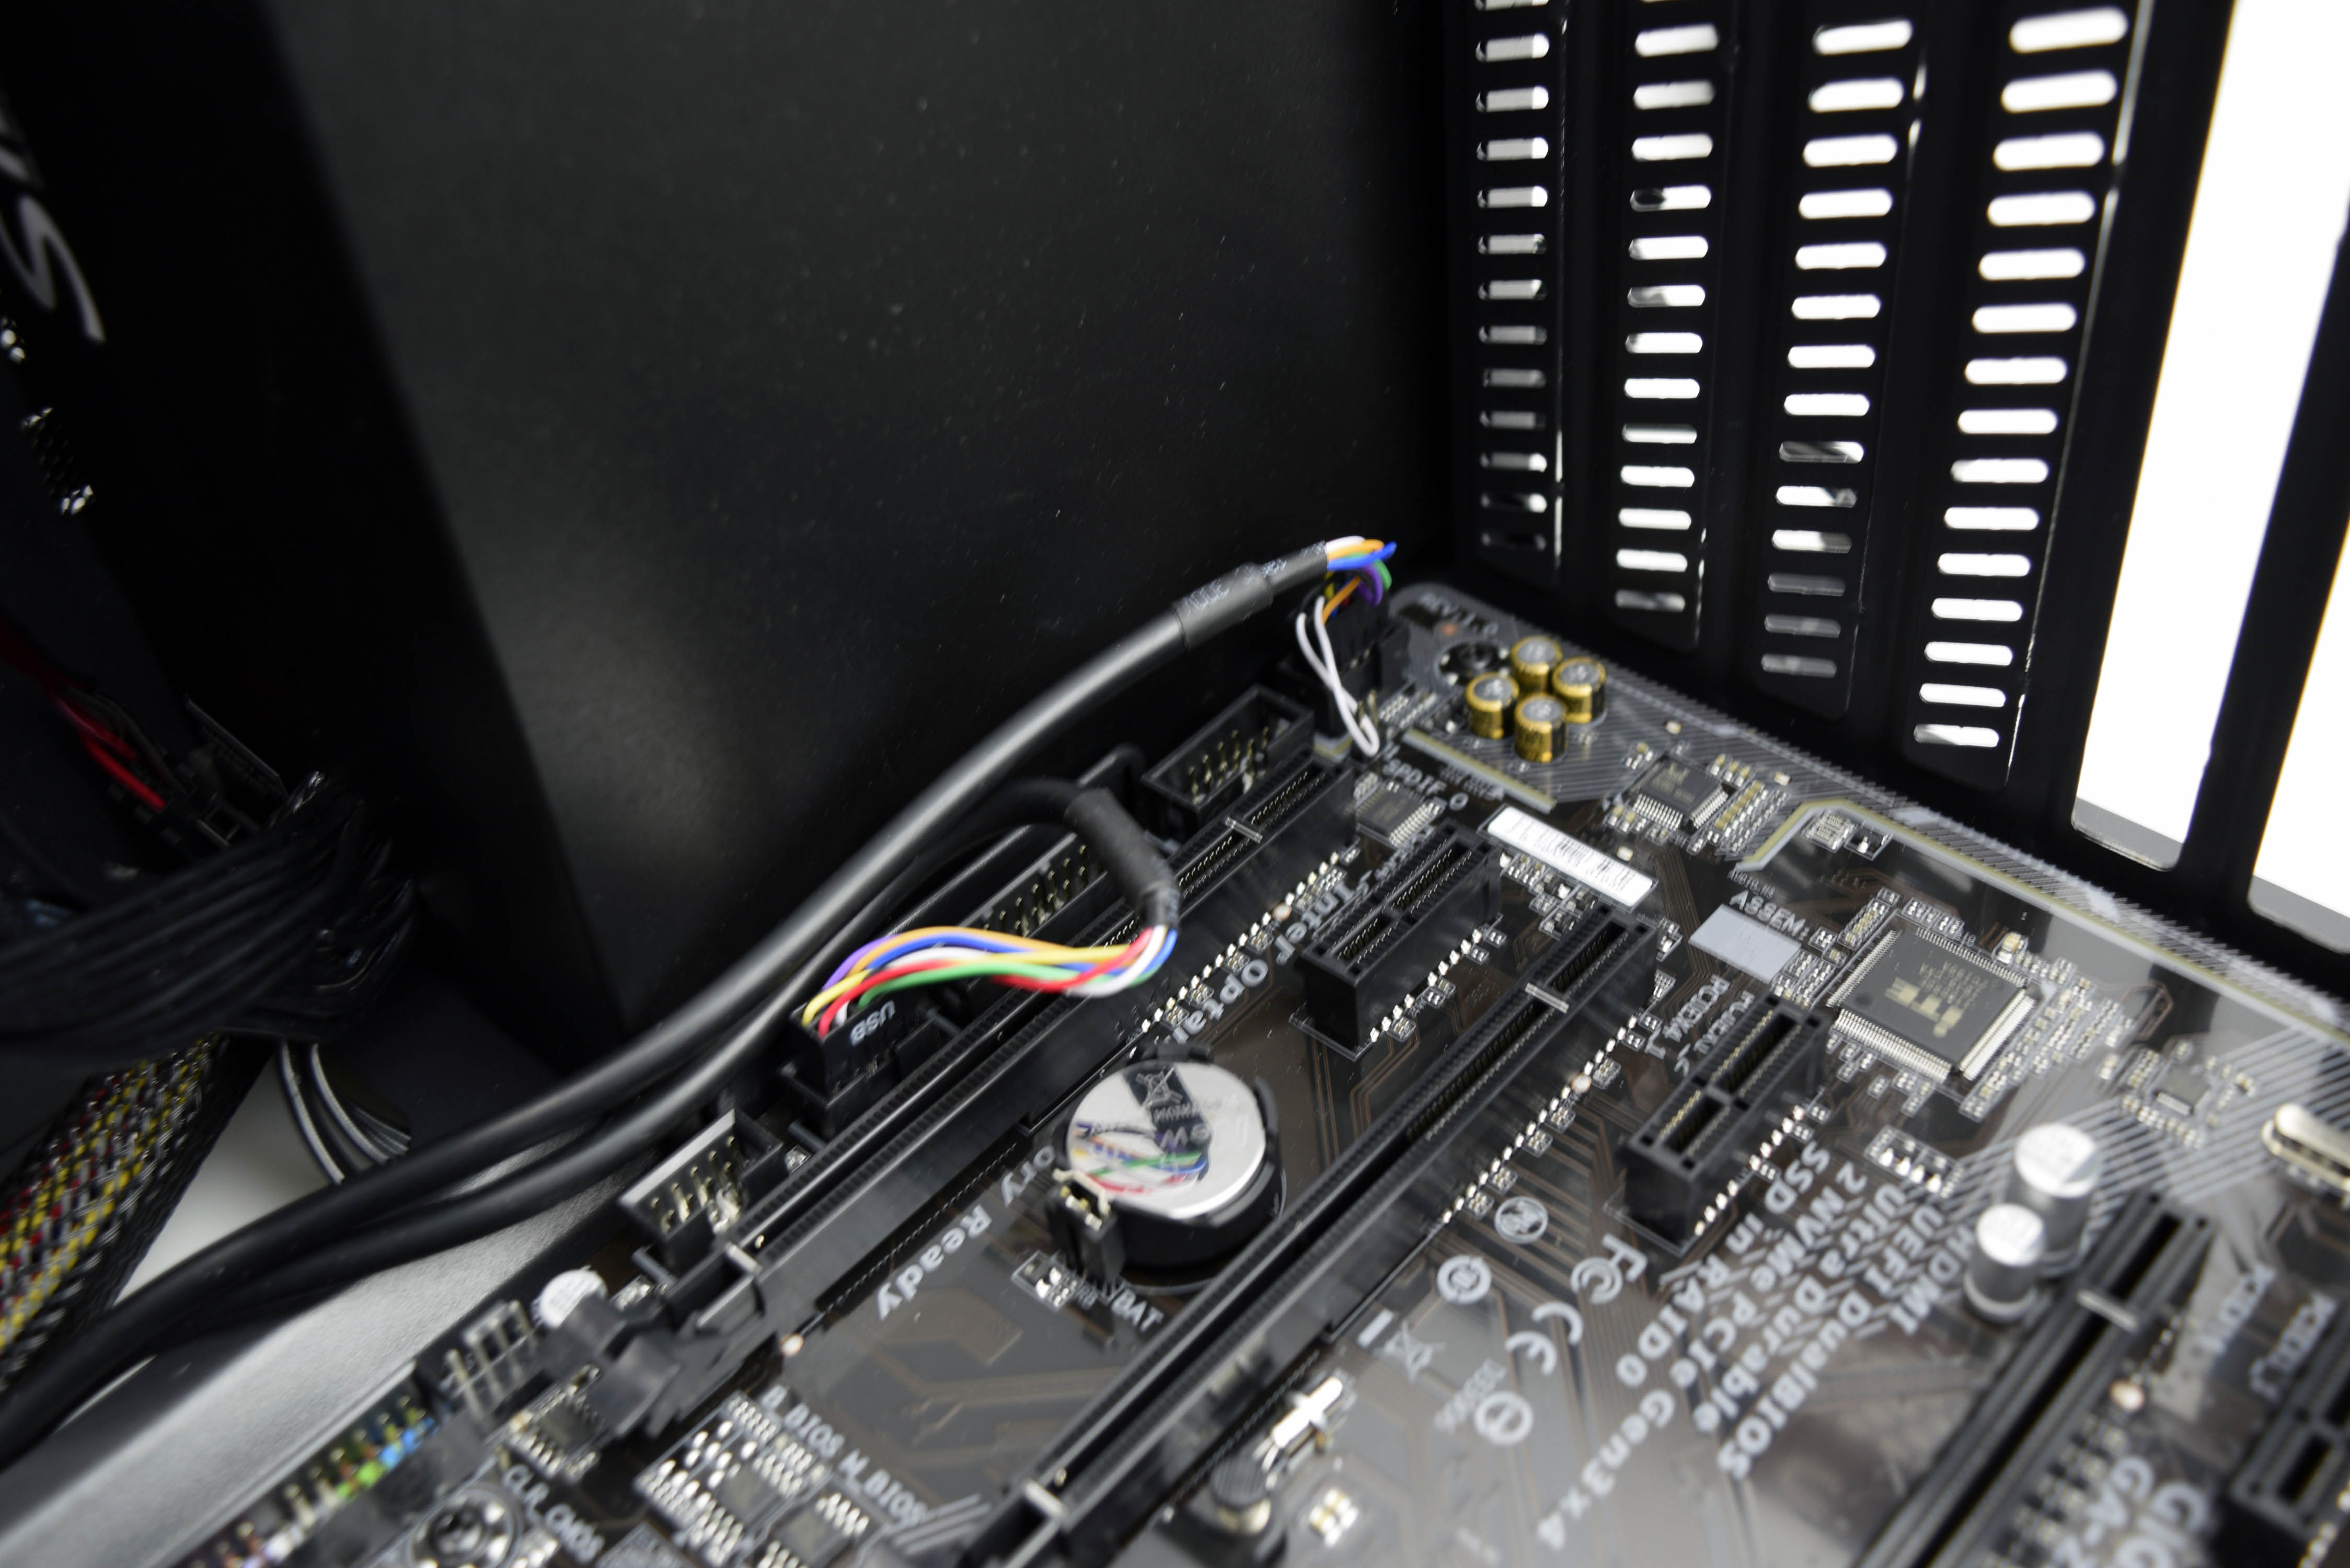
Secure the motherboard with the screws (you may need to just use the screwdriver head to tighten the top screws, there’s not much clearance) and plug in the ATX (picture 5 above) and CPU power cables (picture 6), in addition to the tucked away USB 3.0 plug. You can stuff the access wire of the USB 3.0 cable into the 5.25” bay, along with any ATX power cable slack. Go back to the 7-pin front panel audio cable and plug it into the motherboard, followed by the USB 2.0 plug and the G-Connect plug (with all the front-panel I/O cables attached—ninth picture above).
The Hard Drive
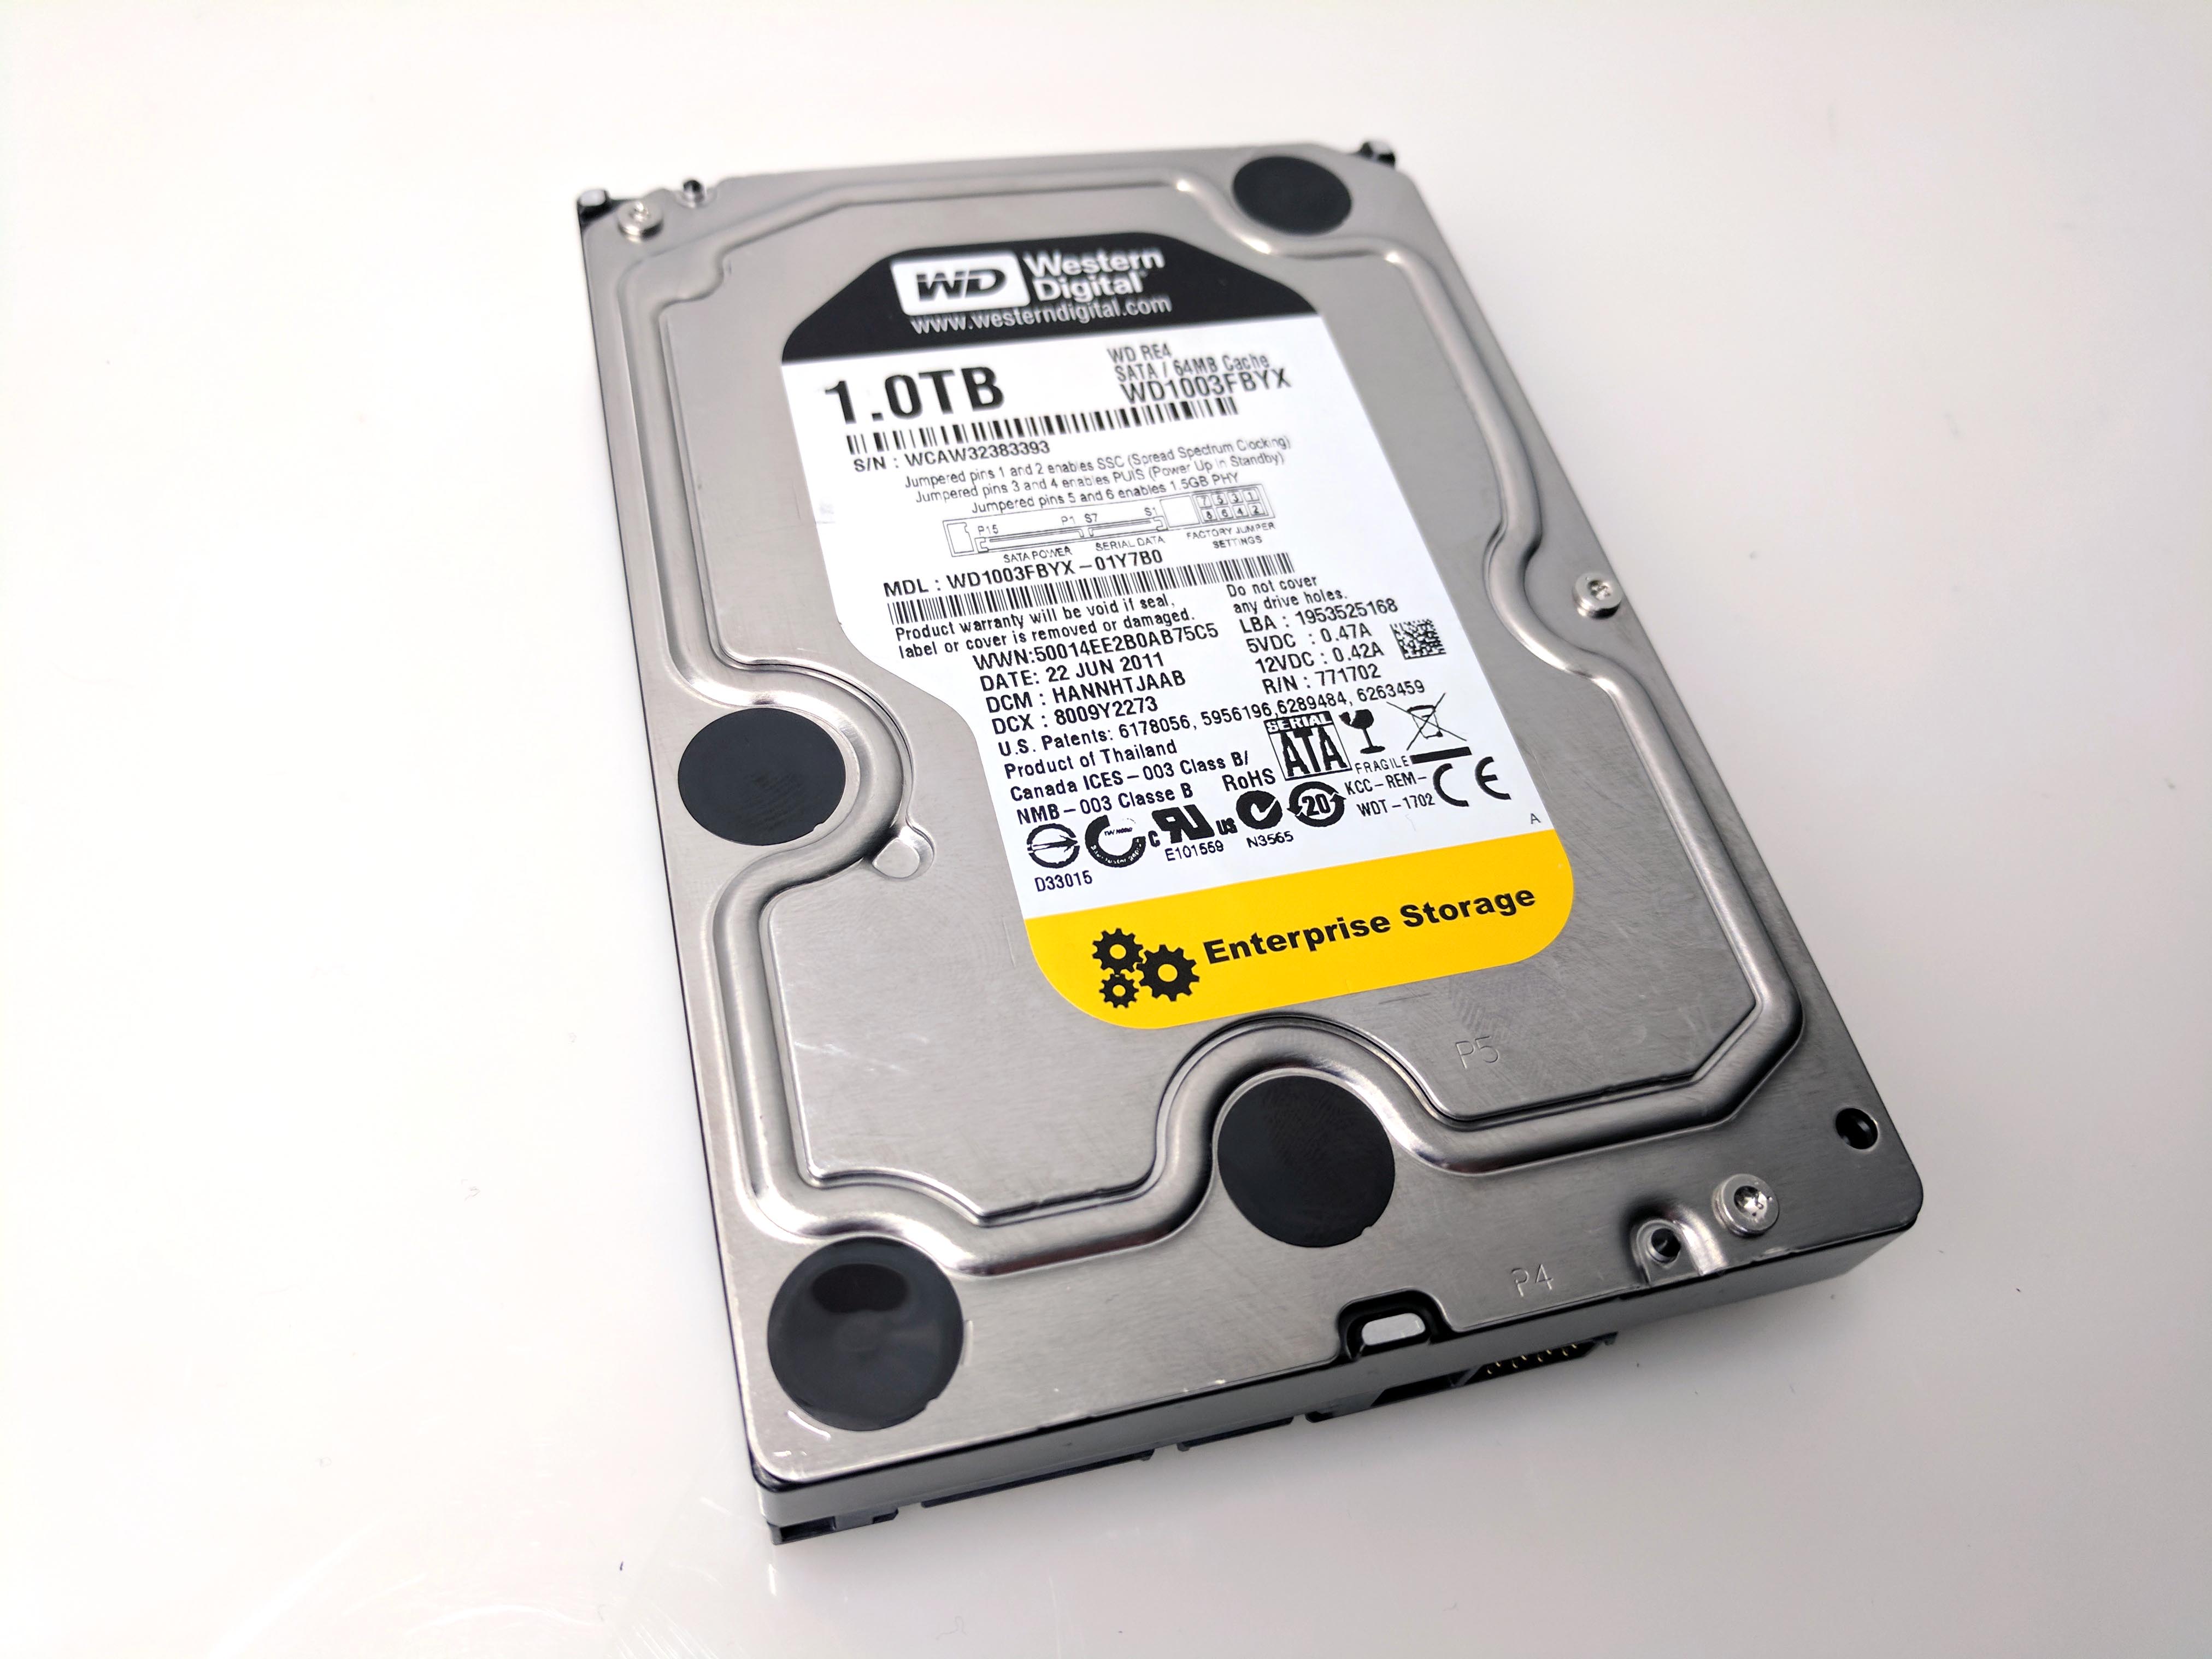
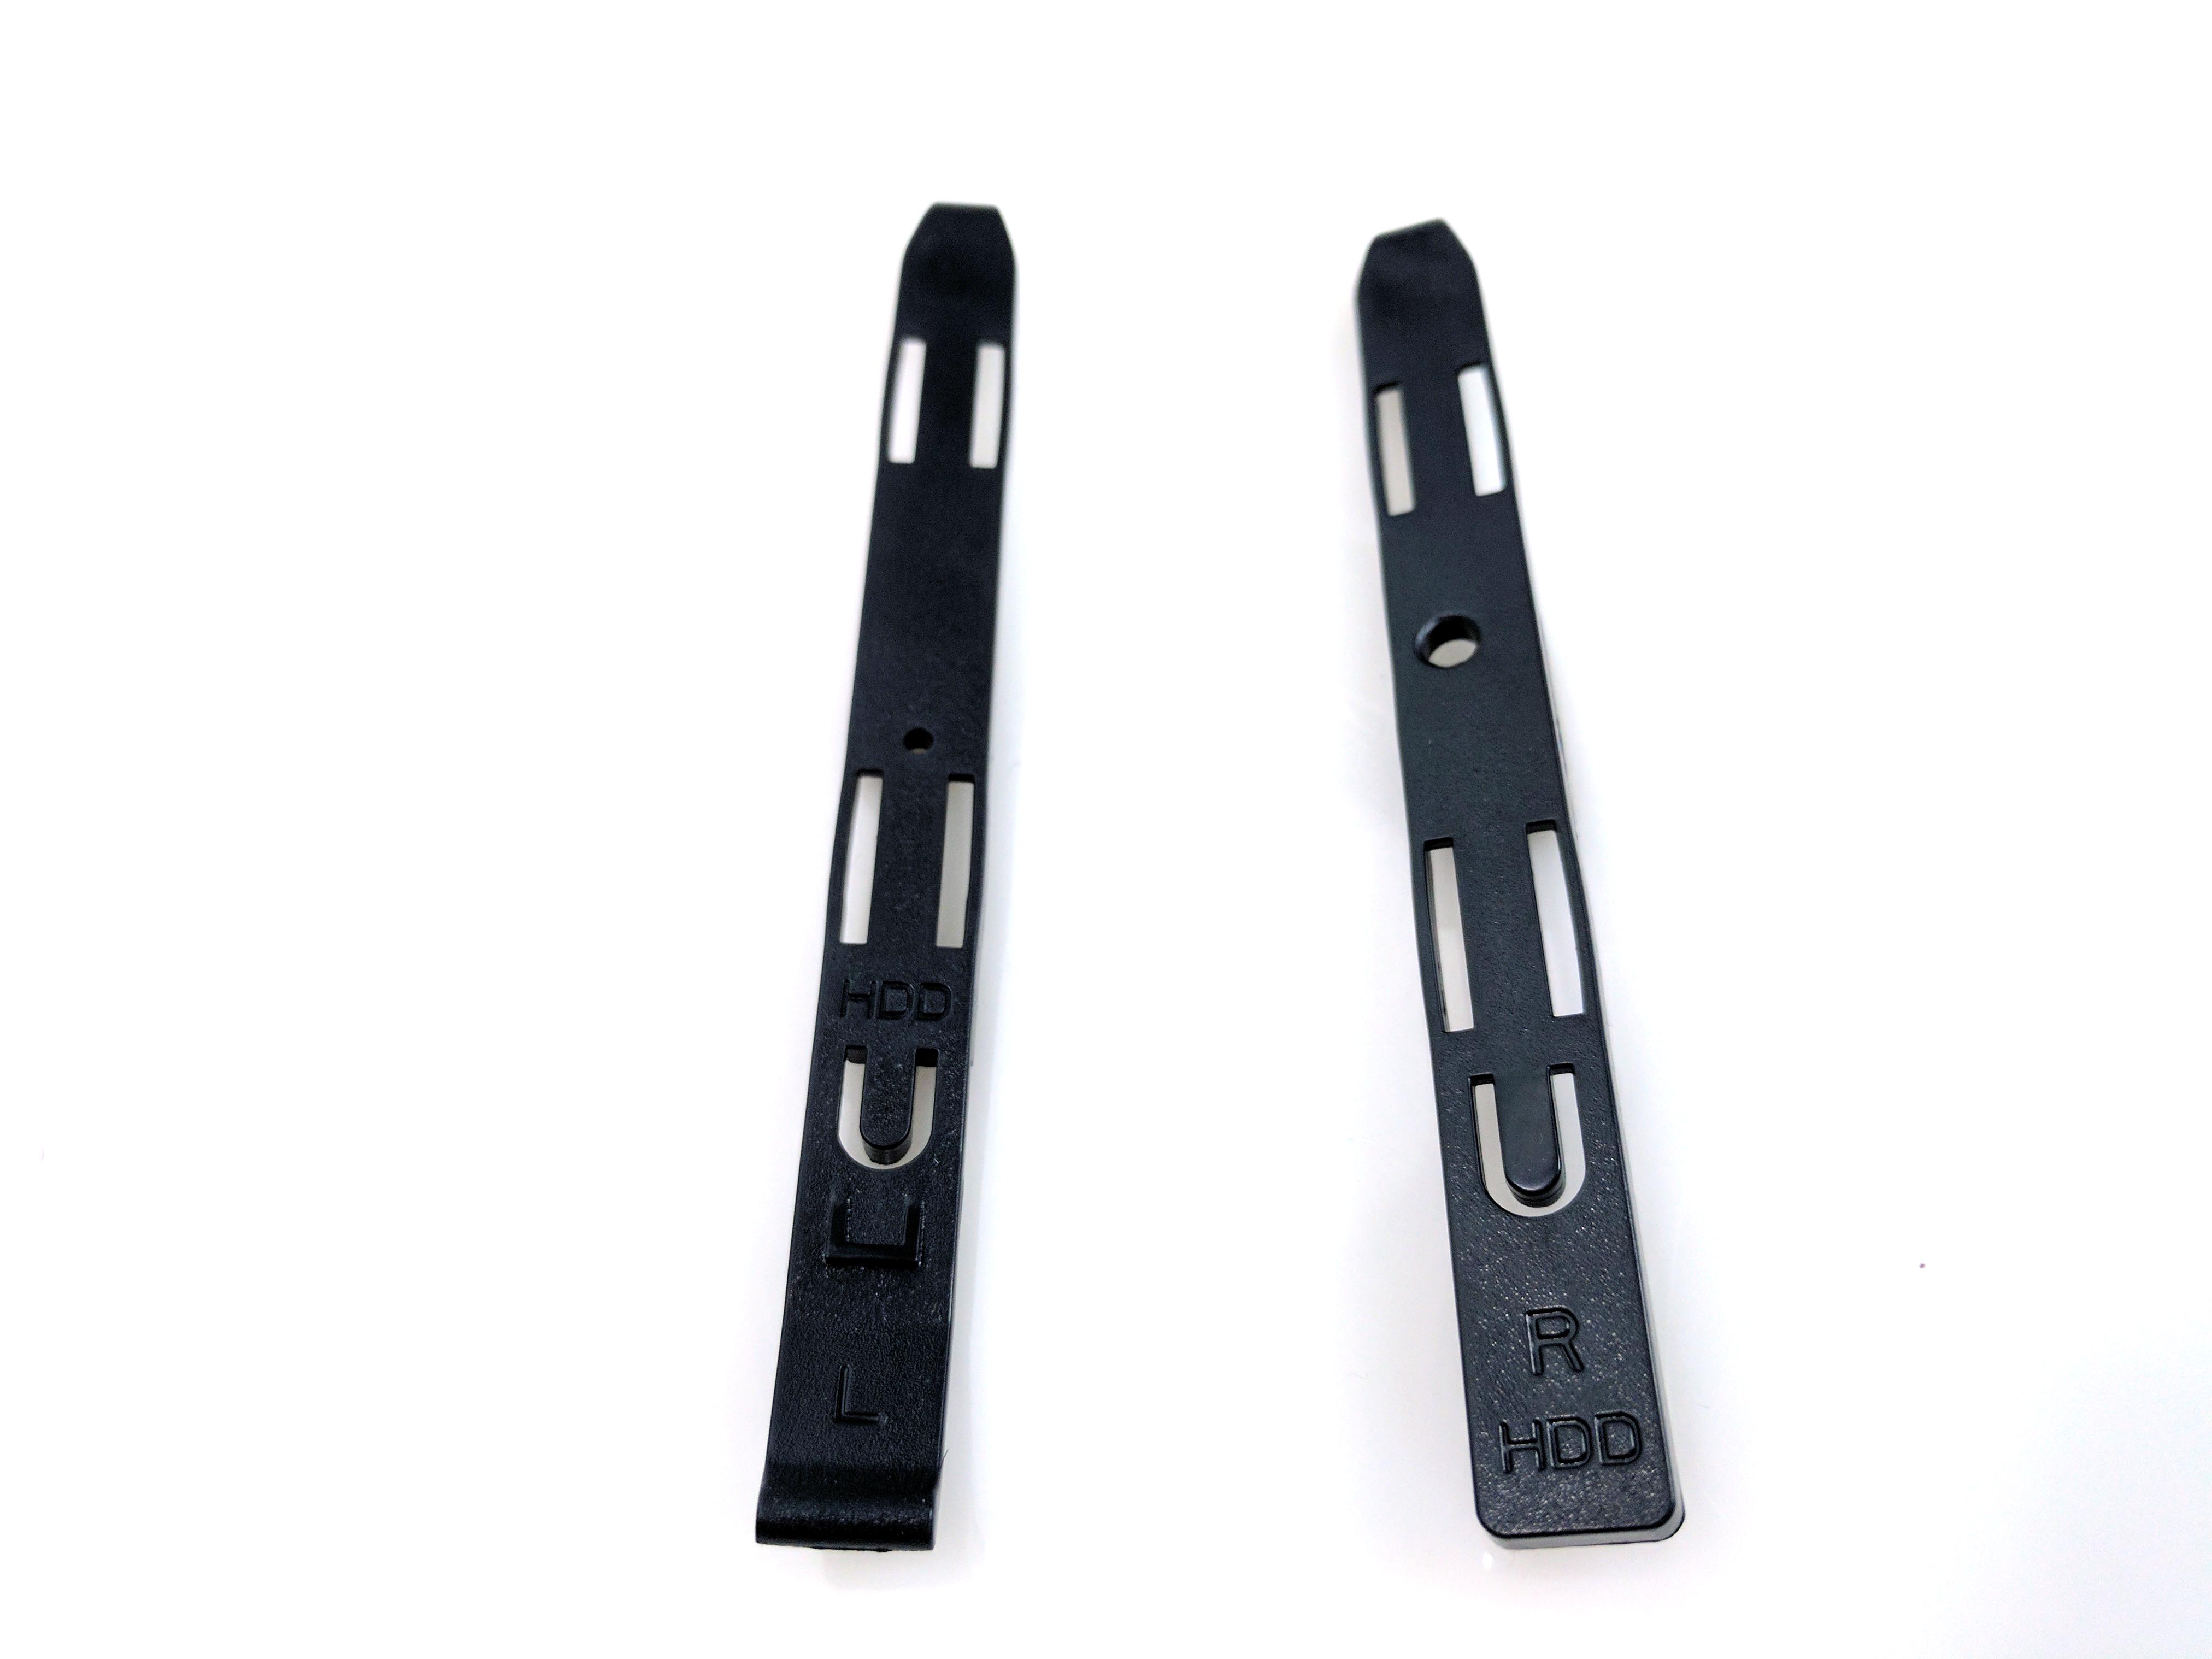
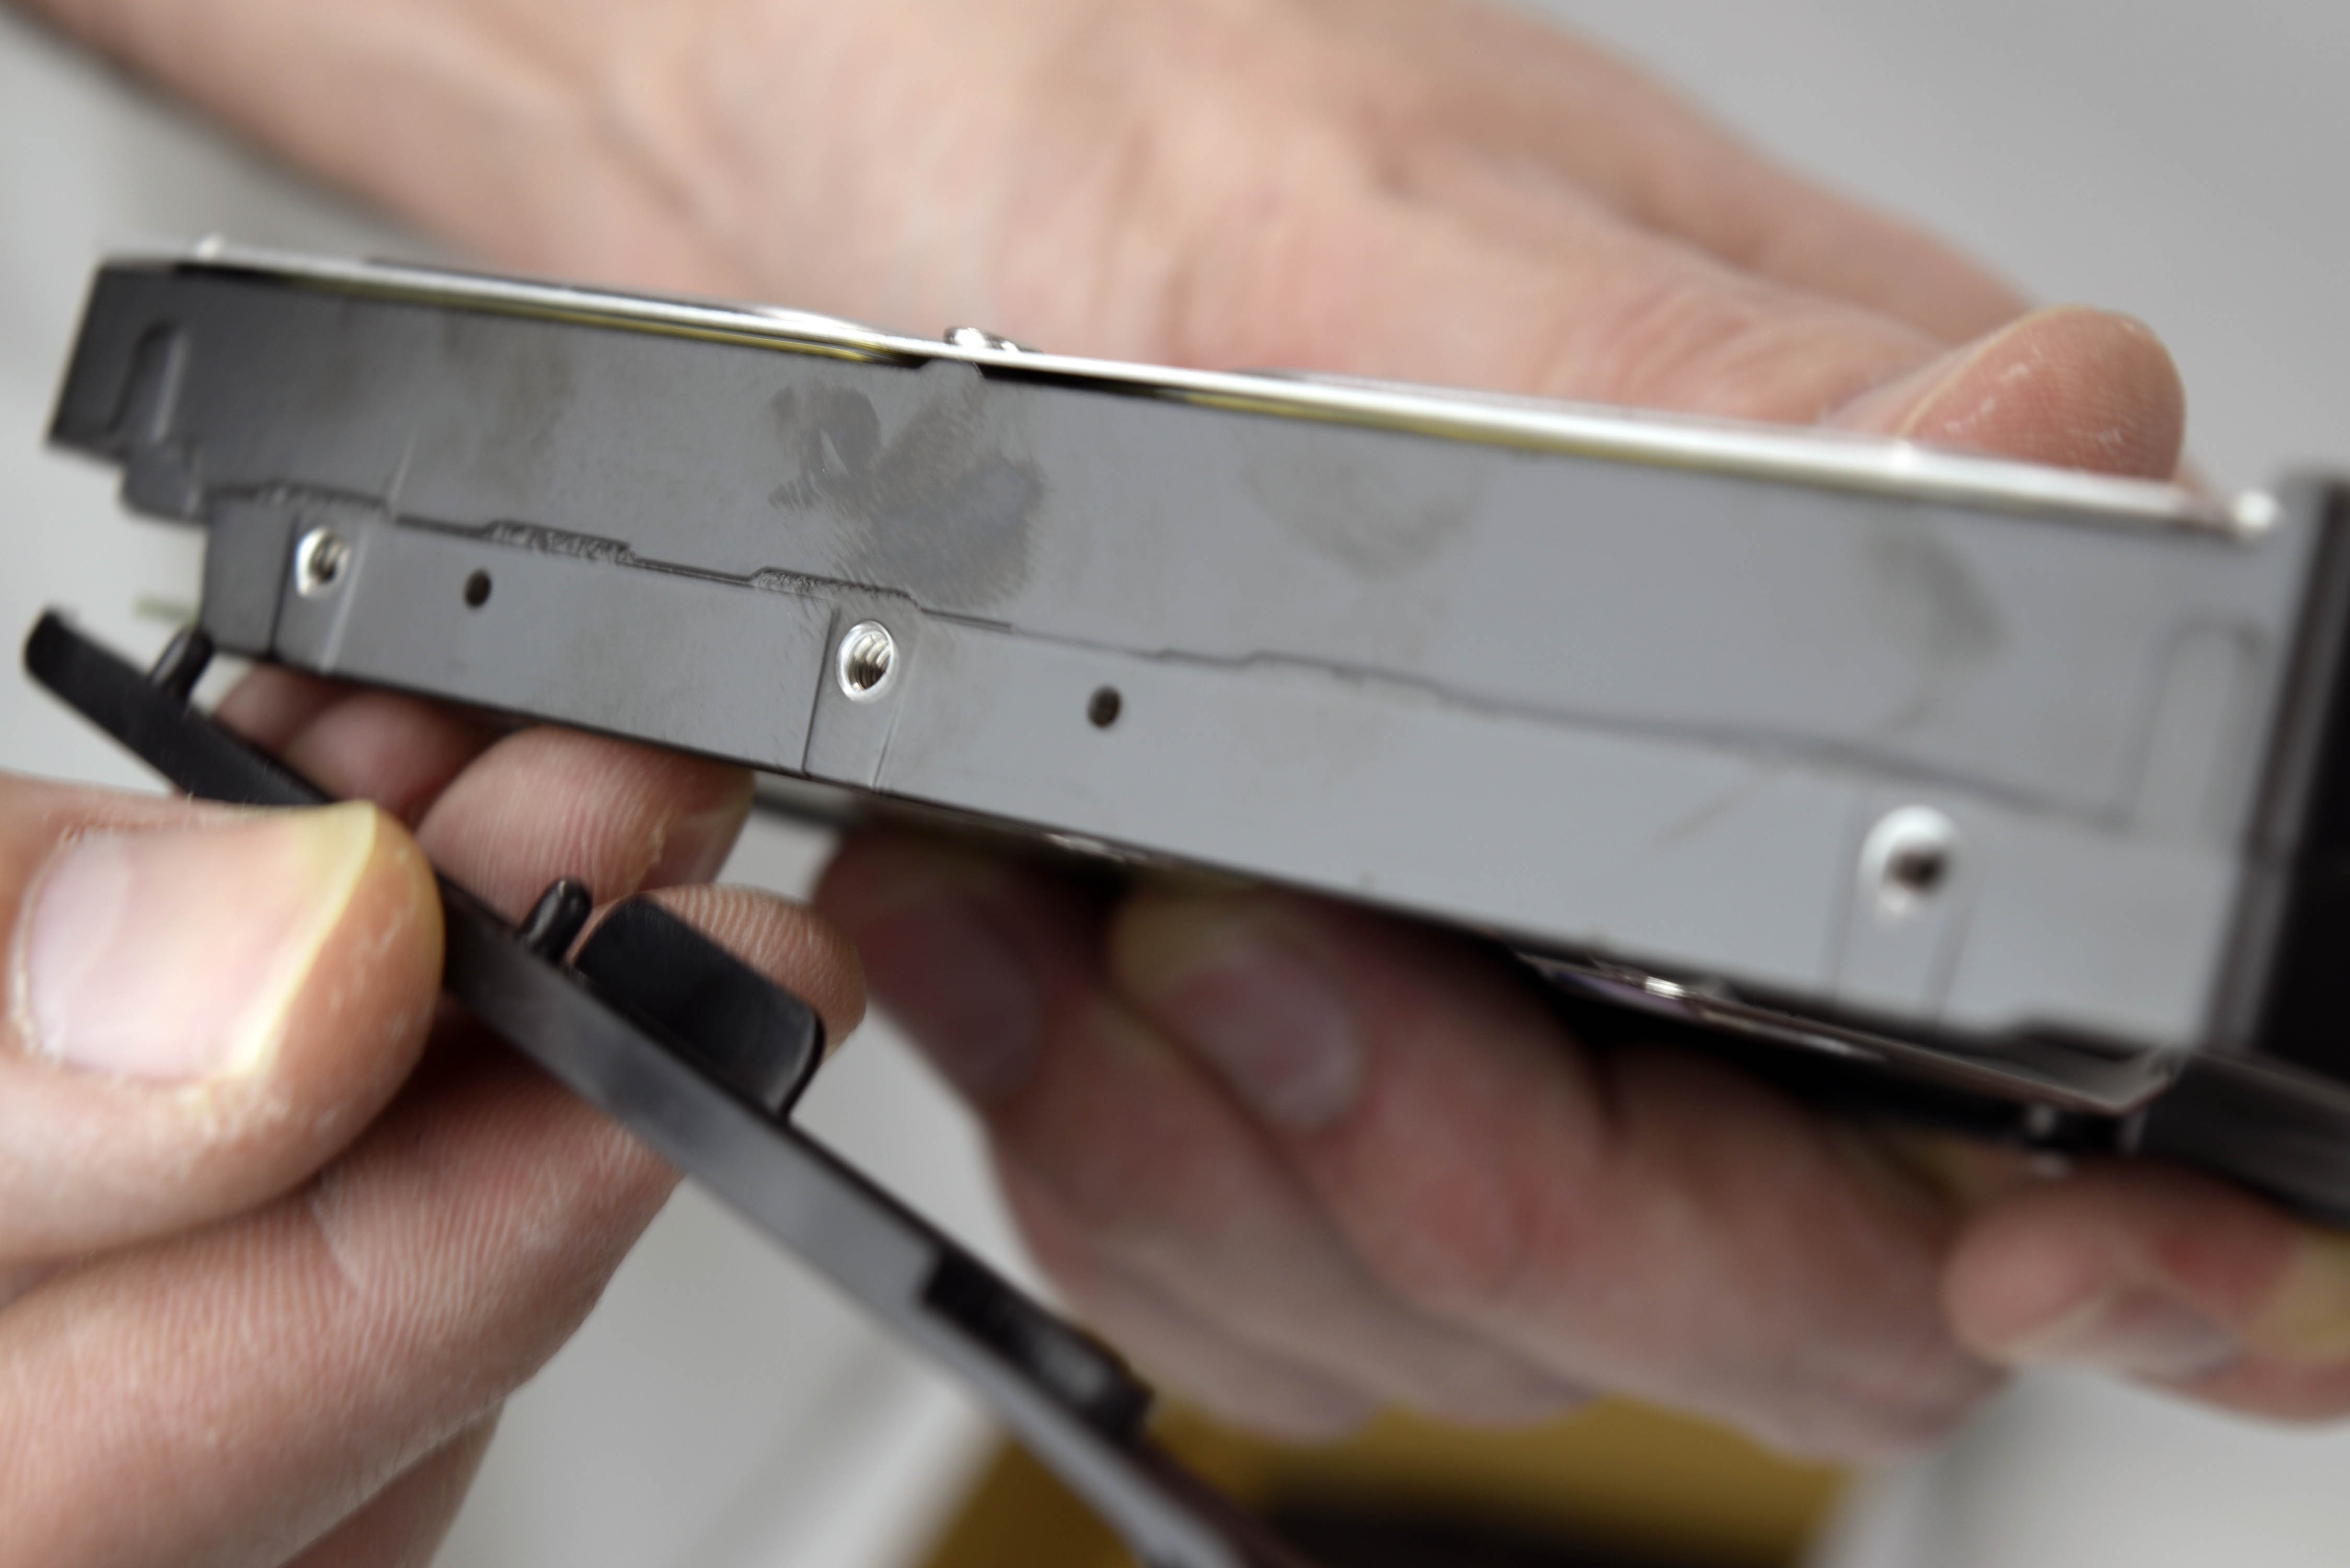
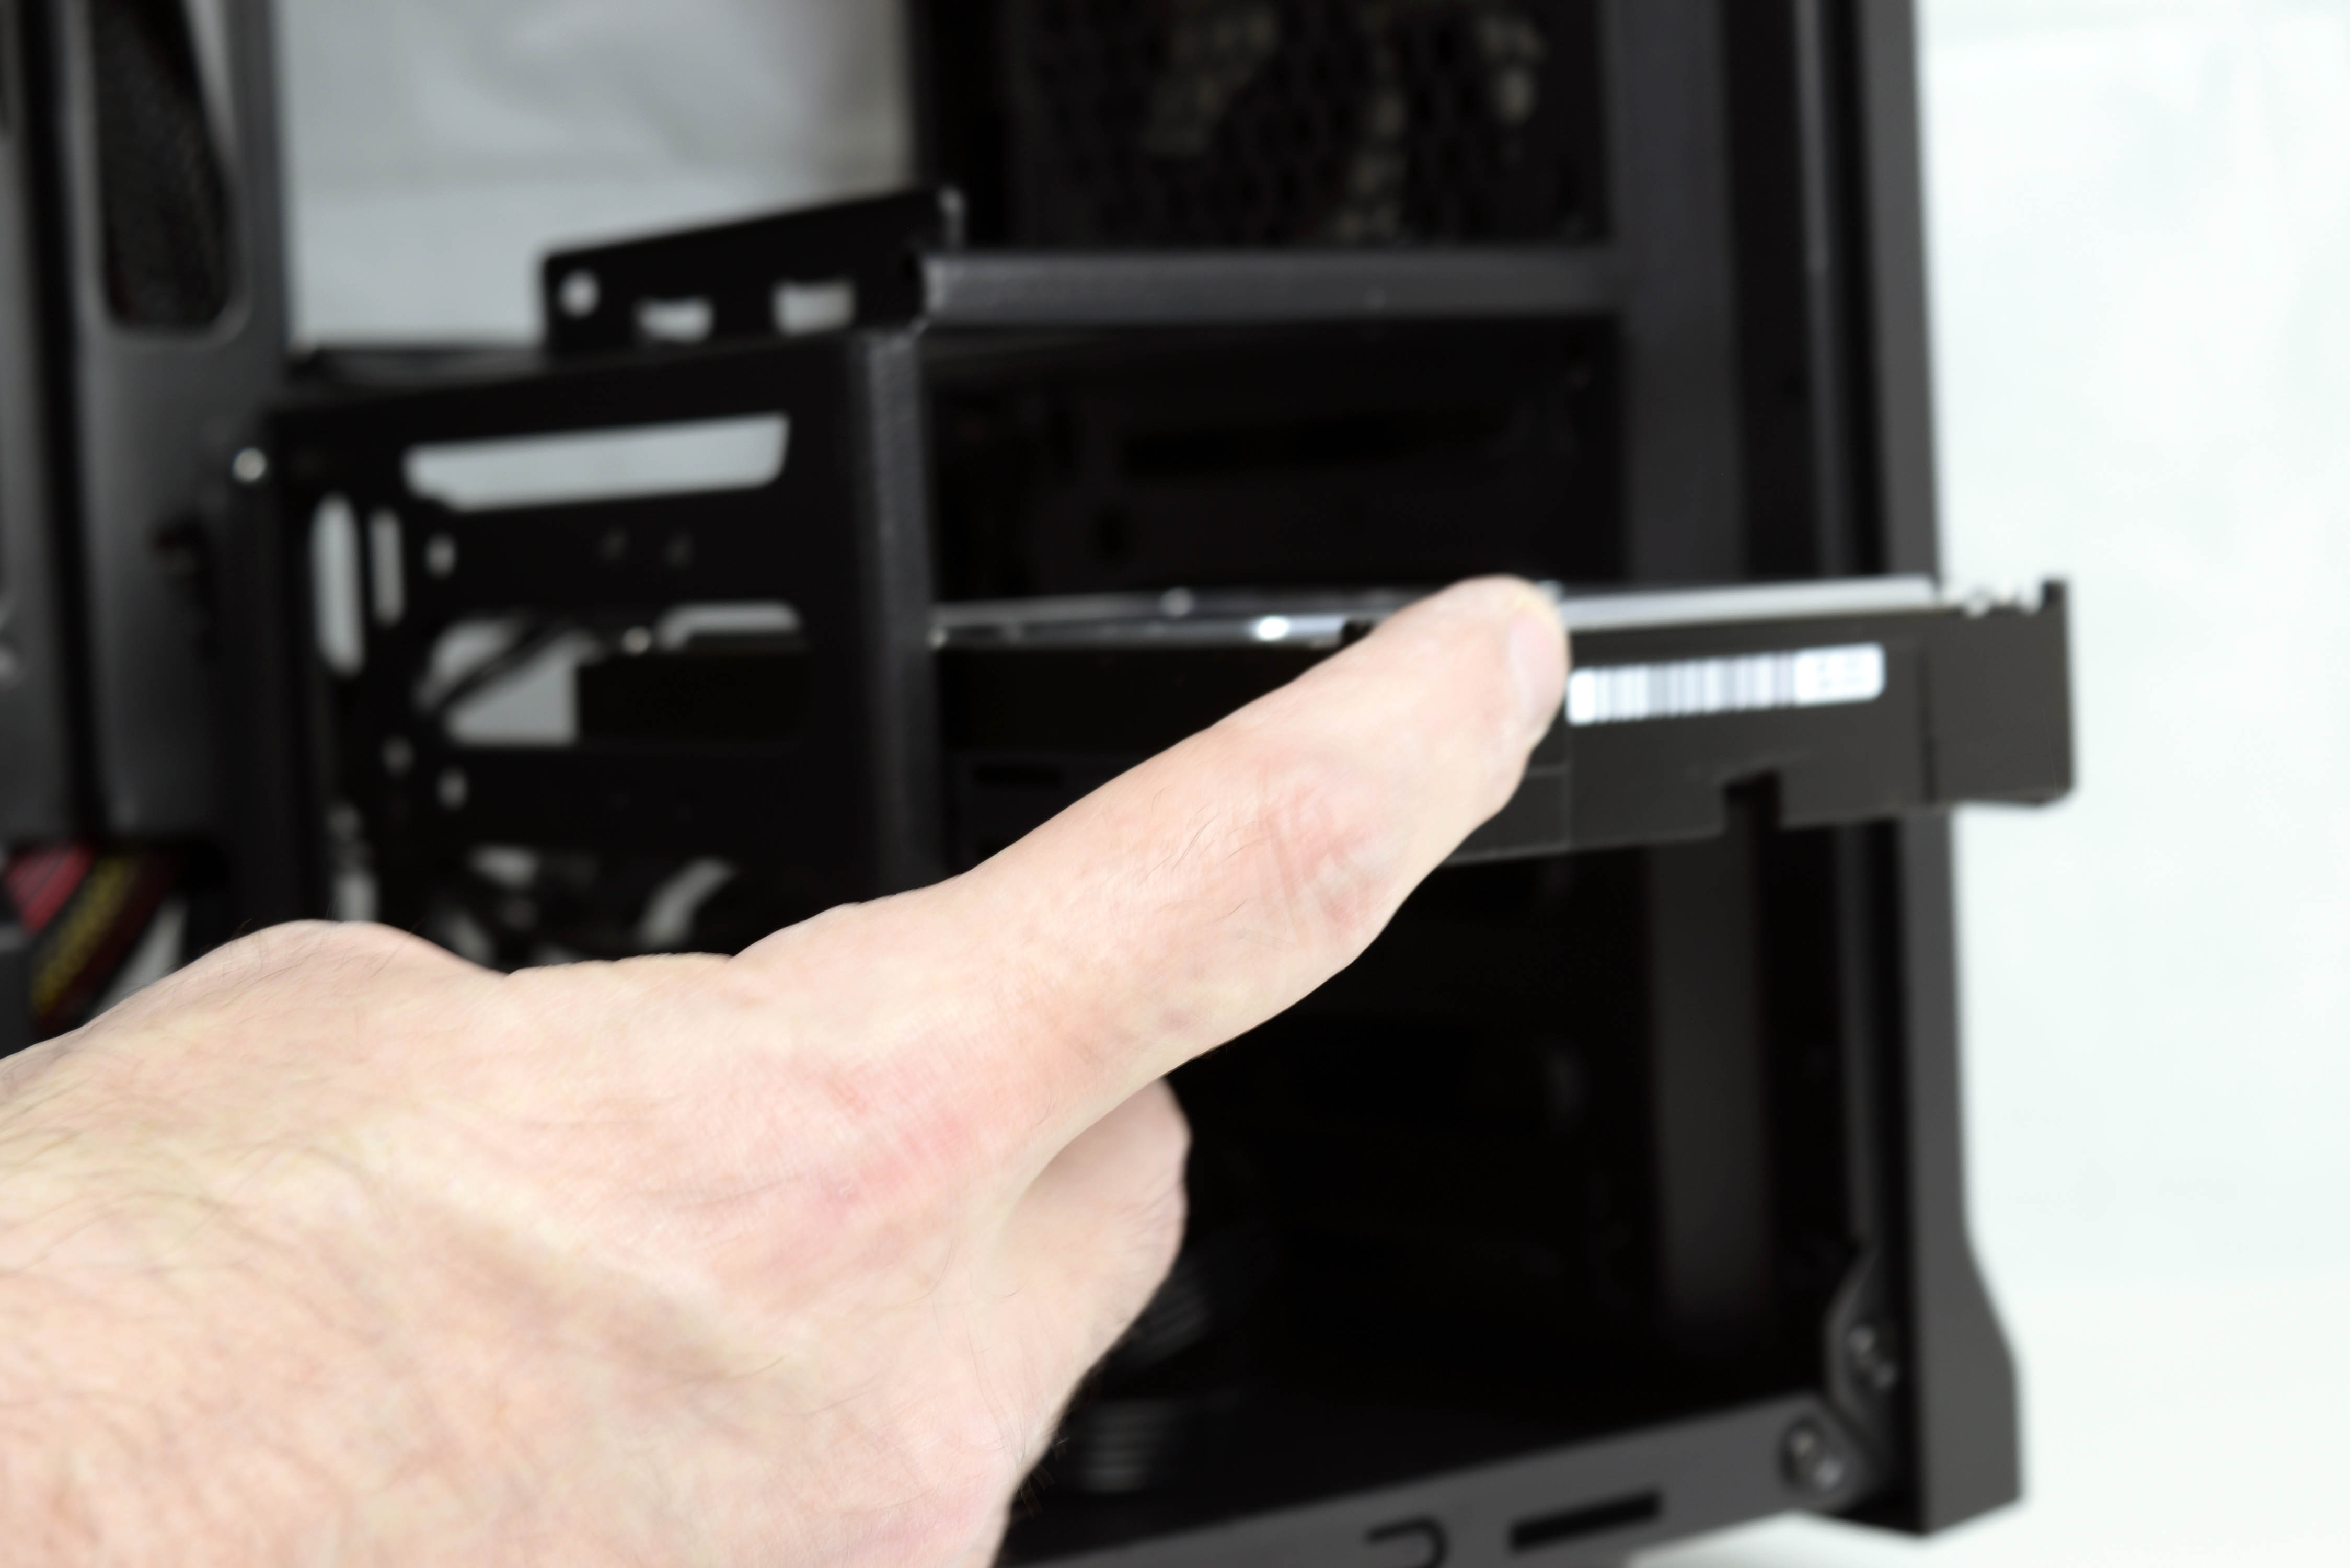
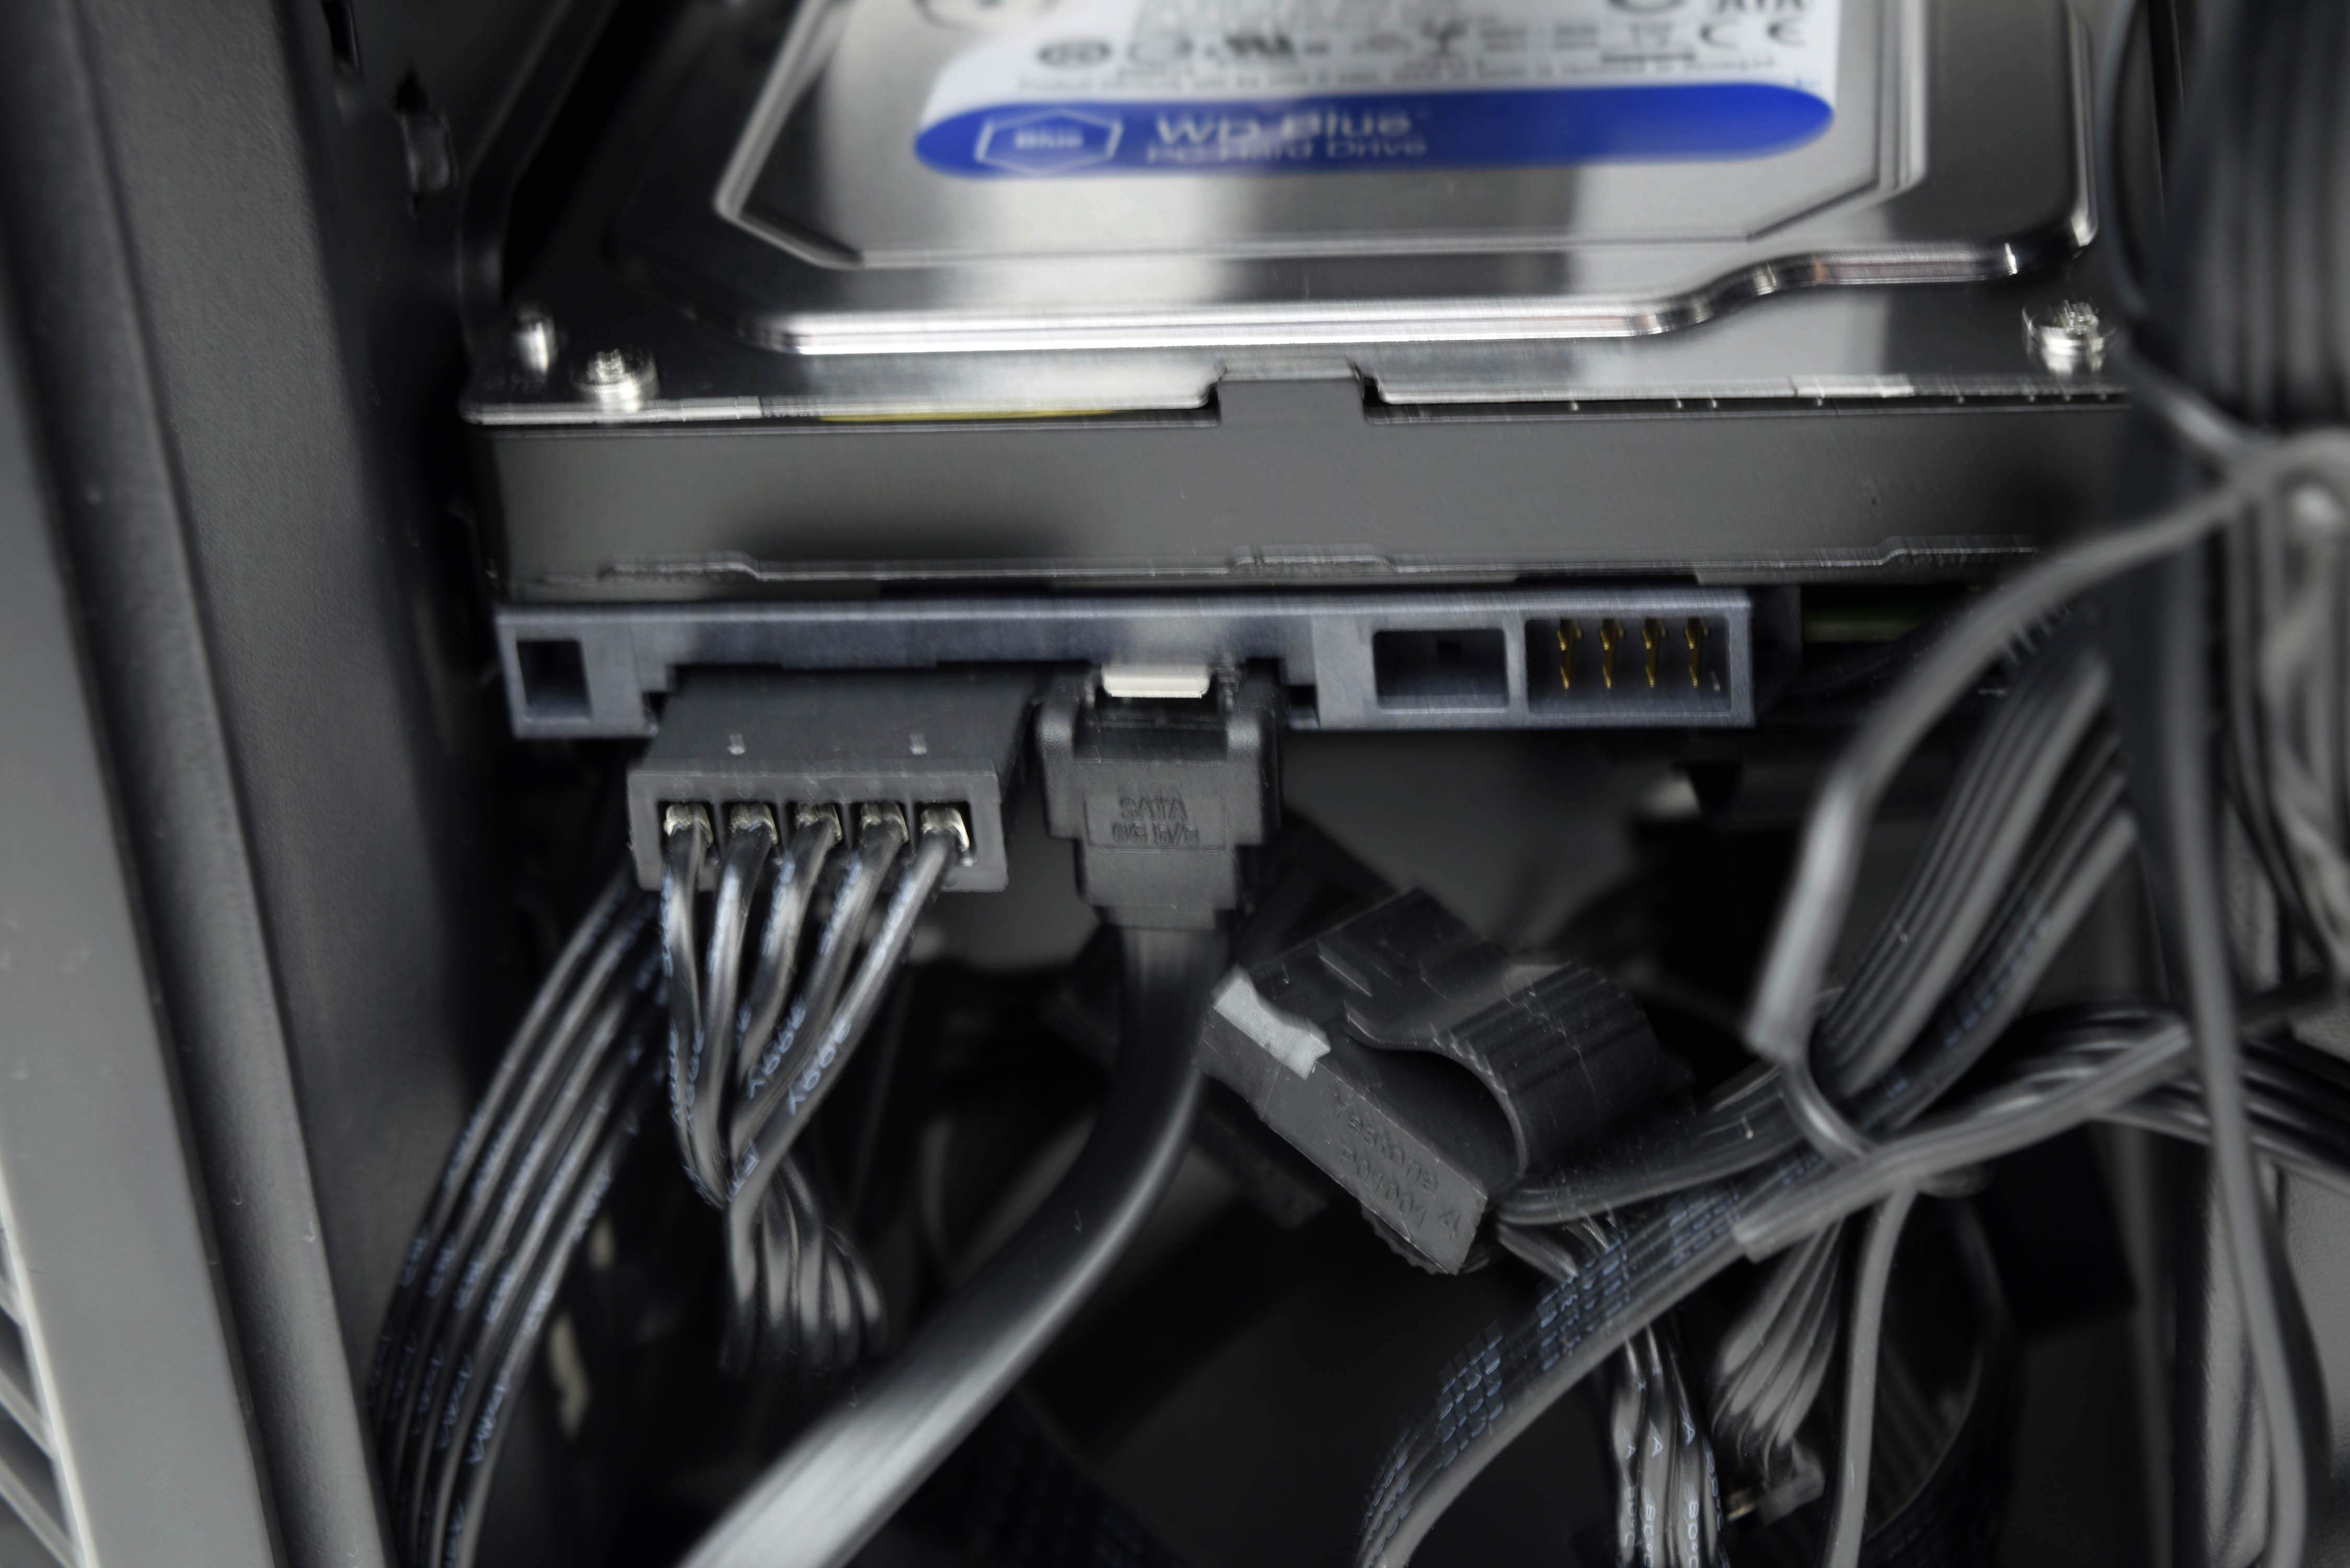
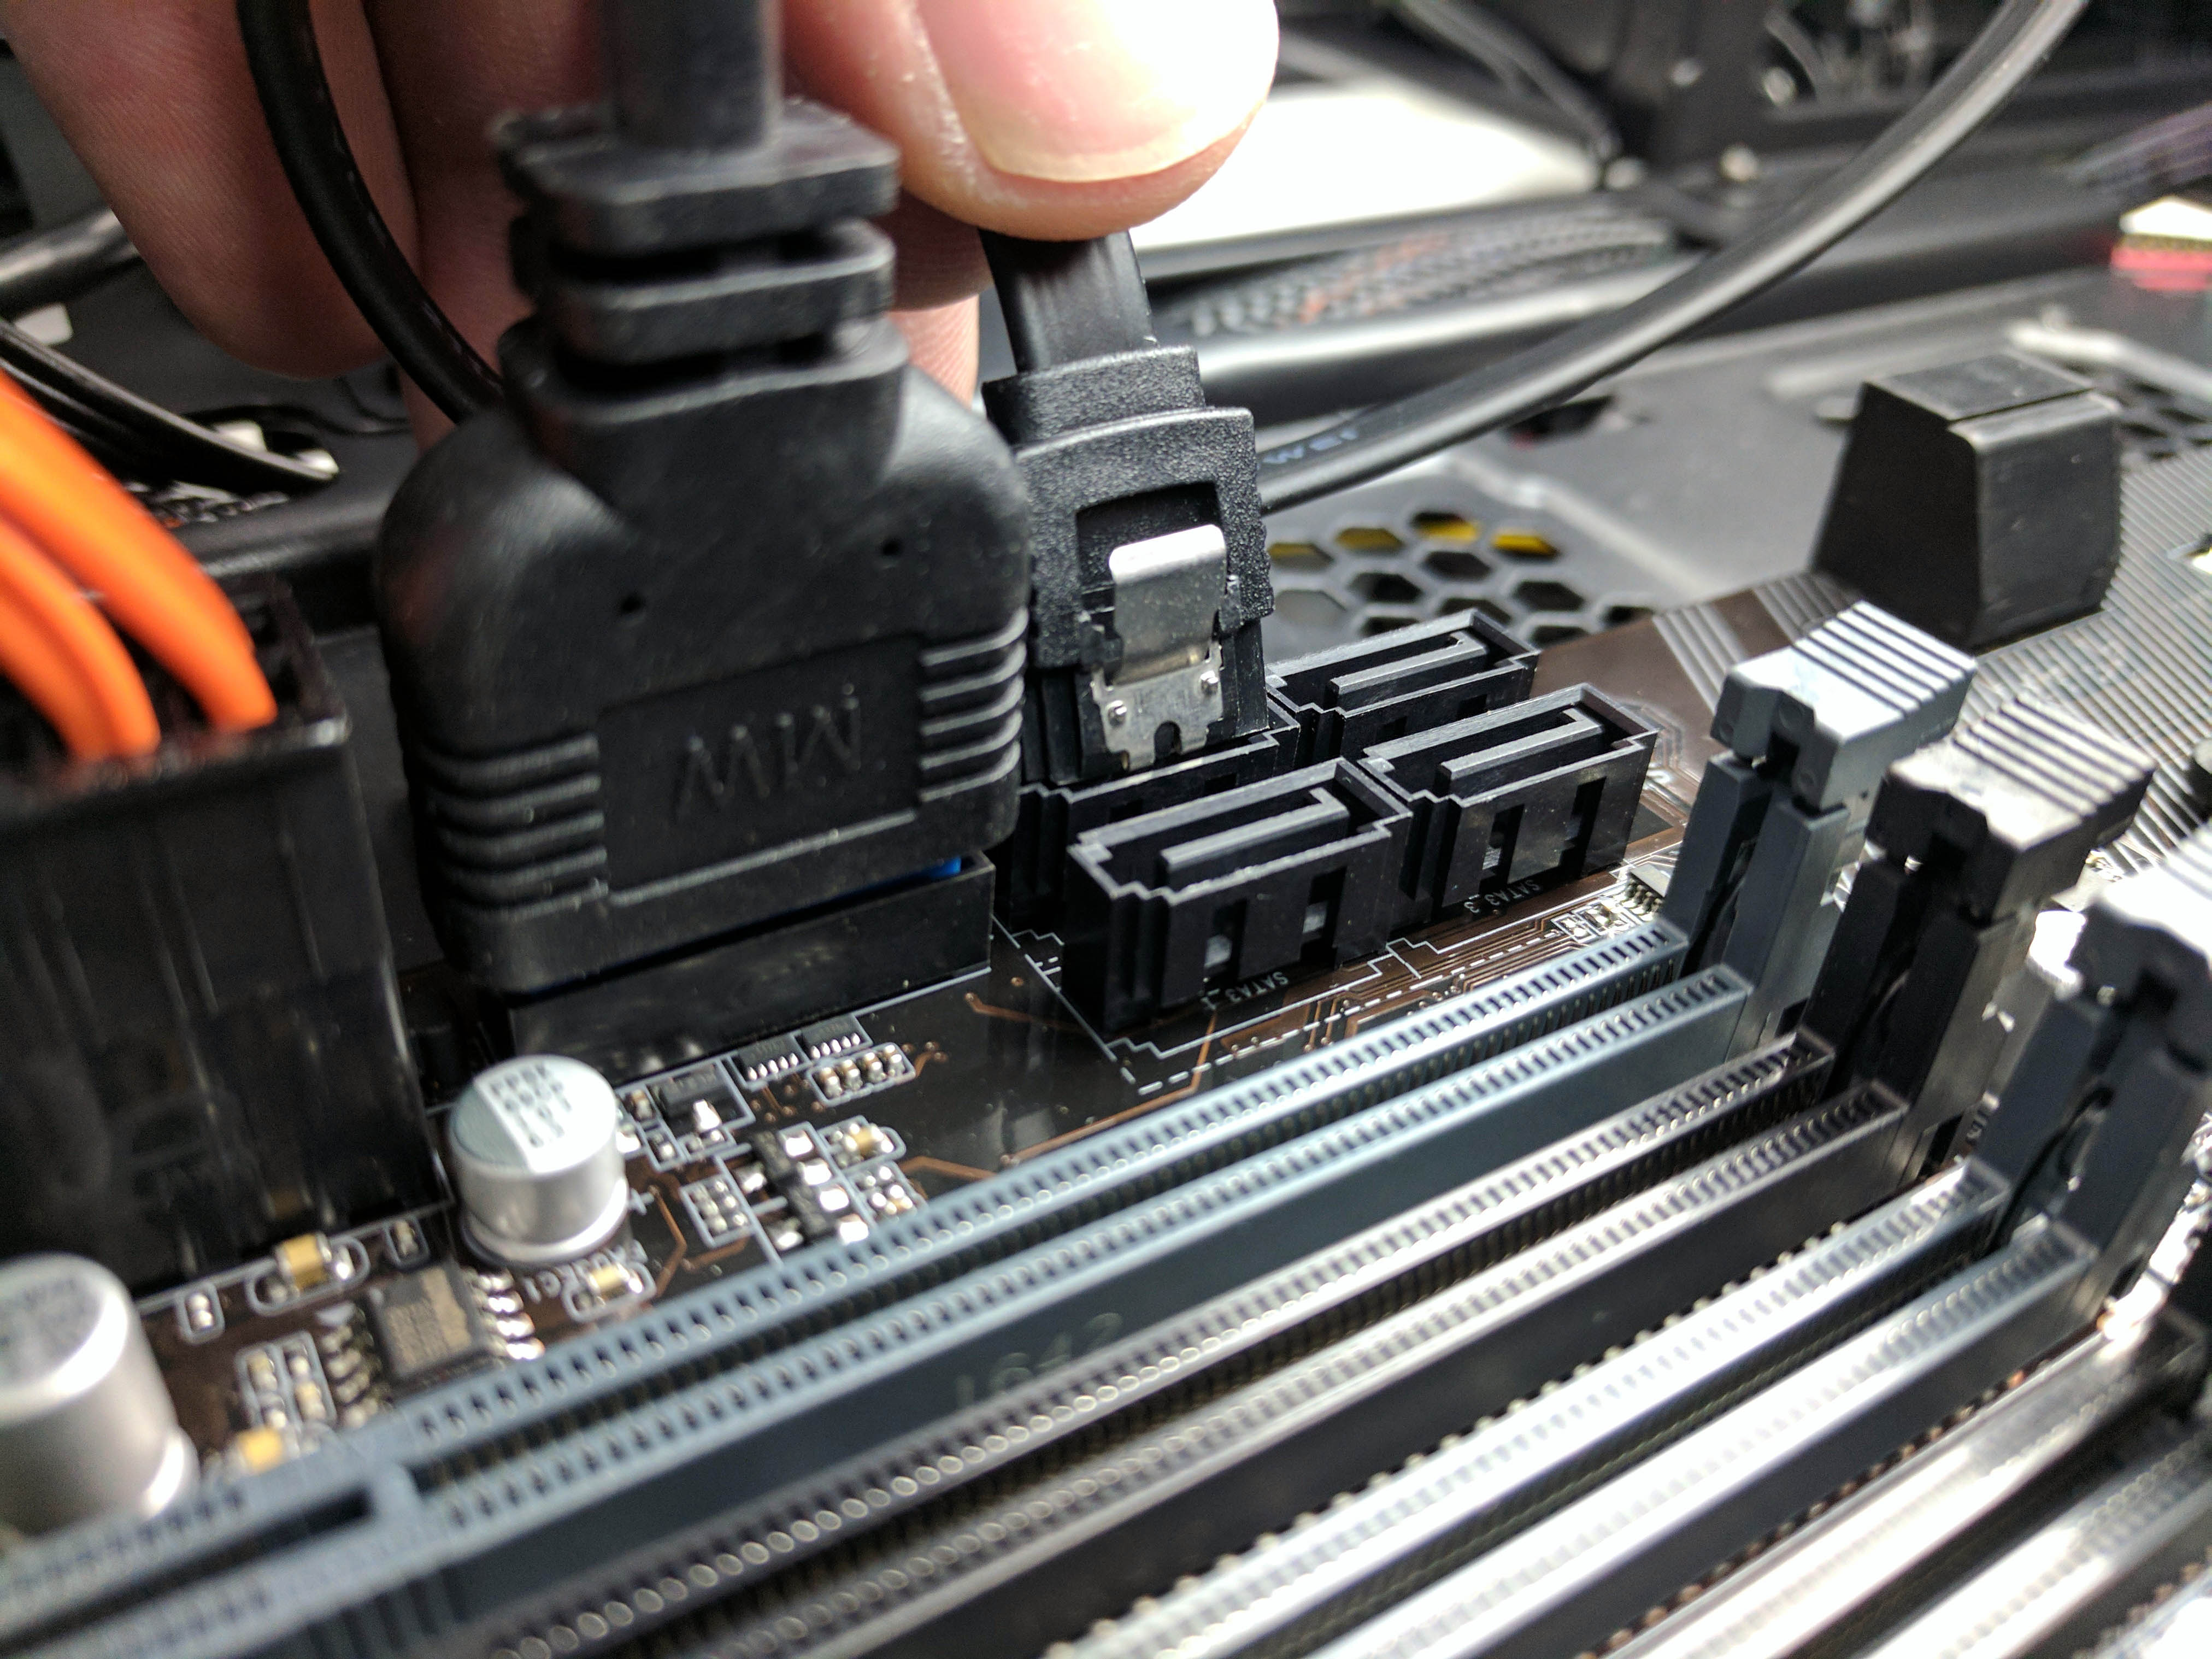
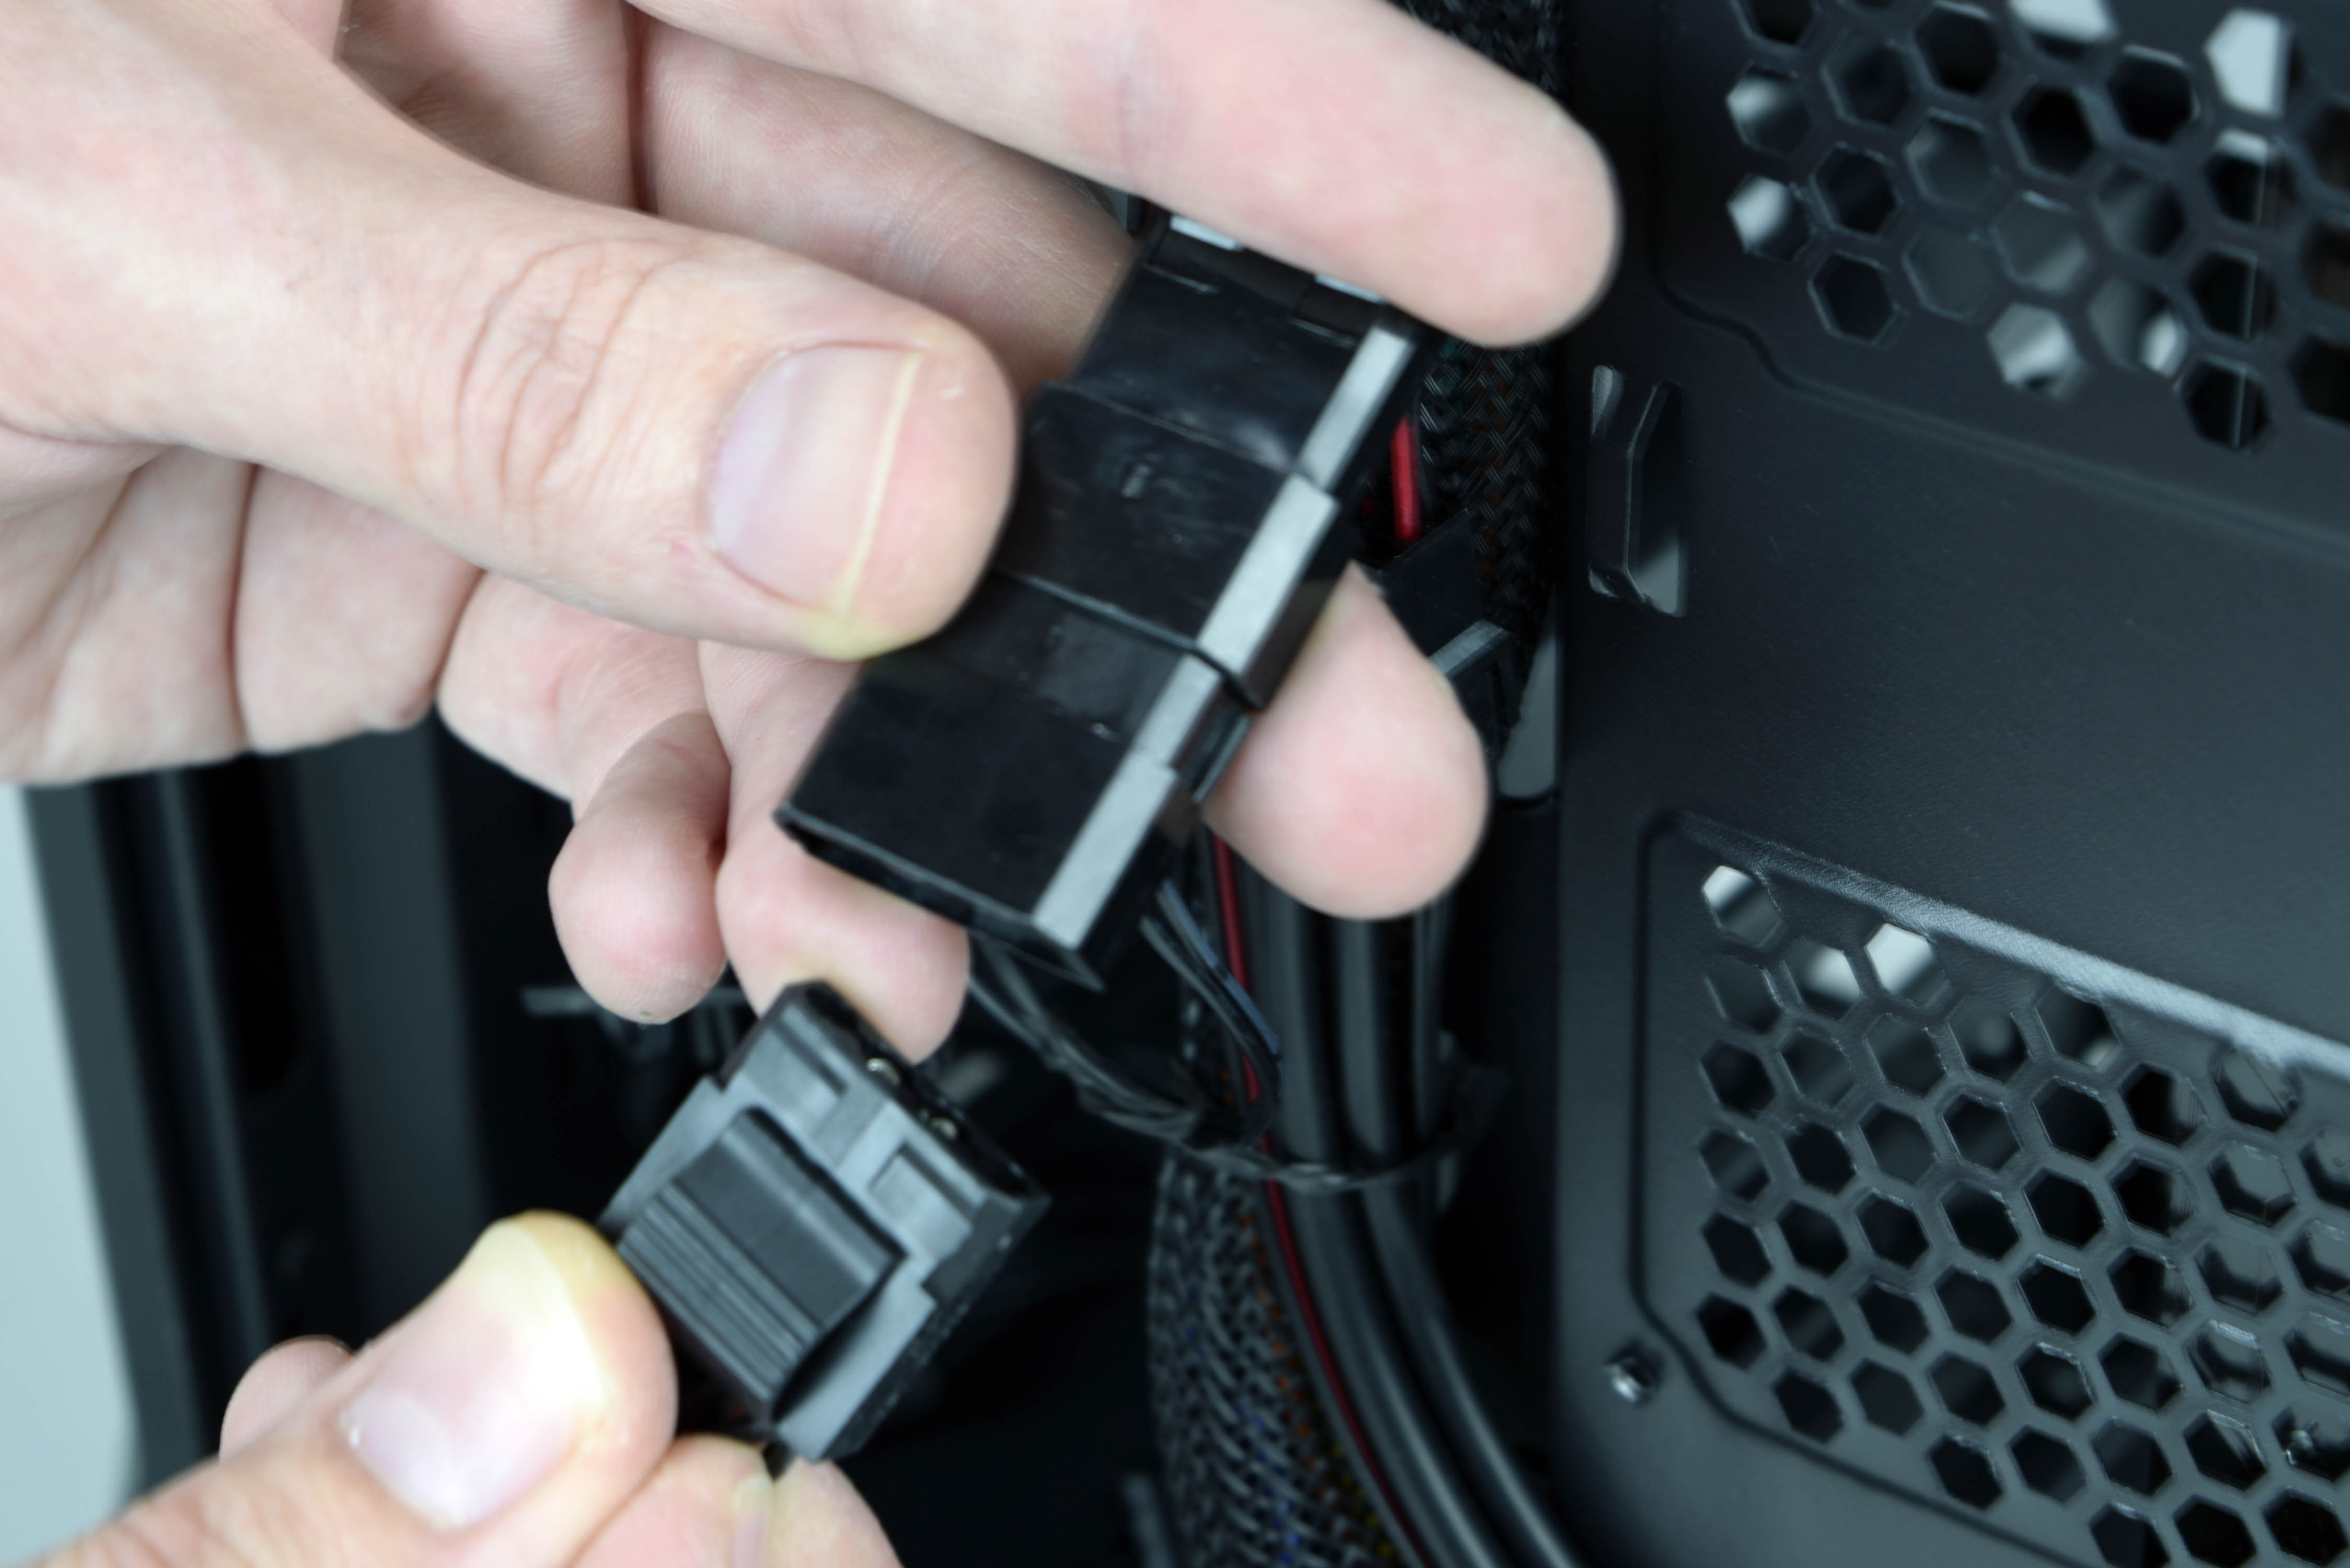
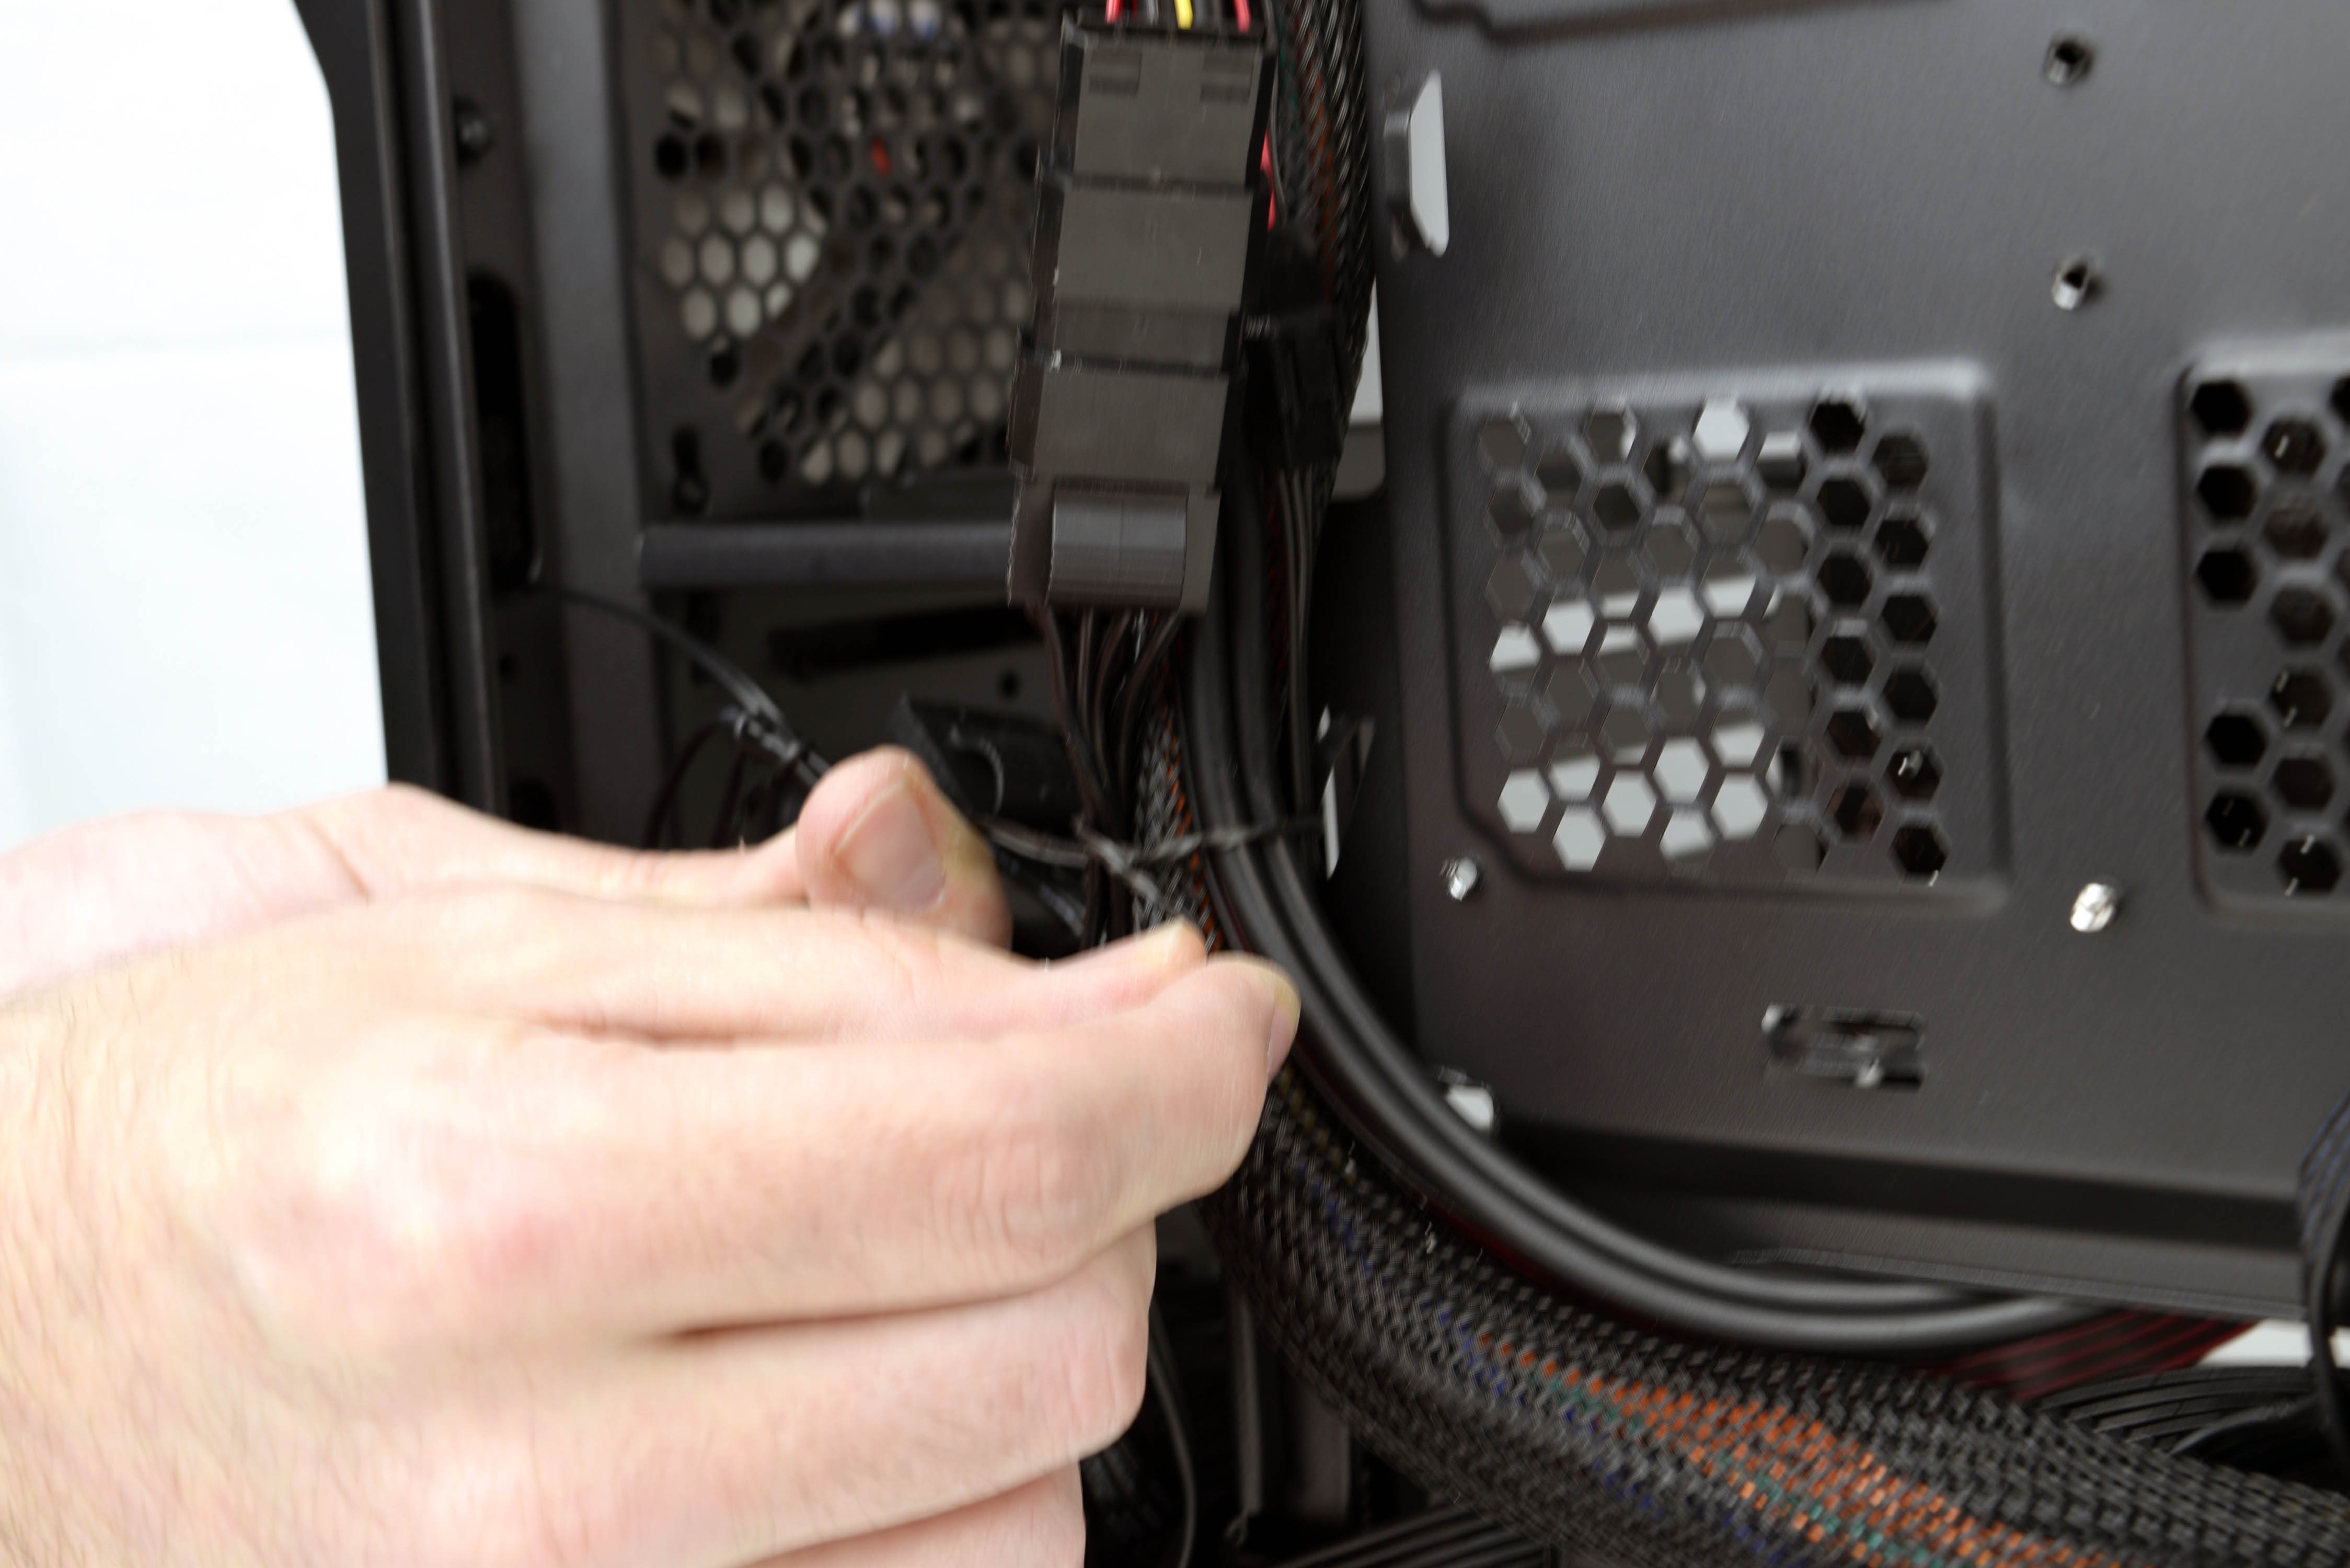
The case comes with rails that can be snapped onto any 3.5” drive so that it can be loaded into the lower drive bay. Each rail is labeled left and right. Simply line up the posts to the side holes on the 1TB HDD and apply pressure (third picture above). Make sure you have the rail with the release on the left side of the drive (with the connectors facing the back of the case). Slide it into the bay.
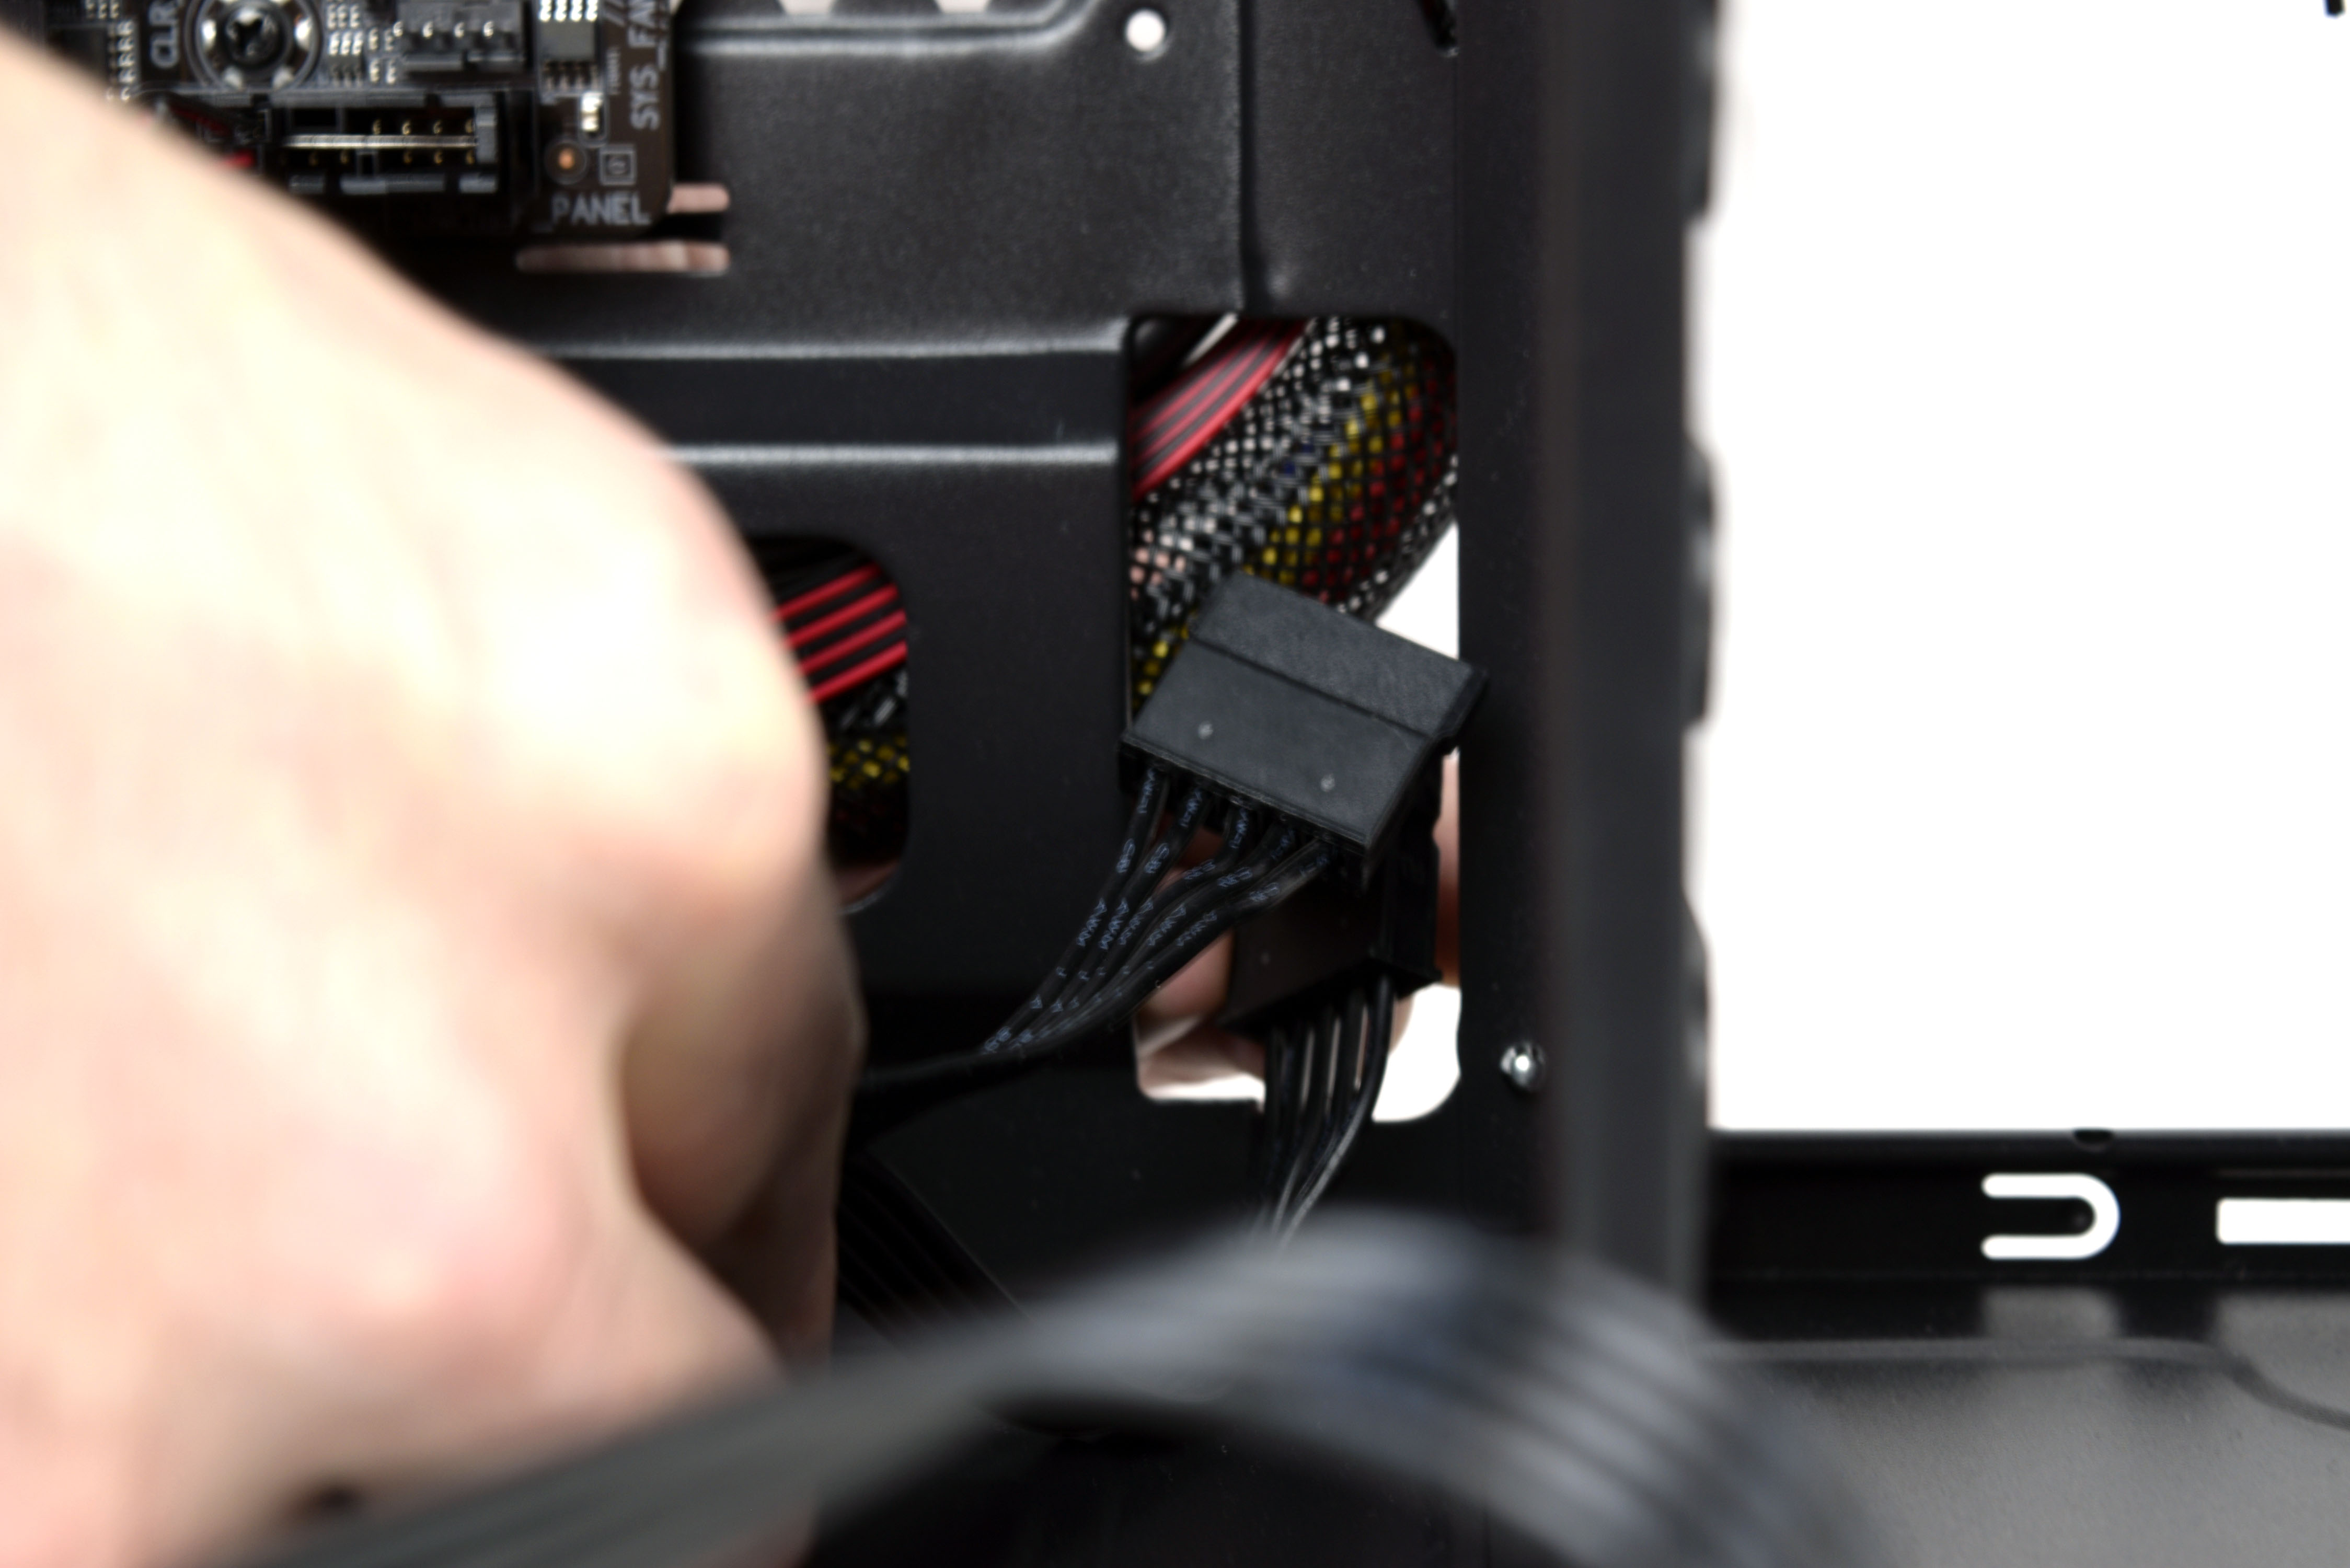
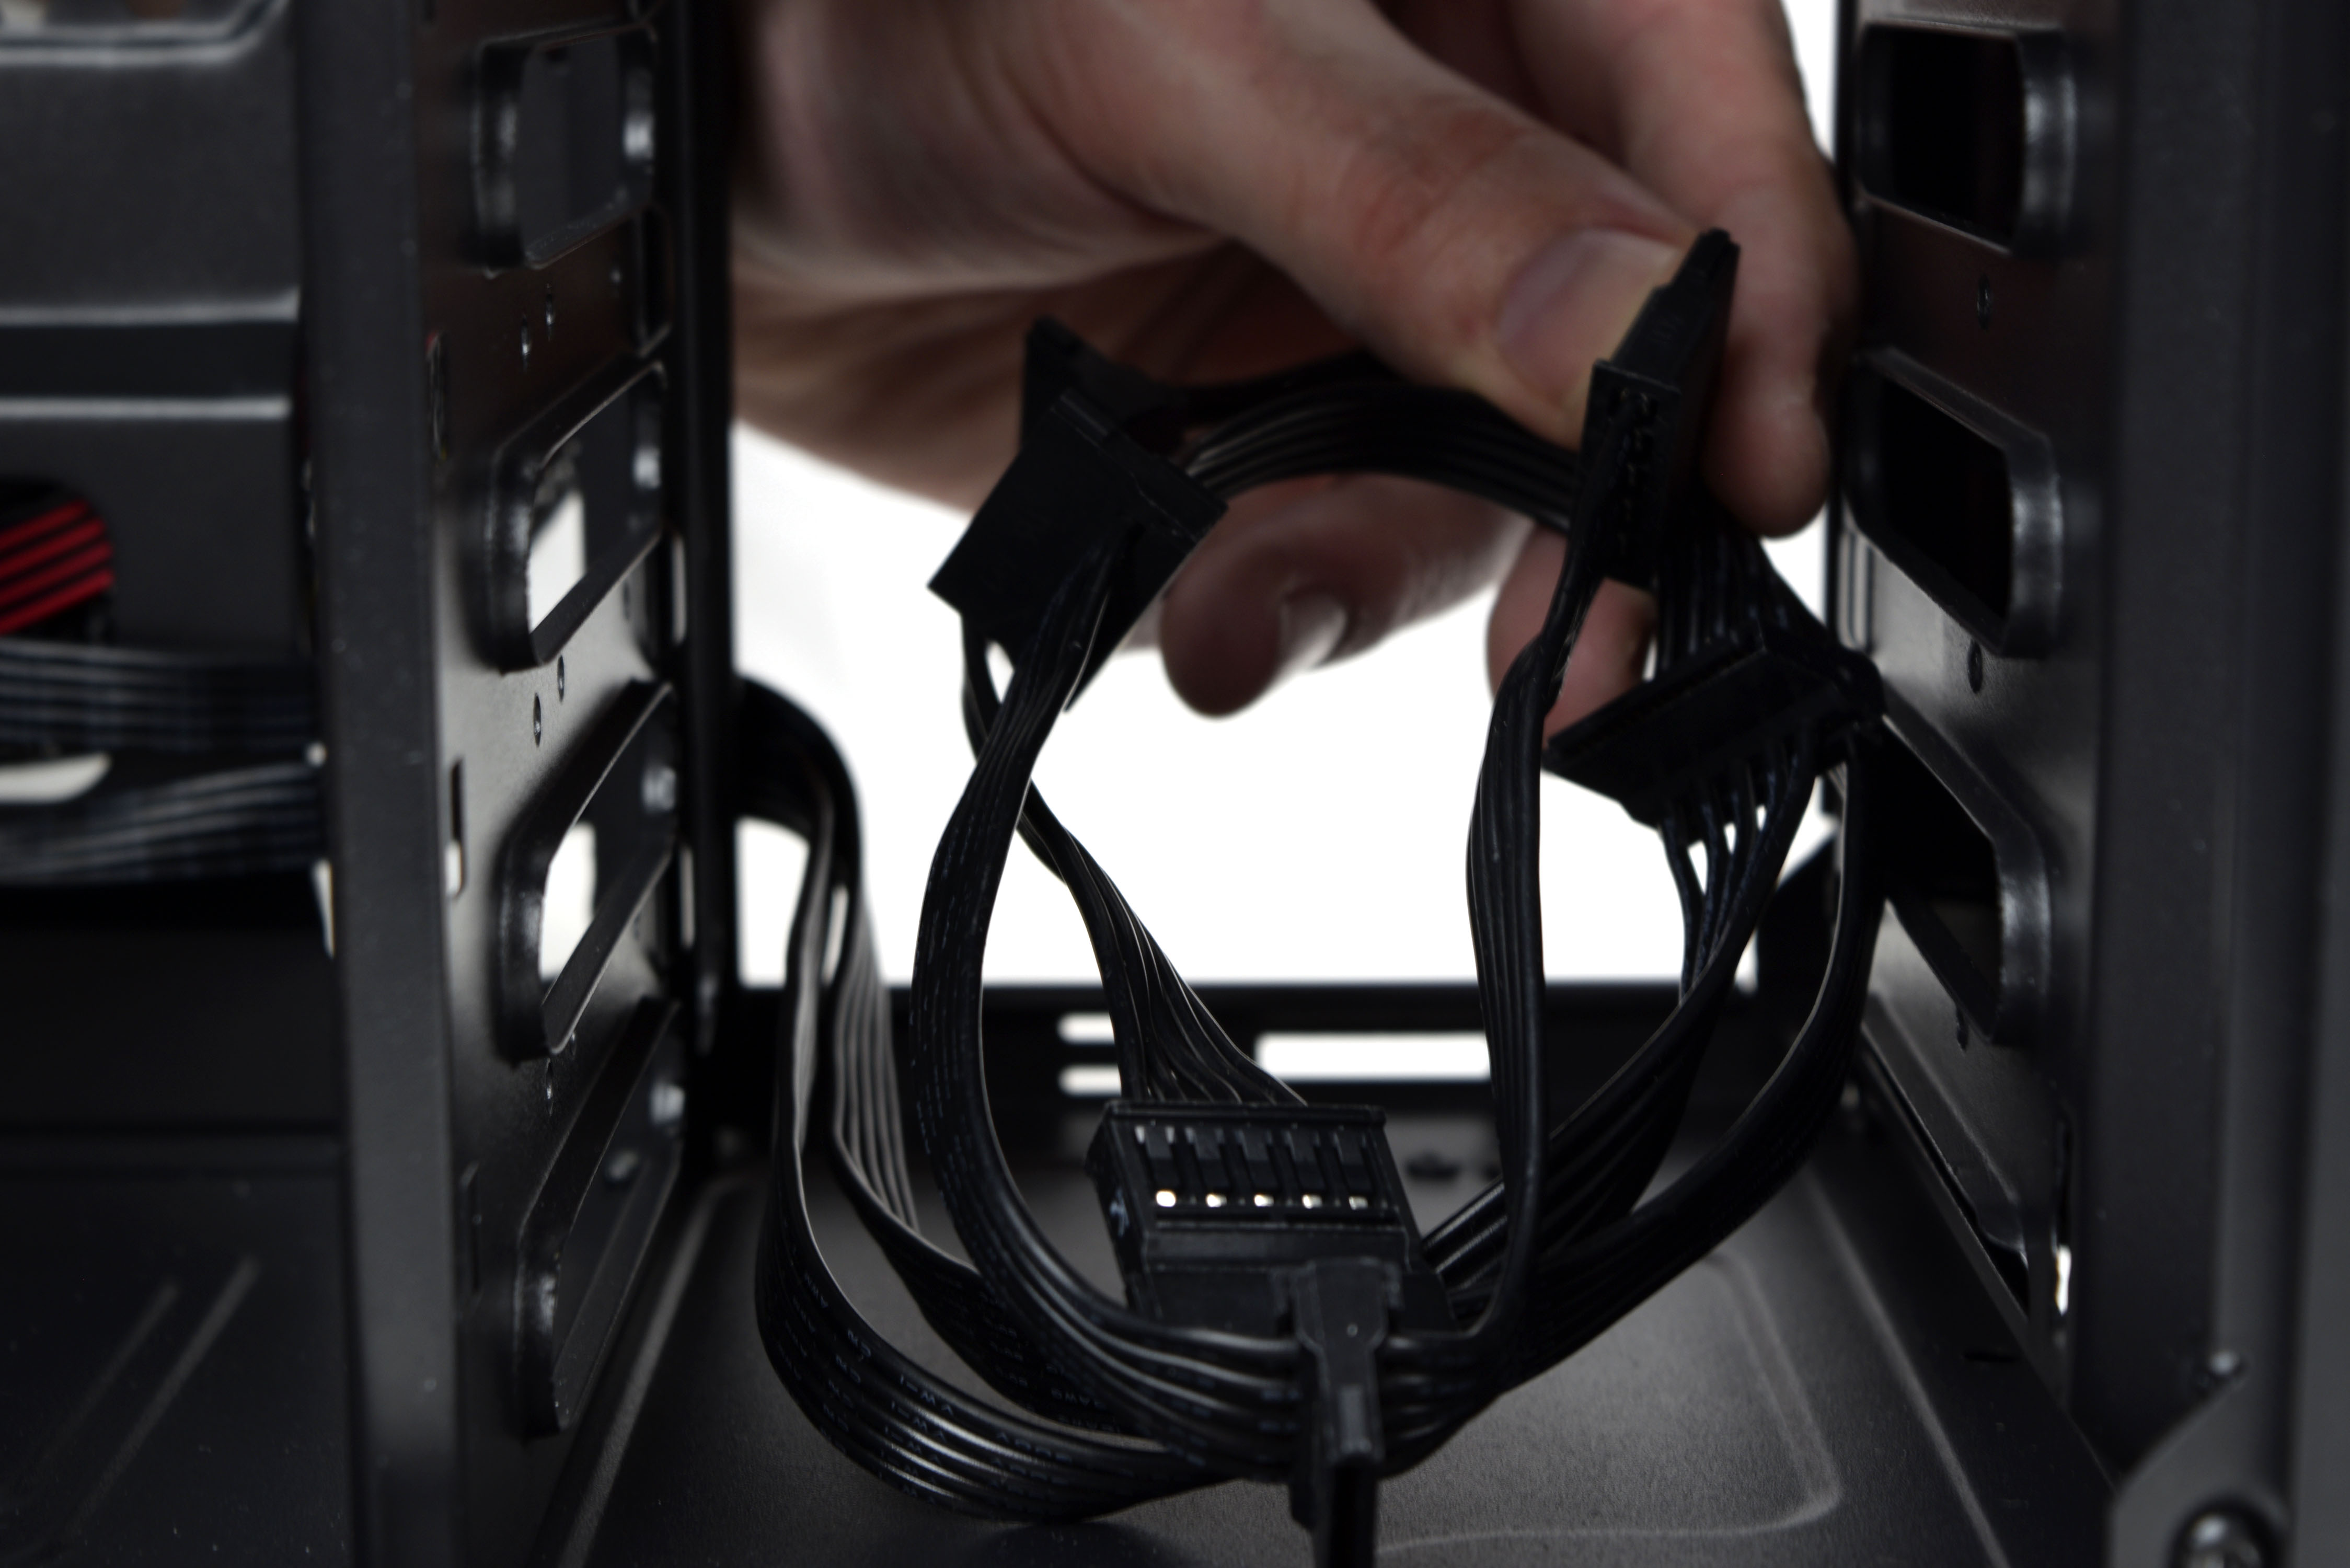
Feed the hanging SATA power cable strands into hole farthest from the PSU and into the 3.5” bay (fifth picture above). Connect one of the SATA leads to the HDD and tuck the remaining plugs from this strand under the drive. Locate one of the provided SATA data cables from the motherboard box and connect it to the HDD. Run it through the existing cable management behind the motherboard and up to an available SATA port. Plug it in, and tuck the remaining SATA power plugs into the 3.5” drive bay. Feed the PSU’s molex strand through the same hole as the SATA power plugs and connect it to the coupled fan molex plugs. Tuck the slack into the 3.5” bay and tie it all down with the existing cables to secure the wiring.
The Graphics Card
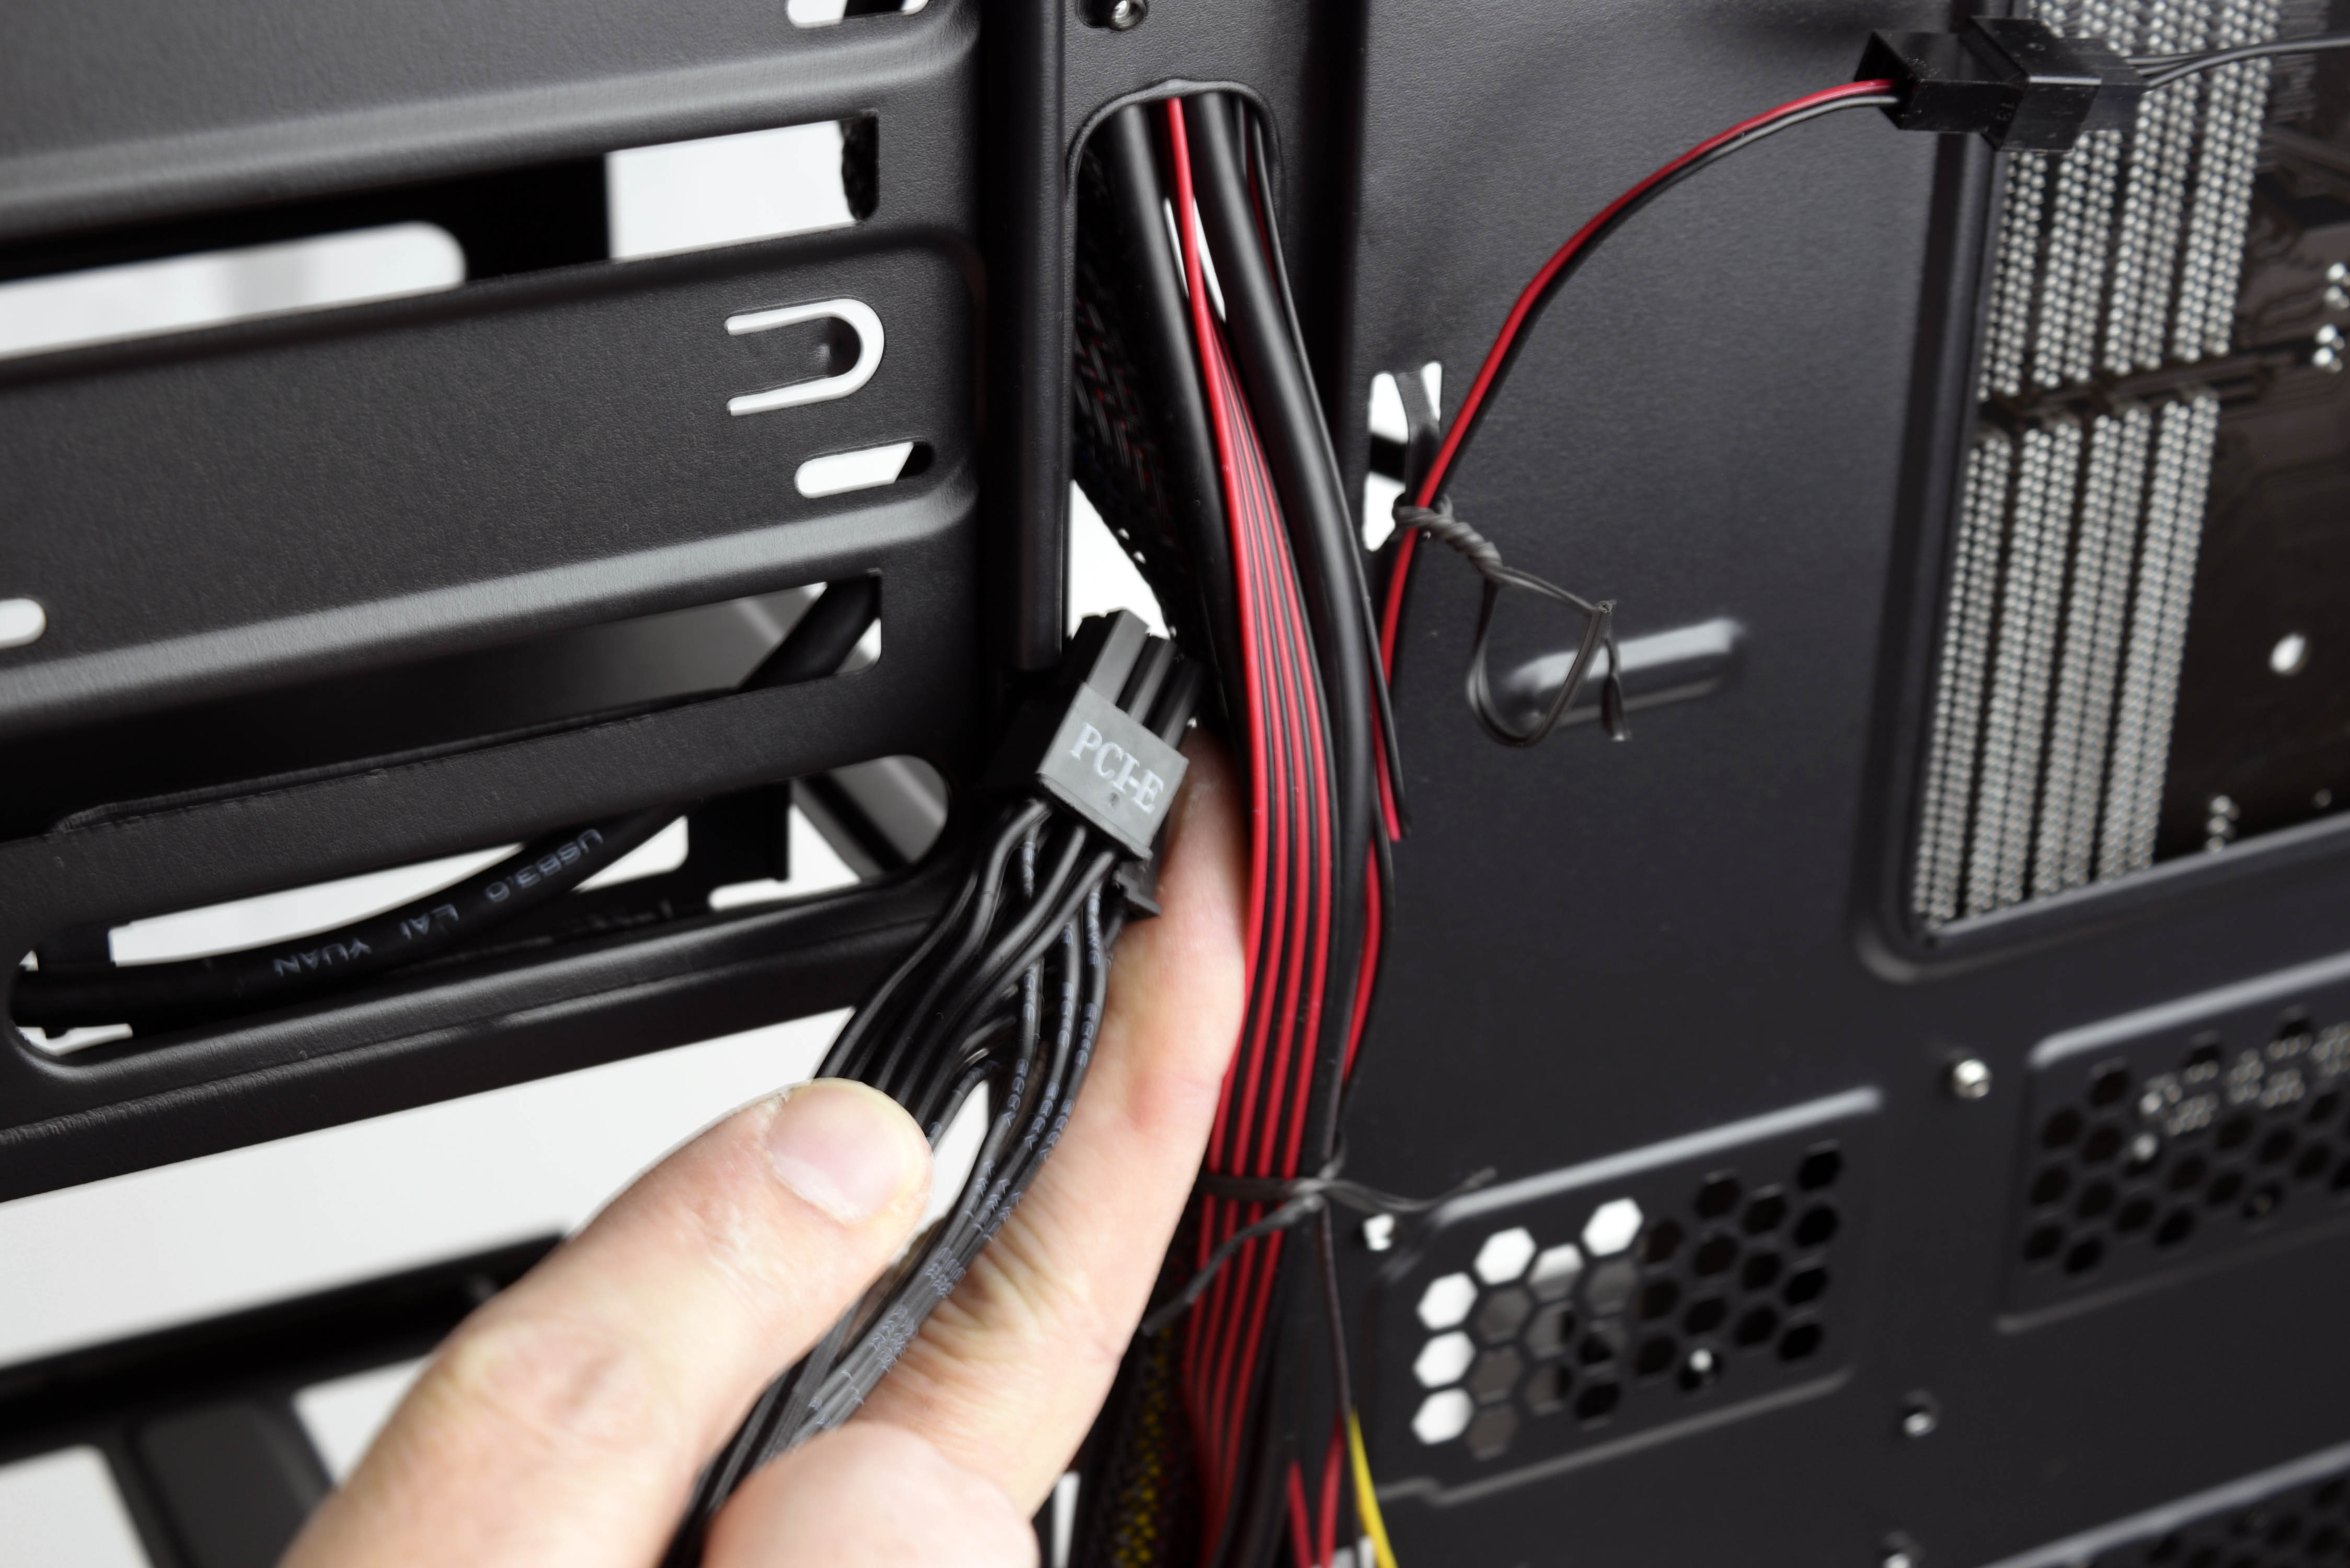
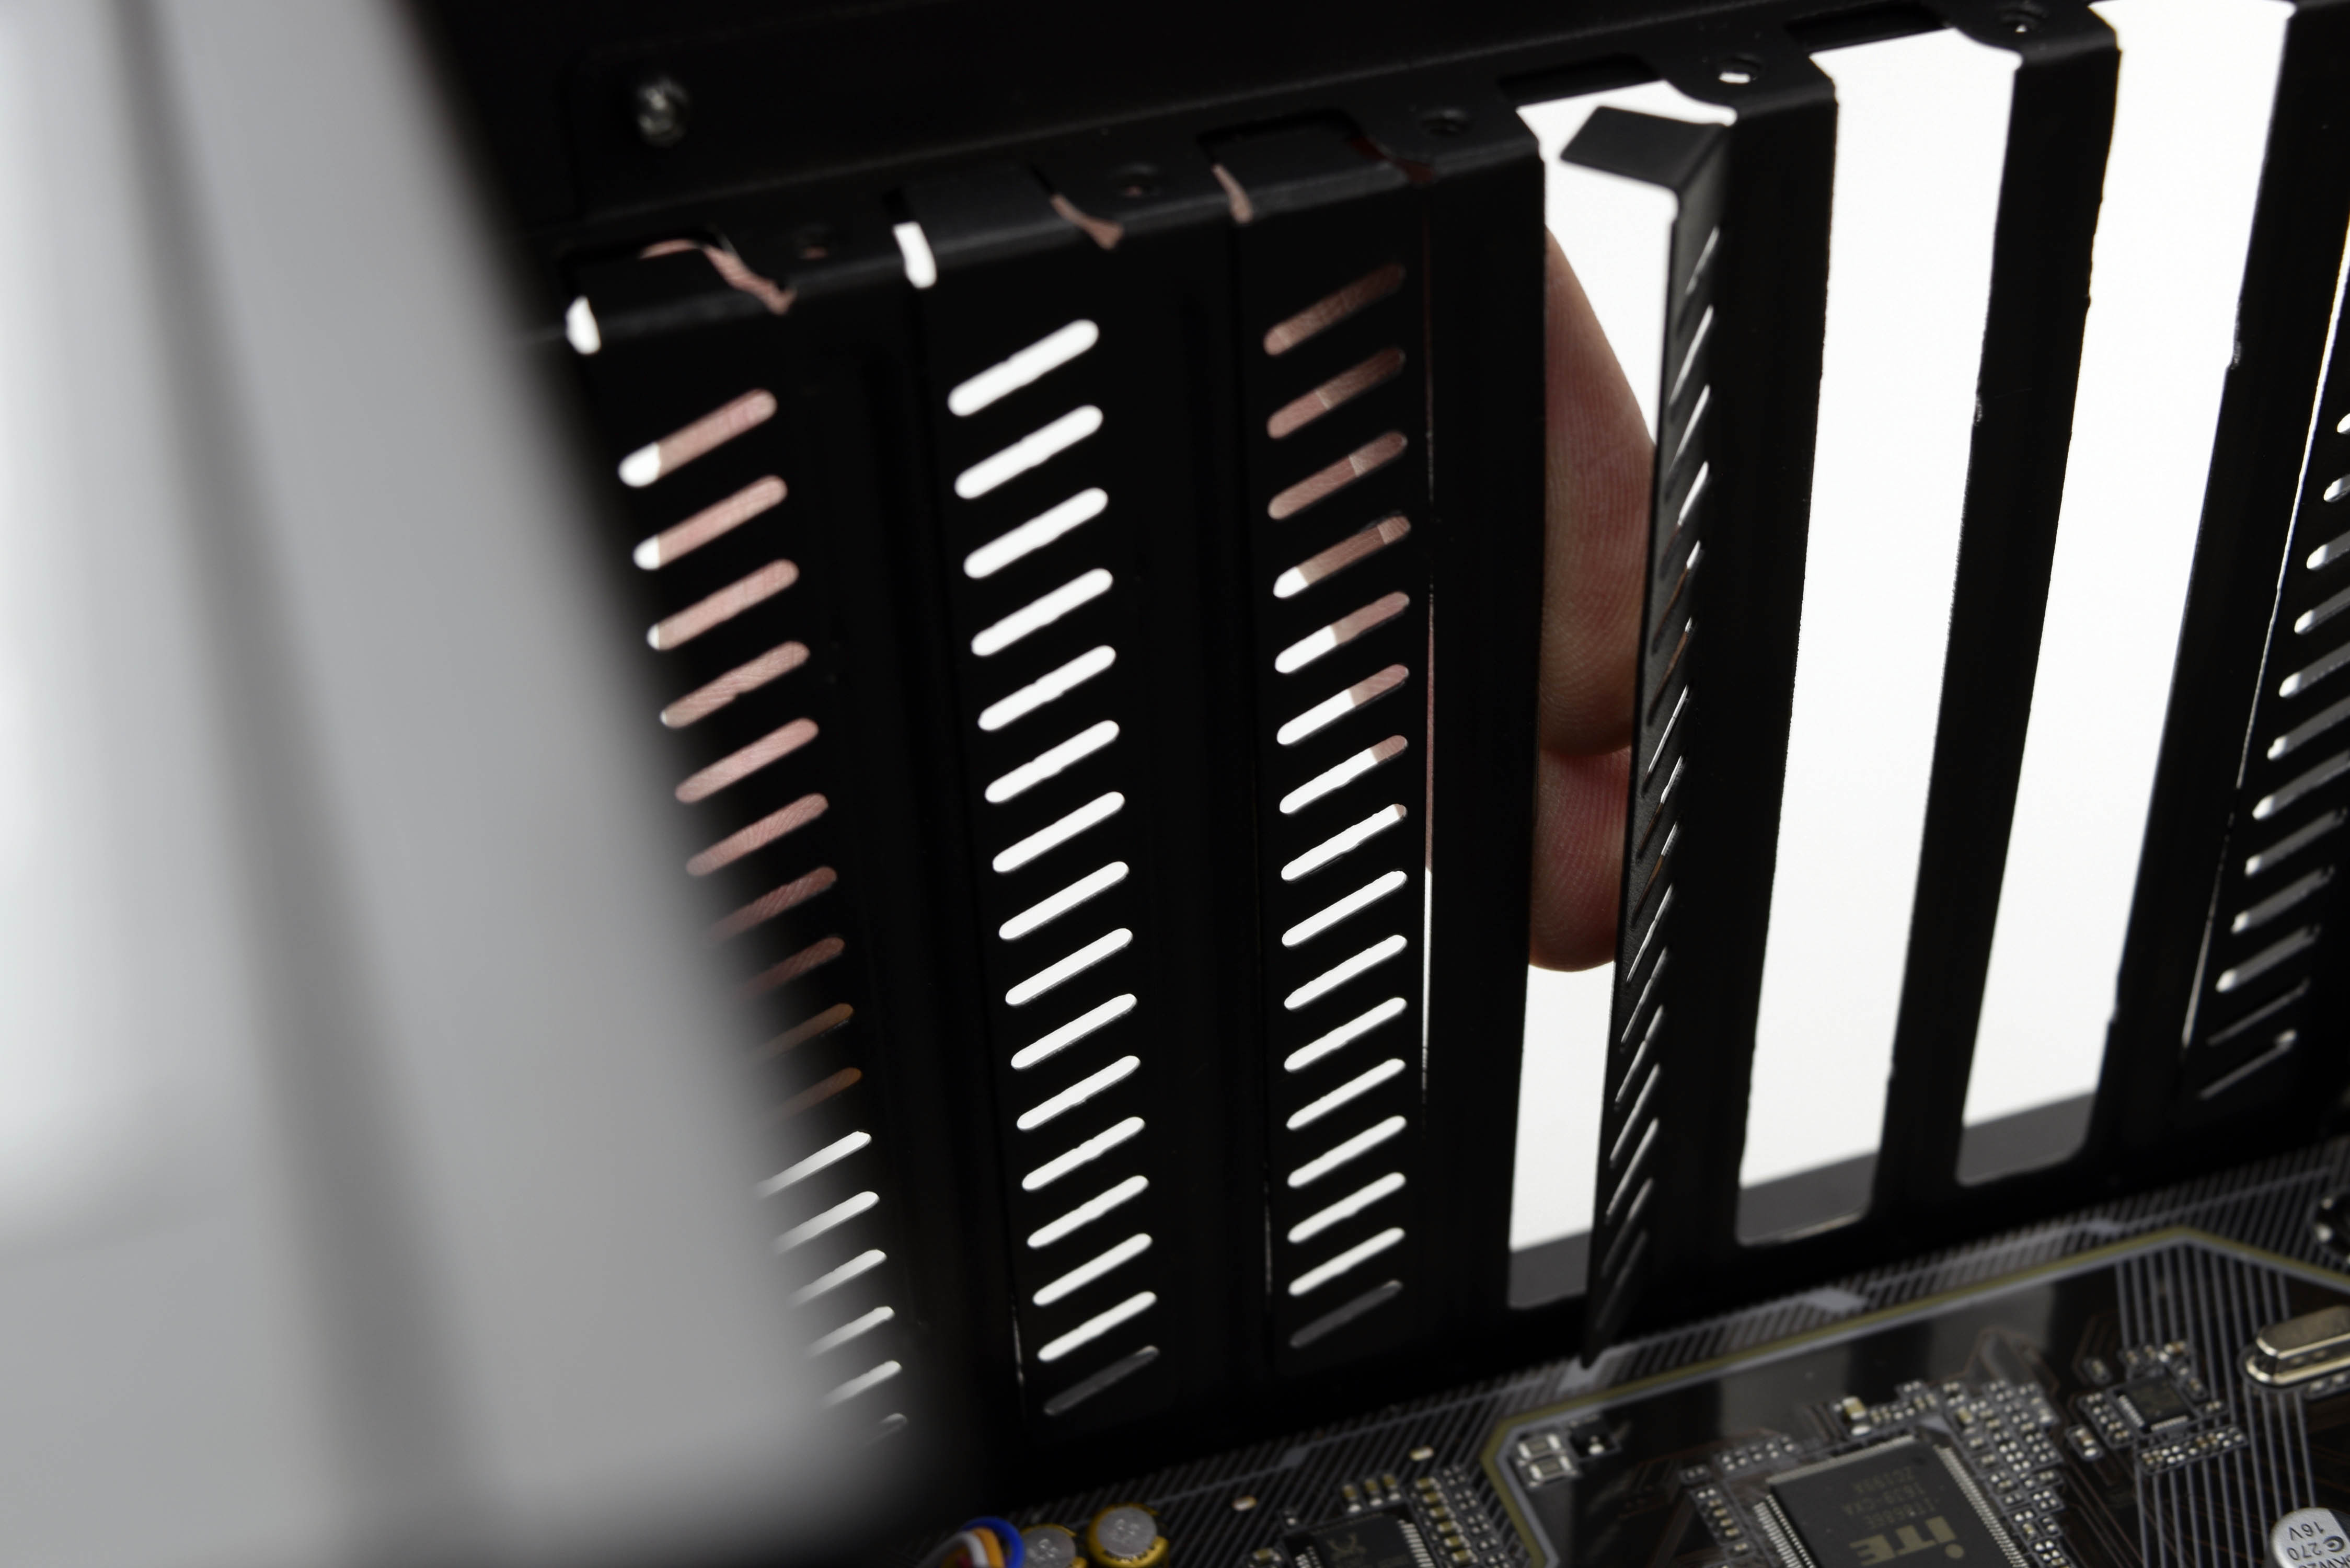
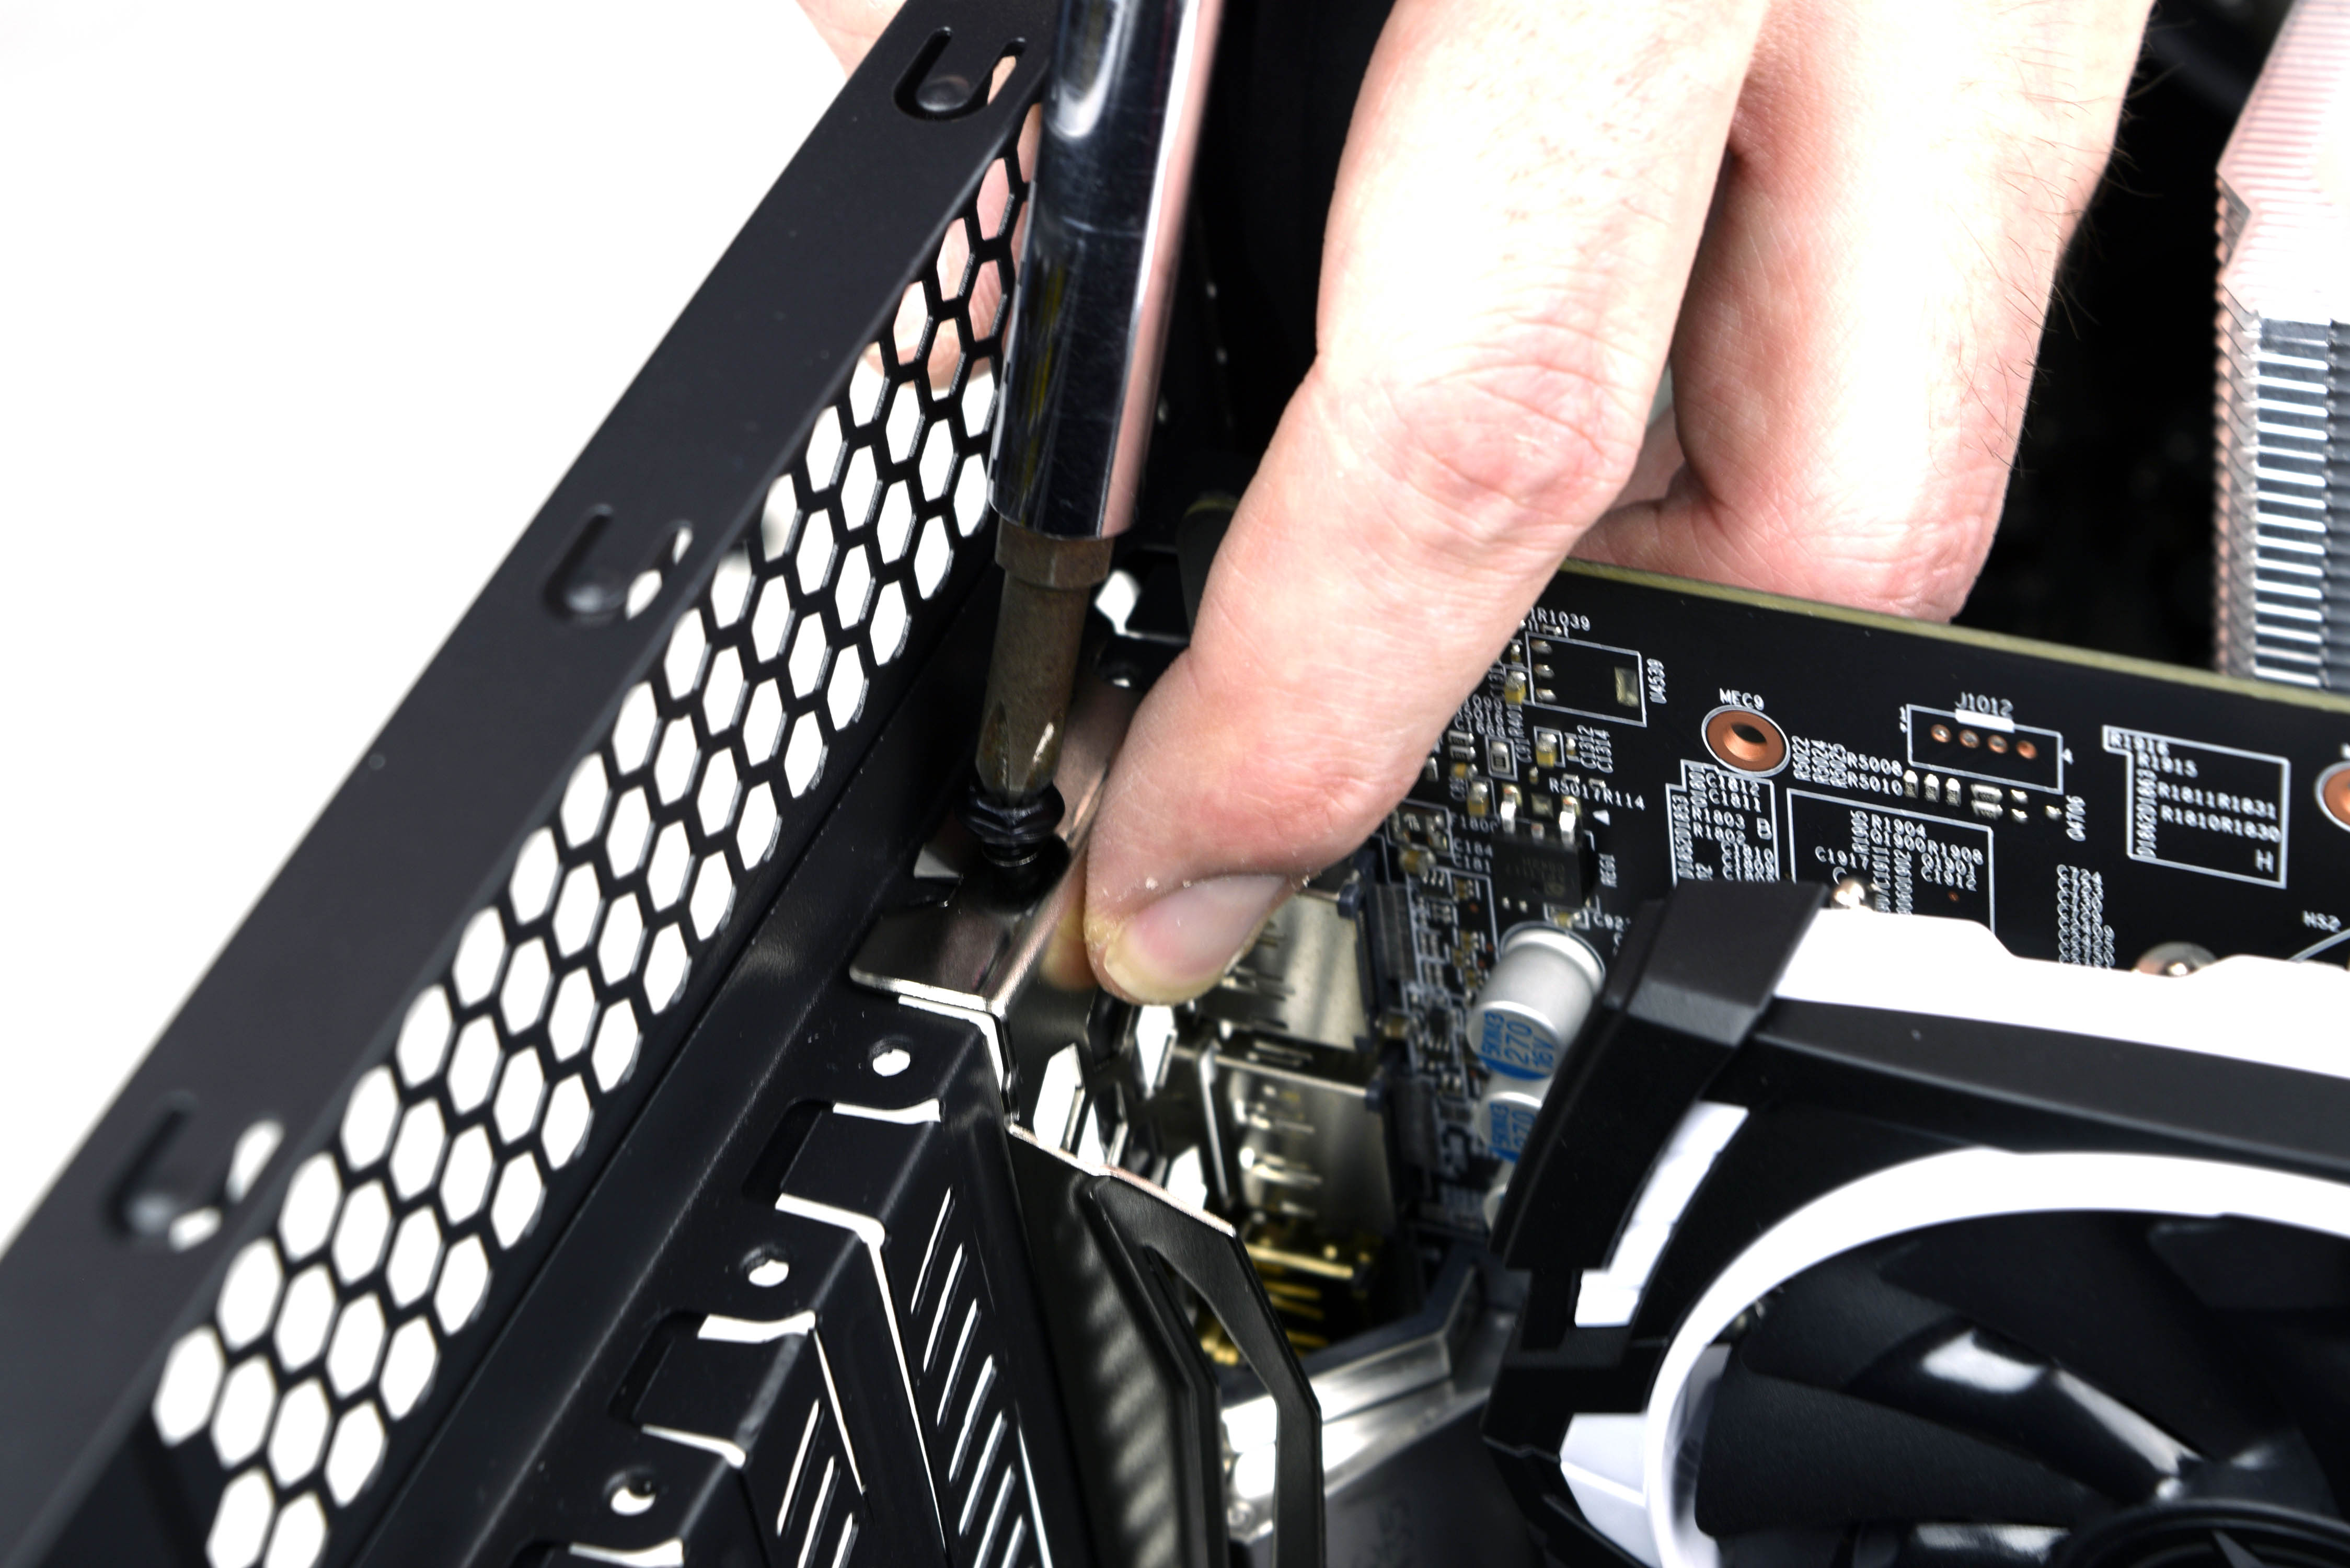
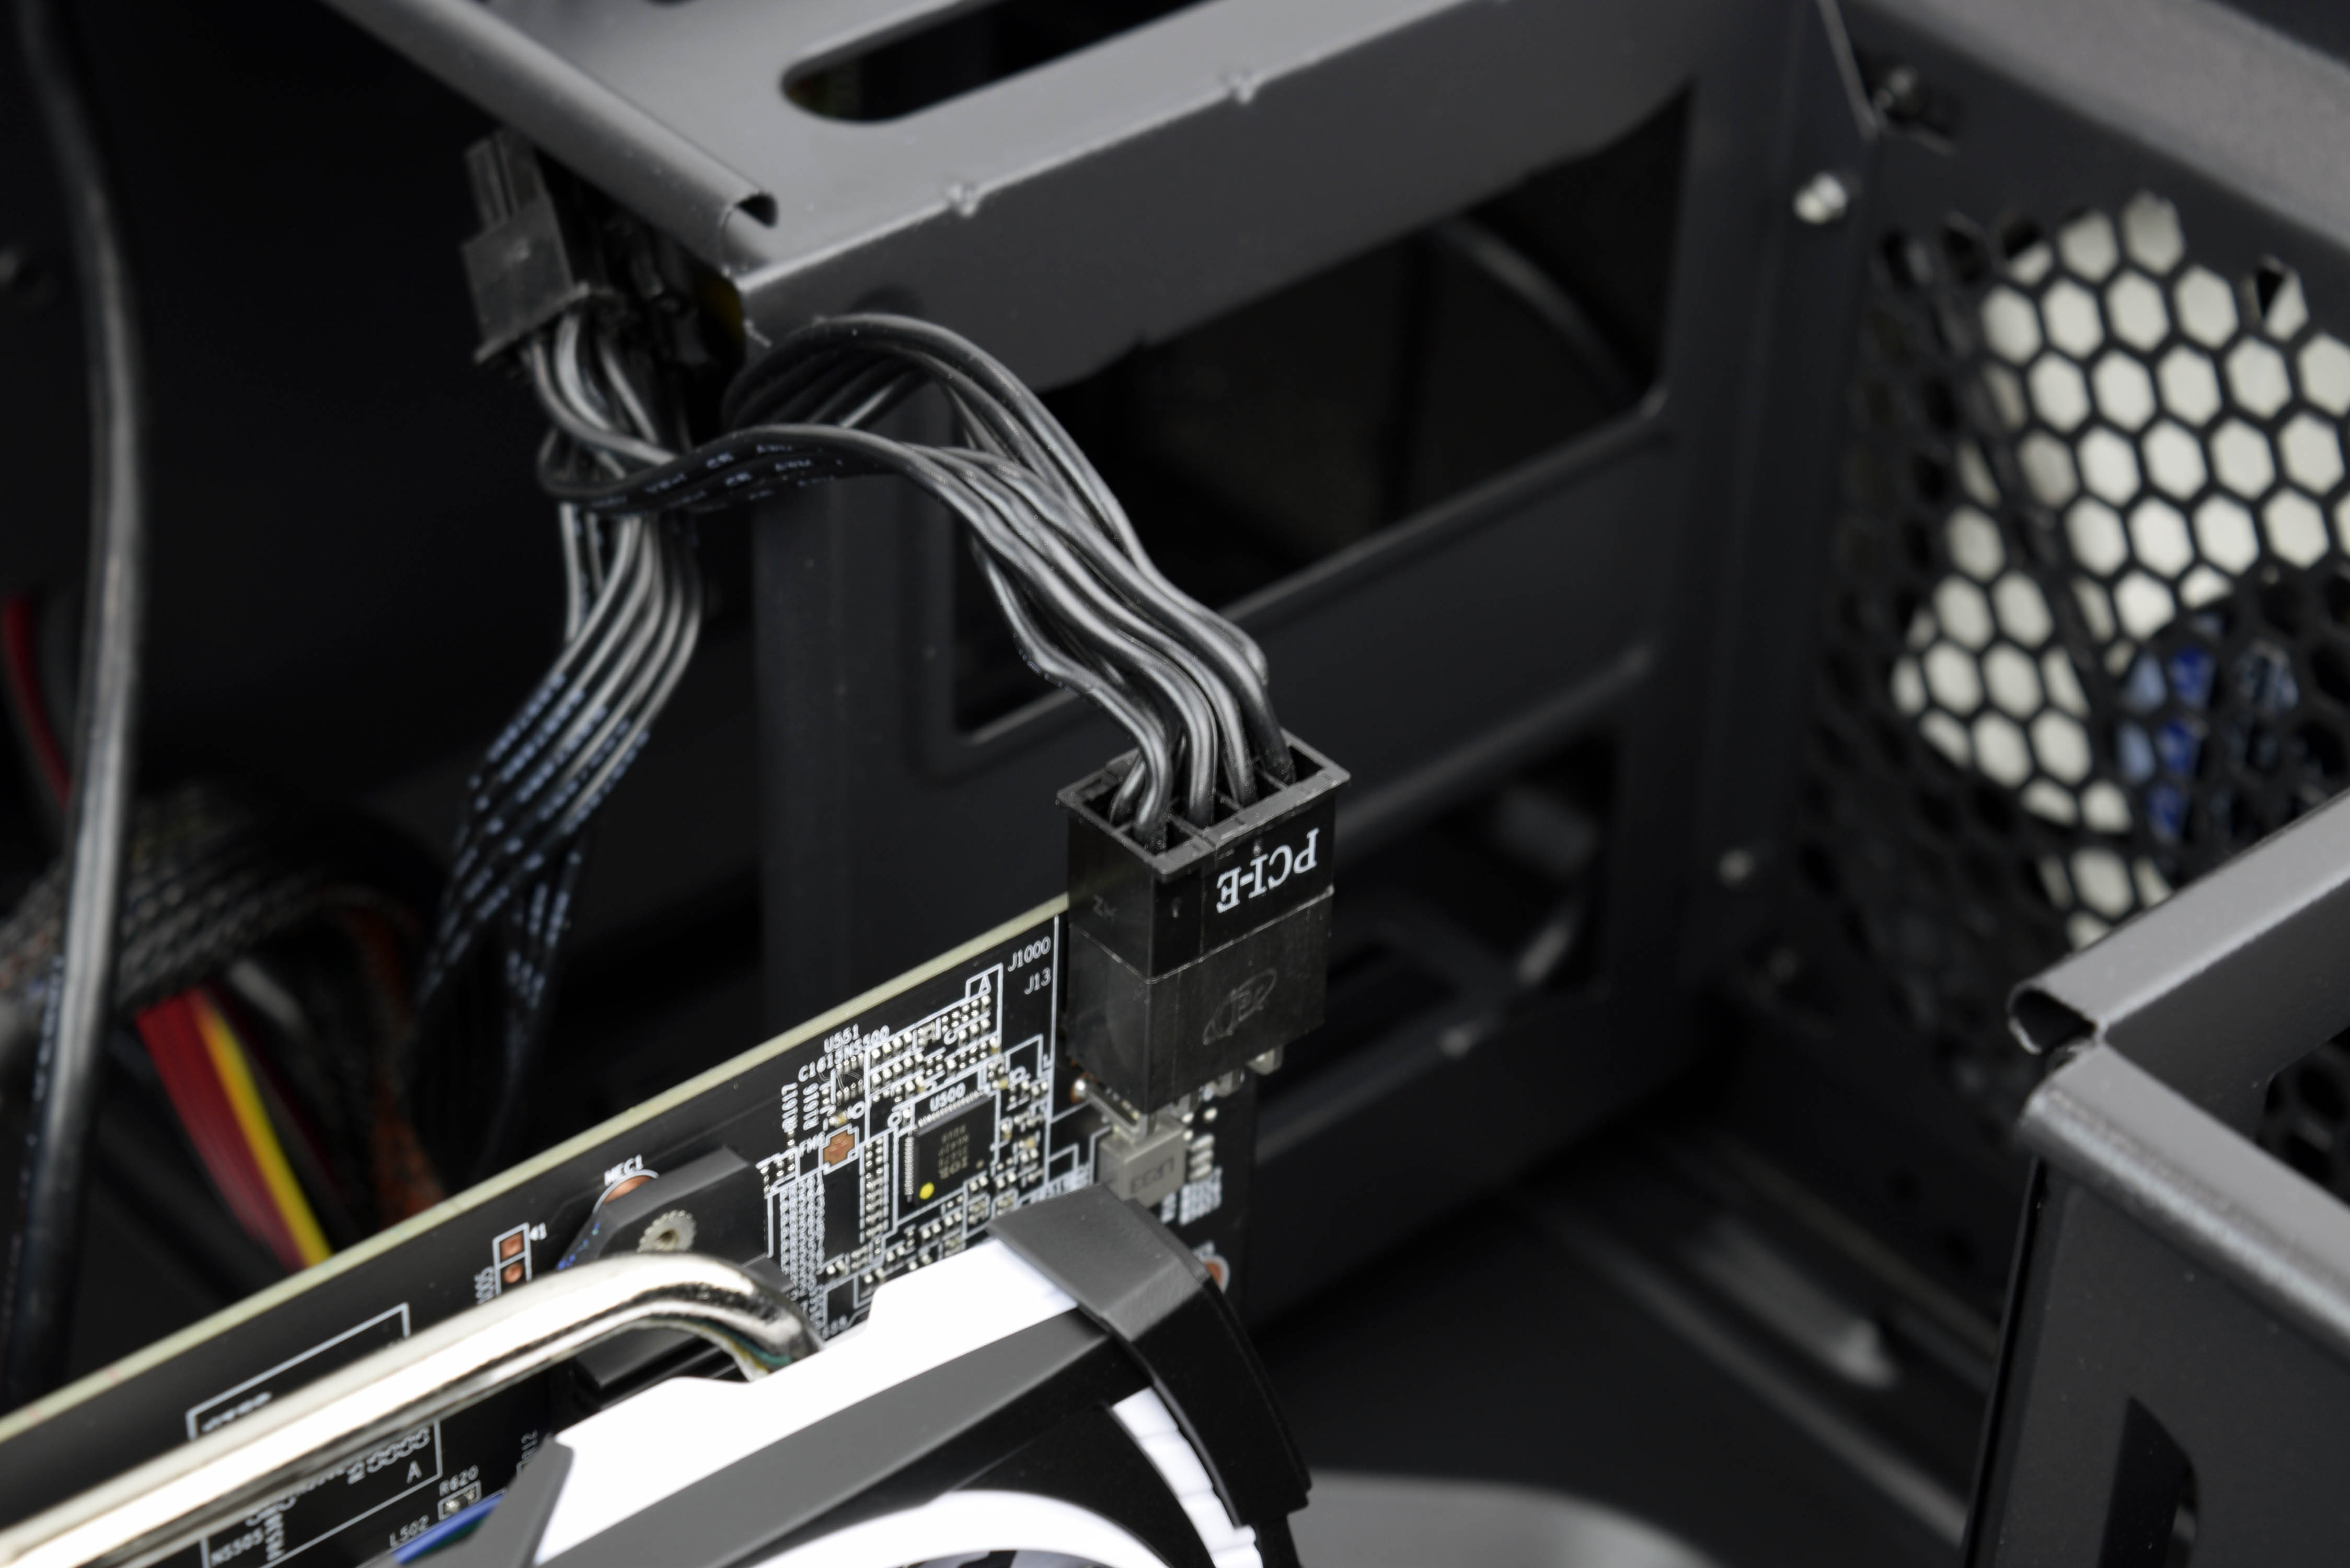
Run the PCIe power cable from the PSU along the main cable pipeline and into the center hole in the floor of the case. Tie it down with the other cables with enough slack to reach the graphics card when it’s in its slot. Remove the two PCIe plates corresponding to where the GPU will go by using a screwdriver to twist the panels until they can be torn free of the chassis.
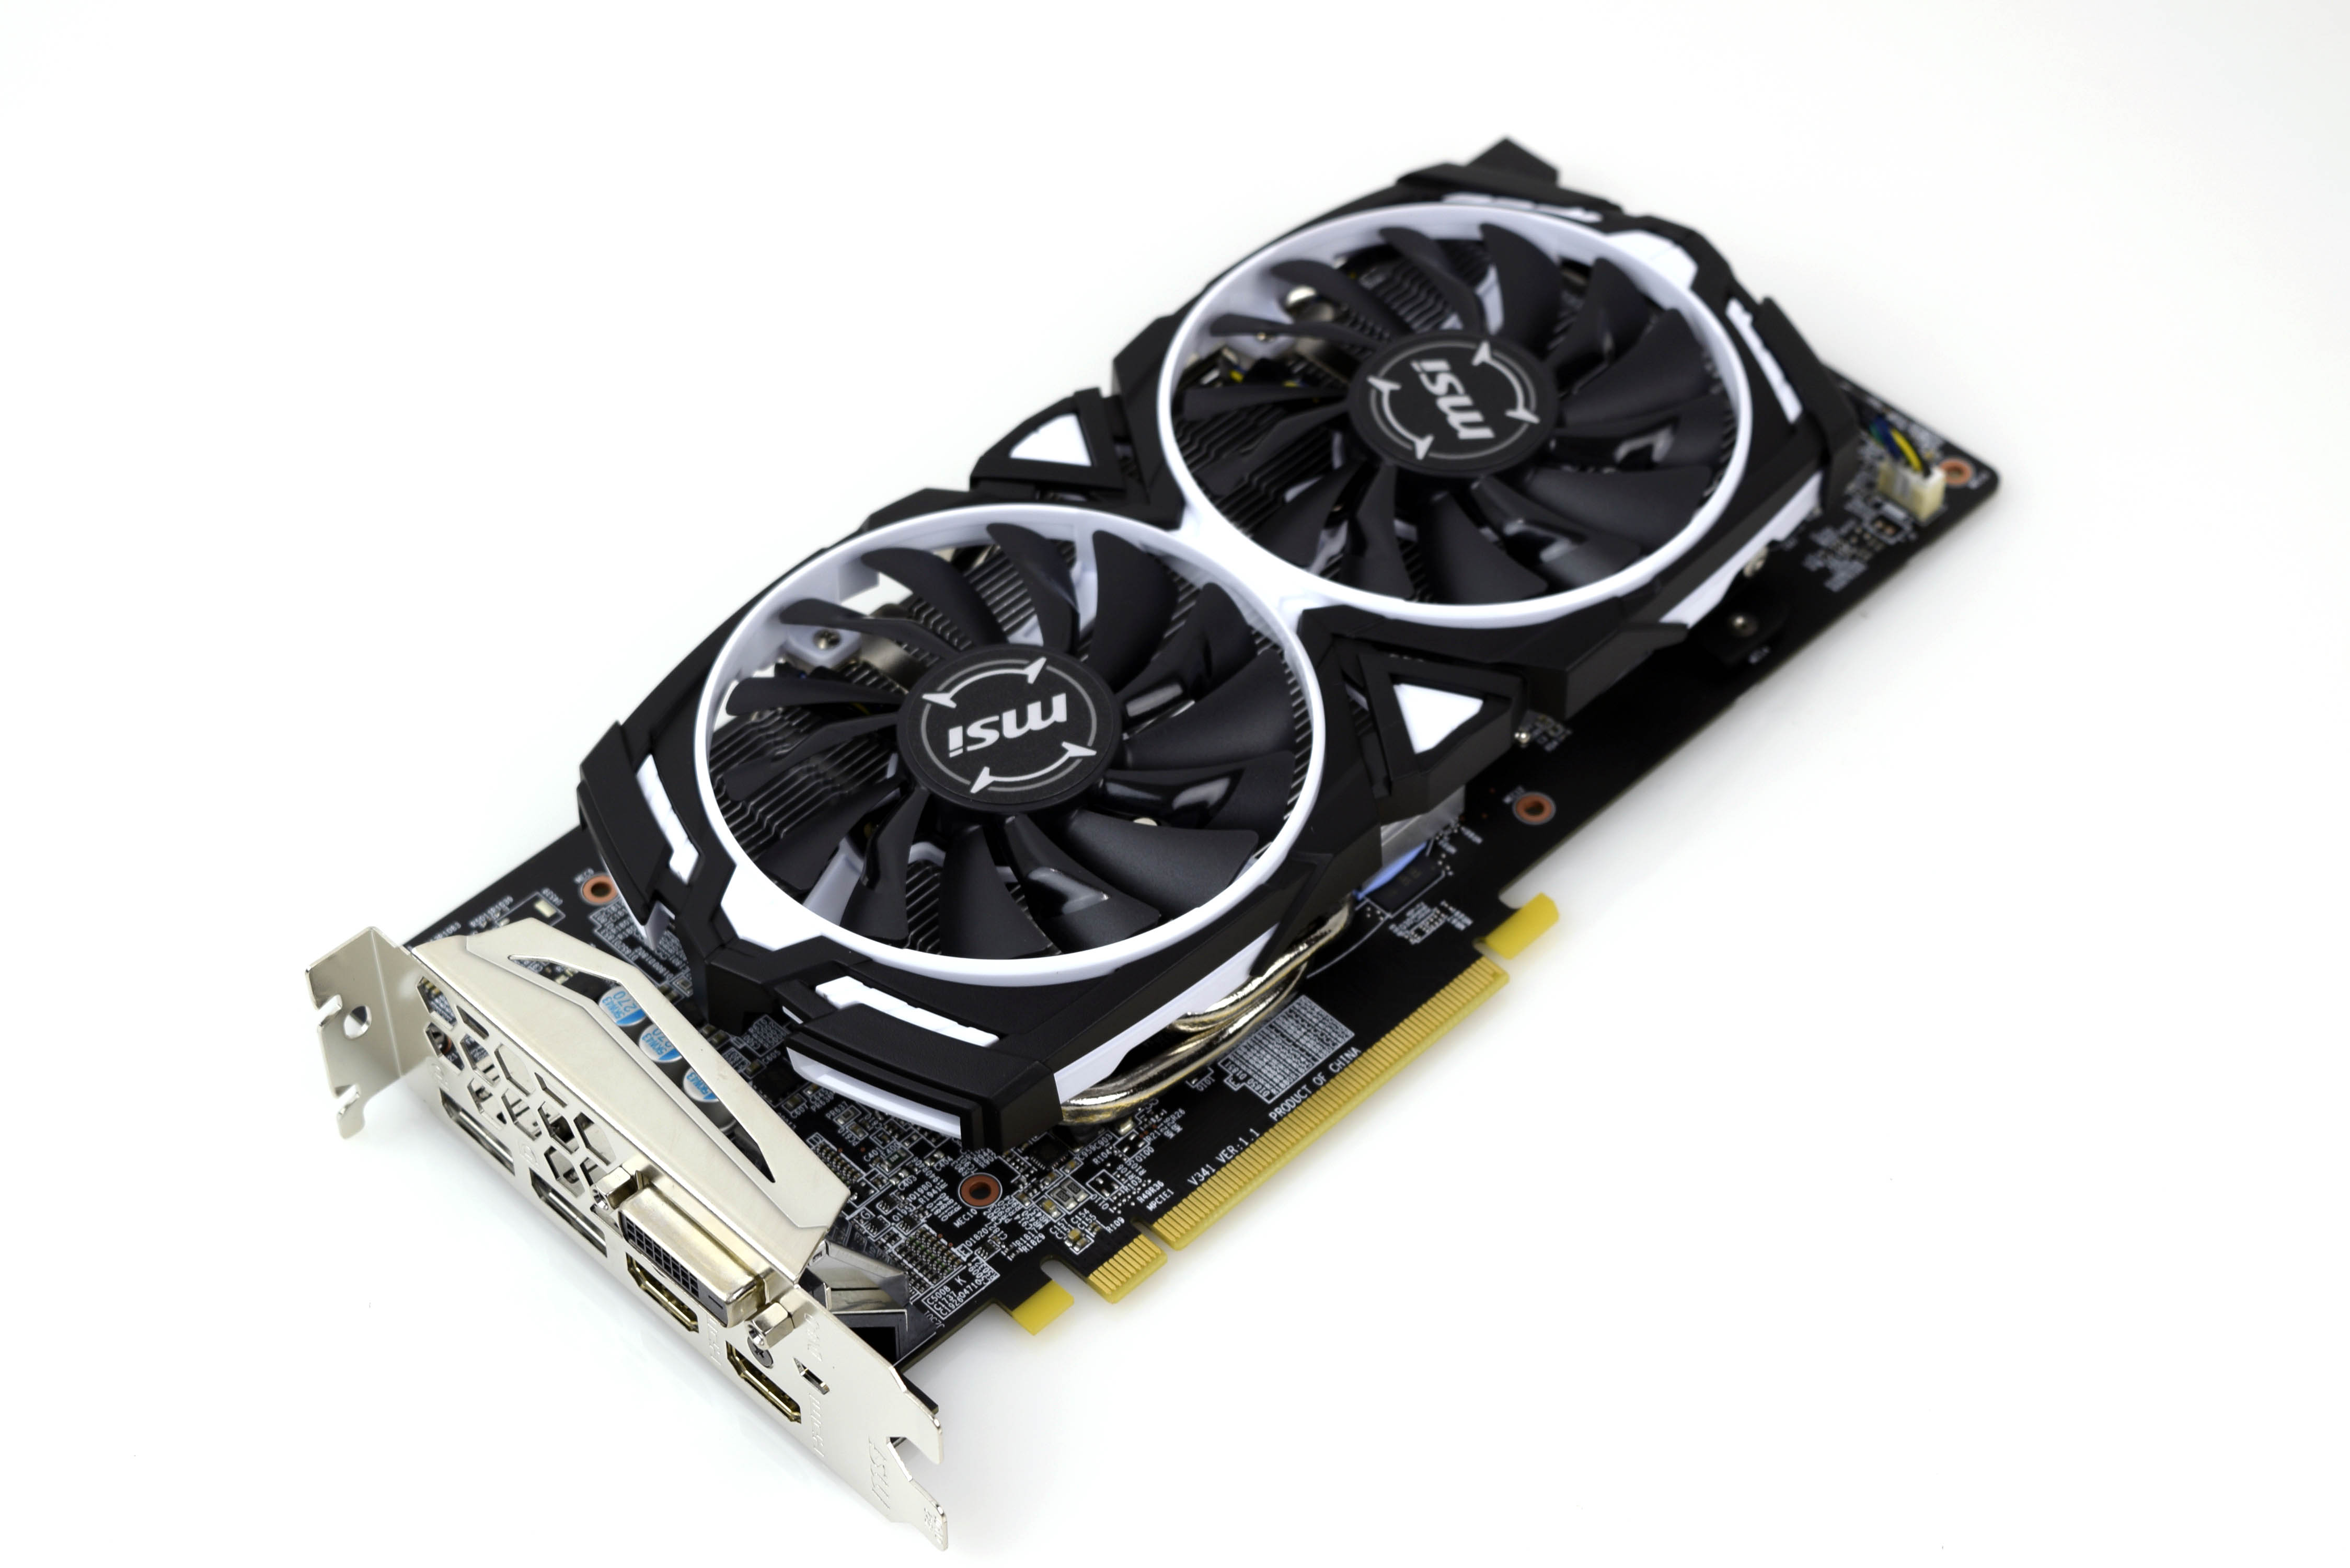
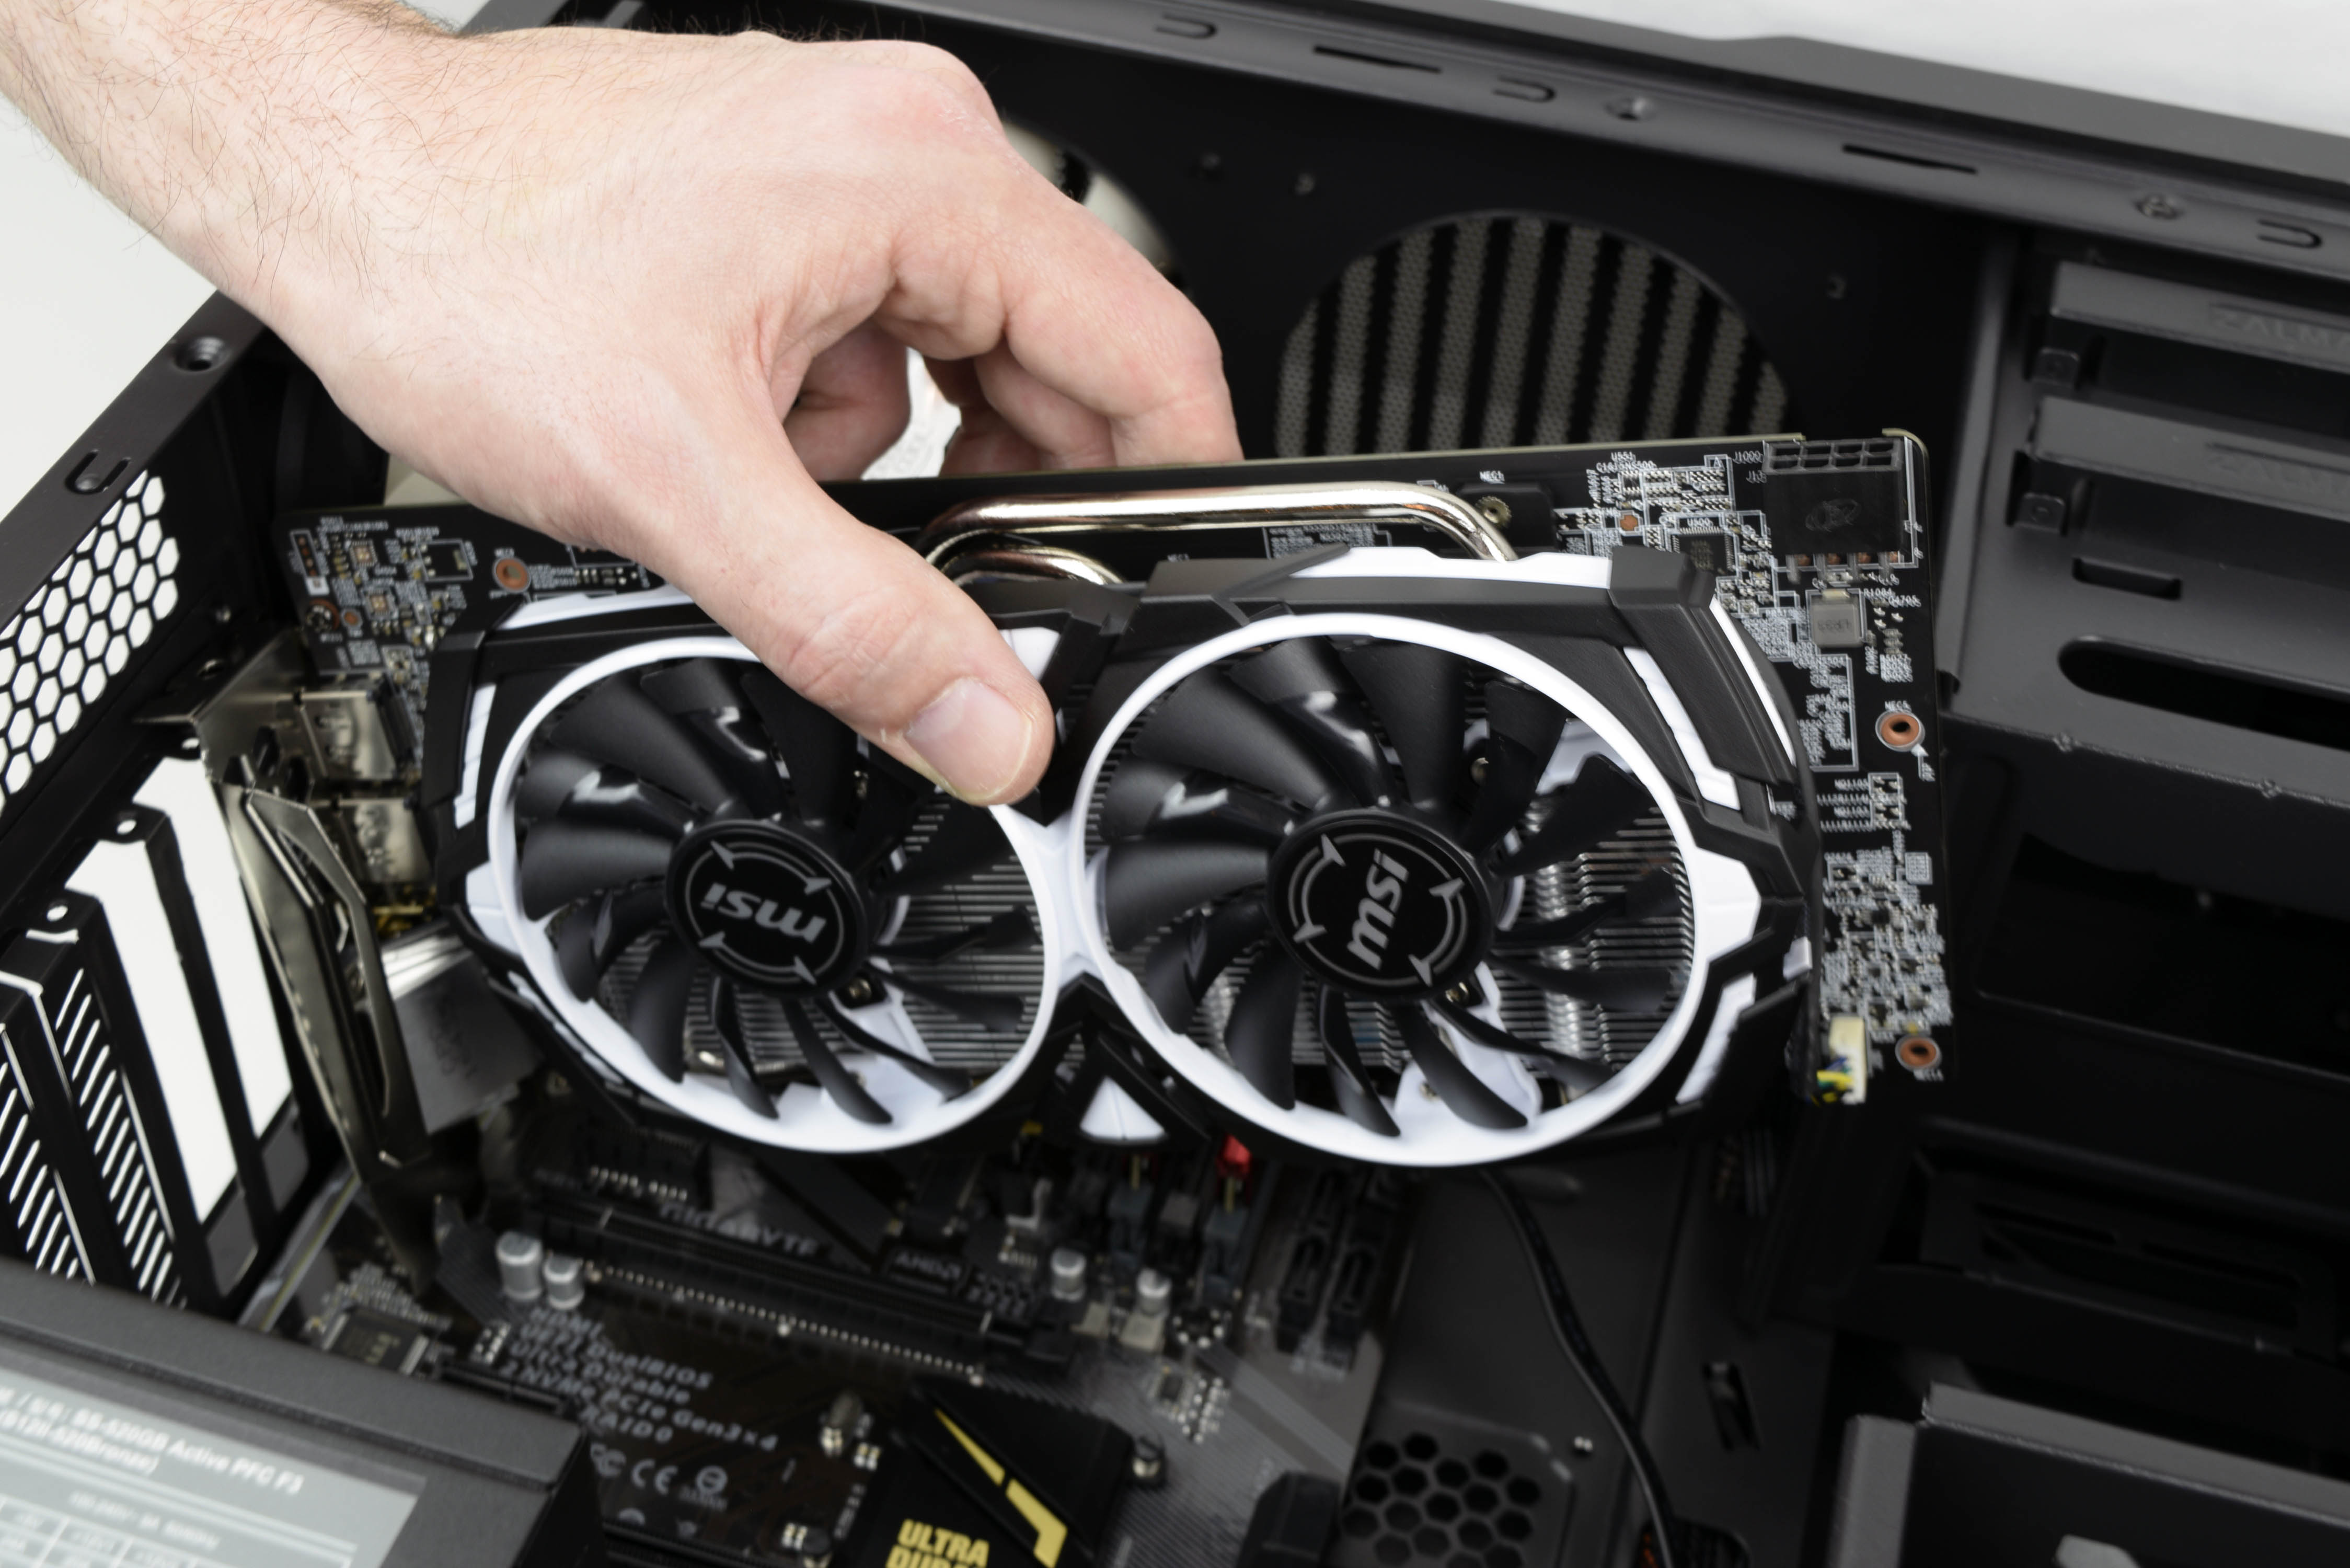
Grab the MSI RX 480 Armor 8G from its box and remove the plastic caps and covers. Carefully install the card to the main PCIe x16 slot (closest to the CPU) on the motherboard and use the larger Phillips-head screws (the ones we told you not to use on the motherboard) to secure it to the chassis. Plug in the PCIe power cable (last picture in the album above) and tuck the slack (if any) into the 5.25” drive bay.
The Memory
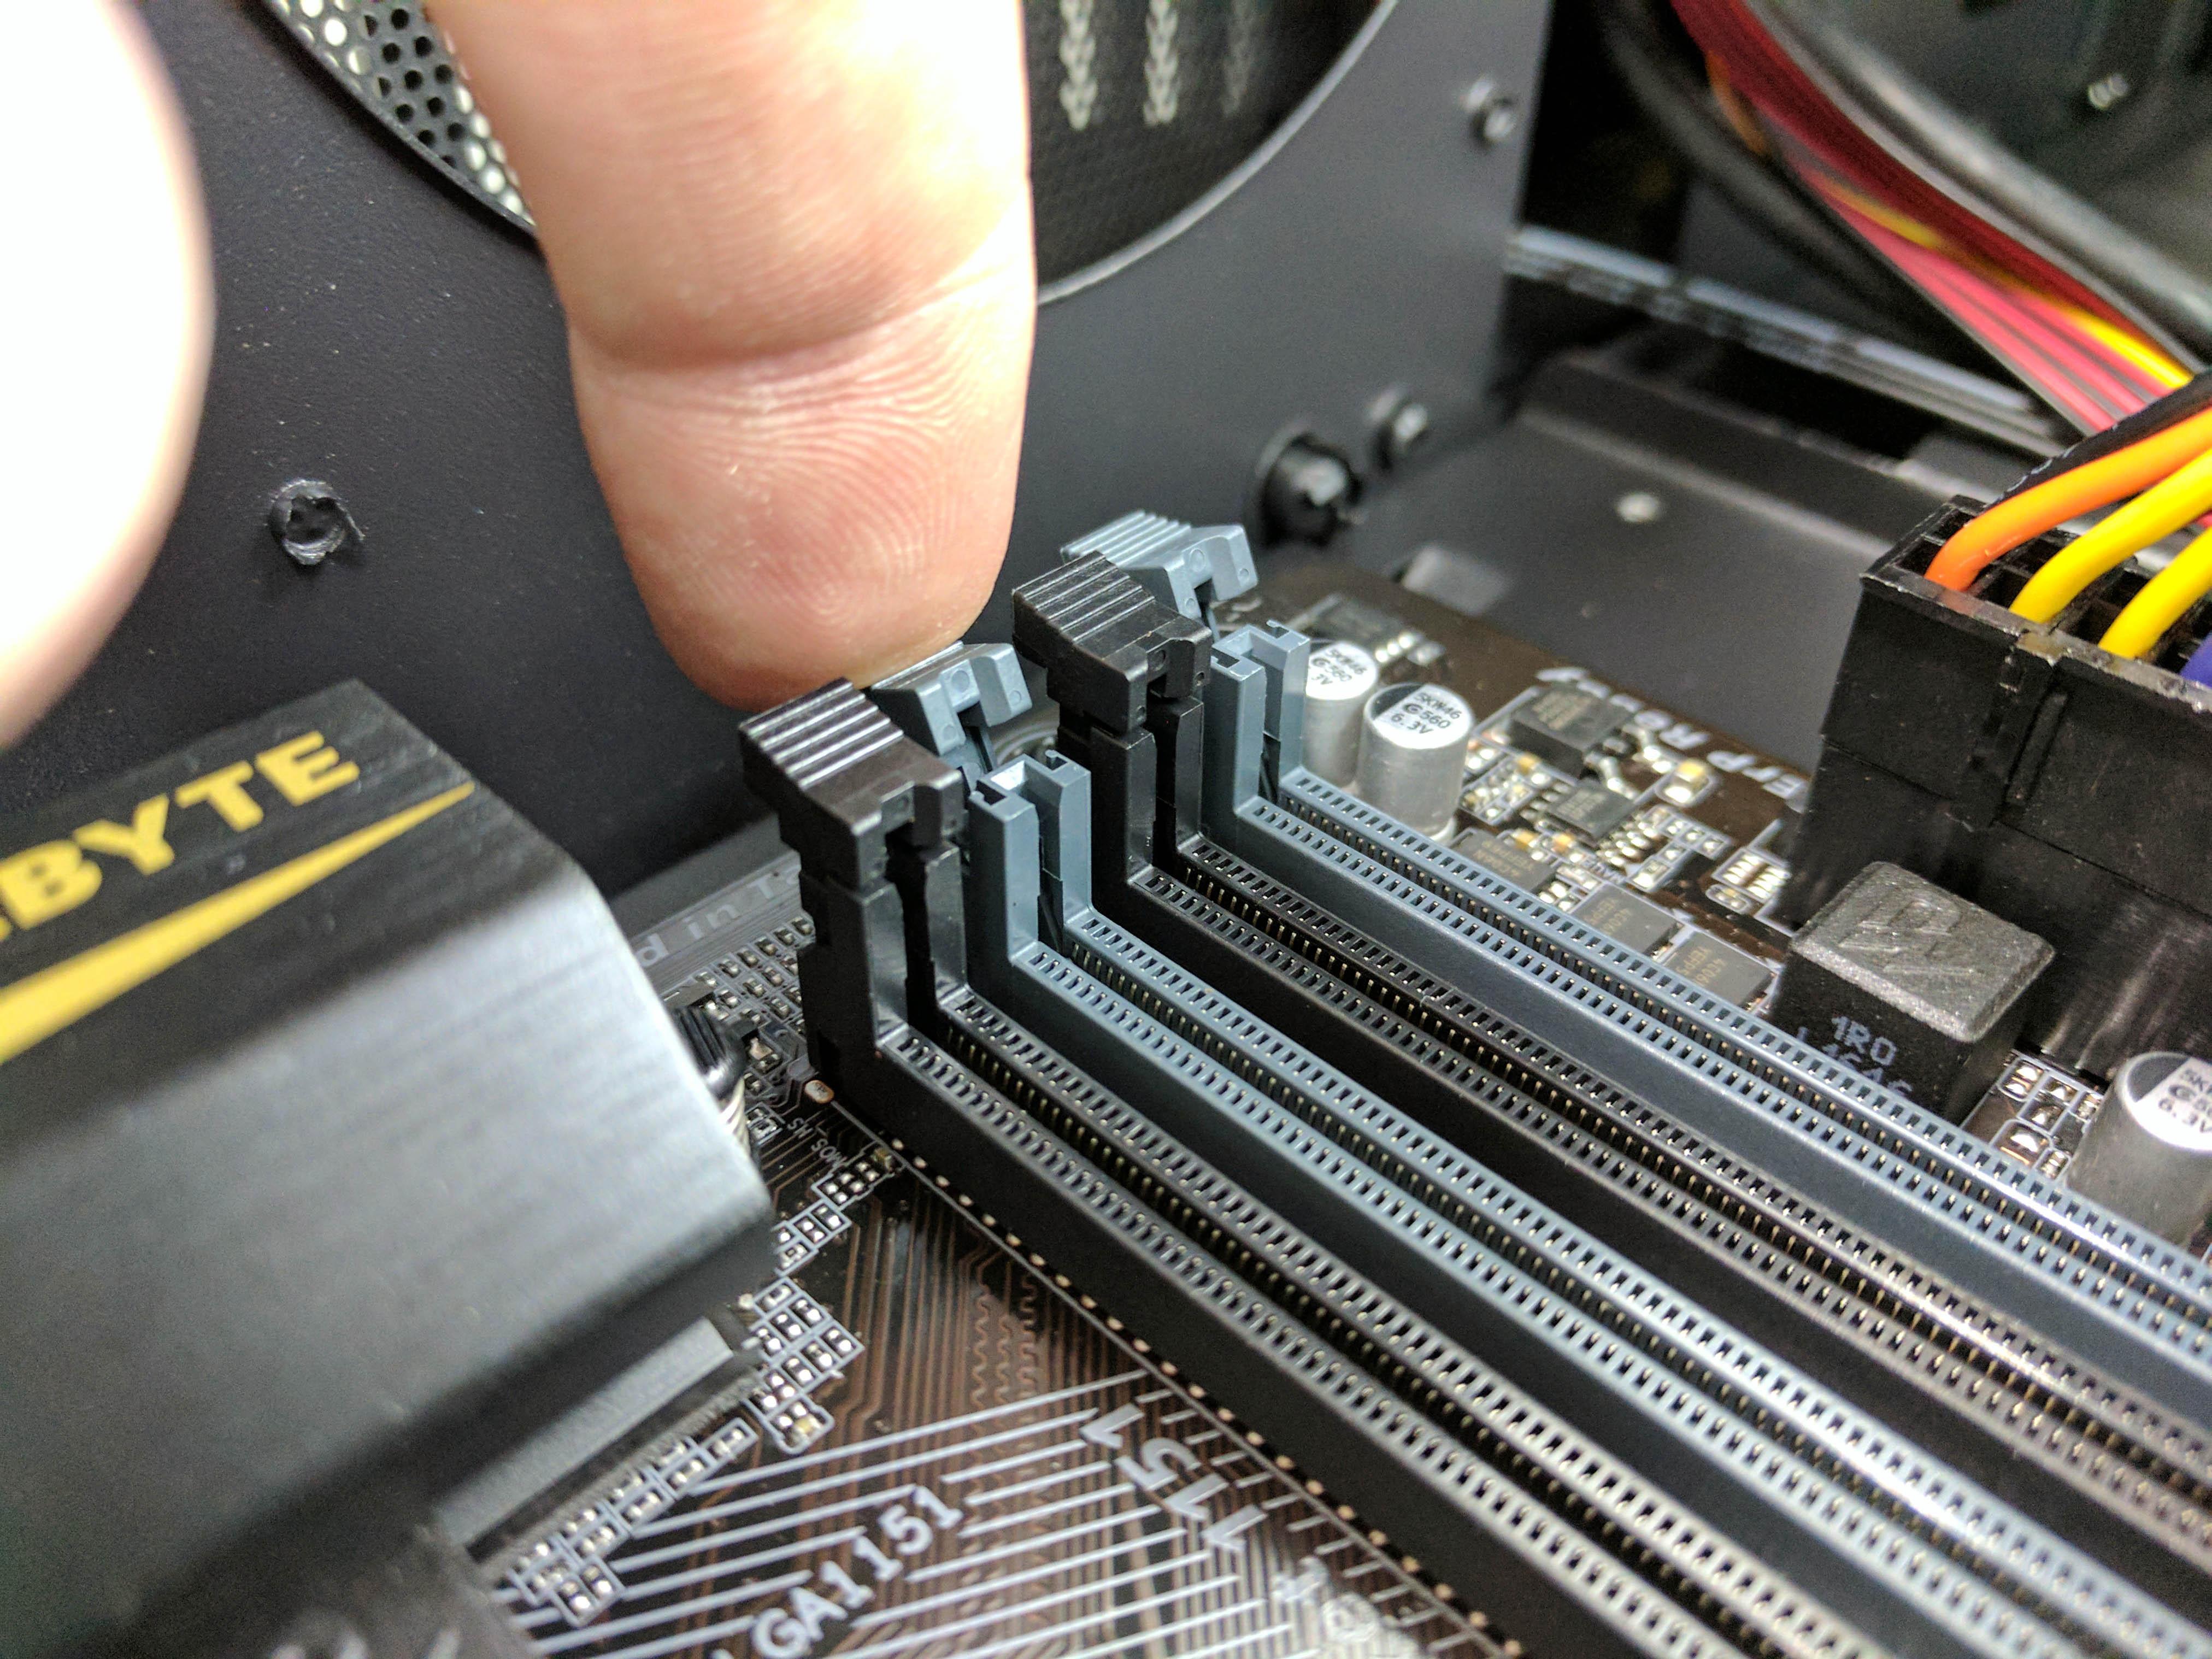
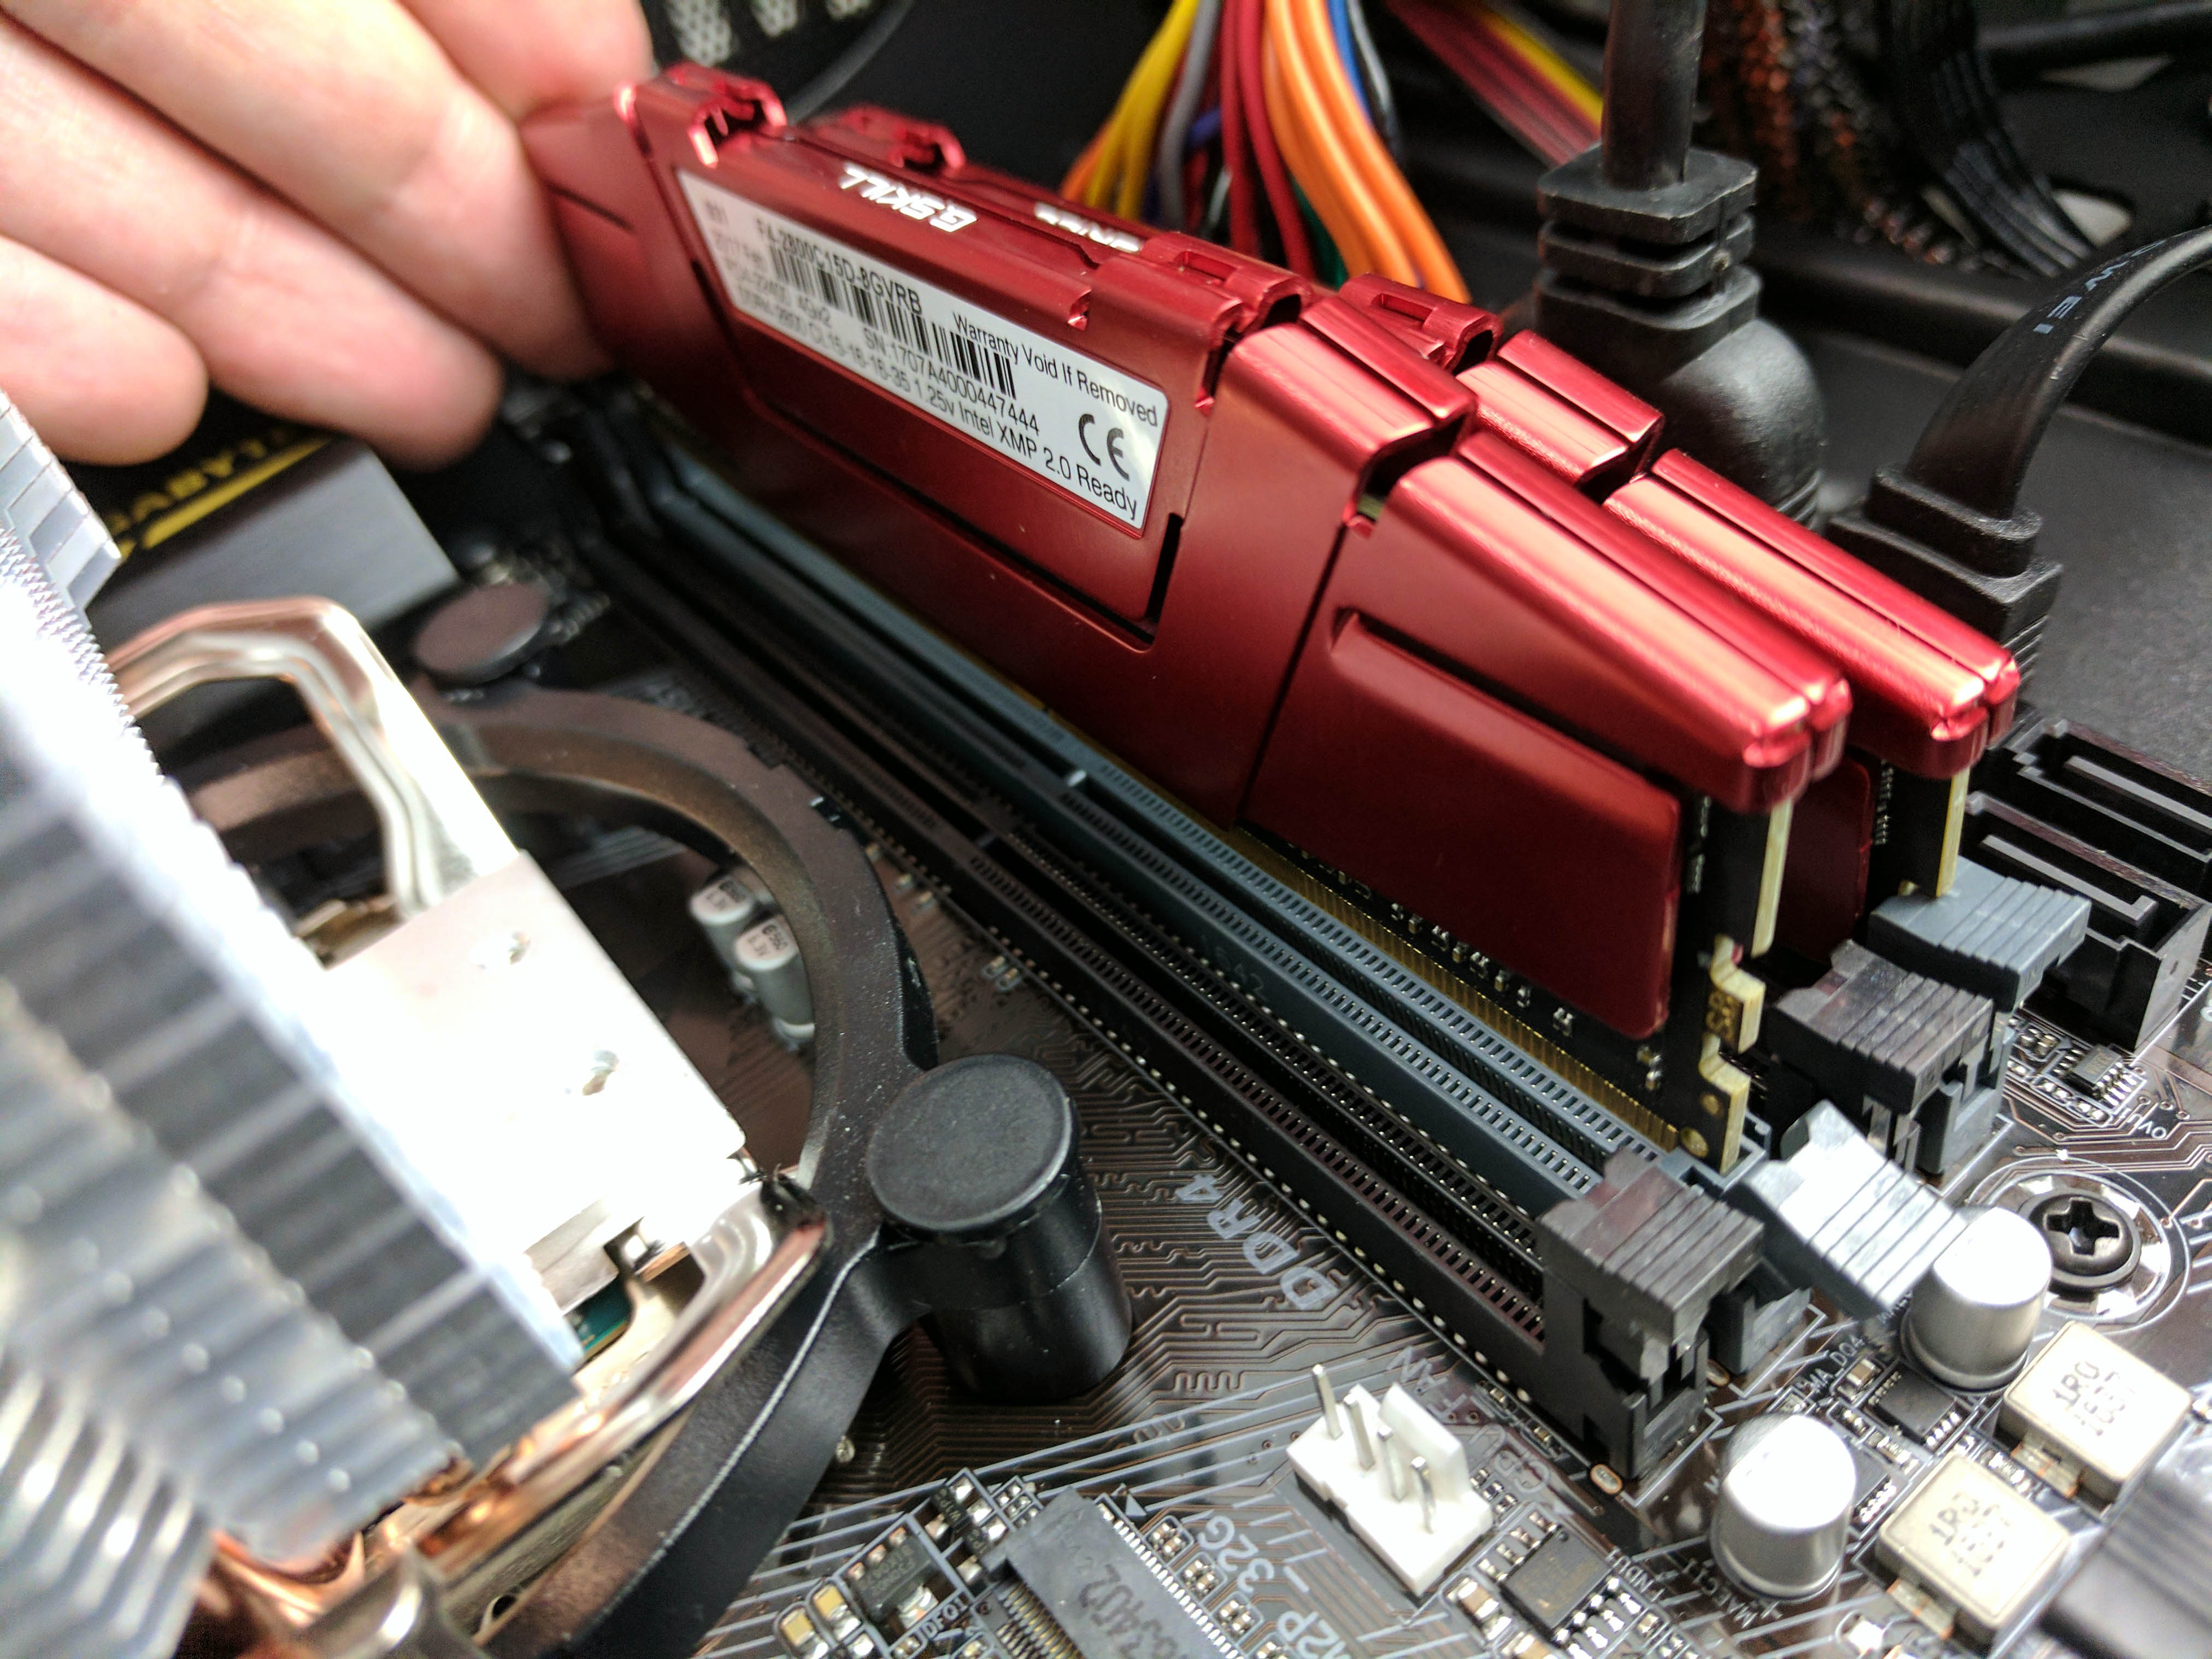
Finally, install the G.Skill Ripjaws V DDR4-2800 modules. Both sides of the motherboard’s memory DIMM slots have clips, making installation much easier (than, say, a motherboard with clips on only one side). Line up the notches in the slot and memory module, and apply pressure to slide it into place (it should click and both clips will return to their locked positions). Also make sure the memory is installed in the proper slots (2 and 4, left to right).
Finishing Touches
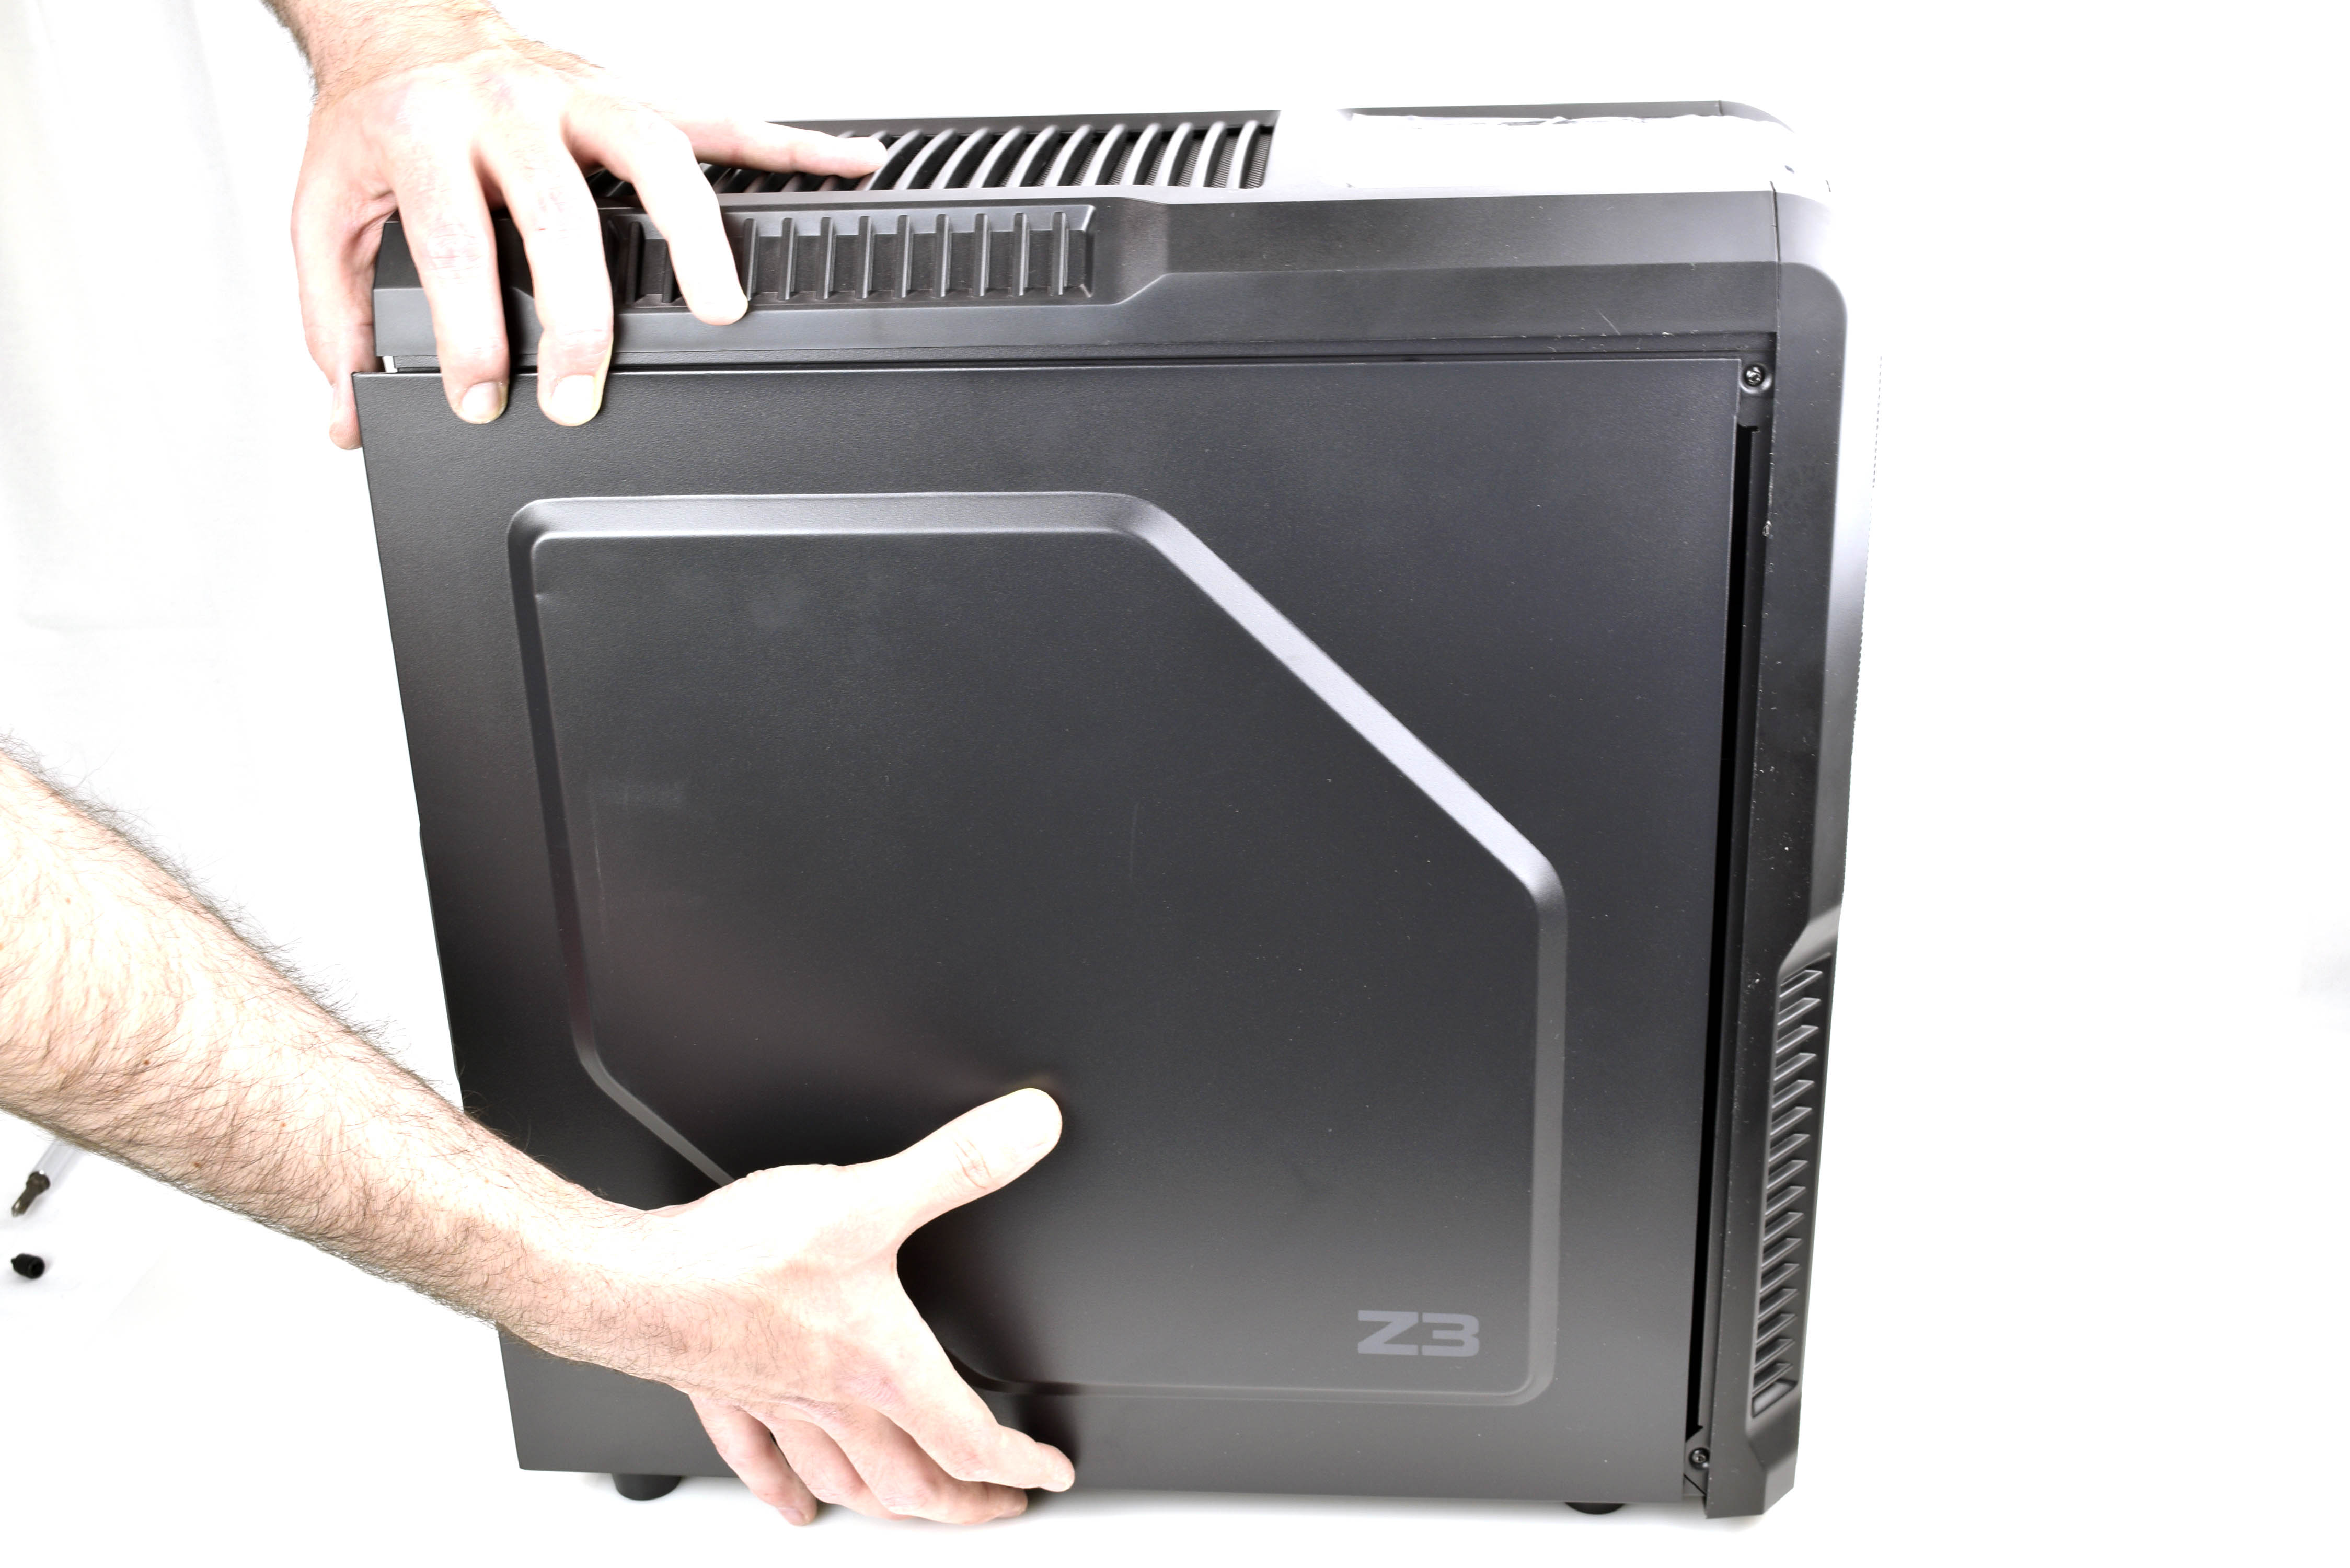
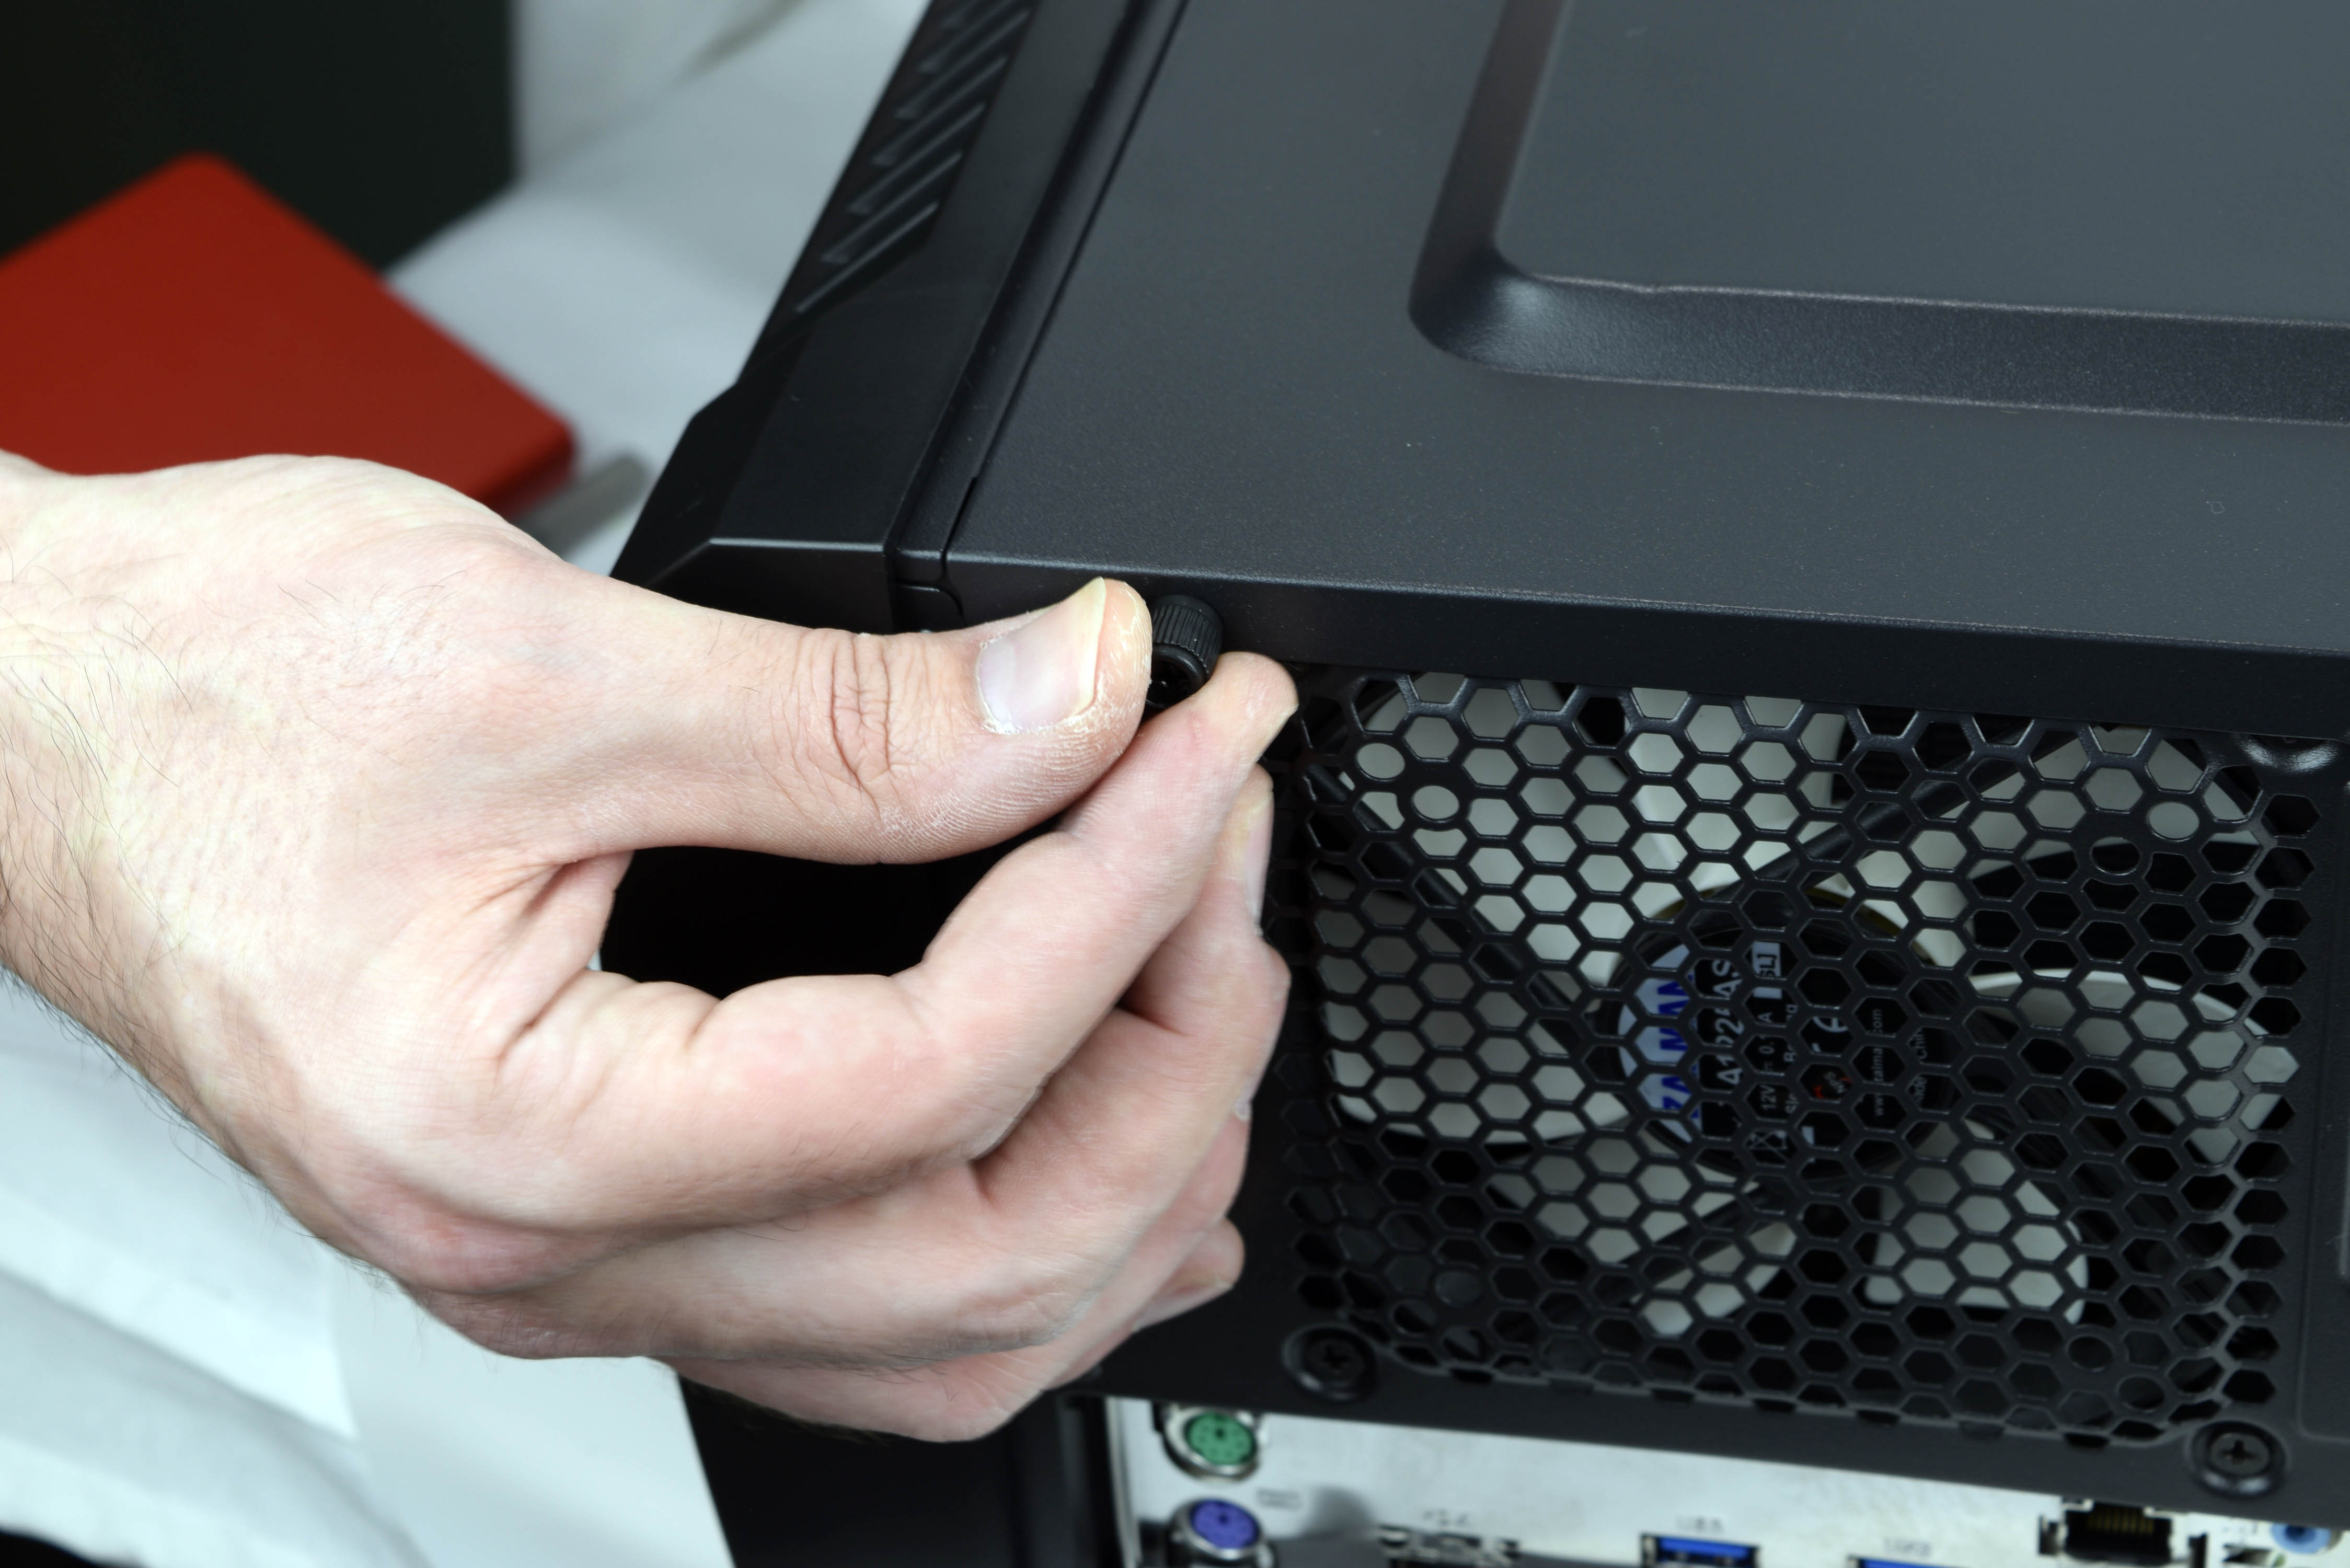
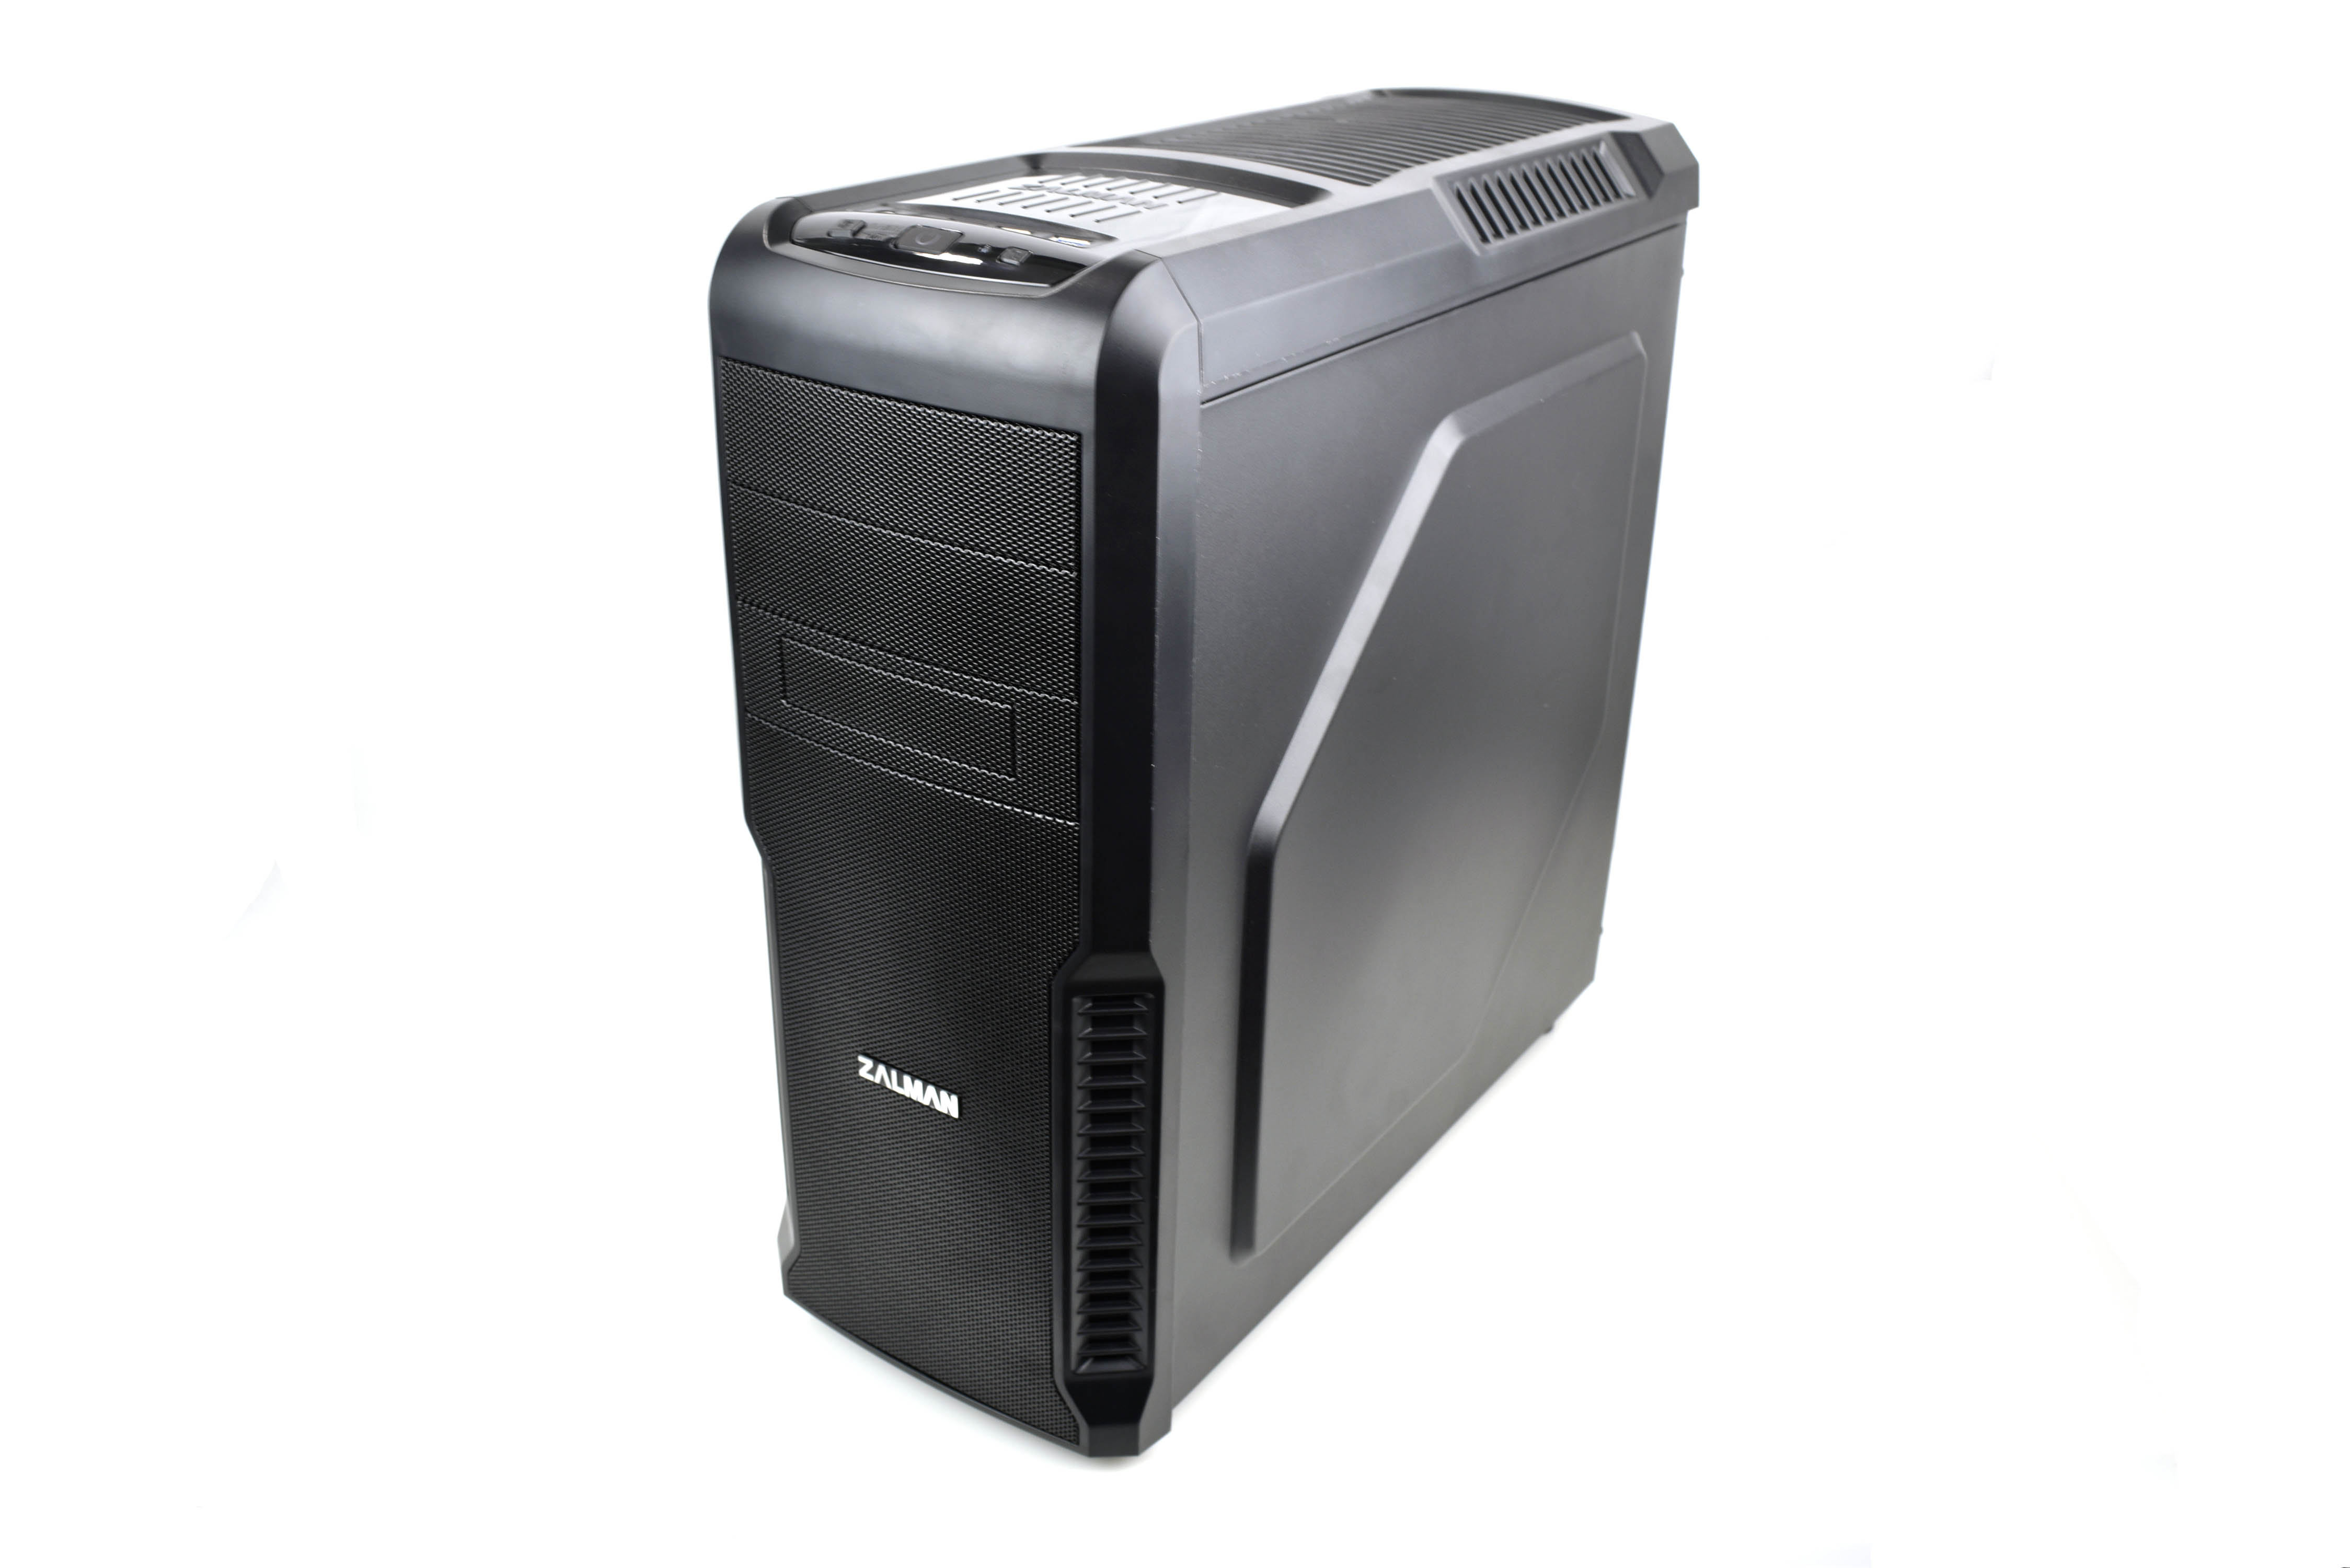
With all of the components installed, make any final adjustments to your cable management and reattach the case’s side panels. You may have to apply some moderate pressure to the rear (right) side panel depending on how well you ran cables back there, but the case will close correctly with a little persistence. Use the thumb screws to secure the panels back into place. Make sure to setup your new gaming PC in a well-ventilated area, as the entirety of the system’s cooling will depend on its airflow. Plug in the power supply and turn on the PSU power switch (next to the plug). Boot up your new overclockable budget gaming PC. The Best PC Build for $750.
Setup & Overclocking Tips
The best thing you can do before loading an operating system is to update the BIOS and get all the latest drivers from Gigabyte’s website. This will ensure that you have the latest compatibility and performance updates.
To update the BIOS, use a different computer to download and unzip the BIOS file and place it on the root directory of a thumb drive. Plug the thumb drive into the new build. Boot the machine and press the End key to access Q-Flash, Gigabyte’s BIOS update and backup utility. It’s fairly simple to use; just click update, select the thumb drive where the BIOS is located, select the file (currently called Z270PD3.F3), select the Fast method, and let it do its thing. After the BIOS has updated (after a few reboots, so don’t jump the gun on this next part), enter the BIOS by pressing the Delete key.
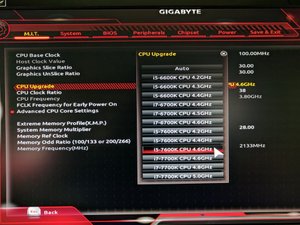
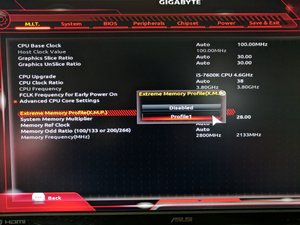
We’d be daft to suggest that anyone building this configuration should skip out on overclocking, especially considering it’s the cornerstone of the build (and a good chunk of the budget that could have been better spent elsewhere if you choose not to overclock). However, we also realize that many readers seeking our how-to guidance likely have no inclination of have to manually overclock a CPU. We have a guide on the finer points of overclocking if you want to learn the ins and outs, but the Gigabyte Z270P-D3 motherboard has some built-in solutions that makes it really easy. For a quick, worry-free CPU overclock, we used Gigabyte’s built in profiles by accessing the Advanced Frequency Settings in the M.I.T. tab of the BIOS and selecting CPU Upgrade. A list of processor models and target frequencies will appear. We selected the highest possible clock rate for the Core i5-7600K and did some stress testing to see if it would remain stable. The CPU holds a rock-solid, all-core 4.6GHz frequency without any issue, and the Gammaxx 200T keeps it sufficiently cool under load (we observed peaks of 56°C in CPU-intensive tests). Finish up by turning on the XMP memory profile in the same Advanced Frequency Settings menu (select Profile 1) and press F10 to save and exit the BIOS.
Benchmark Results
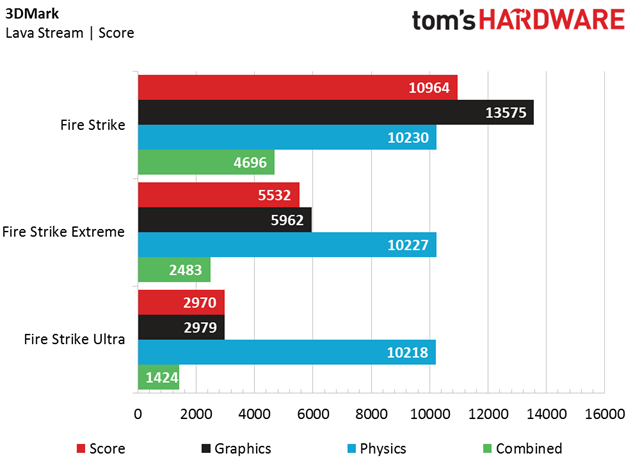
The 3DMark results speak to the $750 Lava Stream’s CPU and graphics horsepower, which is substantial enough to pull out a score of more than 10K points on Fire Strike. It also puts up a decent fight against Fire Strike Extreme, and the results indicate that you will get excellent performance at 1080p and can even dabble at 2560 x 1440 with the low-priced platform.
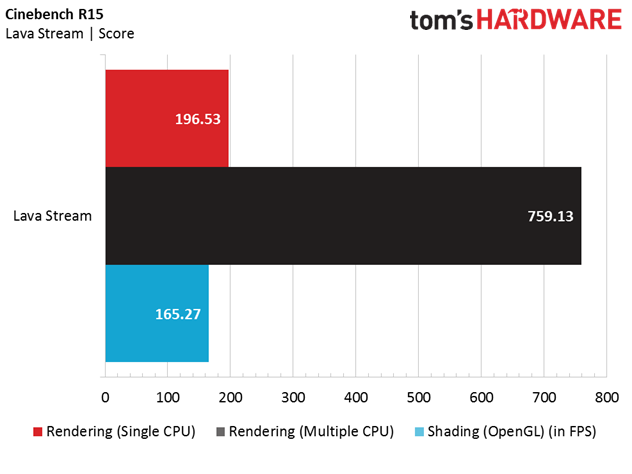
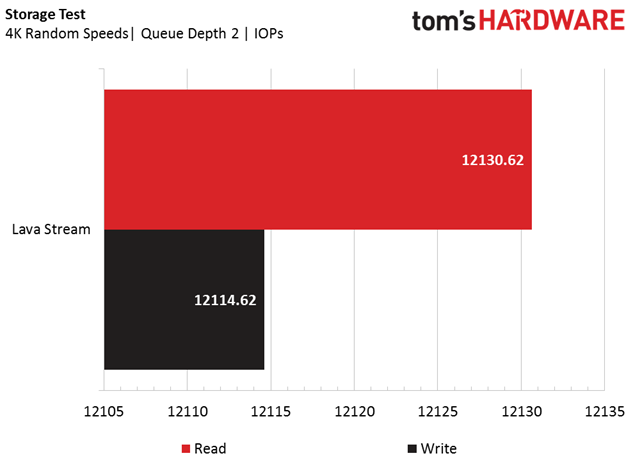
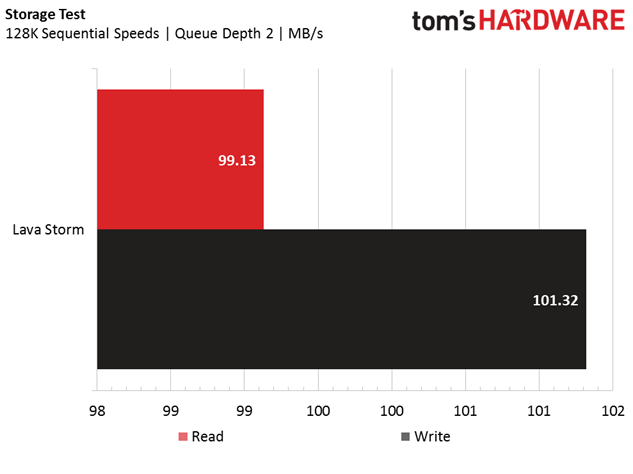
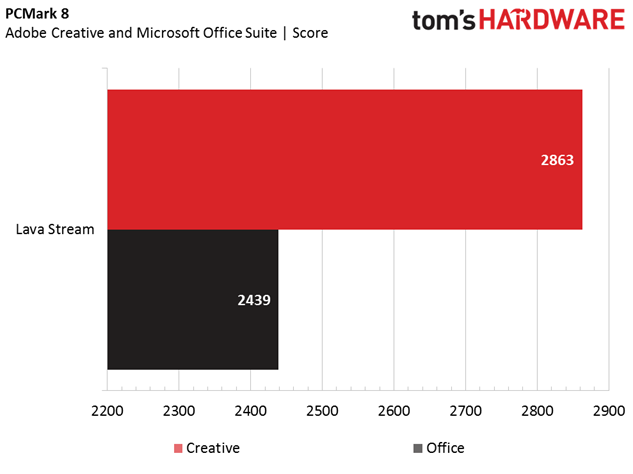
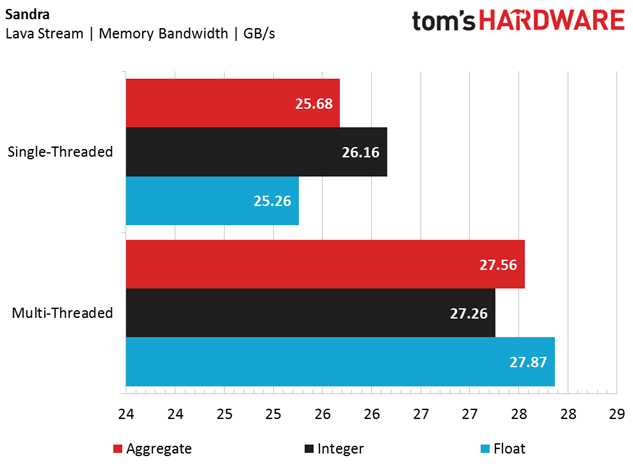
The Cinebench and Sandra results follow this trend, with the overclocked Intel Core i5-7600K and the dual-channel DDR4-2800 memory each scoring above average in their respective tests. However, PCMark 8 and our storage tests speak to the one pitfall of the platform: a slow hard drive. Although the sequential read and write speeds are respectable for a HDD, the IOPS leave you staring at load screens for quite some time when using productivity apps such as Adobe Photoshop and Microsoft Word (and, of course, games).
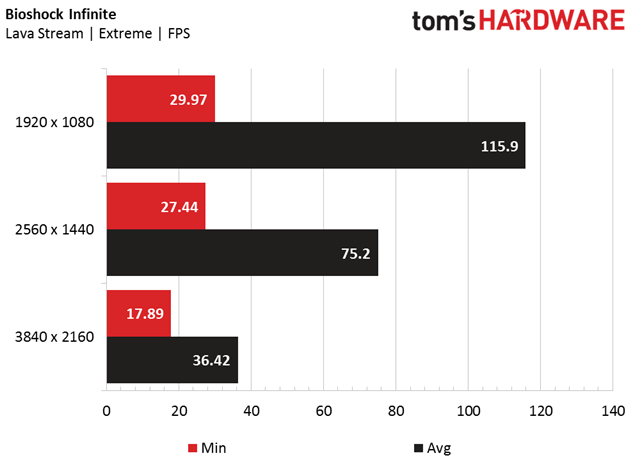
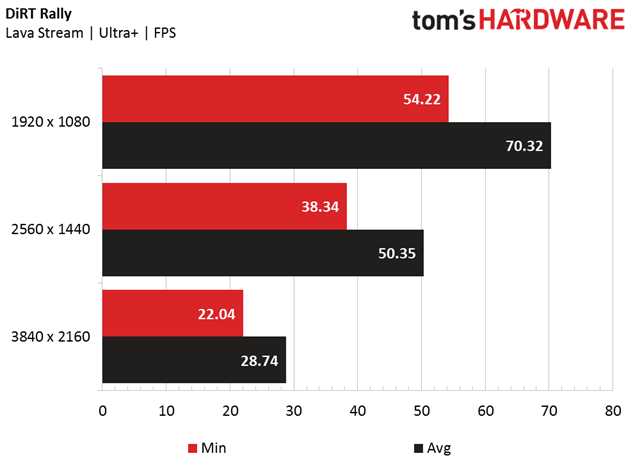
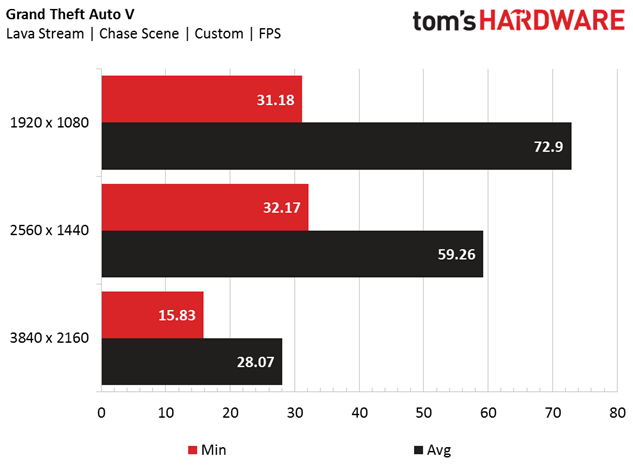
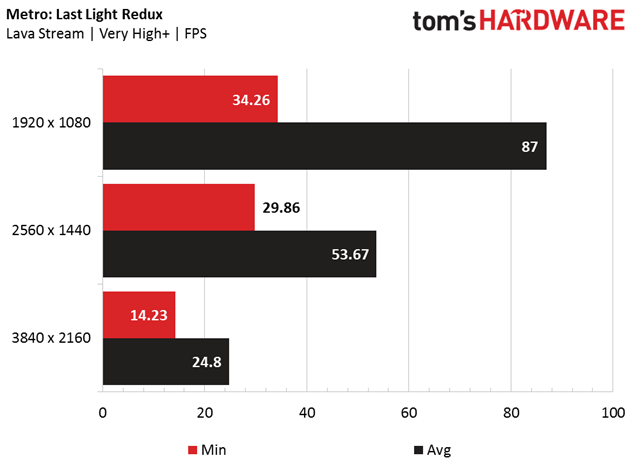
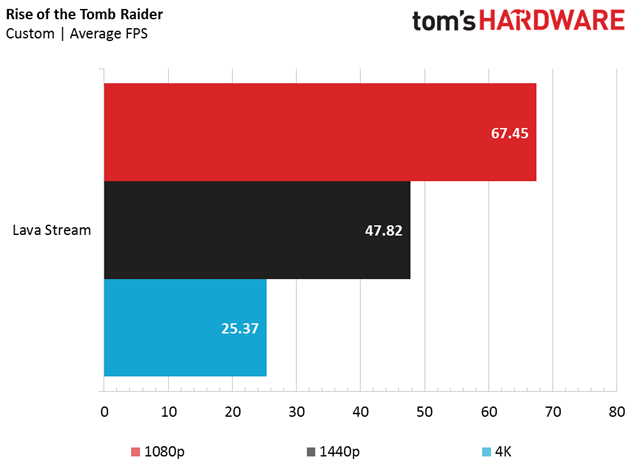
We had to pull back on some detail settings (compared to our full PC review test settings) in a few of the tested games, particularly the Anti-Aliasing options. Instead of maxing out MSAA in GTAV, we turned it off and enabled FXAA. We also set Rise of the Tomb Raider to SMAA (instead of SSAA x4), and we turned off SSAA in the Metro: Last Light Redux benchmark. Otherwise, the detail settings are identical to our PC review suite (completely maxed out).
Overall, our benchmark results show that the $750 Lava Stream can handle demanding detail settings on some of the most popular titles from our review suite at 1920 x 1080, with the ability to achieve playable framerates at 1440p and 4K on certain games. We wouldn’t recommend 4K gaming with this setup, but the RX 480 and i5-7600K combo makes for an excellent VR-ready 1080p gaming rig.
Final Analysis
We honestly wouldn’t change much about SR-17 Blackbird’s $750 Lava Stream build. The choice of CPU, motherboard, cooling, and memory is ideal for someone looking for an Intel platform that meets modern AAA and VR game requirements with an overclockable CPU. Most of all, it doesn't break the bank. The GPU is also a respectable choice for the platform. The motherboard supports AMD Crossfire technology, giving the builder a clear upgrade path if they find themselves wanting more gaming horsepower later on. An argument could be made to substitute the graphics card for a similarly-priced VR-ready Nvidia GTX 1060 GPU, but we’re satisfied with the RX 480’s performance, and you likely won’t see too much of a variance in bottom-line playability if you go with the other team’s applicable GPU. If you can get them, there's also the 500-series GPUs from AMD.
MORE: AMD Radeon RX 480 Roundup
MORE: Nvidia GeForce GTX 1060 Roundup
The power supply is adequate for the component set, but it won’t support an additional GPU if you decide to add one down the line. The case is easy to work with, and the flat PSU cables give you significant flexibility in your cable management. However, expertly laid wiring goes to waste in this chassis, as there’s no side panel window to peer into and admire the craftsmanship. For a little more money, we'd suggest a windowed case for those who demand more aesthetic value. The storage is the only component we’d highly suggest an upgrade for. The 1TB Western Digital RE4 HDD is loud and not the best match for hosting an operating system, and for just a few dollars more, a 1TB WD Caviar Blue WD10EZEX, which is featured in many of the other Best Builds, would be more suitable as a desktop OS drive. If you can afford it, the move to an SSD (even a cheap, low-capacity SSD) would vastly improve the system’s performance.
MORE: Best Cases
MORE: Best SSDs
MORE: Best PC Builds
MORE: How To Build A PC
MORE: All PC Builds Content
Derek Forrest was a contributing freelance writer for Tom's Hardware. He covered hardware news and reviews, focusing on gaming desktops and laptops.