BenQ XL2430T 24-Inch 144Hz Gaming Monitor Review
BenQ sent over a 144Hz-capable 24-inch screen priced attractively. As a gamer, it'd be hard to ignore this model, which doesn't offer G-Sync support, but does deliver a great picture and excellent maximum refresh rate for less than $400.
Why you can trust Tom's Hardware
OSD Setup And Calibration Of The XL2430T
OSD Tour
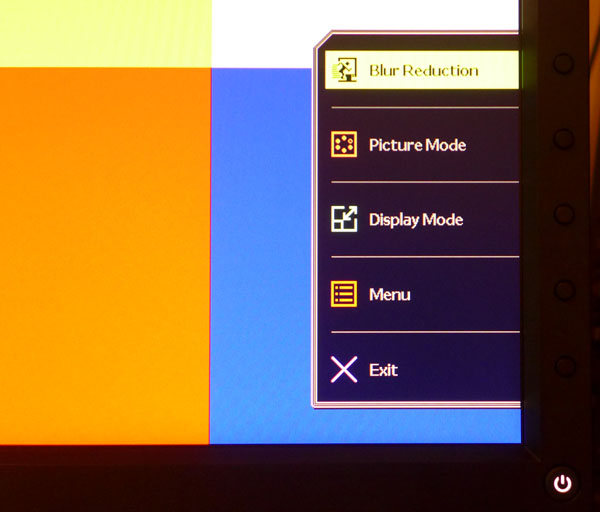
The XL2430T’s OSD is just like every other BenQ monitor we’ve tested: full-featured and efficient. Pressing any bezel key or the wheel on the S Switch brings up a small menu.
The top three slots can be programmed for many quick-access functions. Above you can see how the menu looks from the factory. We changed the third one from Display Mode to Brightness, making it easier to adjust the backlight when using Blur Reduction. Clicking Menu brings up the full OSD.
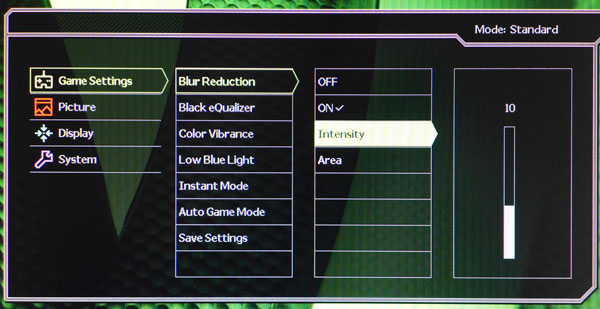
There is a lot here. Fortunately, it’s logically grouped into four sub-menus, the first of which contains gaming settings.
The big star is of course Blur Reduction. If you use it with an HDMI source, it’s either on or off, resulting in an 81-percent brightness reduction. You get a pulse-width adjustment called Intensity over DVI and DisplayPort, along with an Area slider.
At the default setting of 10, Intensity causes only a 51-percent light reduction, which can be easily compensated for by turning up the backlight. You can run Intensity up to 25, but then you’re looking at 96 percent less light output.
The Area slider is something we haven’t seen before. It is intended to selectively reduce blur depending on image content. In our tests, it only seemed to cause tearing and jitter artifacts when turned up too high. It comes set to 10, and that's where it works well.
Black eQualizer tweaks low-end gamma to help improve contrast. Since it starts at zero, it also crushes detail if you increase more than a little.
Get Tom's Hardware's best news and in-depth reviews, straight to your inbox.
Color Vibrance increases saturation and may satisfy some users. Colors look more vivid, though the feature can also cause a loss of image detail.
Low BlueLight is a feature found on most BenQ monitors. It reduces blue and warms the image to reduce eye fatigue. Using the Standard picture mode already gets you pretty close to D65, so we recommend leaving this one alone.
Instant Mode increases the pixel clock to improve response. We enabled it for all our tests.
Auto Game Mode applies different enhancement settings depending on content. If you want consistency between games, it’s best to leave this off.
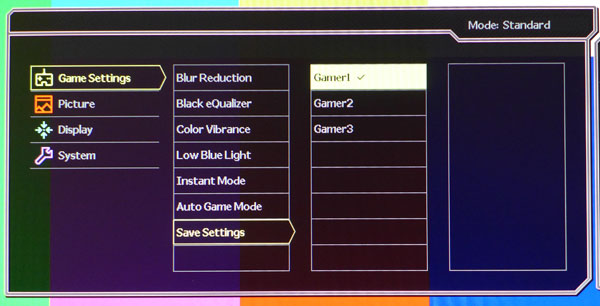
Save Settings lets you preserve the game options to one of three memory slots. They can then be called up using the three buttons on the S Switch. If you change any picture settings in the next menu, they apply globally.
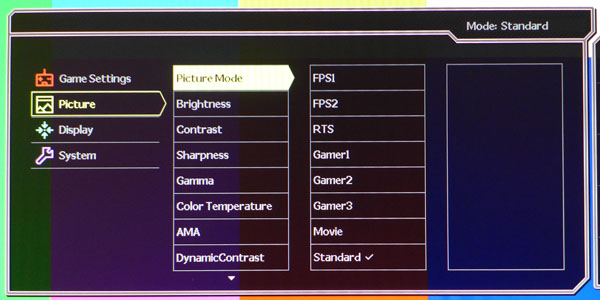
All of the calibration adjustments are in the Picture menu. You get eight image modes – three for FPS and RTS games, three memories for custom gaming settings plus Movie and Standard. Our favorite is Standard, which is very accurate out of the box and can be tweaked for even better performance.
AMA is another tool to help improve the panel’s response time. We set it on High for our tests.
Dynamic Contrast improves perceived contrast at the expense of a skewed gamma curve. If you don’t mind sacrificing a little detail, it can be used sparingly.
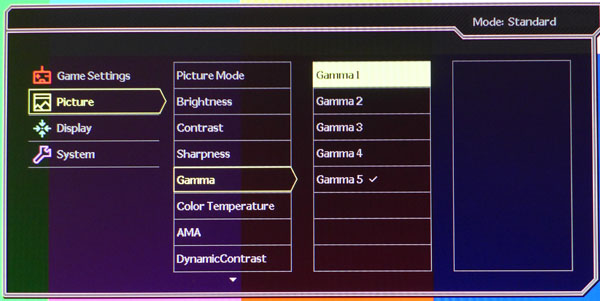
There are five gamma presets, and the fifth option is best. The others are all too light and create a somewhat dull image. Regardless of the other options you choose, we recommend Gamma 5 for all content.
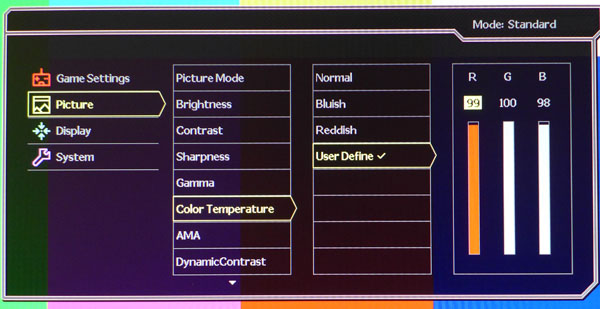
Here are the RGB sliders. They are available in the gaming modes as well, but they are most effective in Standard. You won’t need to change them much to achieve excellent grayscale tracking. The Normal, Bluish and Reddish presets are fixed and can’t be adjusted.
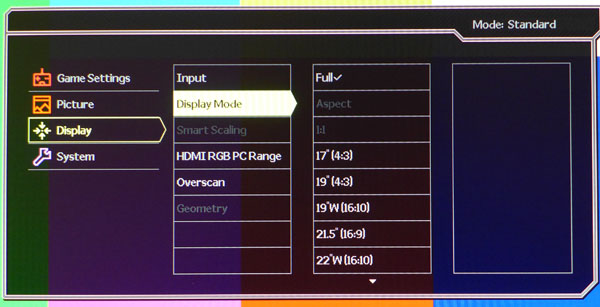
The Display menu contains the input selector and a few other options.
Display Mode refers to image sizing. Full represents a 1:1 pixel map for incoming signals. The other options size the image to match different game screens. This is a great way to avoid distorted images in older titles designed for 4:3 monitors.
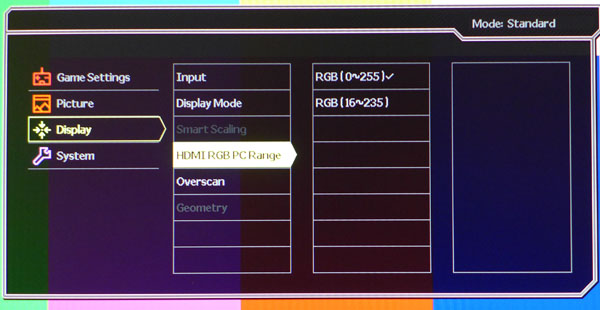
HDMI RGB PC Range comes set to levels 16-235, which is incorrect. Change it to 0-255 for proper compatibility with PC signals. If you use DisplayPort or DVI, the option is grayed-out and the XL2430T handles PC-range content correctly.
Overscan is useful when watching TV broadcasts full-screen. You can use it to remove garbage pixels from edges of the image.
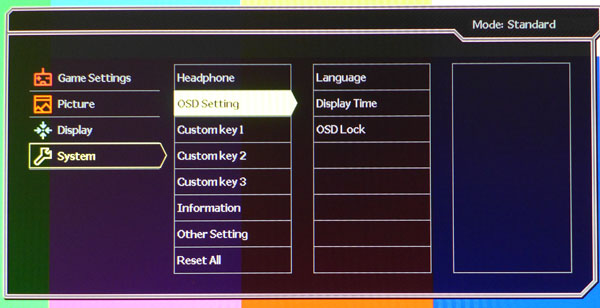
The final menu, System, has OSD options, languages, signal info and a factory reset option.
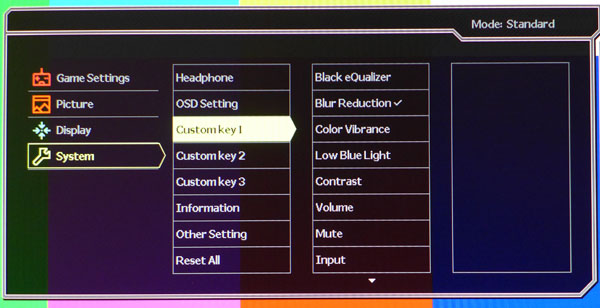
Customkeys refer to the top three bezel control buttons. They can be set to a variety of monitor functions, saving you a trip to the OSD when making quick changes.
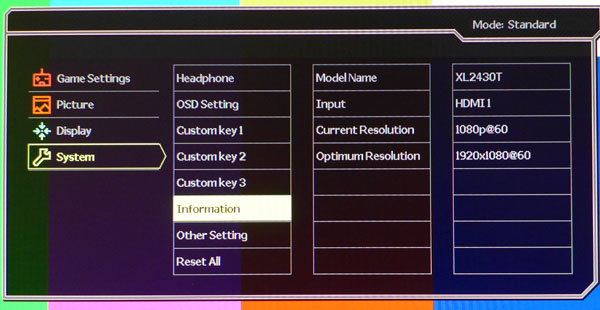
Signal info gives you the active input, plus incoming and outgoing resolution, along with refresh rate.
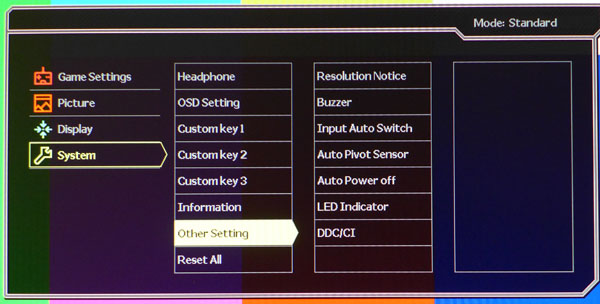
The Other Setting menu has little-used options like on-screen notices. The main one to be concerned with is DDC/CI. Leave it on so the monitor can communicate with your PC.
Calibration
Once we switched to the Standard picture mode, our work was largely done. Tweaking the RGB sliders and setting the gamma to preset five produced a great image, yielding excellent test results. It’s easy to maintain contrast post-calibration thanks to a control that allows some upward adjustment. We could raise it to 52 before any clipping occurred. Sharpness works just fine at level five. Any higher and obvious edge enhancement appears, which actually reduces the clarity of small fonts and objects.
| BenQ XL2430T Calibration Settings | |
|---|---|
| Picture Mode | Standard |
| Brightness | 48 |
| Contrast | 52 |
| Sharpness | 5 |
| Gamma | 5 |
| Color Temp User | Red 99, Green 100, Blue 98 |
Current page: OSD Setup And Calibration Of The XL2430T
Prev Page Packaging, Physical Layout And Accessories Next Page Results: Brightness And Contrast
Christian Eberle is a Contributing Editor for Tom's Hardware US. He's a veteran reviewer of A/V equipment, specializing in monitors. Christian began his obsession with tech when he built his first PC in 1991, a 286 running DOS 3.0 at a blazing 12MHz. In 2006, he undertook training from the Imaging Science Foundation in video calibration and testing and thus started a passion for precise imaging that persists to this day. He is also a professional musician with a degree from the New England Conservatory as a classical bassoonist which he used to good effect as a performer with the West Point Army Band from 1987 to 2013. He enjoys watching movies and listening to high-end audio in his custom-built home theater and can be seen riding trails near his home on a race-ready ICE VTX recumbent trike. Christian enjoys the endless summer in Florida where he lives with his wife and Chihuahua and plays with orchestras around the state.
-
test090927 Don't be interrupted by want type of panel it is.Reply
TN and IPS both have there own advantage. TN for low response time and relatively high refresh rate, whereas IPS has better color reproduction and viewing angle. However, IPS panel generally has long response time, which might cause ghosting when gaming.
For XL2430T TN panel which might seem bad color reproduction, the color is actually fine and it can be adjusted by "Color Vibrance" mode. It's a great choice for you. -
wtfxxxgp Wow. Some people don't bother to read the article. The reviewer clearly states that the ONLY difference between this TN panel and an IPS panel is viewing angle. How is this a problem unless you're using more than 1 monitor? How many people sit and game when they don't have their monitor right in front of them? EVERYTHING ELSE about this monitor as far as performance is concerned completely out-classes IPS panels. Stop complaining, read the full article and unless you have anything constructive to say, rather don't say anything at all. Commenting that you're waiting for an IPS panel or wouldn't ever go back to a TN panel is rather useless. As for me, I think the price is very reasonable for this monitor, given its excellent review on everything that matters to a gamer.Reply -
chenw I stopped reading at 'IPS', not even worth my time.Reply
Seriously, after comparing the VX2770 and swift (which is a classic IPS to TN), I wasn't even sure what IPS was all about, the IPS had much worse BLB and didn't look that much greater (granted, it was probably a bad IPS panel). -
AndrewJacksonZA Is it known if this monitor is FreeSync-compatible, or can be upgraded to be FreeSync-compatible?Reply
Thank you
