Four Z87 Express Motherboards For Three- And Four-Way SLI
Formerly a very exclusive component, the PCI Express switch that makes Intel’s LGA 1150-based platforms three- and four-way SLI-capable is now available across a range of high-end motherboards. Today we compare four premium enthusiast-oriented models.
Z87X-UD7 TH Firmware
Why you can trust Tom's Hardware
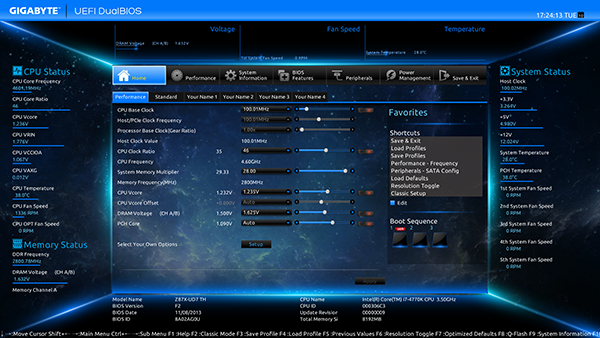
Gigabyte’s UEFI opens to a high-resolution home page with system status bars on both sides and firmware information at the bottom. Frequently-adjusted settings are found in its customizable home menu.
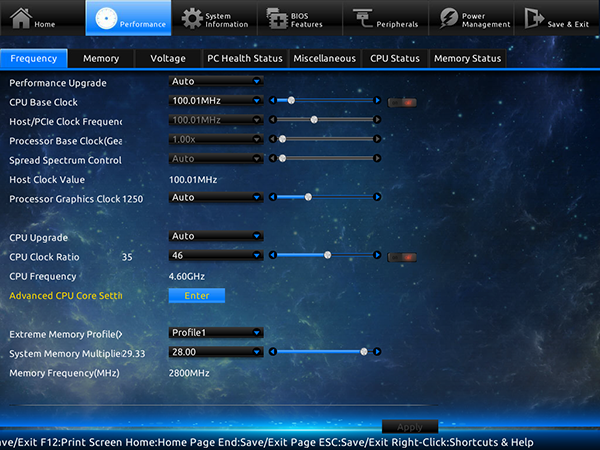
A press of the F6 switch toggles to low-resolution mode, where we can more easily show actual settings. The frequency tab of the Performance menu, for example, begins with automatic overclock presets in 20% intervals, for which anything over 20% is unrealistic given our Haswell-based CPU's heat problems.
Also adjustable above are base clock and clock strap (for high BCLK frequencies), integrated GPU and CPU ratios, and DRAM ratios.
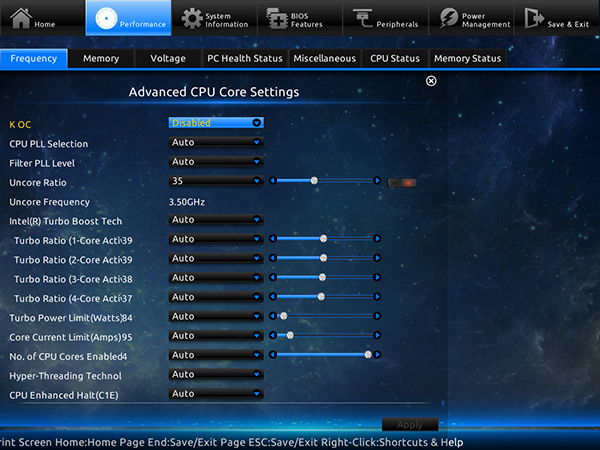
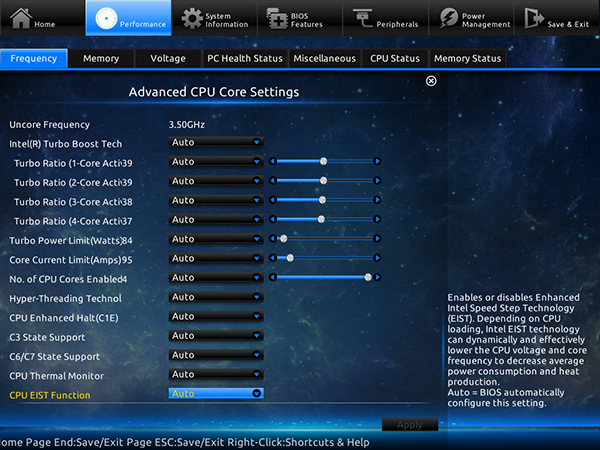
The “Advanced CPU Core Settings” menu offers Turbo Boost, integrated power savings, and power limit controls.
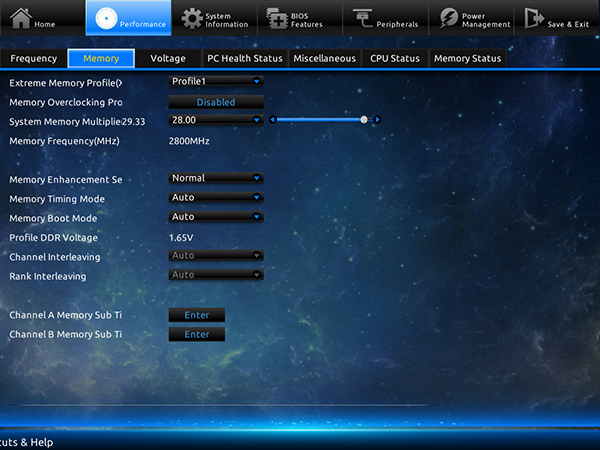
The “Memory” tab has redundant XMP and manual multiplier controls, where we are forced to reduce our DDR3-3000 from its correct 29.33x ratio to 28x in order to reach the board’s maximum stable frequency. Changing “Memory Timing” mode to “Manual” enables combined timing manipulation, while “Advanced Manual” configuration has per-channel timings.


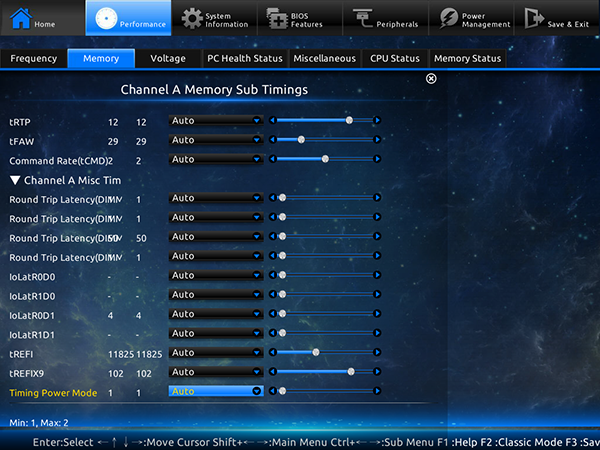
Primary, secondary, and tertiary memory timings are adjustable over a wide range to provide the ultimate stability for custom DRAM overclocking.
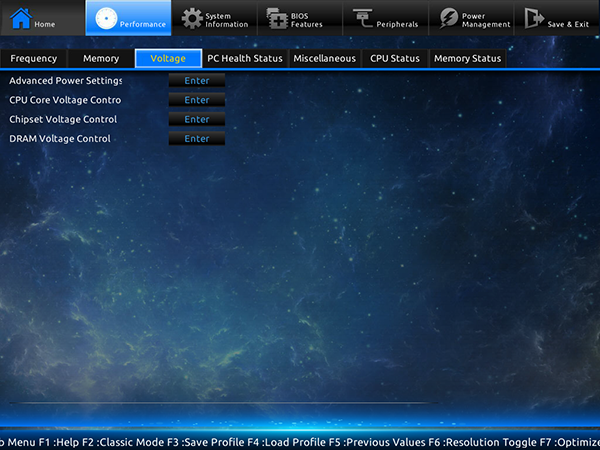
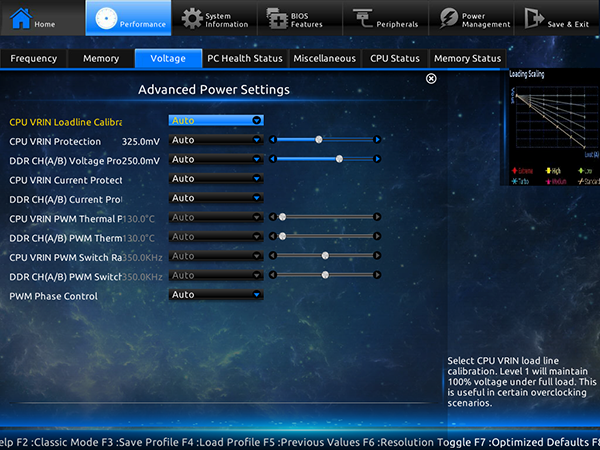
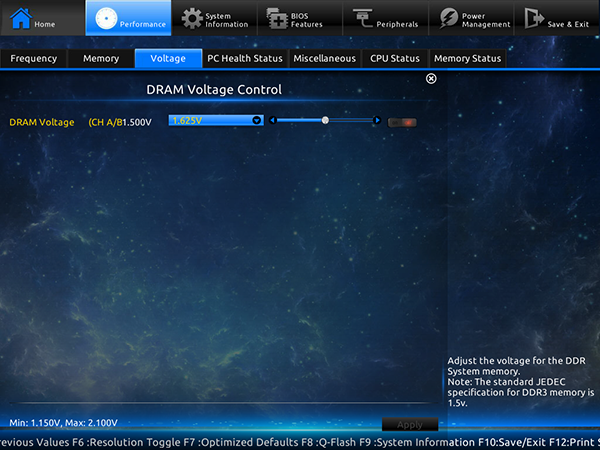
The “Voltage” tab is nothing more than a launching point for various submenus that could have easily been combined into a single menu.


Our CPU reached 1.25 V at the motherboard’s 1.235 V settting, and our DRAM reached 1.65 V at its 1.625 V setting.
Get Tom's Hardware's best news and in-depth reviews, straight to your inbox.
-
iam2thecrowe Am i missing something here? I dont see the point of reviewing 3 and 4 way sli boards and not testing 3 and 4 way sli. Seems rather pointless since any average motherboard will perform well in adobe, productivity etc benches dependent on the cpu....Reply -
Crashman This was really just about finding any board that supports Nvidia's requirements about how that third card is connected. We found some, I overclocked them, now I have enough data to pick a board for the System Builder Marathon. But that only explains why overclocking took priority!Reply
After spending two days per board on a "one week" article, I couldn't add more tests. The general benchmark set looks for unintended overclocking/underclocking, power and memory bandwidth issues, so you can see the performance difference attributable to each board's CPU and DRAM configuration differences. It runs from a .bat file, so it didn't add significantly to the article's completion time.
The PLX bridge that these all share represents the "great equalizer" when it comes to CrossFire and SLI configuration, so that portion of all three boards should be identical. I understand that things that should be the same in theory are occasionally different in practice. My apologies for not having the extra 1-day per board for additional tests. -
iam2thecrowe Reply12341788 said:They all use the same PLX bridge, so you would have seen a whole bunch of identical gaming results. The general benchmark set looks for unintended overclocking/underlocking, power and memory bandwidth issues, so you can see the actual performance difference. And there's still an overclocking section.
These boards had to be tested for general performance and stability like any other boards. The PLX controller is the equalizer when it comes to games.
I think testing 3/4 way sli would still be valid, as it doesn't always work properly, in the past there have been compatibility problems with certain gpu's/boards/firmware/controllers and certain benchmarks completely failed. -
Kraszmyl "internally-mounted external USB 2.0 port for ReadyBoost fanatics" on the asus z87.Reply
Those have nothing to do with readyboost. The internal usb ports are very common on workstations and you put CAD dongles and equivalent items in them so that you can lock them inside the case and don't have to worry about some one stealing them from the outside or them taking up an outside usb port. -
Memnarchon I would love to see Asus Maximus VI Extreme, but it seems ASUS didn't want to give a 2nd board and prefered the Z87 WS....Reply -
Traciatim where are the sli/crossfire benchmarks and comparisons with traditional non-switched setups?Reply
Hey guys, we have these awesome new setups for supreme graphics pumping power! Watch it zip files like every other board! -
duramax08 Why are they still making motherboards with PS/2 connections? Its time to move on, replace those baby's with some USB 3.0!Reply
