How To: Optimizing Your Graphics Card's Cooling
Even with summer gone, cooling remains a hot topic. How can the cooling performance of a graphics card be improved without replacing the cooler, or switching to liquid cooling? We'll cover some causes of poor cooling performance.
Thermal Pads, Backplate Cooling, And Wrapping Up
Thermal Pads: A Miracle or an Illusion?
Next, we'll look at the tape that XFX uses to cover its VRMs. The tape isn't made from a homogeneous material, which would have surely been expensive to manufacture, but rather a foamed mass that is compressed in relevant parts thanks to pressure applied by the assembled card.
Unfortunately, air is one of the worst mediums for transporting heat due to its terrible thermal conductivity. Thus, if compact thermal pads of sufficient thickness and quality are available, we highly recommend using them instead of the stock foam.
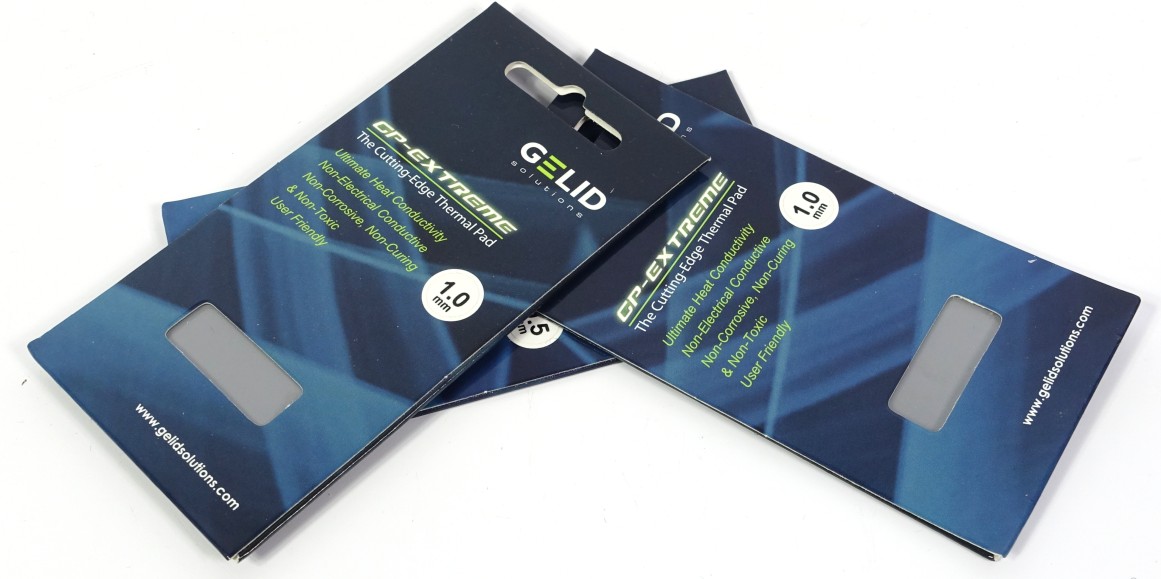
Thermal pads (or tapes) are readily available for little money in a variety of thicknesses (and colors). The depression marks on the original tape provide some help on how and where to properly position the product of your choice.
Note #11 The best thermal pad is just good enough Avoid foamed pads if possible Never use thicker pads than necessary Nevertheless, make sure that there is sufficient pressure on the product
Using the Backplate as a Cooler
Nothing improves cooling like an increase in surface area! So now we're going to show you how to convert an existing backplate to a valuable part of the thermal solution.
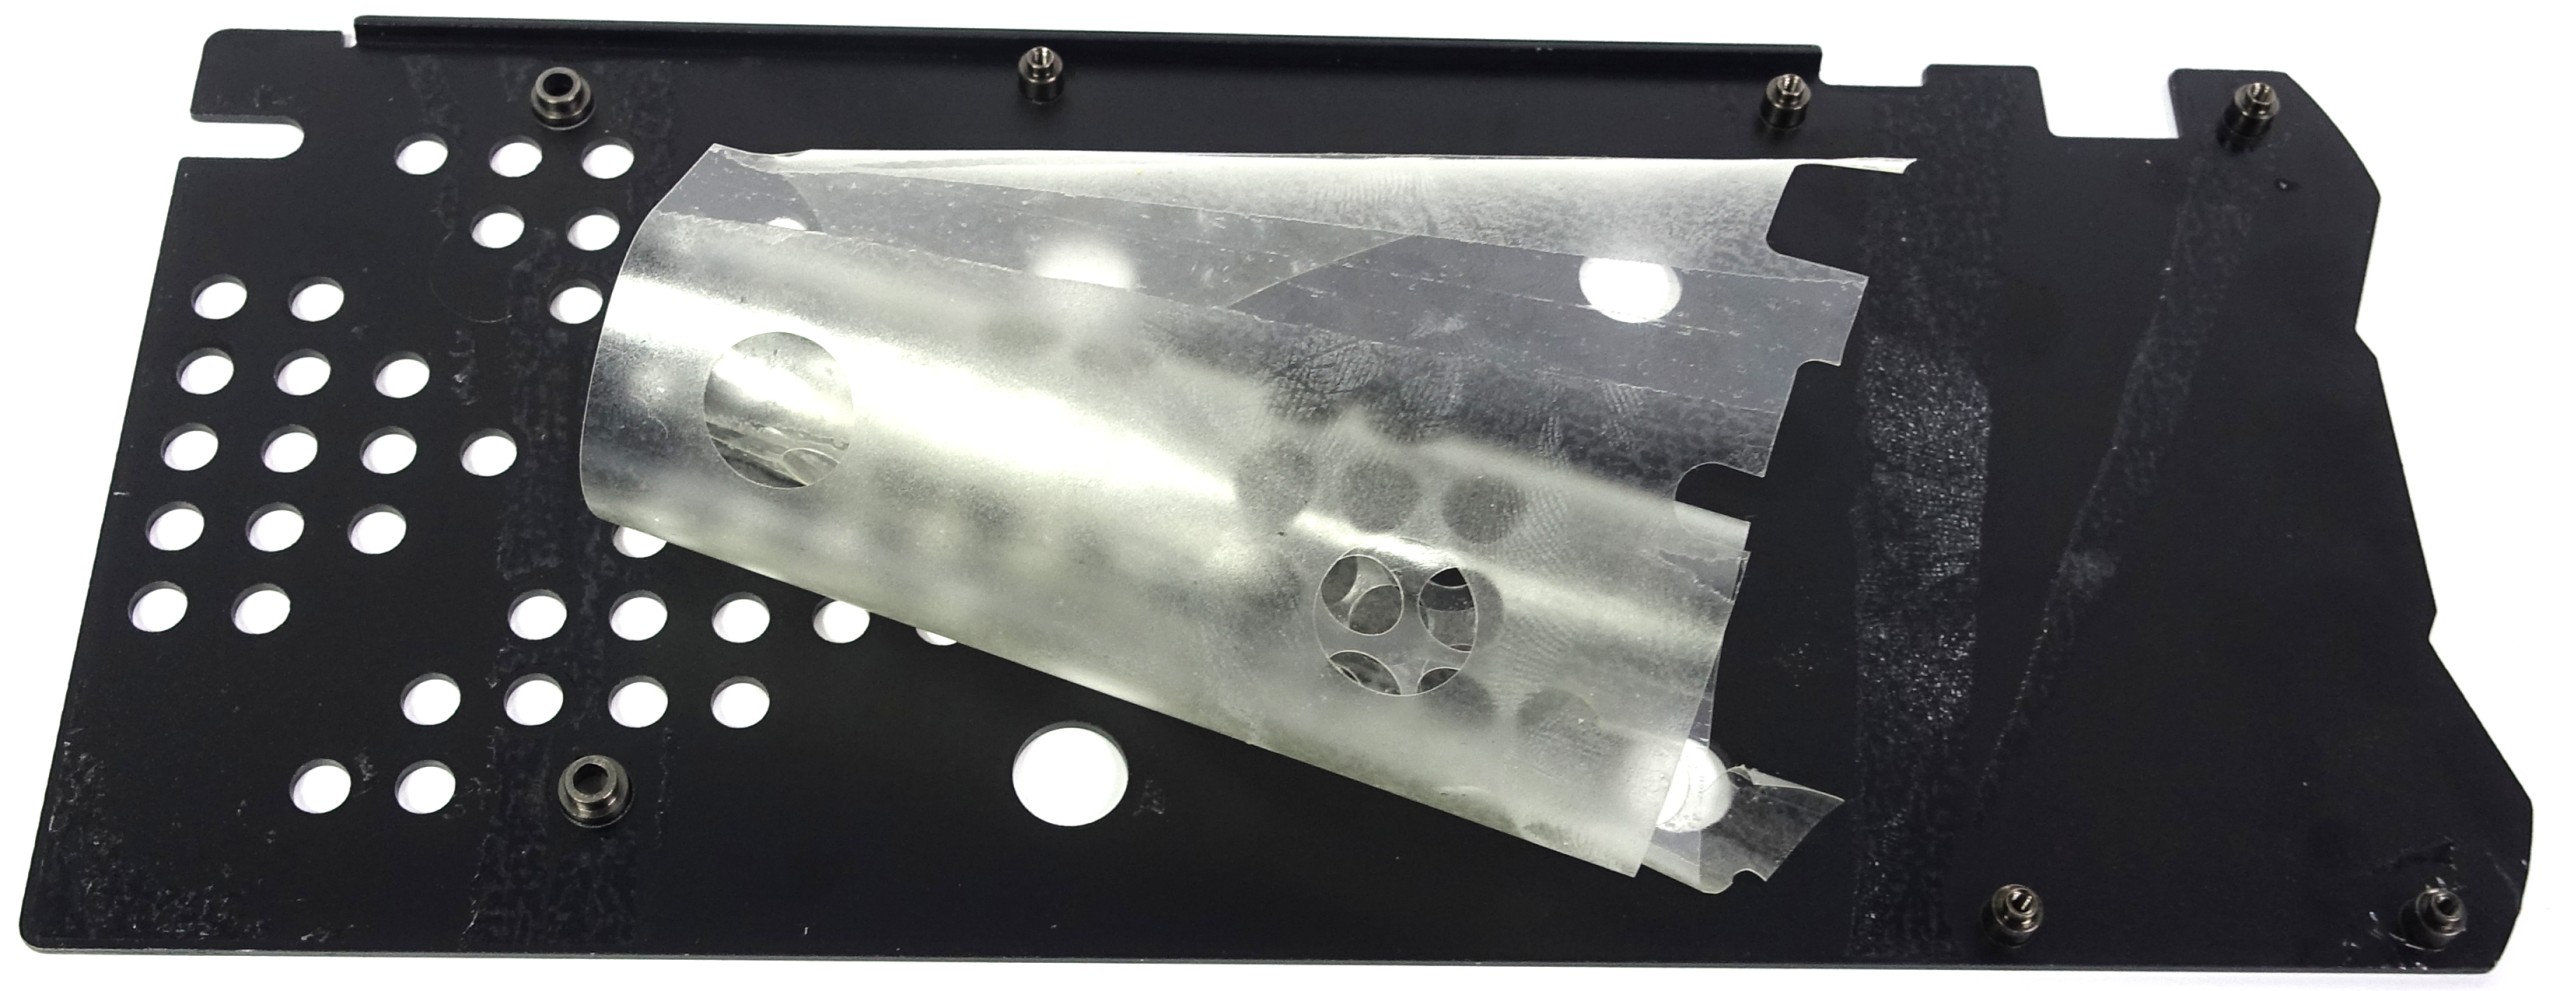
Let us quickly flash back to the images of the backplate and the foil glued inside. This foil should either be removed completely (as shown in the picture below) or removed partially with something like an X-Acto knife. You'll want to thoroughly clean any spot that'll be in contact with the thermal pads. Remove any adhesive residue and fingerprint oil. The previously-mentioned 2-propanol comes in useful here.
Keep in mind that with very soft or thin backplates, slight pressure could be enough to make the plate touch the PCB. Thus, the nonconductive foil should only be cut and removed where necessary, or additional tape should be used as an insulating layer in relevant areas. Since this tape can also dissipate heat, that's the preferred solution.
Get Tom's Hardware's best news and in-depth reviews, straight to your inbox.
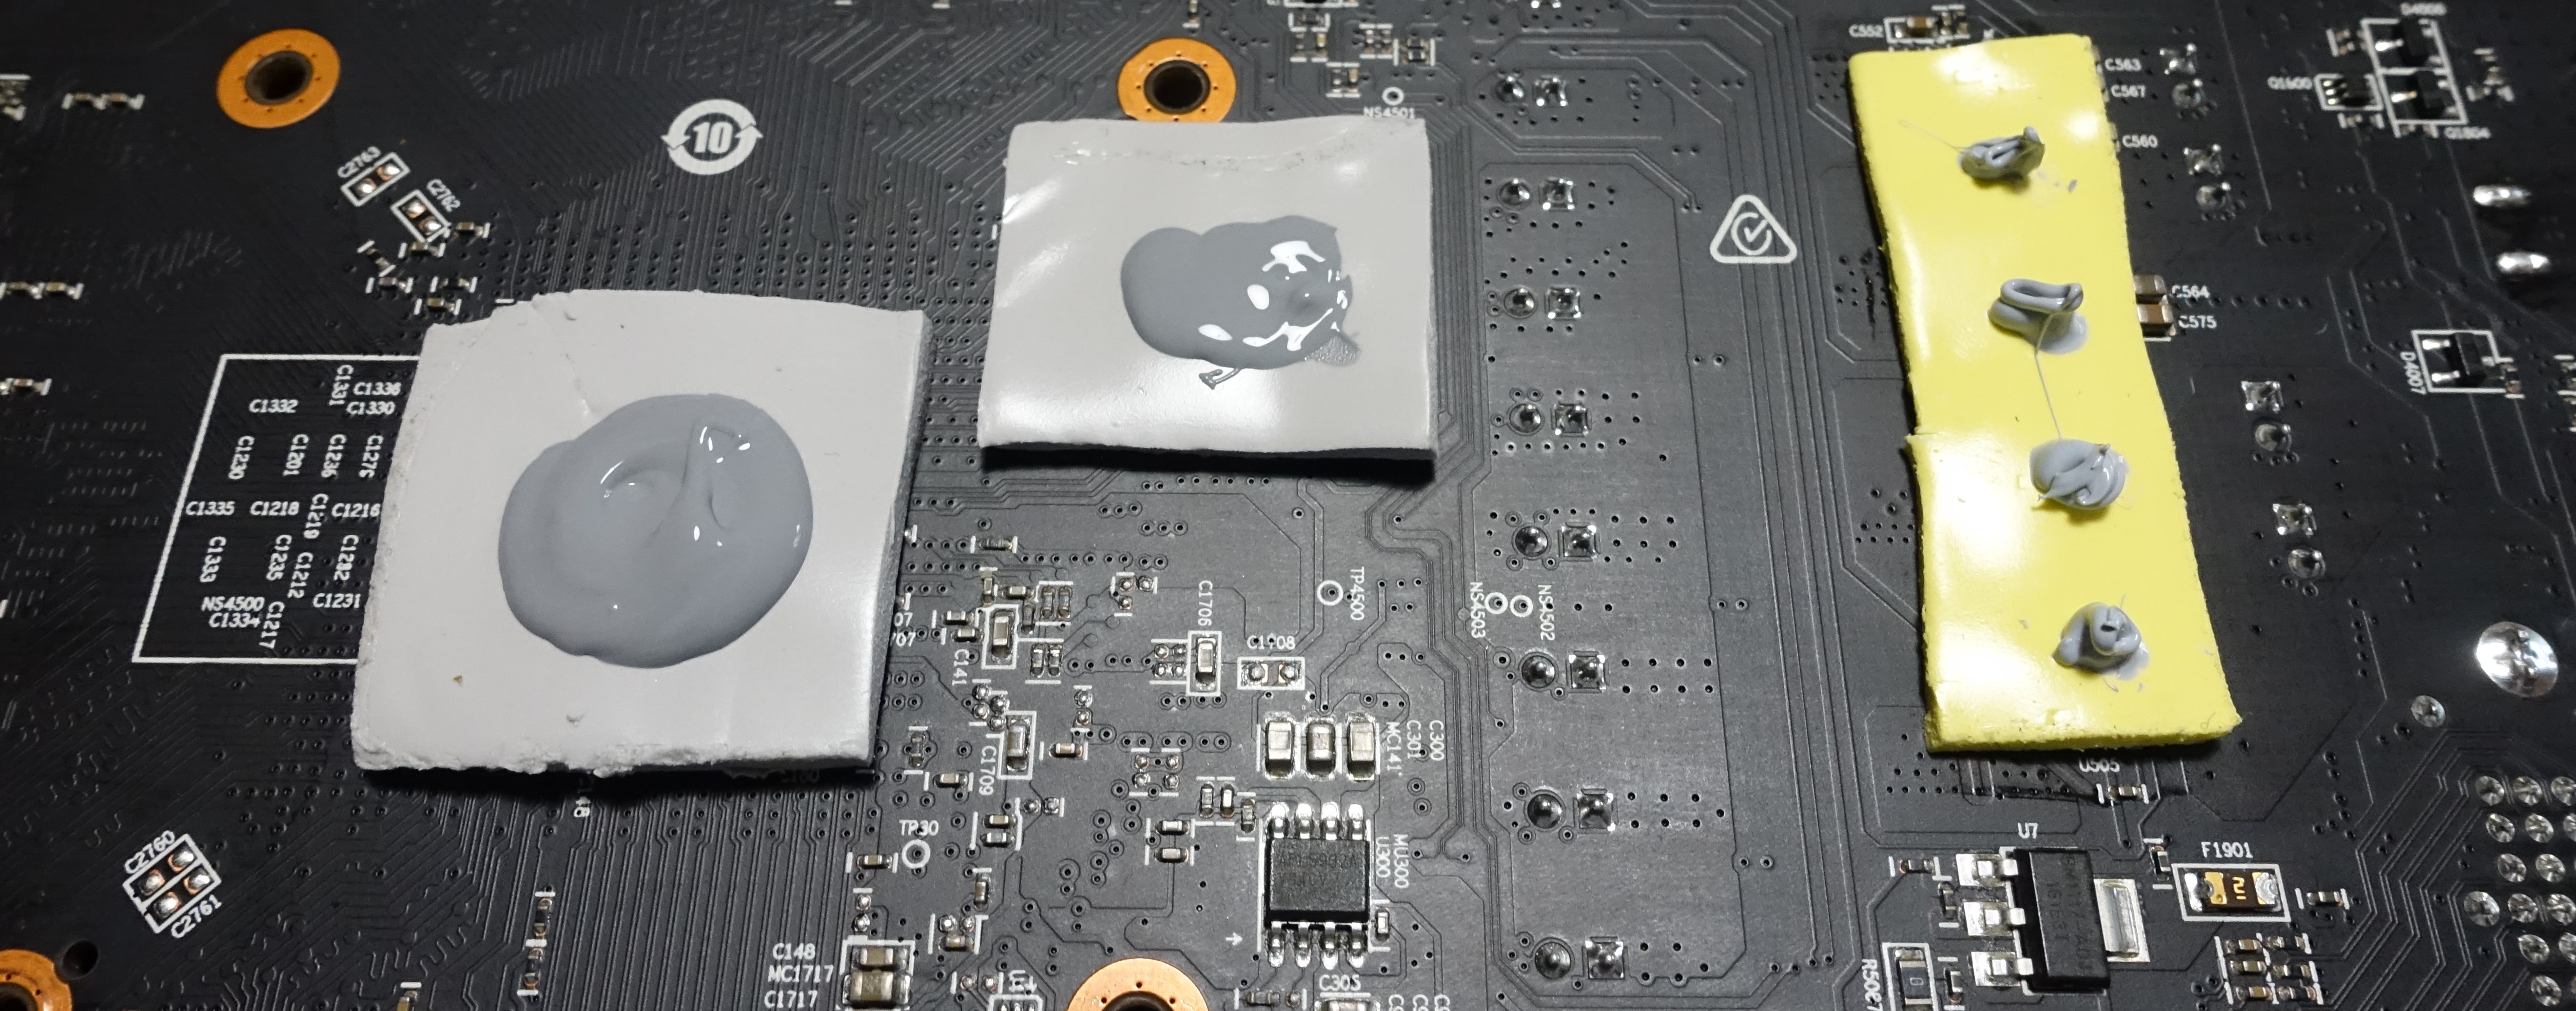
In our specific example—the XFX RX 470 4GB—we put two-millimeter-thick thermal pads directly below the GPU package and one very hot memory module. We used a bit of thermal paste to further improve contact with the backplate, since the plate's inner surface isn't very smooth and also bends slightly under tension.
Since the backplate has a number of ventilation holes, we briefly put it back on prior to installation and marked the holes on the thermal tape. This makes it easier to apply the paste in such a way that there is none in those areas, keeping it from spilling out of the holes. This step is especially easy to see on the yellow pad over the VRMs, where the little blobs are positioned exactly between the holes.
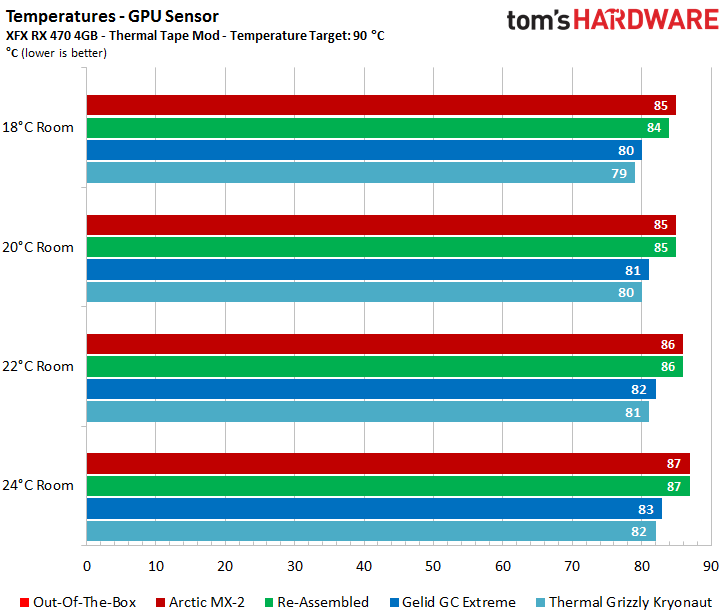
How much can we expect to gain from all of this? We will start with a look at the GPU, which obviously profits from lower PCB temperatures.
These aren't awe-inspiring improvements, but every degree saved is a positive step forward. The memory modules benefit most, as they now remain well below 194°F (90°C). While this primarily helps operational reliability and durability, it also opens up overclocking opportunities that weren't there before.
If you're wondering why our graph is missing a bar, that's due to the fact that we had to completely disassemble the card to remove its backplate. Therefore, measurements in the card's original state were unfortunately not possible.
Note #12 Remove glued-on foils and remove glue residue Ensure a clean application of the thermal pads; optionally use thermal paste where necessary Be aware of holes in the backplate Avoid short-circuits (conduct a visual inspection, insert a sheet of paper for testing)
Conclusion
While it would be wrong to expect (expensive) thermal pastes to deliver miracles, they can serve up significant improvements. The optimized tightening of screws, the use of better thermal paste, and a more careful application of said paste (usually not possible during mass production) can all contribute to measurable gains.
If you want a bit of extra-curricular reading, we recommend expanding your knowledge of thermal pastes before making a purchase. Our recommendations are based on experiences gleaned from the lab. There may be better products out there we simply haven't used yet. Still, we consider our approach to be a good starting point.
Furthermore, it is a good idea to include your card's backplate in the overall cooling solution, as this step is almost always worth the effort. In addition, it would be wise to question existing fan curves, and appropriately adjust them to any temperature changes. Just remember that modifying the fan curve makes the most sense after tuning your card's backplate, since you could see augmented cooling on components back there, such as memory modules.
In the end, it can definitely be worthwhile to go the extra mile and not just replace your graphics card's thermal paste. If you are going to work on improved cooling, think beyond that one step and consider all of the factors that affect cooling, acoustics, and overclocking. You'll also have to consider whether spending about $20 on materials, plus the time and possible loss of warranty, are worth it. Often enough, the extra money could just as easily be invested in a better-equipped graphics card with the same chip, but better properties.
MORE: Best Deals
MORE: How To Build A PC
Current page: Thermal Pads, Backplate Cooling, And Wrapping Up
Prev Page Performance Results And Interesting Interactions
Igor Wallossek wrote a wide variety of hardware articles for Tom's Hardware, with a strong focus on technical analysis and in-depth reviews. His contributions have spanned a broad spectrum of PC components, including GPUs, CPUs, workstations, and PC builds. His insightful articles provide readers with detailed knowledge to make informed decisions in the ever-evolving tech landscape
-
crisan_tiberiu For me, changing the thermal paste on a Sapphire R9 280x resulted in a 8 to 10 degrees celsius lower temps while @ gaming/load. The card went from "very audible" to silent... The thermal paste was so poorly applied, it was on only half of the chip...Reply -
Shankovich I think if you've had your card for about 2 years, it's time for a reseat. Did mine with Noctua NT-H1 (best imo, no burn in needed), delta-T was around 9 Celsius at load :)Reply -
FormatC Especially with higher temps, like on a GPU, the thermal grease will dry out over the time. As cheaper, as faster. So it makes sense to change it periodically.Reply -
enterprise24 Use locking pliers to remove screw with warranty void on it. I try this method on MSI R9-290X Lightning without damage to sticker and can still RMA.Reply -
murzar In 2015, my AMD 6770 would reach temperatures around 100 degrees Celsius! Summers are savage in my city.Reply
But it wasn't cleaned for ages, just cleaning the fan assembly resulted in a temperature drop to around 80 degrees Celsius.
Got a cheap but branded 4 usd Arctic Thermal Paste.
Temperature was around 65s! -
AndrewJacksonZA Reply
After about five years I became concerned that my single fan HIS 6670 was heating up to 66C in Furmark runs even after cleaning the fan and heatsink on the card. I replaced it's factory TIM with Thermal Grizzly Hydronaut which I had bought for my new CPU and it dropped to 54C. I added lots of sound absorbing material in my case blocking some airflow exit holes near the card, and it's still only sitting at 62C during Furmark runs.19165507 said:In 2015, my AMD 6770 would reach temperatures around 100 degrees Celsius...Temperature was around 65s!
It was DEFINITELY worth it for me to replace the TIM on my card.
Edit: typo. -
Olle P There are more ways to improve the cooling:Reply
1. Clean the heatsink fins.
2. Clean the fan blades.
3. Optimise the airflow around the graphics card. Try to prevent the heated air from being drawn back into the fans on the cooler.
4. Polish the heatsink's contact surface to get rid of any milling grooves. You want as much direct contact surface between heatsink and GPU as possible.
Thermal pastes:
* As long as you avoid the really cheap purely silicone based thermal paste the difference between pastes should be marginal. Only with milling grooves to fill will there be a notable difference.
* Burn-in time differ between pastes though. Some reach optimum in an hour, other will need weeks of use to reach their final state.
* Thermal paste will not "dry out" and need a replacement unless the heatsink is relocated relative to the GPU.
Cleaning:
"... a thorough clean-up is advisable. ... because mixing different pastes can be extremely counterproductive. ..."
A small amount of mixing shouldn't make any difference at all, especially given (as stated on page one) that the pastes differ very little in chemical composition in the first place.
"... cleaning the GPU package. Avoid scraping or scratching. Even forceful rubbing with a soft cloth can damage the fragile hardware..."
Since rubbing *will* create static electricity that can fry the GPU I'd stick to cleaning the top surface of the GPU only. Trying to remove old thermal paste around the GPU is more likely going to cause damage than improve the thermal result. -
jonny27 Ok hold on a second, I was reading it all until I saw the thermal paste on top of the pads.Reply
I've been hearing unanimously for years that doing this actually decreases thermal performance, as you're adding an extra layer of heat transfer material, and the compression alone should make the thermal transfer "as good as it can be" (or at least as good as a thermal pad can handle anyway). Not only that, but some pastes could actually degrade/corrode the pad's material.
But to my surprise, I'm seeing improved results on paste+pads. Can someone shed some light onto this? -
cats_Paw Interesting article.Reply
I personally think it would have been a smarter choice to use a laptop gpu (inside a laptop) for this test.
Laptops are more prone to temperature problems, so it should be a better example of worst case scenario.
Another thing is that I have found that my laptop GPU and CPU tend to drop temps of almost 15 C when the thermal paste is reapplied, but in 2 days it goes back up to what it usually gets stable.
This did not happen when the laptop was new, but it seems the thermal paste gets too high temperature, partially making it more liquid and then pushing it out of the heatsink. I have no idea why that is. -
vaughn2k Toms/Igor, just an observation.Reply
You also need to add that compounds should avoid touching the SMD components, and smearing at the side of the substrates/PCB.
Som compounds consist of silver, and if this happens, it will cause shorts and/or degradation of the GPU..
The picture where a new compound is applied, has some remnants of the old paste, present at the SMDs.. this is a No NO..


