How To: Optimizing Your Graphics Card's Cooling
Even with summer gone, cooling remains a hot topic. How can the cooling performance of a graphics card be improved without replacing the cooler, or switching to liquid cooling? We'll cover some causes of poor cooling performance.
Taking Apart And Re-Assembling Your Graphics Card
Disassembly without Dismay
Prior to starting any disassembly, you'll want to monitor the GPU's temperature at idle and under load for at least 30 minutes using a tool like GPU-Z. It is also helpful to write down the ambient (room) temperature for later reference. These baseline values will help you evaluate the results of any subsequent modifications.
While sayings like "organization is half the battle" may sound cliche, there is a certain wisdom in laying out the screws and parts collected as you take the card apart. That'll help you remember which components go where later. To this end, we're using a small box with multiple compartments and covers to safely separate the screws for inner and outer parts of the card. There is good reason for this, since the screws used in a graphics card can differ ever so slightly (yet significantly) in length or diameter, making it difficult to tell them apart visually.
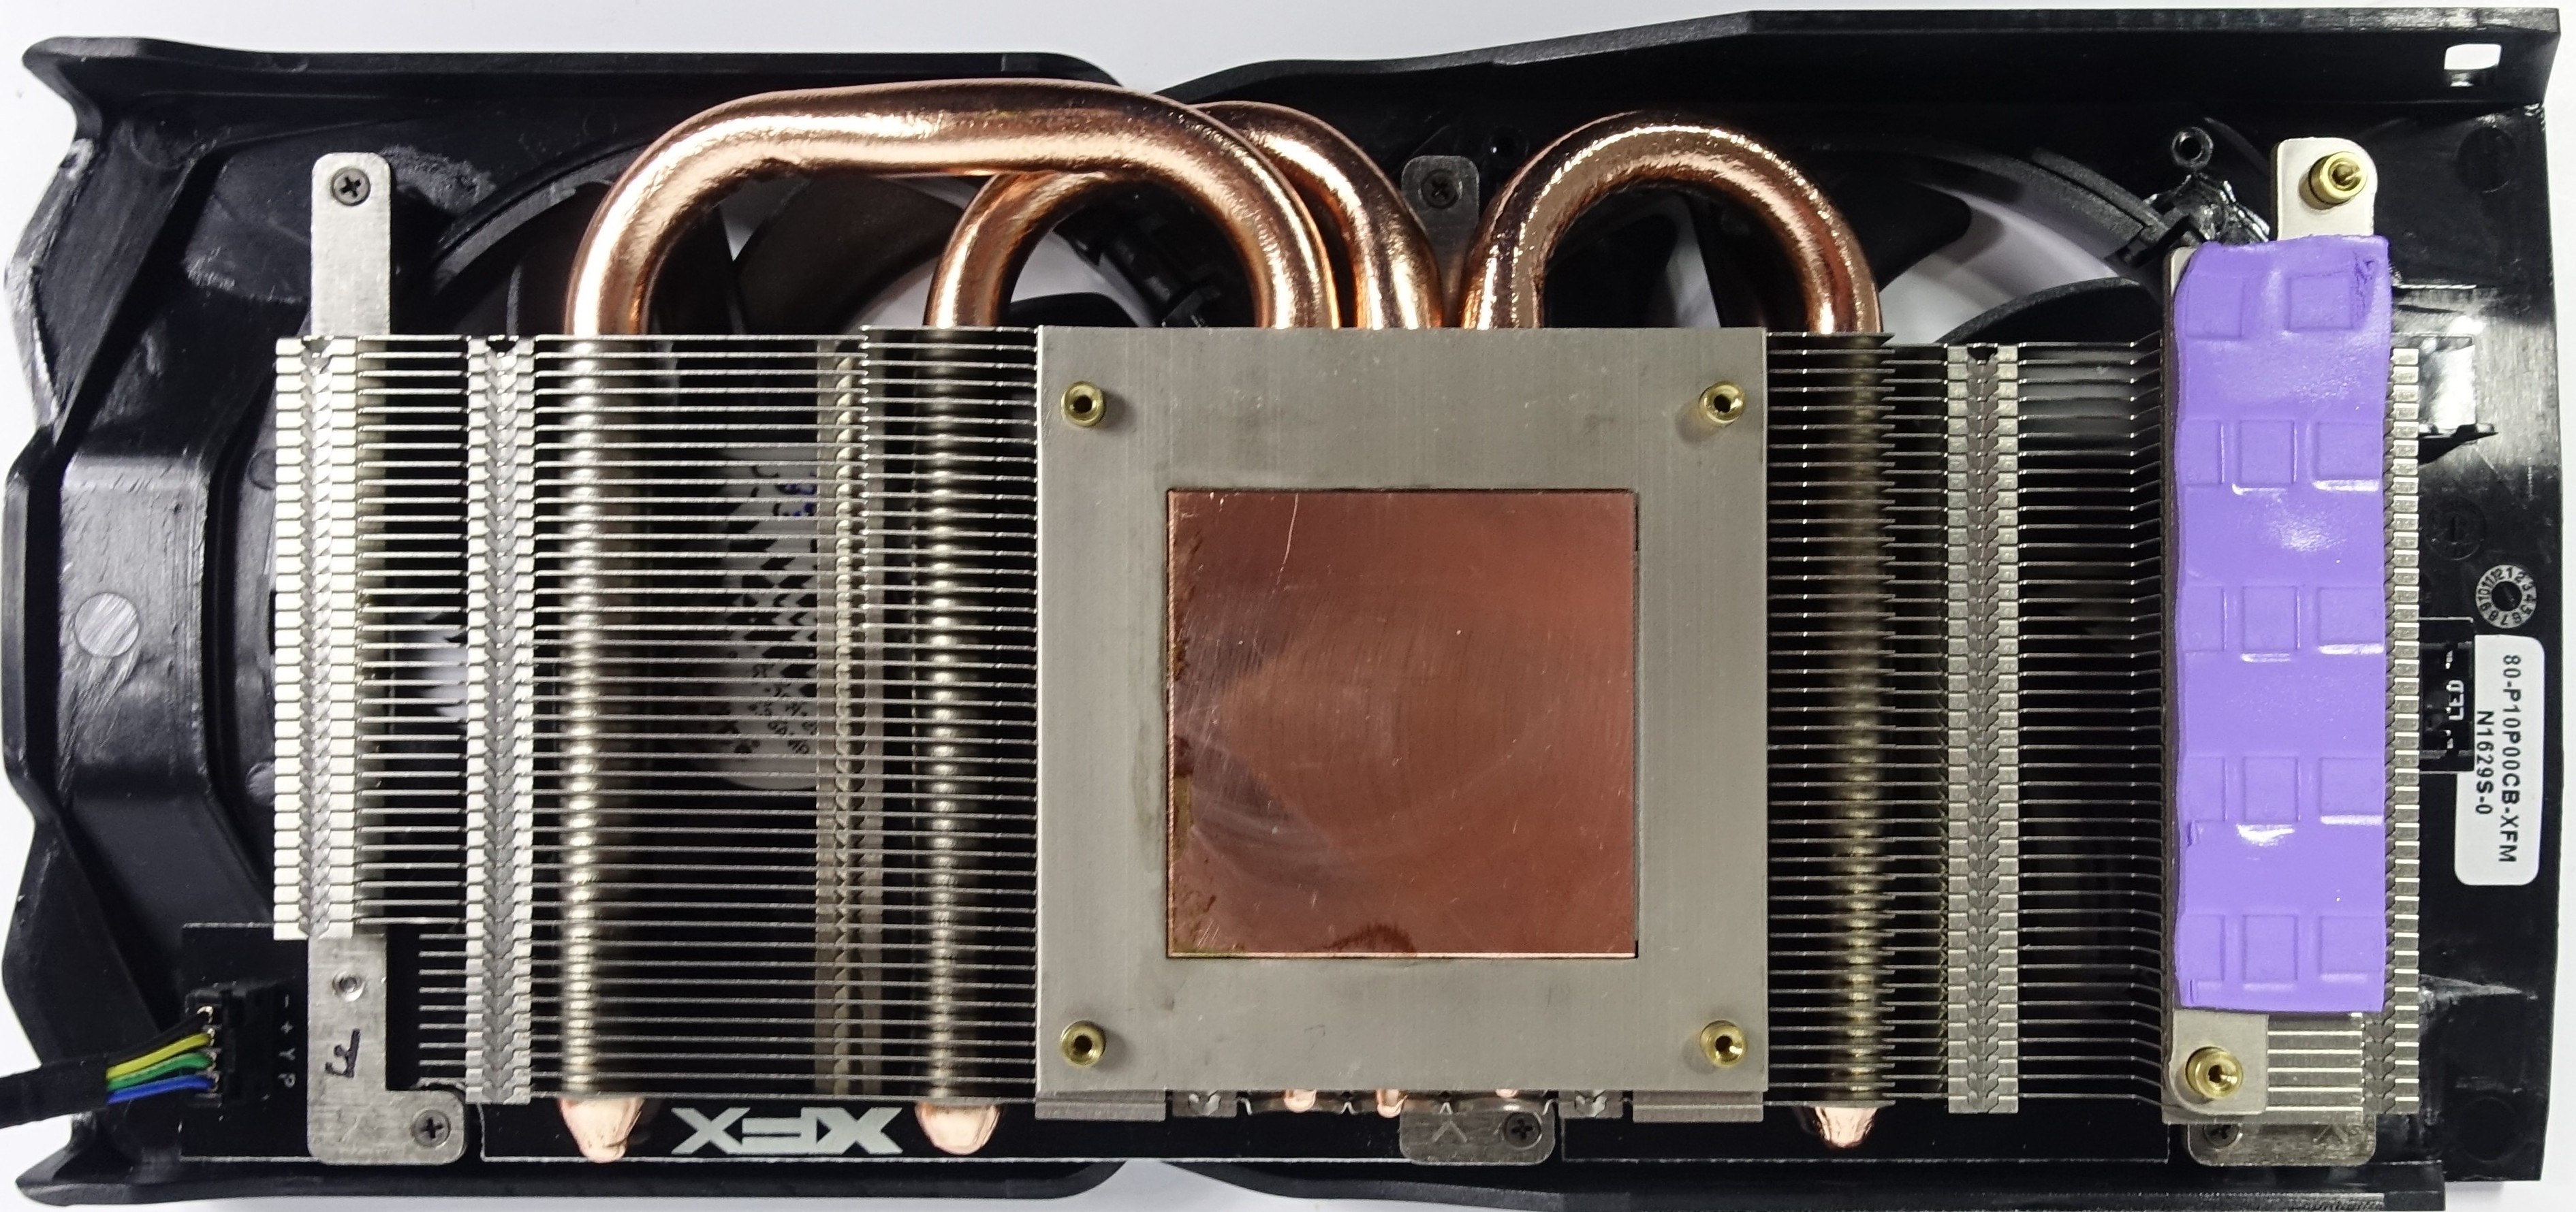
The actual heat sink is almost always attached to the PCB with four screws that extend from the back through the board. If the cooler also contains a built-in heat sink for the voltage converters, there are usually two or three additional screws for that as well. In these cases, it is important to take the cooler off before dealing with the backplate.
In general, even professionals should go step-by-step and capture each stage in a photo when they aren't 100 percent certain about the process. This could prove helpful down the line if the card needs to be returned to its factory state later for a warranty claim. If the cooler is getting replaced as well, it may also be a good idea to safely put all original parts away in clear plastic bags, labeling each bag accordingly.
Once the seals on the screws are broken, you're at the manufacturer's mercy. If your intent was to check whether or not the screw was properly tightened, you should have tried on one that wasn't sealed. If the screw actually isn't as tight as it should be, your options are to fix it or return it to wherever you bought it. Just remember our earlier warning.
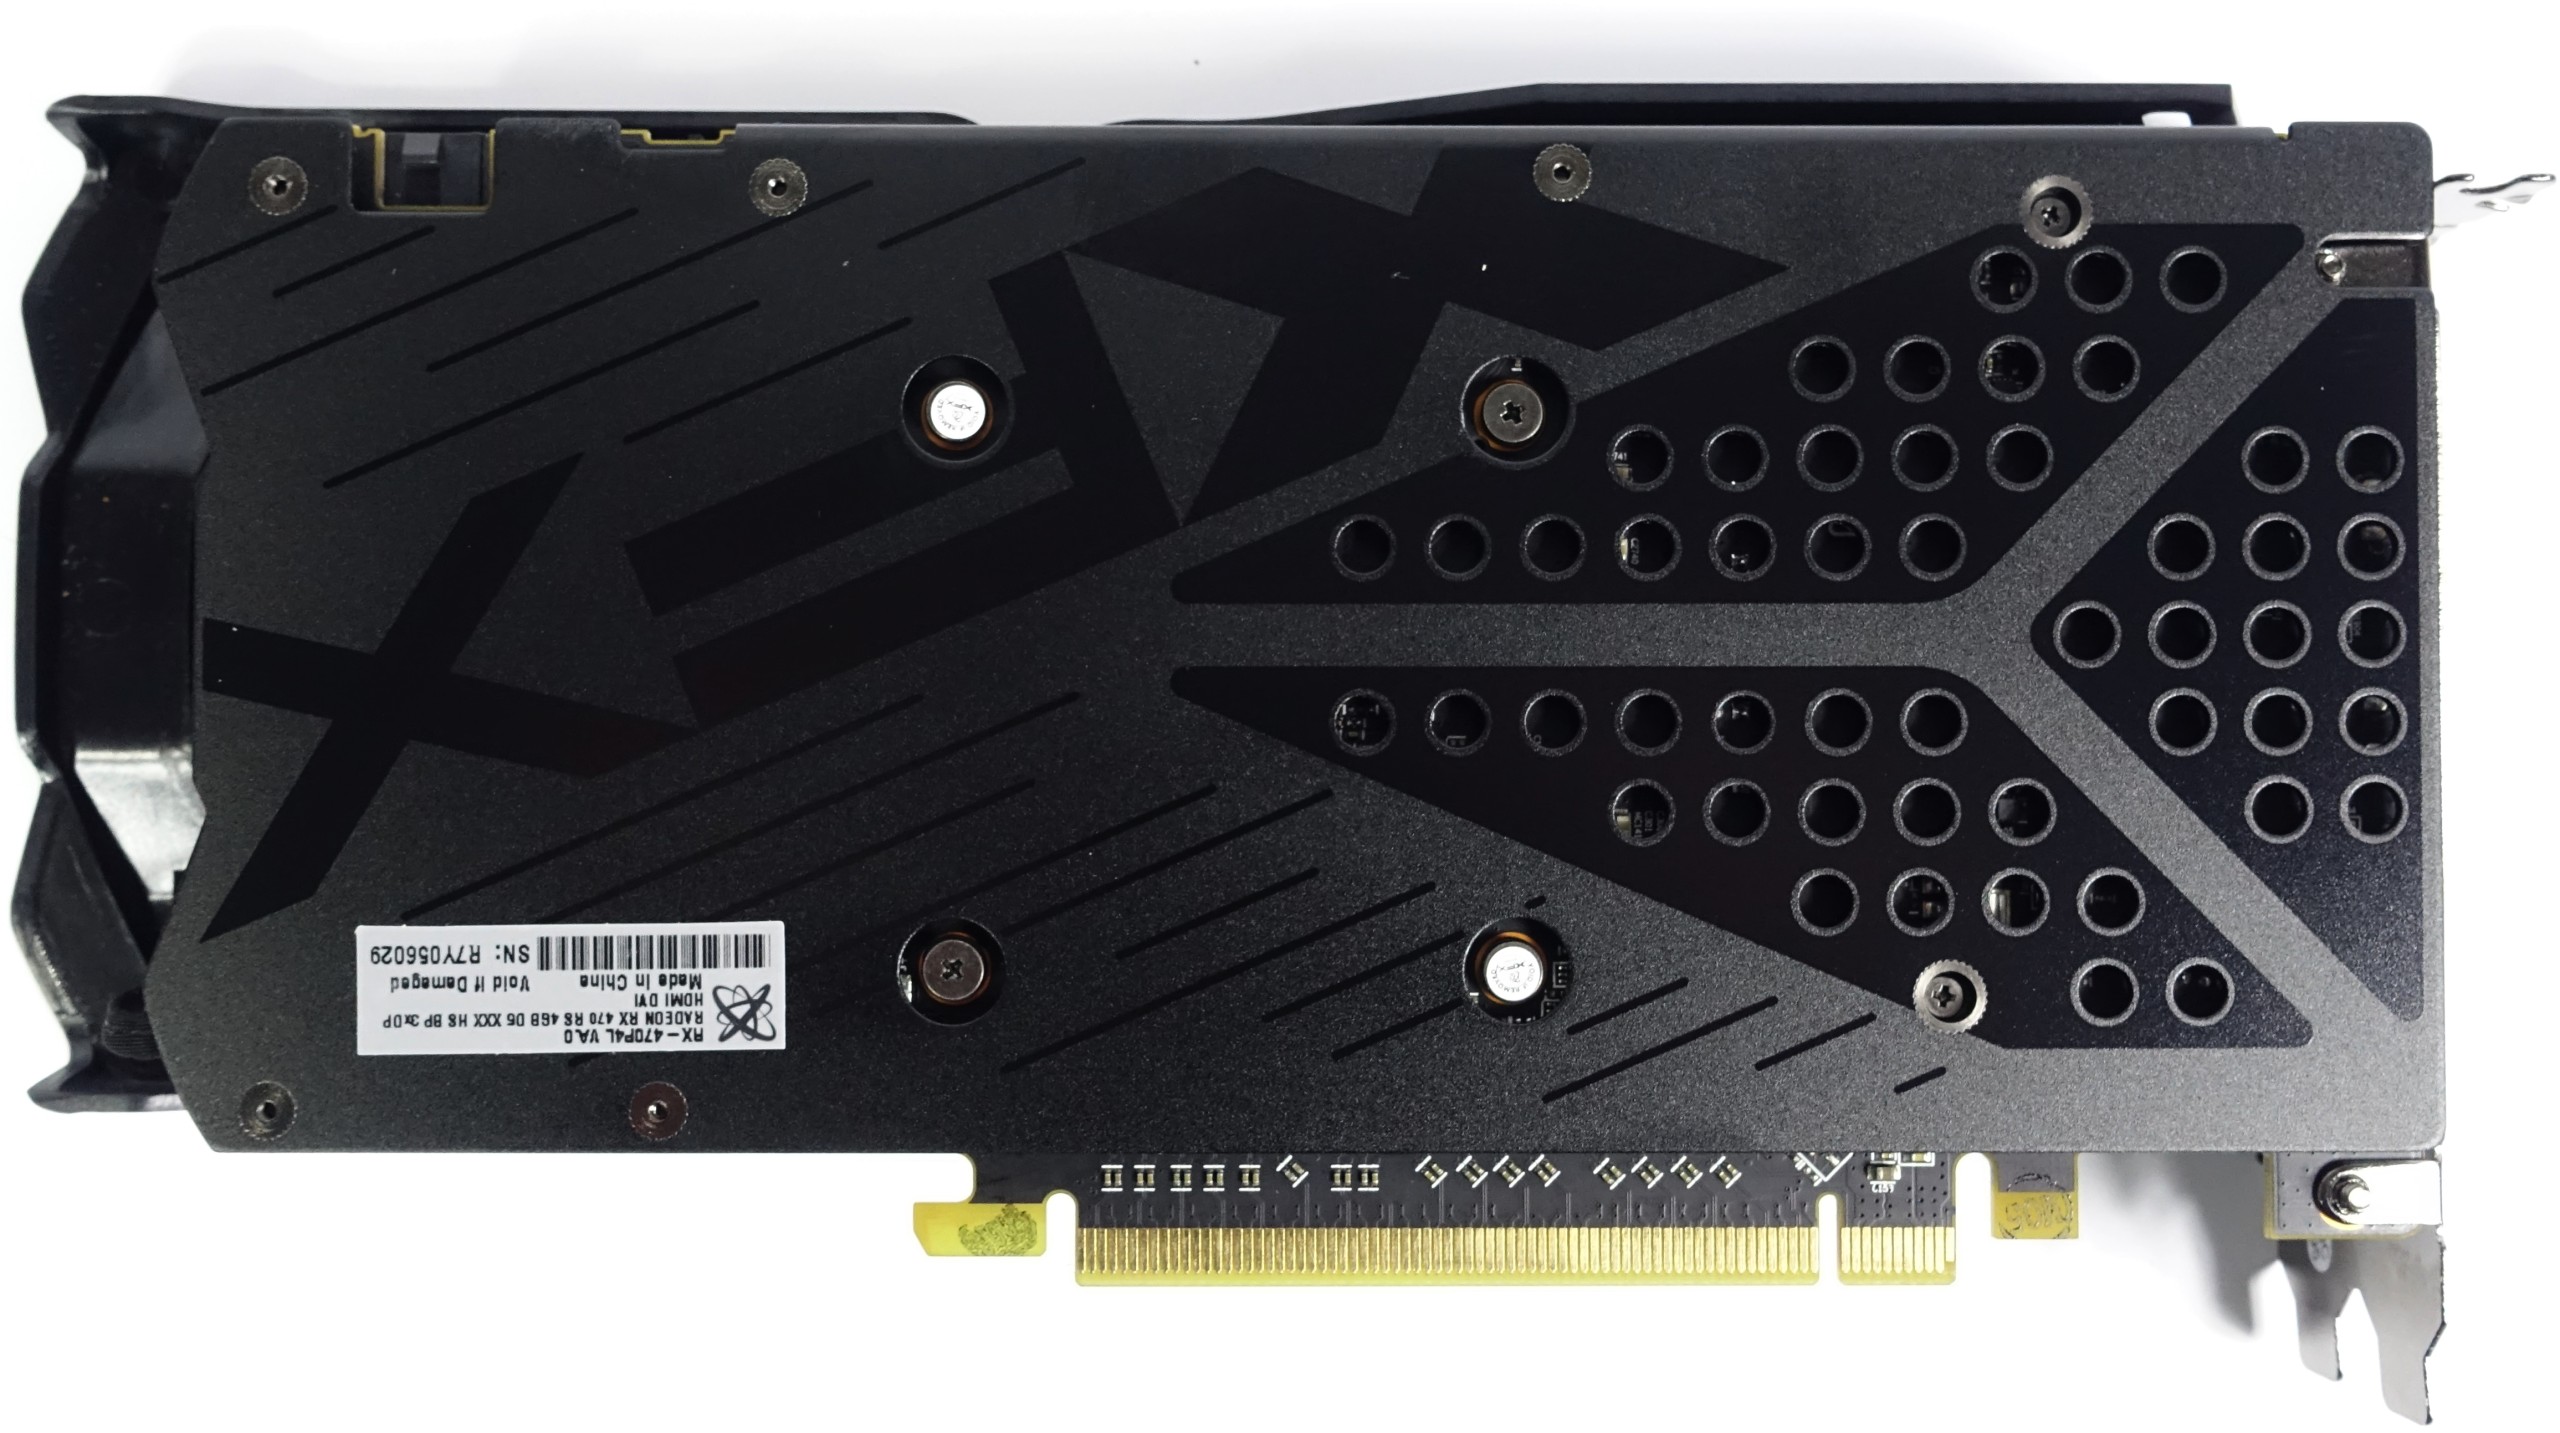
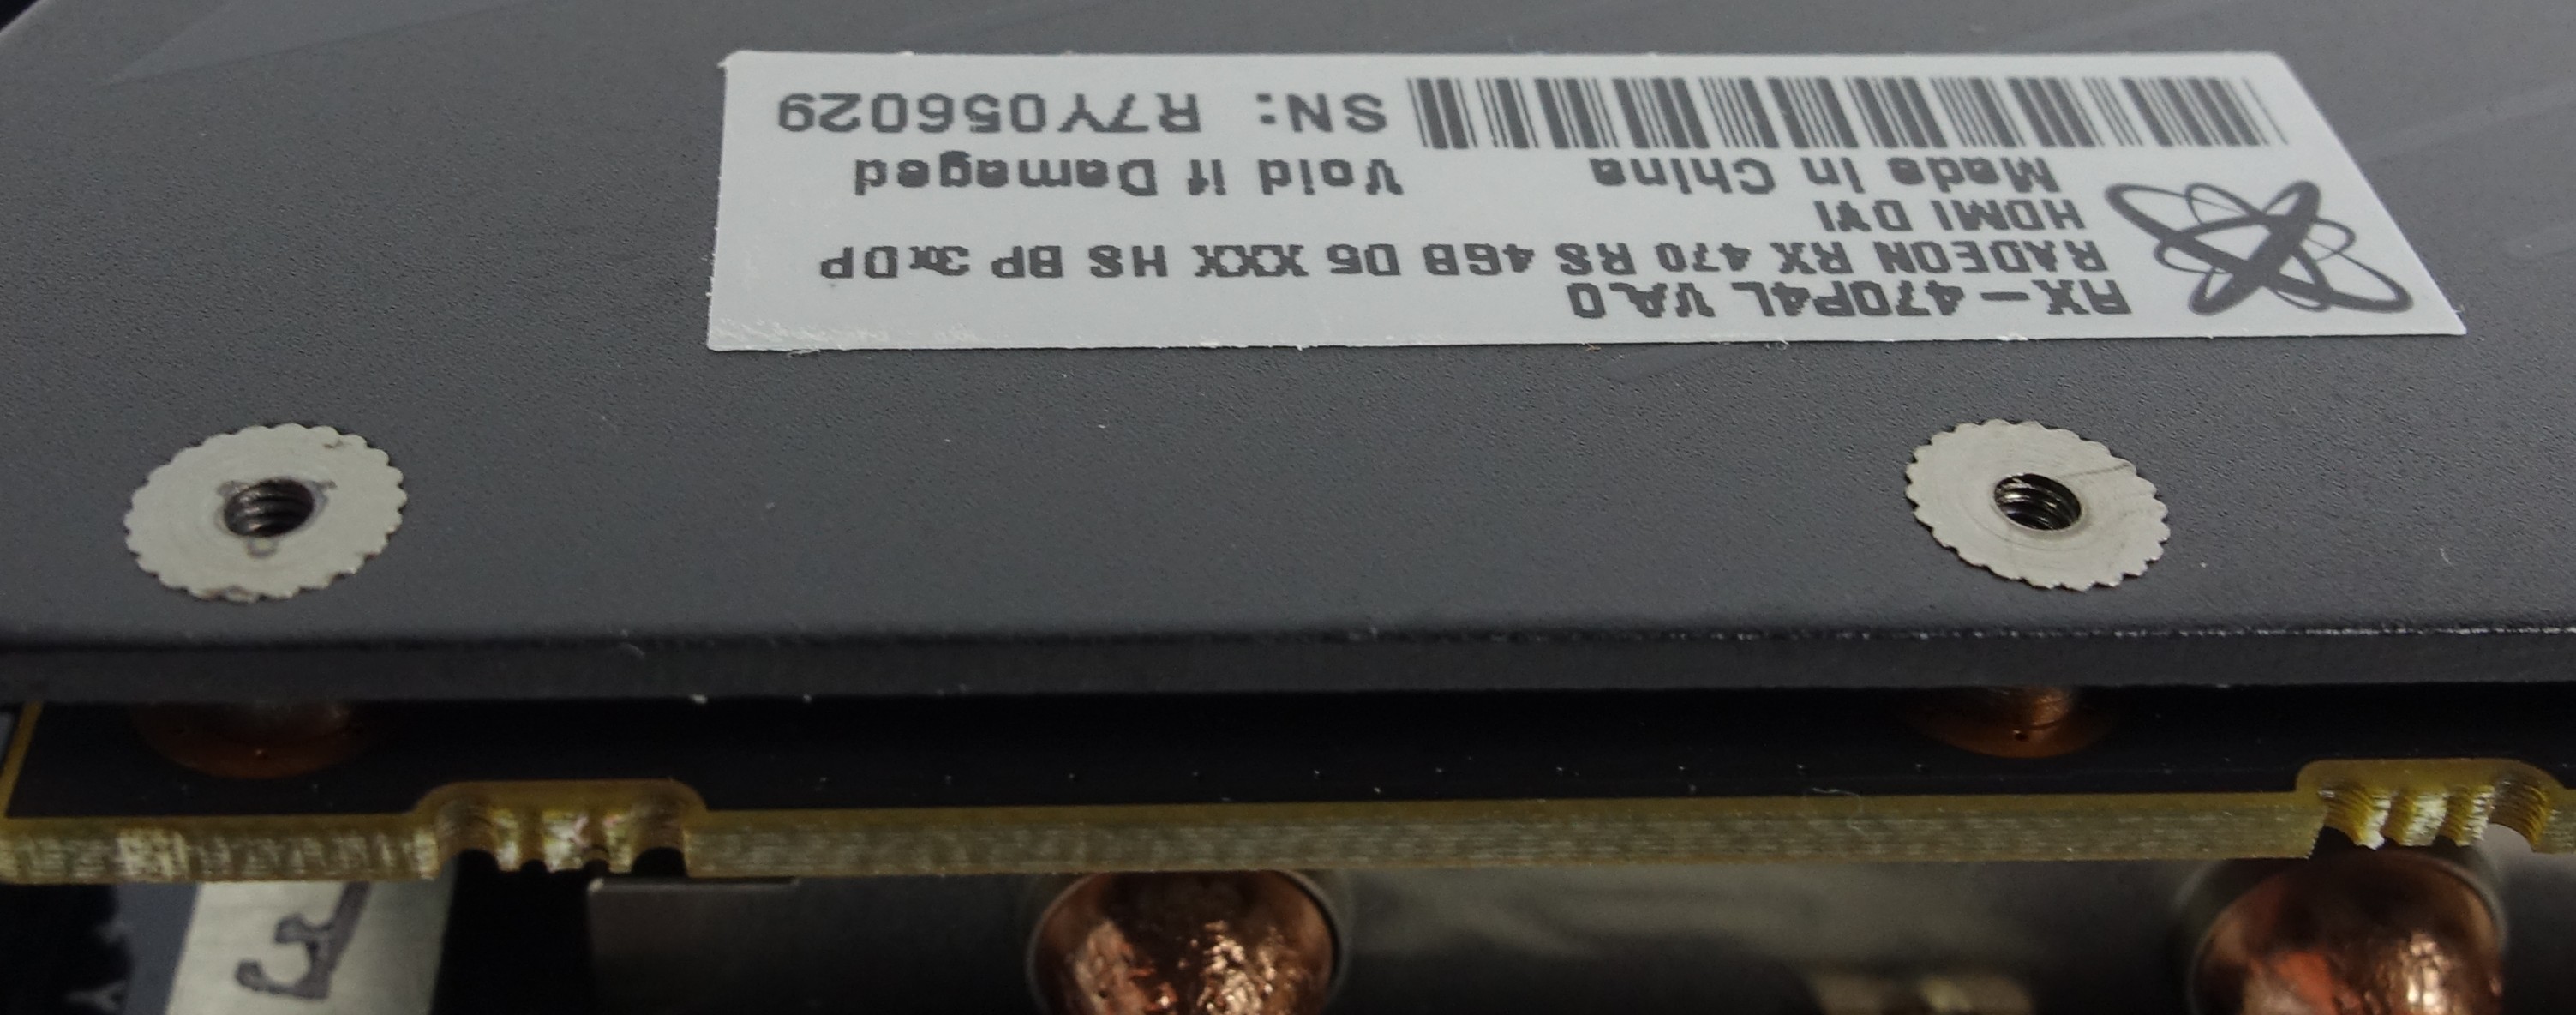
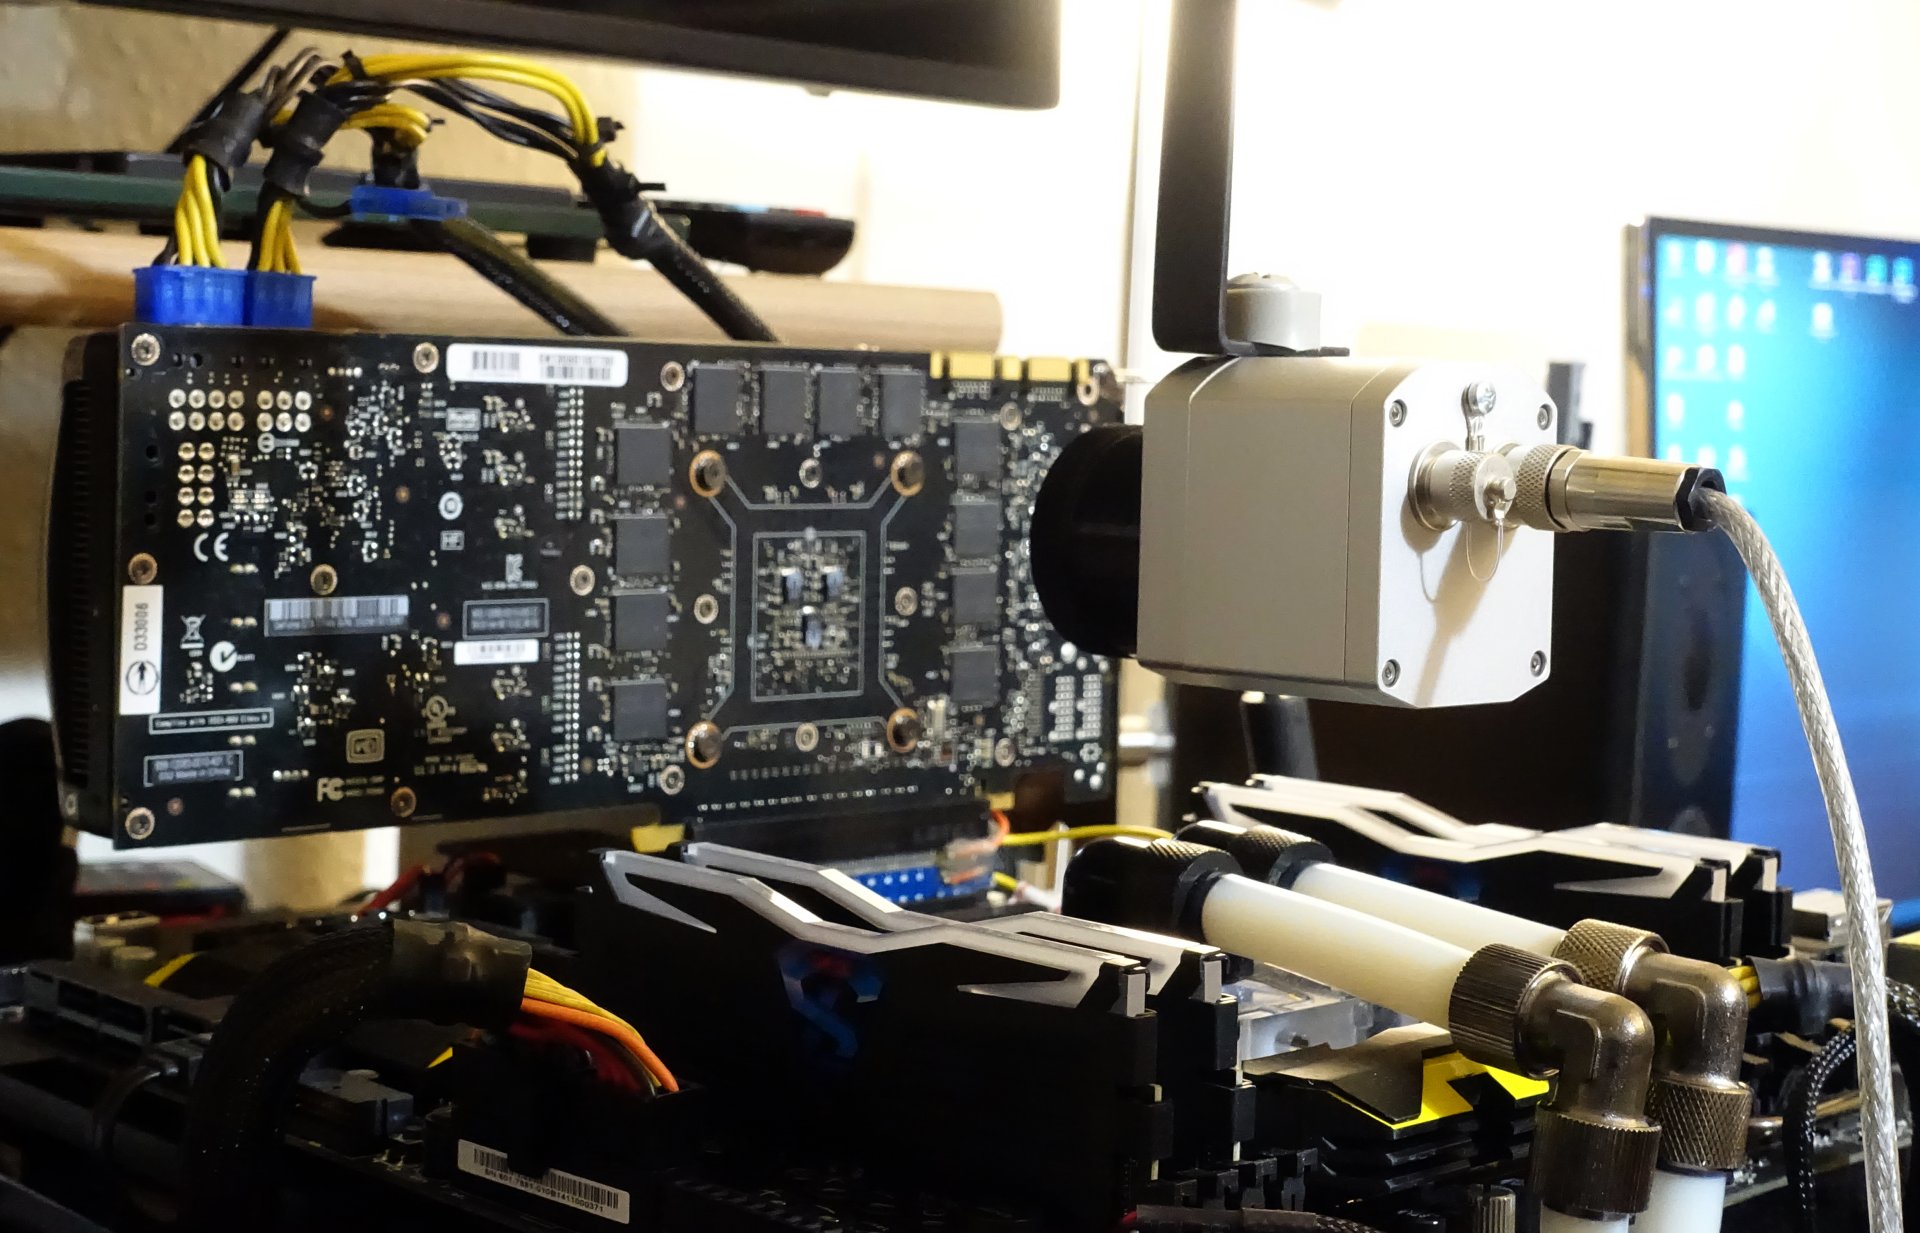
The screws that hold the backplate are their own special story. Not all of them are accessible, let alone removable, from the rear. However, there are almost always technical reasons for this. This is neither meant as a measure to harass you nor as a deliberate barrier for enthusiastic tinkerers.
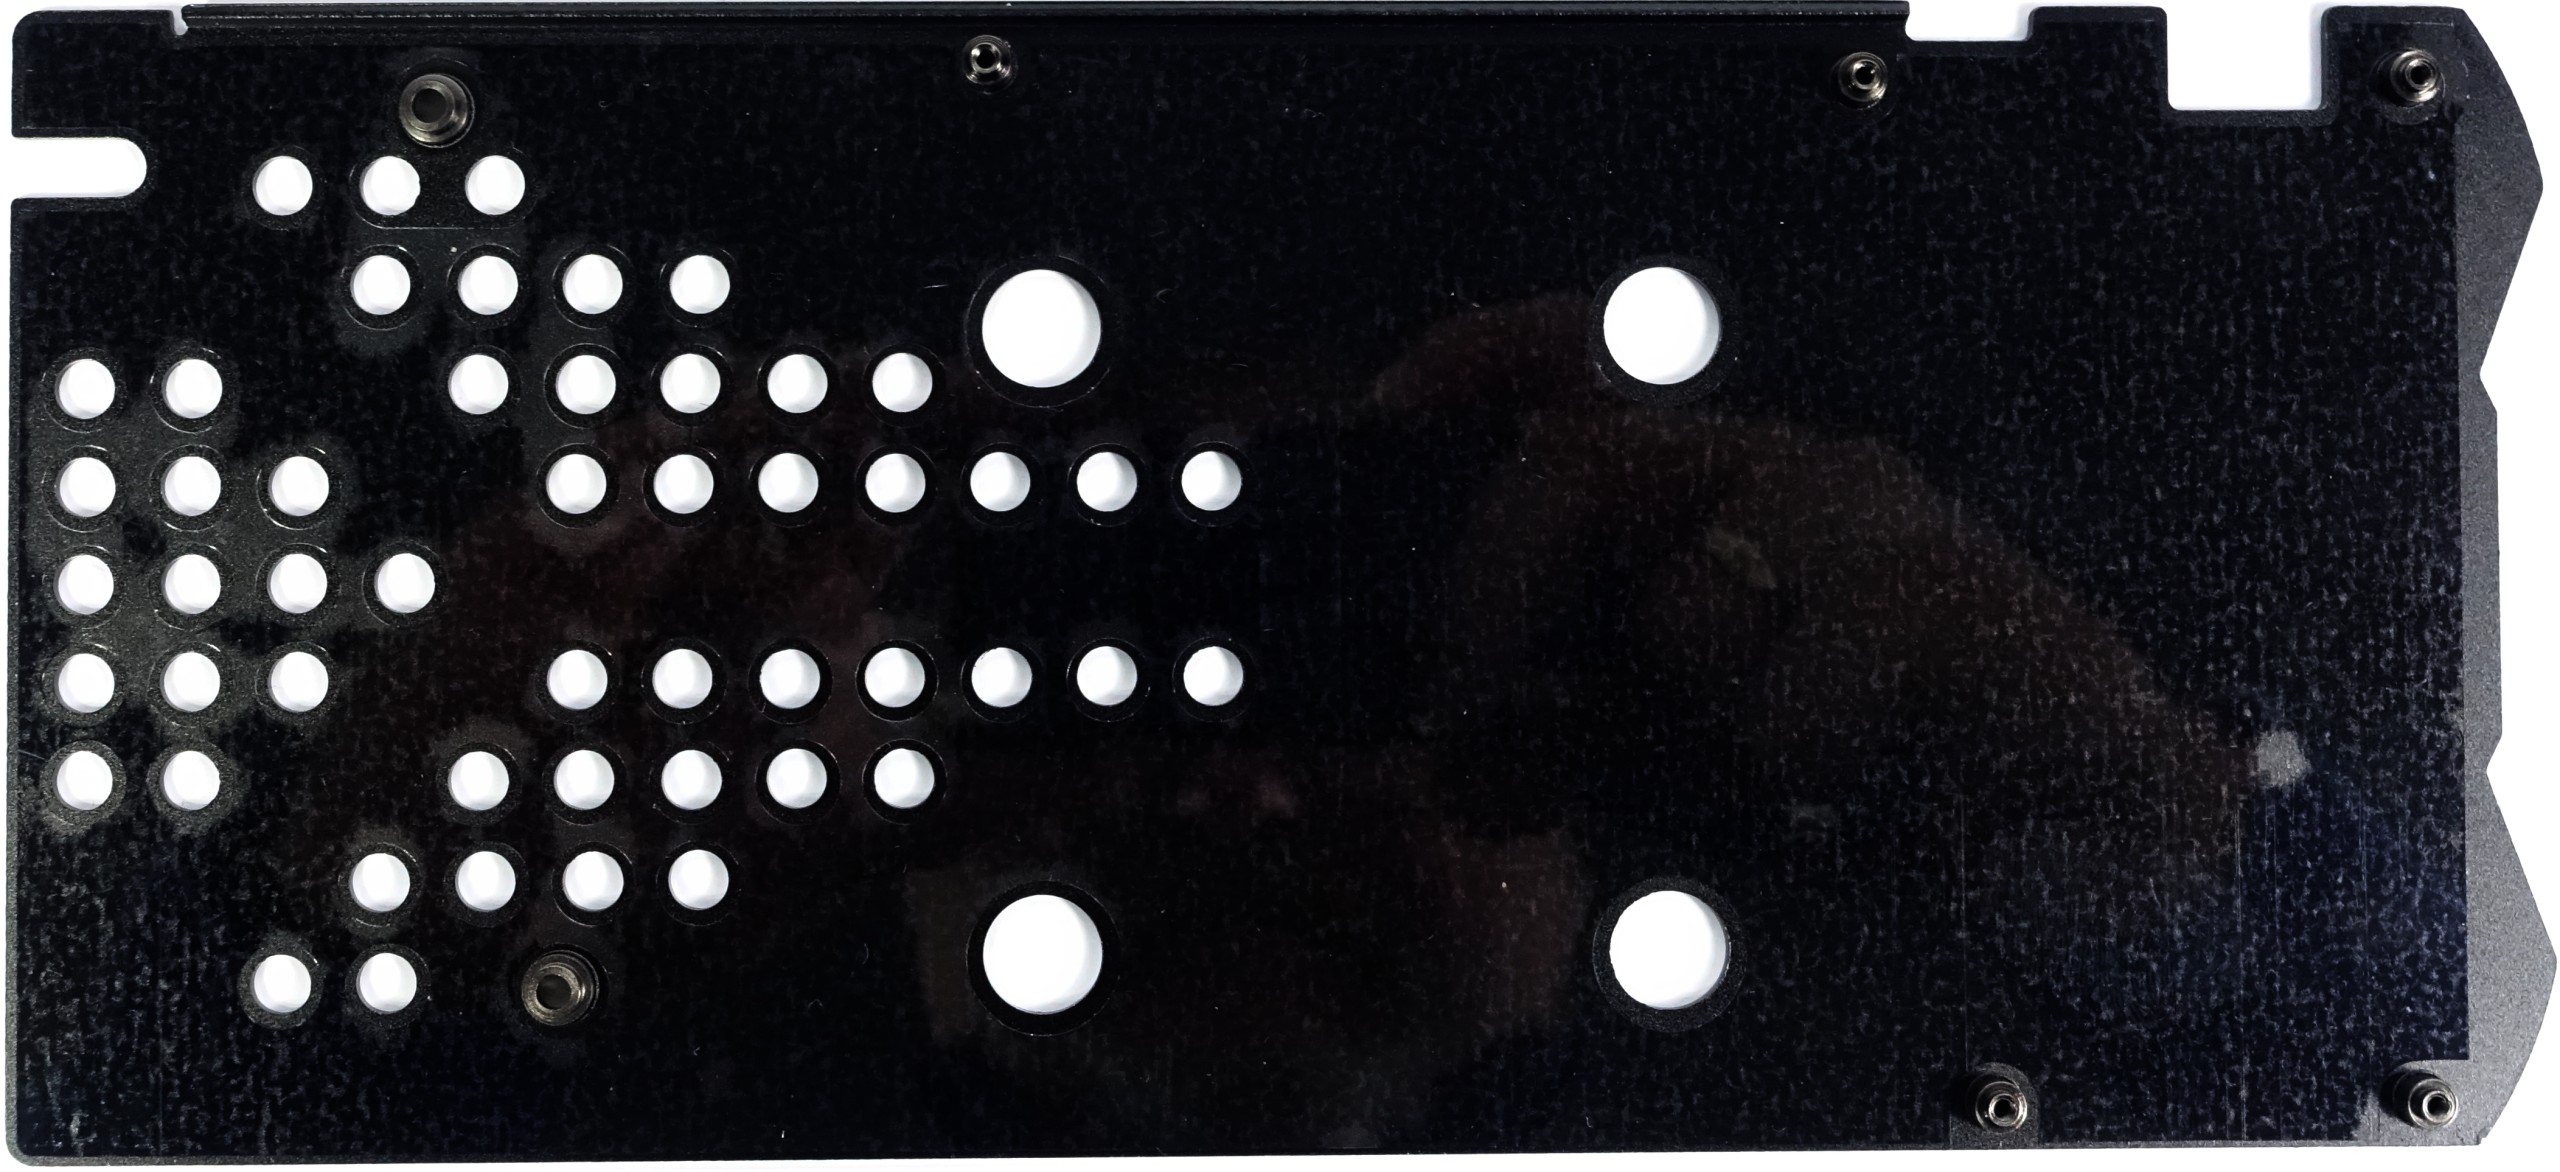
In our exemplary case, XFX doesn't use an inner assembly and cooling frame that could have served as a counter piece for the backplate's screws. Therefore, the nuts are recessed into the backplate (as seen in the picture above). The heads of the screws are thus on the top side of the PCB (as the picture below shows). These screws are often shorter than those for the voltage converters on the back.
Get Tom's Hardware's best news and in-depth reviews, straight to your inbox.
Of course, it is only possible to access those once the cooler itself is completely removed. But even here numerous pitfalls await in the form of various cables and plugs. When in doubt, it's better to play it safe and take one additional photo of whatever similar-looking cables are found to be in close proximity to each other. The connectors should always be handled with extreme care because manufacturers never make those cables longer than absolutely necessary, and the connectors are often a very tight fit. During reassembly, it is important to make absolutely sure that no cable is in the path of the fans prior to putting the screws back in.
Most backplates don't have any thermal contact with the circuit board, unfortunately. At maximum, they come with an insulating foil to prevent short-circuits, just in case.
Note #4: Log several stock temperatures with tools like GPU-Z Just to be safe, document each step with a photo Sort the screws and store them safely Keep an eye on cables that connect coolers and LEDs Never apply force if anything seems to be stuck
Lose the Goop! Start with a Proper Cleaning
Various methods are used to apply thermal paste to graphics cards. Often, paste is applied directly to the heat sink by the cooler manufacturer (via screen printing, pad printing, or using soft pads off a transfer film), or a certain portion of liquid paste is applied later during the marriage of the heat sink to the board.
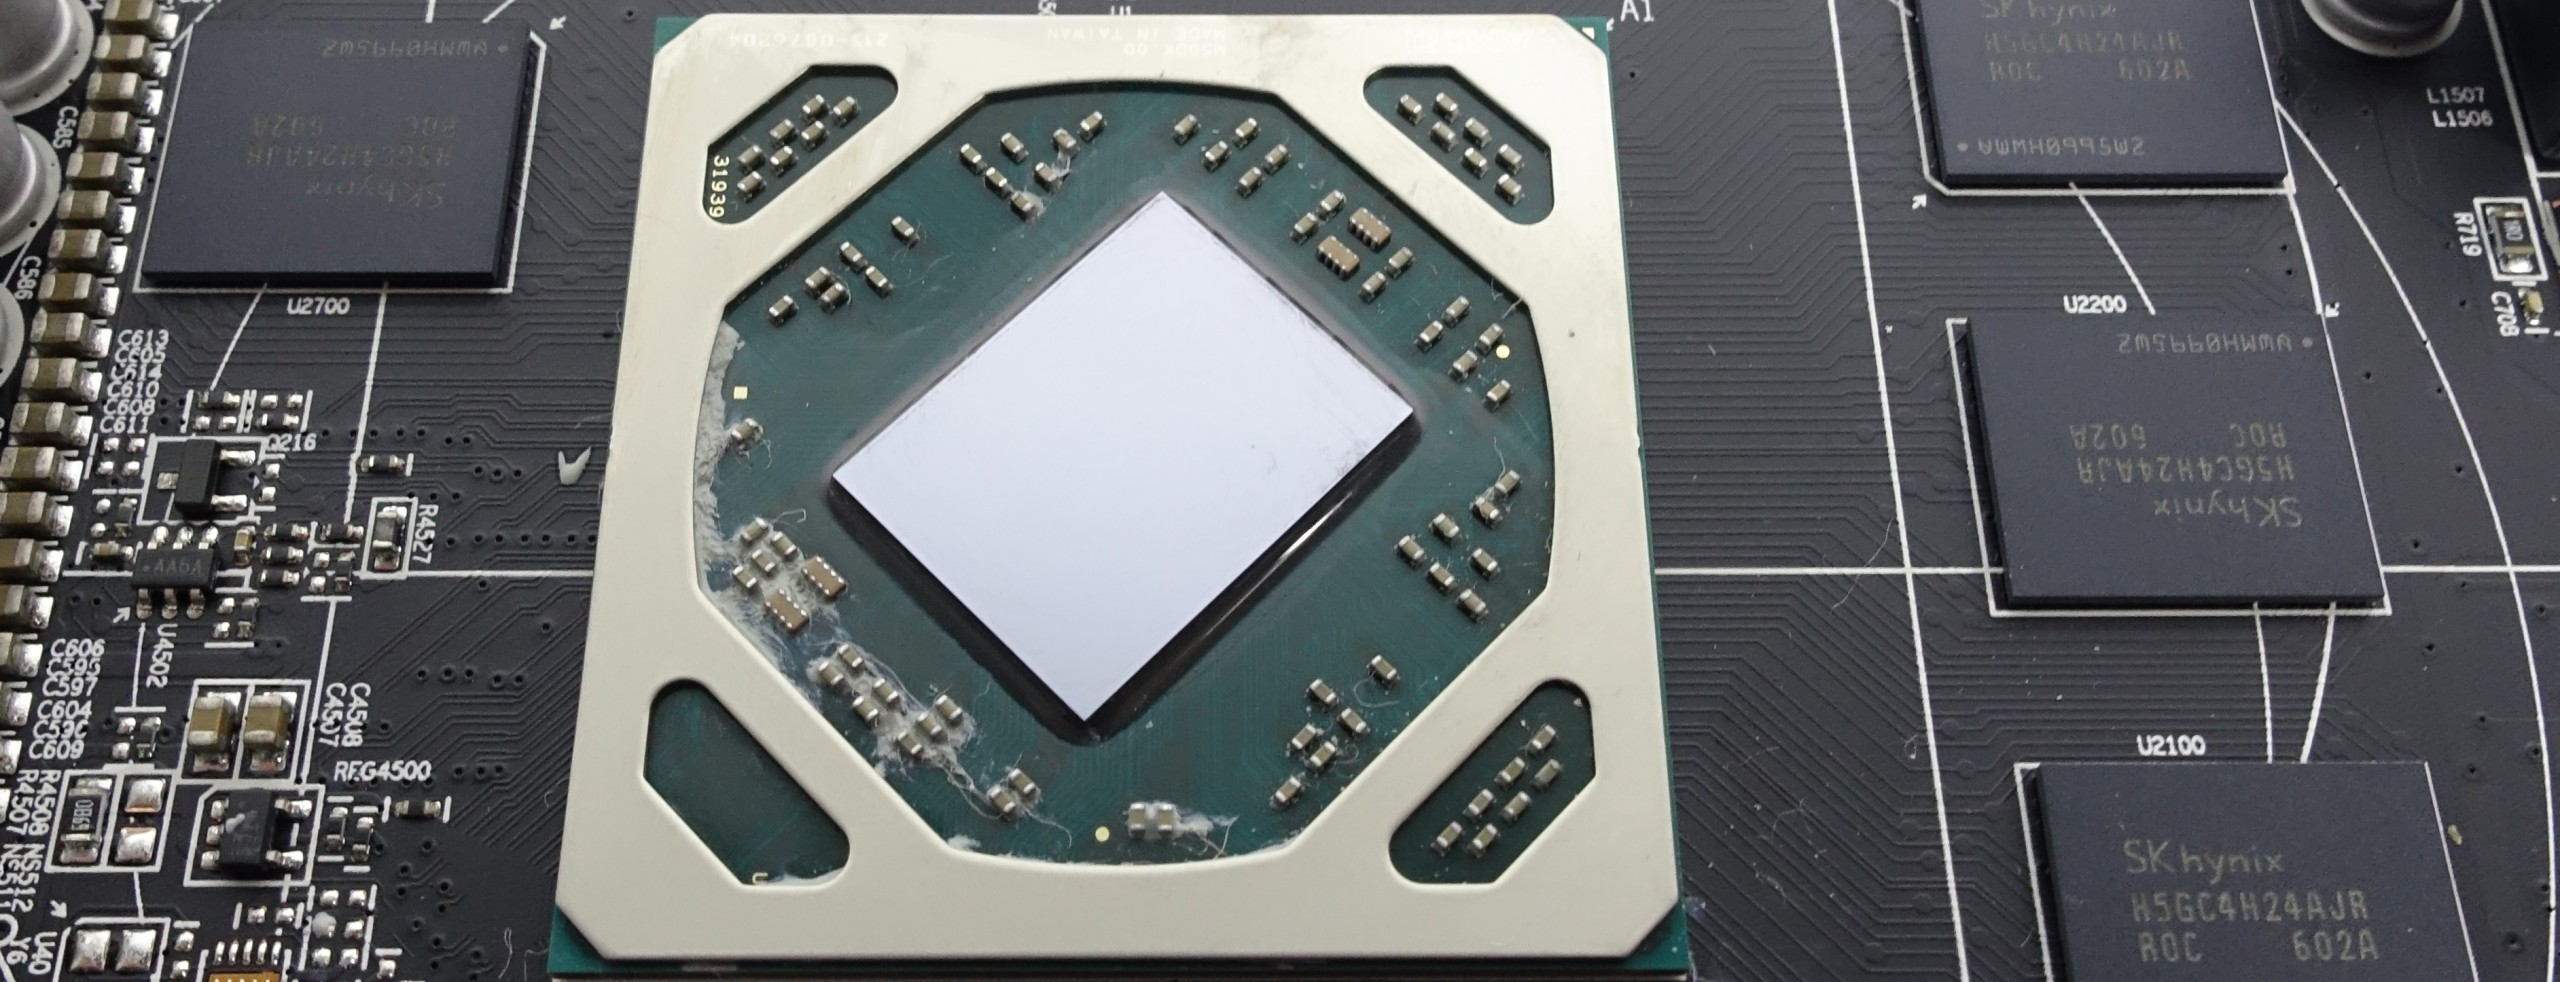
However, almost all manufacturers overdo it with thermal paste, and in the case of our test subject, the result is messy. We were able to scoop up just over one gram of excess for subsequent tests. We will thus be able to test the same installation under identical conditions with both the original paste and an expensive product, and compare the results.
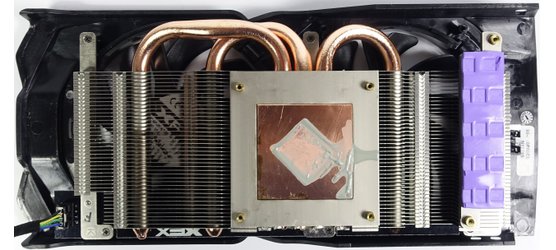
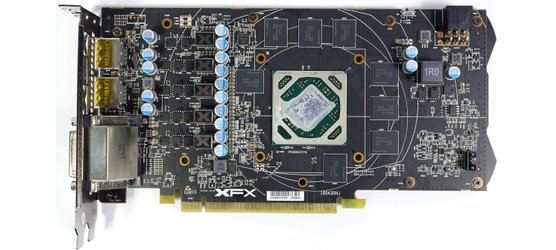
Apparently, thermal paste was applied in such abundance that even half of the package was filled as well. While this makes no sense as far as temperatures are concerned, at least it isn't dangerous. Simple silicone-based pastes are generally non-conductive, and thus there is no chance of causing a short-circuit.
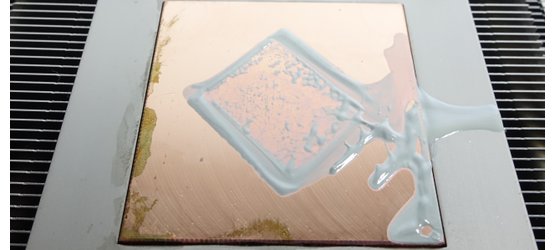
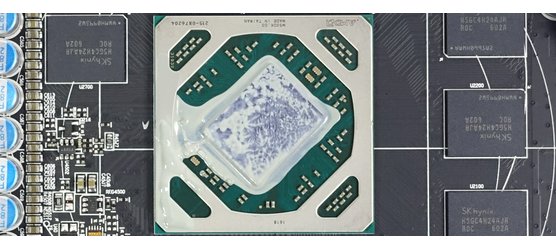
Nevertheless, a thorough clean-up is advisable. As a first step, we recommend using a soft cloth to remove all residue that can easily be wiped off without additional (chemical) aid. When cleaning the heat sink, pay attention to the grating, as remnants of the old thermal paste are easily left behind in the various grooves. This is also true for the surface of flattened heat pipes.
It is important to ensure that those surfaces are thoroughly cleaned because mixing different pastes can be extremely counterproductive. Specialized shops sell cleaning kits for this purpose, but even isopropyl alcohol (2-propanol) will do the trick. It's available on Amazon and at various pharmacies, and usually sold for about two or three dollars per sixteen ounces. It is advisable not to use methylated spirits. And totally unsuitable for the task at hand are acetone cleaners, nitro-cellulose thinners, and nail polish remover. While the latter may also be based on 2-propanol, it often contains other unfavorable additives as well.
Be careful when you're cleaning the GPU package. Avoid scraping or scratching. Even forceful rubbing with a soft cloth can damage the fragile hardware if a certain amount of pressure is exceeded. Whatever remnants are unwilling to part freely are better left alone. Only the GPU itself needs to be polished to a high gloss.
Note #5 Old thermal paste must be removed without solvent as much as possibleDon't use any pointed or sharp objects, don't scratch, don't scrapeApply suitable solvents carefully and in moderationDon't use aggressive solvents (nitro-cellulose, acetone)Avoid solvents around the GPU package; don't leave any puddles
Perfect Application of the Correct Thermal Paste
What makes a paste "correct," anyway? The Internet is full of dubious tests, many of which contradict each other. In fact, any benchmark that ignores the change in fan speeds after modification, or doesn't look at the temperatures of other on-board components are more or less useless.
Except for water cooling, which doesn't need a fan, control mechanisms like AMD's PowerTune and Nvidia's GPU Boost ensure that the GPU's thermal behavior significantly affects fan speed, voltage regulation, and of course clock rate. So, even if the measured temperatures appear the same, the card may suddenly be holding a higher boost frequency for a significantly longer time, the fans may rotate slower, or both. Furthermore, a lower GPU temperature, and thus a reduction of fan activity, can result in a higher thermal load on other components.
The minimum burn-in time necessary for a new application of paste to reach its peak performance is another issue that is rarely taken into account. We have thus allowed all our thermal pastes to "burn in" over a total operating time of 24 hours each. Of course, this prolongs our measurement window, but the extra effort is worthwhile.
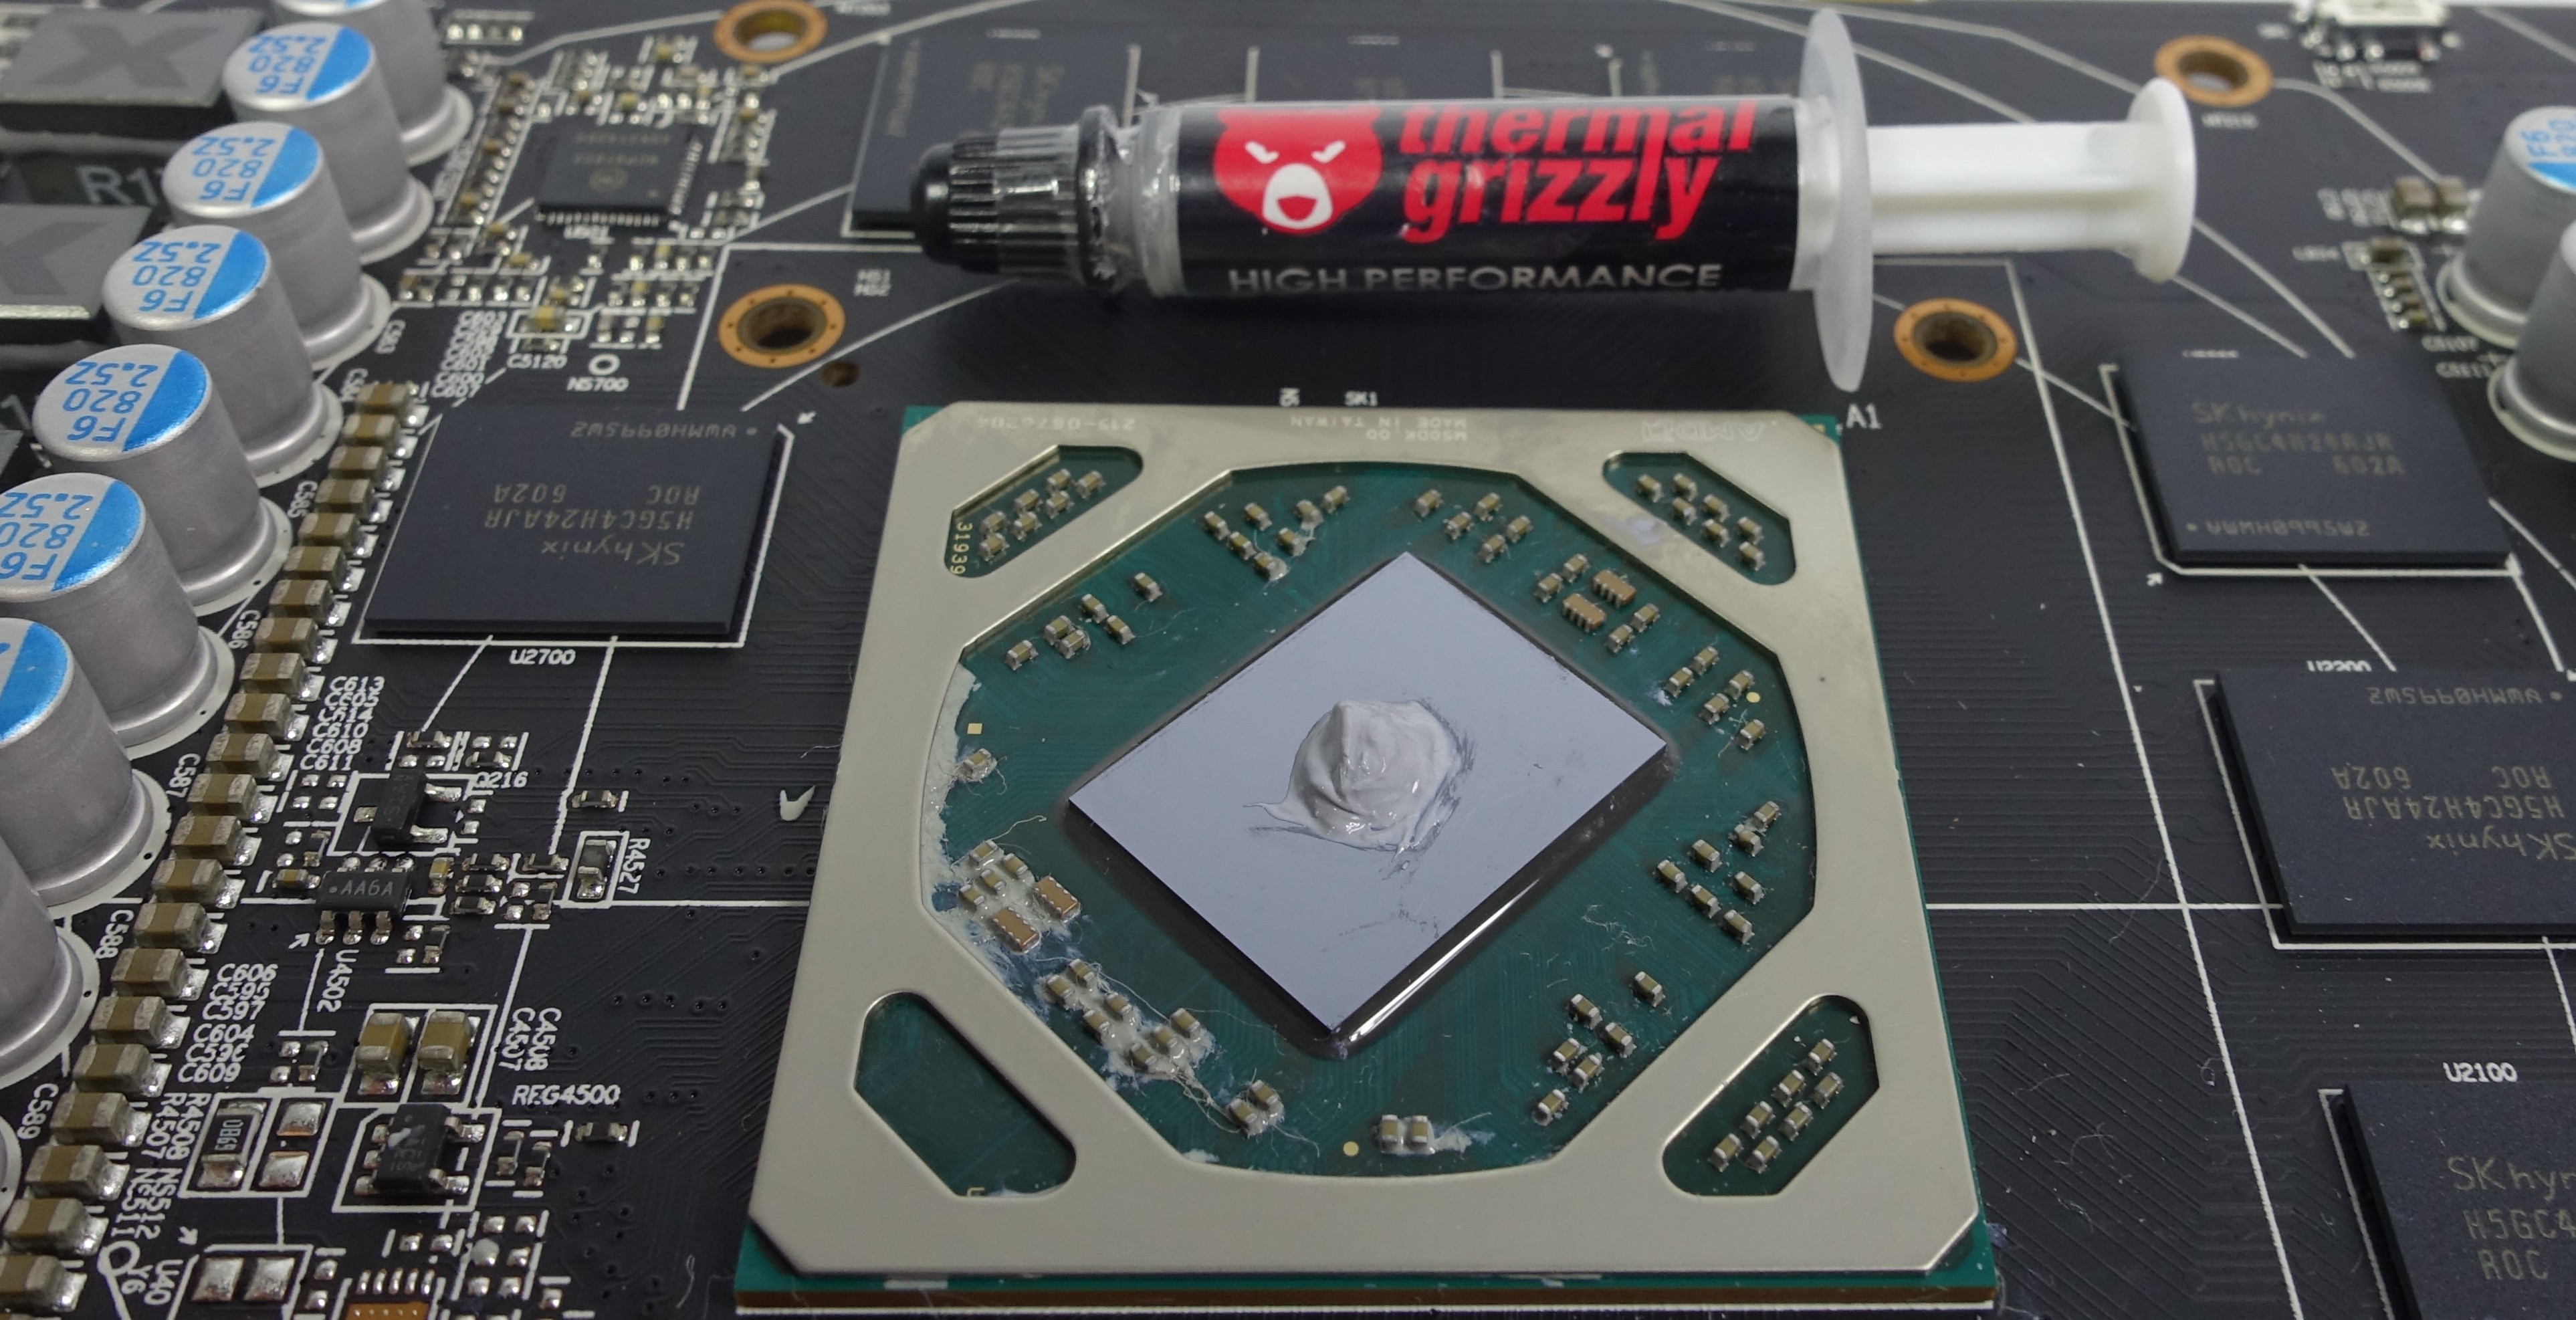
Since we generally prefer the "blob" method, and like to tighten the four GPU screws crosswise, the choice of an appropriate paste actually is the most important task. To recap, a lentil-sized blob is more than enough, and it is absolutely okay if a little bit of paste leaks at the sides once the screws are tightened. It's better to be generous than to create empty spaces with no paste at all. Once your burn-in period is completed, it might be a good idea to check whether the four screws need to be re-tightened.
In addition to the paste's basic properties, such as high thermal conductivity (low thermal resistance), its consistency also plays an important role. In the hands of a professional, thermal pastes with high viscosity (like diamond pastes) can be a perfect weapon to battle excess heat. However, for less experienced modders, they're often unpredictable and difficult to handle. To achieve the perfect result with a highly viscous paste, you have to preheat the paste, warm up the heat sink to somewhere between 60 and 70°C, apply the right amount of paste to the sink, and then screw it all back together before the product cools down.
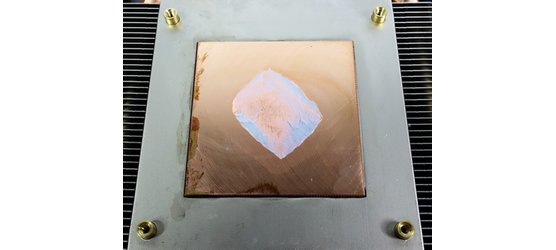
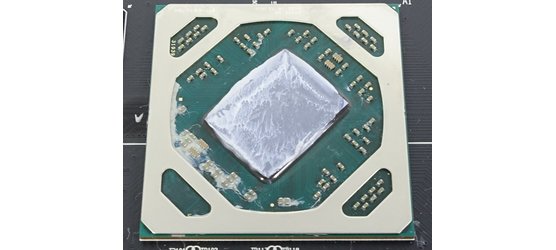
These two images show that the above pictured blob was sufficient, and hardly any of the product got spilled. Furthermore, the image shows a thin and uninterrupted layer of thermal paste across the GPU, which goes to show there's no reason to fumble with a spatula.
Now it's time to talk money. Not everything that is expensive and/or boldly advertised is suitable for the job. When testing under similar conditions, and by taking fan activity into account, the results reveal relatively small differences. This disqualifies many products due to an unfavorable cost-benefit ratio.
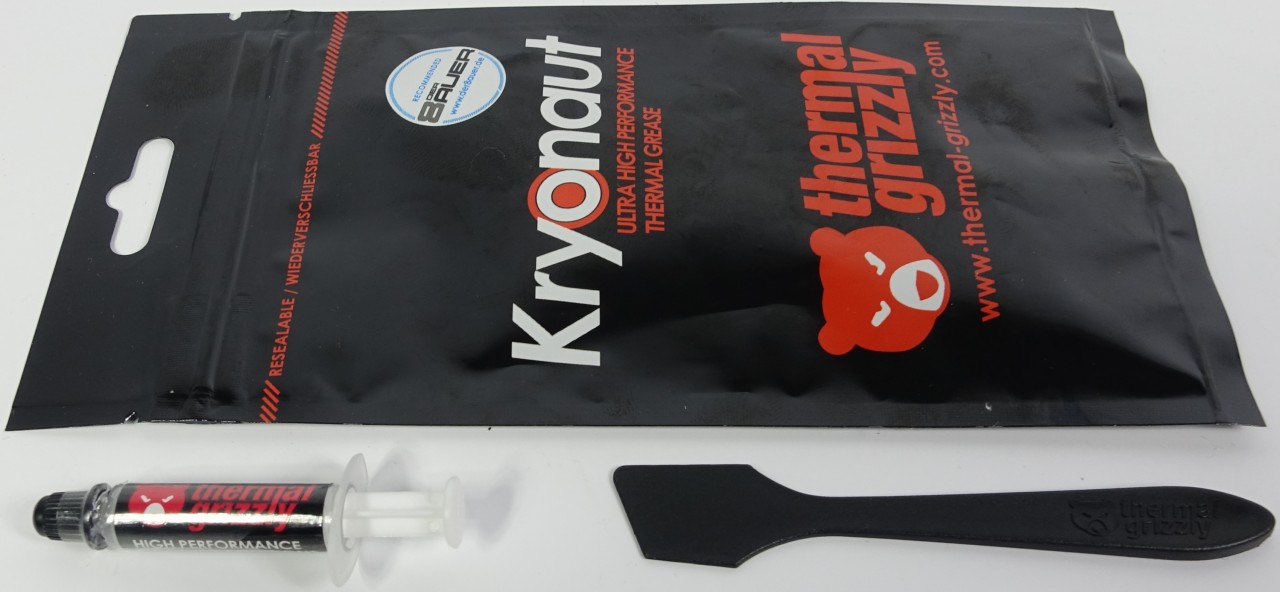
For almost three years, we used Gelid GC Extreme exclusively, and that's after reviewing a number of thermal pastes. Even though Thermal Grizzly's Kryonaut replaced GC Extreme as the weapon of choice for graphics card testing, it's unfortunately also significantly more expensive. On the bright side, you don't need very much of the stuff to modify one graphics card.
Kryonaut is a bit thinner and smoother than Gelid's GC Extreme, yet it doesn't tear. Thus, it is a well-suited candidate for very smooth cooler surfaces. We can recommend this thermal paste in good conscience for all kinds of heat sinks, although there are other suitable alternatives as well.
Note #6: Use only non-conductive pastes; avoid pastes with high viscosity Always question potentially misleading marketing statements concerning thermal conductivity Read several product tests and check the review quality Not everything that is really expensive is also really good Apply the "blob" method with a not-too-viscous paste Tighten screws diagonally and crosswise
Assembly and Functionality Check
Approach the reassembly process by reversing your steps, and don't forget to re-attach cables that were unplugged. After a thorough visual inspection (and comparison to those previously-recommended photos), we proceed to our first check of the card's electrical functions without load using a tool like GPU-Z. Start by logging thermal values at idle.
Given a similar ambient as before, the GPU shouldn't exceed our previous measurements. If it does, something went wrong. We would need to go back to square one and start over. If the temperature isn't higher, gradually increase the load, take the relevant readings, and compare them to the card's previous state. If the fan speeds are lower than before, try adjusting the fan curve to the new, lower temperatures so that the rotational speed matches the previous values.
Note #7 Conduct a thorough visual inspection after completing the reassembly Do a functional check without load Any identified mistakes and issues should be fixed Increase the load slowly, and compare the temperatures to the previous readings under load Allow the paste to burn-in over several hours Remember to check and tighten the screws after burn-in!
MORE: Best CPU Cooling
Current page: Taking Apart And Re-Assembling Your Graphics Card
Prev Page Optimizing Graphics Cooling Next Page Performance Results And Interesting Interactions
Igor Wallossek wrote a wide variety of hardware articles for Tom's Hardware, with a strong focus on technical analysis and in-depth reviews. His contributions have spanned a broad spectrum of PC components, including GPUs, CPUs, workstations, and PC builds. His insightful articles provide readers with detailed knowledge to make informed decisions in the ever-evolving tech landscape
-
crisan_tiberiu For me, changing the thermal paste on a Sapphire R9 280x resulted in a 8 to 10 degrees celsius lower temps while @ gaming/load. The card went from "very audible" to silent... The thermal paste was so poorly applied, it was on only half of the chip...Reply -
Shankovich I think if you've had your card for about 2 years, it's time for a reseat. Did mine with Noctua NT-H1 (best imo, no burn in needed), delta-T was around 9 Celsius at load :)Reply -
FormatC Especially with higher temps, like on a GPU, the thermal grease will dry out over the time. As cheaper, as faster. So it makes sense to change it periodically.Reply -
enterprise24 Use locking pliers to remove screw with warranty void on it. I try this method on MSI R9-290X Lightning without damage to sticker and can still RMA.Reply -
murzar In 2015, my AMD 6770 would reach temperatures around 100 degrees Celsius! Summers are savage in my city.Reply
But it wasn't cleaned for ages, just cleaning the fan assembly resulted in a temperature drop to around 80 degrees Celsius.
Got a cheap but branded 4 usd Arctic Thermal Paste.
Temperature was around 65s! -
AndrewJacksonZA Reply
After about five years I became concerned that my single fan HIS 6670 was heating up to 66C in Furmark runs even after cleaning the fan and heatsink on the card. I replaced it's factory TIM with Thermal Grizzly Hydronaut which I had bought for my new CPU and it dropped to 54C. I added lots of sound absorbing material in my case blocking some airflow exit holes near the card, and it's still only sitting at 62C during Furmark runs.19165507 said:In 2015, my AMD 6770 would reach temperatures around 100 degrees Celsius...Temperature was around 65s!
It was DEFINITELY worth it for me to replace the TIM on my card.
Edit: typo. -
Olle P There are more ways to improve the cooling:Reply
1. Clean the heatsink fins.
2. Clean the fan blades.
3. Optimise the airflow around the graphics card. Try to prevent the heated air from being drawn back into the fans on the cooler.
4. Polish the heatsink's contact surface to get rid of any milling grooves. You want as much direct contact surface between heatsink and GPU as possible.
Thermal pastes:
* As long as you avoid the really cheap purely silicone based thermal paste the difference between pastes should be marginal. Only with milling grooves to fill will there be a notable difference.
* Burn-in time differ between pastes though. Some reach optimum in an hour, other will need weeks of use to reach their final state.
* Thermal paste will not "dry out" and need a replacement unless the heatsink is relocated relative to the GPU.
Cleaning:
"... a thorough clean-up is advisable. ... because mixing different pastes can be extremely counterproductive. ..."
A small amount of mixing shouldn't make any difference at all, especially given (as stated on page one) that the pastes differ very little in chemical composition in the first place.
"... cleaning the GPU package. Avoid scraping or scratching. Even forceful rubbing with a soft cloth can damage the fragile hardware..."
Since rubbing *will* create static electricity that can fry the GPU I'd stick to cleaning the top surface of the GPU only. Trying to remove old thermal paste around the GPU is more likely going to cause damage than improve the thermal result. -
jonny27 Ok hold on a second, I was reading it all until I saw the thermal paste on top of the pads.Reply
I've been hearing unanimously for years that doing this actually decreases thermal performance, as you're adding an extra layer of heat transfer material, and the compression alone should make the thermal transfer "as good as it can be" (or at least as good as a thermal pad can handle anyway). Not only that, but some pastes could actually degrade/corrode the pad's material.
But to my surprise, I'm seeing improved results on paste+pads. Can someone shed some light onto this? -
cats_Paw Interesting article.Reply
I personally think it would have been a smarter choice to use a laptop gpu (inside a laptop) for this test.
Laptops are more prone to temperature problems, so it should be a better example of worst case scenario.
Another thing is that I have found that my laptop GPU and CPU tend to drop temps of almost 15 C when the thermal paste is reapplied, but in 2 days it goes back up to what it usually gets stable.
This did not happen when the laptop was new, but it seems the thermal paste gets too high temperature, partially making it more liquid and then pushing it out of the heatsink. I have no idea why that is. -
vaughn2k Toms/Igor, just an observation.Reply
You also need to add that compounds should avoid touching the SMD components, and smearing at the side of the substrates/PCB.
Som compounds consist of silver, and if this happens, it will cause shorts and/or degradation of the GPU..
The picture where a new compound is applied, has some remnants of the old paste, present at the SMDs.. this is a No NO..
