Building in Asus’ ROG Z11 ITX Case: Pretty Impracticalities
Asus ROG Z1 mini ITX showcase chassis is pretty, but we hope you don’t like getting to your rear ports easily.
Every once in a while, an industry leader releases a bold product that takes the whole industry in a new direction. Asus’ ROG Z11 ITX chassis is certainly bold, with its 11-degree angling of the motherboard, otherwise unorthodox internal layout, versatile horizontal or vertical orientation options and five (yes, five) front-/top-mounted USB ports. It also looks stunning when equipped with the right components behind its aluminum-and-glass panels.
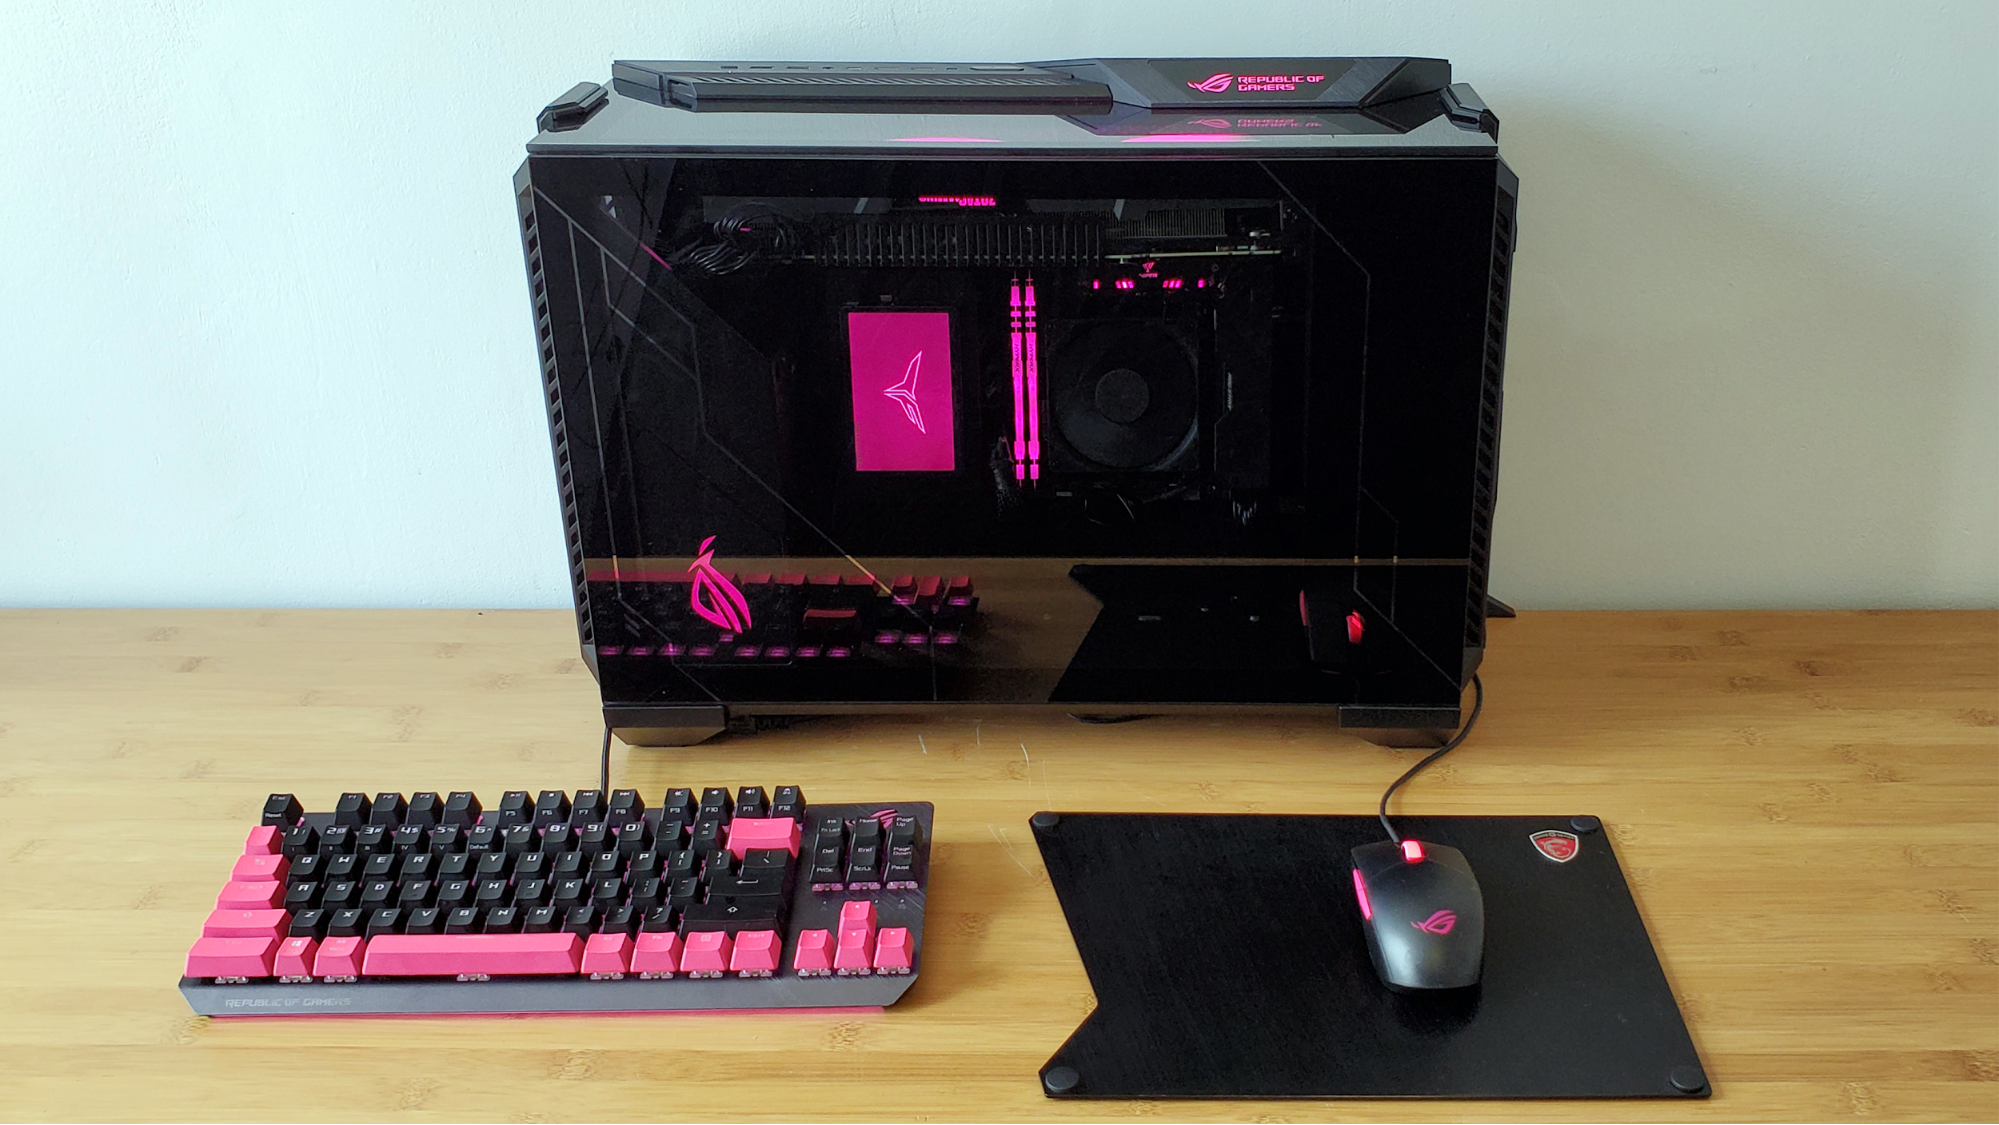
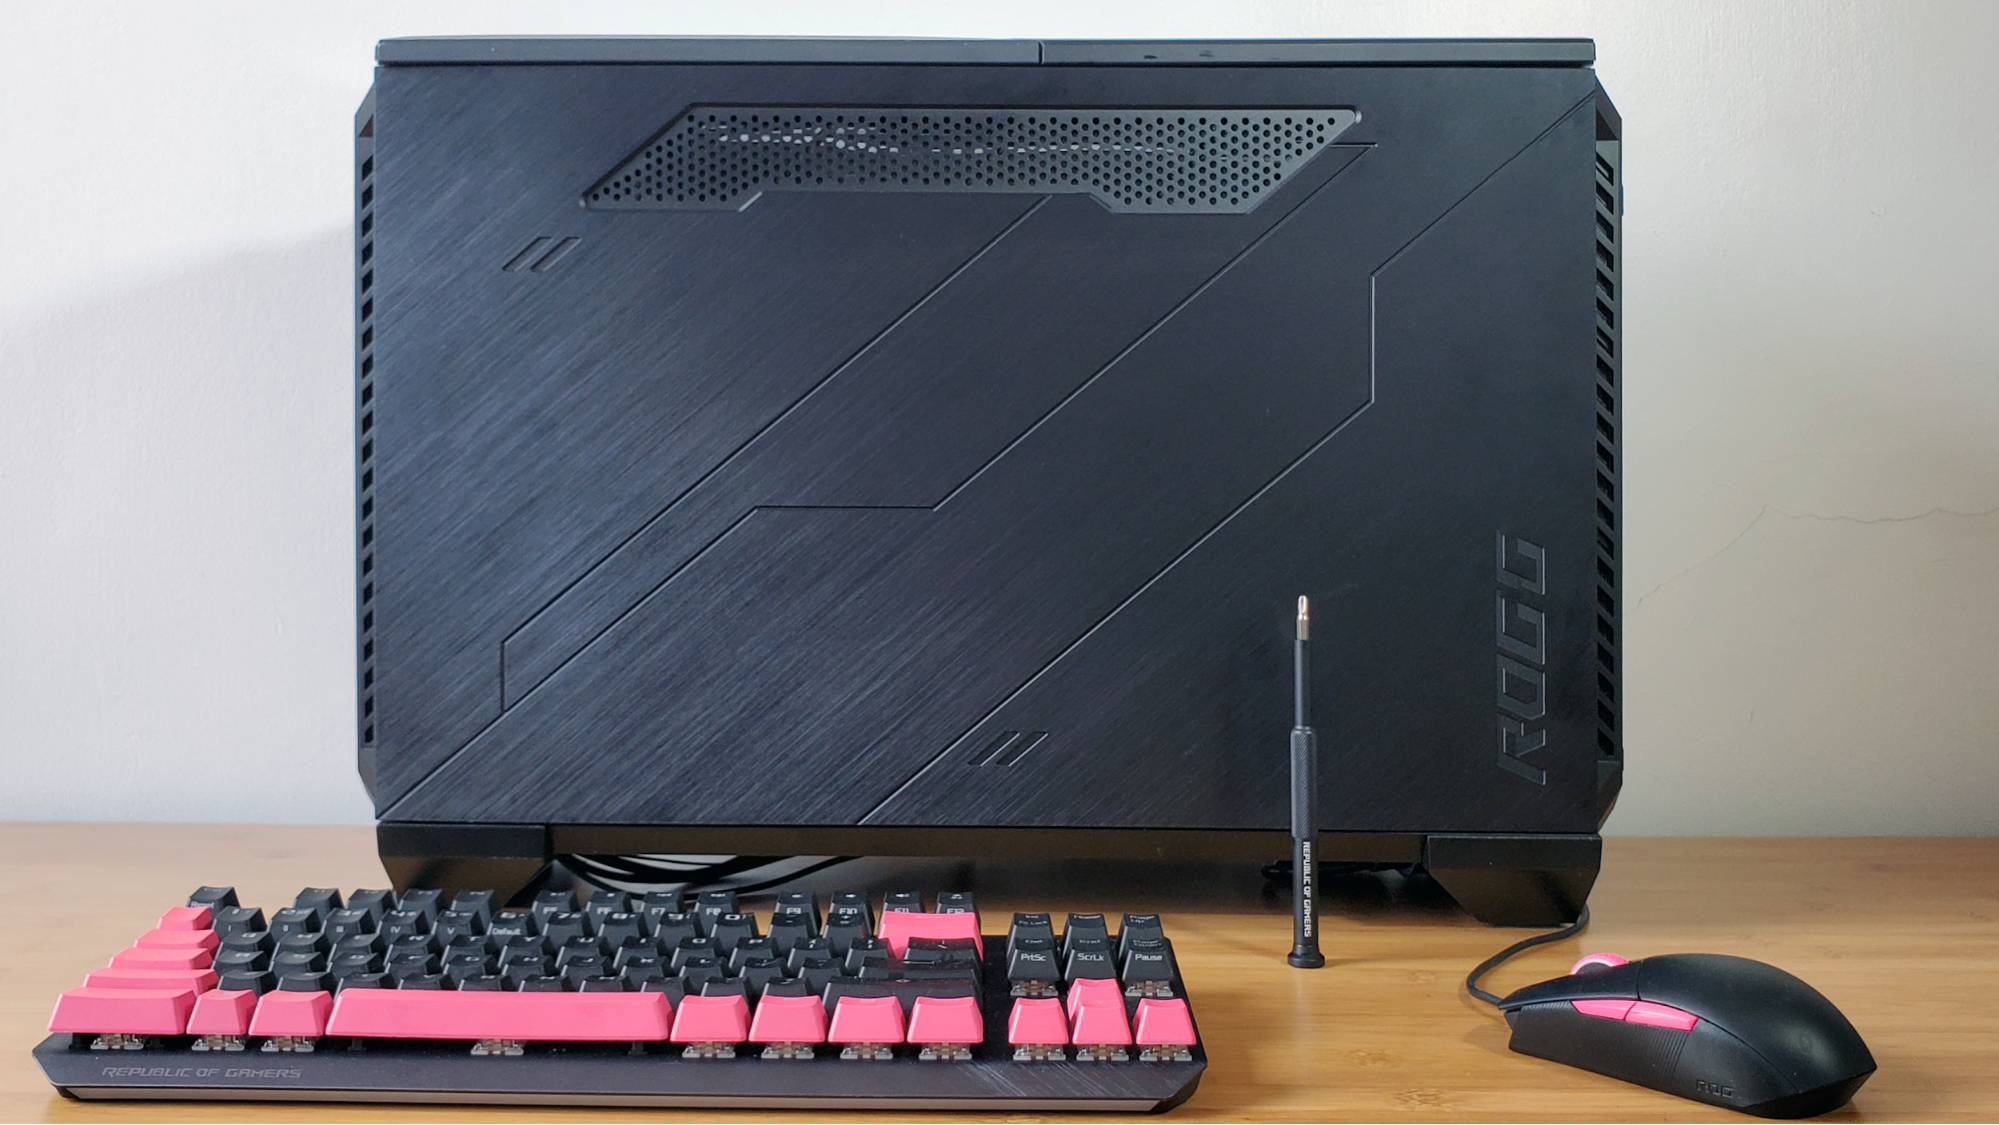
But the ROG Z11 case is unlikely to find appeal beyond a small niche of builders who want a pretty showcase PC -- for more reasons than I can list up top. It’s a gorgeous, premium-feeling case that puts your graphics card on full display, either at the front or up top, depending on how you orient the case. But at 21 x 7.6 x 14.7 inches, it’s quite large for a case that only supports mini ITX motherboards, mostly negating the purpose of opting for the smallest mainstream motherboard form factor. And at $279, it’s also very expensive.
And all that aside, the ROG Z11 also makes it insanely difficult to access any of your motherboard’s rear IO or your graphics card’s video ports (much more on this later). So unless you’re the type who very rarely swaps peripherals or changes up your monitor setup (which, to be fair is probably the vast majority of desktop users), you should probably steer clear of the Z11. But if you’re up for a build that will challenge your expectations, this is still one fascinating chassis to work in. We’ll delve into that below, but first, here’s a full list of the ROG Z11’s specs, direct from Asus.
Specifications
| Type Mini | Mini ITX tower |
|---|---|
| Motherboard | Support Mini ITX |
| Dimensions (HxWxD, vertical orientation) | 20.9 x 7.6 x 15.2 inches (531 x 194 x 386mm) |
| Max GPU Length | 12.6 inches (320 mm) |
| CPU Cooler Height | 5.1 inches (130 mm) |
| Weight | 19.25 pounds (8.73 kg) |
| External Bays | ✗ |
| Internal Bays | 1x 3.5-inch and 2x 2.5-inch, or 4x 2.5-inch |
| Expansion Slots | 1x |
| Front I/O | 2x USB 3, 2x USB 2.0, 1x USB-C, 3.5 mm Audio/Mic Combo |
| Other | Tempered Glass Panel, RGB |
| Front Fans | 2x 140mm exhaust |
| Rear Fans | 1x 140mm intake |
| Top Fans | None |
| Bottom Fans | None (Up to 2x 120mm) |
| Warranty | Two year limited warranty |
Accessories and Front-Panel Ports
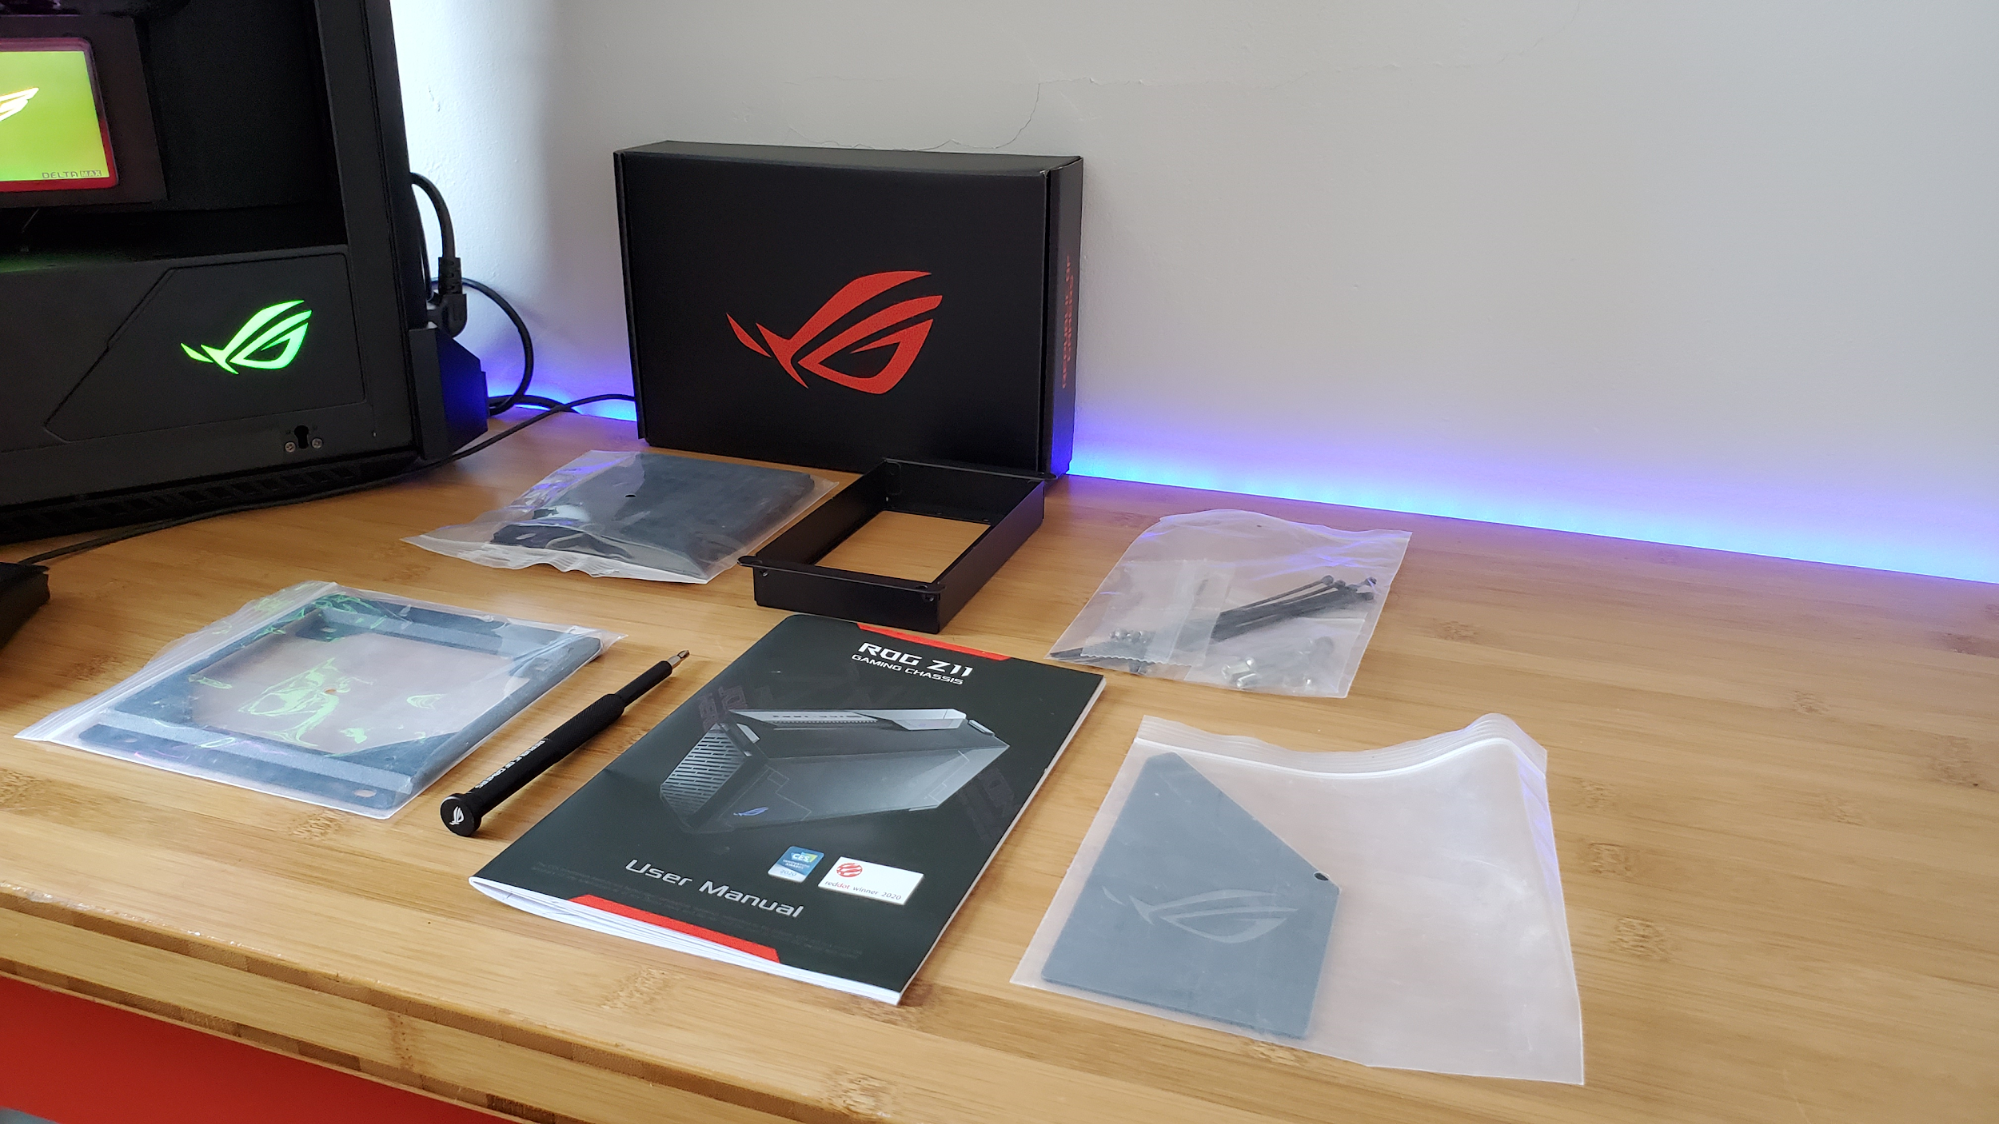
Asus includes some interesting accessories in the box with the ROG Z11. Apart from the usual collection of manual, screws and zip ties, you get an ROG-branded screwdriver, brackets for mounting SFX or standard ATX power supplies, a mount for a reservoir for custom cooling, and two plates for the PSU shroud--so that the RGB-lit ROG eye logo can be horizontal or vertical, depending on how you place the case on your desk. There’s also an L-shaped power adapter, which is basically required if you want your system to sit horizontally on your desk. Because in that orientation, your PSU plug sticks out the bottom of the case. Confused yet?
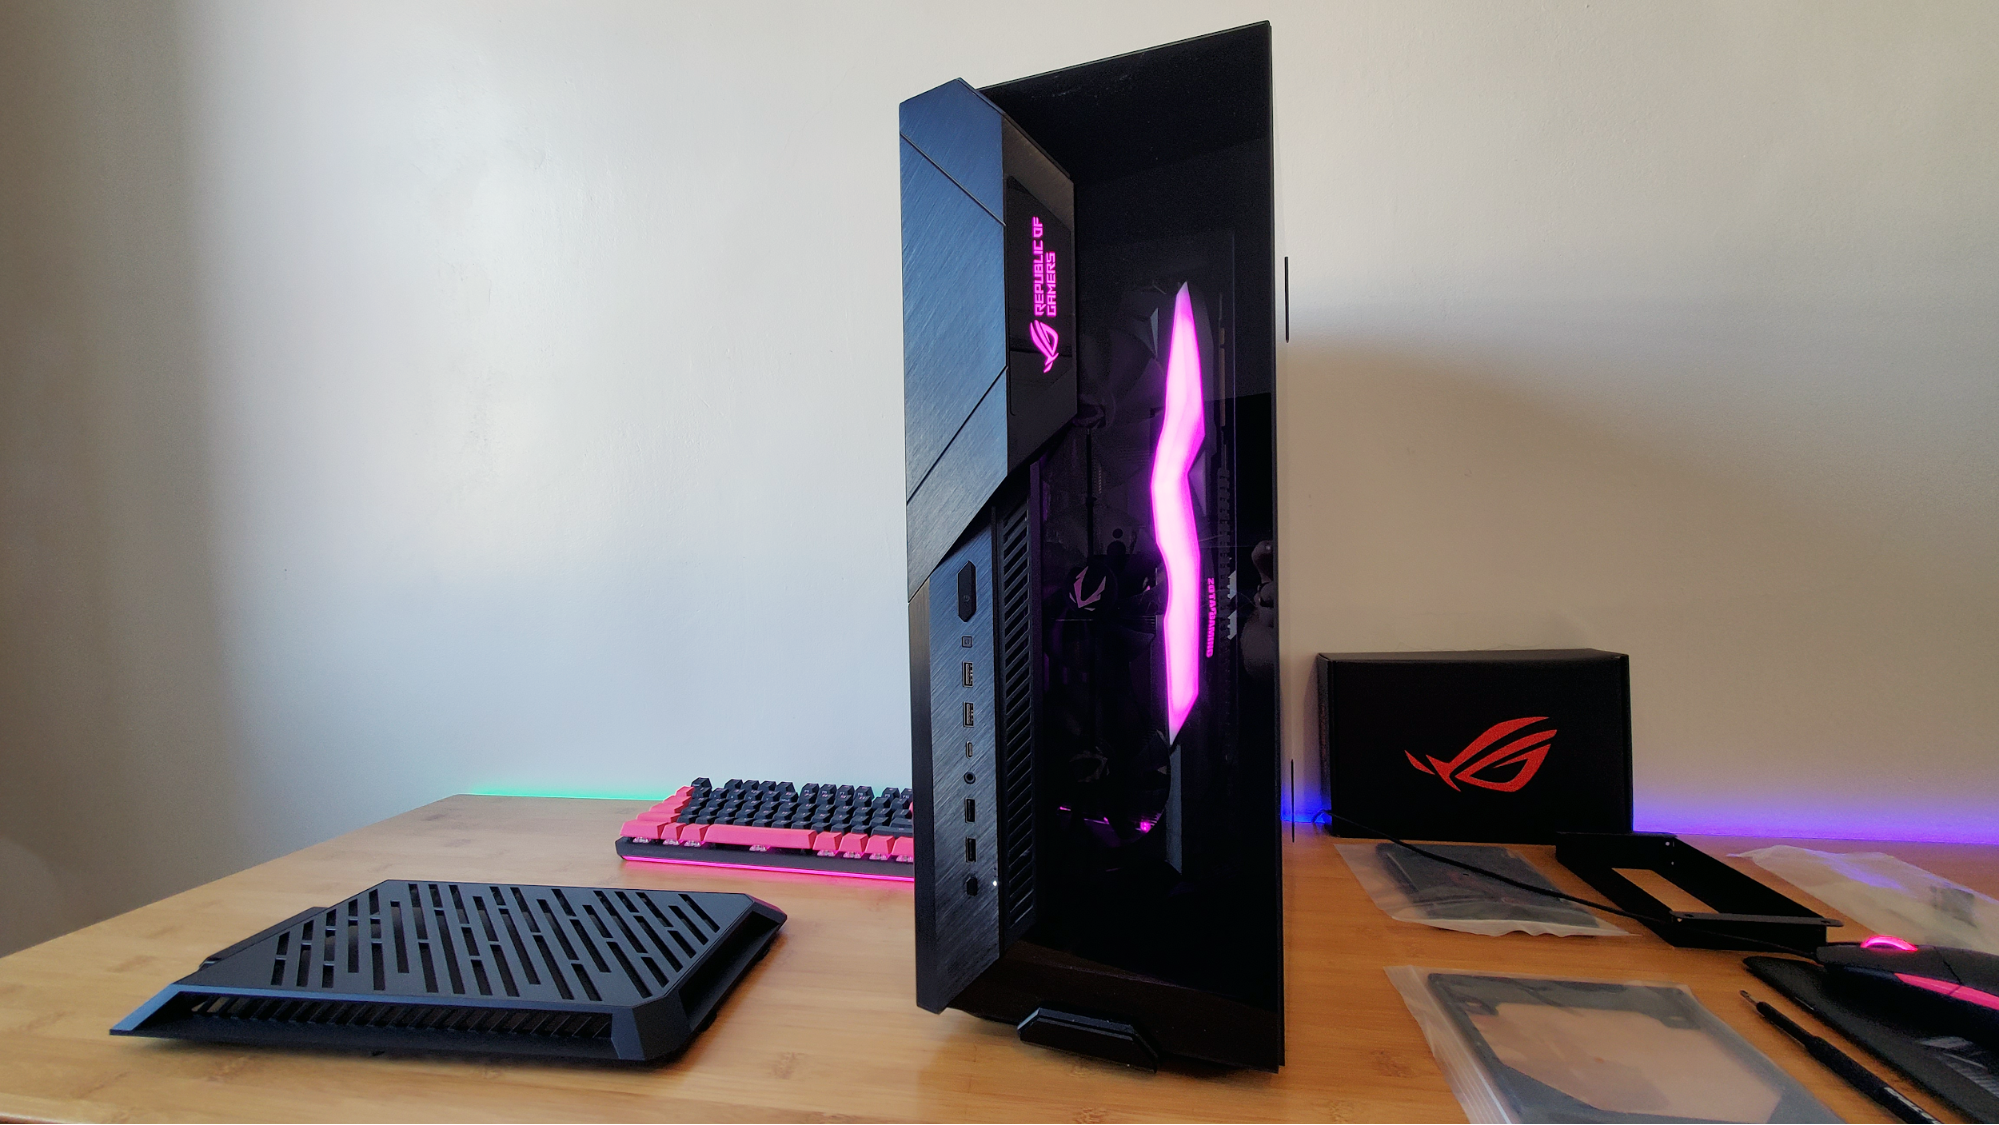
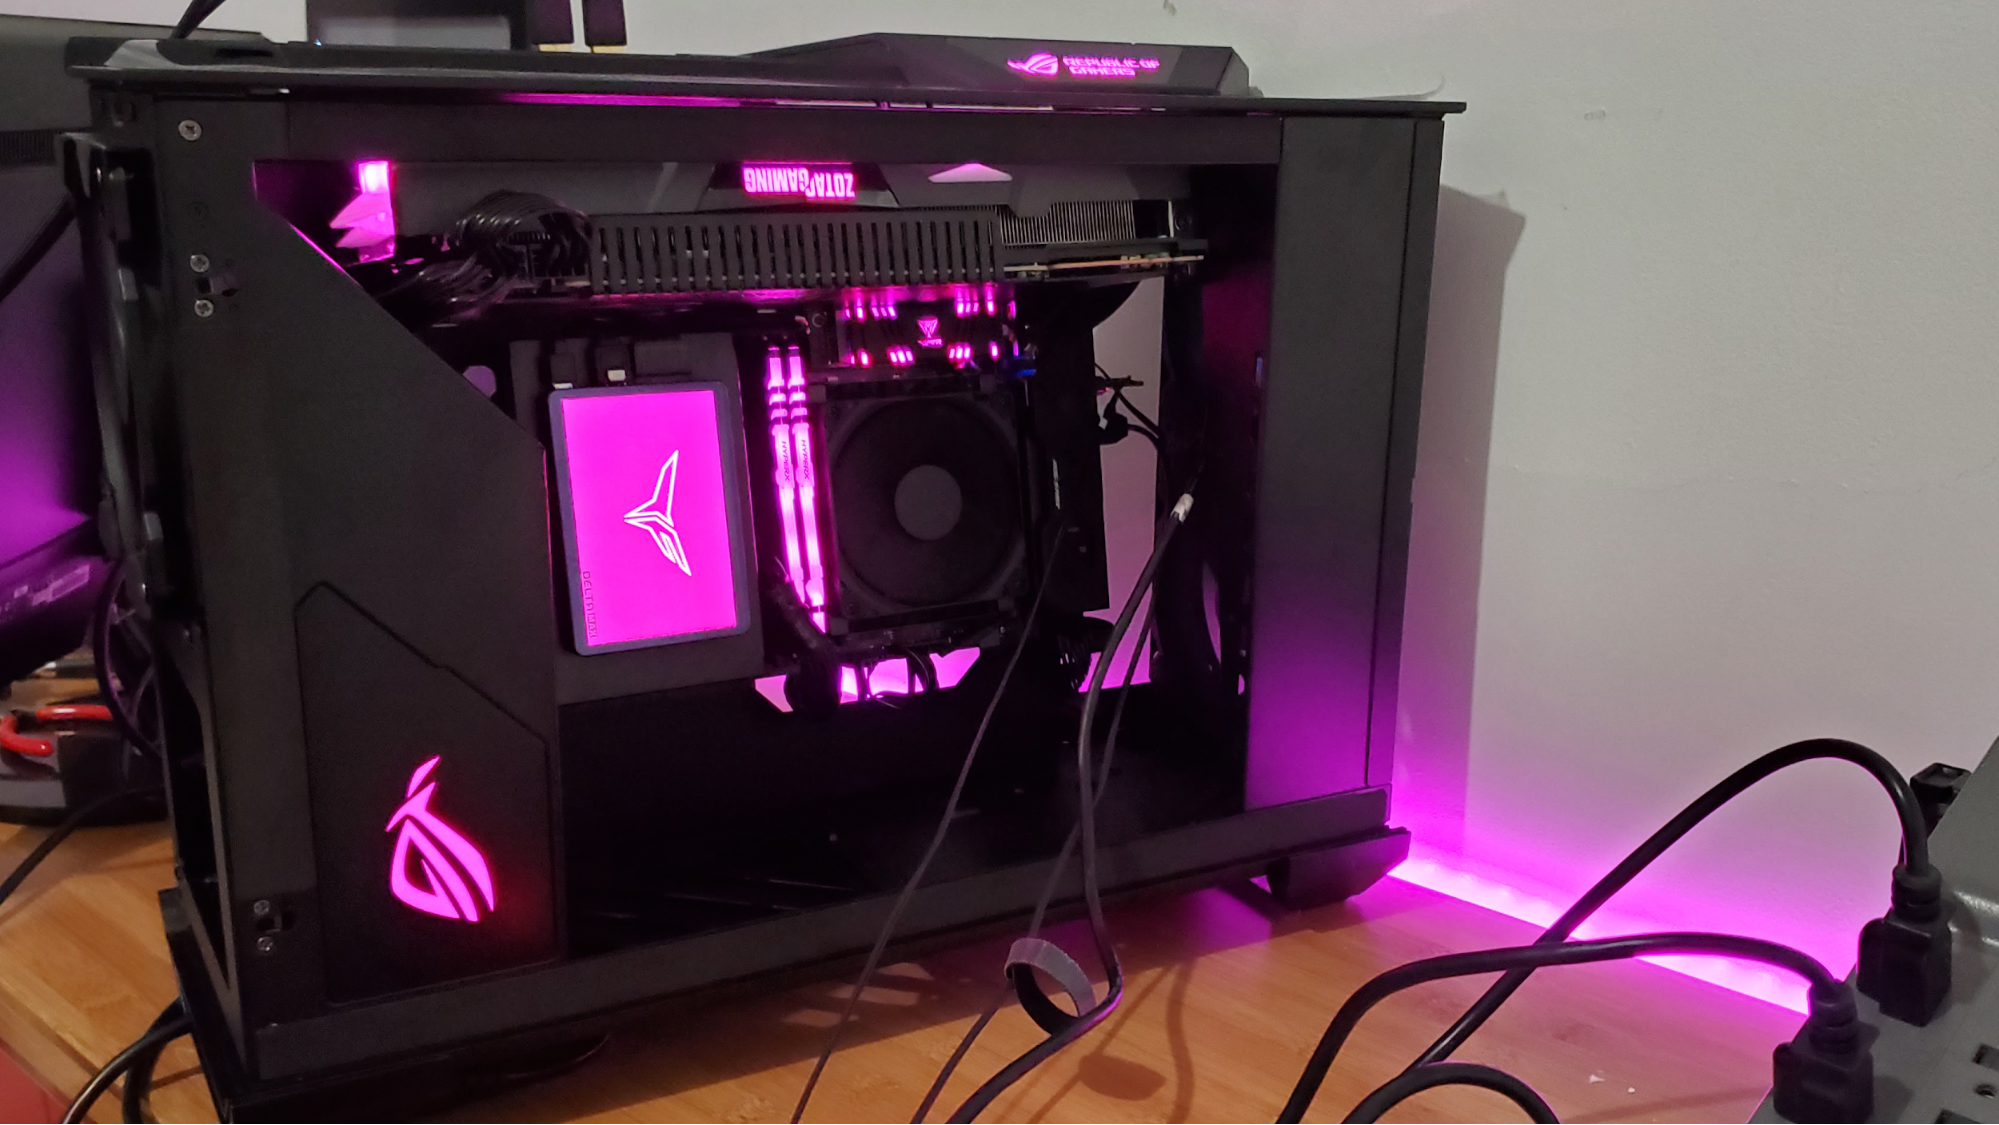
The front of the Z11 (or the top if the case is sitting horizontally) sports a glass panel for showing off your graphics card (we used the RTX 2080 Amp Extreme from our RGBaby build), an RGB-lit ROG logo, and a plethora of connectivity and buttons.
From top to bottom, there’s the power and reset buttons, a pair of USB 3.2 Gen1 Type-A ports (USB 3.0), a USB 3.2 Gen2 Type-C port, a headphone/mic combo jack, another pair of USB-A (2.0) ports, and a button for controlling the case and internal lights at the bottom. Of note here: The lighting button lets you turn off your RGB lights by holding it down for six seconds. But not all of our Aura Sync-compatible components worked with this button. We had to resort to software control to change the lighting of our RAM, SSD, and graphics card. This despite the fact that Asus’ Armoury Crate software actually works to control the lighting of everything save for our Zotac graphics card.
Popping off the panels to get inside
Many of the case’s other niceties come pre-installed inside, but you’ll have to get in the case first. To do so, you’ll want to pop off the smaller top and bottom panels, which is easily done by squeezing the sides of the clasps at the front of the panels.
Get Tom's Hardware's best news and in-depth reviews, straight to your inbox.
Getting the side panels (one glass, the other aluminum) off for the first time involves removing four small screws -- time to break out that boxed screwdriver. But push-pins in the bottom of both panels mean in most cases you won’t need to re-attach these screws when putting the panels back on, although you may want to do so for the back panel if you have cables that push against the inside of the panel -- as we did.
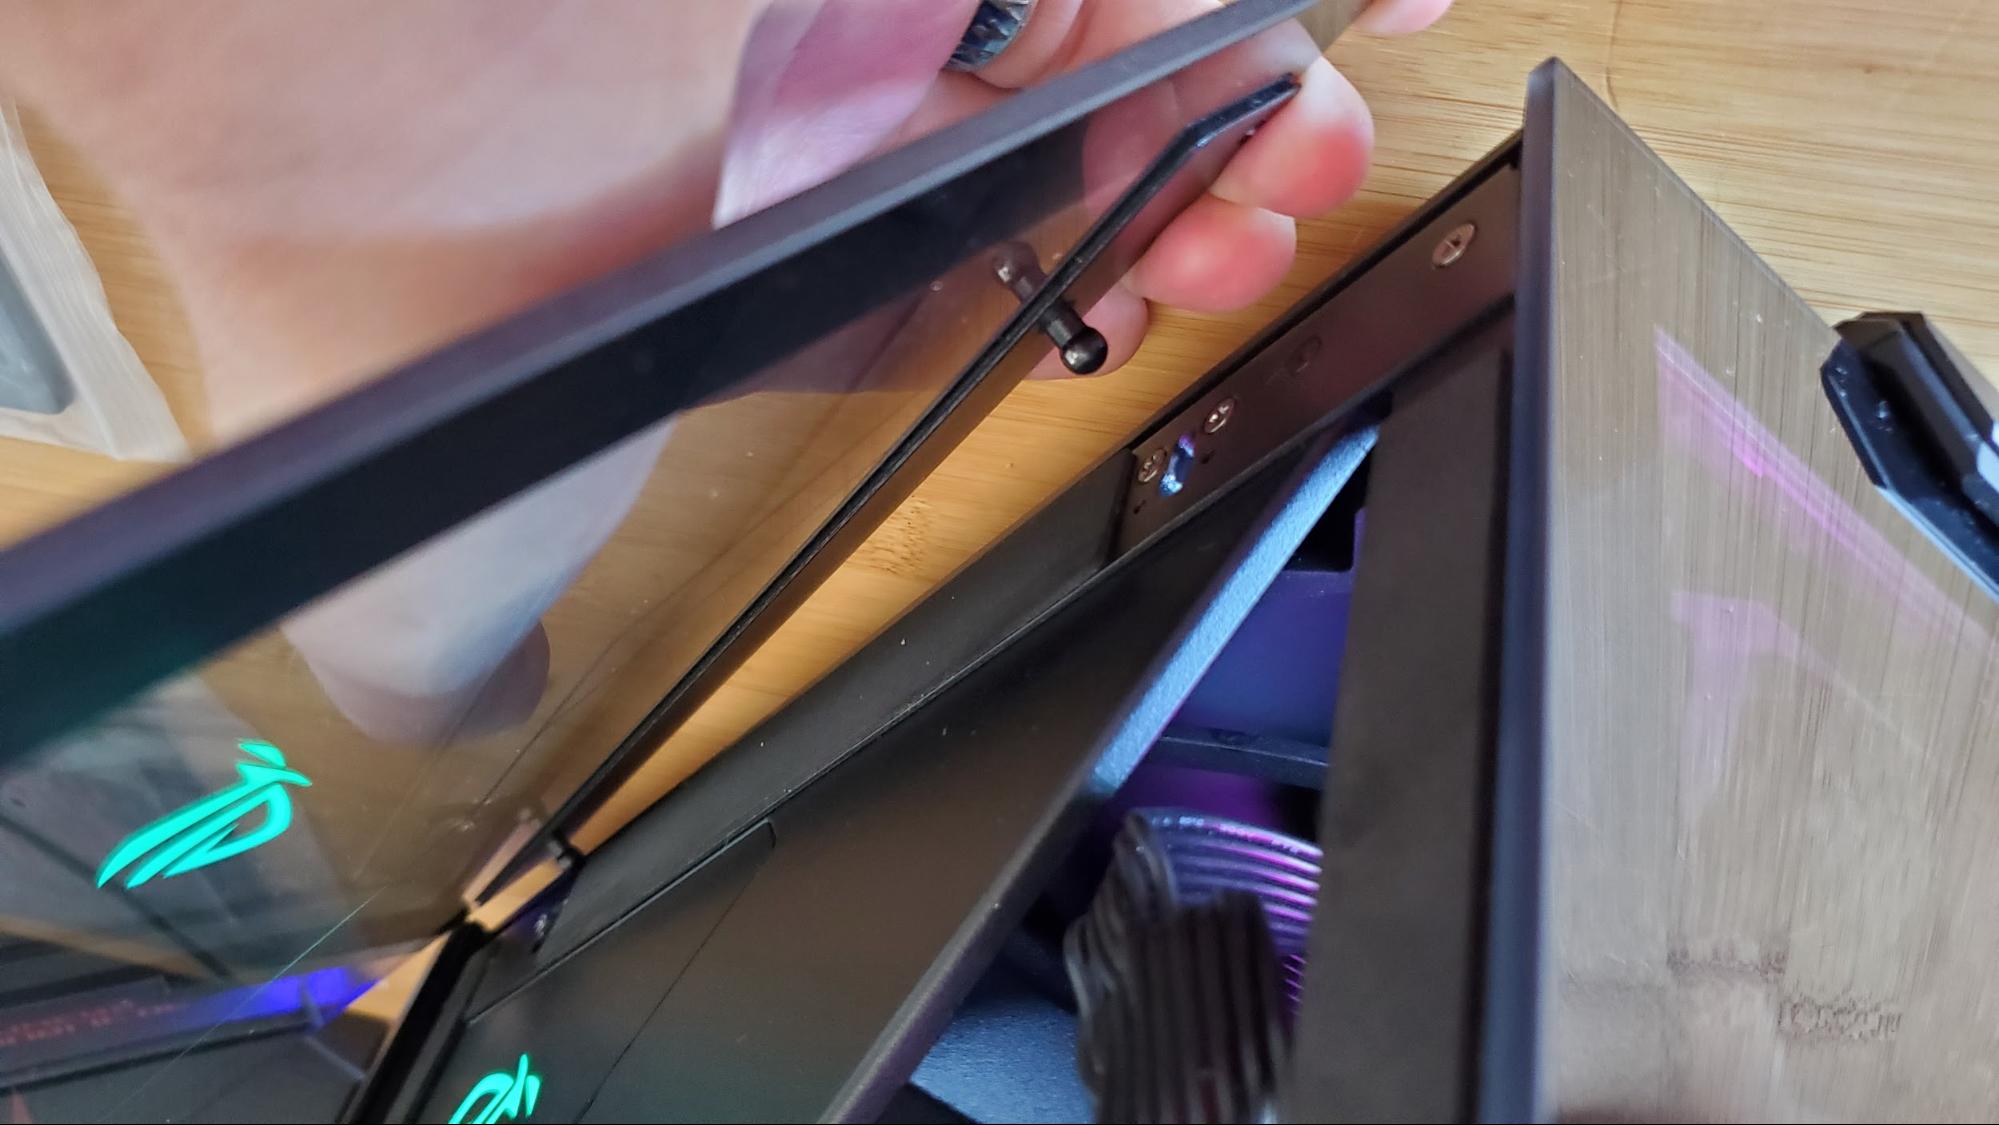
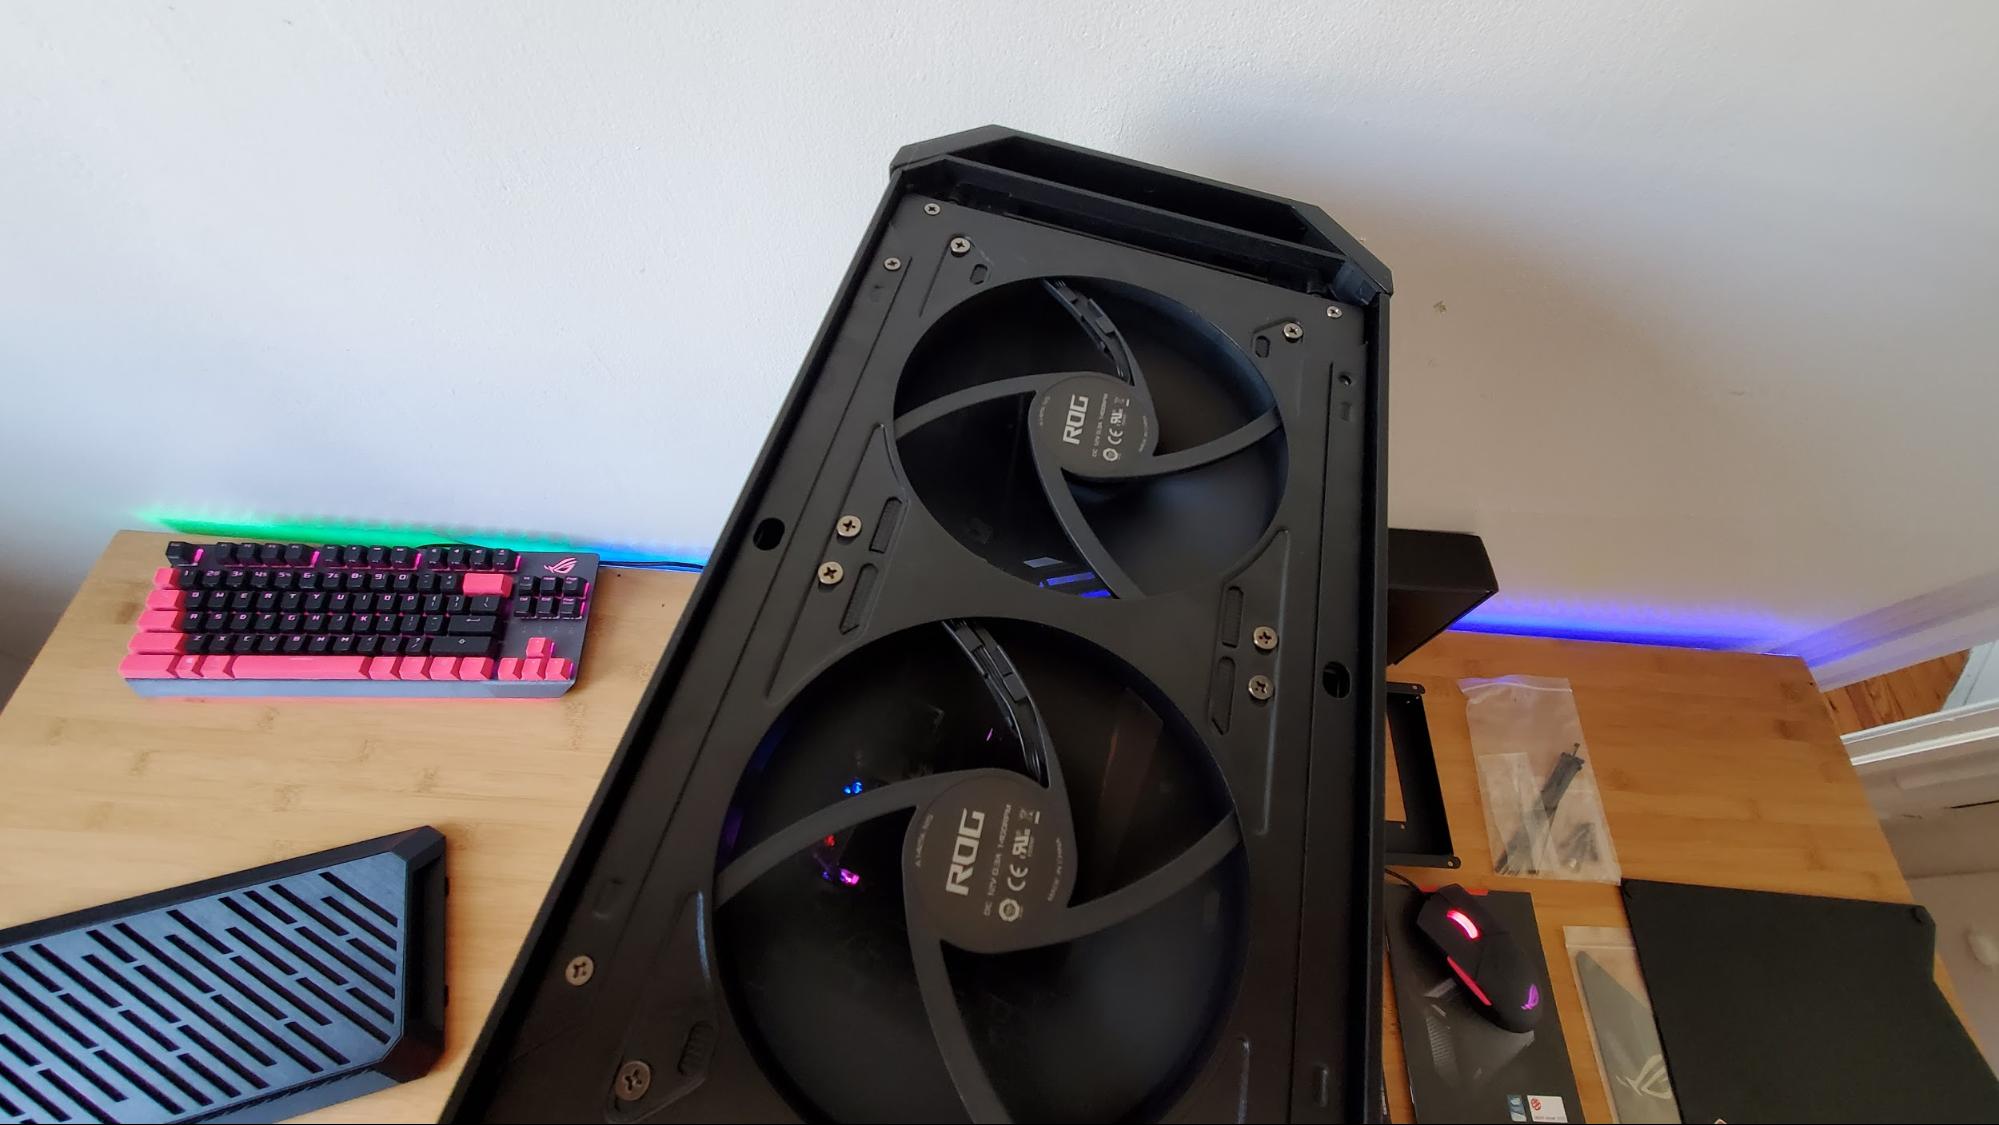
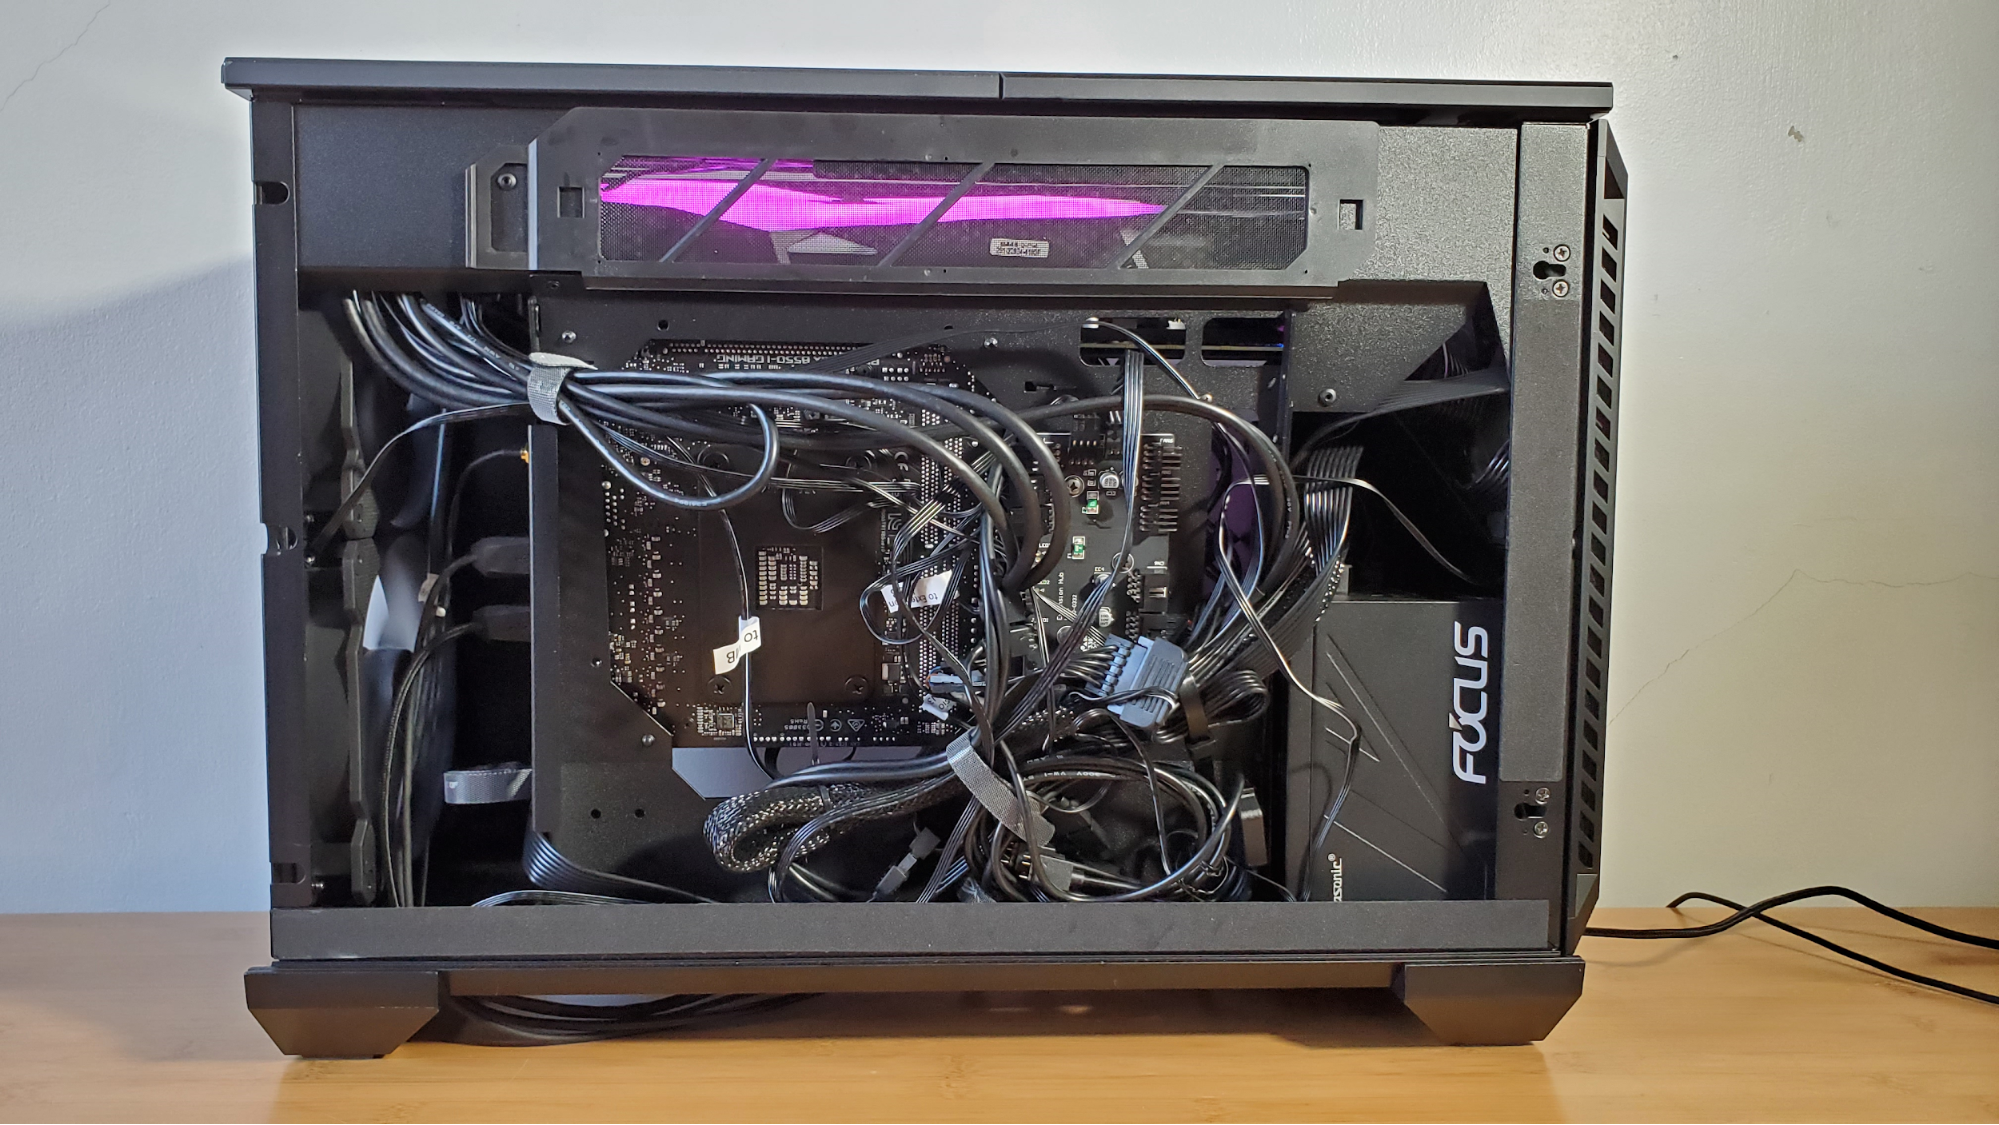
Speaking of the area behind the back panel, that’s where you’ll find a couple of the Z11’s key features. The case has an “extension hub” pre-installed which lets you plug in up to six fans, three ARGB components, as well as adding a special USB 2.0 header for Asus’ OLED-equipped Ayujin AIO cooler. While most of this is handy, what I’d love to see here are more USB 2.0 headers. Plenty of RGB components (like the Team Group Delta Max SSD we added to this build) use these headers, and there’s often never enough, particularly on compact motherboards.
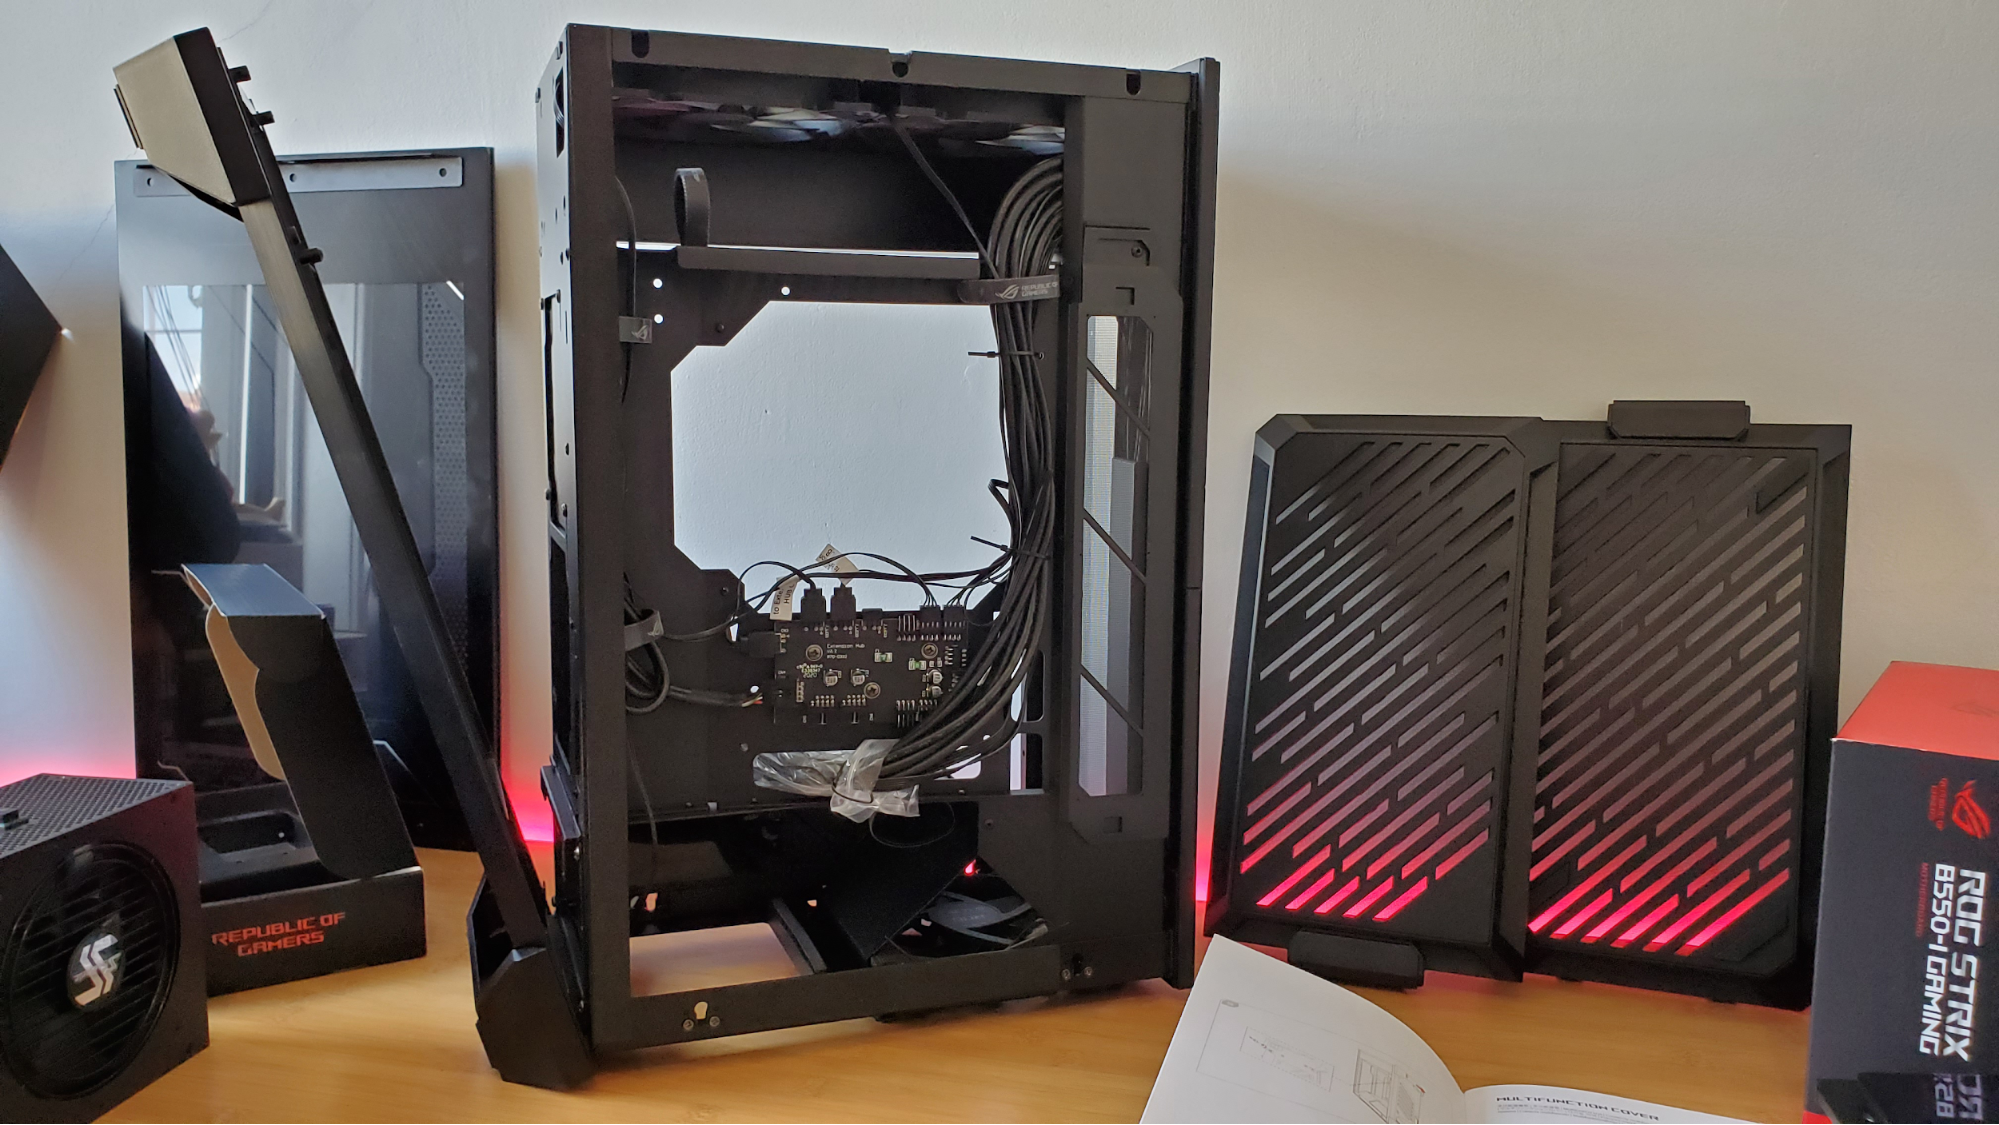
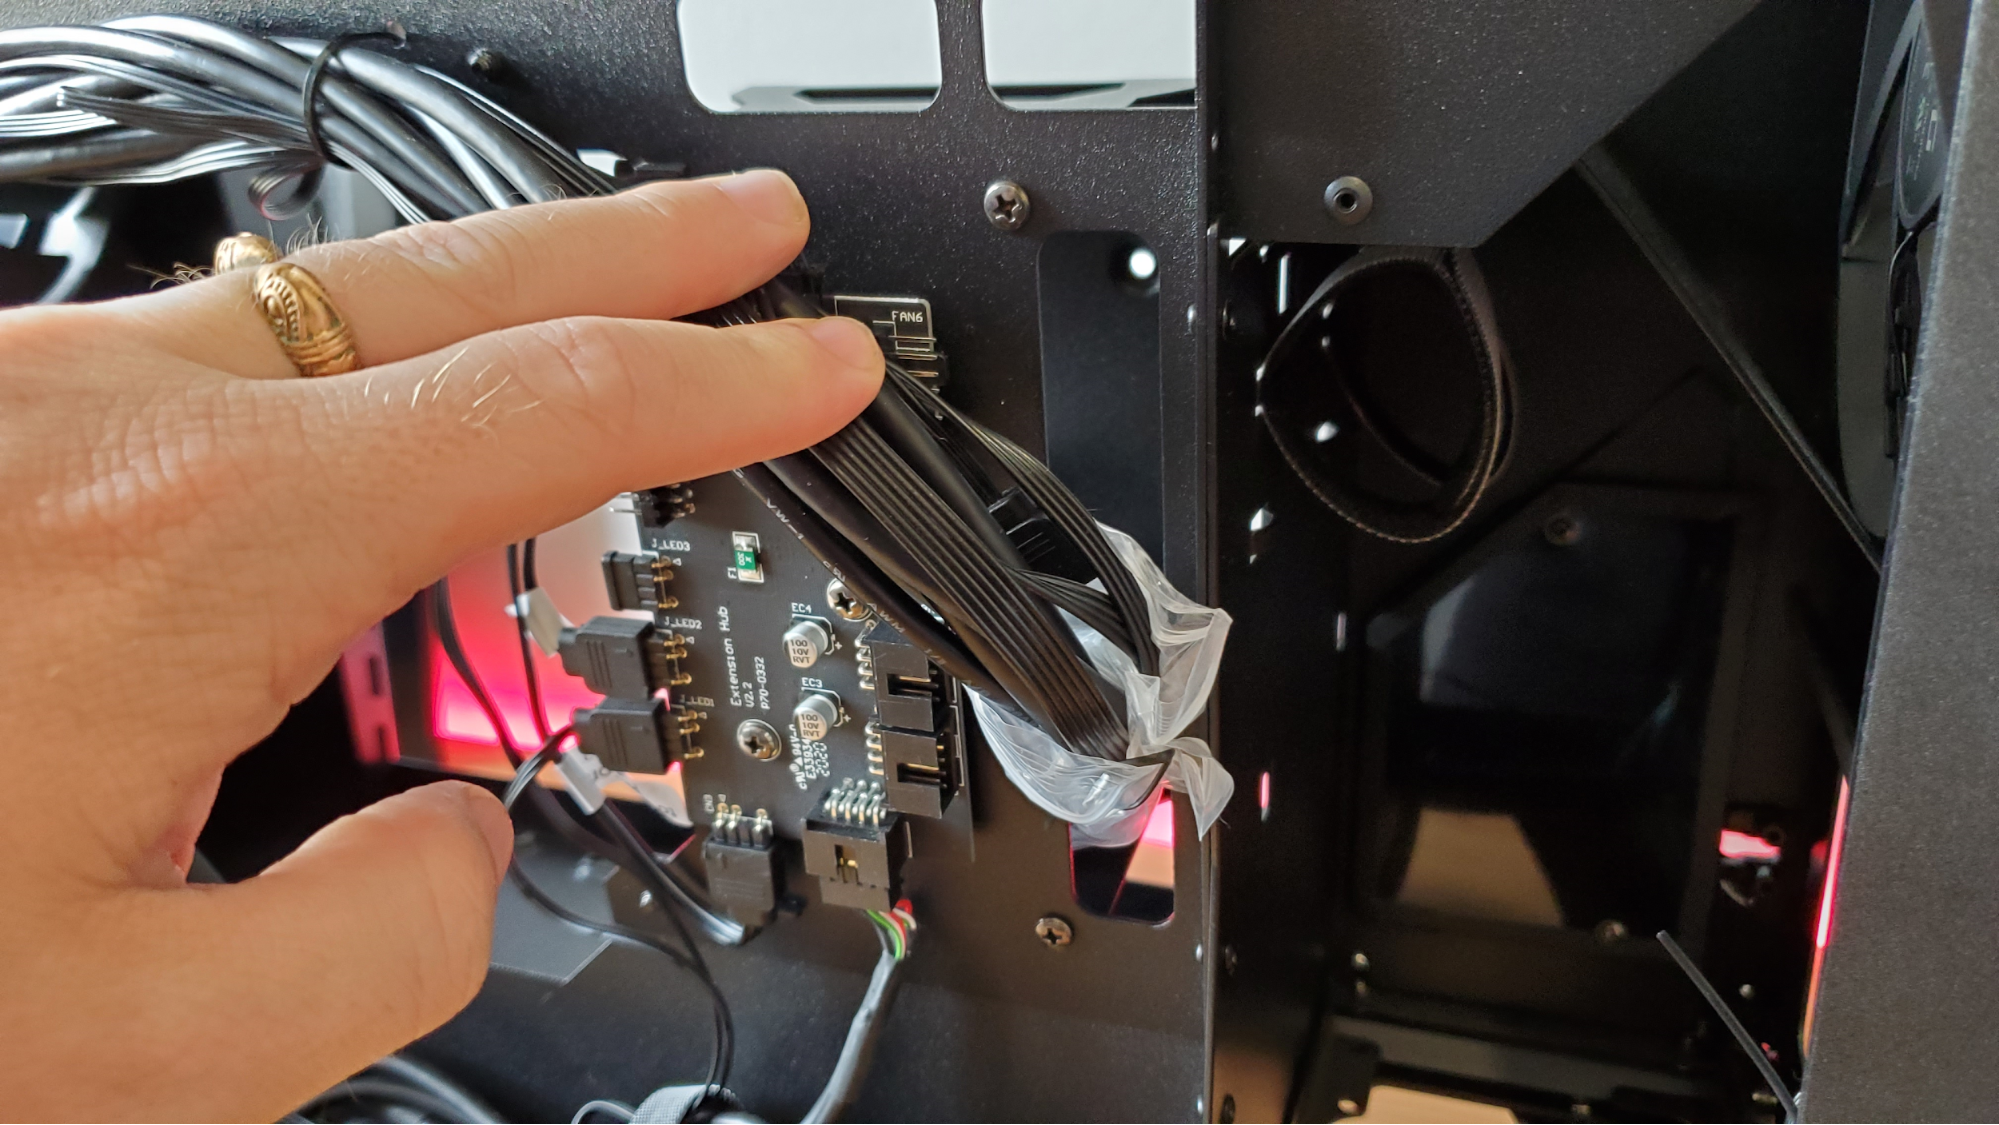
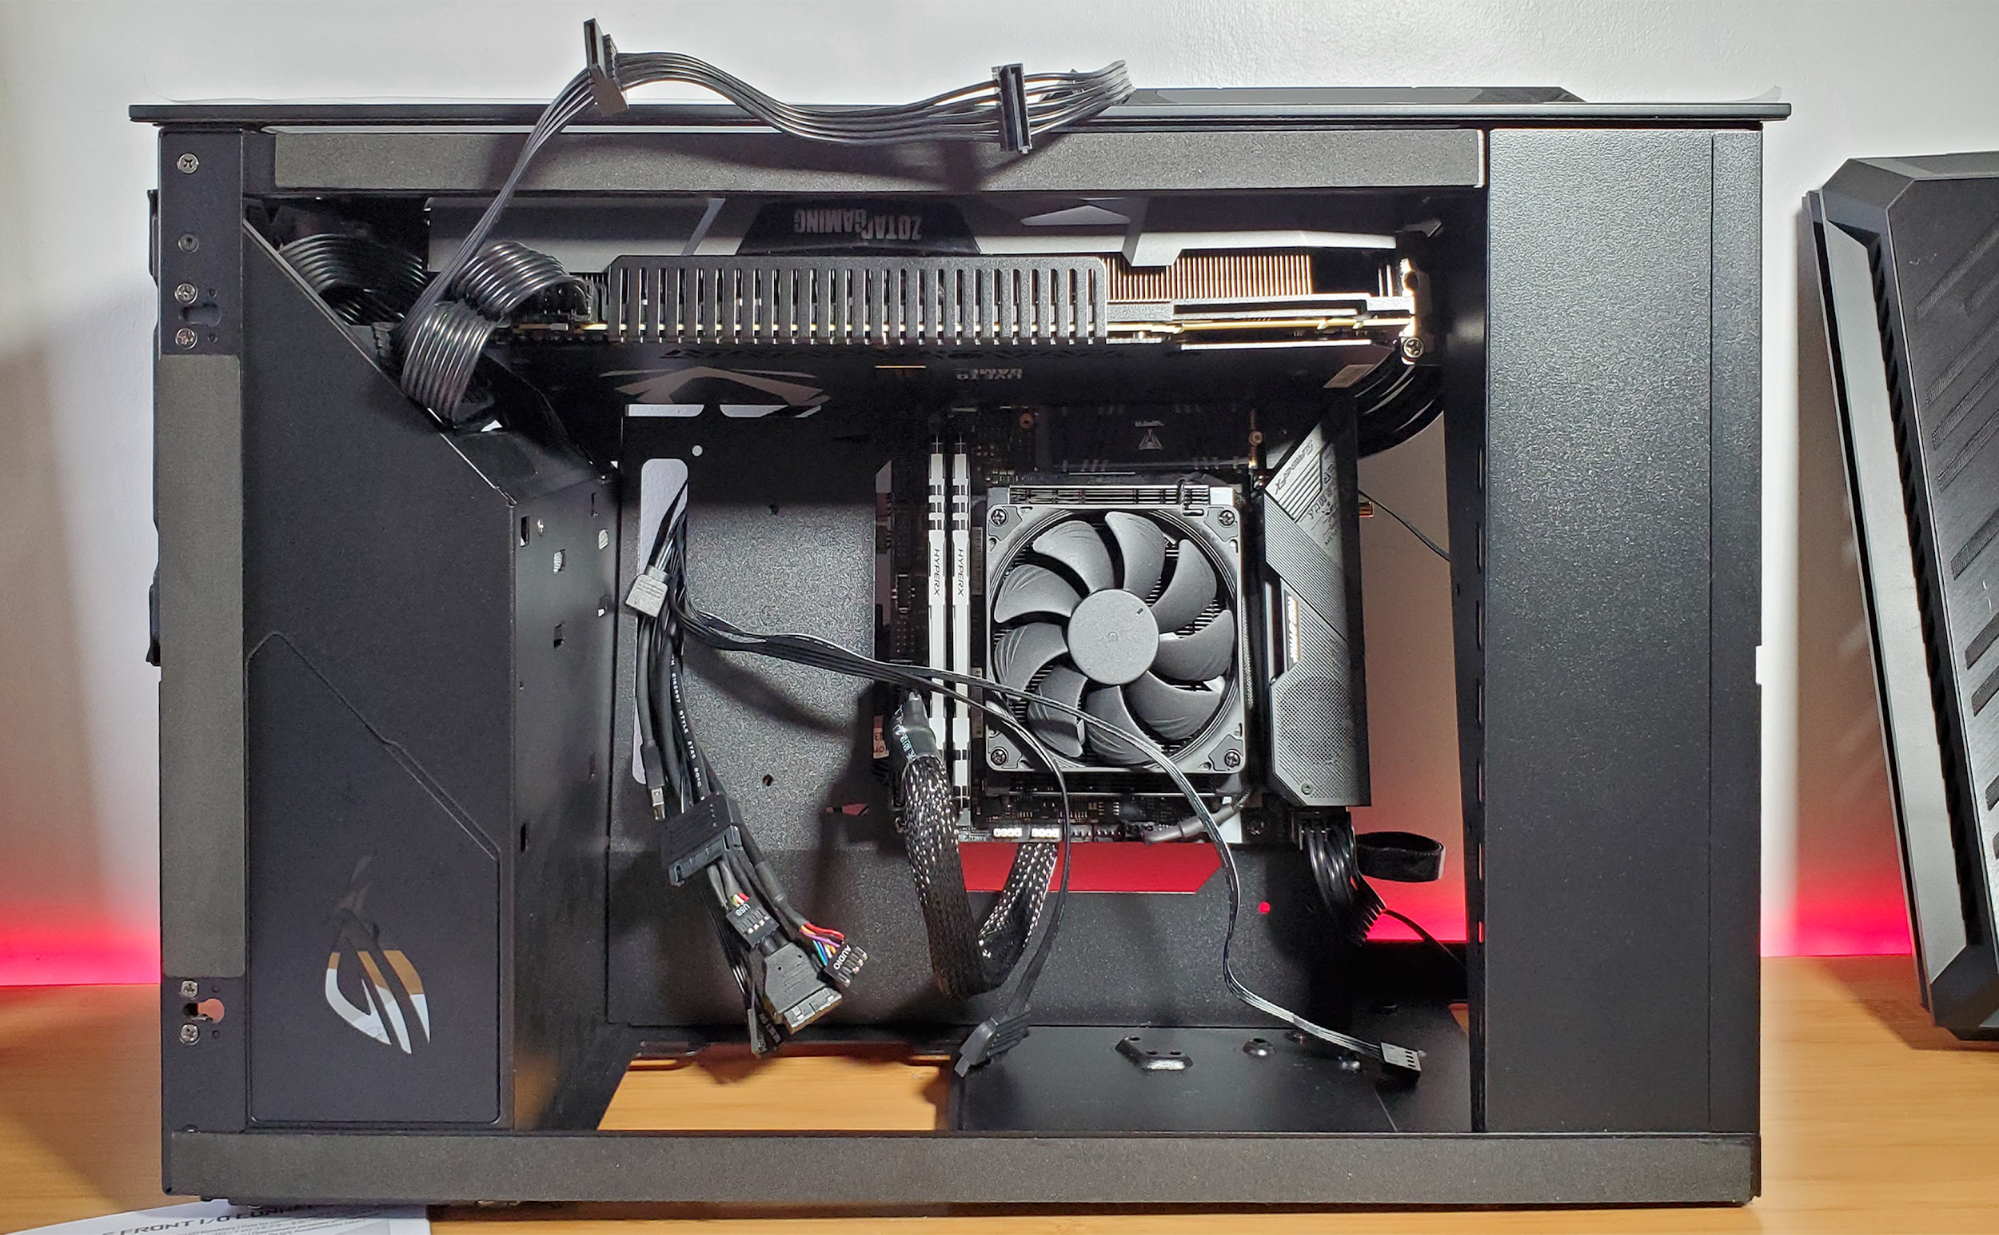
Also inside the system, you’ll find the feature that gives the Asus ROG Z11 its name -- or at least the back half of it. The company has angled the motherboard’s mount 11 degrees backward from vertical. Asus says this results in more airflow ”around the CPU, graphics card, and a back-mounted M.2 SSD.” While at least part of that is probably true, if you have an M.2 drive on the backside of your mini ITX motherboard, it’s likely a secondary drive that doesn’t get constant use -- and most M.2 drives don’t really need a whole lot of airflow to operate anyway. So heat there probably isn’t an issue.
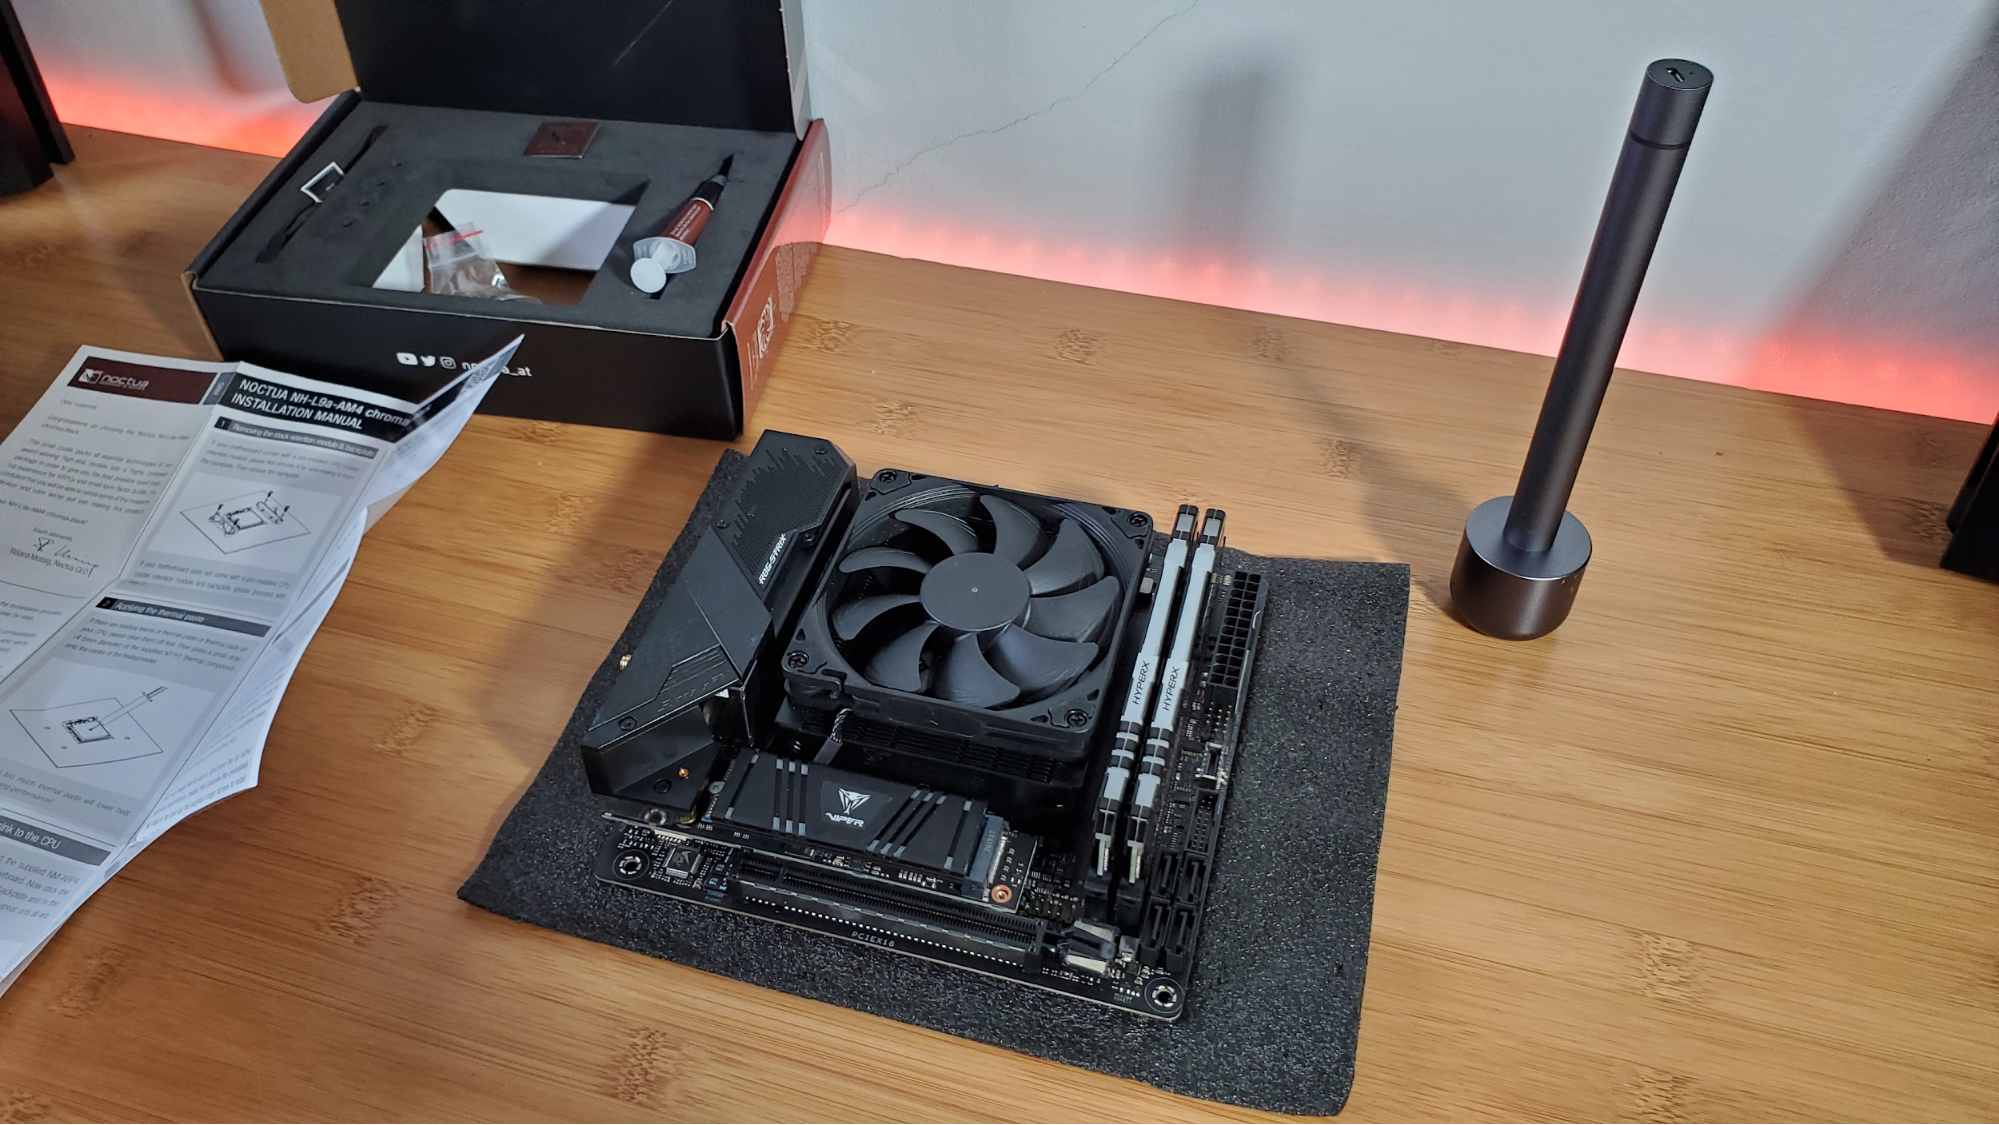
Tilting the motherboard inside a case that’s less than 8 inches wide also has the annoying side-effect of limiting the Z height of the cooler to just 5.1 inches. That forced us to ditch our trusty be quiet! Pure Rock 2 in favor of something much smaller. We opted instead for Noctua’s low-slung and stealthy NH-L9a-AM4 chromax.Black, which is at less than 1.5 inches tall, is roughly the same height as the HyperX Fury RGB RAM we installed.
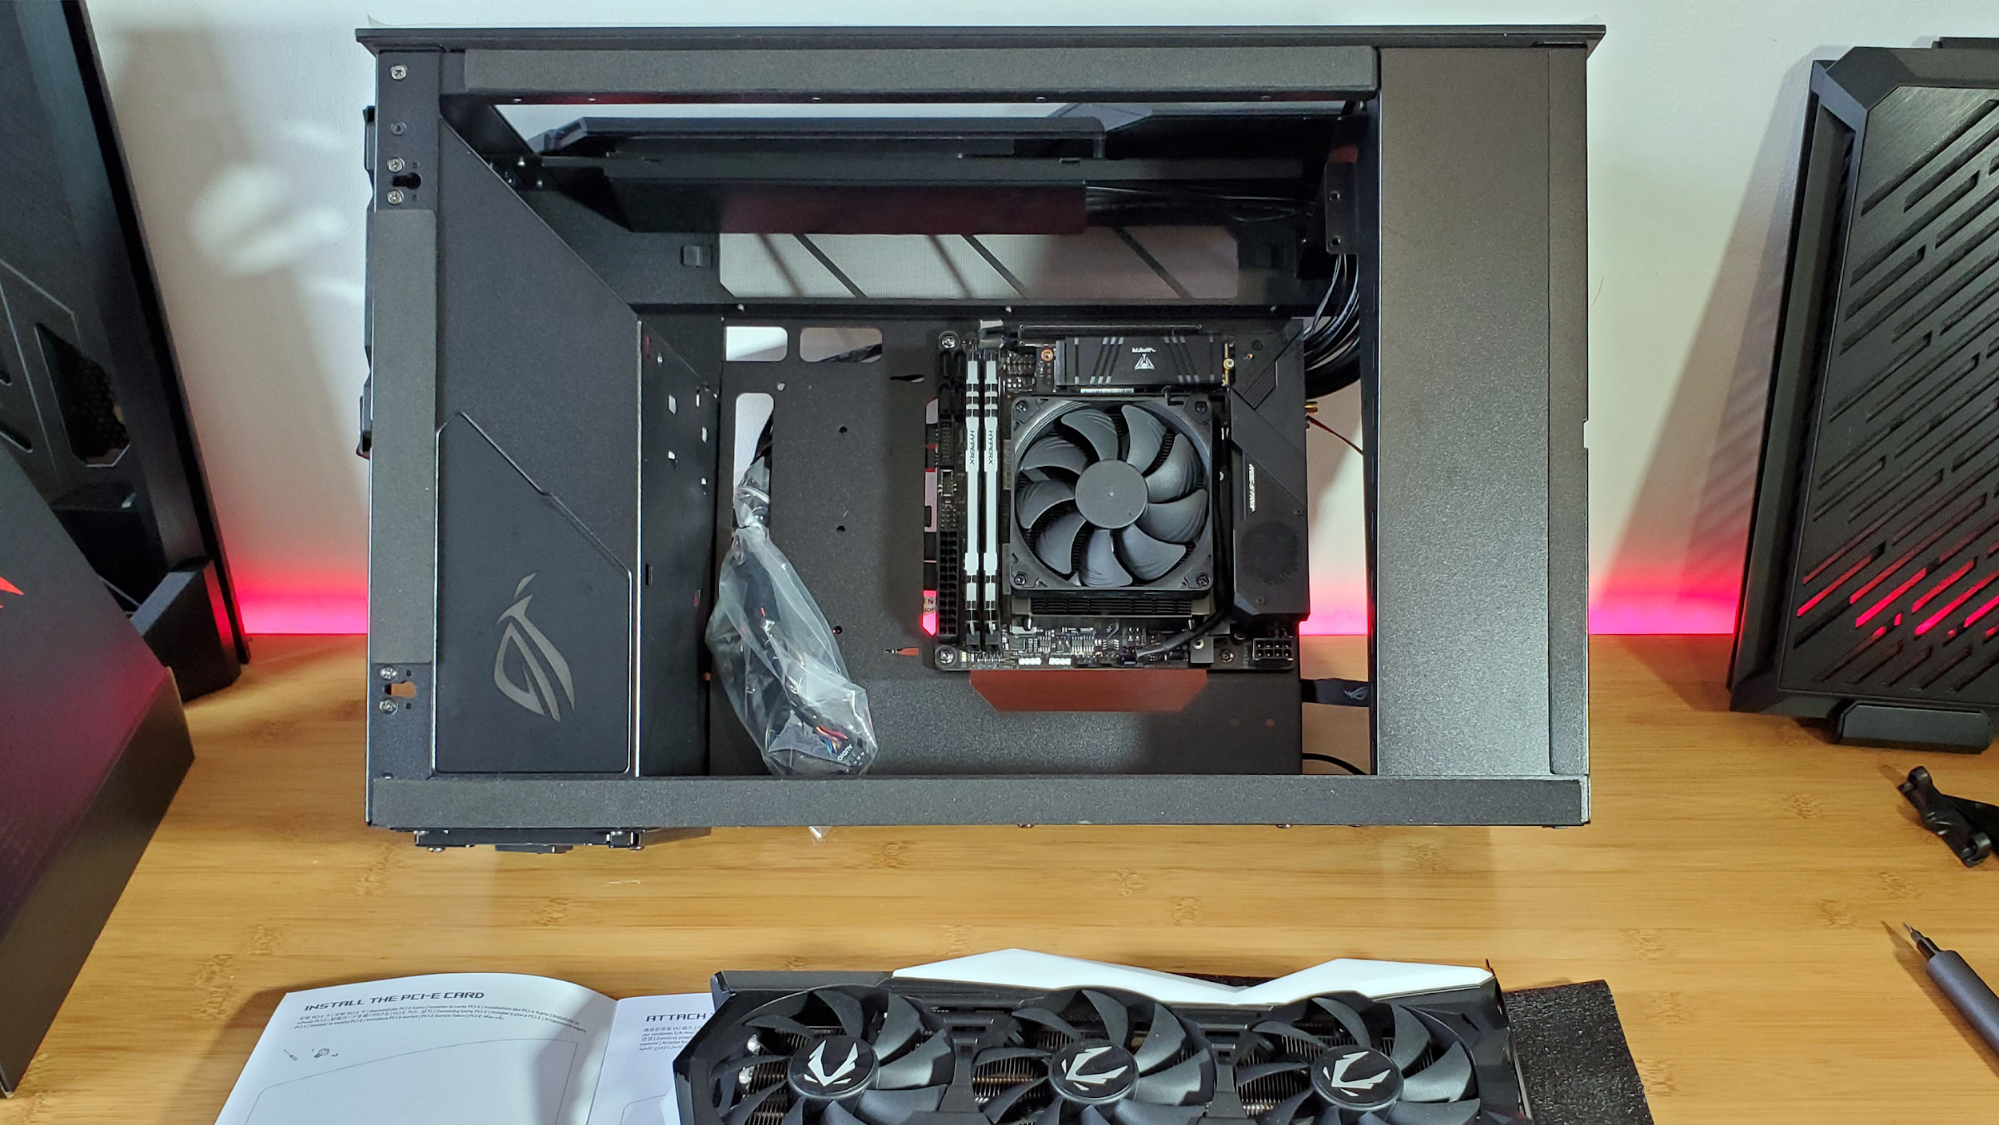
You can also install a 240mm radiator on the bottom (or back of the case if oriented vertically), and there’s a bracket for installing a reservoir atop the PSU shroud for a custom cooling loop. We decided to stick with air cooling here for the sake of sanity. Building in this case is confusing enough already without adding the complications of even an AIO with all the extra cables.
AIO Complications
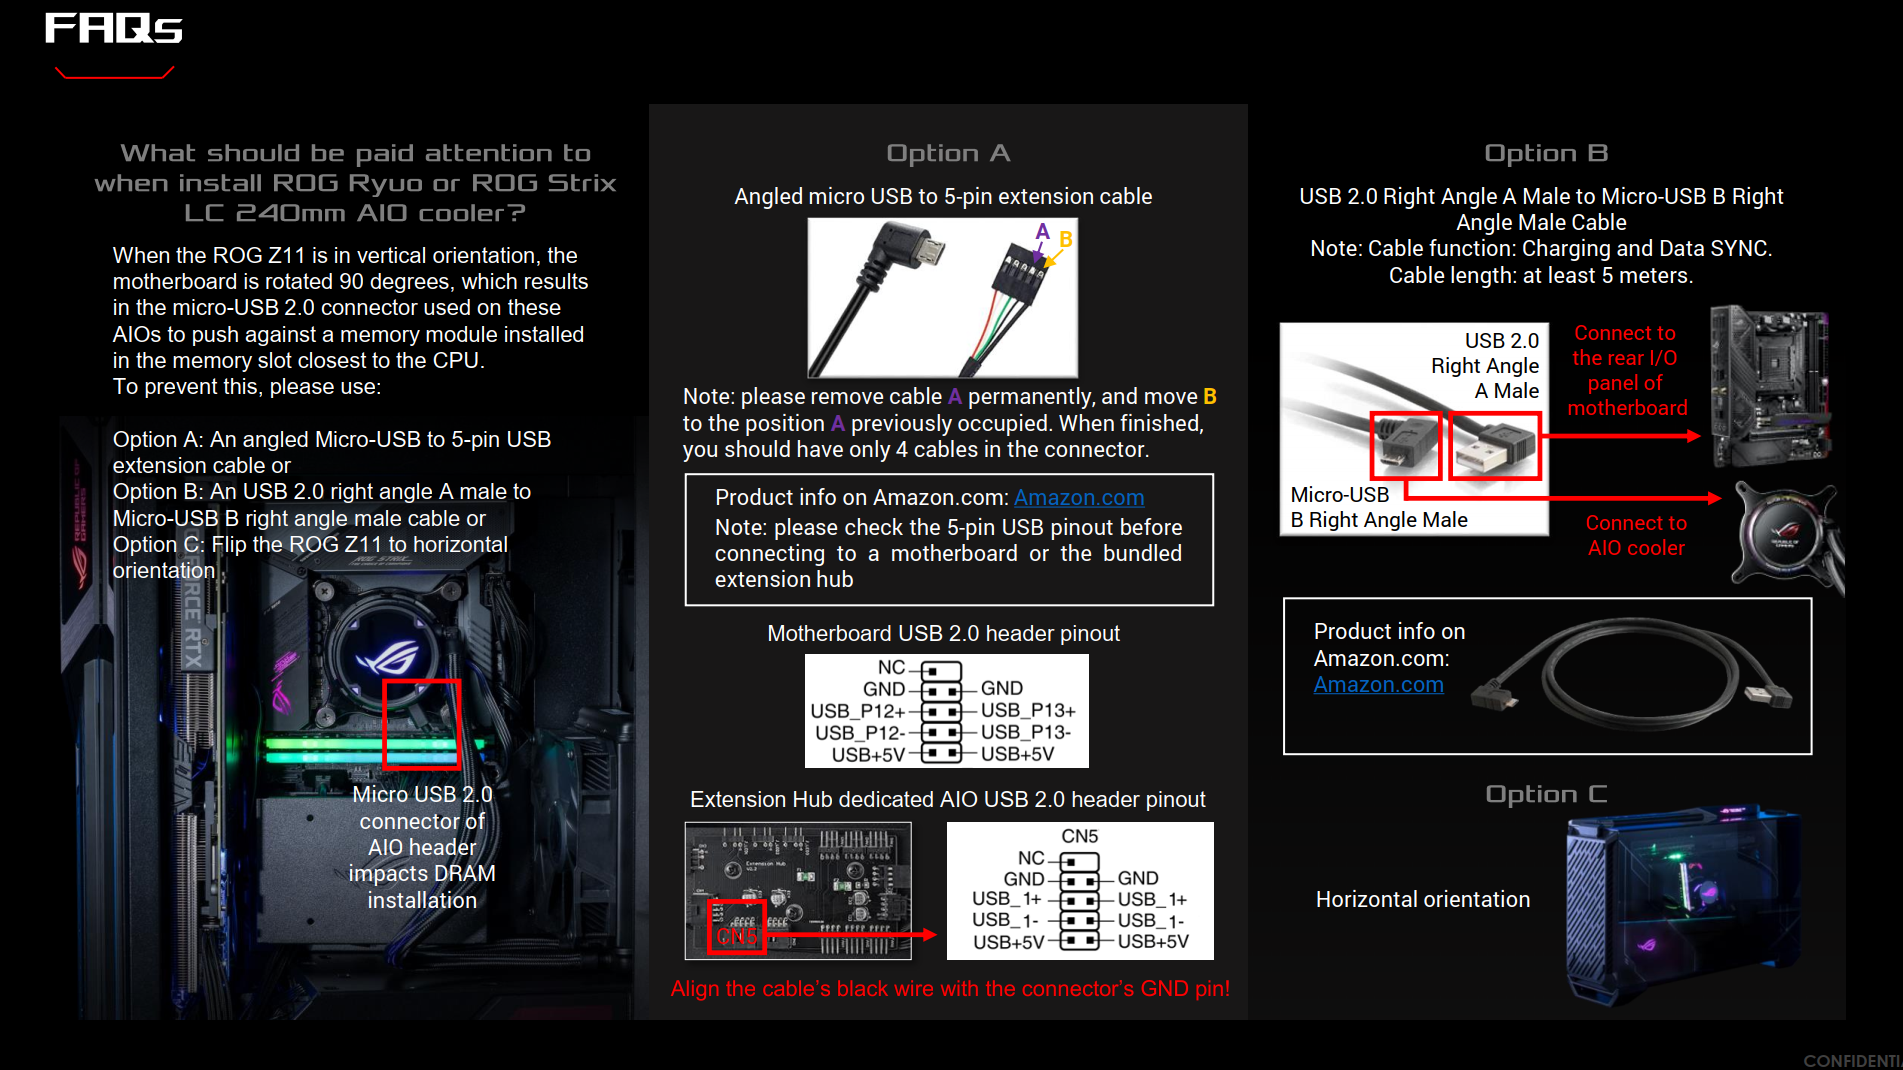
If you are going to install an AIO in this case, however, there may be some complications, particularly with models that have a logo on the pump that connects to a USB cable for lighting and data.
In short, Asus points out in the materials they sent for this case that if you orient the case vertically with just such a setup, the USB connector port may be blocked by your RAM. Asus offers up three possible solutions: Either buy a random cable from Amazon and mod it by removing one of pins and moving another, buy a right-angle connector and route it to an external motherboard USB port, or... just leave the case horizontal in the first place.
At least two of those are a lot of trouble to go to for a logo on the AIO. Personally I’d just opt for a cooler that doesn’t have a logo, or one that doesn’t have this issue with the USB plug placement.
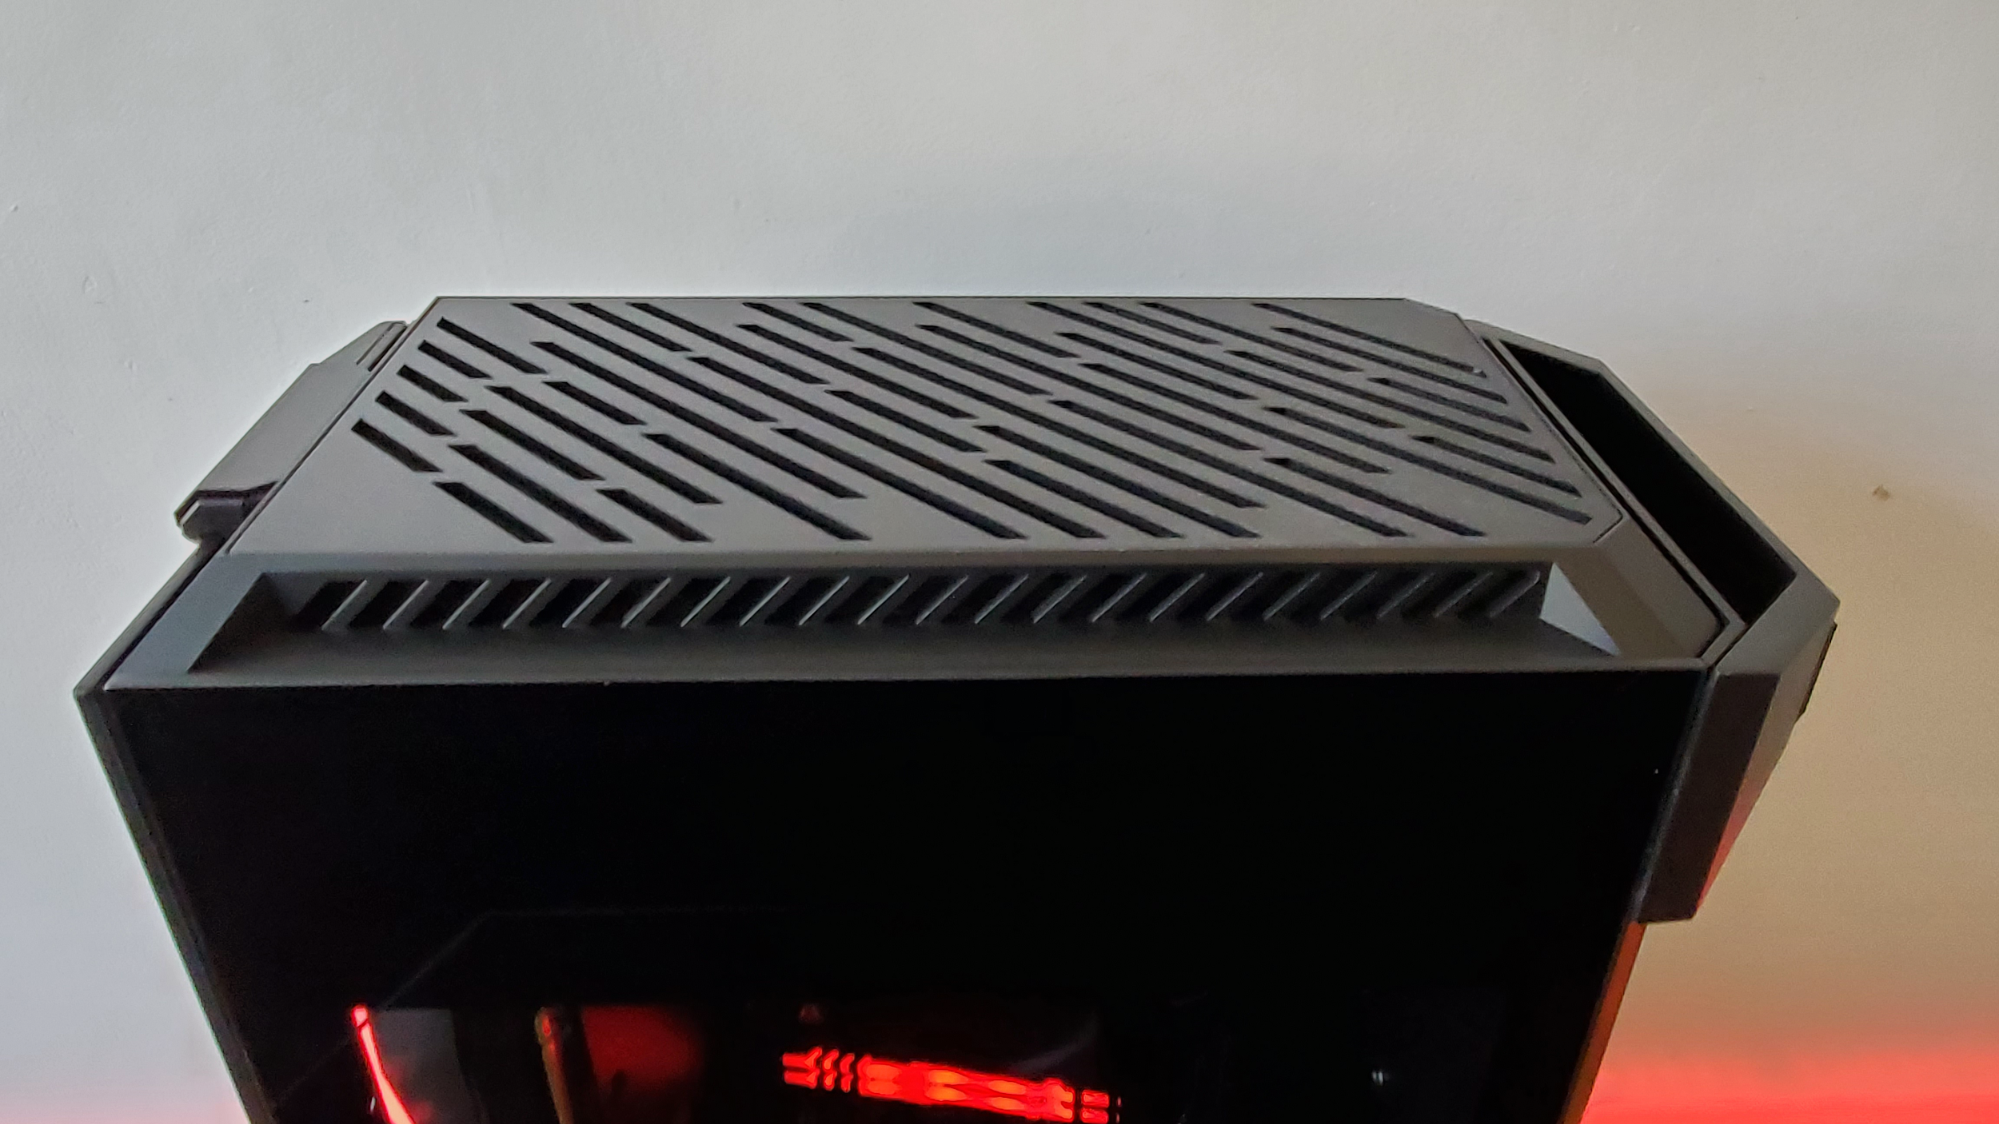
Asus has clearly gone out of its way to accommodate different cooling setups here, and the top / bottom panels are smartly vented and filtered to make sure enough air gets into your system.
But the angled motherboard orientation seems much more about showing off your graphics card and motherboard than anything else. There’s also a cable-hiding bracket with a mount for an SSD, where we attached Team Group’s Delta Max.
If you’re at all worried about airflow, there are plenty of more traditional cases that aren’t much bigger than the Z11 but have more room around the components for improved circulation. Corsair’s 280X RGB comes to mind.
Despite the angled components, it’s unlikely that there’s going to be a whole lot of airflow behind the motherboard for your second M.2 drive with the ROG Z11, as there’s barely enough room there for cables, especially if you’re planning on loading this case up with liquid cooling and as many components as its spec sheet can fit. Even with just the GPU, Patriot’s Viper VPR100 RGB M.2 drive and the RGB-lit Team Group SATA drive installed, the back side of the Z11 was quite cramped in our build.
Horizontal or Vertical?
One of the cooler aspects of the ROG Z11’s design is its ability to stand either horizontally, with the “front” ports up top, or vertically. Going vertical could conceivably cause some problems with airflow, but the metal top and bottom panels are adorned with generous vents (as well as mesh dust filters). So intake shouldn’t be a problem unless you put the case on a plush rug -- and why would you ever keep a case like this on the floor?
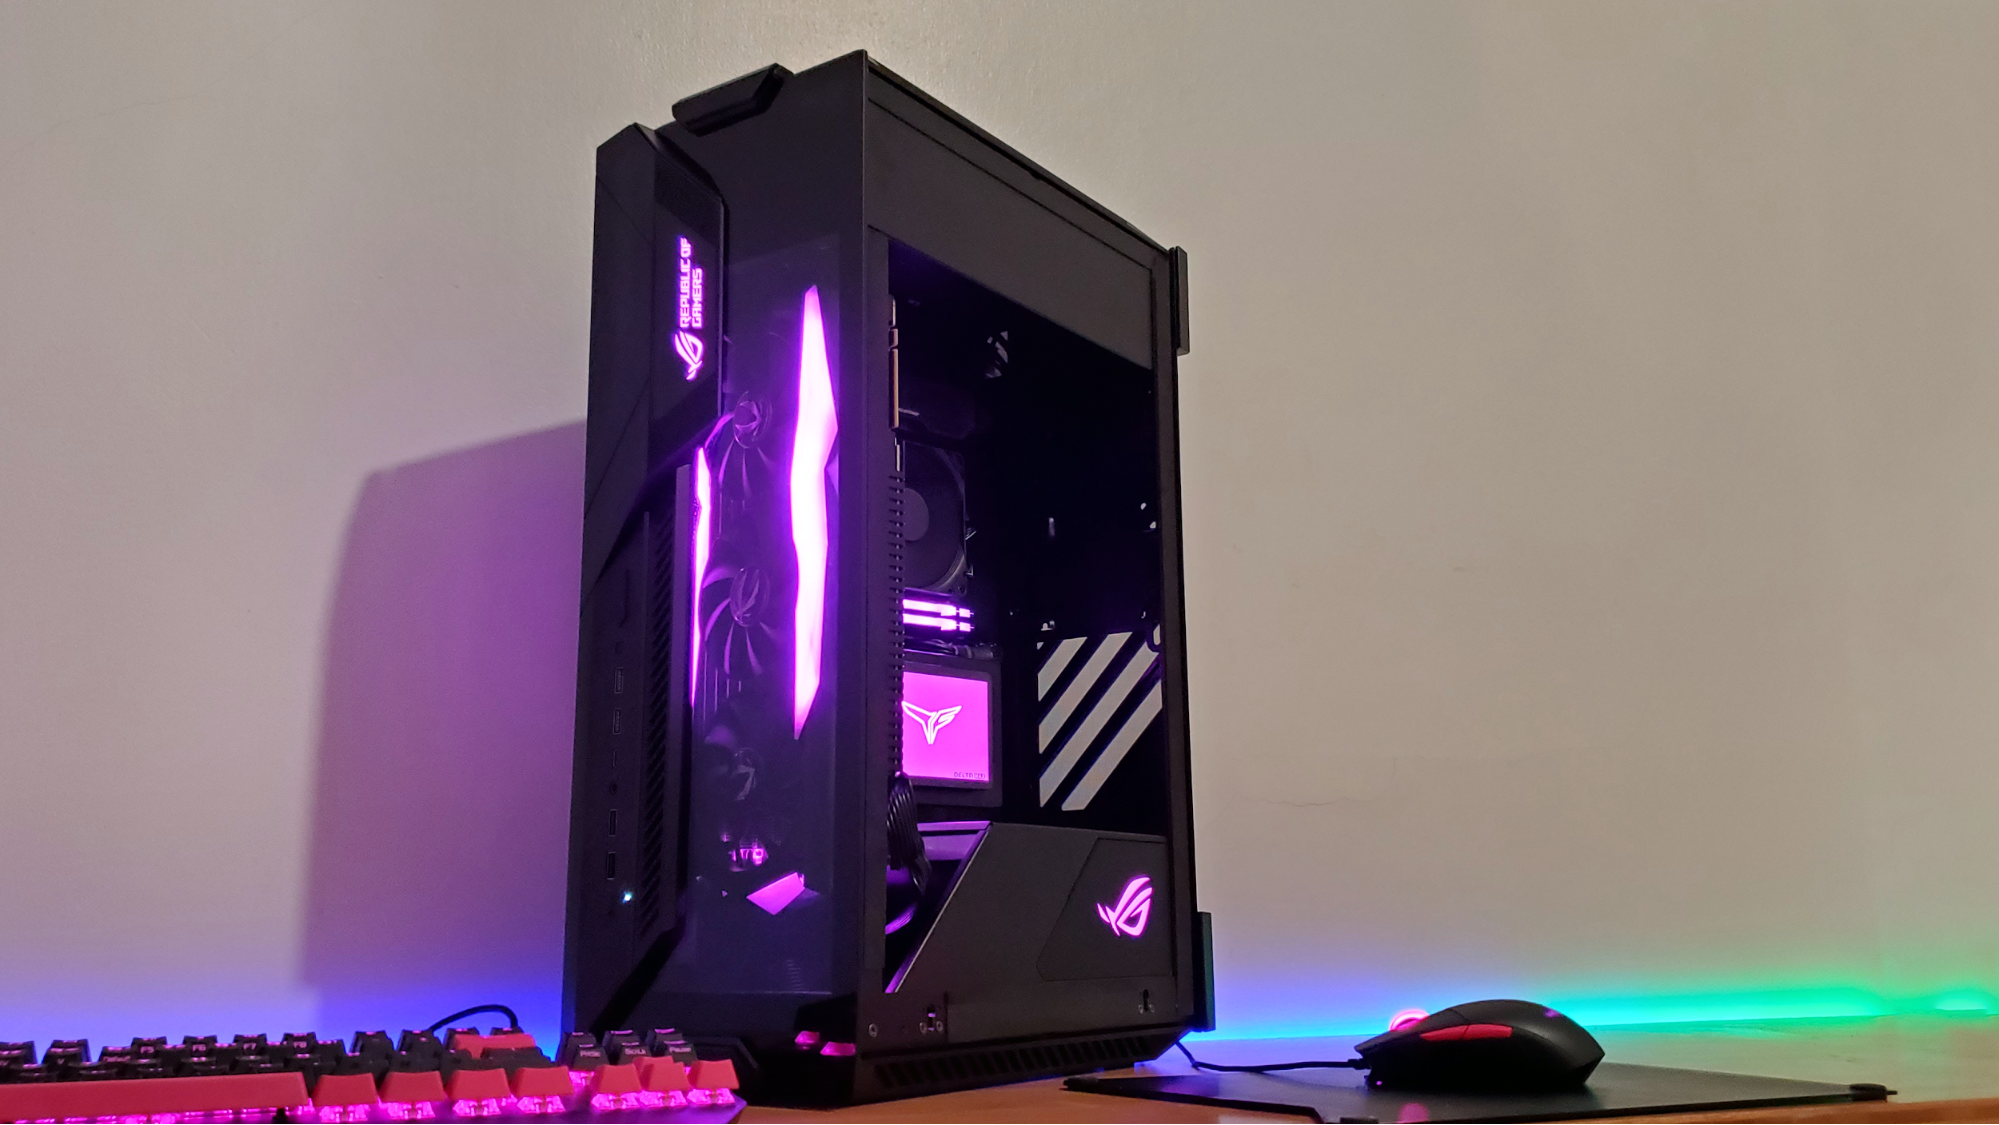
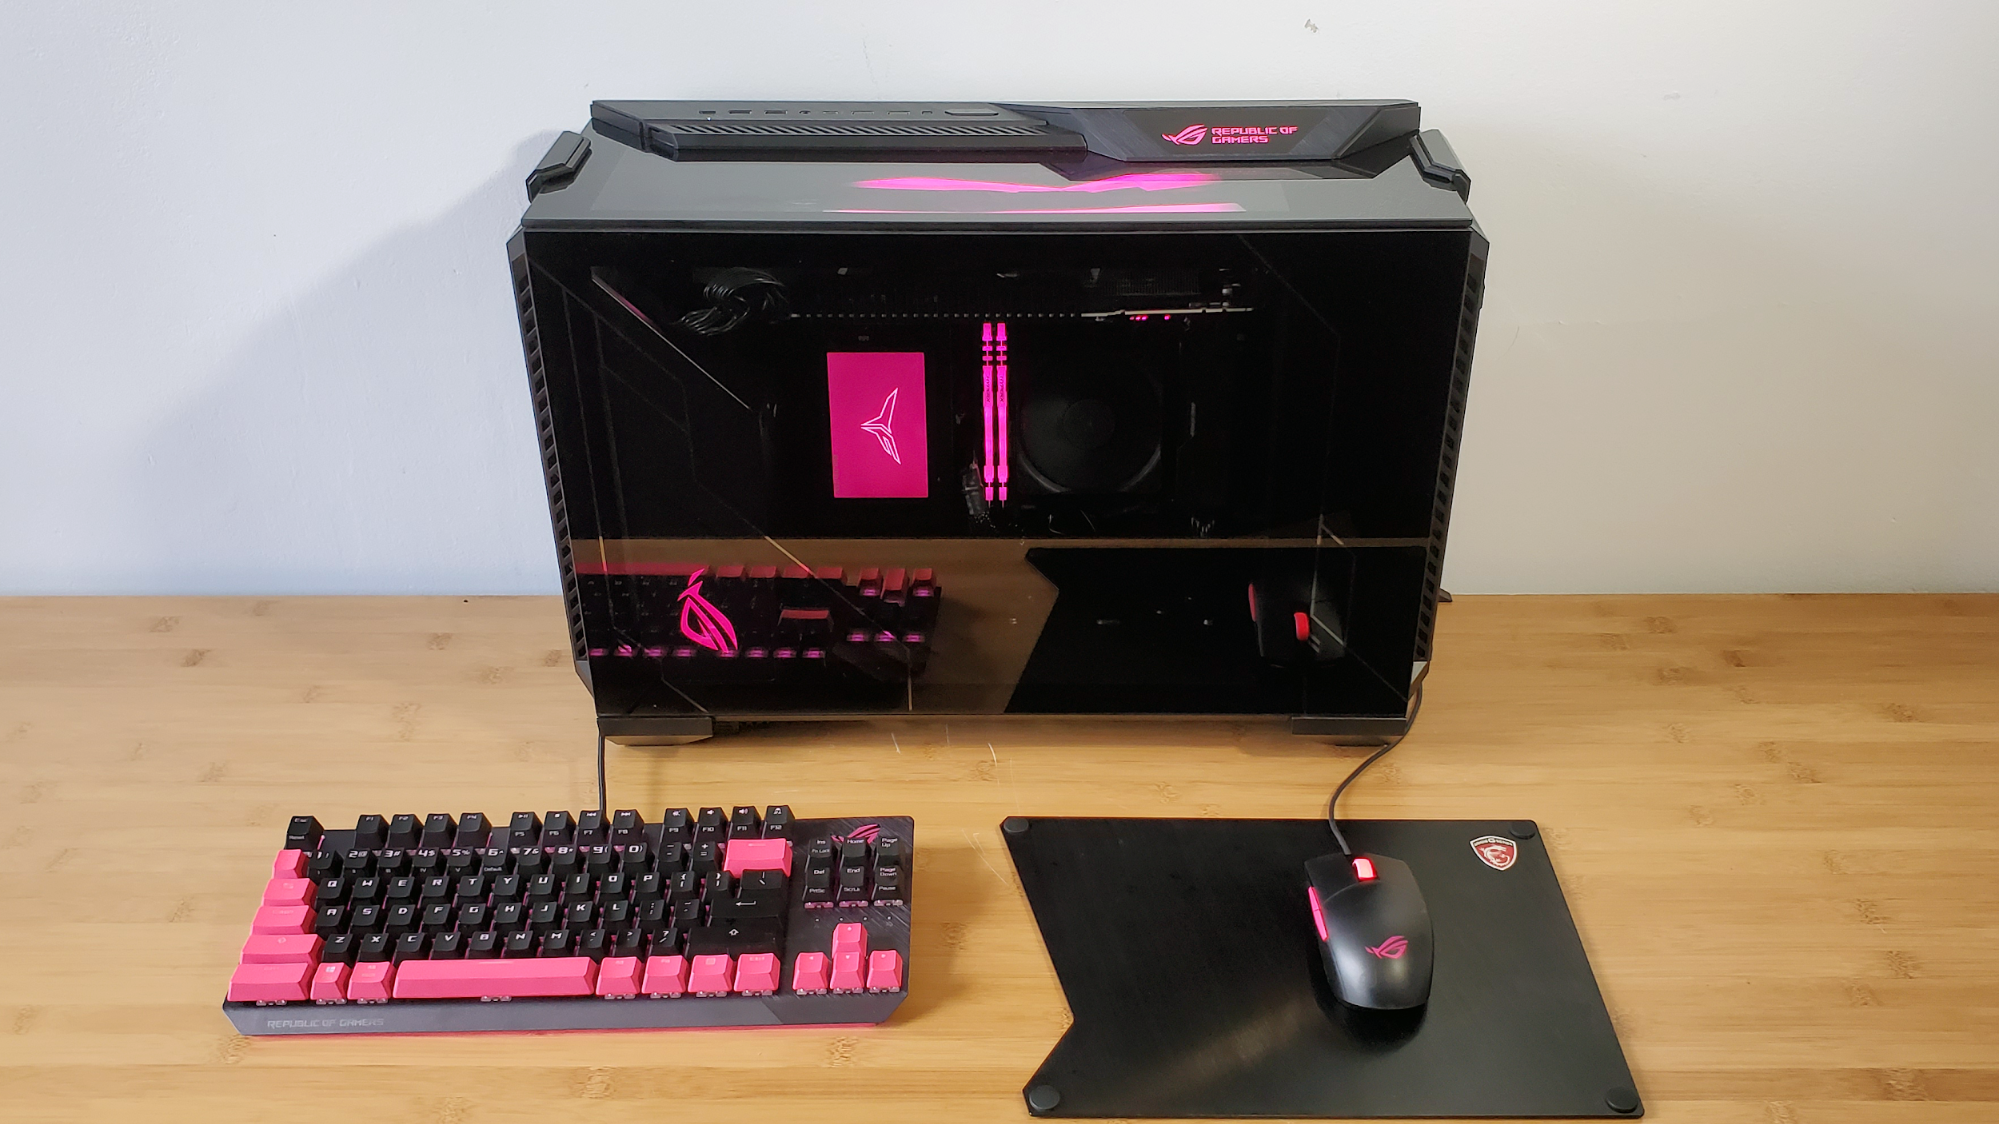
In the vertical orientation, air enters at the bottom with the help of a 140mm fan and exhausts out the top, coaxed along by convection and two more 140mm spinners. This is a tried-and-true cooling scheme, which we’ve seen in several cases from Silverstone and others, going back more than a decade. But given the fact that this chassis costs close to $300 and has a built-in hub for fans and RGB lights, the three fans Asus includes here don’t light up is just another aspect of the ROG Z11 that left us scratching our heads.
The rear ports are where?
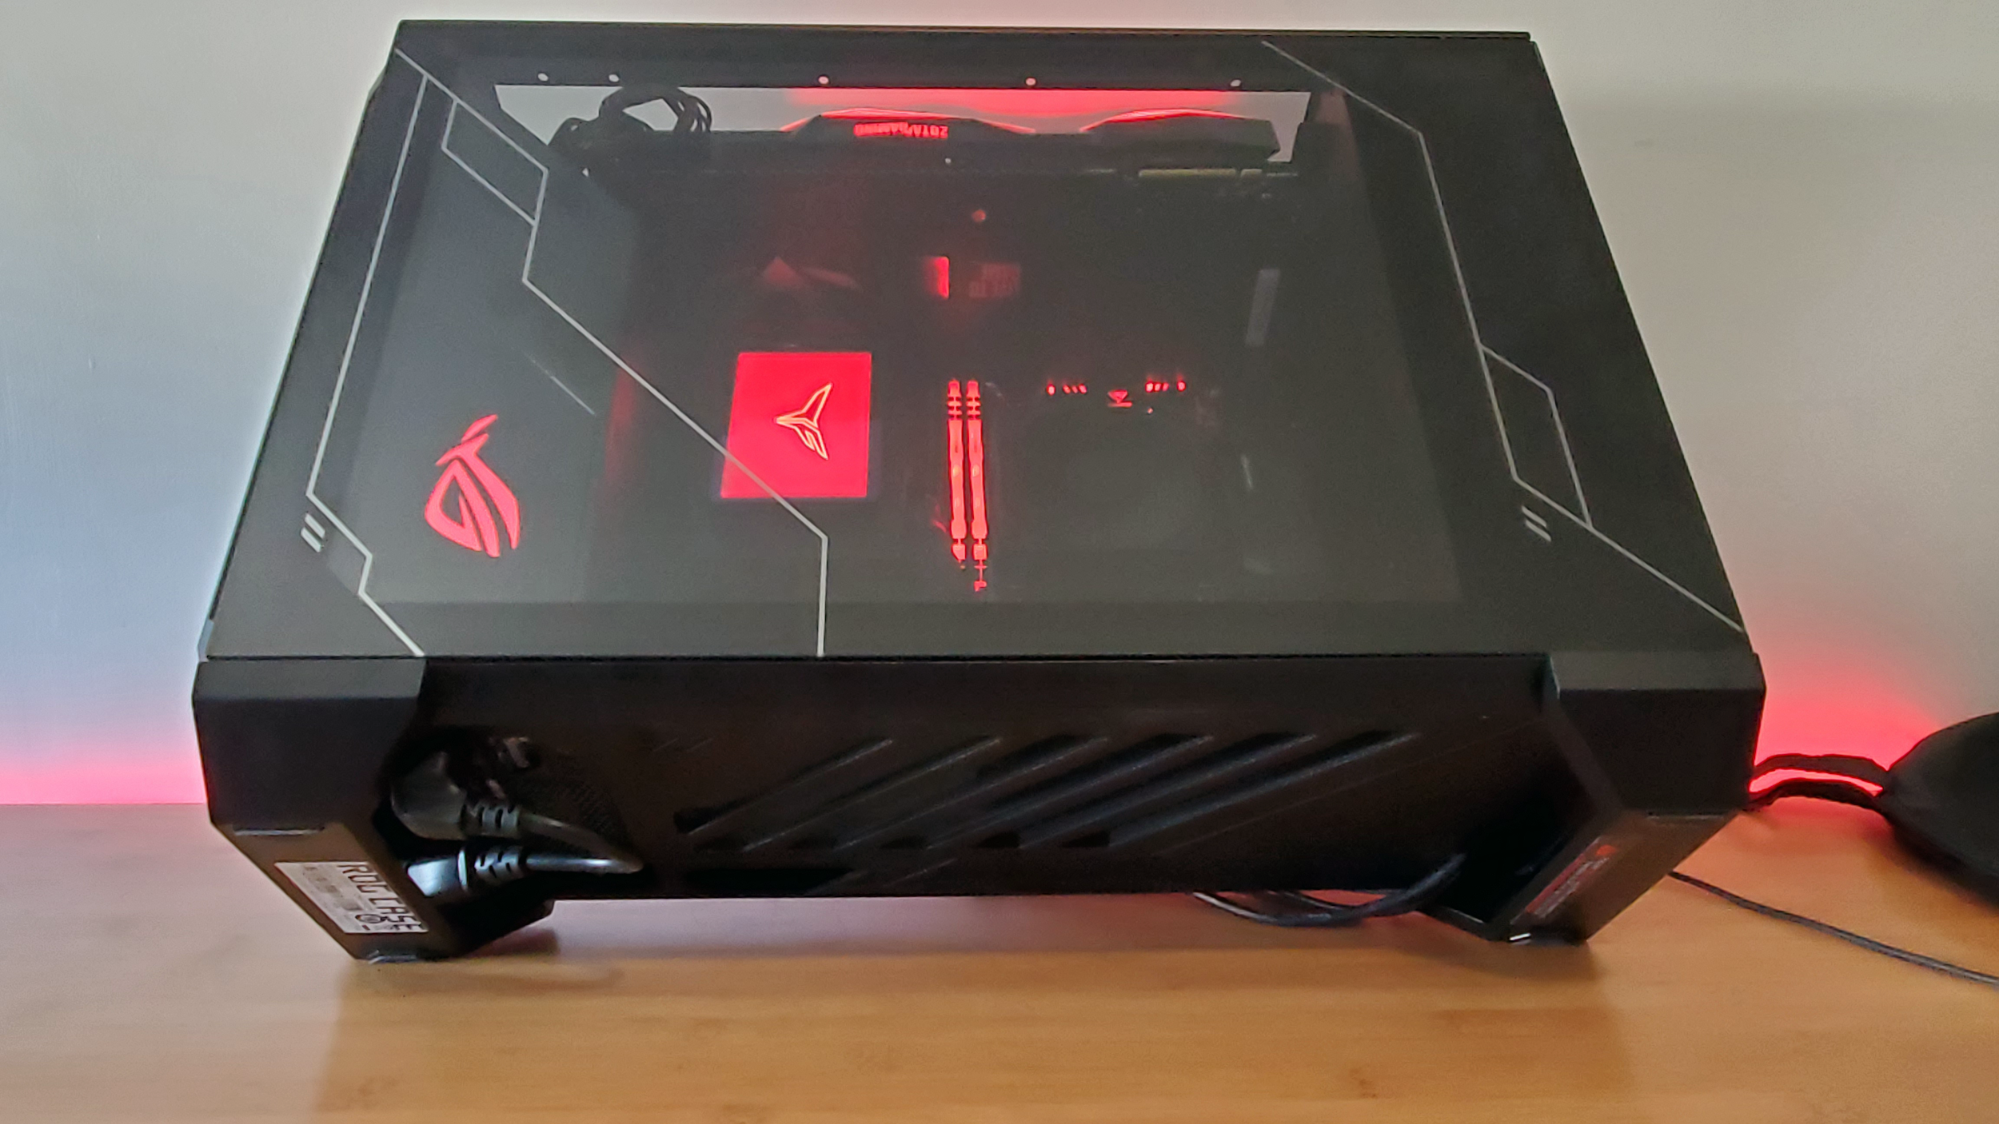
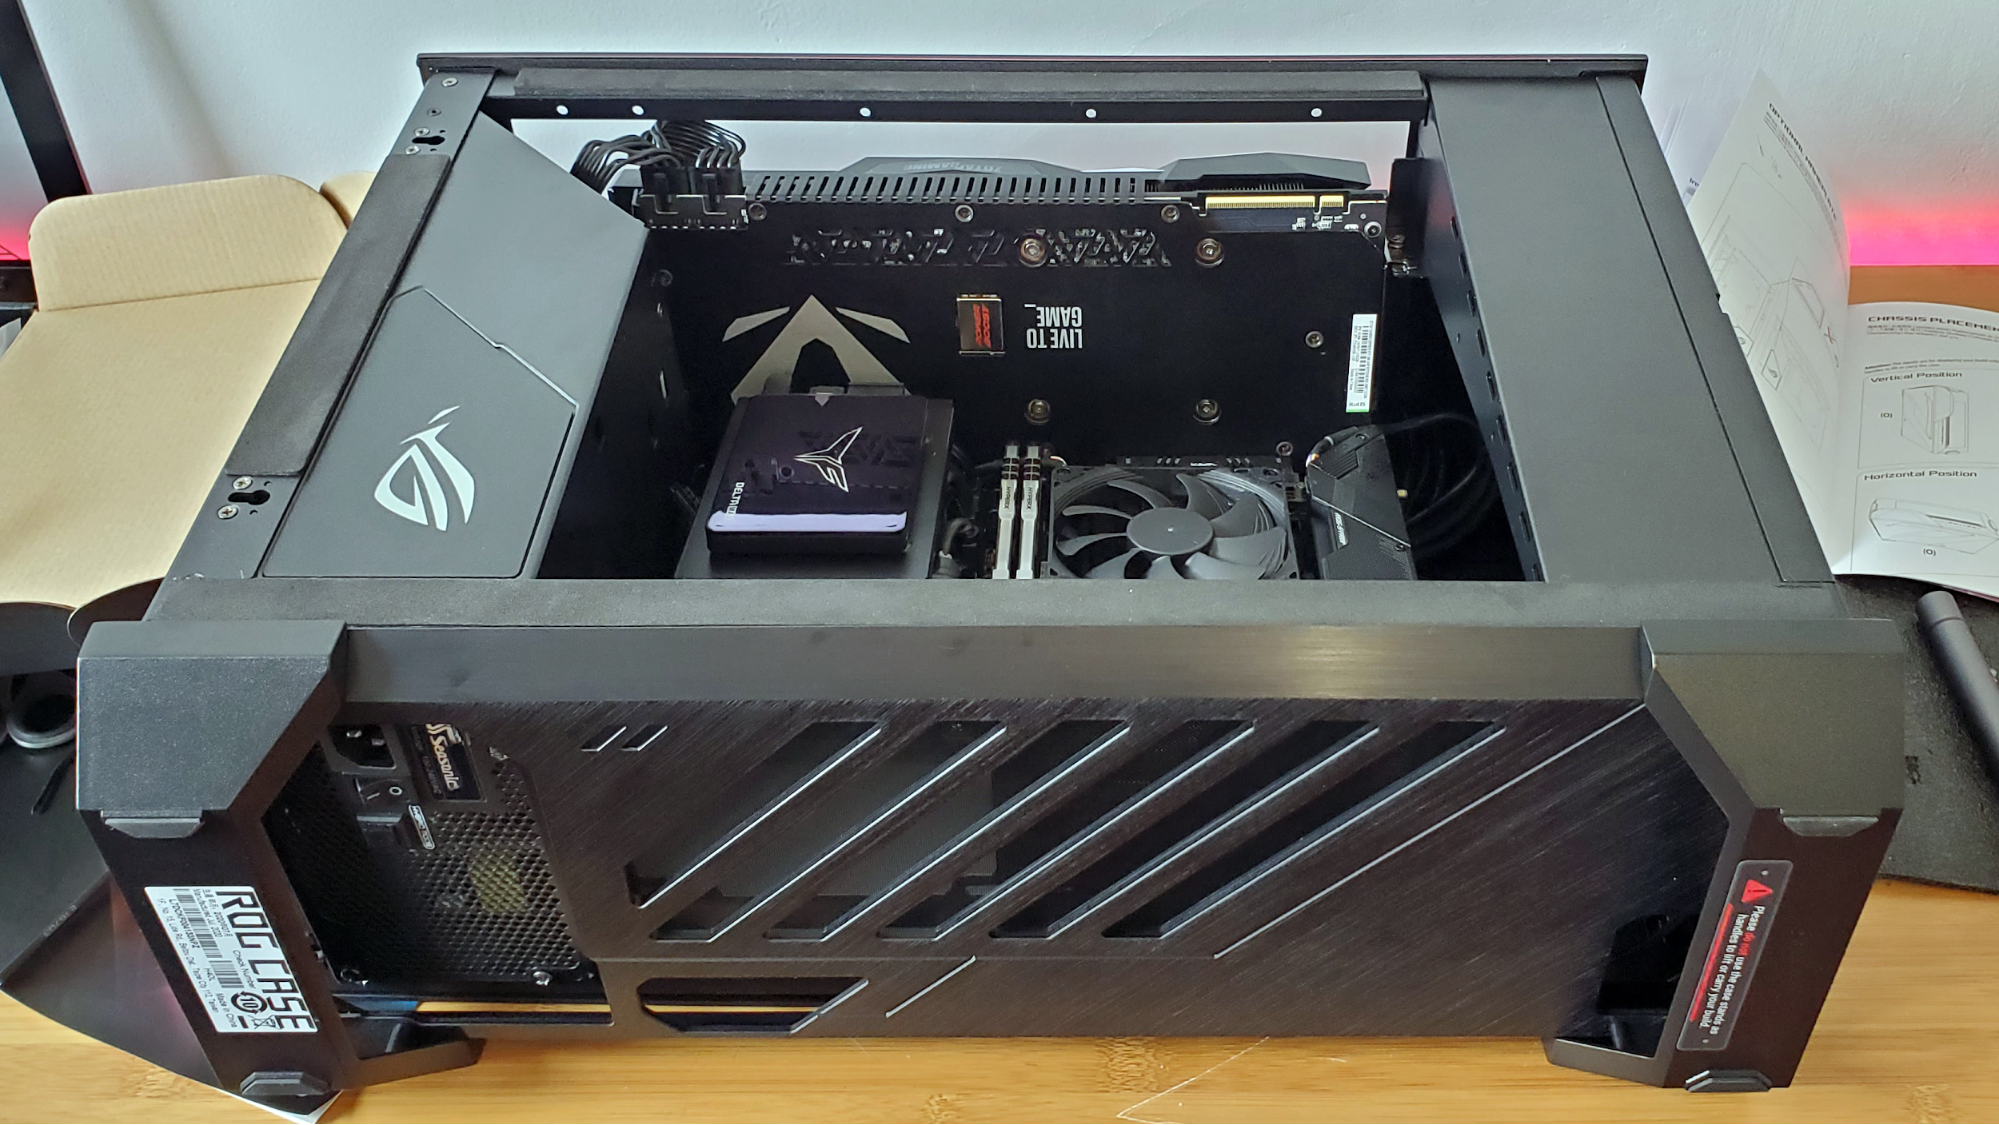
And speaking of head-scratchers, that leaves us with the Z11’s last and most inconvenient design issue to discuss. As hinted at up top, and evidenced in a few of the photos, the rear IO ports on the motherboard and the video card are literally walled off inside the Z11 case once it’s fully assembled. They’re near the front if the case is horizontal, or up top if you rotate things vertically.
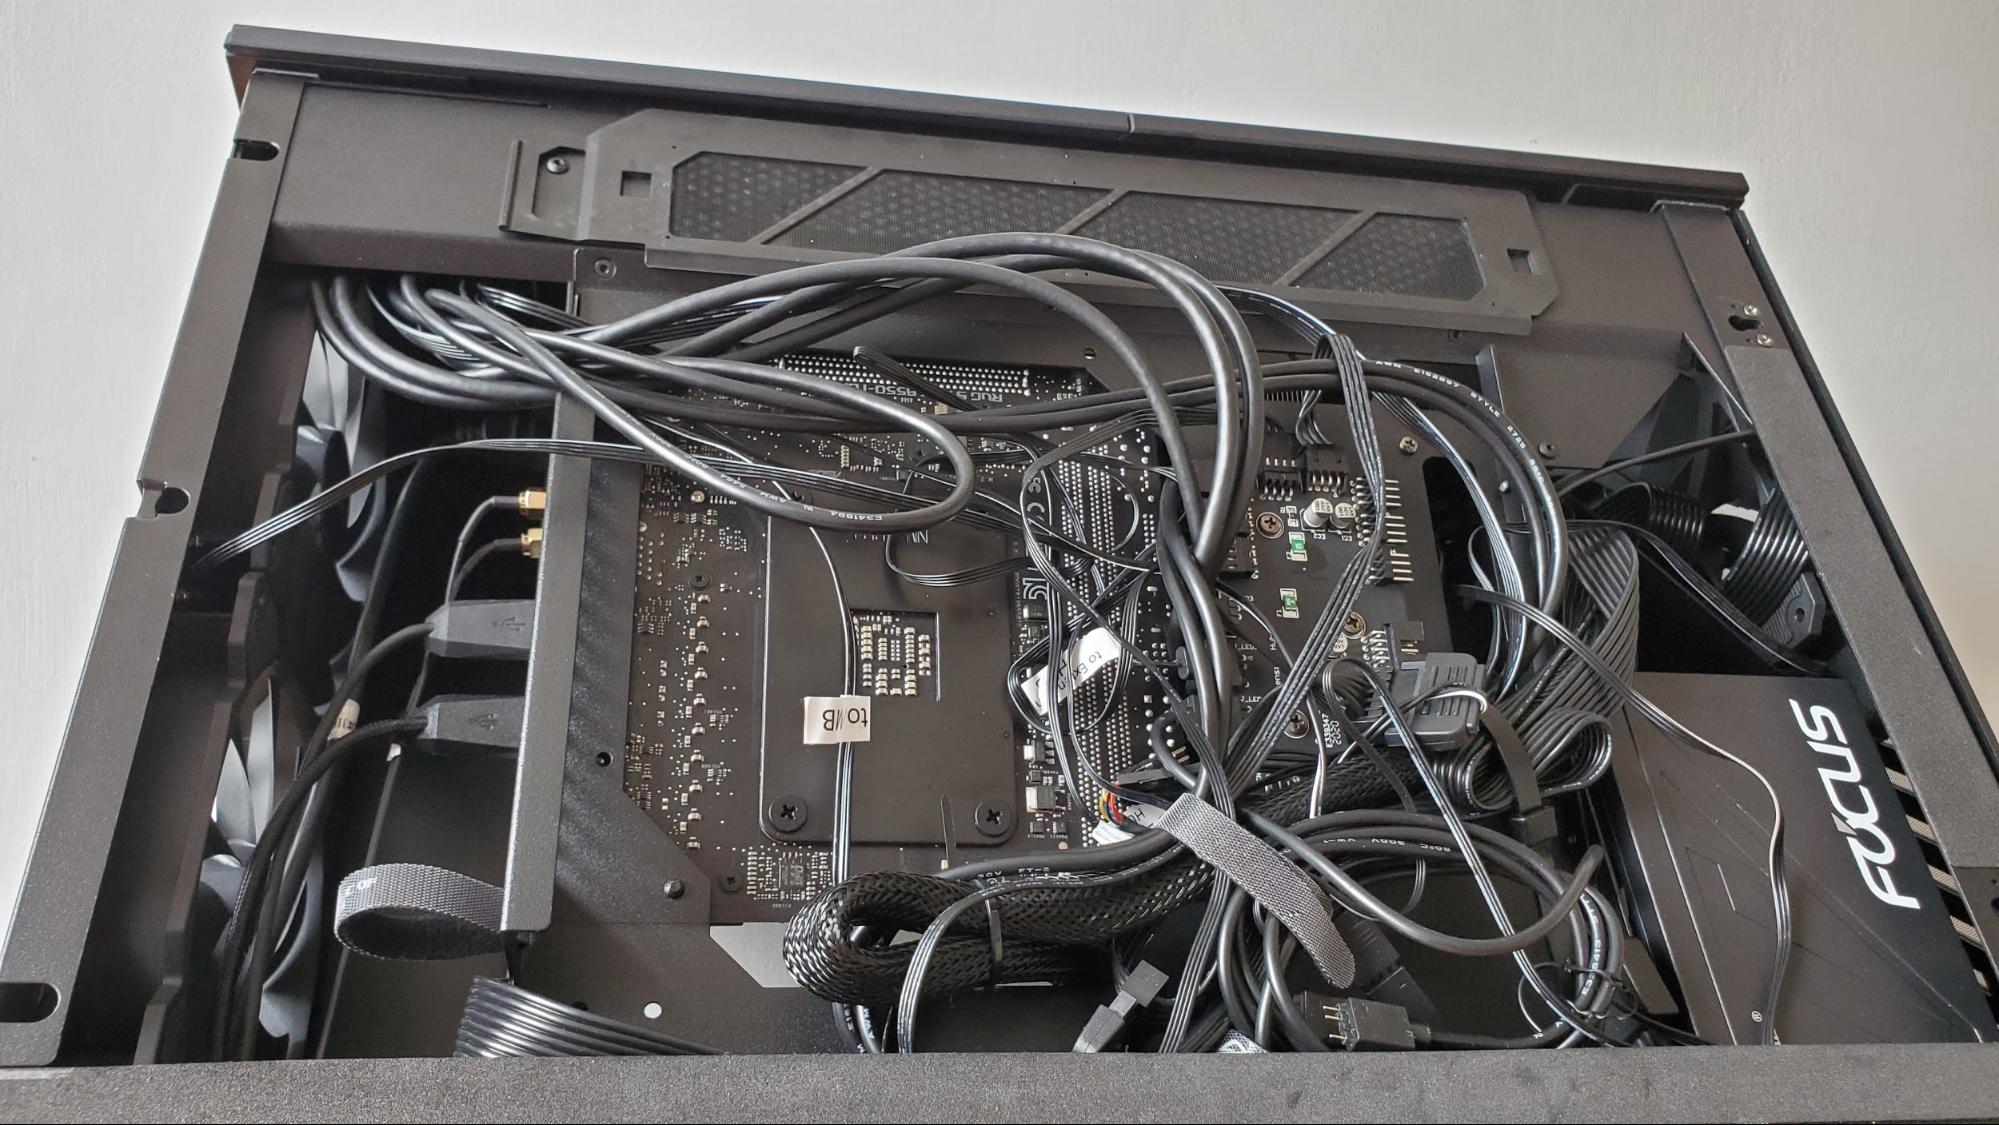
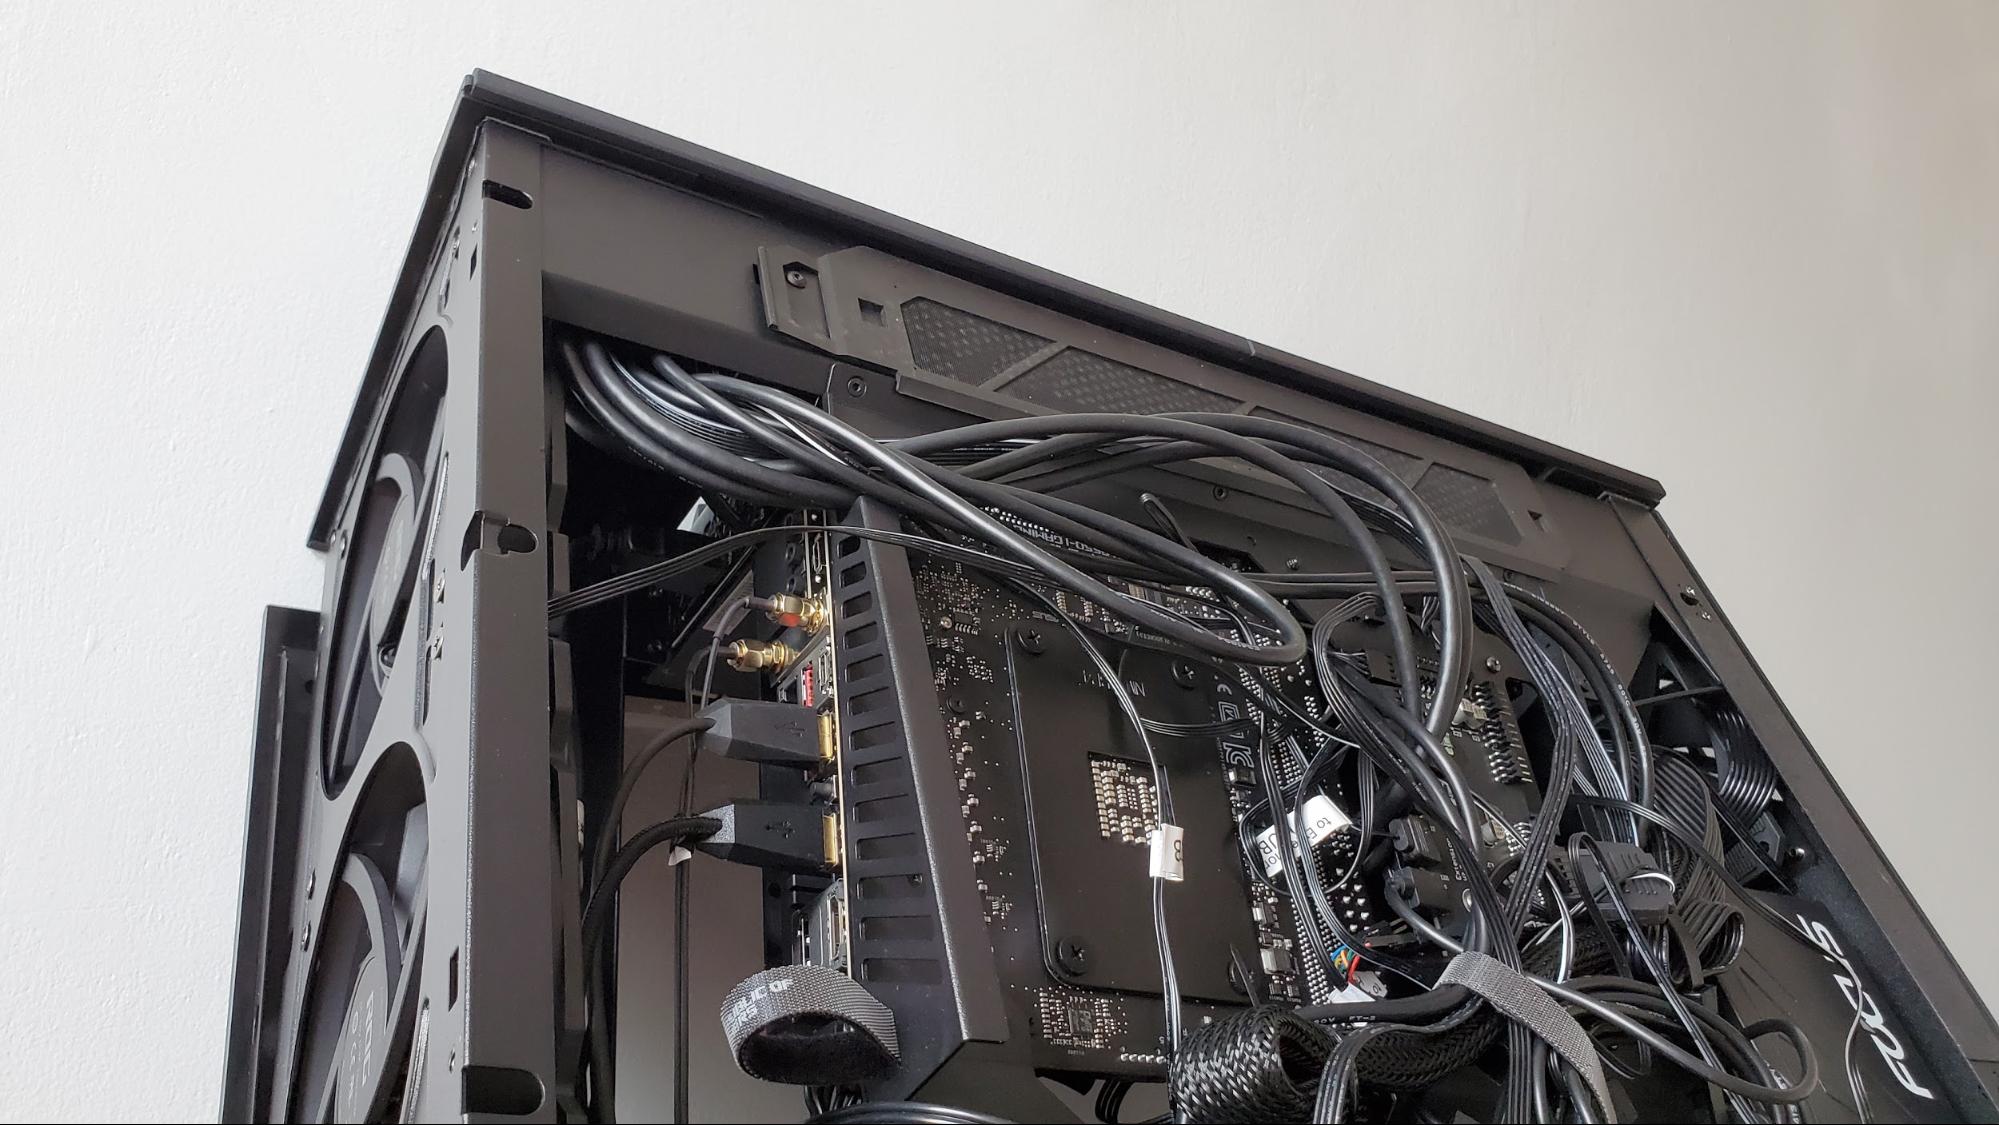
The only way to get to them is to remove the front / top panel and then either the glass or the solid aluminum side panel. Either technically works, but removing the metal panel behind the motherboard means the ports on the motherboard and graphics card are leaning toward you, rather than away, making them easier to plug things into. And easier doesn’t always mean easy.
If you’re wondering about how your "external" cables get into the case, there’s a roughly 2.5-inch diagonal hole in the bottom / rear of the chassis, seen in the lower-right in the image above, on the bottom of the case. You’ll need to snake all your USB cables, antenna wires, and video connections through there, then up to the motherboard and graphics card. There’s about an inch of clearance between that hole and the feet that lift the case up off the ground for airflow when the case is vertical.
For safety, whenever plugging or unplugging any of these cables, you should also be sure to shut the system down before doing so. Because the exhaust fan blades sit less than three inches in front of all your system’s "rear" ports inside the case.
This also means some bulky, inflexible video cables are going to be very tricky to use here. In particular I have a braided DisplayPort-to-HDMI cable with a plug that’s over two inches long on its own, making it extremely difficult to plug in -- the graphics card ports are jammed up in the corner of the case, making getting to them even more difficult than the motherboard’s ports. In the end, I went with a different cable with a shorter plug and less-stiff cabling to make sure my monitor cable would at no point make contact with the case’s fan blades.
A Pretty, Inconvenient Showpiece
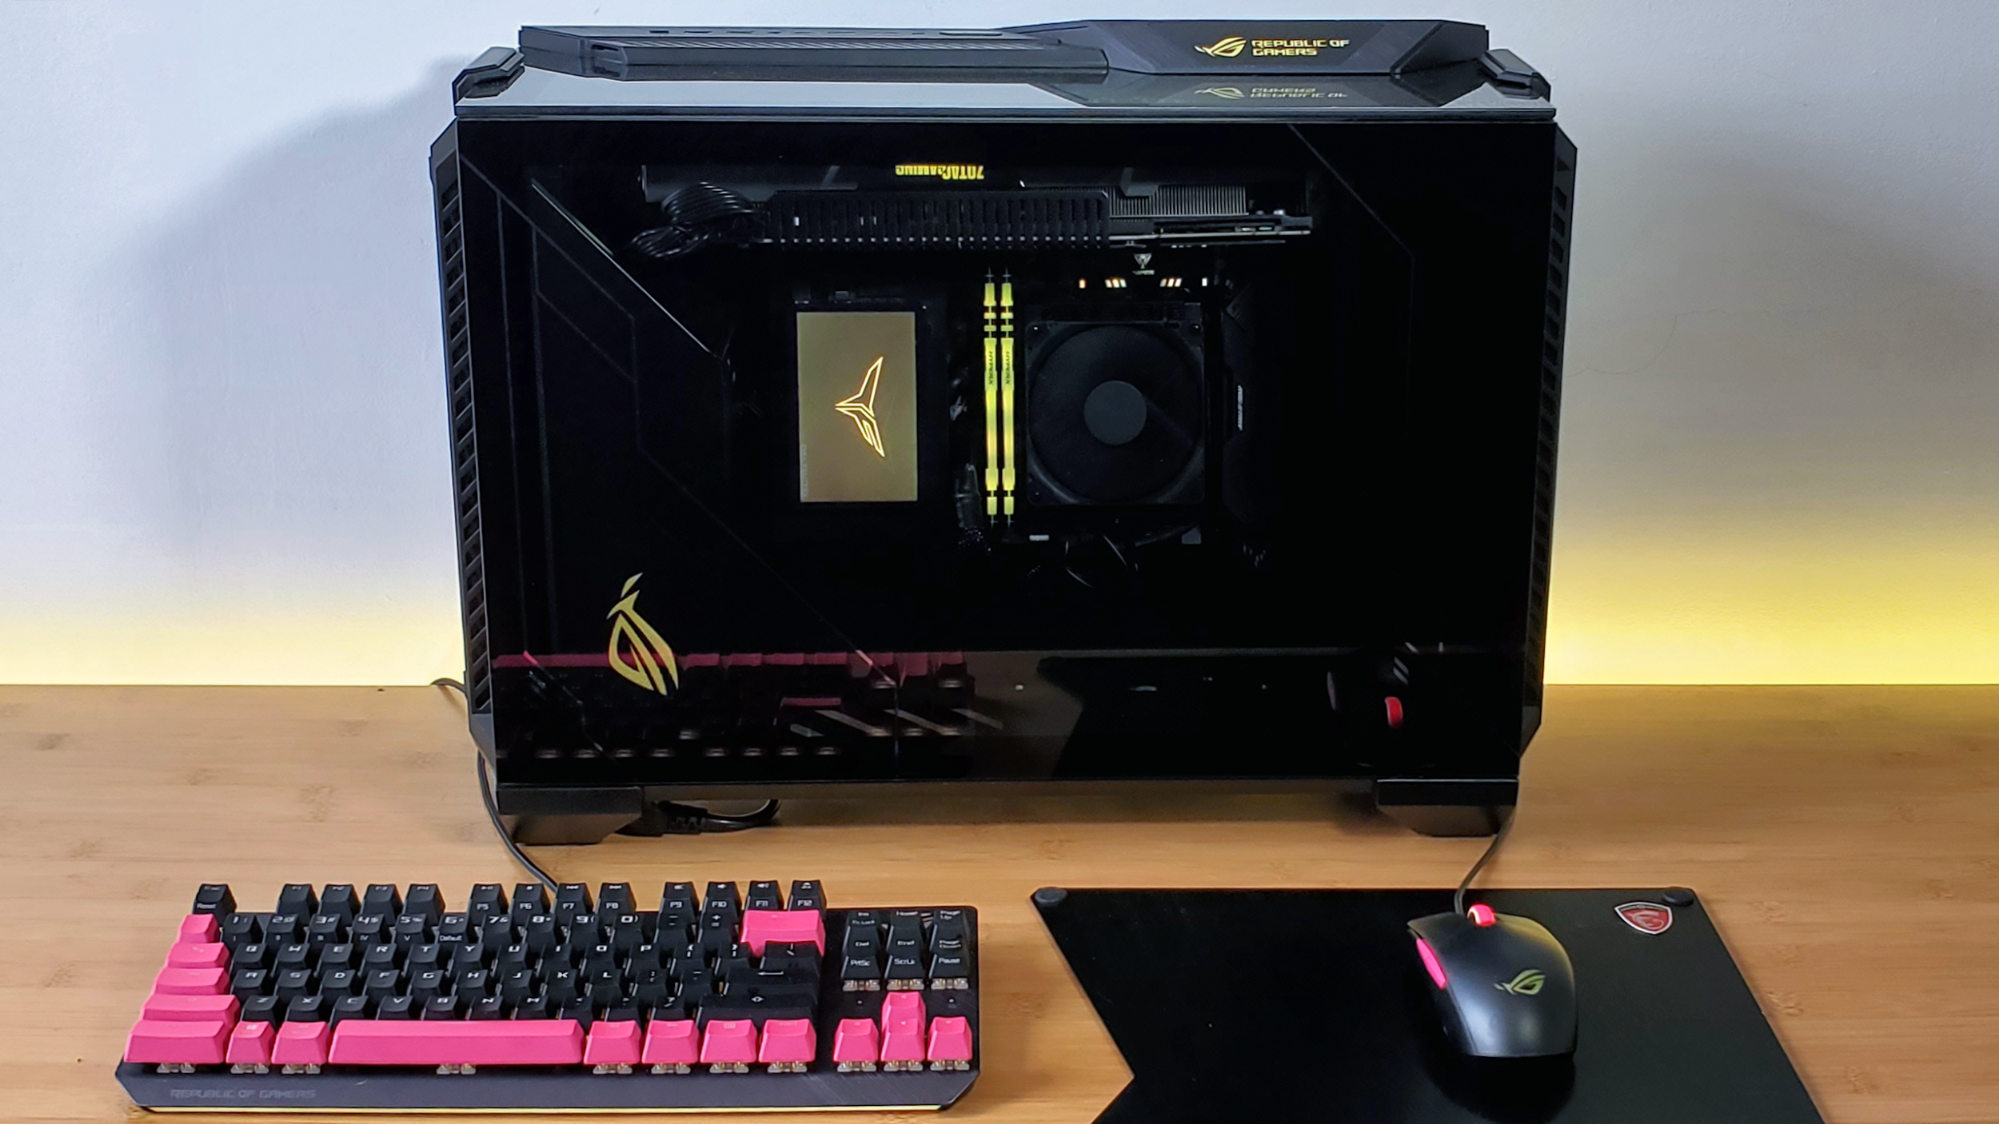
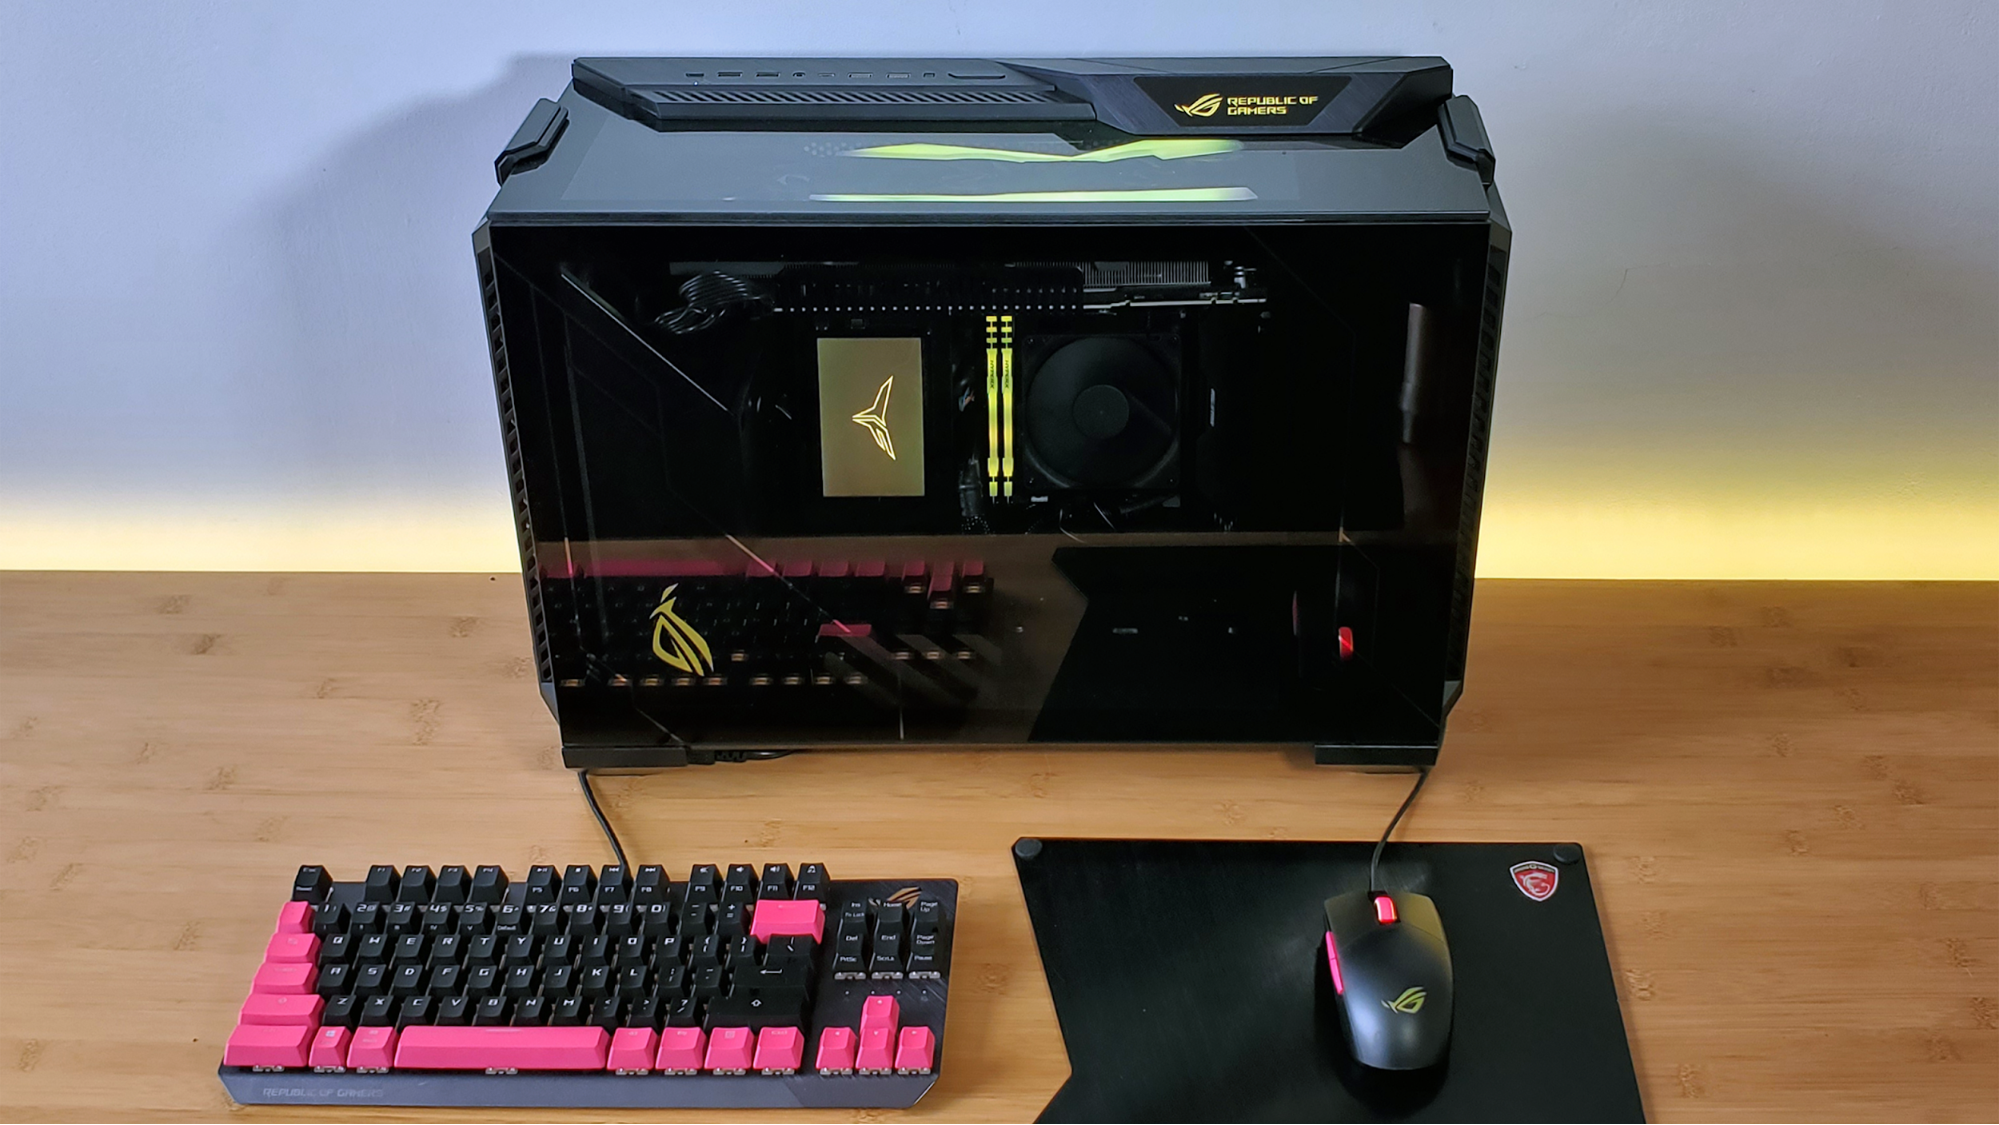
Given what I’ve pointed out in the previous sections, you now know that if you opt for Asus’ ROG Z11, you’ll need a mini ITX motherboard, despite the fact that the case is rather large (and heavy at over 19 pounds empty) for a small-form-factor build.
Building in the case isn’t terribly difficult, though it certainly is different. You’ll definitely want to follow the manual, despite the fact that it’s mostly just illustrations and short section headlines, repeated in 15 different languages. Also note that, once you remove all four side panels, which you’ll need to do for most of the build process, the case’s metal interior frame is heavy and sharp enough that it left several gouges in my wood-top workbench.
We’ve also covered the fact that, while you get a generous five USB ports on the top panel, getting to your rear IO motherboard and graphics card ports (which are actually housed up front if the case is sitting horizontally) in the ROG Z11 involves removing two case panels and shutting the system down. At the very least, you’ll want to do some thinking about your peripherals so that anything you unplug more than once every couple months gets plugged into the case’s front port.
On top of being big (for a mini ITX case), confusing to build in, and incredibly inconvenient to access most of our ports, there’s also the $279 price to consider. While the ROG Z11 is made of premium materials (it’s nearly all aluminum and glass), and it comes with a handy pre-mounted hub for your fans and RGB components, that’s a lot to ask for a case -- especially one without any included RGB fans or internal lighting. The case does have RGB-lig Asus ROG logos on its front and side, but there’s nothing here to light up the inside of your case. For that, you’ll need to bring your own light-up components or light strips.
I still like it… sort of
Despite that ample collection of inconveniences and potential negatives, after building a system in the ROG Z11 and clearing everything off my work bench to actually get a good look at the finished product and start using it, I find myself still liking this case. A lot of that is down to its looks. This is one pretty case -- especially with some RGB components added and with Armory Crate getting all the lighting to sync up --well, almost all the lighting. The Zotac card we installed didn’t work with Asus’ lighting platform, forcing us to install that company’s Firestorm utility to get our GPU’s bright lights to match the rest of the test system.
The ROG Z11 looks particularly good decked out in pink lights, alongside the company’s ROG Strix Scope TKL Electro Punk keyboard and mouse. It would be a fine rig to take into battle in the realm of Cyberpunk 2077, or switching the lights to red to battle hordes of hellspawn in Doom Eternal. And if all your RGB components are compatible, the case would be good for watching movies and TV, too, because holding down the lighting button on the front of the chassis should turn off all the system’s compatible lights -- although this didn’t quite work with our build.
But back in the day-to-day of the real world where I’ve been working and playing from home since March with no change to this routine in site, I think I’d get tired of the Z11’s impracticalities pretty quickly. When plugging in a second monitor, an Ethernet cable, or a webcam into the system (all tasks that should take seconds) instead forces me to shut the system down and tear it half apart, I’d be considering other, uglier options pretty quick.
Perhaps I’d find a big ugly USB-C hub to plug into the front, giving me more easy access ports there. But that would negate the ROG Z11’s primary pro -- its clean futuristic good looks. If aesthetics are your primary concern, and you don’t change up much of what’s plugged into your PC very often, then by all means the Z11 is worth considering -- especially if you’re a veteran builder who’s after a bit of a challenge.
But for everyone else, even those specifically looking for a premium mini ITX case, you’re probably better off opting for something more traditional. You’ll probably also save yourself some money in the process since the vast majority of cases are cheaper than $279. And you’ll definitely save yourself loads of frustration in the long run by opting for a case that doesn’t require you to remove multiple panels to get to your ports.
After a rough start with the Mattel Aquarius as a child, Matt built his first PC in the late 1990s and ventured into mild PC modding in the early 2000s. He’s spent the last 15 years covering emerging technology for Smithsonian, Popular Science, and Consumer Reports, while testing components and PCs for Computer Shopper, PCMag and Digital Trends.
-
comedichistorian "Asus ROG Z1 mini ITX showcase chassis is pretty, but we hope you don’t like getting to your rear ports easily."Reply
Well that's no good, you've gotta be able to get to your rear ports otherwise ya can't wipe and that's just a disaster. -
comedichistorian Replycomedichistorian said:"Asus ROG Z1 mini ITX showcase chassis is pretty, but we hope you don’t like getting to your rear ports easily."
Well that's no good, you've gotta be able to get to your rear ports otherwise ya can't wipe and that's just a disaster.
Thanks for liking my childish butt joke SaltyGoat! Also, I can’t decide which of my amusing thoughts about your username I like the most. A salty goat sounds like a delicious alcoholic beverage, a great name for a bluegrass band/album OR a euphemism for one’s pennis. <——— That was not a misspelling, that’s how I say it.
