How to Run ChatGPT on Raspberry Pi or PC
Run the popular AI content generator on your Pi or even incorporate it into your scripts.
You will not have missed the frenzy of excitement surrounding ChatGPT (Chat Generative-Pre-Trained Transformer). It can create images, write code, songs, poetry and try to solve our problems, big or small. It may not know how to beat Star Trek’s Kobayashi Maru simulation, but it can write Python and Bash code with ease. At a push it can also be used to write G-Code for the best 3D printers though we have yet to try it on our Creality Ender 2 Pro.
Typically we interact with ChatGPT via the browser, but in this how to, we will use a special Python library that will connect our humble Raspberry Pi to the powerful AI and provide us with a tool to answer almost any question. This project is not exclusive to Raspberry Pi; it can also be used with Windows, macOS and Linux PCs. If you can run Python on it, then chances are this project will also work.
If you are using a Raspberry Pi then you can use almost any model with this project as we are simply making requests over an Internet connection. However, for the smoothest performance overall, we recommend a Raspberry Pi 5 or Raspberry Pi 4.
Setting Up ChatGPT API Key for Raspberry Pi
Before we can use ChatGPT with our Raspberry Pi and Python we first need to set up an API key. This key will enable our code to connect to our OpenAI account and use AI to answer queries, write code, write poetry or create the next hit song.
1. Login to your OpenAI account.
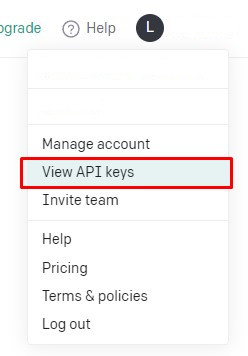
2. Click on the menu and select View API Keys.
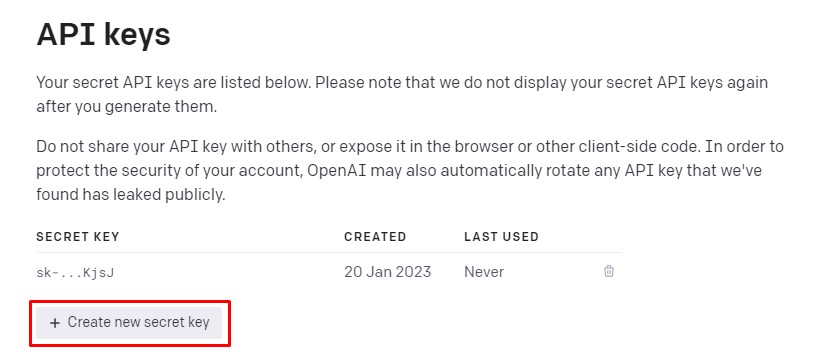
3. Click on Create new secret key to generate an API key. Make sure to copy and paste this key somewhere safe, it will not be shown again. Never share your API keys, they are unique to your account, any costs incurred will come from your account.
Get Tom's Hardware's best news and in-depth reviews, straight to your inbox.
Installing the ChatGPT Python API on Raspberry Pi
With our API key in hand we can now configure our Raspberry Pi and specifically Python to use the API via the openAI Python library.
1. Open a Terminal and update the software on your Raspberry Pi. This command is two-fold. First it runs an update, checking that the list of software repositories on our Pi is up to date. If not, then it downloads the latest details. The “&&” means that if the first command (update) runs cleanly, then the second command where we upgrade the software will begin. The “-y” flag is used to accept the installation with no user input.
sudo apt update && sudo apt upgrade -y2. Install the openai Python library using the pip package manager.
pip3 install openai3. Open the bashrc file hidden in your home directory. This file is where we need to set a path, a location where Raspberry Pi OS and Python can look for executable / configuration files.
nano ~/.bashrc4. Using the keyboard, scroll to the bottom of the file and add this line.
export PATH="$HOME/.local/bin:$PATH"5. Save the file by pressing CTRL + X, then Y and Enter.
6. Reload the bashrc config to finish the configuration. Then close the terminal.
source ~/.bashrcCreating a ChatGPT Chatbot for Raspberry Pi
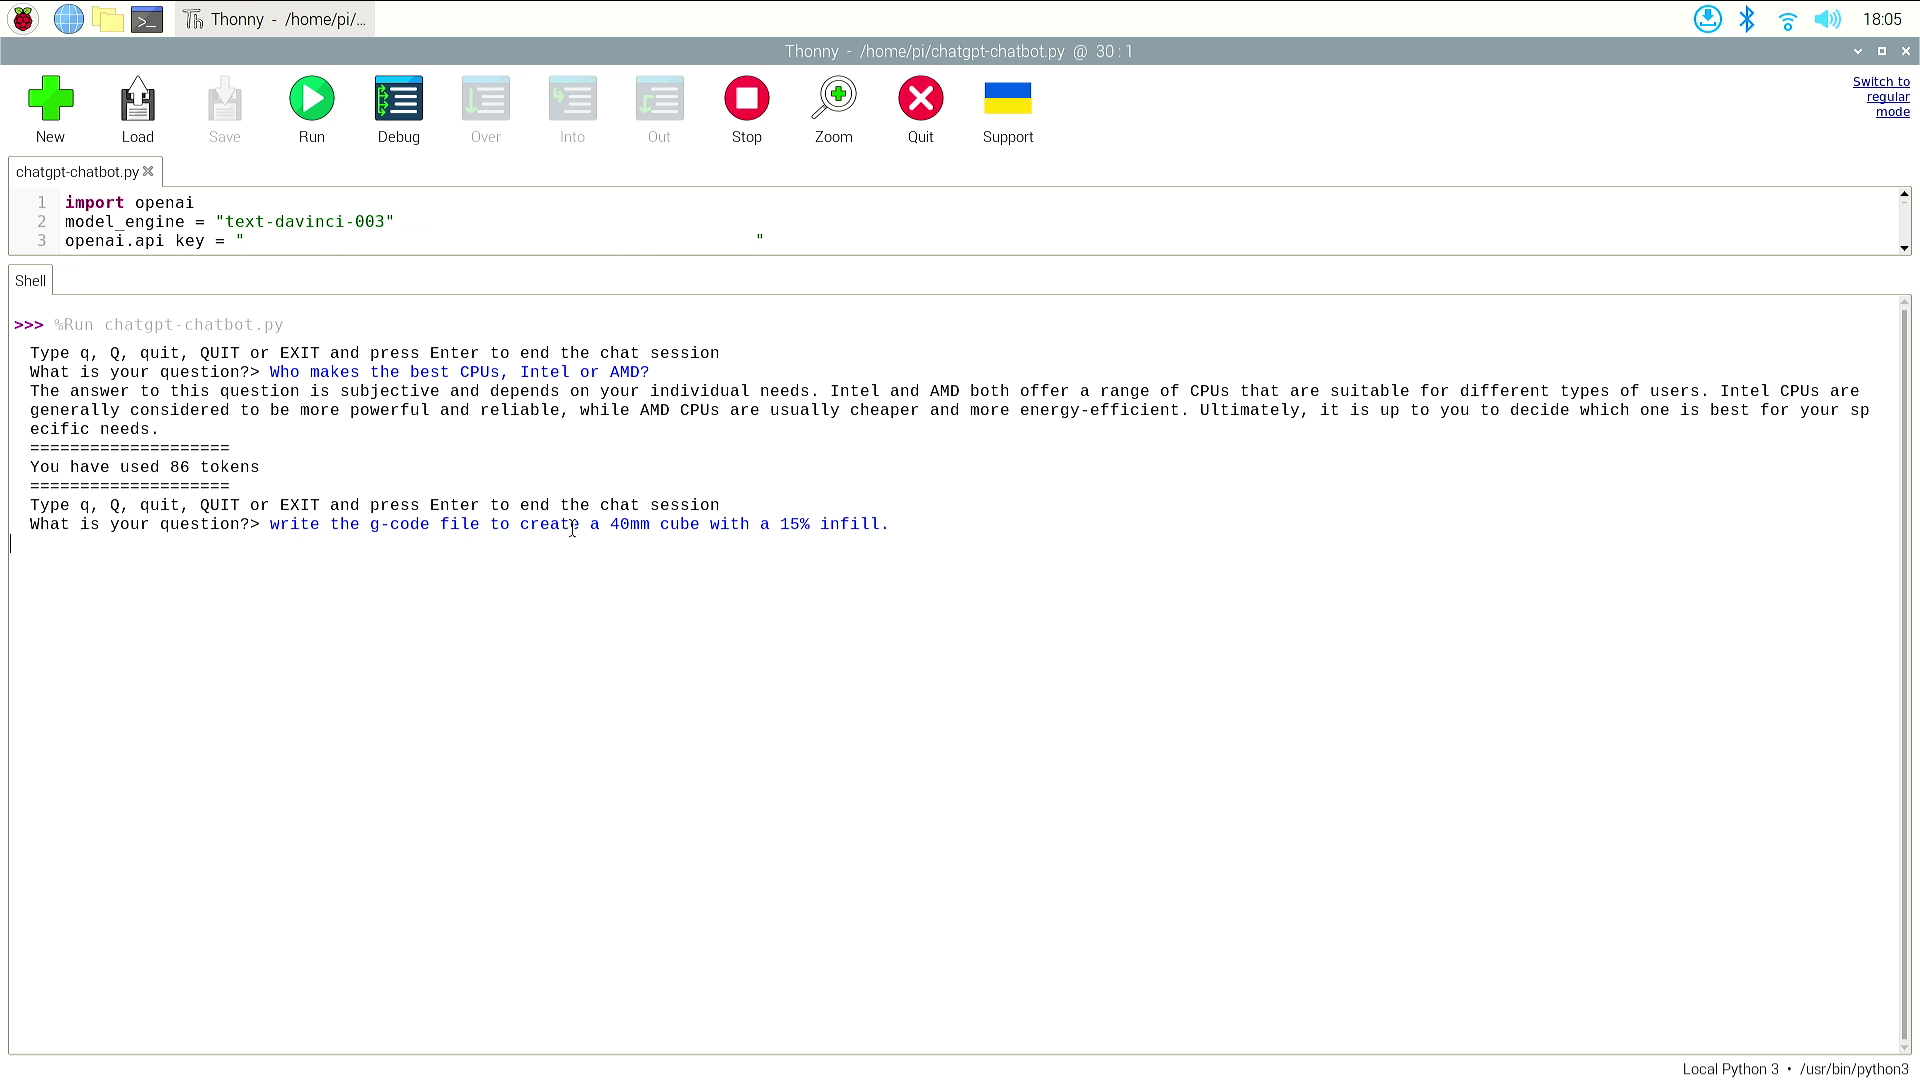
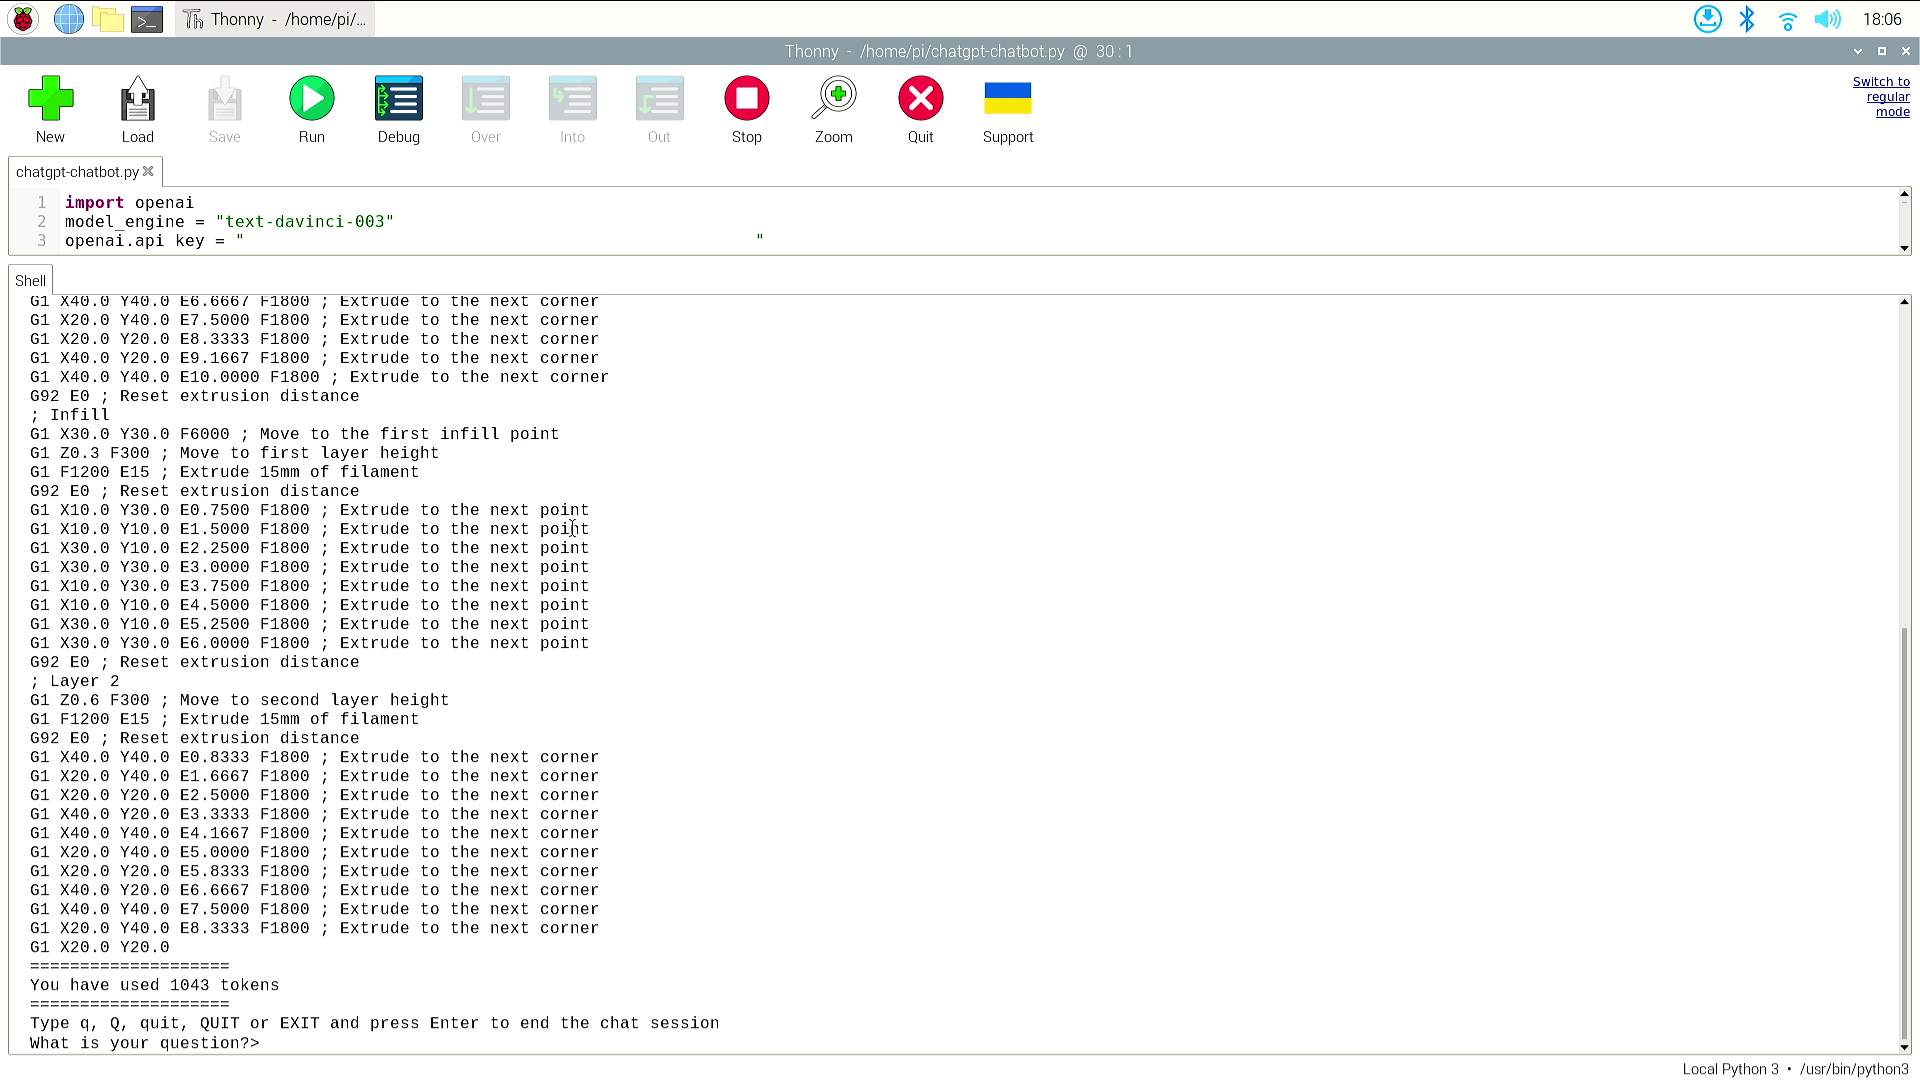
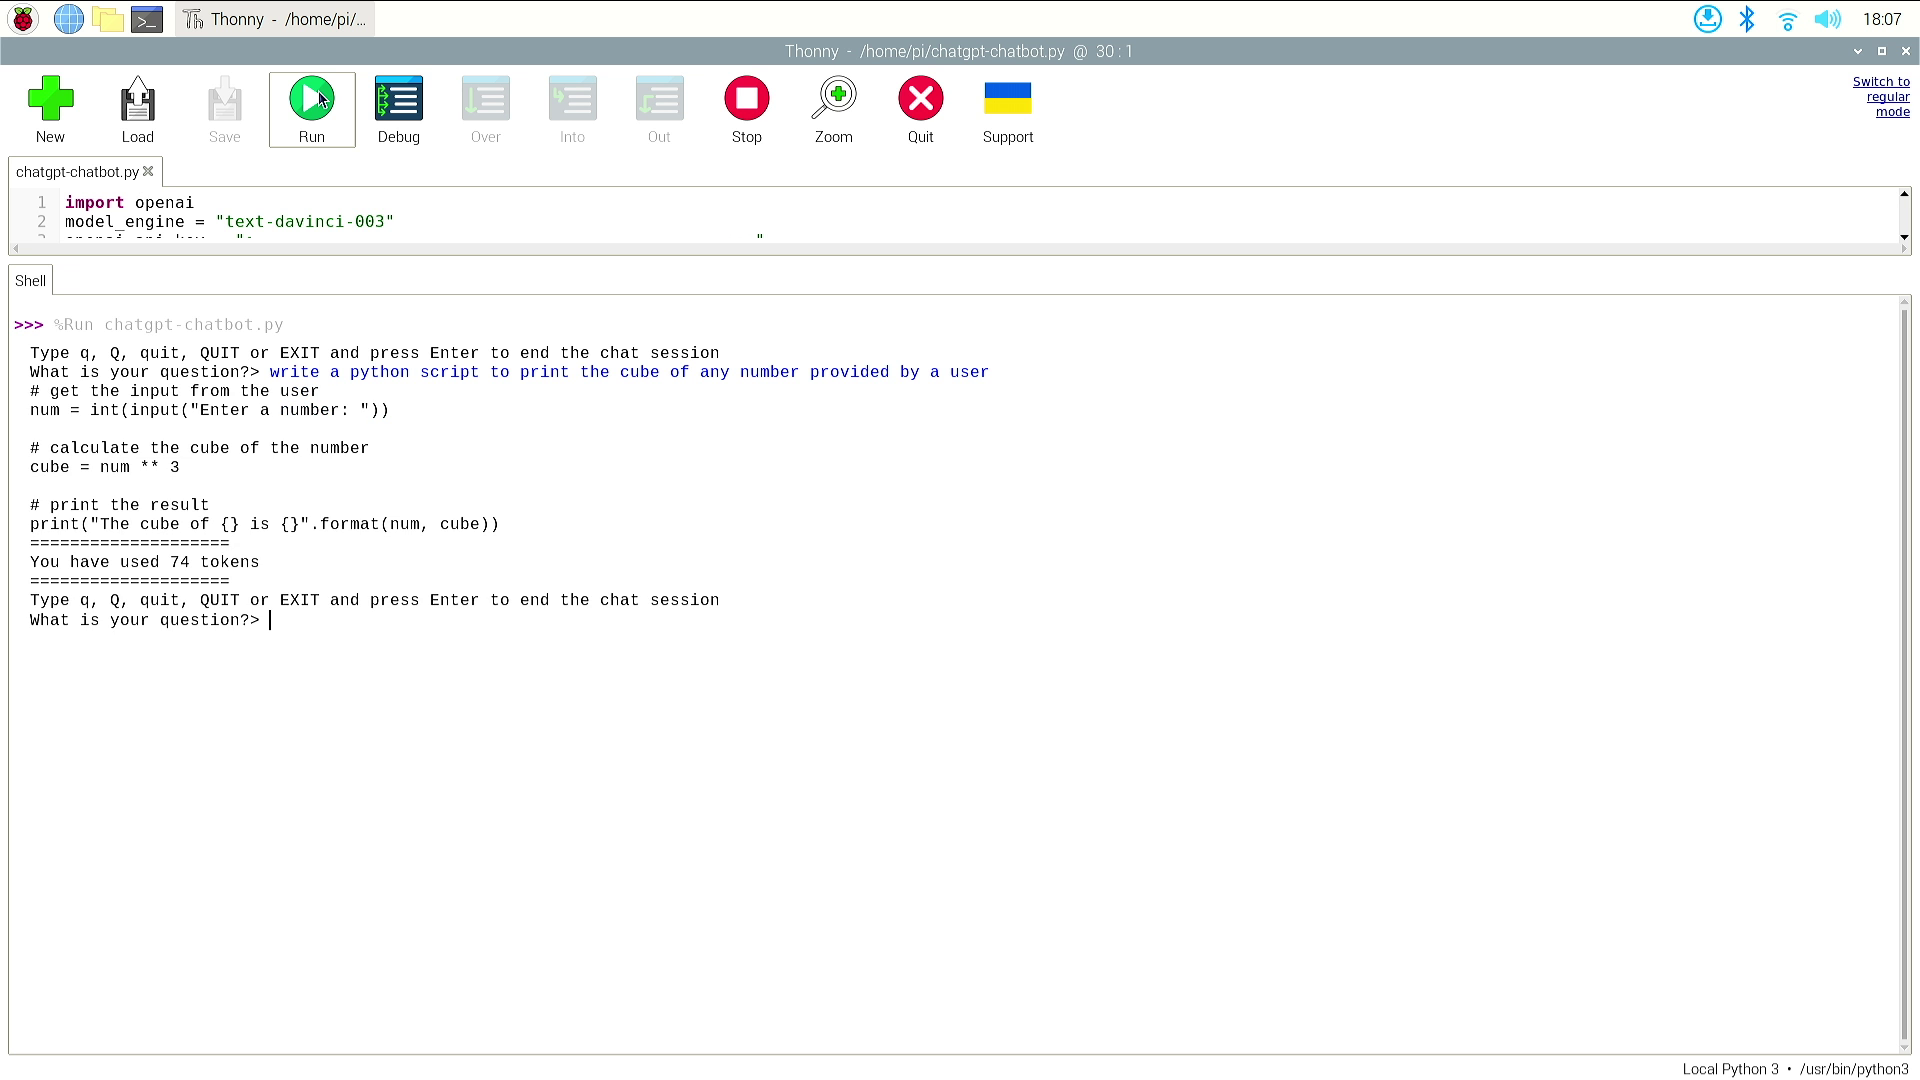
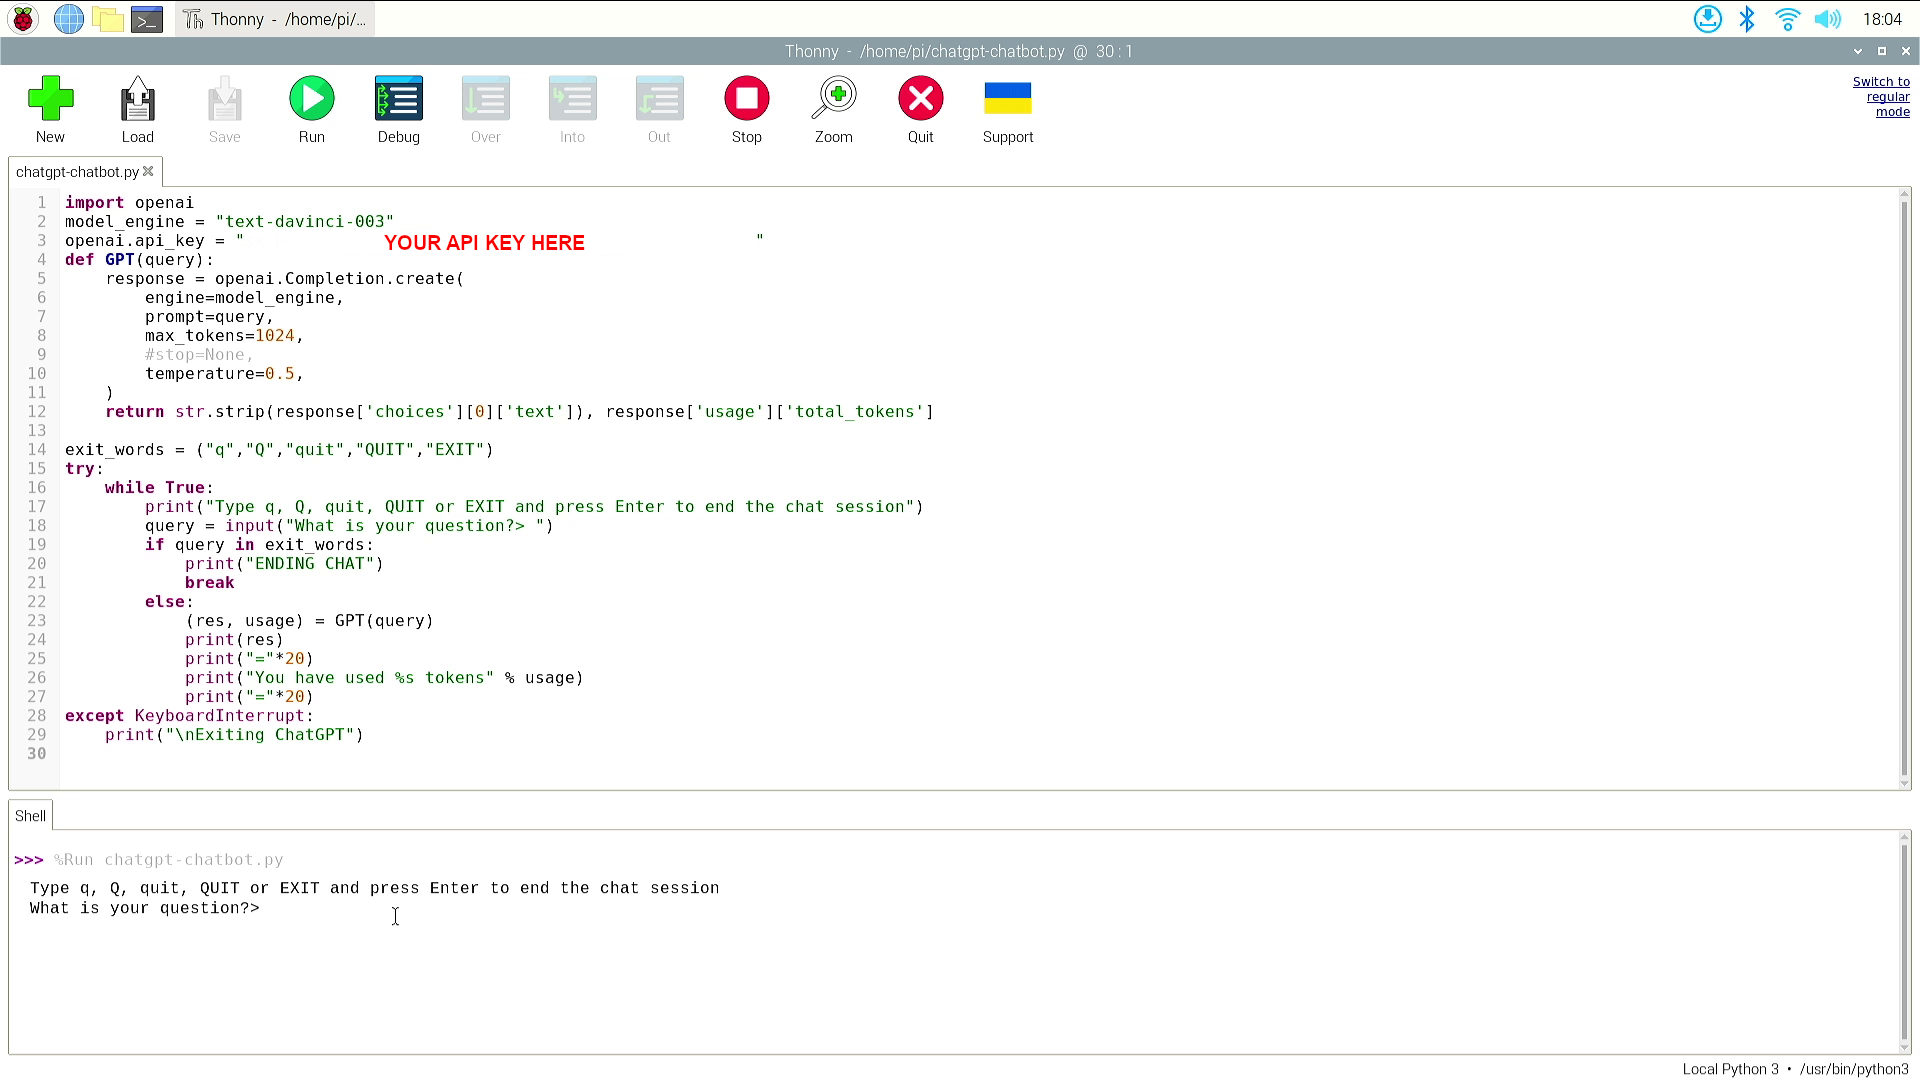
The goal of our chatbot is to respond to questions set by the user. As long as the response can be in text format, this project code will work. When the user is finished, they can type in a word to exit, or press CTRL+C to stop the code. We tested it with facts and trivia questions, then asked it to write Python code, Bash and a little G-Code for a 3D printer.
1. Launch Thonny, a built-in Python editor. You can find it on the Raspberry Pi menu, under Programming >> Thonny.
2. Import the openai library. This enables our Python code to go online and ChatGPT.
import openai3. Create an object, model_engine and in there store your preferred model. davinci-003 is the most capable, but we can also use (in order of capability) “text-curie-001”, “text-babbage-001” and “text-ada-001”. The ada model has the lowest token cost.
model_engine = "text-davinci-003"4. Create an object, open.api_key and store your API key. Paste your API key between the quotation marks.
openai.api_key = "YOUR API KEY HERE”5. Create a function, GPT() which takes the query (question) from the user as an argument. This means we can reuse the function for any question.
def GPT(query):6. Create a response object that will pass the details of our query to ChatGPT. It uses our chosen model and query to ask the question. We set the maximum token spend to 1024, but in reality, we will spend far less so this can be tweaked. The “temperature” controls how creative the responses can be. The higher the value, say 0.9, the more creative the model will try to be. 0.5 is a good mix of creative and factual.
   response = openai.Completion.create(
       engine=model_engine,
       prompt=query,
       max_tokens=1024,
       temperature=0.5,
   )
7. Return the data from ChatGPT, stripping out the response text, and the number of tokens used. The returned data is in a dictionary / JSON format so we need to specifically target the correct data using keys. These keys return the associated values.
return str.strip(response['choices'][0]['text']), response['usage']['total_tokens']8. Create a tuple and use it to store a list of strings that can be used to exit the chat. Tuples are immutable, meaning that they can be created and destroyed, but not updated by the running code. They make perfect “set and forget” configurations.
exit_words = ("q","Q","quit","QUIT","EXIT")9. Use a try, followed by while True: to instruct Python to try and run our code, and to do so forever.
try:
   while True:
10. Print an instruction to the user, in this case how to exit the chat.
print("Type q, Q, quit, QUIT or EXIT and press Enter to end the chat session")11. Capture the user query, using a custom prompt and store in an object called query.
query = input("What is your question?> ")12. Use a conditional test to check if any of the exit_words are solely present in the query. We can use these words in a query, but if they are the only words, then the chat will end.
if query in exit_words:13. Set it so that, if the exit_words are present, the code will print “ENDING CHAT” and then use break to stop the code.
           print("ENDING CHAT")
           break
14. Create an else condition. This condition will always run if no exit_words are found.
else:15. Run the ChatGPT query and save the output to two objects, res (response) and usage (tokens used).
(res, usage) = GPT(query)16. Print the ChatGPT response to the Python shell.
print(res)17. Print 20 = in a row to create a barrier between the ChatGPT text and then print the number of tokens used.
           print("="*20)
           print("You have used %s tokens" % usage)
           print("="*20)
18. Create an exception handler that will activate if the user hits CTRL+C. It will print an exit message to the Python shell before the code exits.
except KeyboardInterrupt:
print("\nExiting ChatGPT")
19. Save the code as ChatGPT-Chatbot.py and click Run to start. Ask your questions to the chatbot, and when done type one of the exit_words or press CTRL+C to exit.
Complete Code Listing
import openai
model_engine = "text-davinci-003"
openai.api_key = "YOUR API KEY HERE"
def GPT(query):
   response = openai.Completion.create(
       engine=model_engine,
       prompt=query,
       max_tokens=1024,
       temperature=0.5,
   )
   return str.strip(response['choices'][0]['text']), response['usage']['total_tokens']
exit_words = ("q","Q","quit","QUIT","EXIT")
try:
   while True:
       print("Type q, Q, quit, QUIT or EXIT and press Enter to end the chat session")
       query = input("What is your question?> ")
       if query in exit_words:
           print("ENDING CHAT")
           break
       else:
           (res, usage) = GPT(query)
           print(res)
           print("="*20)
           print("You have used %s tokens" % usage)
           print("="*20)
except KeyboardInterrupt:
print("\nExiting ChatGPT")
Les Pounder is an associate editor at Tom's Hardware. He is a creative technologist and for seven years has created projects to educate and inspire minds both young and old. He has worked with the Raspberry Pi Foundation to write and deliver their teacher training program "Picademy".
-
siddhesh22 This article is plain wrong. The ChatGPT API is not yet released and the model suggested in the article - "text-davinci-003" is a GPT3 model whereas ChatGPT is a separate GPT3.5 model trained on InstructGPT to follow instructions properly.Reply -
Hckngrtfakt Reply
text-davinci-003 is a model used by ChatGPT just as text-curie-001, text-babbage-001 & text-ada-001 but this has nothing to do with the official API as any other front end can submit queries to these data sets and receive a similar response, in the same sense that stable diffusion uses different "models".siddhesh22 said:This article is plain wrong. The ChatGPT API is not yet released and the model suggested in the article - "text-davinci-003" is a GPT3 model whereas ChatGPT is a separate GPT3.5 model trained on InstructGPT to follow instructions properly.
You may want to research a bit more on this topic before accusing any articles of being incorrect,.... if anything there's just a small fix needed
the complete code listing contains a syntax error
except KeyboardInterrupt:
print("\nExiting ChatGPT")
should be
except KeyboardInterrupt:
print("\nExiting ChatGPT") -
JockyMacIntosh After copy and pasting your code and adding my api I get the following errorReply
File "/home/tam/.local/lib/python3.9/site-packages/openai/api_requestor.py", line 680, in _interpret_response_line
raise self.handle_error_response(
openai.error.RateLimitError: You exceeded your current quota, please check your plan and billing details.
Does this actually work on the free version ? -
edzieba ReplyRun ChatGPT on Raspberry Pi or PC
This article is not anything to do with running any language model (GPT or otherwise) on a Raspberry Pi or PC. It is merely how to interface with a language model run by a third party.
It would be like titling an article "how to run Doom on a Raspberry Pi" and providing steps on how to display streamed video from Geforce Now. -
elcano21 ReplyHckngrtfakt said:text-davinci-003 is a model used by ChatGPT just as text-curie-001, text-babbage-001 & text-ada-001 but this has nothing to do with the official API as any other front end can submit queries to these data sets and receive a similar response, in the same sense that stable diffusion uses different "models".
You may want to research a bit more on this topic before accusing any articles of being incorrect,.... if anything there's just a small fix needed
the complete code listing contains a syntax error
except KeyboardInterrupt:
print("\nExiting ChatGPT")
should be
except KeyboardInterrupt:
print("\nExiting ChatGPT")
Clickbait anyway. From the Wikipedia article: "...released ChatGPT, which was fine-tuned from a model in the GPT-3.5 series." In other words:
ChatGPT <> GPT3.5, but a fine tuned version instead. The author could have stated the truth, "How to invoke the GPT3.5 API from a Raspberry Pi" in the title, but that wouldn't have reached as many clicks as the popular ChatGPT term, so he decided to inflate the claim instead.
As already commented the uninitiated would be very attracted to the possibility of running ChatGPT on a Raspberry Pi, although anybody with an idea of the size of this language model knows that this would be impossible. Yet, anything is valid if you need to fulfill a quota I guess. -
Iamflimflam1 Looks very similar to a tutorial I wrote . But to be honest it’s very simple to use the ooenAI APIs to make a chat bot.Reply
However. It’s not ChatGPT. It can ve made to superficially behave in a similar way, but it’s not going to be as good.
jQFhtFMDz1sView: https://youtu.be/jQFhtFMDz1s -
sprout__ What's a fair name for what OP is doing without advertising it as ChatGPT. ChatGPT API? Something else?Reply
