How to Share Your Internet Connection in Windows Using Ethernet or Wi-Fi
Get Internet on any device by attaching it to your Windows 10 PC.

In many situations, you can connect all of your devices to the same Wi-Fi network so getting them online is no problem. But what happens when one of your devices doesn’t have access to the connection, either because there it doesn’t have Wi-Fi, there is no Wi-Fi or the access is restricted (as in a hotel that only allows one connection per room)? Fortunately, you can easily share your Internet connection in Windows 10 and you can do it over a direct Ethernet connection or by turning the host PC into a hotspot. The client device doesn’t even have to be running Windows.
The direct Ethernet solution comes in very handy when you have one device that has Wi-Fi helping another that doesn’t. Recently, I needed to share my Internet connection over Ethernet when I installed Ubuntu on a Raspberry Pi. The Pi has Wi-Fi, but I couldn’t get Ubuntu to support it out of the box so I just plugged my Raspberry Pi’s Ethernet port into an Ethernet-to-USB adapter, which I attached to my Windows laptop.
How to Share Your Internet in Windows Using Ethernet
1. Connect your client device to your host PC using an Ethernet cable. If either device doesn’t have a free Ethernet port, use a USB-to-Ethernet adapter.
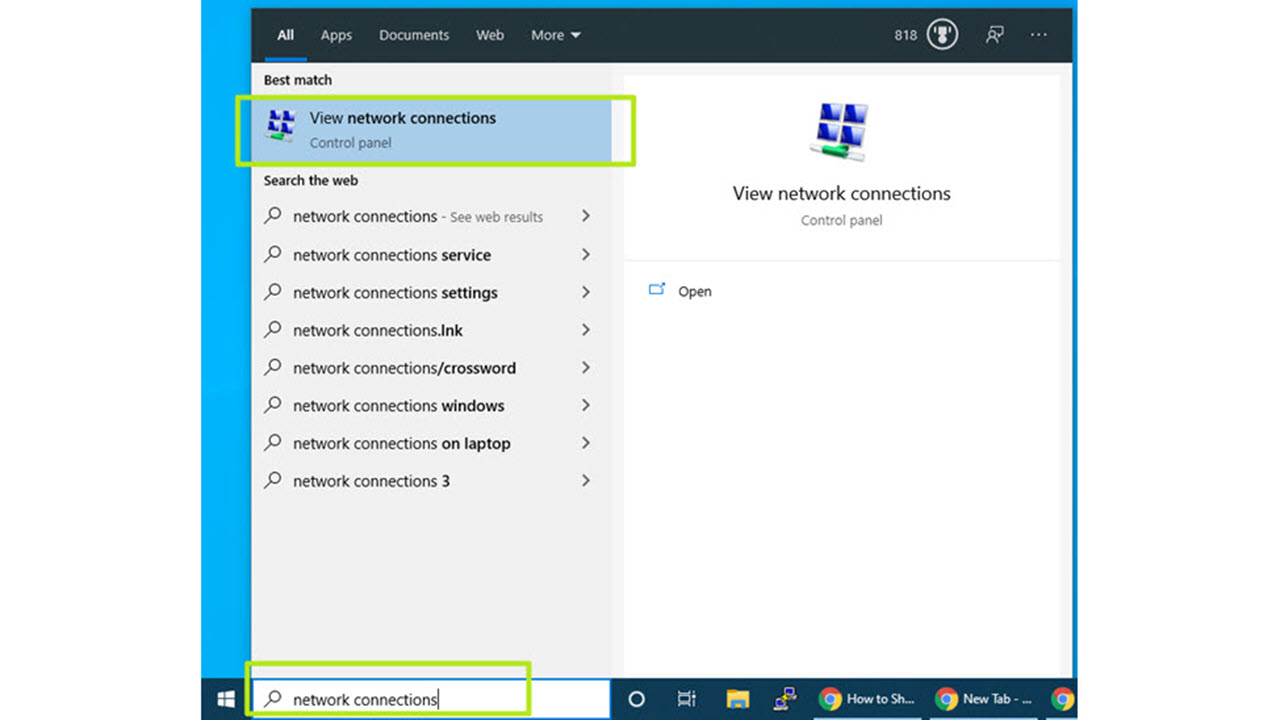
2. Go to the Network Connections menu. The easiest way to get there is by searching for “Network Connections” in the Windows Search box.
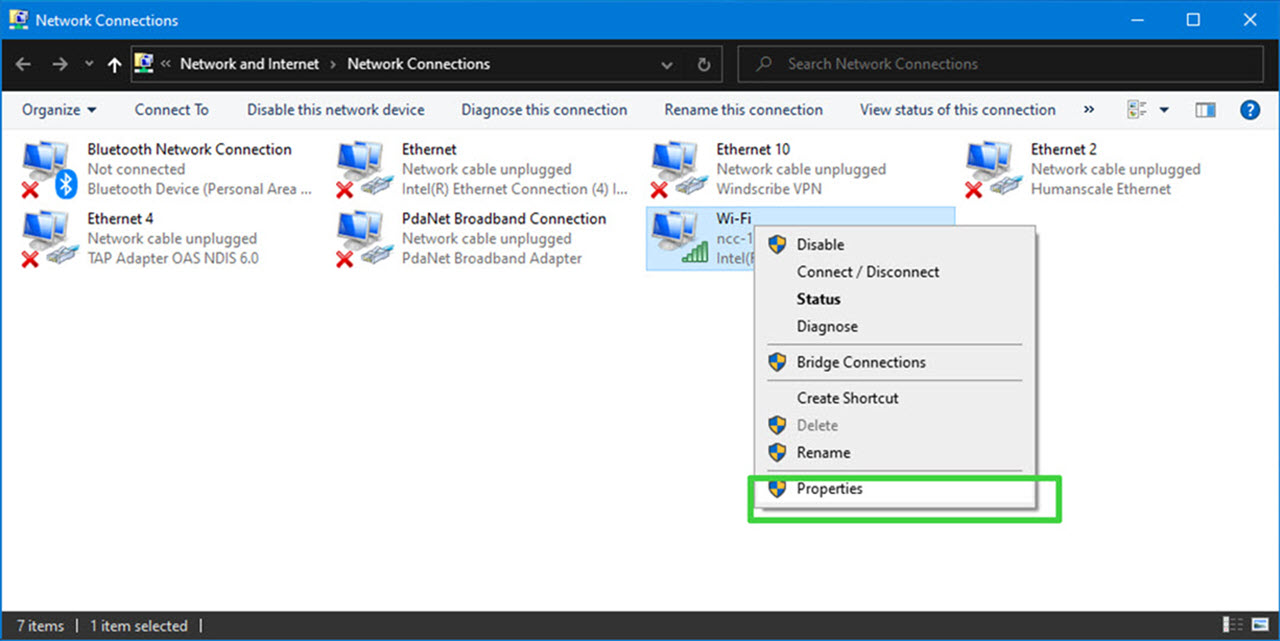
3. Right click on the active Internet connection and select Properties.
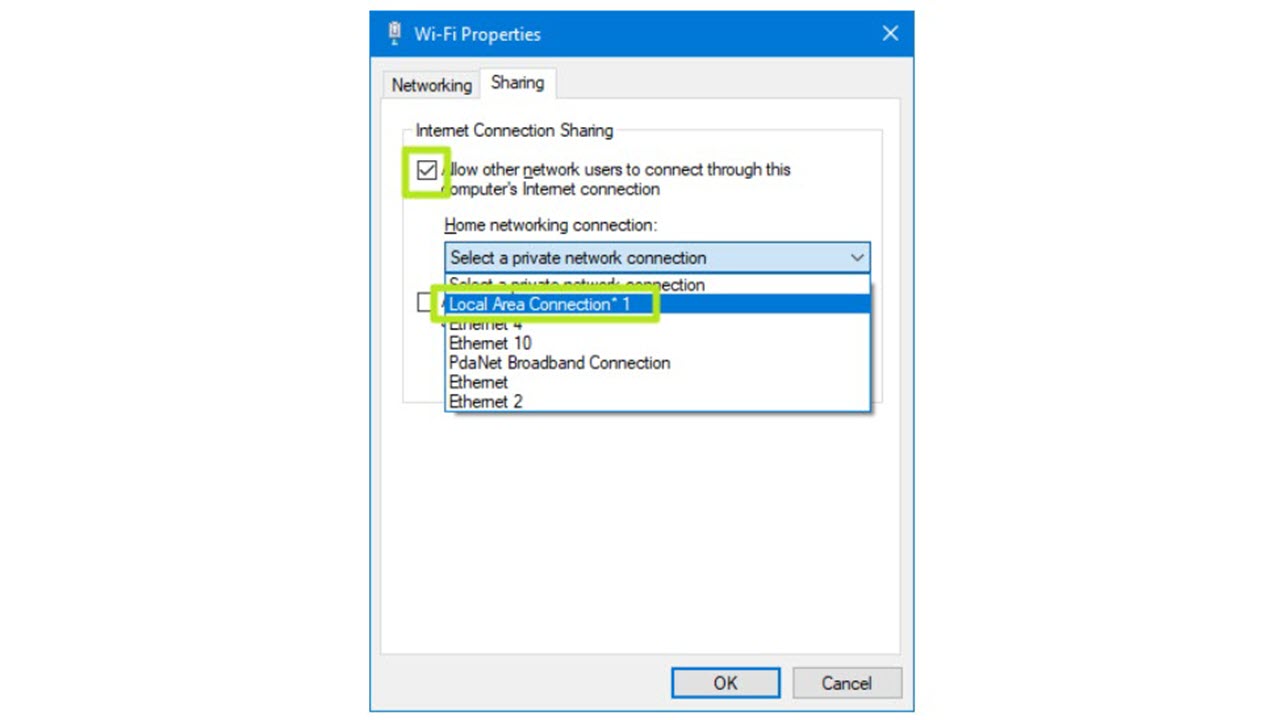
4. Toggle “Allow other network users to connect” to on from the Sharing tab and select the relevant Ethernet port from the pulldown menu. Note that, if you have VPN software installed, you may see a lot of virtual Ethernet ports on your list and you’ll need to pick the real one.
After you click OK, Internet should flow to your client device over its Ethernet port.
Get Tom's Hardware's best news and in-depth reviews, straight to your inbox.
How to Share Your Internet in Windows via Wi-Fi Hotspot
So let’s say your PC has a cellular connection and your friend’s laptop doesn’t or perhaps you have a desktop that’s connected via Ethernet but you need to get your tablet online and there’s no router. Turning your WIndows PC into a mobile hotspot for other devices is quite easy.
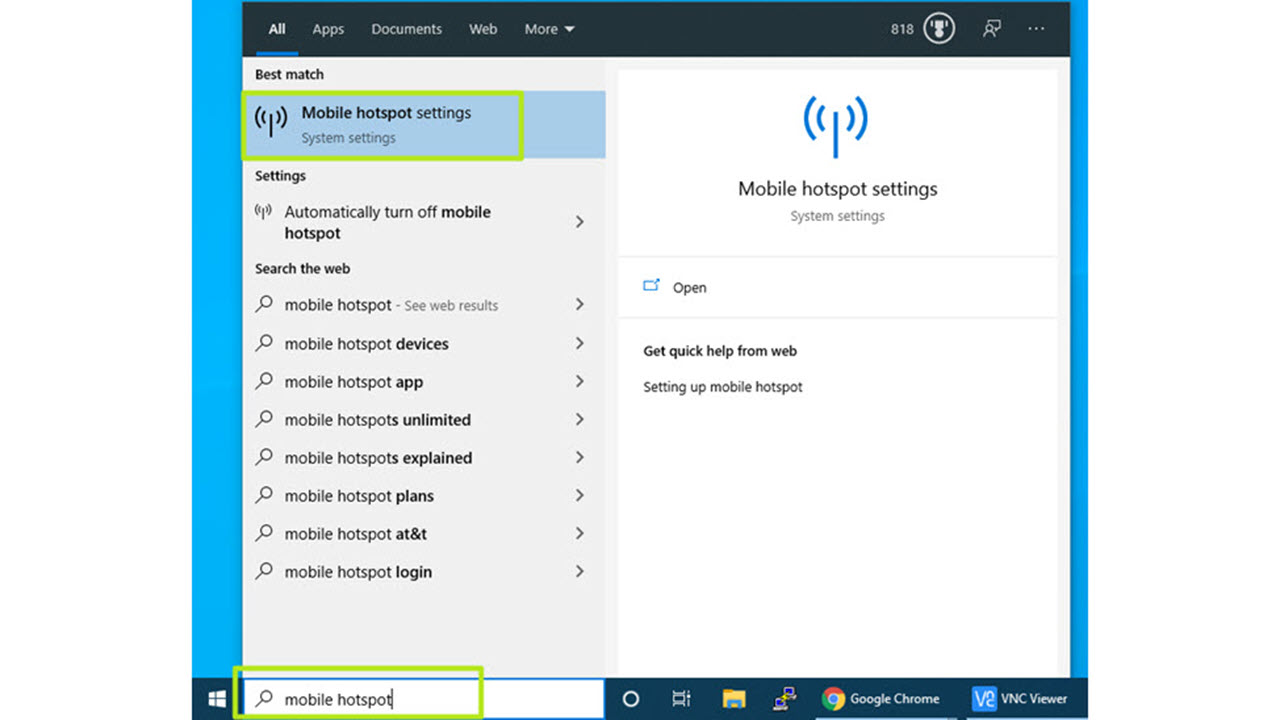
1. Navigate to the Mobile Hotspot settings menu. You can get there by typing “Mobile Hotspot” into the Windows search box.
2. Toggle “Share my Internet connection” to on.
3. Select the source of your Internet connection if it’s not already chosen by default. Chances are that, unless you have more than one Internet connection at once, the menu will show the correct source on its own.
4. Select Wi-Fi on the “Share my Internet connection over” menu if it’s not already selected.. Bluetooth is way too slow.

5. Click the Edit button under “Network band.”
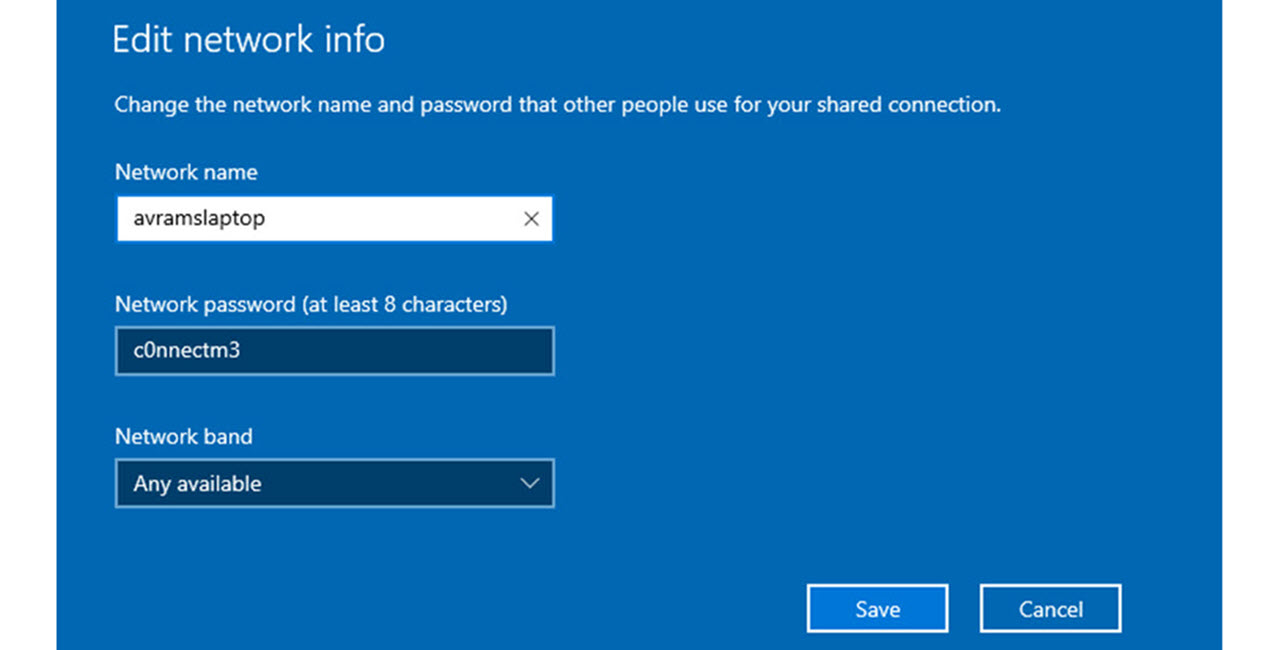
6. Set the Network name, password and network band. This will be the SSID and password that your client devices need to connect. Note that, if you are sharing a 5-GHz Wi-Fi connection, your client devices will need to support 5 GHz also. Some older devices such as Raspberry Pi 3s and Zeros can only do 2.4 GHz
You should now be able to connect to your WIndows 10 PC from other devices, just like it was any other hotspot. However, when I tried this the first time, I got an error on my client device saying “failed to obtain IP address.” Perhaps that was because I had shared my connection over Ethernet previously. Whatever the reason, here’s how to fix it.
How to Fix the Failed to Obtain IP Address Problem in Windows Mobile Hotspot
1. Navigate to Network Connections, right click on your Internet source and select Properties. You can see how in steps 2-3 and in the “how to share over Ethernet” section above.
2. Select Local Area Connection* on Sharing tab. Make sure that “Allow other network users to connect” is toggled to on.
Avram Piltch is Managing Editor: Special Projects. When he's not playing with the latest gadgets at work or putting on VR helmets at trade shows, you'll find him rooting his phone, taking apart his PC, or coding plugins. With his technical knowledge and passion for testing, Avram developed many real-world benchmarks, including our laptop battery test.
