How to Format a Hard Drive Using the Command Prompt
Get Tom's Hardware's best news and in-depth reviews, straight to your inbox.
You are now subscribed
Your newsletter sign-up was successful
Formatting one of the best hard drives or SSDs is the same as buying a new hard drive since the process erases all the data in one fell swoop. When you format your hard drive, you can clean internal as well as external storage media.
In this tutorial, we explain how you can format a hard drive using the command prompt. Before proceeding further, make sure you backup all available data to prevent data loss. Follow the steps below to format a drive:
STEP 1: Open Command Prompt As Administrator
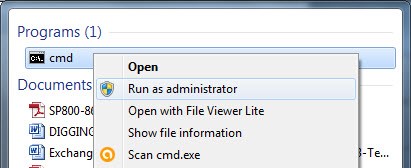
Search for command prompt, right click and run as Administrator.
STEP 2: Use Diskpart
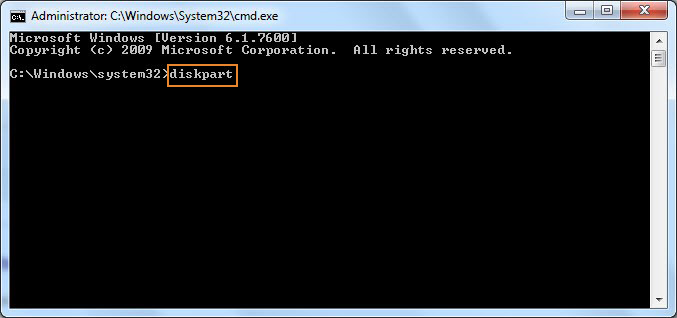
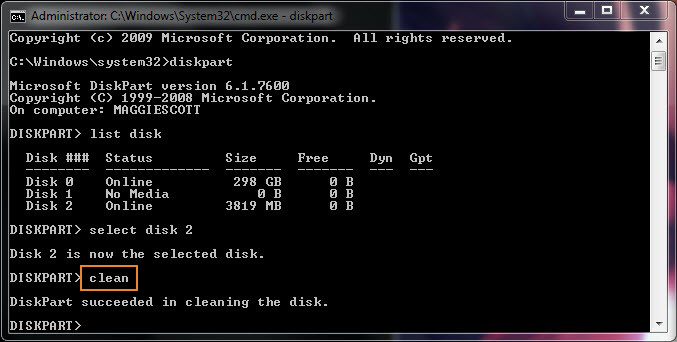
Once command line is open, type 'diskpart' and press Enter.
STEP 3: Type List Disk
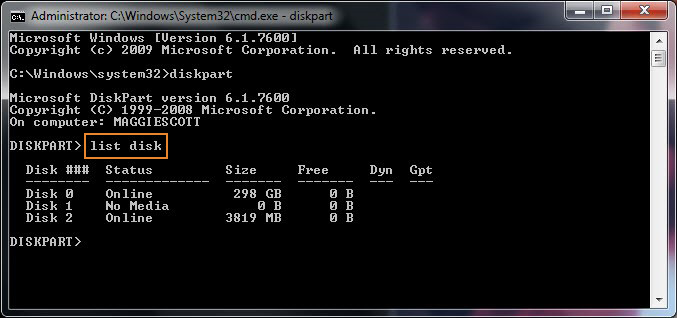
The above command will open a Diskpart window. In this window, type 'list disk' and press Enter. It will list all the available drives.
STEP 4: Select the Drive to Format
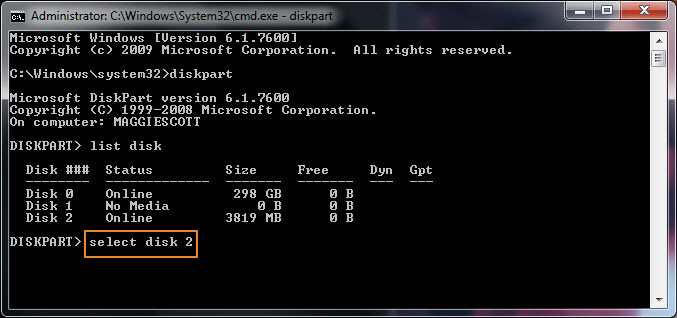
Now type 'select disk (disk number)' as shown above. Specify the drive number which needs to be formatted.
STEP 5: Clean the Disk
In this step, type 'clean'. This command will permanent delete all files and folders, and successfully clean up the disk.
Get Tom's Hardware's best news and in-depth reviews, straight to your inbox.
STEP 6: Create Partition Primary
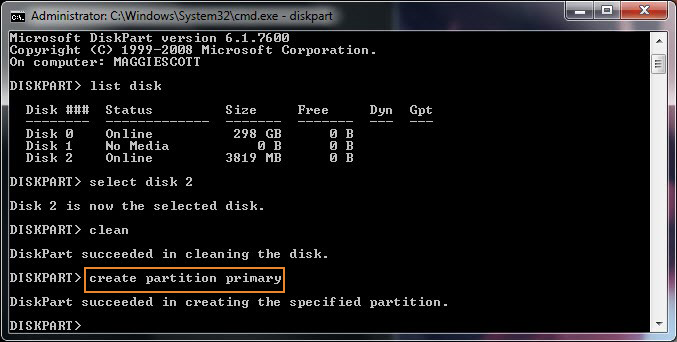
To make the drive again accessible, type 'create partition primary'.
STEP 7: Format the Drive
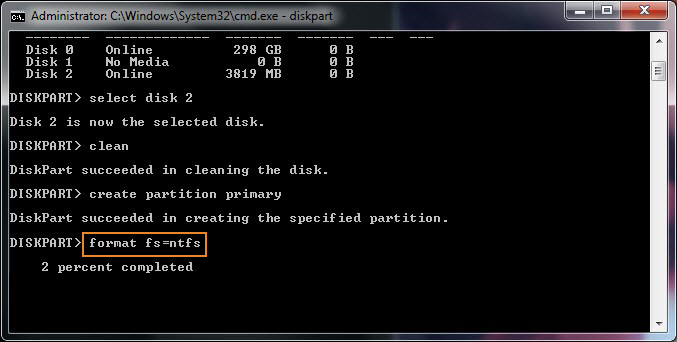
Now format the drive with FAT or NTFS file system. Type 'format fs=ntfs' and press Enter.
STEP 8: Assign a Drive Letter
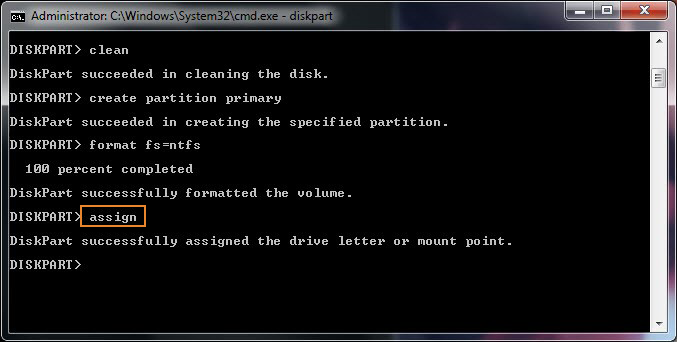
To assign a drive letter, you can type 'assign' as shown below.
MORE: How to Enter the BIOS on Any PC
MORE: Windows How-To Articles
Joshua Simenhoff was a former Tom's Hardware community manager. He covered a wide range of topics, including PC hardware how-tos and articles with a focus on community engagement. His expertise lay in connecting with readers and providing practical, informative content about the latest technology.
-
ehmkec Am I missing something? Couldn't you just bring up a command prompt and type "format e:" - or some other drive letter?Reply -
polomint Or use Computer Management -> Disk Management if you want to remove all partitions on a drive then format it...Reply -
shrapnel_indie Reply21240634 said:Am I missing something? Couldn't you just bring up a command prompt and type "format e:" - or some other drive letter?
While I cannot guarantee this article does exactly what it claims it does (I haven't tried it, let alone heard about this way before) I can speak for the way format works now days.
Drives come pretty much preformatted now days as to its sectors and such. Format just basically wipes the file data/directory/folder content, not the data elsewhere on the drive. It's possible to recover the data with a little work, primarily on the "folders."
I would hope that this utility, DiskPart, issuing its "clean" command actually does more than clear the data partition info.
-
jimmysmitty Reply21240861 said:21240634 said:Am I missing something? Couldn't you just bring up a command prompt and type "format e:" - or some other drive letter?
While I cannot guarantee this article does exactly what it claims it does (I haven't tried it, let alone heard about this way before) I can speak for the way format works now days.
Drives come pretty much preformatted now days as to its sectors and such. Format just basically wipes the file data/directory/folder content, not the data elsewhere on the drive. It's possible to recover the data with a little work, primarily on the "folders."
I would hope that this utility, DiskPart, issuing its "clean" command actually does more than clear the data partition info.
It doesn't. The only way to truly erase a disk is to have it do a 0 write pass. The more the better too. A single pass wont cover everything up. The DoD has a 7 pass minimum. I prefer the 35 pass called Gutmann method. -
JamesSneed Reply21240634 said:Am I missing something? Couldn't you just bring up a command prompt and type "format e:" - or some other drive letter?
Sure you can say: format e: /fs:NTFS However you would need to use diskpart to create the partition in the first place to already have an "e" drive to format.
The title really should be how to partition and format a drive. -
shrapnel_indie Reply21240932 said:21240861 said:21240634 said:Am I missing something? Couldn't you just bring up a command prompt and type "format e:" - or some other drive letter?
While I cannot guarantee this article does exactly what it claims it does (I haven't tried it, let alone heard about this way before) I can speak for the way format works now days.
Drives come pretty much preformatted now days as to its sectors and such. Format just basically wipes the file data/directory/folder content, not the data elsewhere on the drive. It's possible to recover the data with a little work, primarily on the "folders."
I would hope that this utility, DiskPart, issuing its "clean" command actually does more than clear the data partition info.
It doesn't. The only way to truly erase a disk is to have it do a 0 write pass. The more the better too. A single pass wont cover everything up. The DoD has a 7 pass minimum. I prefer the 35 pass called Gutmann method.
That's what I thought. Its faster to just erase/invalidate the partition, create a new partition, and MAYBE verify sectors instead of doing a real format and then verifying. -
jpe1701 I agree with USAFRET. I've had disk management just not let me format a drive and I had to use diskpart to get it done. Heck I've even used Ubuntu on a bootable drive to do disk management many years ago just because I knew the Linux commands and not the windows.Reply -
stdragon It's useful when installing Windows 10 on a used drive. But it's not a secure erase. So long as you know that, then proceed.Reply
