Tom's Hardware Verdict
AOSeed’s X-Maker is a decent, easy-to-use 3D printer semi-locked into a child-friendly ecosystem of ready-to-slice toys and a variety of simple modeling programs.
Pros
- +
Simple to use
- +
Flexible build plate
- +
Excellent print quality
- +
Comes with kid friendly design apps
Cons
- -
Clunky software
- -
Throw away hotend
Why you can trust Tom's Hardware
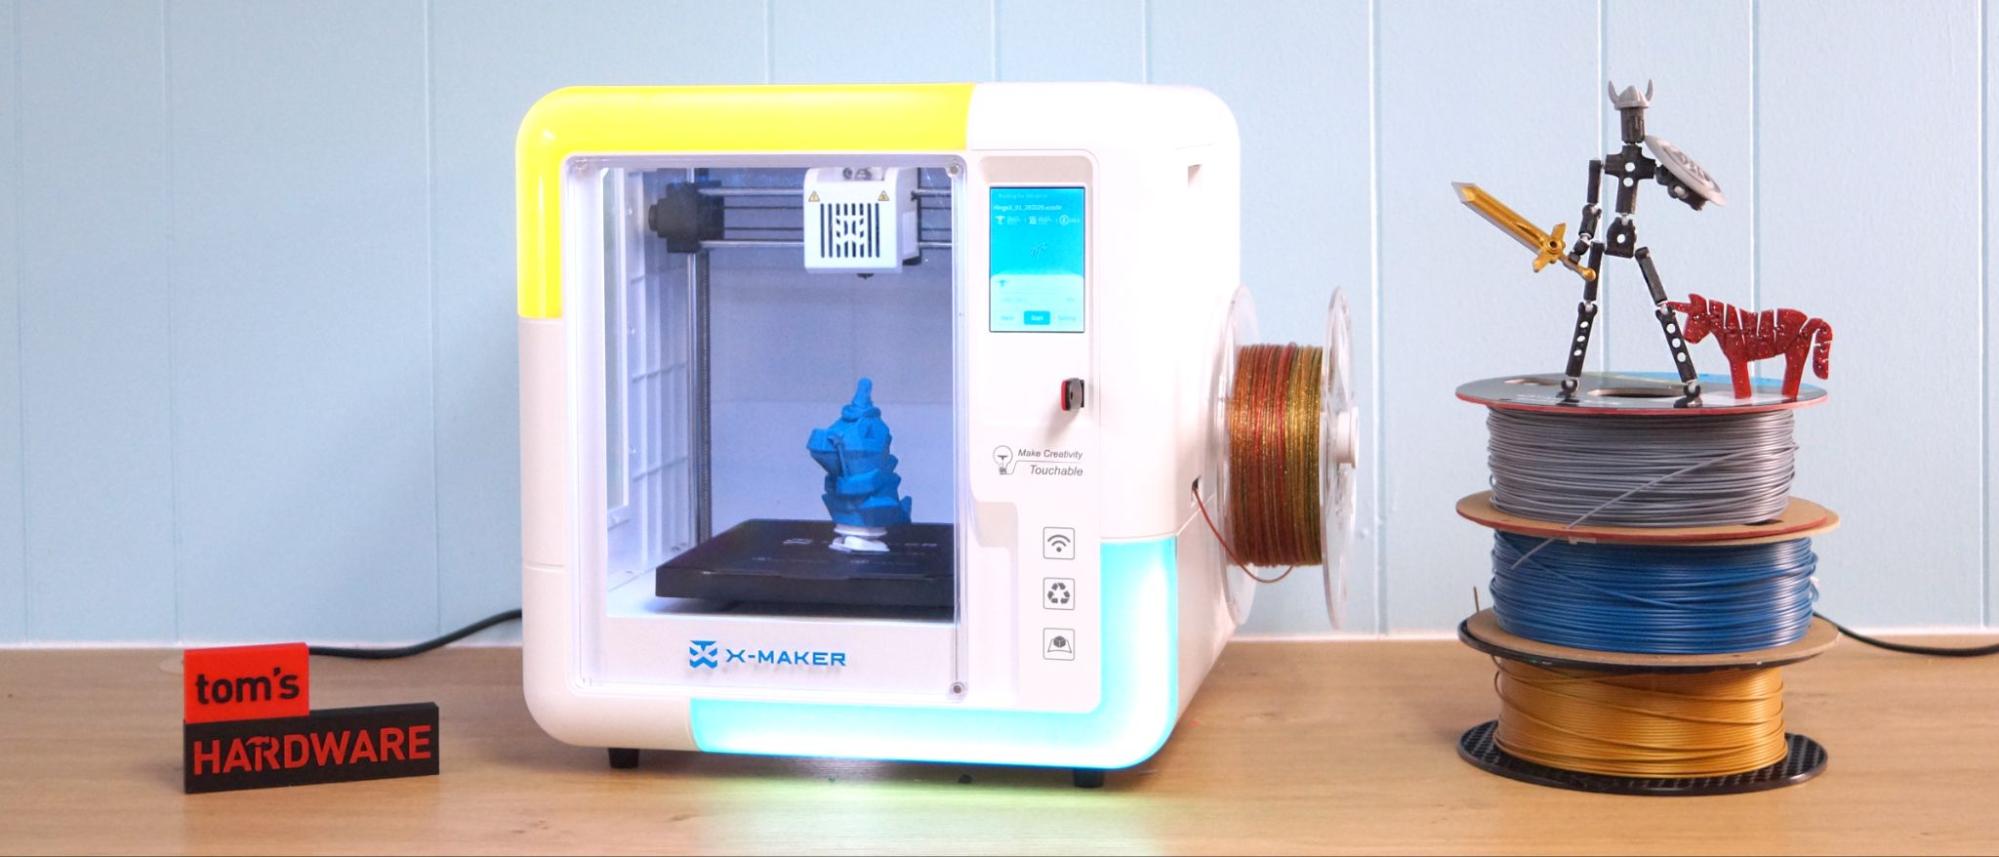
People often ask me what 3D printer they should buy for their kids, and that’s a tough question. AOSeed is trying to make it easier to answer with the X-Maker printer for kids. It’s a compact cube shaped 3D printer that comes fully assembled and with a suite of toy building apps.
The X-Maker has a lot to offer on its own. It’s fully enclosed to discourage little fingers from touching the mechanics, fairly simple to load and has a simple graphical touch screen interface. It comes with a suite of kid friendly design software and ready to print toys, which offers a “wall garden” of 3D printing fun safe from the unfiltered internet.
Re, the X-Maker boasts a 150mm cubed print volume with a top speed of 160mm/s. It’s factory leveled and has bulletproof print settings: slow speeds, fine layers and a chonky raft.
I can’t help but compare this to the ToyBox 3D printer, which has a similar goal of making 3D printing accessible to children, but disappoints with a tiny build plate and pay to unlock premium features. X-Maker’s software isn’t as slick, but it’s free. And the printer itself is far beyond the ToyBox in usability, with a separate full-featured slicer and the ability to read gcode from a USB stick. This allows the X-Maker to grow with your kid and become less of a toy – while remaining easy to use.
Overall, the AOSeed X-Maker keeps things simple without locking users into a pay-to-play ecosystem, making it one of the best 3D printers for kids.
Specifications: AOSeed X-Maker
| Build Volume | 150 x 150 x 150 mm (5.9 x 5.9 x 5.9 inches) |
| Material | PLA, PETG, ABS (up to 265 degrees) |
| Extruder Type | Bowden |
| Nozzle | .4 (MK8) |
| Build Platform | Soft PC Magnet, heated |
| Bed Leveling | Factory Set (Semi Auto) |
| Filament Runout Sensor | Yes |
| Connectivity | WiFi, USB |
| Interface | 3.5 Inch Touch Screen |
| Machine Footprint | 360 x 370 x 370 mm (14.7 x 14.5 x 14.5 inches) |
| Machine Weight | 10.9 KG (24 lbs) |
Included in the box: AOSeed X-Maker
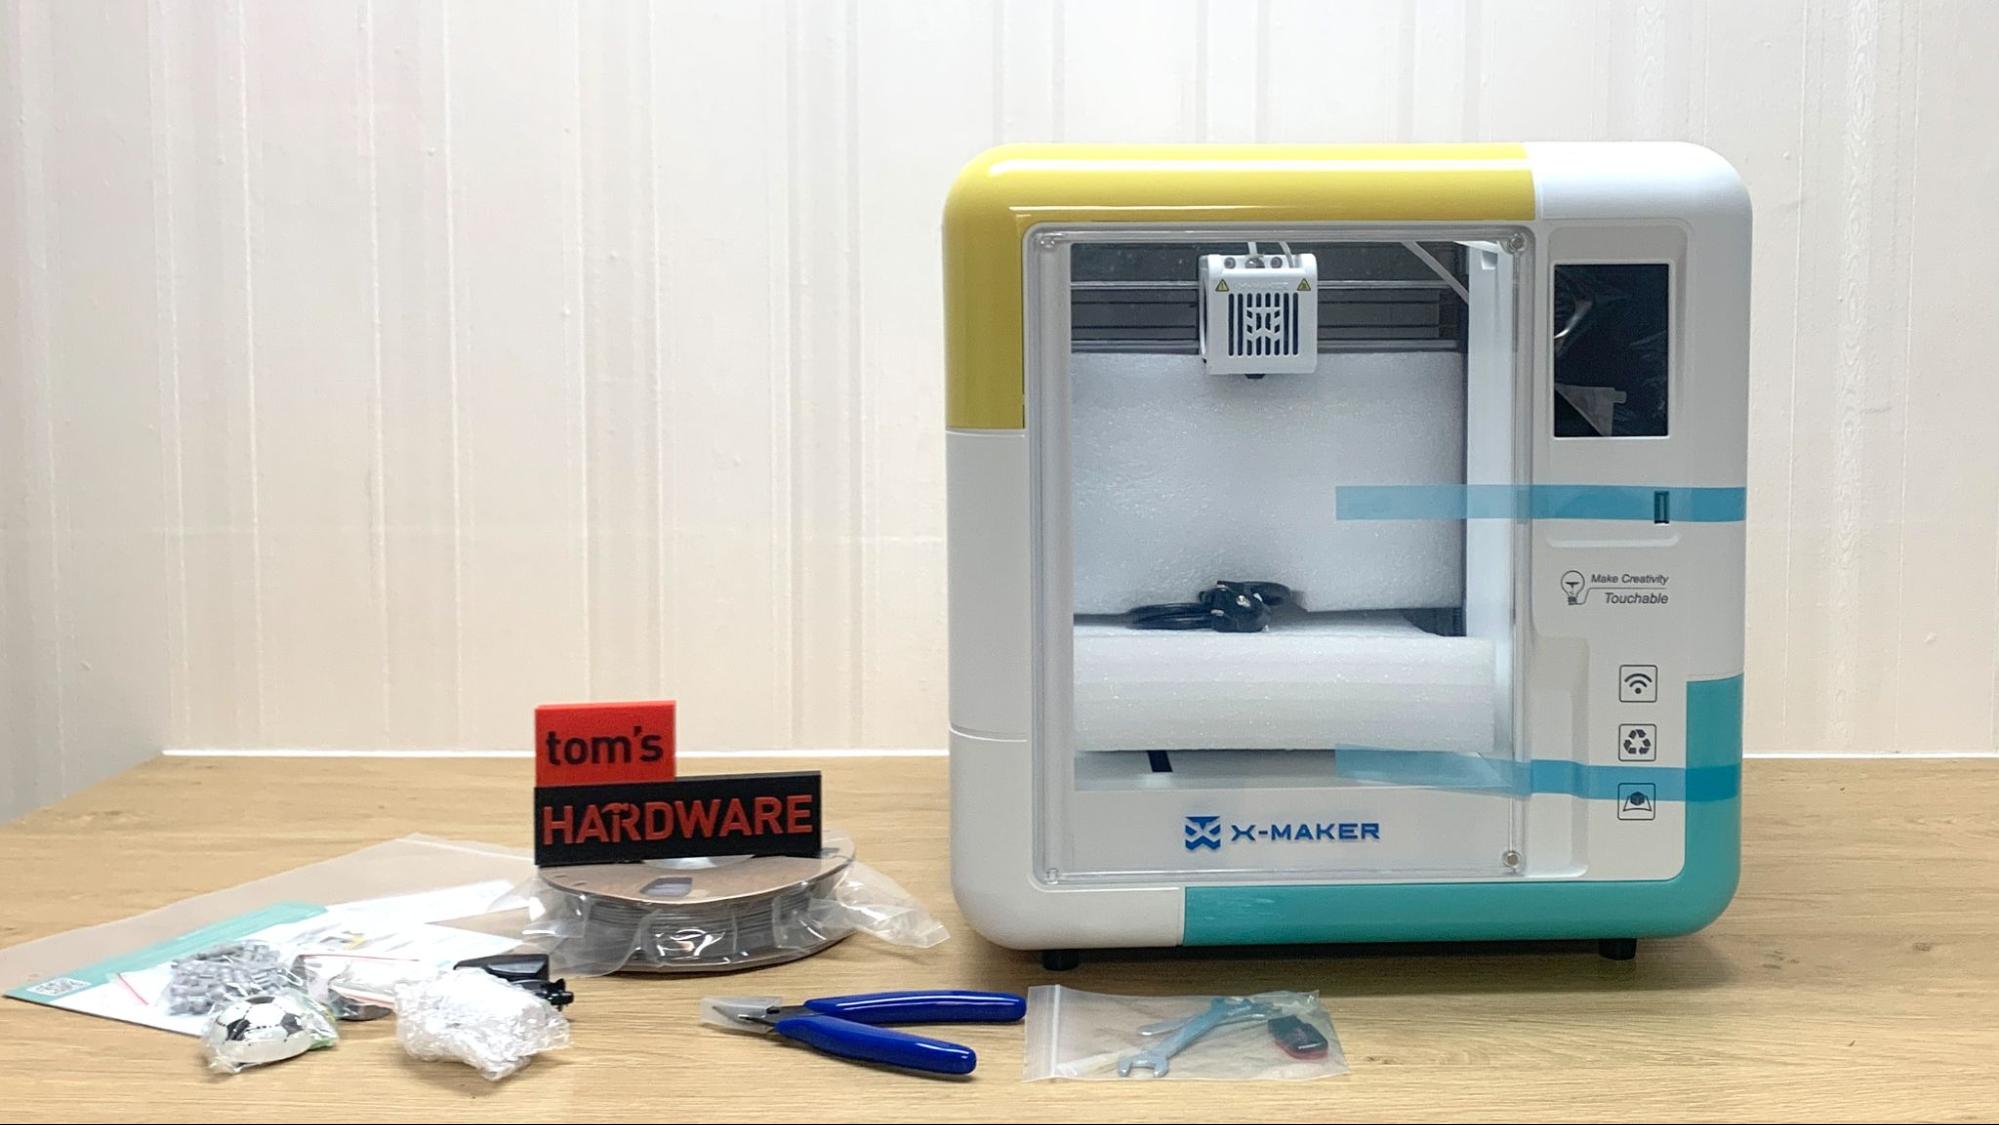
The AOSeed X-Maker comes with a tool kit for maintaining the printer, a pair of side cutters, a USB flash drive and a small roll of PLA. There’s also a paper quick guide to get started, with a full manual in PDF form on the flash drive.
The flash drive includes all the programs that you need to design and slice models.
Get Tom's Hardware's best news and in-depth reviews, straight to your inbox.
Assembling the AOSeed X-Maker
The AOSeed X-Maker arrives fully built and only needs to be unpacked.
Leveling the AOSeed X-Maker
The AOSeed X-Maker arrives factory leveled and ready to print. There are instructions included for releveling should the printer drift out of calibration. The bed is hard mounted without any adjustment knobs. If you need to level the machine you can set nine points around the bed with a piece of paper, using the control pad to move the nozzle.
Loading Filament in the AOSeed X-Maker
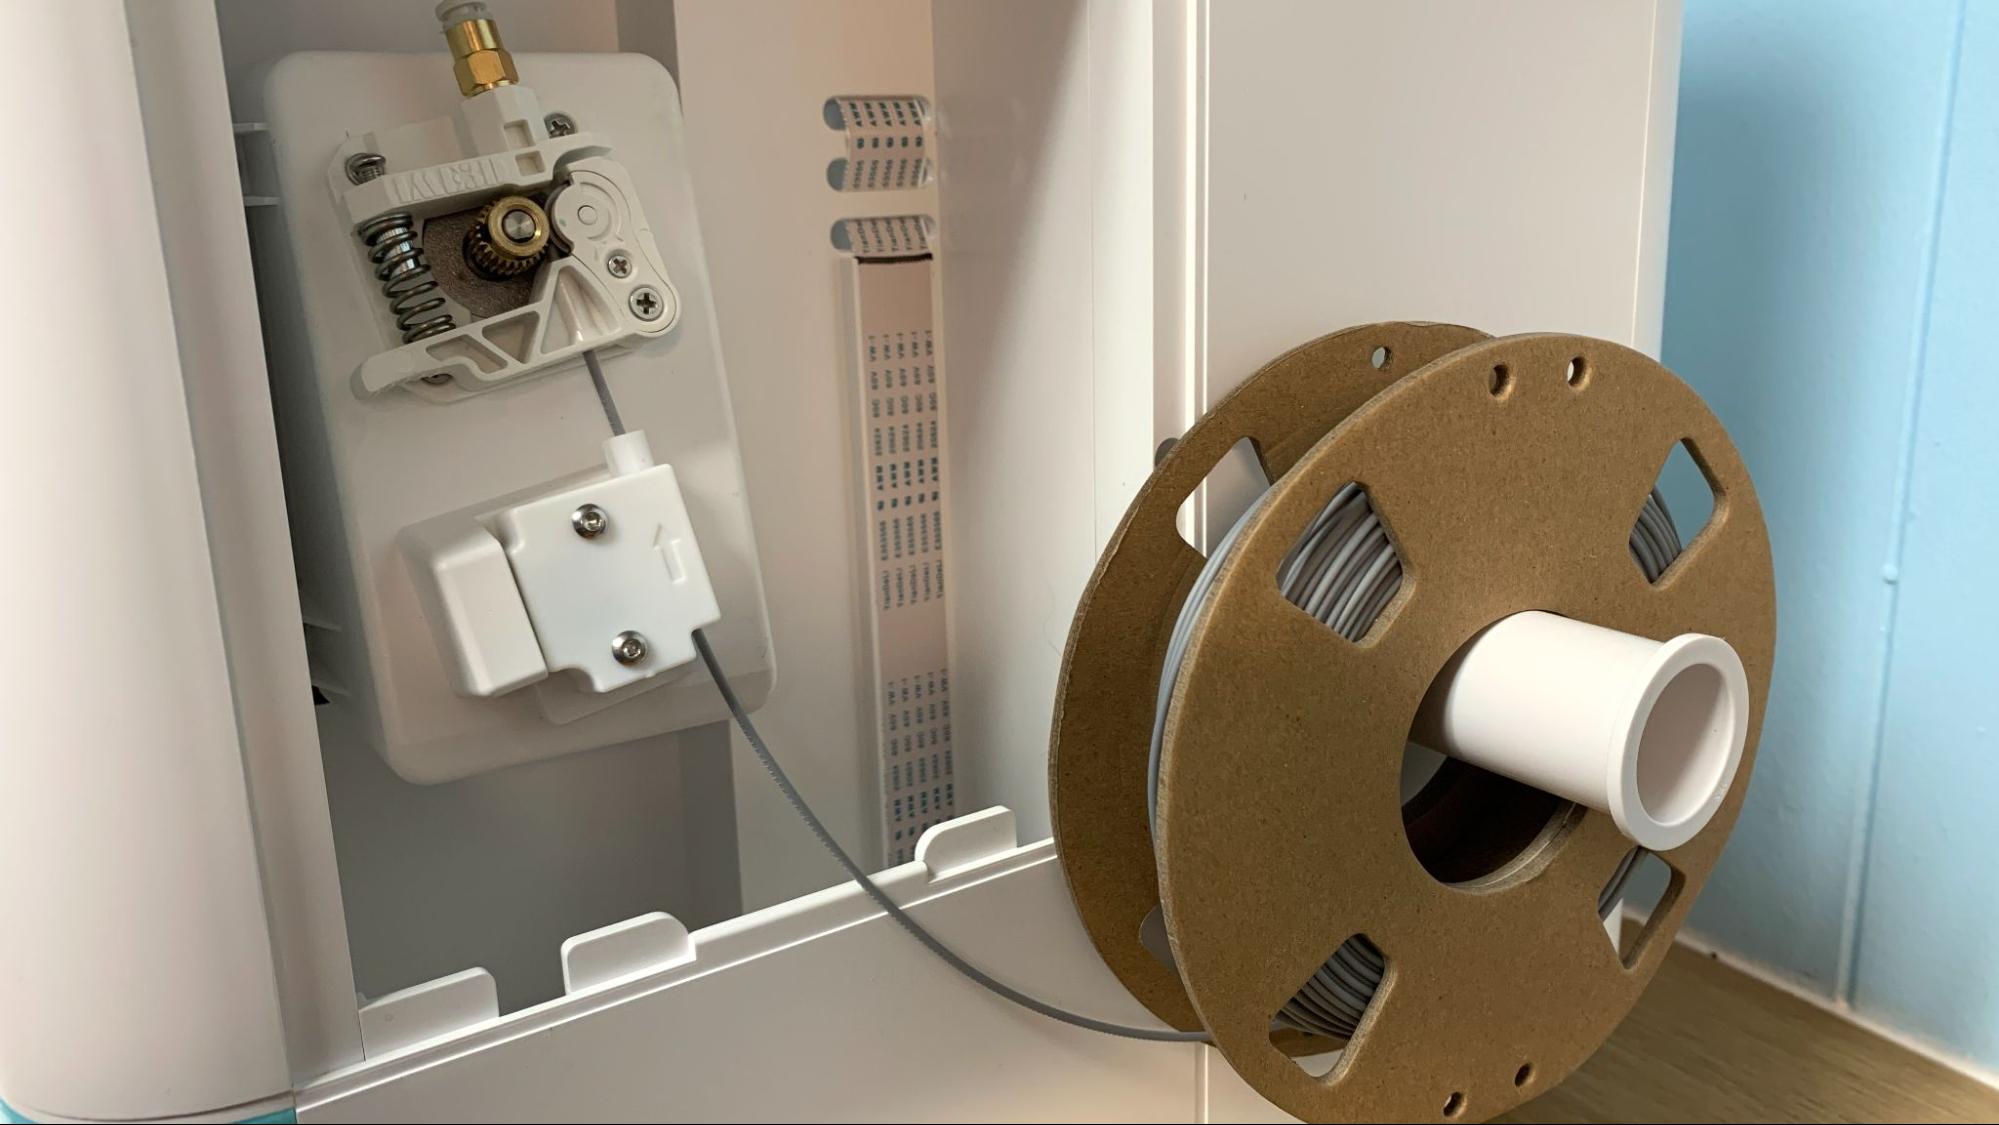
Loading filament is very easy on the X-Maker, though it takes some patience. The extruder is located behind a plastic outer panel next to the spool holder, and held in place with a magnet. Remove the panel, place a roll of filament on the spool holder, and push the filament into the run out sensor and then into the gears. The lever to release tension on the gears is very stiff and at an awkward angle, so just push the filament up against the gears.
On the control panel’s main screen, tap Filament, then Load. The printer will heat up and then begin feeding the filament through.
It shows a progress bar in millimeters, so you can see that it was programmed to pull the filament a full 480mm from the spool to the nozzle. Don’t bother manually feeding the filament, because there’s no way to stop the programmed amount.
To remove filament or change colors, reverse the process.
Design of the AOSeed X-Maker
The AOSeed X-Maker is a 3D printer with a playful design that looks like a child’s toy rather than a grownup’s tool. It’s fully enclosed, with an acrylic window on the side and top for observation, and a clear acrylic door that’s held shut with magnets. It has LED lights on the front just for fun, and an interior LED so you can watch the magic happen.
There’s a child safety feature that locks down the screen with a pass code, but does not prevent the door from opening nor stops the toolhead. It’s only useful to keep kids from changing the setting.
The X-Maker is a bedslinger in a box, with a curiously arranged Y axis that makes me wonder if the guts of this printer have been repurposed from a smaller machine. The Y axis belt is on the left of the machine and the right side is allowed to glide freely on a Teflon strip.
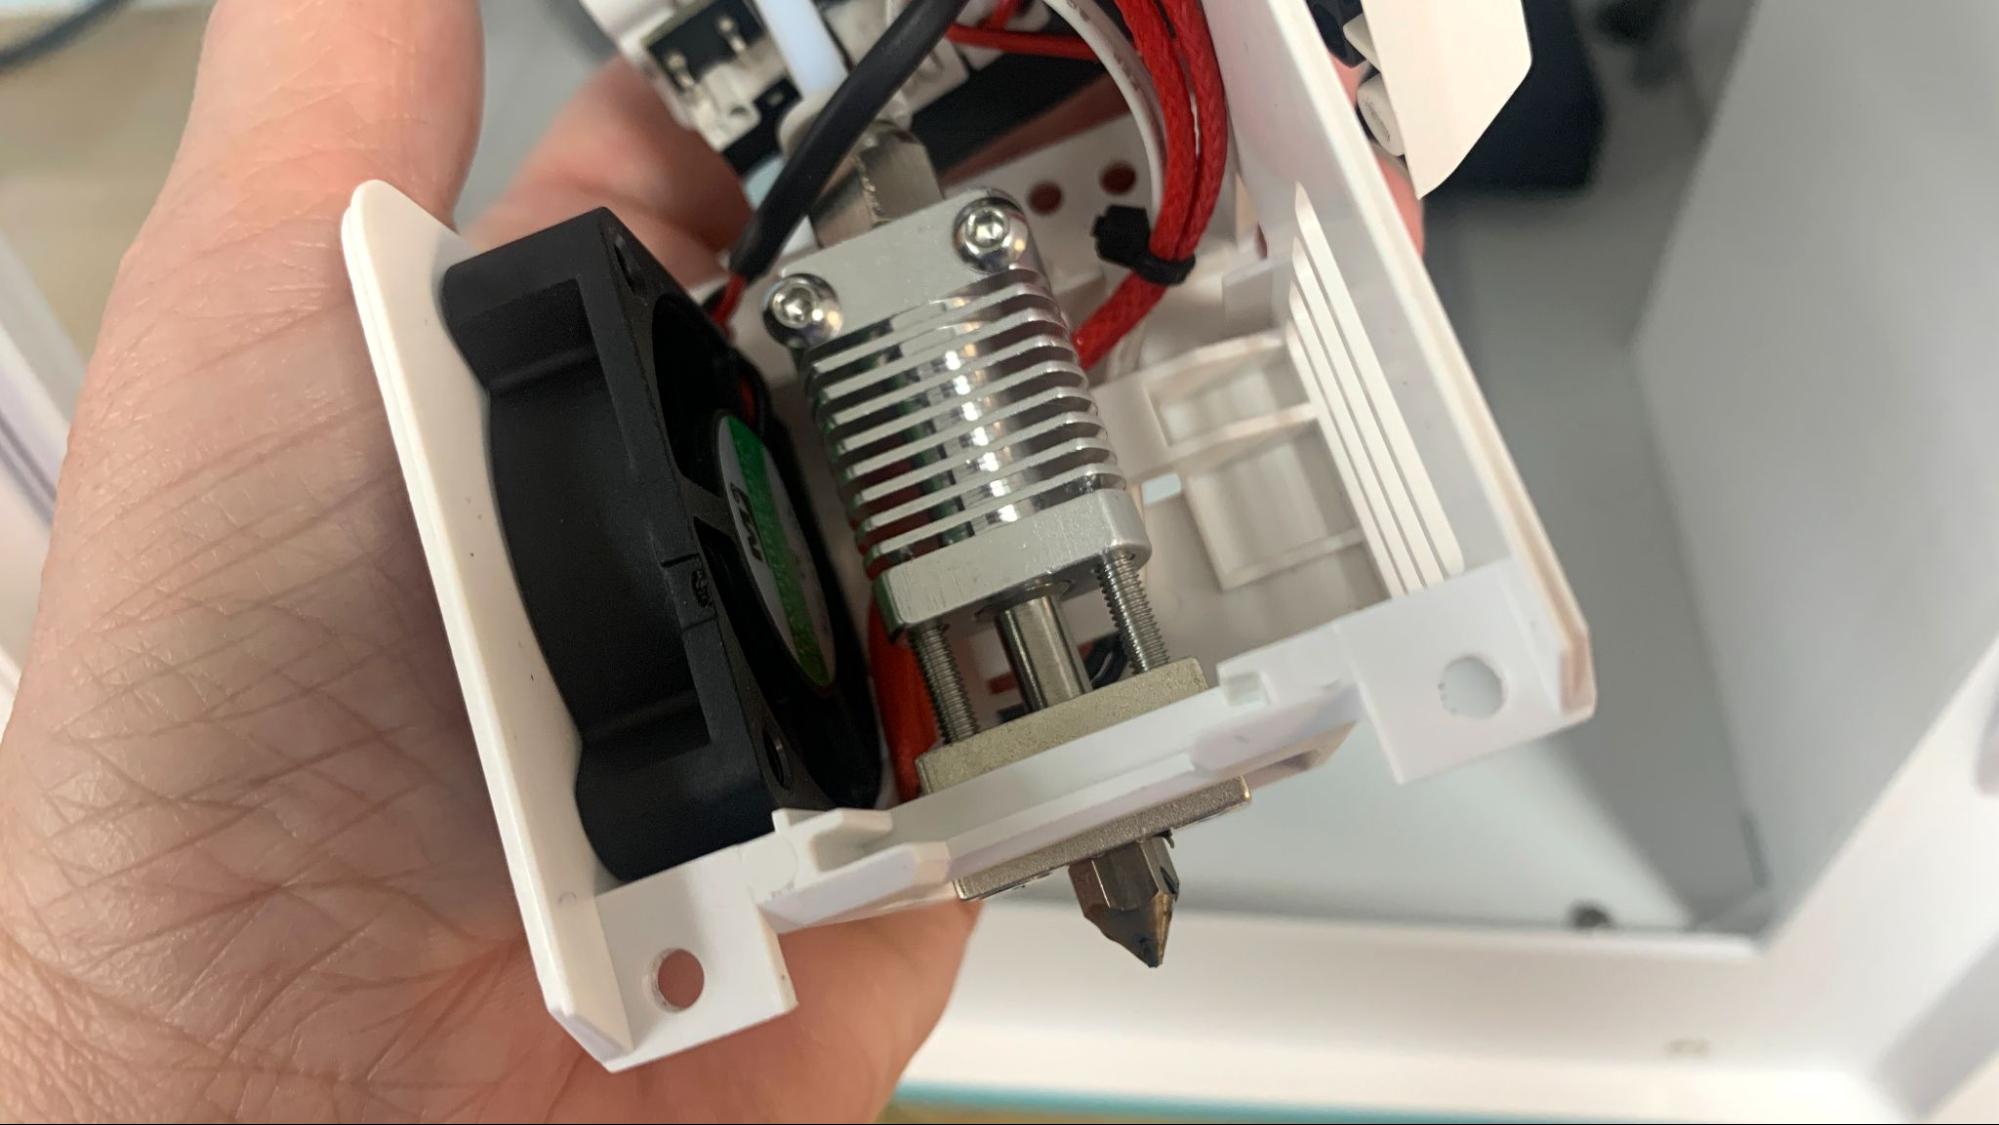
The hotend is fairly standard with what looks to be a steel nozzle. The good news, bad news here is that AOSeed would rather sell you a whole new tool head than show you how to change the nozzle. While somewhat wasteful, a steel nozzle will last longer than cheap brass, and they’re only charging $30 for the entire assembly.
Otherwise, the X-Maker has a well configured design for young users. The soft magnet build plate doesn’t have enough snap to pinch fingers, and it's cradled by the baseplate so that it always fits in place. The printer has a Bowden tool head with the extruder hidden behind a side panel attached with magnets.
The control panel is simple with easy to understand icons. More complex controls are hidden behind “expert” menus, but are only held off limits with a warning. My only gripe with the design is the LED screen is hard to read if it's not at a 90-degree angle to your eyeballs.
It can handle full sized spools, and though they recommend their own filament you can feed it whatever you like…as long as it’s PLA. This is because the main “kid friendly” slicer in the computer app has no settings for materials or anything beyond Fast, Standard and Fine Quality.
The printer is relatively quiet, and the lights can be turned off to avoid being a distraction while in use.
Preparing Files / Software
AOSeed went full speed with a suite of design programs to encourage kids to build their own toys. The software has two versions, one for Windows PC and one for Android or IOS. The desktop version has more features, with apps to create posable stick figures, vehicles, wind up toys, 3D drawings and more.
The mobile app is honestly confusing and attempts to “gamify” 3D printing with coins in a way I simply don’t get. However, if you click “Things,” you’ll open a library of models you can slice right from the phone or tablet and send to your printer.
The X-Maker has three slicers. First there’s the slicer on the mobile app, which can only slice items from the mobile app. It has limited features, but considering it’s on your mobile device it’s pretty useful.
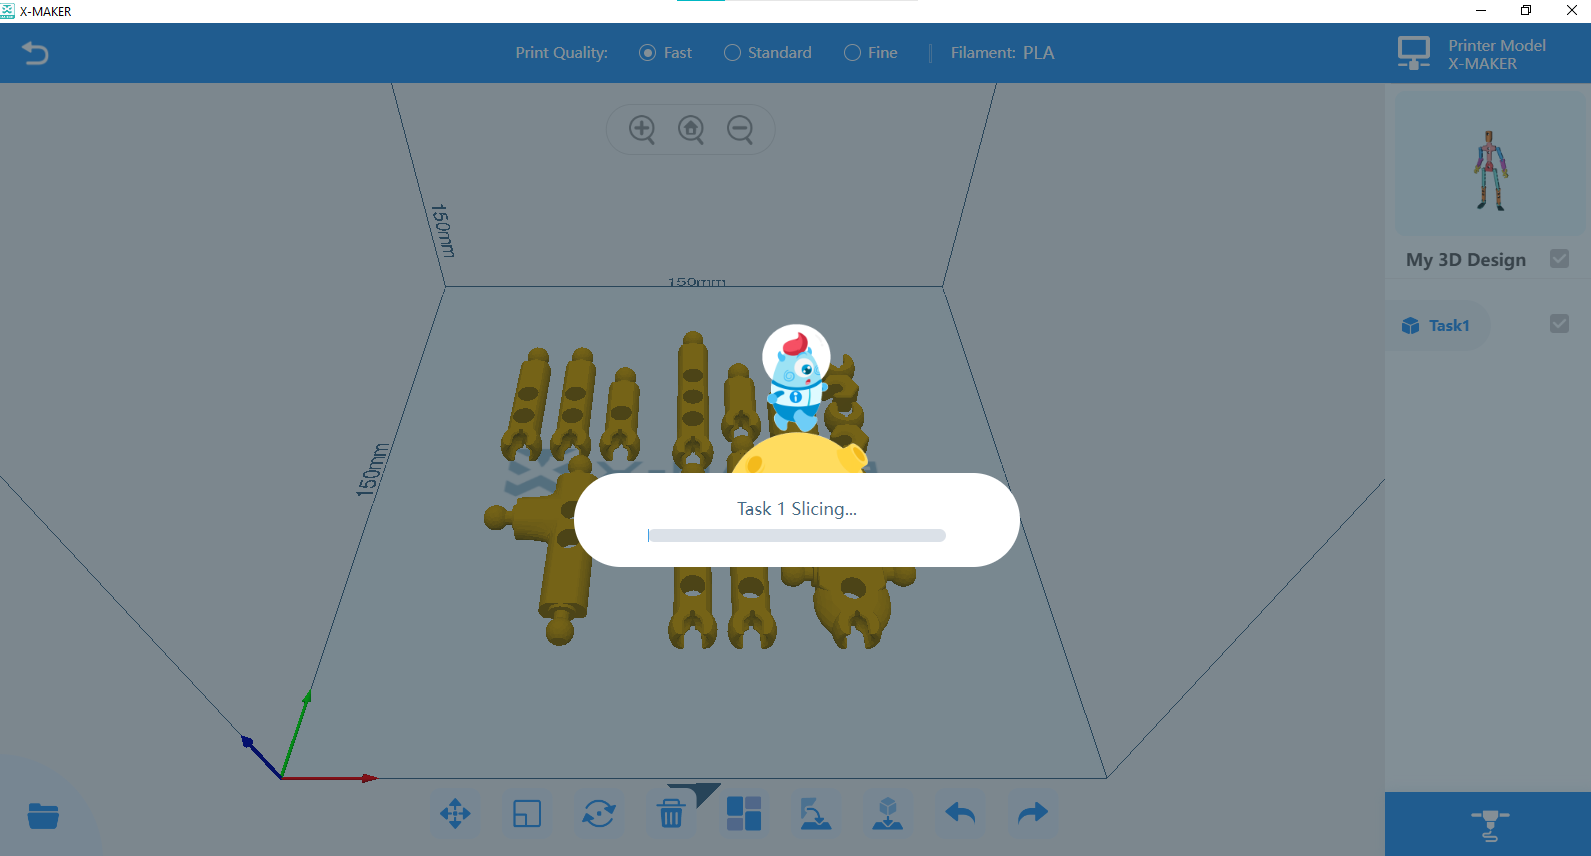
Then there’s “One-Press Printing” inside the Windows version of the app. Whenever the user completes a toy design, pressing print will launch One-Press Printing. There is no way to bring in models created with 3rd party software, you only have access to models created and saved by X-Maker.
You can resize and rotate your print and select the quality level. Everything is preset, including the material which is permanently set to PLA. Rafts, supports and 20% Gyroid infill are also automatic and unchangeable. Clicking the nozzle will give you the option to print over WiFi, save to your cloud account or save to the computer.
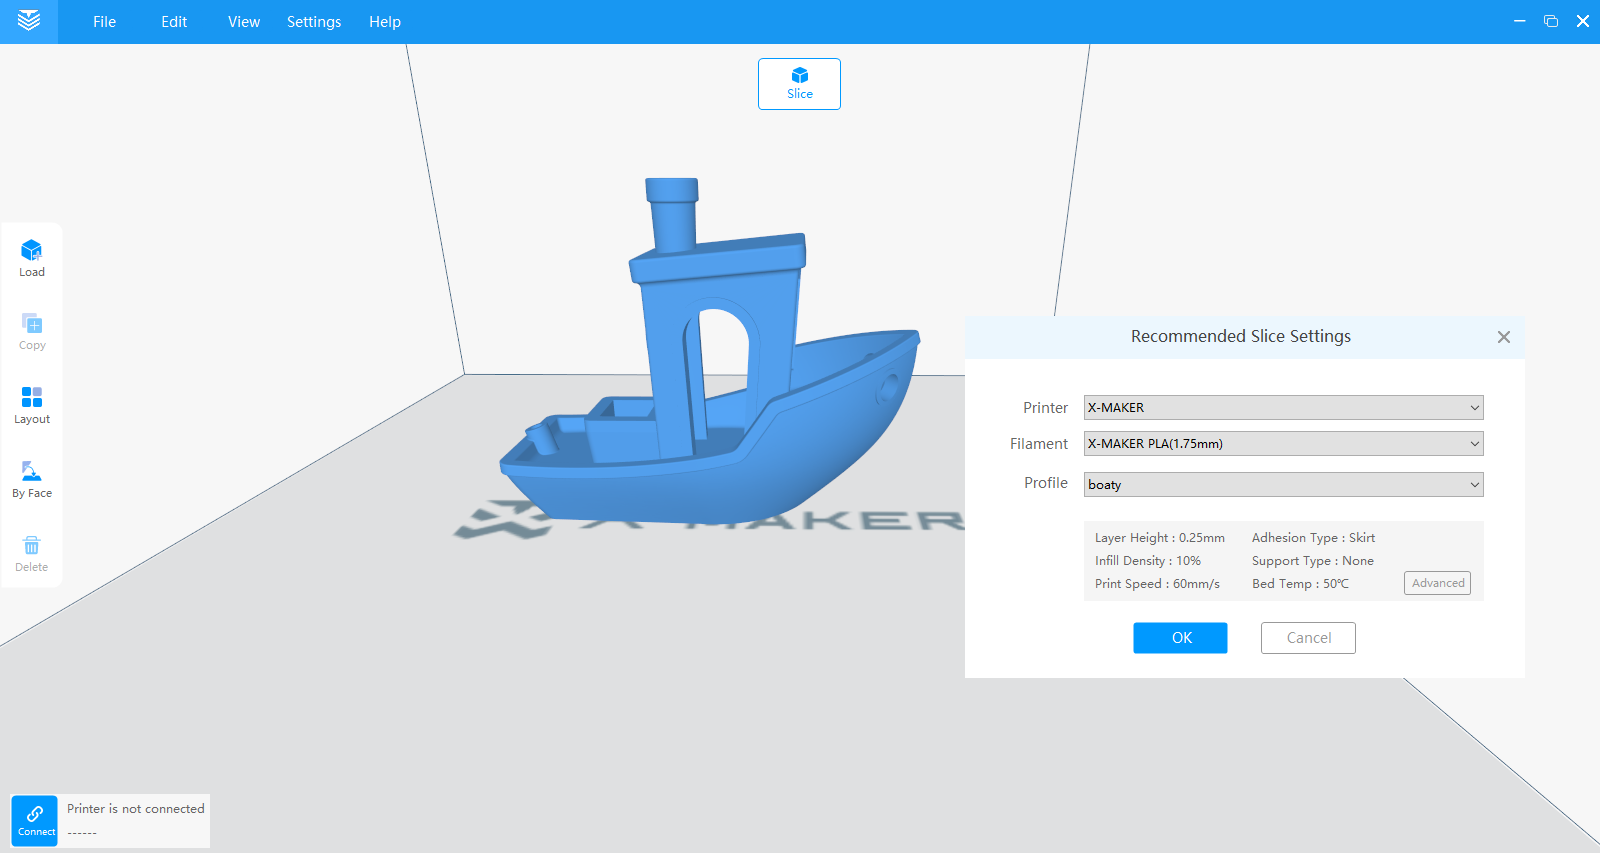
The other slicer is X-Print and is a typical Cura-based slicer with three levels of difficulty. The basic level defaults to settings similar to One-Press Printing. However, here you can click “Advanced” mode to set the speed, support level and adhesion. One more click to open “Expert” gives you full access to every setting. You can save these settings as profiles that are available from the easy mode.
Unlike the TOYBOX, this printer has a USB port, and can understand gcode so you can use your slicer of choice as long as you don’t mind setting up a profile. I was able to resize an Ender profile to slice a (not very fast) Speed Benchy.
This means that the printer is not limited to using its own proprietary software. If a more experienced maker wanted to use third-party design software or slicers they would have no problem.
Printing on the AOSeed X-Maker
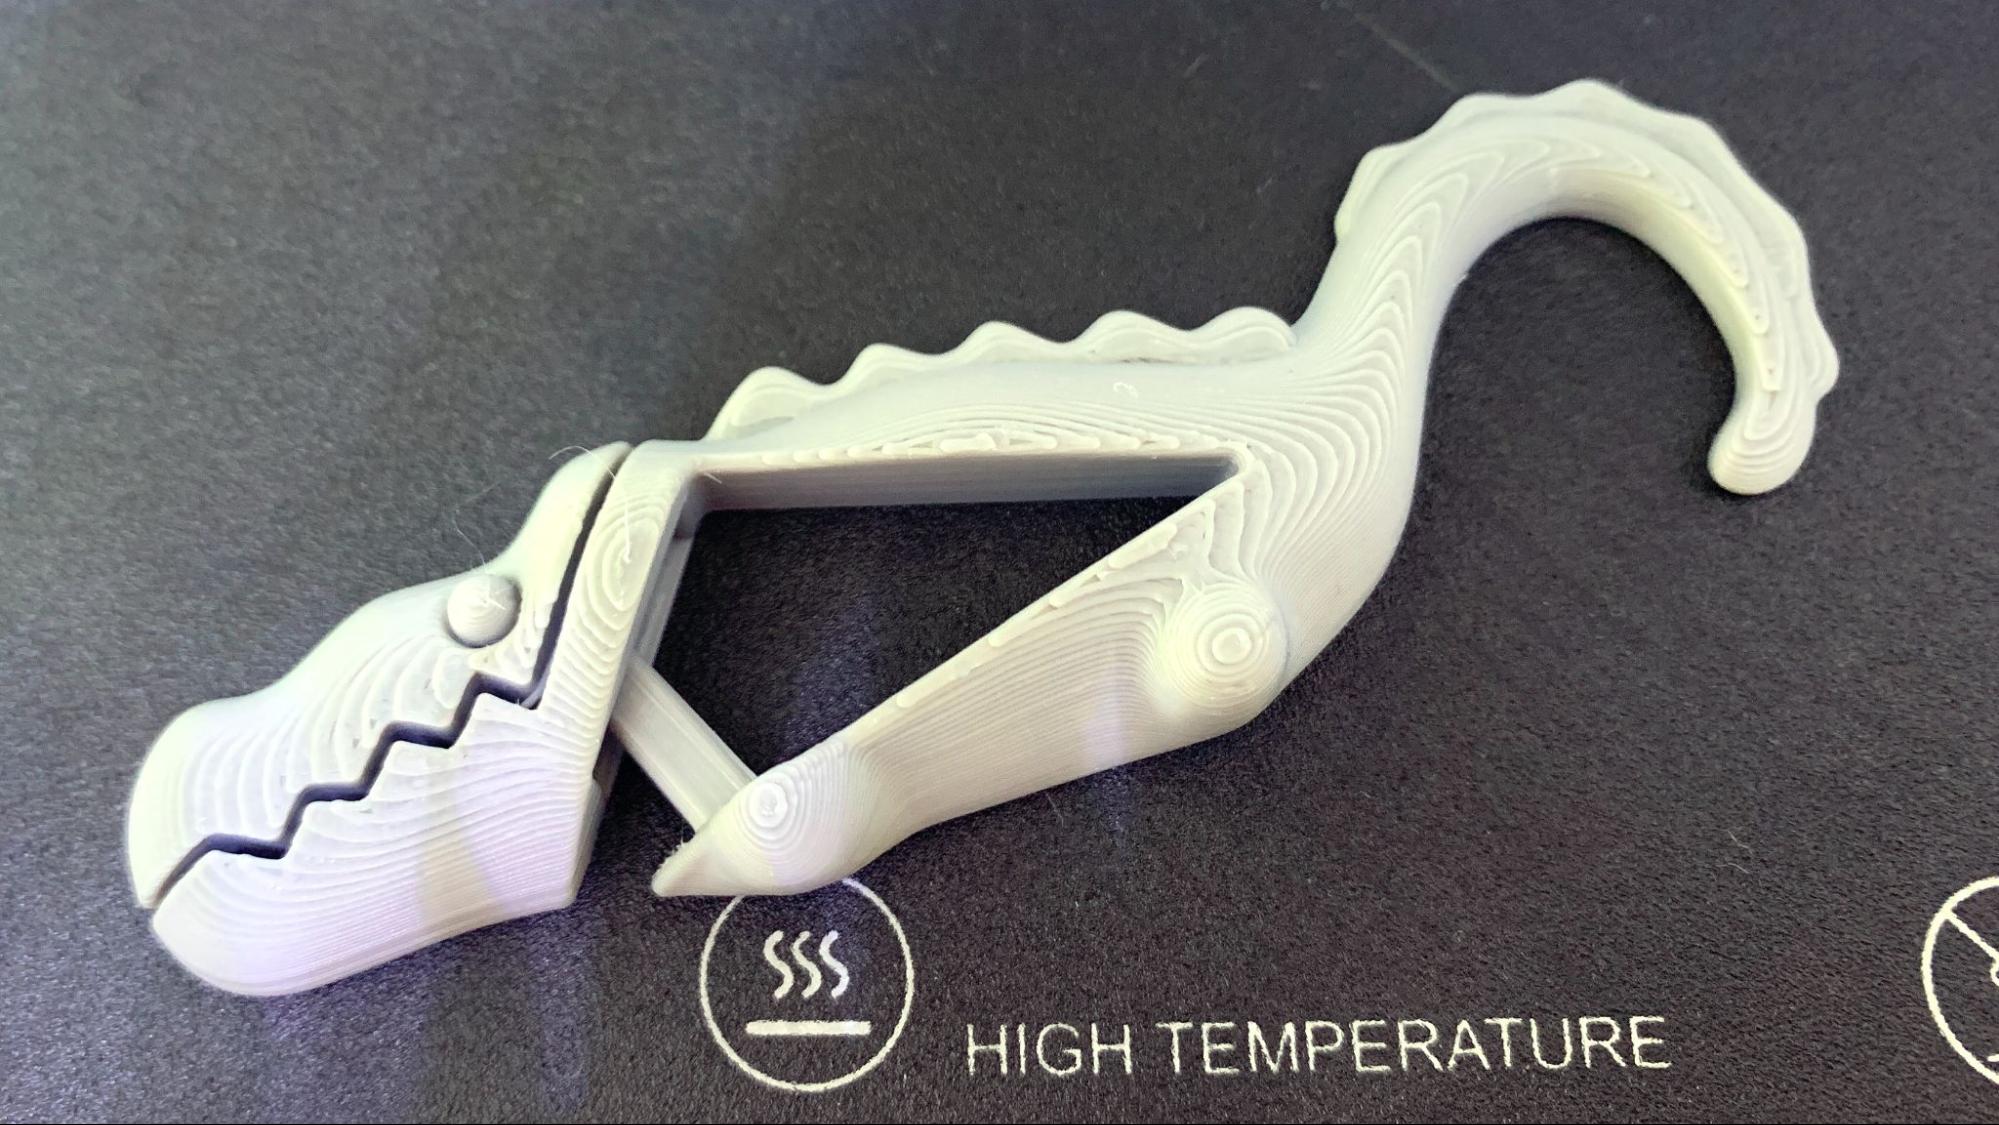
The AOSeed X-Maker has a top speed of 160 mm/s, but defaults to slower speeds to ensure quality. The printer comes with pre-sliced files on the flash drive so you can immediately start printing something fun. Our first print was an alligator clip printed in the gray PLA that came with the machine. You’ll definitely want more colors to use with your X-Maker, so check out our list of the best filaments for 3D printing.
The clip turned out beautifully though it took an hour and 12 minutes to print using an incredibly fine setting that practically eliminated layers lines. This top-down photo hardly does justice to the print.
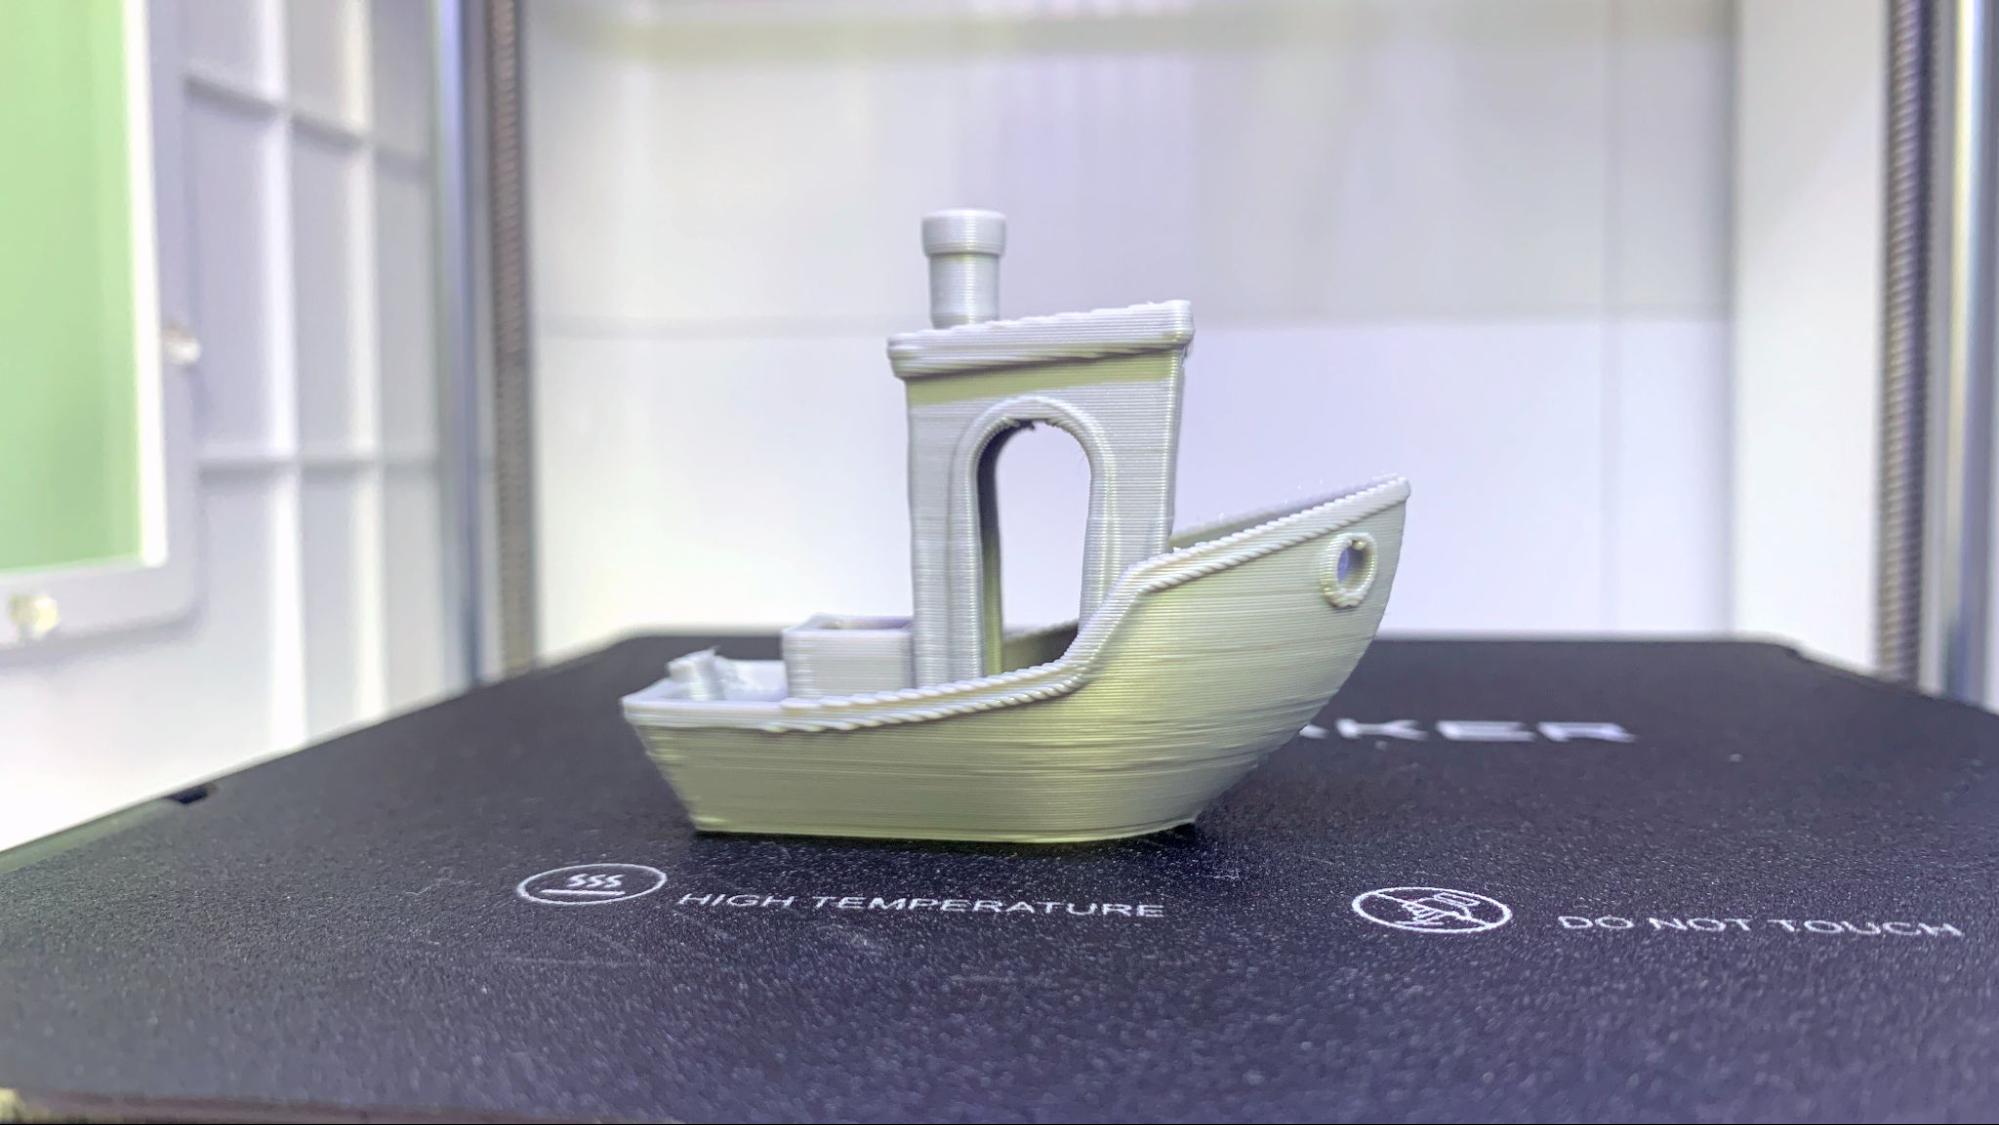
I had to print a Benchy, and stuck with the Speed Benchy rules for consistency. This is printed in the provided Grey PLA and took 54 minutes and 29 minutes. There’s no ringing, no stringing and the edges are crisp.
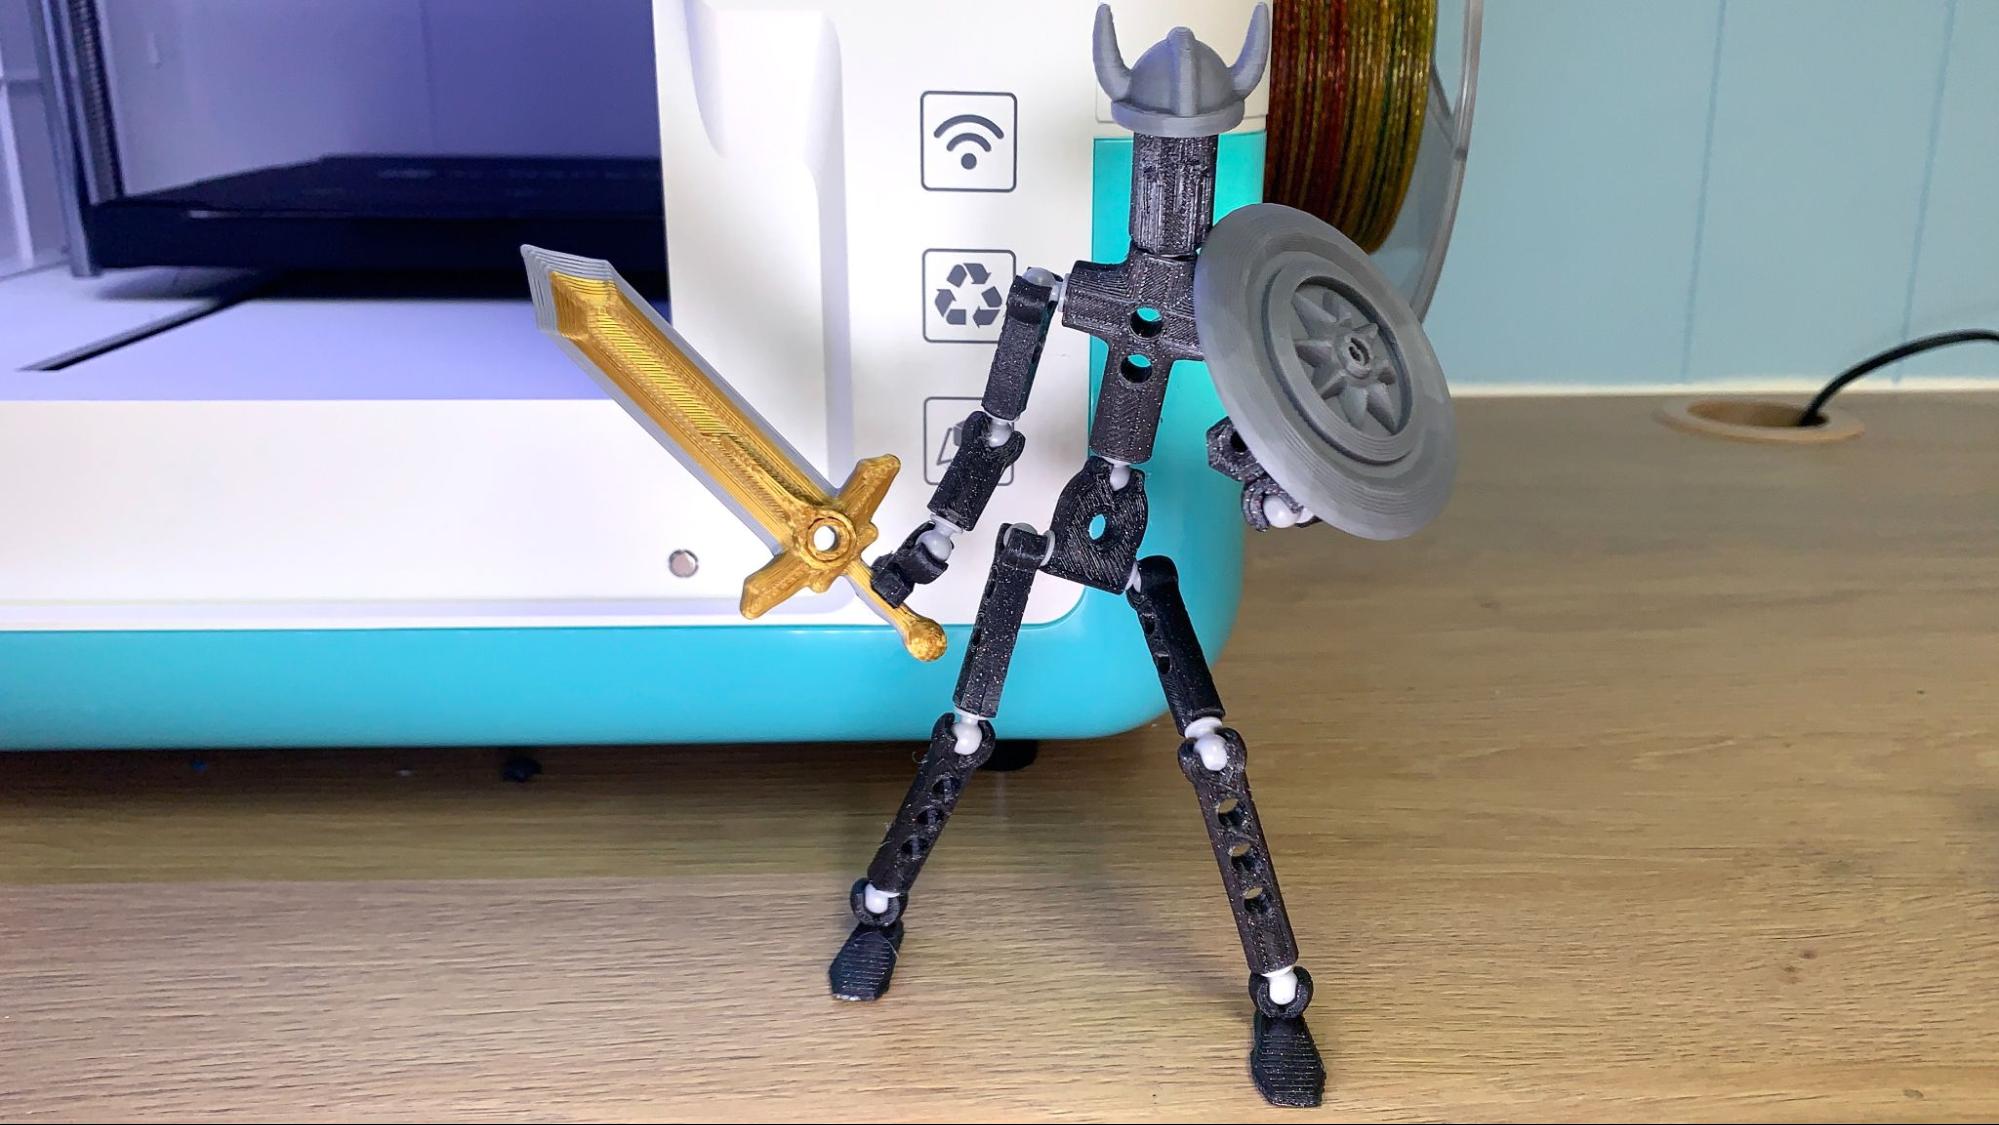
Next up I tried out the “doll maker” which creates poseable stick figures. You can choose to print them with injection molded joints that come with the printer, or print your own. The feet were a little delicate, so I reprinted them using X-Print and beefed up the walls. This is printed in ProtoPasta Wonder Black Rainbow Glitter HTPLA, Prusament Viva La Bronze and the included spool of gray. It took 8 hours and 25 minutes to print in standard mode in three batches – the sword was printed alone, so a color swap could be made.
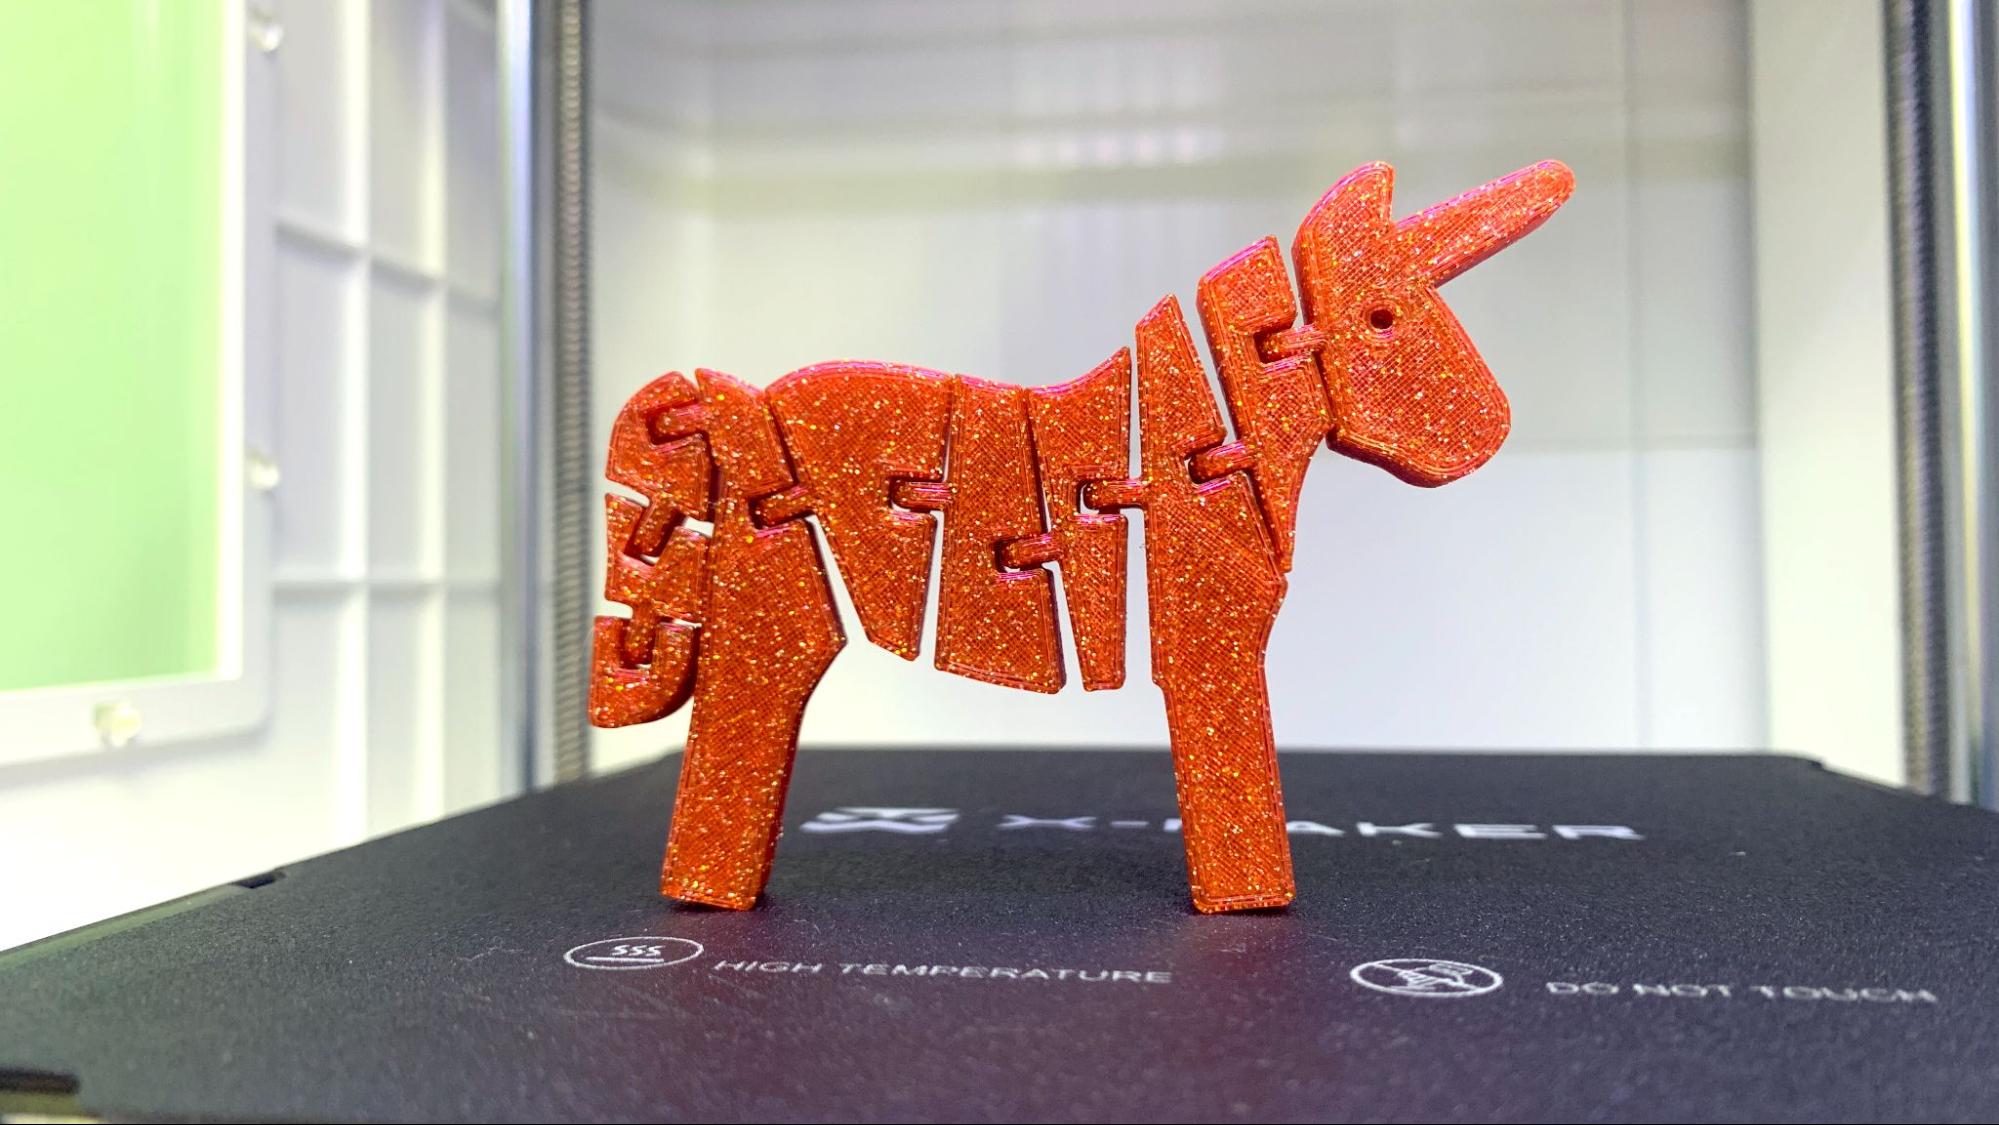
The most fun print was this flexible unicorn, made in X-Print’s “HingeX” app. The app allows you to draw your own design or pull from a set of clip art, but does not allow outside artwork. You place the hinges where ever you please, hit print and get a unique model. This is printed in Inland Twinkling Rainbow, though the print was too small to show any color transitions. It took 2 hours and 22 minutes on the standard setting. The print is smooth with even lines.
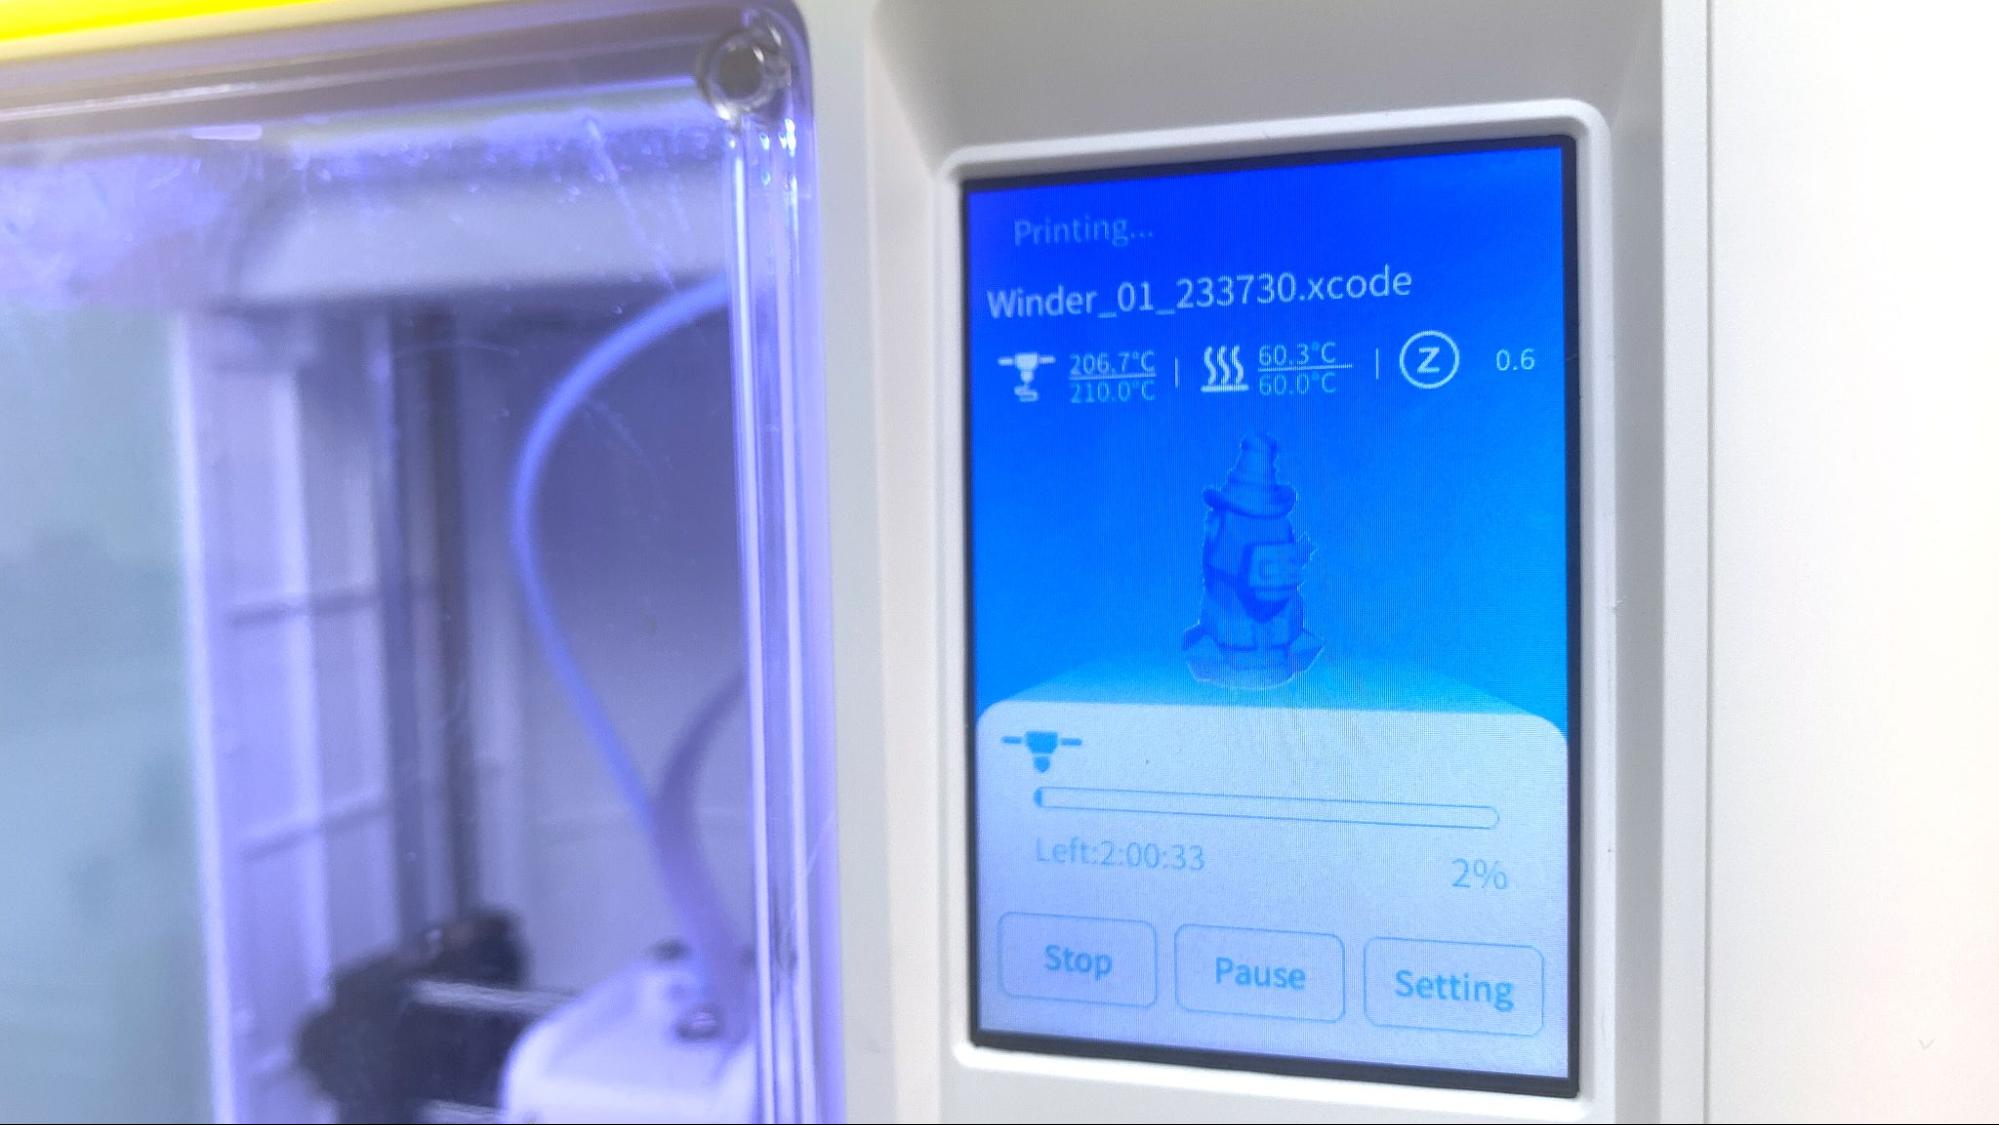
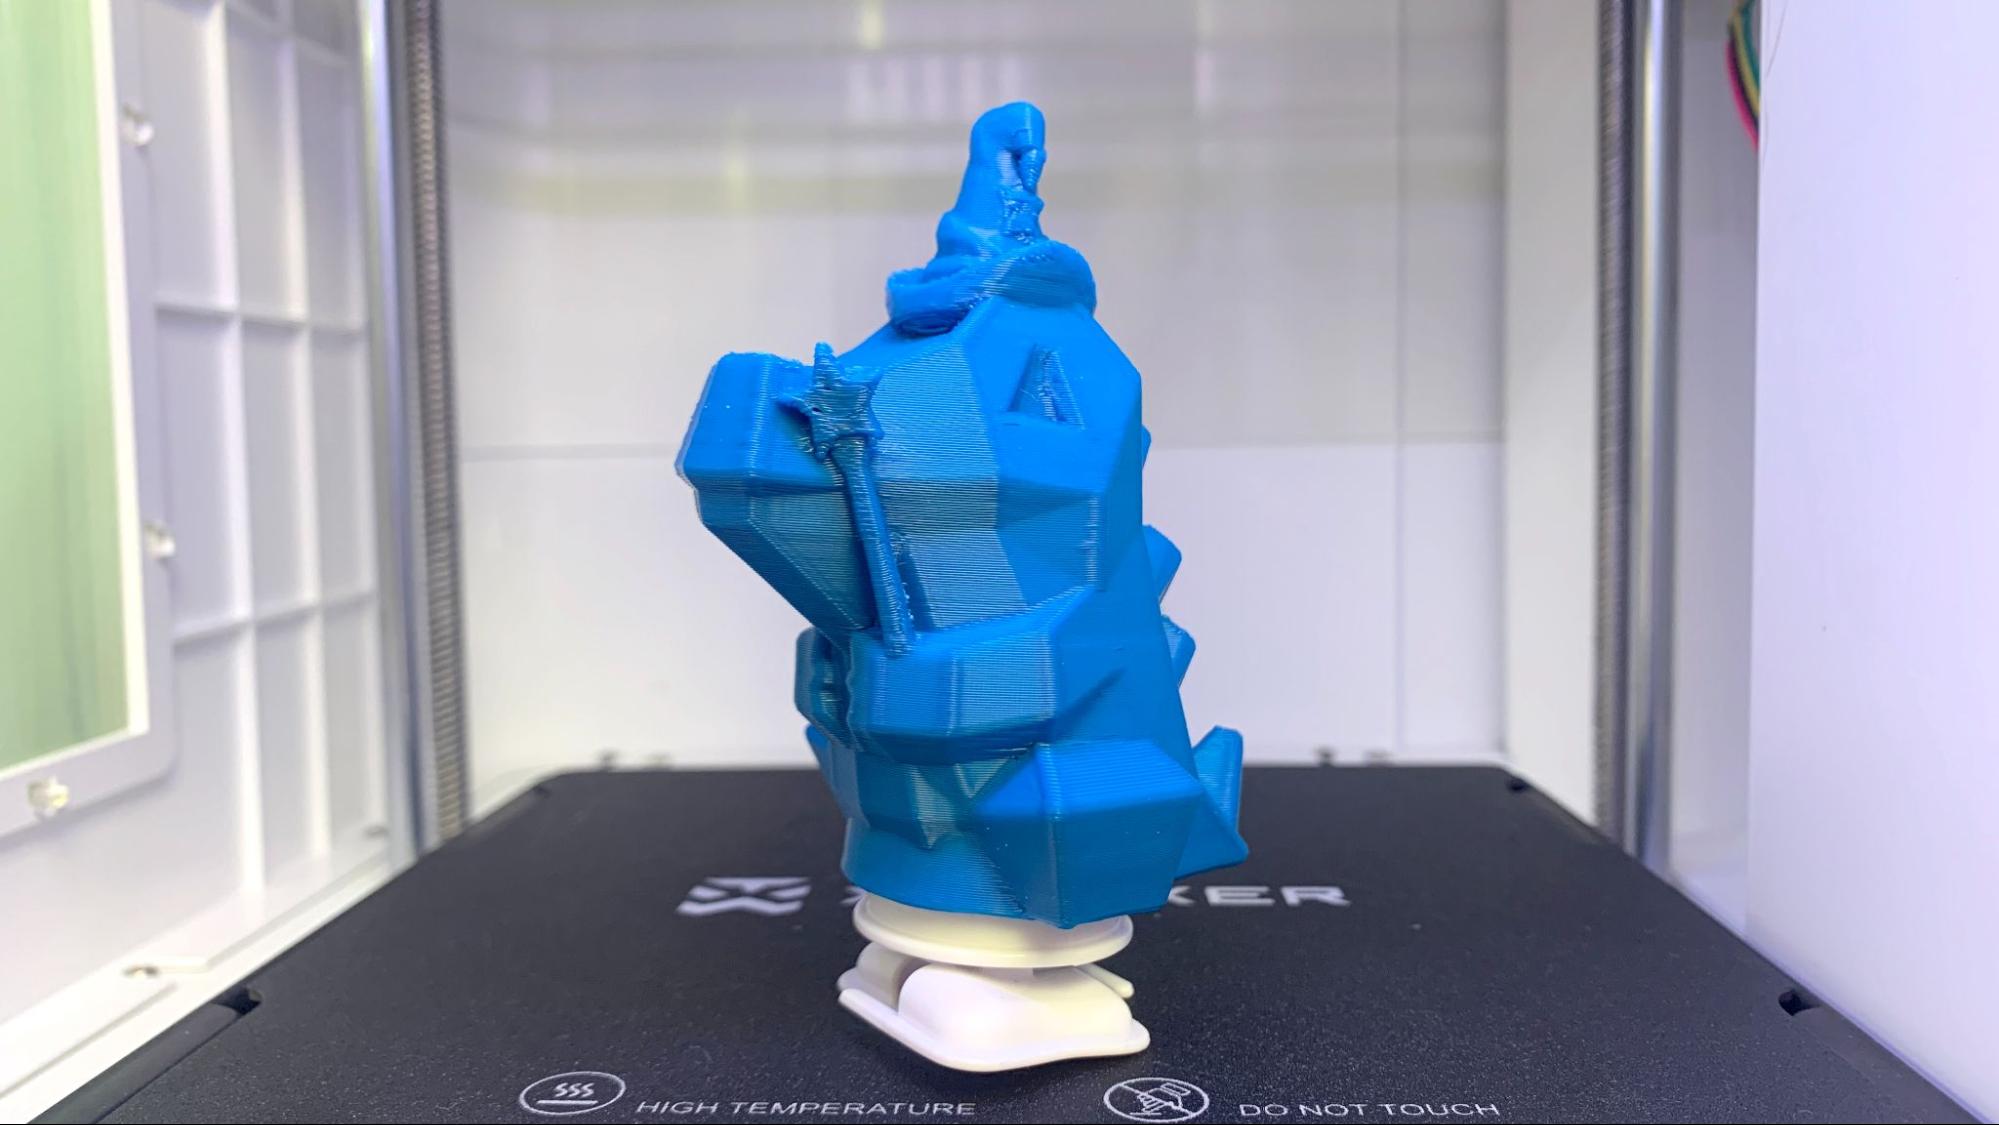
The X-Maker came with a wind-up motor to go with the “Winder” toy maker app. Here you can choose from a few dozen creatures, or make your own. Each can be personalized with 3D clip art before being sent to the printer.
I added the hat and wand, trying my best to avoid the need for supports. This one was printed with the X-Print app in ABS, the only other material the X-Maker has a setting for in the full slicer. The print is a little rough due to the lack of supports and the thick layer height of .28mm layer, but it did not warp. It printed in 2 hours and 47 minutes using a sedate 50 mm/s speed in Inland Blue ABS.
Bottom Line
The AOSeed X-Maker is a printer for kids that doesn’t insult their ability to learn and grow. It allows you to start with simply picking presliced models from the phone app, then encourages experimentation with a suite of toy designing apps. It protects kids from the “NSFW” side of STL file search by keeping all the activities within their family friendly “walled garden” collection of apps.
As a stand-alone printer, the X-Maker delivers quality prints with a build volume that’s on the small side. It’s not as fast as other printers currently hitting the hobby market, but it serves its target audience well by being extremely easy to use.
By including a USB port on the printer and providing a full-featured slicer, the X-Maker can avoid becoming an outgrown toy and transition to a printer the whole family can use. Treating the toolhead as a disposable module is a little disappointing, but anyone with a little curiosity and a hex wrench can easily figure out how to save themselves $29.50 by treating it like a typical Ender clone.
Priced at $399, the X-Maker seems a bit expensive compared to other beginner 3D printers, but the 14 different toy building apps, wealth of included models and kid-friendly slicer makes up for it. The apps could admittedly use a little more polish – they were slow to load and often closing a module sent us to the desktop rather than back into the main X-Maker software. Still, as a mom, I can see the value of a system that lets a kid explore 3D printing without having to be online.
If the X-Maker seems intriguing, check out the smaller ToyBox, which is currently available for $299. Like the X-Maker, it's positioned as a toy making factory for kids. If you want more printer for your dollar, then check out the Neptune 3 Pro, a great printer for grown up beginners with a price tag of only $269. If you have more of a budget and want a printer that’s nearly as easy to use as the X-Maker but with buckets of speed and a full sized build volume, then check out the AnkerMake M5c for $699.
MORE: Best 3D Printers
MORE: Best Budget 3D Printers
MORE: Best Resin 3D Printers

Denise Bertacchi is a Contributing Writer for Tom’s Hardware US, covering 3D printing. Denise has been crafting with PCs since she discovered Print Shop had clip art on her Apple IIe. She loves reviewing 3D printers because she can mix all her passions: printing, photography, and writing.
