Asus ROG PG348Q 34-inch Curved G-Sync Monitor Review
Asus adds to its premium Republic of Gamers line with the curved ultra-wide PG348Q. It sports a color-accurate IPS panel at 34" diagonal, with 3440x1440 resolution, G-Sync, and a 100Hz refresh rate. We’re checking it out today.
Why you can trust Tom's Hardware
OSD Setup And Calibration
OSD Tour
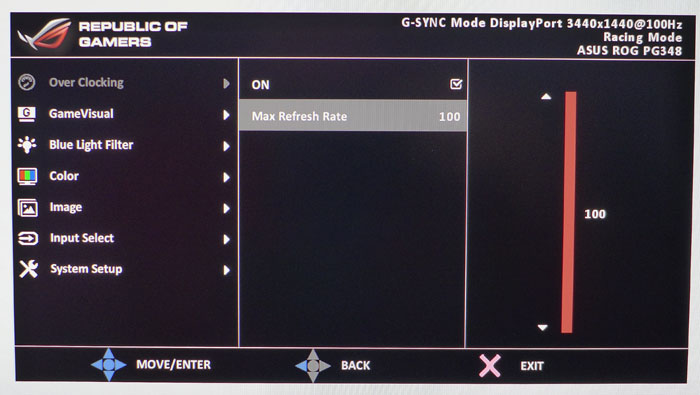
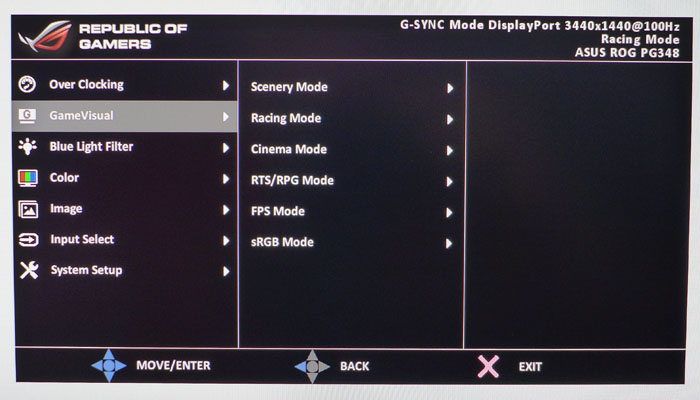
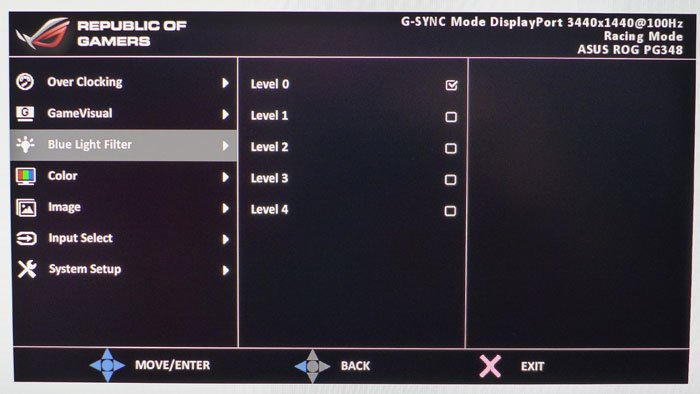
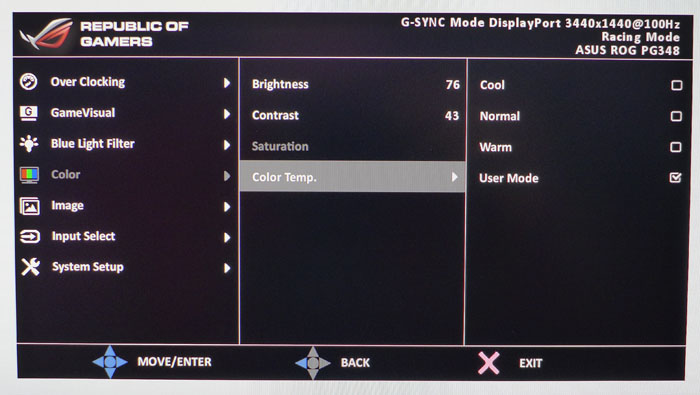
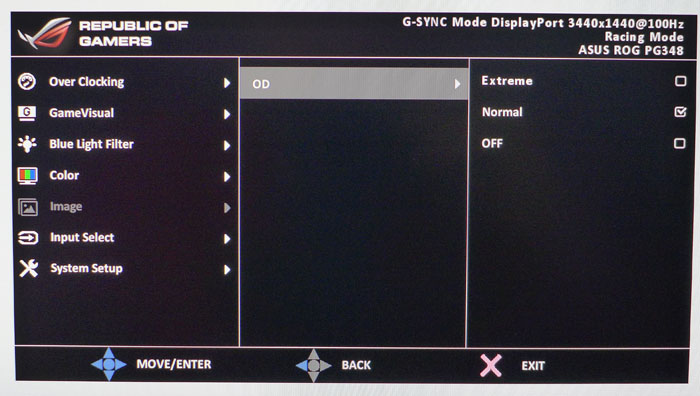
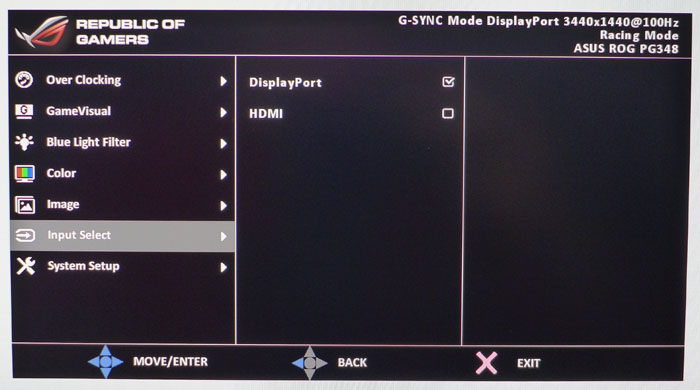
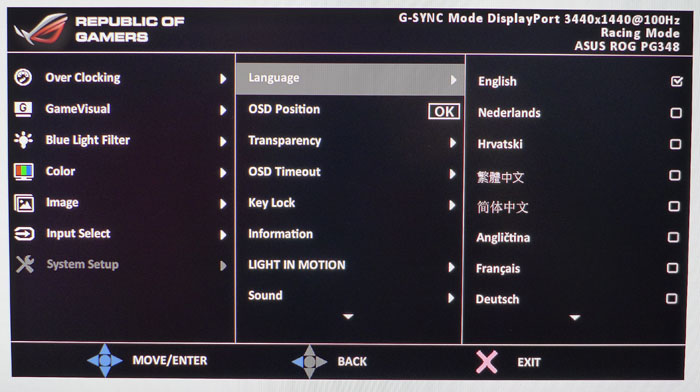
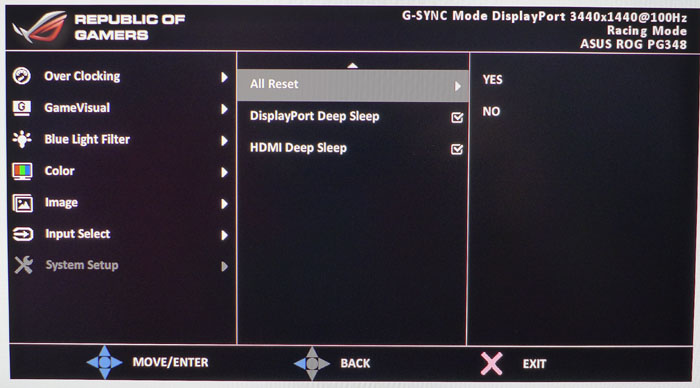
Pressing the joystick brings up the main menu, and it is fairly comprehensive but missing a couple of things too.
First up is the Overclock control. The PG348Q runs at 75Hz natively but can be bumped up to 100Hz in 5Hz increments. A reboot is necessary after any change to refresh rate. We had no issues running our sample at 100Hz in all tests.
Game Visual includes six picture modes. Racing is the default and probably the best bet for users who don’t choose to calibrate. sRGB provides similar accuracy but locks out all adjustments and fixes brightness at 170cd/m2.
The Blue Light Filter has four levels of operation plus off. It will warm the color temperature to prevent eye fatigue along with reducing brightness a bit. We feel the same thing can be accomplished with proper image adjustments during calibration.
The Color menu controls brightness and contrast along with color saturation in some modes. You also get three fixed color temperature presets plus a user setting with RGB sliders. There is no gamma control, but if you adjust contrast properly, it isn’t needed. See our calibration notes below for full details.
The Image menu contains only the PG348Q’s overdrive control. The options are Off, Normal or Extreme. Normal provides good reduction of motion blur without visible ghosting. Extreme is more aggressive, but we could see white trails behind most moving objects.
The Input Select menu does just what is indicated. It is also the only way to change sources. Obviously for G-Sync operation and high refresh rates, you’ll need to use DisplayPort. HDMI supports native 3440x1440 signals up to 50Hz.
Get Tom's Hardware's best news and in-depth reviews, straight to your inbox.
The OSD is available in 21 languages, can be positioned anywhere on the screen, and has a max timeout of two minutes. You can also adjust its transparency. Key Lock will turn off the bezel keys to protect your settings. Light In Motion refers to the pattern that comes from the PG348Q’s base. It has three brightness levels, or you can turn it off. You can view signal information here as well, although everything you need to know is always displayed in the upper-right corner of the OSD menu.
If you want to return the monitor to its factory settings, choose All Reset. Enabling Deep Sleep will reduce power consumption in standby mode.
GamePlus
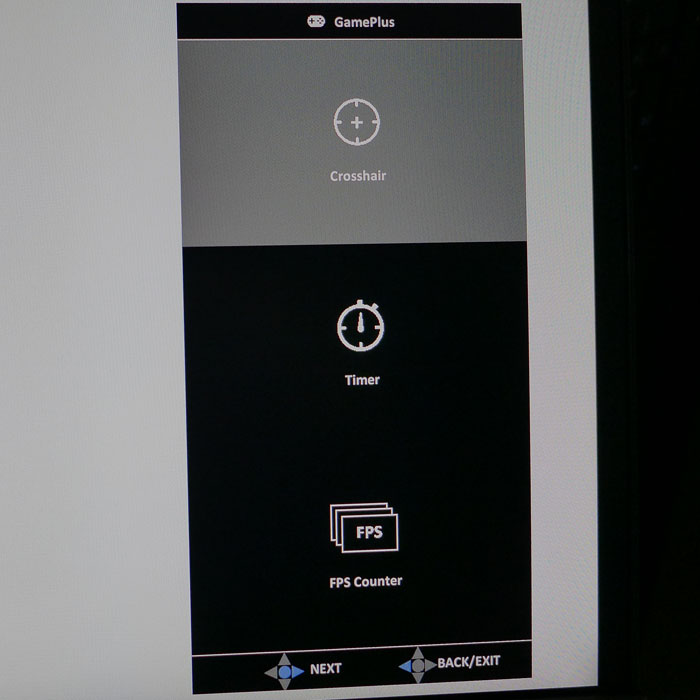
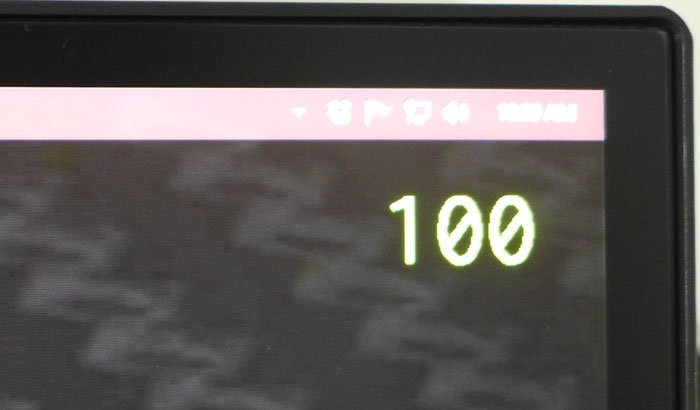
Like all Asus gaming monitors, the PG348Q includes GamePlus features. You get four different aiming reticules, a countdown timer and an fps indicator. You can only use a single option at a time. The fps counter doesn’t have a black box around it like we saw in the two MG-series monitors reviewed here recently. You can move it around the screen with the joystick. The reticules and timers are also moveable.
Calibration
Many Asus gaming monitors require no calibration in the Racing mode, but we found a gamma anomaly in the PG348Q that needed some attention. Adjusting the white balance produced excellent grayscale tracking but did not address the gamma problem. Our solution was to lower the Contrast slider. That took care of the issue, and overall dynamic range was not significantly affected. It’s important to make this change, because it also influences color saturation tracking and color luminance. You’ll see how it all works on page four. Please try our recommended settings below to optimize your PG348Q.
| Asus ROG Swift PG348Q Calibration Settings | |
|---|---|
| Game Visual | Racing |
| Brightness 200cd/m2 | 60 |
| Brightness 120cd/m2 | 32 |
| Brightness 100cd/m2 | 25 |
| Brightness 80cd/m2 | 18 |
| Brightness 50cd/m2 | 8 |
| Contrast | 43 |
| Color Temp User | Red 97, Green 100, Blue 100 |

Christian Eberle is a Contributing Editor for Tom's Hardware US. He's a veteran reviewer of A/V equipment, specializing in monitors. Christian began his obsession with tech when he built his first PC in 1991, a 286 running DOS 3.0 at a blazing 12MHz. In 2006, he undertook training from the Imaging Science Foundation in video calibration and testing and thus started a passion for precise imaging that persists to this day. He is also a professional musician with a degree from the New England Conservatory as a classical bassoonist which he used to good effect as a performer with the West Point Army Band from 1987 to 2013. He enjoys watching movies and listening to high-end audio in his custom-built home theater and can be seen riding trails near his home on a race-ready ICE VTX recumbent trike. Christian enjoys the endless summer in Florida where he lives with his wife and Chihuahua and plays with orchestras around the state.
-
RocketChild How's the cable management on this pretty monitor? Doesn't look like there is any and I take it no VESA mounting points either? Seems like a decent part of the cost with this monitor is that stand so you can have a flashlight on your surface. Good to see headway is being made with higher refresh rates at greater resolutions.Reply -
itsnotmeitsyou I don't understand why we're still seeing Predator/Bionicle themed high-end hardware... Can the kids that are into this garbage actually afford it?Reply
I would guess that the larger market is the people who grew up gaming that are now career professionals. I suppose that doesn't imply their taste in hardware styling has matured, but personally I'm over the whole PowerRangerMegaZord kitsch that started with Alienware in the 90s.
It looks like a beautifully specd monitor. Just wish it wasnt so painfully styled. -
moogleslam I've had this monitor since April 2016, and it's phenomenal. The combination of 21:9, 34", 3440x1440, 100Hz, Curved, IPS, & G-Sync cannot be bettered by anything currently on the market. Today, this is the ultimate gaming monitor. It's completely immersive, and I've had no issues with game support so far. Funnily, my most jaw dropping moment was when I first took it out of the box and saw the size of it.... before I even powered it up! It's huge! My own sample isn't 100% perfect though. There is noticeable IPS Glow/Backlight Bleed (I don't really know the difference) in all four corners, though it can only be seen in almost entirely black scenes, and fortunately, for the games I play, that's almost never. There are also visible scanlines at any overclock. You have to look very closely to see them, and certainly, during normal game play, I never notice them. In all though, I am incredibly happy with this monitor (even if I paid $1300!), and I expect it to serve me well for many years, regardless of what else comes to market!Reply -
Realist9 Wouldn't it be smarter to pick up a 4k of similar size/specs like the Predator XB32 for $60 more?Reply
Given you have the rig to run 4K?
My concern is relative adoption of 3440x1440 vs 4k. I *feel* like 3440 is not as widely supported as 4k, and with 4k, there's no fisheye (right?).
for ref: Currently running 3x32" surround on a 1080 (for ref concerning frame rate). 3440x1440 = 4.9M pix, 5760x1080 = 6.2M pix, and 4k = 8.3M pix. -
moogleslam Reply18663297 said:Wouldn't it be smarter to pick up a 4k of similar size/specs like the Predator XB32 for $60 more?
Given you have the rig to run 4K?
My concern is relative adoption of 3440x1440 vs 4k. I *feel* like 3440 is not as widely supported as 4k, and with 4k, there's no fisheye (right?).
for ref: Currently running 3x32" surround on a 1080 (for ref concerning frame rate). 3440x1440 = 4.9M pix, 5760x1080 = 6.2M pix, and 4k = 8.3M pix.
I've tried 4K, and this is far superior. There is no 4K with similar specs. Two of the three most important things this monitor provides are missing on 4K; 100Hz, and 21:9. Before this monitor, I had a 144Hz monitor, and dropping to 100Hz was a sacrifice I was willing to make, but I'll never go back to 60Hz, even with G-Sync/FreeSync. And 21:9 is the real difference maker. The extra horizontal screen real estate is amazingly useful, and it's what provides greater immersion than ever before; probably immersion that can only be beaten with VR (not even with triples because I hated the bezels).
I don't see any adoption issues. Firstly, this format is becoming more and more popular all the time. Secondly, whether it's adopted by the masses or not, I'v had zero support issues to date. The most I've had to do is edit a config file (World of Tanks), but all other games have been completely straight forwards.
There's zero fish eye in any games. I'm not quite sure what you're getting at.... I mean, your in-game FOV isn't distorted by having a wider monitor; you just see more left and right, in a completely natural manner; there's no stretching to fill it.
I've tried triples and 4K, and I firmly believe that the three most important factors in a gaming monitor, which I'll never go without again are:
21:9
G-Sync/FreeSync
100+Hz
Resolution would only be 4th on my list, and I'd even take a 2560x1080 21:9 before I went to 4K, just so I could have the 3 must haves above. -
moogleslam Reply18662798 said:How's the cable management on this pretty monitor? Doesn't look like there is any and I take it no VESA mounting points either? Seems like a decent part of the cost with this monitor is that stand so you can have a flashlight on your surface. Good to see headway is being made with higher refresh rates at greater resolutions.
Cable management is actually good. If I recall correctly, the cables, where they plug into the monitor, are hidden behind the back cover, and then feed through the stand, coming out at the rectangular square you can see at the bottom/back of it.
-
larsv8 This guy, or similar, is on my wish list for some time over the next two months. Heard the light bleed is really the only noticeable downside, but that is not the biggest deal.Reply
I am assuming this is mostly identical to the Predator X-34? Gonna have to make a decision on which brand to go with.
I am hoping the new version, the X34P, which is supposed to have some performance improvements is released soon, to either drive this price down, or be affordable enough to upgrade.
I can't wait to fire up Forza Horizon's 3 on this badboy at max settings. Good time to be a gamer!
-
moogleslam Reply18663459 said:This guy, or similar, is on my wish list for some time over the next two months. Heard the light bleed is really the only noticeable downside, but that is not the biggest deal.
I am assuming this is mostly identical to the Predator X-34? Gonna have to make a decision on which brand to go with.
I am hoping the new version, the X34P, which is supposed to have some performance improvements is released soon, to either drive this price down, or be affordable enough to upgrade.
I can't wait to fire up Forza Horizon's 3 on this badboy at max settings. Good time to be a gamer!
It uses the same panel as the Acer Predator X34, yes. The ASUS PG348Q seems to have had less issues/better QA, and the OSD and associated controls are far superior on the ASUS as well. Many also tend to prefer the PG348Q styling. Other than that, they're more or less identical.
Sim racing on these monitors, in cockpit view, is one of my favorite things. Try out iRacing if you can, and use the built in FOV calculator. -
infamousk12 This monitor is extremely expensive, however, it is absolutely amazing. I have owned it for about a month. Out of the box, it was easy to assemble and the quality of the parts is simply top notch. The monitor performs extremely well, and once you game on a native 21:9 aspect, you will never go back.Reply -
poochiepiano Reply
If you take a 4k monitor and chop of the top and bottom 1/6 of the screen, you get 1440p with an even wider screen. How is having additional vertical real estate bad? Assuming the 4k monitor has 100+ Hz that is variable, for the same price, I don't see how it's not better.18663372 said:I've tried 4K, and this is far superior. There is no 4K with similar specs. Two of the three most important things this monitor provides are missing on 4K; 100Hz, and 21:9. Before this monitor, I had a 144Hz monitor, and dropping to 100Hz was a sacrifice I was willing to make, but I'll never go back to 60Hz, even with G-Sync/FreeSync. And 21:9 is the real difference maker. The extra horizontal screen real estate is amazingly useful, and it's what provides greater immersion than ever before; probably immersion that can only be beaten with VR (not even with triples because I hated the bezels).
I've tried triples and 4K, and I firmly believe that the three most important factors in a gaming monitor, which I'll never go without again are:
21:9
G-Sync/FreeSync
100+Hz
Resolution would only be 4th on my list, and I'd even take a 2560x1080 21:9 before I went to 4K, just so I could have the 3 must haves above.
I love the 21:9 form factor too, and I use one at home, but at these prices, I don't see how a 1440 21:9 can beat a 4k with the same specs.
If the price was more in line with the comparative resolutions, aka it didn't cost virtually the same with <1/3 of the pixels, I would say that 1440p IPS in 21:9 with a 34" diagonal is my sweet spot too, but it just costs too much. This is pretty much the highest-end of these types of displays, especially with 100 Hz, so it's understandable, but with a comparable 4k? Why go with this?