Four Full Tower Cases From $150 To $600
Thermaltake Spedo--Unpacking And Build
$209
Unpacking
There’s only one way I can think to pronounce Thermaltake’s newest chassis, and as a former swimmer, fond memories are not conjured up by the word. Nevertheless, the Spedo is well-packaged in a blue fabric bag with foam supports. Two thumb screws hold each side panel in place. Pop the left one off, as usual, and—wow. Look at all of that plastic. We’ll get into its purpose shortly. Just know that to get at Thermaltake’s little box of accessories, the plastic has to come out.
It turns out that the box of accessories isn’t so small after all, though. Inside you’ll find a converter kit for turning a hard drive cage into a 5.25” device bracket, an adapter to make a 5.25” drive bay hold an external 3.5” device, an extra 120 mm case fan, a bag of screws and standoffs, an extender for the 24-pin ATX cable, and an extender for the eight-pin +12V cable.
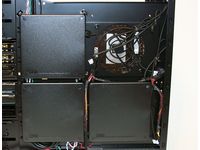
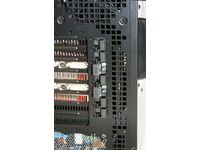
You’ll notice that the chassis interior is suspiciously neat. That’s because Thermaltake devoted extra effort to cable management, so fan wires and leads attached to the front panel I/O remain hidden behind plastic blocks under the motherboard tray. Before installing, you’ll want to free those wires and route them around to the front.
Build
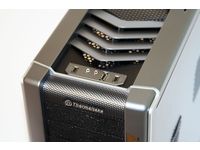
I may be dating myself here, but if the Cooler Master HAF 932 is the Shredder, then Thermaltake’s Spedo is the Super Shredder—very similar in appearance, but larger and with more aggressive angles and features. The chassis is based on a steel frame. However, much of the case is plastic, so its empty weight sits just under 30 pounds.
Get Tom's Hardware's best news and in-depth reviews, straight to your inbox.
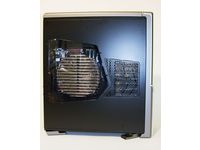
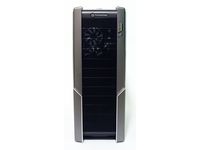
Like the other enclosures in this roundup, special attention is paid to cooling. Thermaltake includes a 140 mm intake fan on the front of the case, two 120 mm exhaust fans on the back, a 230 mm exhaust fan up top, a 230 mm side panel fan, and a 120 mm fan bar intake fan. All of that cooling goes hand in hand with gobs of ventilation. The Spedo’s front is almost entirely mesh and plastic bezel. The left and right sides feature prominent ventilation grilles. Its top is predominantly vented, as is the case’s back. Even the bottom has a cutout for a 120 mm fan.
We did run into one disturbing issue with the Spedo’s build. Though the case was well-packaged, thin metal at the bottom of the chassis had warped, preventing a proper fit with any of our power supplies. Once we figured out the issue, heavy pressure popped the affected area back into place and the PSU’s screw holes lined up properly.
Current page: Thermaltake Spedo--Unpacking And Build
Prev Page Cooler Master HAF 932--Build And Installation Next Page Thermaltake Spedo--Build And Installation-
Proximon Thank you Chris, another very useful article. Not enough case comparisons around, as I'm sure you realized.Reply
I'll be sure to add the HAF to my recommendation list. I hadn't before because I thought all the extra holes would hinder cooling more than help. The hole in the MB tray sounds especially useful.
I would have liked to see on of the Cosmos cases included, although I suspect they are simply quieter but hotter. -
malveaux Nice article.Reply
Though, I'm curious. 40db+ isn't whisper quiet. That's freak'n loud. What's up with calling it whisper quiet? -
Pei-chen The three cheaper cases are powerhouses but too big and overkill for most people including gamers. I think the Antec's Three Hundred ($60 a few weeks ago on Newegg) suits the need for most people. 750w PSU are usually enough for SLI/Crossfire so 1000w+ aren't needed.Reply -
malveaux I'm curious when they will start releaseing more cases that have more depth, so that they have more room for today's much larger videocard solutions.Reply -
kubes Ya I agree that case designers should consider making them have more depth. With this in mind though i'm sure vidoe card manufactors will only make their card even longer however.Reply -
antiacid Good article. Now it gives a procedure and template to test other cases as well. It'd be great to have a review of cases which could be "best of" a certain category (cooling, noise, ease of use, weight, etc). It would be even nicer if the results were put in bullet point form and were setup in a table like the ones used in hdd/video card tables. That would make it a lot easier to compare everything.Reply -
avatar_raq I do believe that all the cases available in the market these days are poorly designed especially when it comes to air flow. You may notice that front fans, rear fans, buttom, side and top panel fans -when combined- cause turbulence in air flow that reduces the overall air flow. That's why I buy a cheap $25 case and modded myself!!!Reply
I have so many innovations regarding case designs that I hope someone buys them and excutes them in reality!! -
avatar_raq Here is one of my ideas...Reply
To put it plainly: air needs to be moved in one direction, preferably from down-upwards, since hot air tends to go upward by nature and the hottest part of any system (that's the GFX cards) is located at the lower part..Hence a PSU mounted at the upper part of the case (with its 120-140mm fan), with another 120mm top-panel exhaust fan and two 120mm buttom intake fans will be by far more efficient than all the available cases. To achieve this efficincy I close any other holes (even the ones the manufacturer meant for ventilation) so the air enters the case only from the buttom fans where I put dust filters to minimize dust inside my case. Furthermore I use a case with long "legs" to minimize inhalation of the dust at my desk's surface.
To minimize noise: I use
1.low RPM silent fans.
2.rubber washers between the fans and the case to minimize vibration noise.
3.cover all the interior surfaces with a layer of an insulator, that can be as simple as sponge!!!
4.even design external air ducts that divert the exhausted air (which carries the interior noise) to the back. -
avatar_raq Fortunately many aftermarket CPU and GPU coolers helped me. They can be installed in a way that the fan moves the air upwards. There is evidence that the setup I suggested above reduces -though marginally- the power consumed by the CPU and GPU fans to reach thier designated rpm and increases the lifetime of these fans, since instead of meeting resistance, the one directional air flow helps them.Reply
